Escape Game “The Invitation”
By IDAC CO.,LTD. (WaveA)
 [DKB url=”https://www.appunwrapper.com/EscapeGame” text=”Download” title=”” type=”” style=”” color=”green” width=”” opennewwindow=”” nofollow=””]
Walkthrough:
Note: For all IDAC/WaveA games, make sure you tap each clue/item numerous times to make sure it doesn’t have anything else to tell you. If you miss something, the game might not let you use that clue to solve a puzzle.
1. Look inside the fireplace to find the screwdriver.
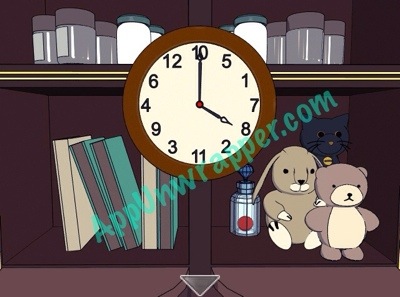
2. Look behind the stuffed animals near the clock to see a bottle. Take the round red piece from it.
3. Look inside one of the books for a bunch of clues.


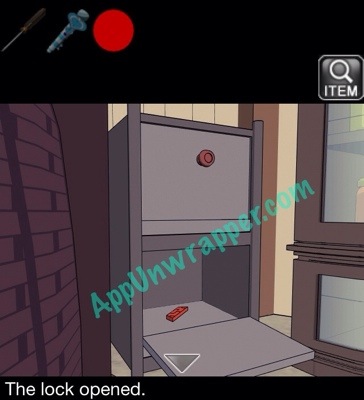
4. To the right of the fireplace, there’s a couple of drawers. Look at the left side of the top drawer for some screws. Use the screwdriver to remove them and get the heart key.
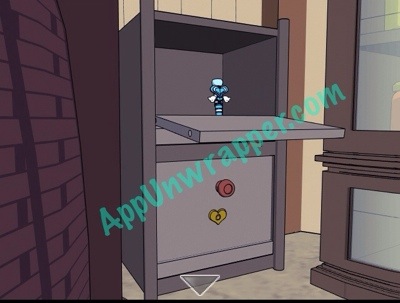
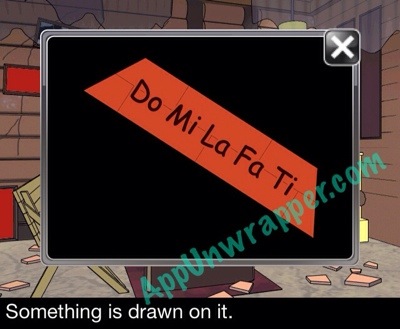
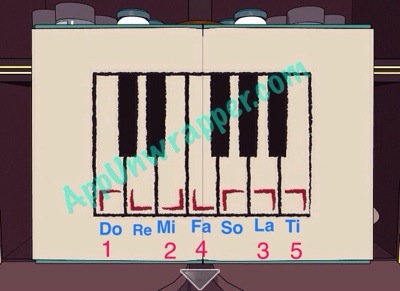
5. Use the heart key to unlock the lower drawer and get the trapezoidal block. Flip it over to see “Do Mi Fa La Ti.”
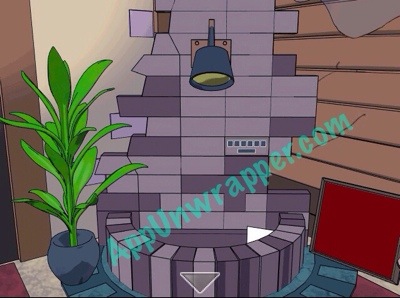
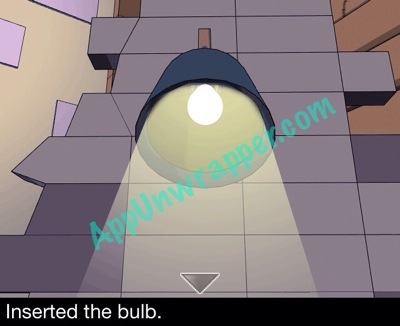
6. Turn right. Look at the note below the light fixture. It shows some months of the year with numbers in place of a few letters. Also look at the lock above the note. Use the clue from the book you saw earlier together with the note to get the password for the lock. Then take the bulb from inside and place it in the light fixture.
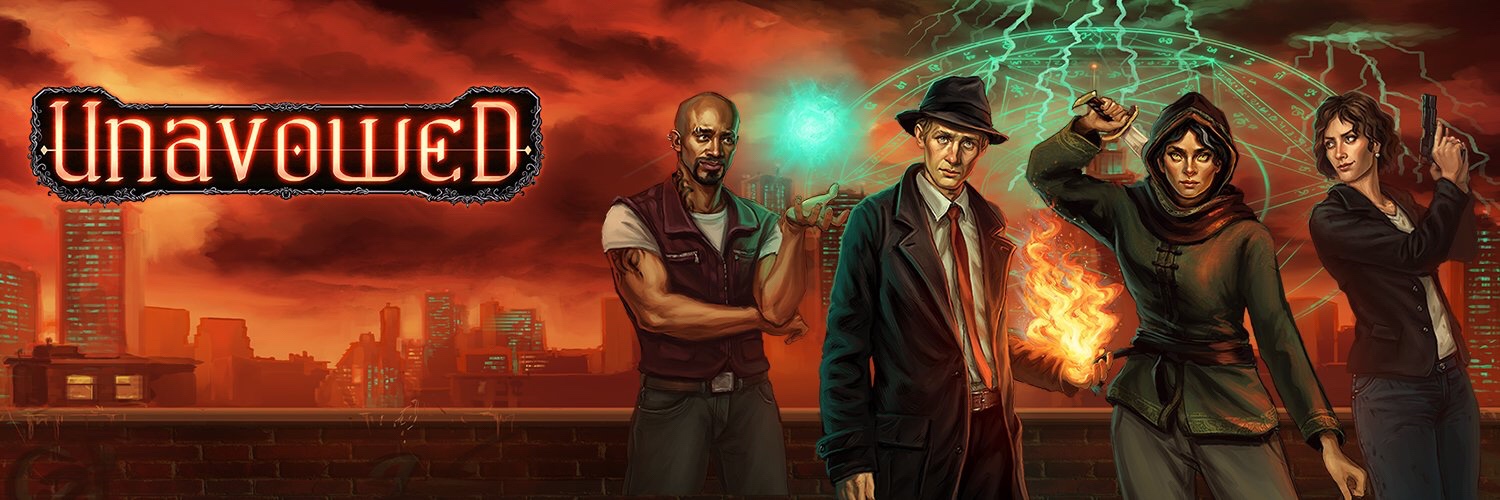
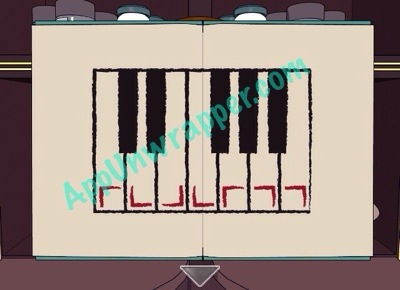
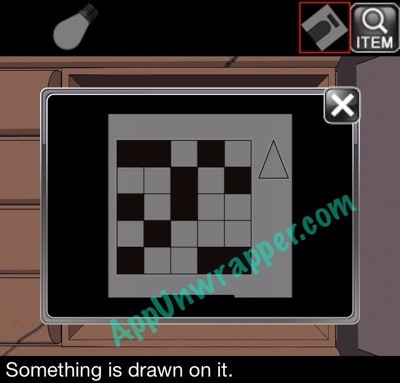
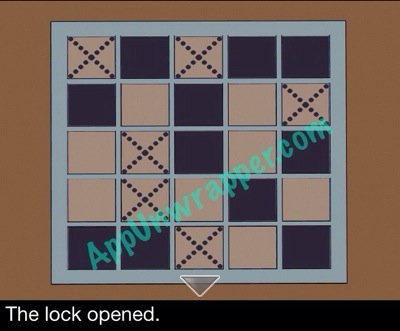
7. Turn right. There’s a peg board on the wall. Use the clue from the trapezoidal block and the page from the book to solve the puzzle. Press the corners in the order shown below.
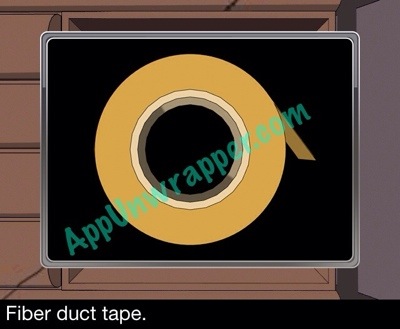
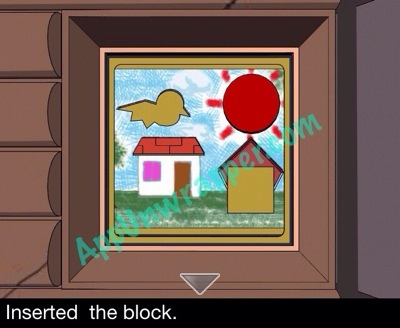
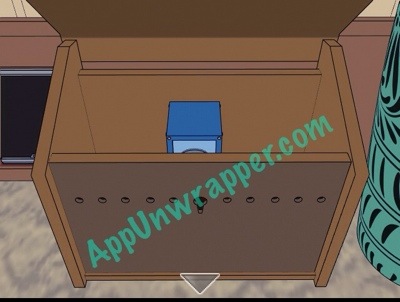
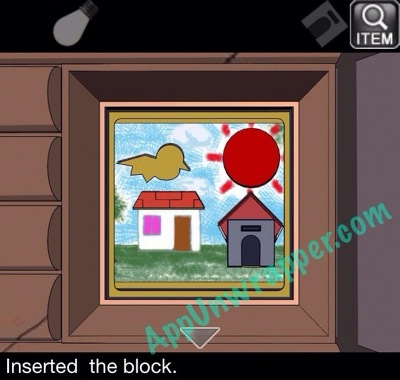
8. Take the roll of duct tape from inside. Also, place the roof and sun blocks in their slots.
9. Go right. There’s a button that opens a small hatch/door, but it closes if you release the button. Place tape on the button so it stays open and take the square block. Look at the back of it for a clue.

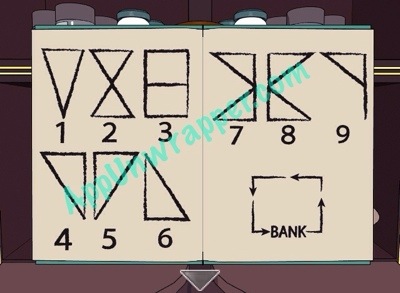
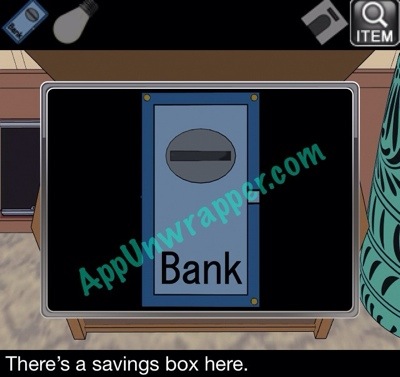
10. Below where you got the piece, there’s a table with a puzzle on it that resembles the clue. Use the clue to solve the puzzle. It’s the mirror image, based on the clue from the book earlier. Take out the savings bank once it’s unlocked.
11. Place the square block in the house slot.
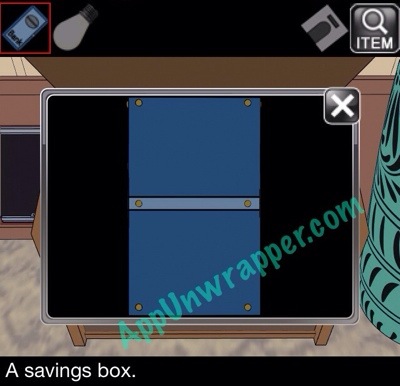
12. Turn the bank over a few times to look at the other sides.
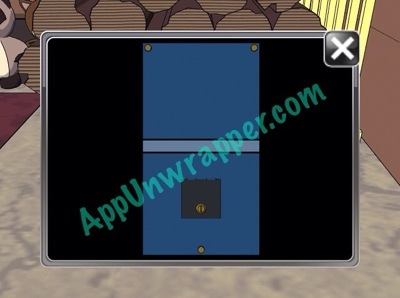

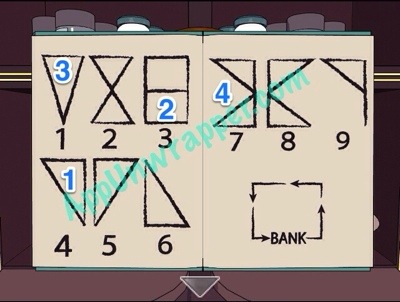
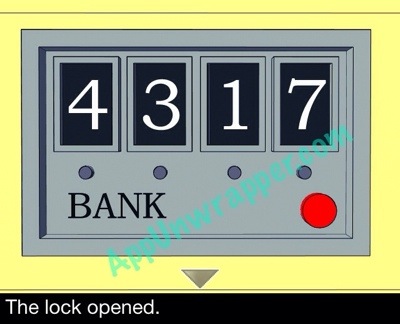
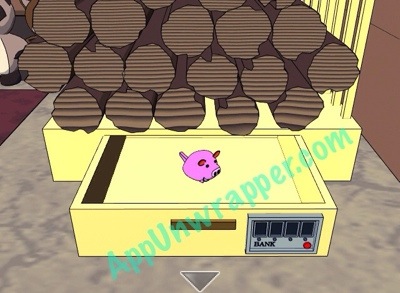
13. Now look at the page from the book that says “BANK” on it. Look at each side of the bank box and pay attention to the yellow dots. Trace the dots to make shapes and then find them on that page for the corresponding number. You get 4317. Use that number to unlock the drawer below the logs and take the toy piggy.
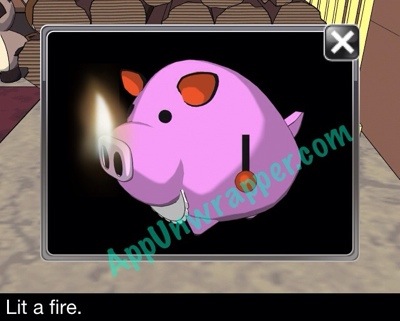
14. The pig is a lighter. Turn it on and use it to light the candle on the table to see a clue.

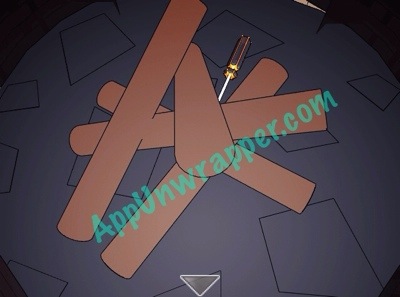
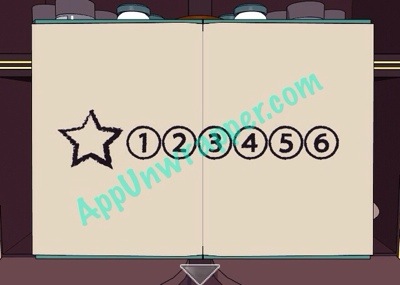
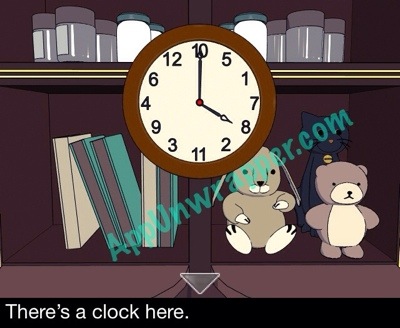
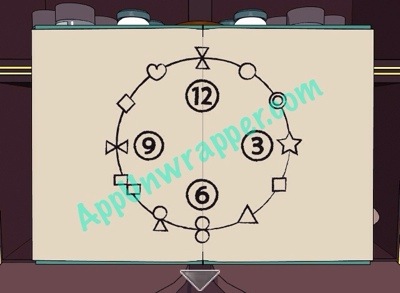
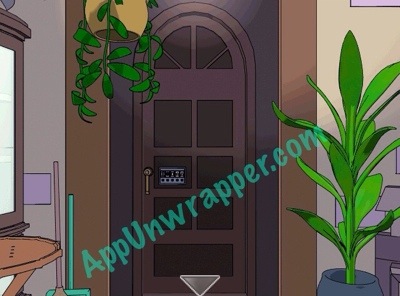
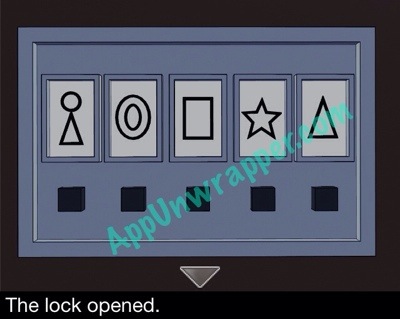
15. Look at the clock. Use the clue from the table and the clue from the book to solve this puzzle. You have 35971 and 1=5. Look at the clock. Where there should be a 1, there’s a 5 instead. Do the same for the other numbers to find 72435. Now find those numbers on the page from the book and use the shapes on the lock to unlock the closet door.
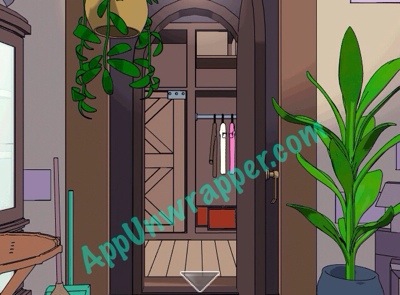
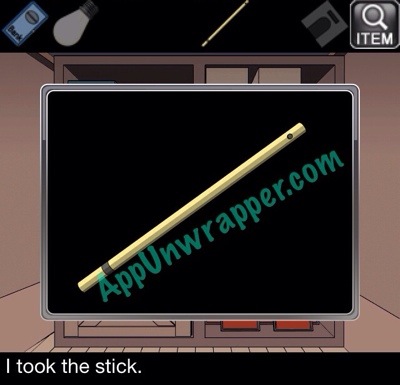
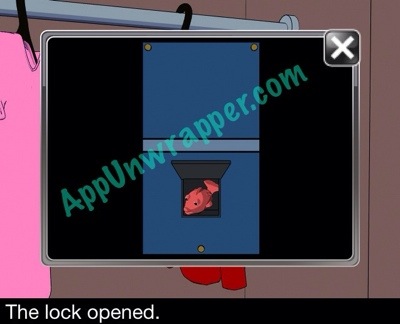
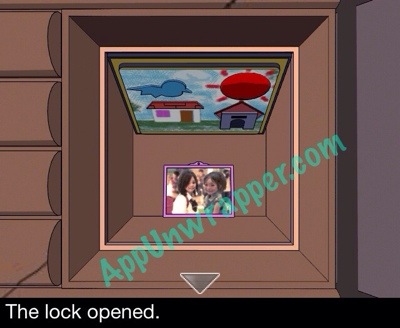
16. Enter the closet. Take the long stick. Use it to prod at the board above the clothing. Something will fall. Check the pocket of the red jacket to find a silver key. Use the key to unlock the back of the bank box and get the goldfish.


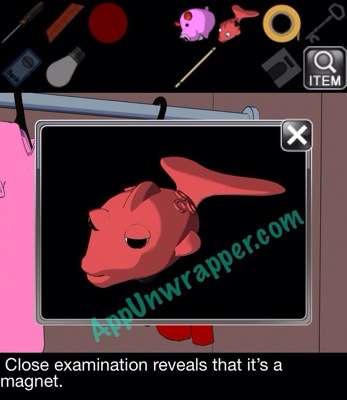
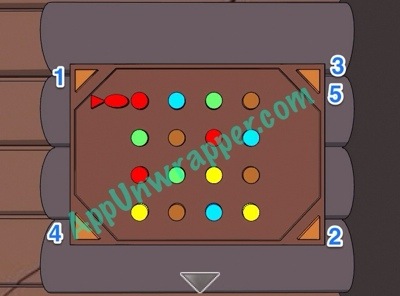
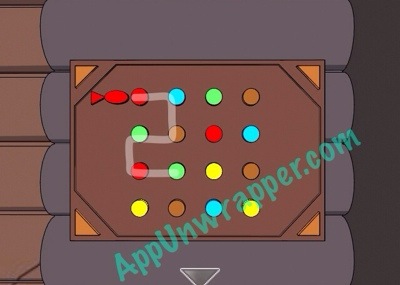
17. The goldfish is a magnet. Use it on the table with the holes in it and tap it to see it move and leave a trail.
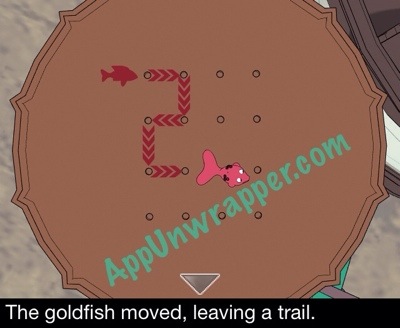
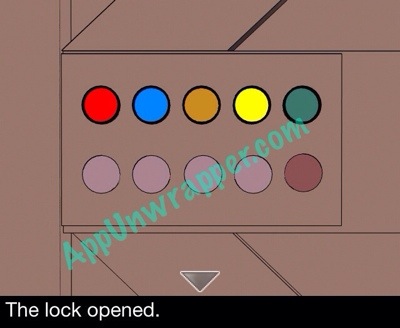
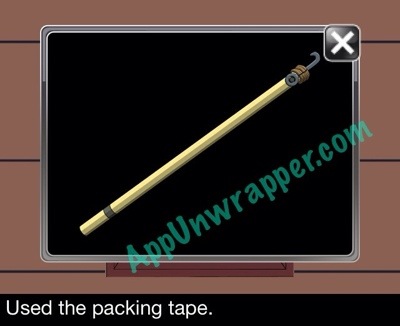
18. Look at the pegboard with the colors pegs in it and trace the same pattern that the fish did. Then go to the closet and press those colors on the puzzle in there to open the lock.
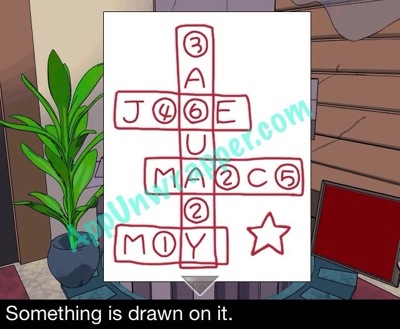
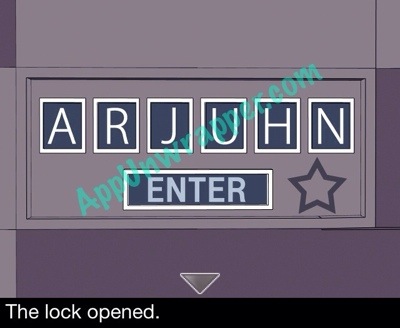
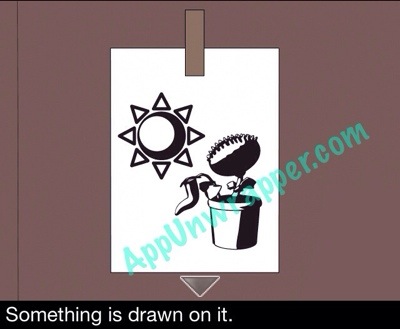
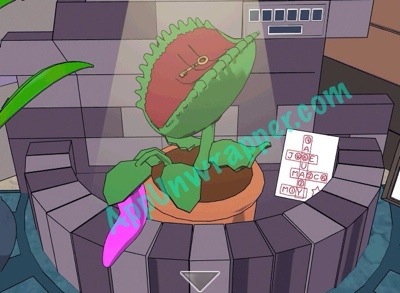
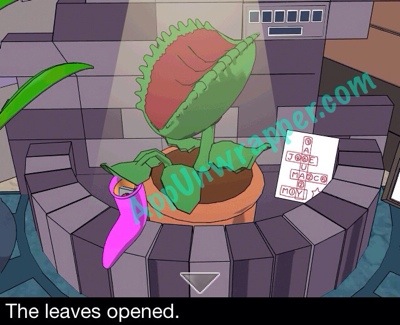
19. Look at the drawing here, take the plant, and grab the bird block.

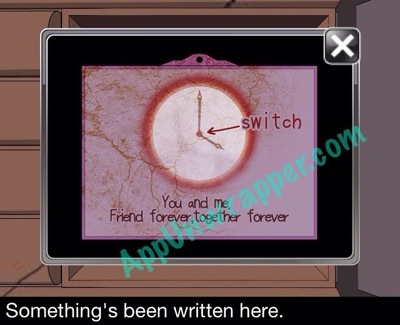
20. Place the bird block with the others behind the peg board. Take the photo. Look at the back and then use the lighter to burn it and see that the center of the clock is a switch. DON’T press that switch or you’ll get the BAD ENDING!!


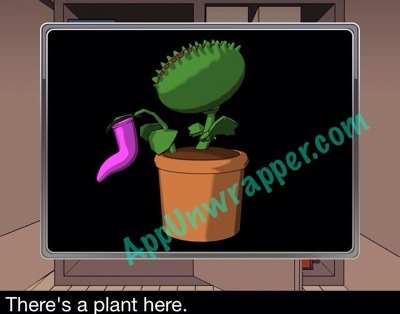
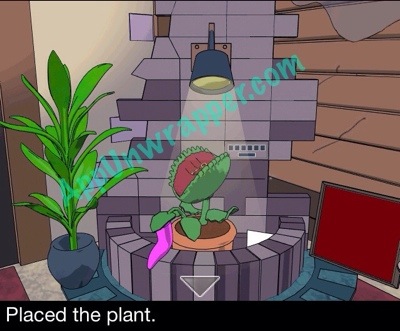
21. Place the plant under the lamp and take the key from its mouth.
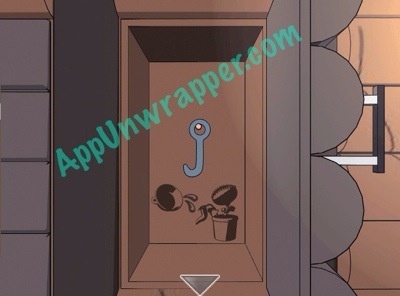
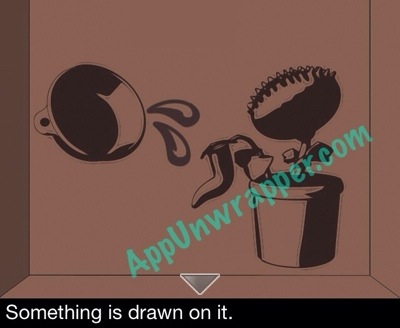
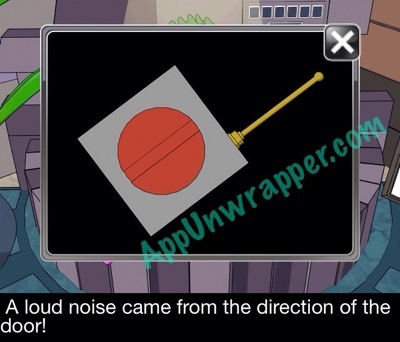
22. Use the key to unlock this hatch and get the hook. Also, look at the drawing.

23. There’s another small hatch with a water pail in it but you can’t reach. Attach the hook to the long stick and then secure it with the packing tape. Use the stick to get the pail.
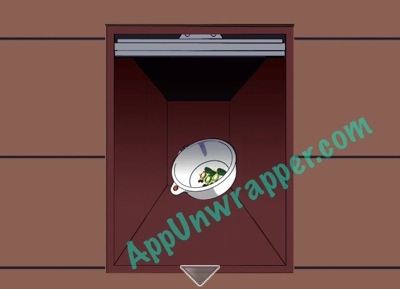
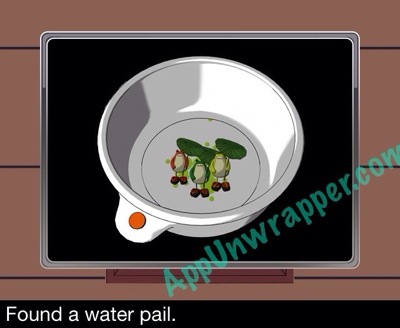
24. Fill the pail with water from the urn and pour it on the pink flower bud. Take the switch from it and turn it to unlock the front door. Now you can escape and get the GOOD ENDING!

Congratulations! You completed the game! If you liked this game, try The Magic Castle — Mystery Adventure, Spooky Manor and some of these other room escape and adventure games.