Chapter 4, An Inverted Funeral:
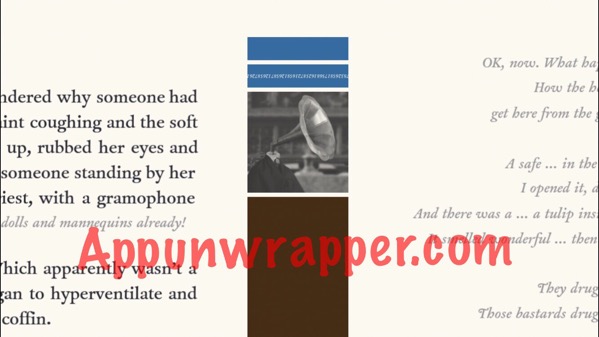
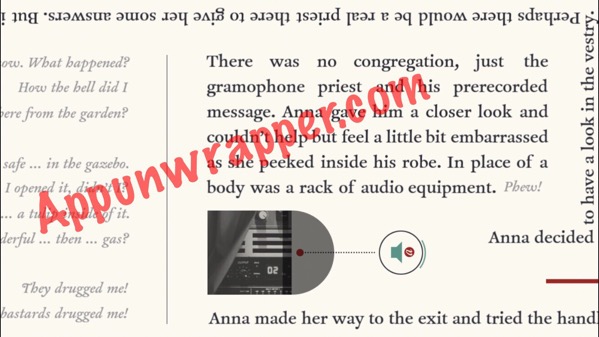
1. Anna wakes up in a coffin at the WHITE CHAPEL at what seems to be her own funeral! Almost immediately upon starting this chapter, you’ll hear a recording coming from a gramophone that says:
“We are gathered here to say farewell to doubts. To grieve the passing of the player. But also, to welcome the believer. Let us forever forget the doubts she once felt. Let us bury her past failures and past mistakes. She is now gone home.
Now, let us together say the welcoming words:
The moon, let her in.
The head of a black dog, let her in.
The smile from a stranger, let her in.”
Those last three lines are clues, so remember them.
2. Continue on. You can change the radio station, but leave it alone for now.
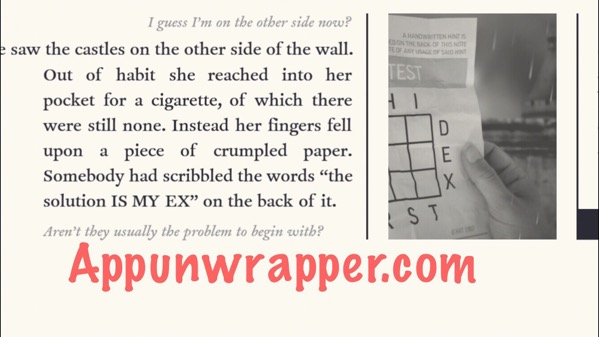
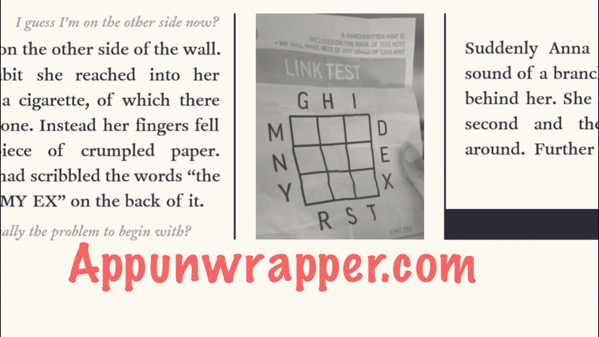
3. Continue on through DOUBTER’S REST CEMETERY, down GLORY ROAD. Anna reaches into her pocket to find a crumpled up piece of paper with a grid on it and the letters:
GHI
M D
N E
Y X
RST
And a clue “the solution IS MY EX” on the back of it.
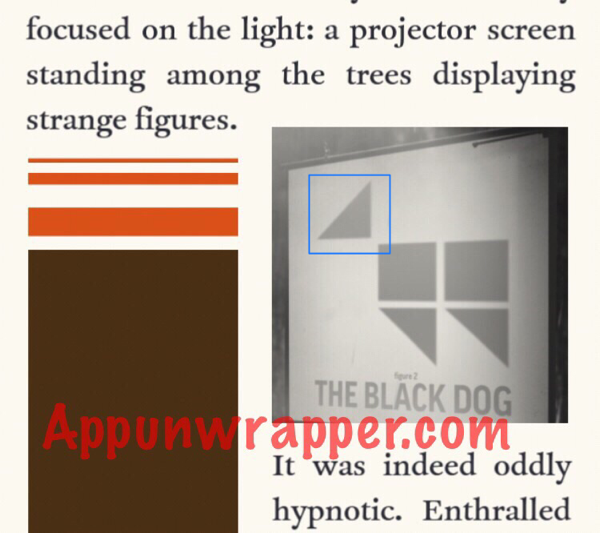
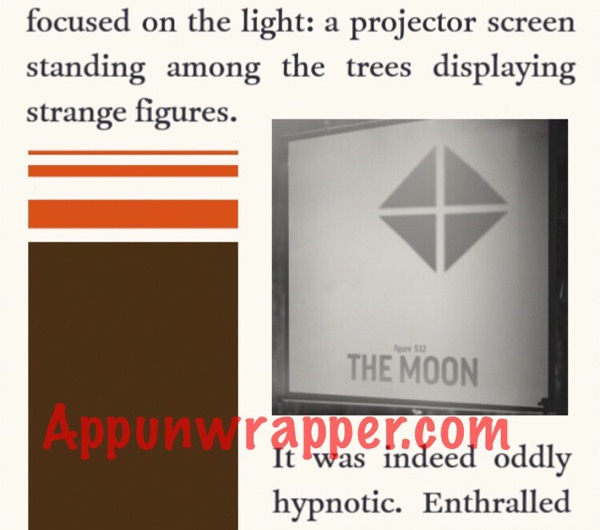
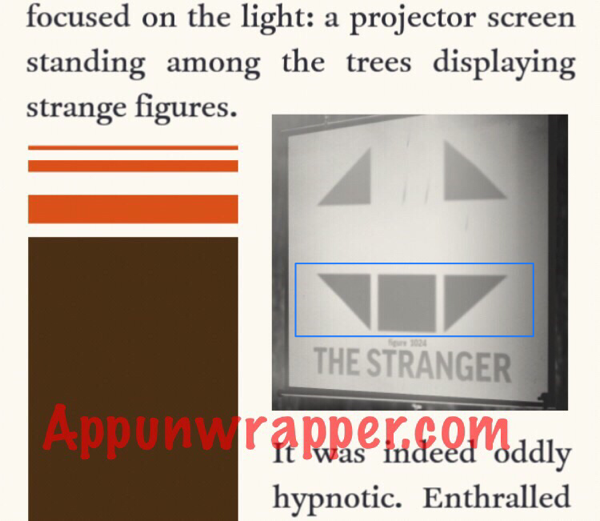
4. Continue on to BELIEVER WOODS. There’s some sheep watching something being projected onto a screen. You can ignore most of the slides, but you need to pay attention to three of them. Remember the priest’s speech? He mentioned the moon, the head of a black dog, and the smile from a stranger. So either memorize the moon, black dog and stranger slides or take screenshots of them. We’ll need them soon.
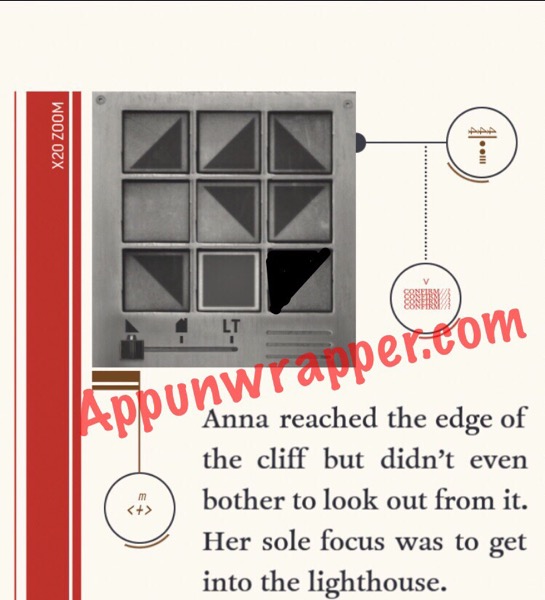
5. Continue on to FOOT HILL, LIGHTHOUSE SHELL. There’s a lock on the door that’s made up of three different puzzles. We have everything we need for two of them, but will have to retrace our steps before we can solve the third.
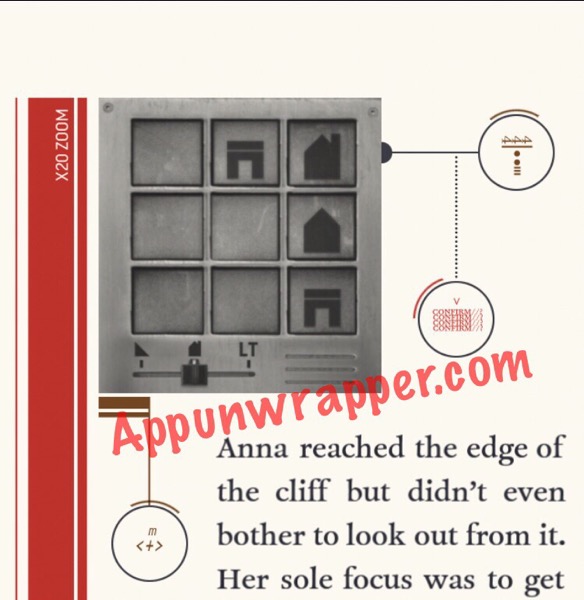
6. The first puzzle is related to the slides. Take the head from the BLACK DOG slide, the smile from the STRANGER slide, and then the whole MOON slide. Enter all of them into the first puzzle so they look like this:
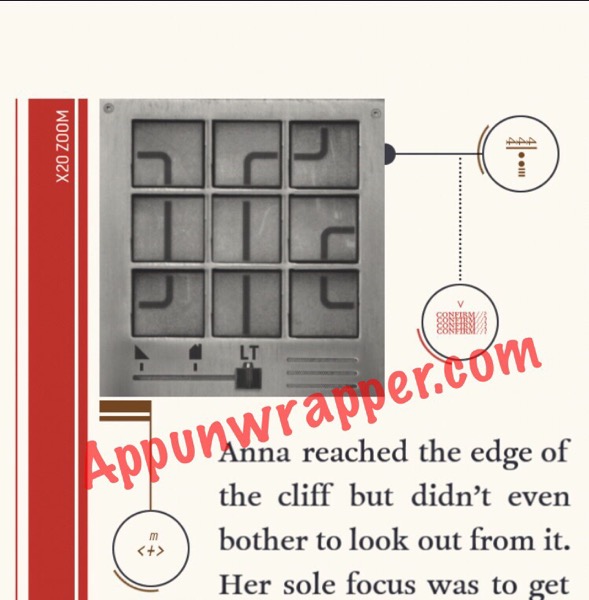
7. Then, go to the third puzzle, the one that says LT on the slider. The clue for this one is the note with the grid on it and the clue IS MY EX. What you need to do is create links between I & S, M & Y, and E & X. So it should look like this:
8. The final puzzle is related to houses, so let’s backtrack and find the clues for it. Go all the way back to the WHITE CHAPEL, to the part where you can change the channel for the gramophone. A new path has opened to the vestry. Follow it past the big 4 at the beginning of the chapter to the BLACK CHAPEL. Here, everything is reversed. You can either look at it in the mirror or see it reversed below.
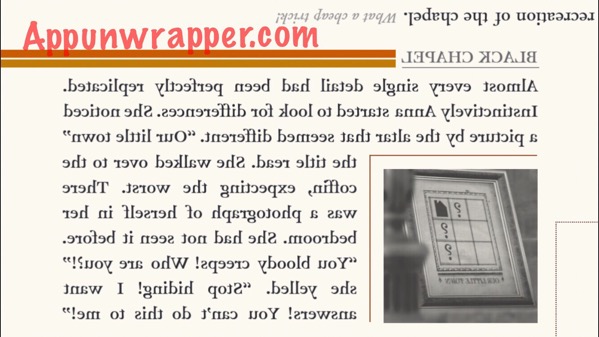
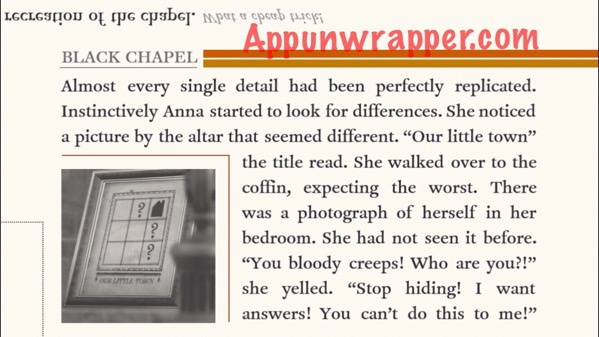
9. The framed picture of “Our little town” is the clue you need. But it’s not enough. It starts off the solution for you, with one house and the locations of the other three. But it doesn’t tell you what goes in those other three spots. For that, you need to go back to the radio and change the channel to 2 (it starts on channel 1). It sounds like it’s words being spoken backwards, doesn’t it? So, in order to understand it, you need to go back to the BLACK CHAPEL, where everything is mirrored — including sounds! This is what it says:
“South of Agent Alpha lives Agent Beta.
Between Agent Alpha’s house and Agent Beta’s house, there’s an old abandoned house without any doors.
Me and Agent Alpha are neighbors.
Agent Alpha’s house is the only house in our town with a chimney.
I live in a modern house with a flat roof, just like Agent Beta.”
10. Based on the clues above, you can determine that the answer to the final puzzle to get into the lighthouse should look like this:
You can now enter the lighthouse and continue to chapter 5.
Click on the little numbers below to continue to the walkthrough for Chapter 5 or click here.