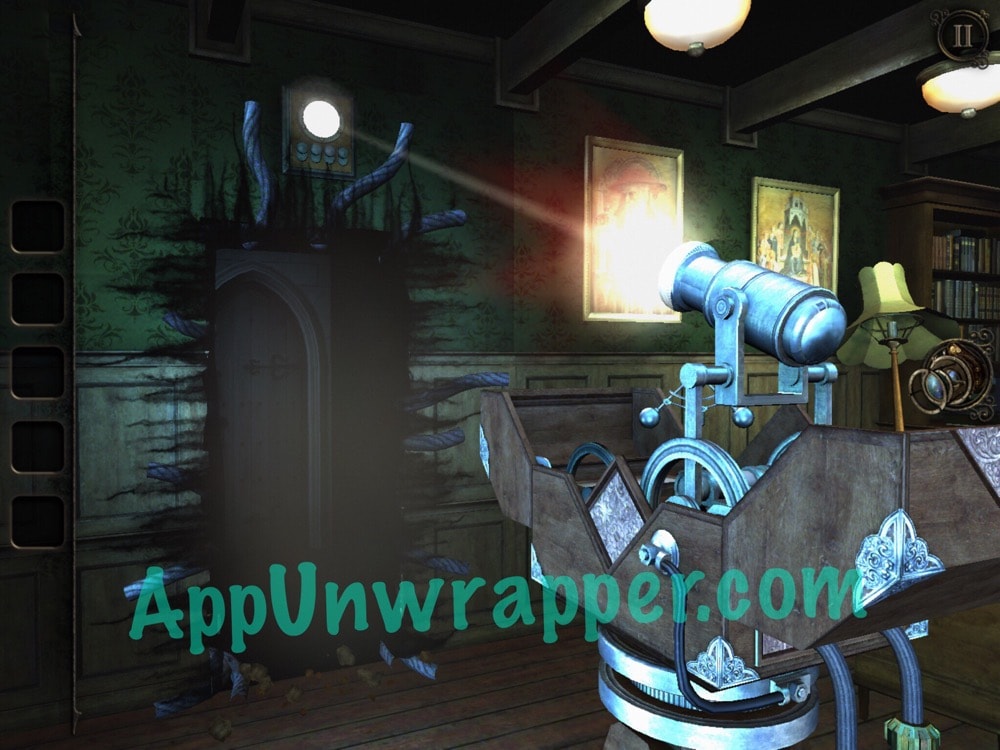
16. You’re now looking at the back of this machine on a tripod. It has four switches. Flip all four of them up and then press the button that’s revealed.

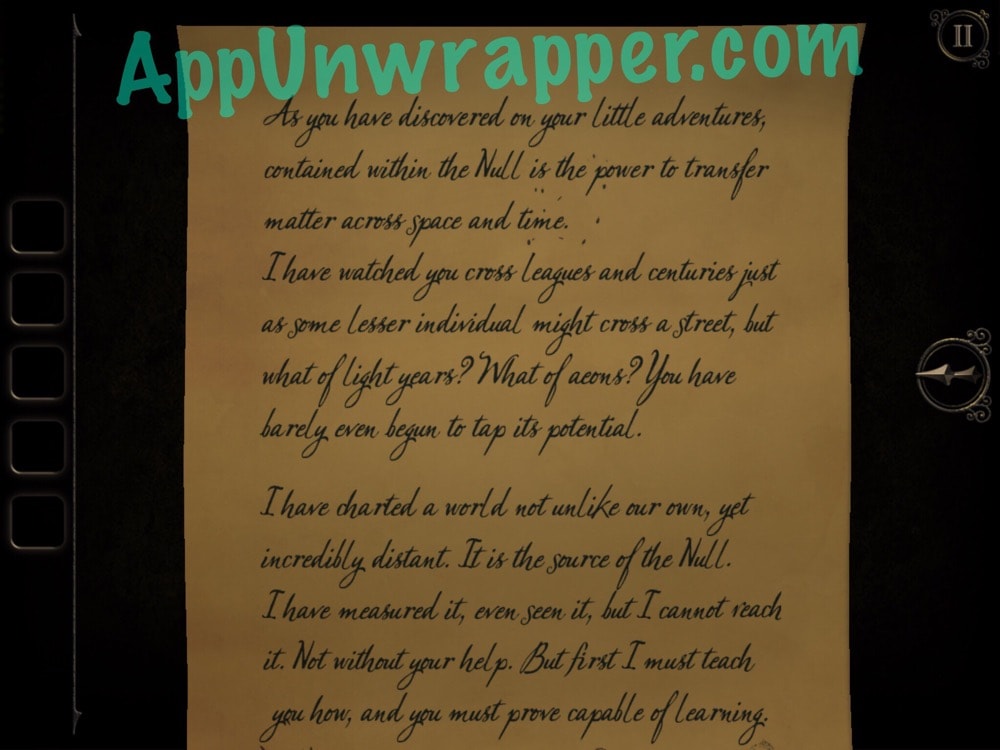
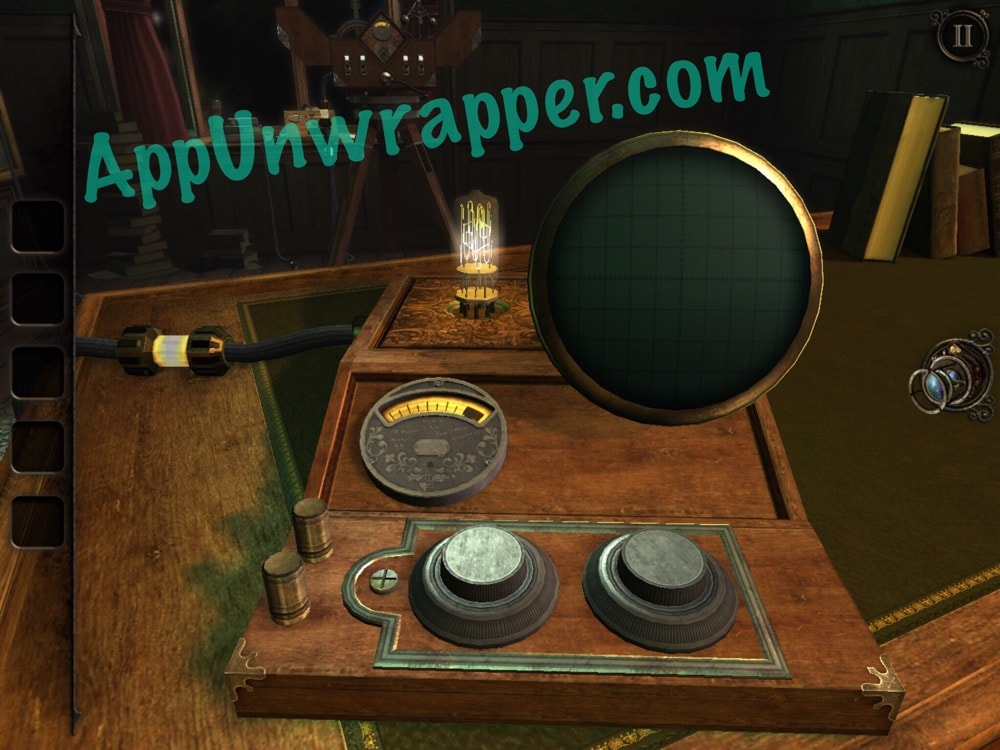
17. Next, you’ll be looking at the desk. First, read the letter about the Null. Then, turn the two dials until the bulb lights up. Some laser will shoot out from the tripod in middle of the room and open a door to the next room.

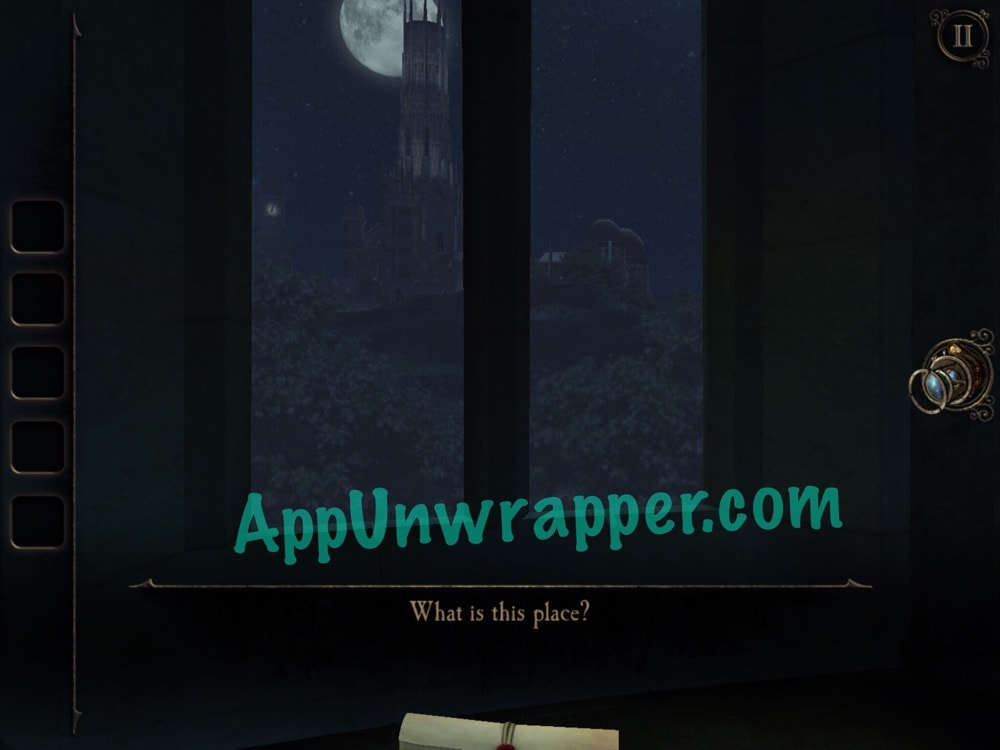
18. There’s a scroll across the room by the window. Take a look at it and notice the castle again.
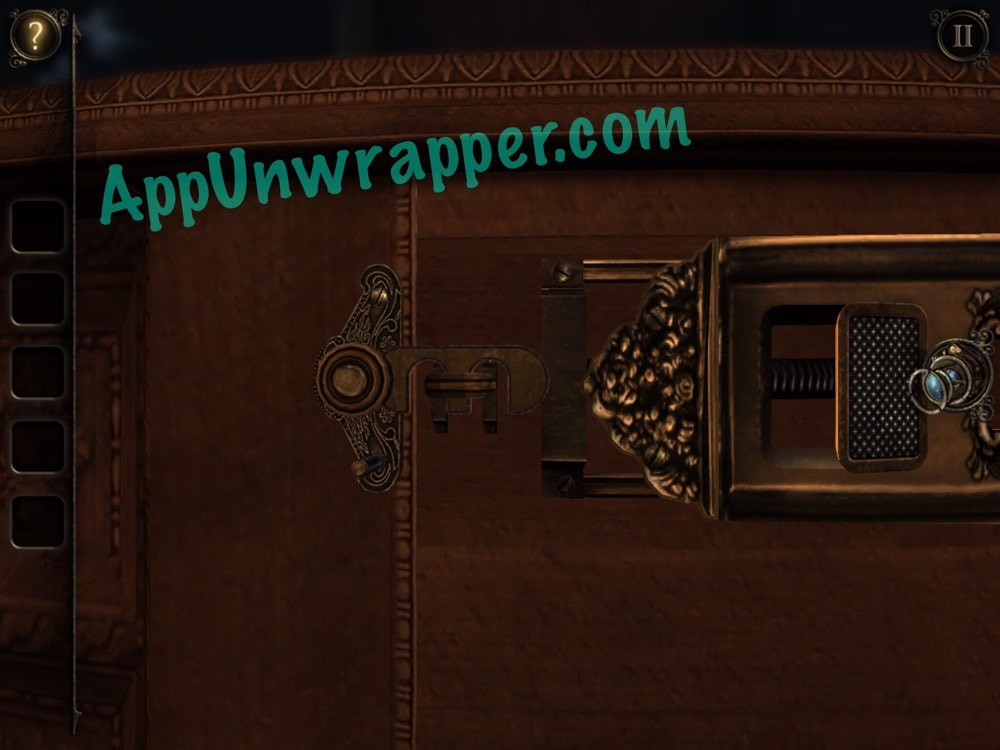
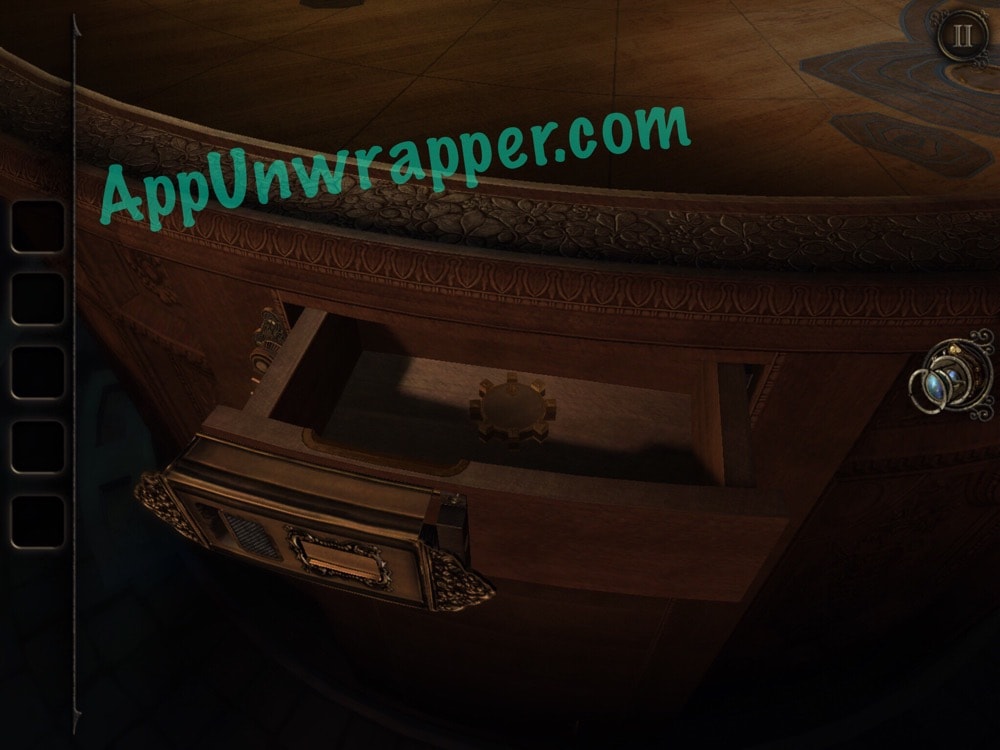
19. Go back to the round table in middle of the room. Look at the side and go around until you find this little switch or slider. You need to use one hand to slide it to the right and hold it there. Use your other hand to lift the metal piece locking the drawer in place. The drawer will open and you can take the wooden gear.
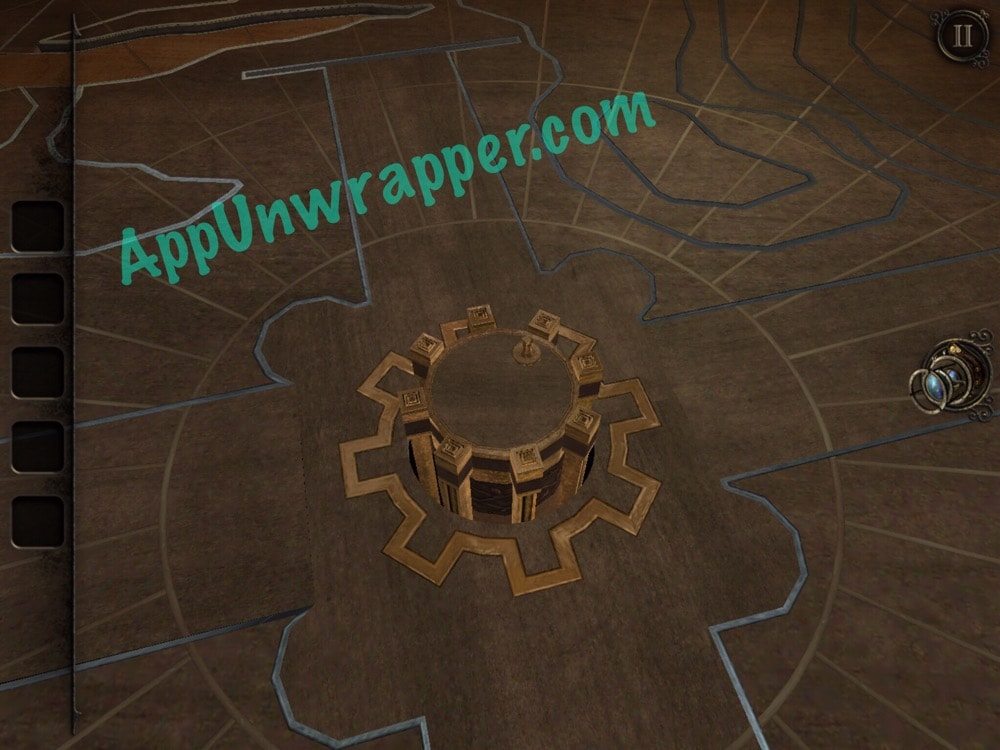
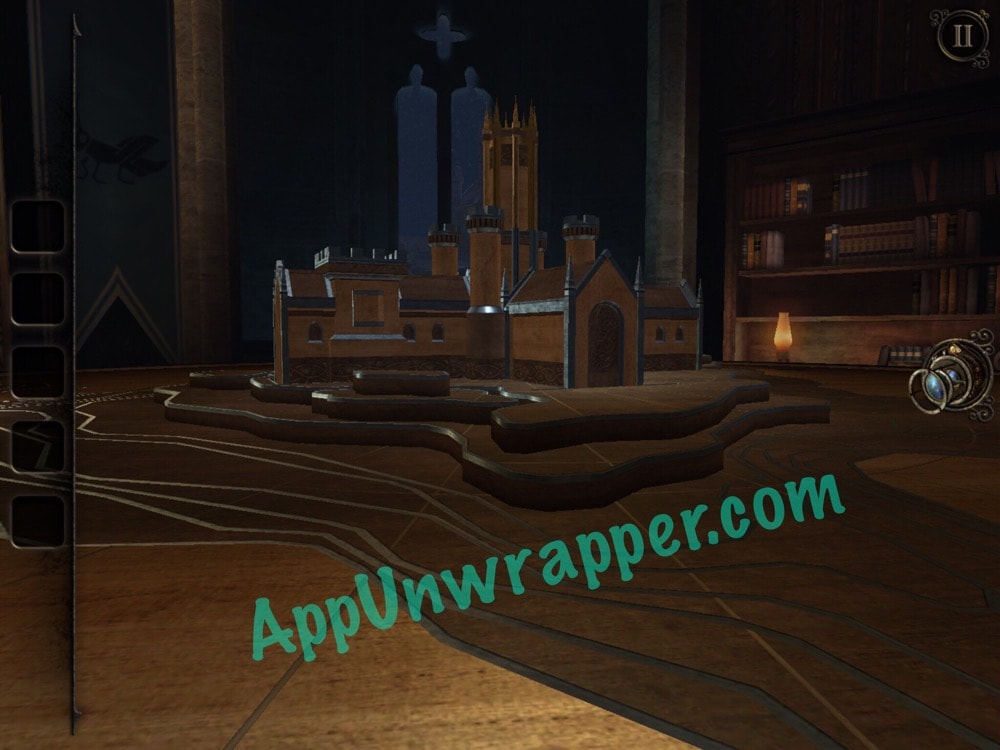
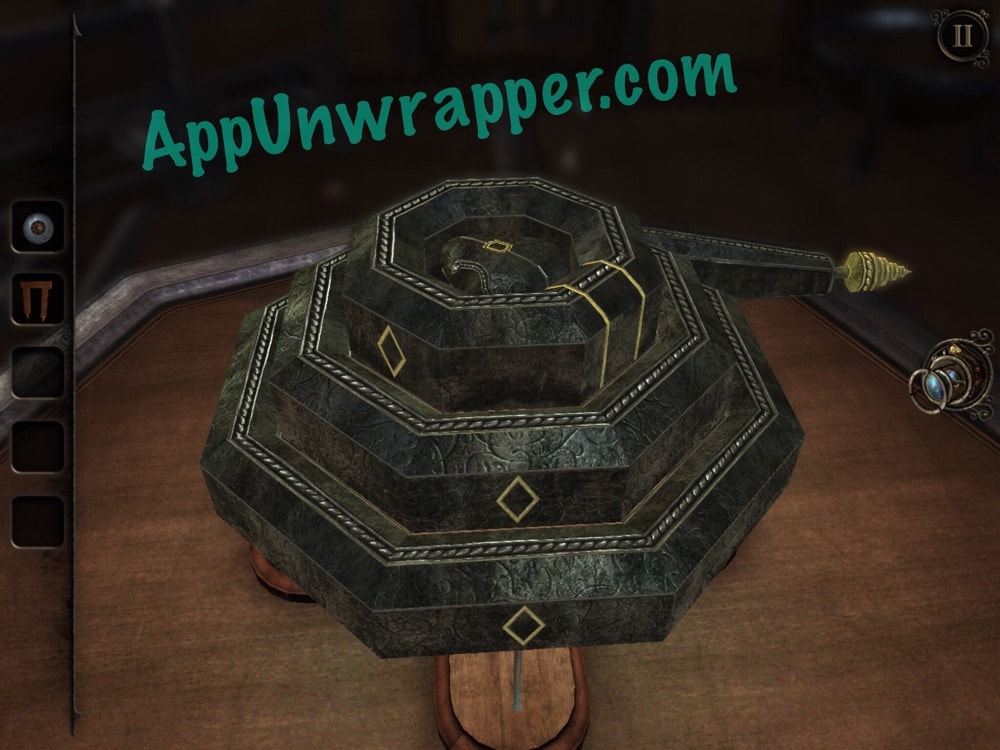
20. Place the wooden gear in middle of the table and then spin in it until 3D structures rise up from the map.
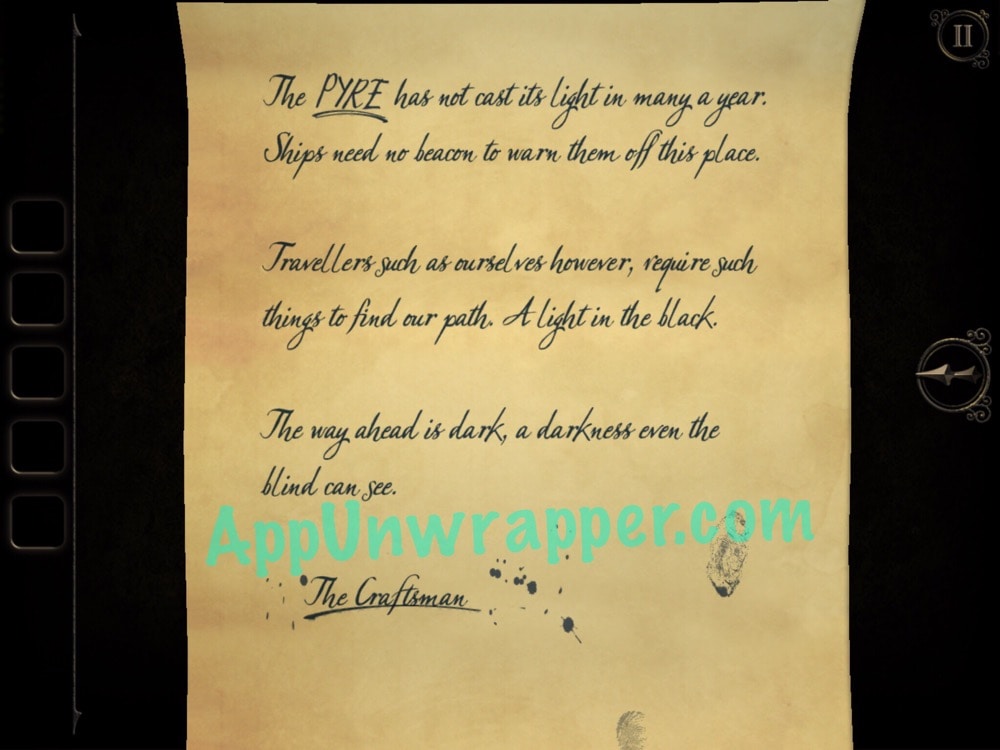
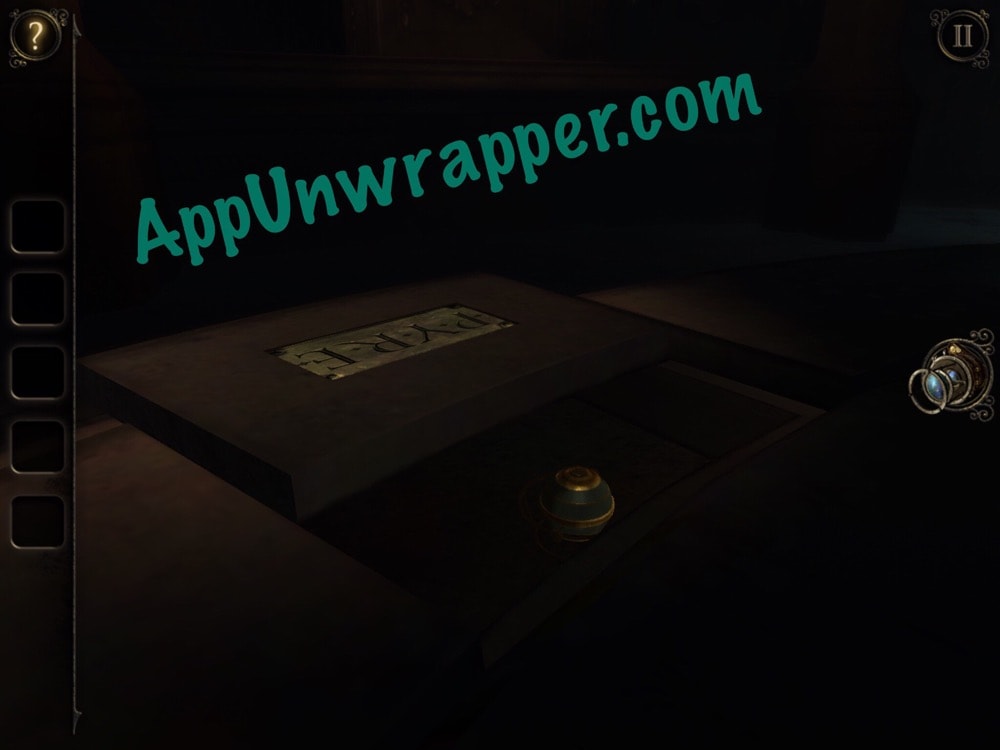
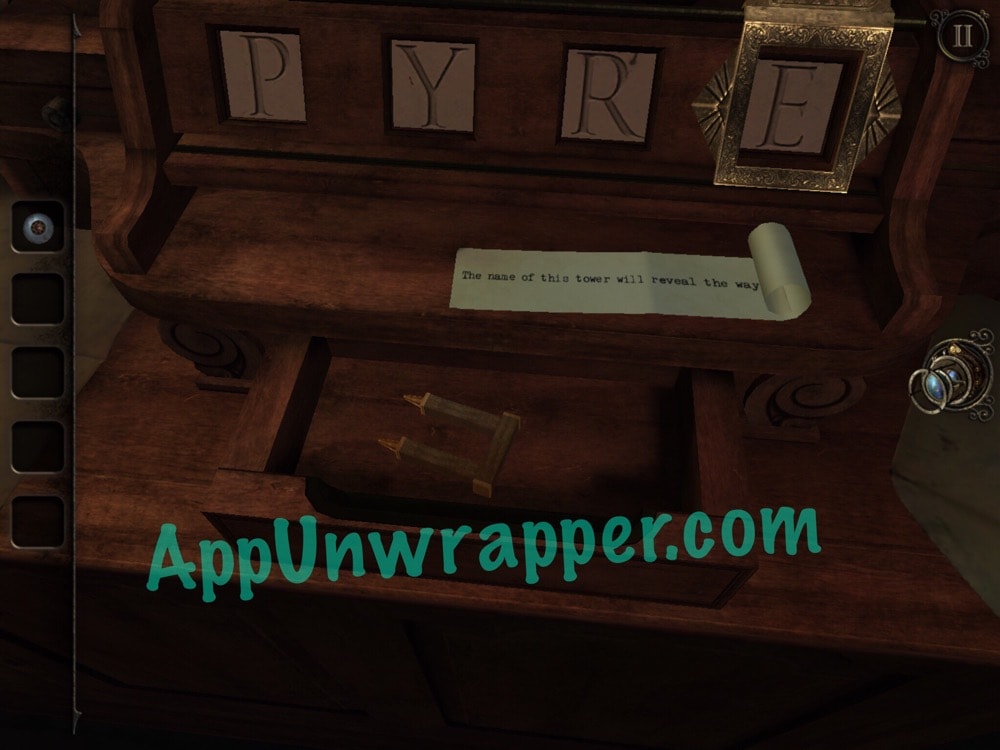
21. Remember it said “PYRE” in one of the letters? Notice the same word on the floor. Slide the tile open and take the sphere suspended in a cradle.
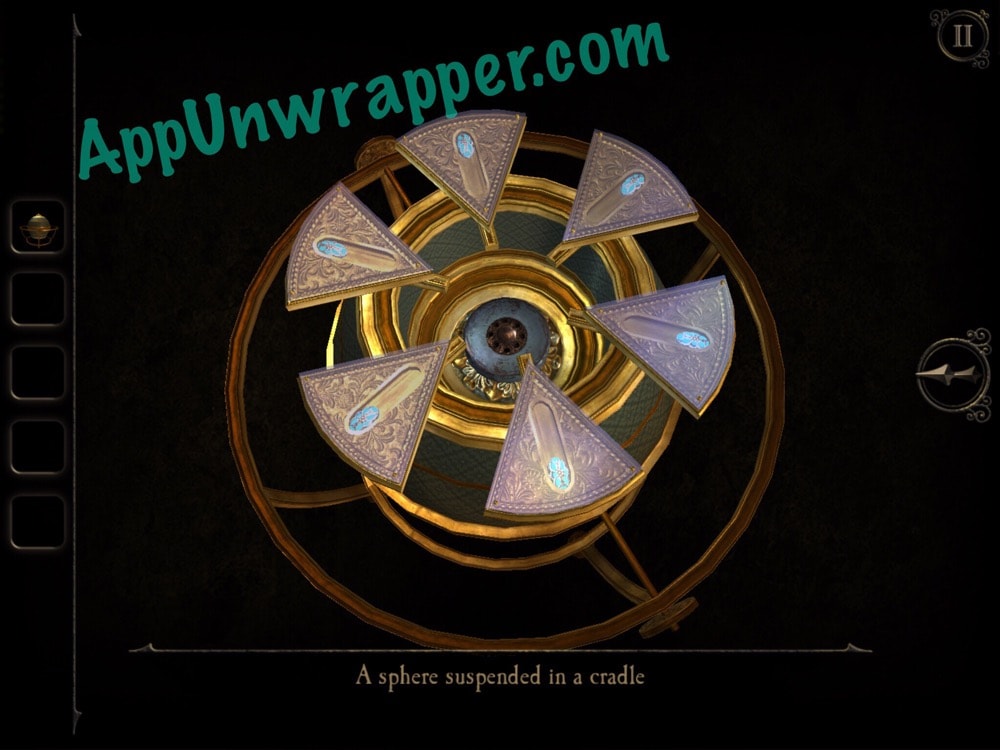
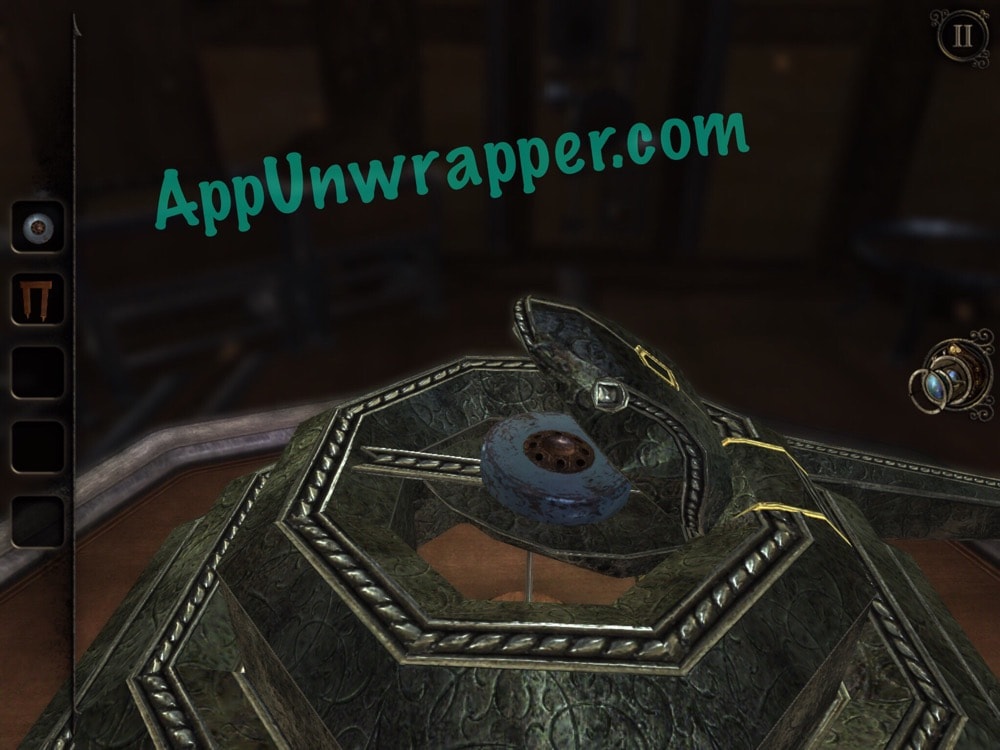
22. Spin the sphere upside-down, then spin it around until it opens up, revealing a magnet. Take the magnet.
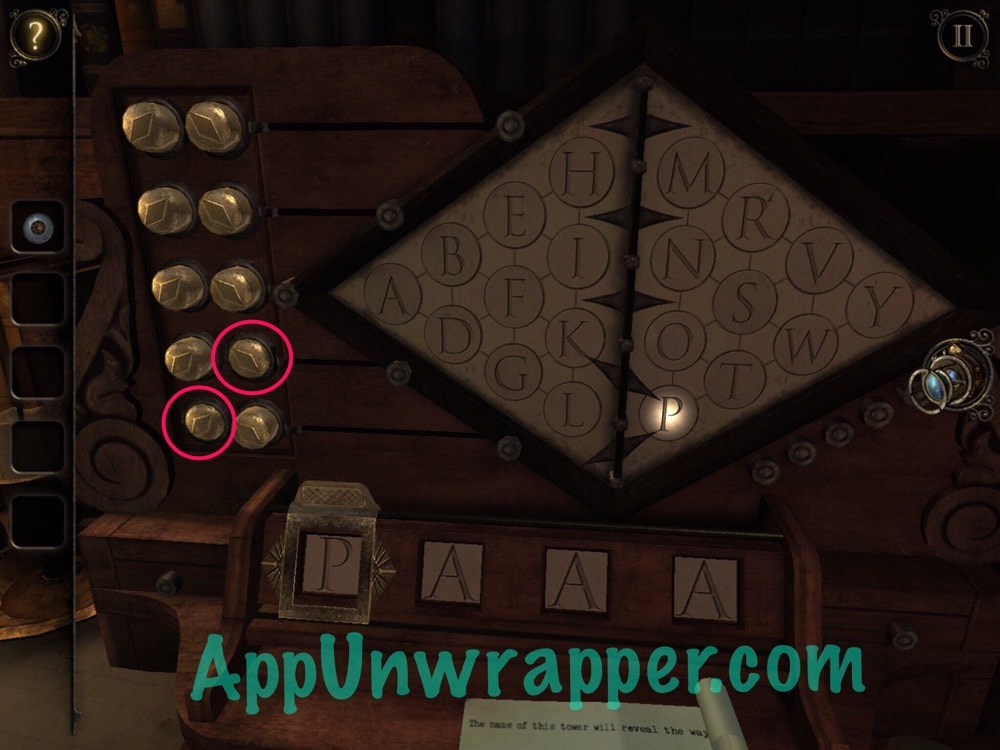
23. Go to the table by the bookshelves. There’s a note that says, “The name of this tower will reveal the way.” Remember, the name of the tower is PYRE. So you need to spell it out here. This is how. First, put the sliding frame on the first letter. Press the buttons on the left so two arrows point to P, lighting it up.
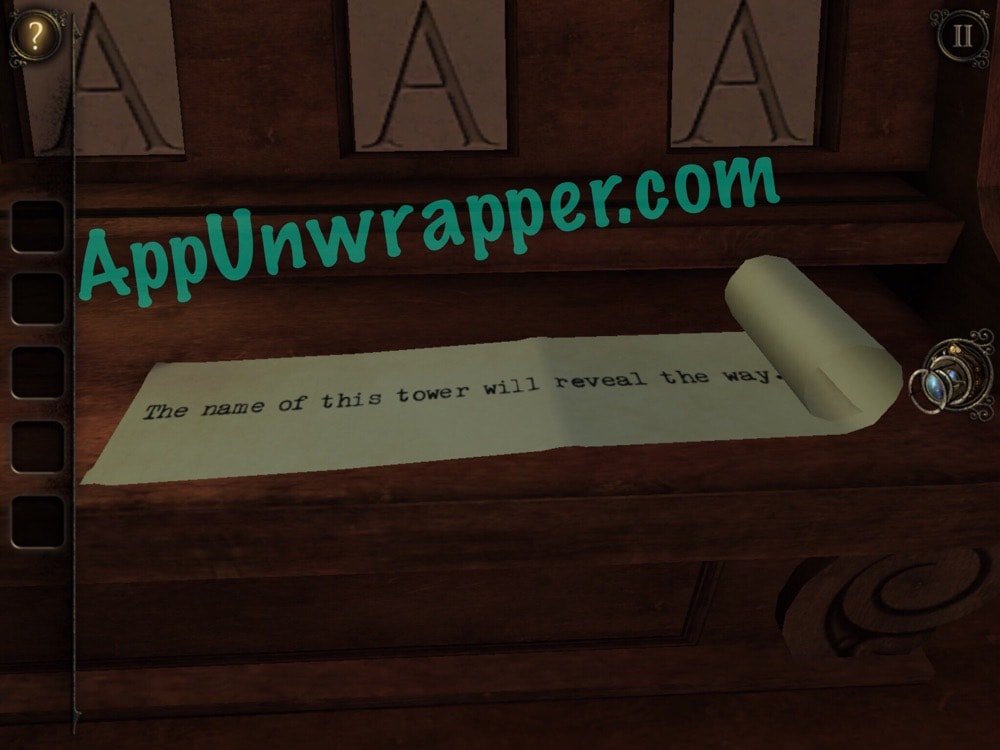
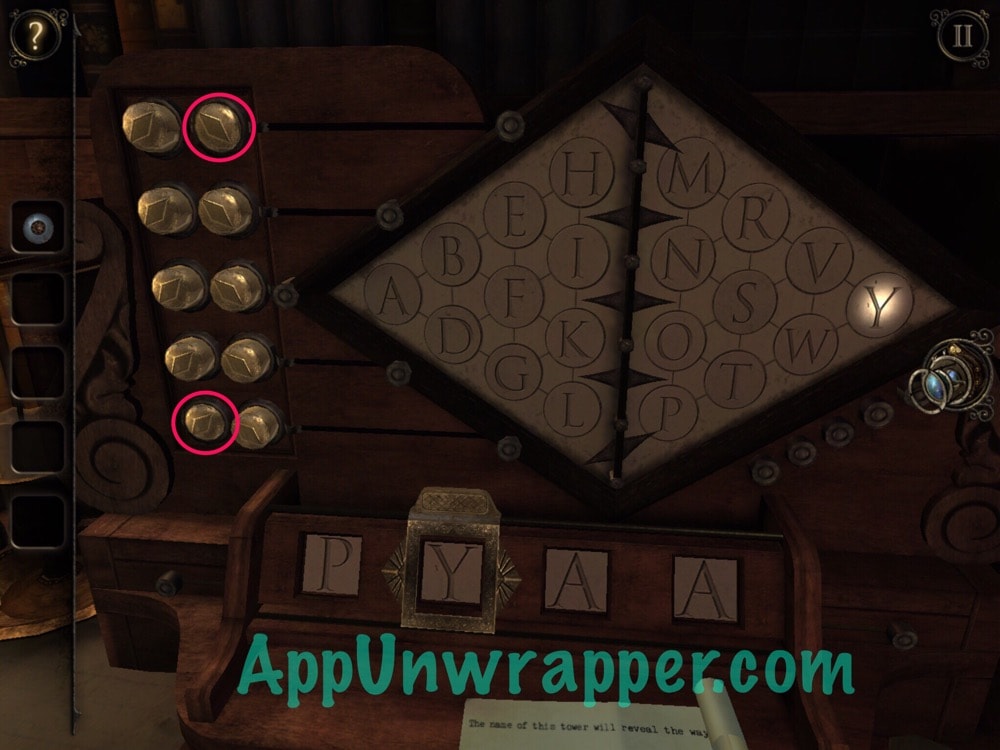
24. Next, move the slider to the second letter. You need one arrow pointing at P and one at M, which will cause Y to light up.
See my review for The Room Three.
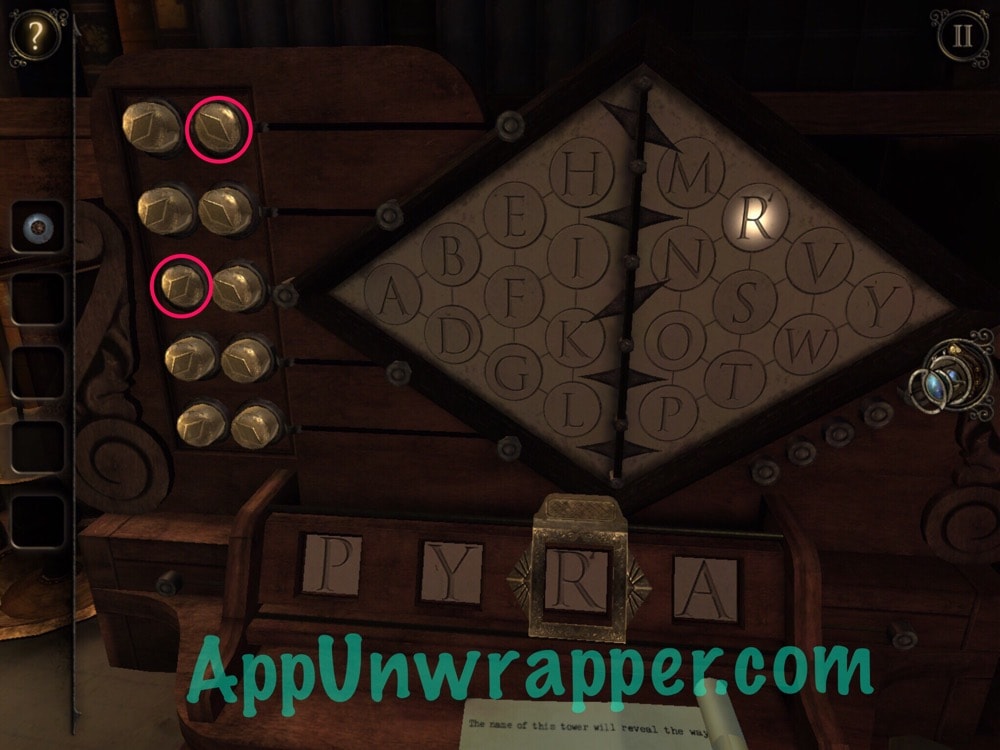
25. Move the slider to the third letter. Point one arrow at N and one arrow at M to light up R.
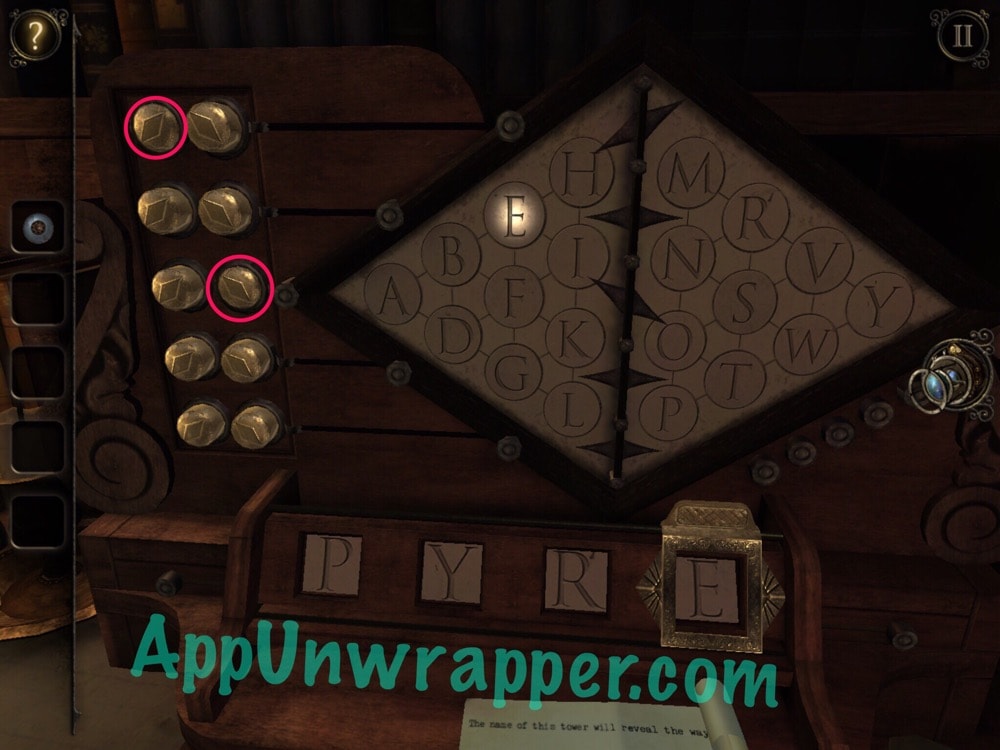
26. And finally, move the slider to the last letter and point the two arrows at H and I to light up E. Then take the carved wooden arch from the drawer.
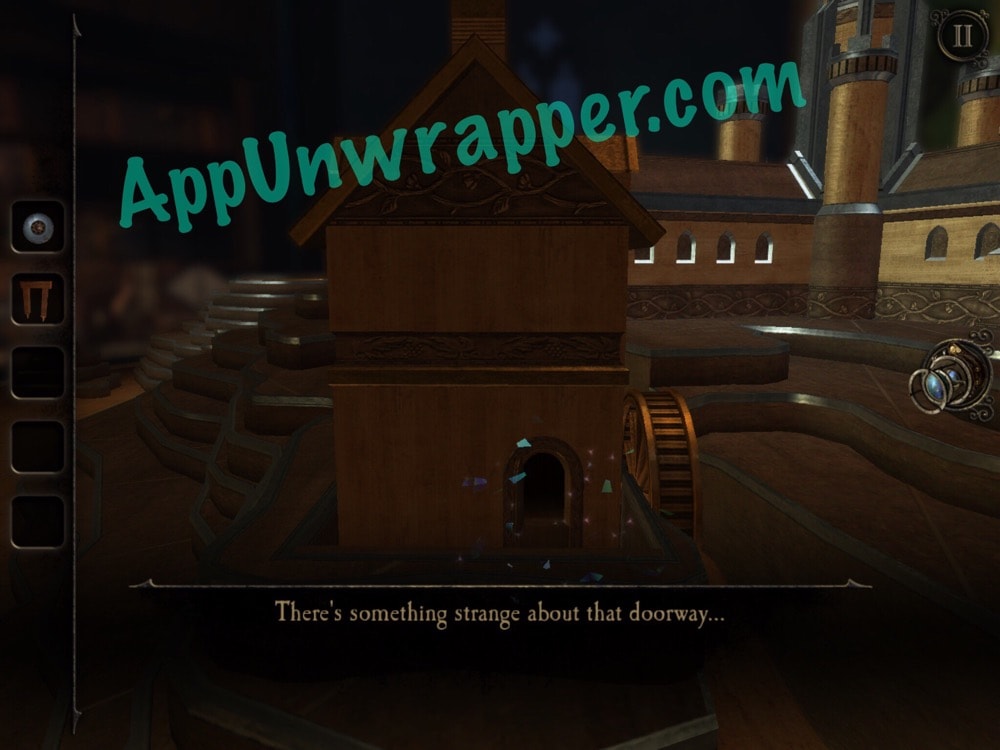
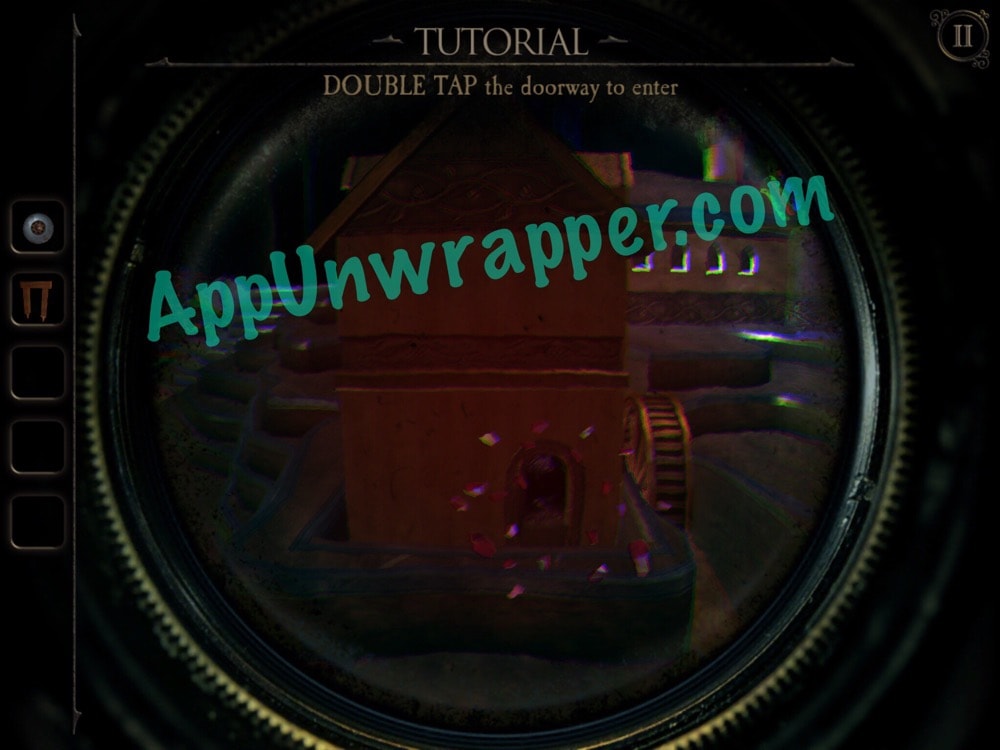
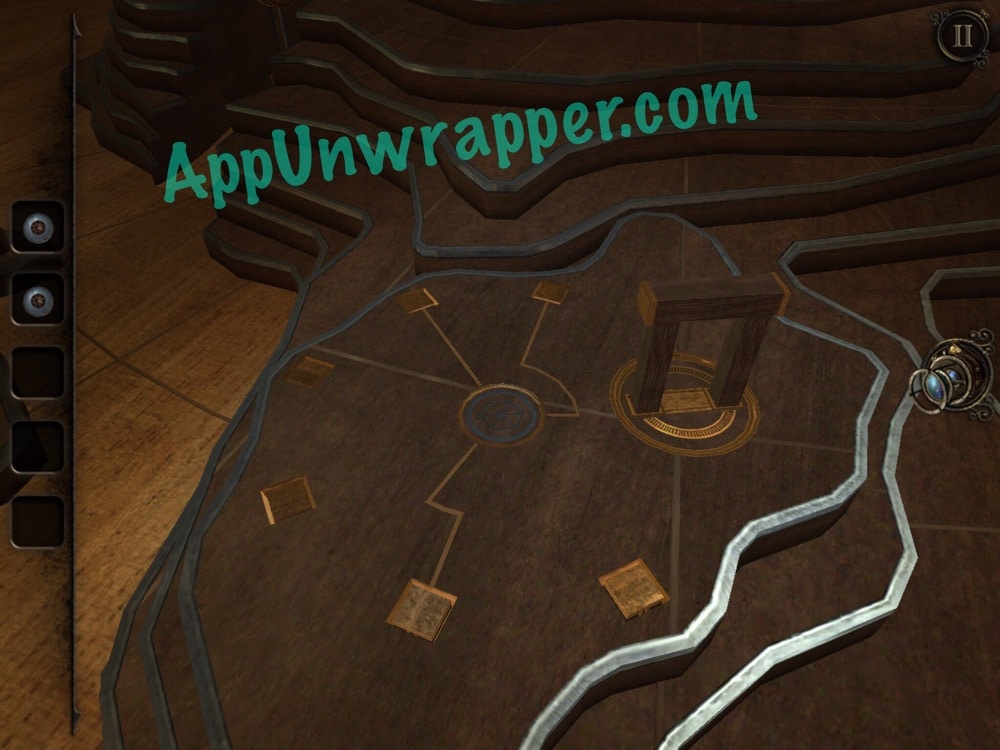
27. There’s a little house or small building on the map with a wheel next to it. If you spin the wheel, the window will open and some red particles will appear before it. Put on your eyepiece/lens and double-tap to go inside. Notice that the green spiral in the center of the room is a rattlesnake. Pull on the rattle at the end of its tail to get the middle to rise up. Turn each level of the snake until you get three of the same diamonds lined up. The mouth will open and a button will appear on his head. Press the button and take the magnet from his mouth and leave the room.
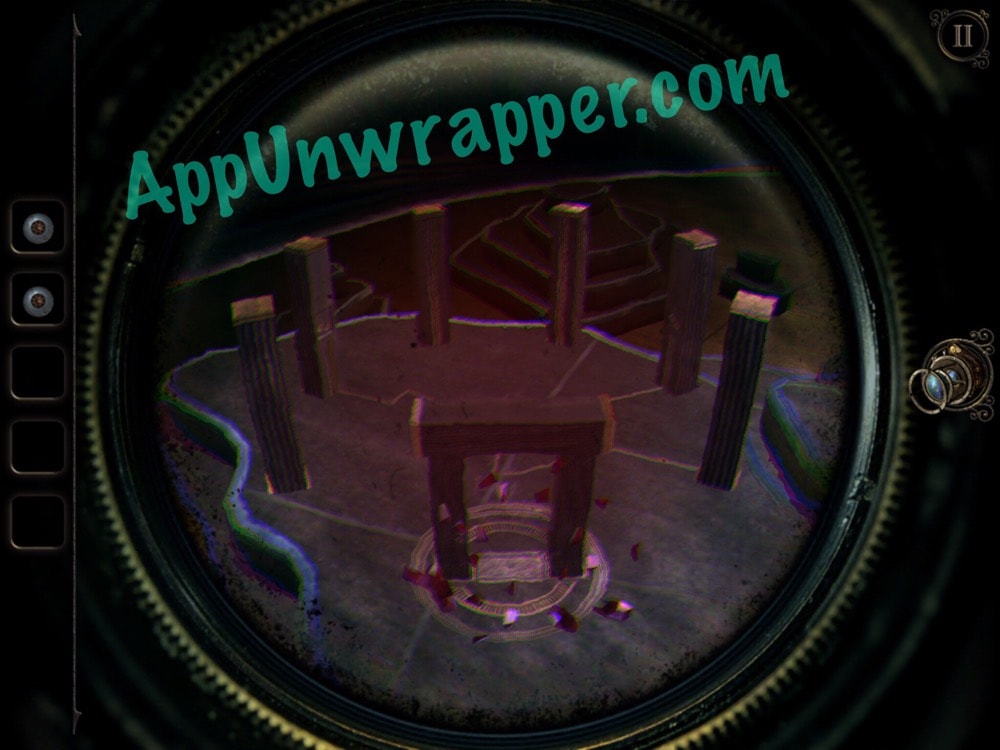
28. Find this spot on the map with two square holes and insert the carved wooden arch. Turn it a bit and you’ll be looking at a sort of Stonehenge.
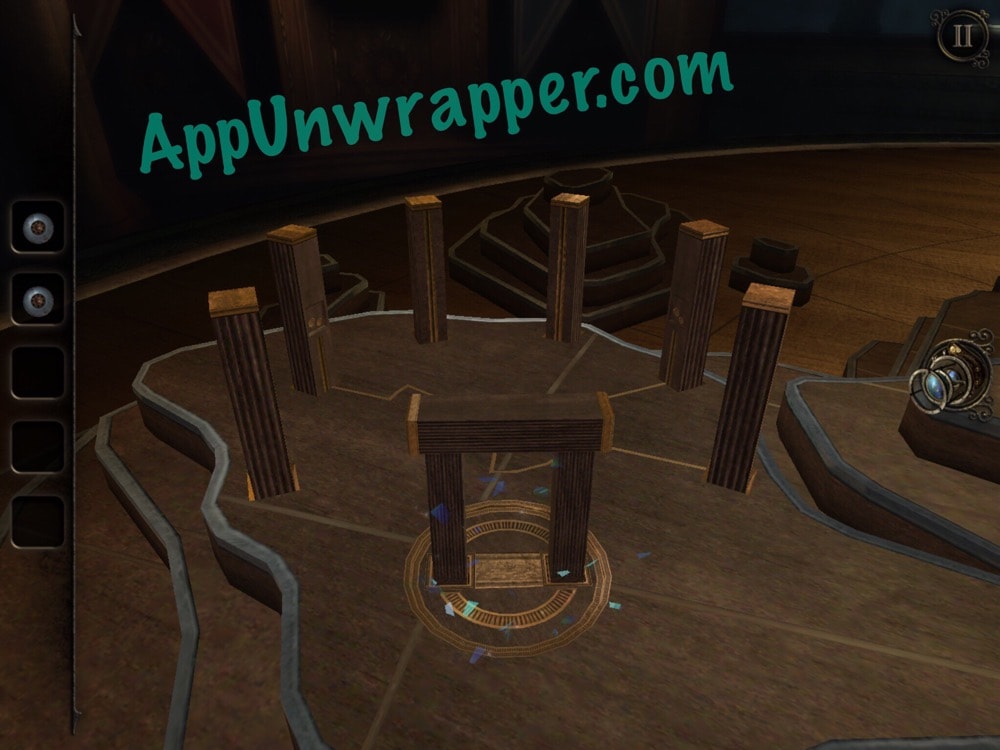
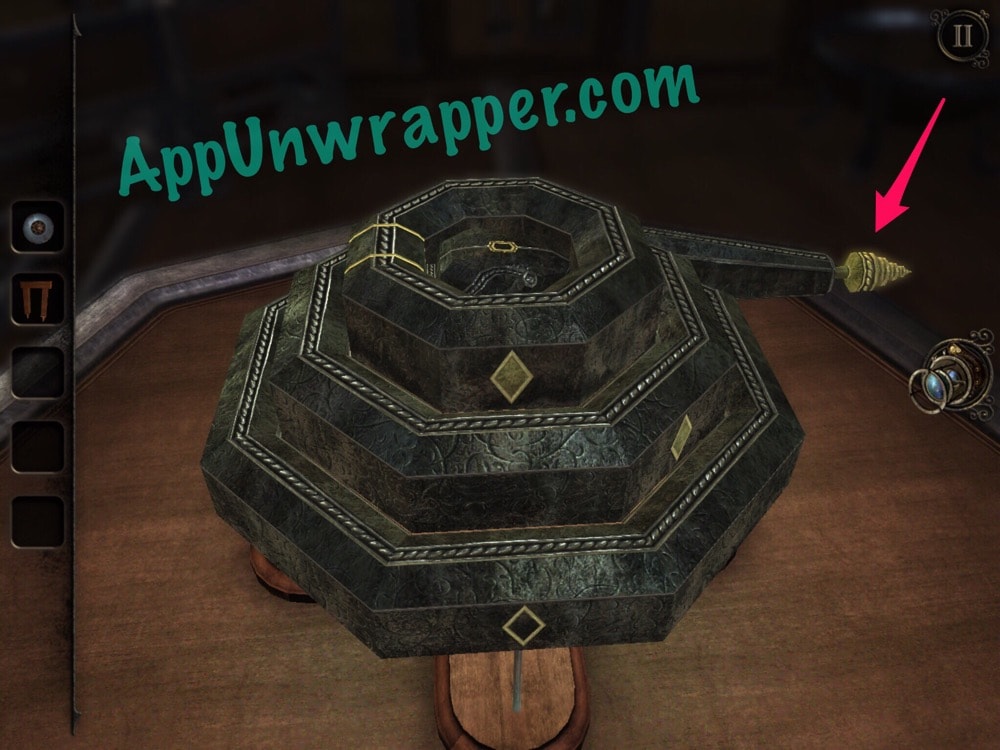
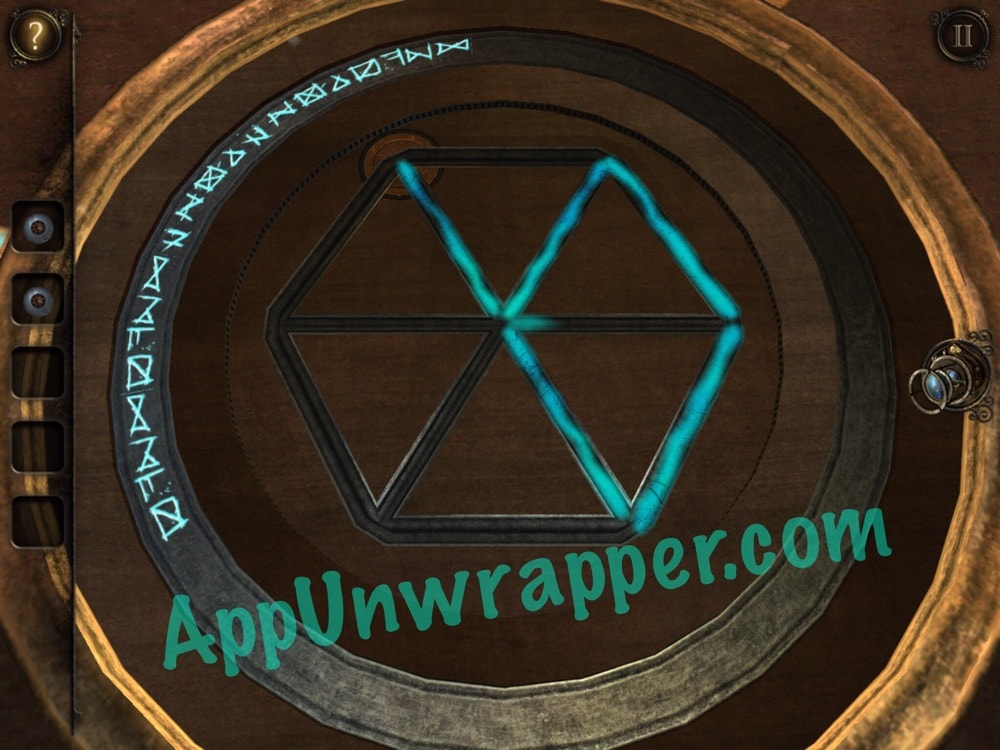
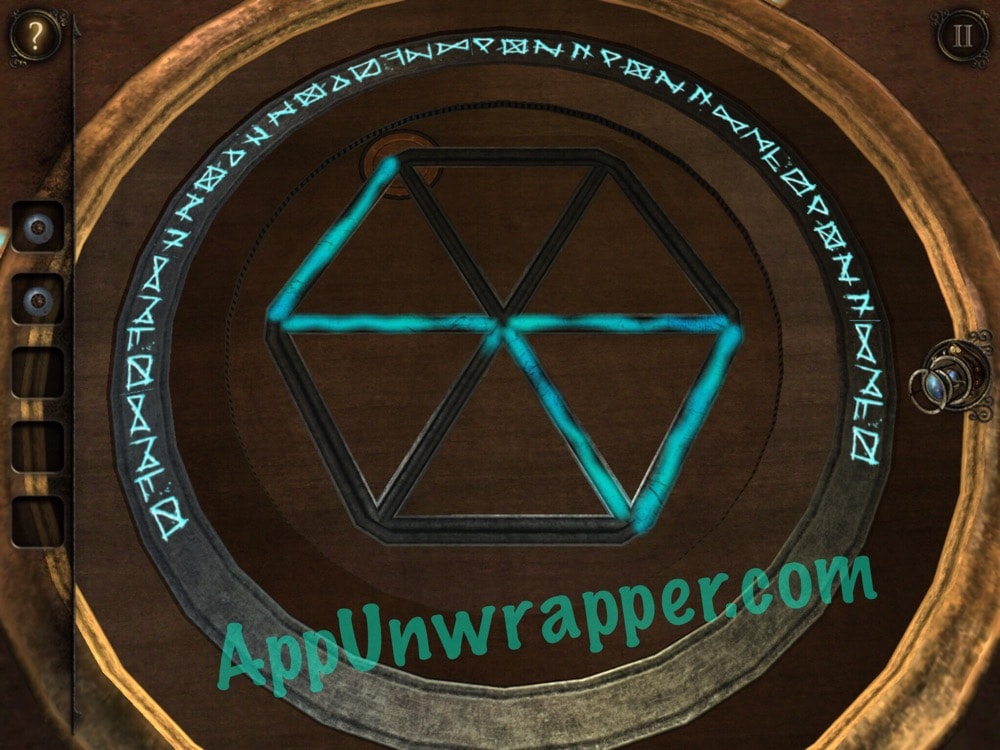
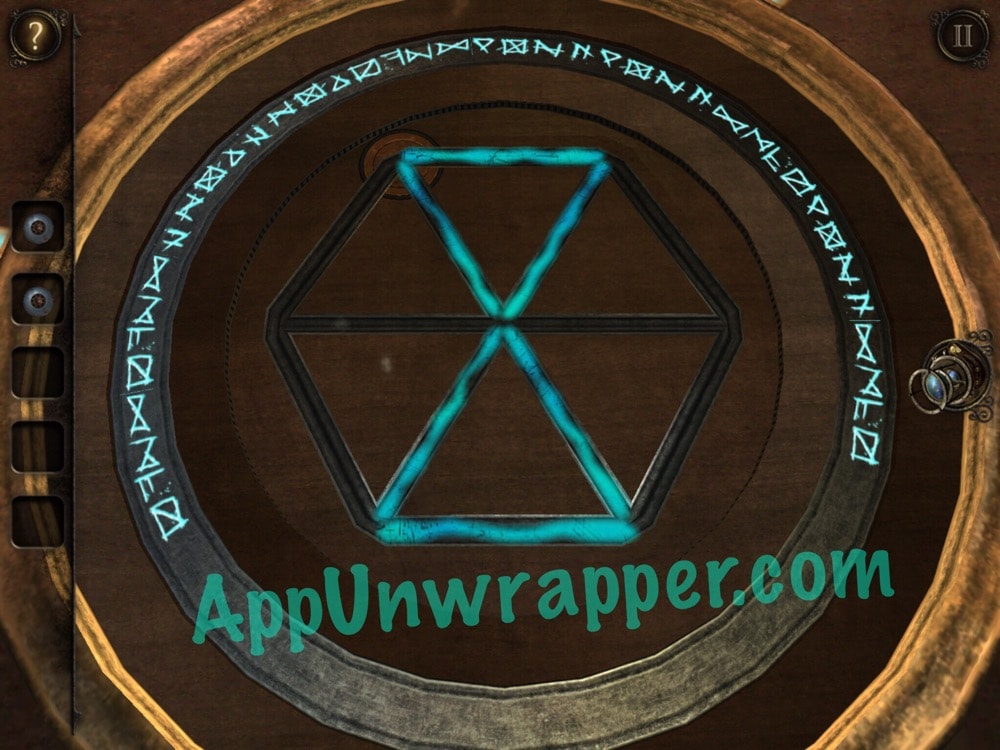
29. There are more particles here. Use the lens and double-tap to go inside. Then, zoom in on each of the three pillars with dots on them and hold a finger on each of the two dots to makes some glowing symbols appear.
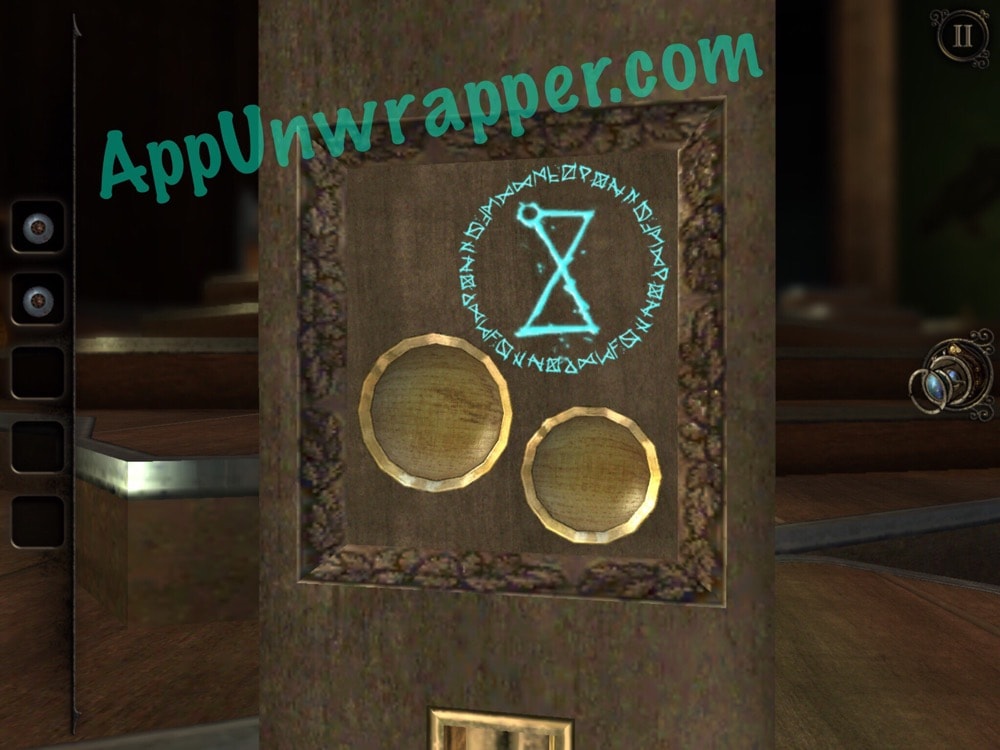
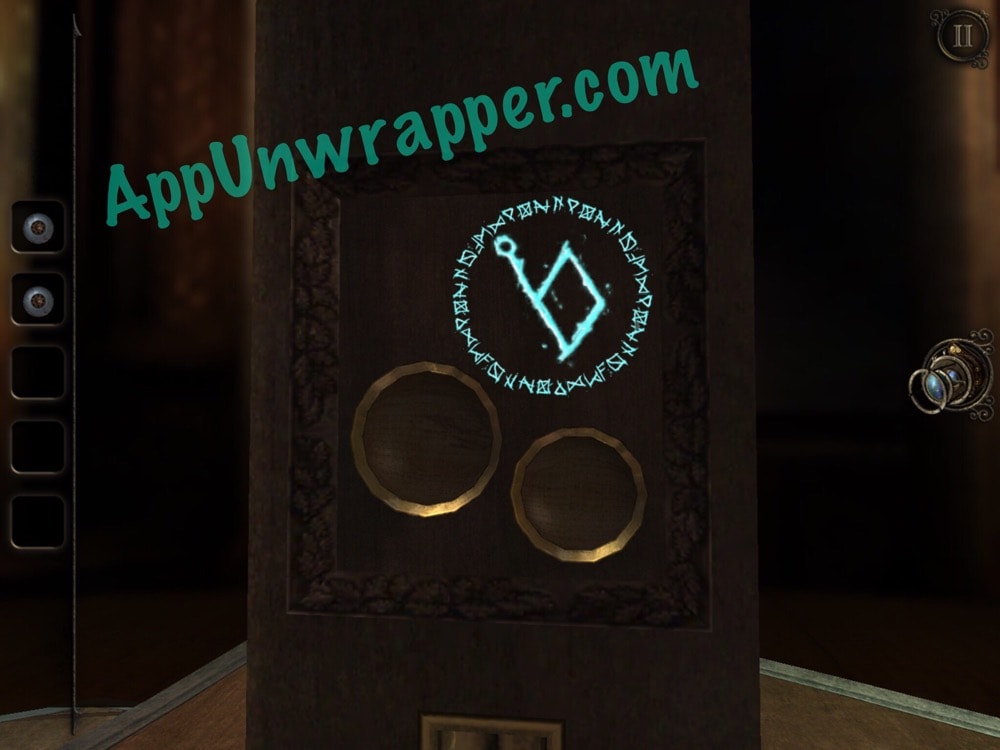
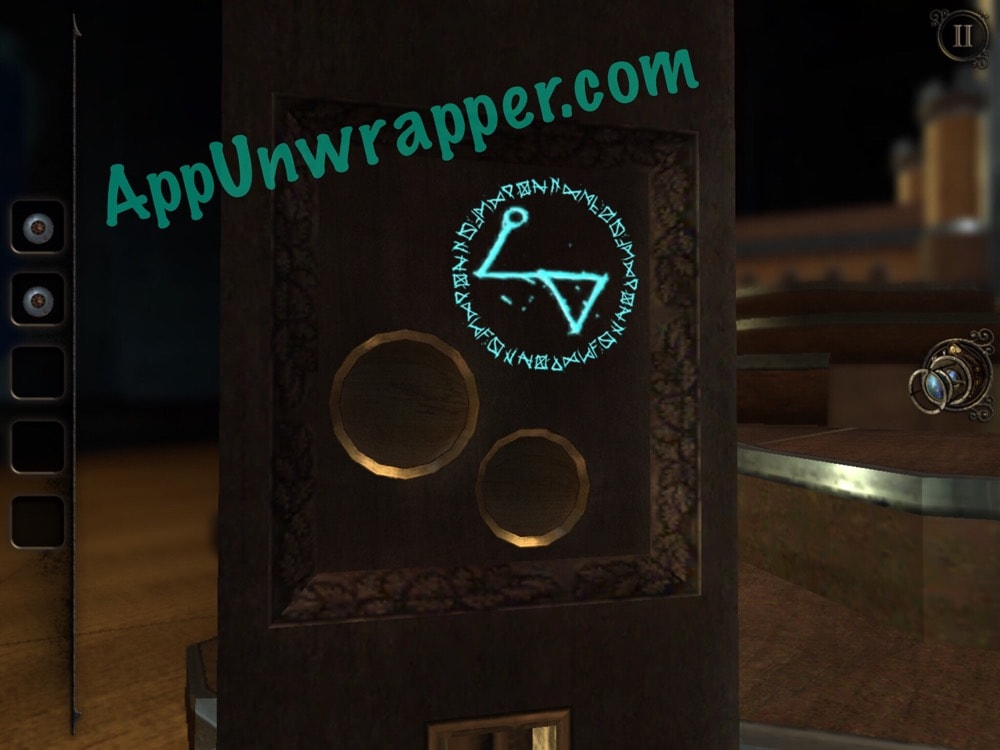
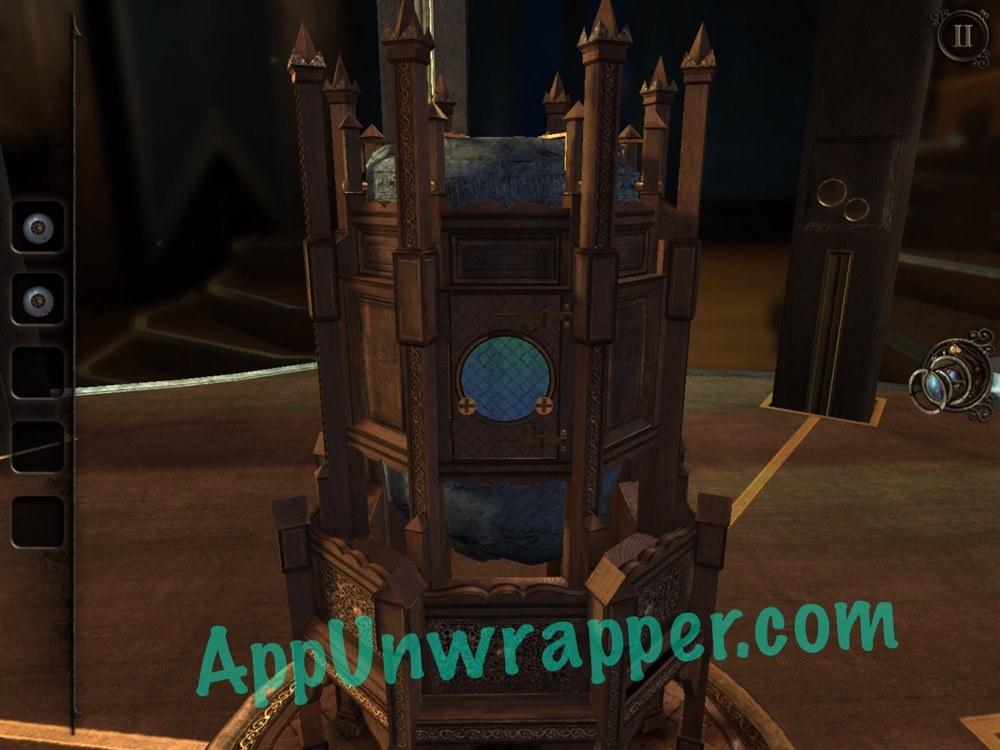
30. Now you need to trace each of those shapes in the hexagon in the middle. Pay close attention to the little circle in the symbols and match that to the circle in the hexagon. When you finish, a new structure will rise up from the center.
Click on the little numbers below to continue to the next page of the walkthrough or click here.

What about the cage in the first room? Can you open it?
I cannot figure out how to get the lantern placed!
Okay not bad not bad for