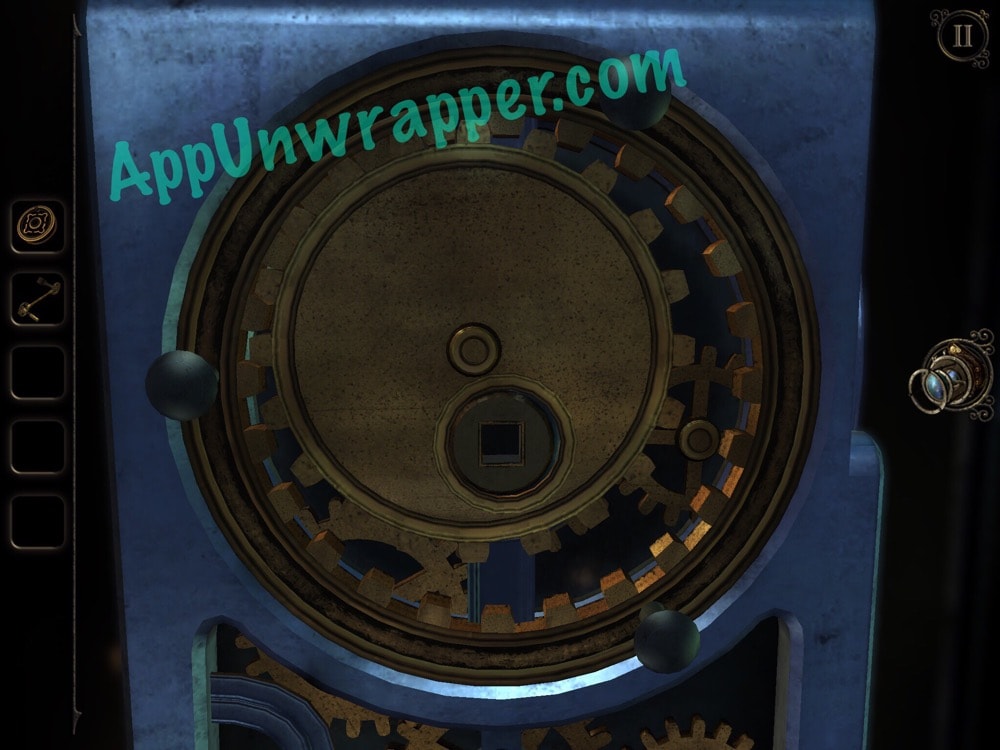
16. Turn to this side and place the metal ring down. Turn it so the hole matches up with the square socket, then insert the crank handle and turn it.
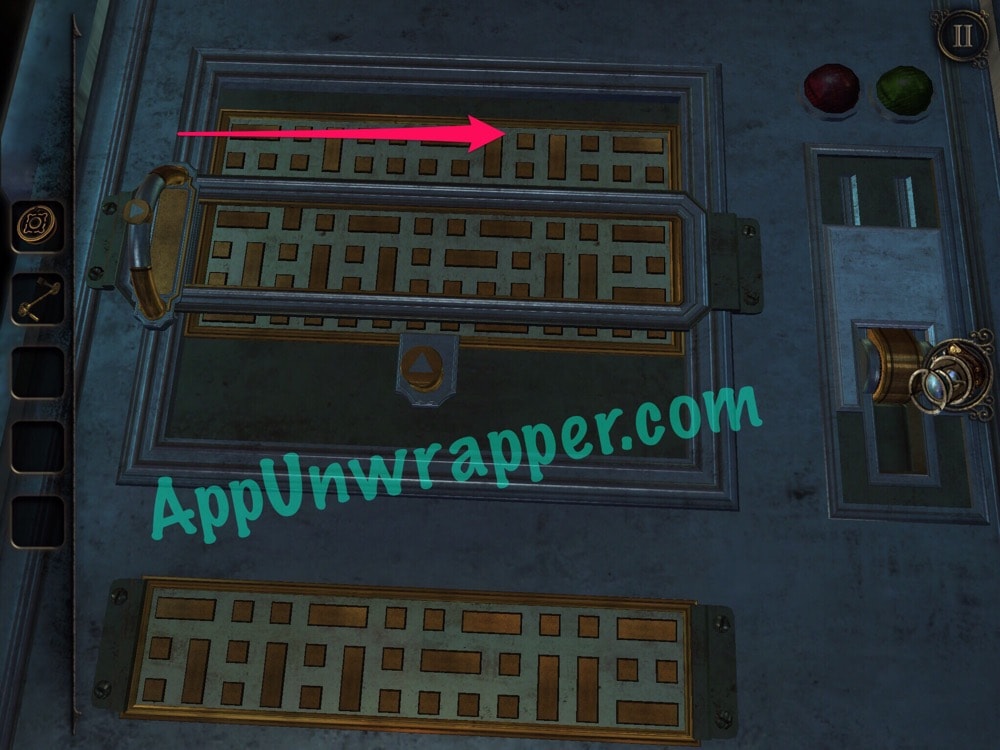
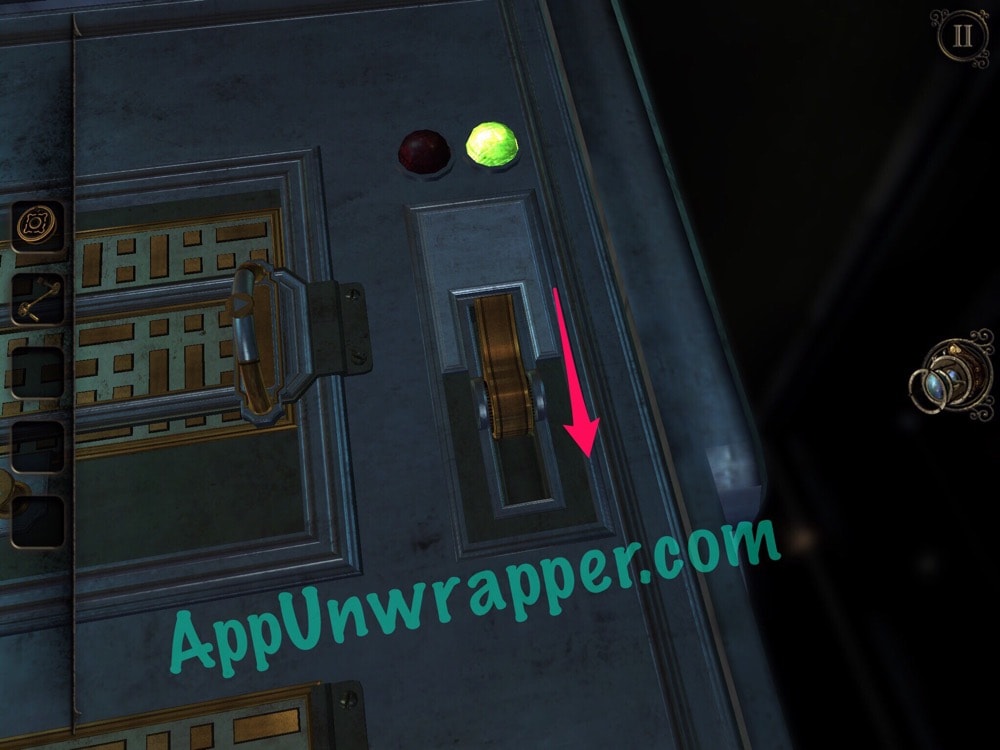
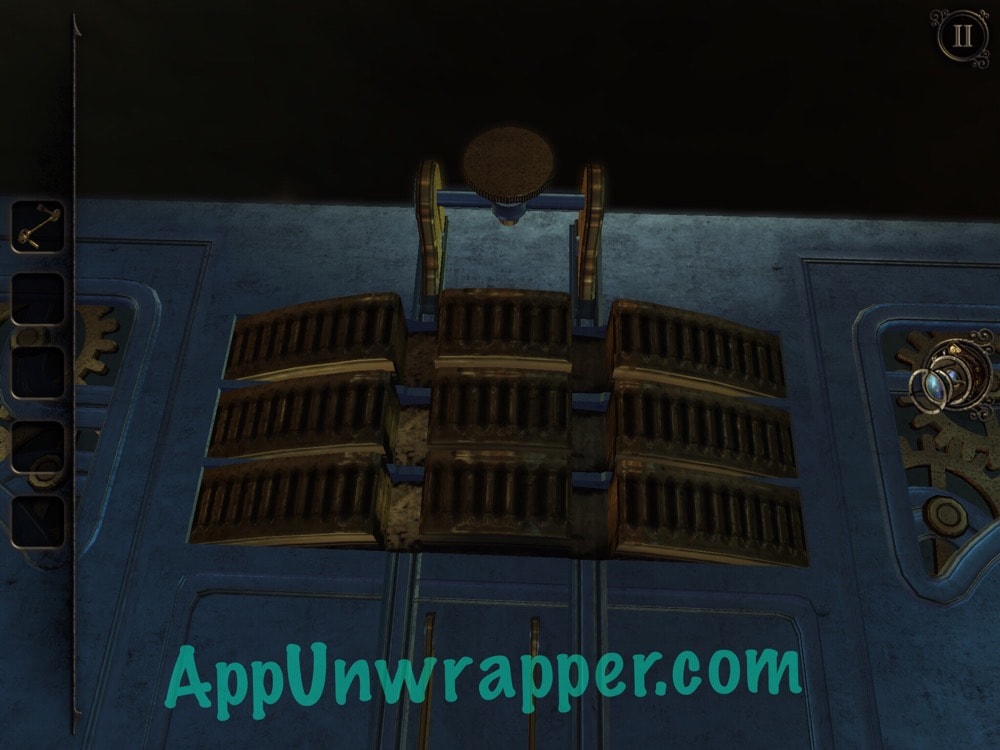
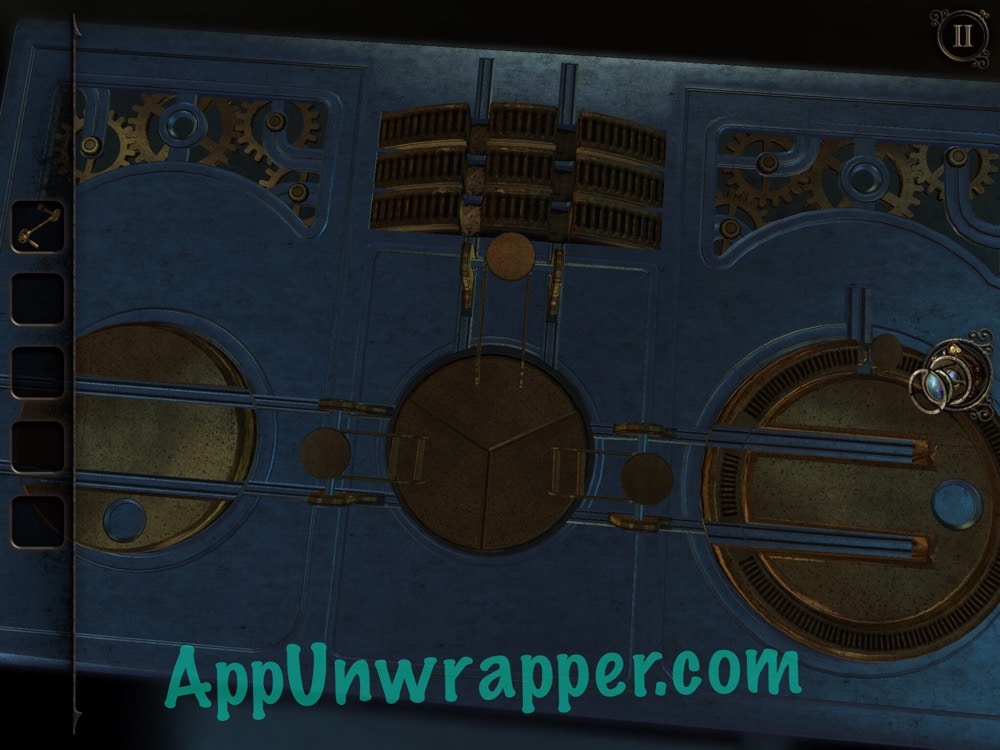
17. On this next part, you need to match the top pattern to the one on the bottom. It should look like the screenshot below. Then slide the arrow to the right and flip the switch. Leave the box.
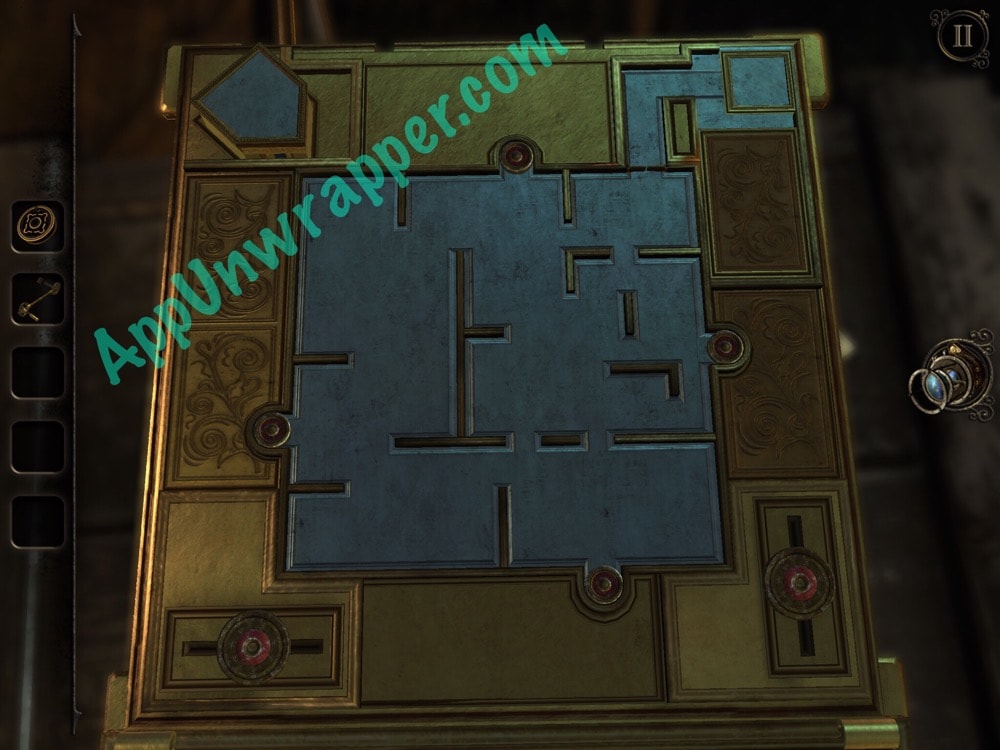
18. Now you’re back at the top of the box. Four little metal discs will line up. You need to play a sort of labyrinth/pinball/hockey game here. Use the two directional controls to navigate each of the discs into a hole. You can use the video below if you need help. A new piece will rise up. Use the lens to go inside.
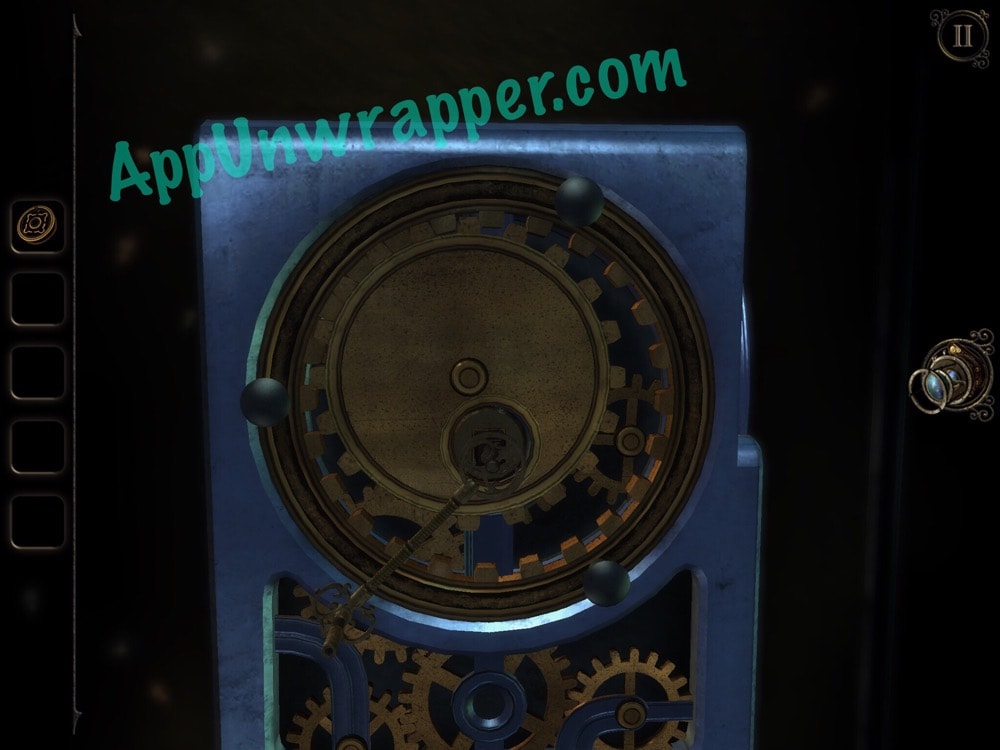
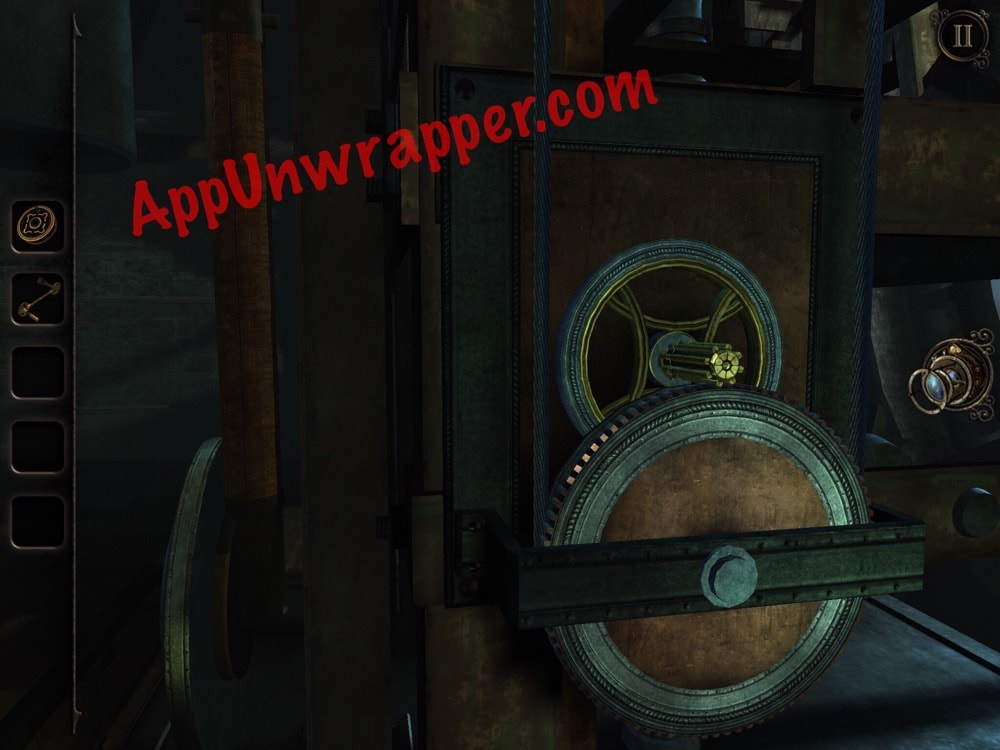
19. Insert the crank in the square hole. Turning it makes the gear move, but only when you’re turning it. This allows you to move it a bit, then move the other pieces around to form its path. Keep doing so until it gets to the circle at the end. Press the button to reveal another puzzle on the top.
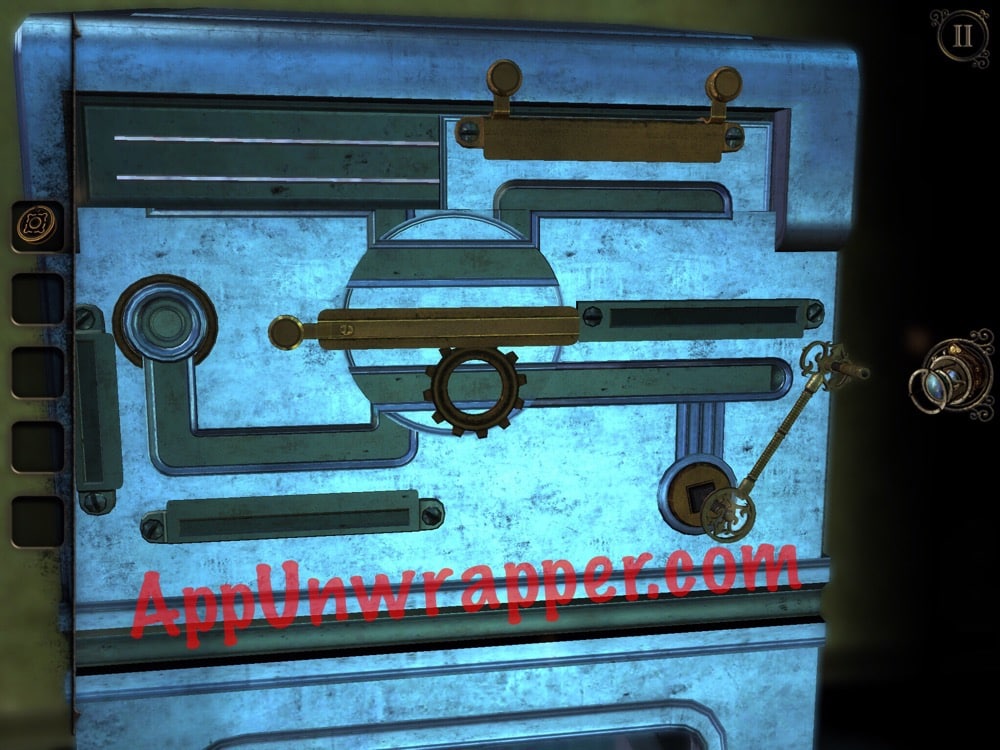


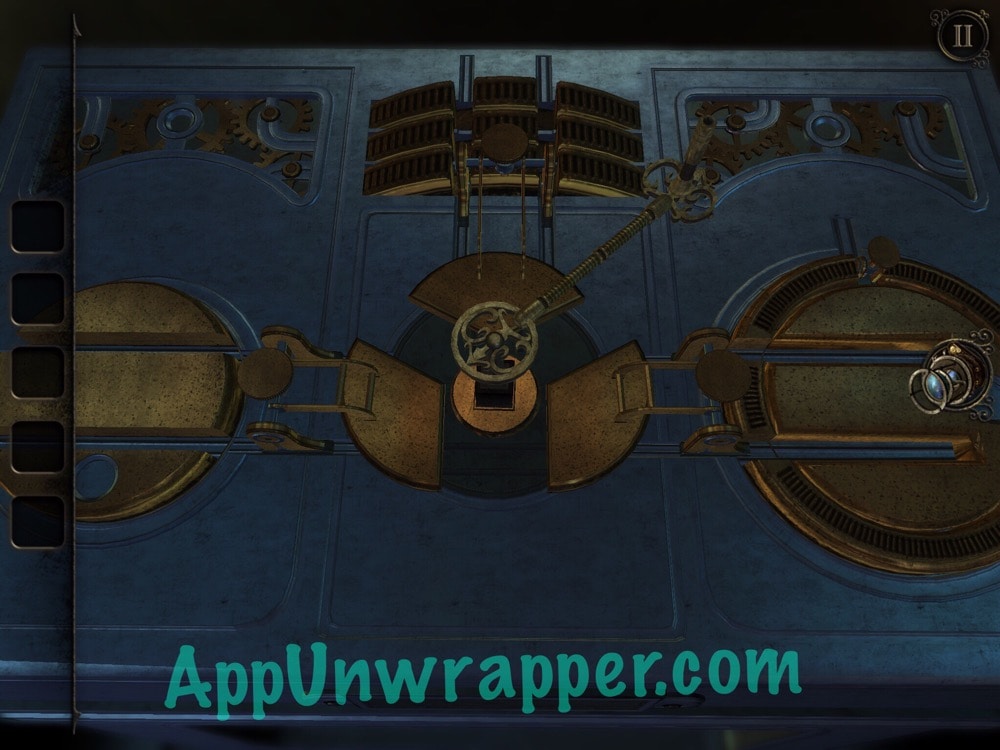
20. This puzzle is like the one from before, only a bit more complicated. Copy the image below of you need help, then slide the arrow across and flip the switch. Take the gear.

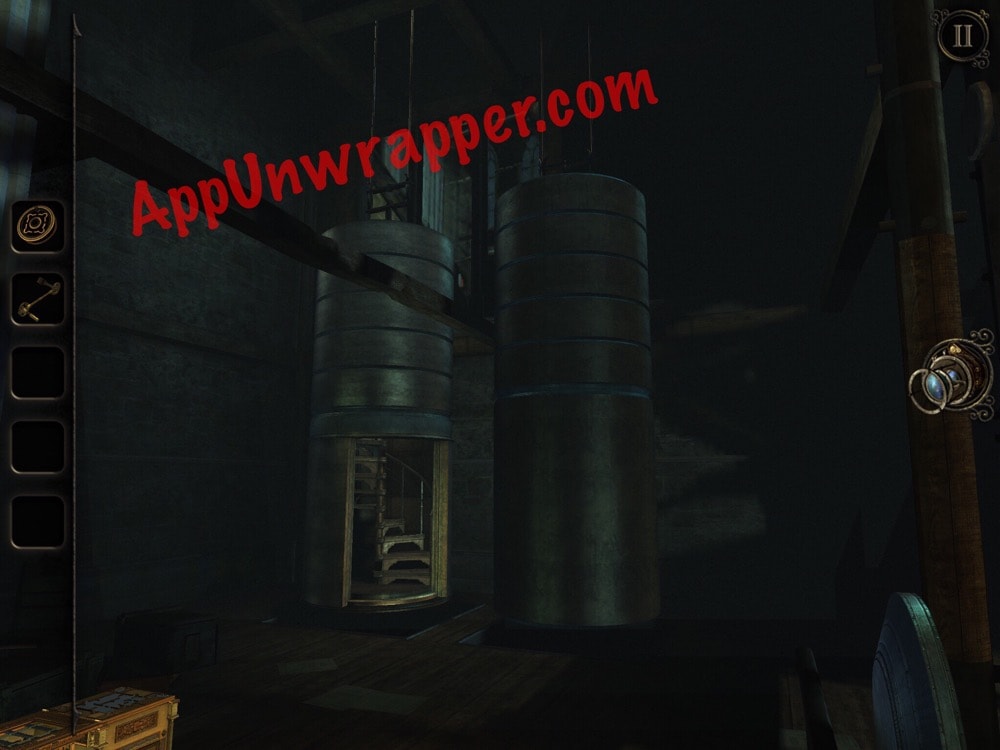
21. Place the gear in the whole by the gear on the wall. A staircase will be revealed. Climb up to the next floor.
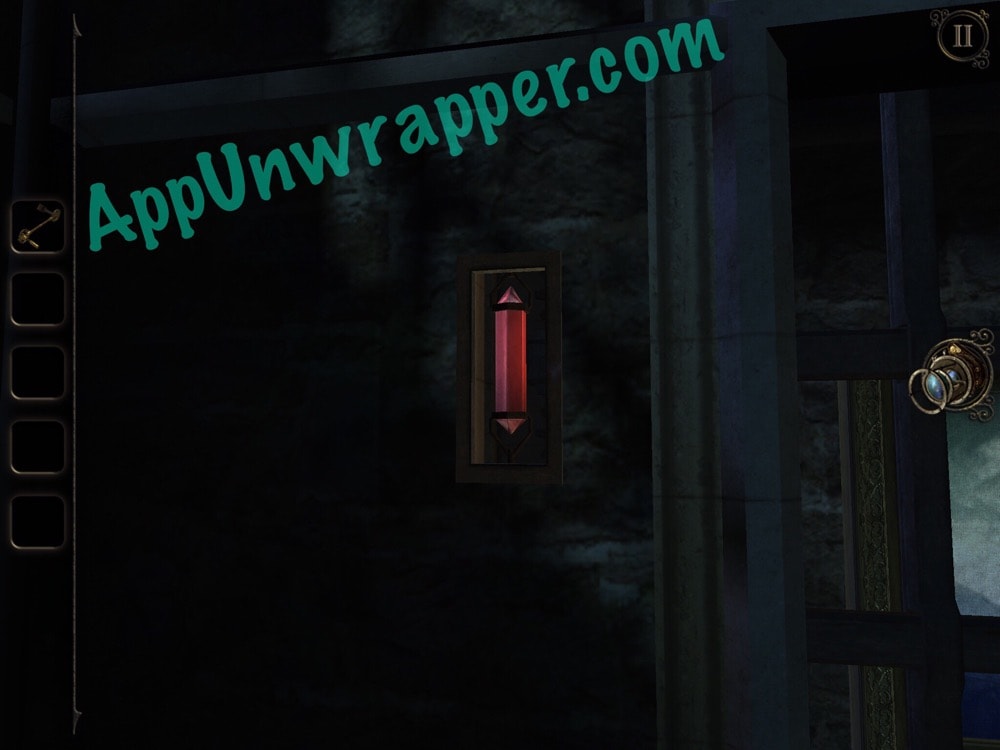
22. Find the wheel on the wall and add the wheel with a handle to it. Turn it until it causes the bell to ring. The red crystal will shatter, causing the bars in front of the painting to clear out.
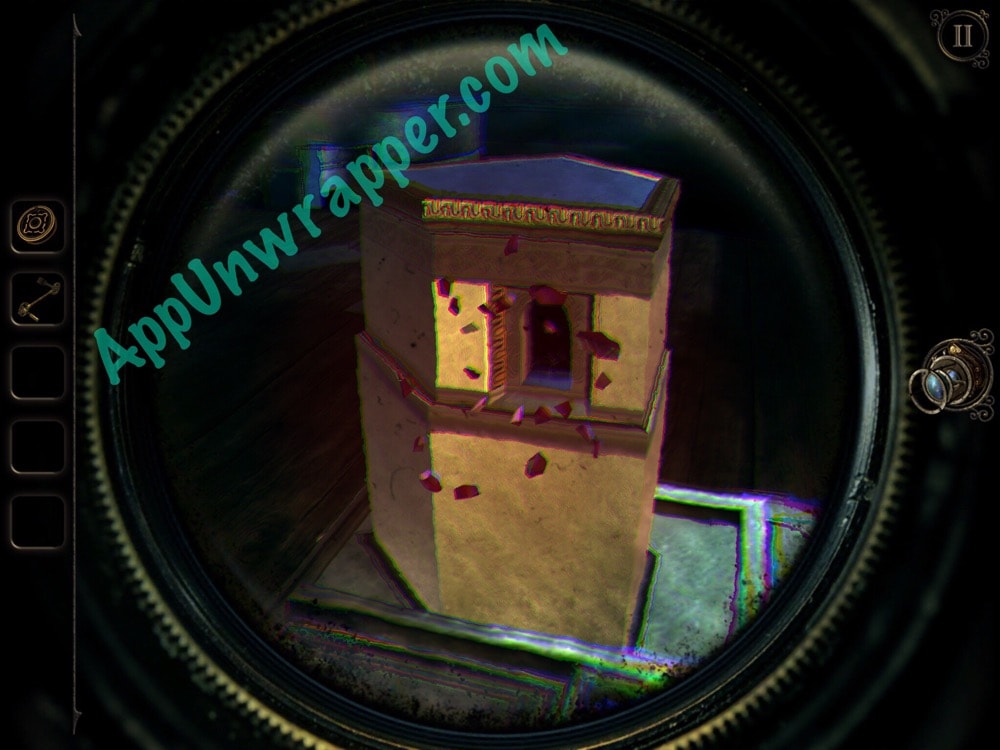
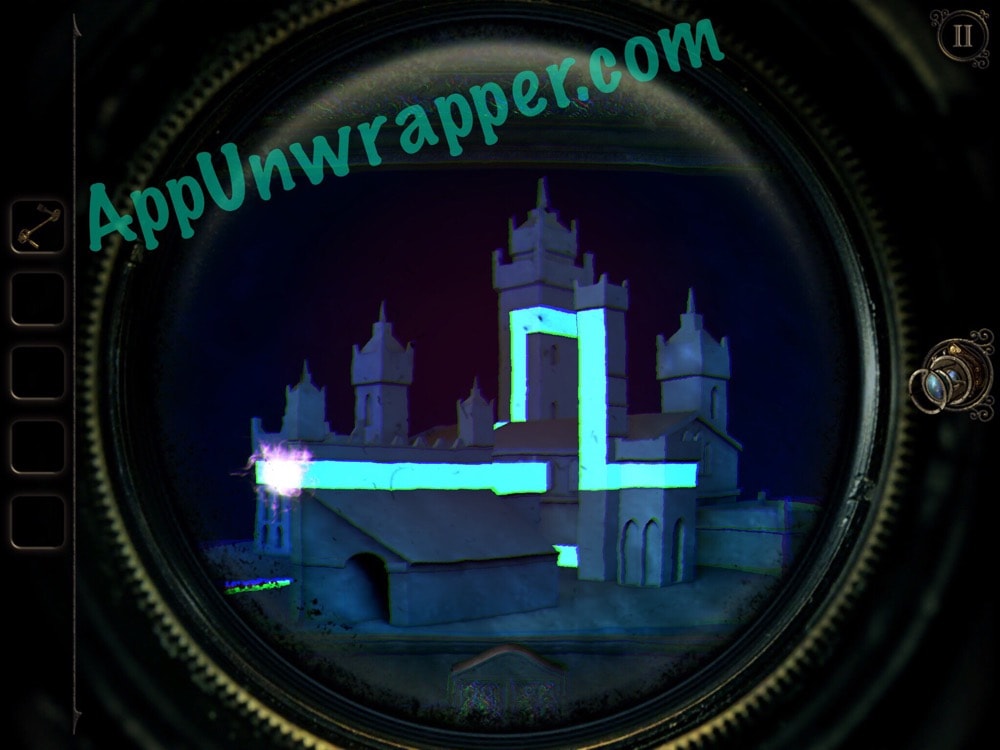
23. Zoom in on the painting and put on your eyepiece. The clock tower is now in 3D and you’ll see some white lines and a glowing pink spot. You need to rotate the building and make a path out of the white lines for the pink glowing spot. It should come towards you at the end and then you can take the clock face. You can watch my video clip below if you need help.

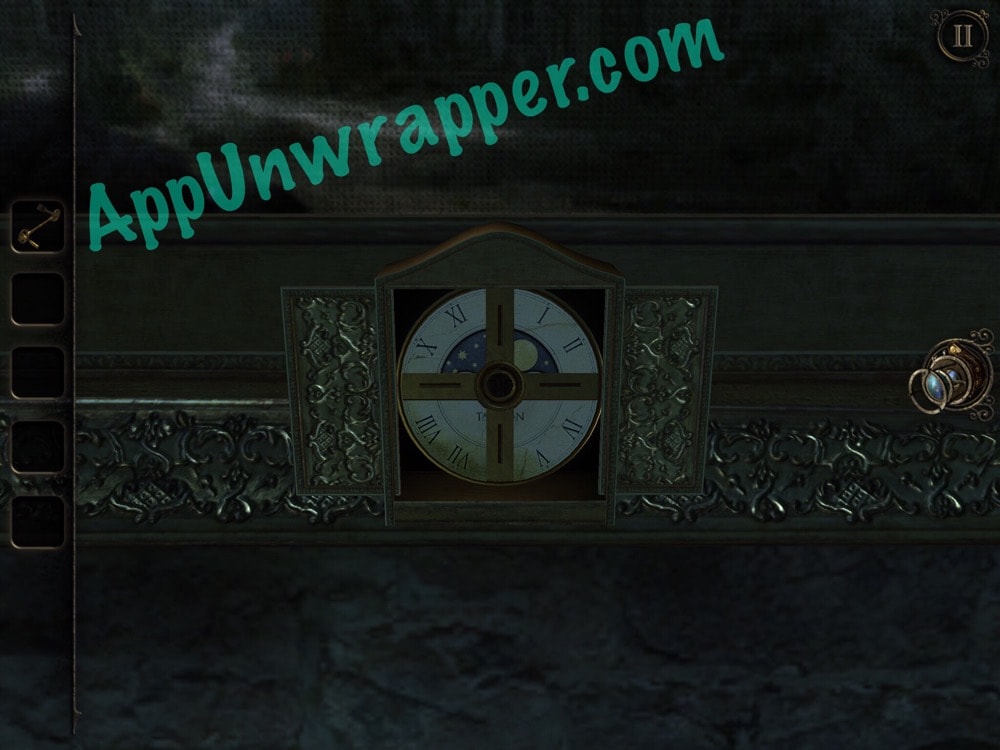
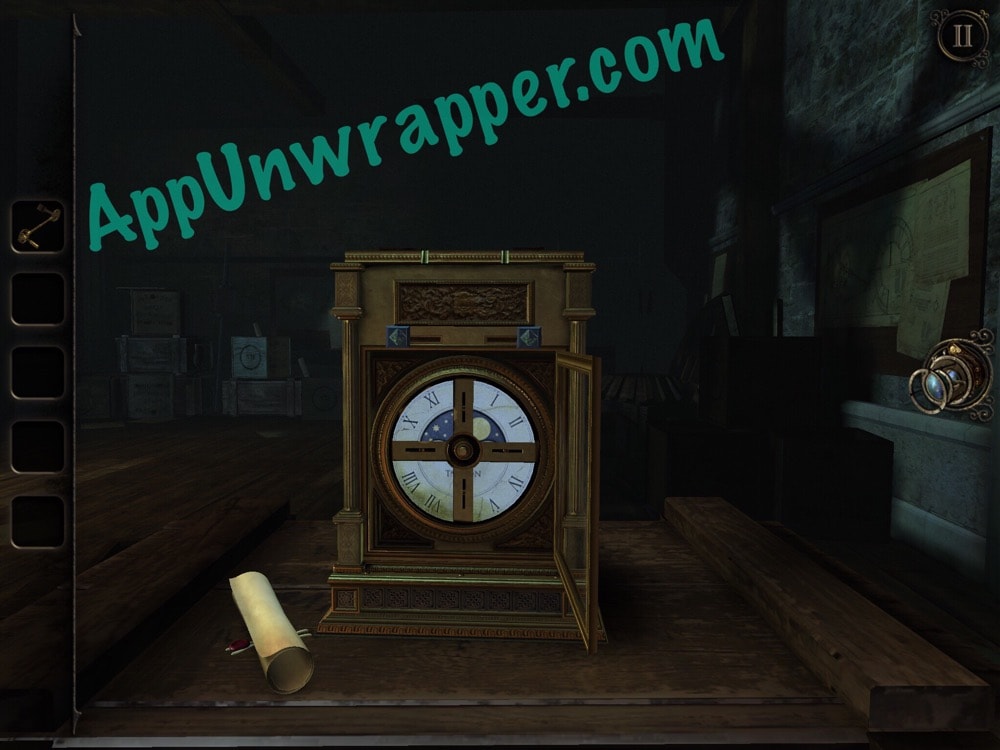
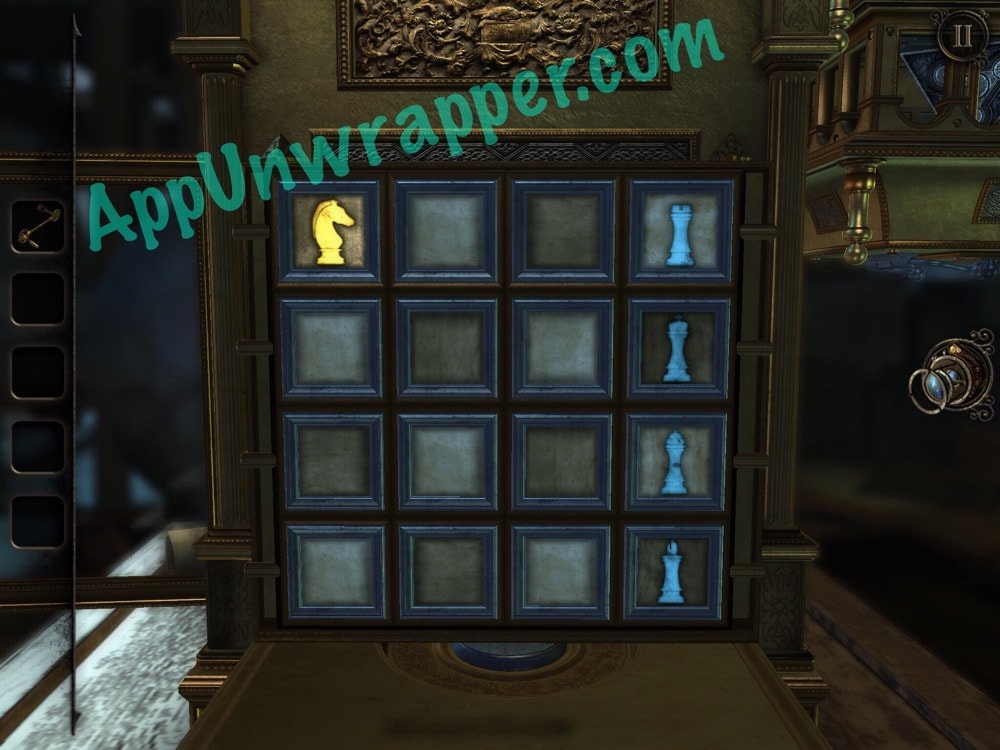
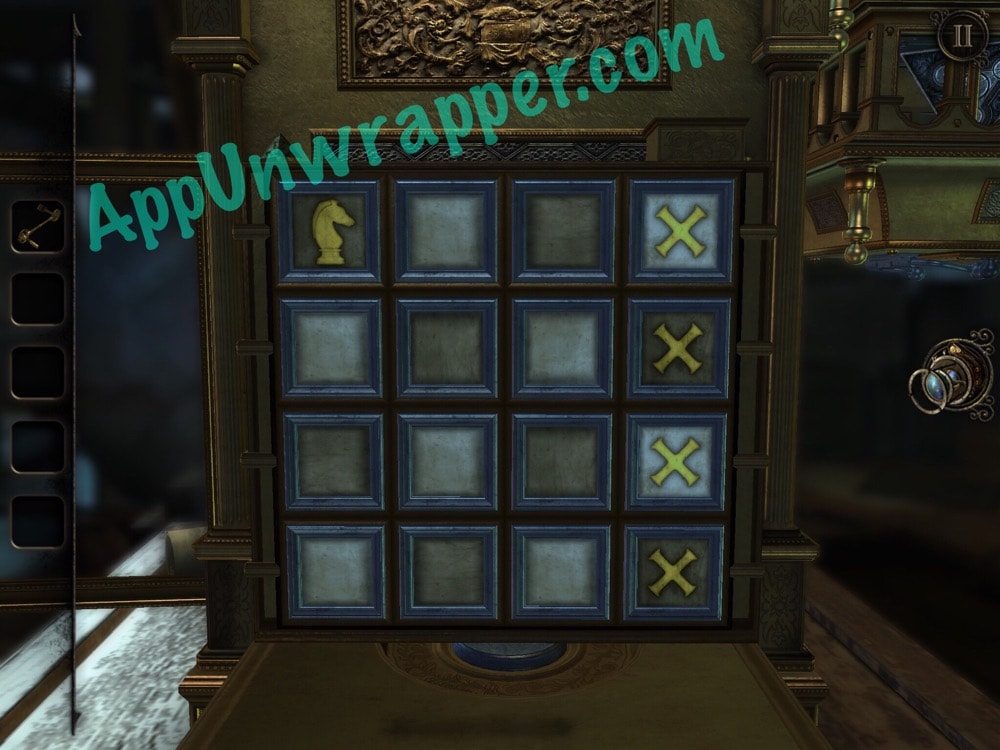
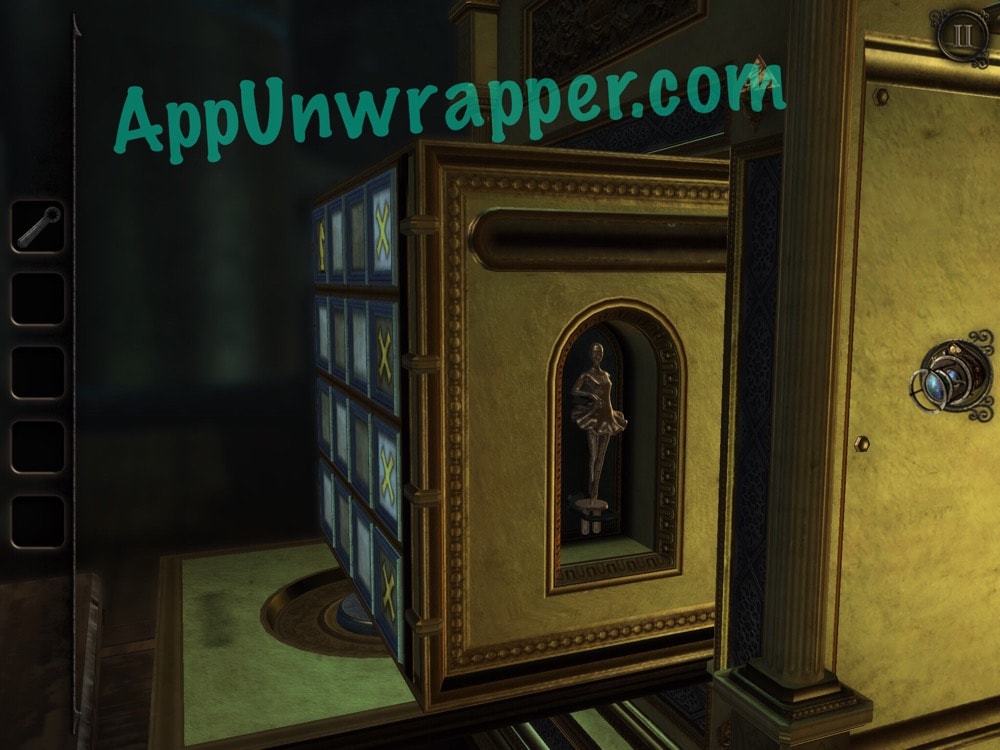
24. Place the clock face in the circular slot on the gold box. Then, solve the chess puzzle. You need to use the knight/horse to take down all four rooks/castles. Move in an L shape and take them down one by one until you have four X’s.
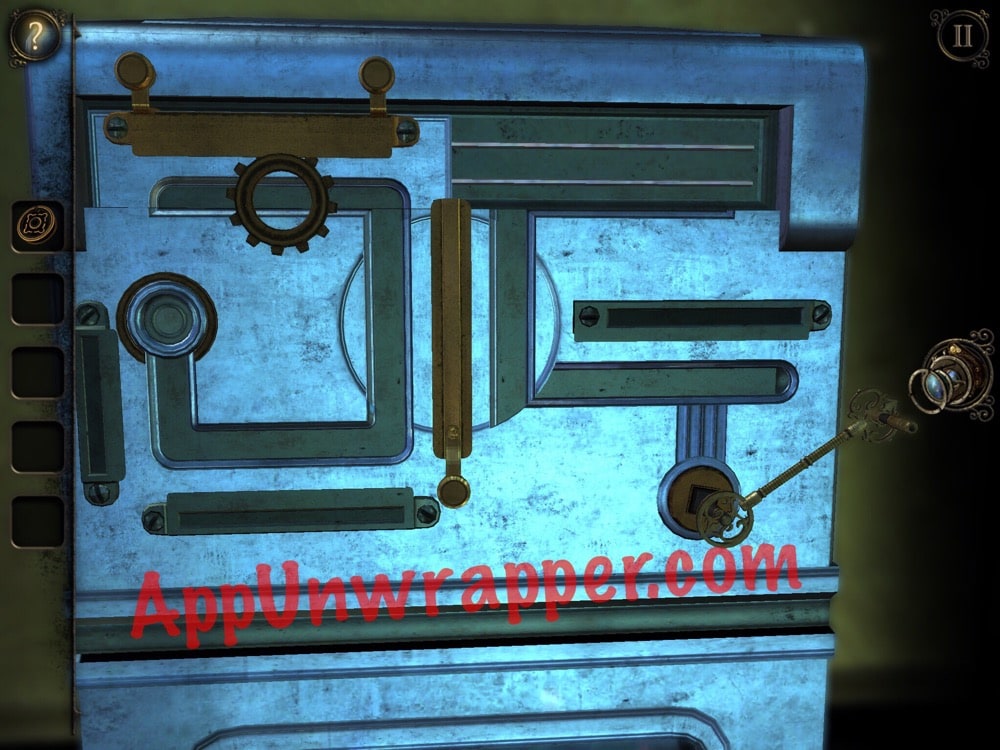
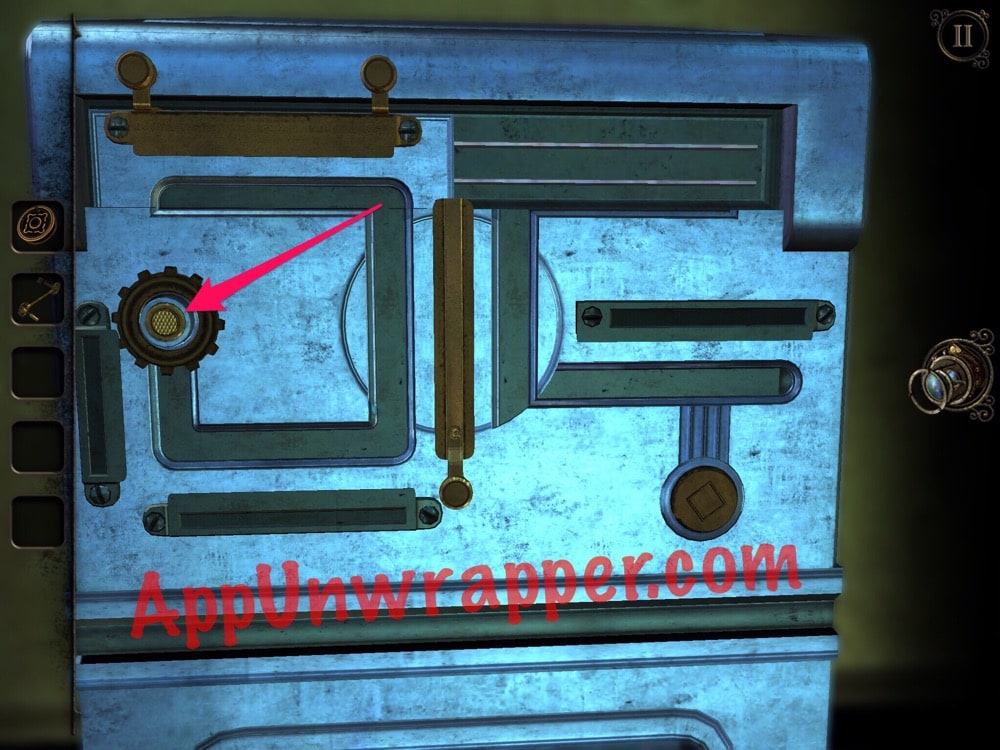
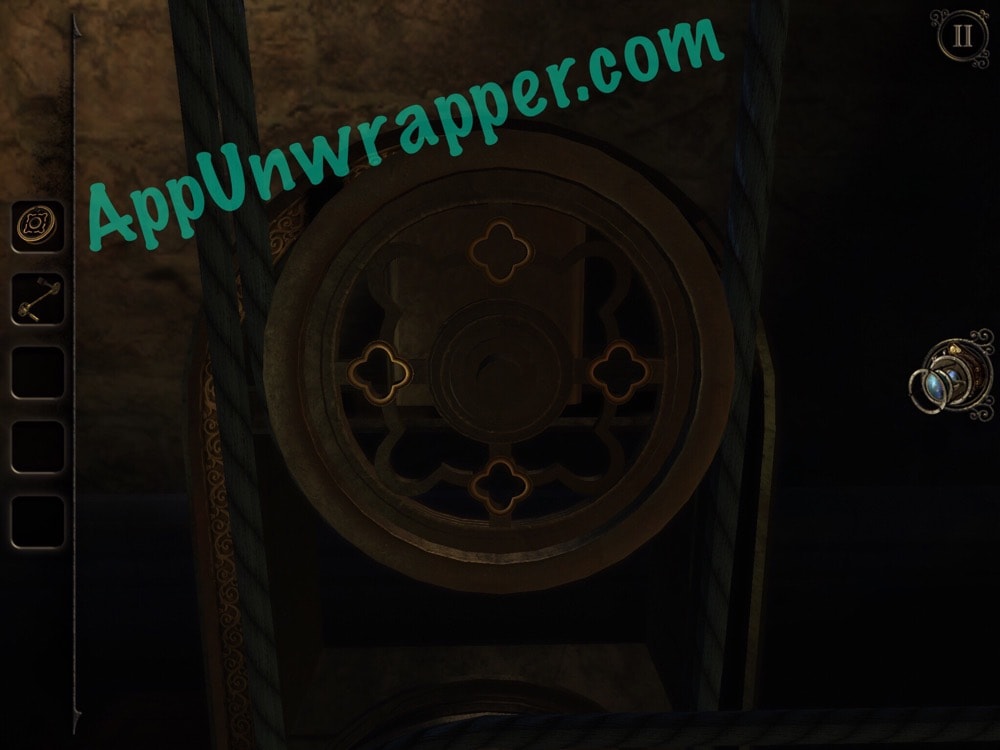
25. Use the lens to enter the new structure. This puzzle looks a bit like a stove. You need to first get the three identical pieces to the center, around the gold circle.

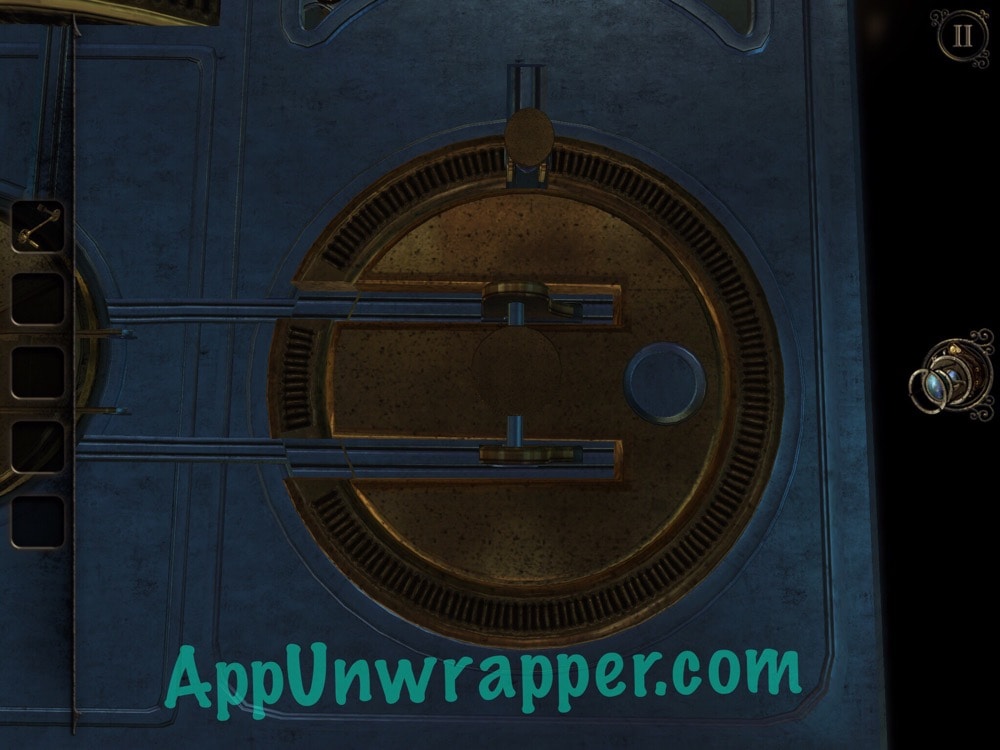
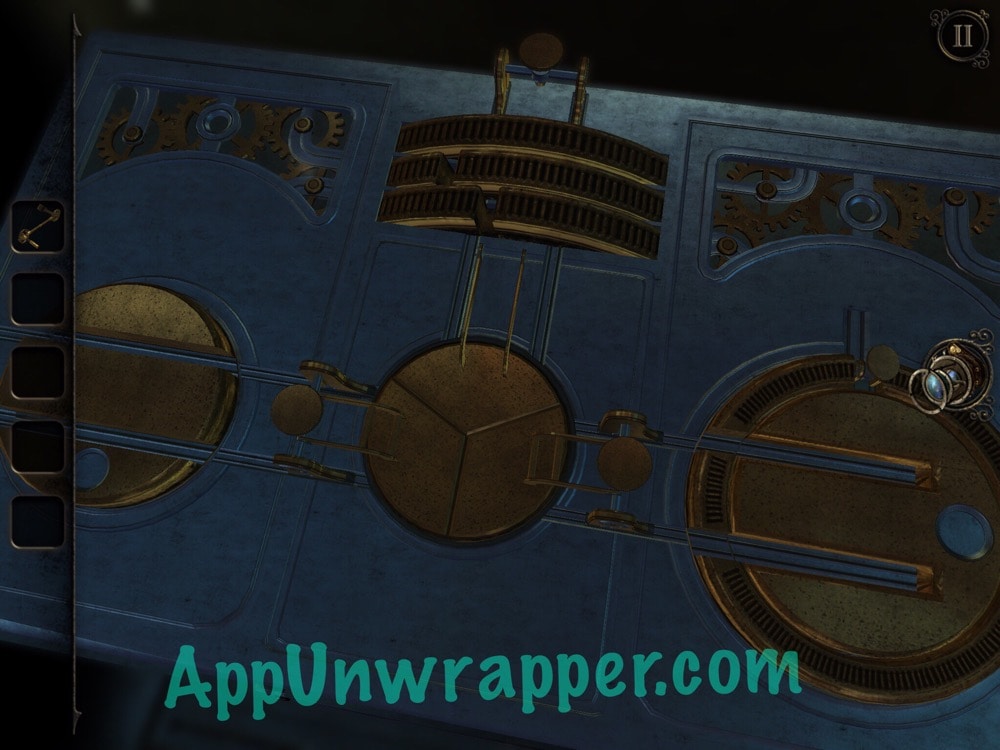
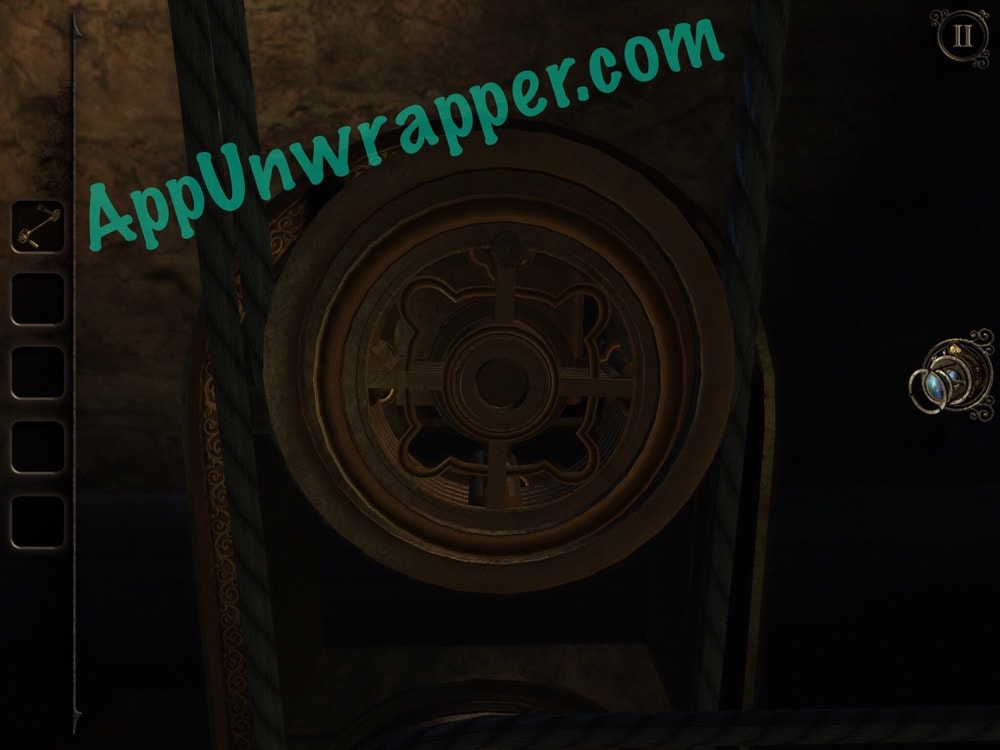
26. Now, pull all three pieces apart to reveal another square socket. Insert the crank and turn it to unlock the top.
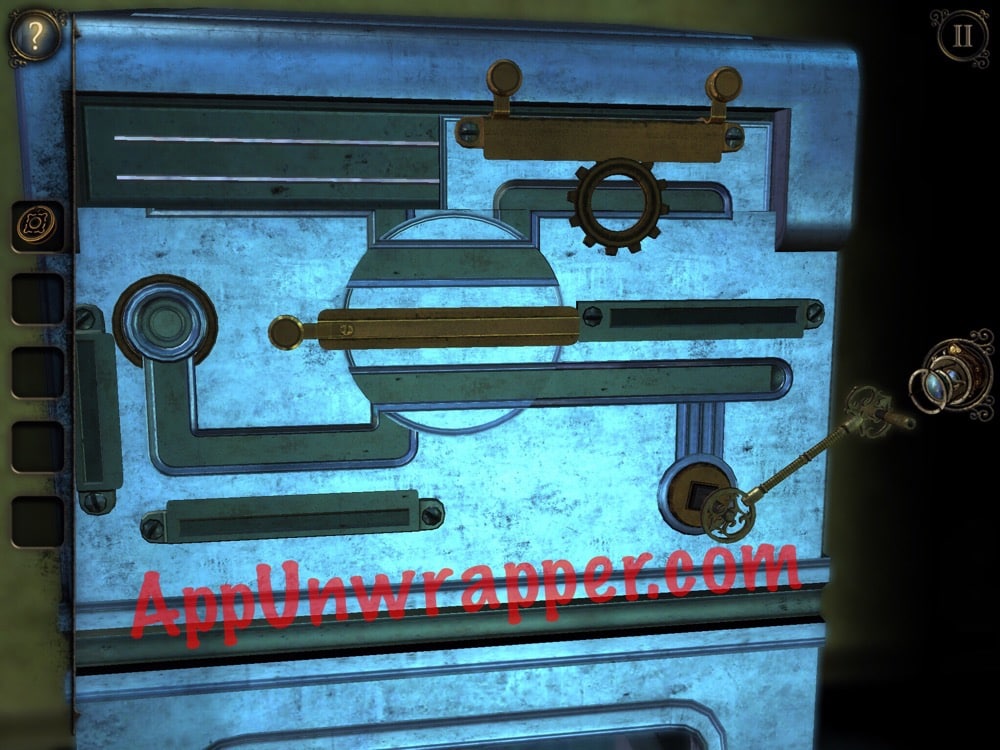
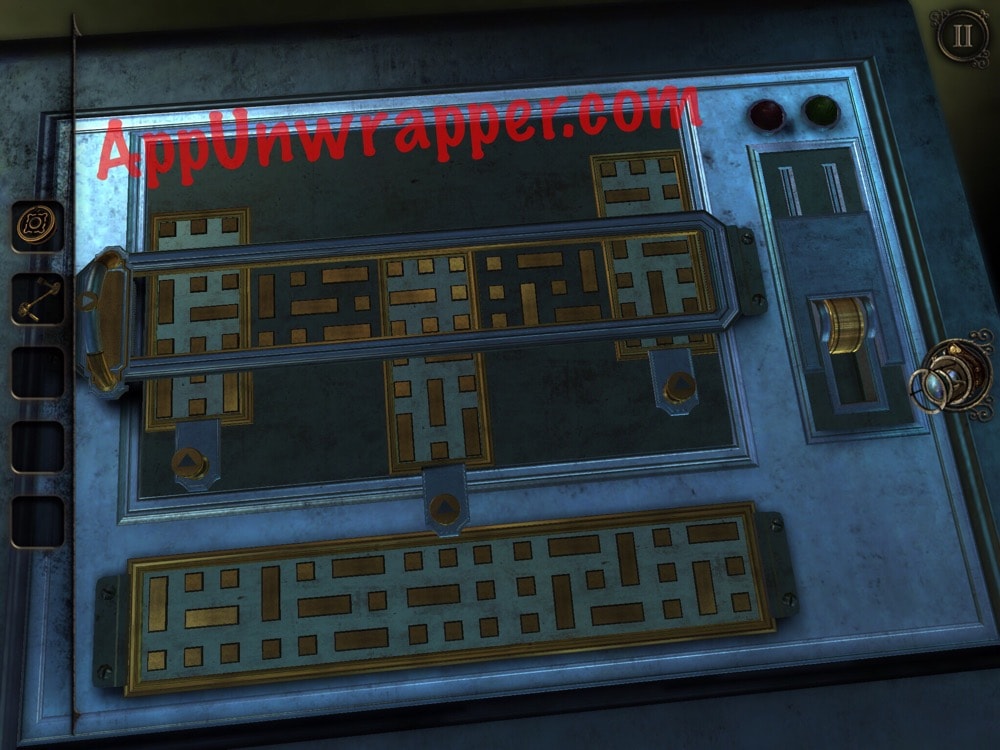
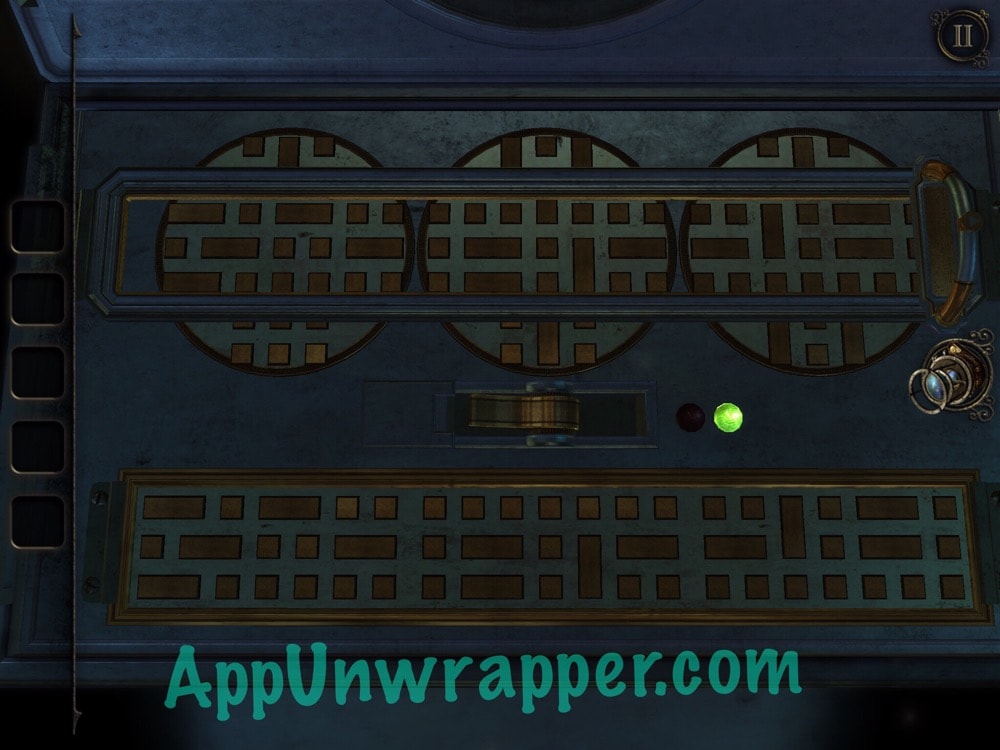
27. This is like the two earlier puzzles. If you need help, you can use the image below. Slide the arrow to the right and flip the switch. Then take the handle with a socket.

28. Take the ballerina statuette.
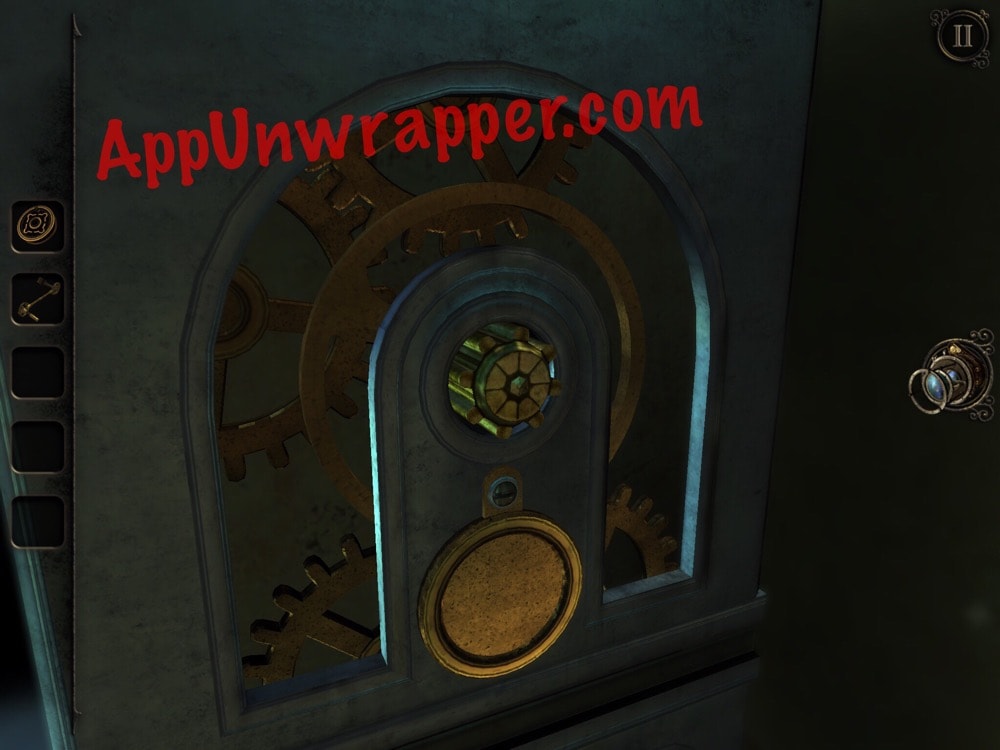
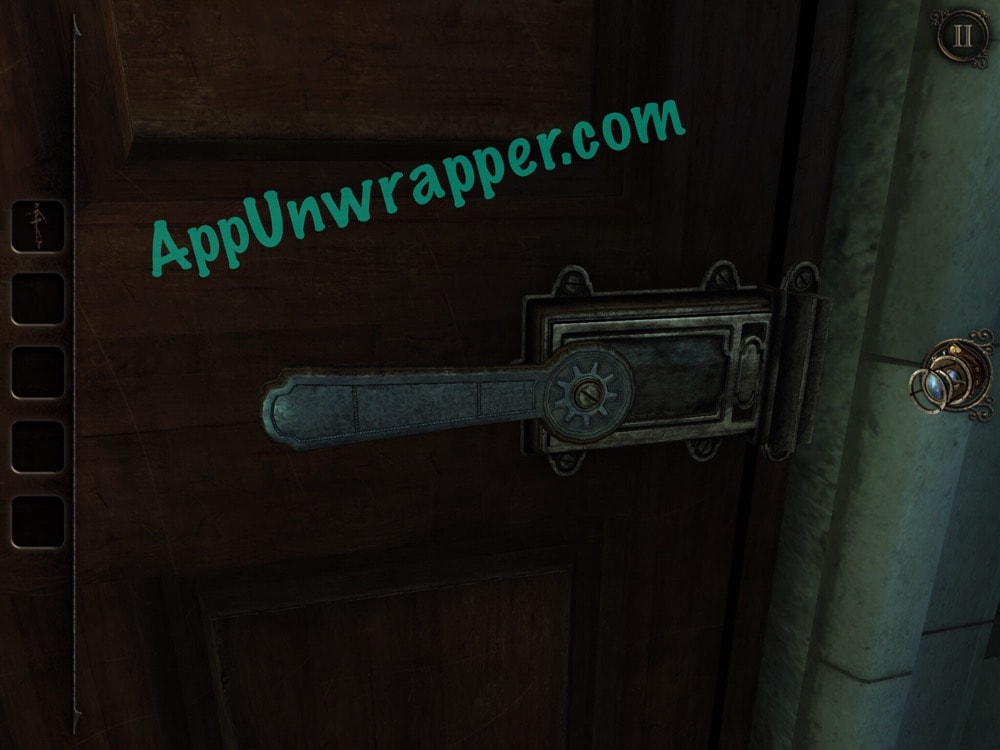
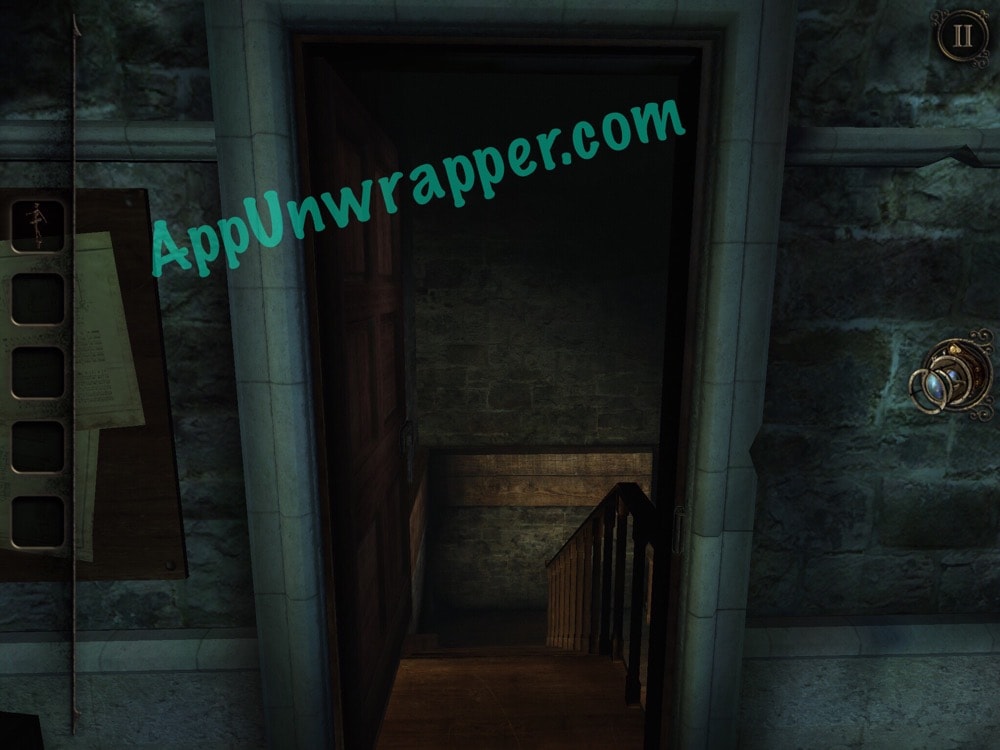
29. Find the door near the yellow box and use the handle with the socket on the gear. Turn it to open the door and head downstairs.
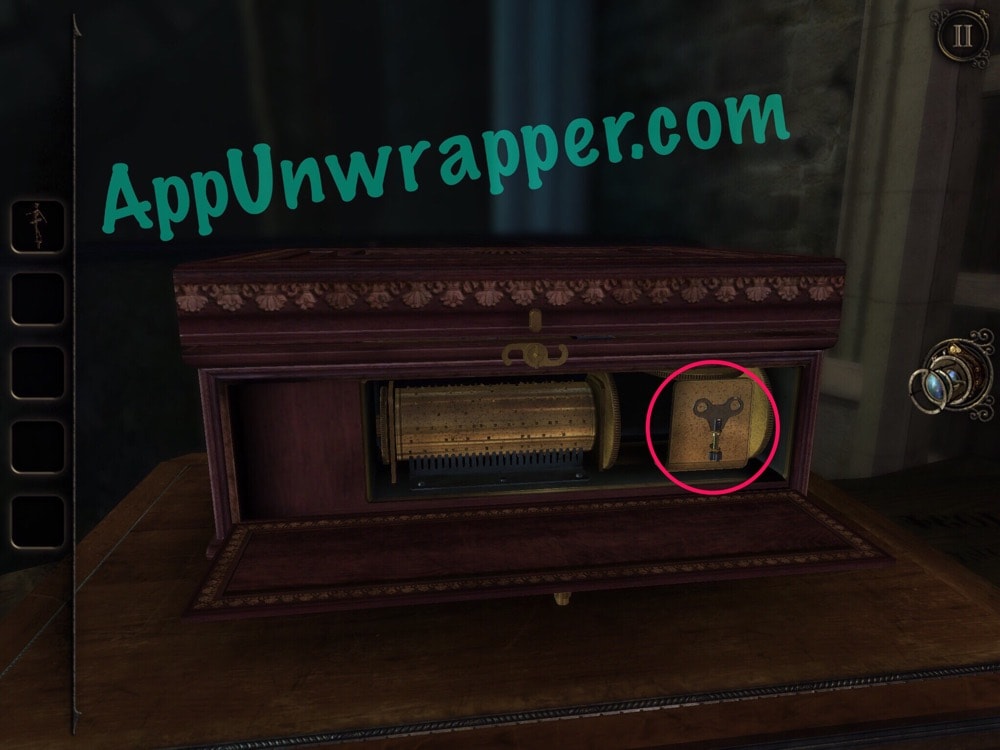
30. Find the little red music box. Zoom in on the clasp and open it. Take the winding key and open the lid of the music box.
Click on the little numbers below to continue to the next page of the walkthrough or click here.
I do not have the ballerina in my inventory to put into the music box. I’m stuck…where do I find it
On the side of the clock when you do the chess game.
I’m playing room 3 and beginning chapter 2. But i can’t turn around. What do i do? Is there something wrong?
You might just need to pinch to zoom out first?
I’m also stuck. Right after I got the pyramid from chapter one, it put me in a small room. W a desk. And nothing to do. Your first scene in chapter two is a place to put a pyramid. Mine isn’t like that. I’m stuck in a room w a desk.
You usually end in the room you started in and have to walk back to the fountain in and place the pyramid on it.
the same thing is happening to me. I get to the small room at the very beginning of chapter two and then I won’t let me go down the hall to get to the pyramid room! Idon’t know why its doing this! Is there anything you need before you leave that room besides the purple crystal and the pyramid?
Like Tan and Sarah I’m stuck in exactly the same spot, just as Sarah describes. Ugh.
I’m stuck where you put a pattern in and a lightbulb comes the hint says there is something more I must do. What?
Simply enter the second pattern that you have not already entered.
Me too. I have entered both patterns but can’t find the shadow things to rotate
Me too…even restarted the whole chapter and everything…stuck and pissed…
Im having the same problem. I can’t find any buttons anywhere or any bird. Just a light and the gem walls. I’ve even put the patterns in again….nothing.
The most stupid game there is. Constantly need to use hints to figure out what to do next. Pece of junk to buy. Frustration ruins any fun you could get.
One of the most stupid comments I’ve read about this game.
If you can’t figure out how to go on is your fault, not the game.
Here’s a little interesting thing about the game.
If you decide to complete the optional puzzles of Grey Holm before activating the portals for the various structures of the island, you may notice some interesting things.
In the library, When you pick up the mechanical key from the fortune teller machine (and everytime you insert a token in the machine, except the last one.) and then you use the eyepiece, you can see some lines used in a ritual, plus a trail of stains that guide you to the room where you have to solve the optional puzzles.
After having made them all and inserted all tokens available in that stage, you will receive a creepy message from Maggy, indicating that by the time you’ve finished all the optional puzzle.
You perhaps already know about this?
Someone told me about this, but after playing through the game 2+ times for my walkthroughs, I don’t see playing it again any time soon!
I see, thanks for the reply !
It won’t let me turn around in the very beginning
Hello!
I’m stuck with the two skaters. One is at the center, and the other just moves in the direction that I don’t want. Any clue on that?
Hi, I cant seem to get the switches on the tripod to open in chapter 2
Ps I love these games Thank You
I cannot find the key for the music box in the cellar where is it?
I can’t find anywhere to put the bird key in the metal cabinet!
I just can’t get the magnets to get the diamonds in place to match the star chart. Is there some trick here that’s not obvious?
I’m stuck on the part where you have to move the magnets to line up the diamonds in some star patters that I can’t find
I’m stuck! After making the two patterns, the lightbulb turned on. The hint says there is something left to do but i do not have the four buttons to turn to make the bird puzzle appear. there is just blank wood where the buttons should be.