Adventure Escape: Hidden Ruins – Mystery Story
By: Haiku Games

This is a complete step-by-step walkthrough guide with hints, tips, tricks, answers and solutions for the iOS and Android adventure game, Adventure Escape: Hidden Ruins – Mystery Story by Haiku Games. Feel free to ask for extra help in the comments section.
Walkthrough:
Chapter 1 | Chapter 2 | Chapter 3 | Chapter 4 | Chapter 5 | Chapter 6 | Chapter 7
Chapter 2:
You can watch my video for Chapter 2 here or continue with the step-by-step walkthrough below:
1. Open the corpse’s pack and take he flint rocks. Also, look at the symbols and numbers in the book. You’ll need that soon. Pick up the driftwood, mushrooms, and unit torch.
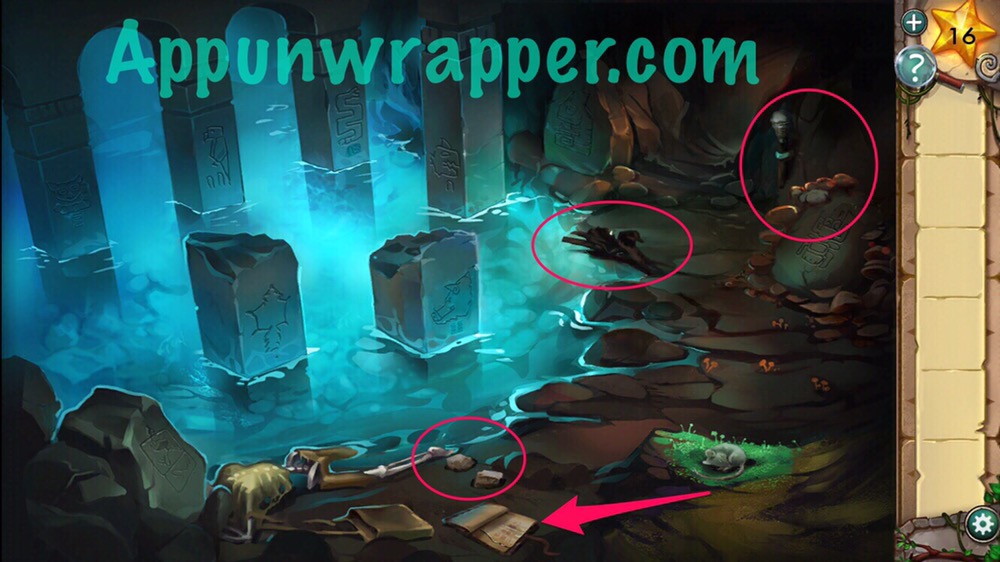
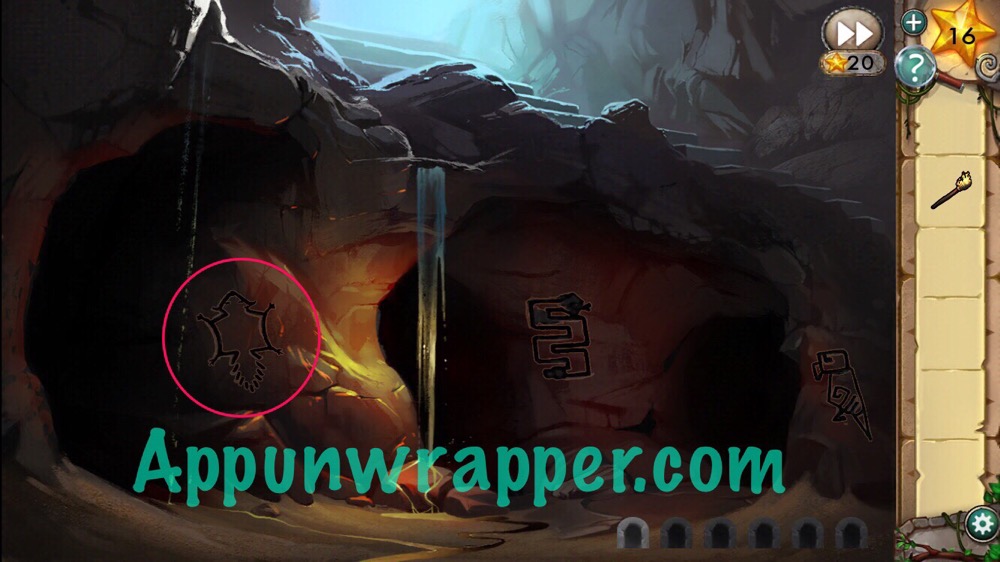
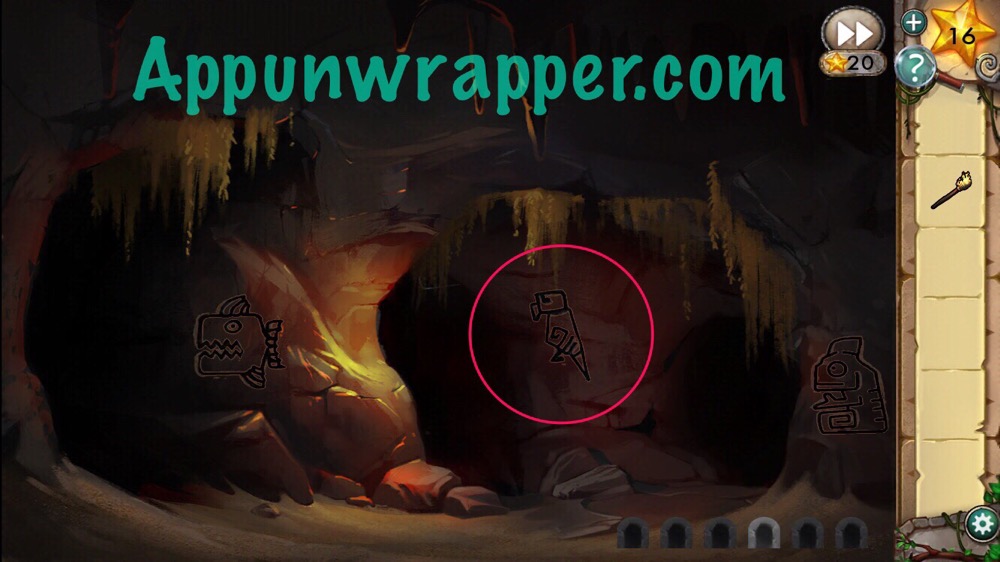
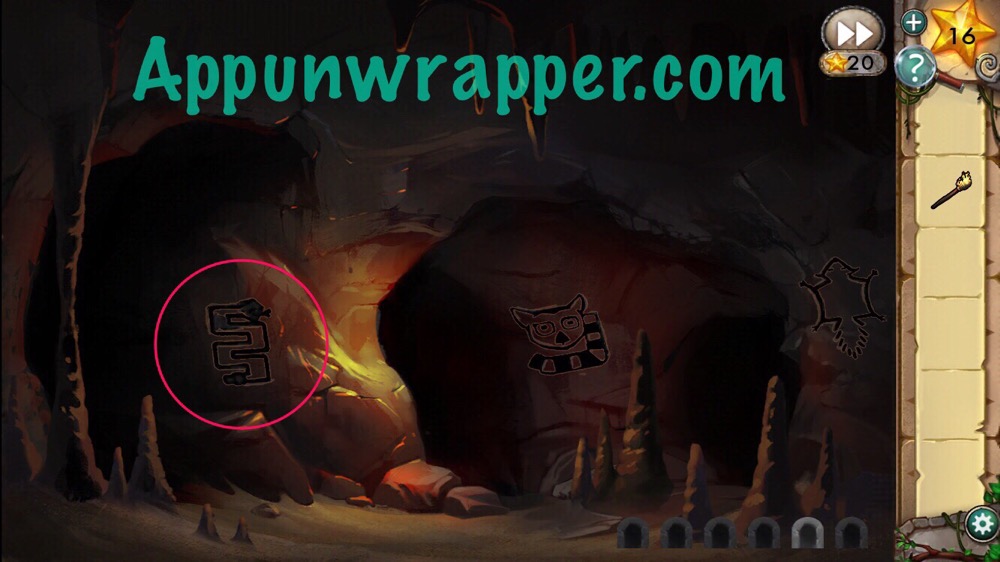
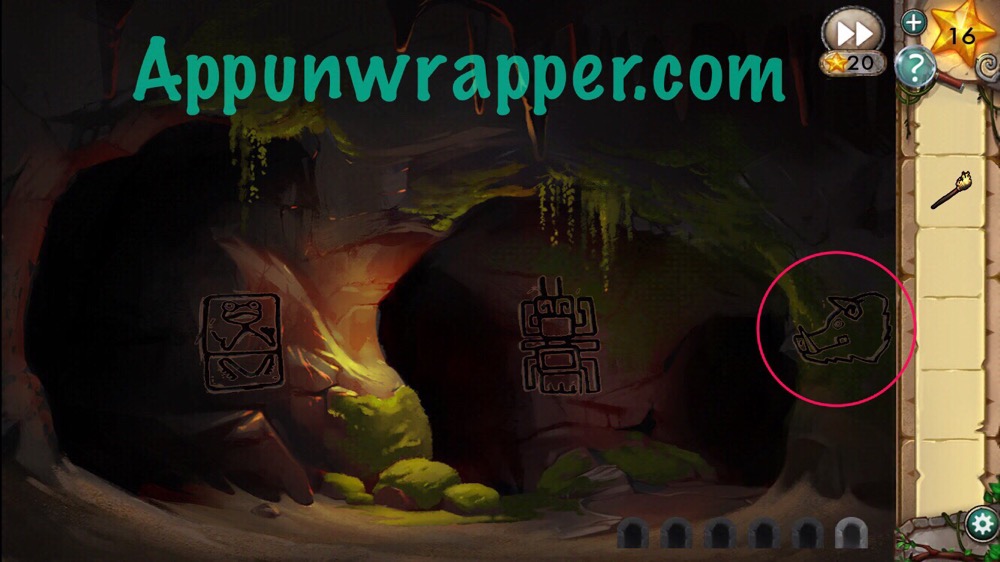
2. Feed the mushrooms to the mouse so it leaves. Then use the flint rocks on the dry moss, add the driftwood and then use it to light the torch. Before going through the doorway, take a close look at all the engravings on the stones.
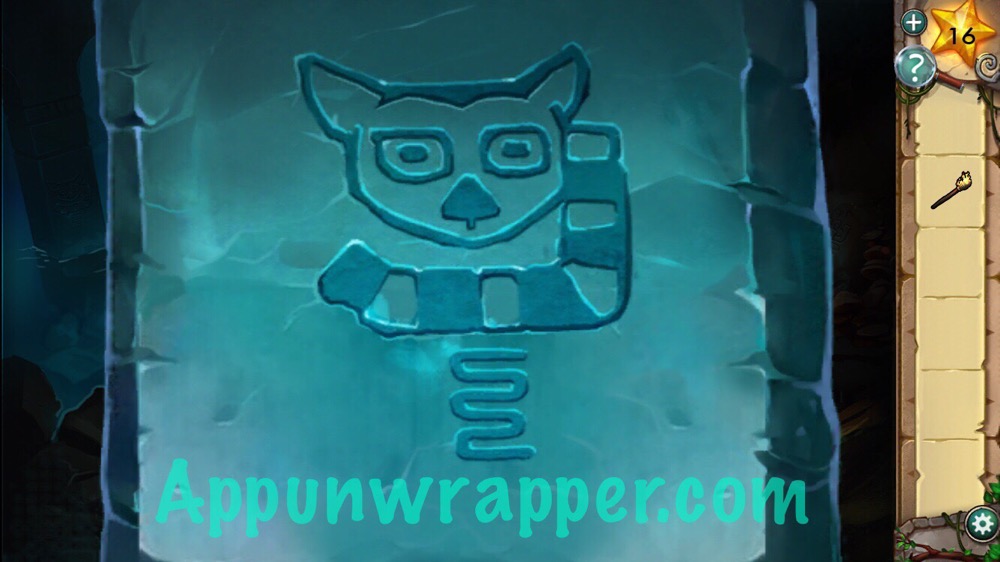
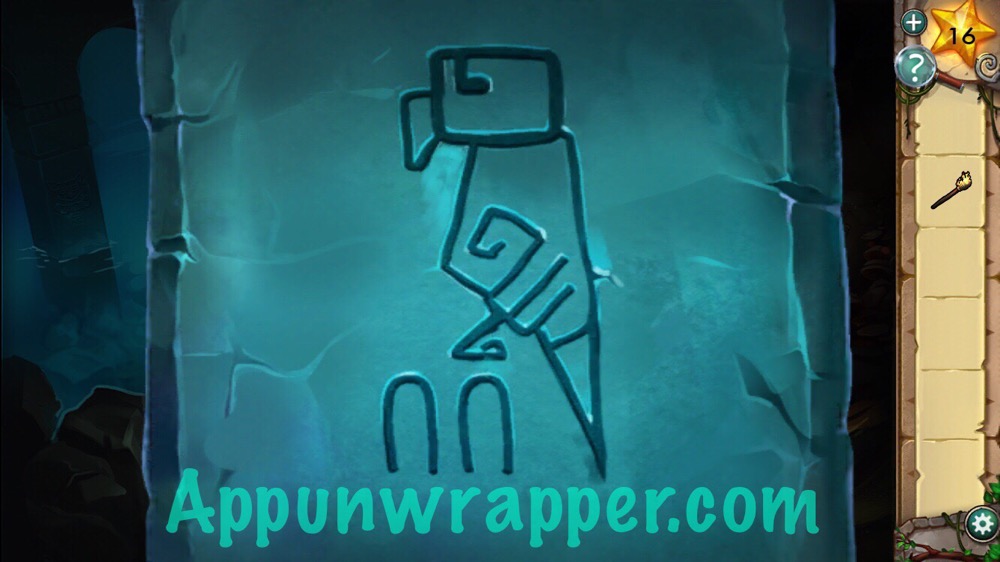
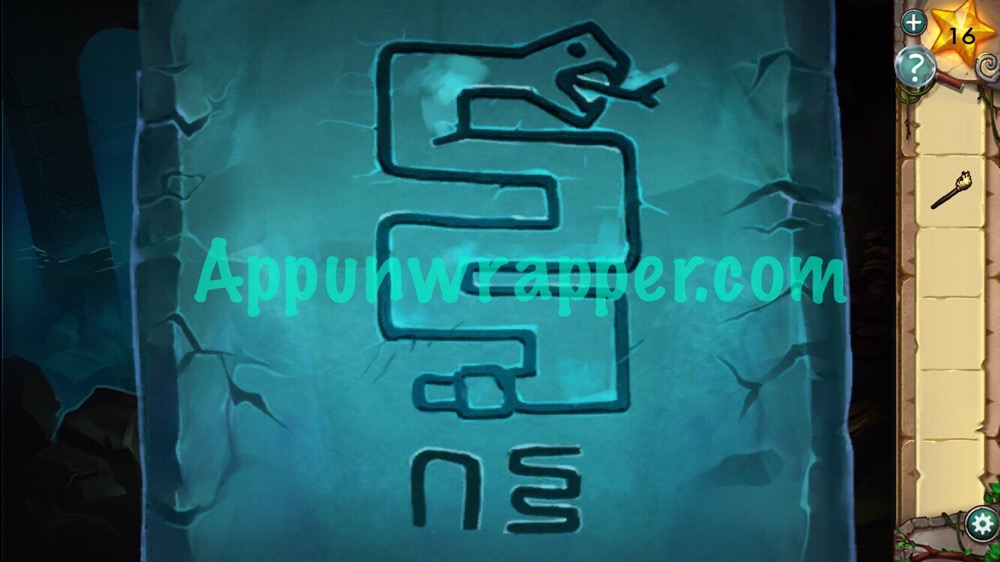
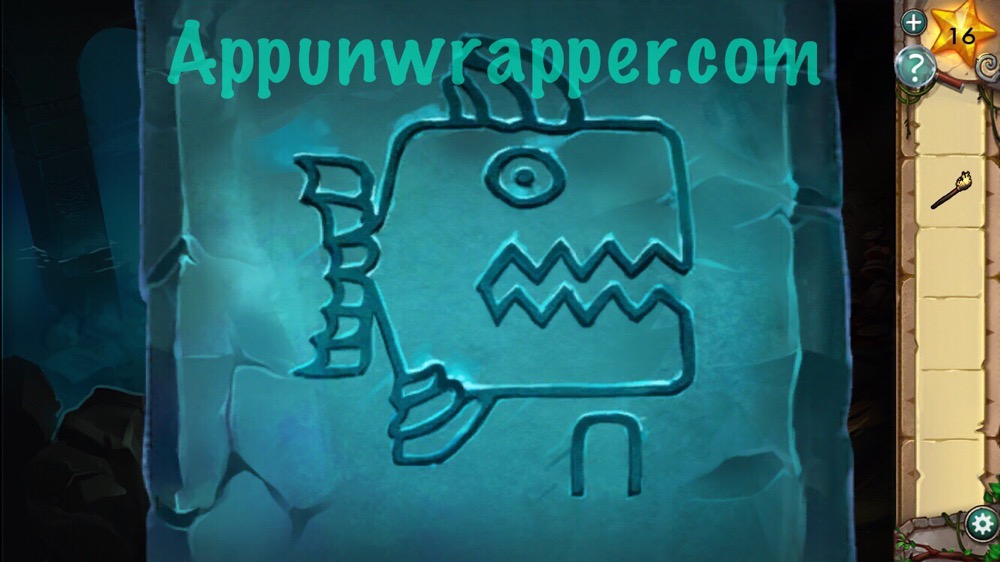
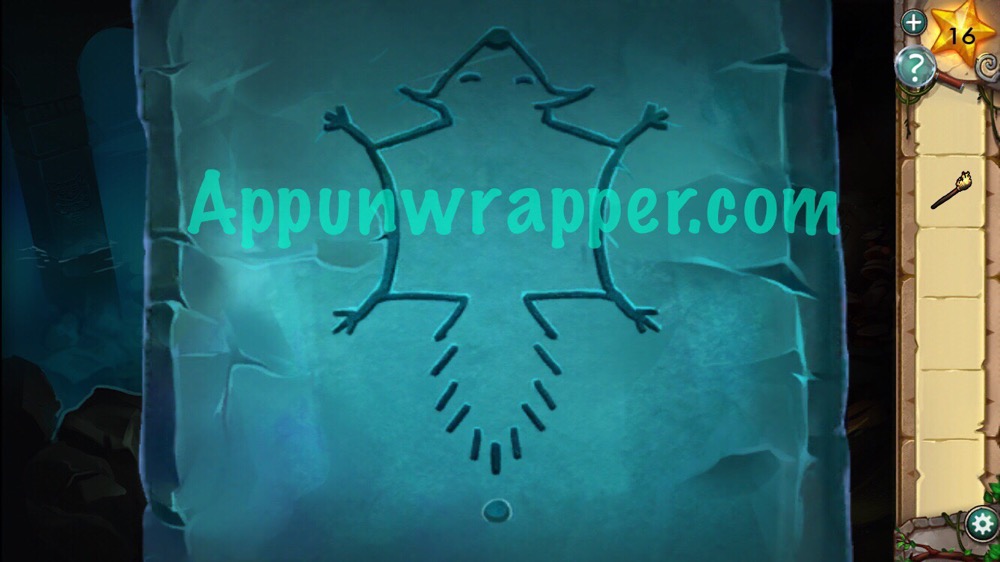
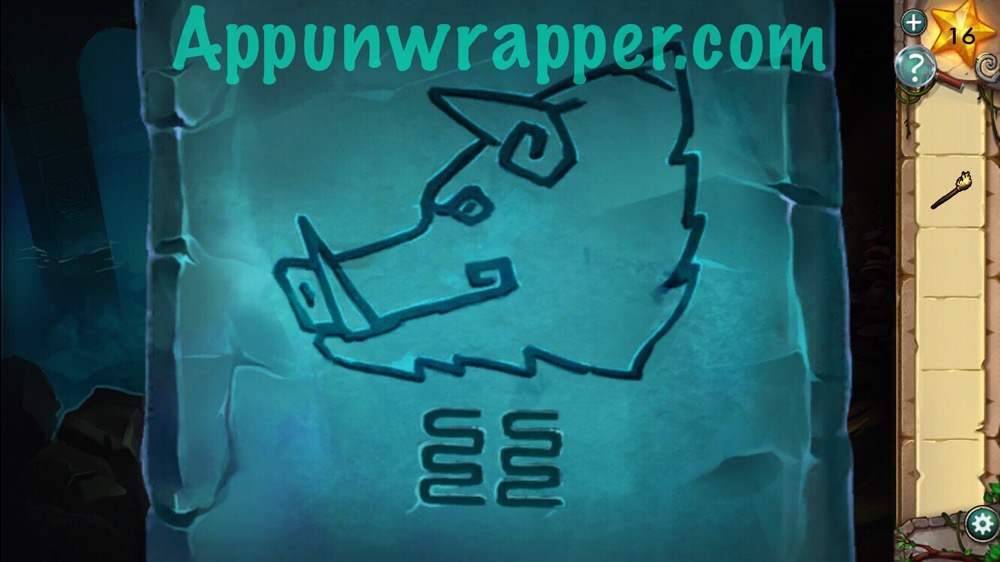
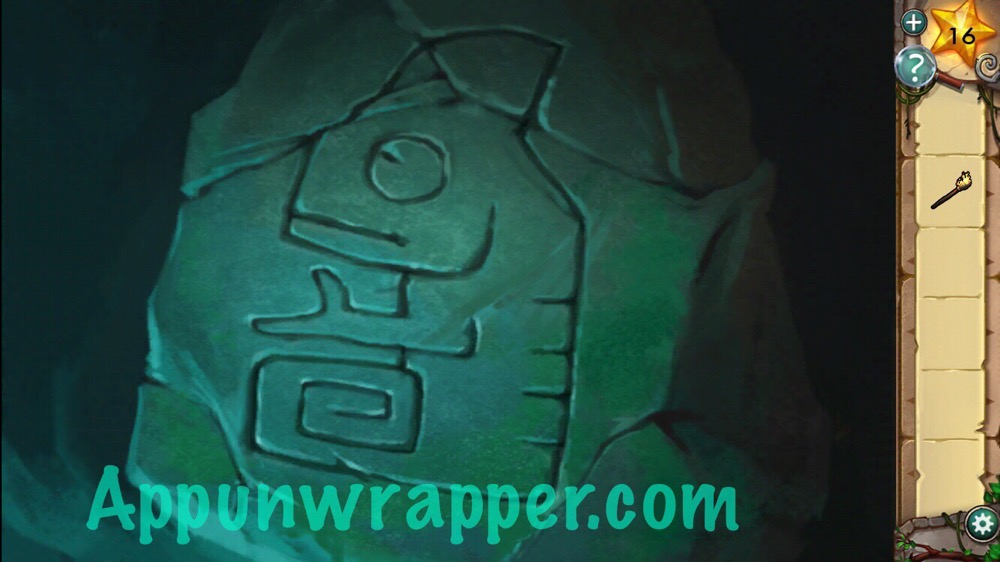
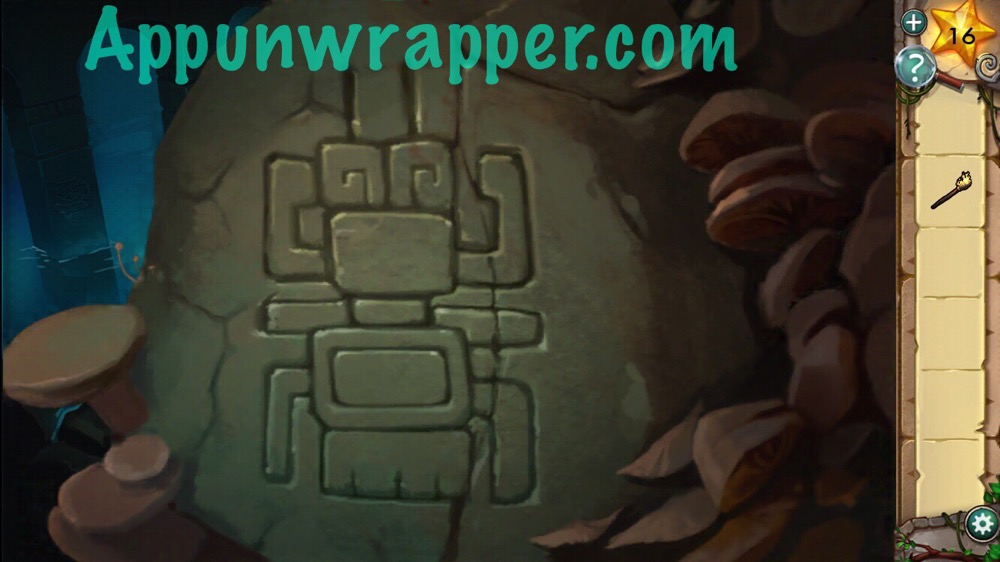
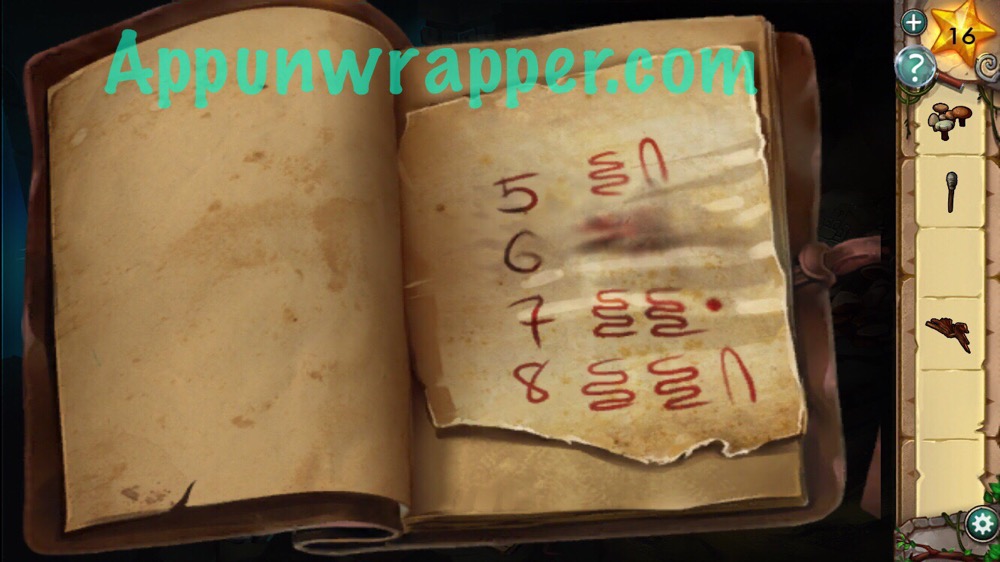
3. Combine the symbols from the engravings with the clues from the book to figure out the right path. So this is how it works. The dot beneath the flying squirrel represents 1. The arch under the fish represents 2. The squiggle below the lemur represents 3. You can then add two or three of the symbols together to make bigger numbers. You only need to count from 1 – 6 to get through the caves. So it goes squirrel, fish, lemur, parrot, snake, boar.


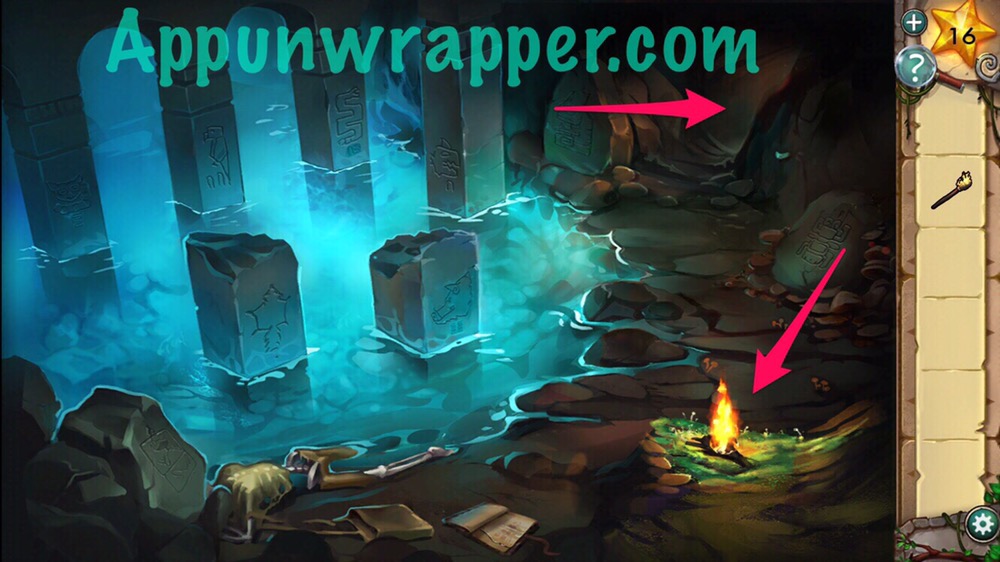
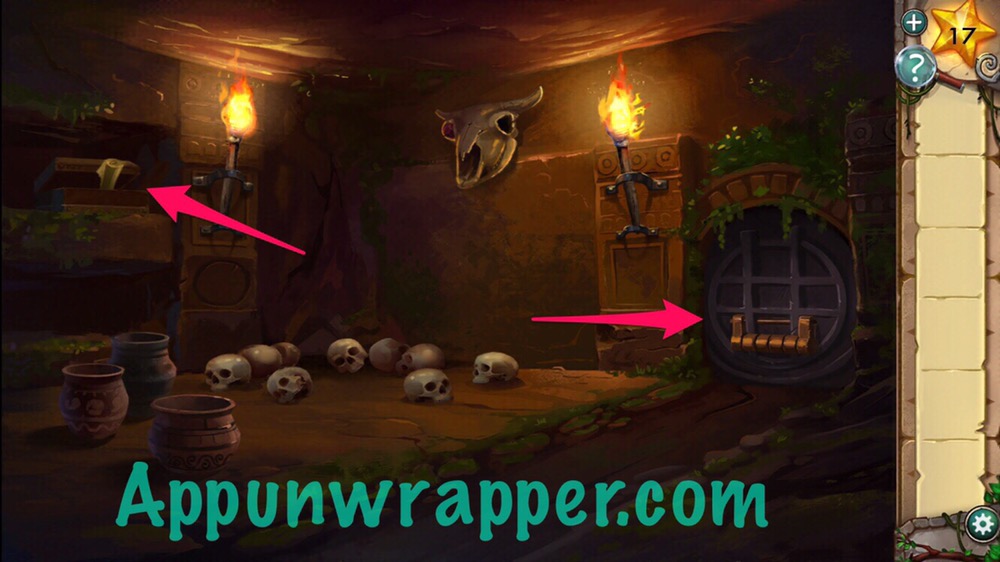
4. Find the other two touches in the room and light them. Knock over the pile of skulls and take the bone. Also, take the animal skin from the wall.
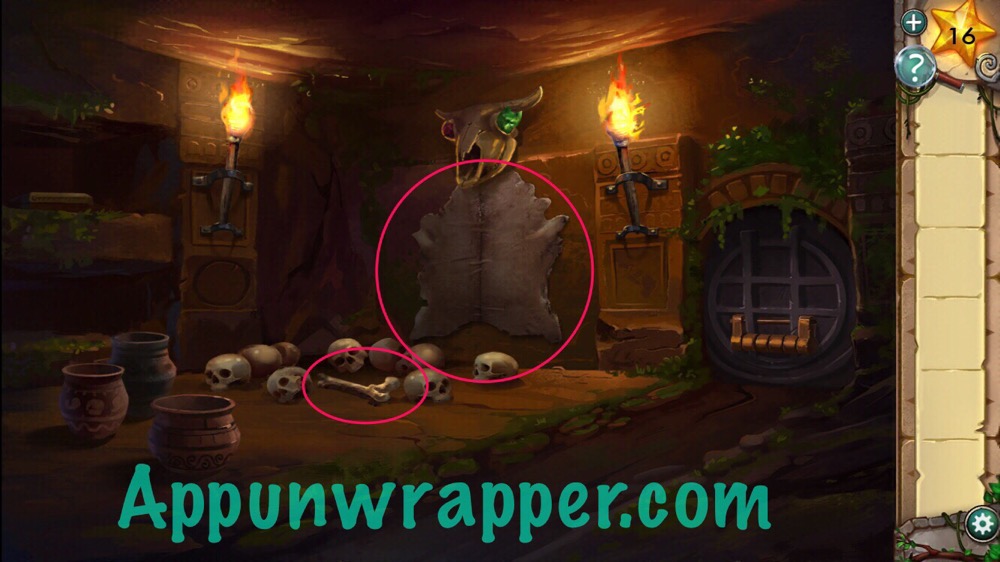
5. Use the bone to pull the box to the left closer. Also, dip the animal skin in fish oil.
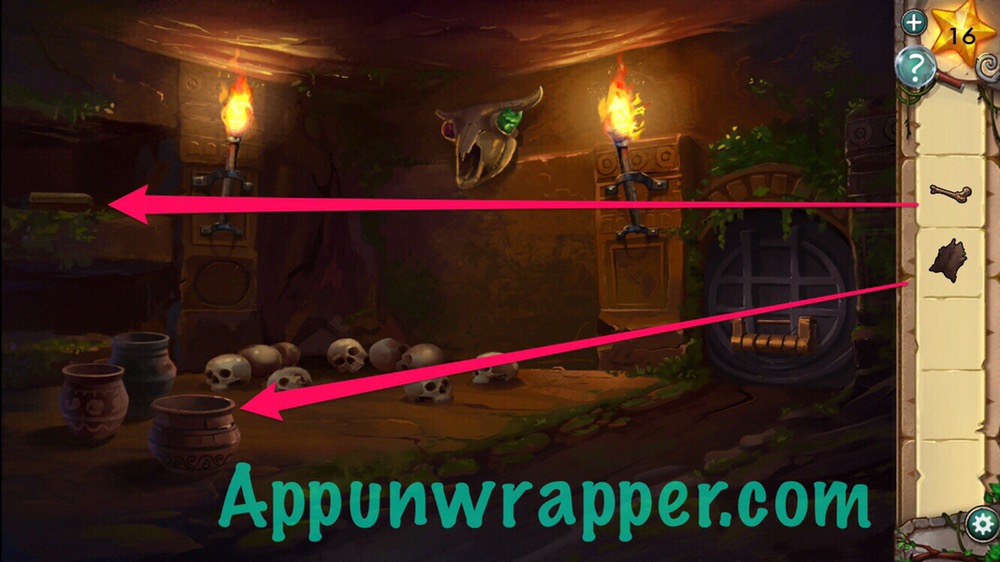
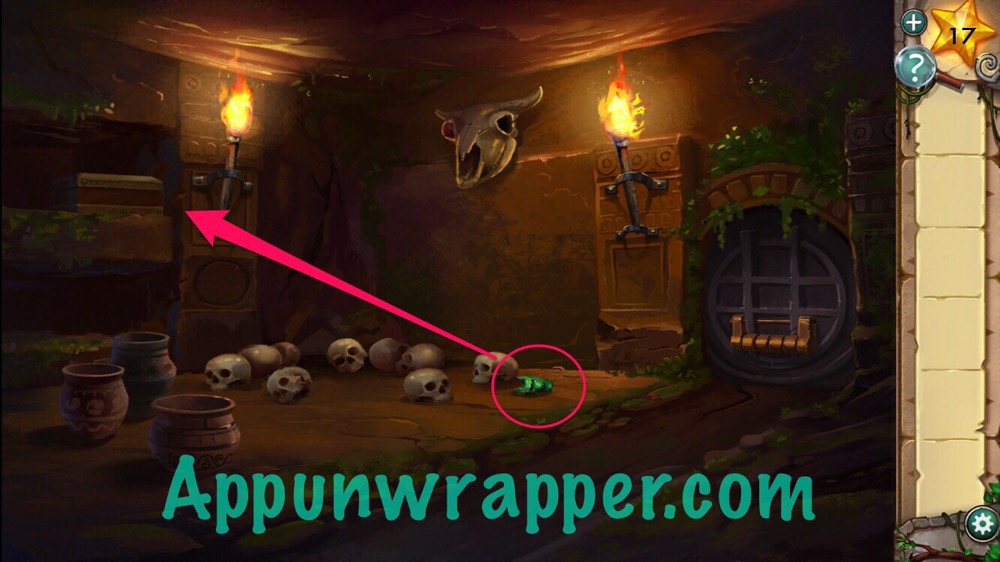
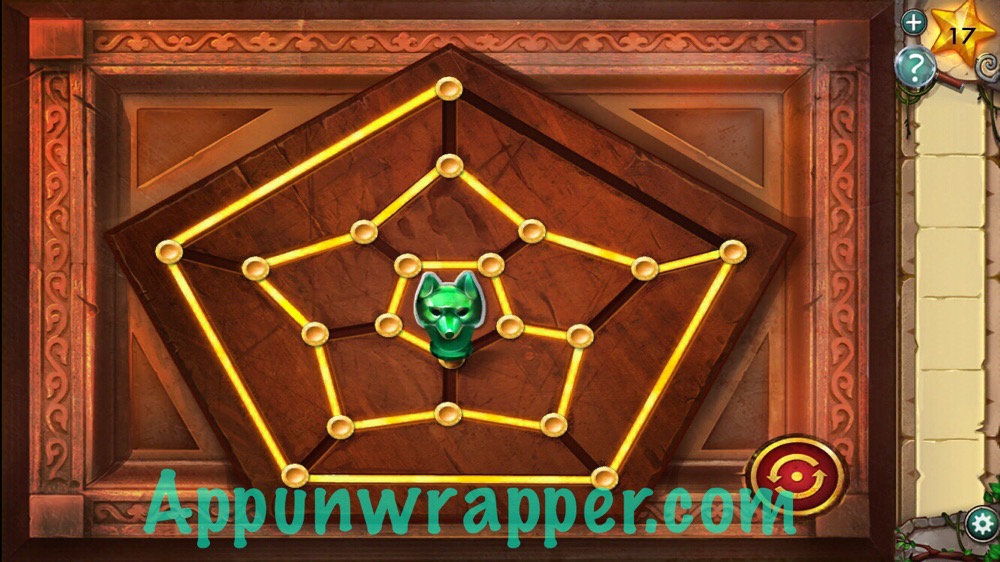
6. Use the greasy animal skin on the ox head to get a Jade Fox Head. Put it in the box and solve the puzzle by getting it to the center of the box without it crossing its own path.

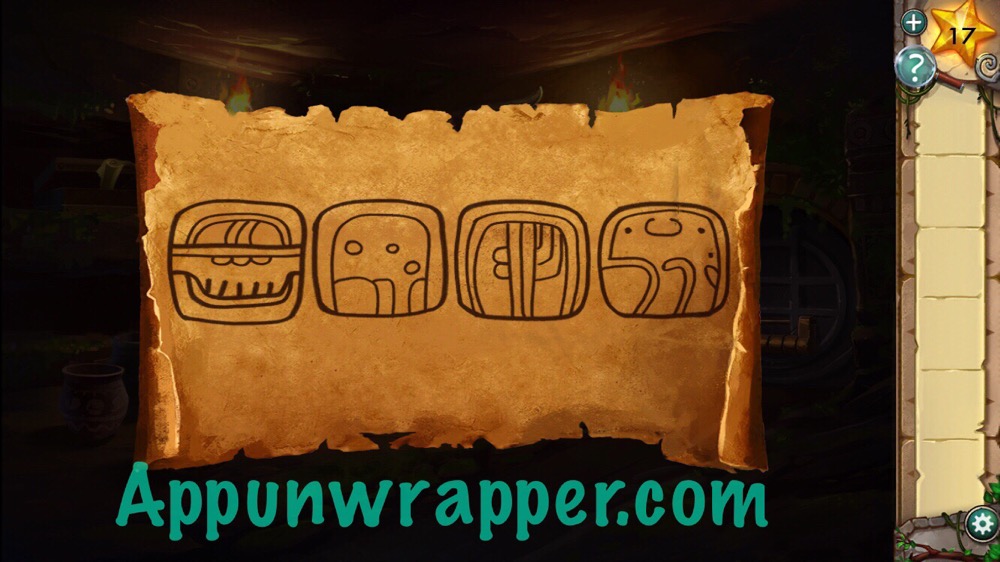
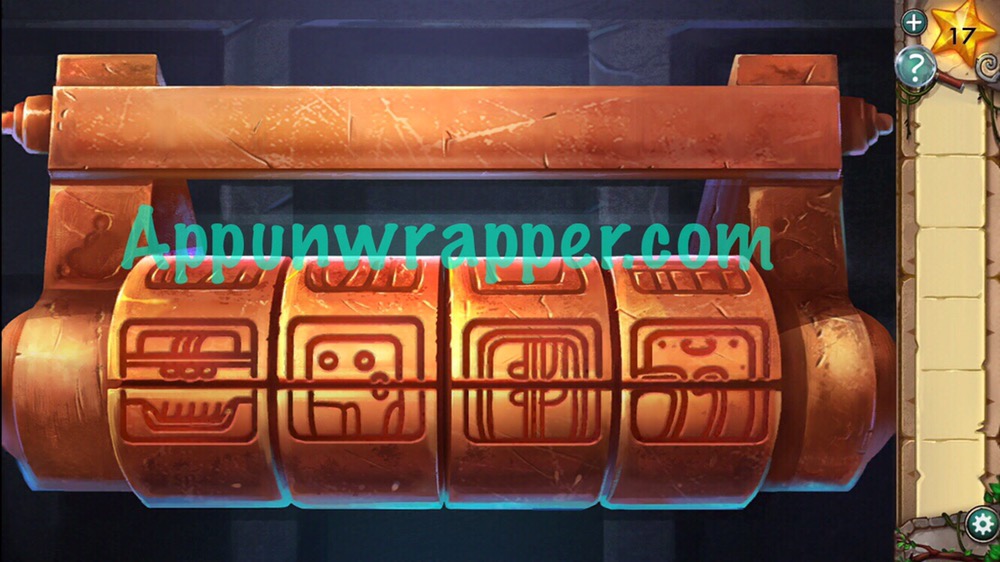
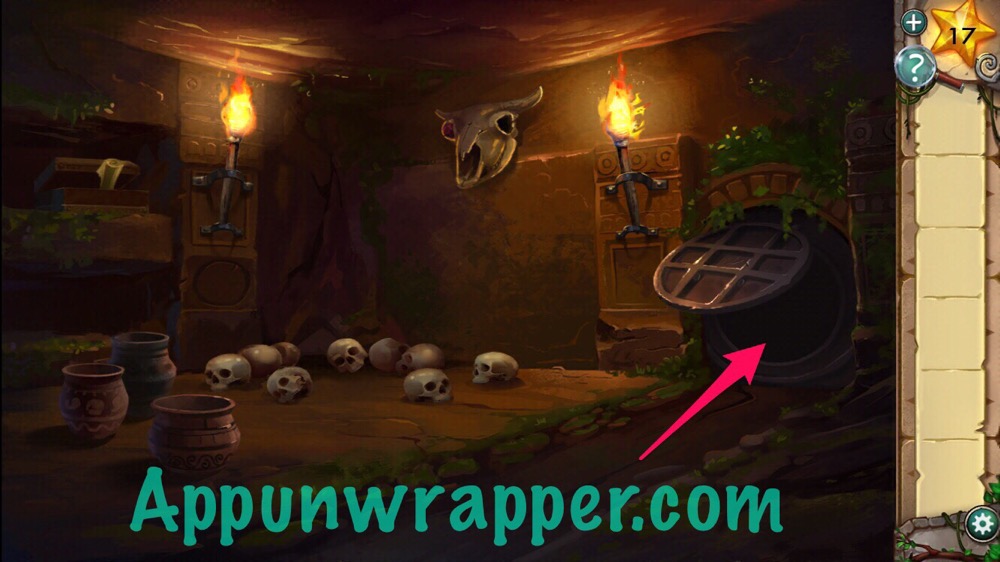
7. Look at the scroll left in the box. It’s a clue for the combination lock puzzle to the right. Use it to solve the puzzle.
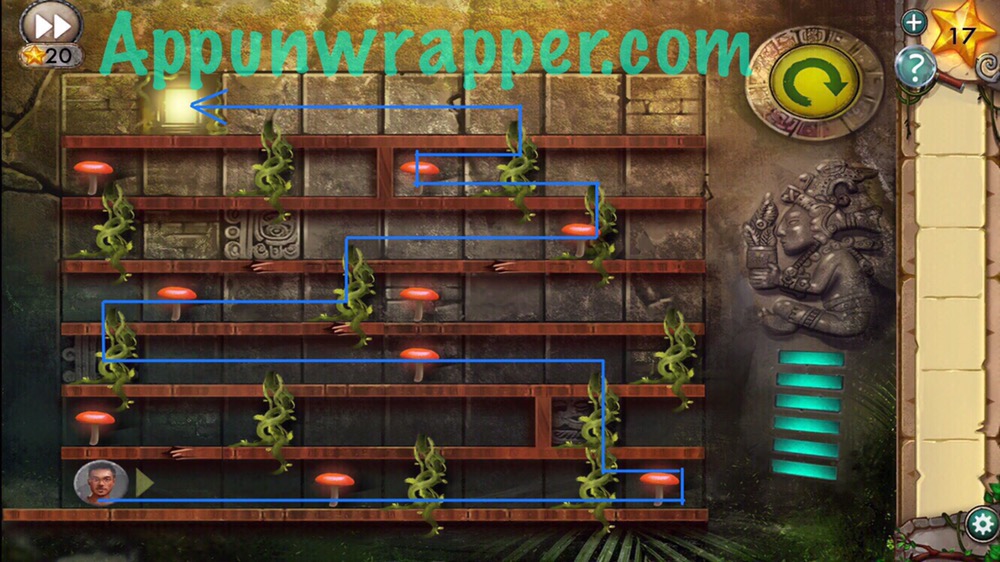
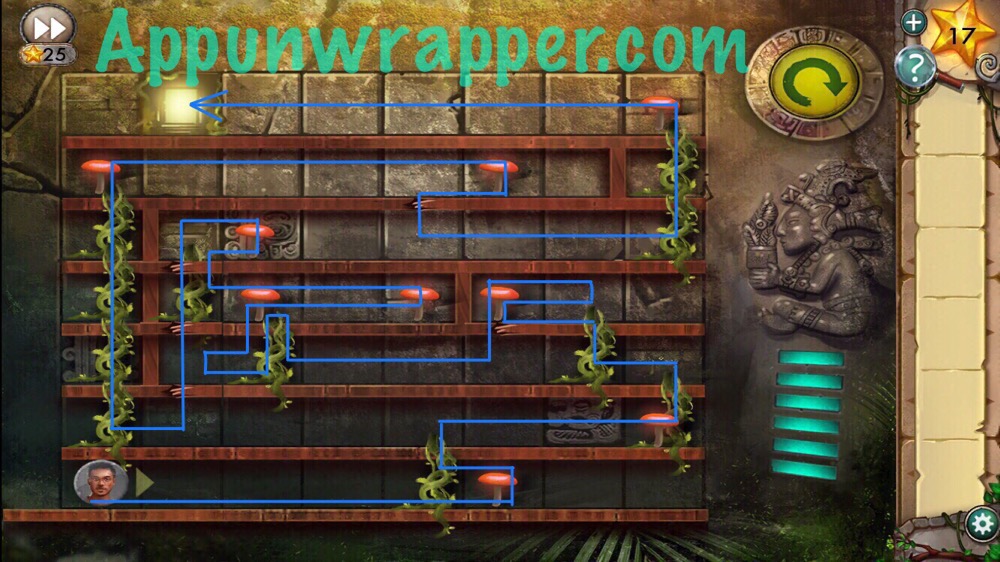
8. Go through and solve the mushroom puzzle. You need to move Tawa one step at a time to the top of the well, using the mushrooms as energy. There’s two parts to this puzzle and you can follow the path shown below if you need help. And that’s the end of Chapter 2!
Click on the chapter you need below or click here to continue to Chapter 3.
Chapter 1 | Chapter 2 | Chapter 3 | Chapter 4 | Chapter 5 | Chapter 6 | Chapter 7
Second cave wave through looks to be incorrect,
It doesnΓò¼├┤Γö£├ºΓö£├╗t explain that you have to double back over many of the cracked boards in order to break them – so you can fall thru – and not waste an energy bar with any additional moves.
There are many YouTube Videos that show the exact placement.