Mindsweeper: Puzzle Adventure
By: Snapbreak Games


Mindsweeper: Puzzle Adventure is the latest adventure game from Snapbreak Games. You have to dive into Dr. Amy Harris’ disappearing mind and find the cure for the Genetic Plague. This walkthrough guide will help you with hints, tips, tricks, answers and solutions for all the puzzles. Feel free to ask for extra help in the comments section.
Walkthrough:
Chapter 1 | Chapter 2 |
Chapter 2:
You can watch my video for Chapter 2 here or continue below for my step-by-step guide.
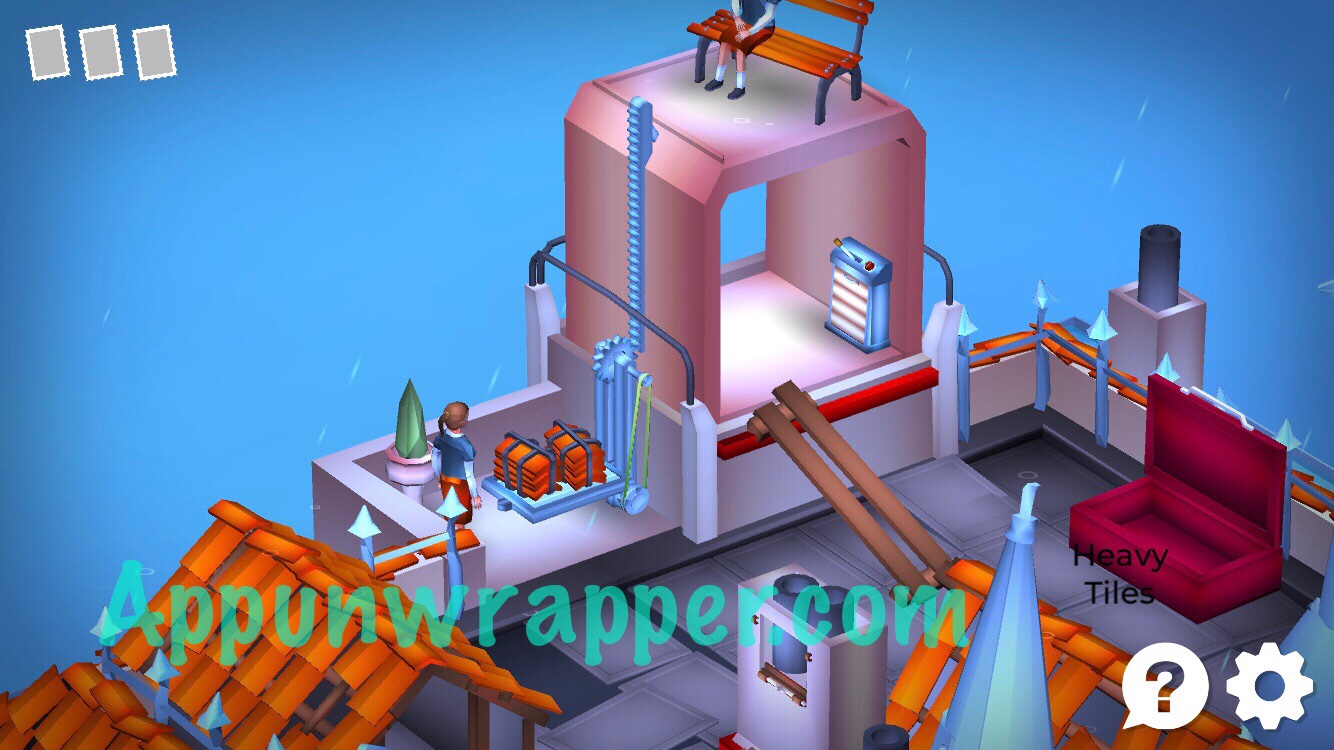
Level 4, Rainy Rooftop:
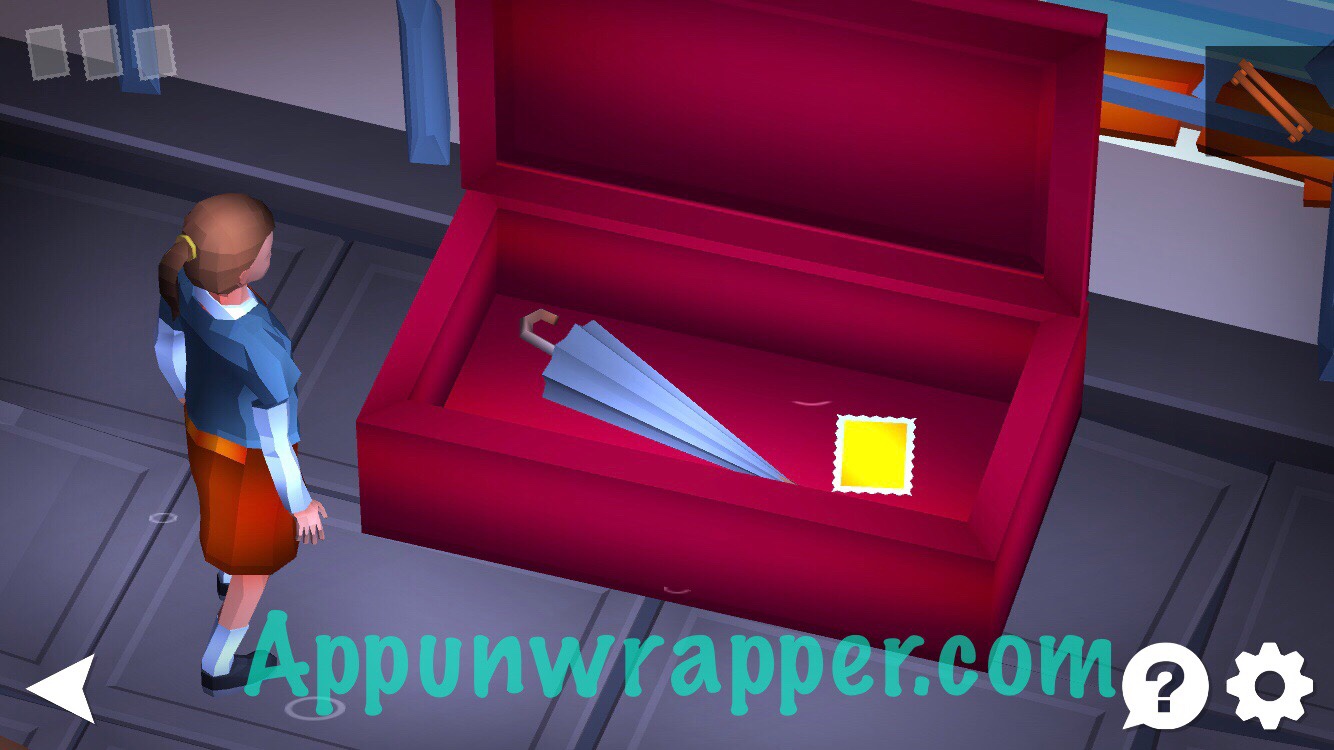
1. Head to the red chest. Pick up the planks holding it closed. Then open it and take the umbrella and memory glimpse.
2. Go up the planks to the left and talk to the girl. She asks for something to protect her from the rain. Give her your umbrella. Take the hair stick she gives you in return.
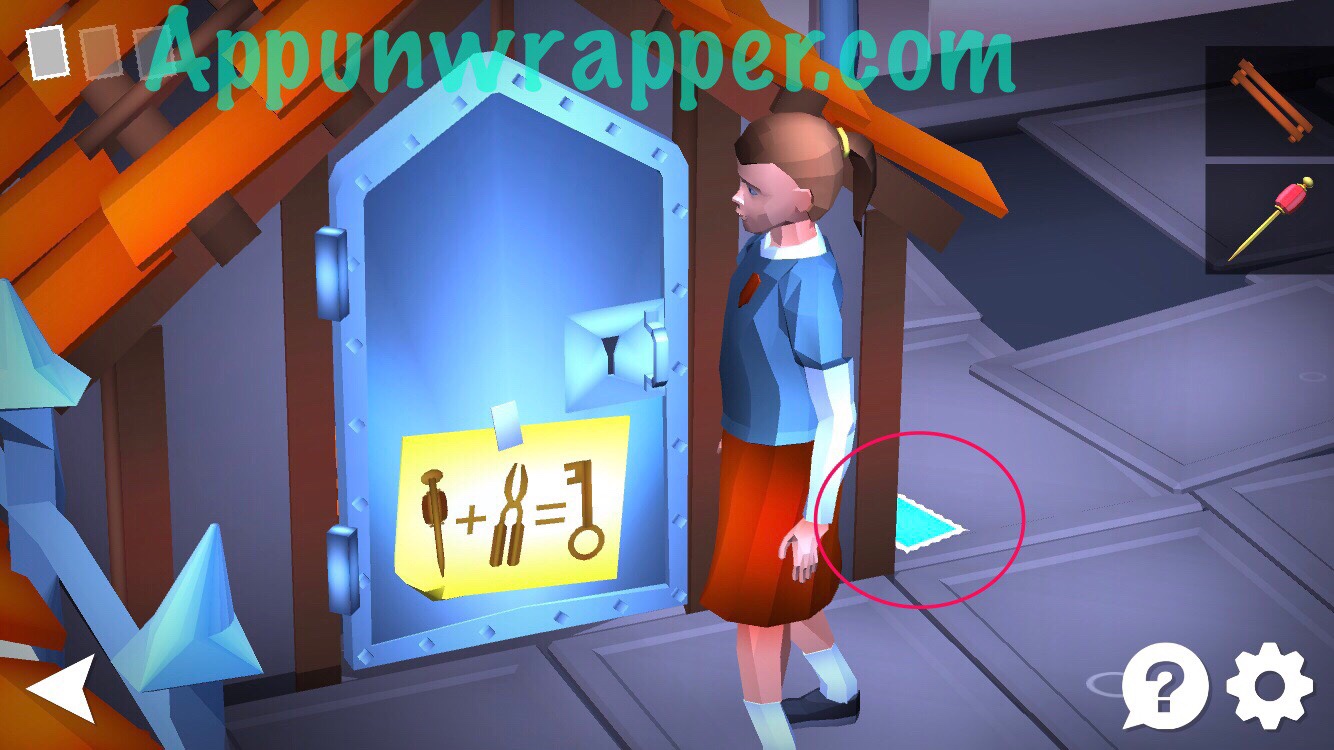
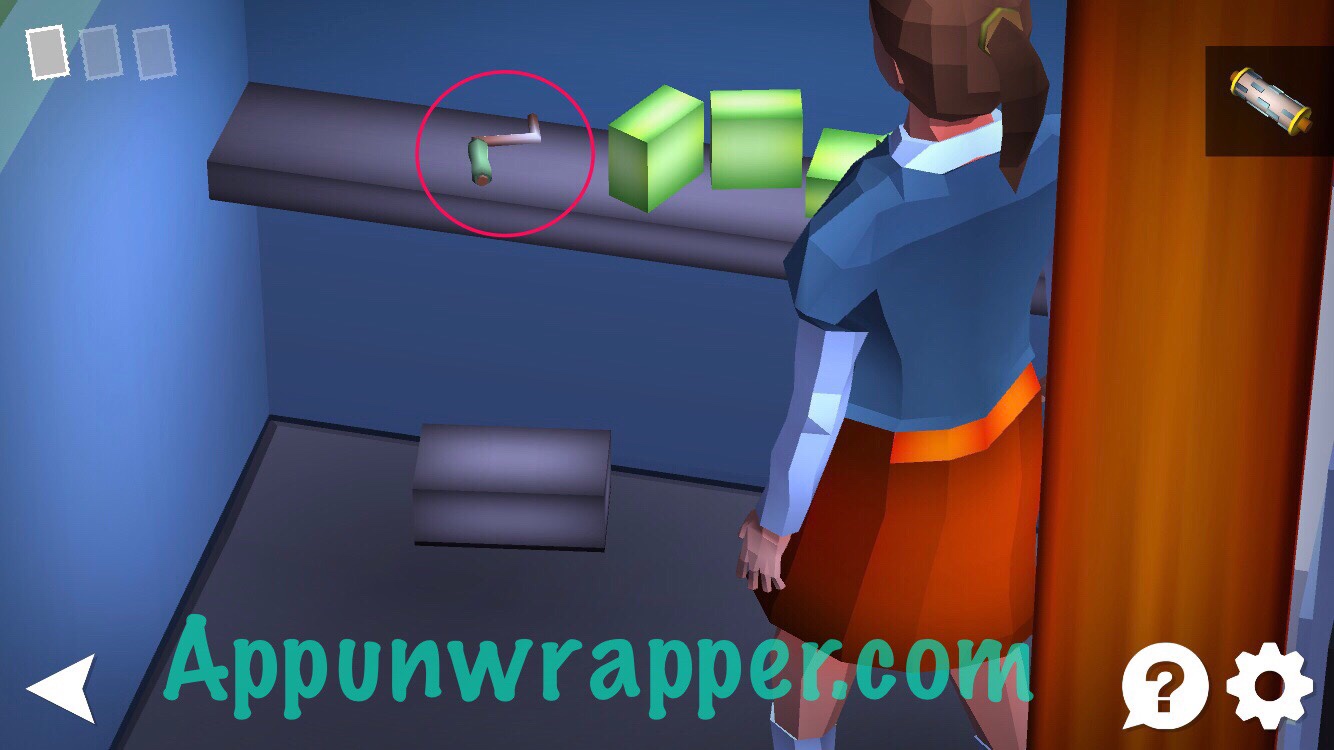
3. Head back down the planks and tap on the clue on the door. It shows you that you can use the hair stick and some pliers to make a key. Also, pick up the memory glimpse here.
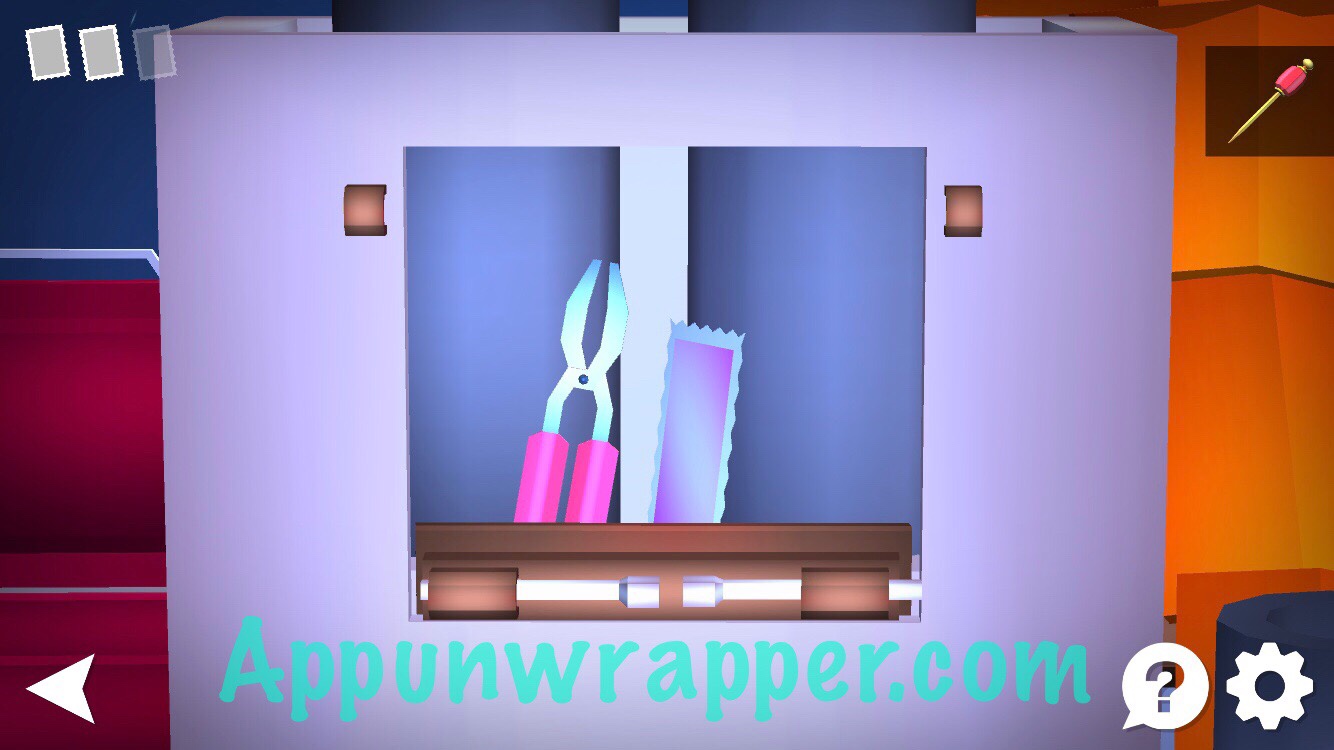
4. Tap on the locked compartment that’s a bit high up. Now, place the planks down to climb up on them. Pull the locks inwards to open the compartment. Take the pliers and the memory glimpse.
5. Combine the hair pin and pliers to make a key. Use the key to unlock the door. You need to solve a puzzle. Then take the two stacks of tiles from inside.
6. Head over to the scale and place both stacks of tiles on it. A hidden area will open! Head up.
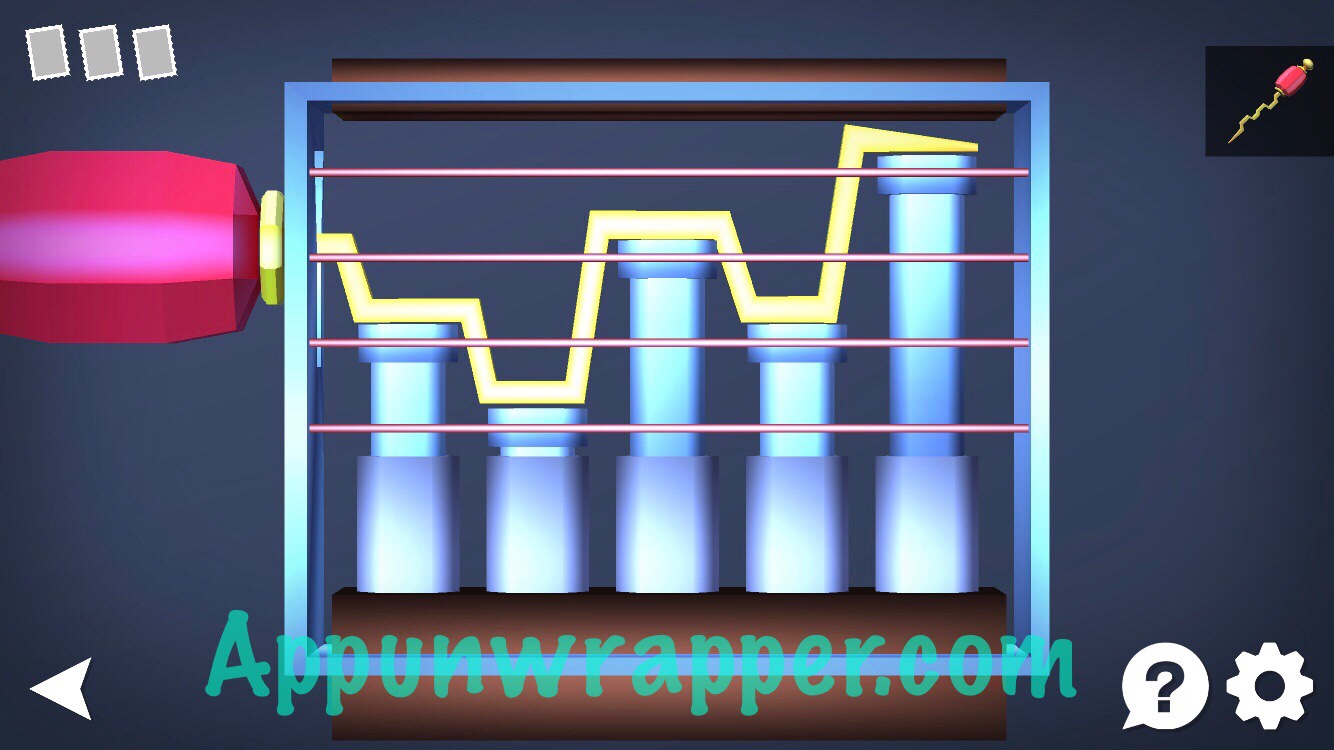
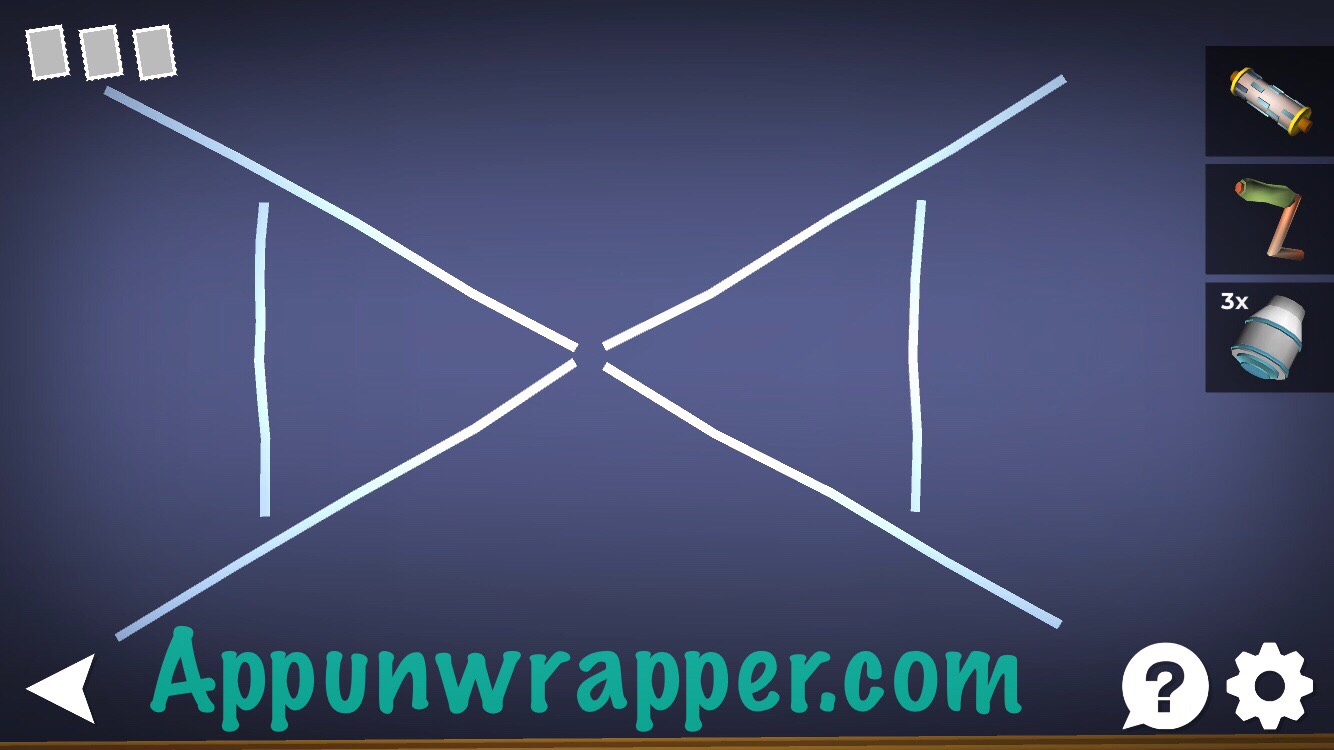
7. There’s another puzzle here. Open the door to see a generator or fuse box or something. You need to create a path from one end to the other while keeping the meter in the green.

8. Now just pull the lever and press the button to complete the level.
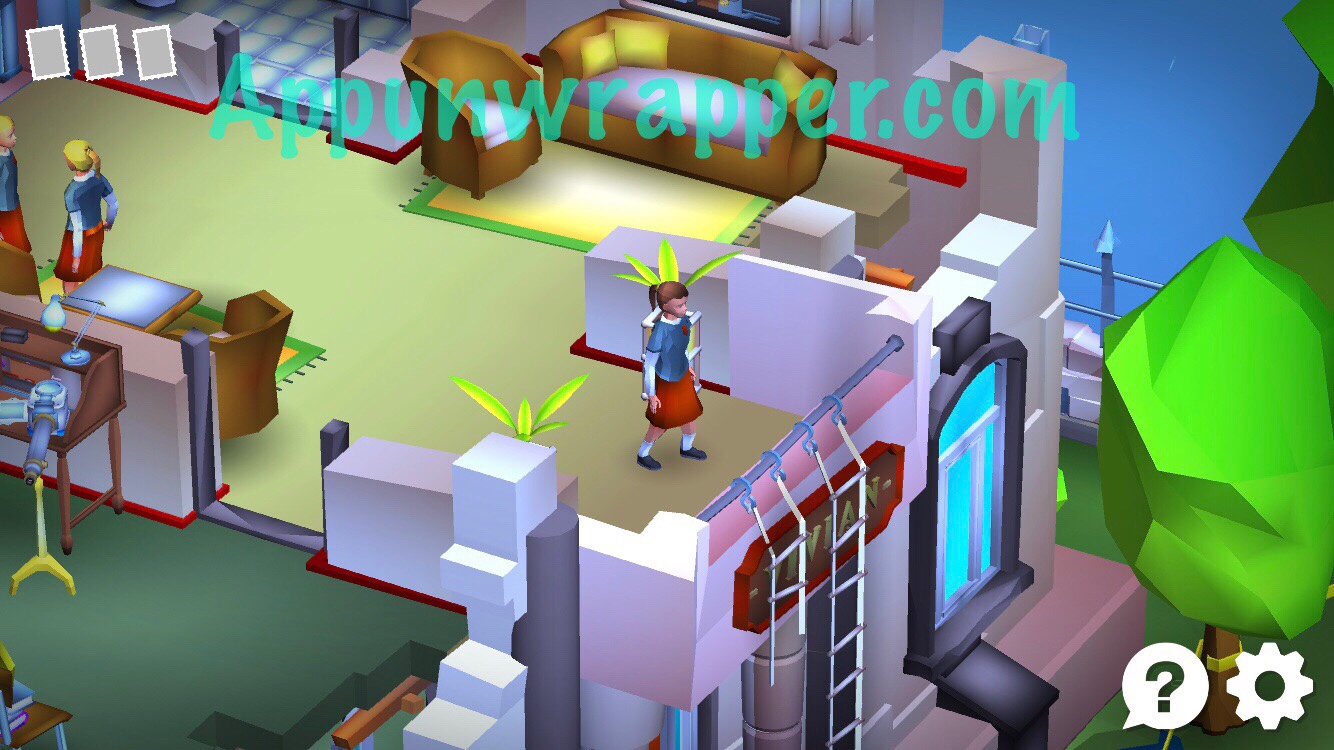
Level 5, Private Chambers:
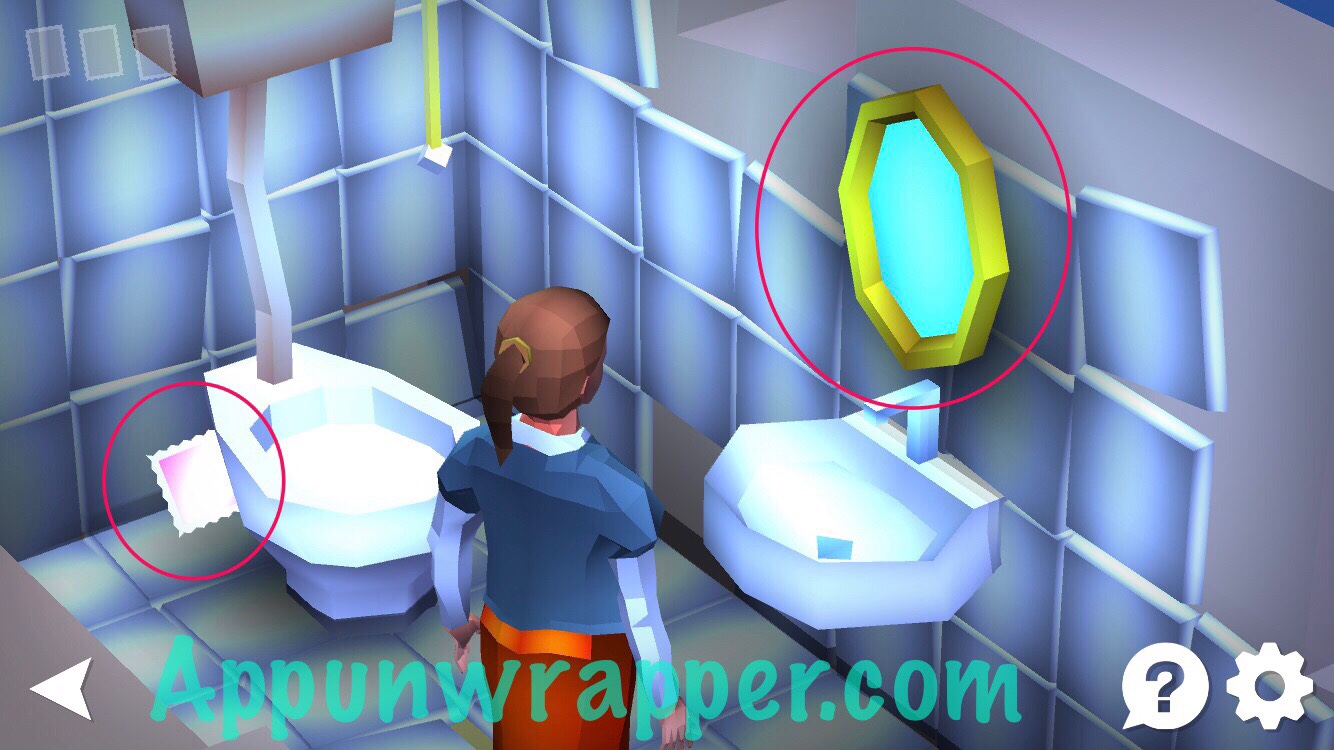
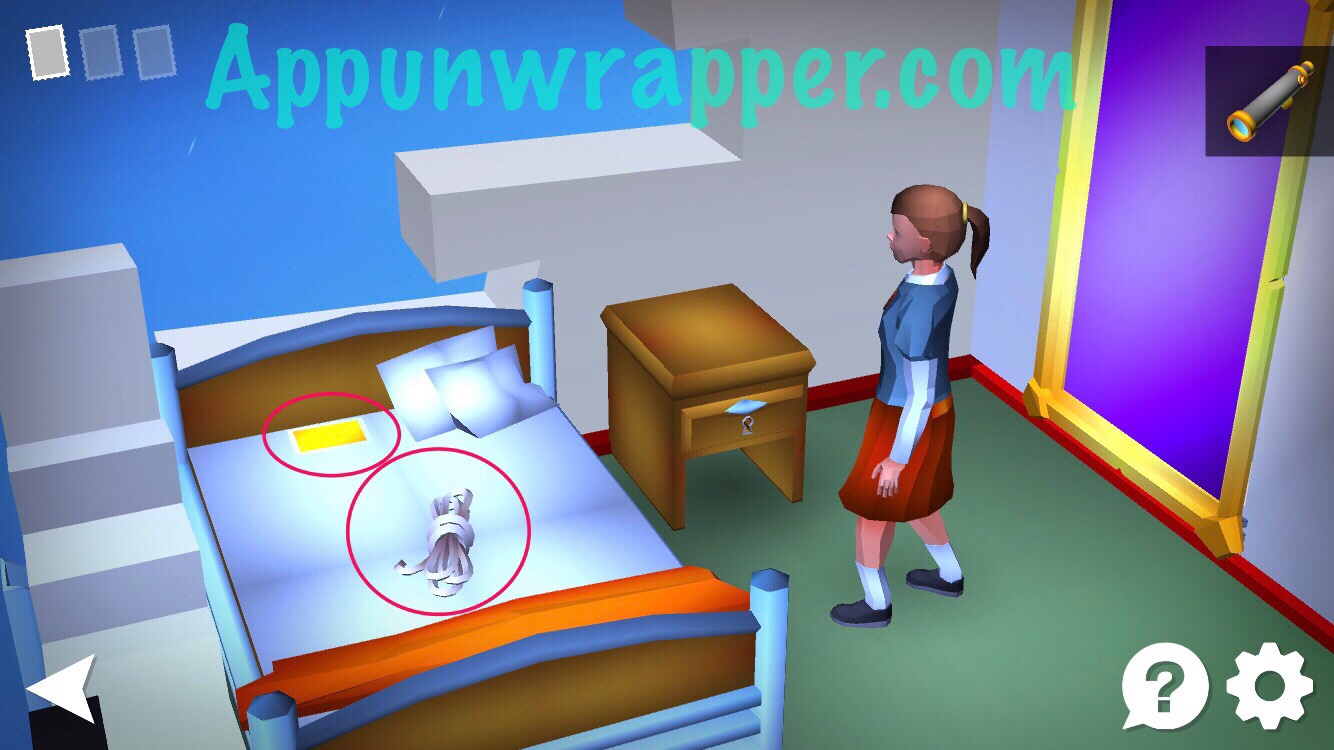
1. Walk into the bathroom and grab the mirror and the memory glimpse. Then leave the bathroom.
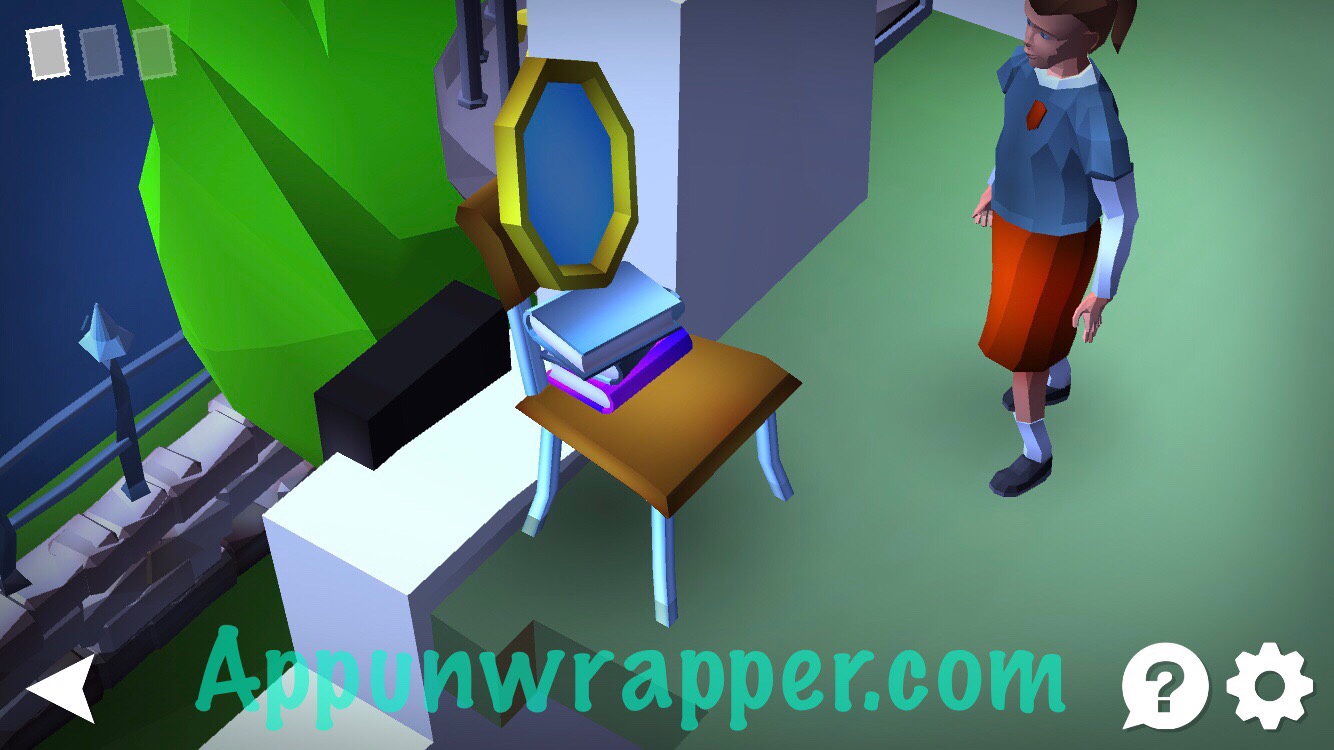
2. Head into the room behind the two girls. Place the mirror on the chair.
3. Take the telescope from the stand. Then head over to the bed and lift the sheets to get a rope. Also, move the pillows aside and take the memory glimpse.
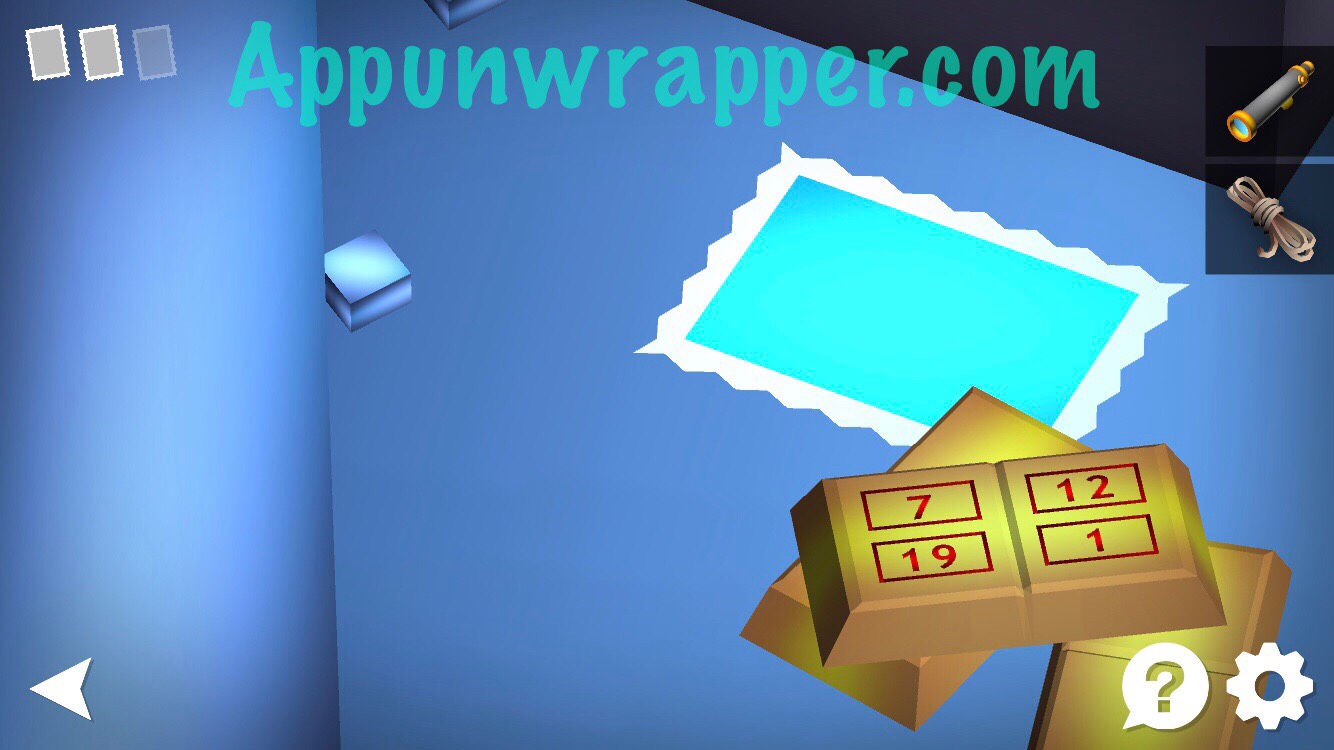
4. Pull the purple painting aside to reveal a safe. Turn the dial right and then left to open it. There’s a clue inside with four numbers — 7, 12, 19, 1. Also, take the memory glimpse.
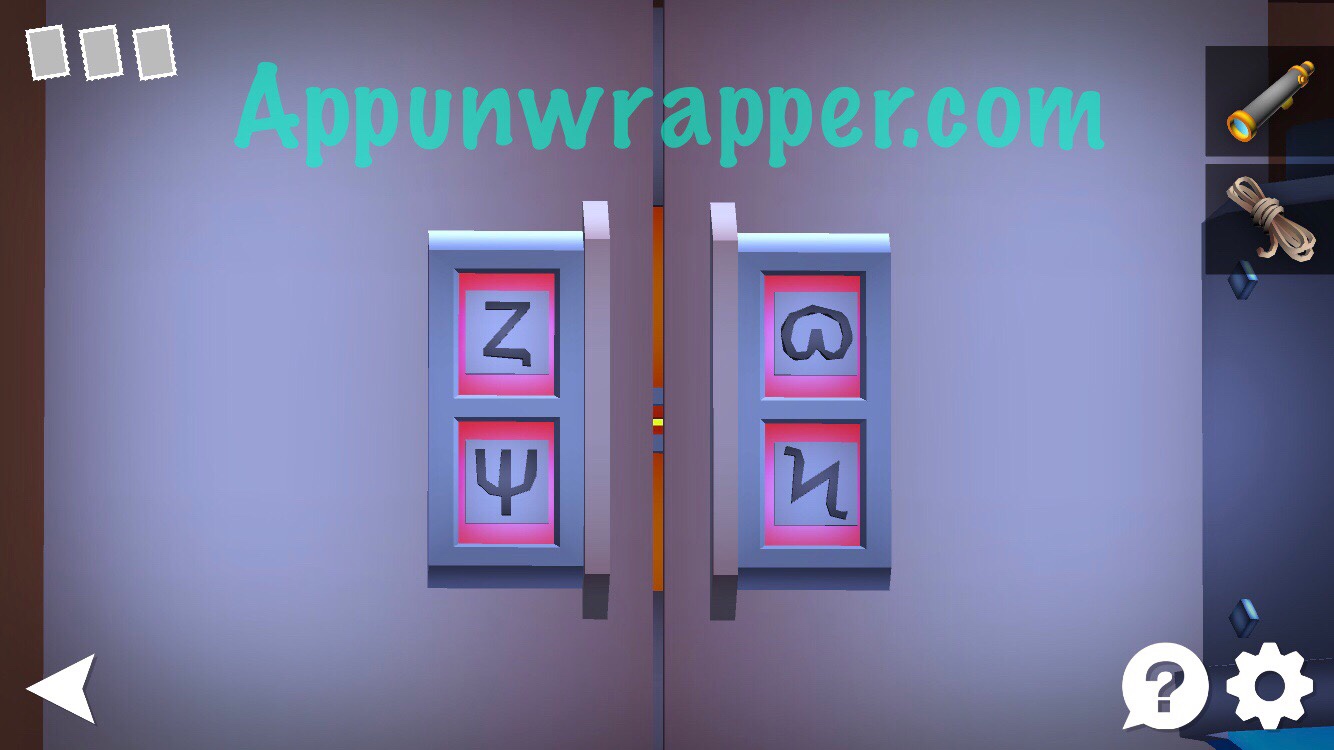
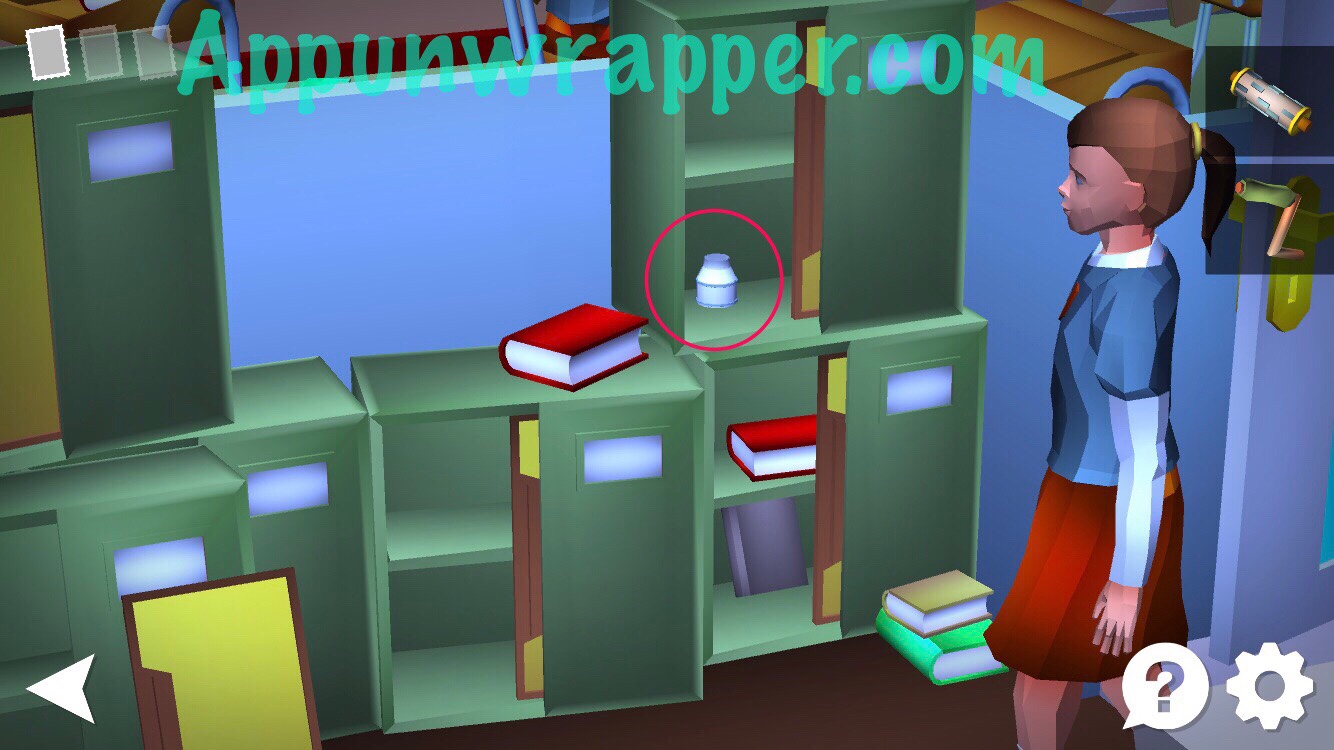
5. Go to the desk and move aside some papers to find a sheet that tells you which symbols represent which numbers. Look for 7, 12, 19 and 1 and note down those symbols.
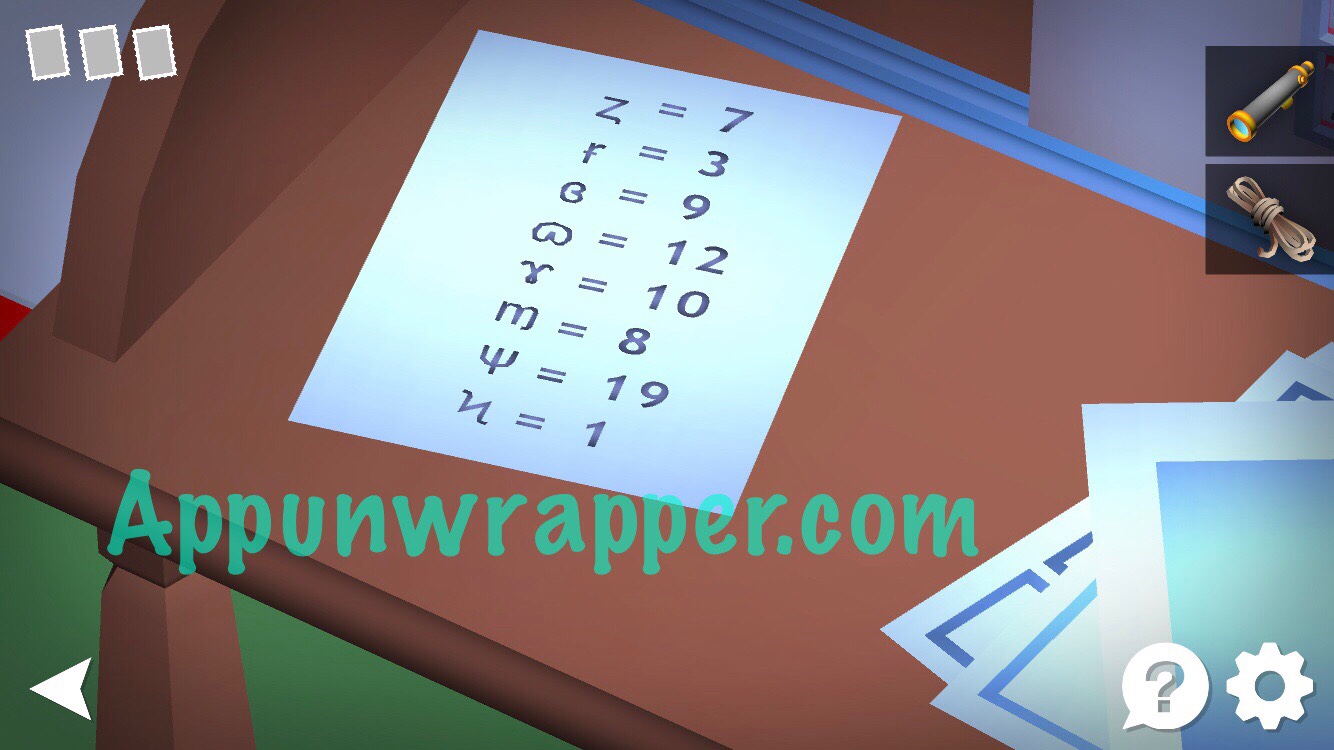
6. Now use those symbols to open the lock on the desk.
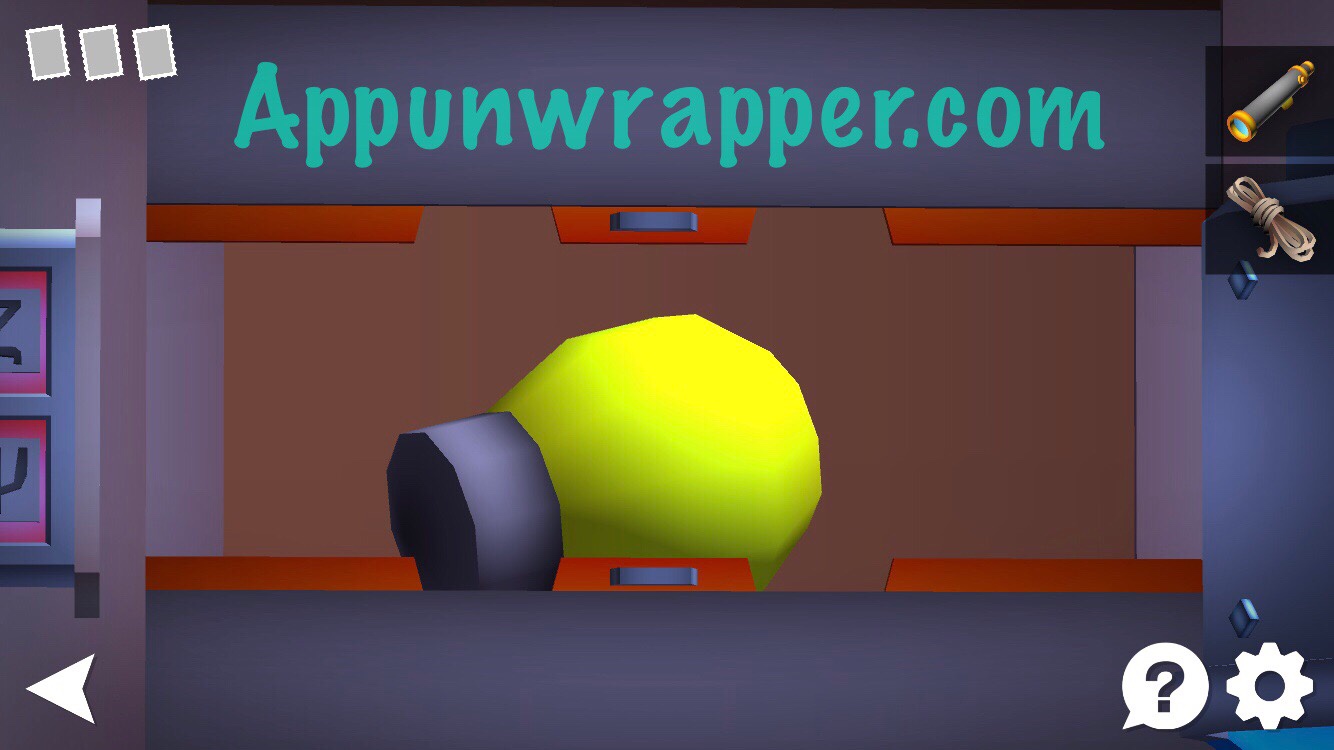
7. Pull open all the doors here and take the light bulb.
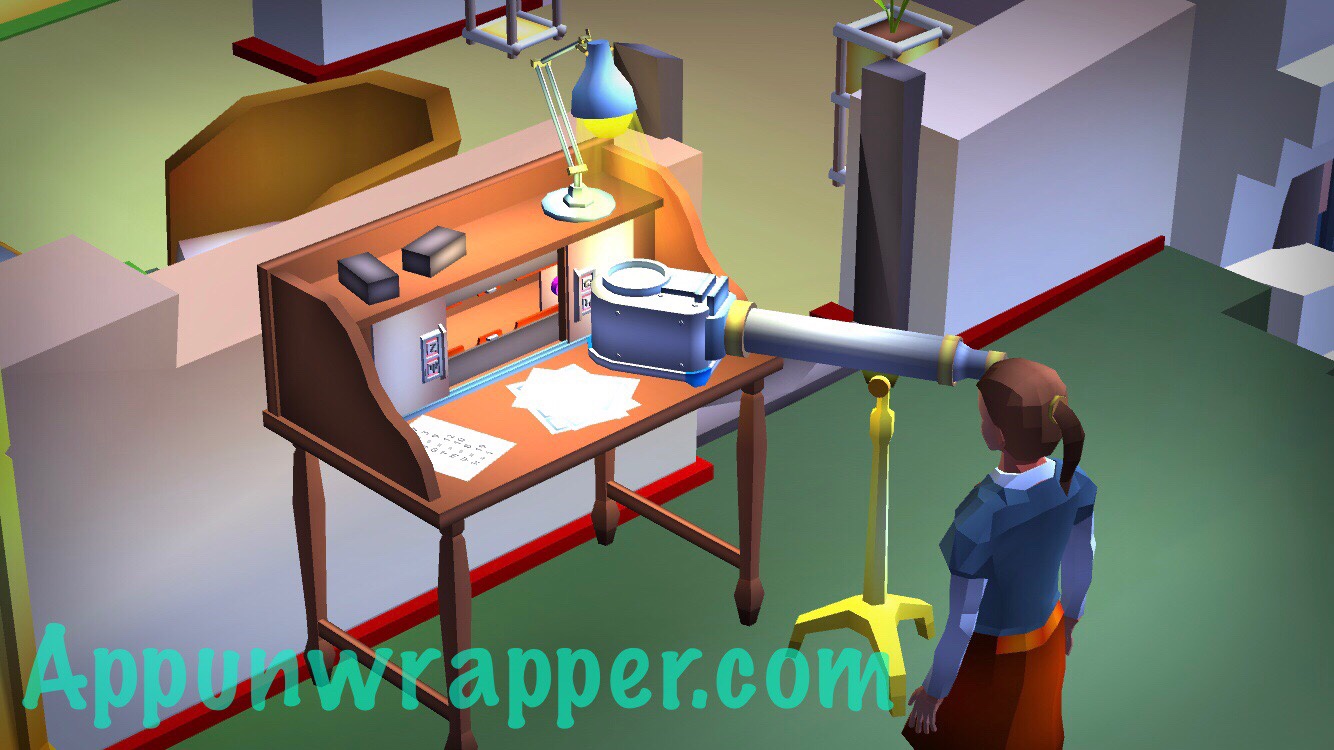
8. Screw the lightbulb into the lamp on the desk and place the telescope on the stand here. A laser will shoot out and reflect off the mirror to a spot on the wall in the other room.
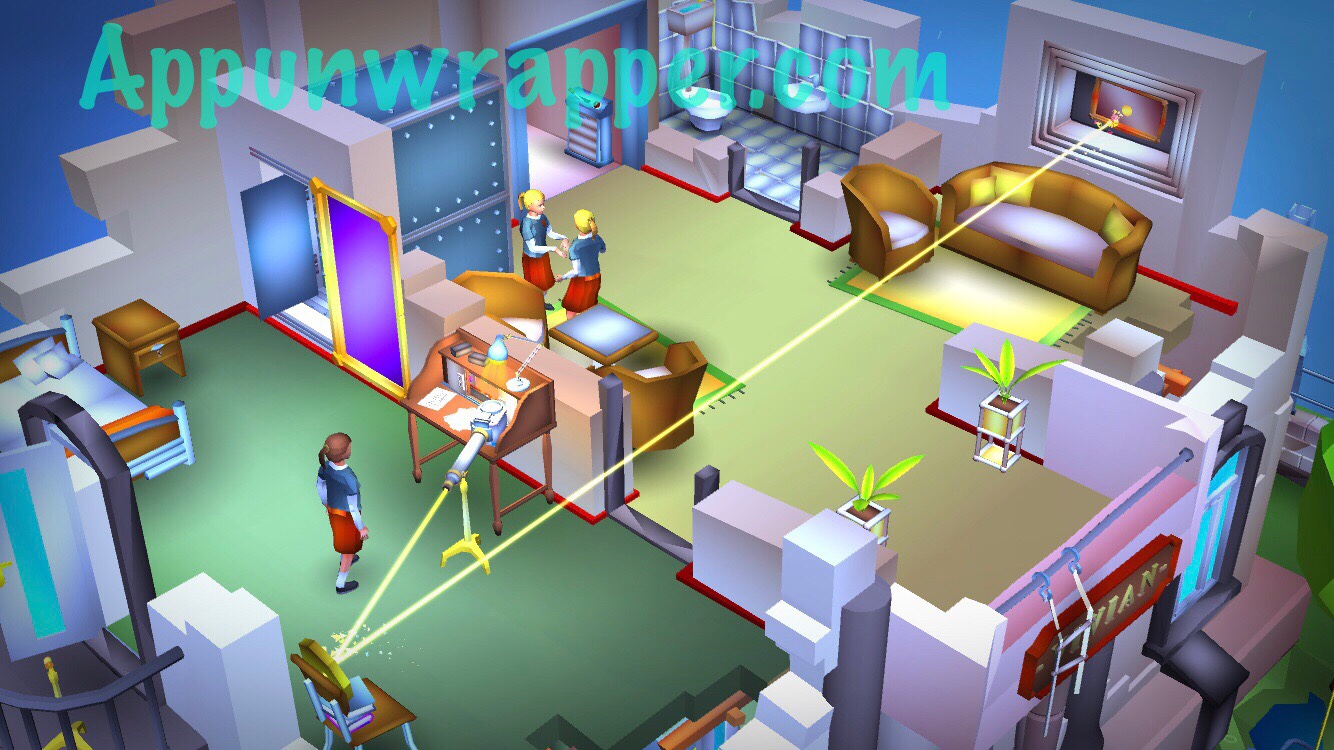
9. Head over there! Solve the puzzle and then take the ladder steps and key.
10. Head back to the bedroom and use the key to unlock the night table. Take the hooks from inside. Combine the rope with the hooks and then combine that with the ladder steps to make a ladder.
11. Find the half ladder and place your full ladder next to it. Climb down and complete the level!
Level 6, Classroom and Garden:
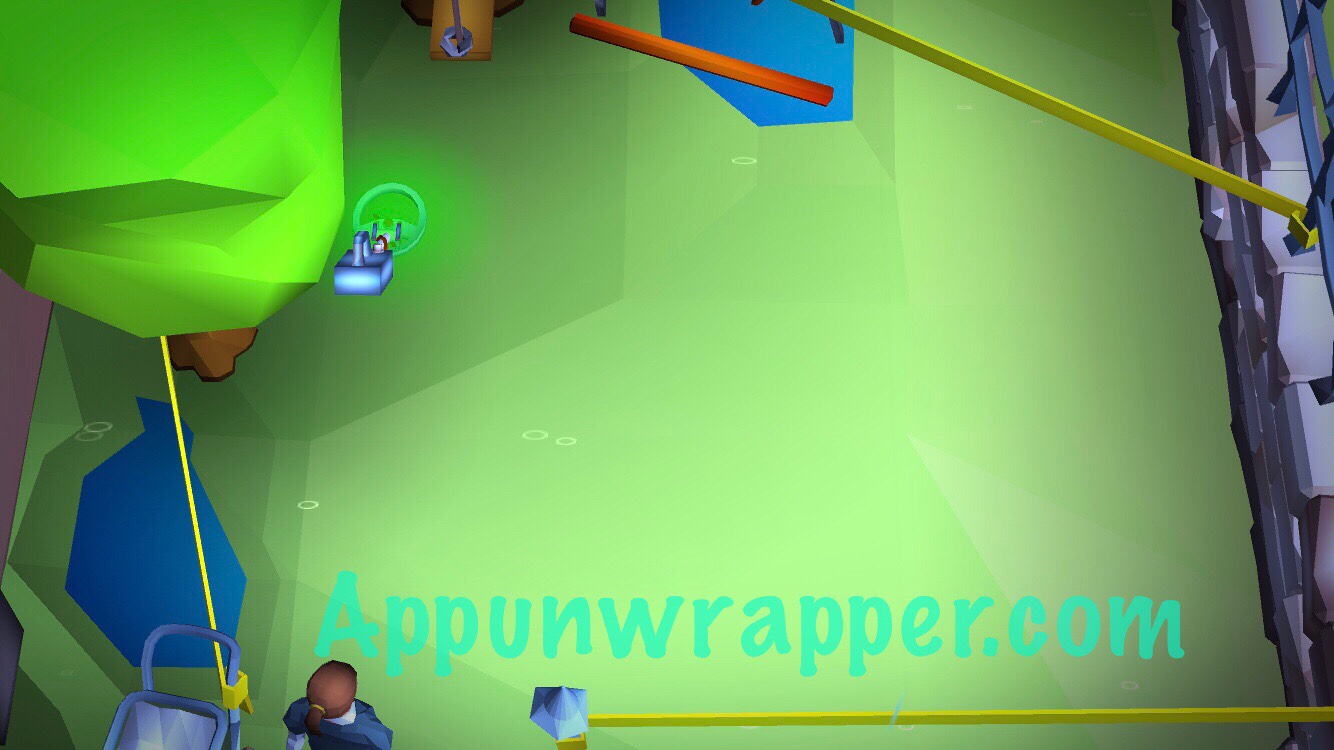
1. Examine the baby carriage. Take the smelly t-shirt and metal detector.
2. Head down and give the dog the smelly t-shirt. He’ll run off and bring back a purse. Take the music cylinder from inside.
3. Tap on the broken bench and then on the loudspeaker. You can now hear what the girl has to say.
4. Take the shovel from the grave.
5. Head back up and use the metal detector on the big open space. It will mark a spot with an X.
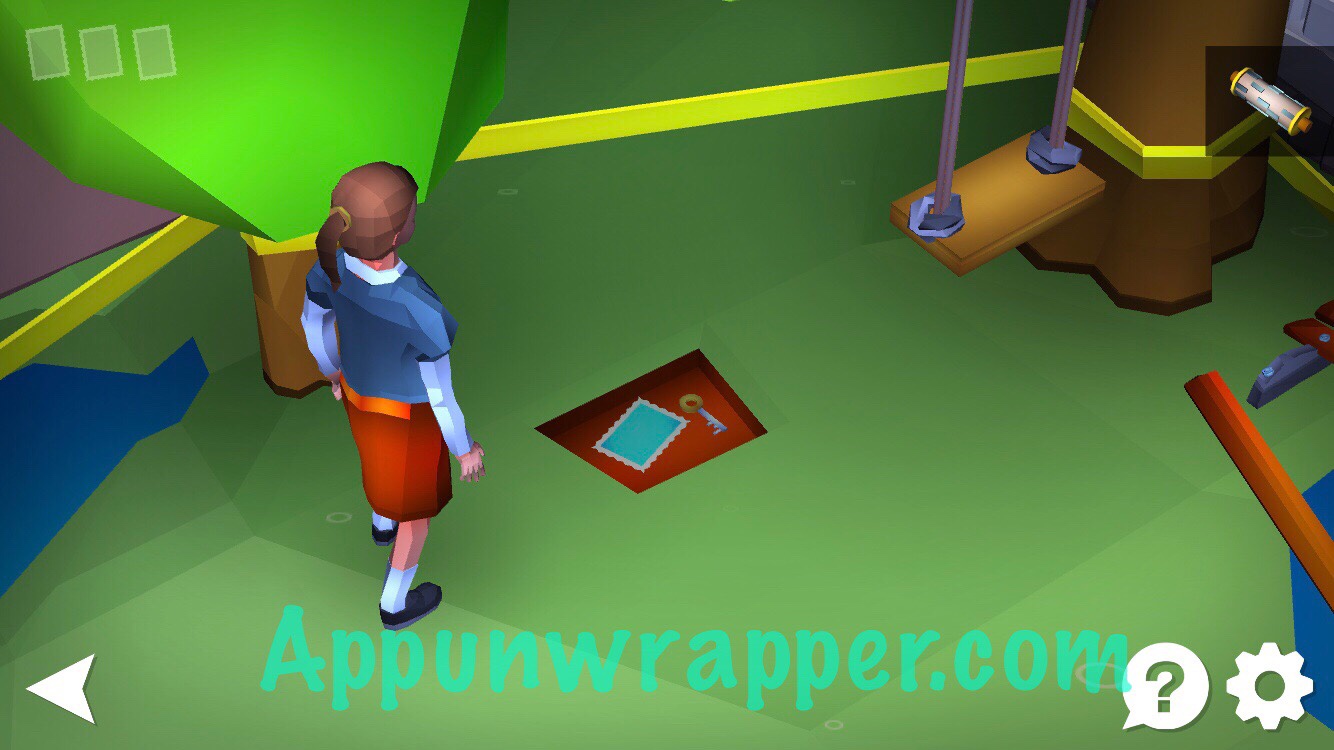
6. Use the shovel to dig on the X and take the memory glimpse and key.
7. Use the key to unlock the gate. We can’t do much else there yet, so head into the school.
8. Pull aside the curtain and enter the closet. Pick up the handle.
9. Head over to the lockers and open them all. Get the two fuses and the memory glimpse.

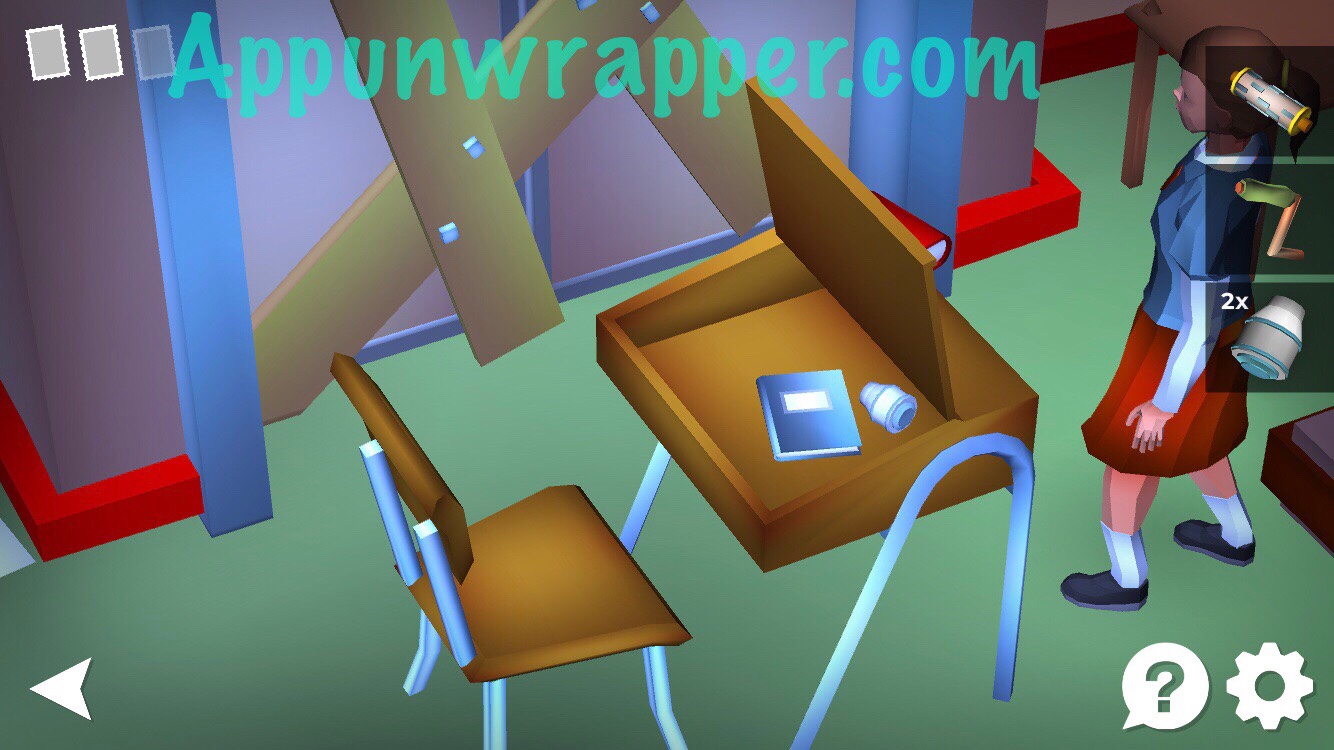
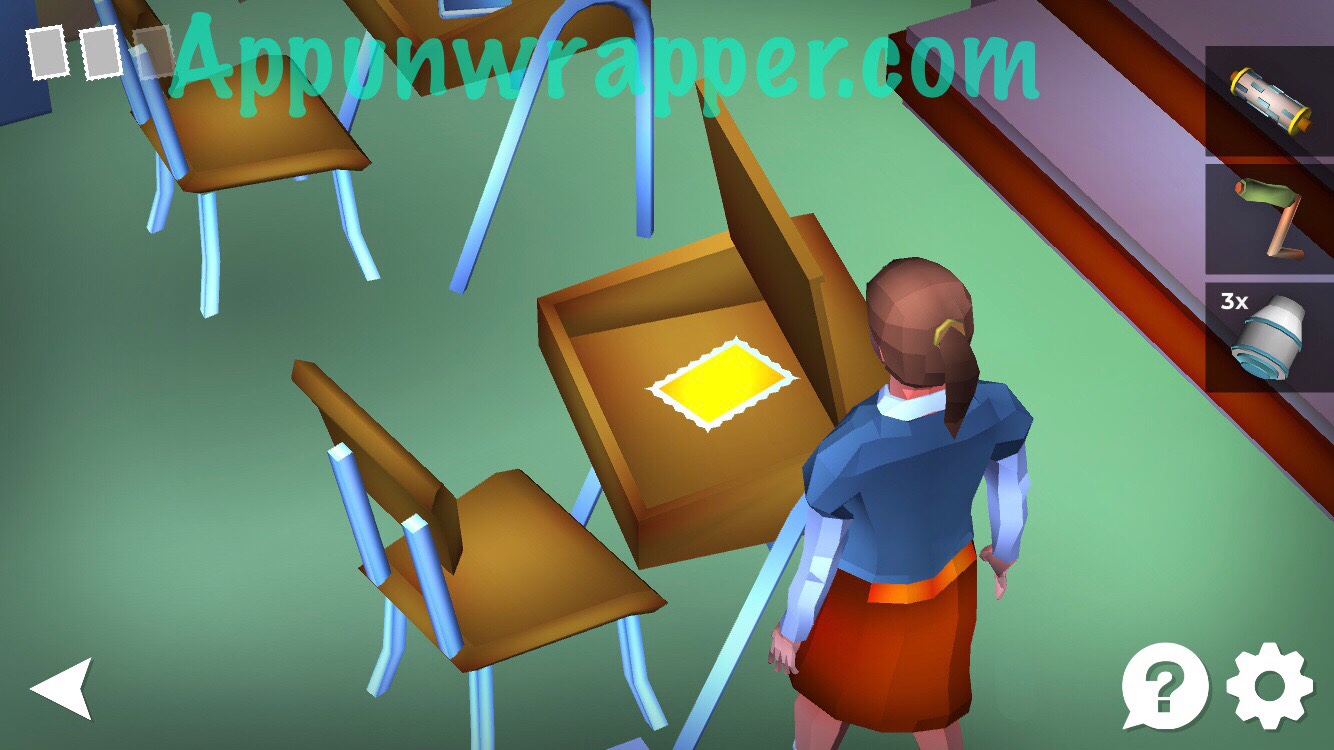
10. Head into the classroom. Talk to the student. Open the desks to find a fuse in one and the third memory glimpse in another.
11. Head to the blackboard. Press the arrow that’s drawn on there and the blackboard will lift up, revealing a clue. Memorize it or take a screenshot of it.
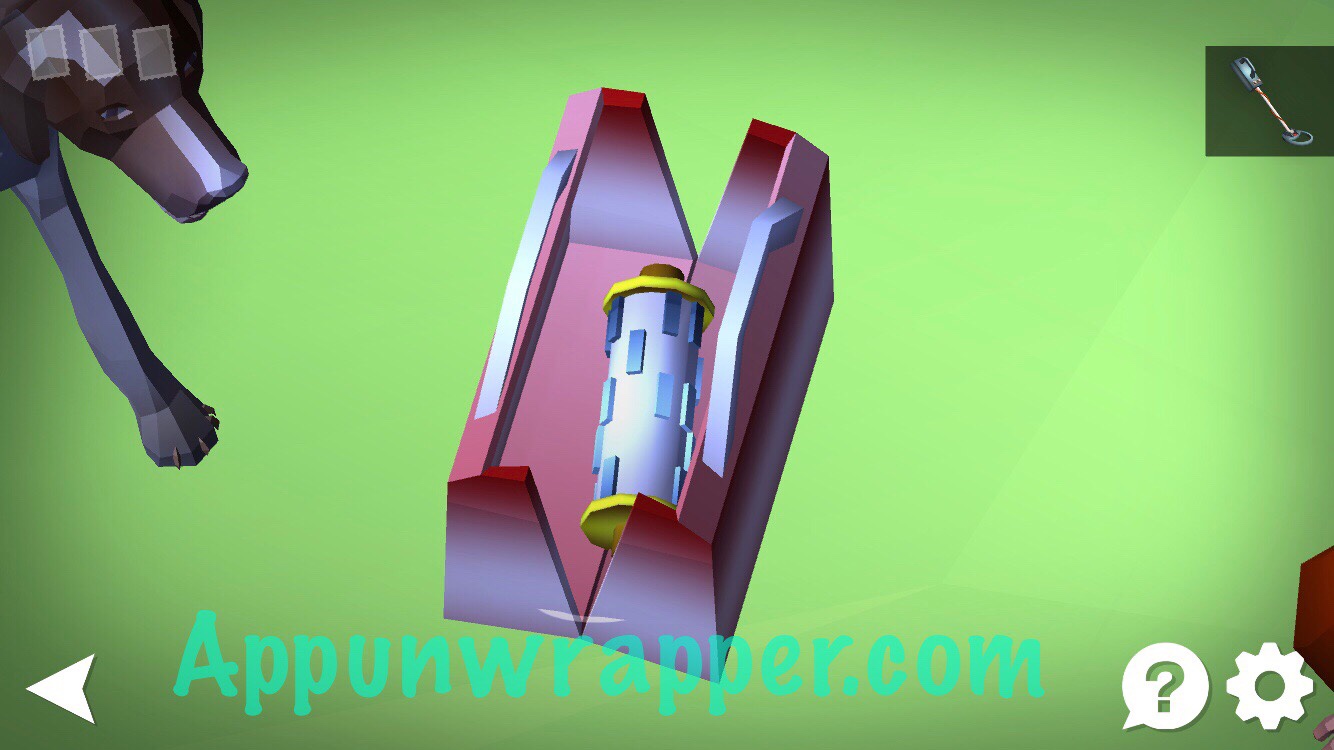
12. Head over to the piano. Move the music book out of the way and then copy the pattern you saw on the blackboard into the lock.
13. Attach the handle at the top and insert the music cylinder in the slot. Turn the handle and the piano will disappear, replaced by another puzzle.
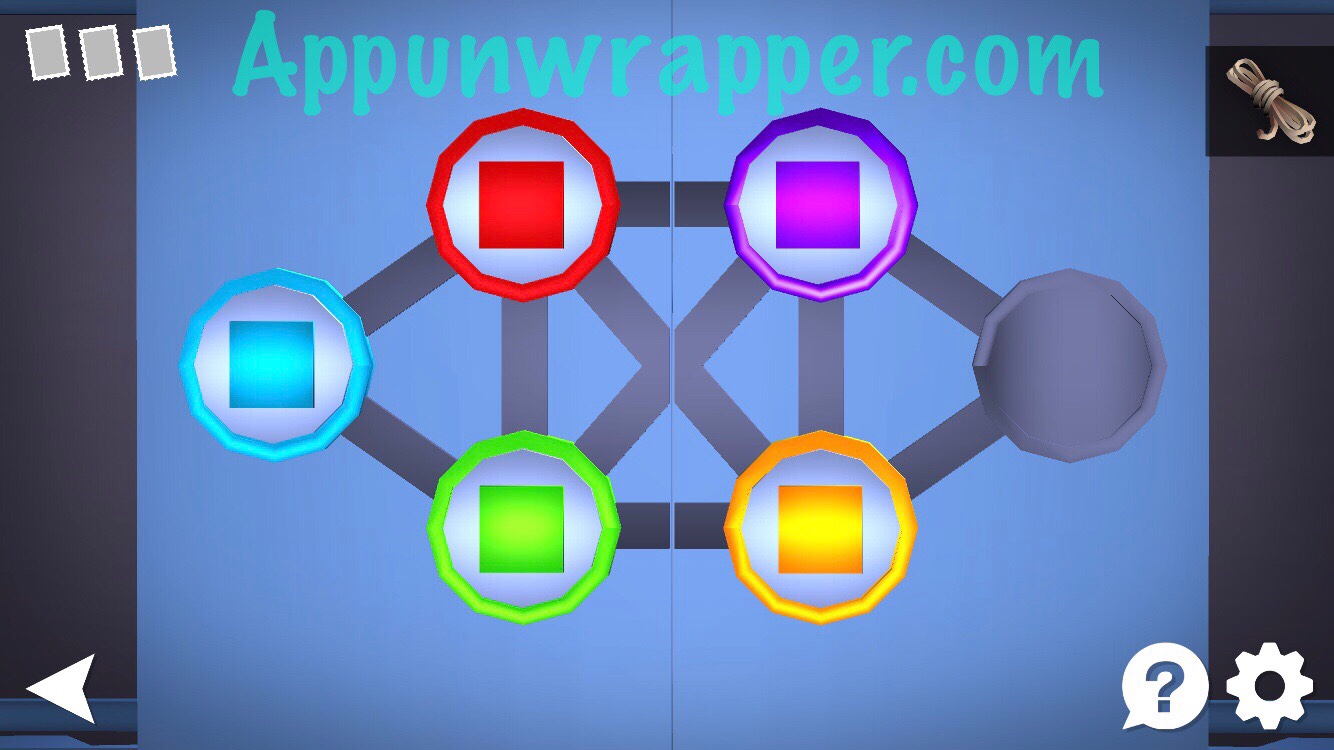
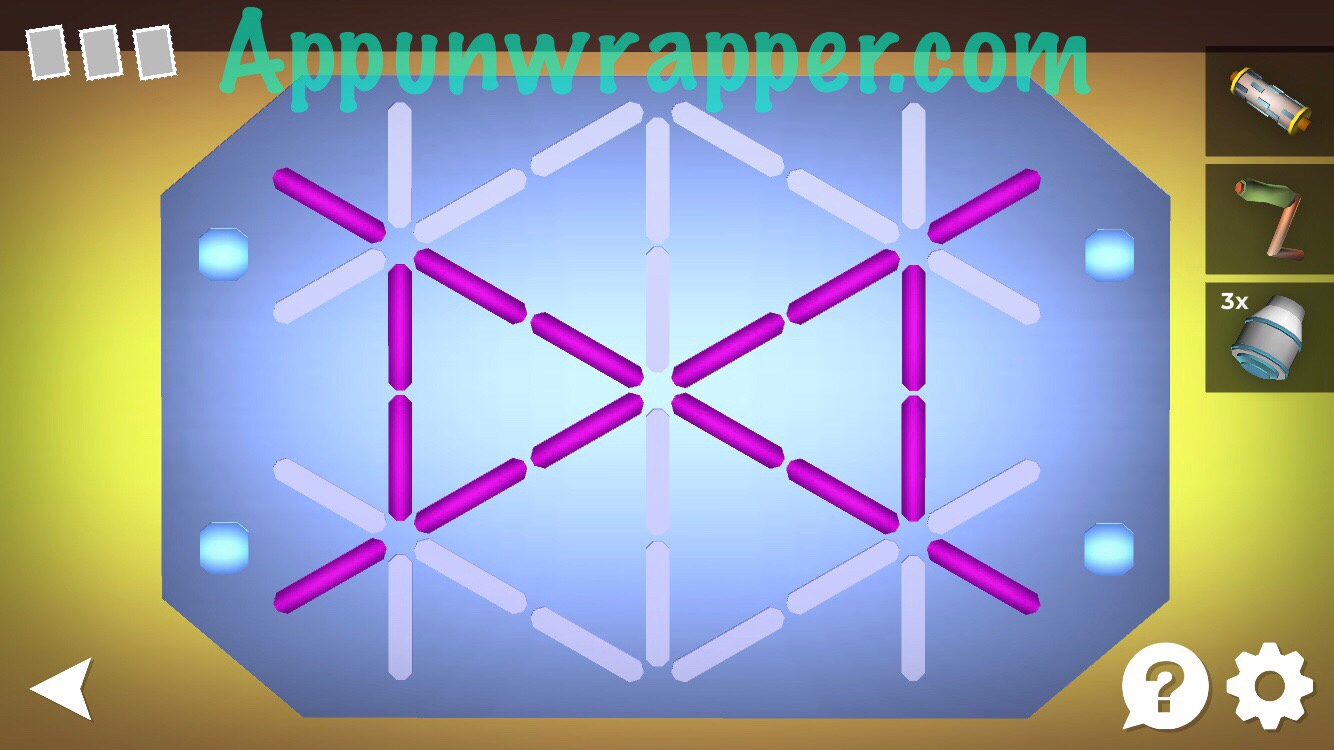
14. Insert the three fuses and then complete the four Simon mini games. A bridge will appear outside the gate! Head out and over it to complete the chapter.
Chapter 1 | Chapter 2 |
More coming soon!