Veritas
By: Glitch Games

Veritas is the latest puzzle adventure game from Glitch Games. You wake up in a locked room without any idea how you got there. It turns out you’re in a facility called Veritas Industries, though you can’t remember much. You need to solve puzzles and make your way from room to room to figure out what’s going on. It can be tricky, so this walkthrough guide will help you if you get stuck. Feel free to ask for extra help in the comments section.
Walkthrough:
Prologue + Chapter 1 | Chapter 2 | Chapter 3 | Chapter 4 | Chapters 5 6 7 8 9 | Notes & Journal Entries
Chapter 3:
You can watch my video for Chapter 3 or continue below for my step-by-step guide.
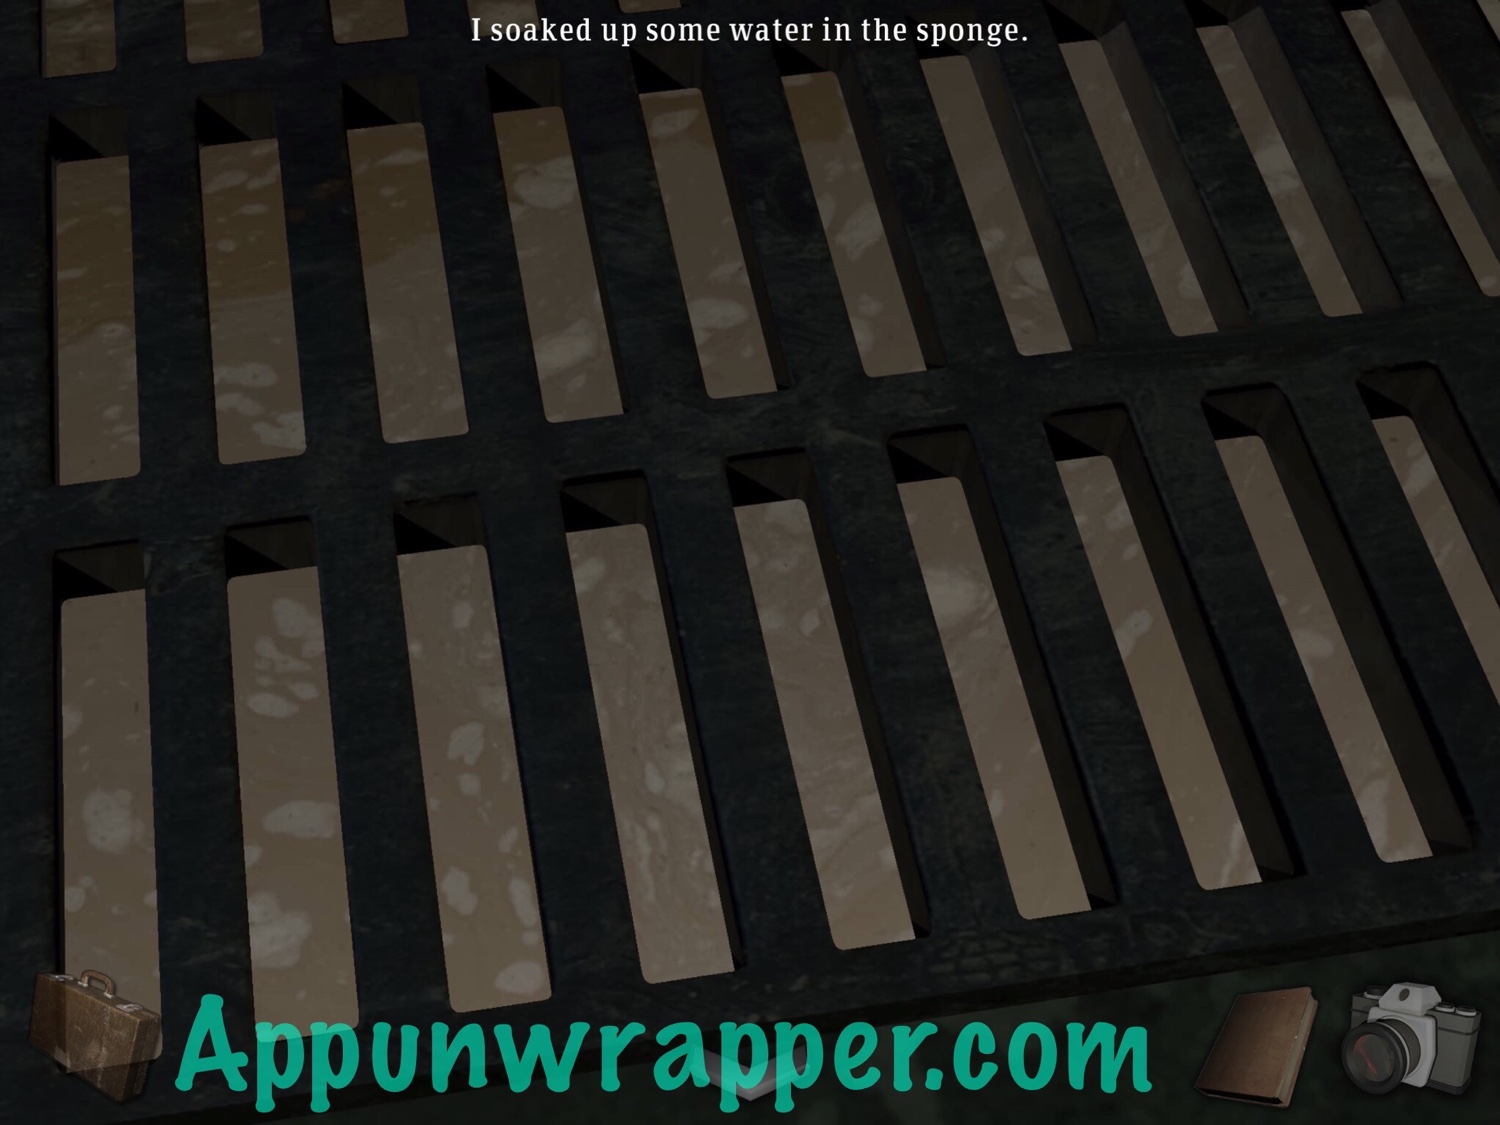
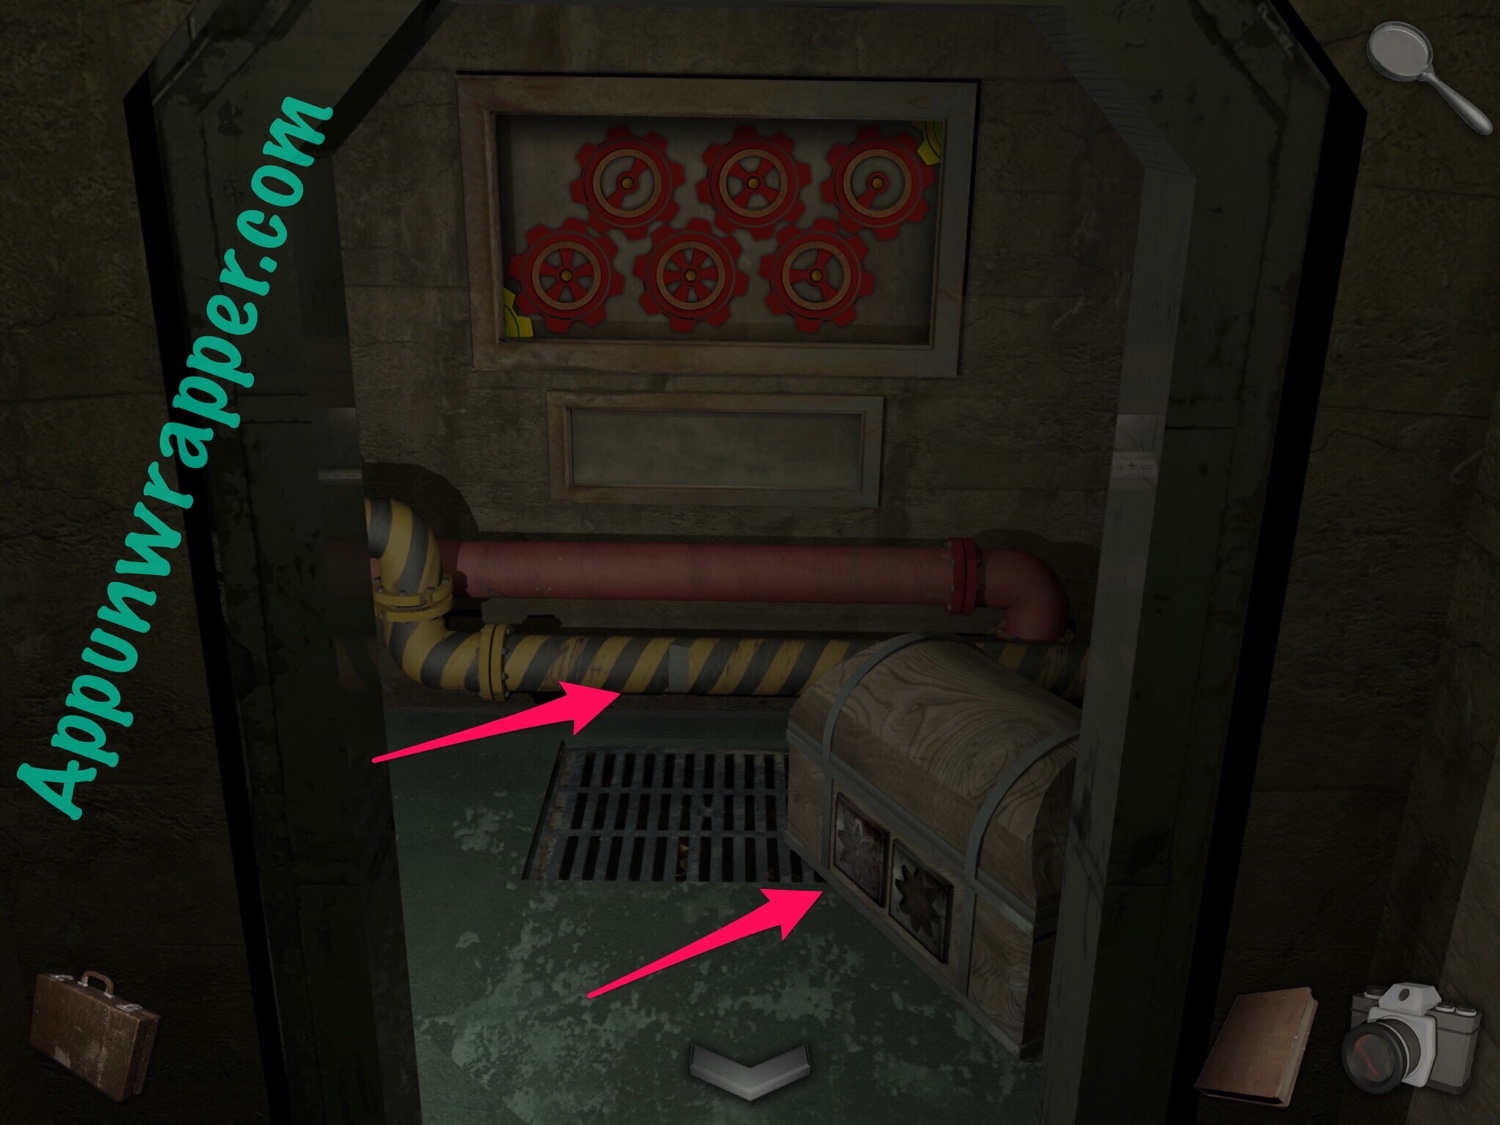
1. Head through the left door to see some metal cogs turning. There’s also a grate. Look down at the dirty water and soak some of it up with the sponge. Then leave the room.
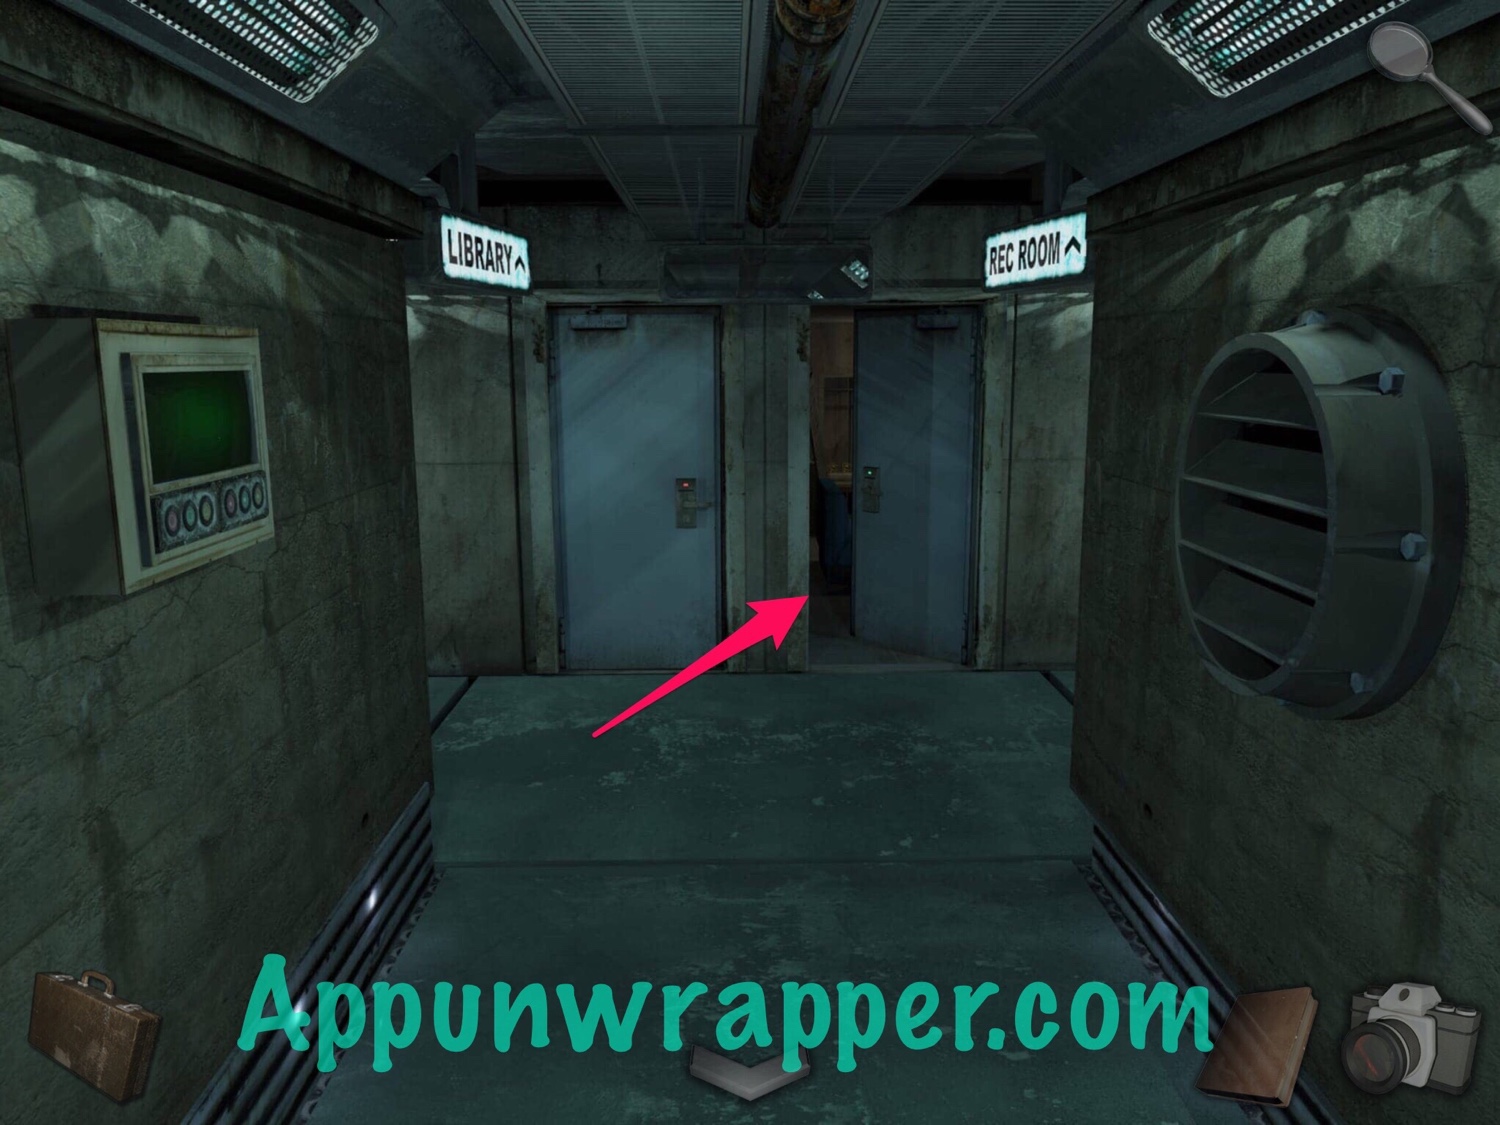
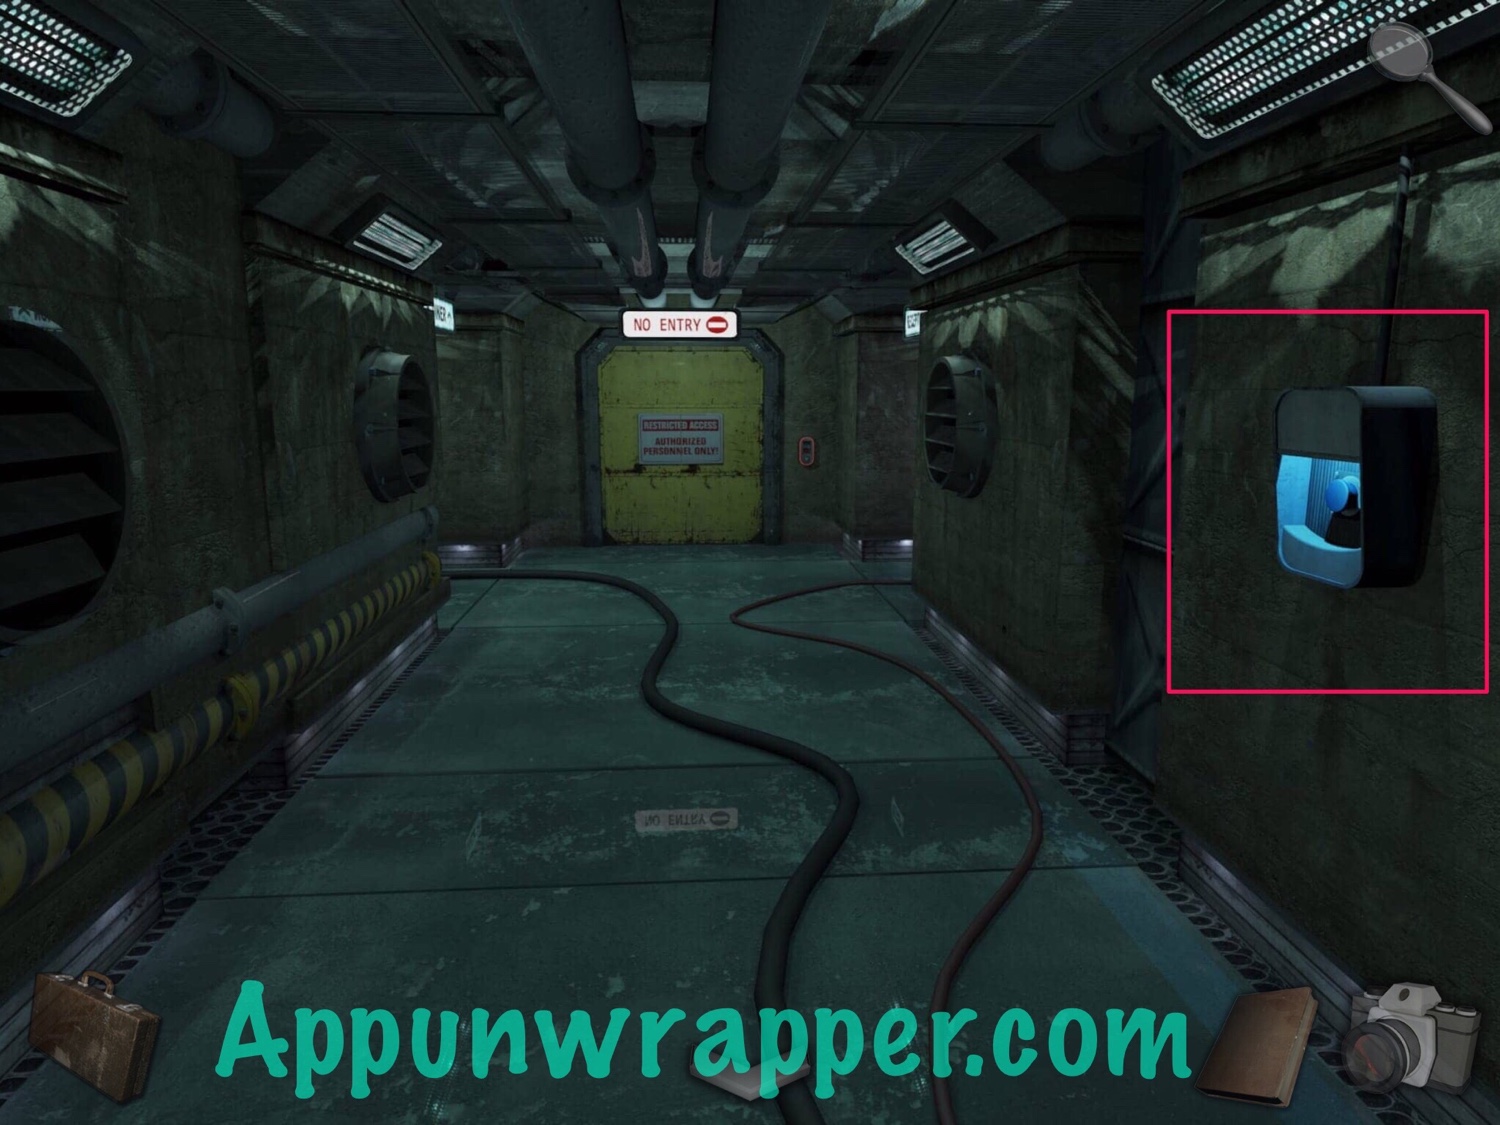
2. Head through the main doorway. Notice there’s a blue button to the right, but ignore it for now. Continue ahead. Then go right towards the Library. Go through the open door in front of you.
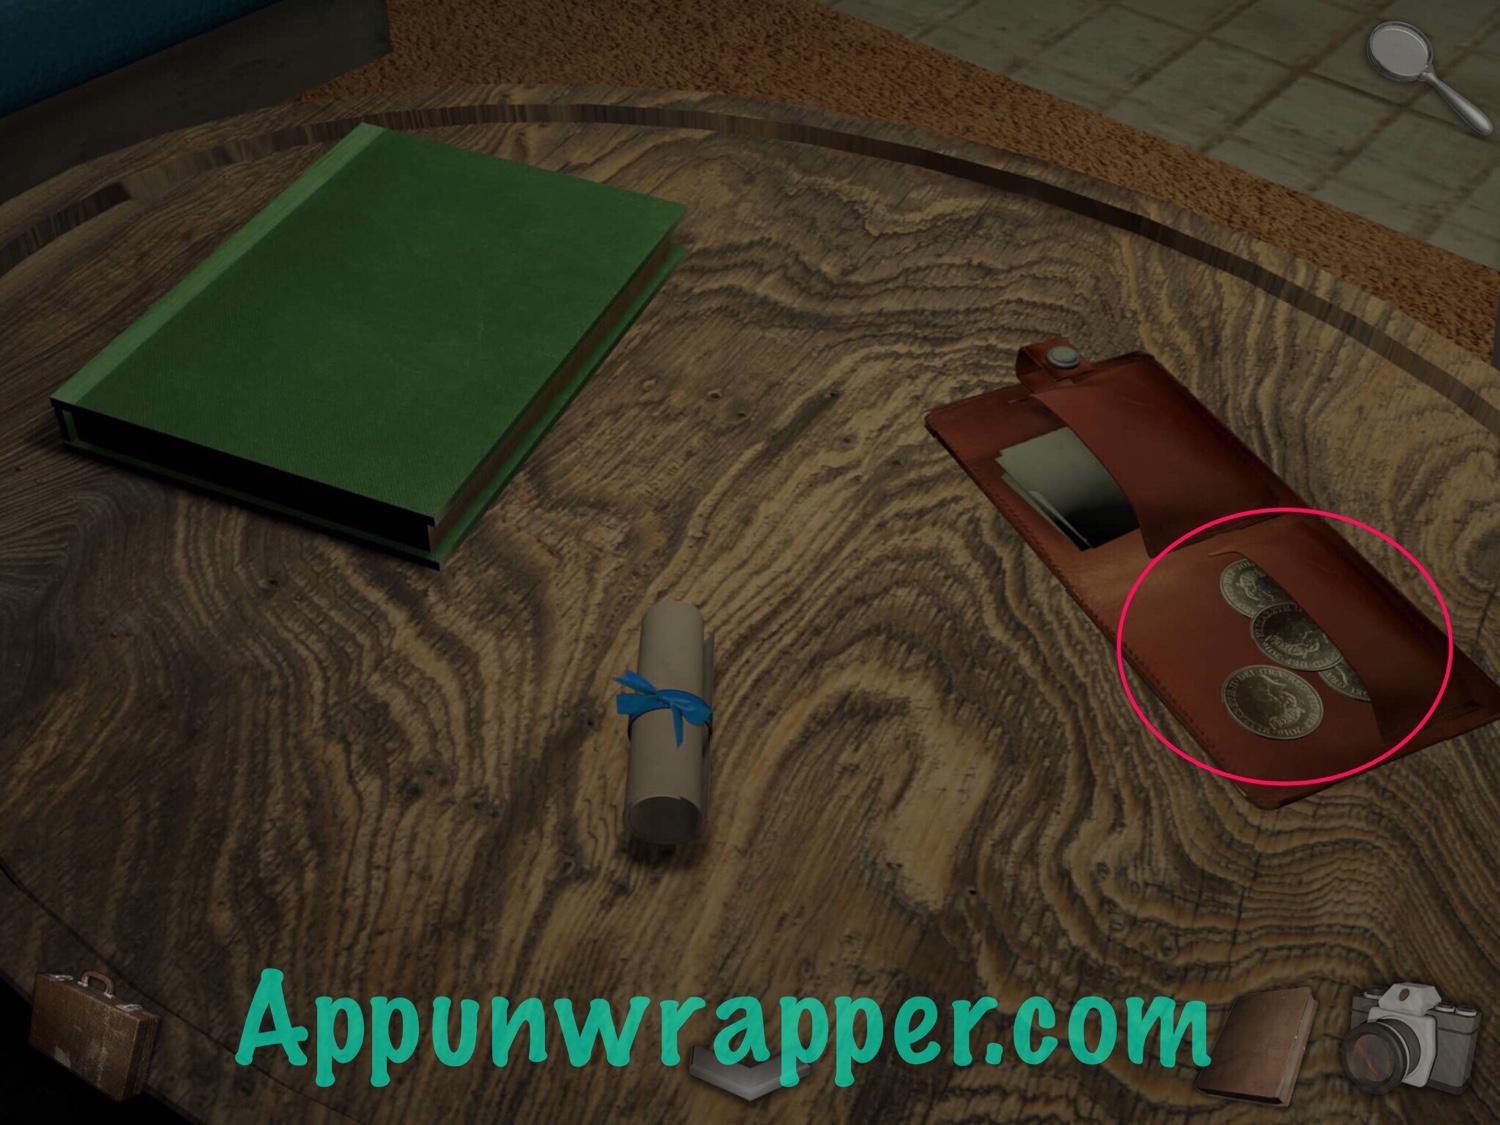
3. Read through the journal on the table and also note 4-16. Then open the wallet and take the coins.
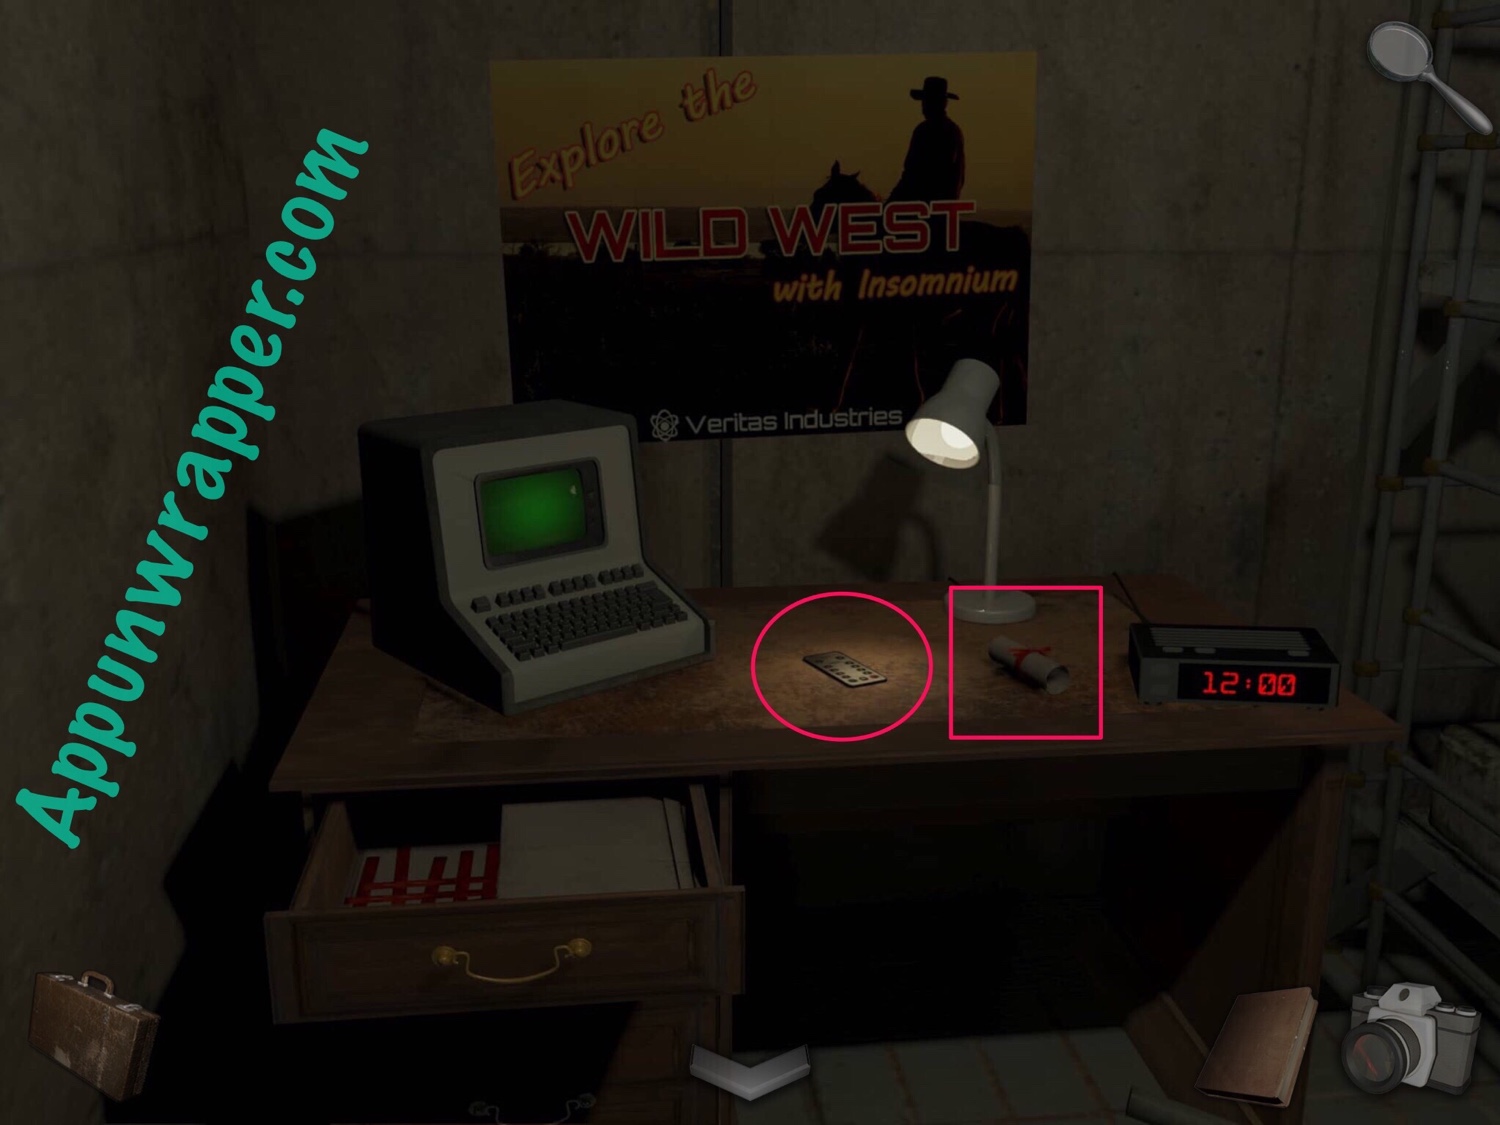
4. Now, go towards the back of the room to a desk. Pick up the projector remote and read note 1/16. You can also open the drawer and see where the paper and ribbons came from for the notes.
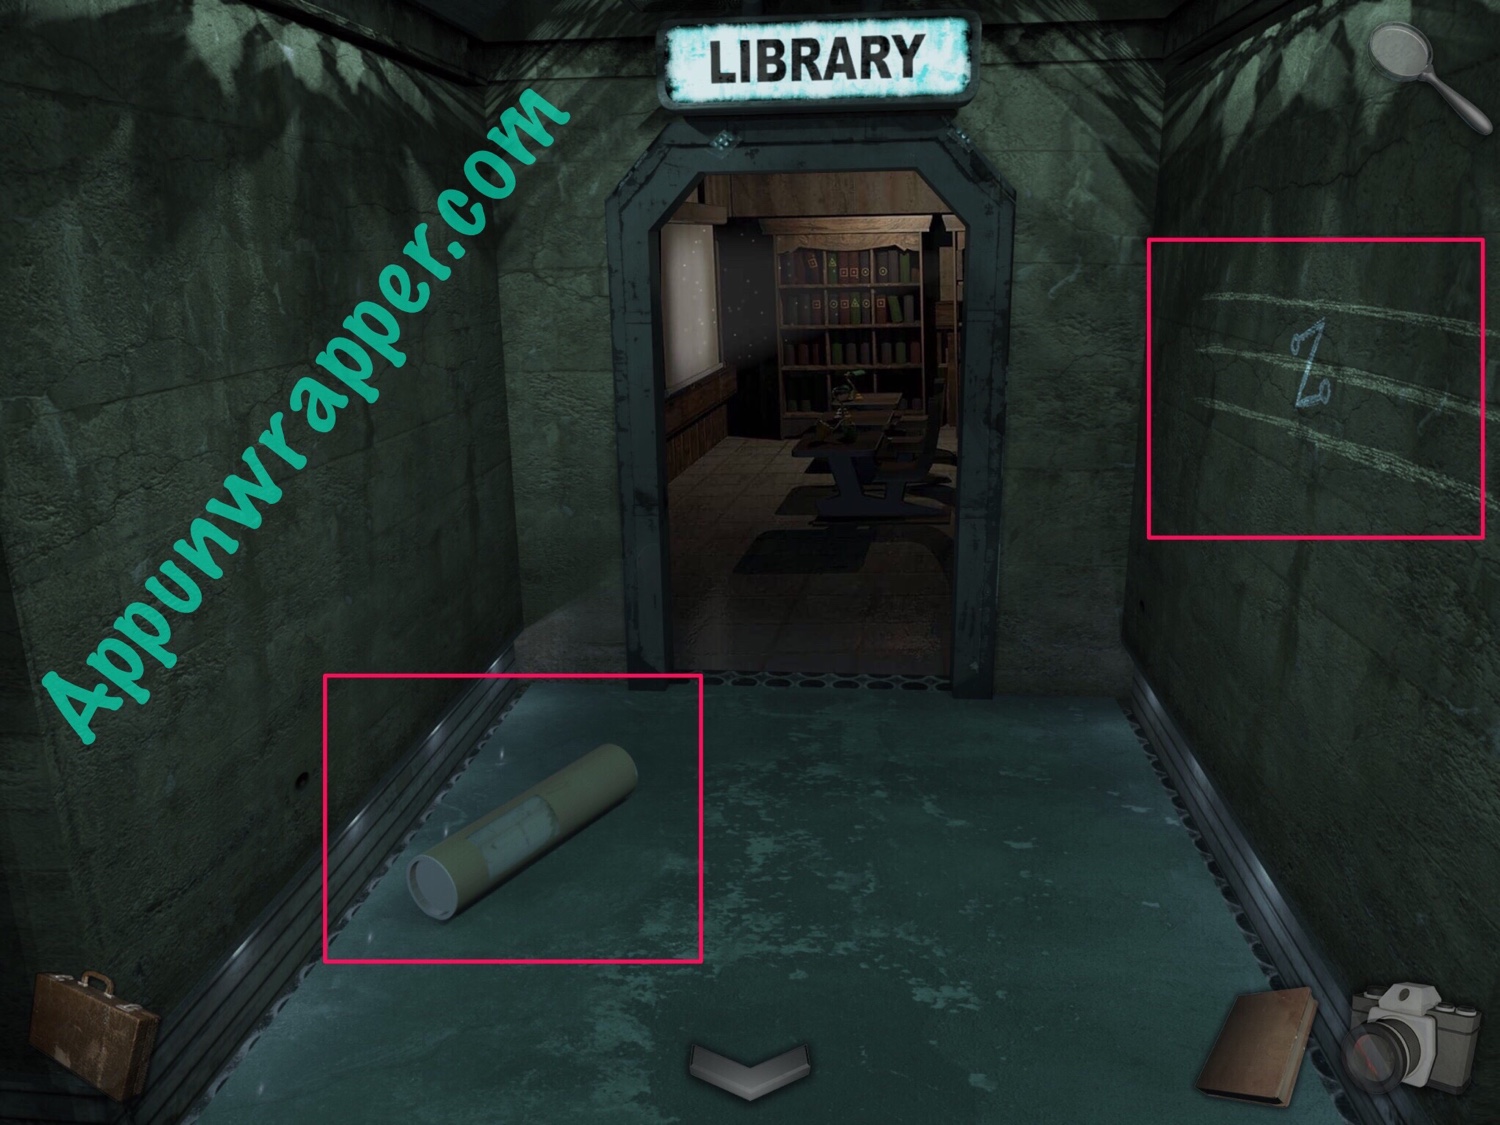
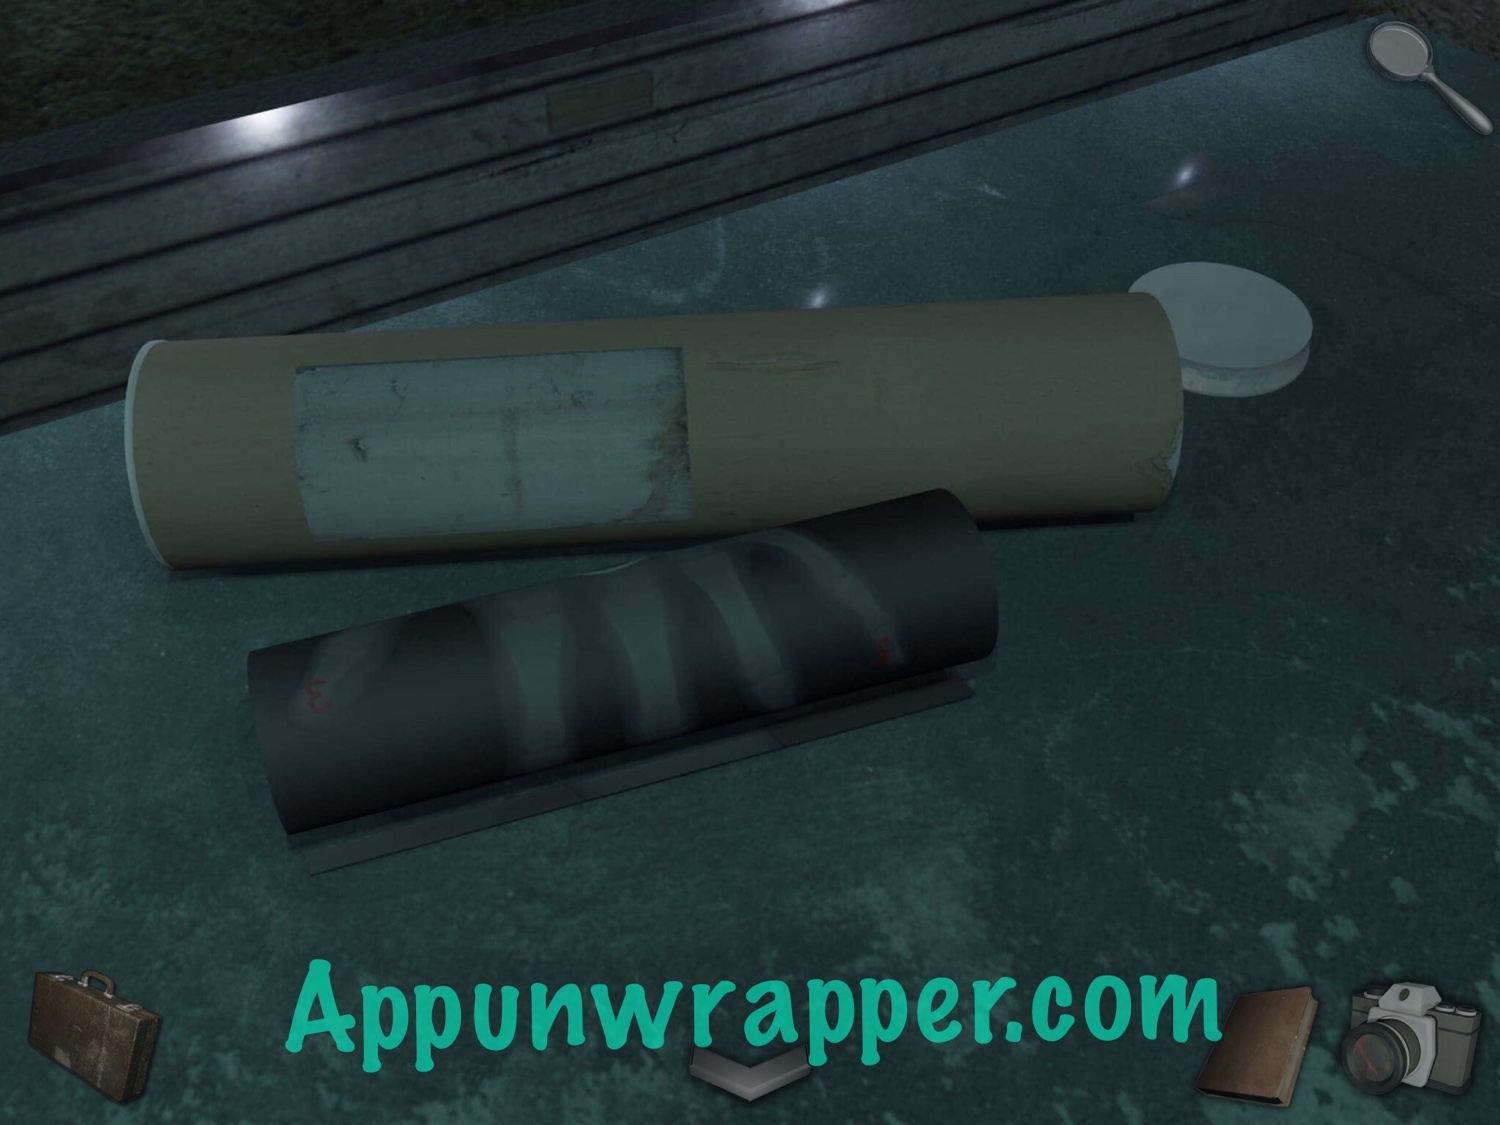
5. Leave the room and head left towards the library. Notice the Z on the wall, but we’ll come back to it. Open the tube to get an x-ray.
6. Enter the library. There’s a few things to do here. First, look at the computer and tap the eye icon to show the password. You can’t see it, though, because of the hole in the screen.
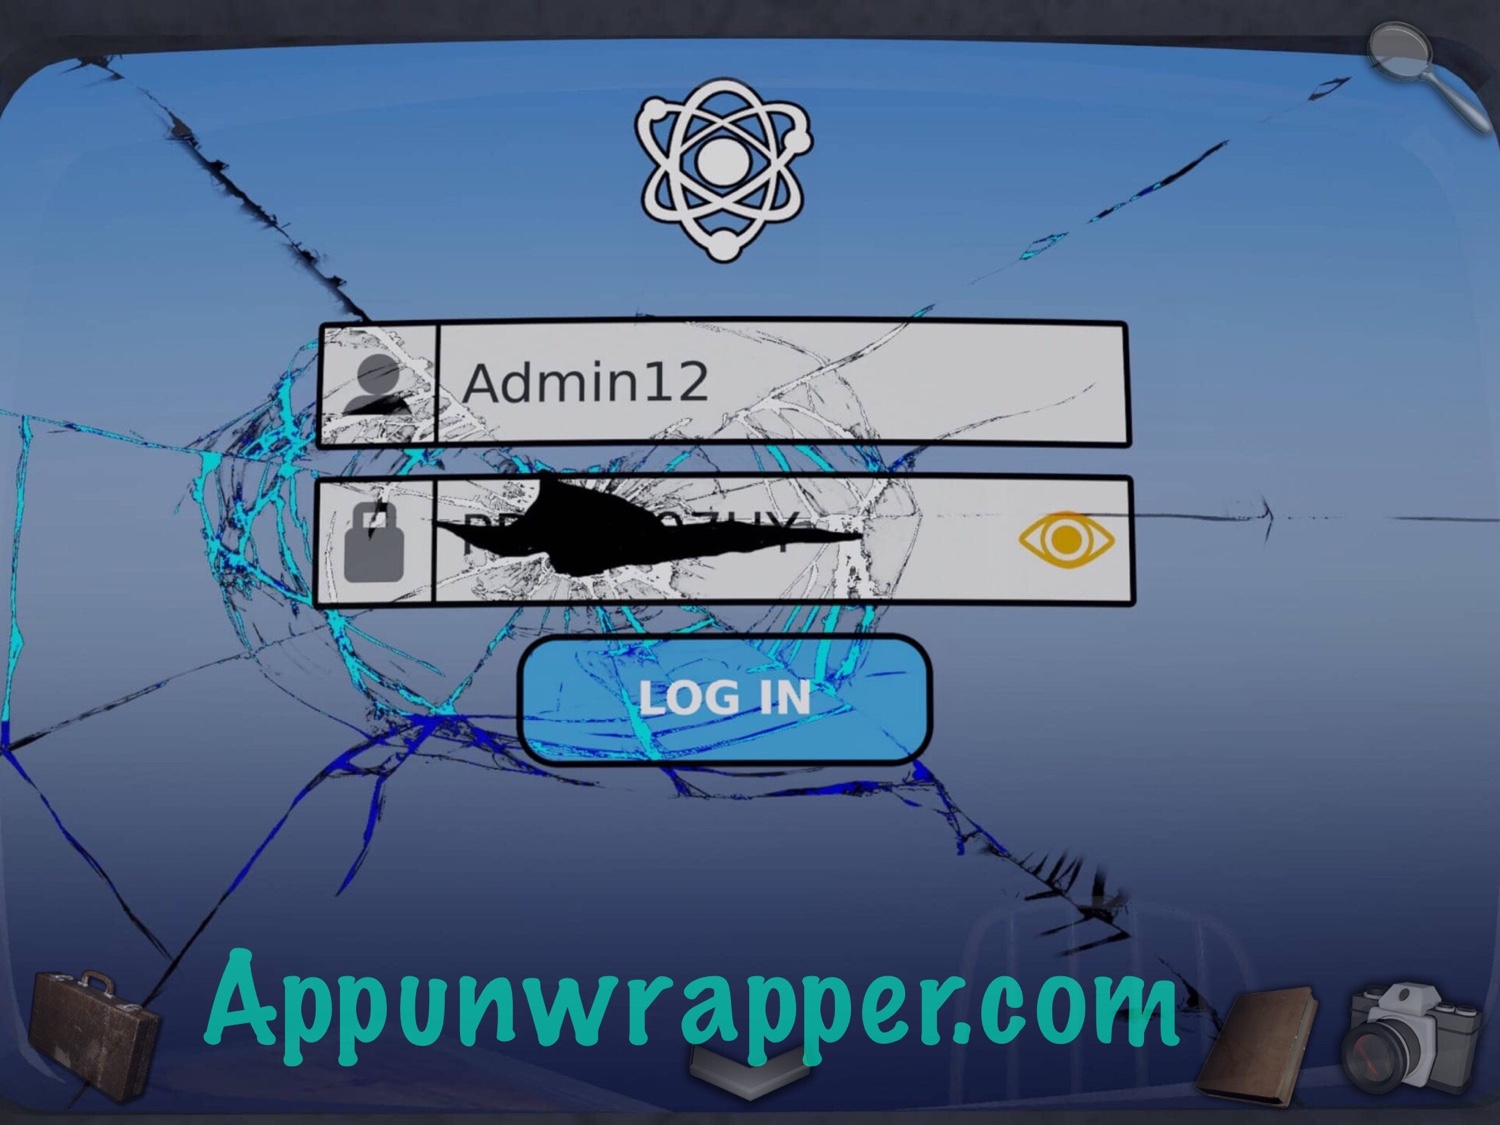
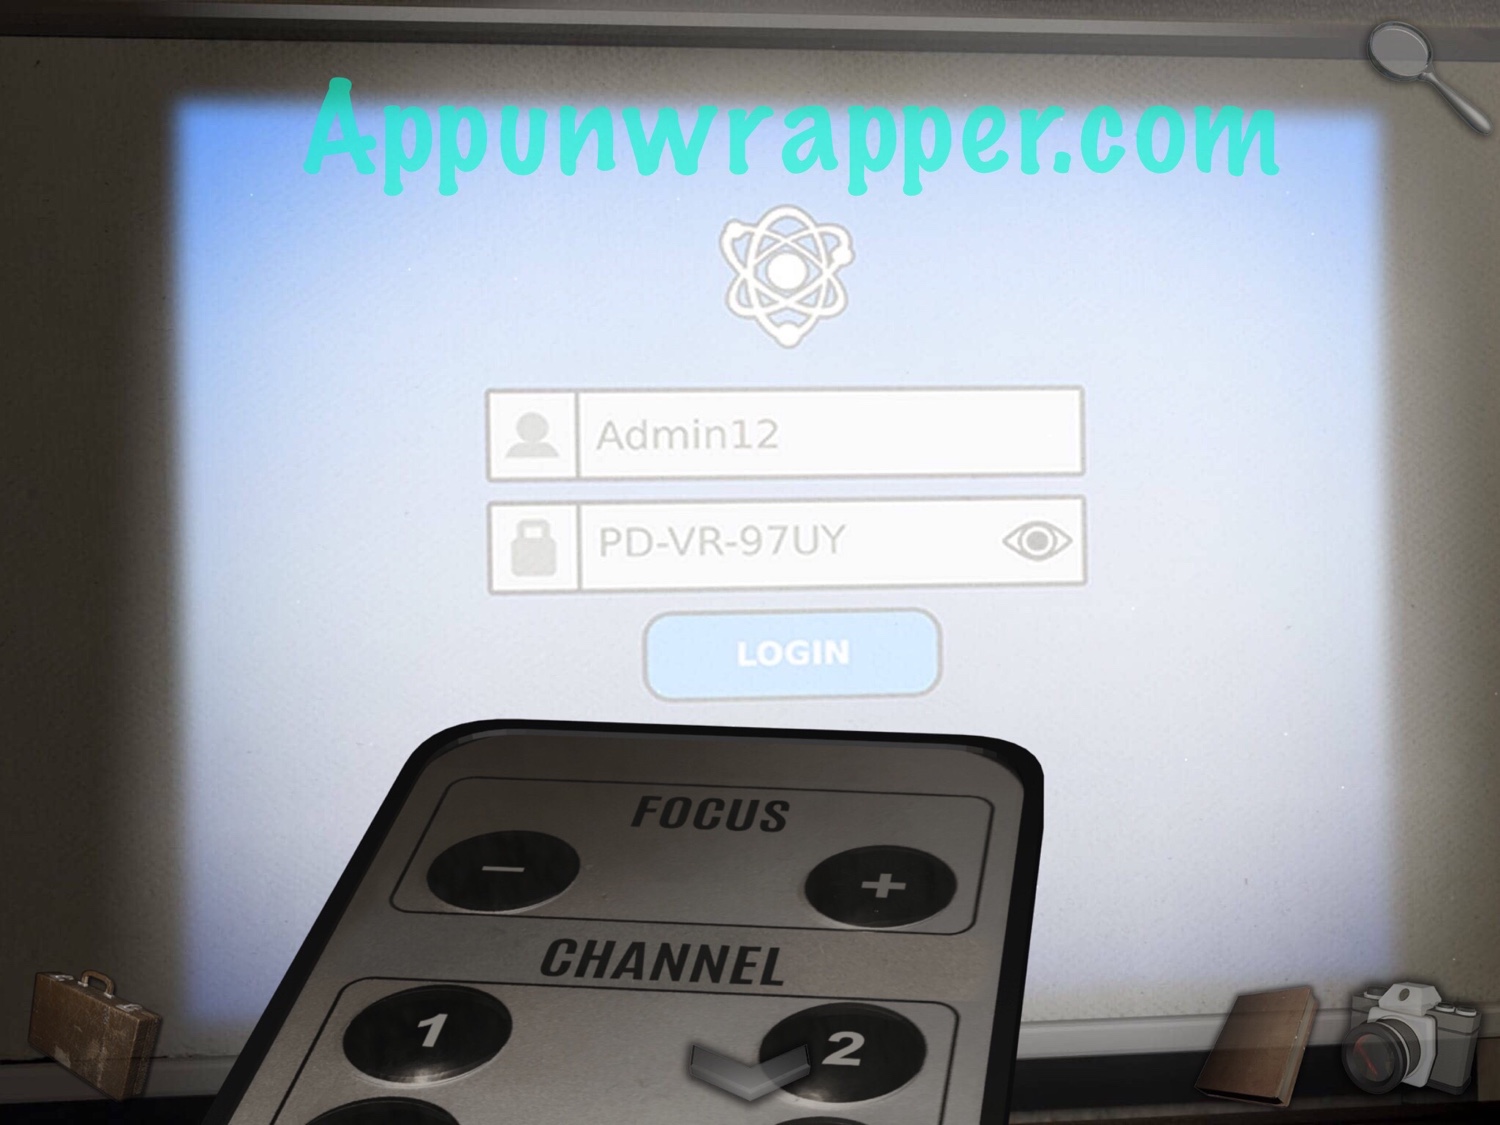
7. Use the projector remote with the projected image and then increase the focus until you can see the password. Take a photo.
8. Look at the books in the back. Take a photo of them. It’s a clue.
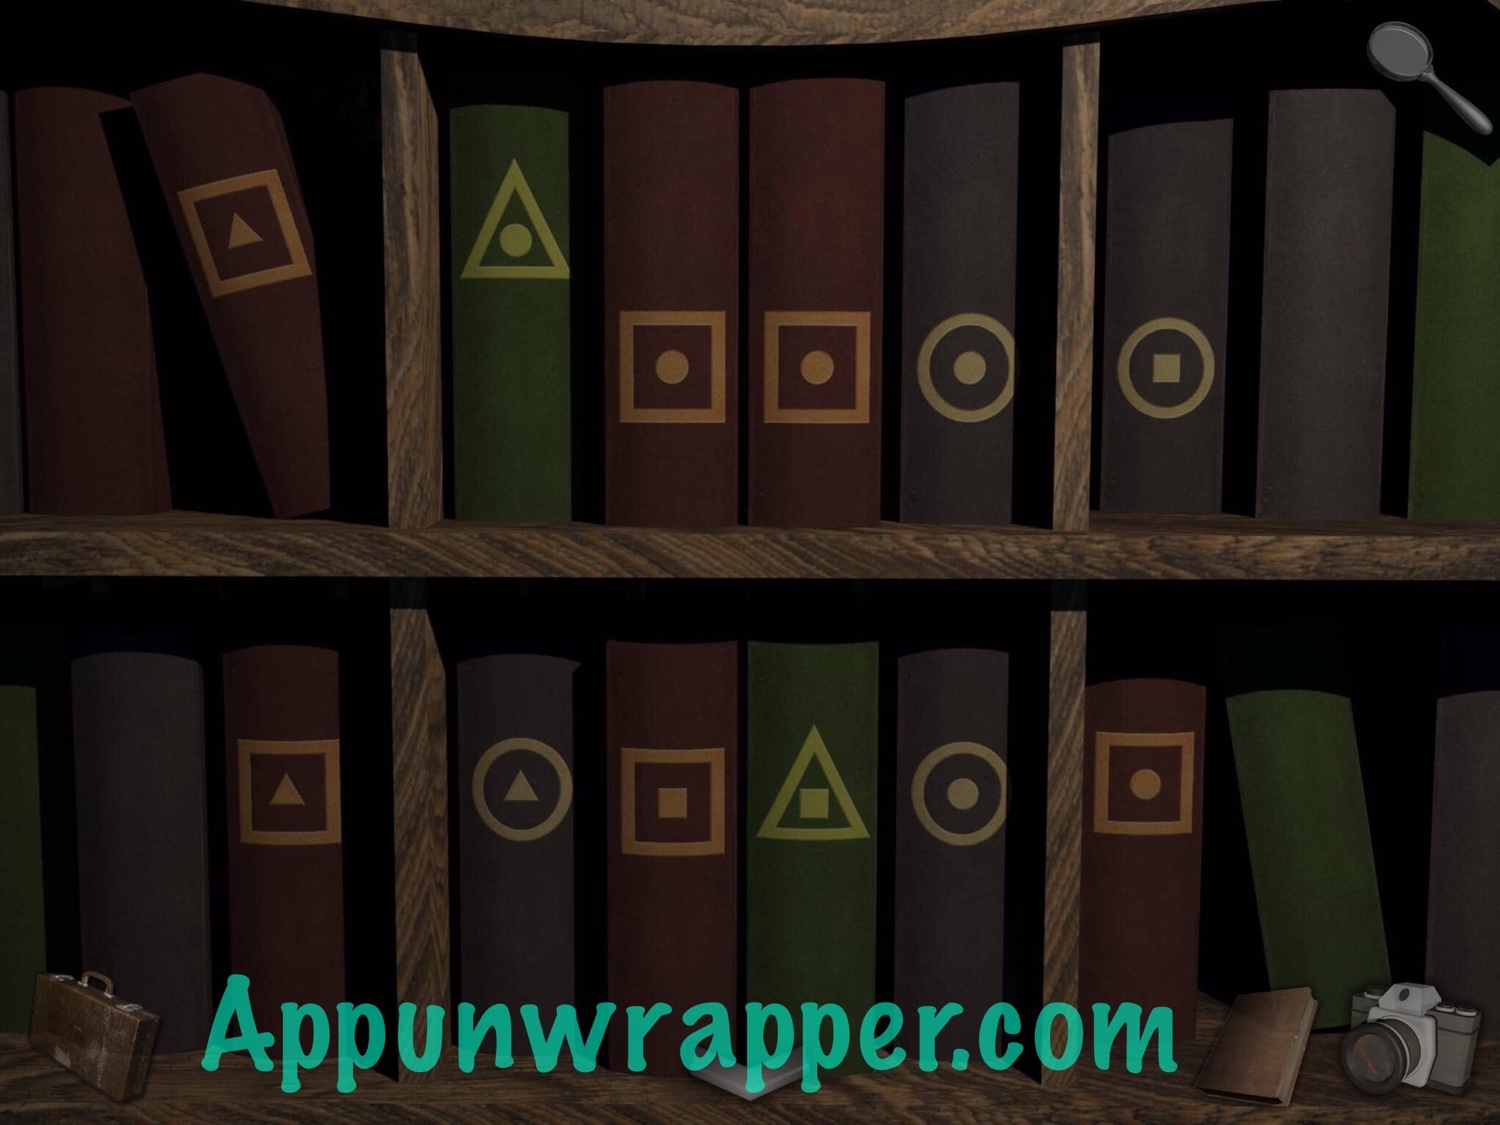
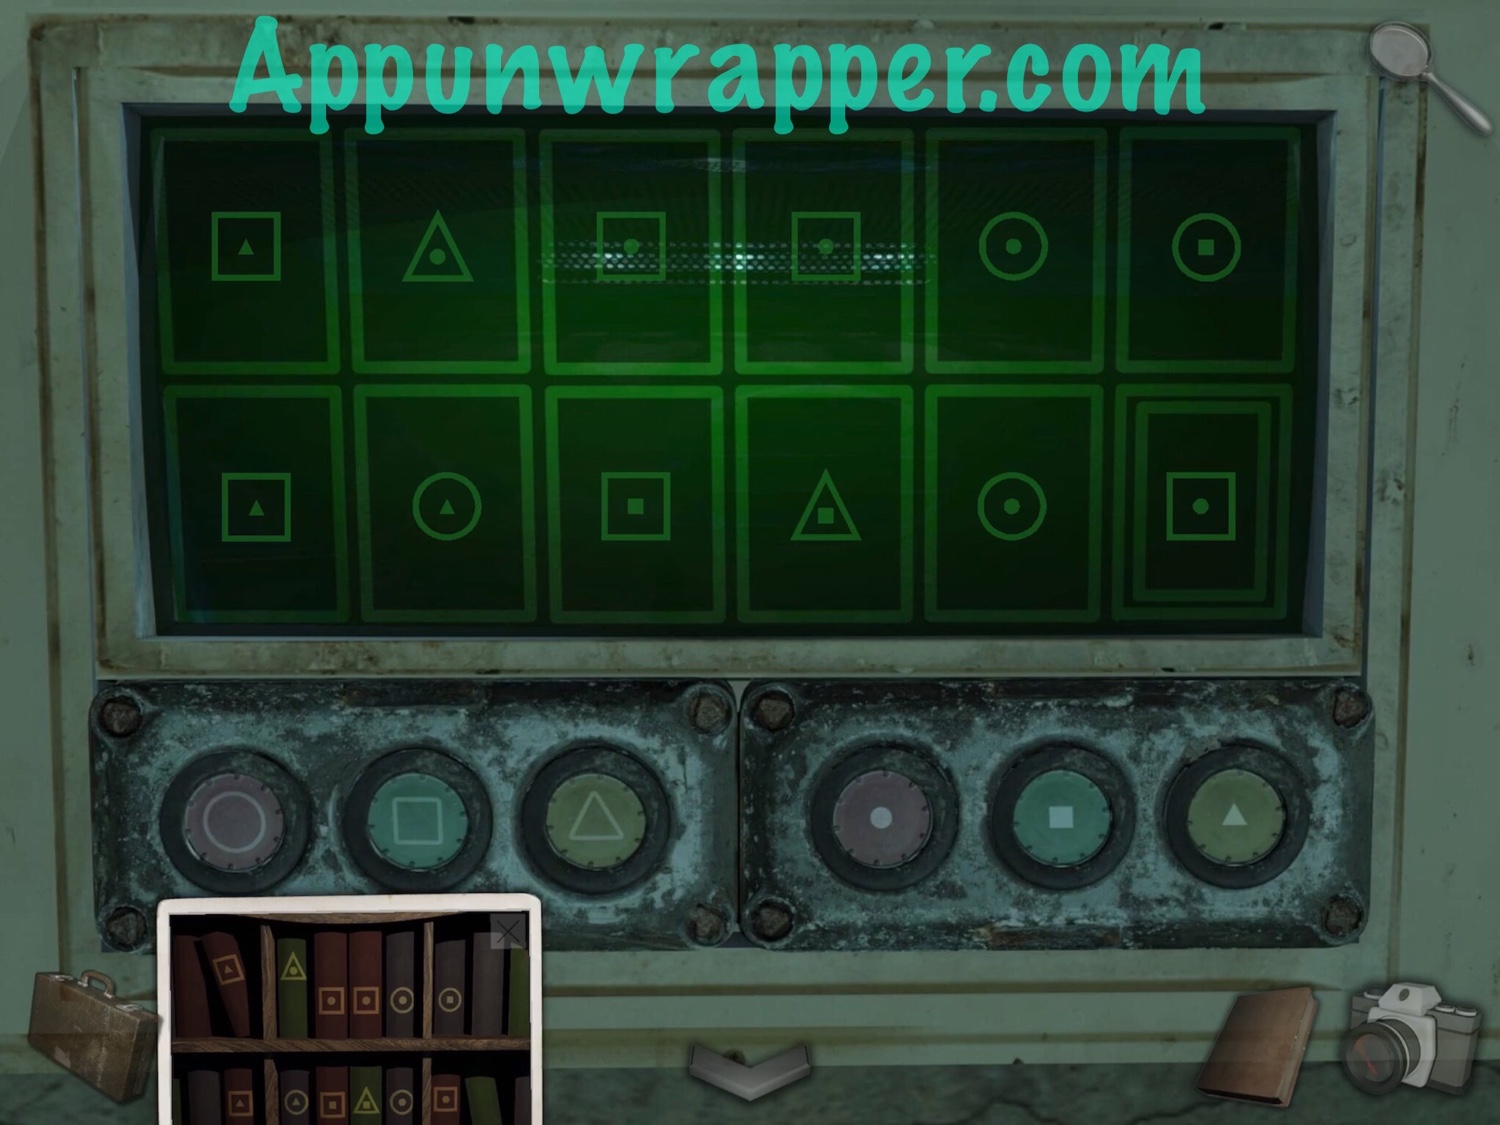
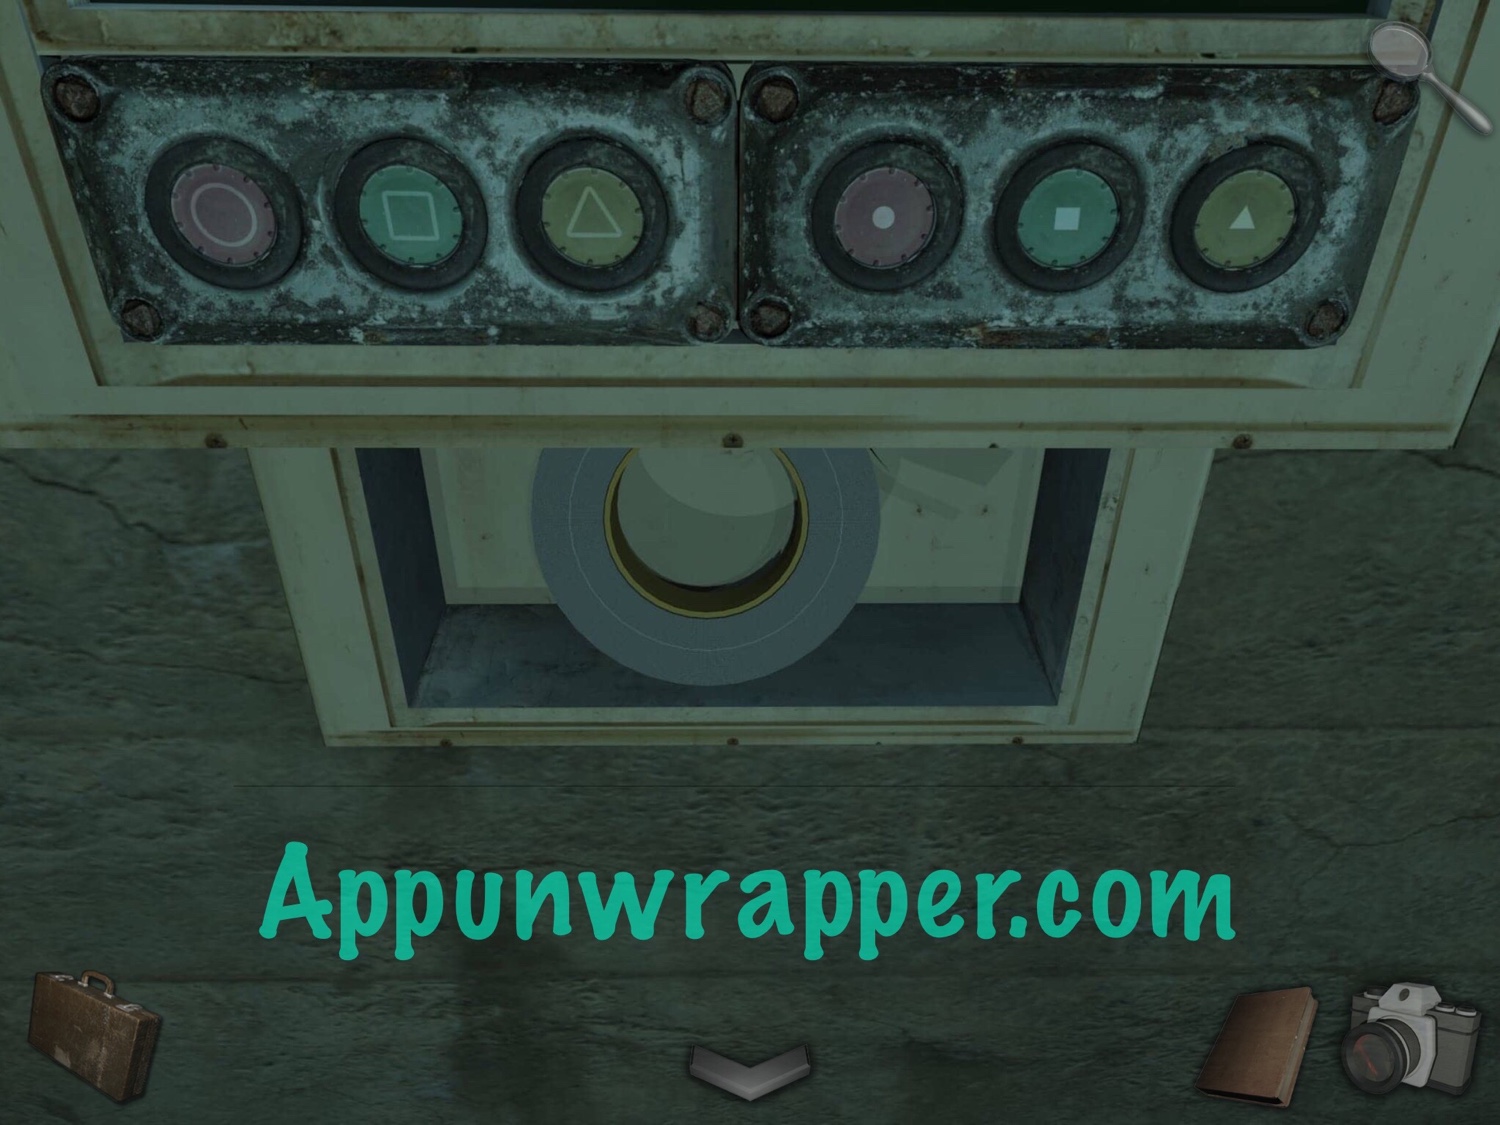
9. Leave the library. Go back one more screen and tap on the puzzle on the left wall. Use the clue from the books to solve it. For each cell, press one bigger shape and one smaller shape. Then take the duct tape.
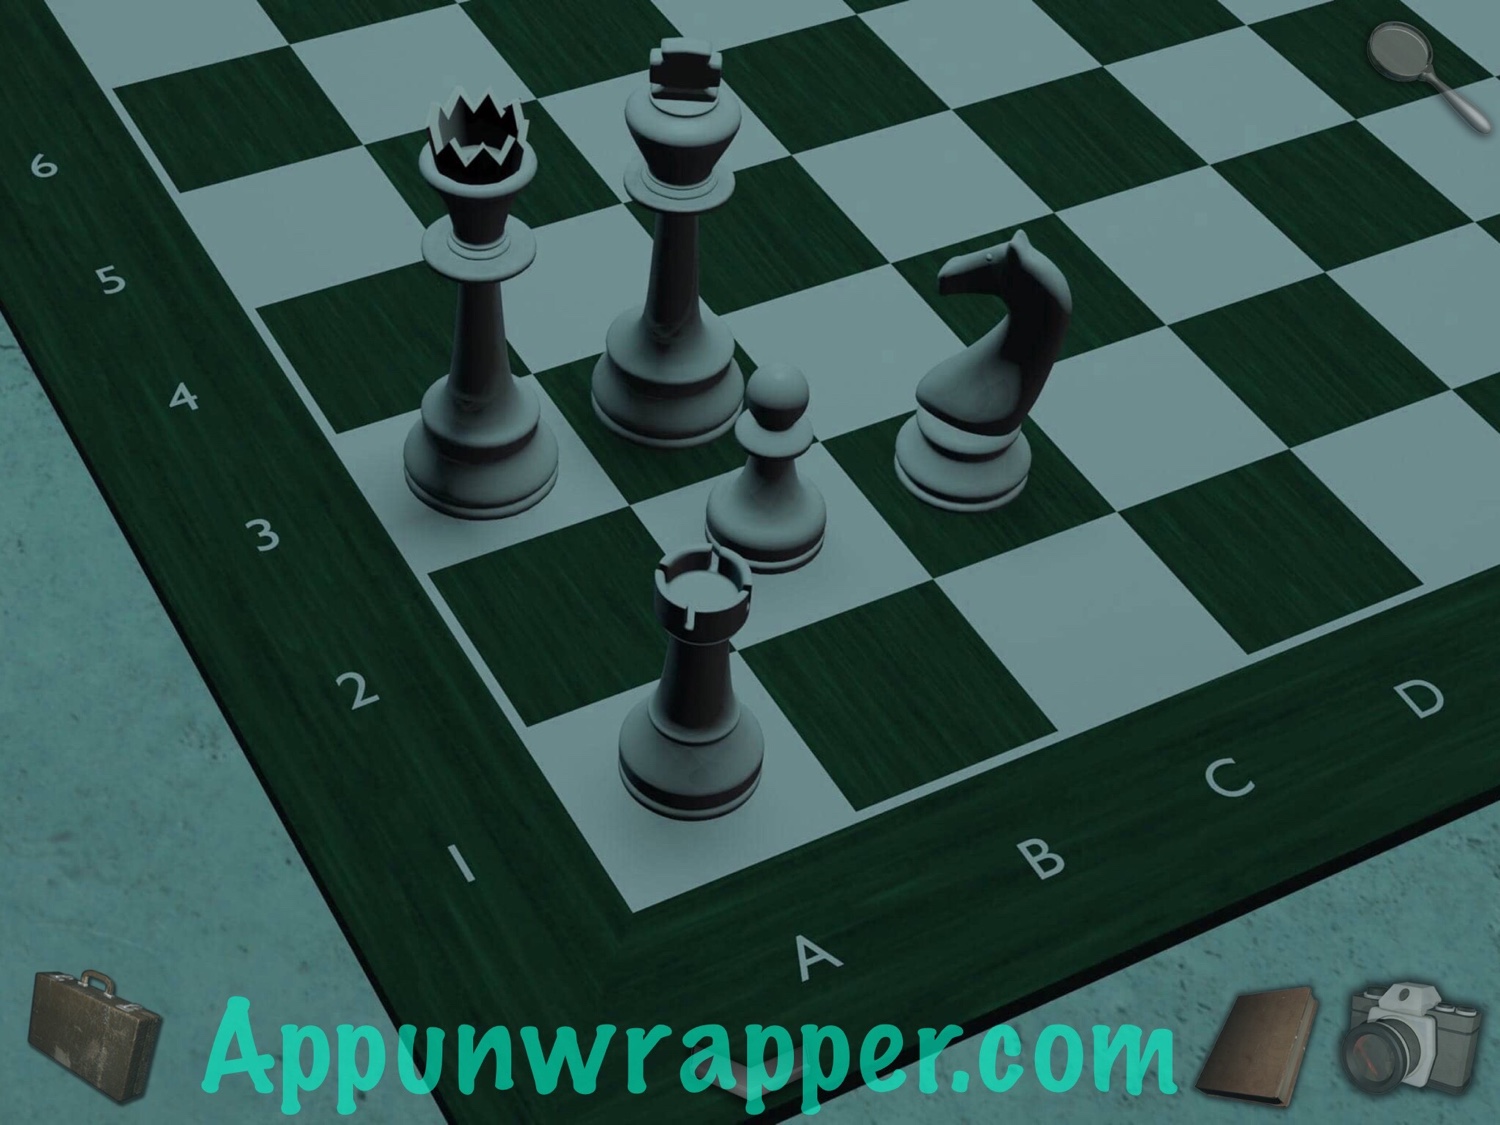
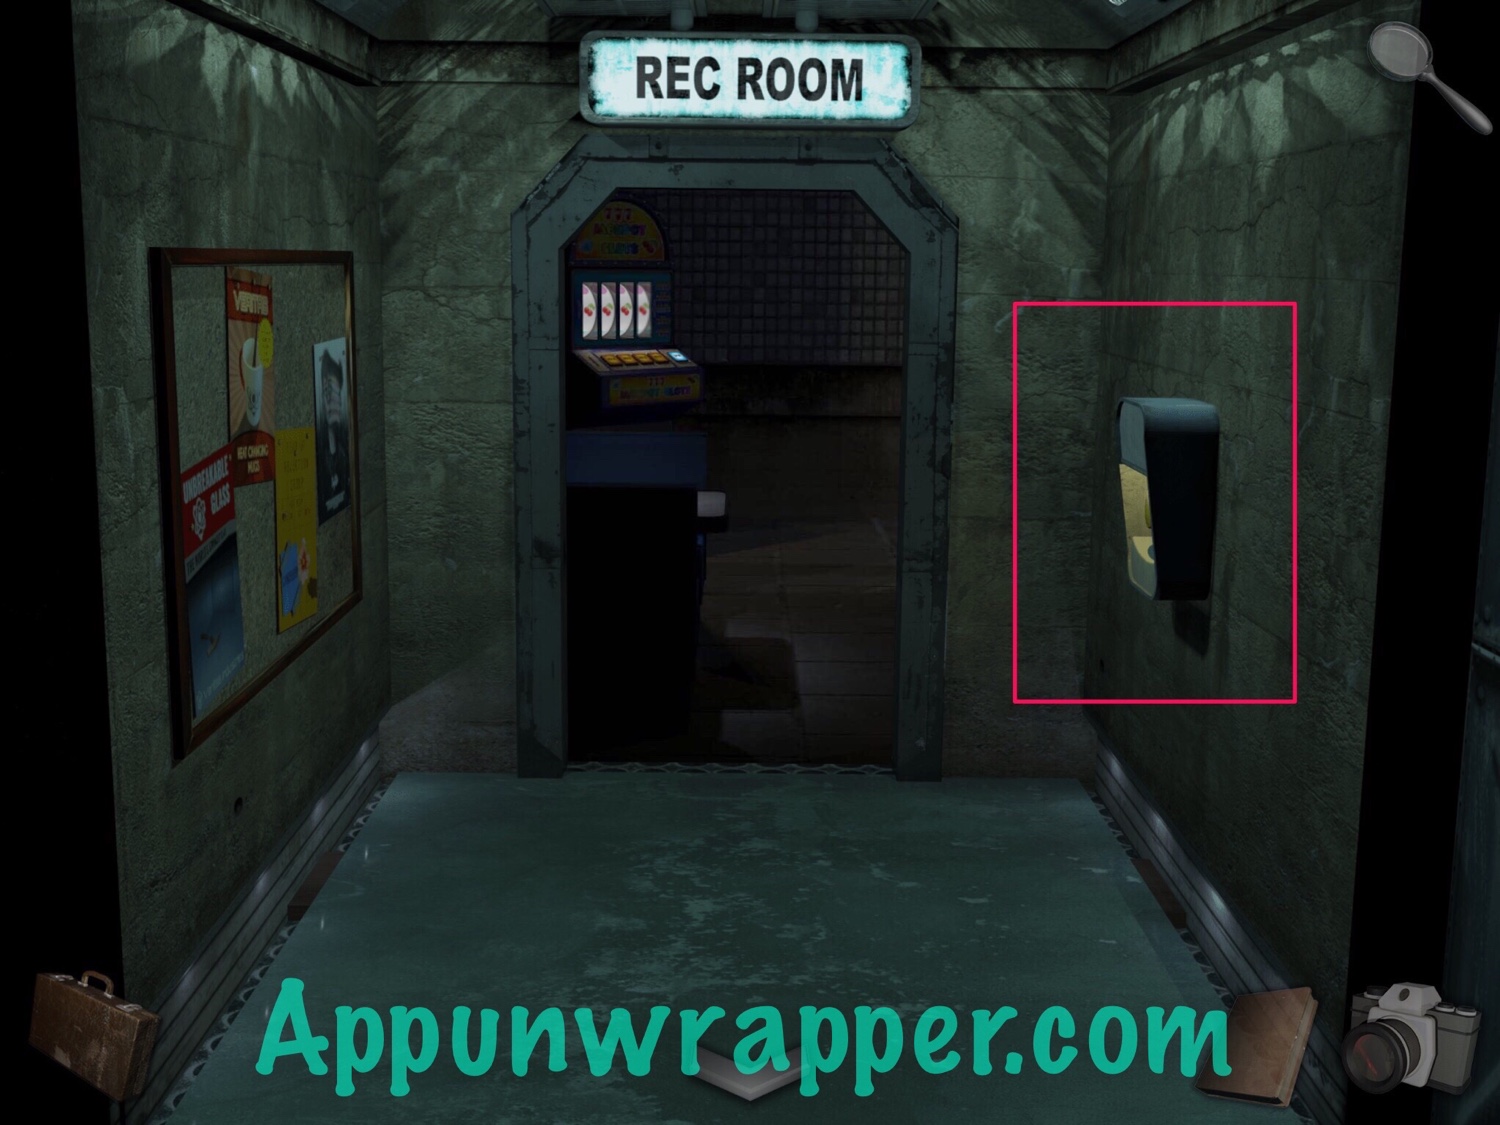
10. Go right towards the Rec Room. Ignore the yellow button for now, but remember where it is. Enter the Rec Room. Take a photo of the chess set.
11. Look at the card table. Pick up the metal disc and notice the puzzle box. There’s some letters on the lid of the box. Take a photo of them.

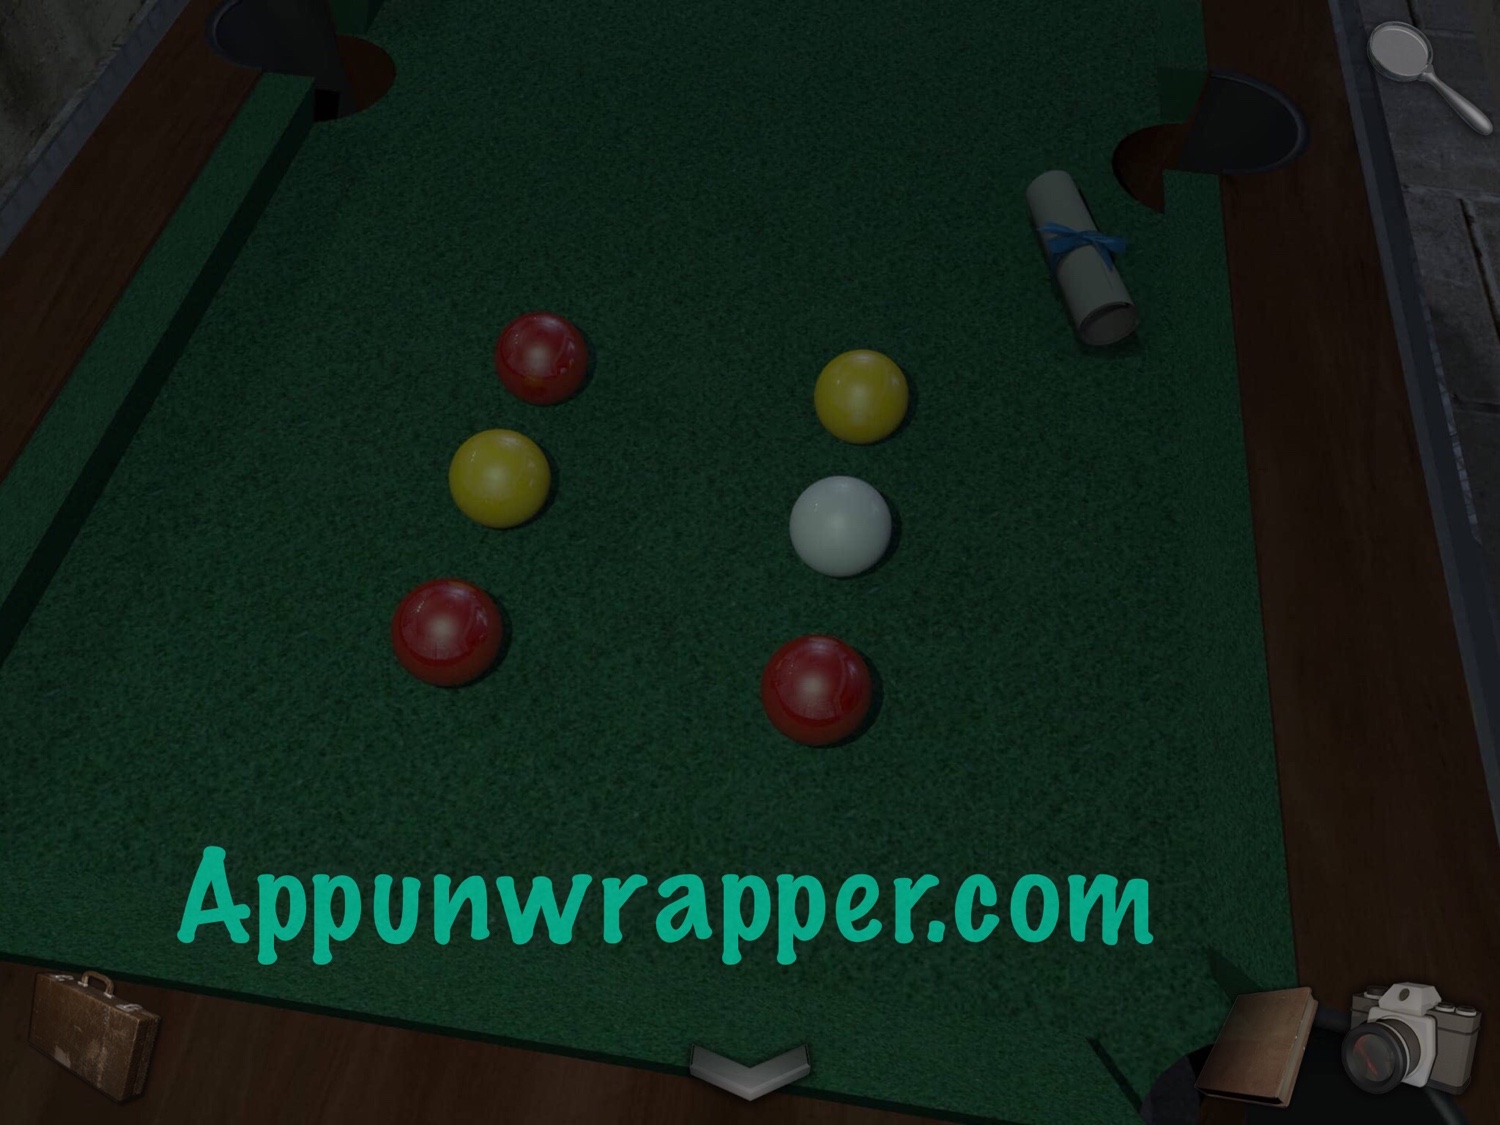
12. Go to the pool table in the back. Take a photo of the pool balls and read note 2/16.
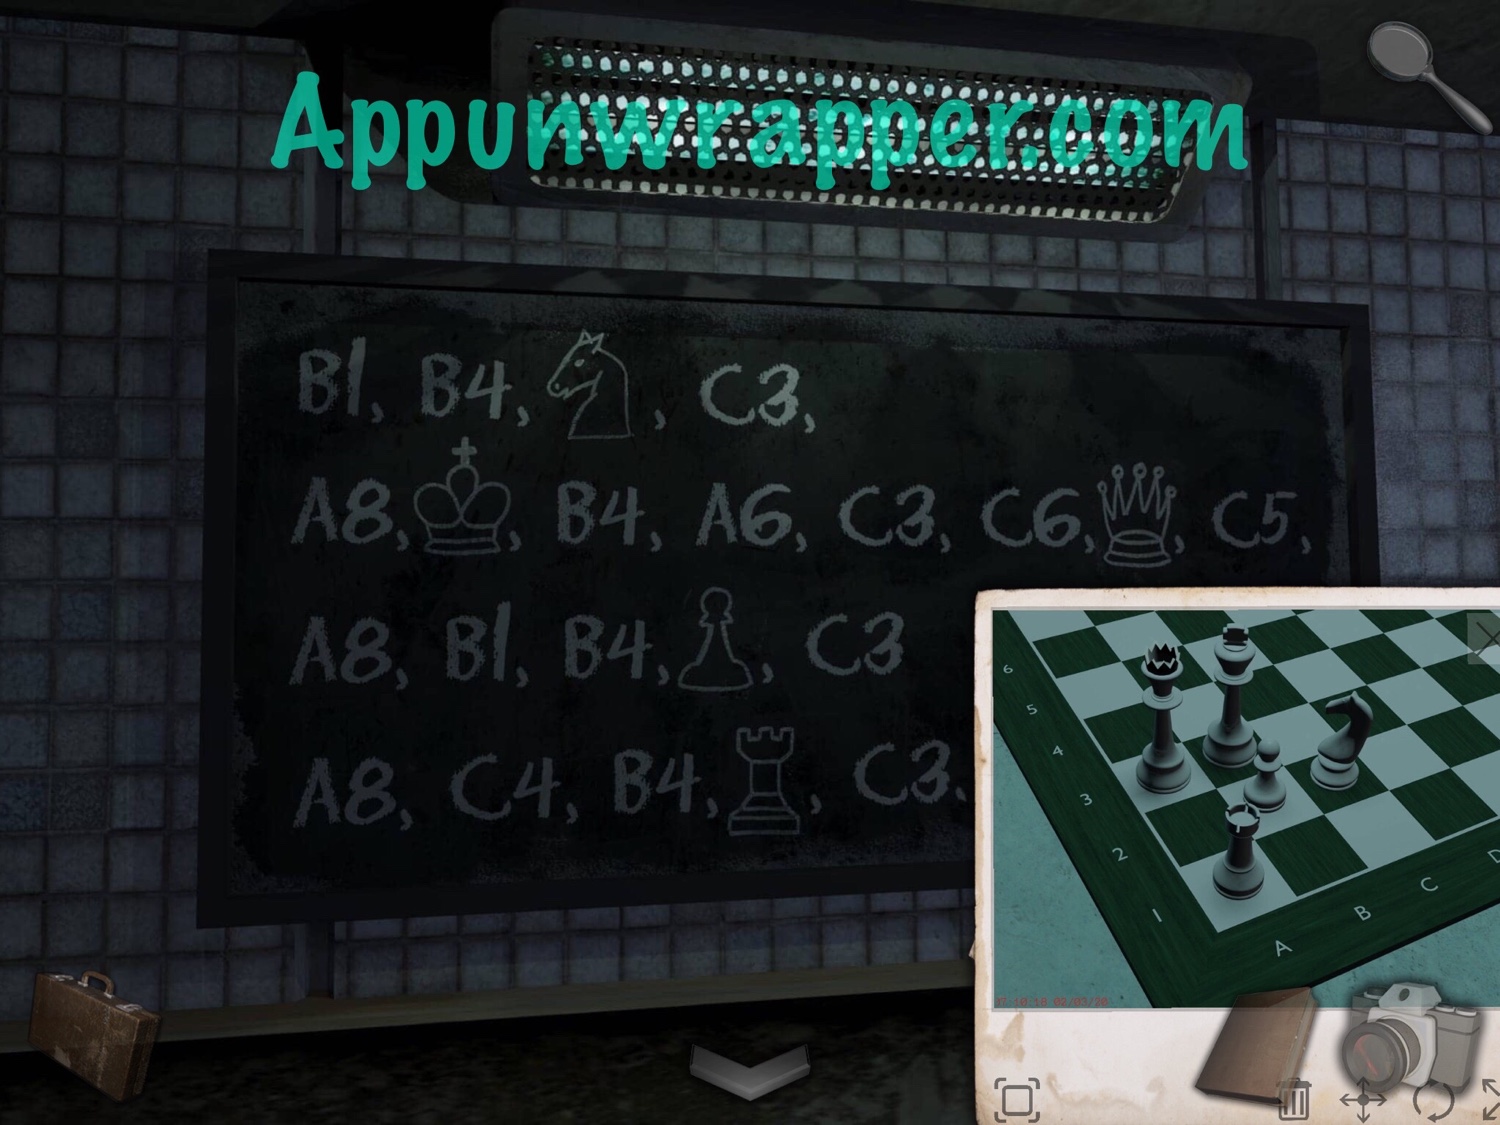
13. Look at the blackboard. Take out your photo of the chess game and use it to fill in the blanks on the board.
Knight = C2
King = B3
Queen = A3
Pawn = B2
Rook = A1
Now put everything together and you get:
B1, B4, C2, C3, A8, B3, B4, A6, C3, C6, A3, C5, A8, B1, B4, B2, C3, A8, C4, B4, A1, C3
We’ll be using that in a little bit.
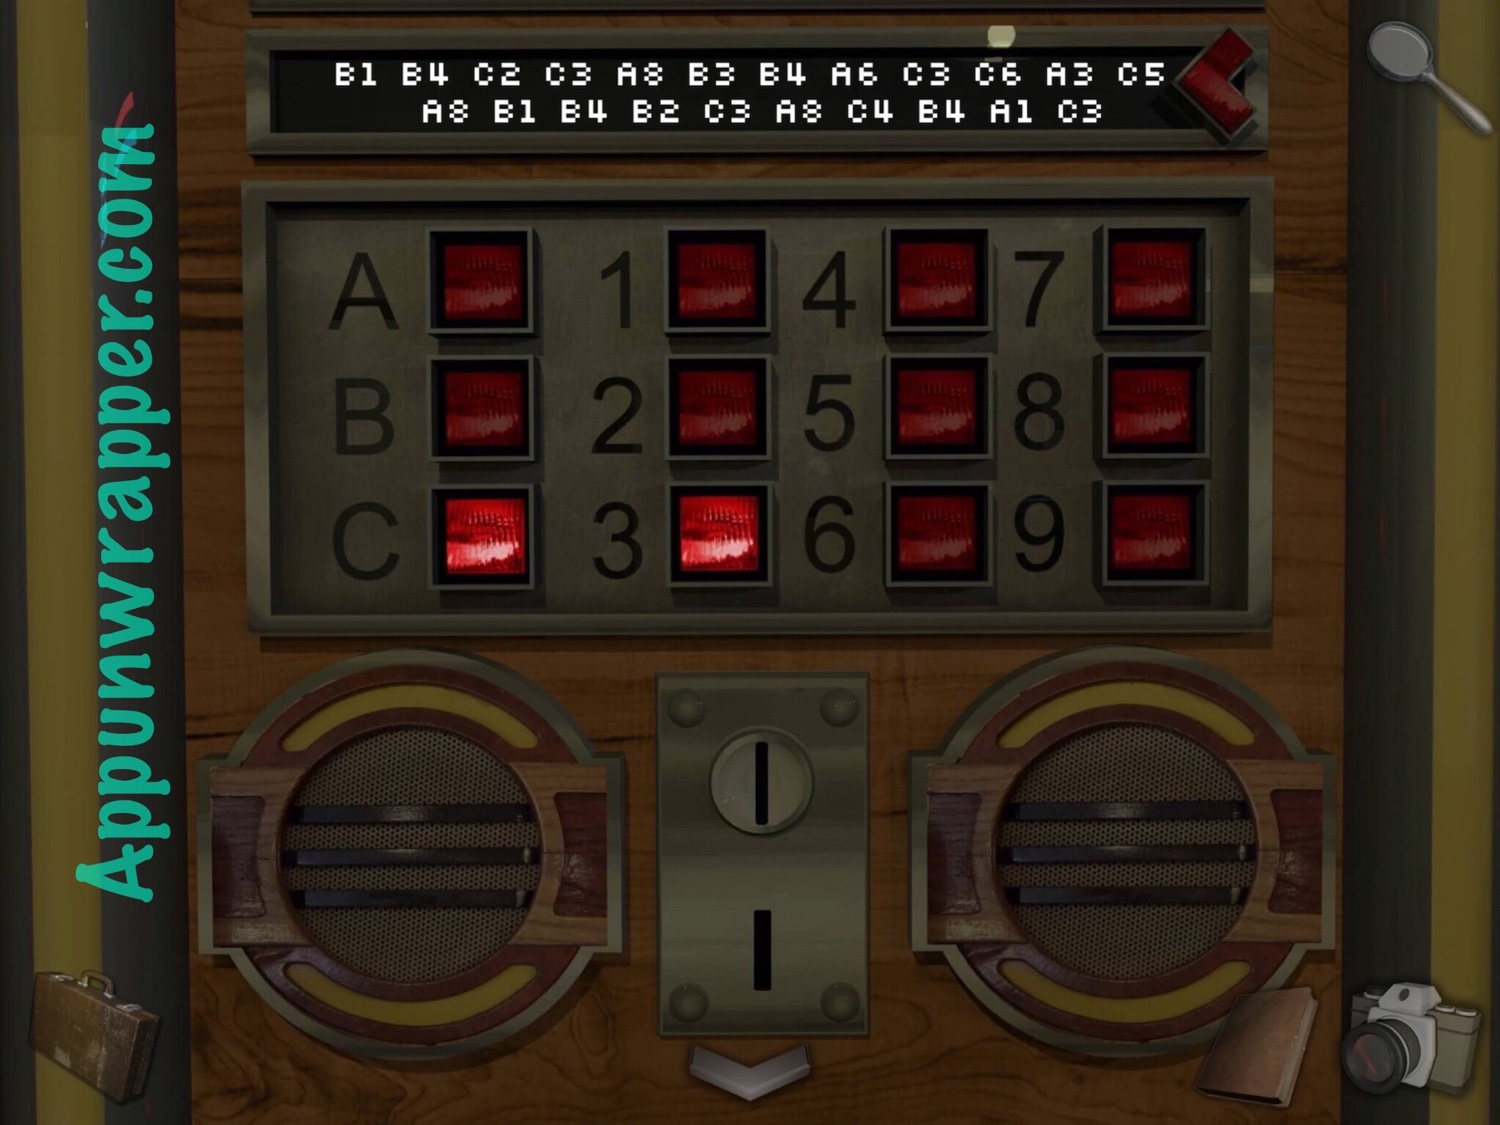
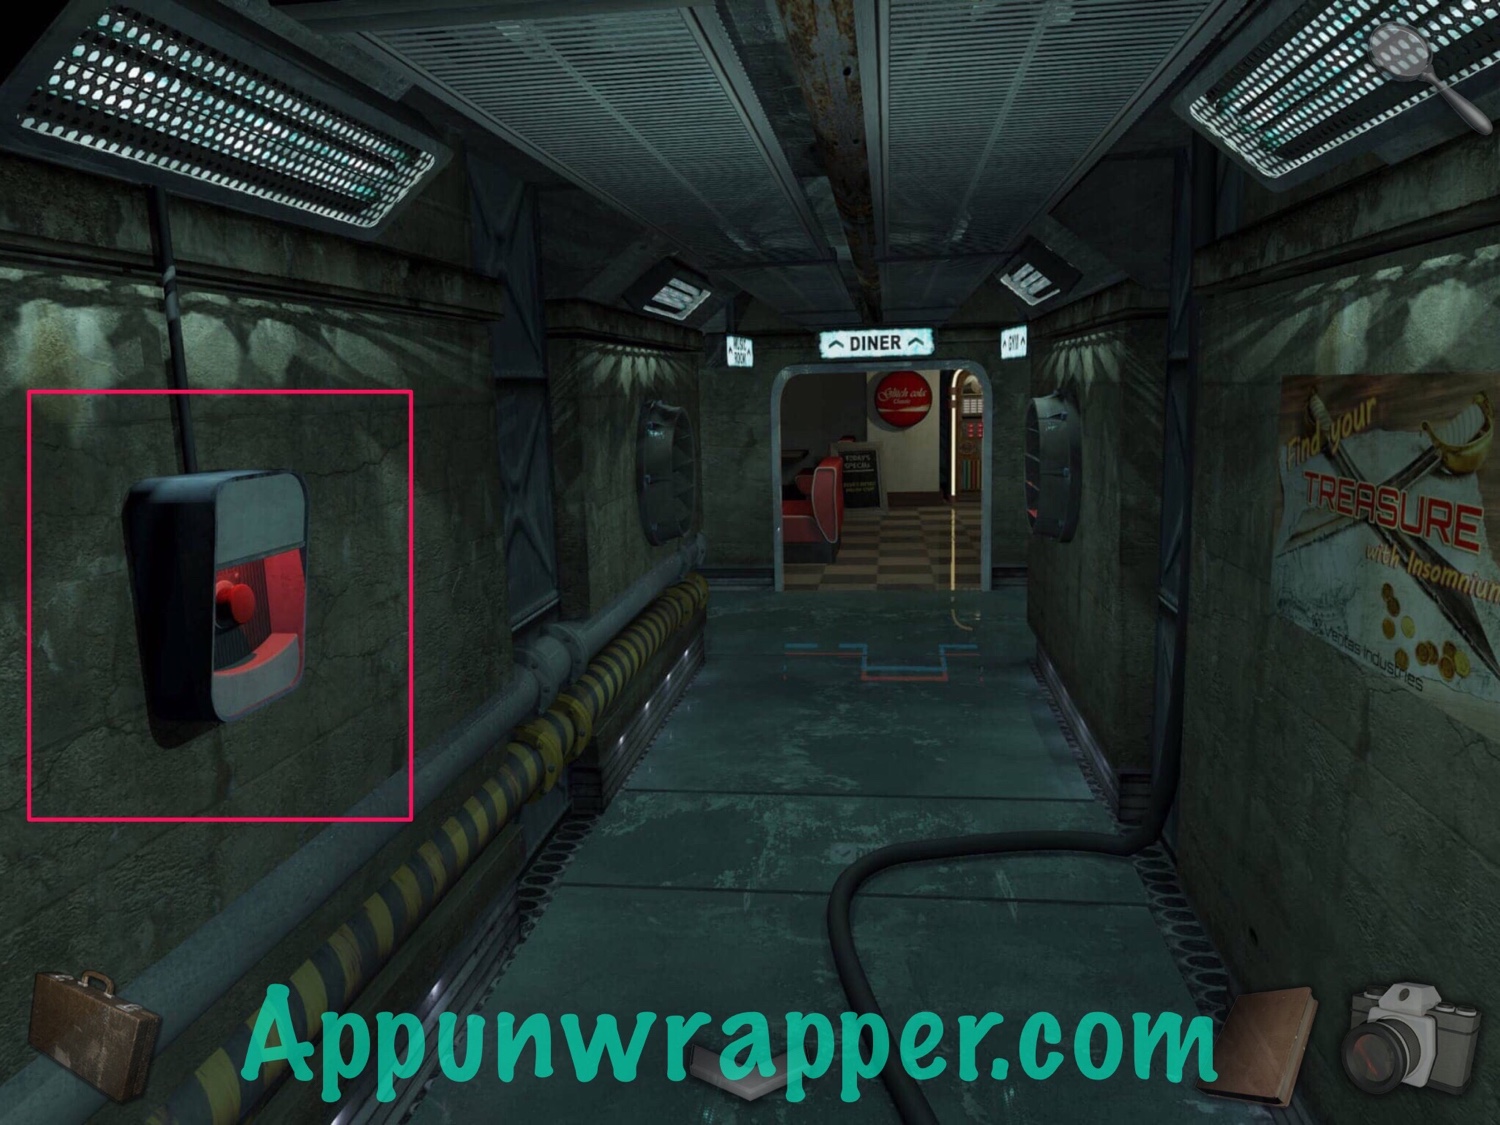
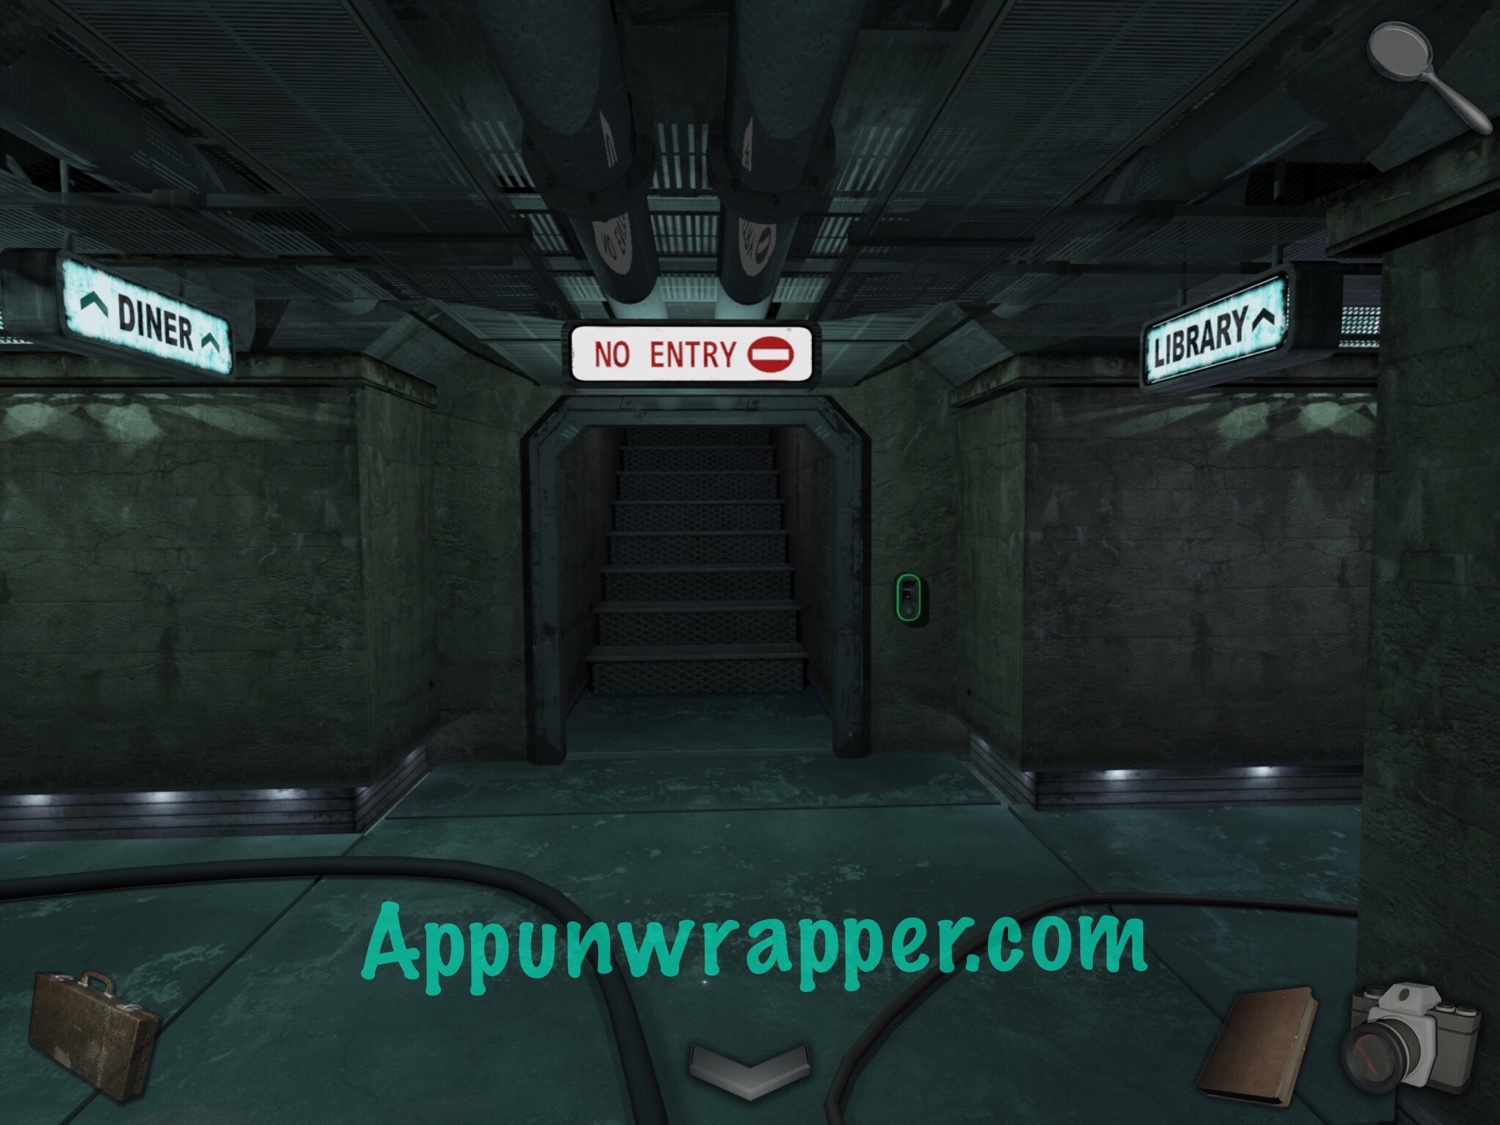
14. Head back a few screens to the NO ENTRY door. Head left towards the Diner. Notice the red button to the left but ignore it for now. Enter the Diner. Go to the jukebox and insert a coin. Now we’re going to use the sequence we got from the chess clues. Press the buttons so you get:
B1, B4, C2, C3, A8, B3, B4, A6, C3, C6, A3, C5, A8, B1, B4, B2, C3, A8, C4, B4, A1, C3
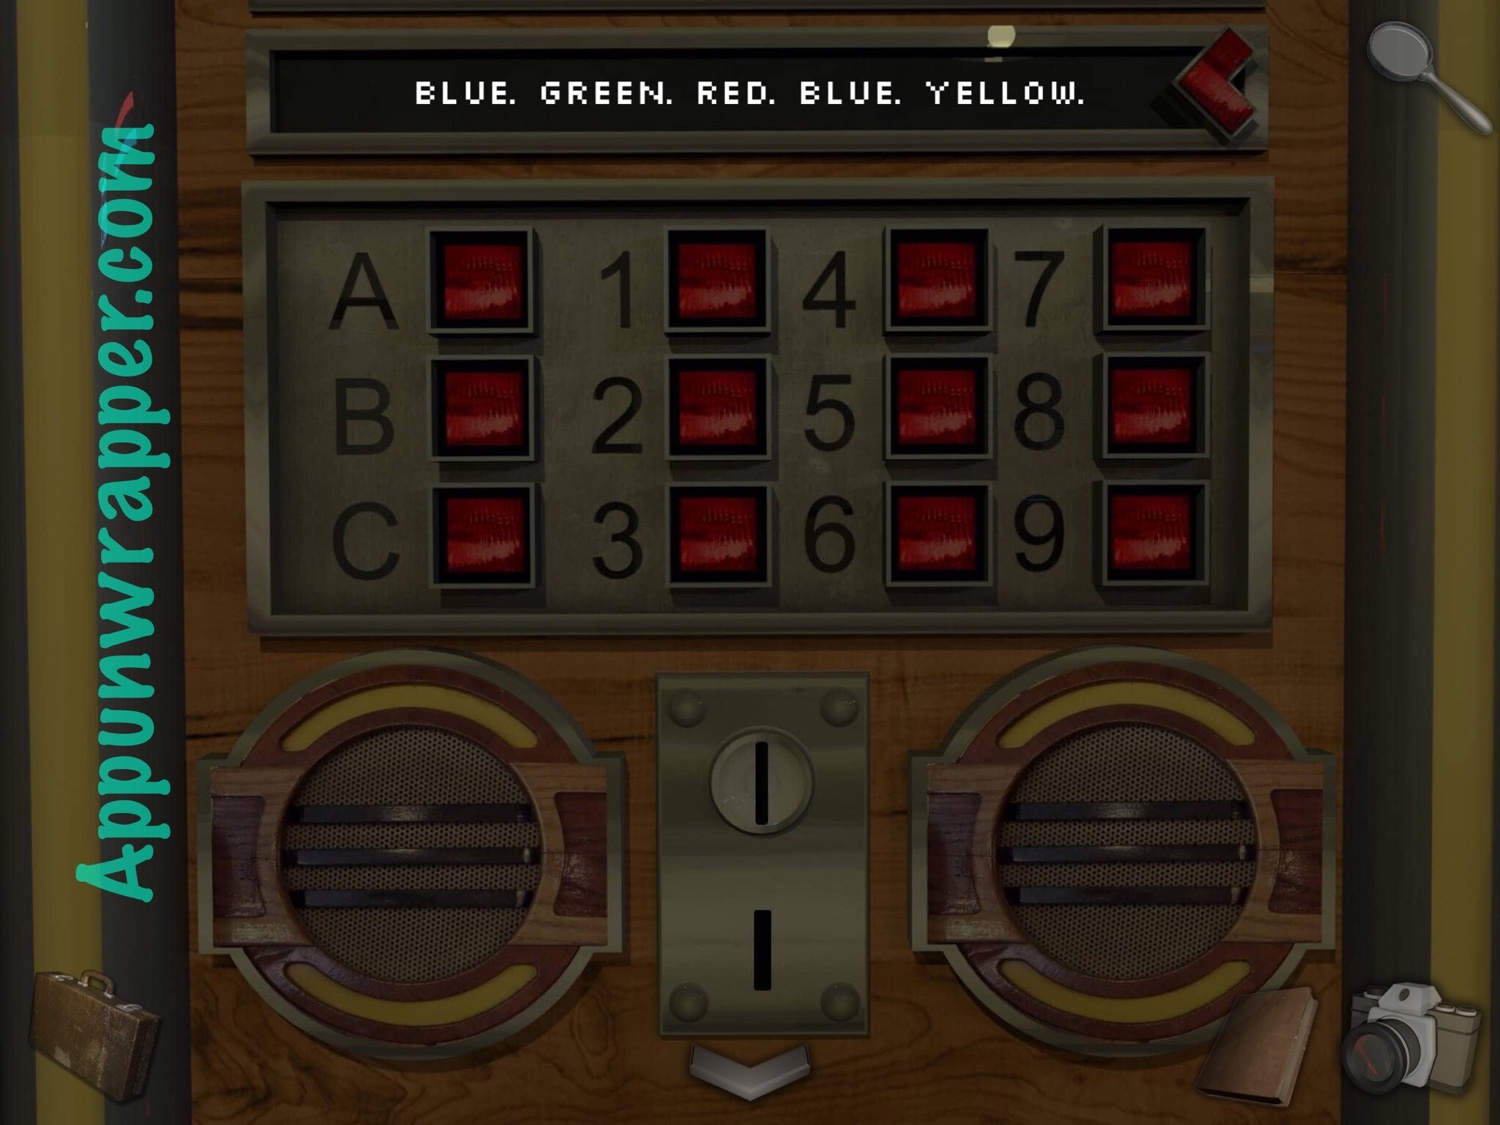
Then the jukebox will give you the clue:
BLUE, GREEN, RED, BLUE, YELLOW
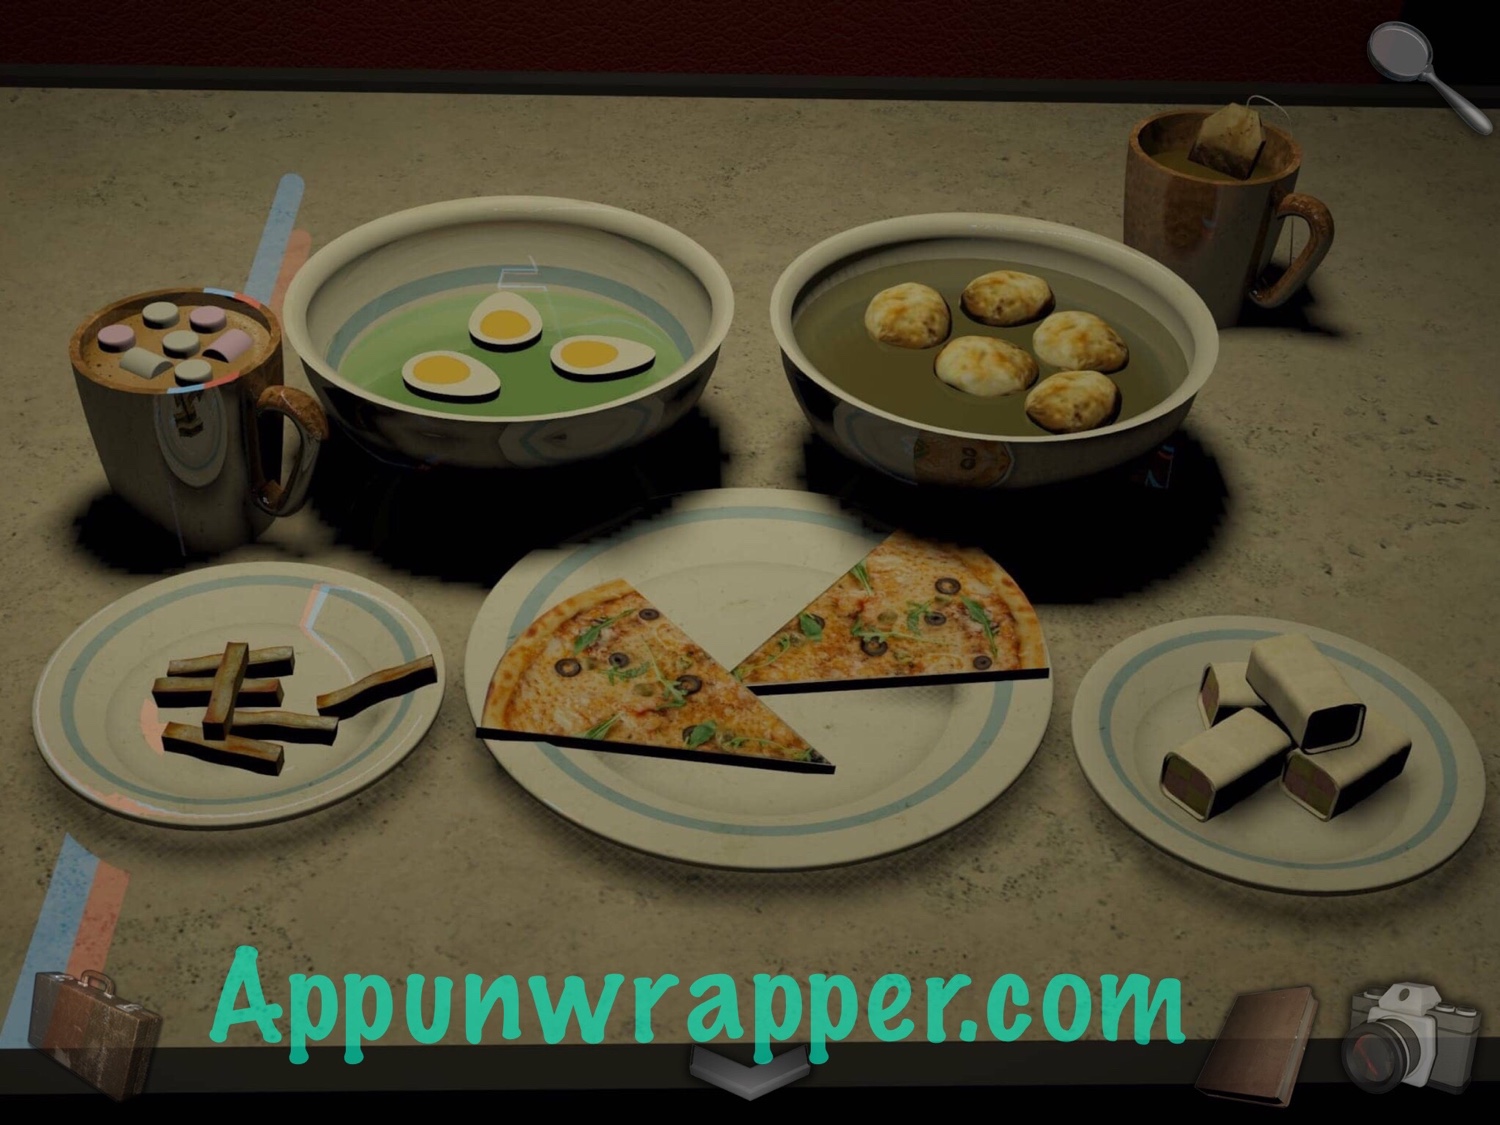
15. Take a photo of the food on the table.
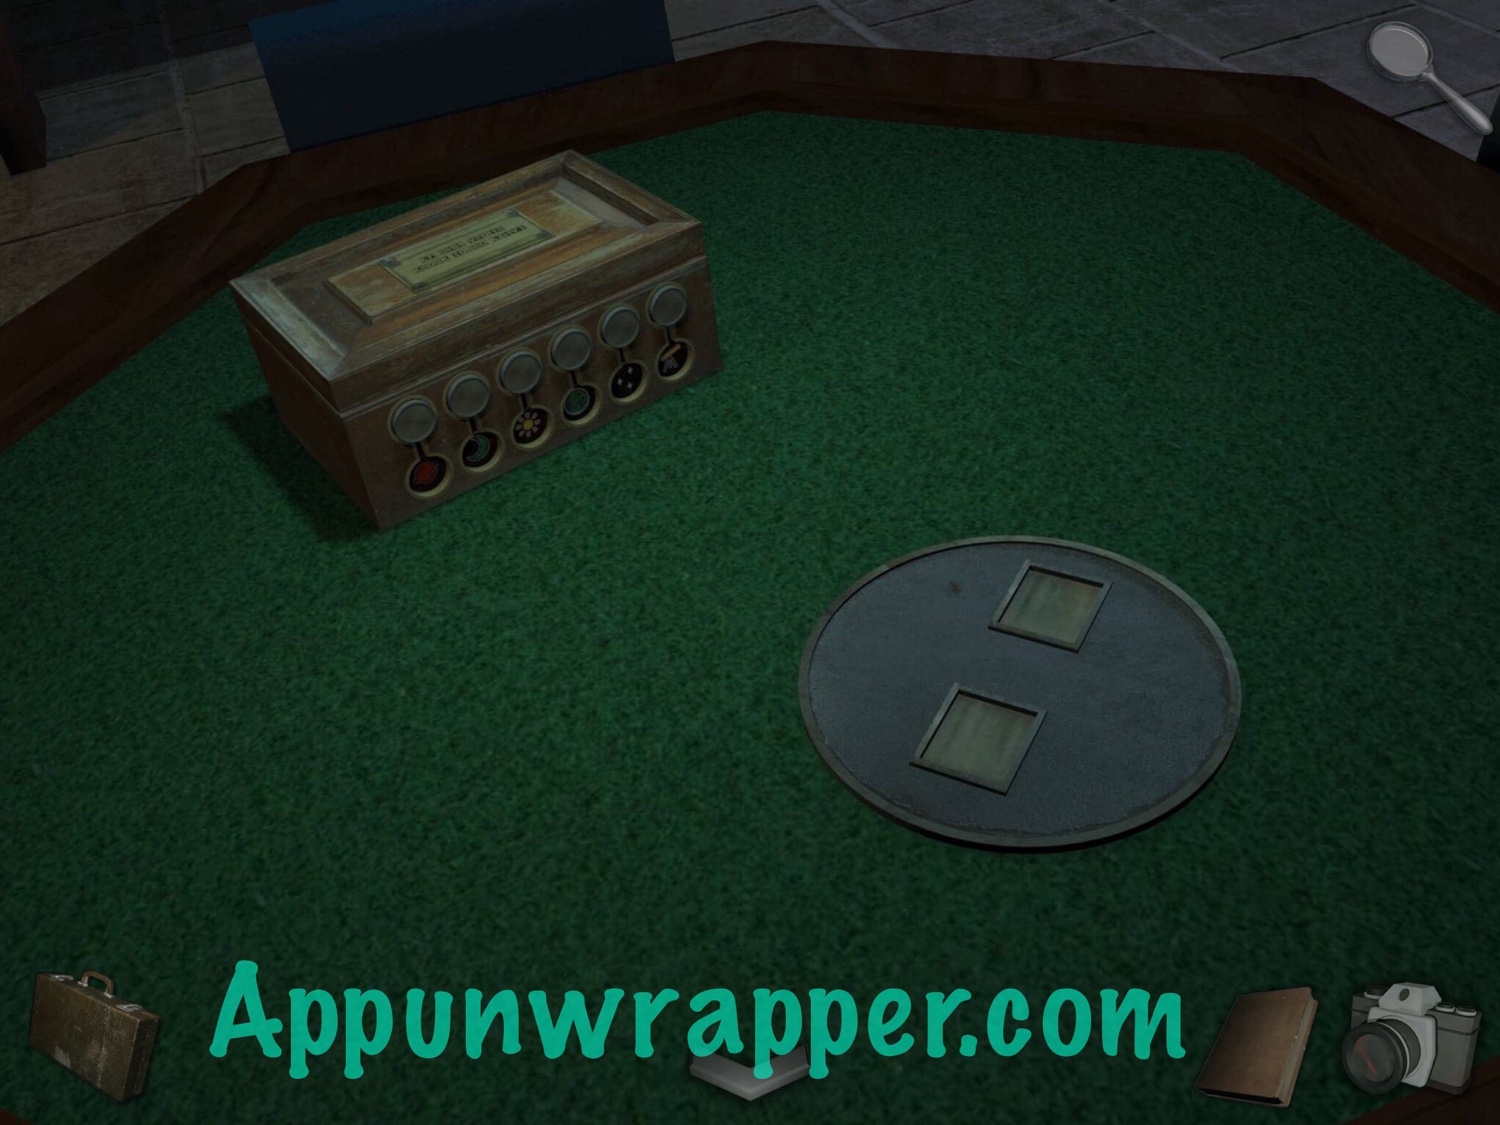
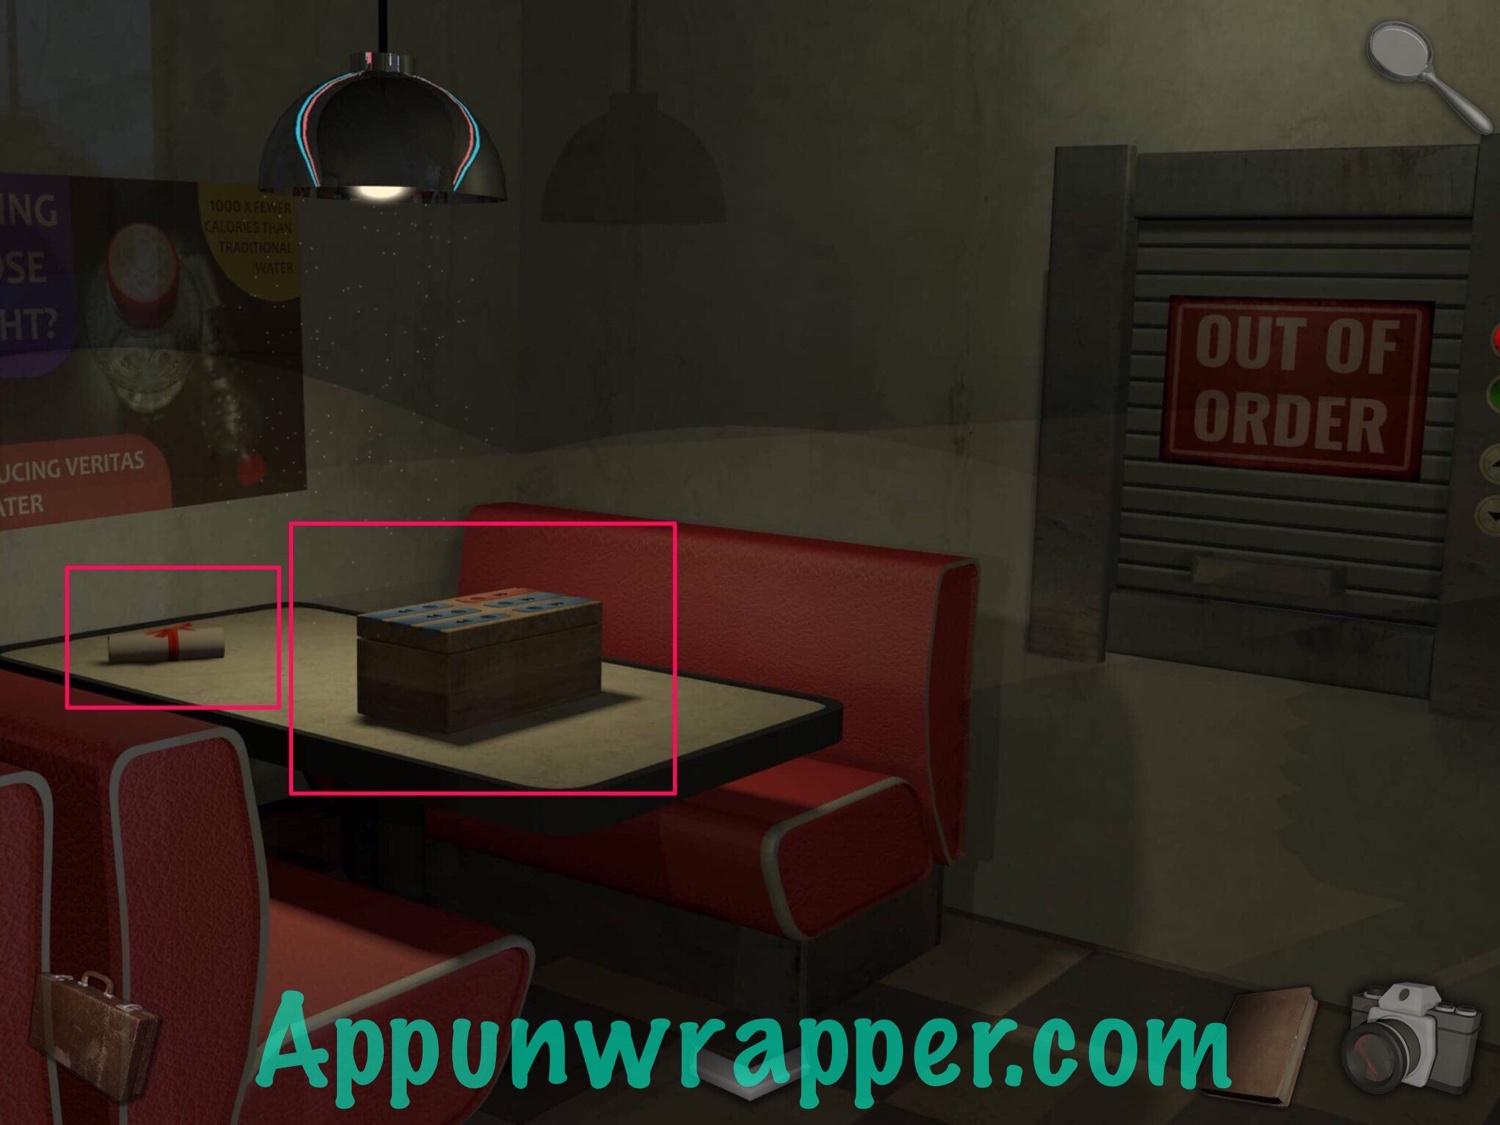
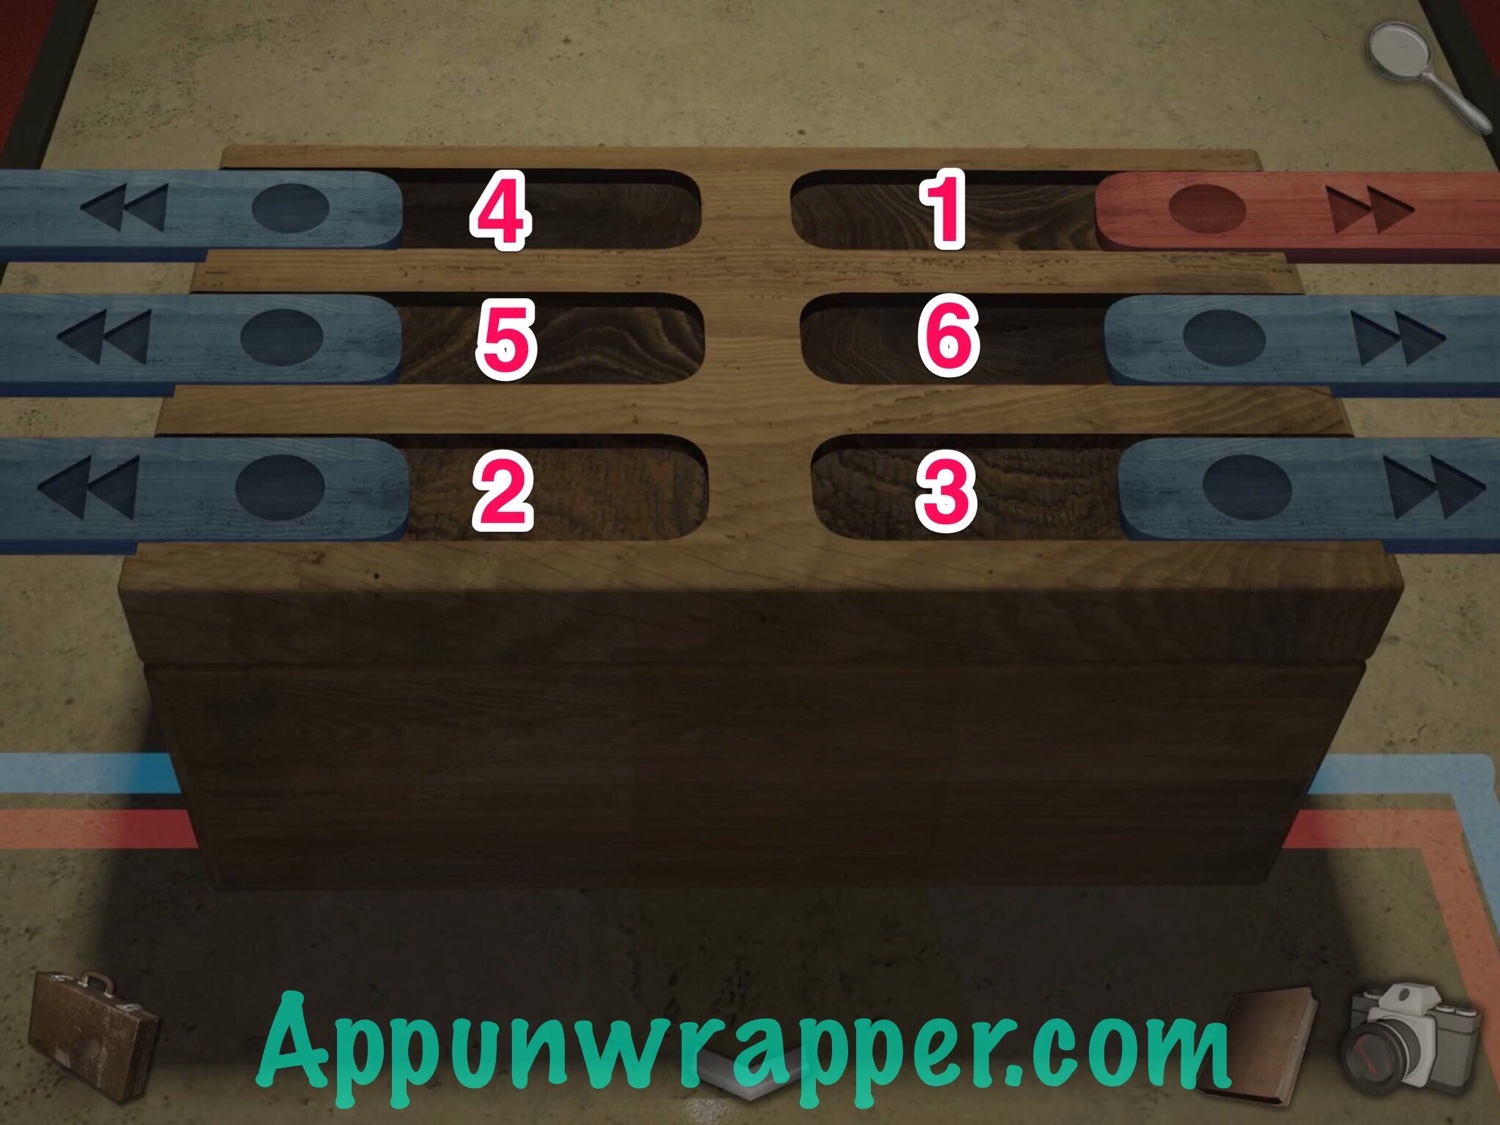
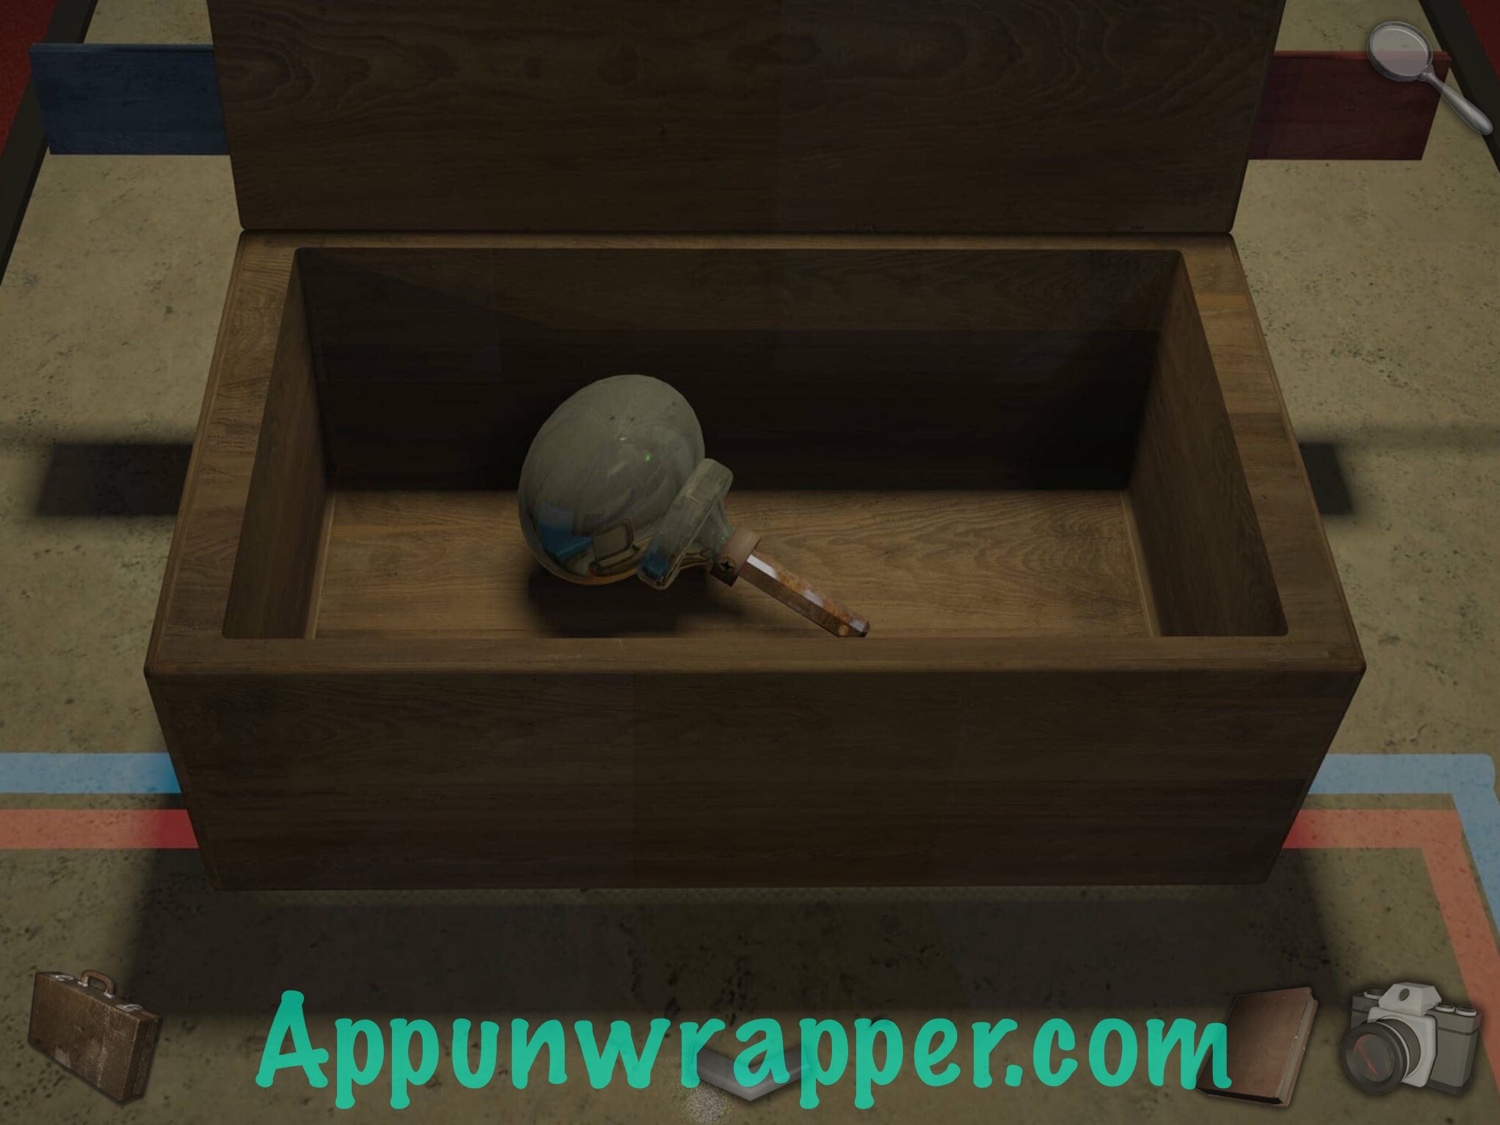
16. Look at the other table further back. Read note 3/16 and open the box on the table using trial and error. You can follow my order in the photo below. Then take the doorknob.
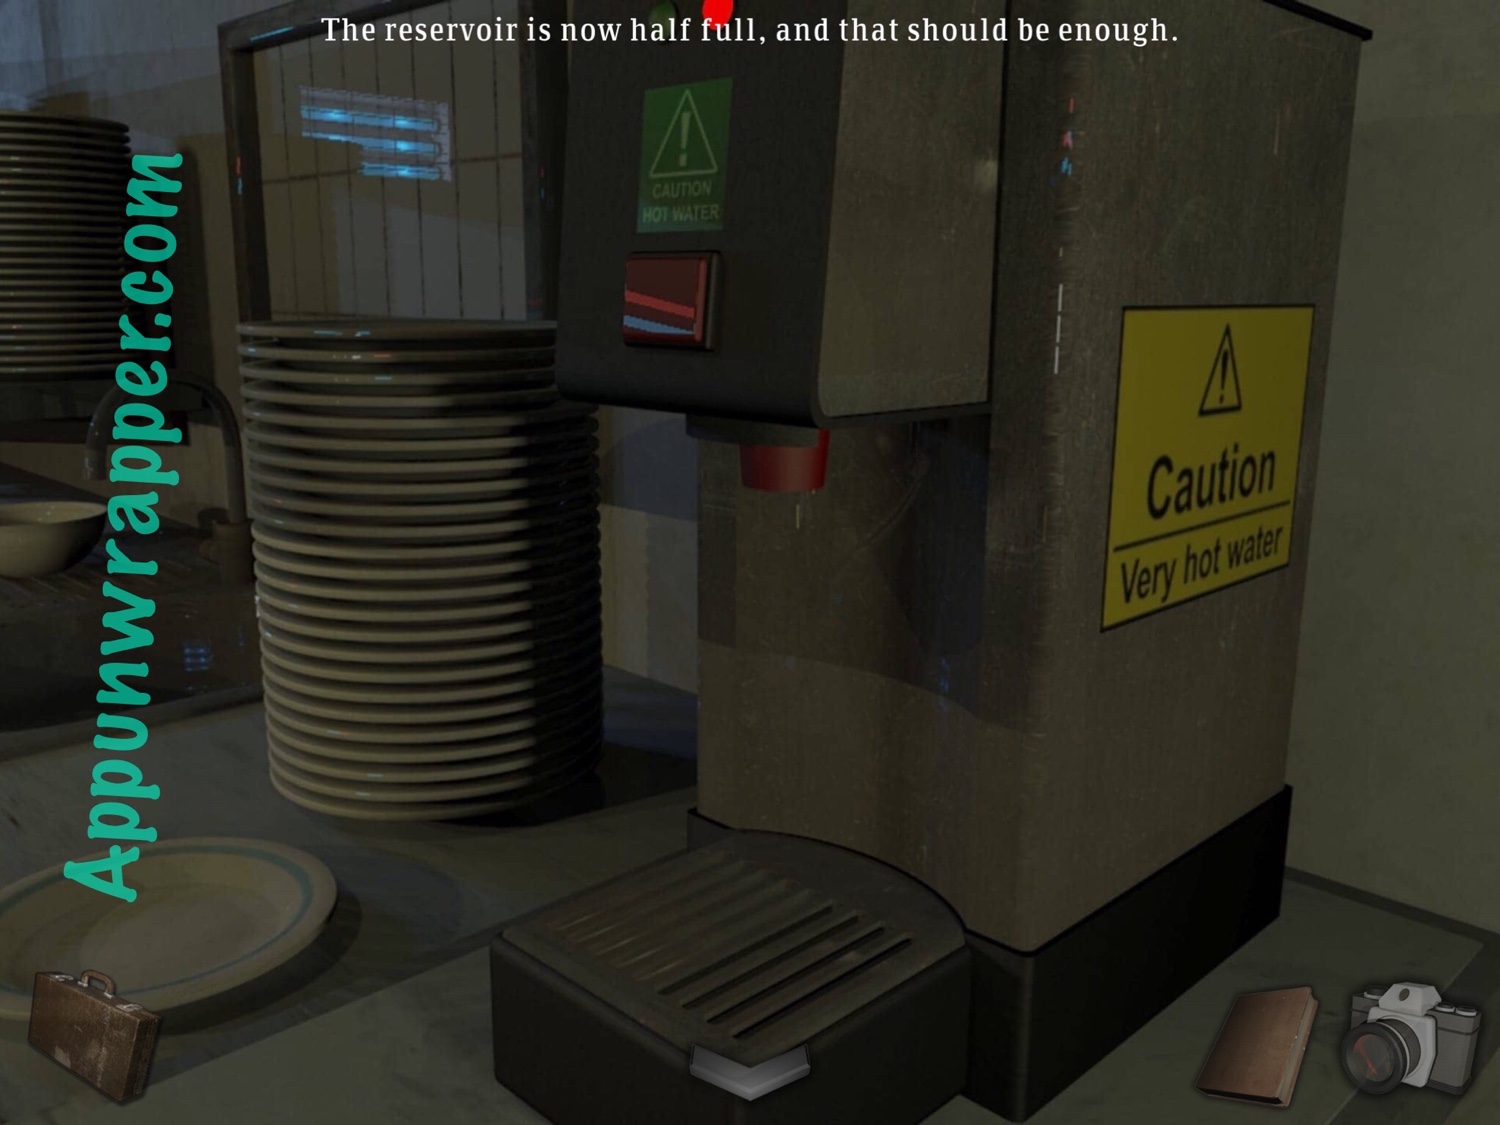
17. Now, turn around to the sink and coffee machine. We still need a mug, but you can squeeze the water from the sponge into the coffee machine.
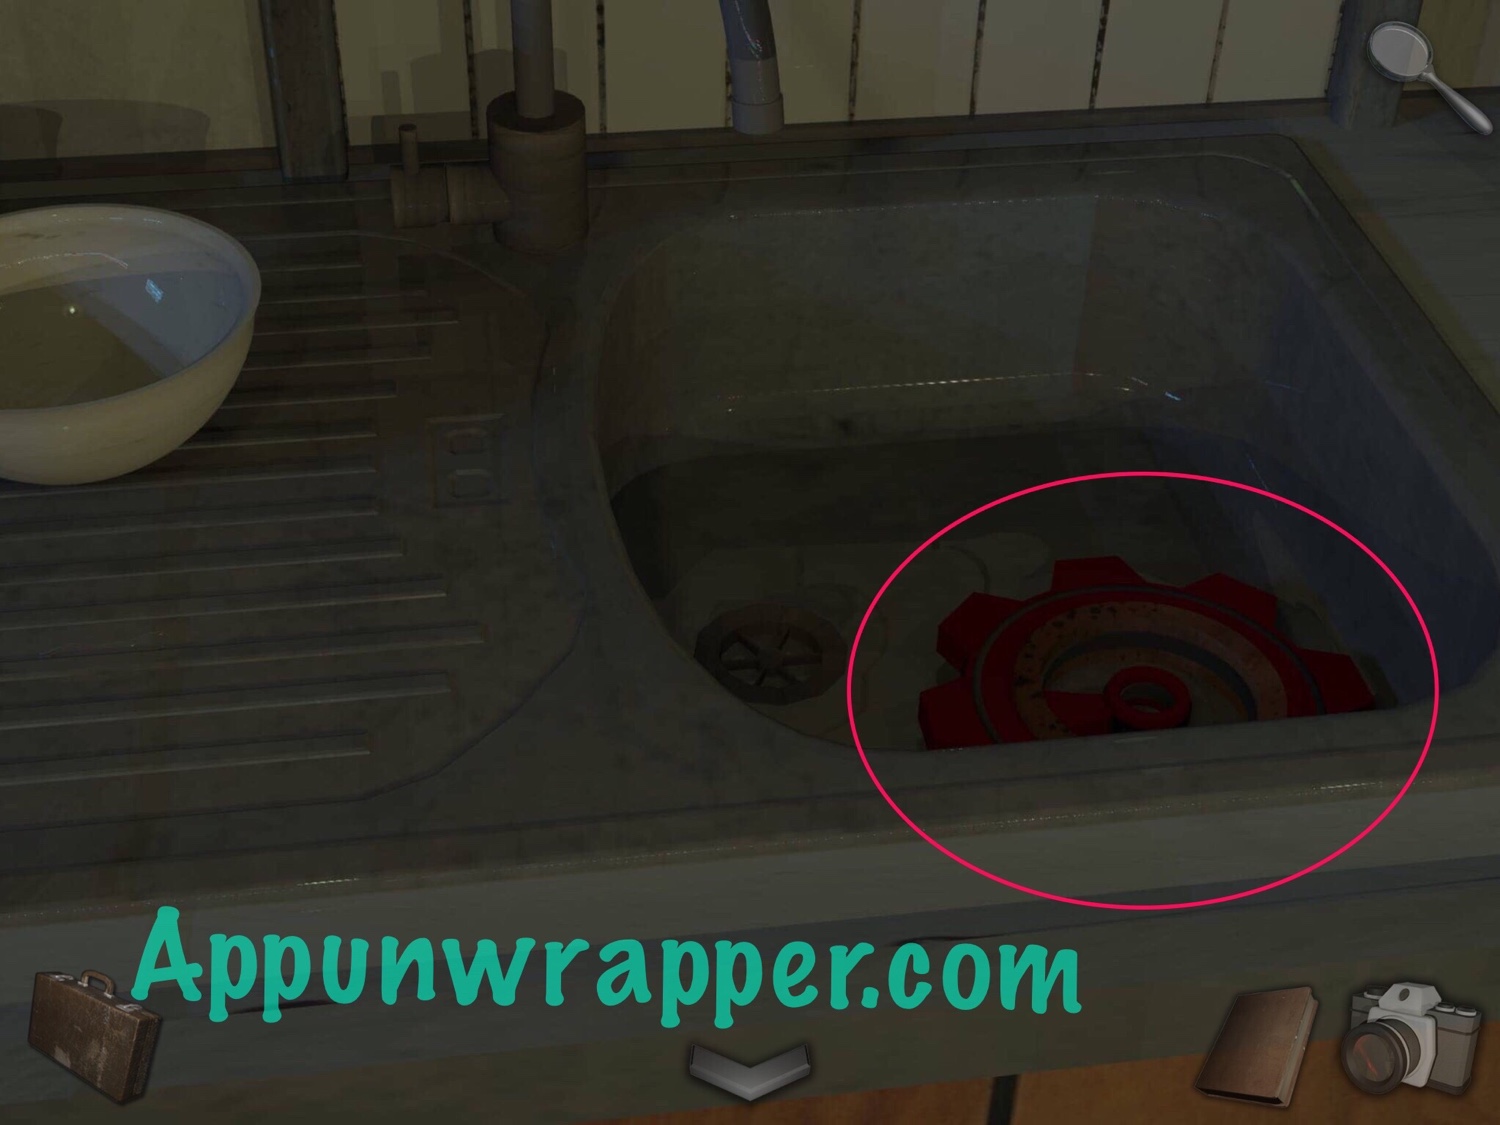
18. Look inside the sink and grab the metal cog.
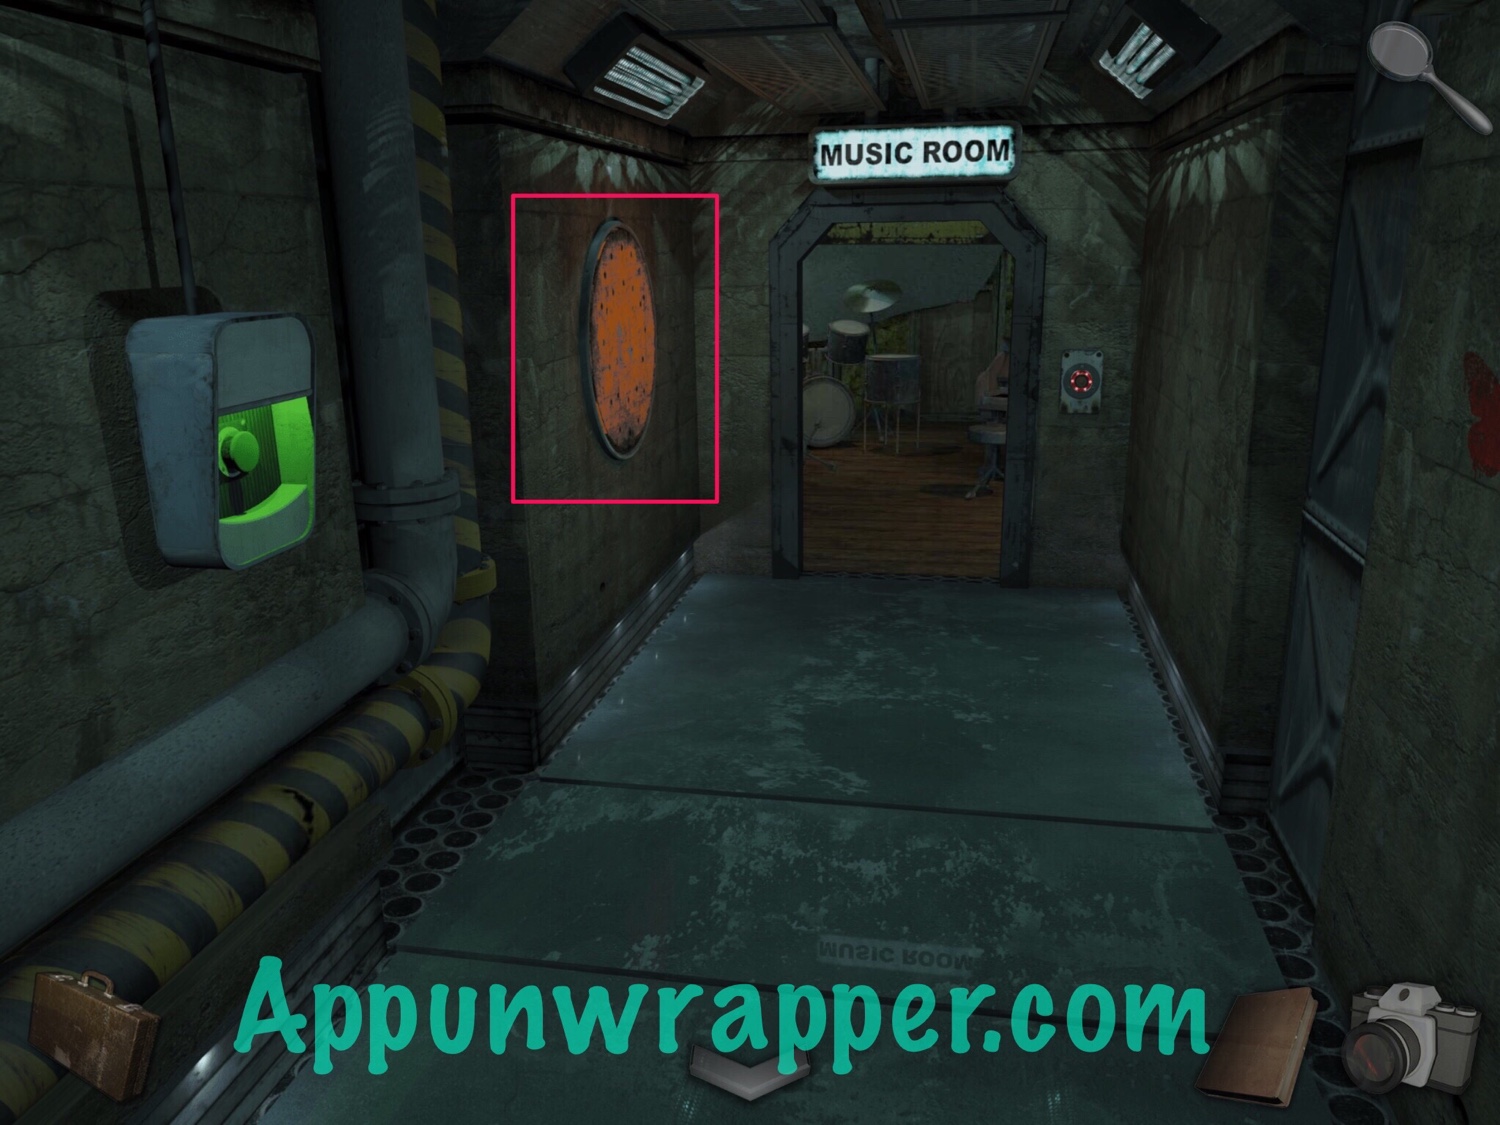
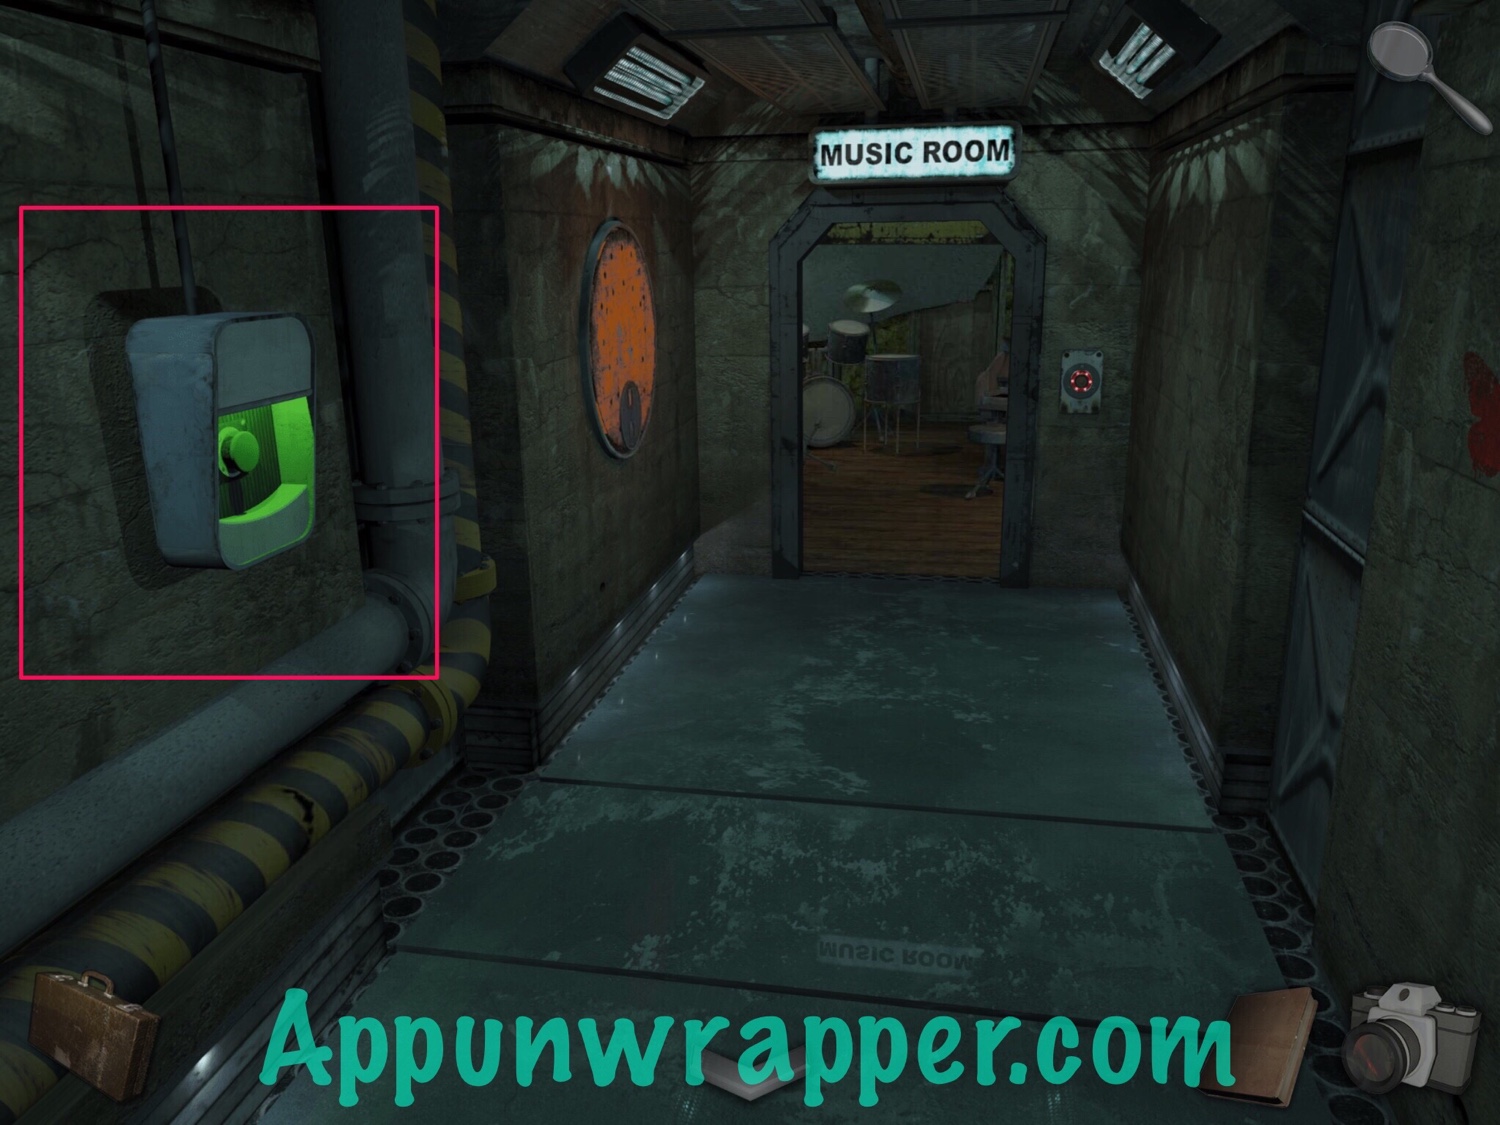
19. Leave and head left towards the music room. Notice the green button. We’ll get to those in a bit. Open the door to the music room, but don’t go in yet. There’s nothing there we need just now. Instead, look at the orange circle on the wall. Place the metal disc down.
20. Now, take out the photo of the letters that were on top of that box in the Rec Room. You need to slide the disc around until you see each of those letters in one of the white squares. Connect it to another letter in the other white square. I’m not going to show a screen shot of all of them, but I’ve written them down below.

21. This is the key:
T = E
W = J
R = B
G = M
A = D
Z = C
S = K
F = L
H = O
Y = U
V = P
I = N
The message says:
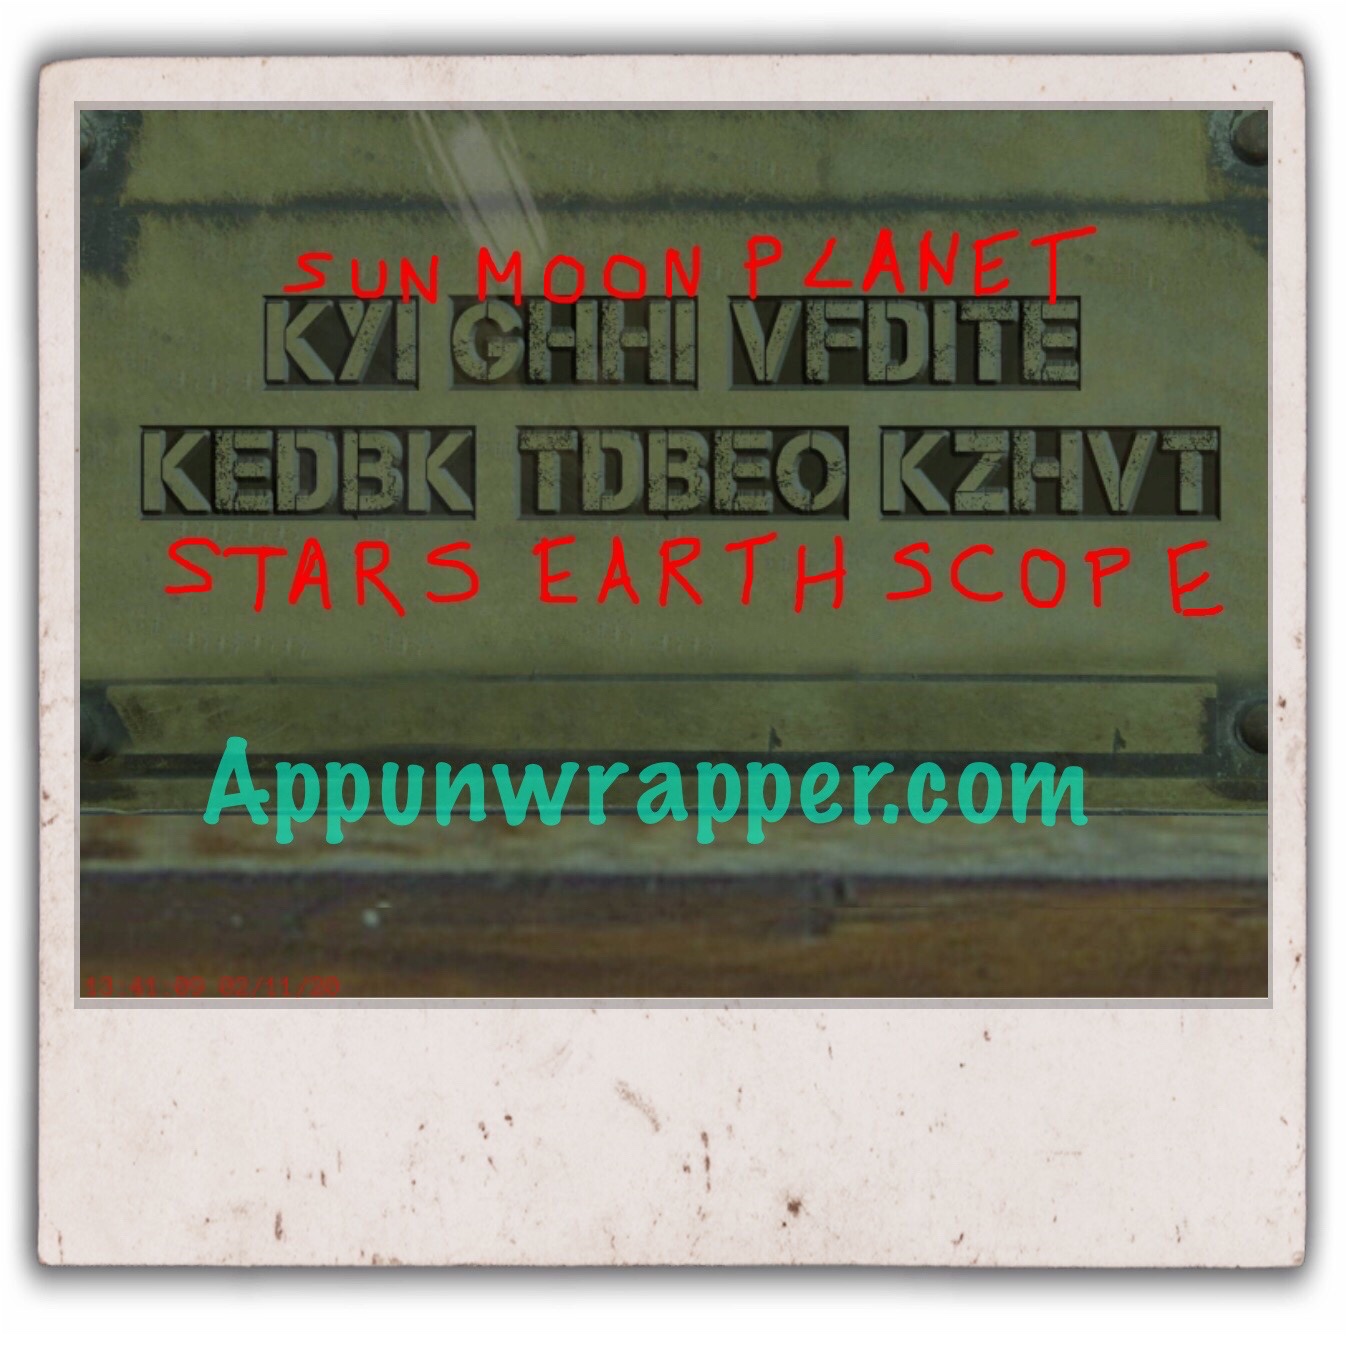
KYI GHHI VFDITE KEDBK TDBEO KZHVT
So now substitute the letters from they key to get:
SUN MOON PLANET STARS EARTH SCOPE
We’ll use it in a bit.
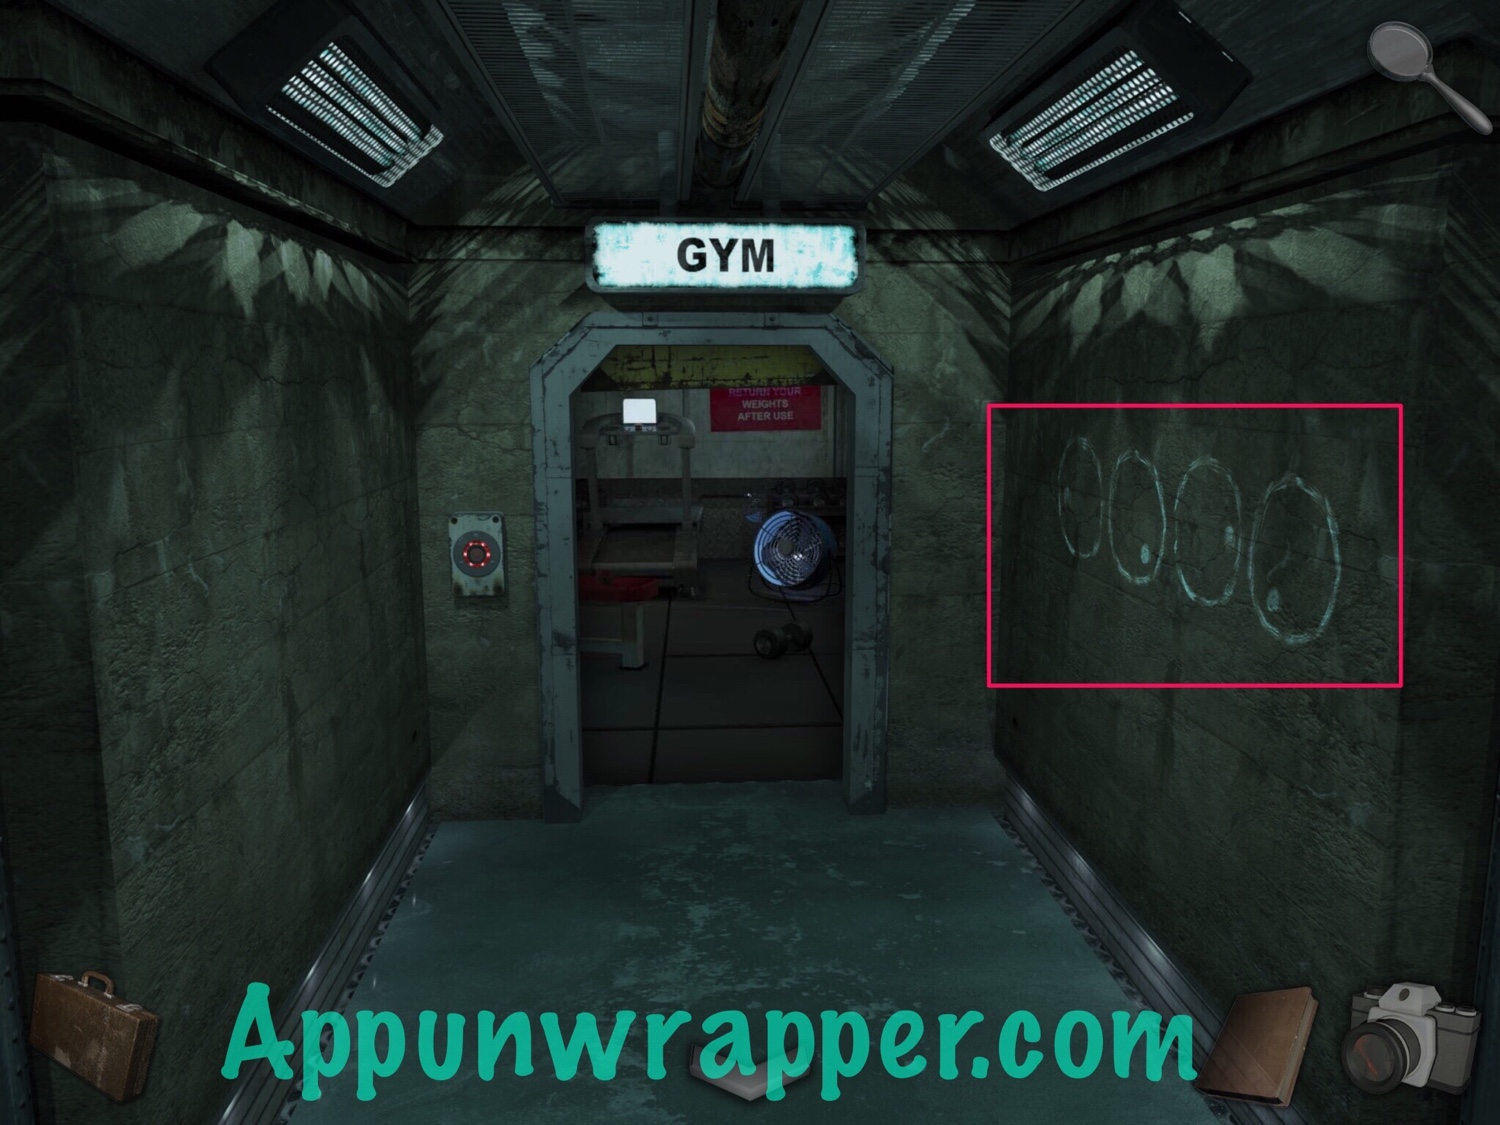
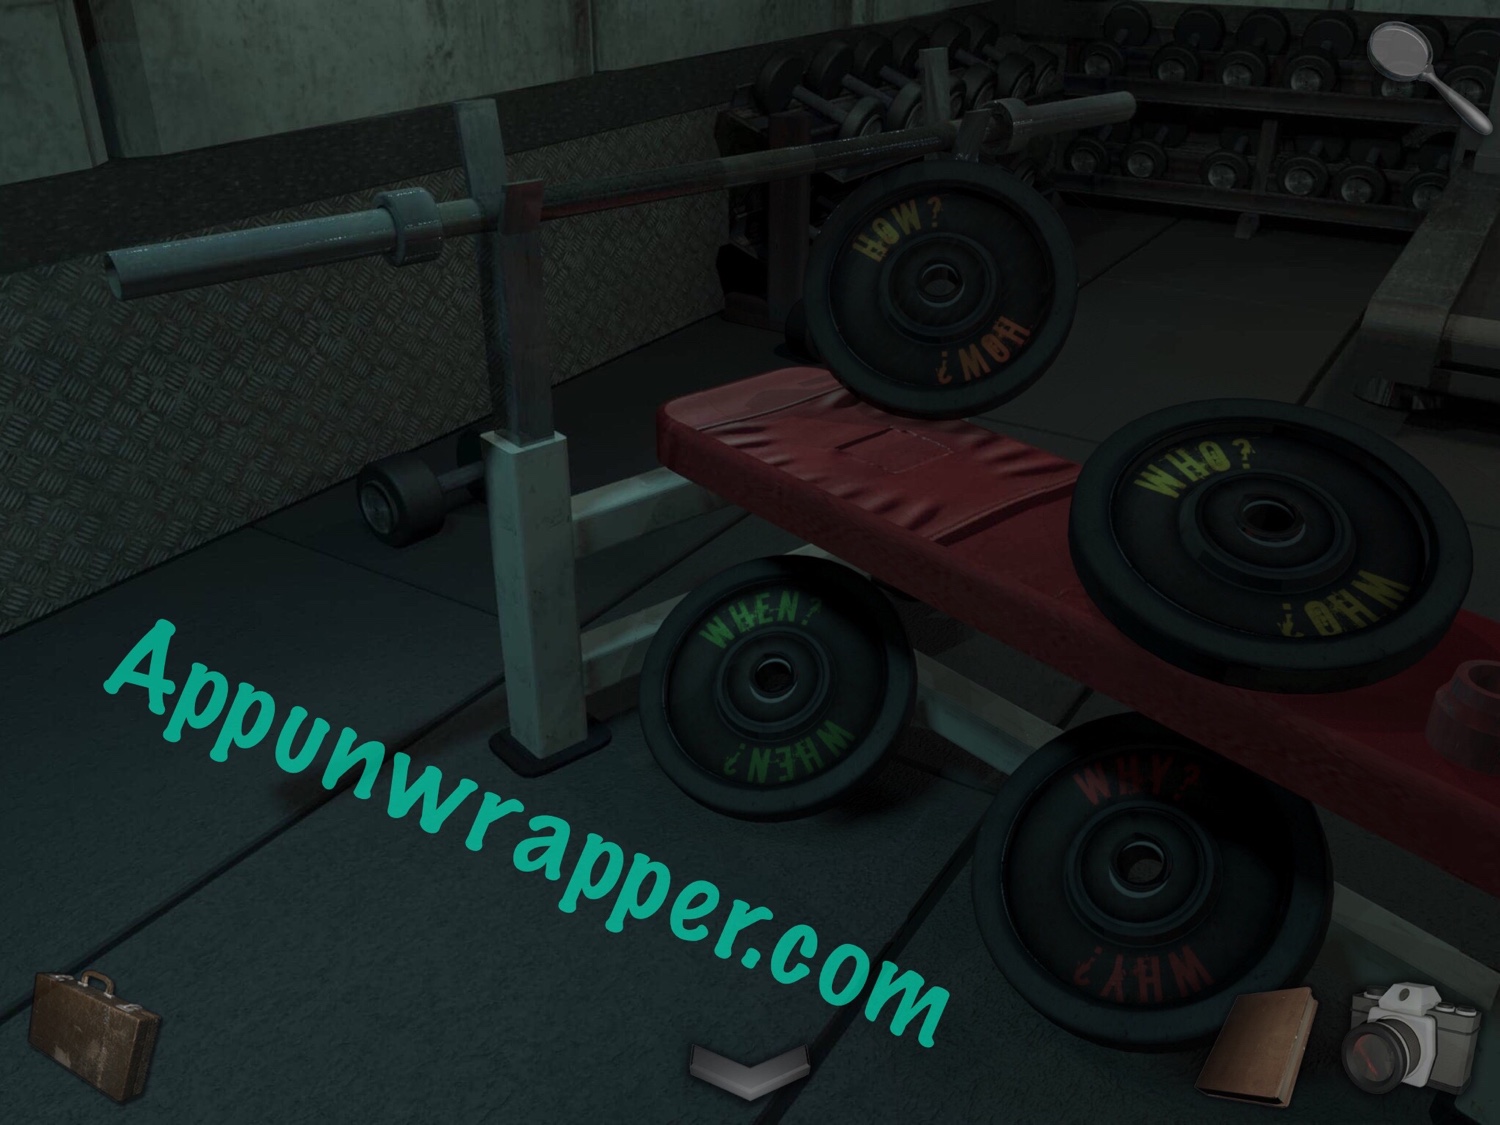
22. Go back and then right towards the Gym. Open the door and take a photo of the clue on the wall.
23. Enter the gym. Use the knife to cut open the punching bag on the right and take the eyepiece. Also, pick up the WHERE weight. We still need a hex key to get the other weights.

24. Let’s complete the buttons puzzle. The jukebox said to press them in this order:
BLUE, GREEN, RED, BLUE, YELLOW
So go back to the start of the chapter to find BLUE again and press it:
Find GREEN by the Music Room and press it:
Find the RED button on the way to the Diner and press it:
Find BLUE again and press it:
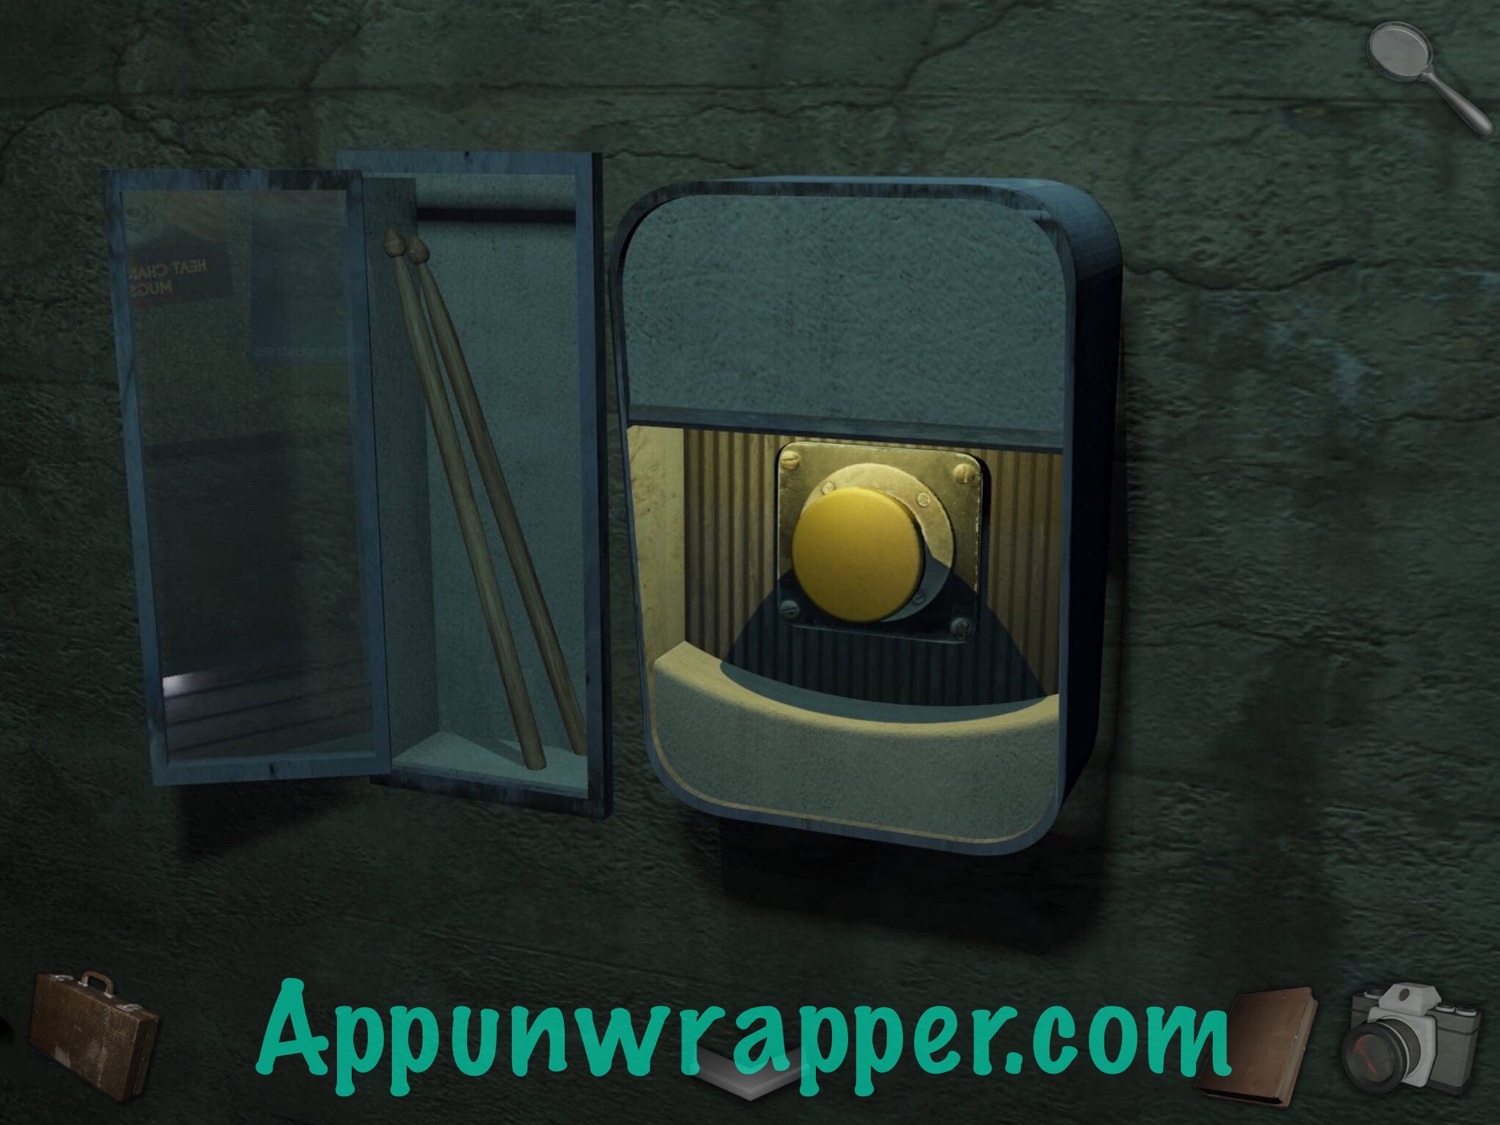
And last, find YELLOW by the Rec Room and press it. Then take the drumsticks.
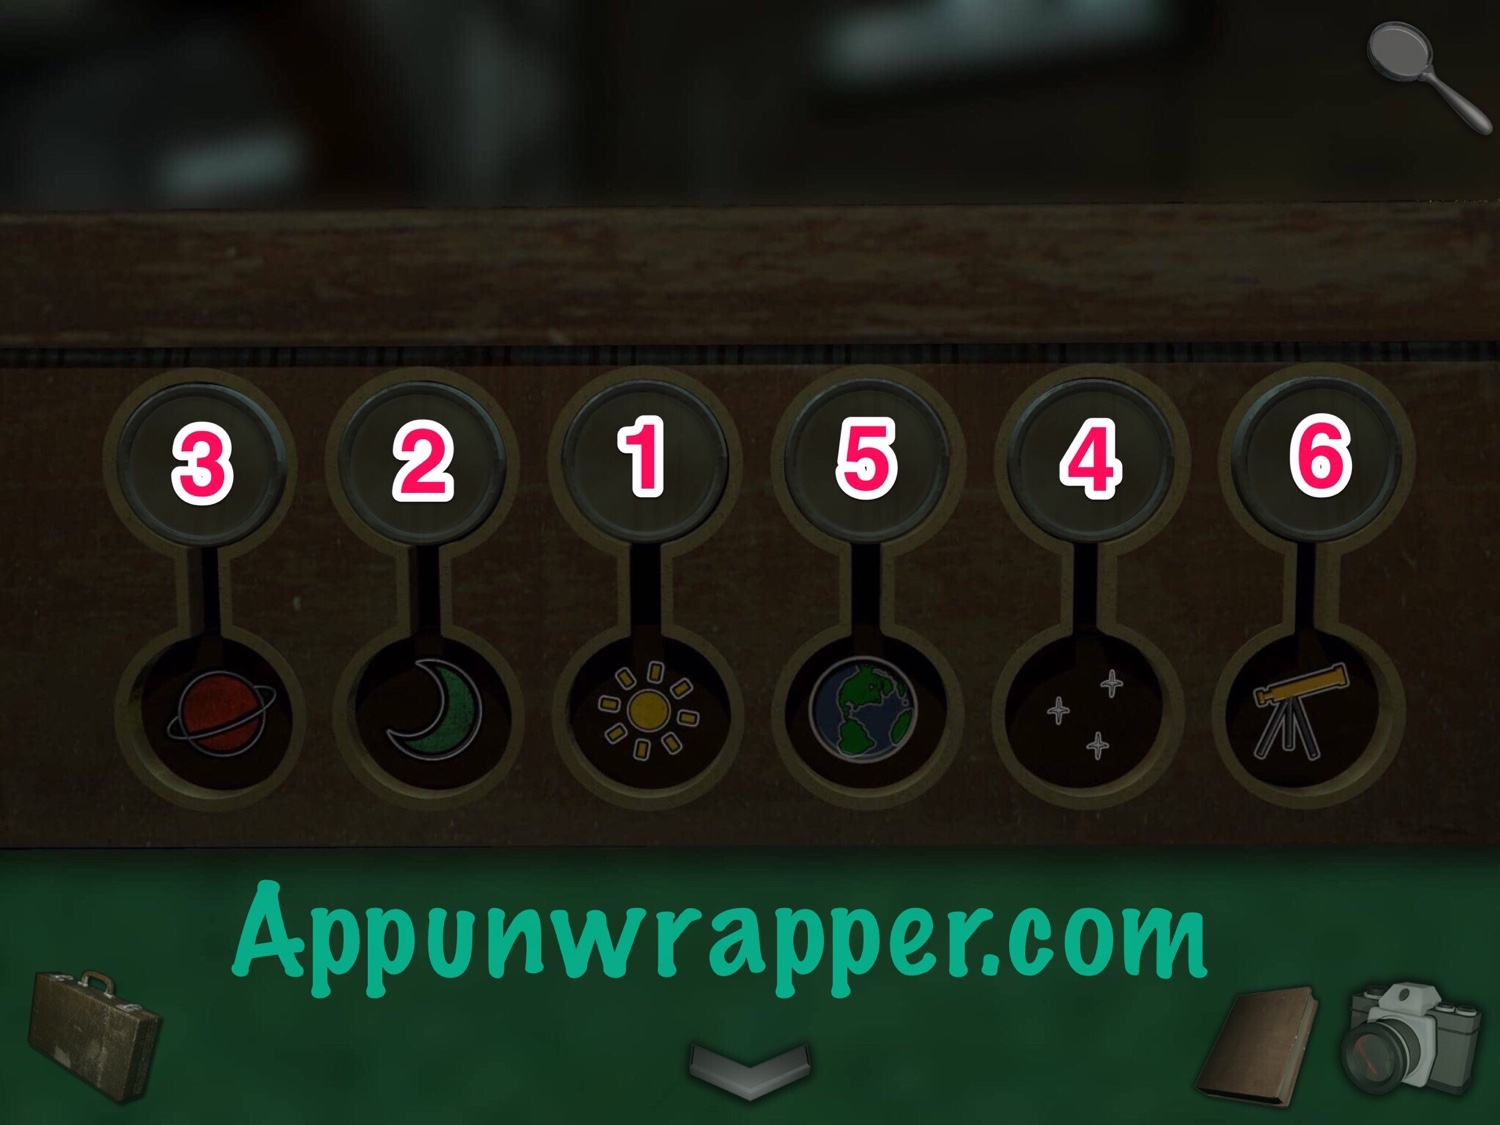
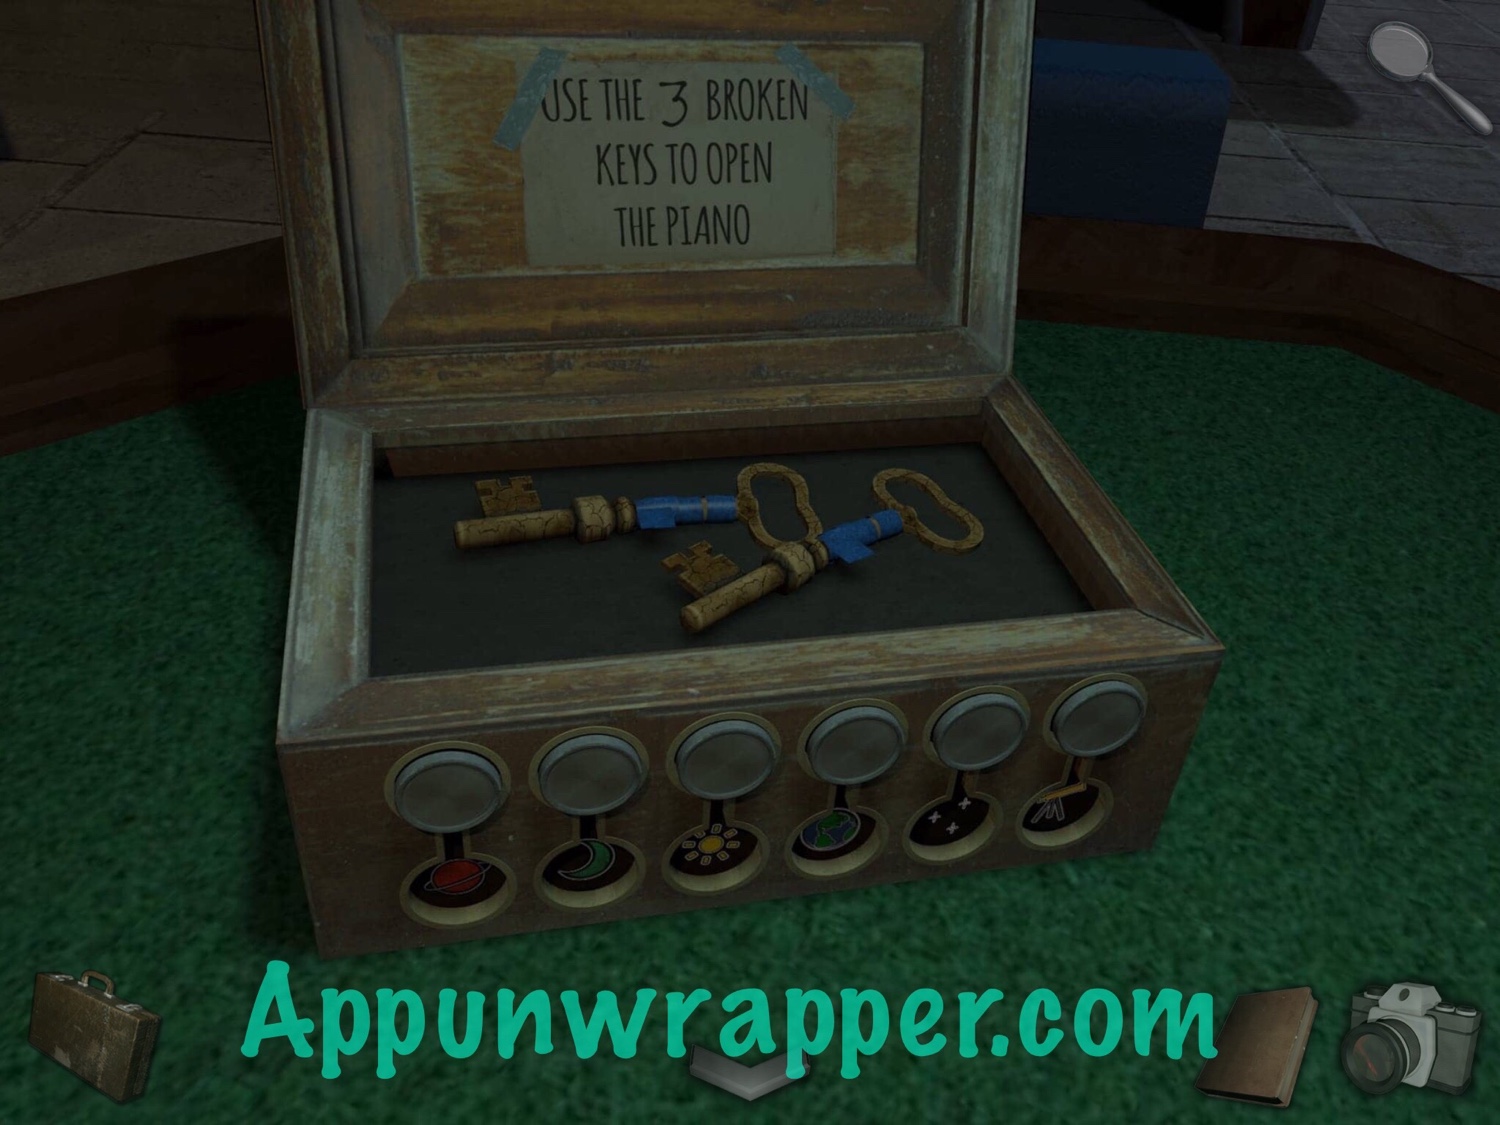
25. While here, let’s open the box on the card table. Remember, the words we deciphered went:
SUN MOON PLANET STARS EARTH SCOPE
So pull the discs down in that order. Then take the two broken keys from inside and notice the message that says: USE THE 3 BROKEN KEYS TO OPEN THE PIANO.
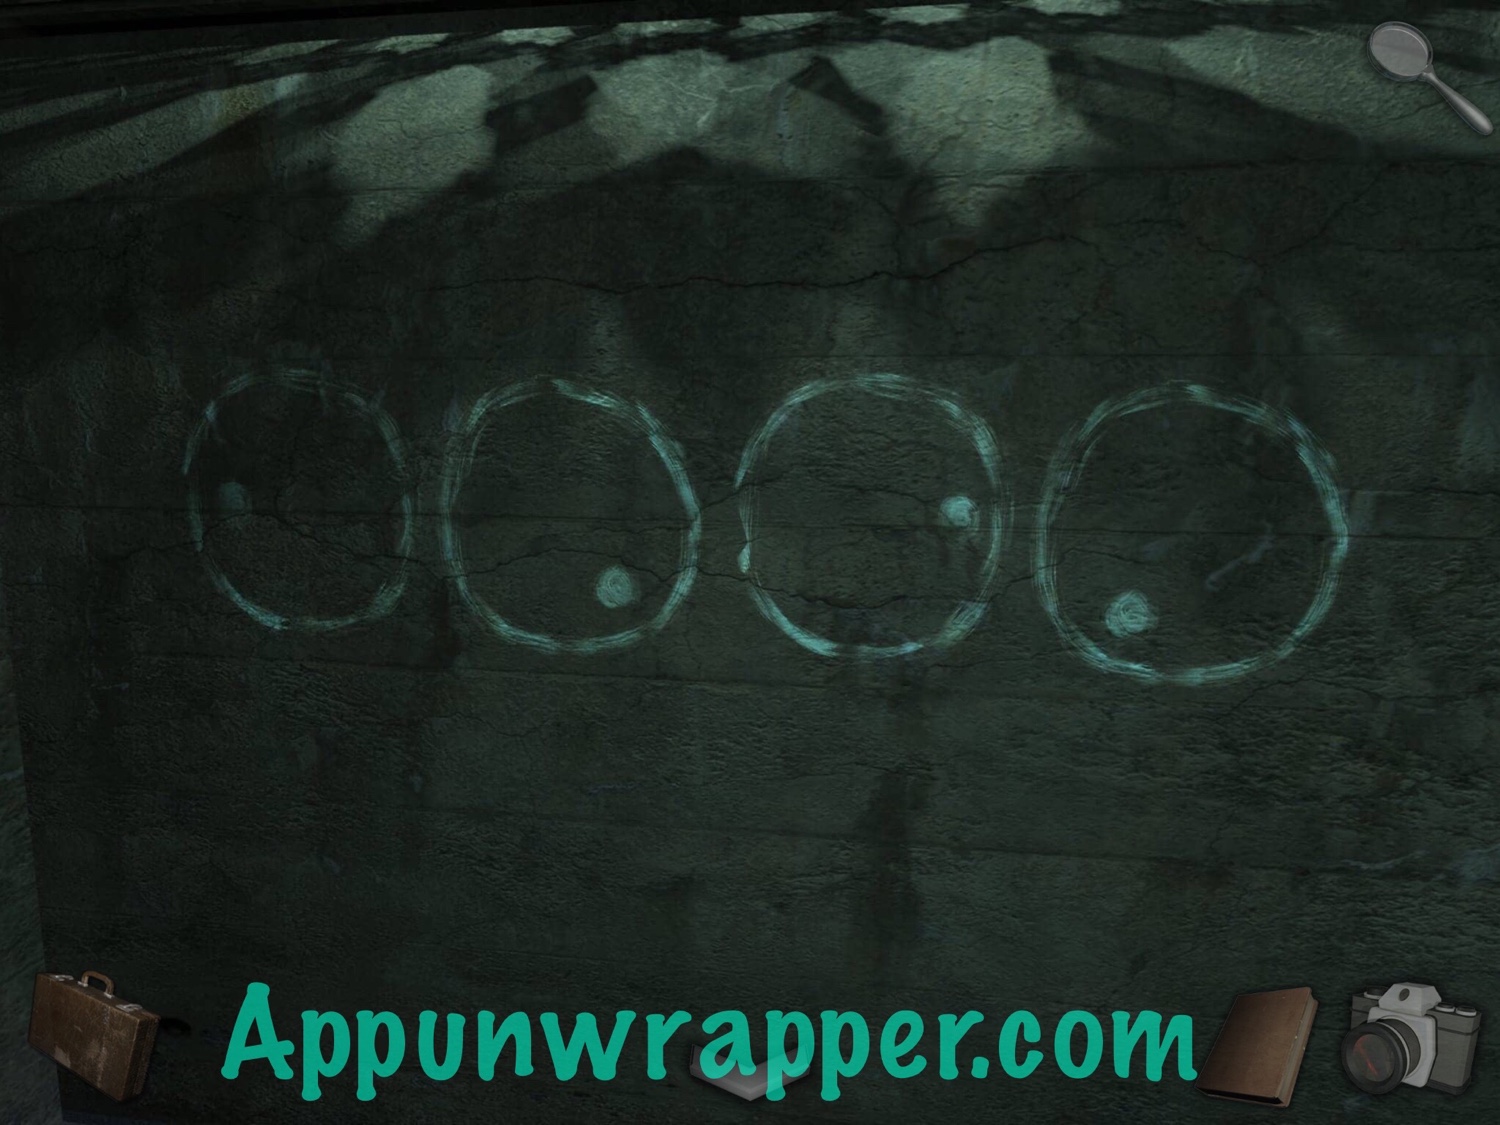
26. Head towards the Library again. Use the eyepiece to look at the Z on the wall and get a proper clue. Take a photo.
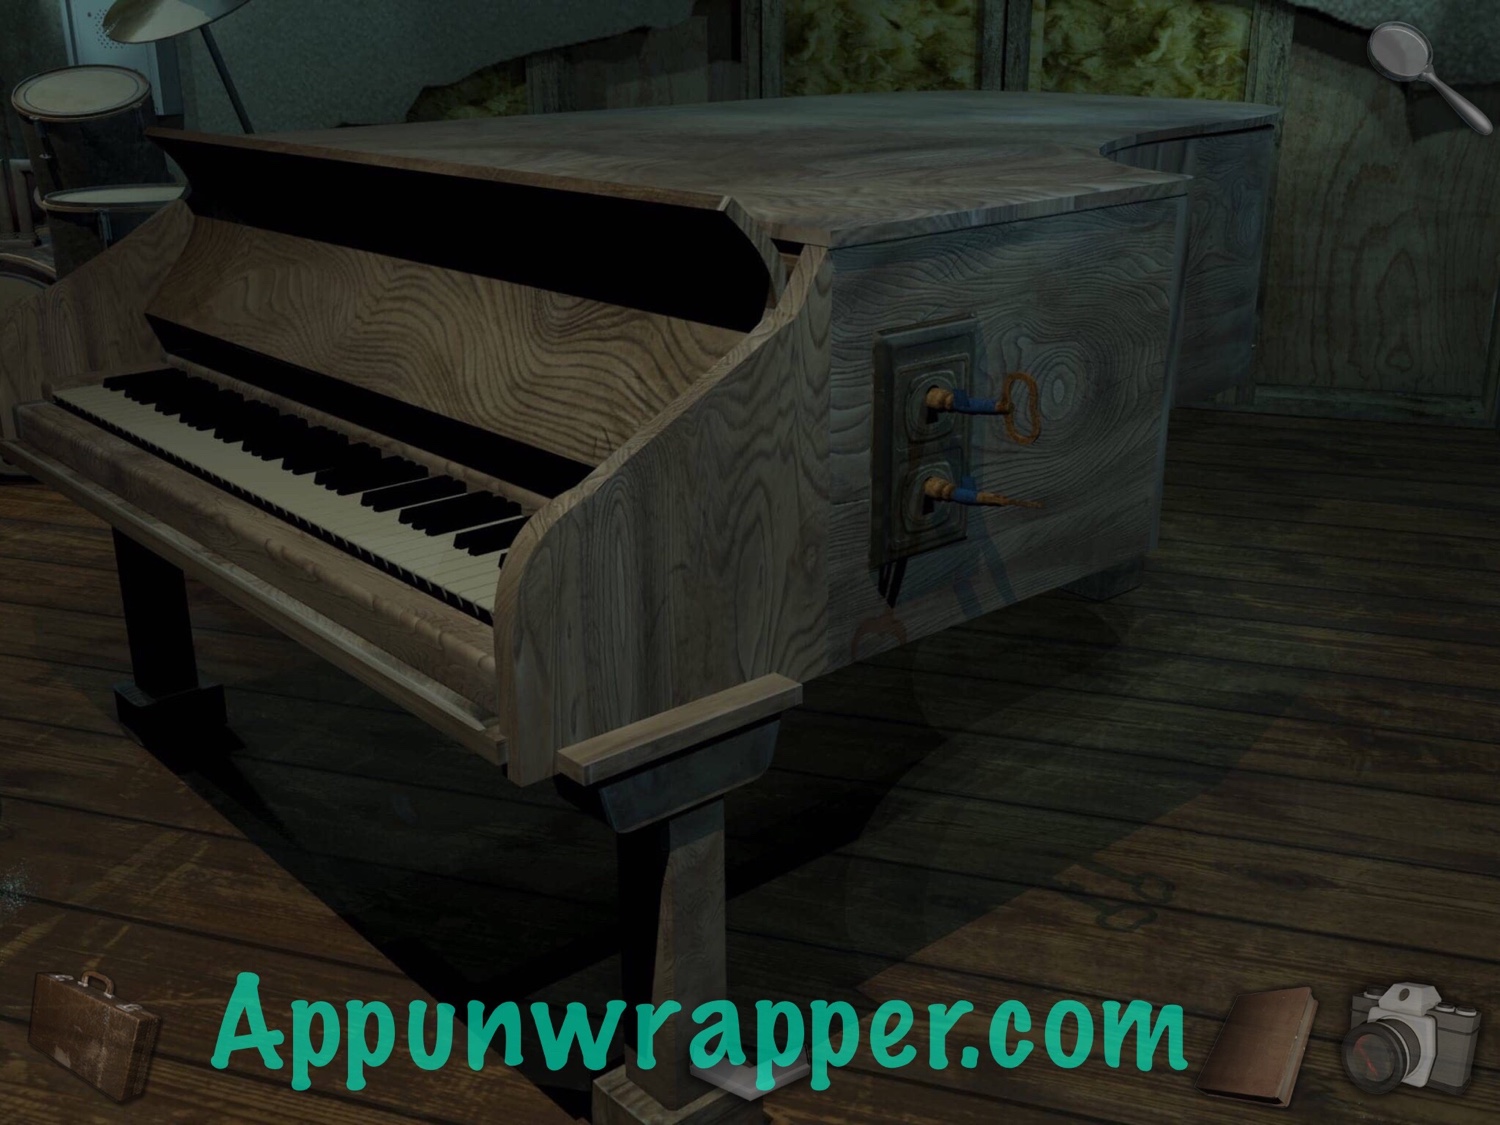
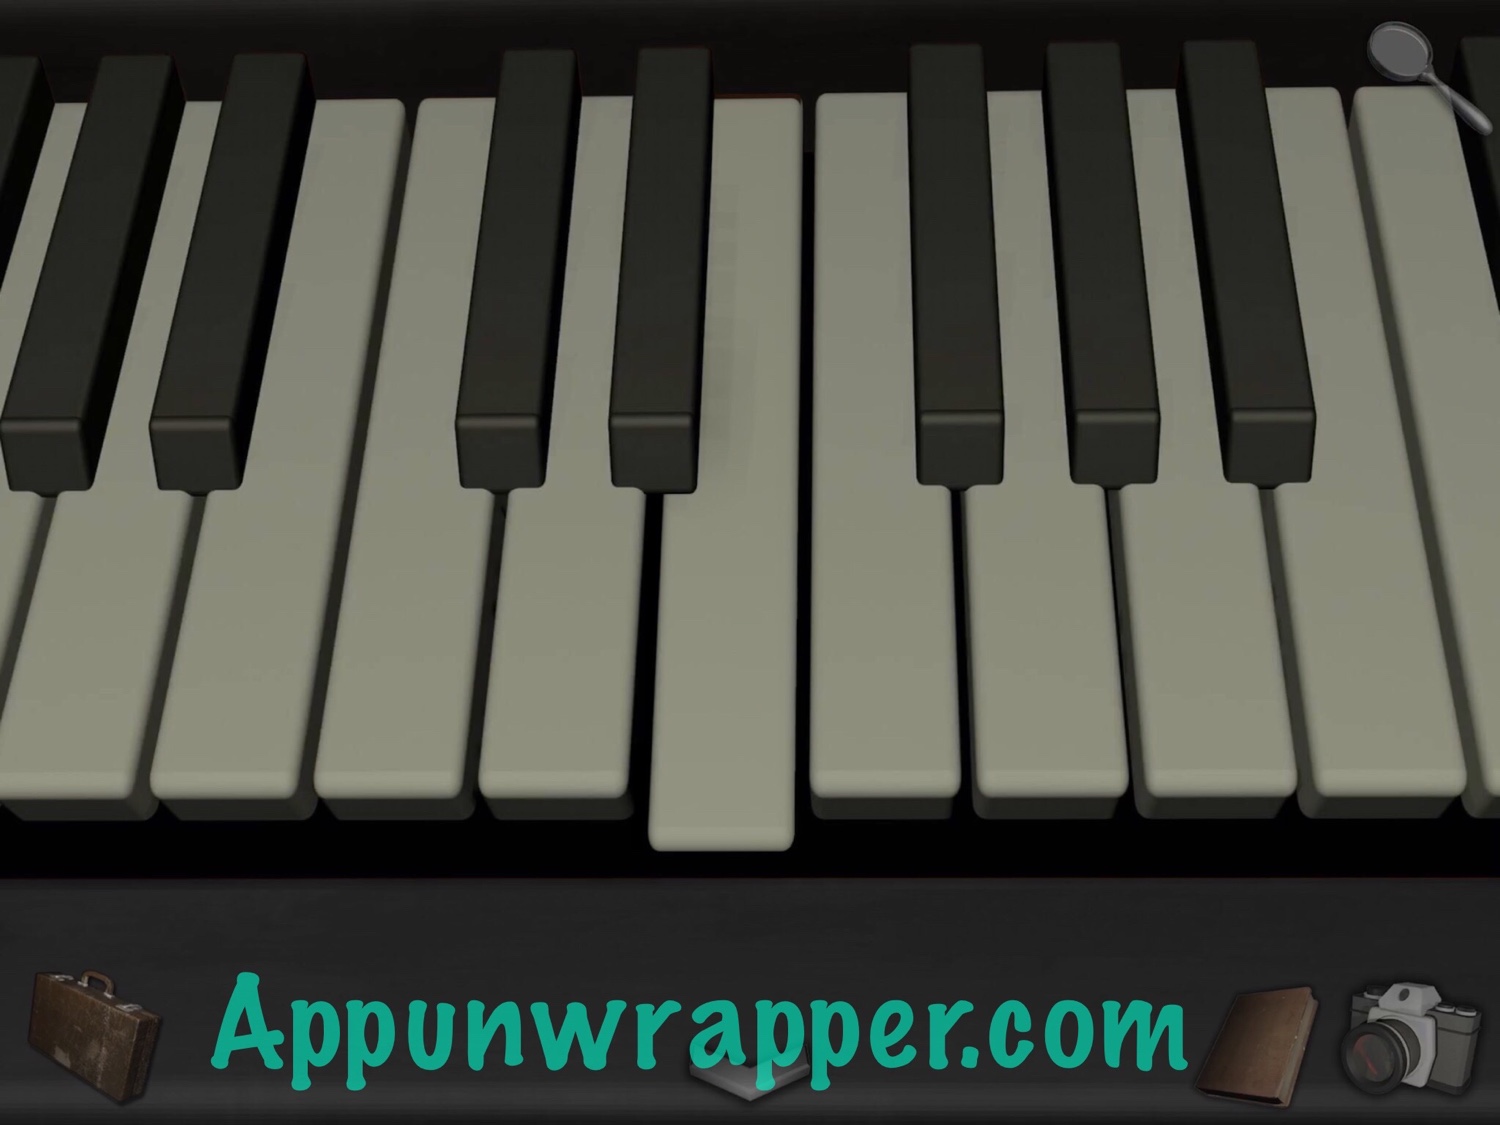
27. Go back to the music room. We can now solve both the piano and the drums puzzles. Let’s start with the piano, since it’s easier. Insert the two broken keys in the keyholes on the side. Then, go to the keyboard and press and hold the broken key, the one that doesn’t make any sound. After a few seconds, the piano should open up.
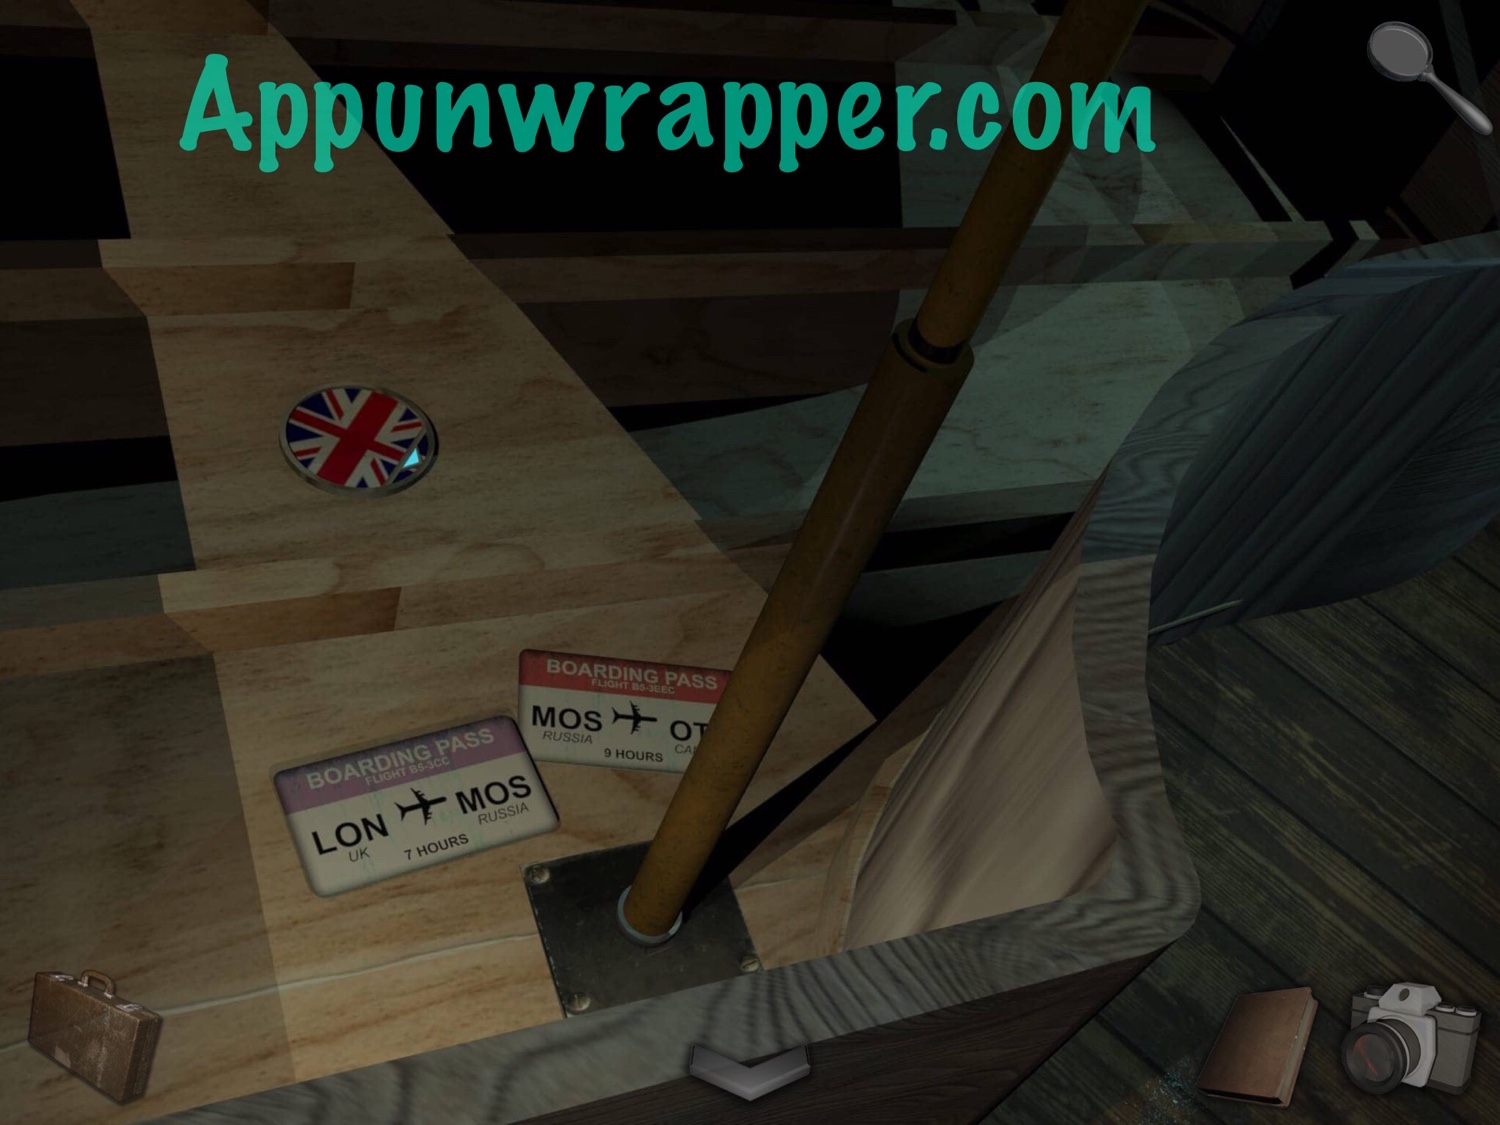
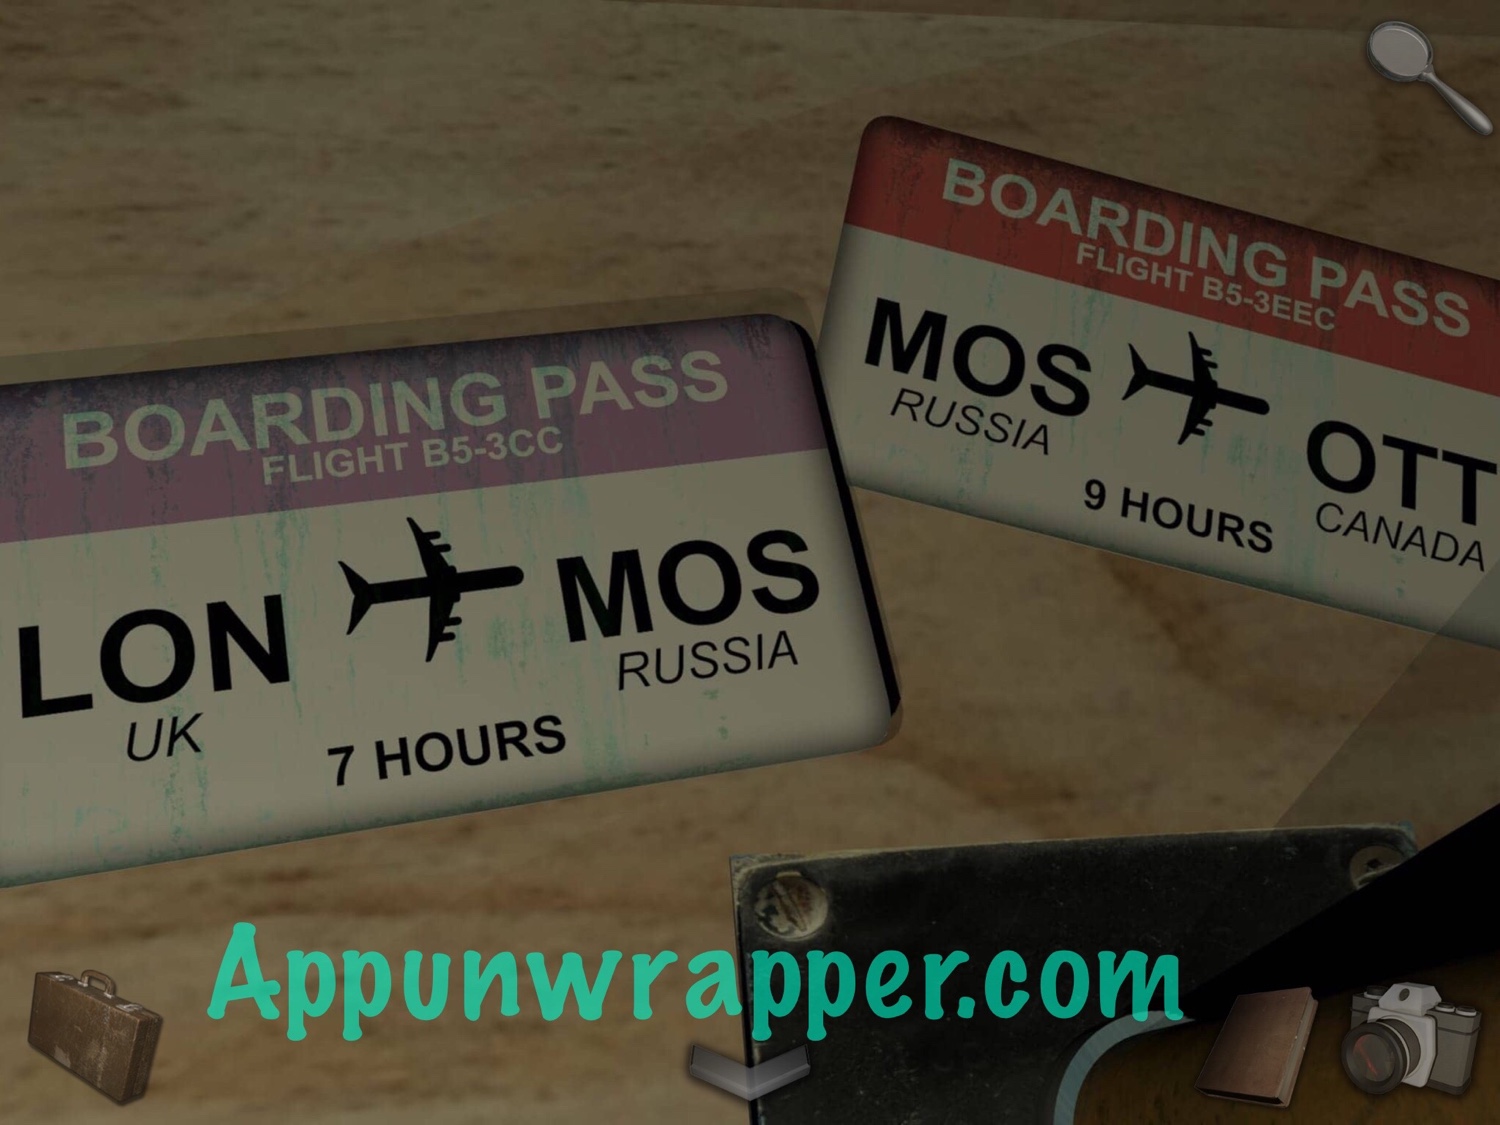
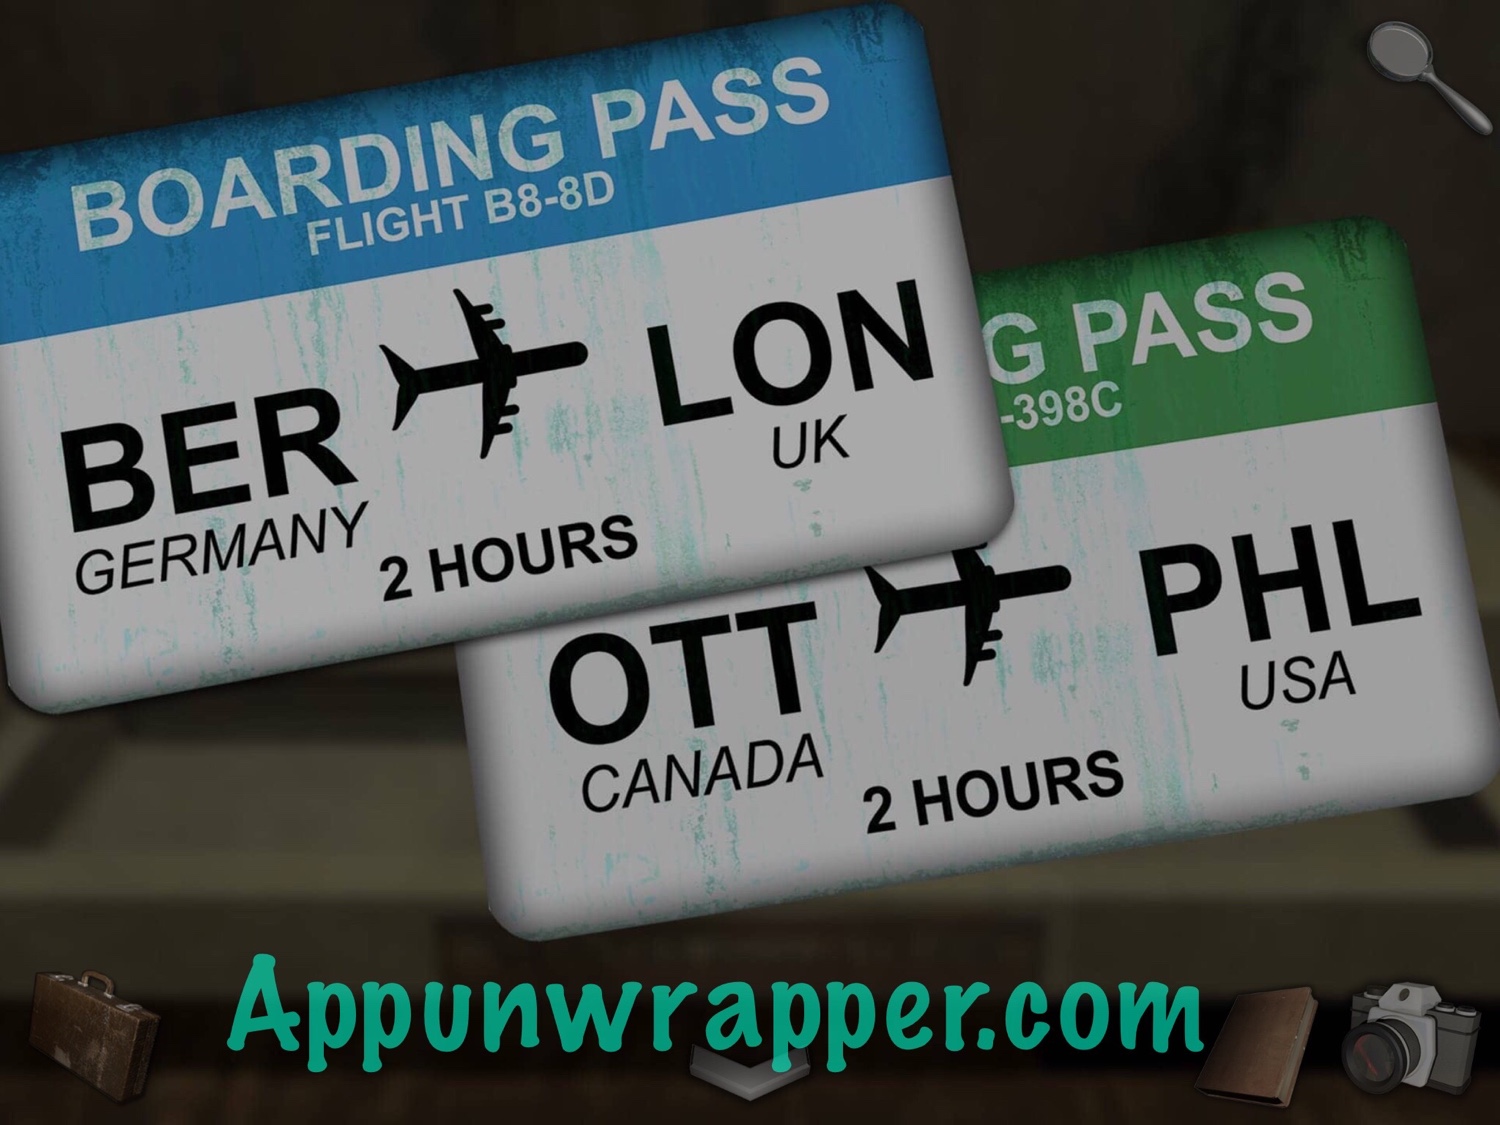
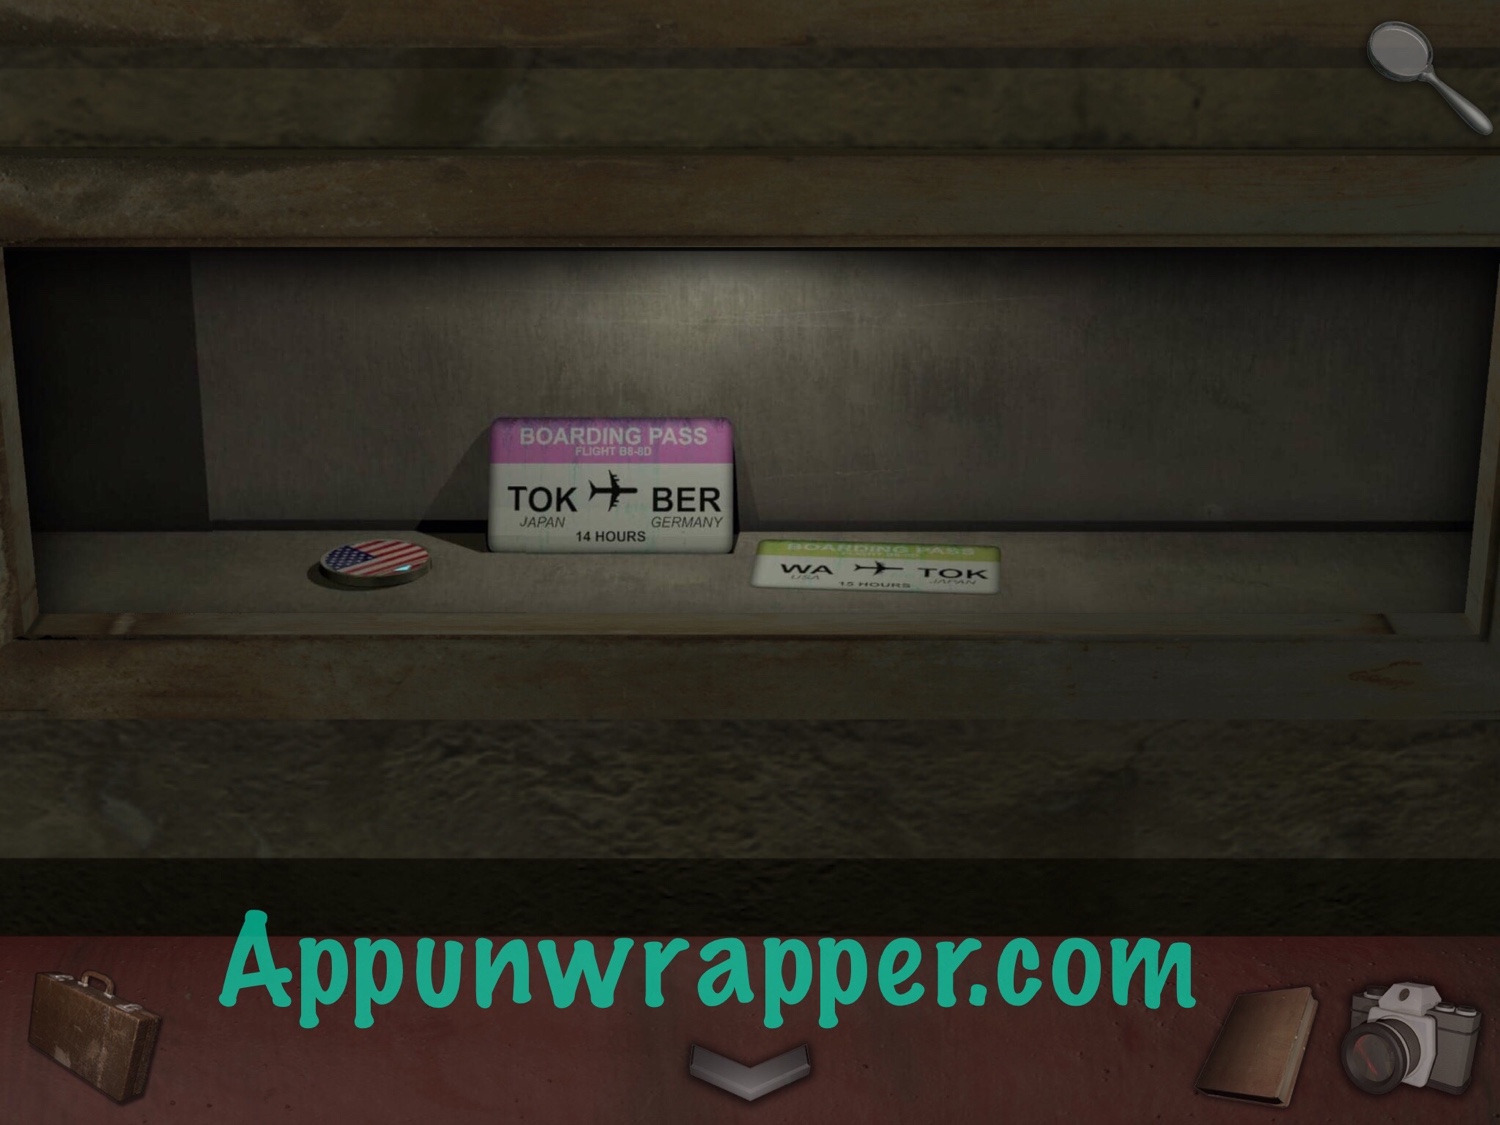
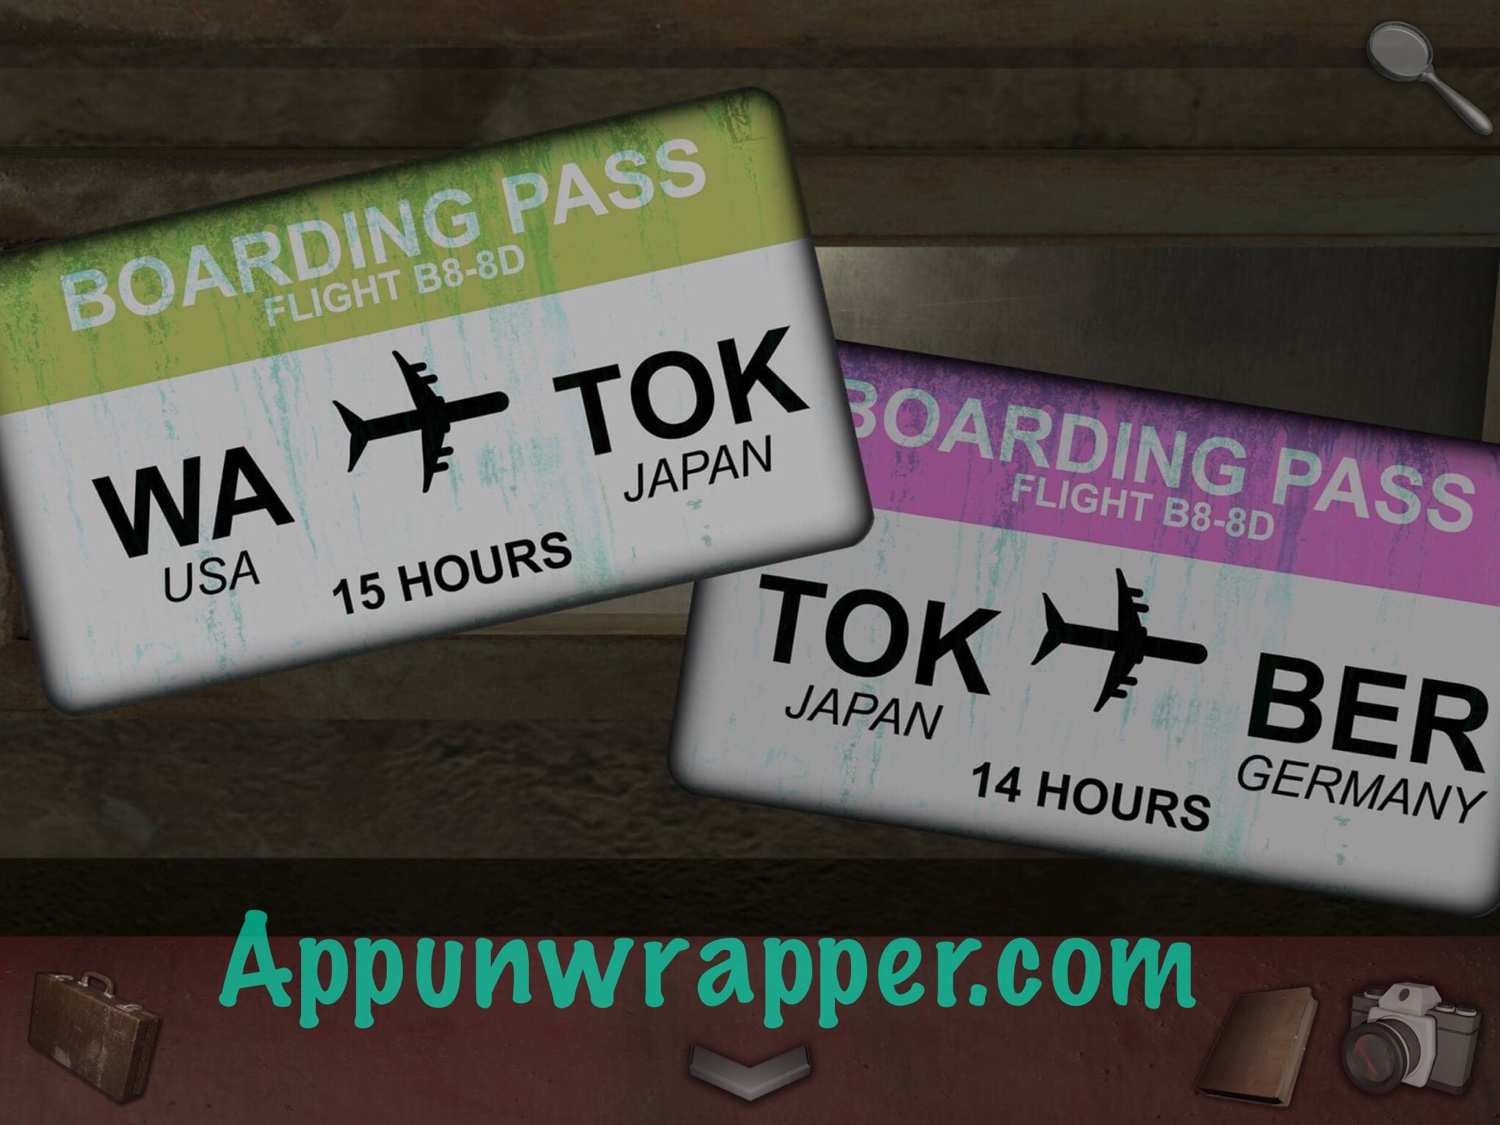
28. Look inside the piano. Take the UK flag token and snap a photo of the two boarding passes.
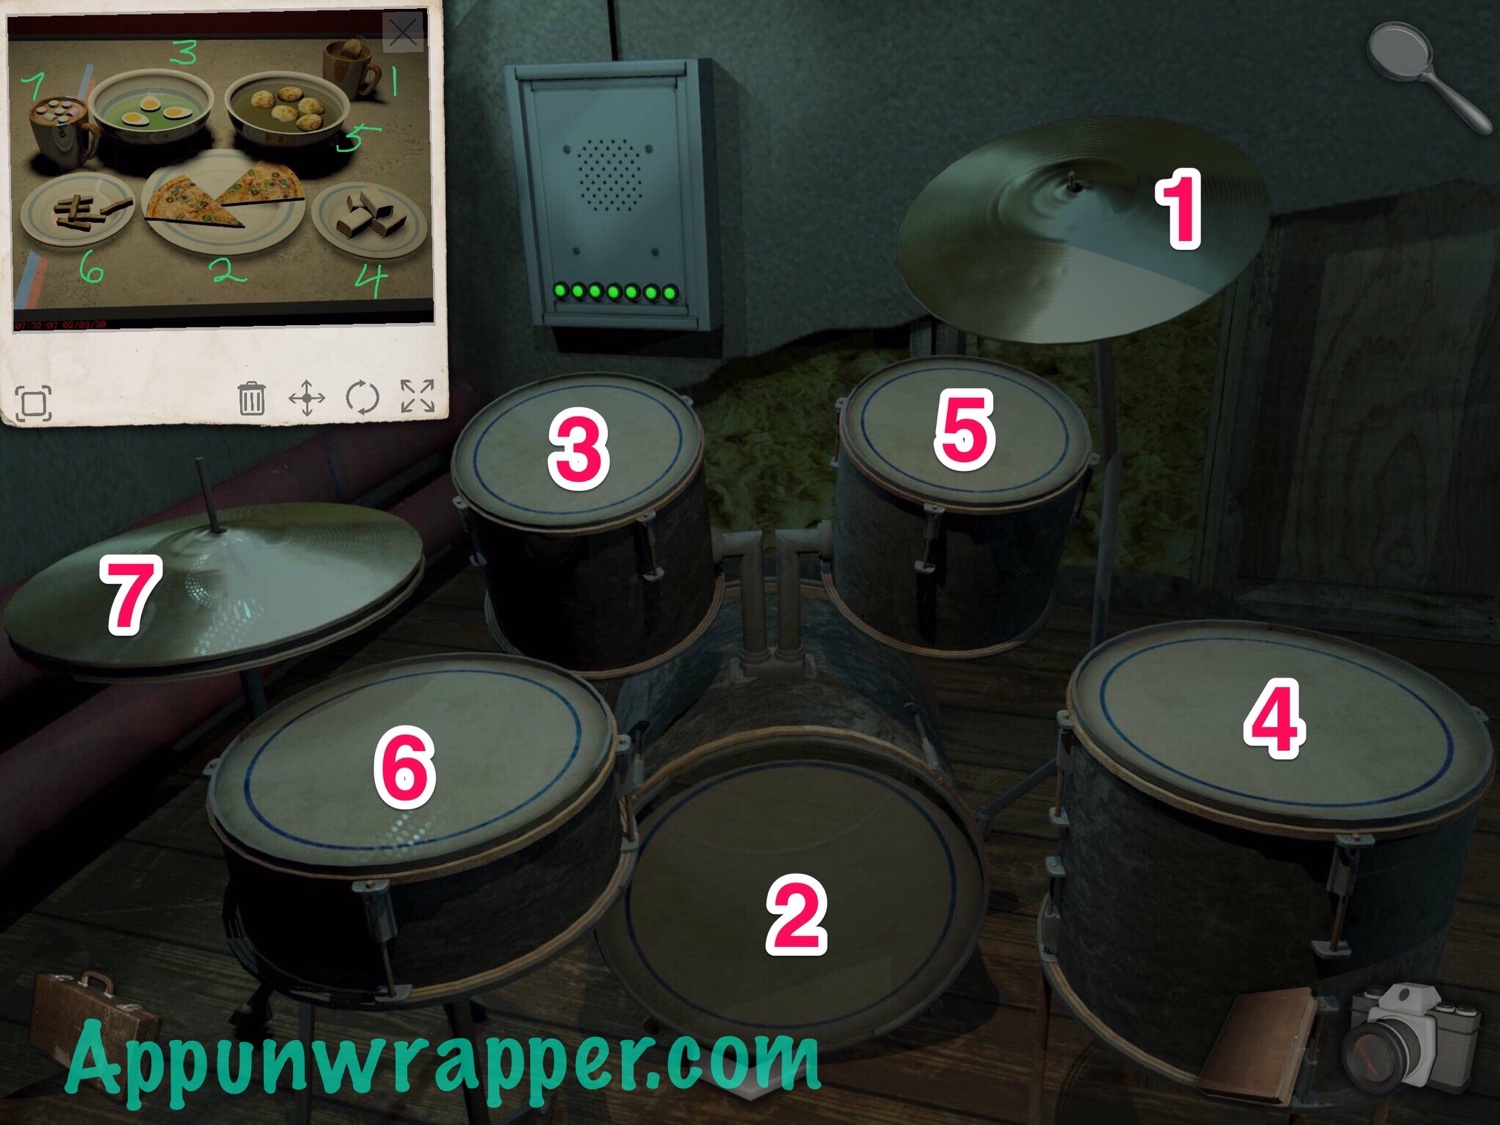
29. And now the drums. Notice there are seven parts to it and they’re laid out similarly to the dishes of food on the table in the diner. Take out the photo and number each dish for how much food is in it, to make things easier.
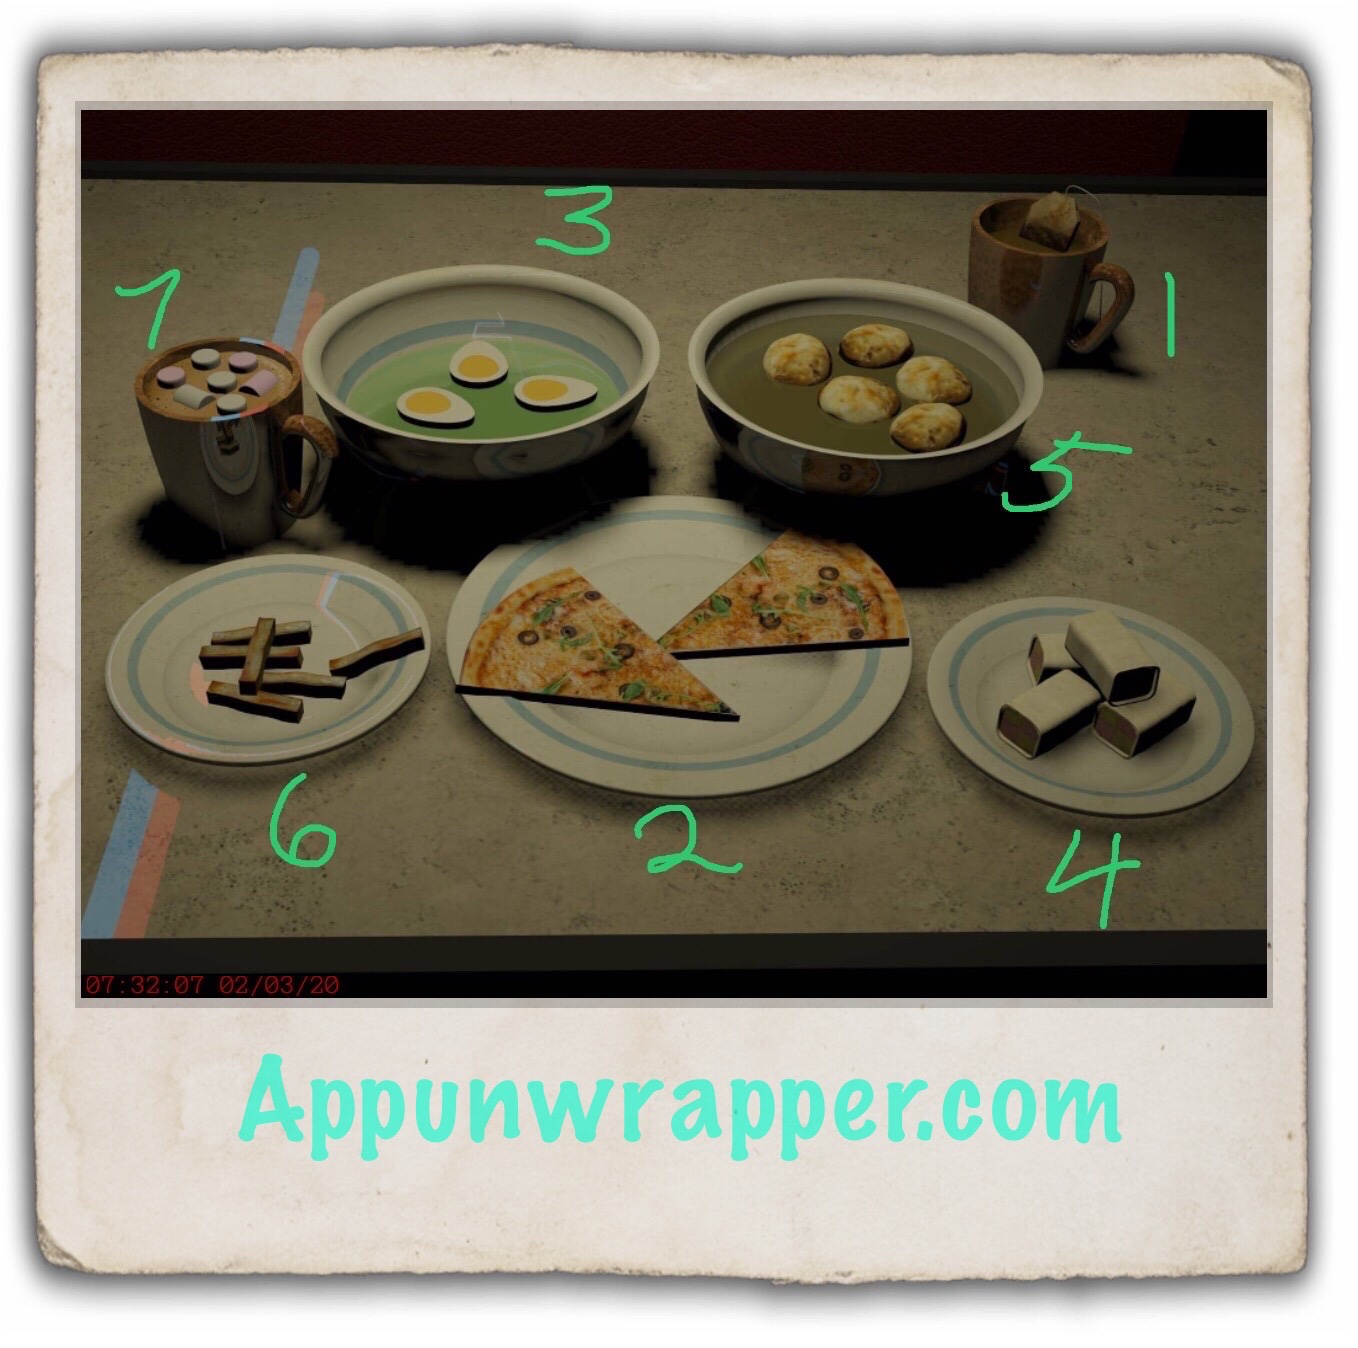
30. Now, use the drumsticks on the part that’s in the upper right hand side, where the cup of tea would be. Then follow the order shown on the table. Then take the wooden star from the opening in the wall.
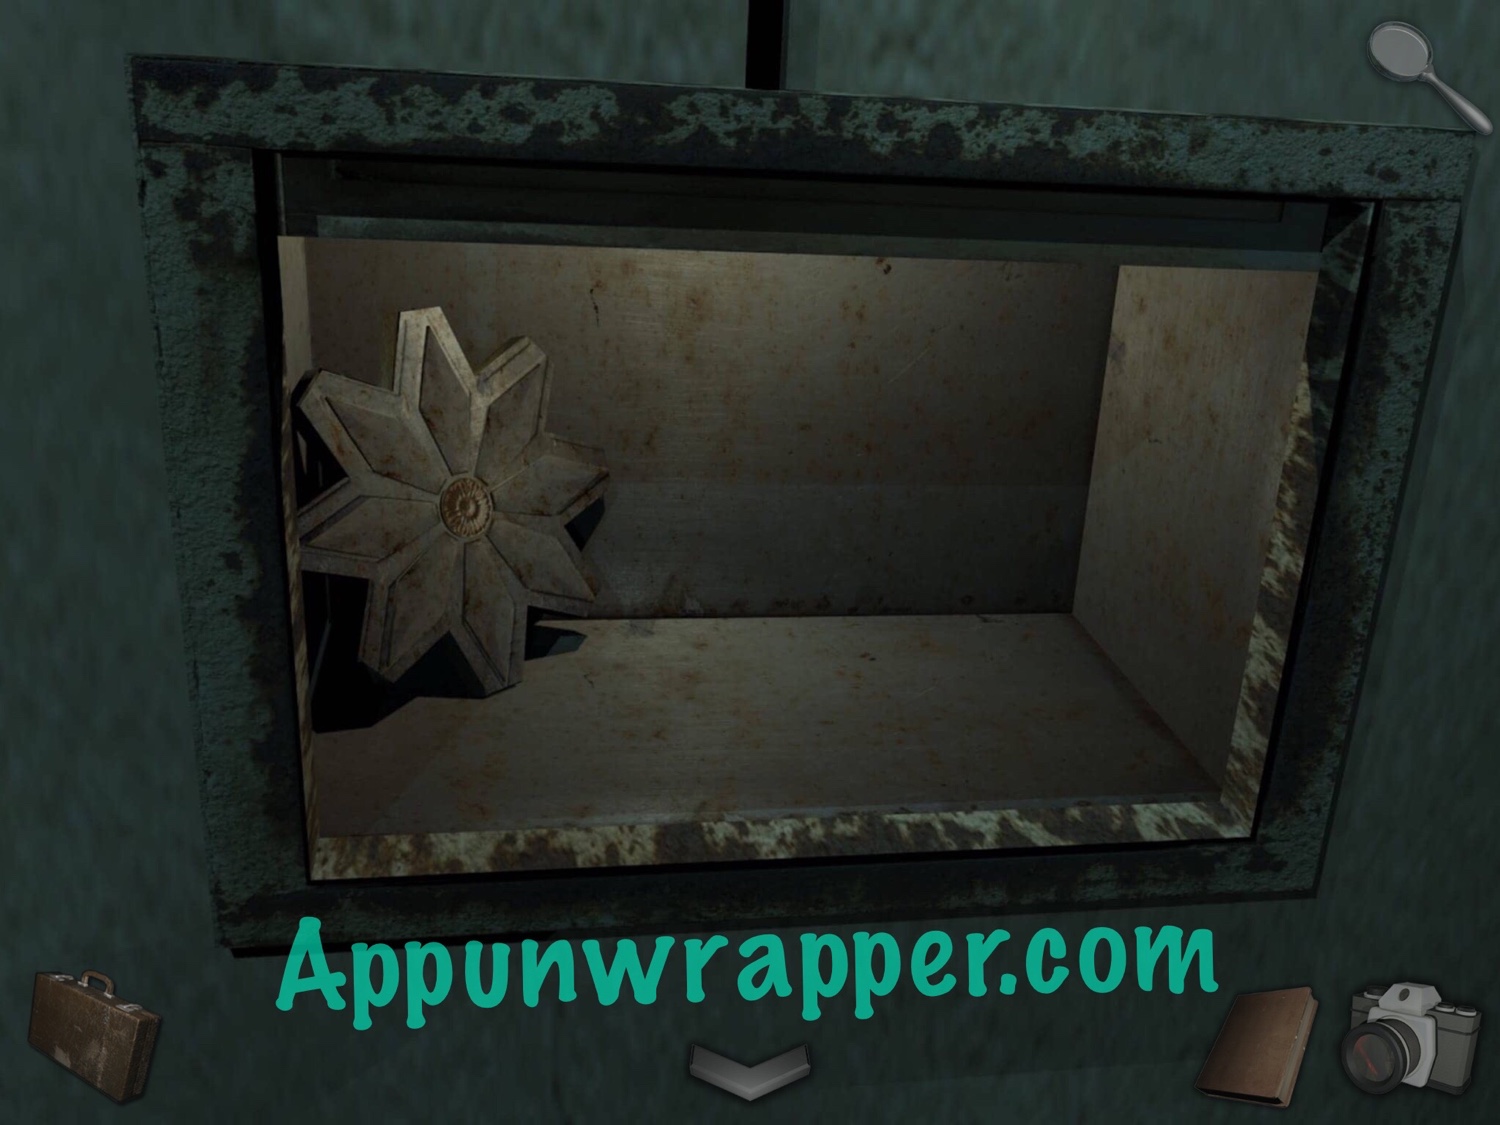
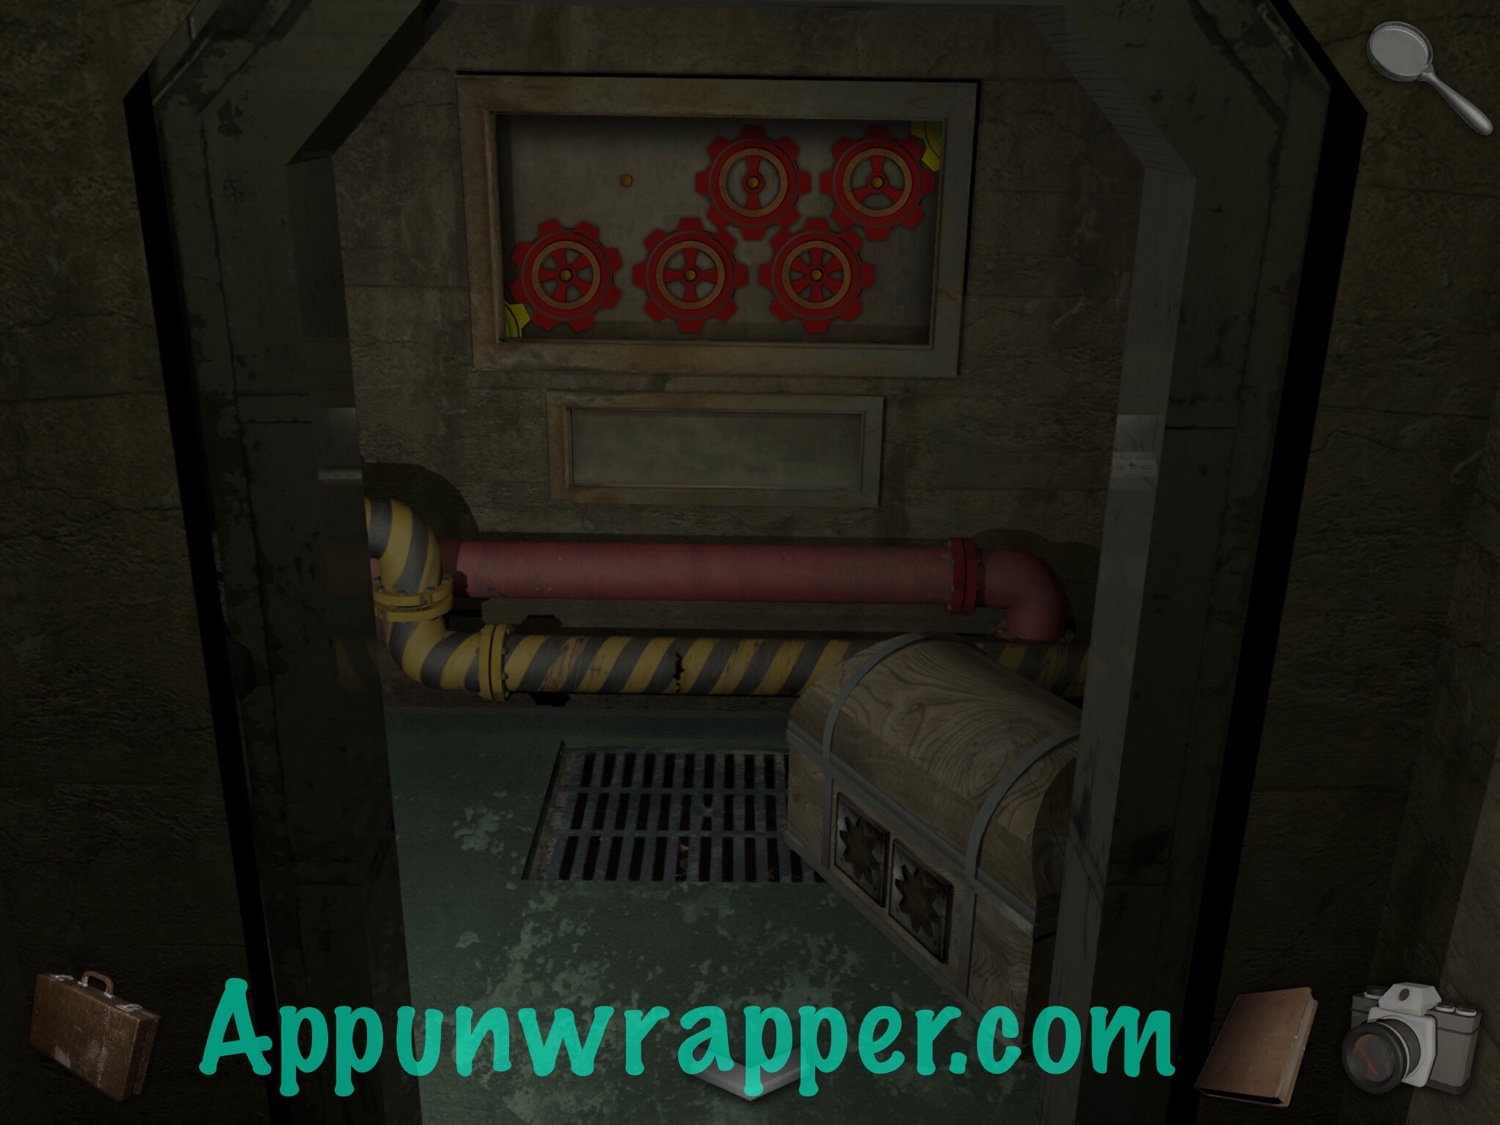
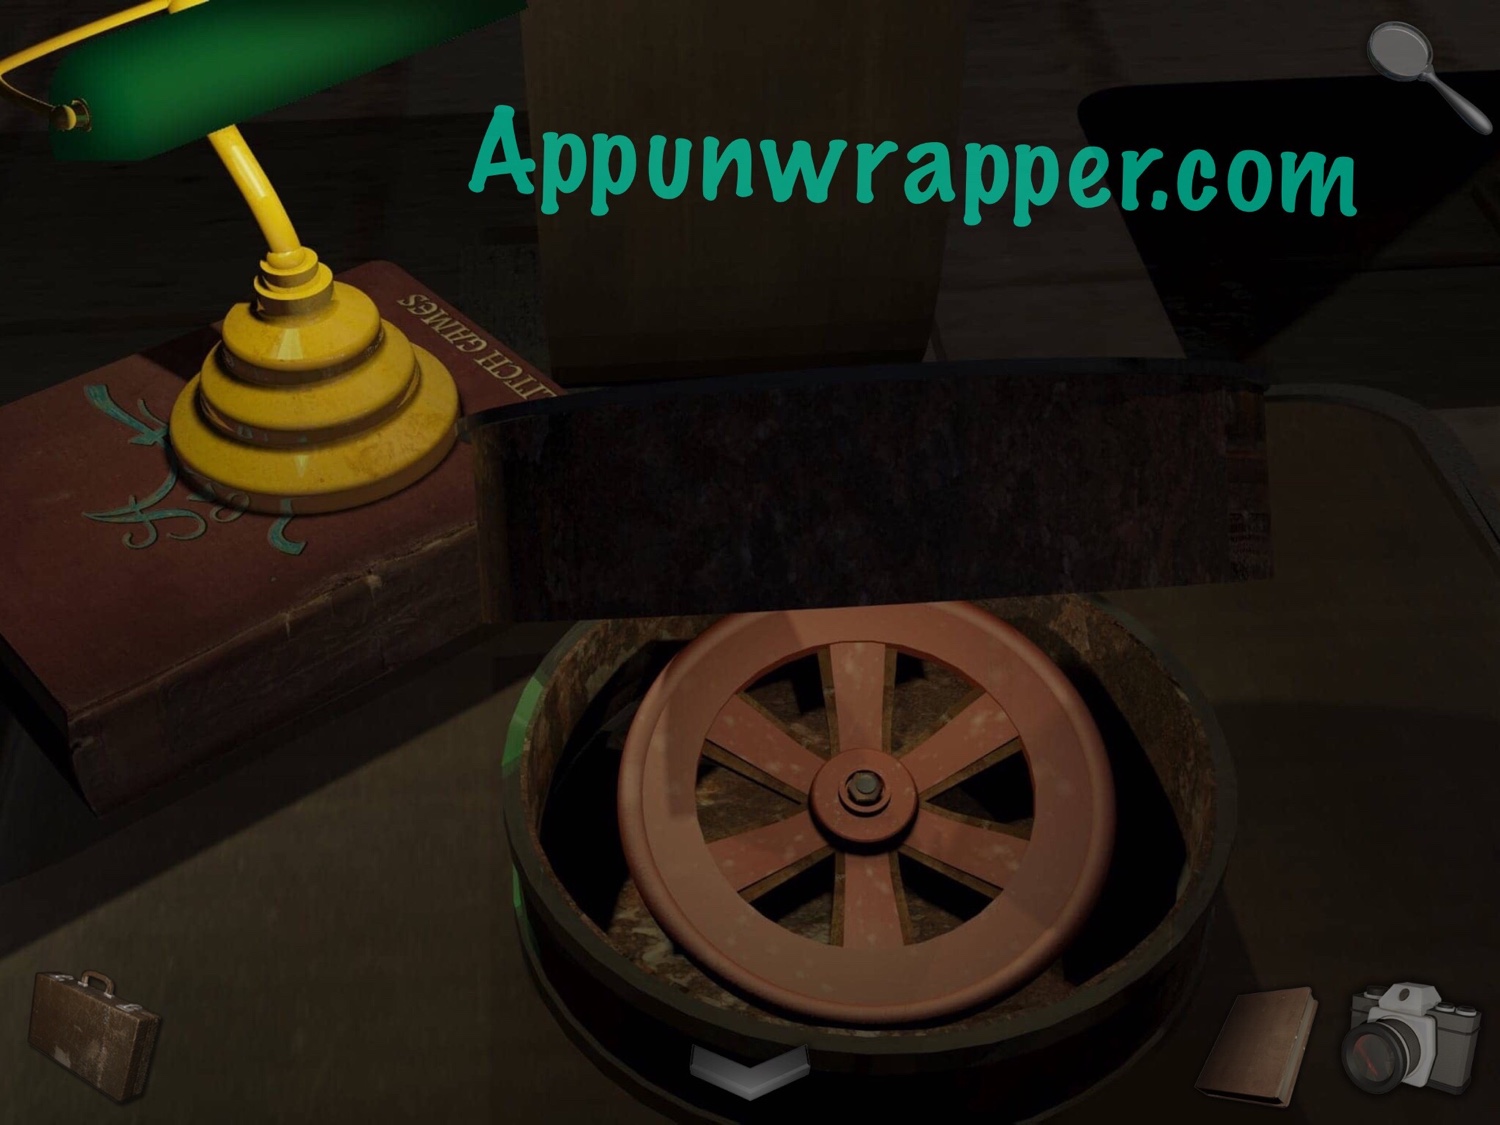
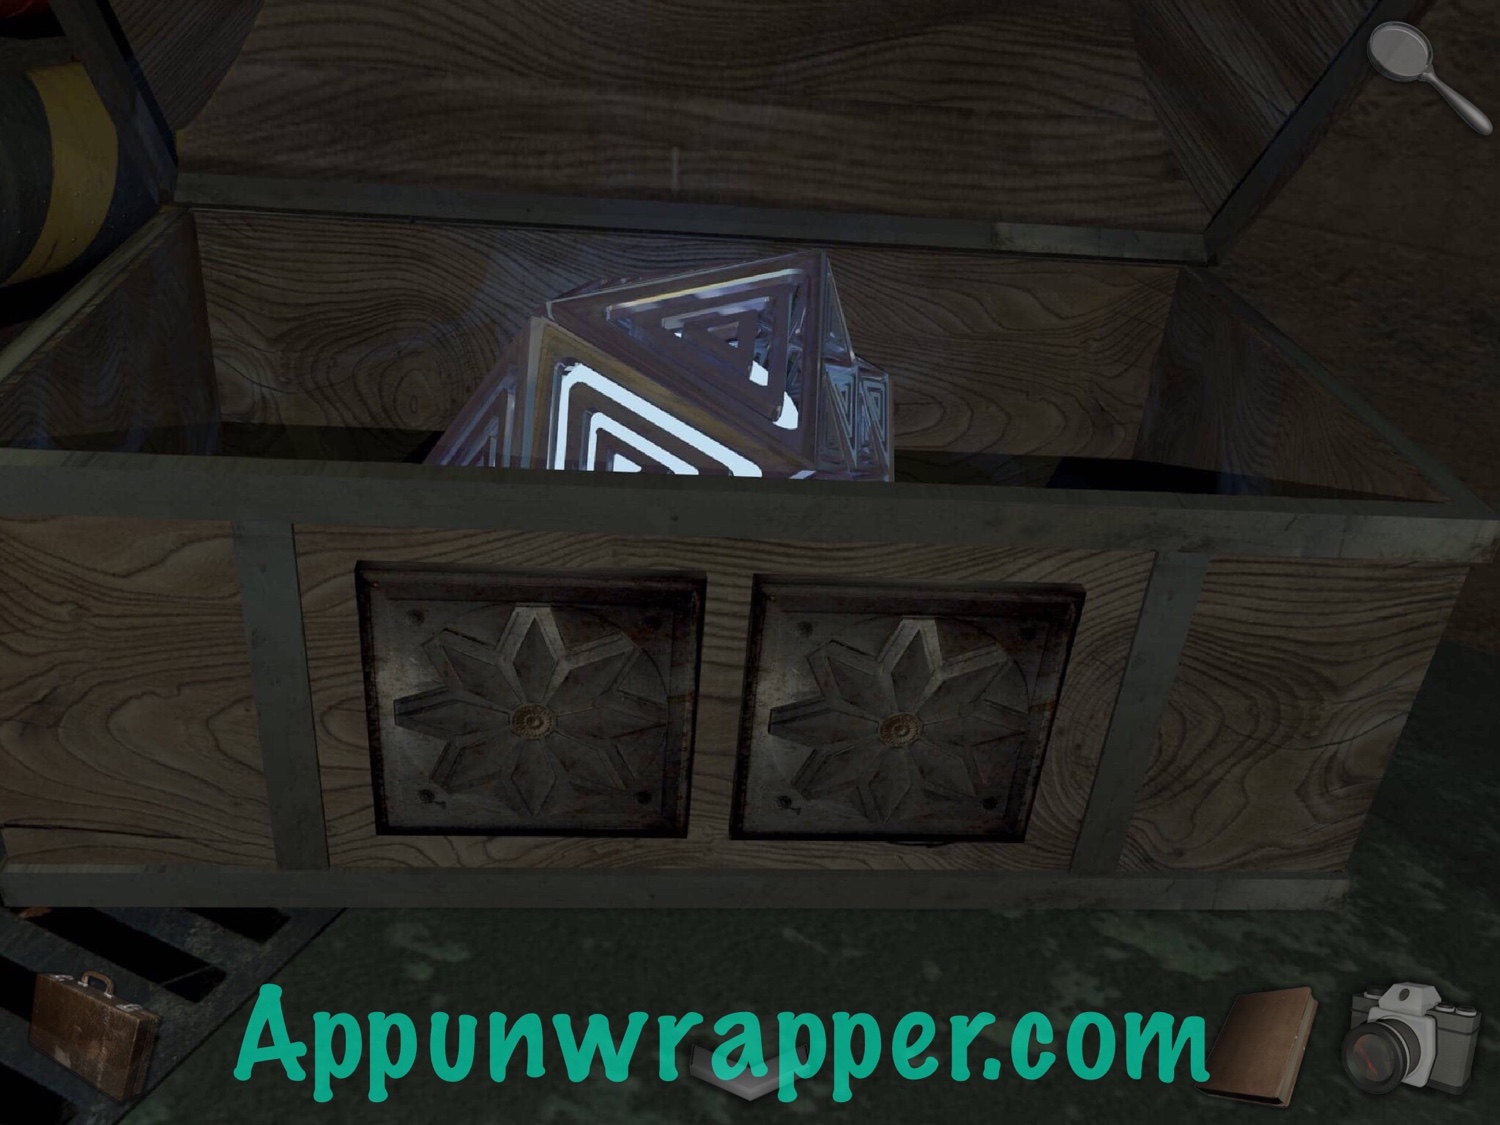
31. Go all the way back to the start of the chapter. Head into the cogs room and place the cog with the others. We still need a clue for the order. But while you’re here, use some duct tape to seal up the crack in the pipe. Also, place the wooden star in the slot on the chest.
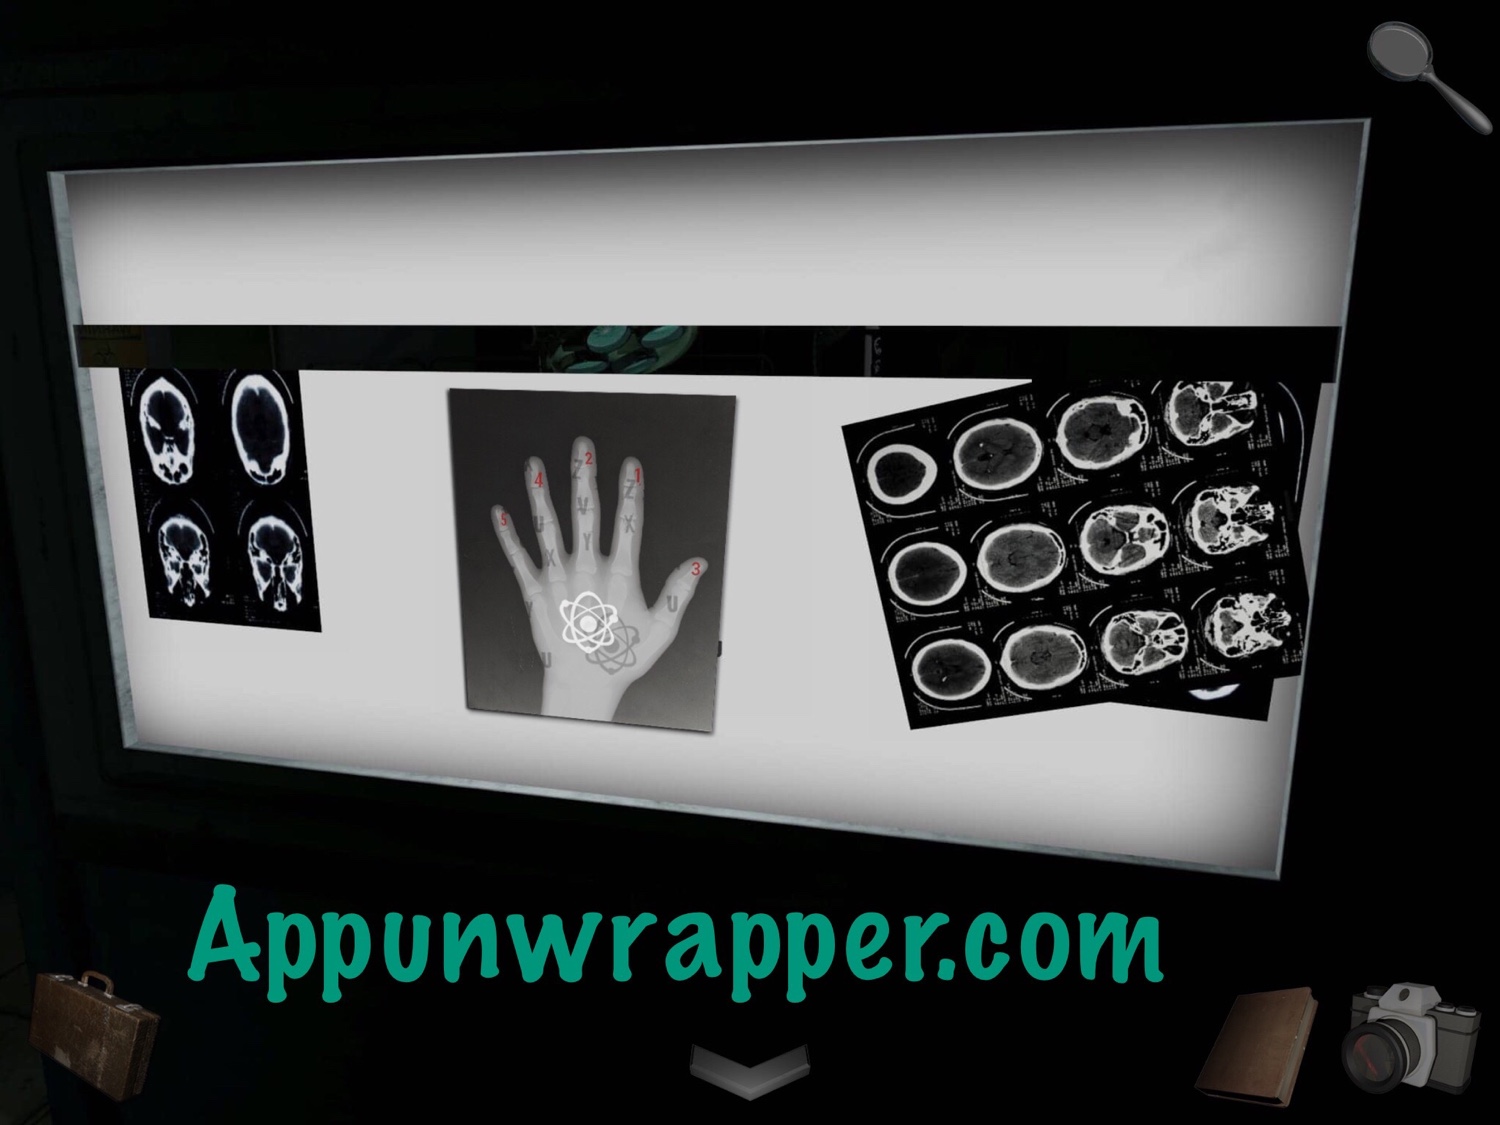
32. Go back to the lab and place the x-ray down with the others. Then move it so the Veritas logo lines up with the one under it. Take a photo. You end up with this clue:
5U Y4 U2 X1 Z3
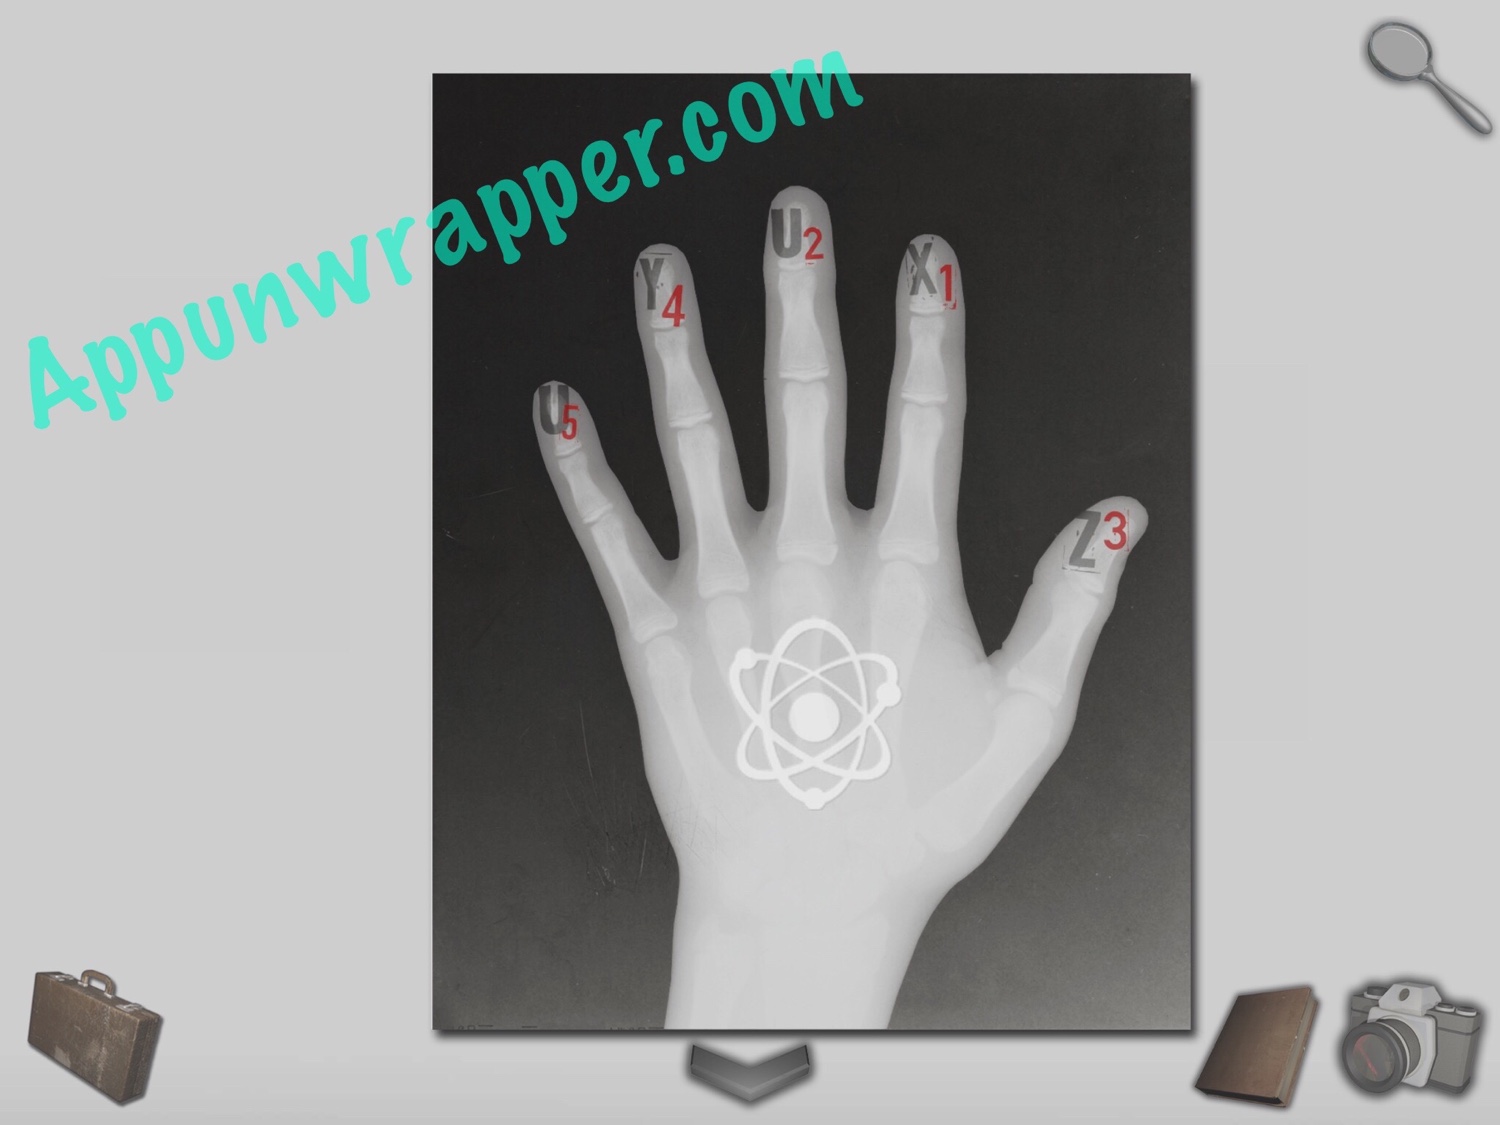
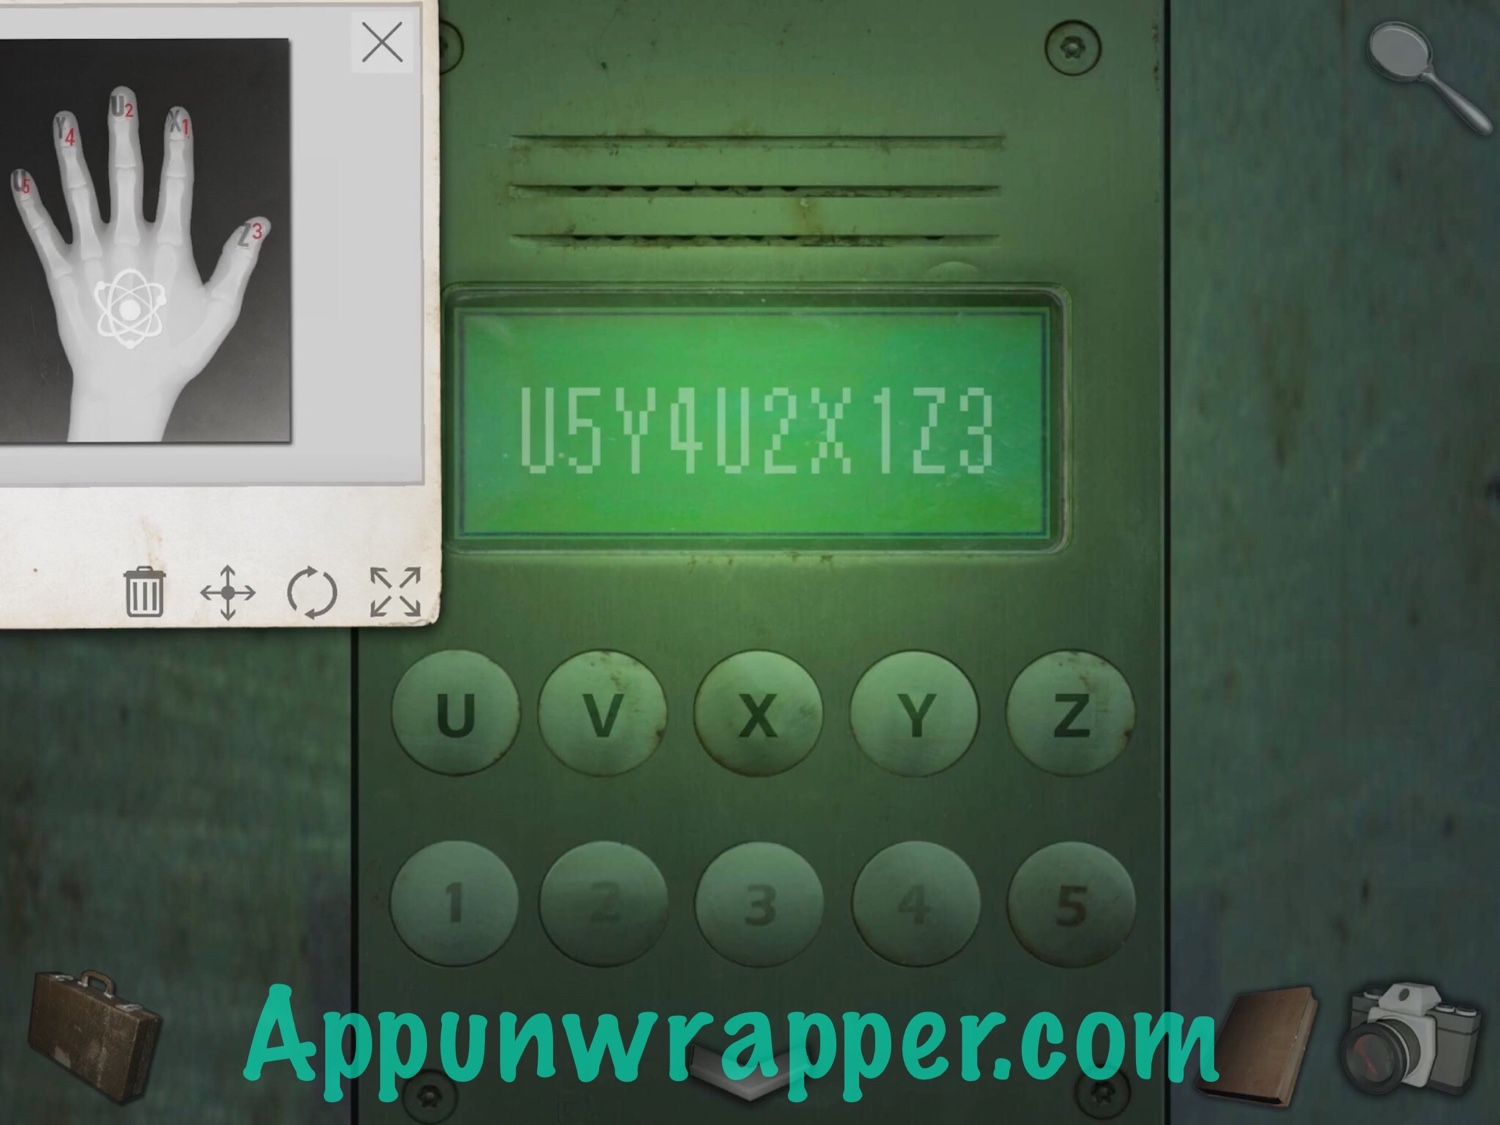
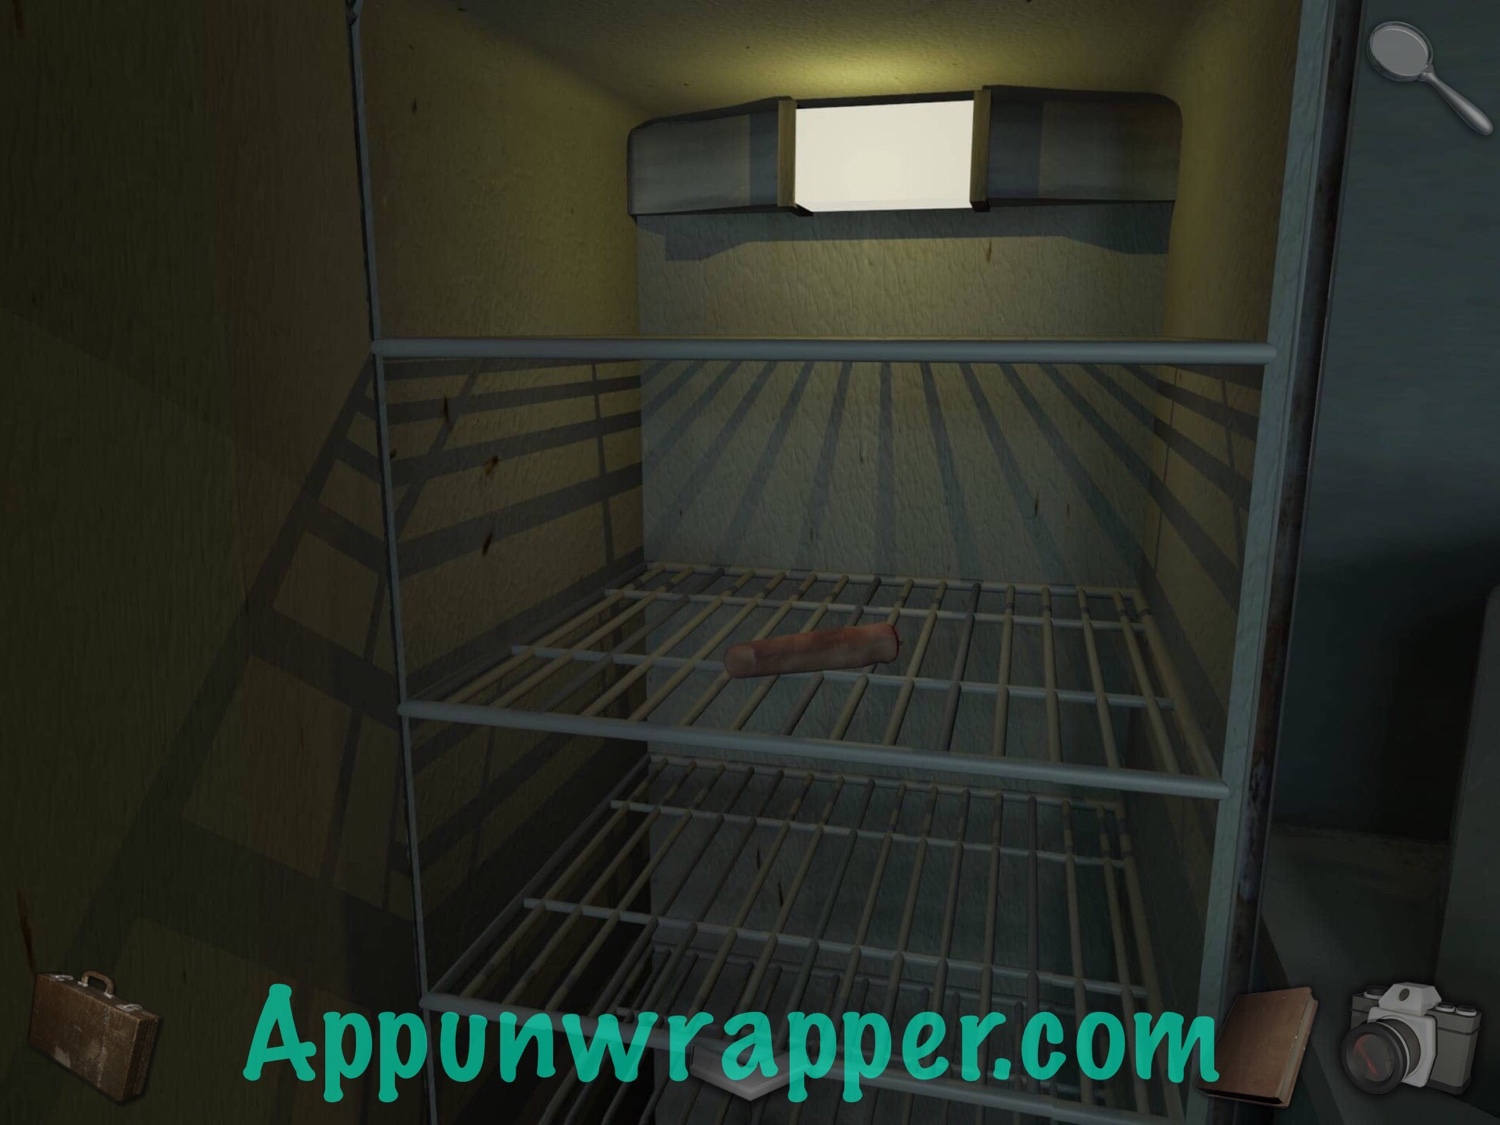
33. Go to the back of the room and zoom in on the fridge. Enter U5Y4U2X1Z3 to open the fridge. Grab the severed finger from inside.
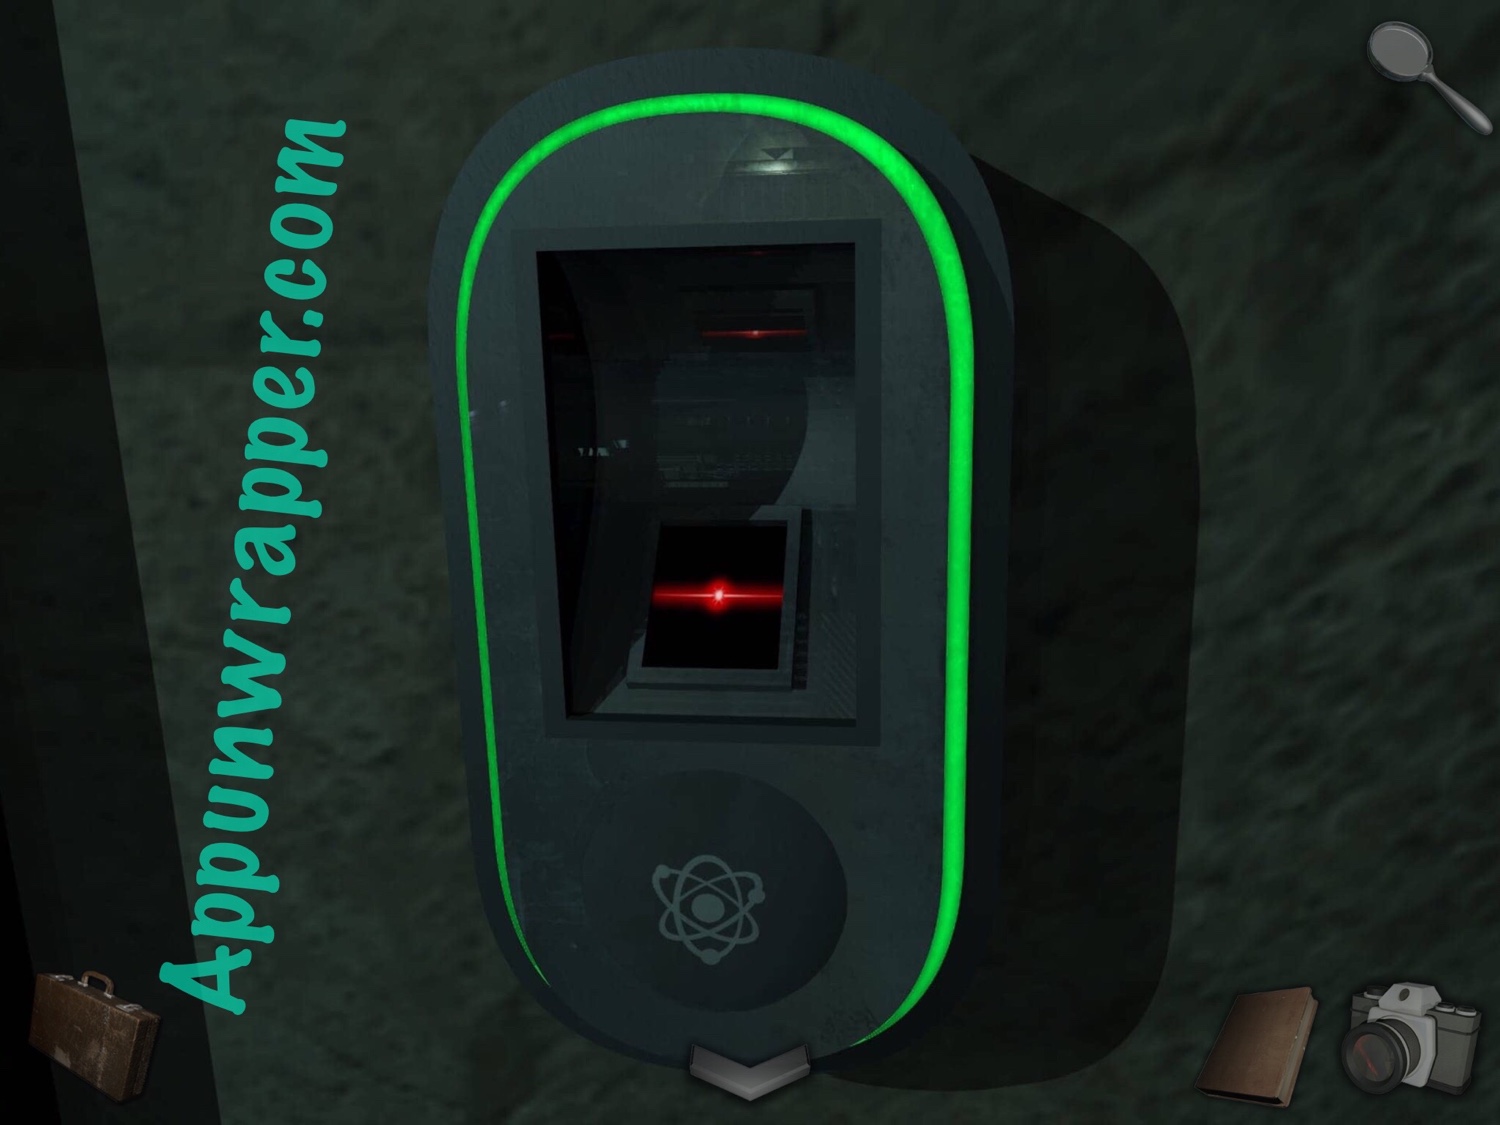
34. Head back to the NO ENTRY door and place the severed finger on the scanner to open it. Head through and up the stairs.
34. There’s a slot for something right at the entrance, but we’ll come back to it. Head inside and pick up the mug.
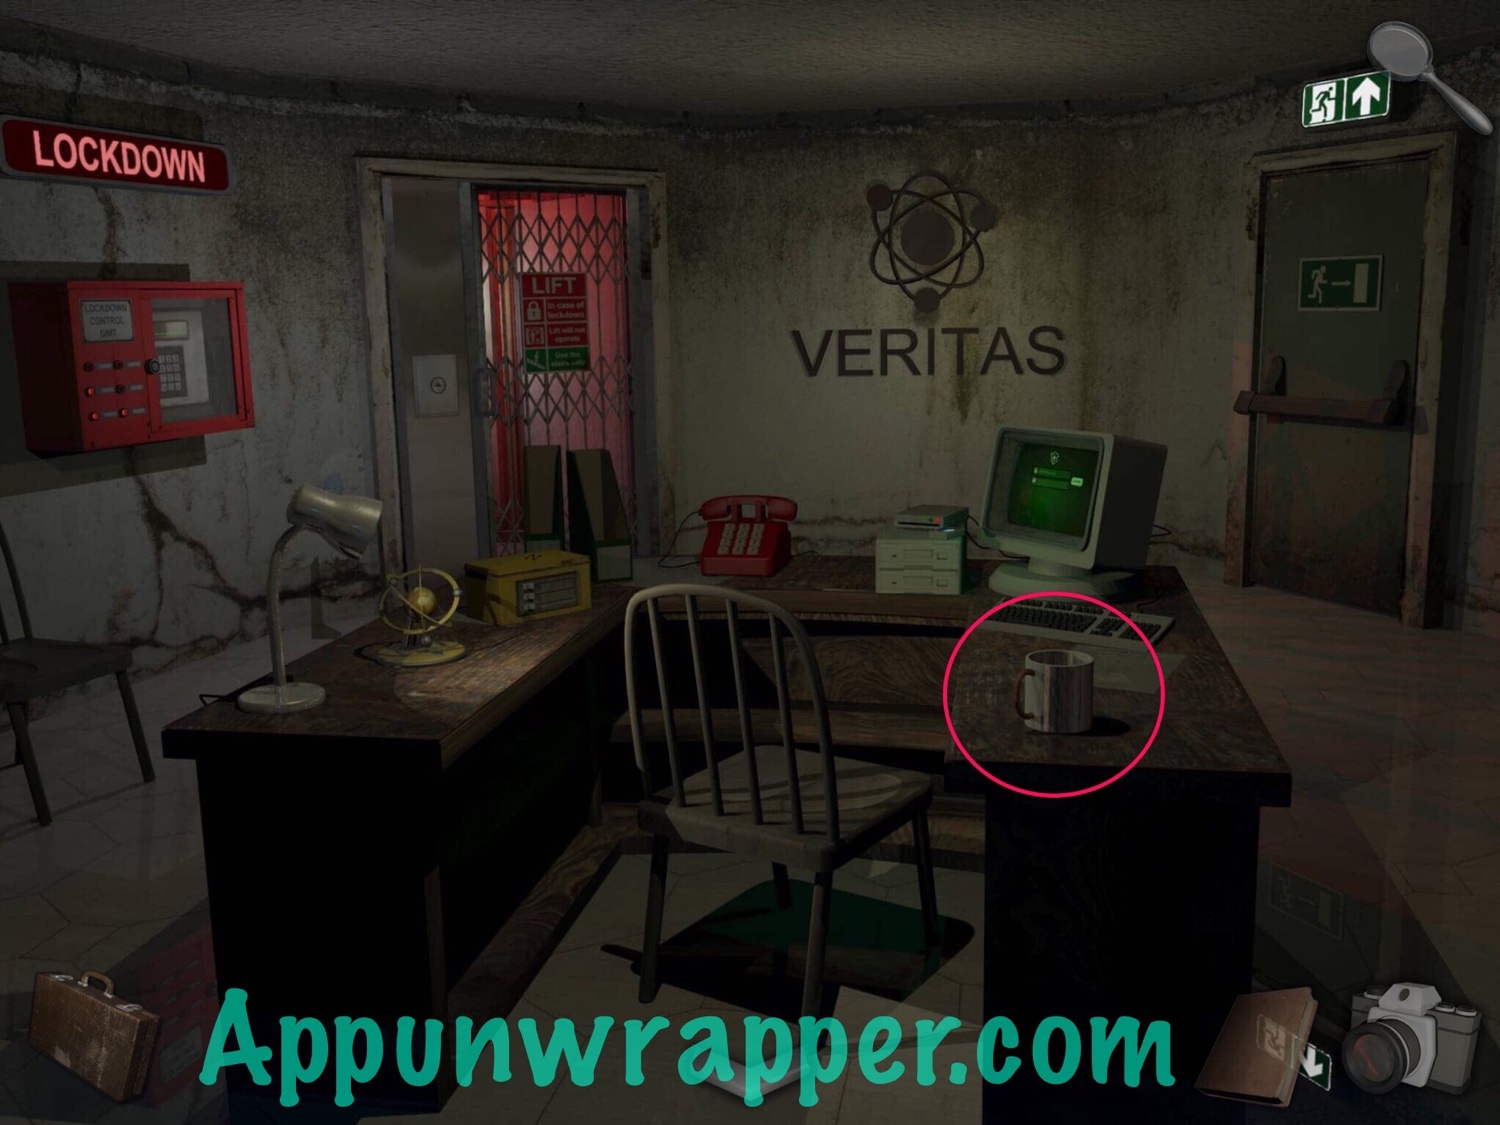
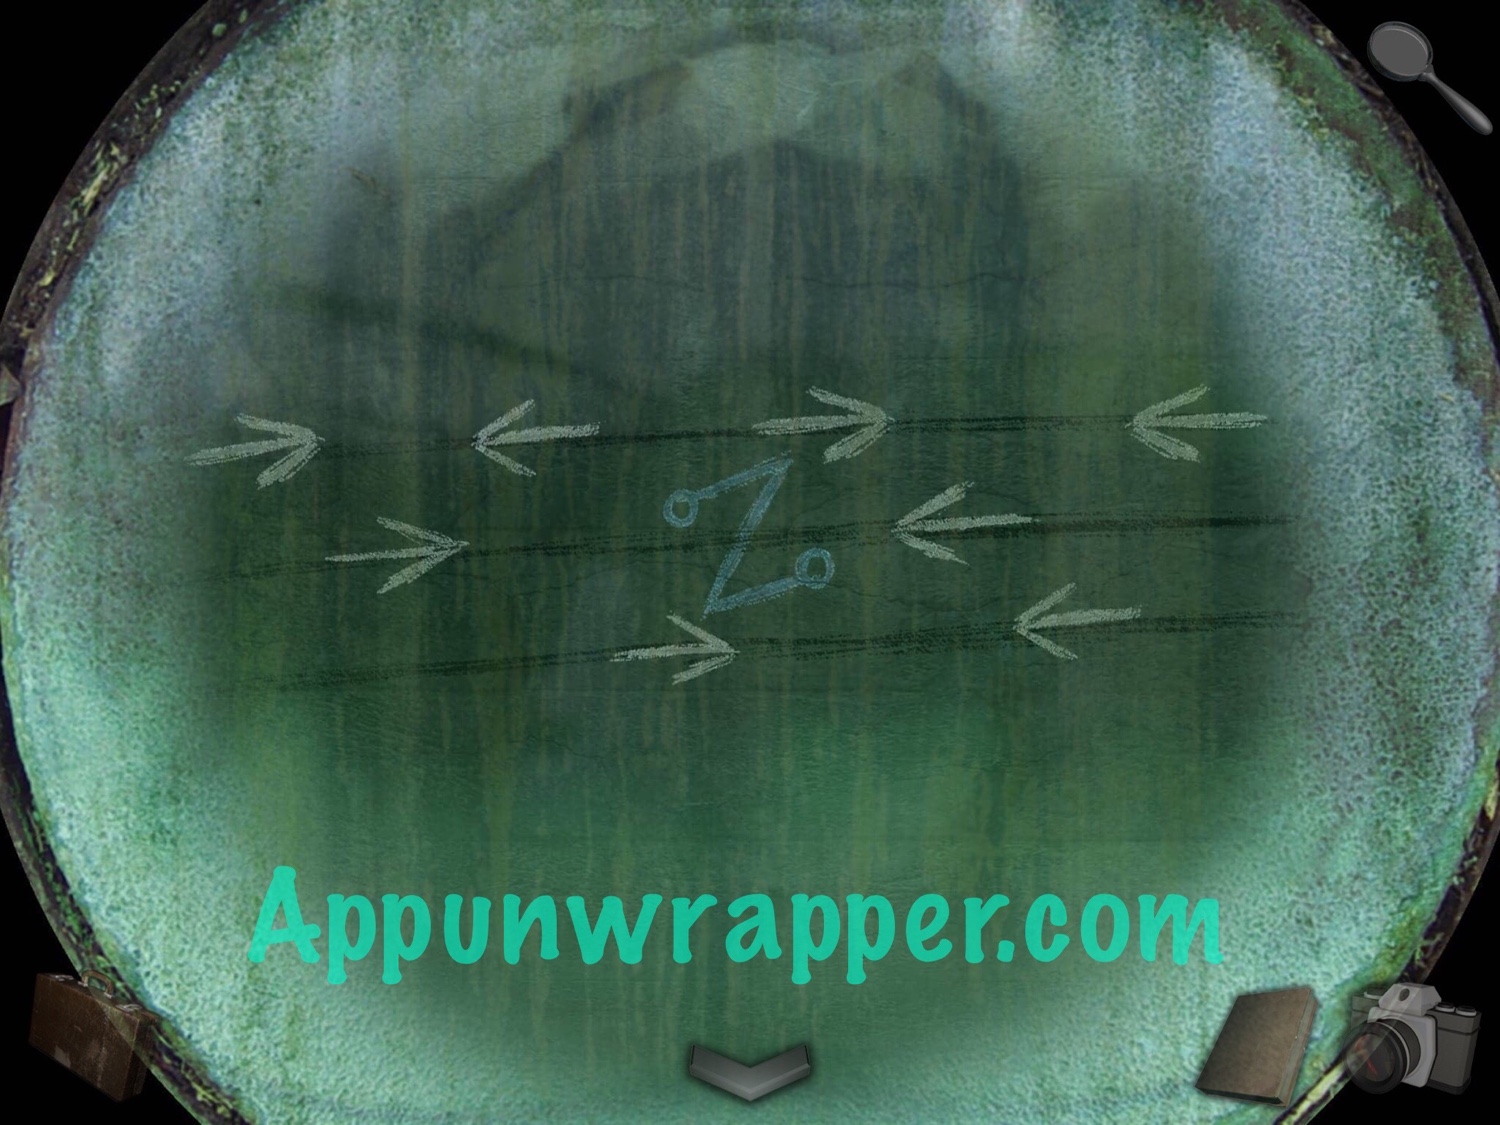
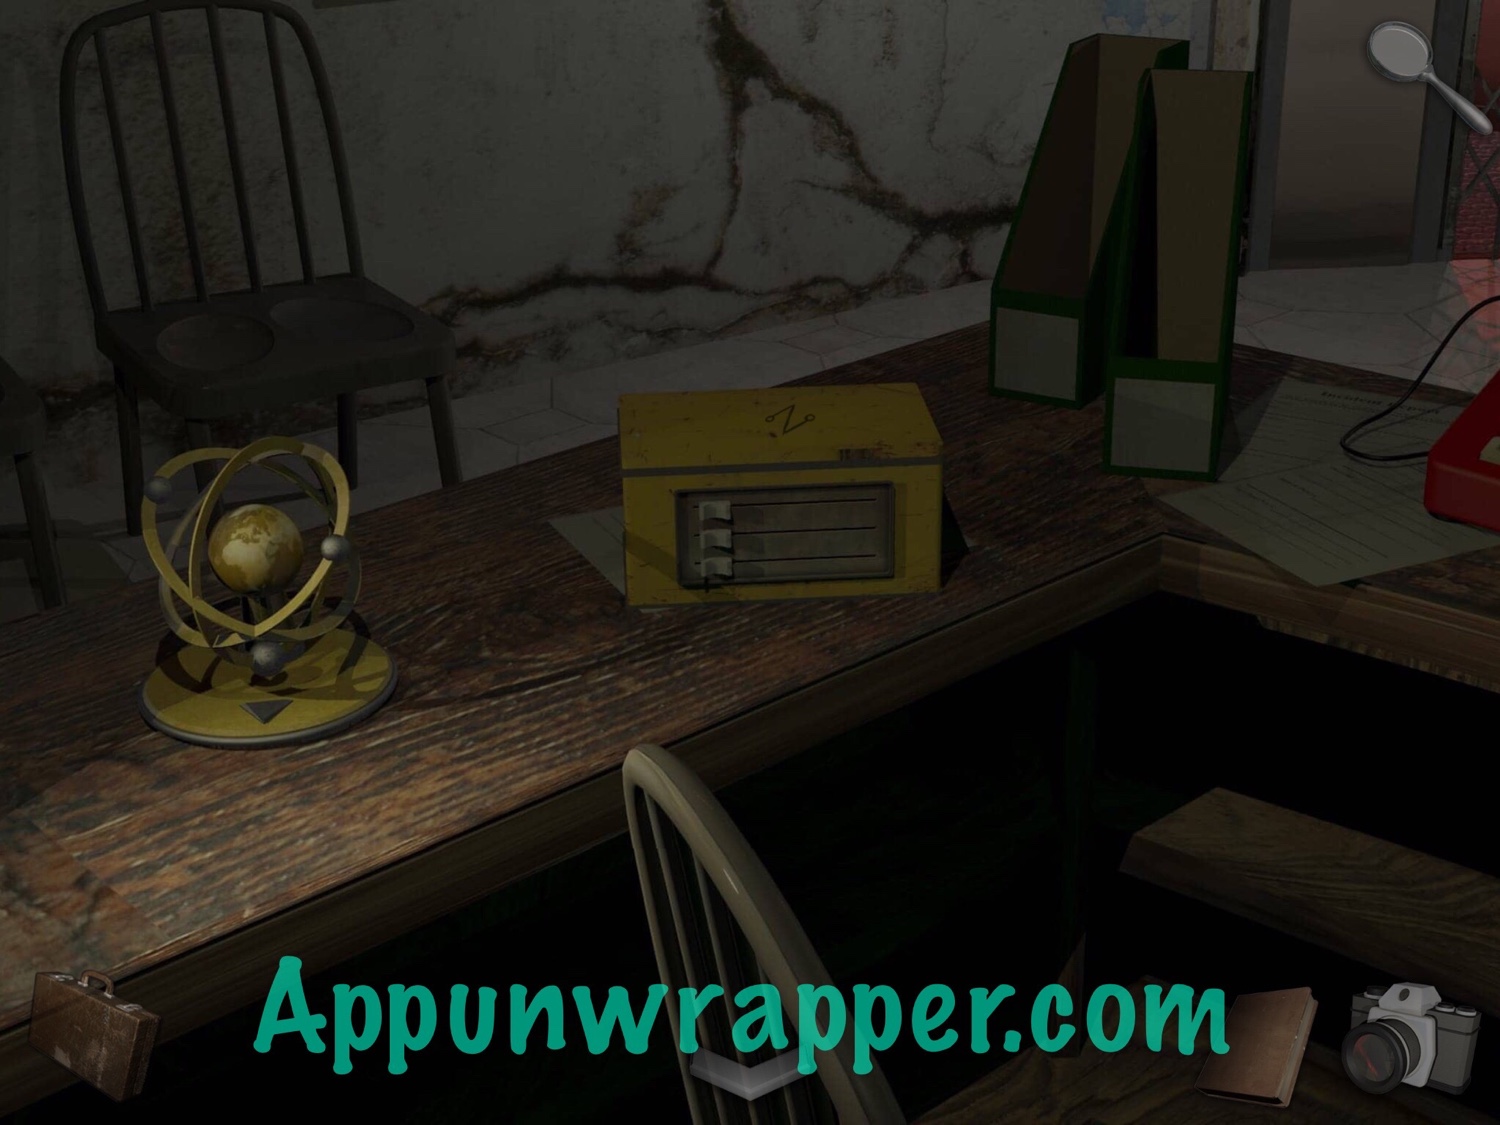
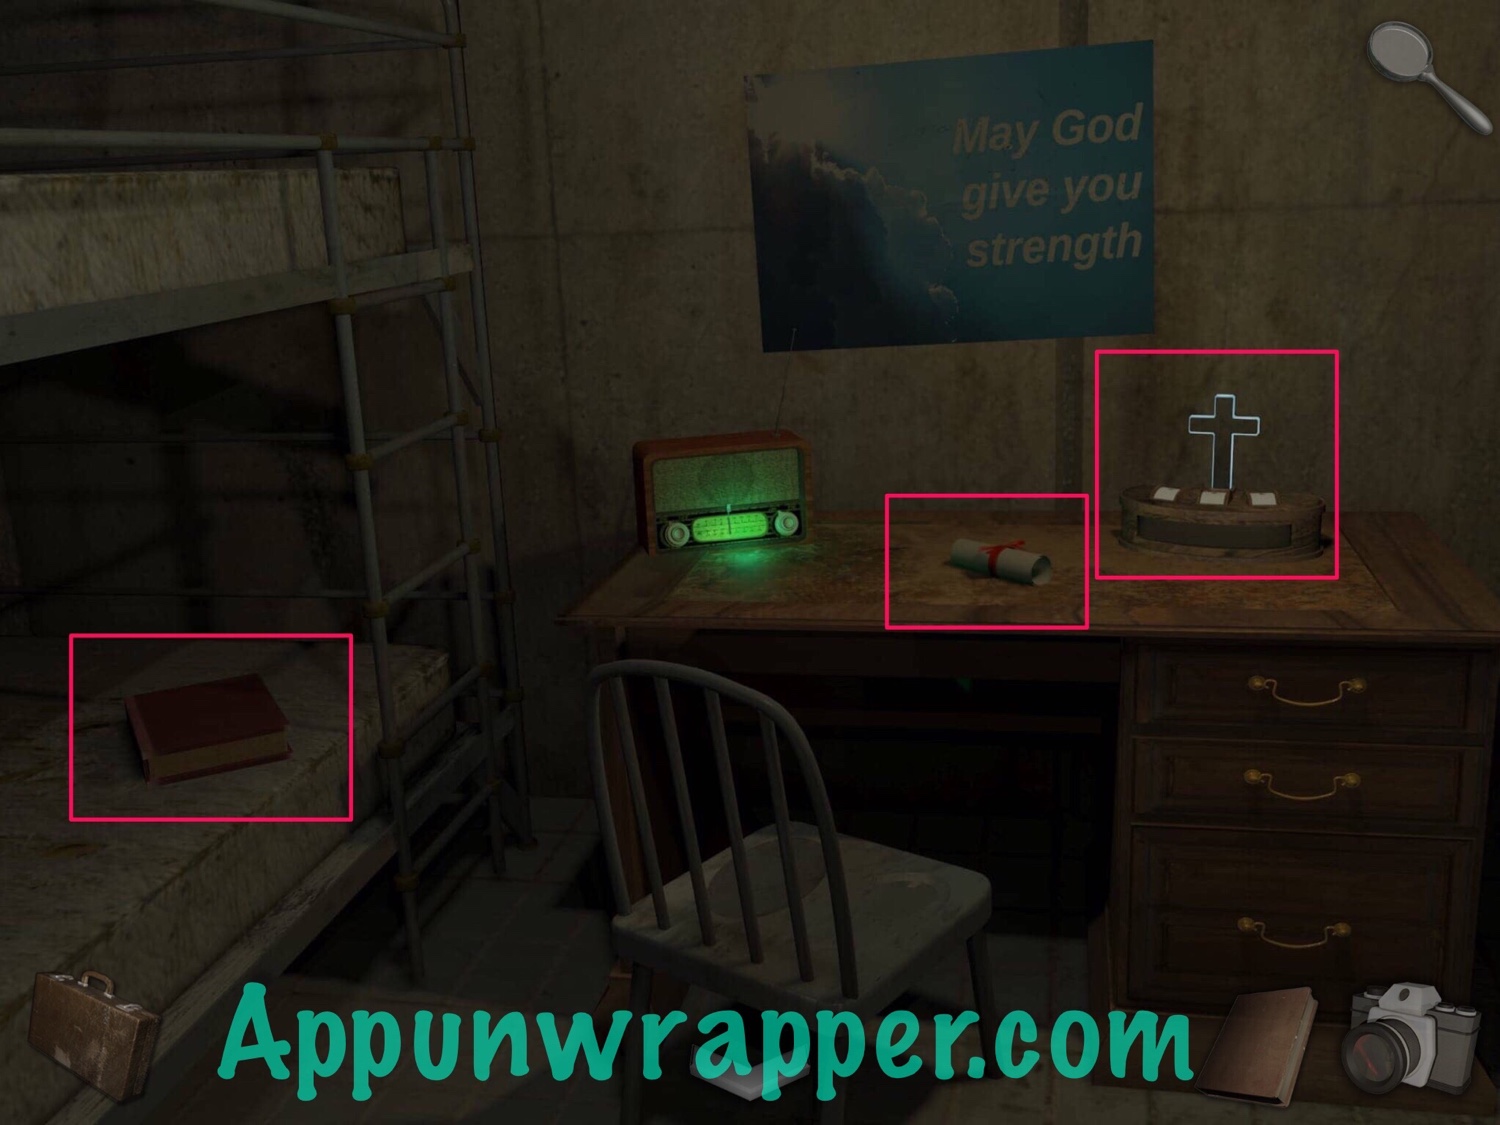
35. Examine the left side of the desk. Grab the metal globe and tap on the Z puzzle next to it.
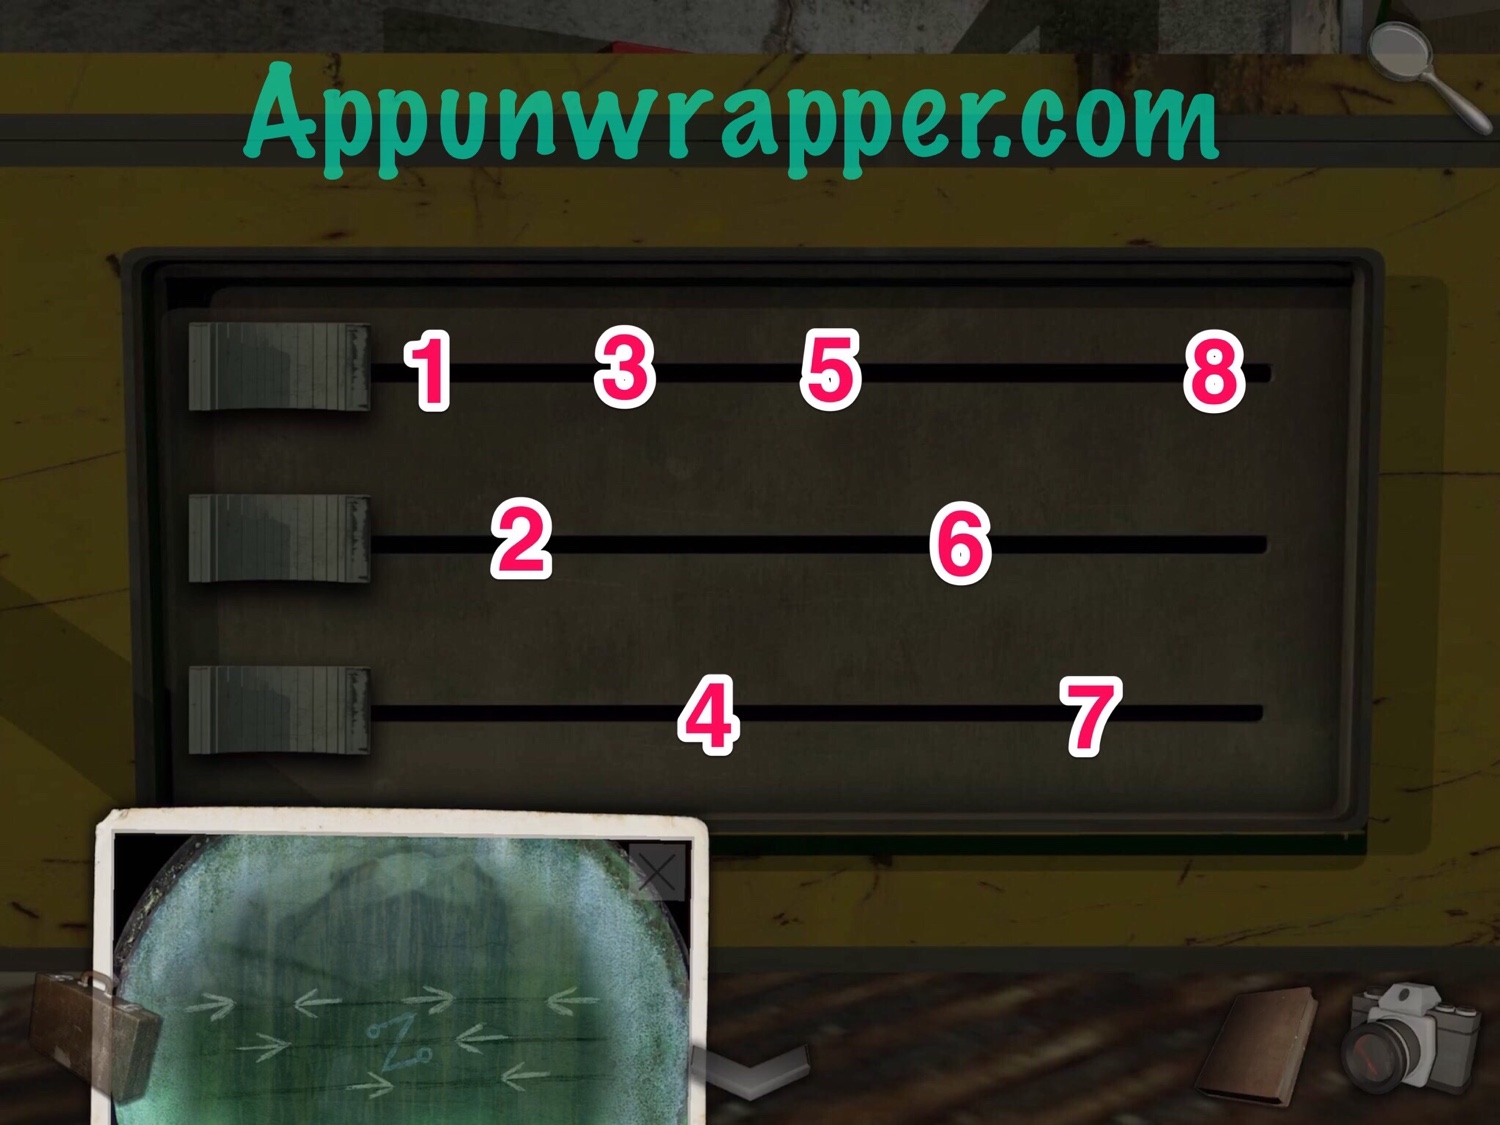
36. Take out the Z clue and solve the Z puzzle. Basically, follow the arrows going from left to right. It’ll be clearer in the video than in a screenshot, but I’ve numbered them anyway. Then take the bedroom key card.
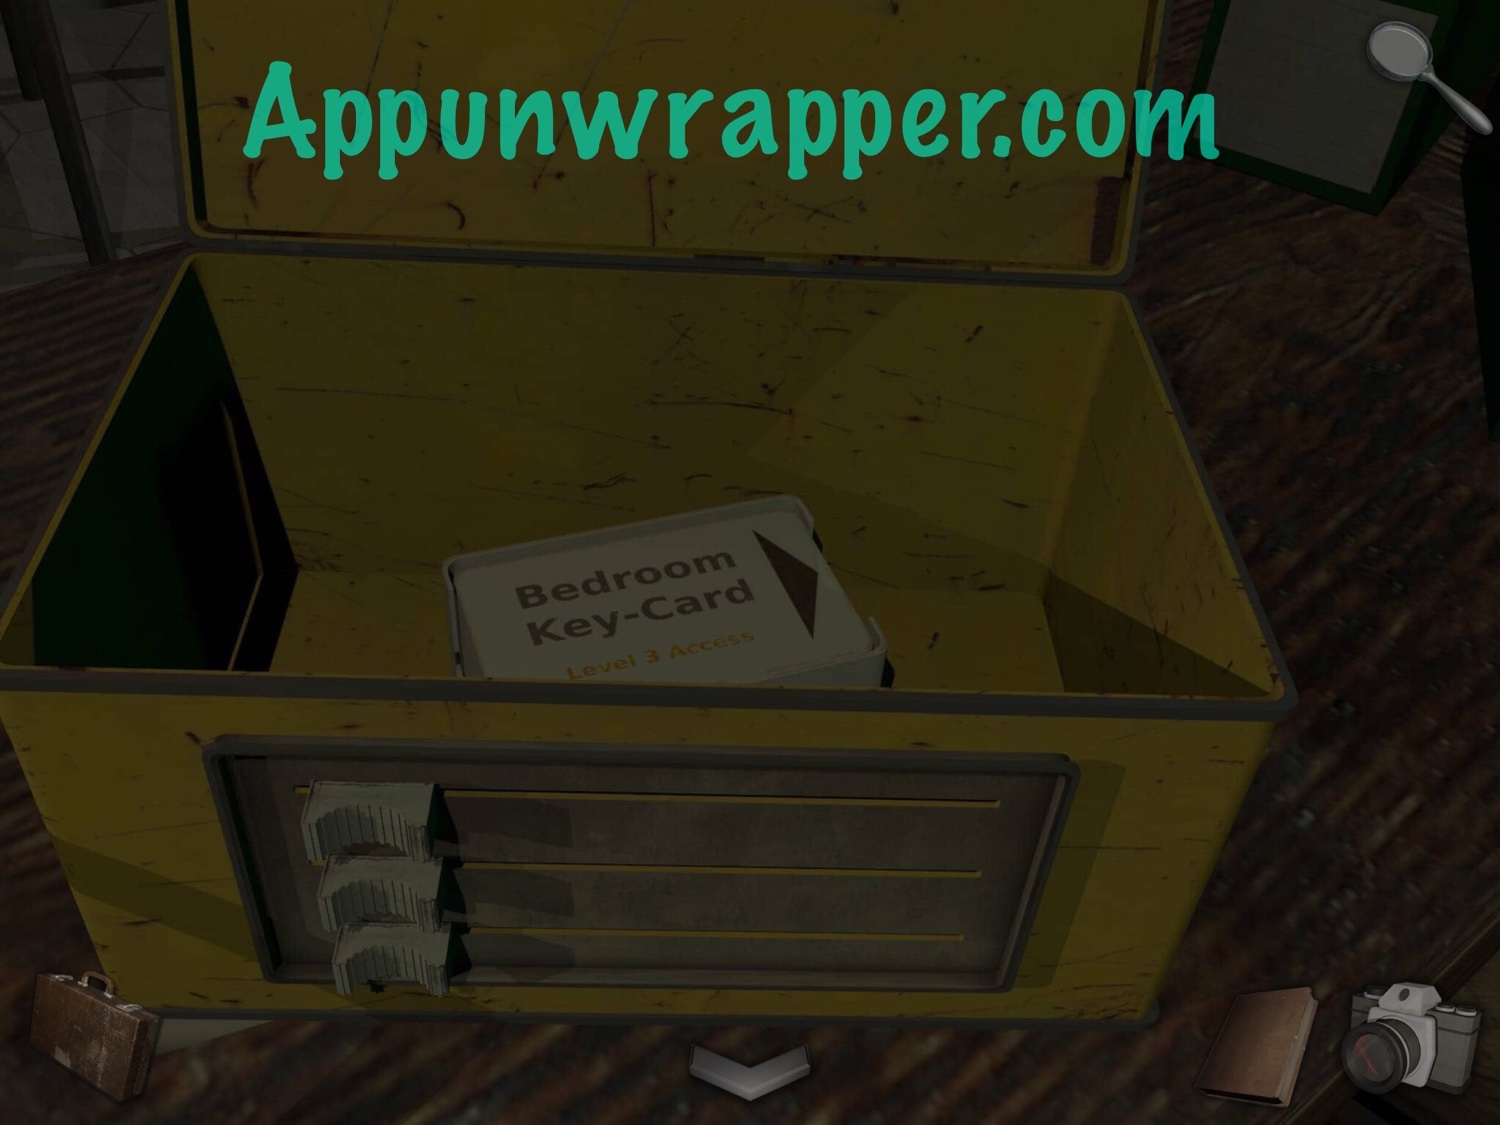
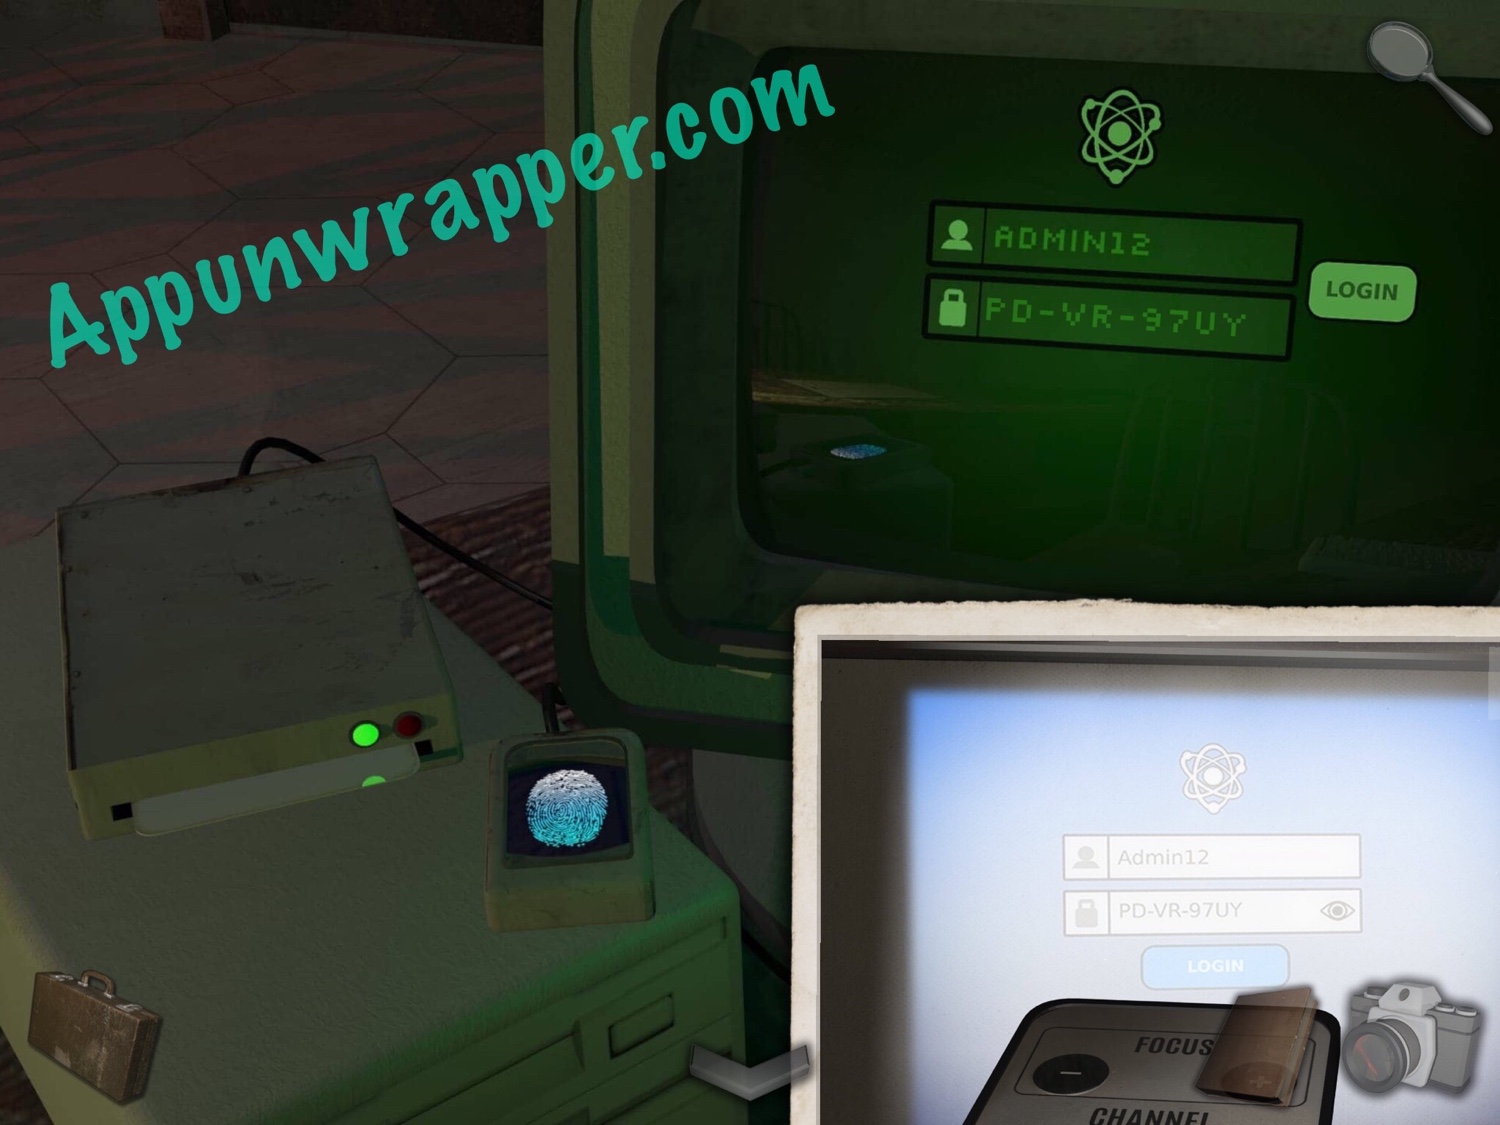
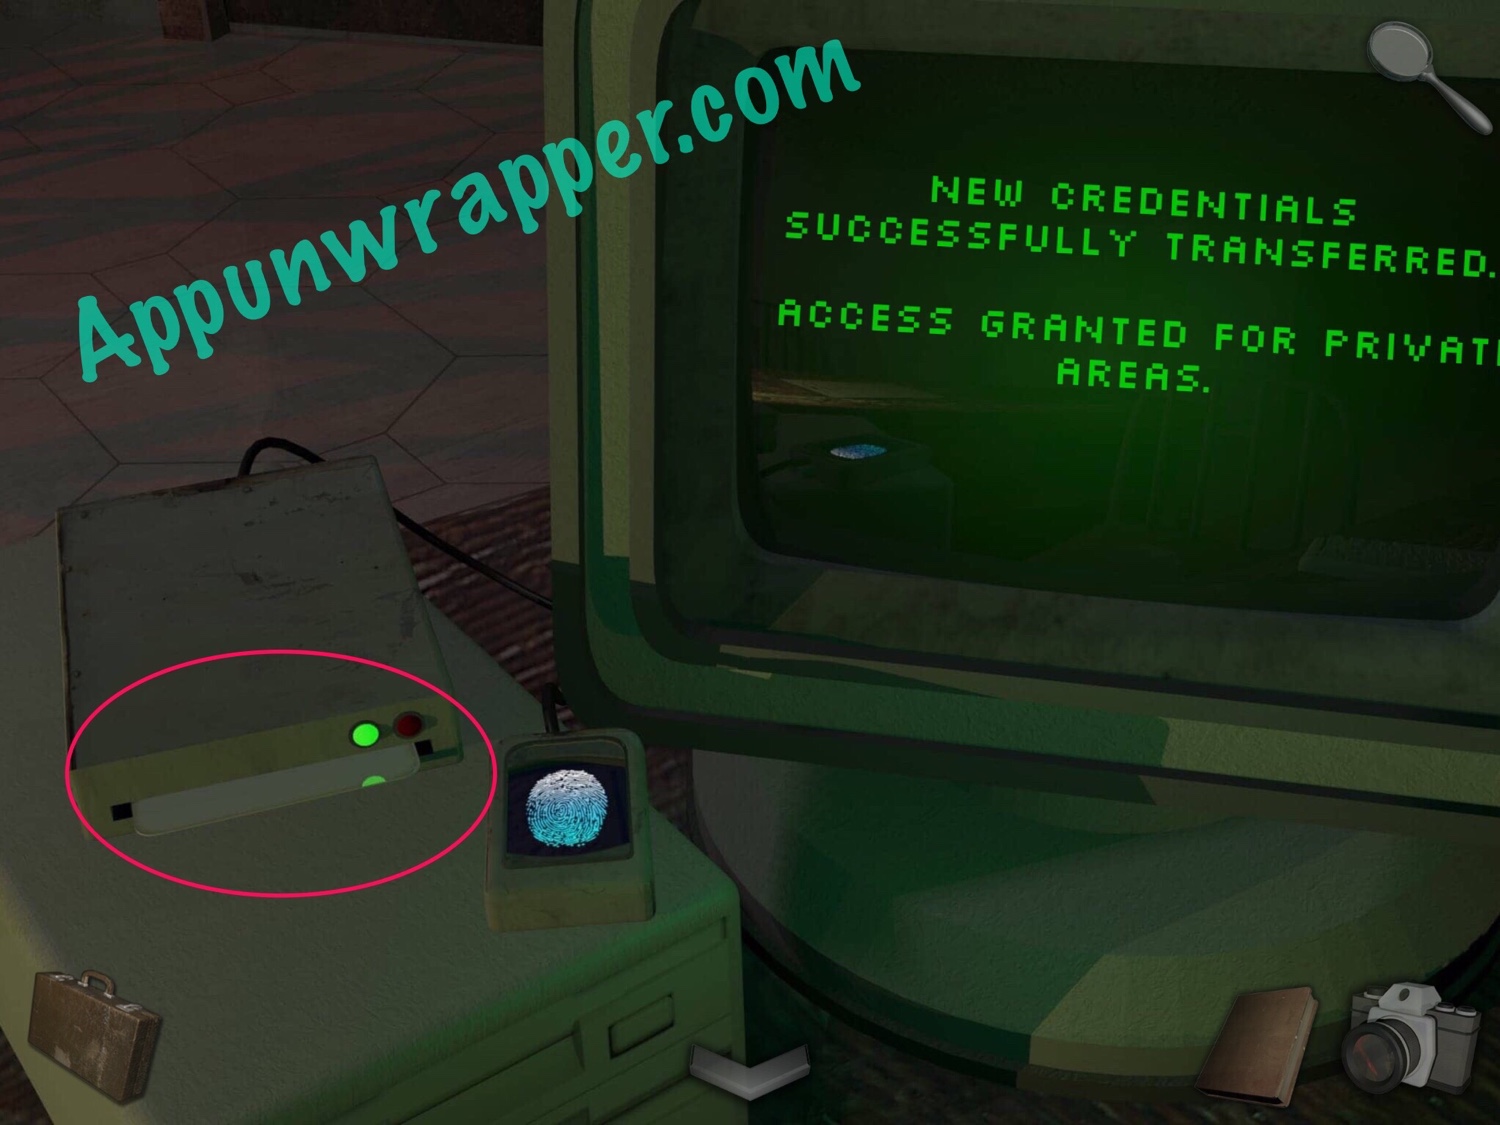
37. Tap on the computer. Insert the key card into the slot. Then take out the the photo of the password from the projector and enter it into the computer to log in. Use the severed finger on the fingerprint scanner. Now the key card should give you a lot more access. Take it back.
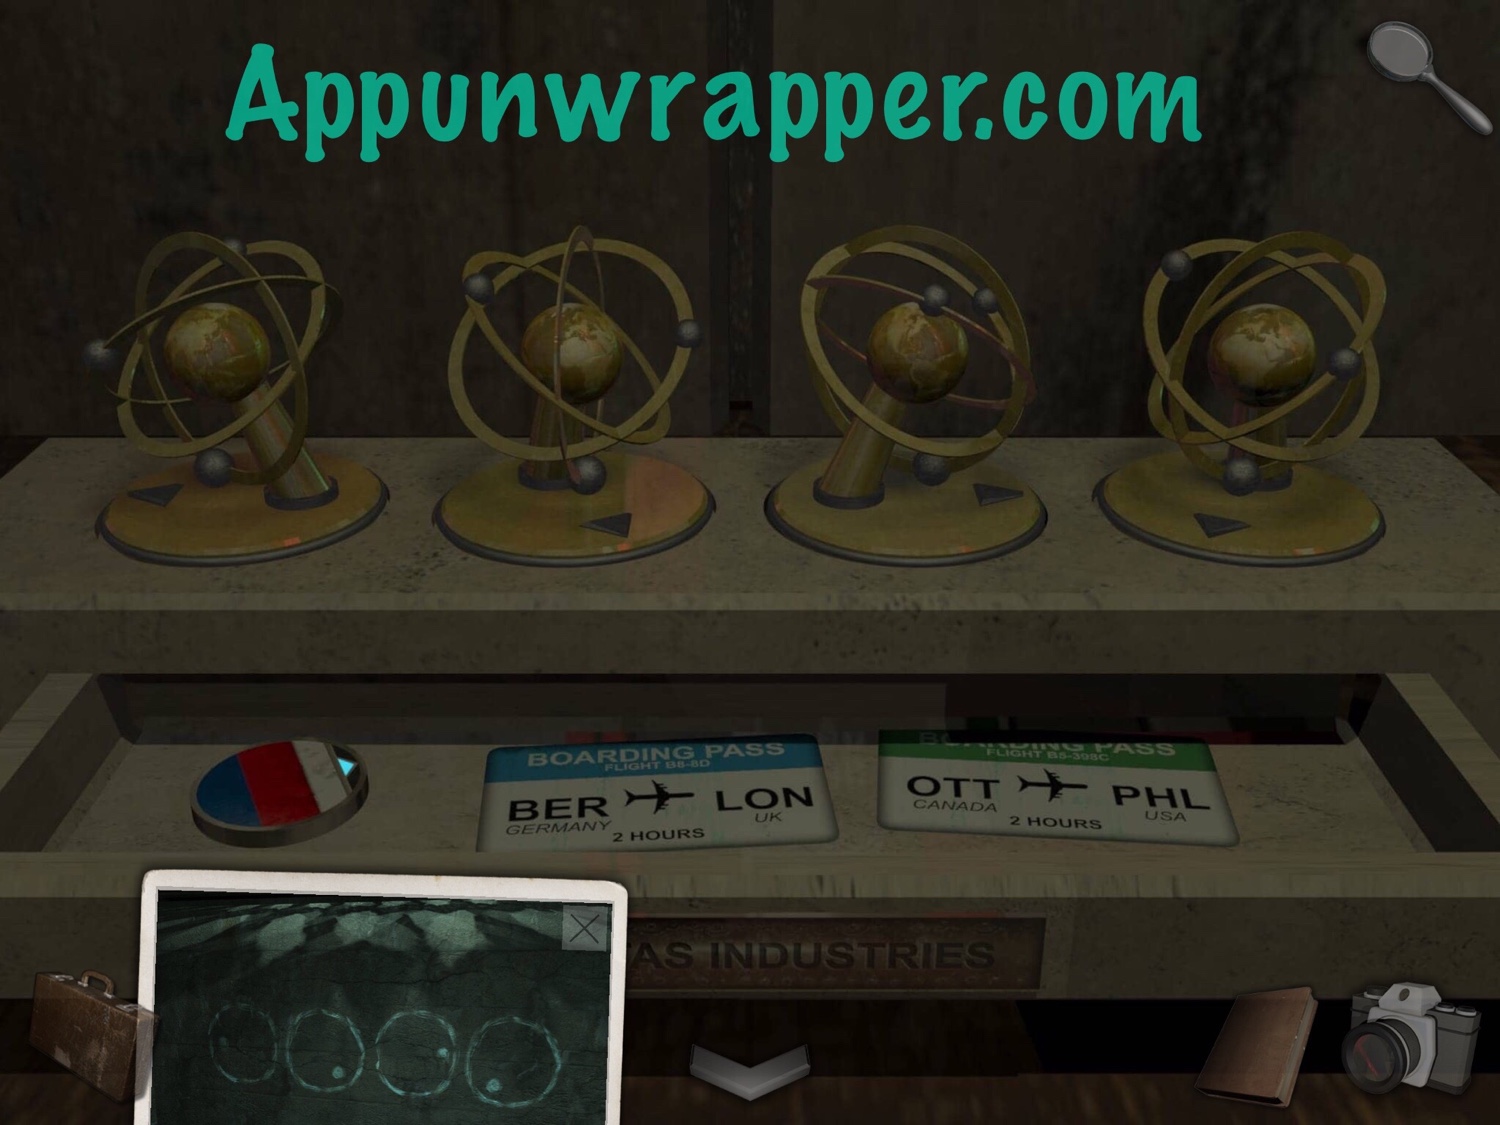
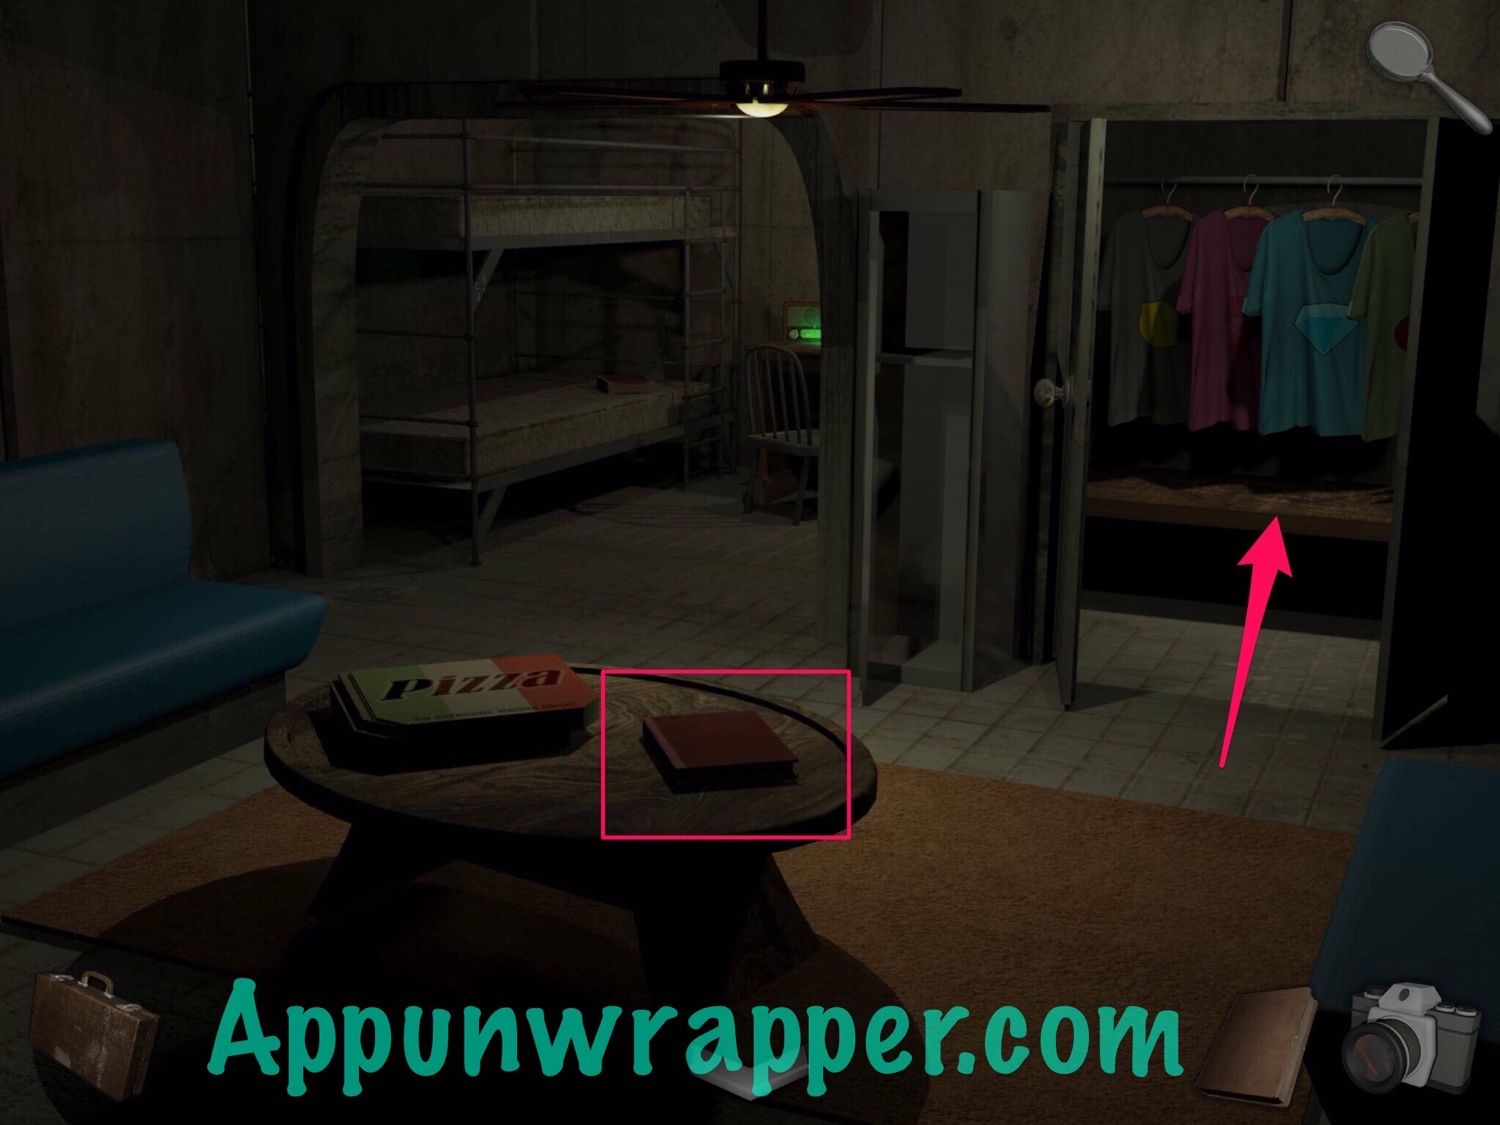
38. You can enter the stairwell, but it won’t take you anywhere right now, so just go back the same way you came. Go back to the locker room with the bunk beds. In a closet to the left are some metal globes. Place the one you found with the others. Then take out the photo of the clue from the wall and turn each globe to match the drawing. Then take the Russia flag token and take a photo of the two boarding passes.
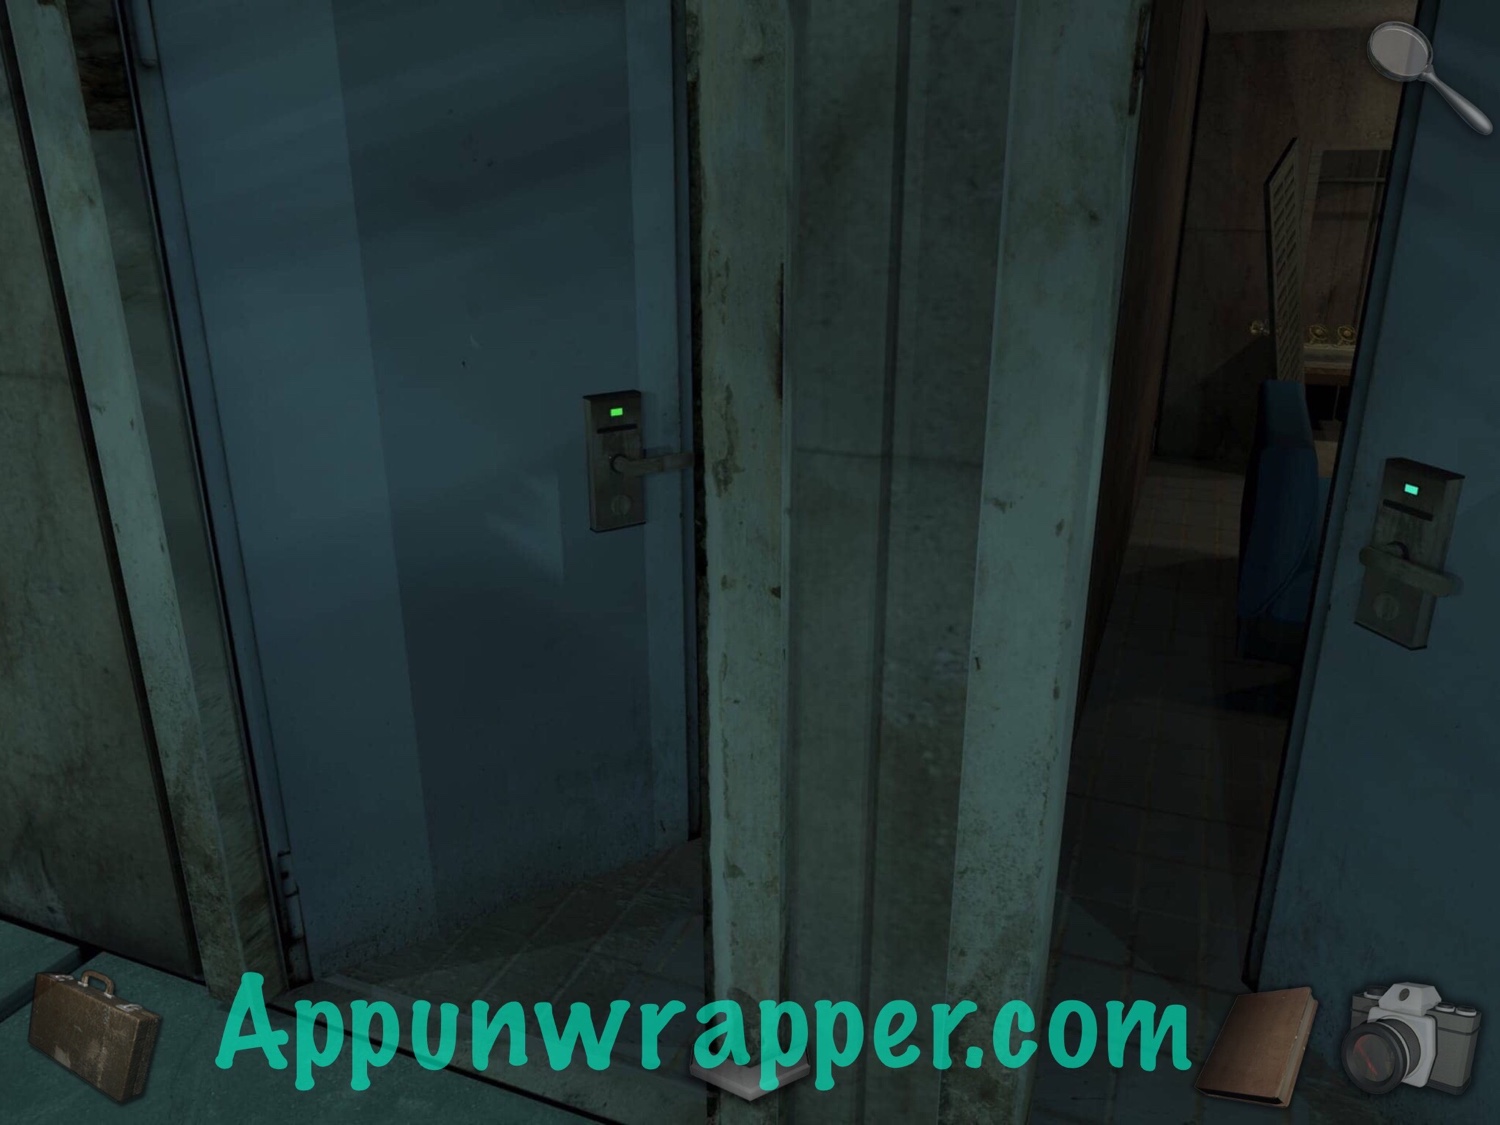
39. Leave the room and use the key card to open the door on the left. Go through.
40. Read the journal on the table. Then use the doorknob to open the closet. Take a photo of the shirts in the closet, because it’s a clue.

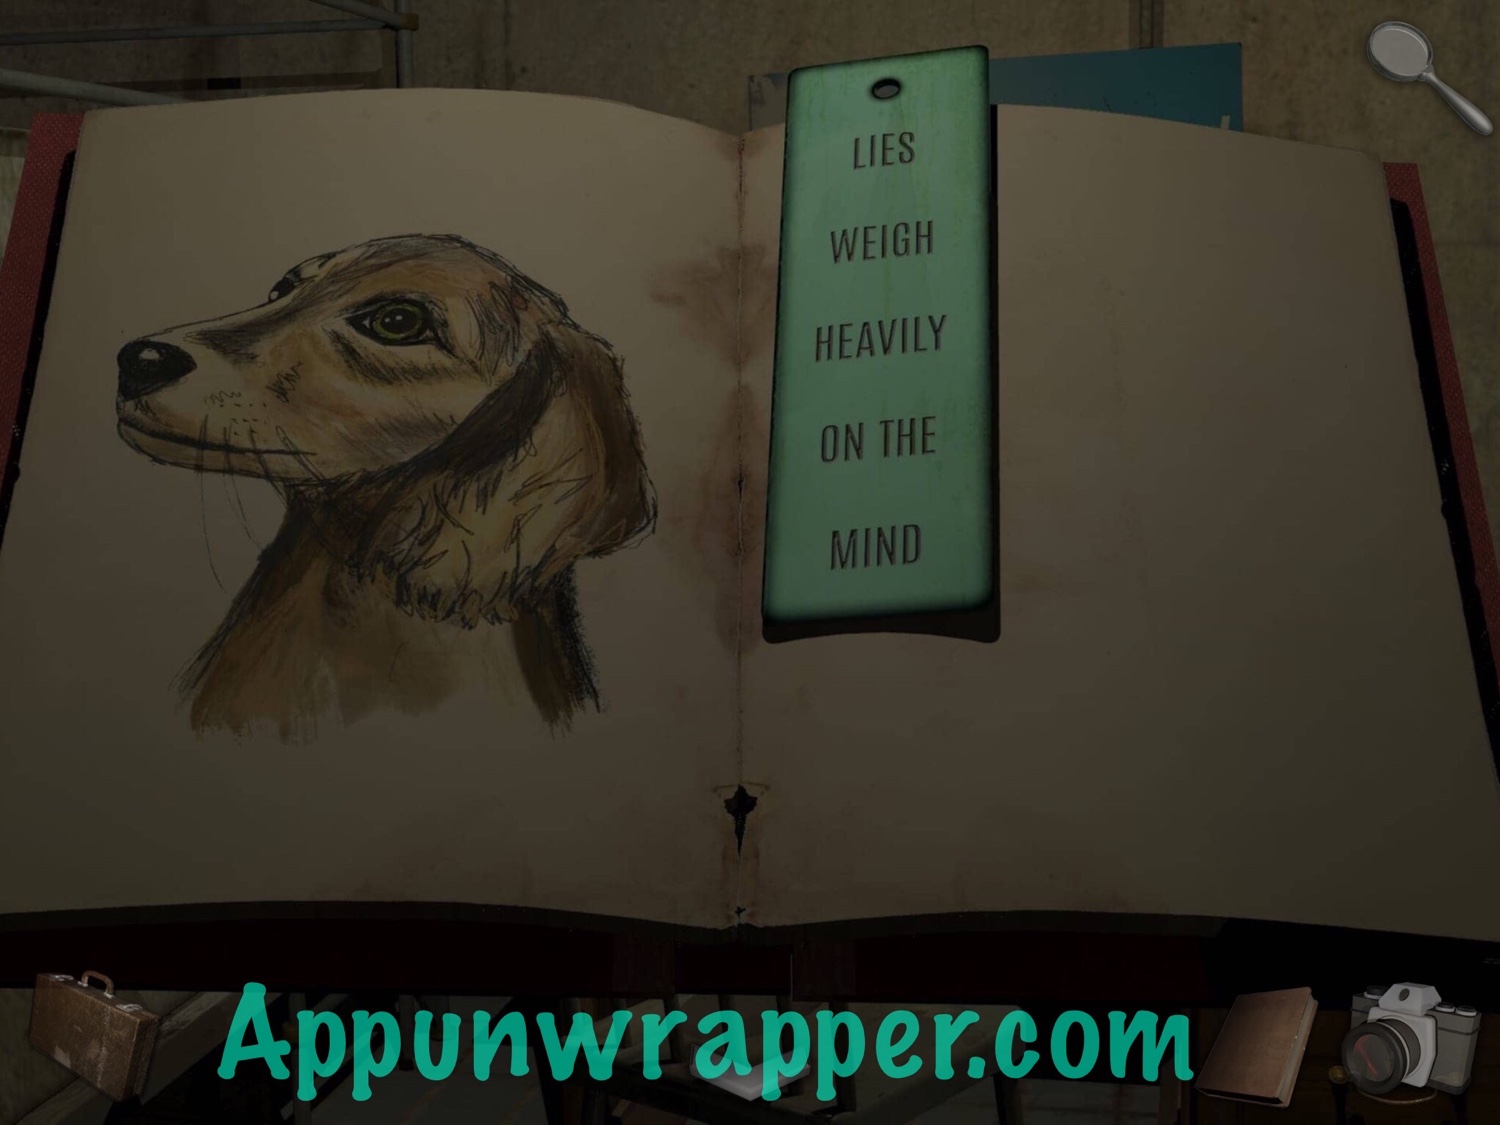
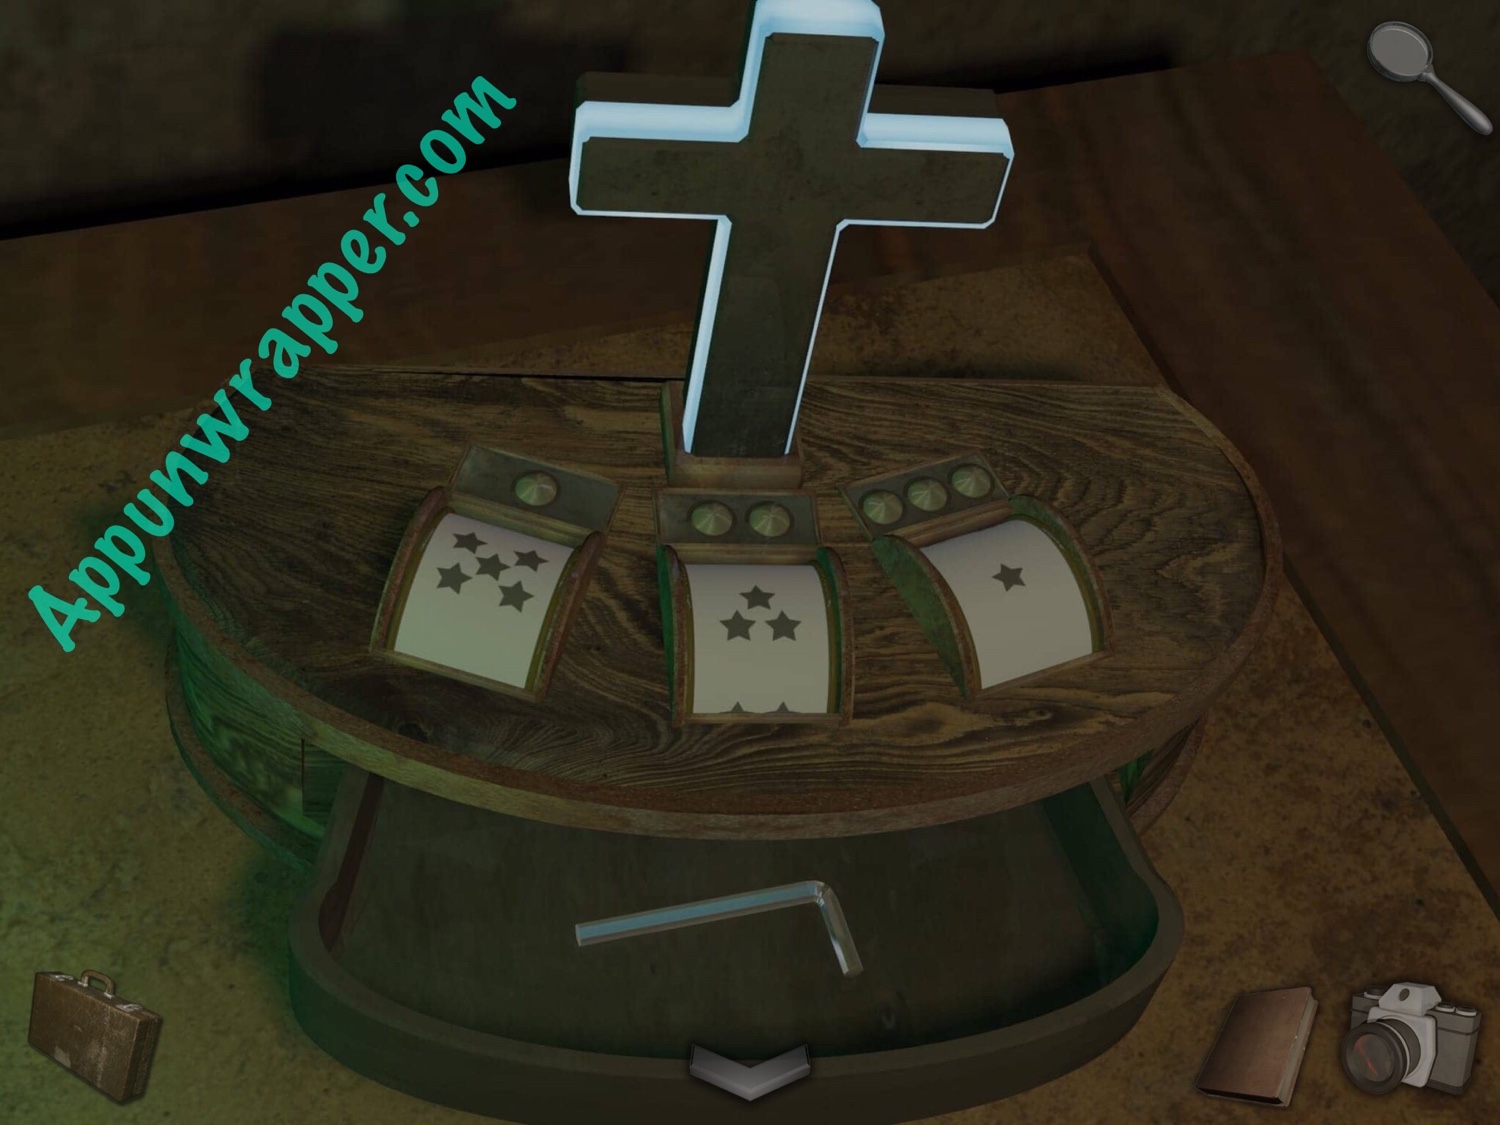
41. Go to the back of the room. Read note 5/16 and open the book on the bed. There’s a drawing of a dog and the words LIES WEIGH HEAVILY ON THE MIND. Also, notice the cross. We’ll get to that in a second.
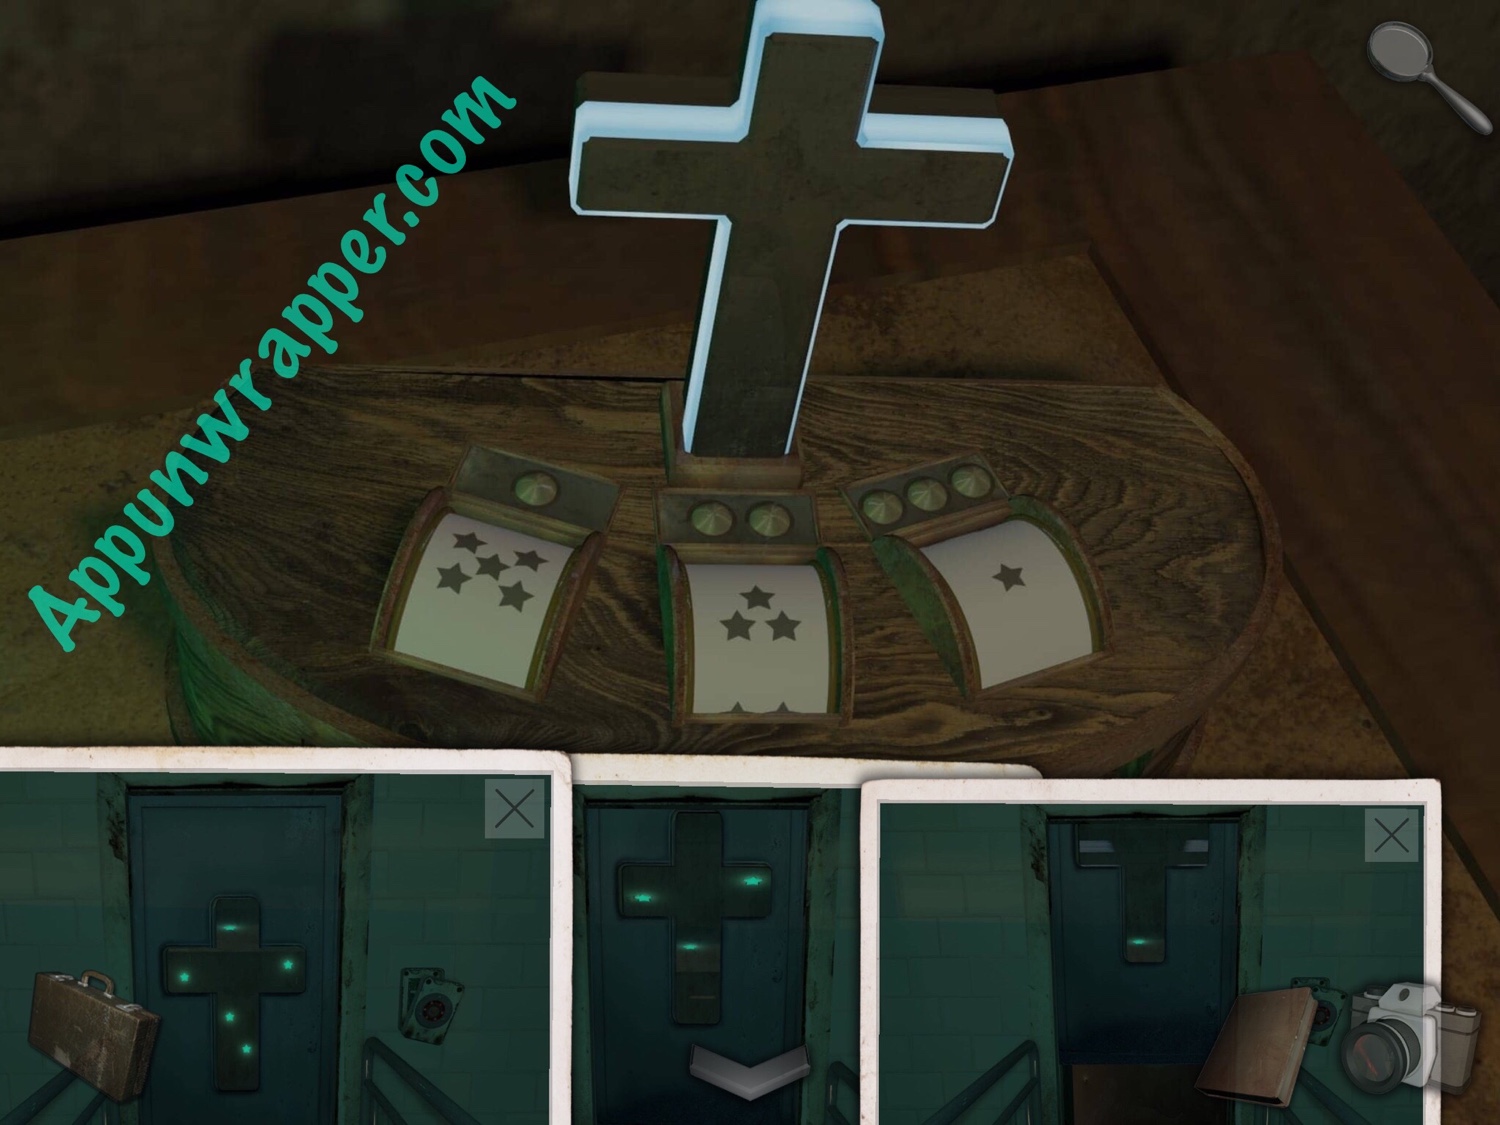
42. Now let’s solve the cross puzzle. Take out the photos of the cross on the door and the photos of the six lights. Use the clues to figure out how many stars to put for each number of dots. Basically, count the stars in the cross in each phase of the door. It goes 5, 3, 1. You can also copy my photo below. Then take the Allen key.
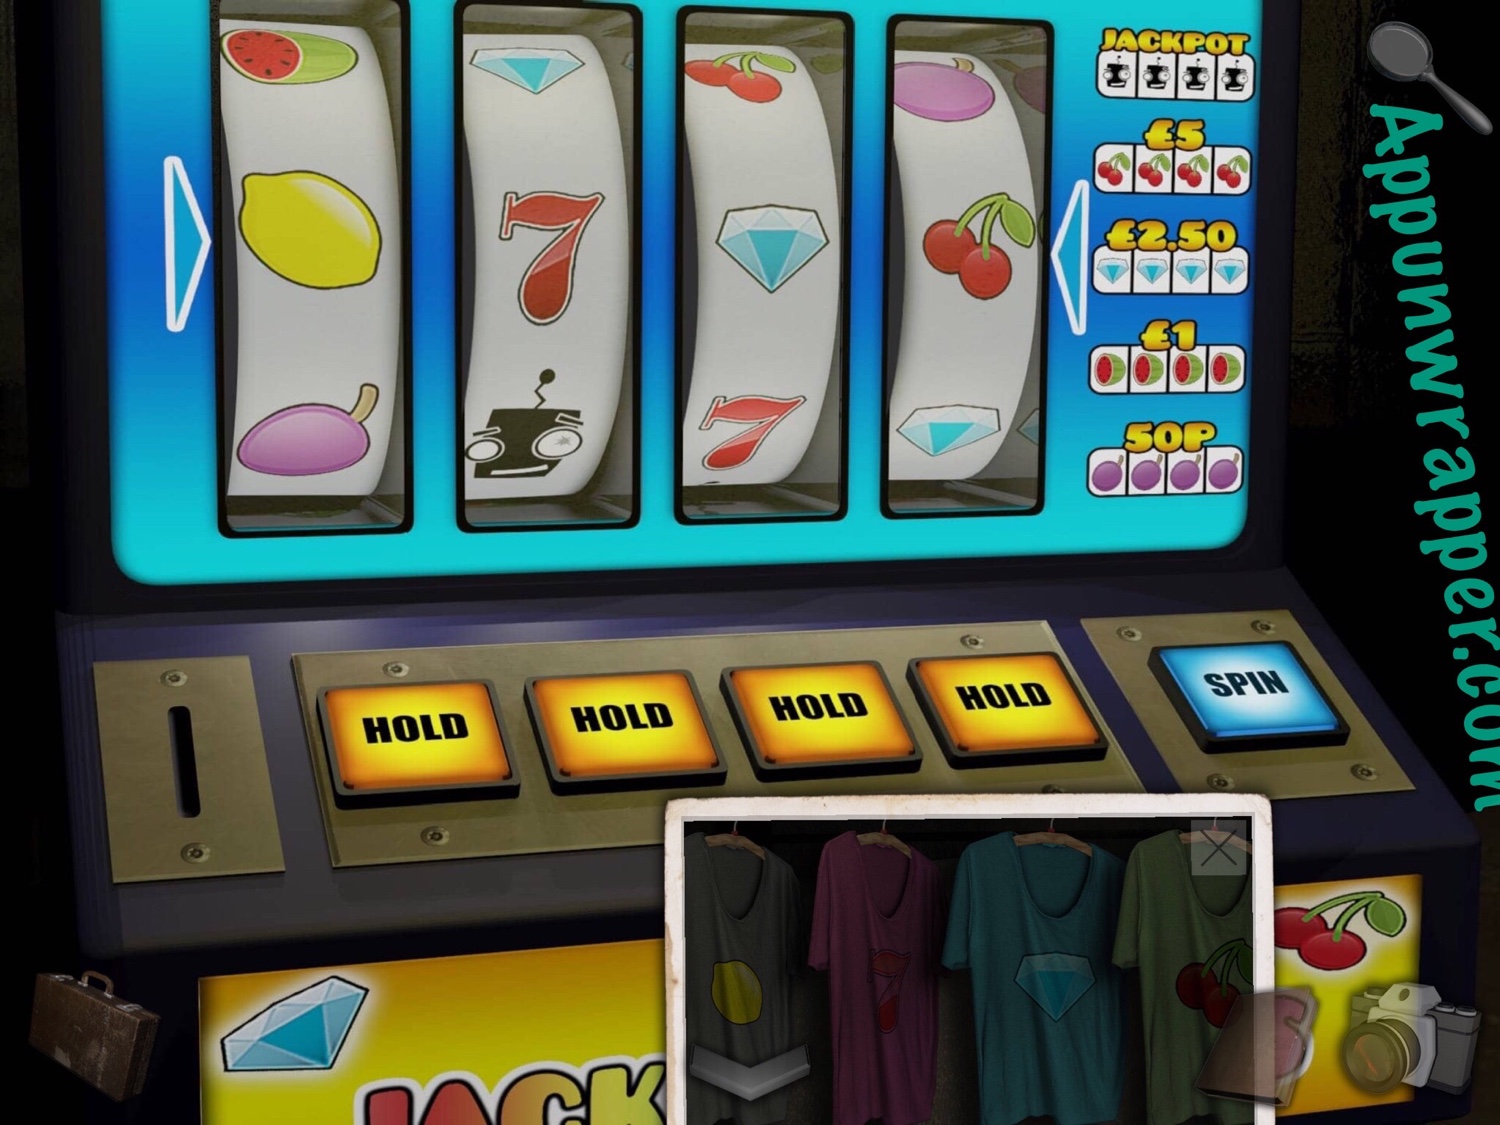
43. Go back to the Rec Room. Insert a coin into the slot machine. Then use the clue from the shirts to solve the slots puzzle. Just spin and then press HOLD when you get any of the images you need. It should go LEMON, 7, DIAMOND, CHERRIES. Then take the torch/flashlight.
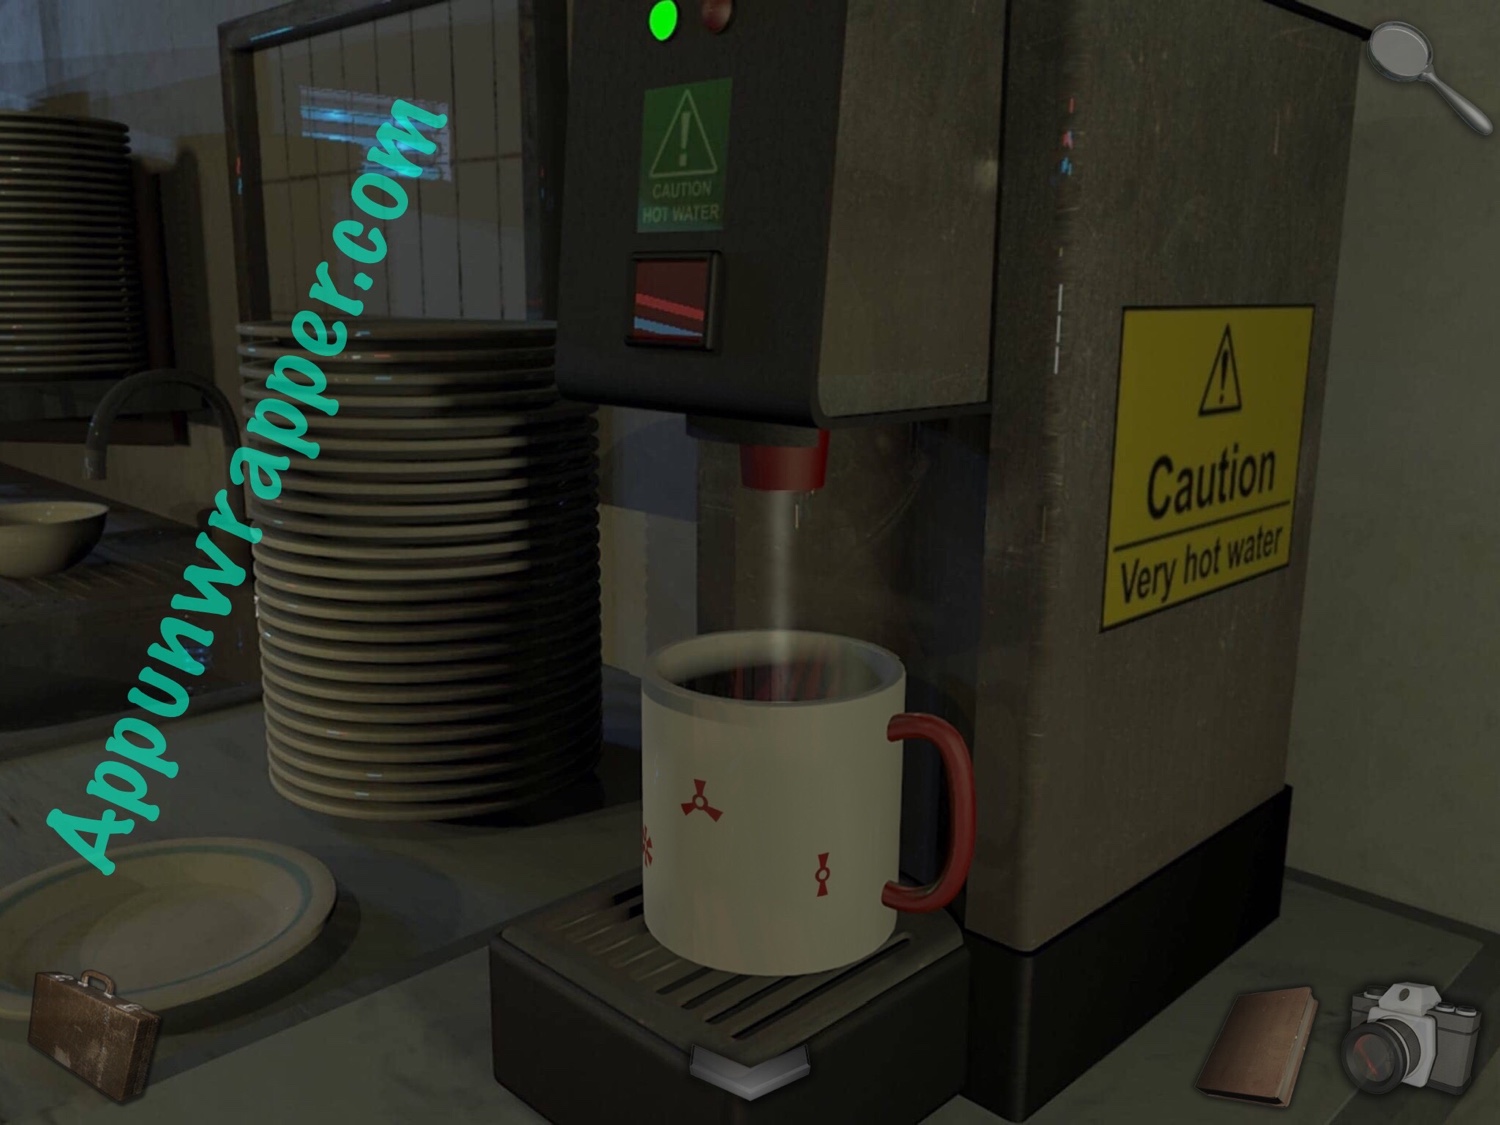
44. Go back to the Diner. Fill the mug with hot water and notice that some symbols appear on it.
45. Go back to the Gym. Use the Allen wrench to loosen the grip on all the weights, then grab the HOW, WHO, WHEN and WHY weights.
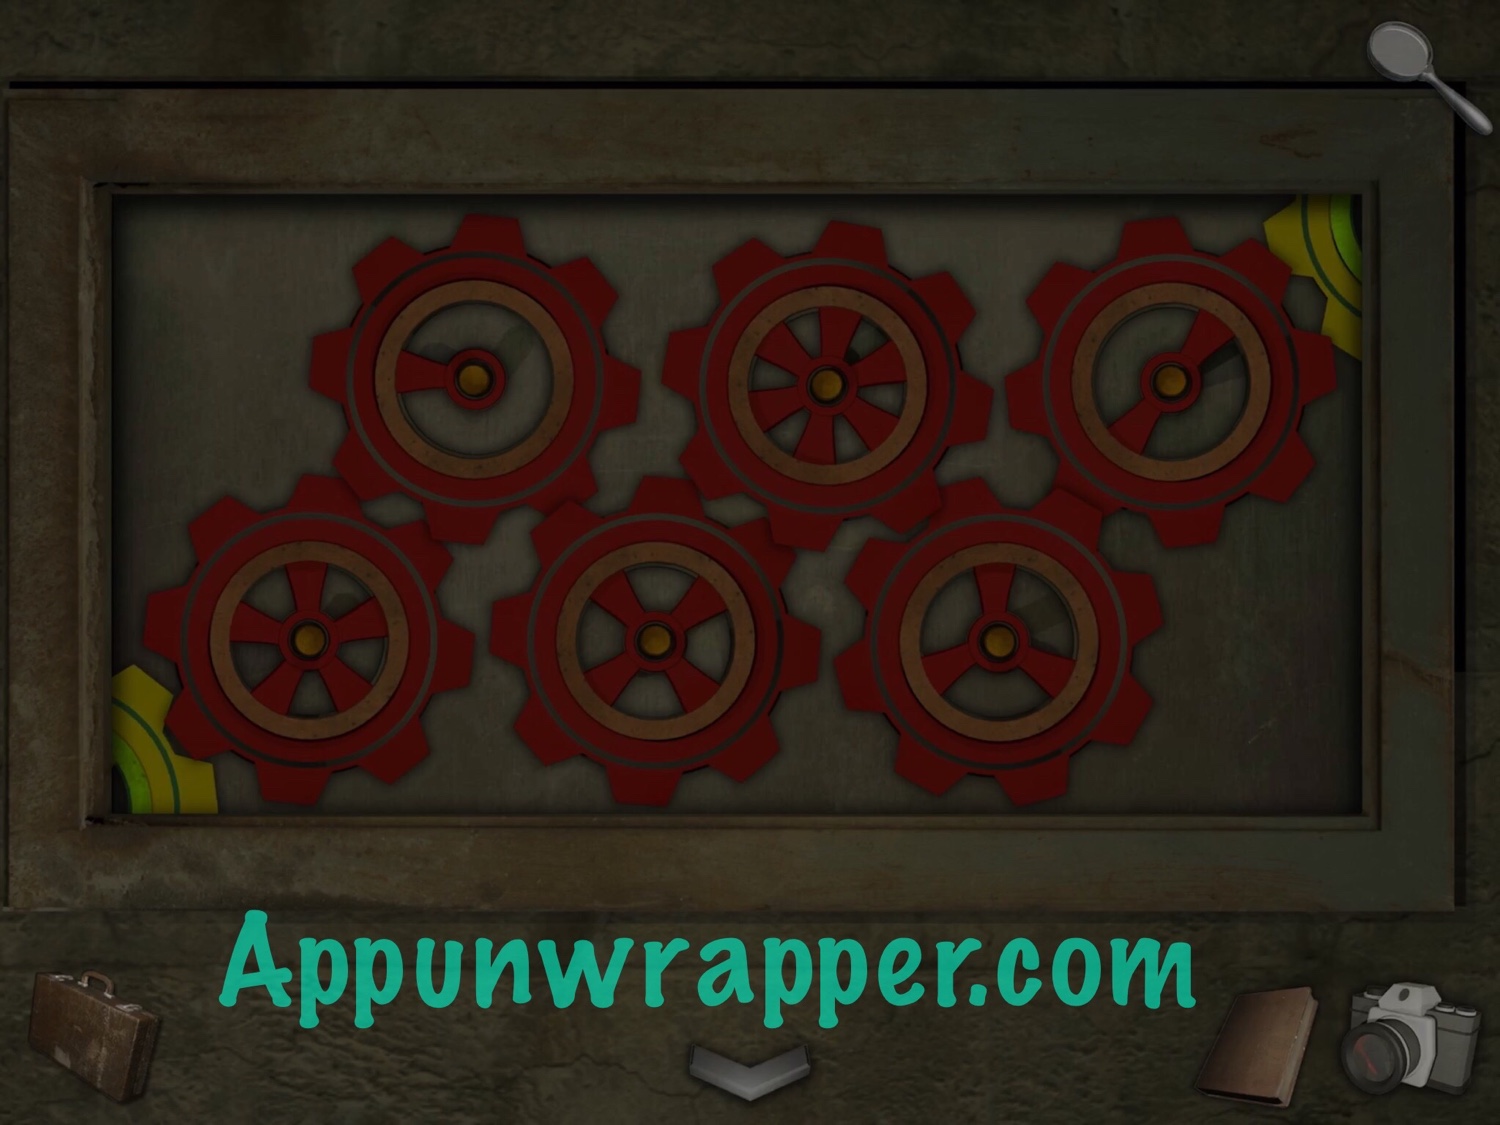
46. Now, go back to the room with the six metal cogs. Open your bag and take a good long look at the mug. Try to memorize the layout of the symbols. They’re basically cogs with different numbers of lines on them. Using that clue, organize the six cogs on the wall, as shown below.
It goes 514632, but starting from the lower left corner and going on a zigzag. In other words:
162
543
47. Grab the America flag token and take a photo of the two boarding passes.
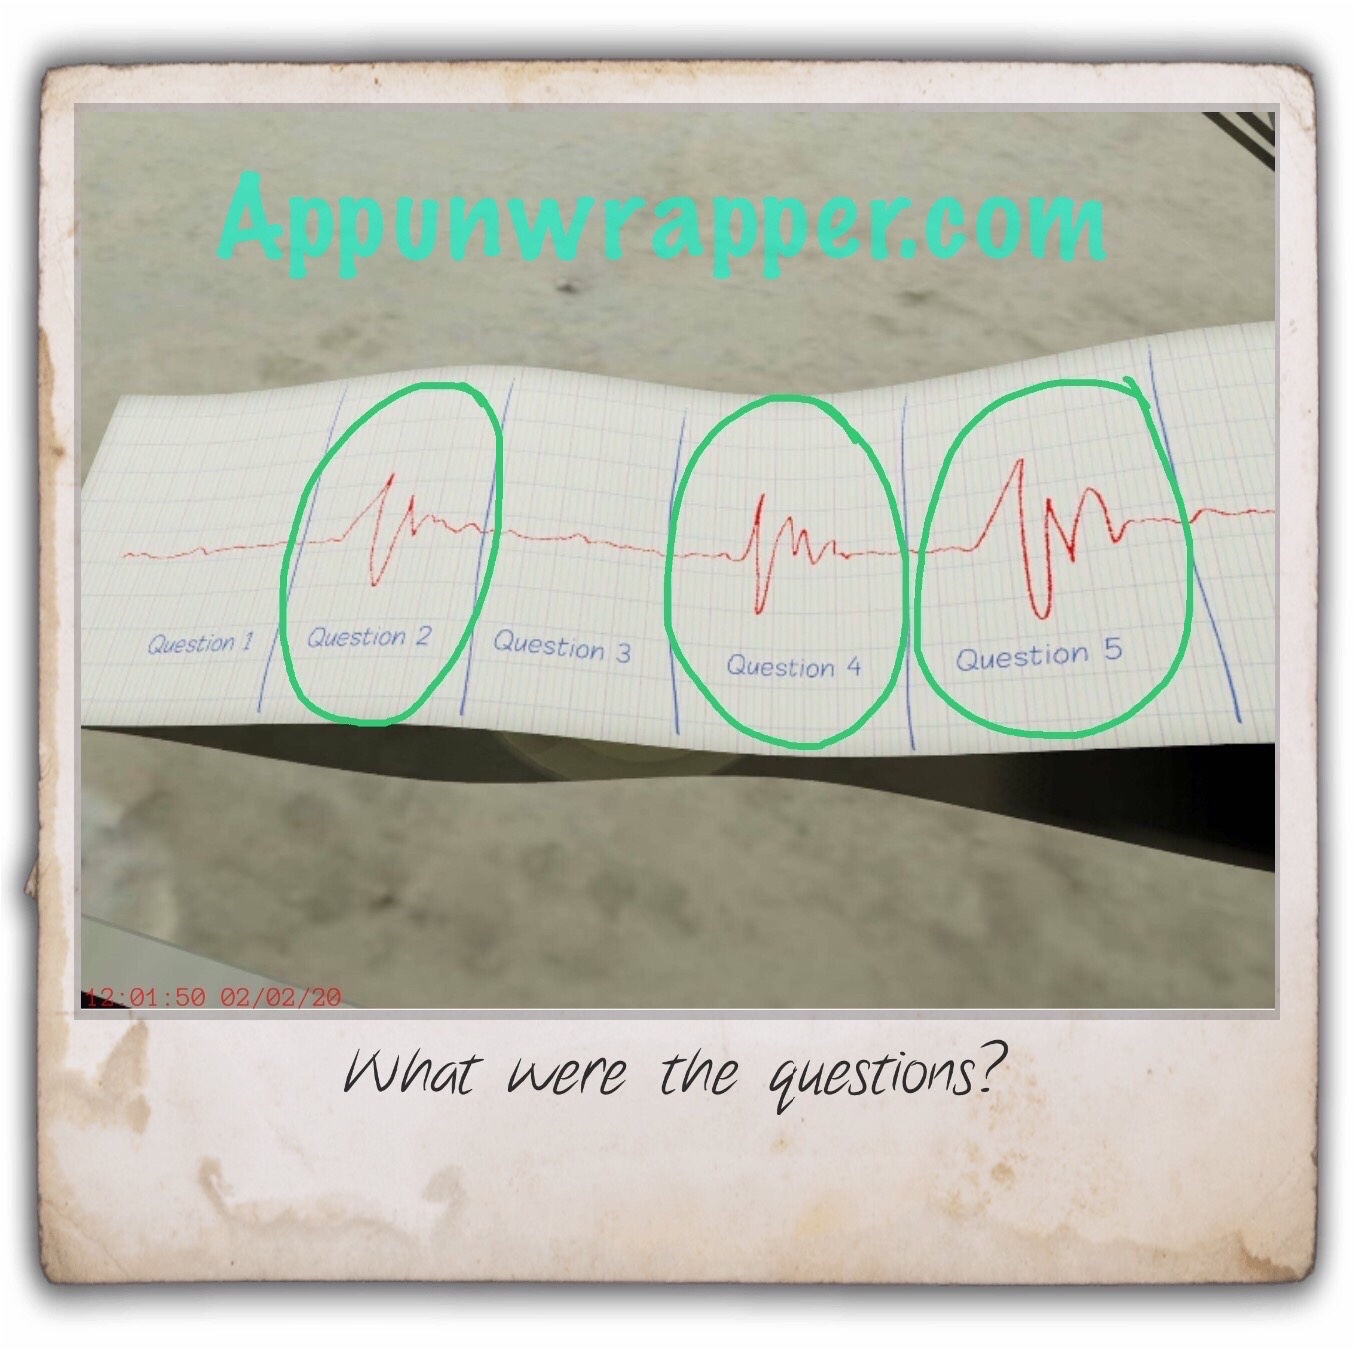
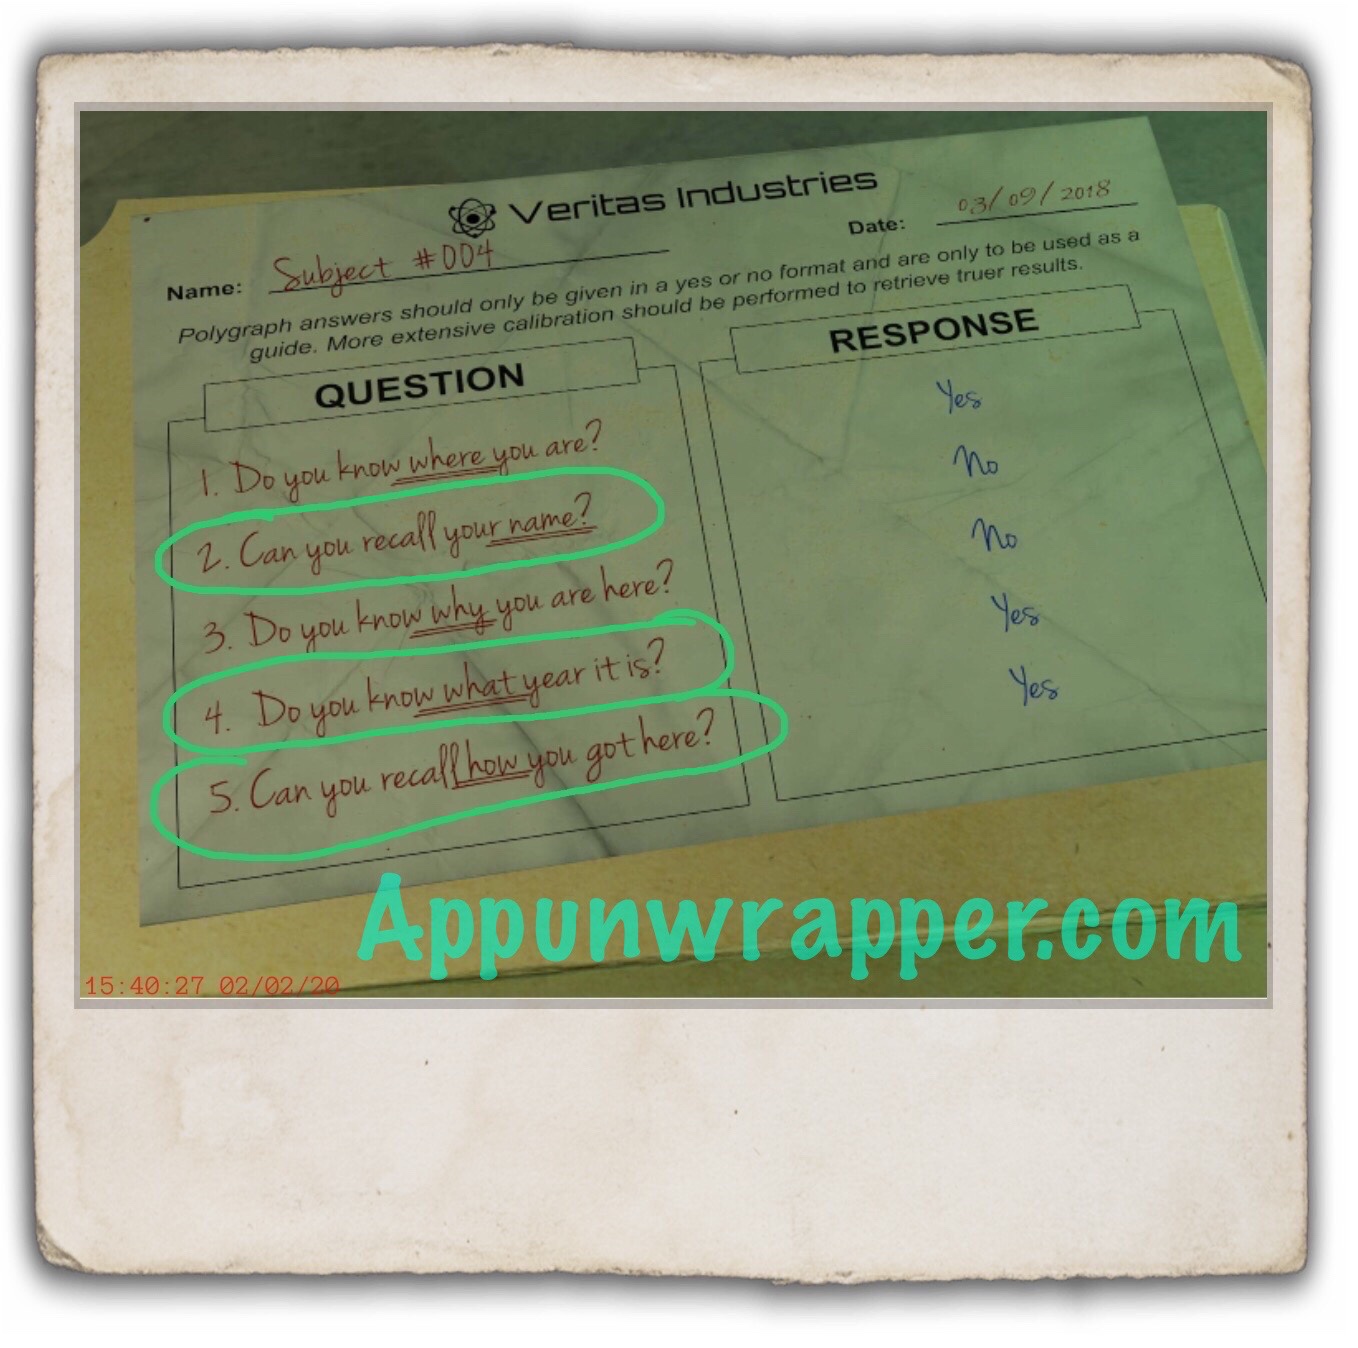
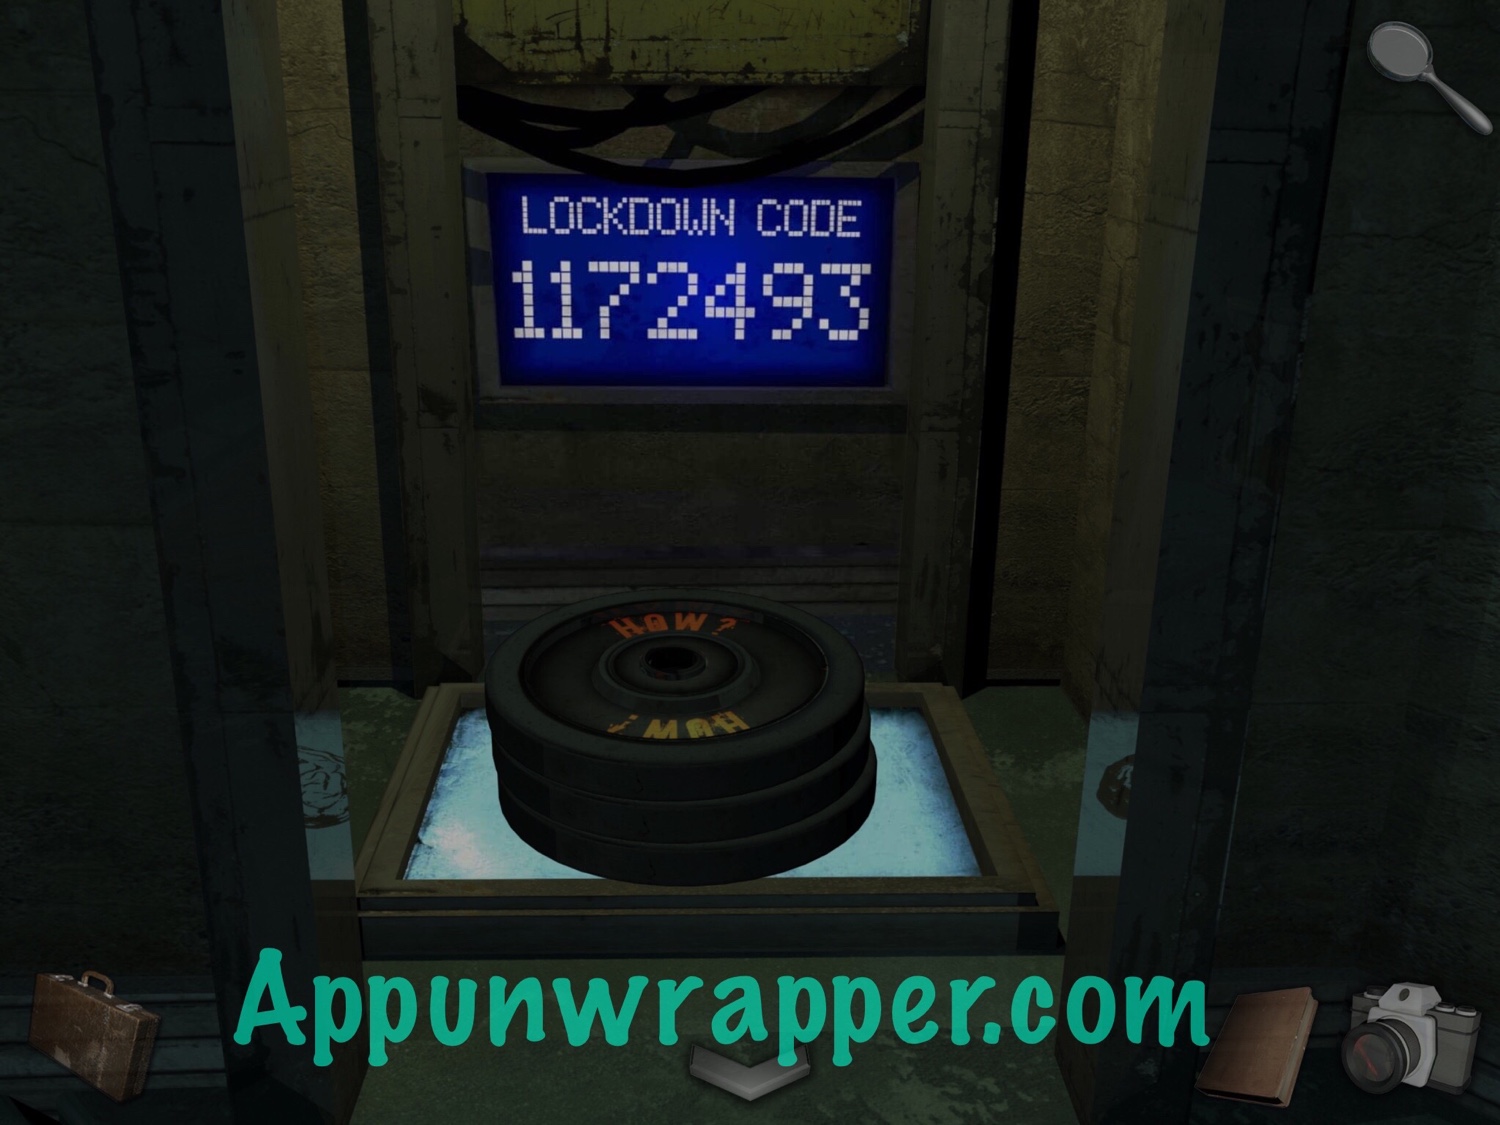
48. Go back. Head to the right door with a drawing of a brain on the floor. It’s a scale. We need to use all the clues we found to figure out which weights to place on it. Remember the bookmark that said LIES WEIGHT HEAVILY ON THE MIND? So we need to figure out which ones are lies. First, look at the polygraph questions and the polygraph results. The polygraph shows a lot of activity on questions 2, 4 and 5. That implies that he was lying when he answered those three questions. Notice the underlined words on those three questions are NAME, WHAT YEAR, and HOW. For NAME, we would use the WHO weight. FOR a WHAT YEAR you use WHEN. So place WHO, WHEN and HOW on the scale. A door will open, revealing a lockdown code as 1172493.
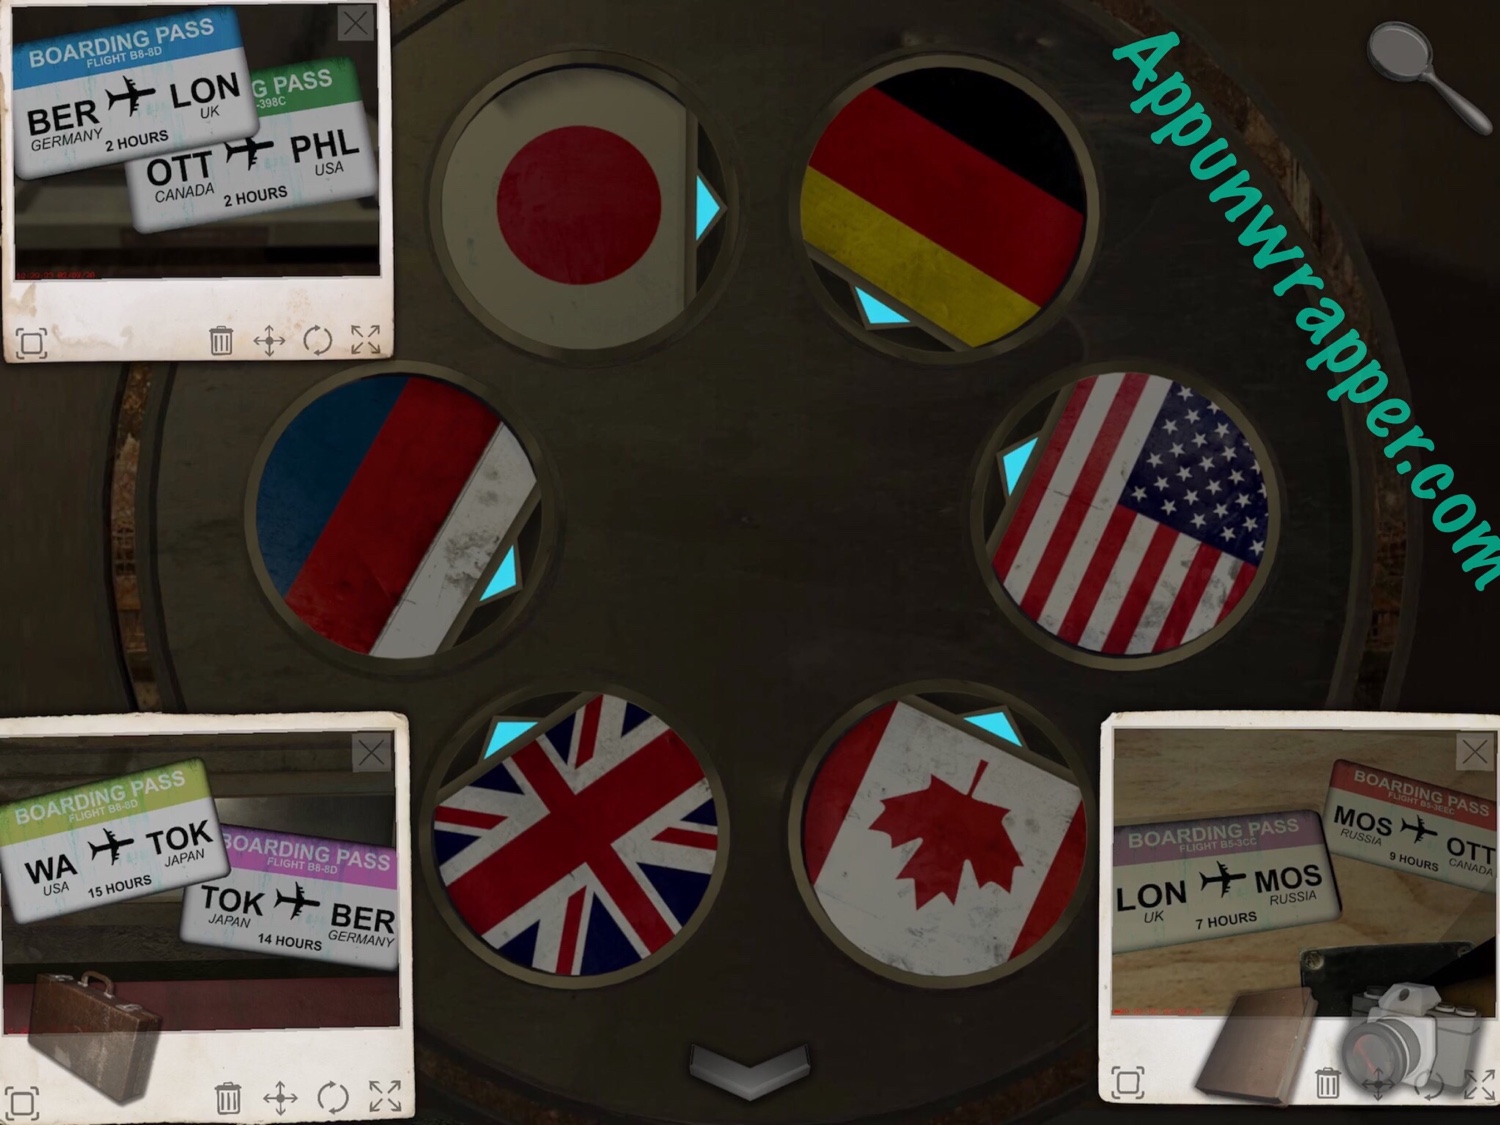
49. Now, go back to the library and place all three flag tokens with the others. Take out the three photos of the boarding passes. You have:
USA to JAPAN
JAPAN to GERMANY
GERMANY to UK
CANADA to USA
UK to RUSSIA
RUSSIA to CANADA
So now just point the flags in those directions so it looks like the photo below. Then take the metal valve.
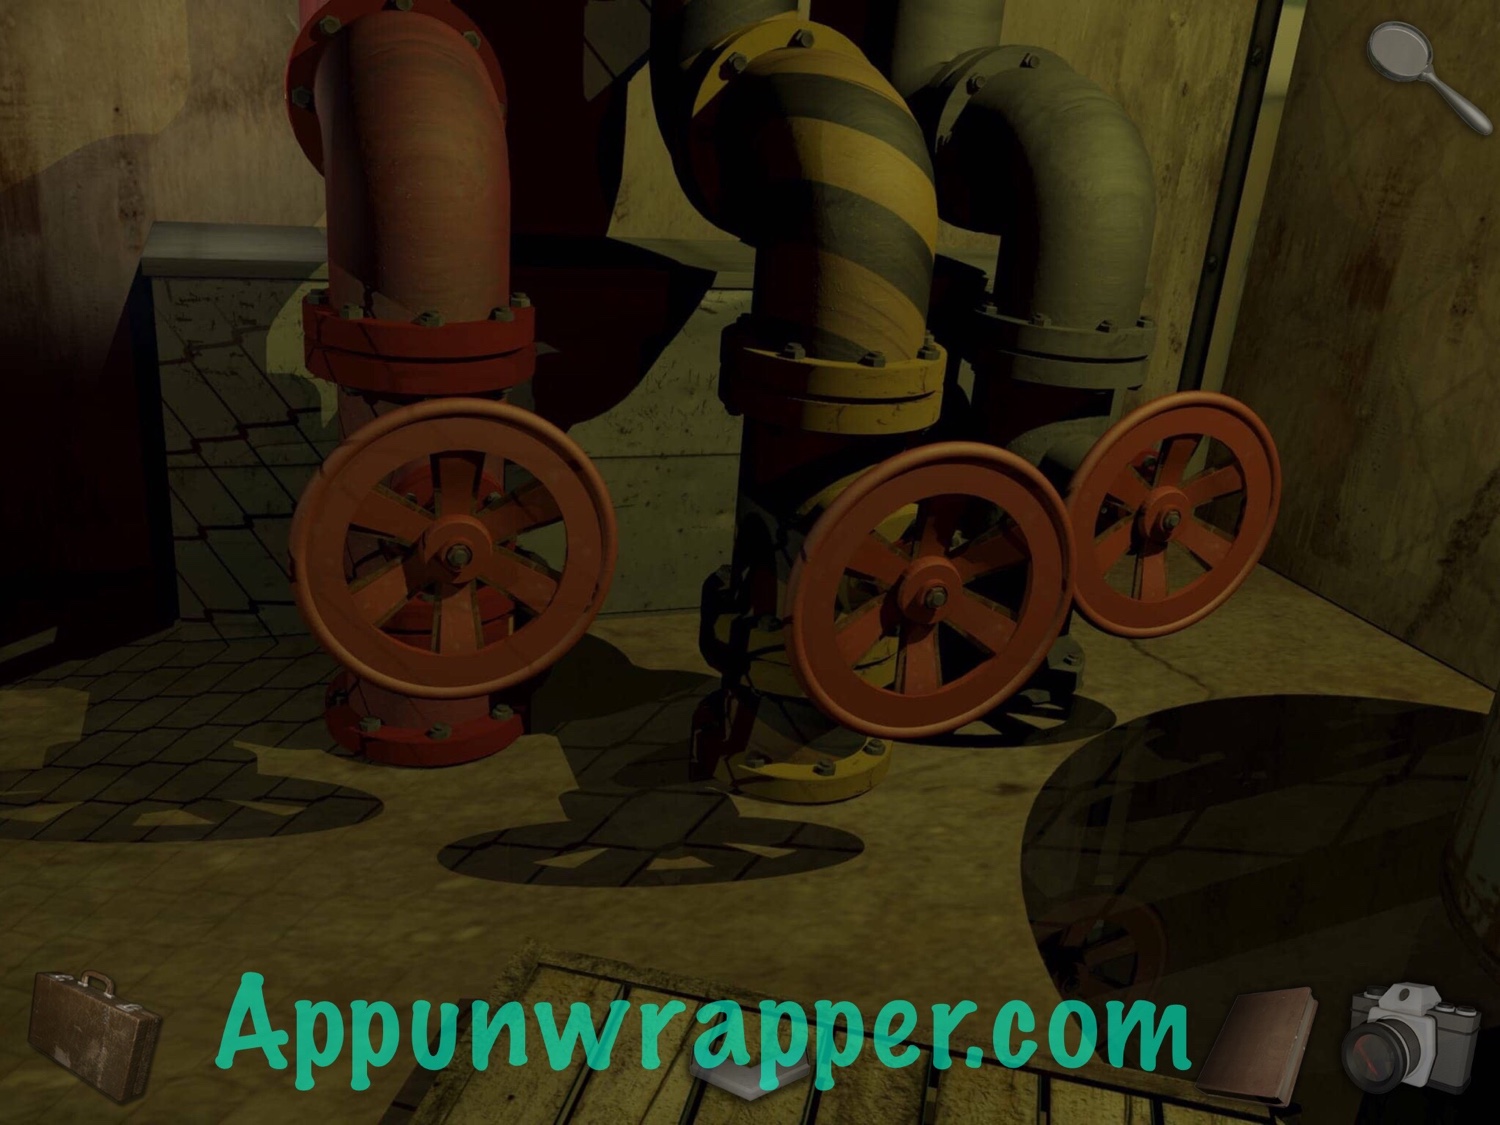
50. Go back to the room that had a locked gate, where you saw the FRAGILE stickers. Replace the valve and turn it to shut off the water.
51. Go back to the start of the chapter and take the lockdown control key.
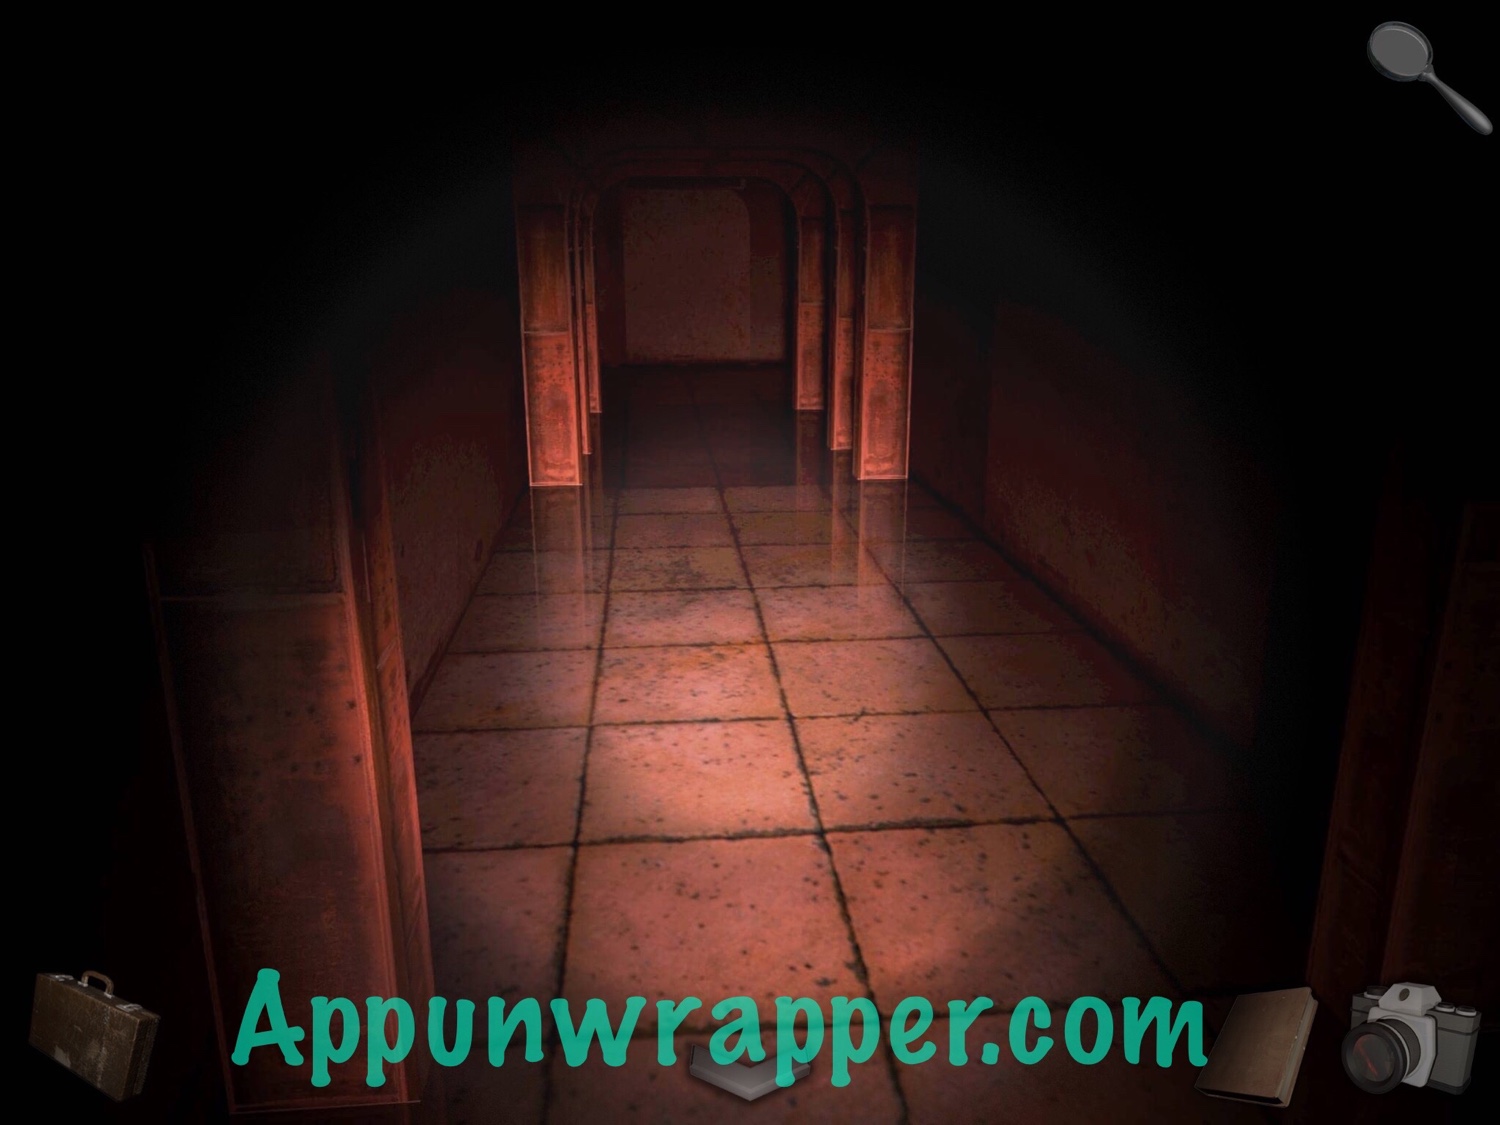
52. Go back to the room with the body on the table. Remember the door you broke into on the left? It was dark. Use the flashlight to see in the dark and keep going until you come to a locked door.

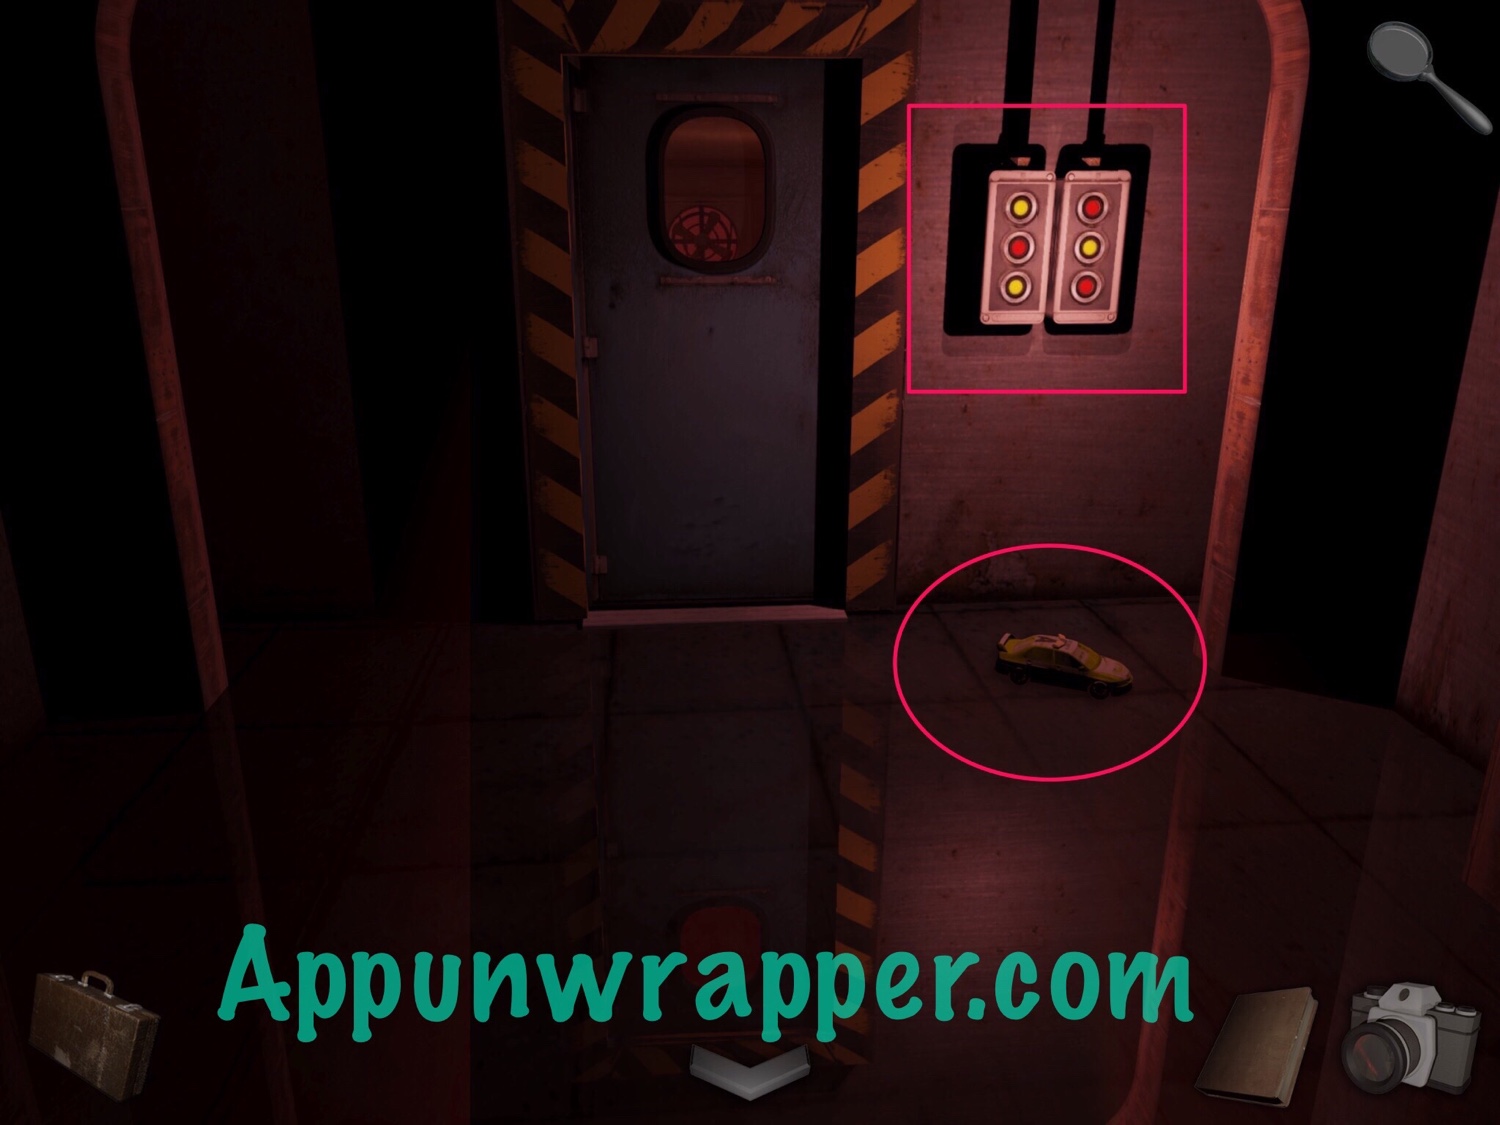
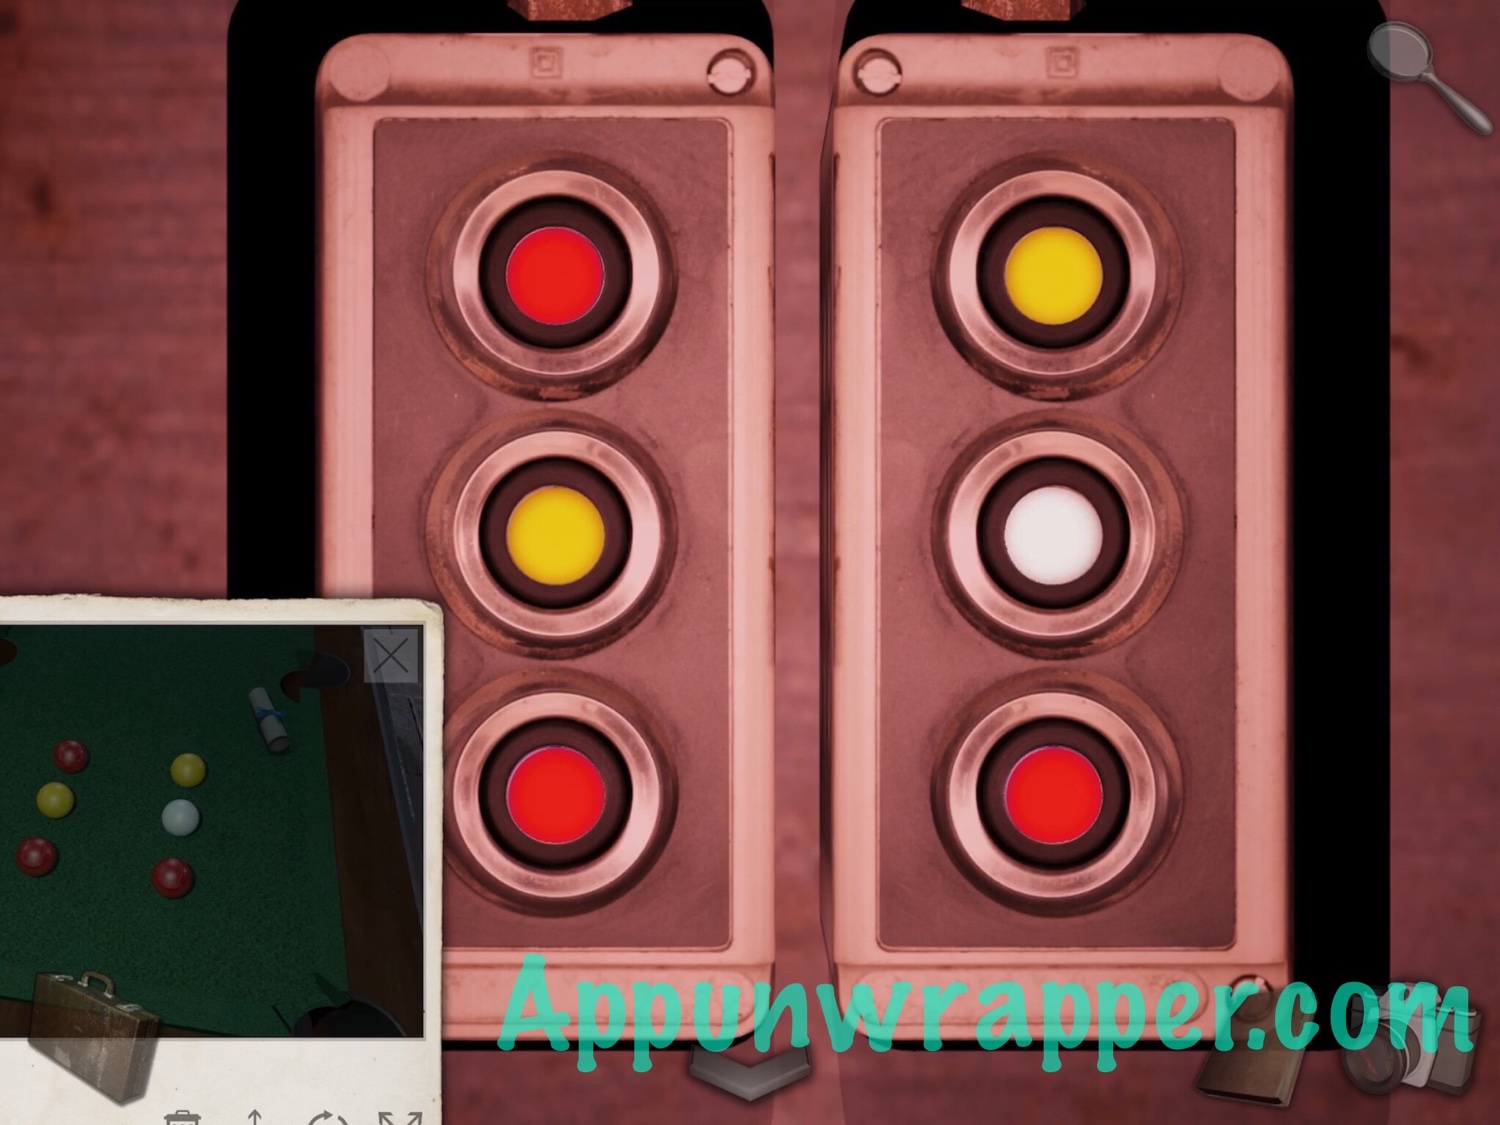
53. Pick up the toy car. Notice it has an A on it. Then take out the pool balls photo and copy the colors onto the door lock.
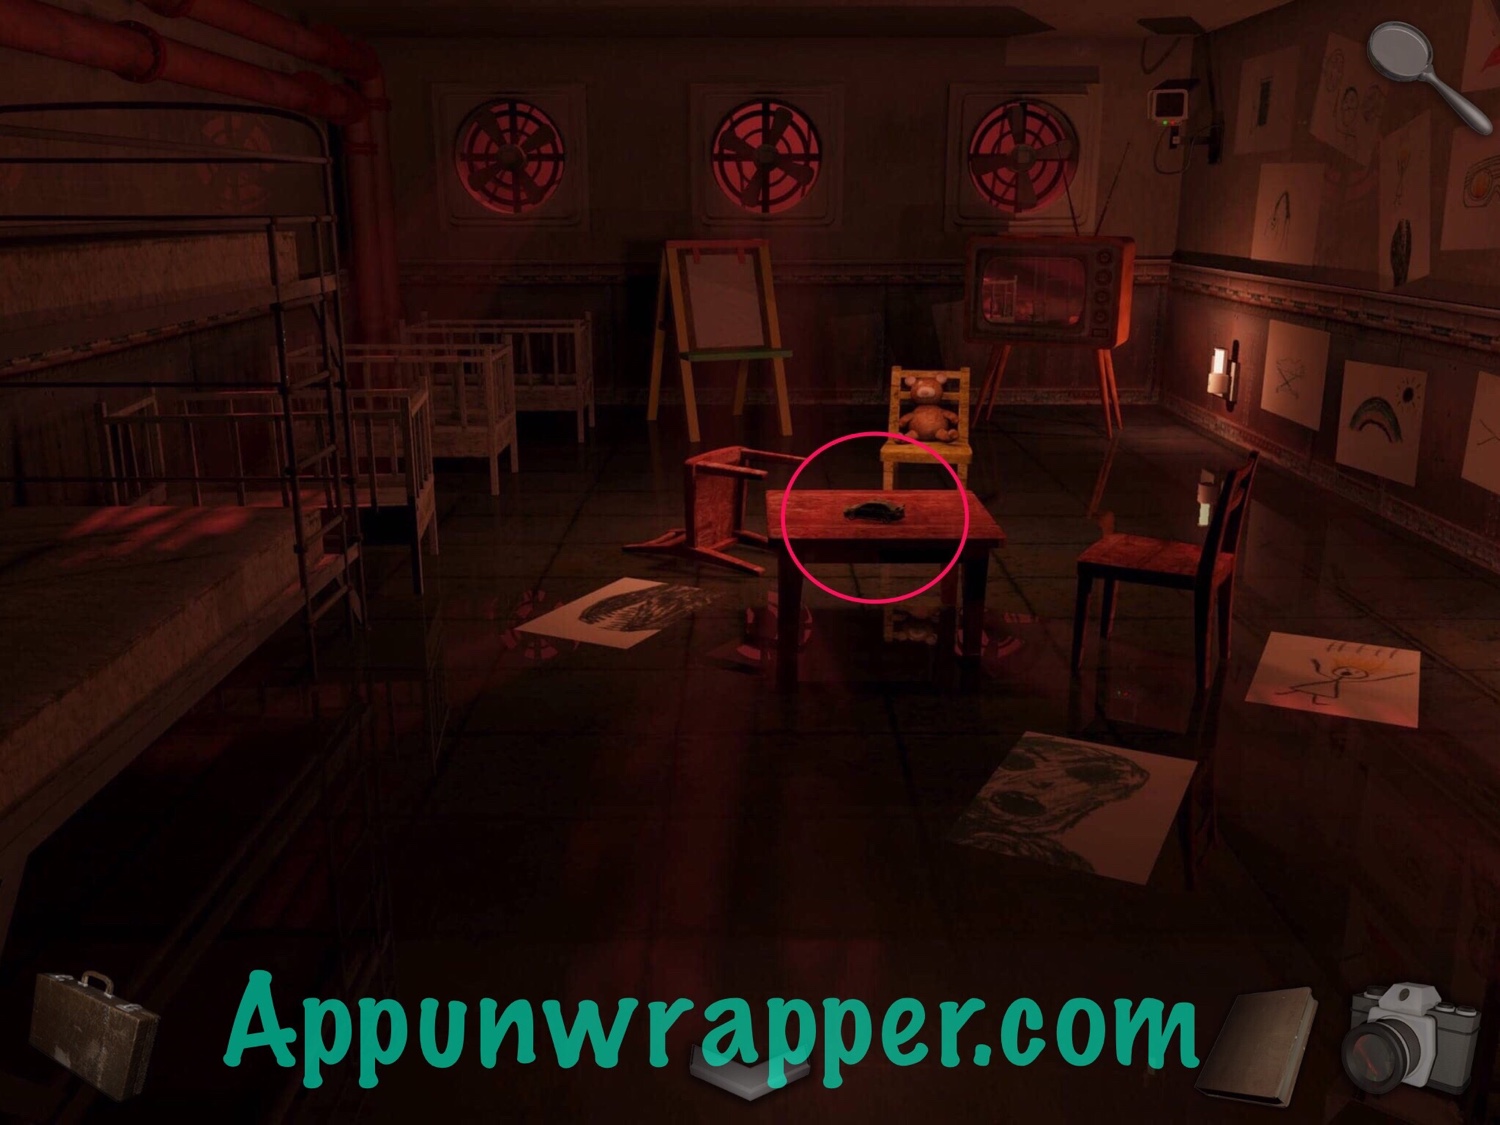
54. Enter the nursery. Take the toy car from the table. Notice there’s a D on it. There doesn’t seem to be much else to do here besides look at drawings, so leave.
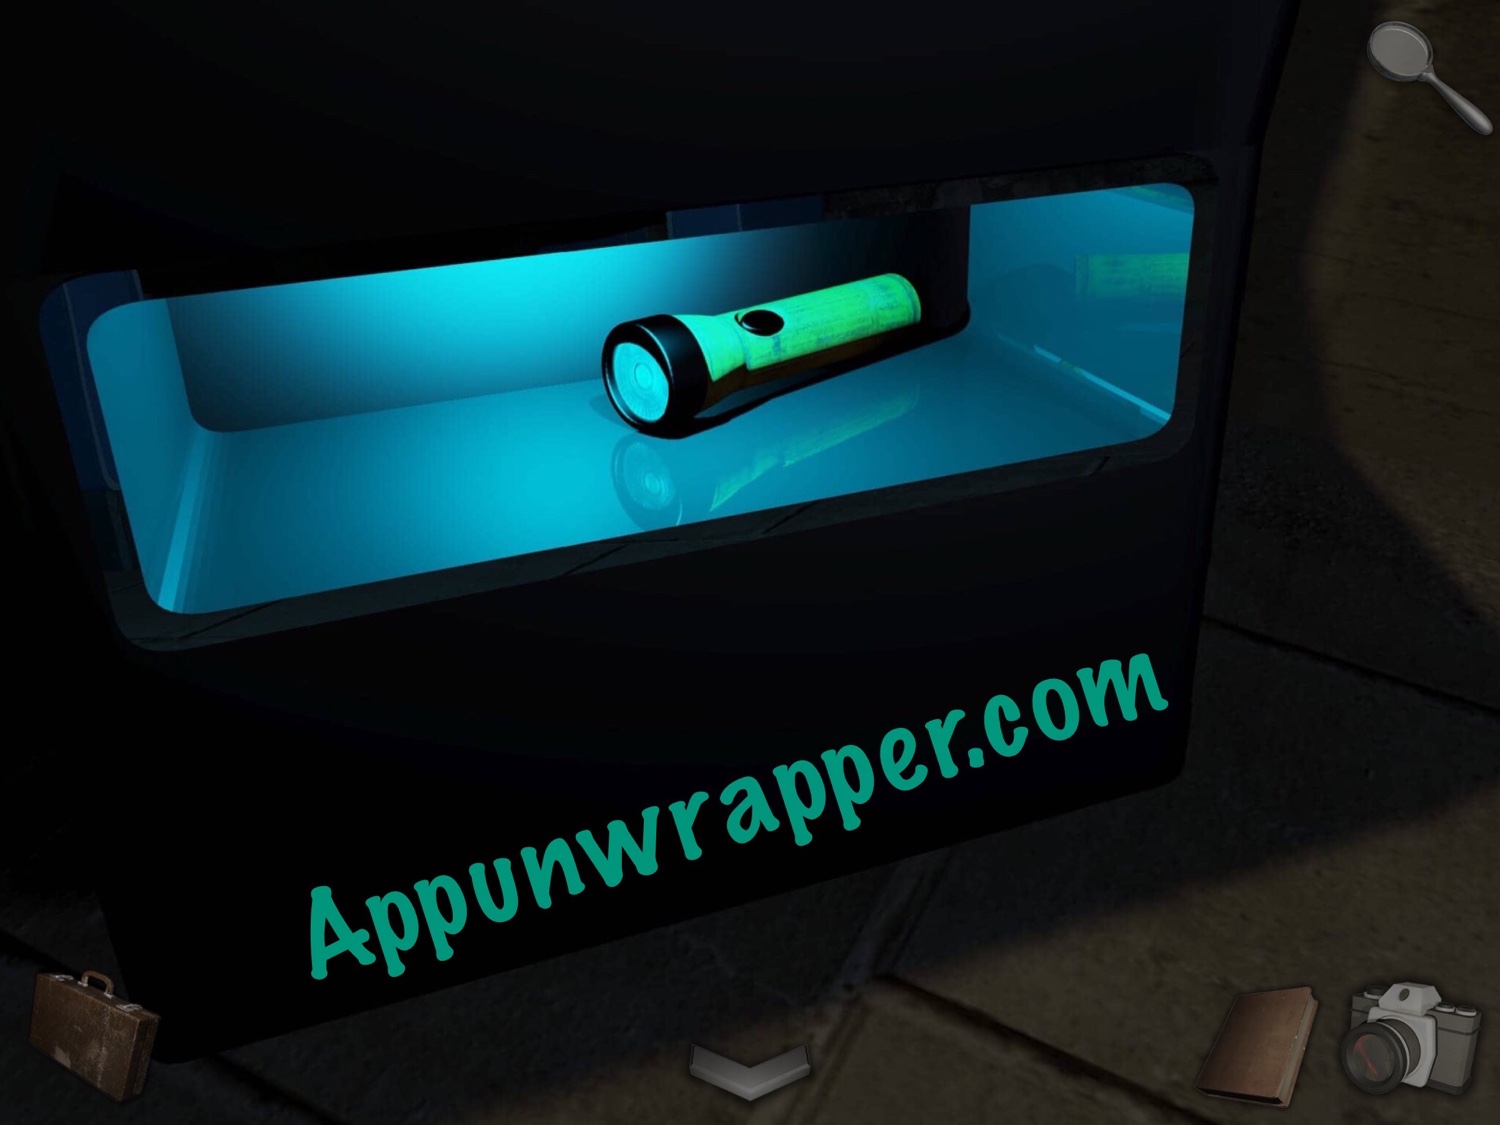
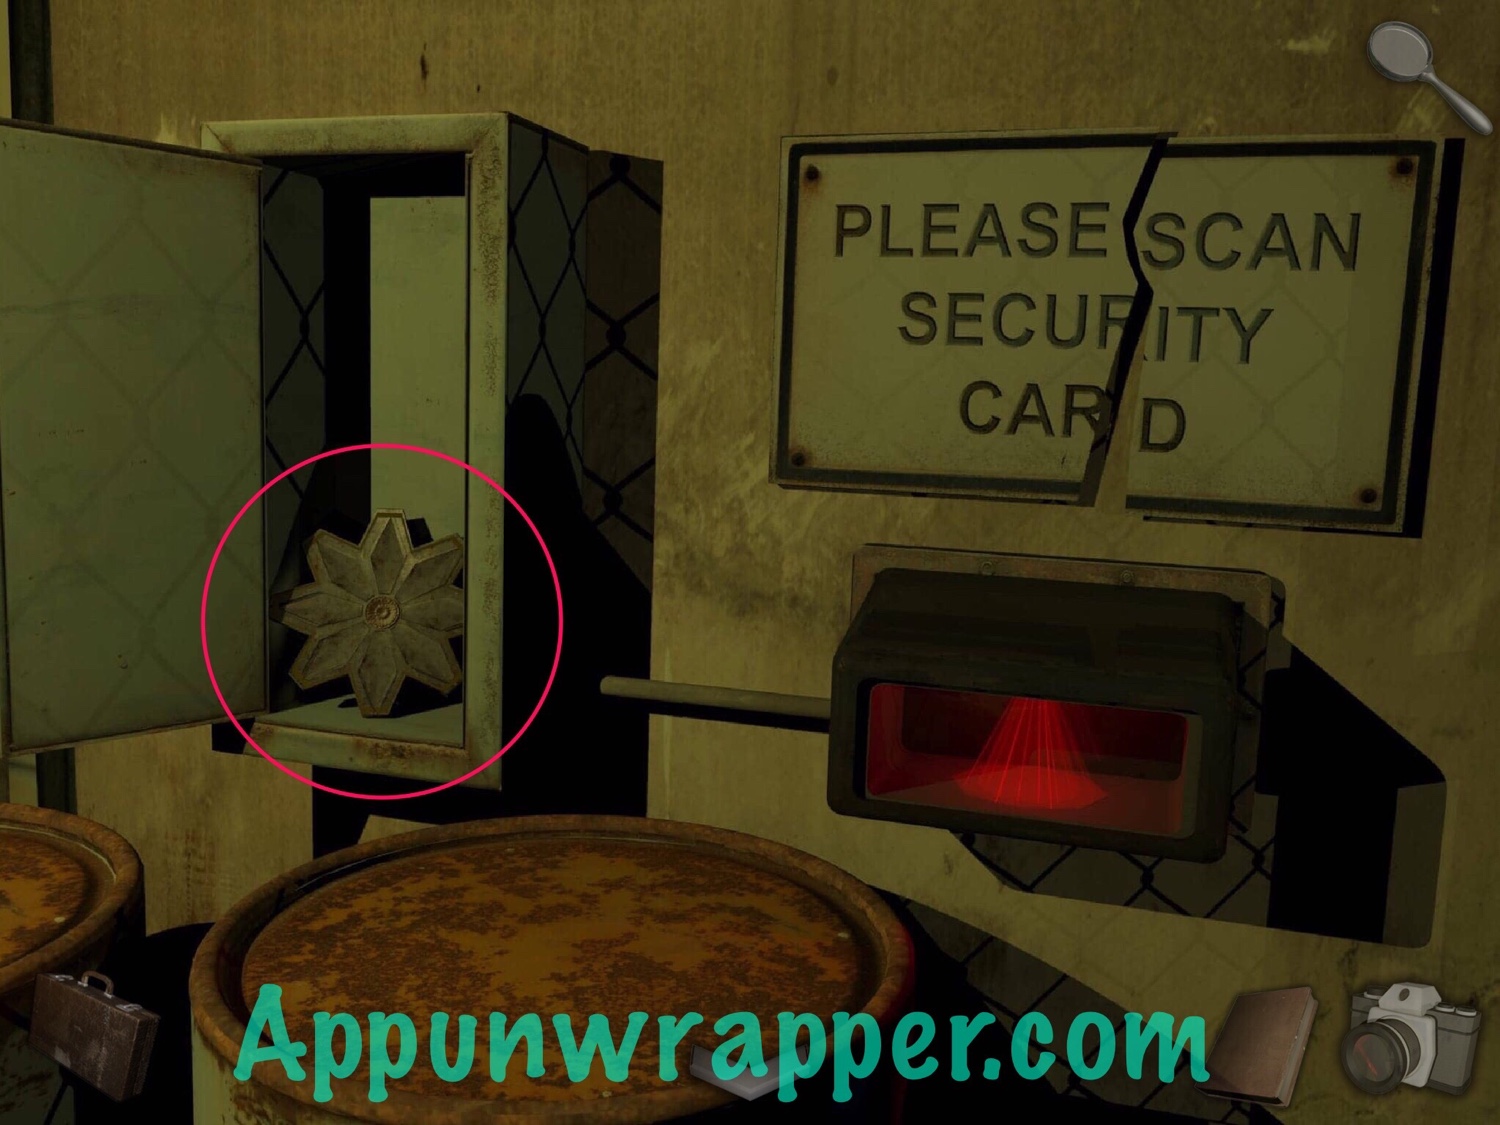
55. Ok, this part is a little evil. If you go back to the gated room, there’s a sign that says PLEASE SCAN SECURITY CARD. But there’s a crack between CAR and D. So place the toy car with a D on it (SECURITY CAR D) in the slot and scan it. Then take the wooden star from the locker.
56. Go back to the cogs room and place the wooden star on the chest with the other. Then take the glowing artifact from inside.
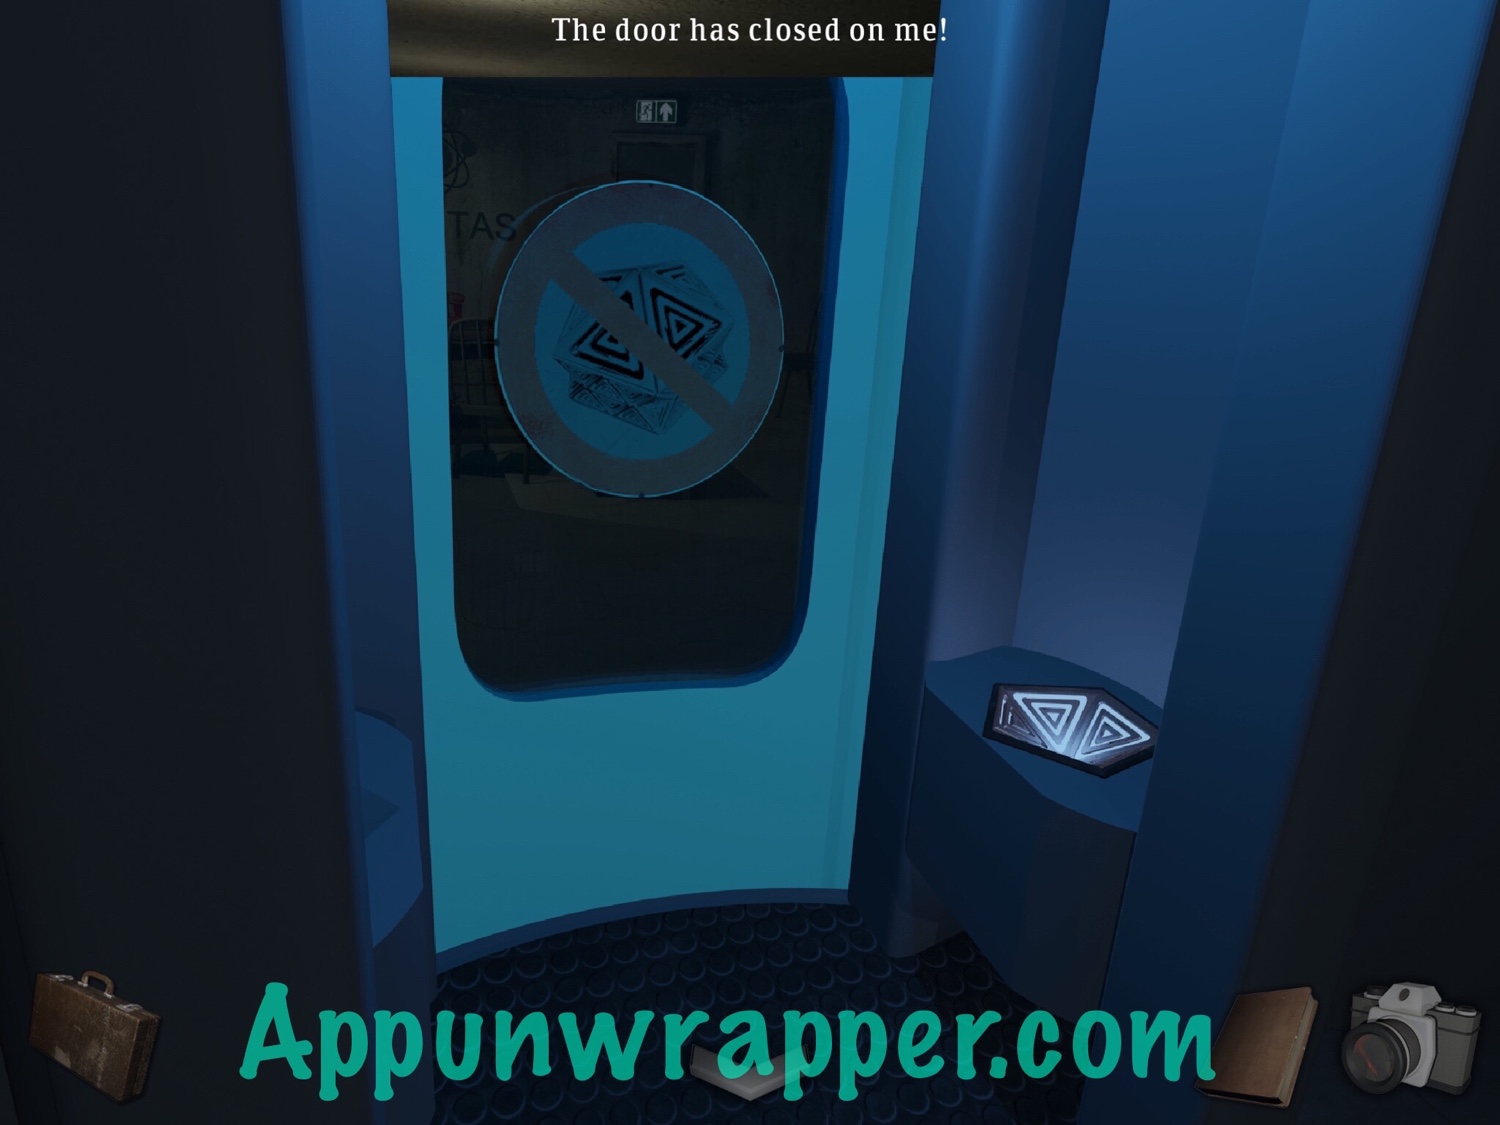
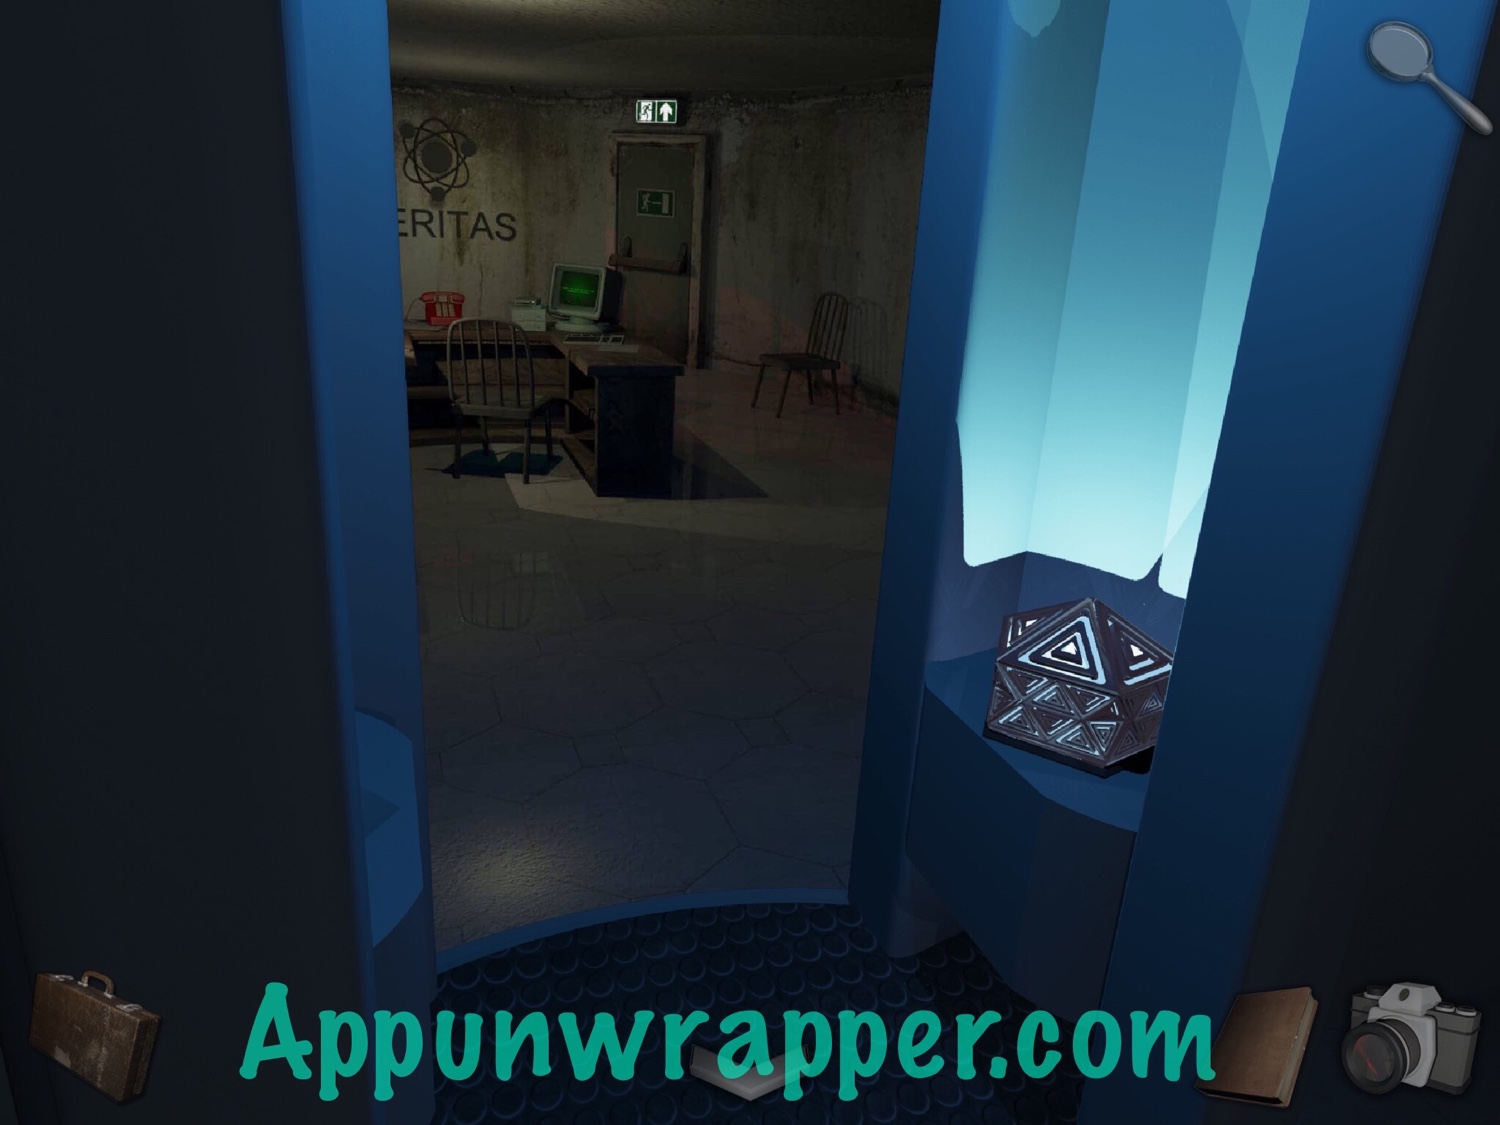
57. Go back upstairs. The door has closed on you! Place the glowing artifact in the slot to open it again.
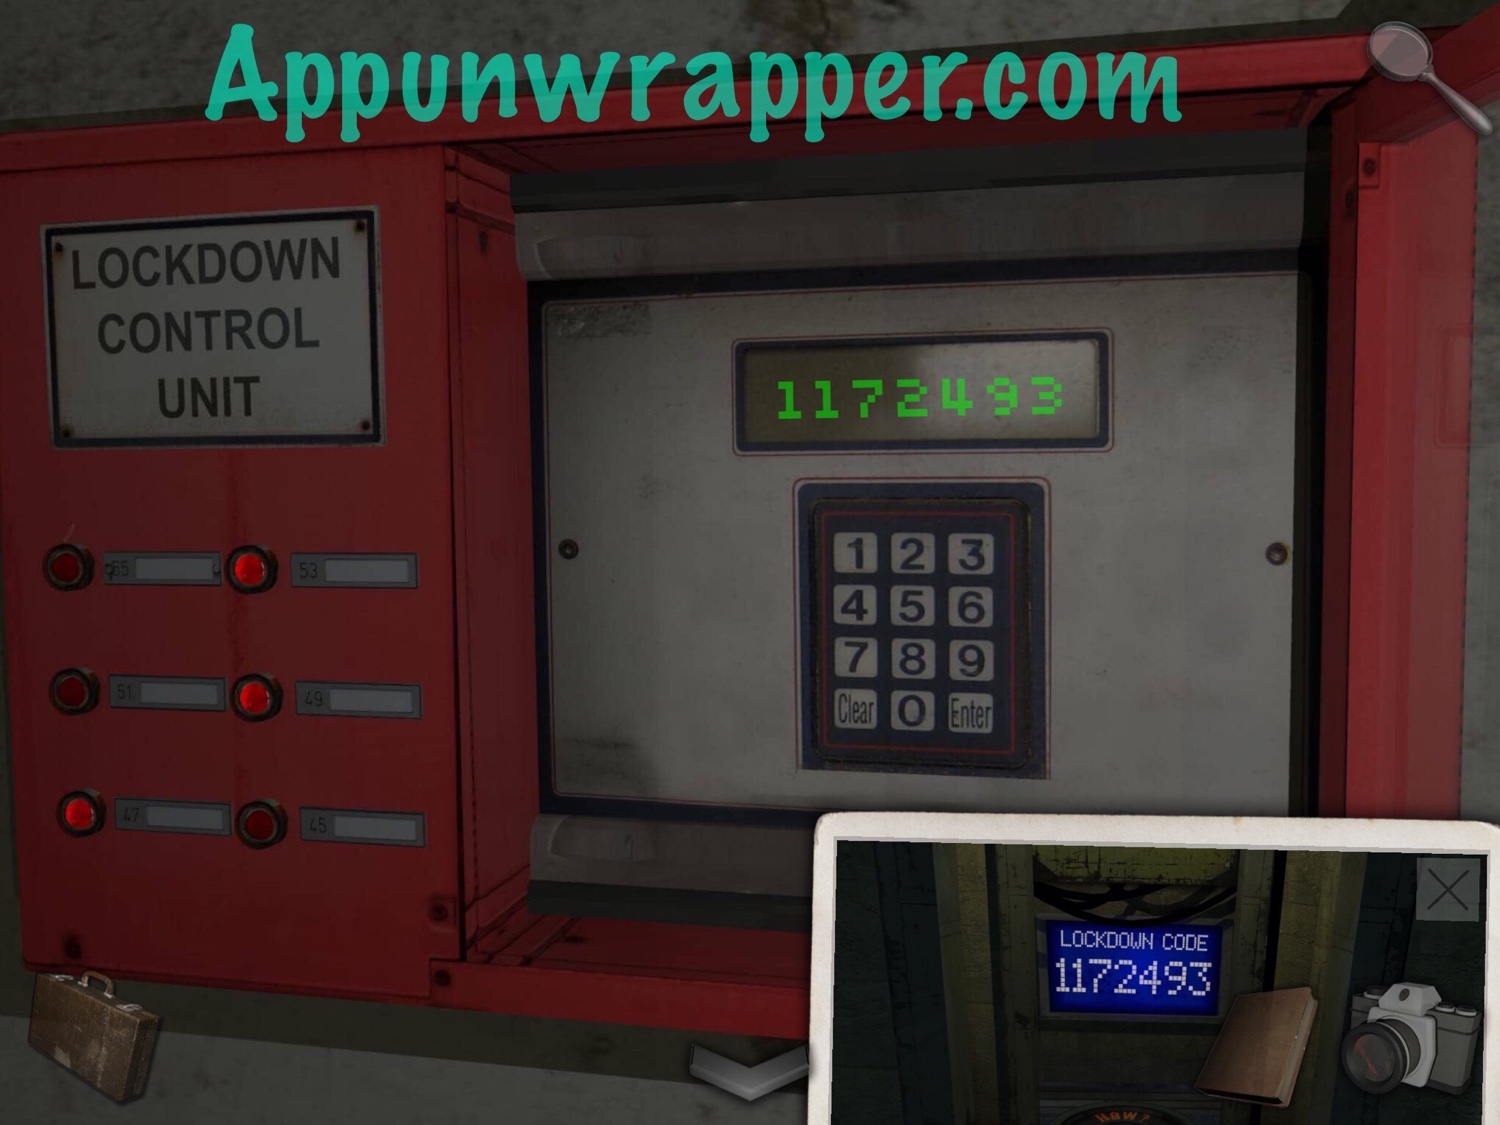
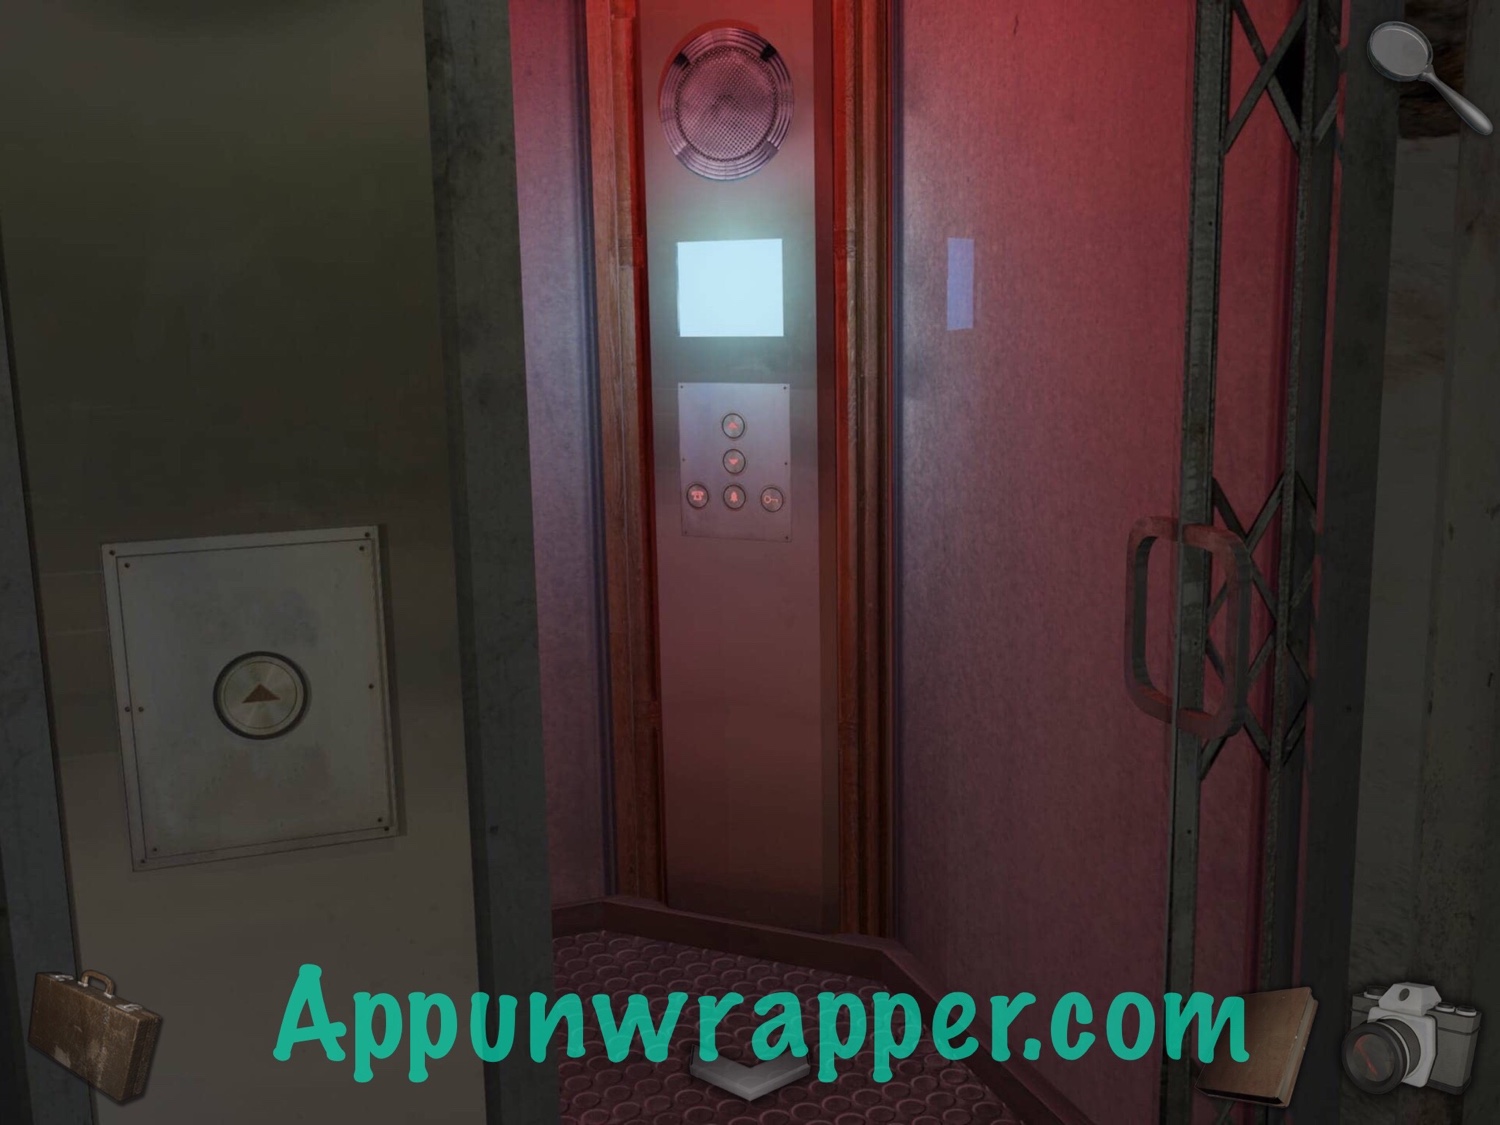
58. Go through. Go to the Lockdown Control Unit and use the key to access the keypad. Enter the numbers you got from the brain scale puzzle: 1172493. Then enter the lift to end Chapter 3 and start Chapter 4.
That’s all for Chapter 3! Click here to continue to Chapter 4 or choose a chapter below.
Prologue + Chapter 1 | Chapter 2 | Chapter 3 | Chapter 4 | Chapters 5 6 7 8 9 | Notes & Journal Entries
Where, exactly, is the sponge…? I don’t know what it means by storage cage – where is it…?
The sponge is in Chapter 1 (in the box with all the ‘fragile’ stickers)
Where is the mug! None of the mugs on the desk I saw can be picked up!