Veritas
By: Glitch Games

Veritas is the latest puzzle adventure game from Glitch Games. You wake up in a locked room without any idea how you got there. It turns out you’re in a facility called Veritas Industries, though you can’t remember much. You need to solve puzzles and make your way from room to room to figure out what’s going on. It can be tricky, so this walkthrough guide will help you if you get stuck. Feel free to ask for extra help in the comments section.
Walkthrough:
Prologue + Chapter 1 | Chapter 2 | Chapter 3 | Chapter 4 | Chapters 5 6 7 8 9 | Notes & Journal Entries
Chapter 4:
You can watch my video for Chapter 4 here or continue below for my step-by-step guide.
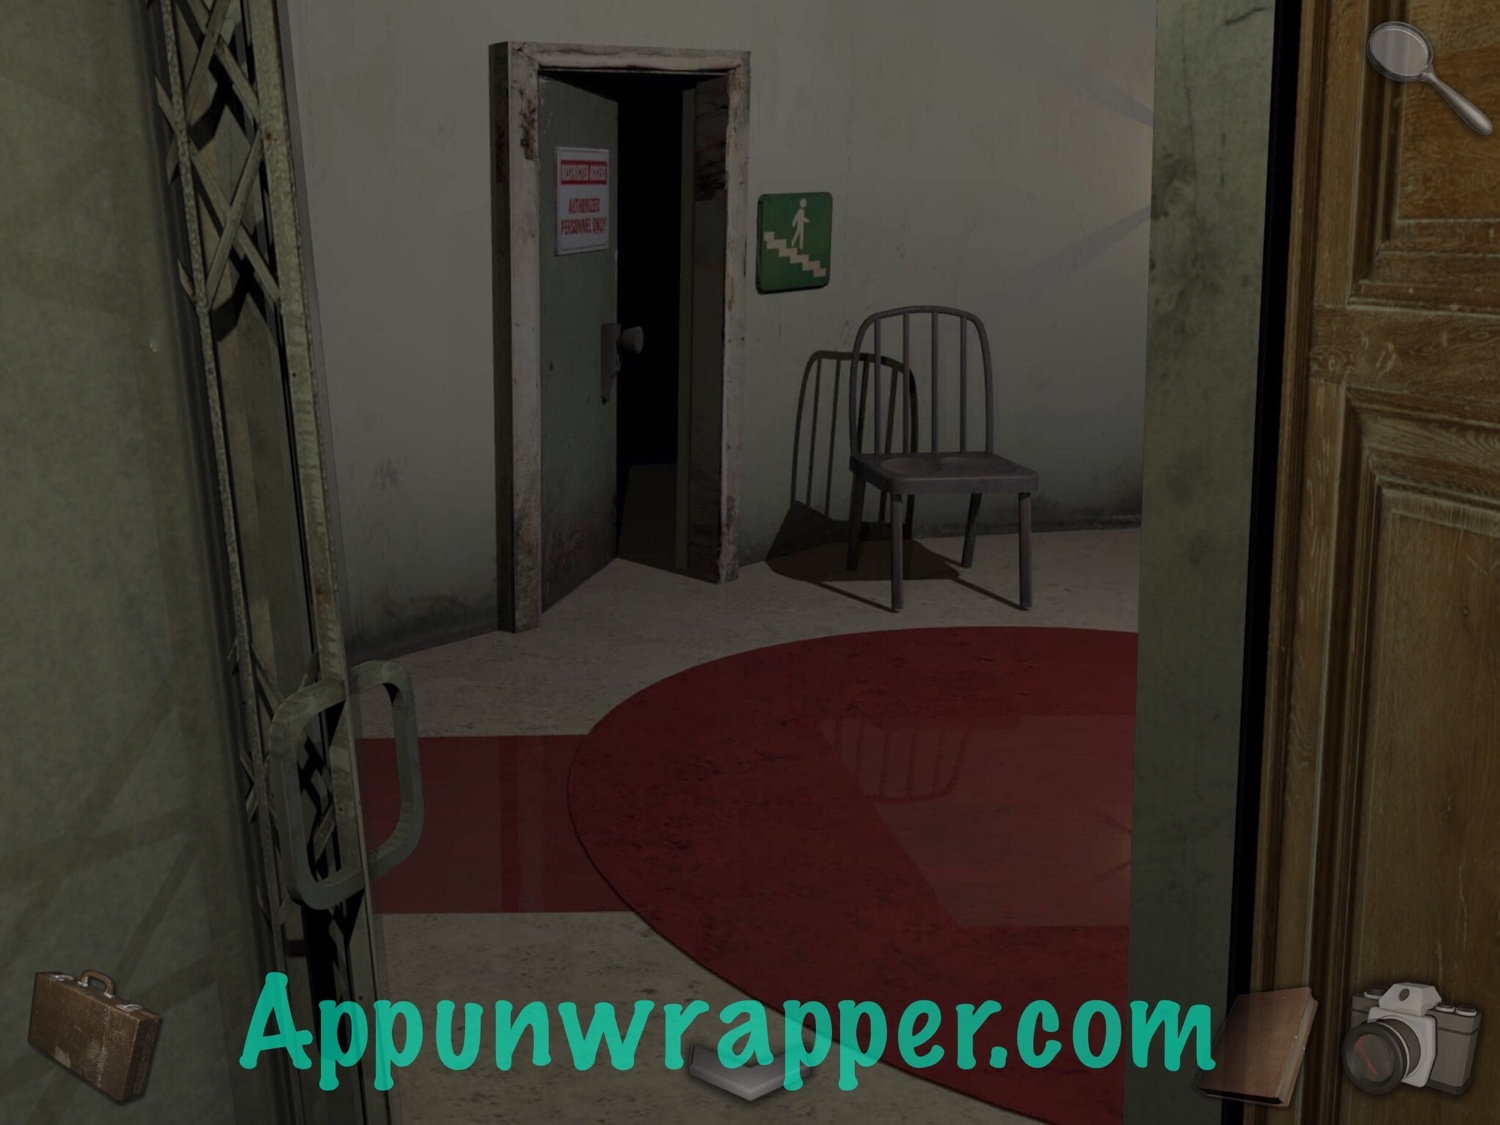
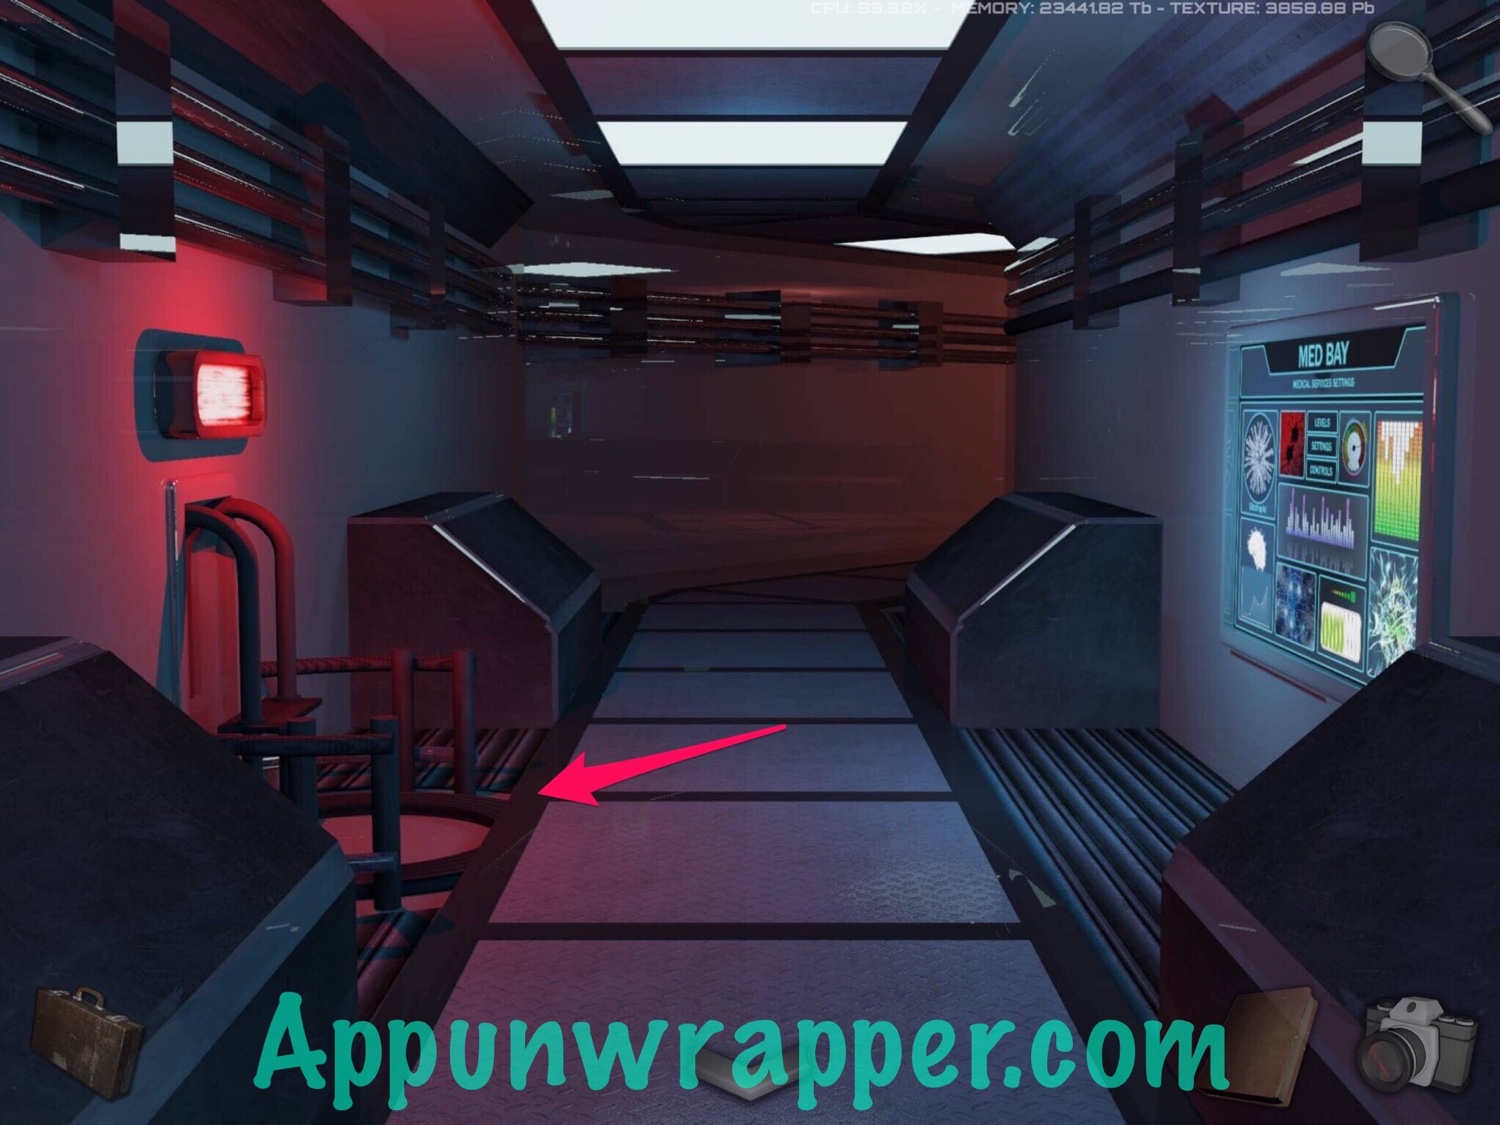
1. Move the chair away from the door. You now have a shortcut to the stairwell.
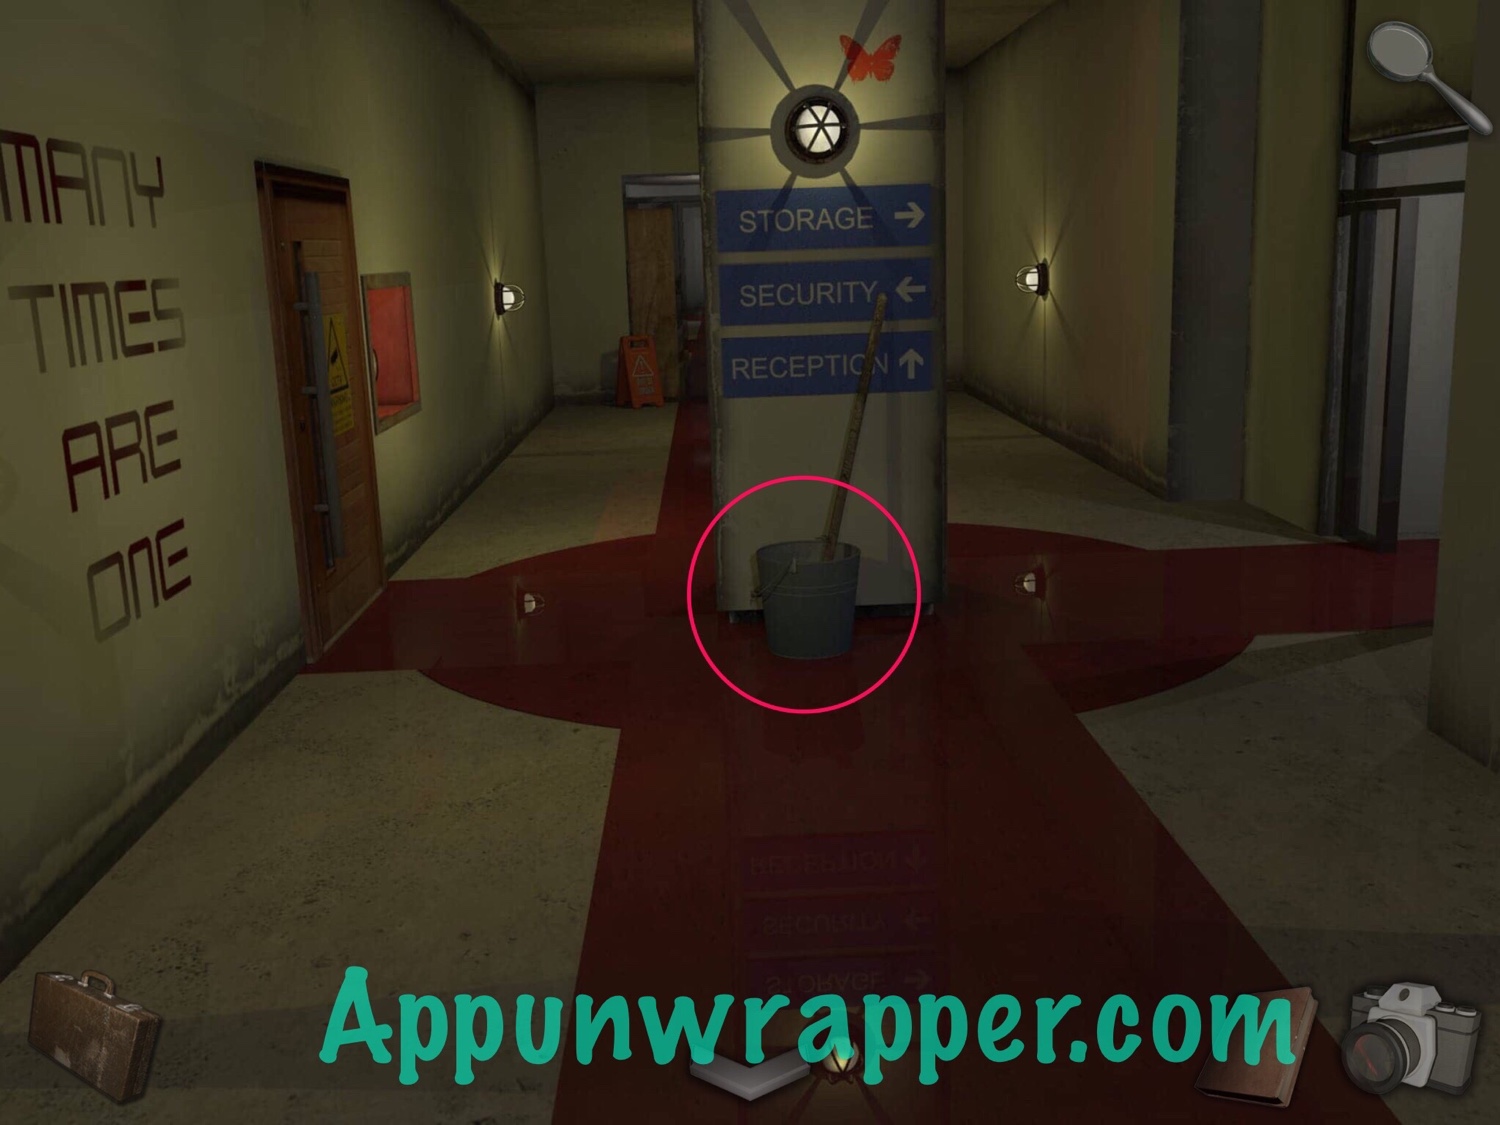
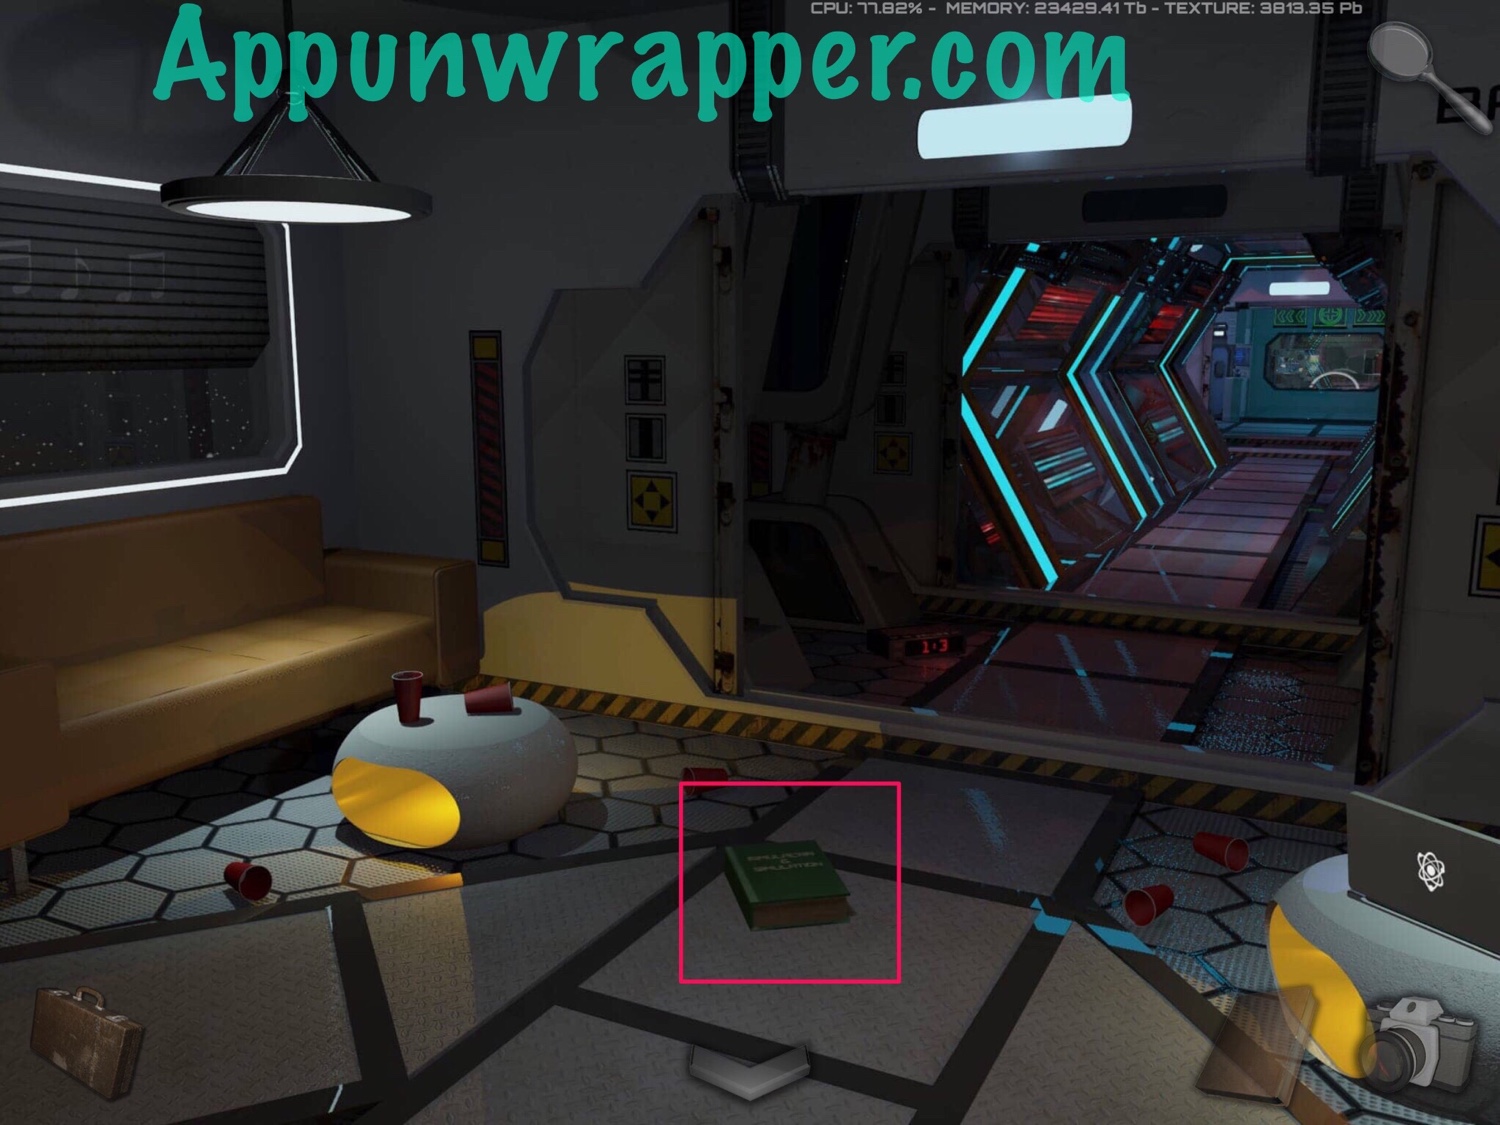
2. Continue on. Pick up the bucket and take a photo of the words MANY TIMES ARE ONE on the wall. It’s a clue we’ll use later.

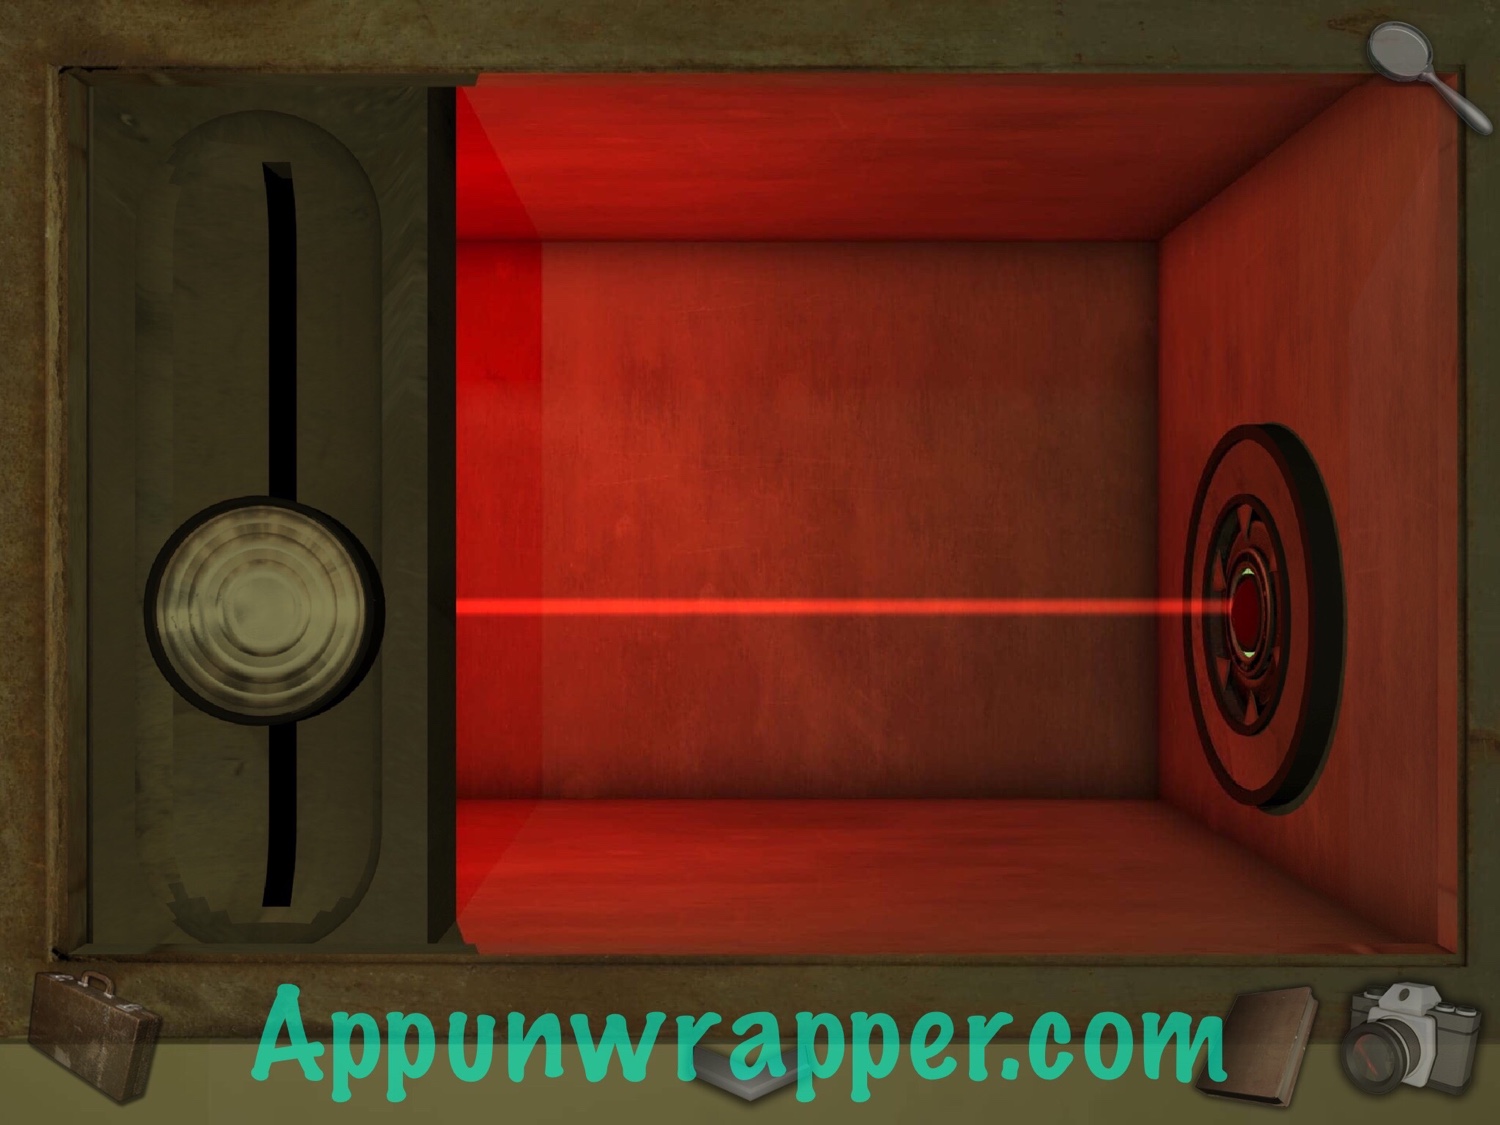
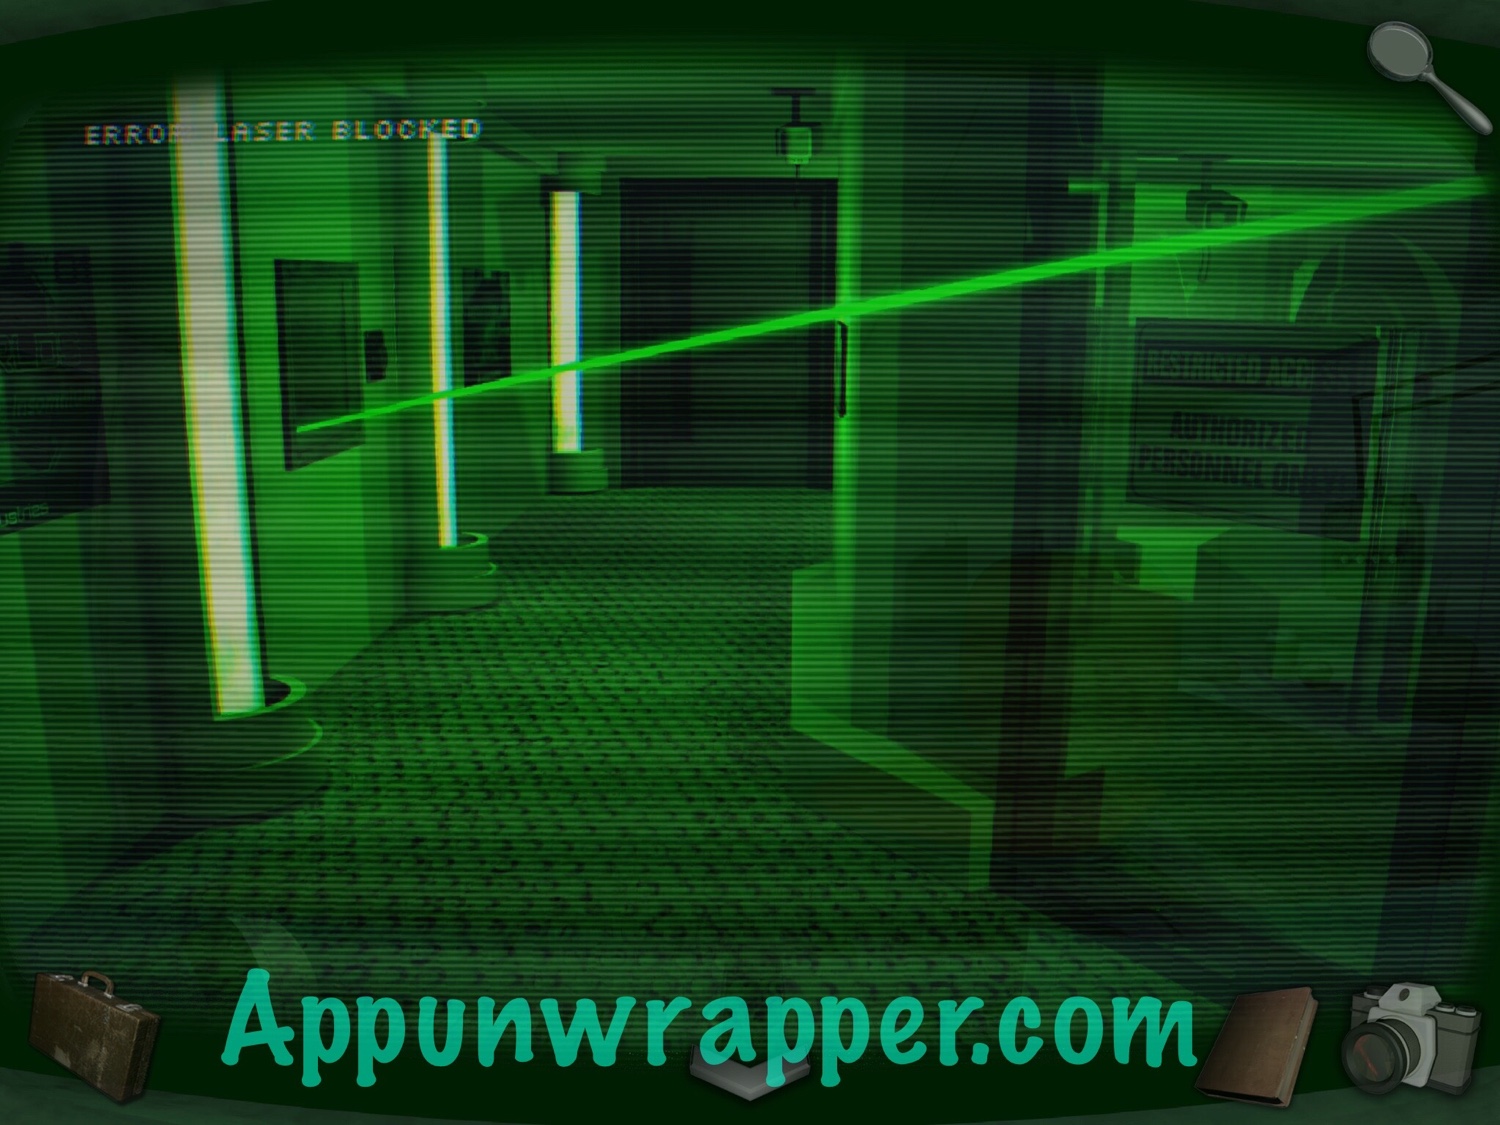
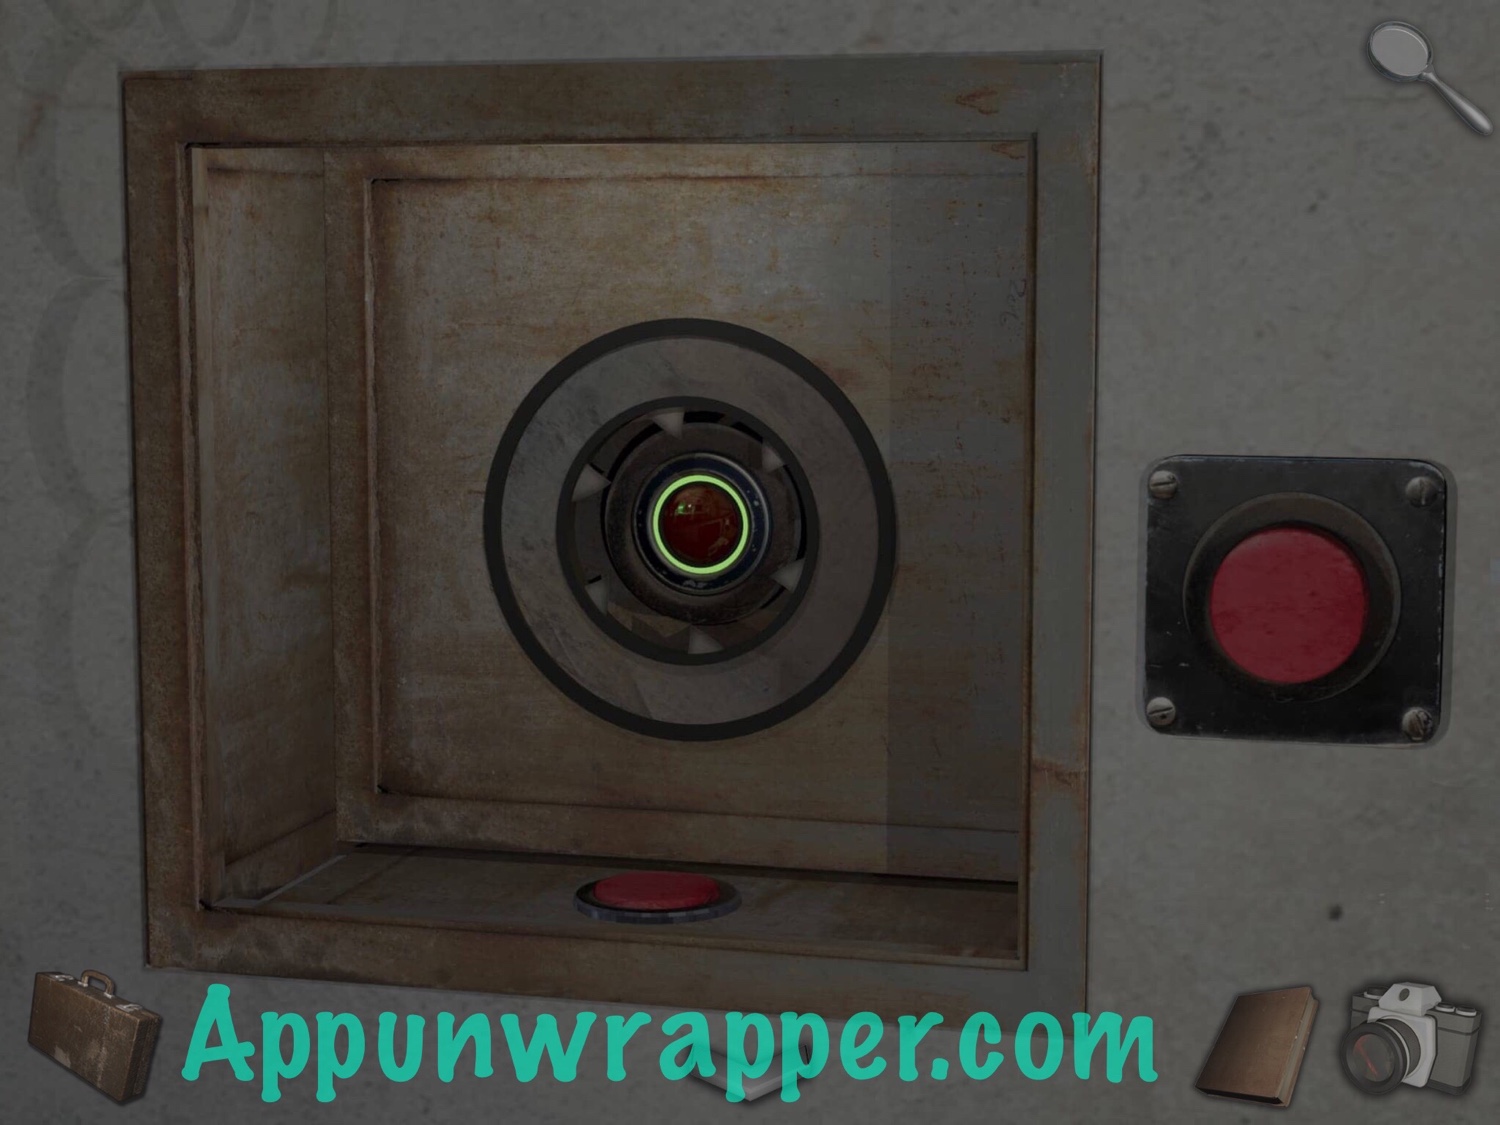
3. Turn to the door on the left, the one that leads to the security office. Pull the laser down so it points at the center of the bullseye to open the door. Go through.
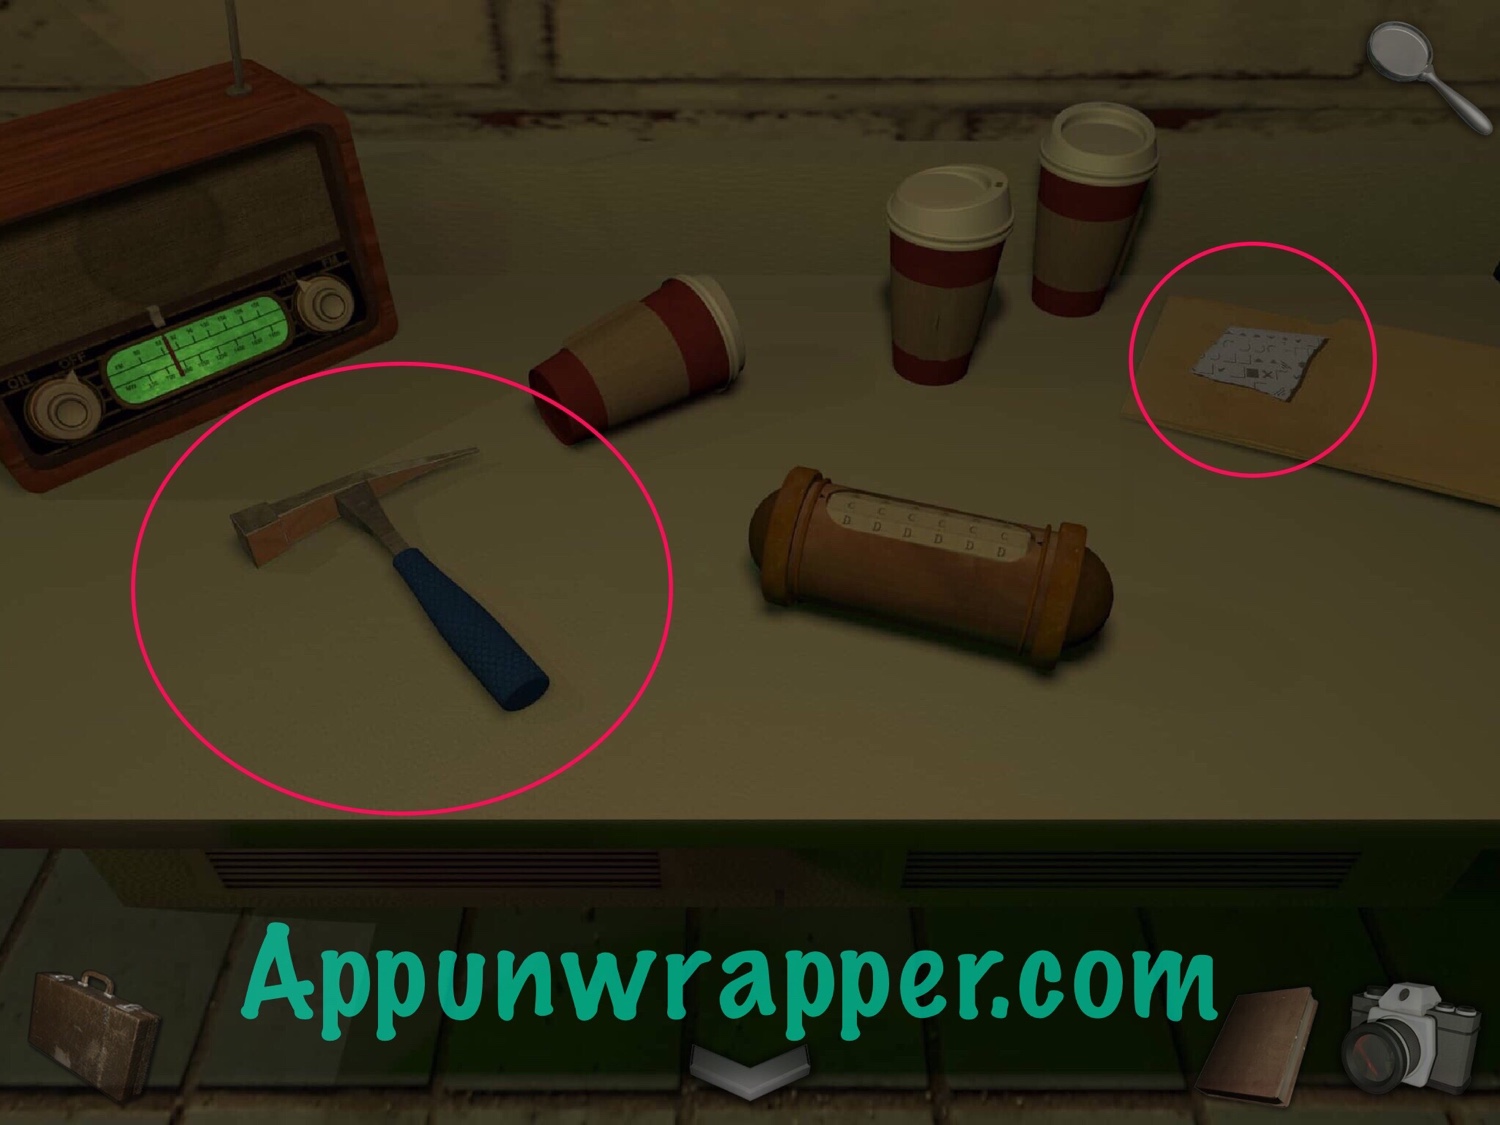
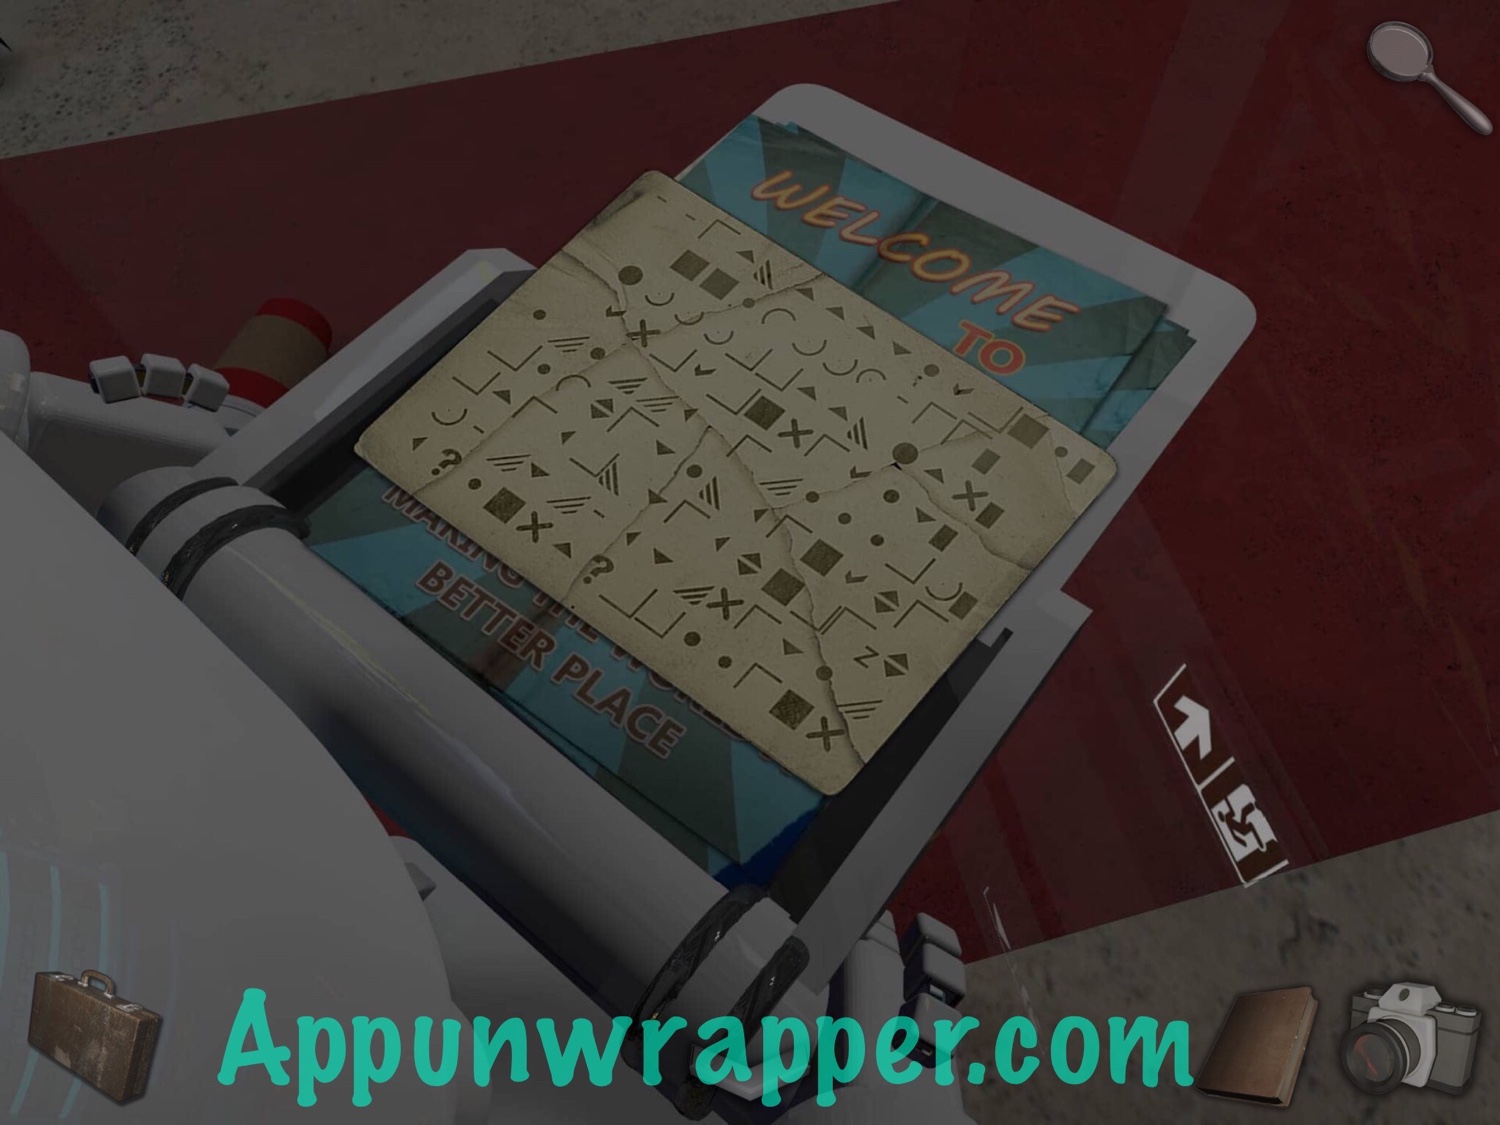
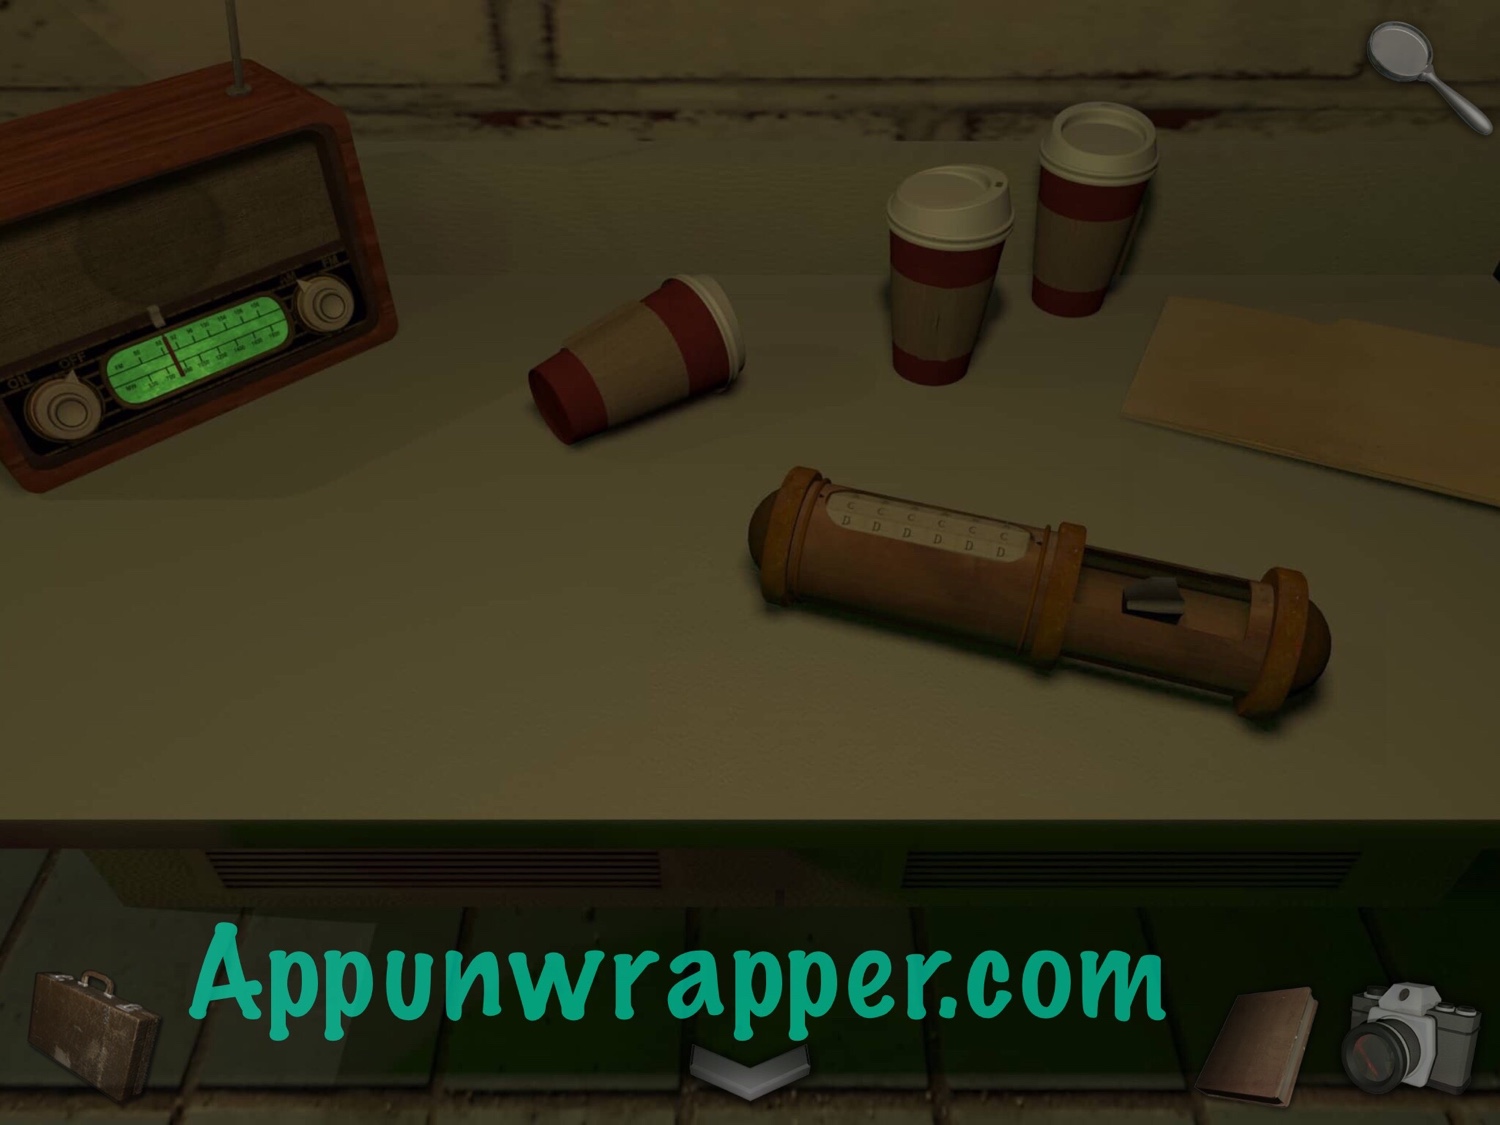
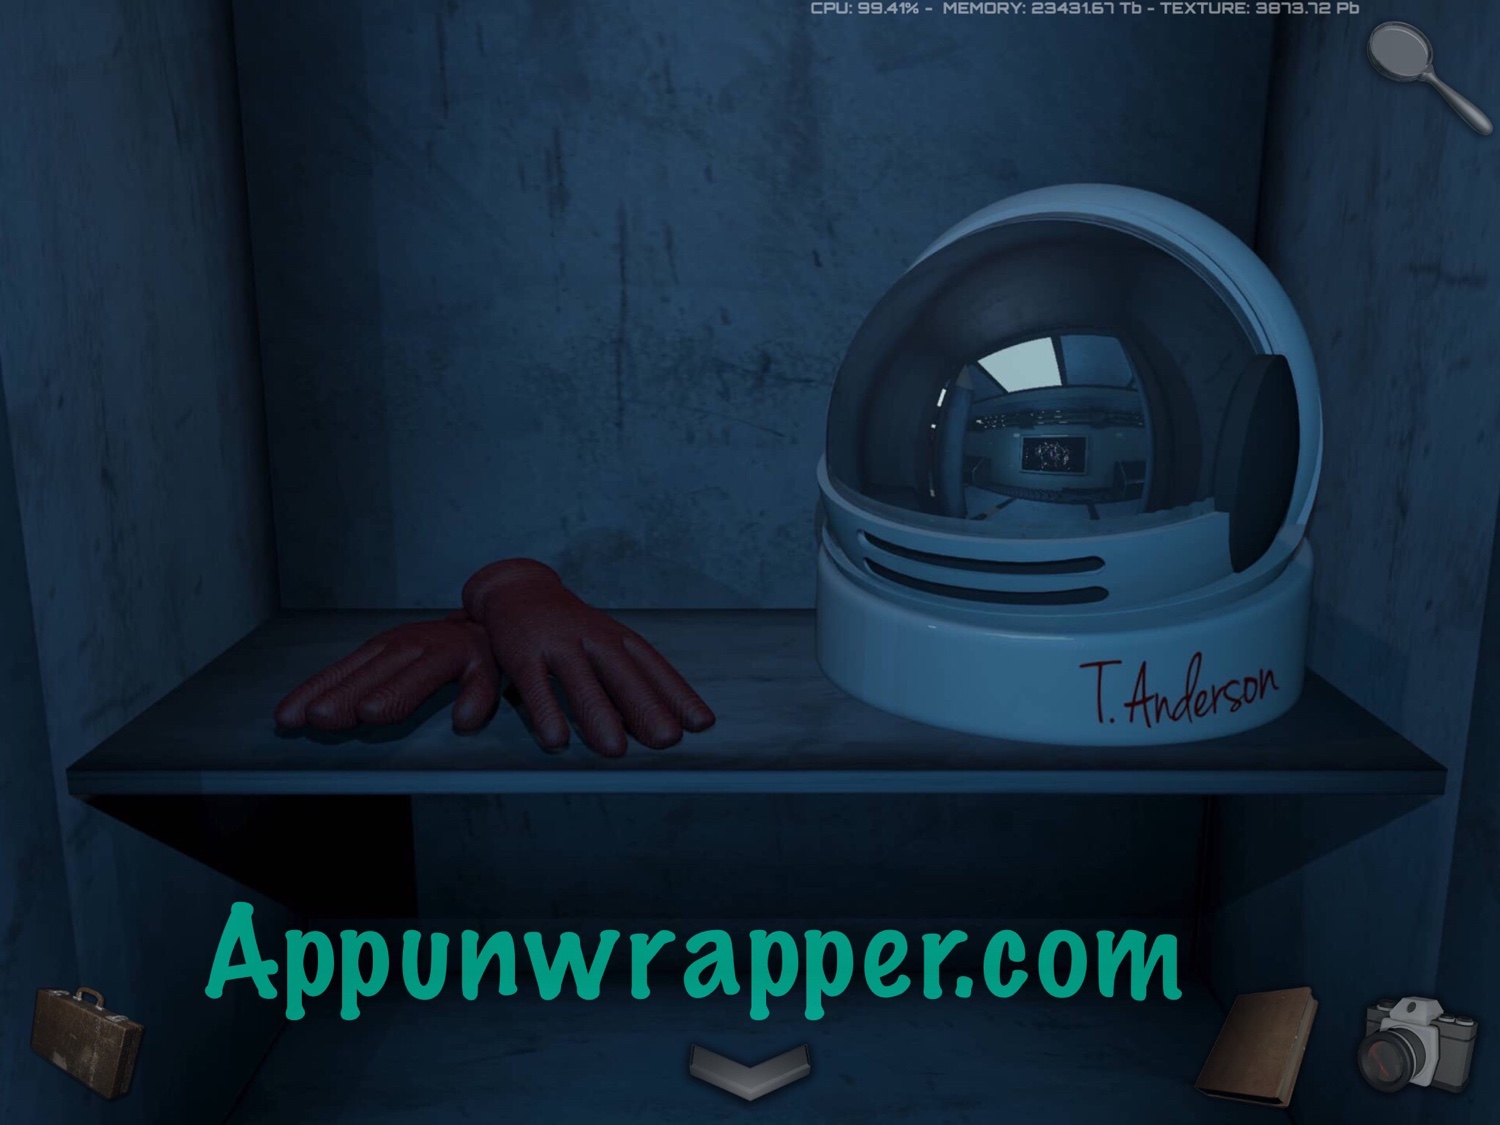
4. Pick up the hammer and the scrap of paper from the table. Also, notice the cryptex. We’ll have to come back to that.
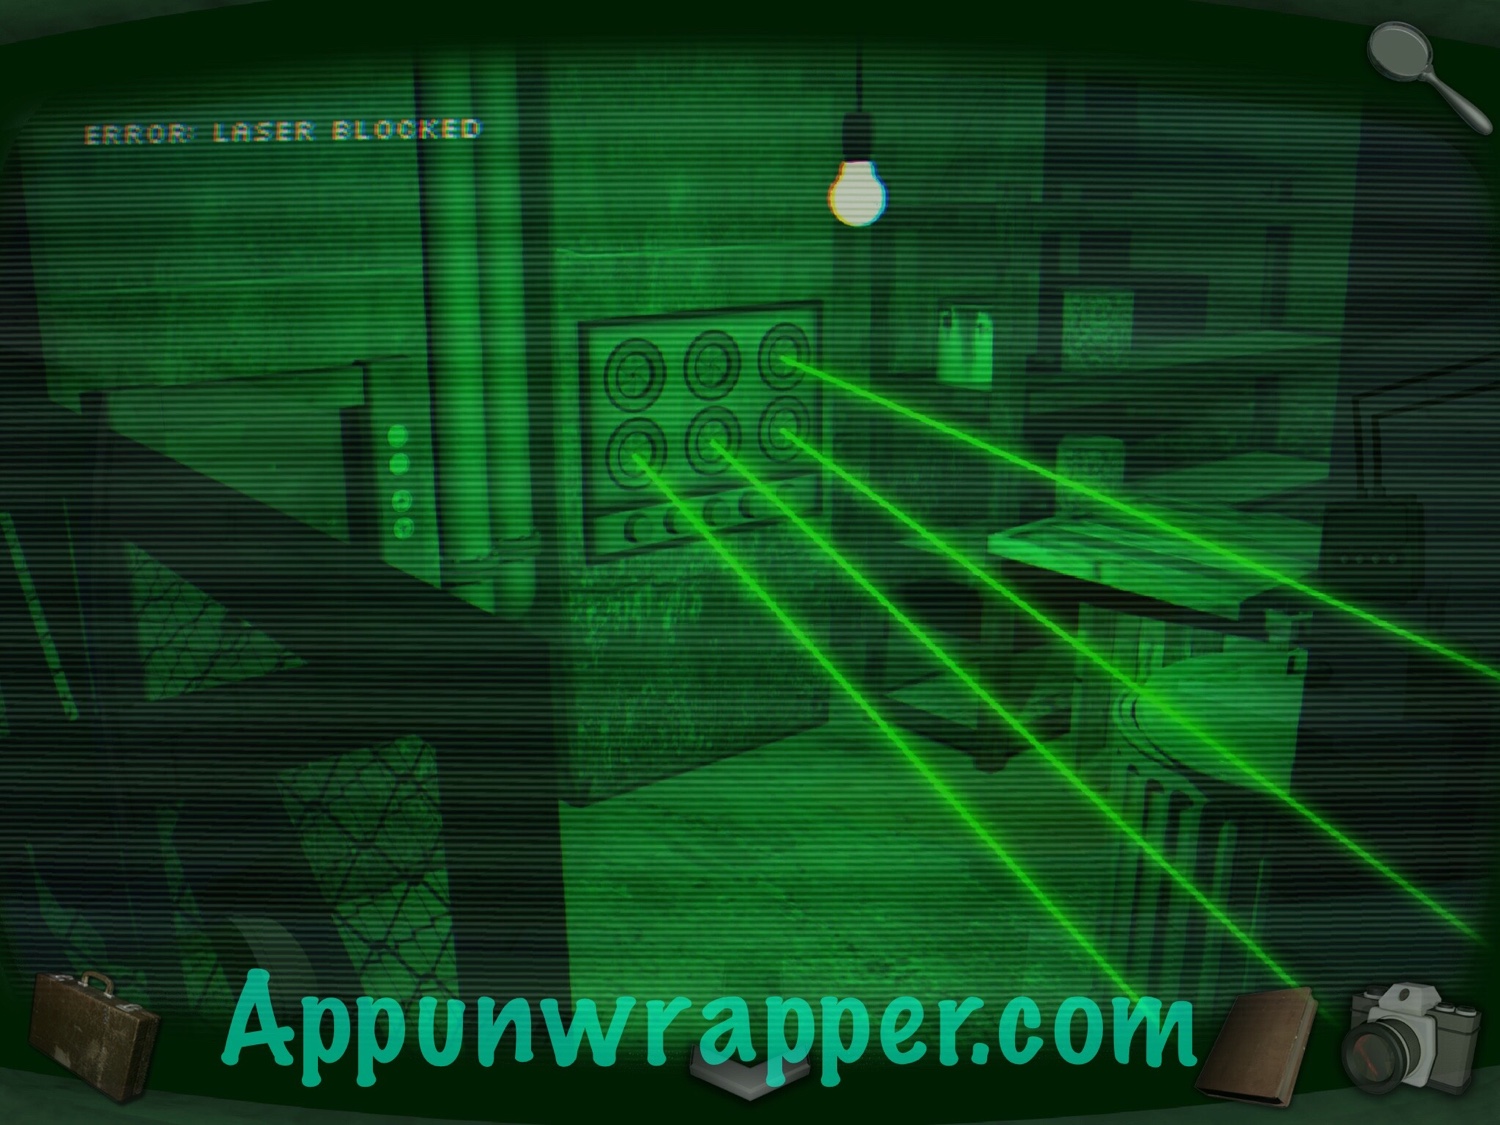
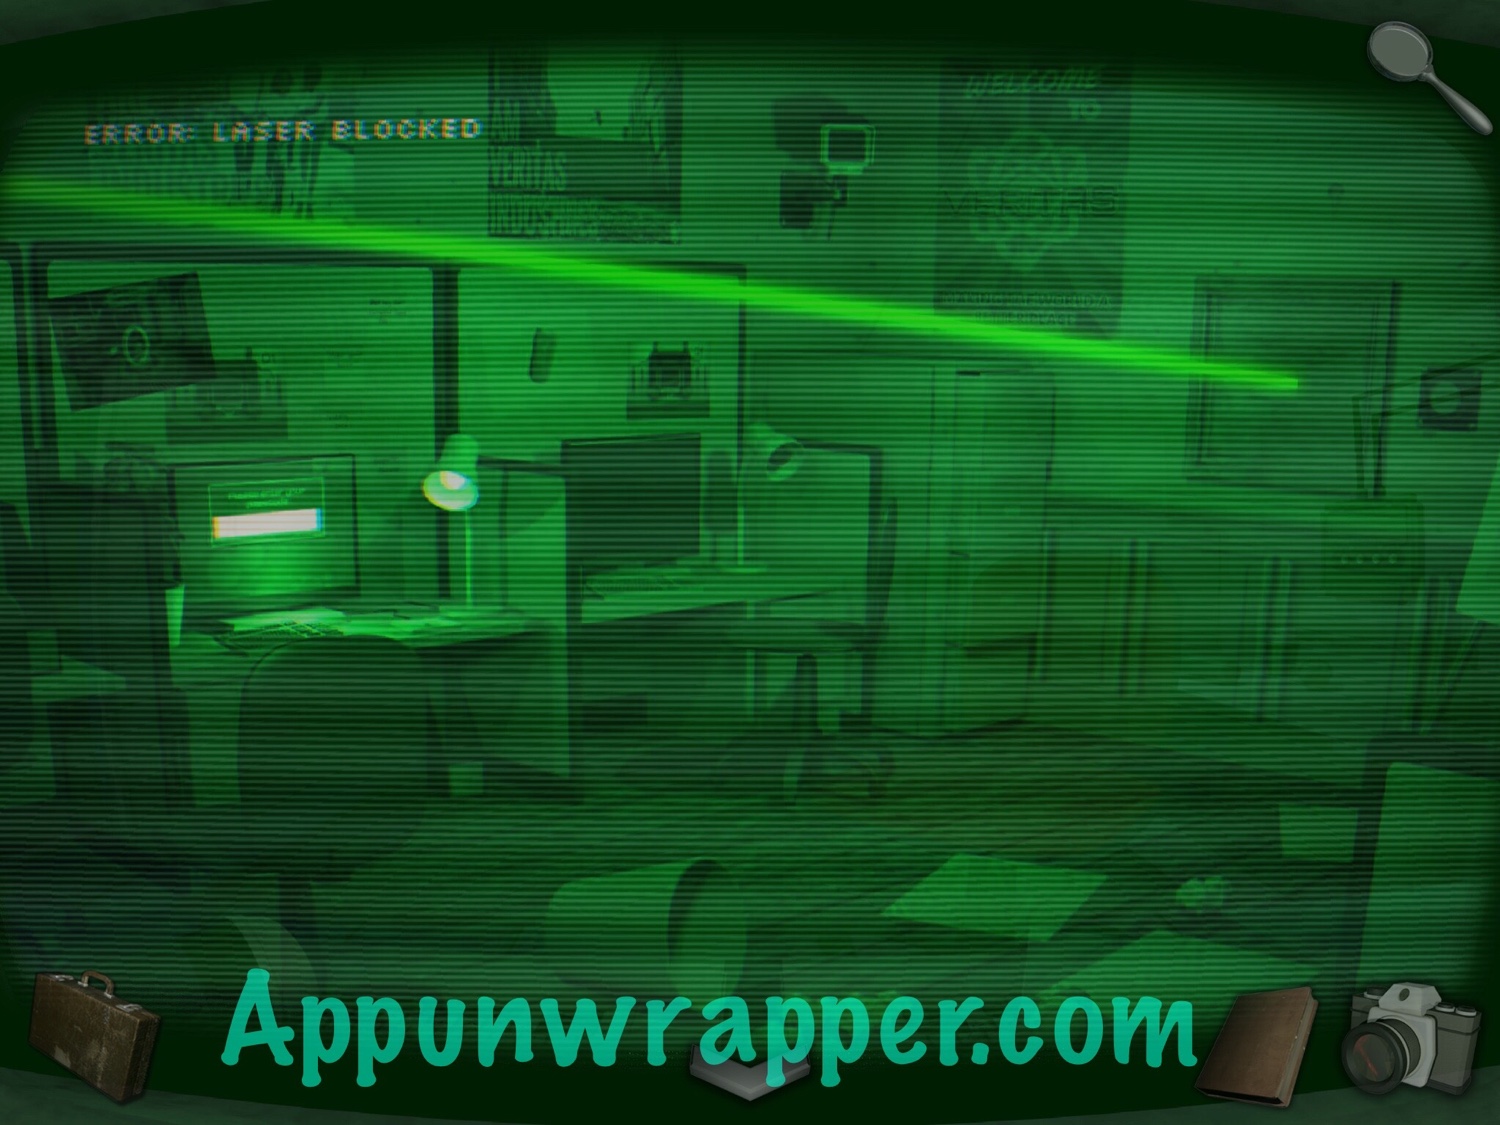
5. While here, take a look at each of the security monitors to see where lasers are being blocked.
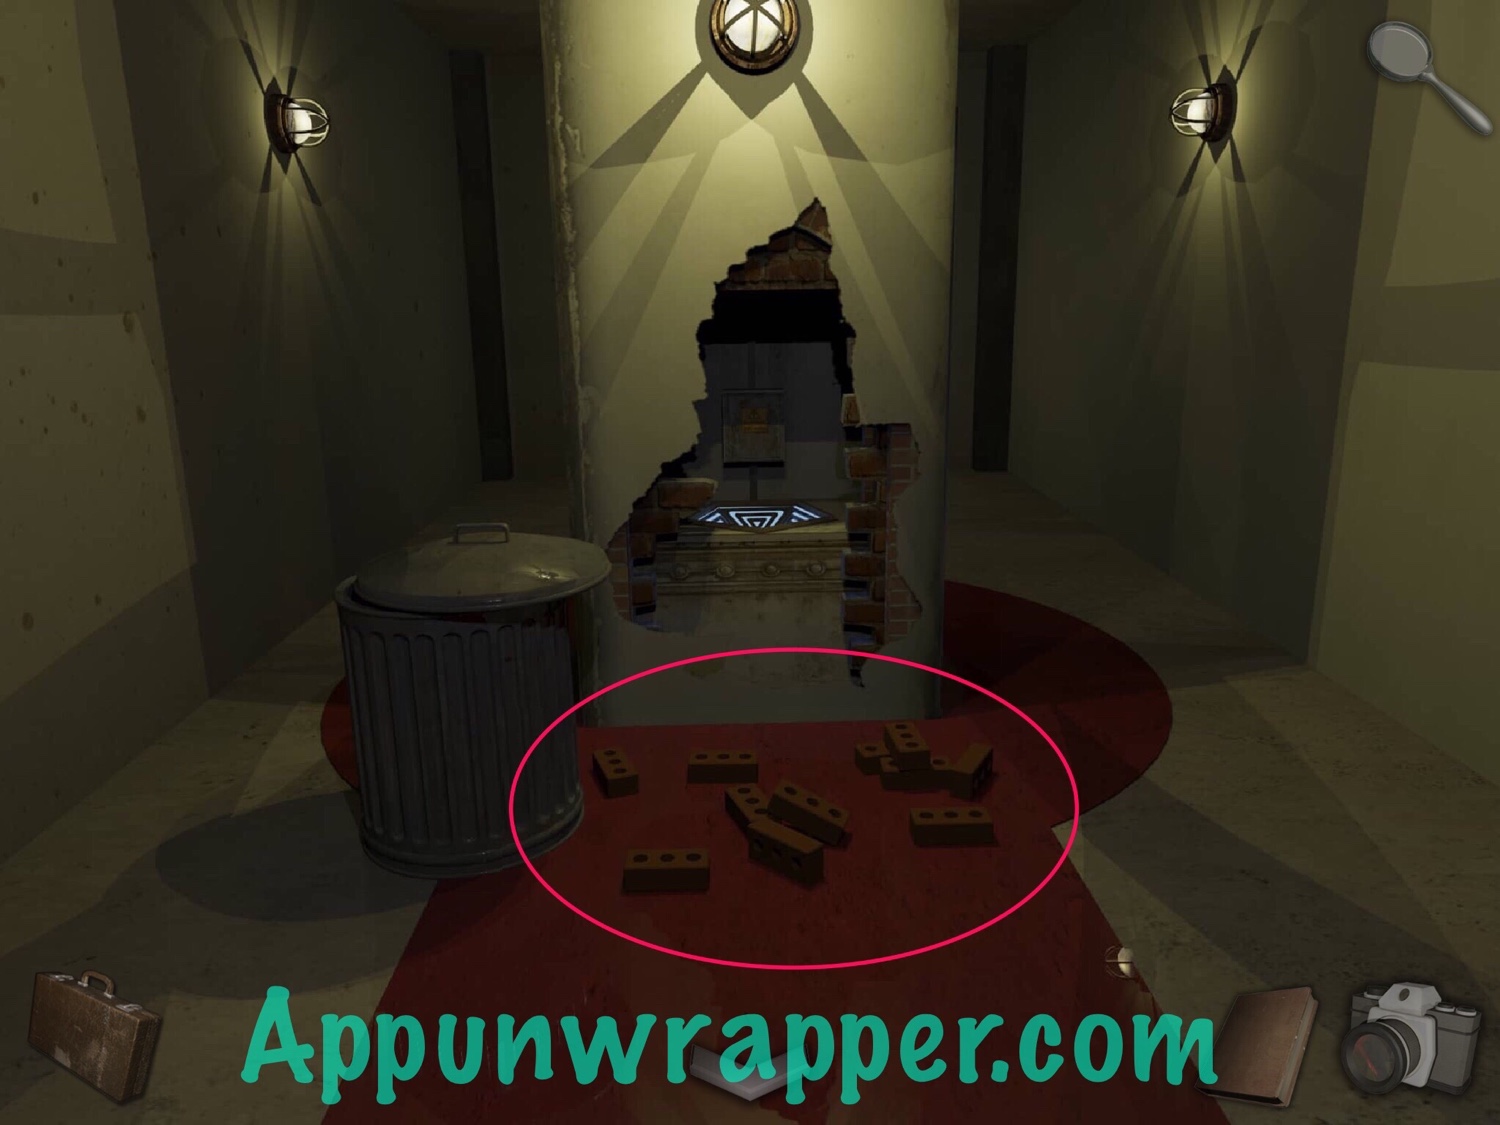
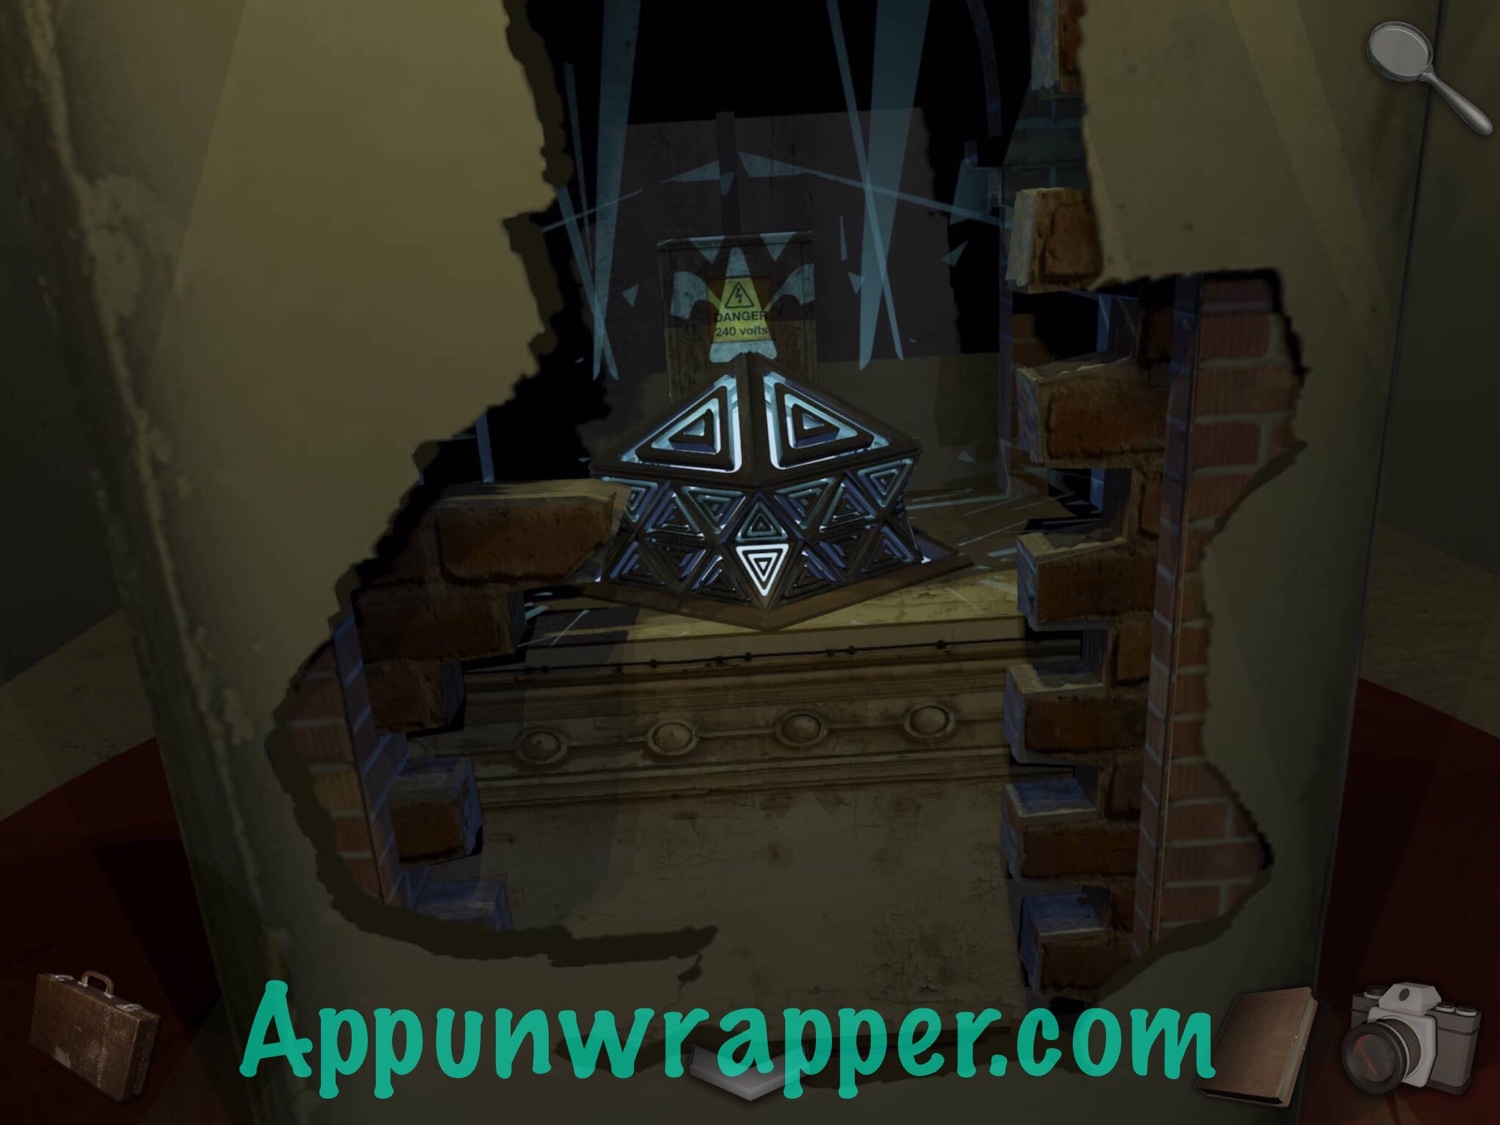
6. Leave the room and go right towards the storage area. Use the hammer to break through the wall and see another slot for for the glowing artifact. We have to get it over here somehow. Pick up the bricks.
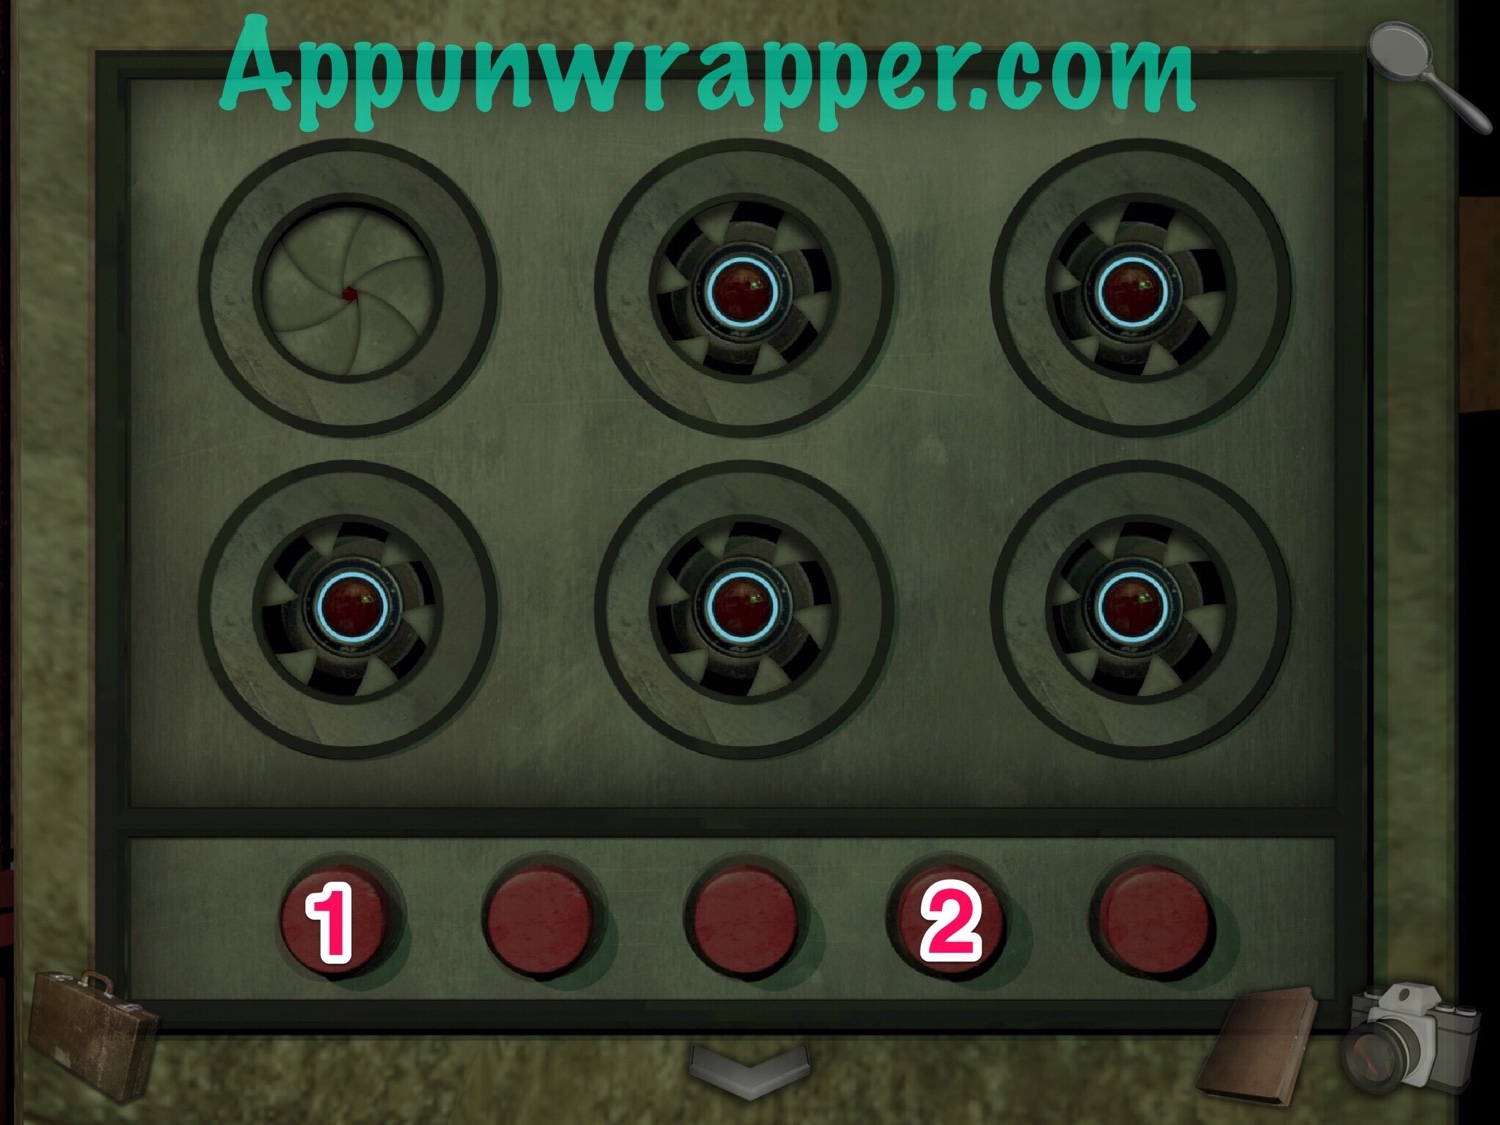
7. Continue on behind the pillar. Go through the door to the storage room. Pick up the mirror. Also, let’s solve the puzzle with the five buttons.
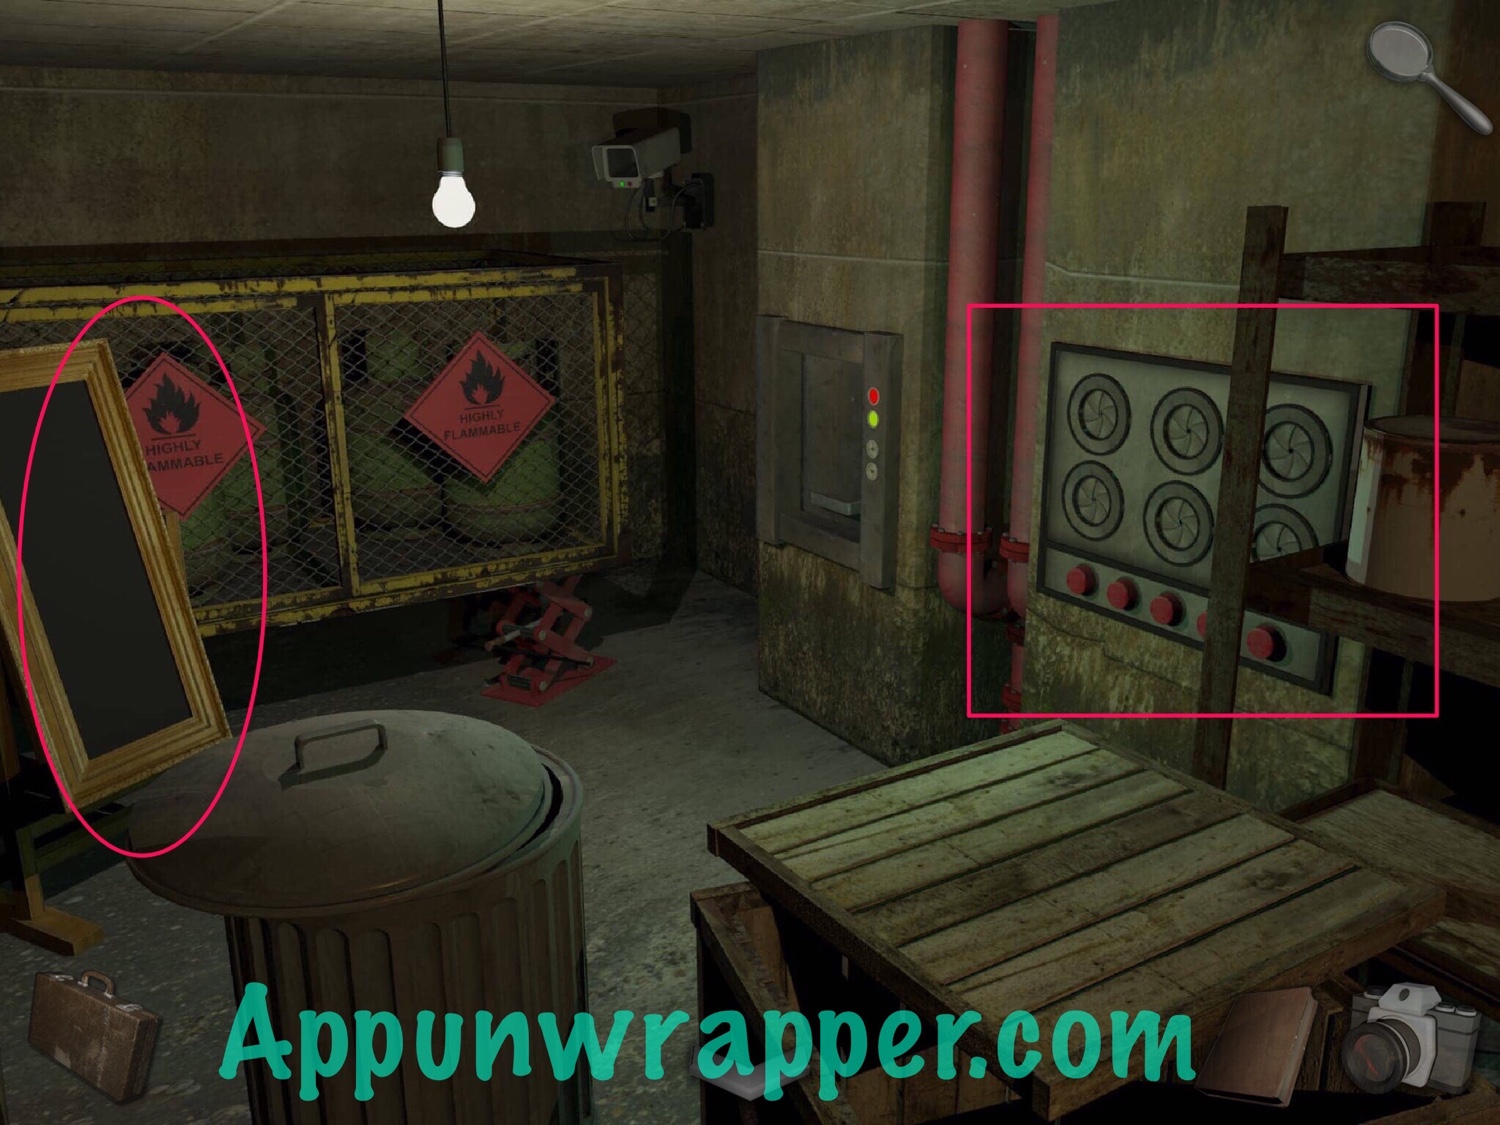
8. Simply press buttons 1 & 4 to open enough holes to let the four lasers through.
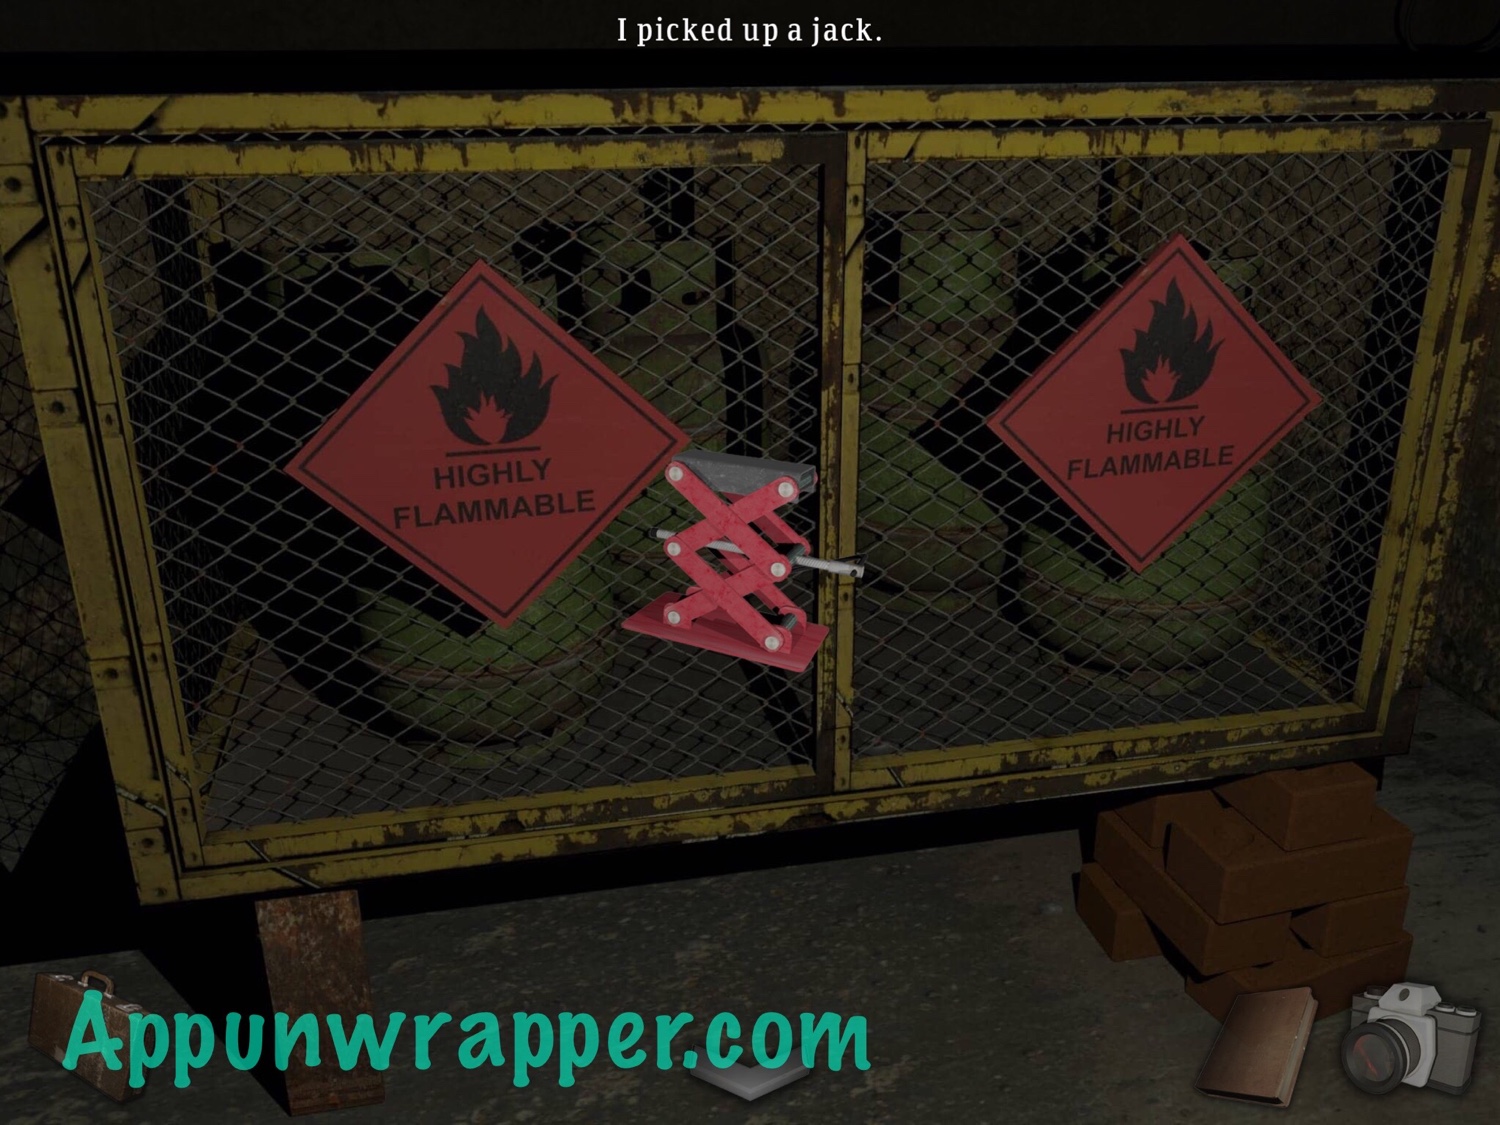
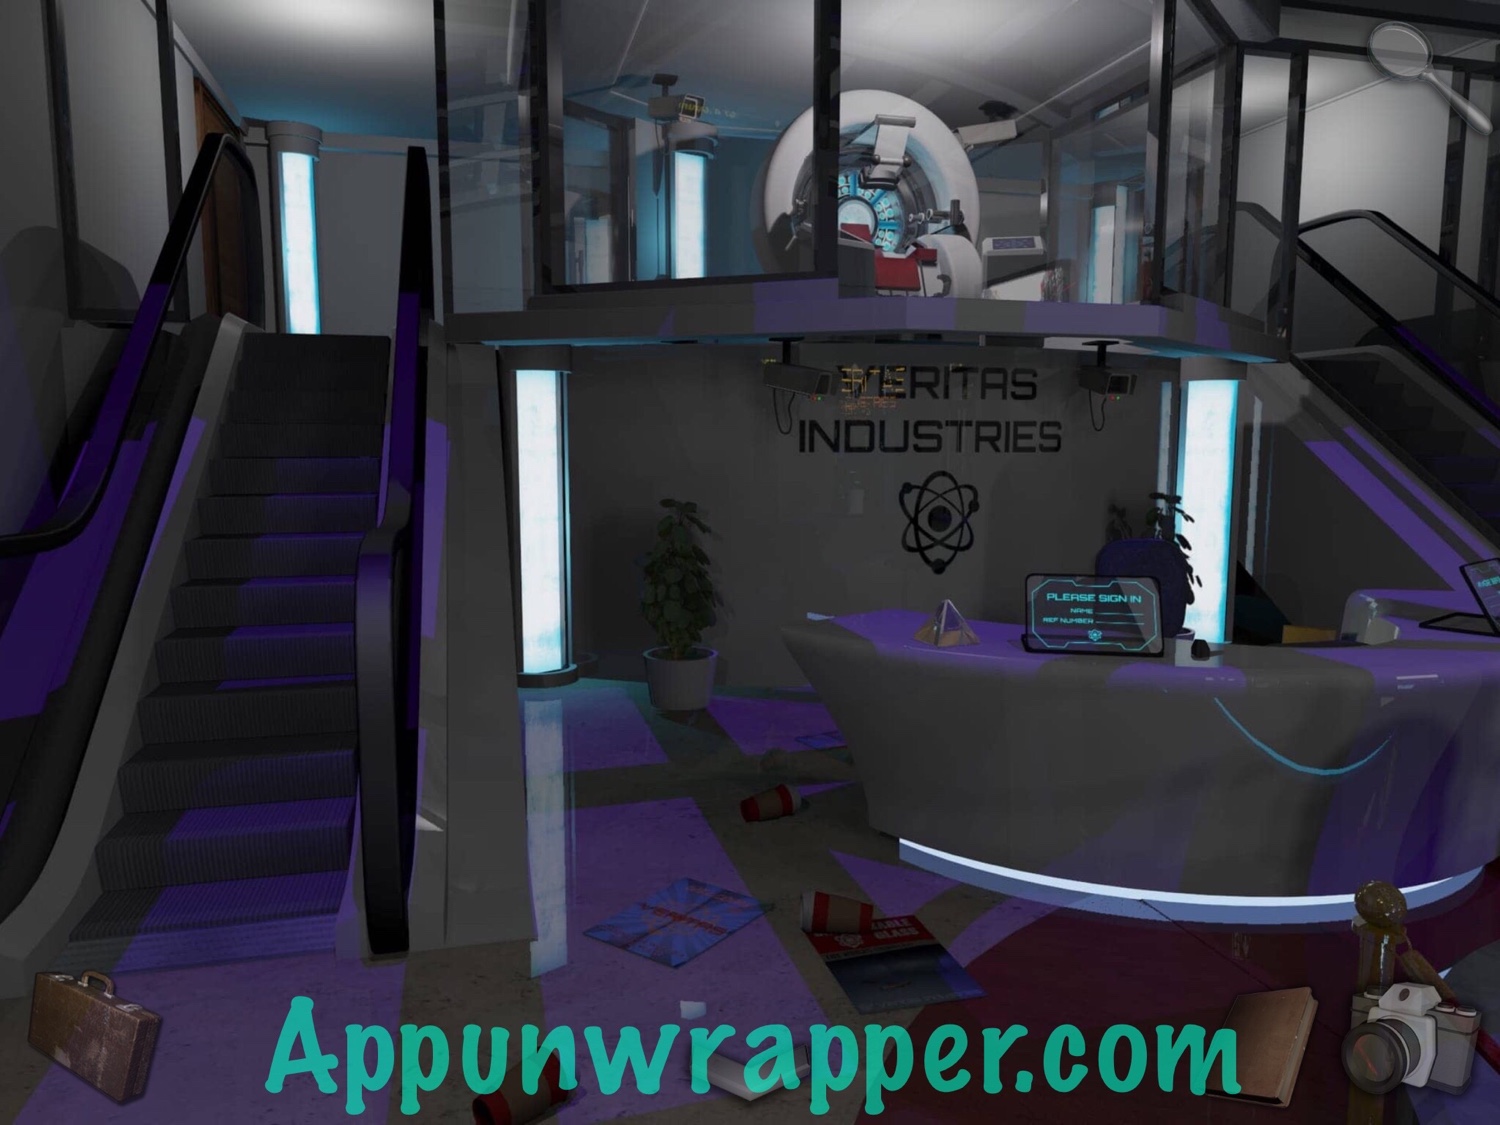
9. While here, swap out the car jack with the bricks.

10. Also, combine the rope with the bucket to make a bucket on rope. Then open the dummy waiter door and drop the bucket down.
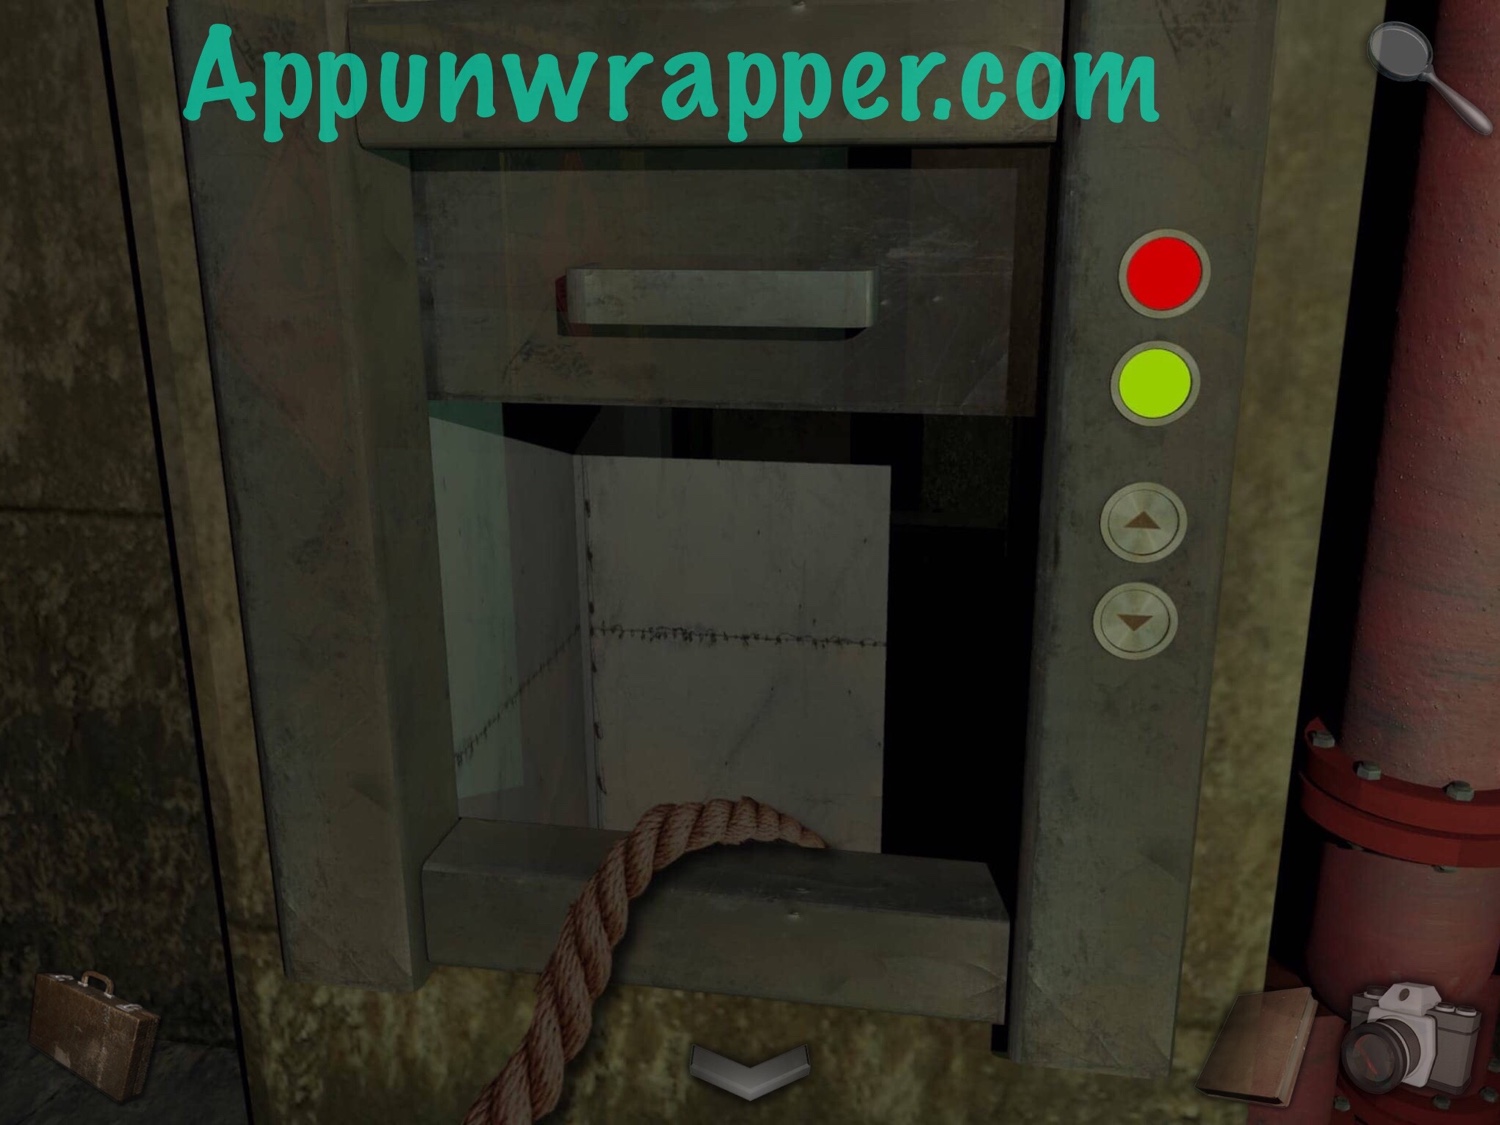
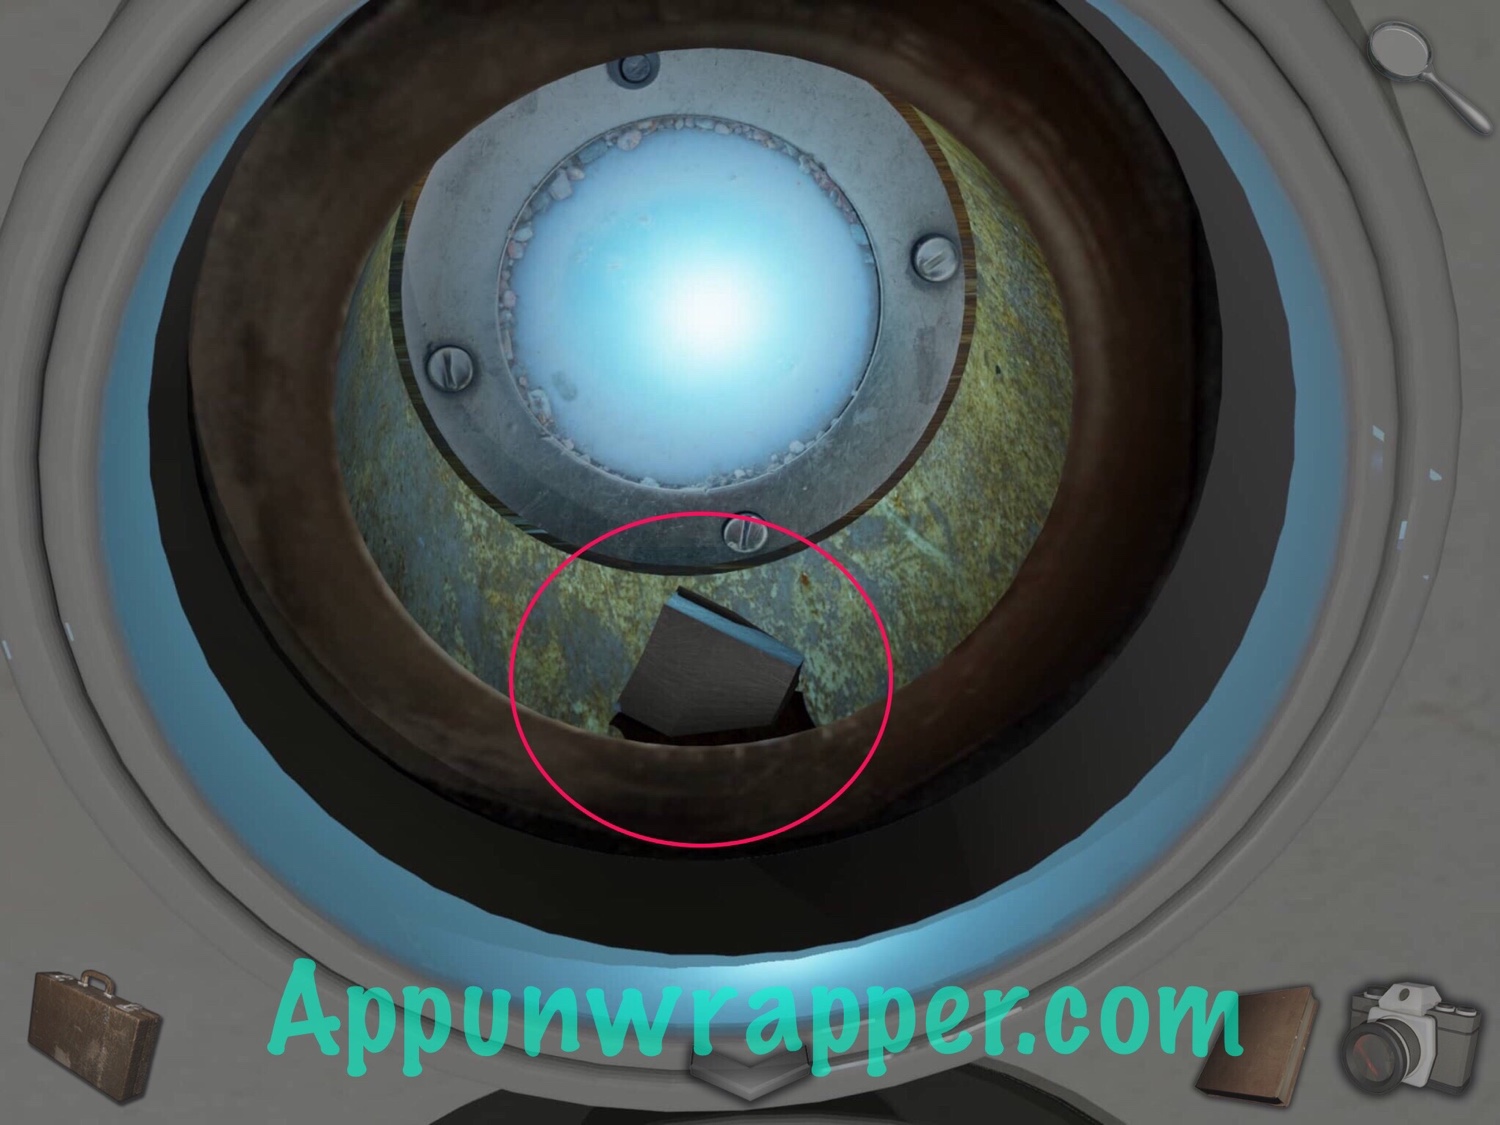
11. Go back and get the glowing artifact and pick it up. Go back to the diner and open the dummy waiter door. The bucket should be there. Place the glowing artifact inside.

12. Go back to the storage room and get the glowing artifact from the dummy waiter.
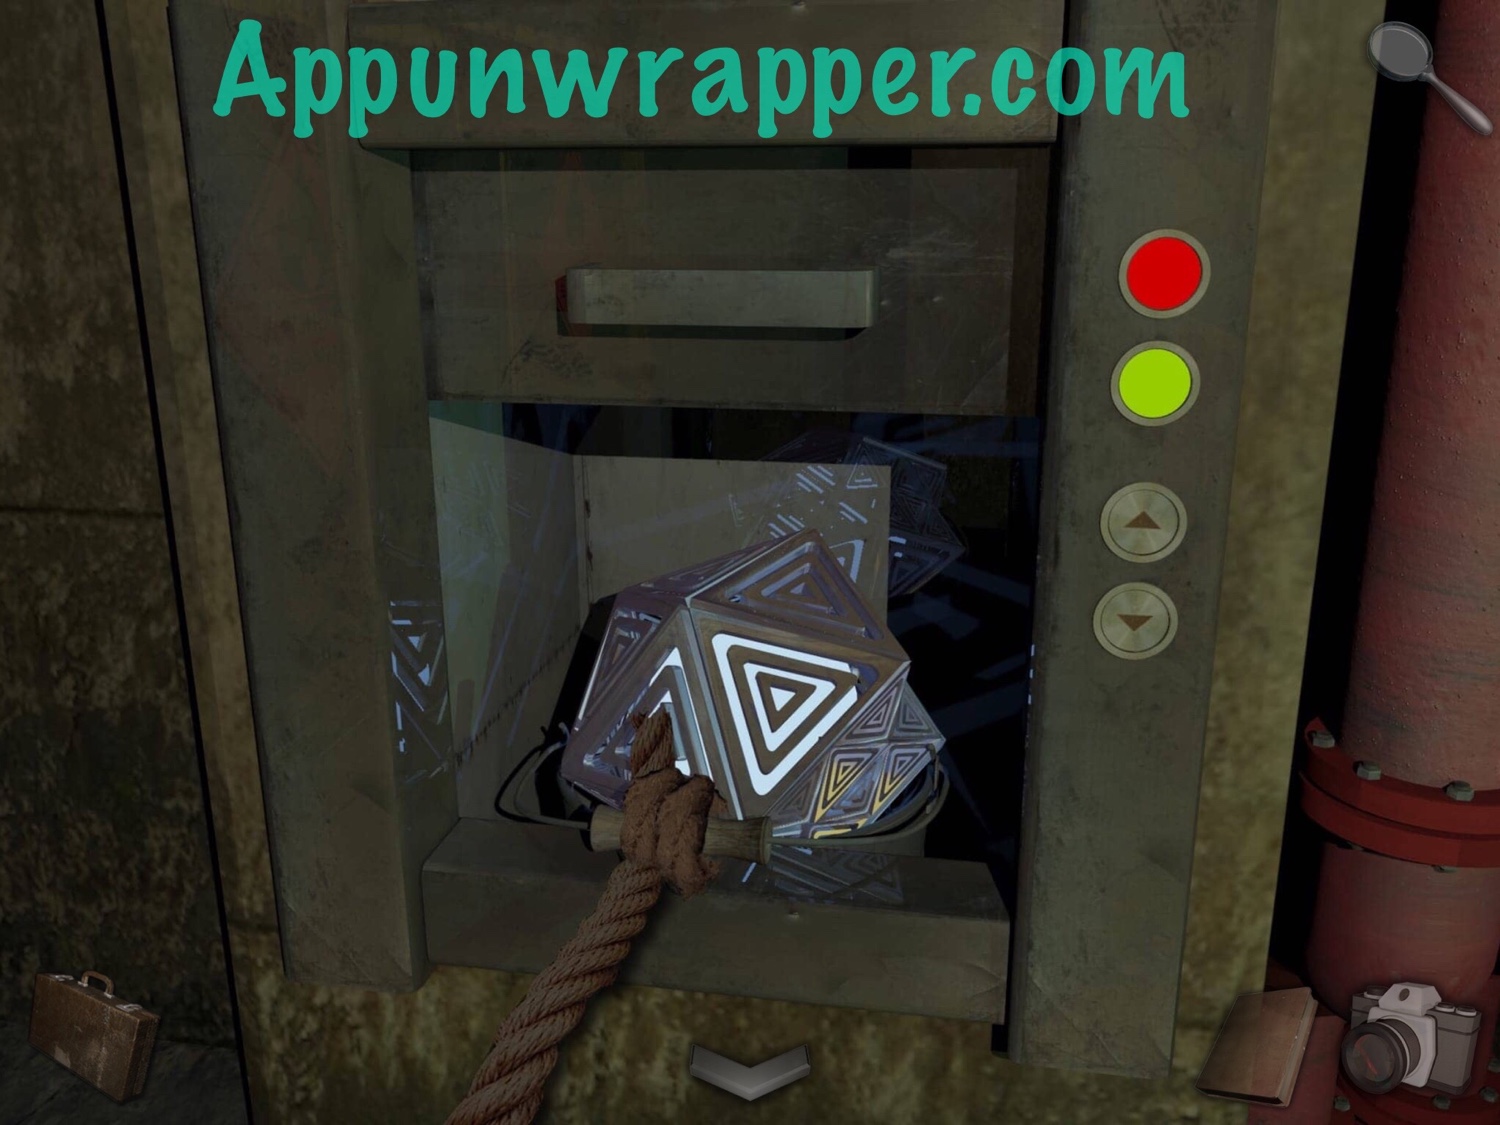
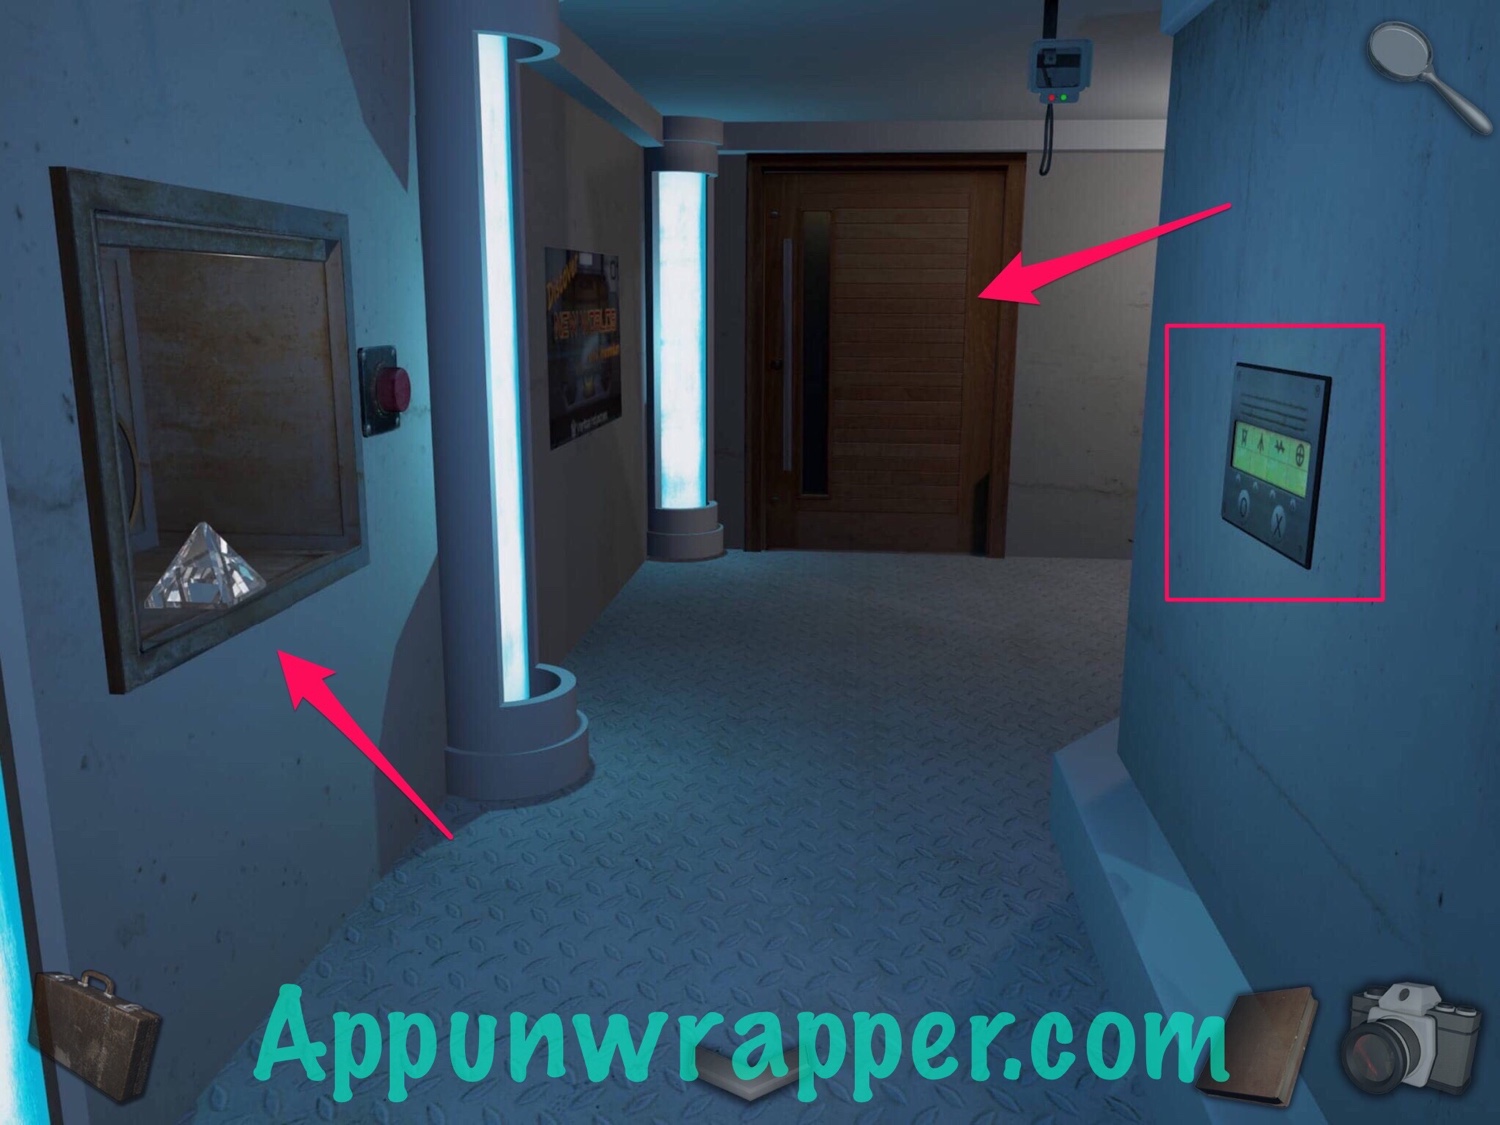
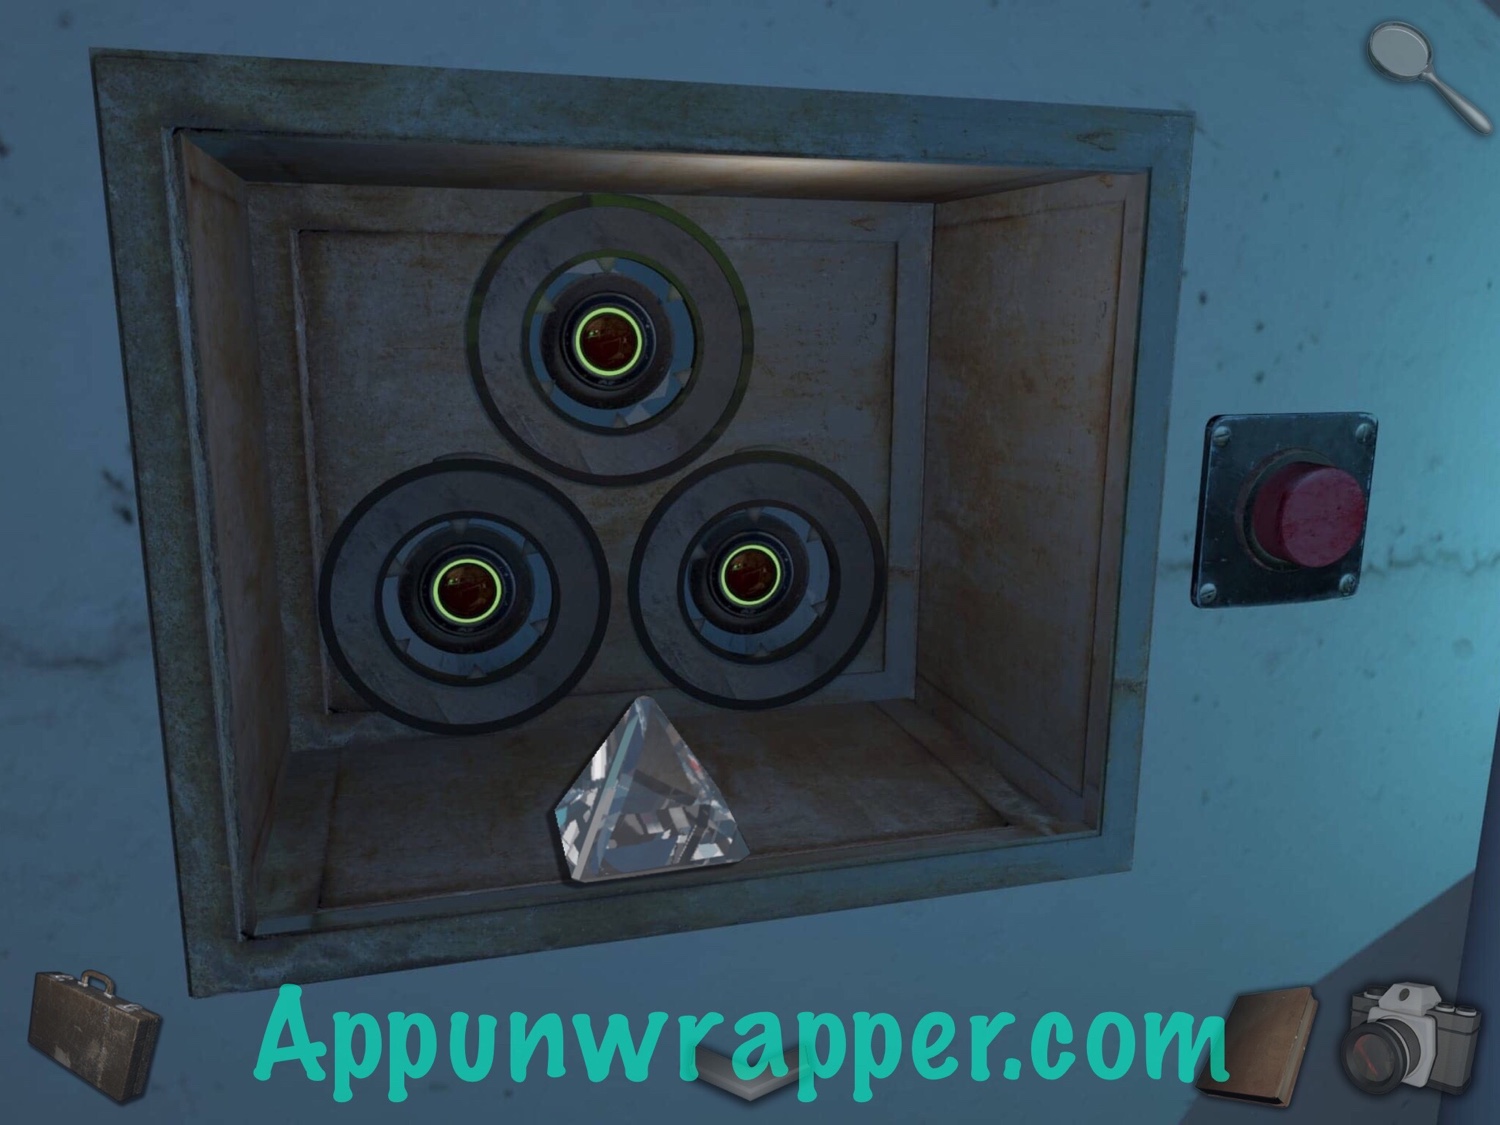
13. Go back and place the glowing artifact in the slot in the wall.
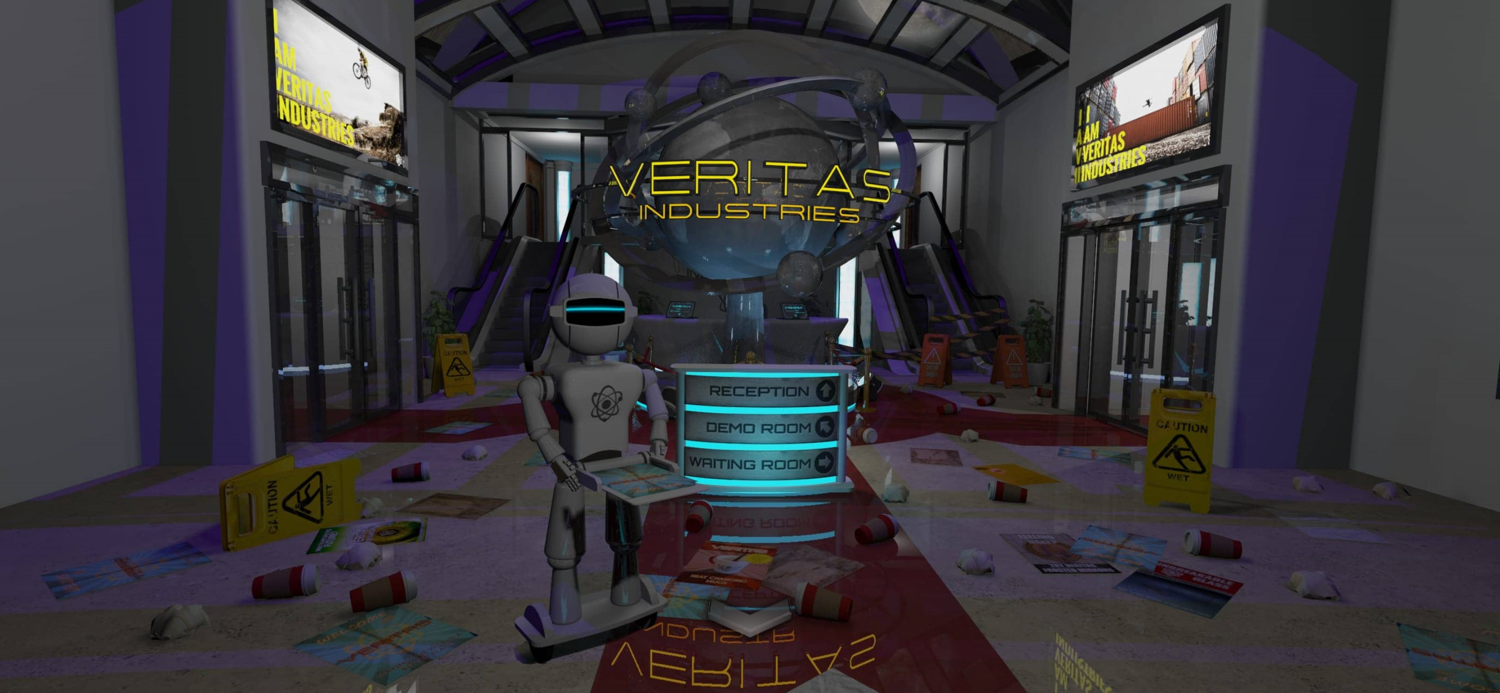
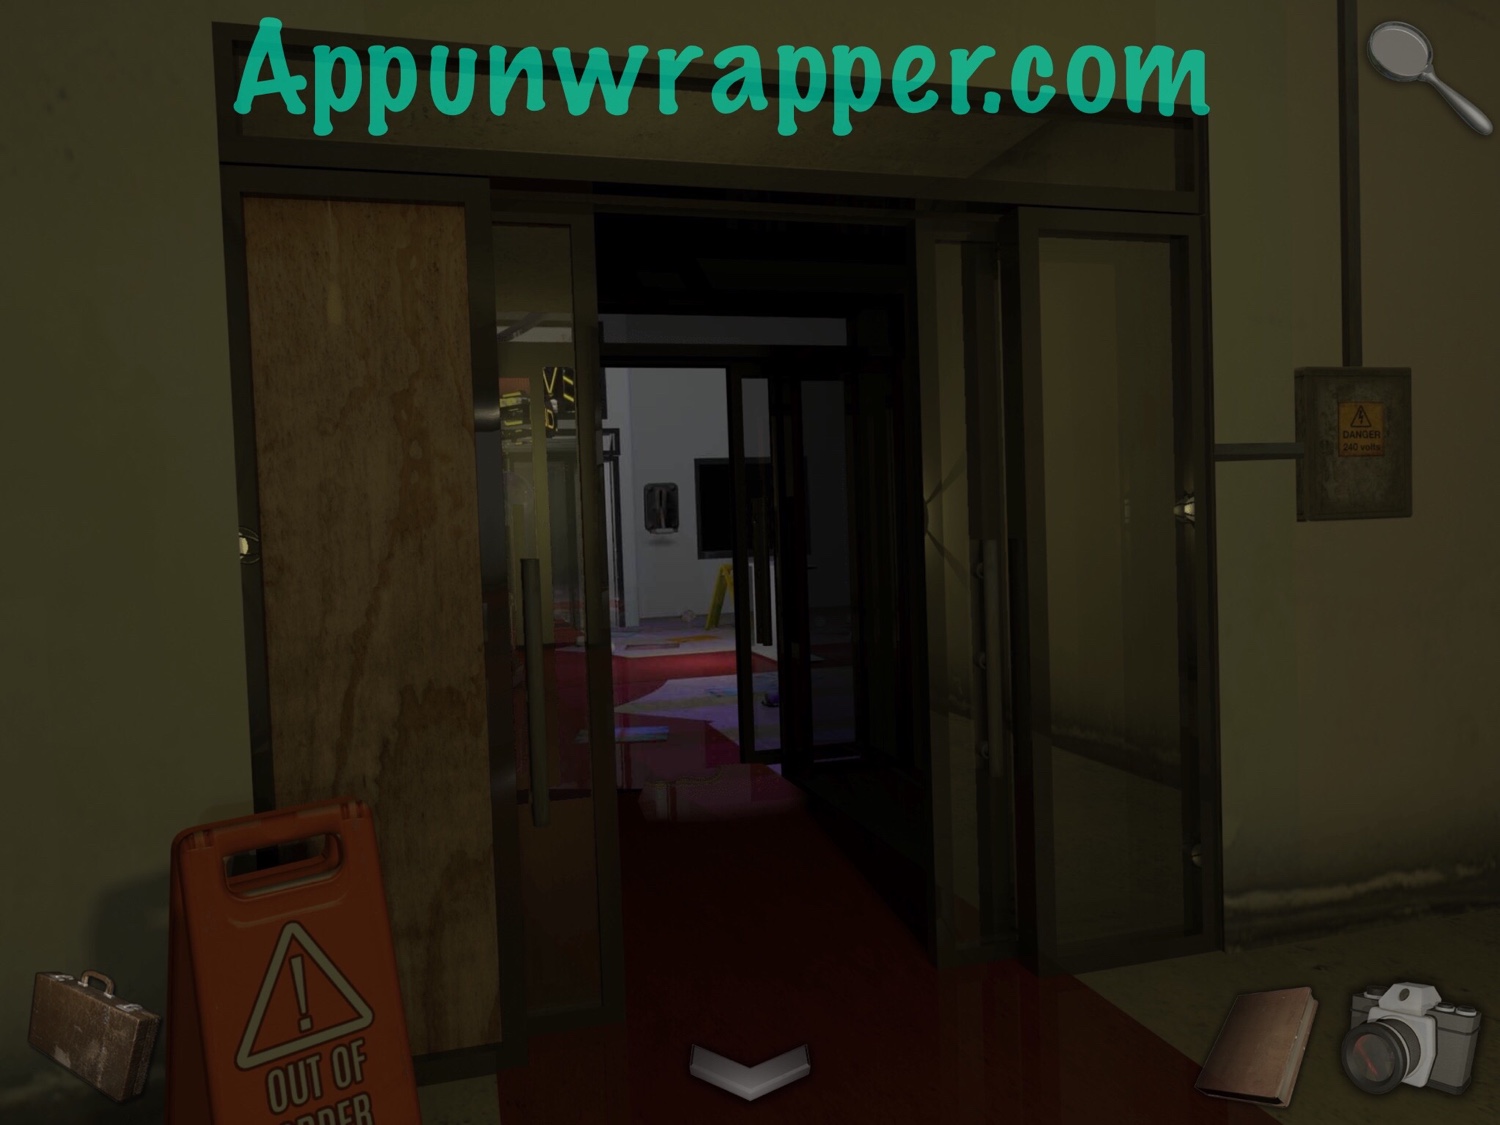
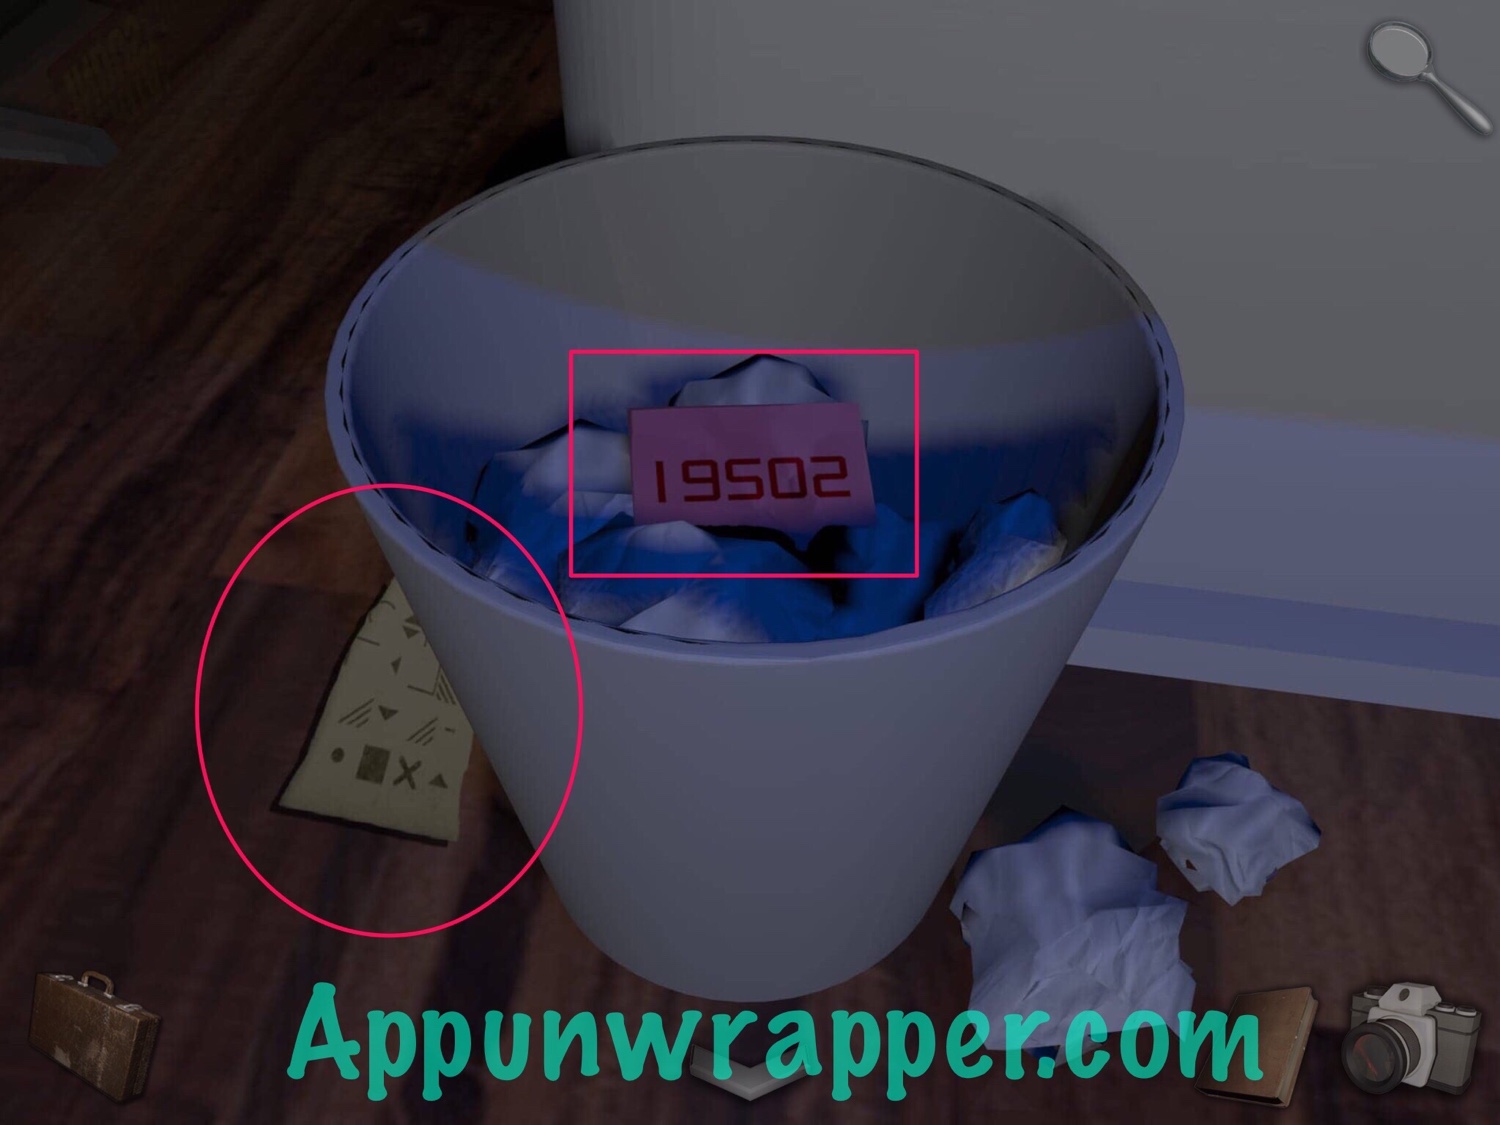
14. Now the Reception door is open. Head towards it and go through.
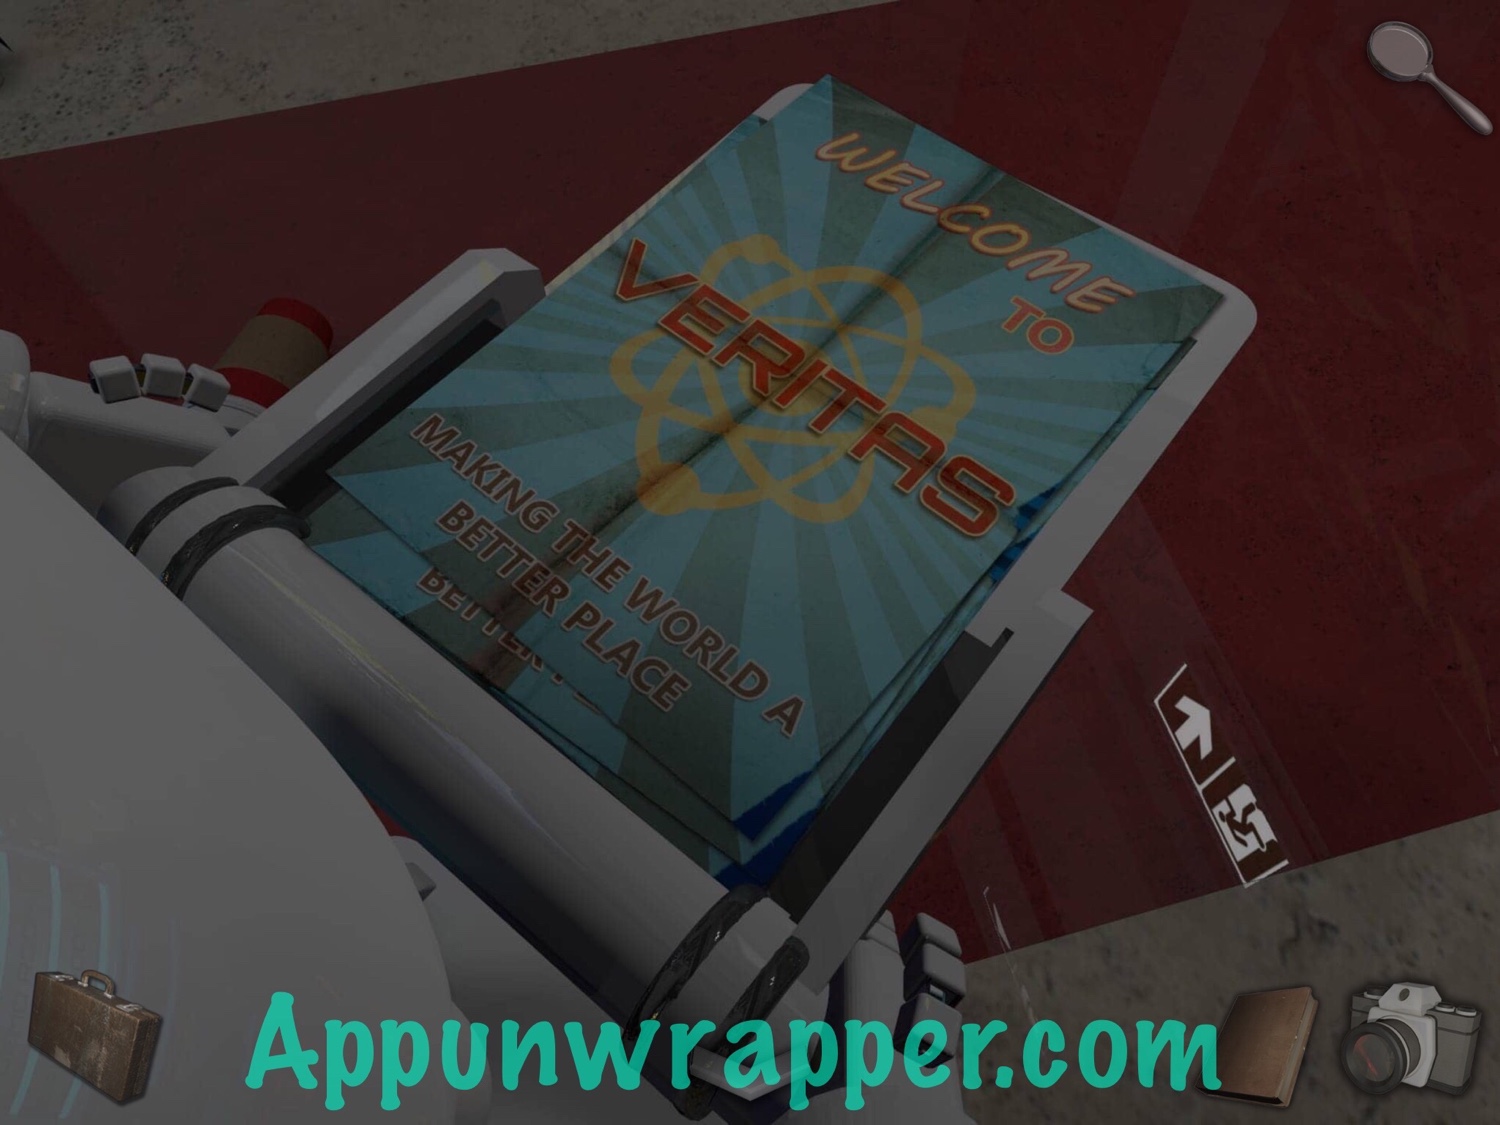
15. There’s no turning back now! We’re at the reception area of Veritas Industries. Take a leaflet from the robot.

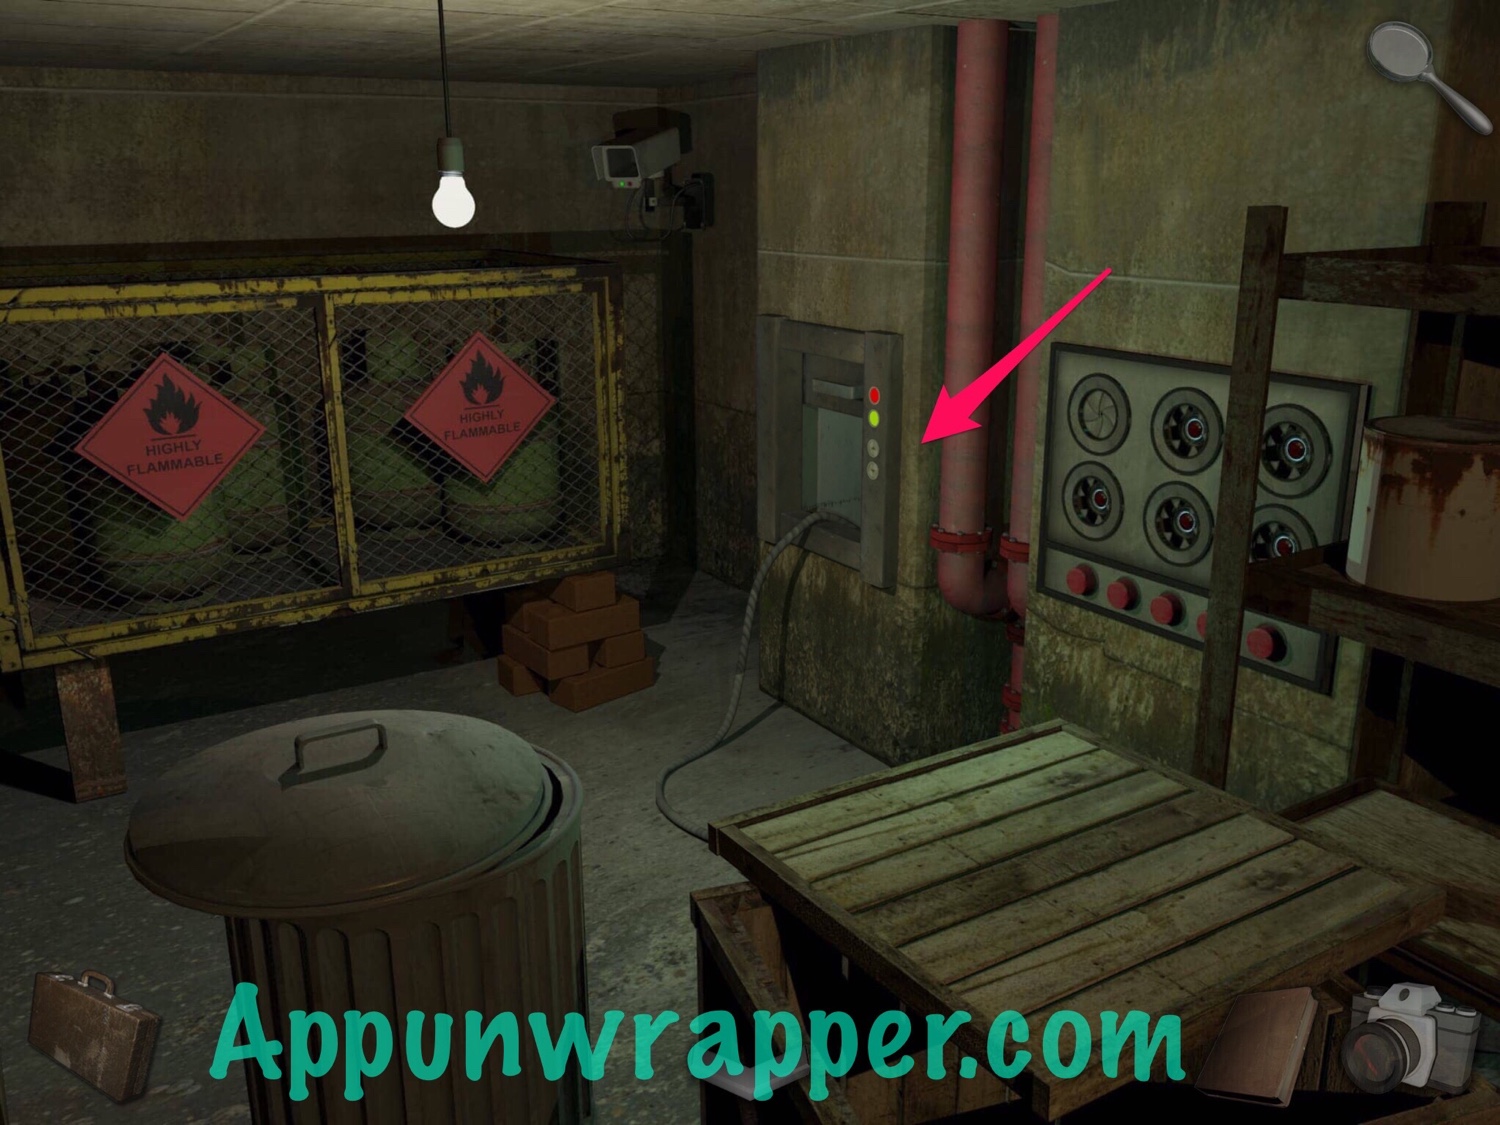
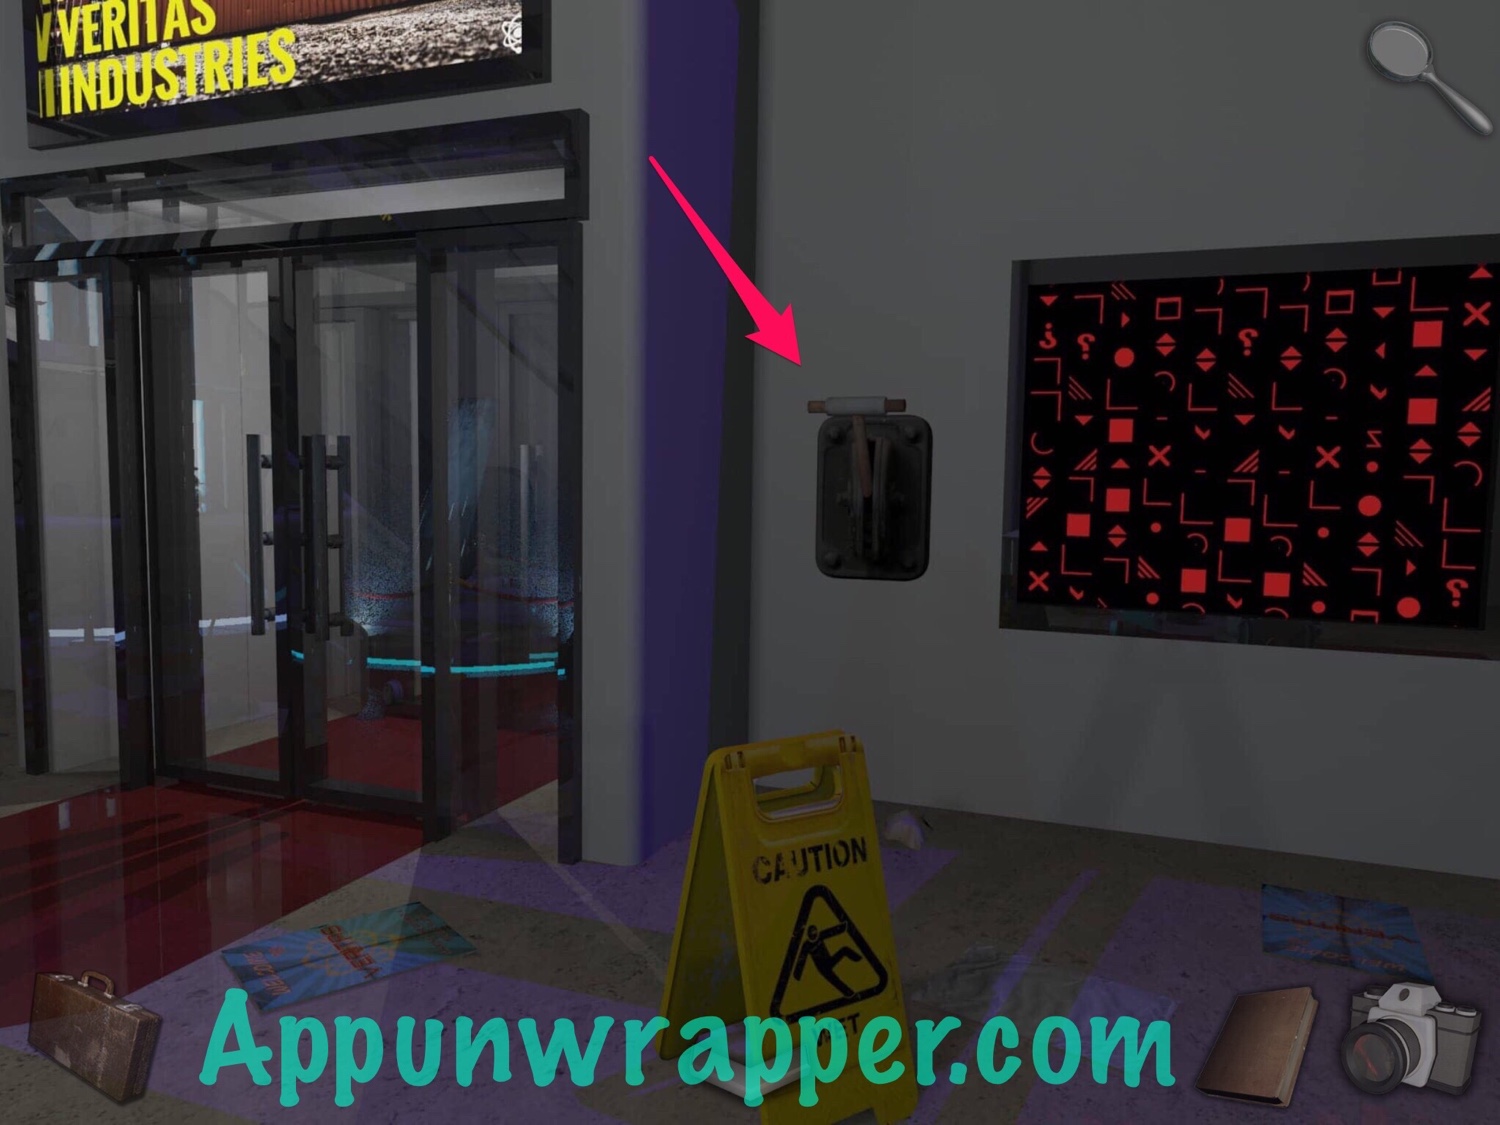
16. Tap on the right side and pull up the lever to make a bunch of symbols swim across the screen.
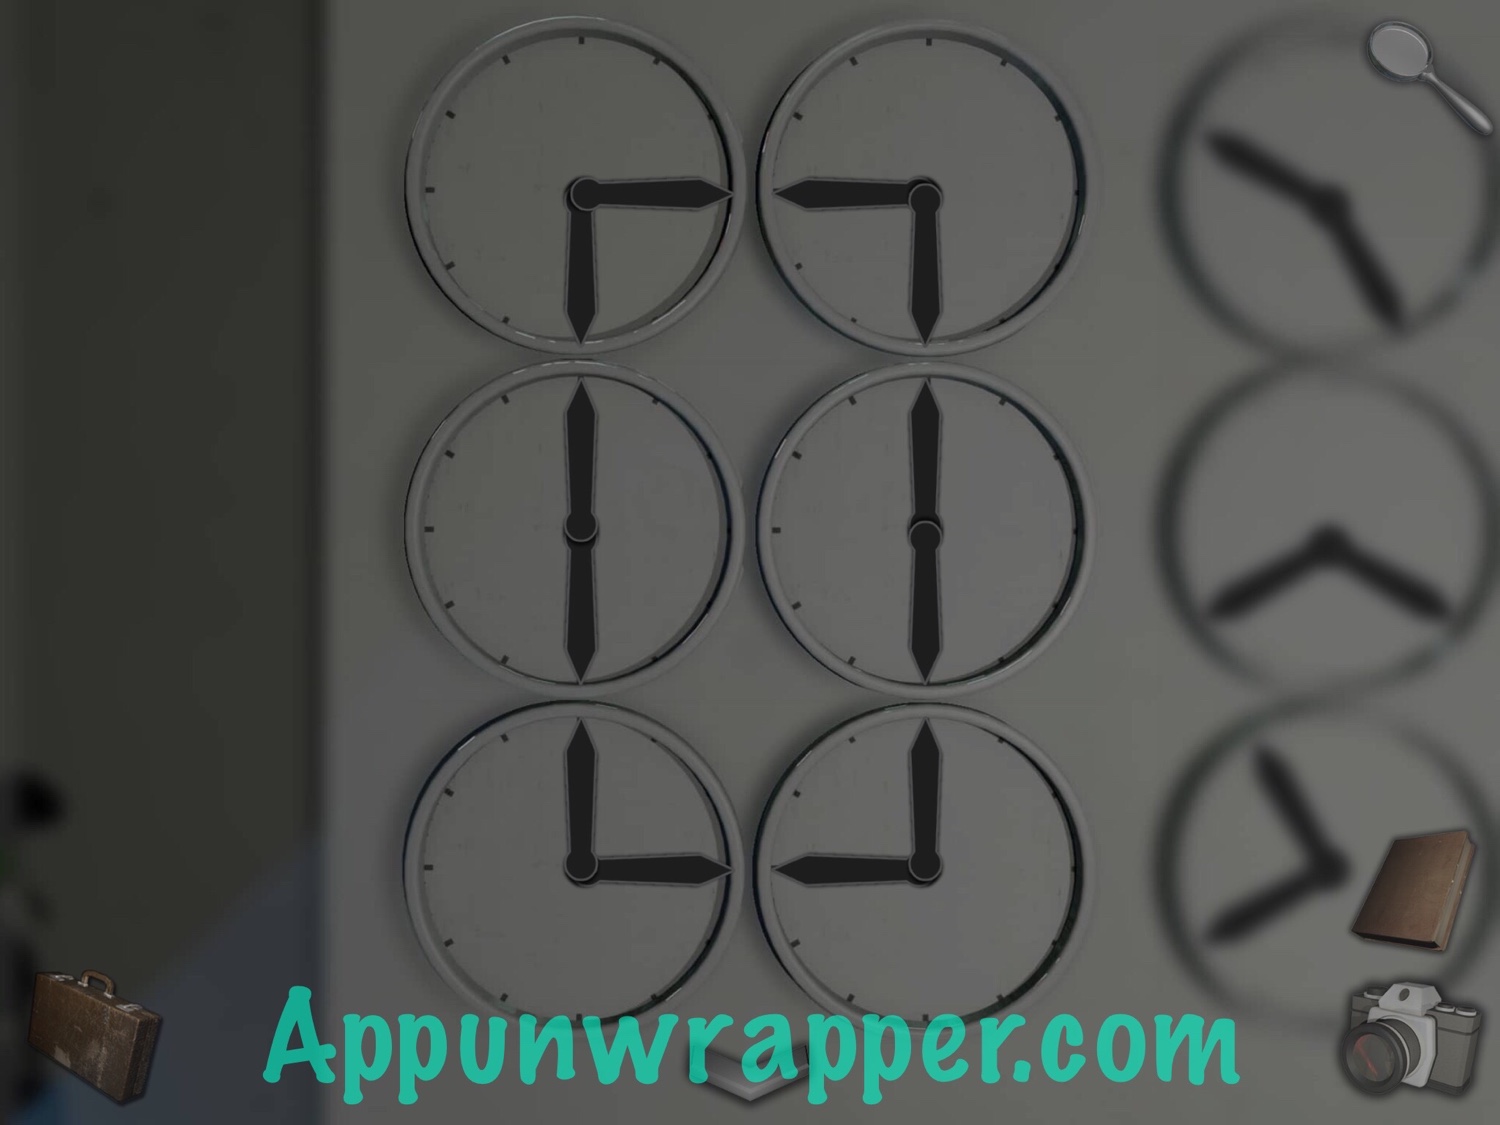
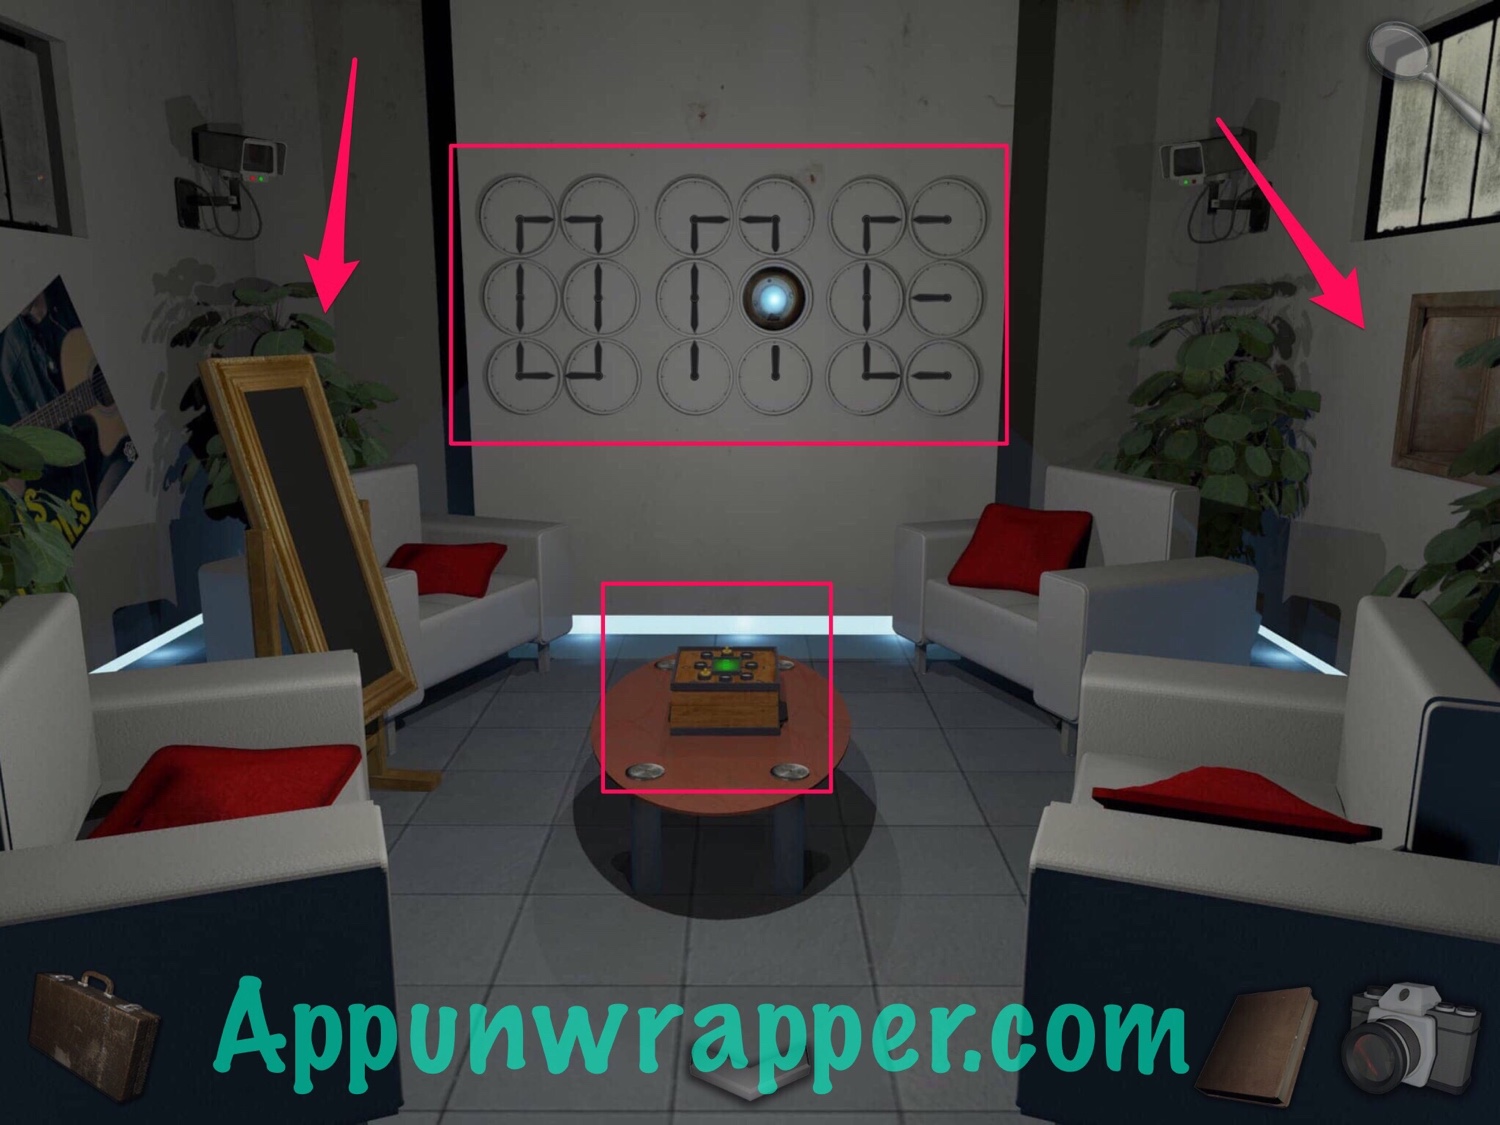
17. Go through the door and head to the hatch on the right wall. Press the button to open the eye for the laser. Also, place the mirror down on the left side of the room. Also, spell out ONE with all the clocks, since MANY TIMES ARE ONE. Then take the key piece. And last, zoom in on the box on the table and pick up the scrap of paper.


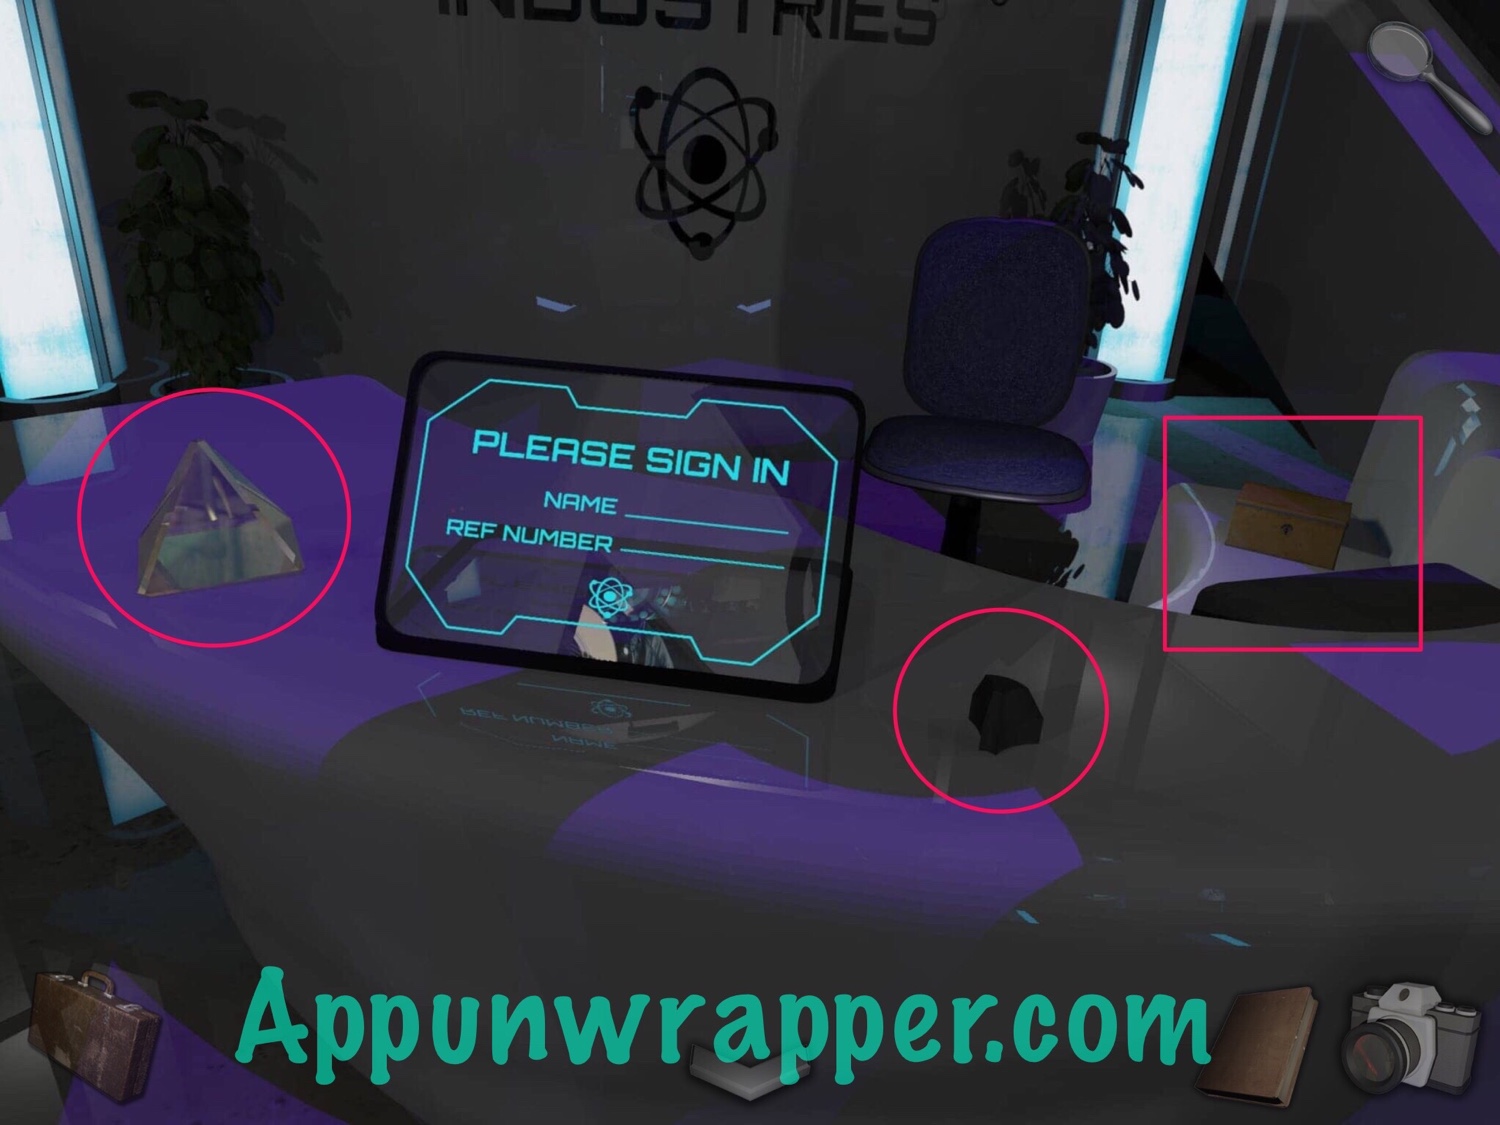
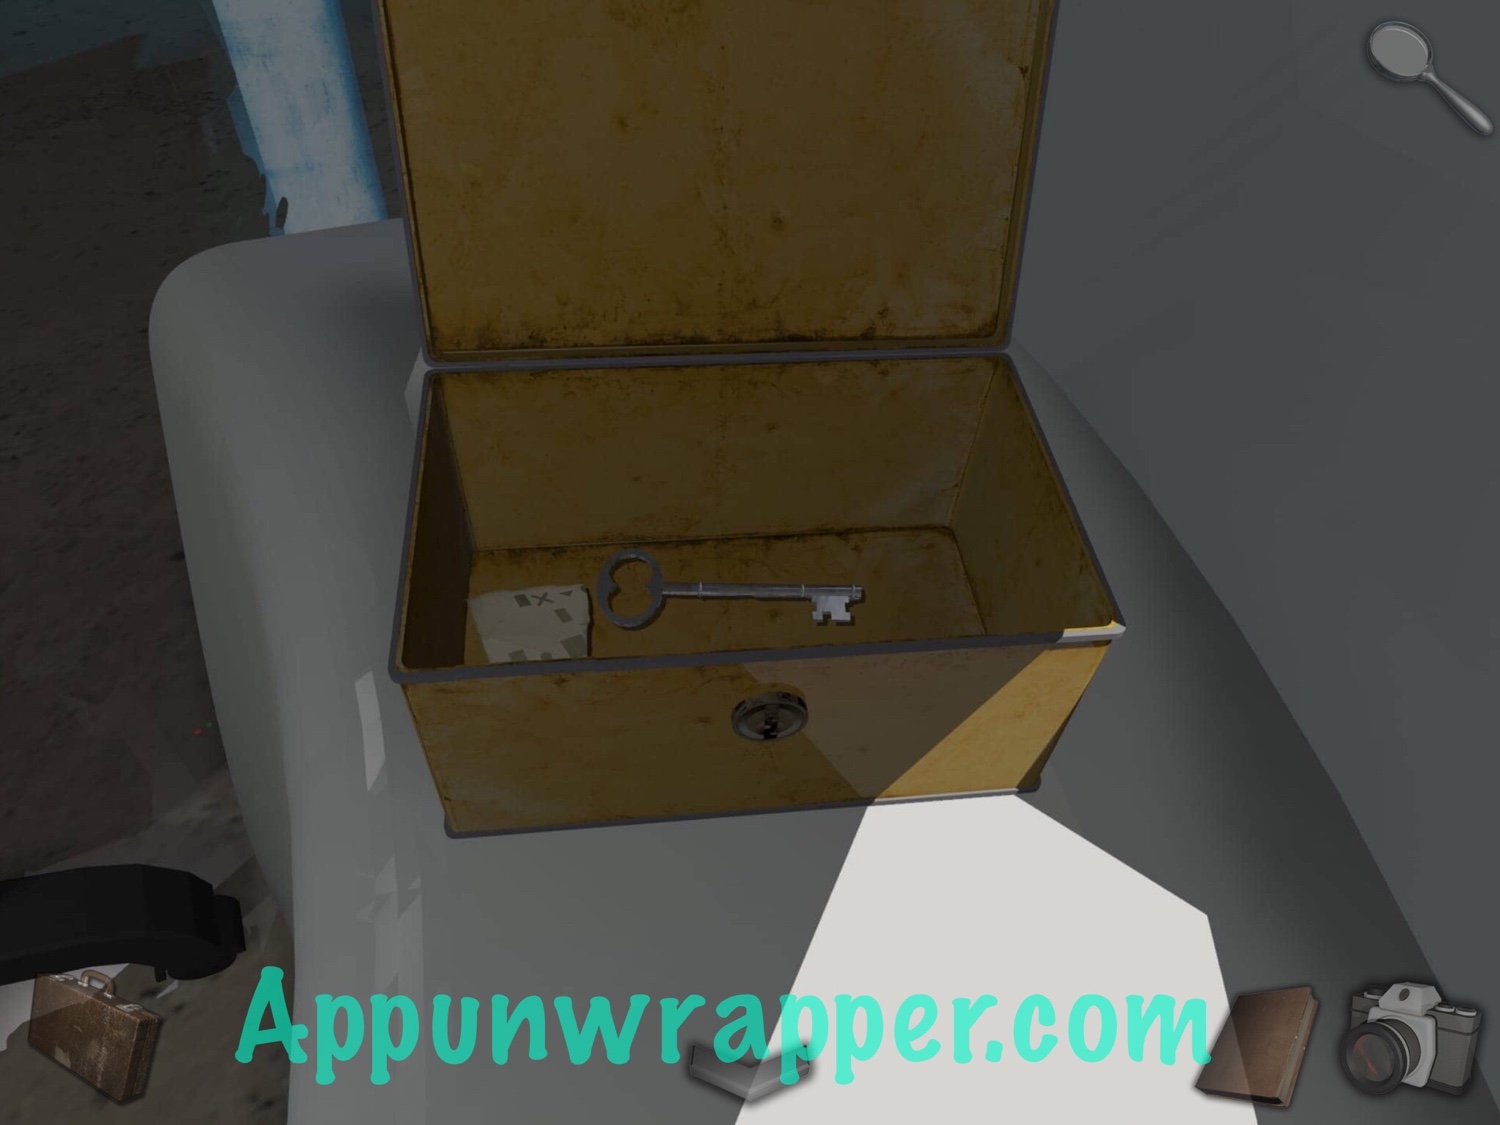
18. Leave the room and head towards the left escalator. Zoom in on the front desk and grab the prism and key piece. Also, open the small box and get a door key and another scrap of paper.
19. Head up the escalator. Go past the room with the Restricted Access sign. Place the prism in the hatch with the three laser receptors. Take a photo of the panel on the right. And use the key to unlock the door in front of you.
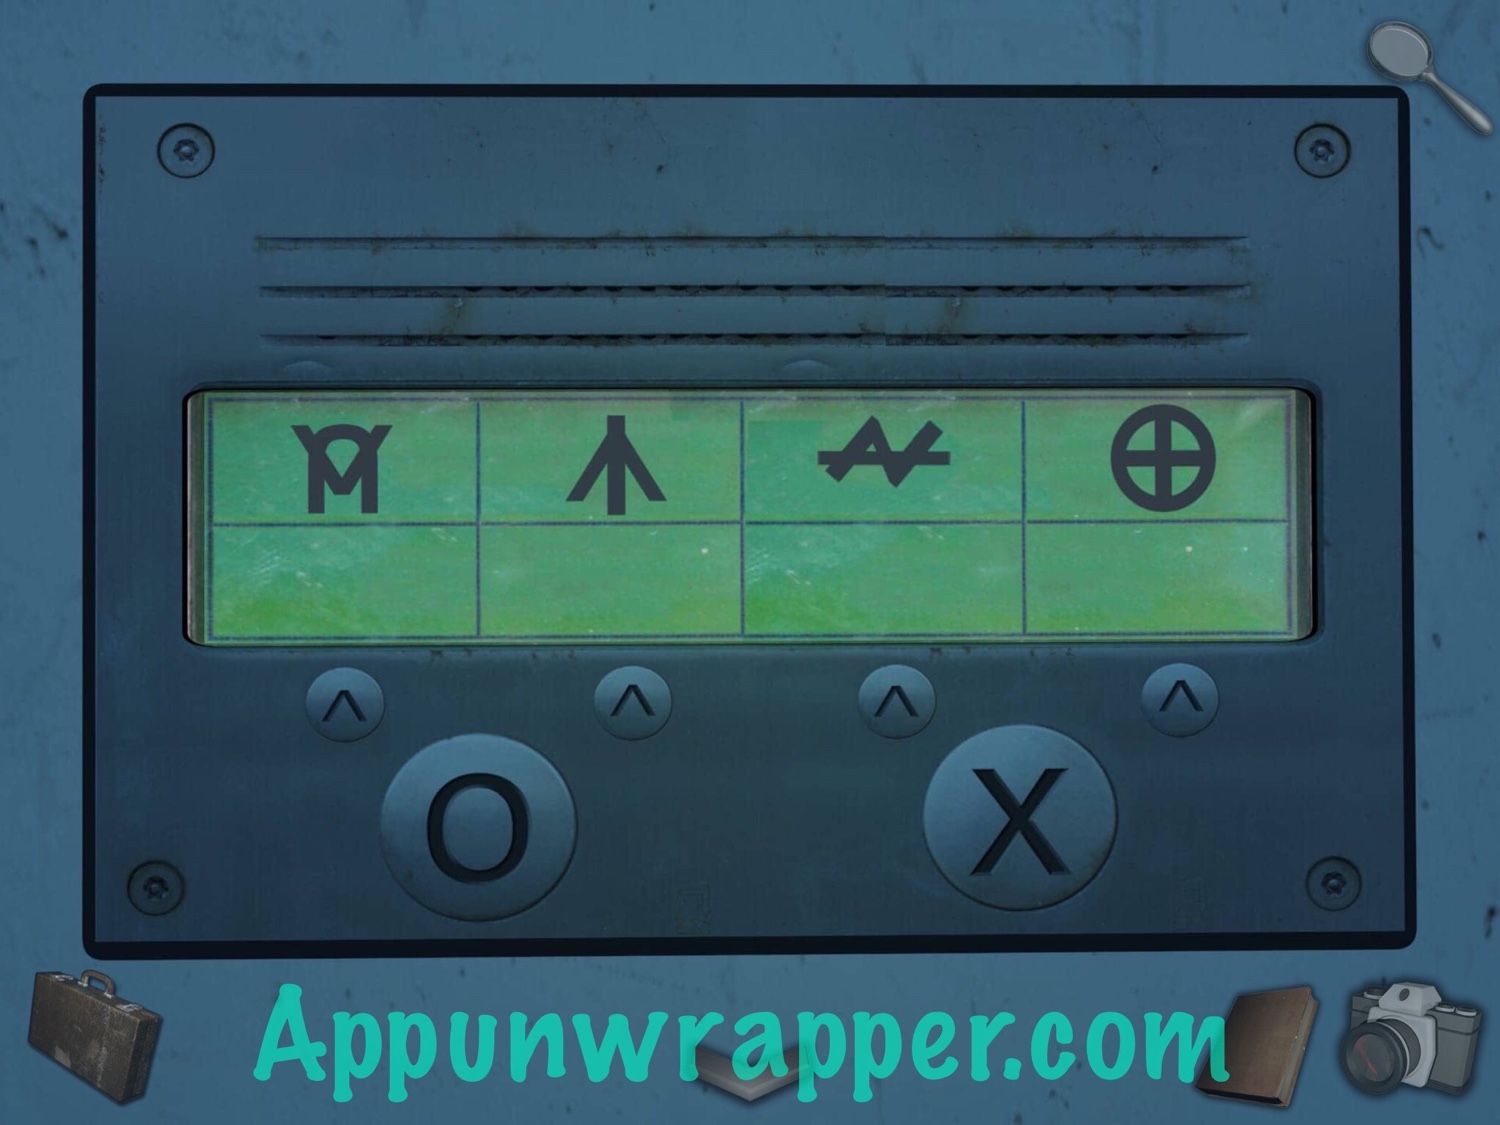
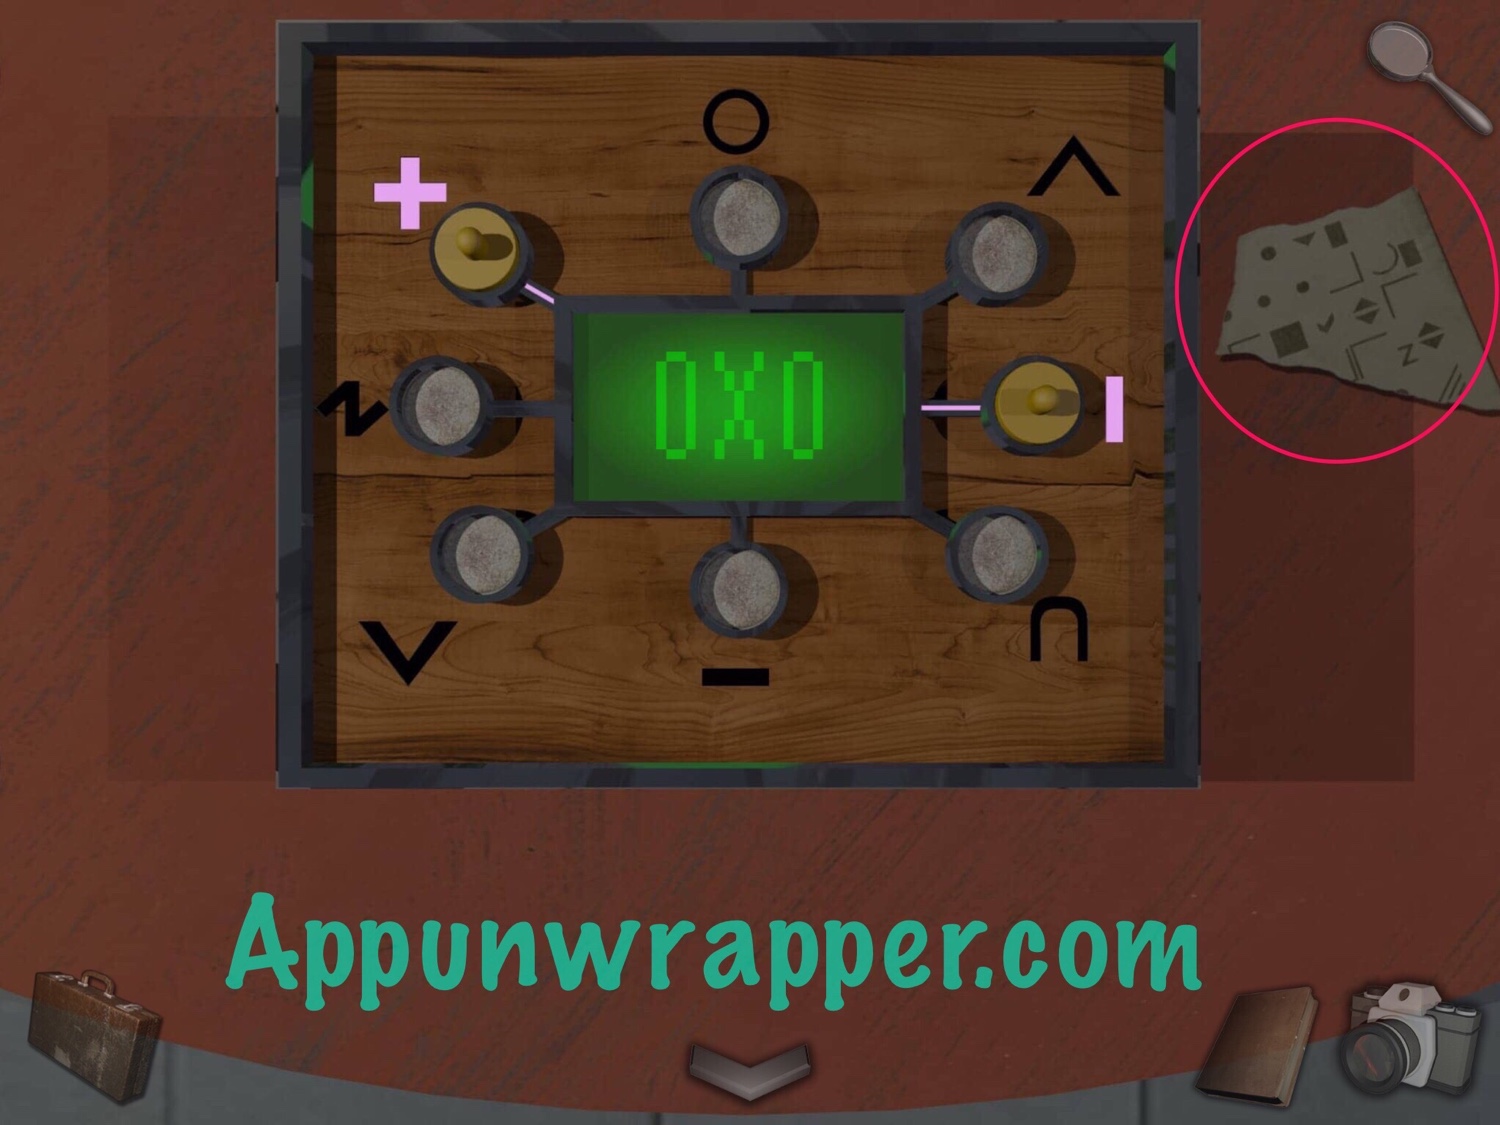
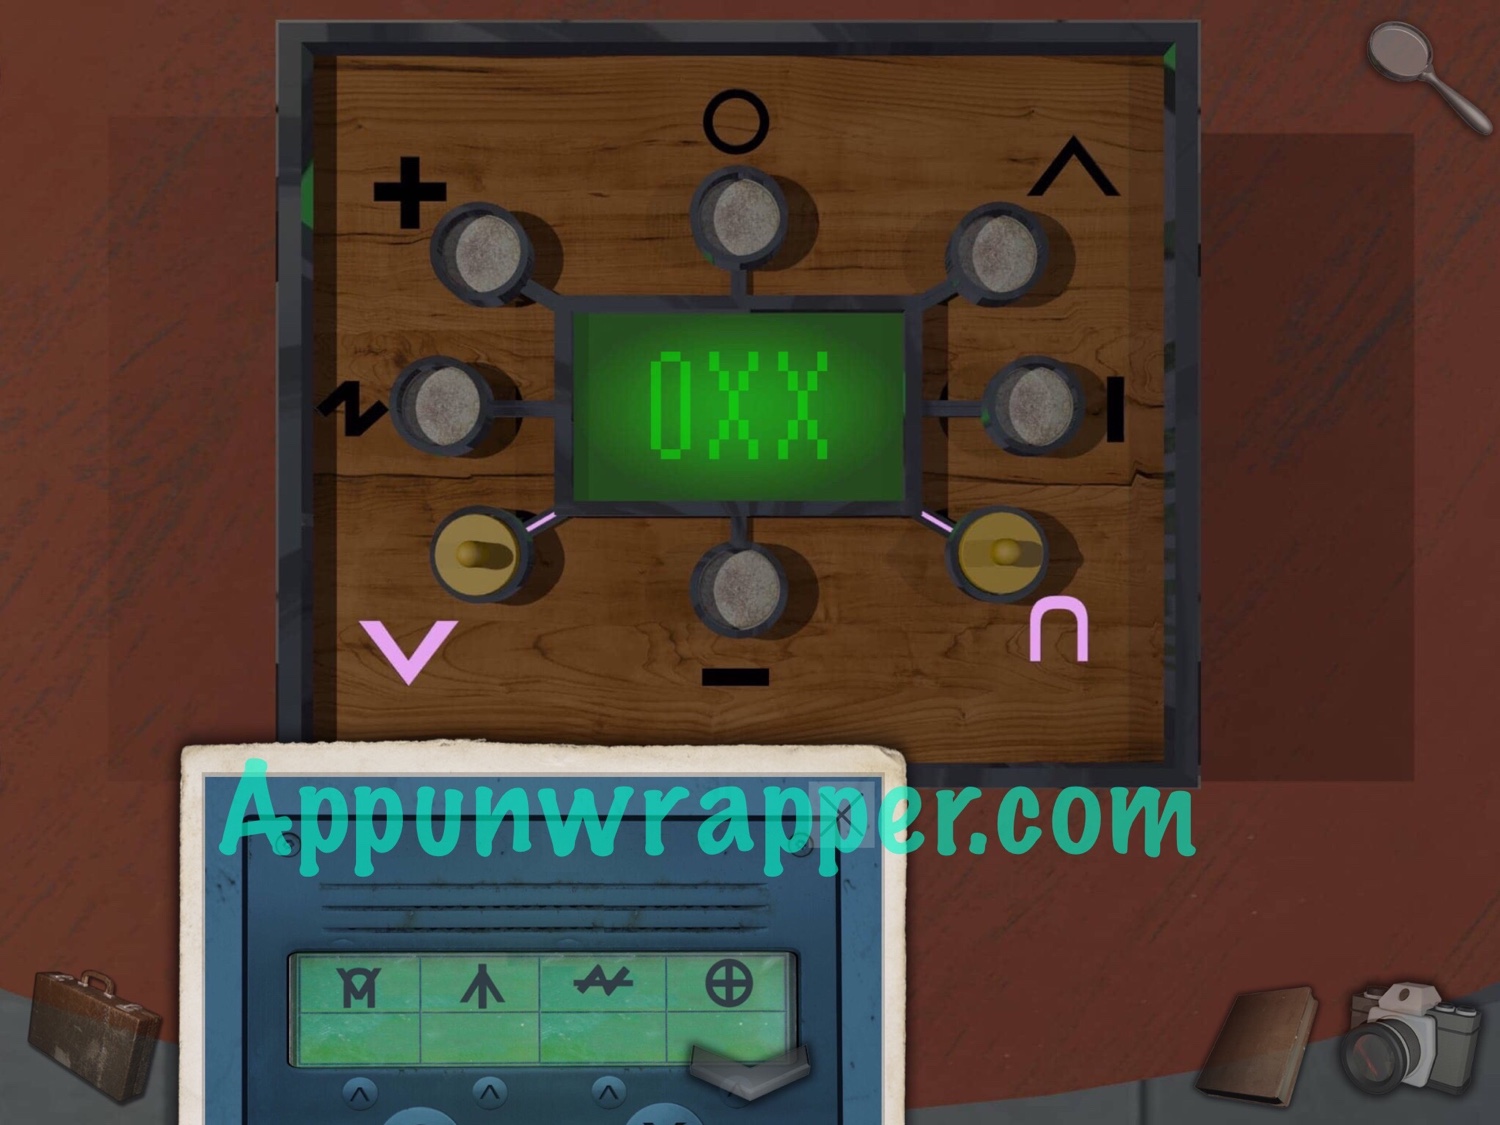
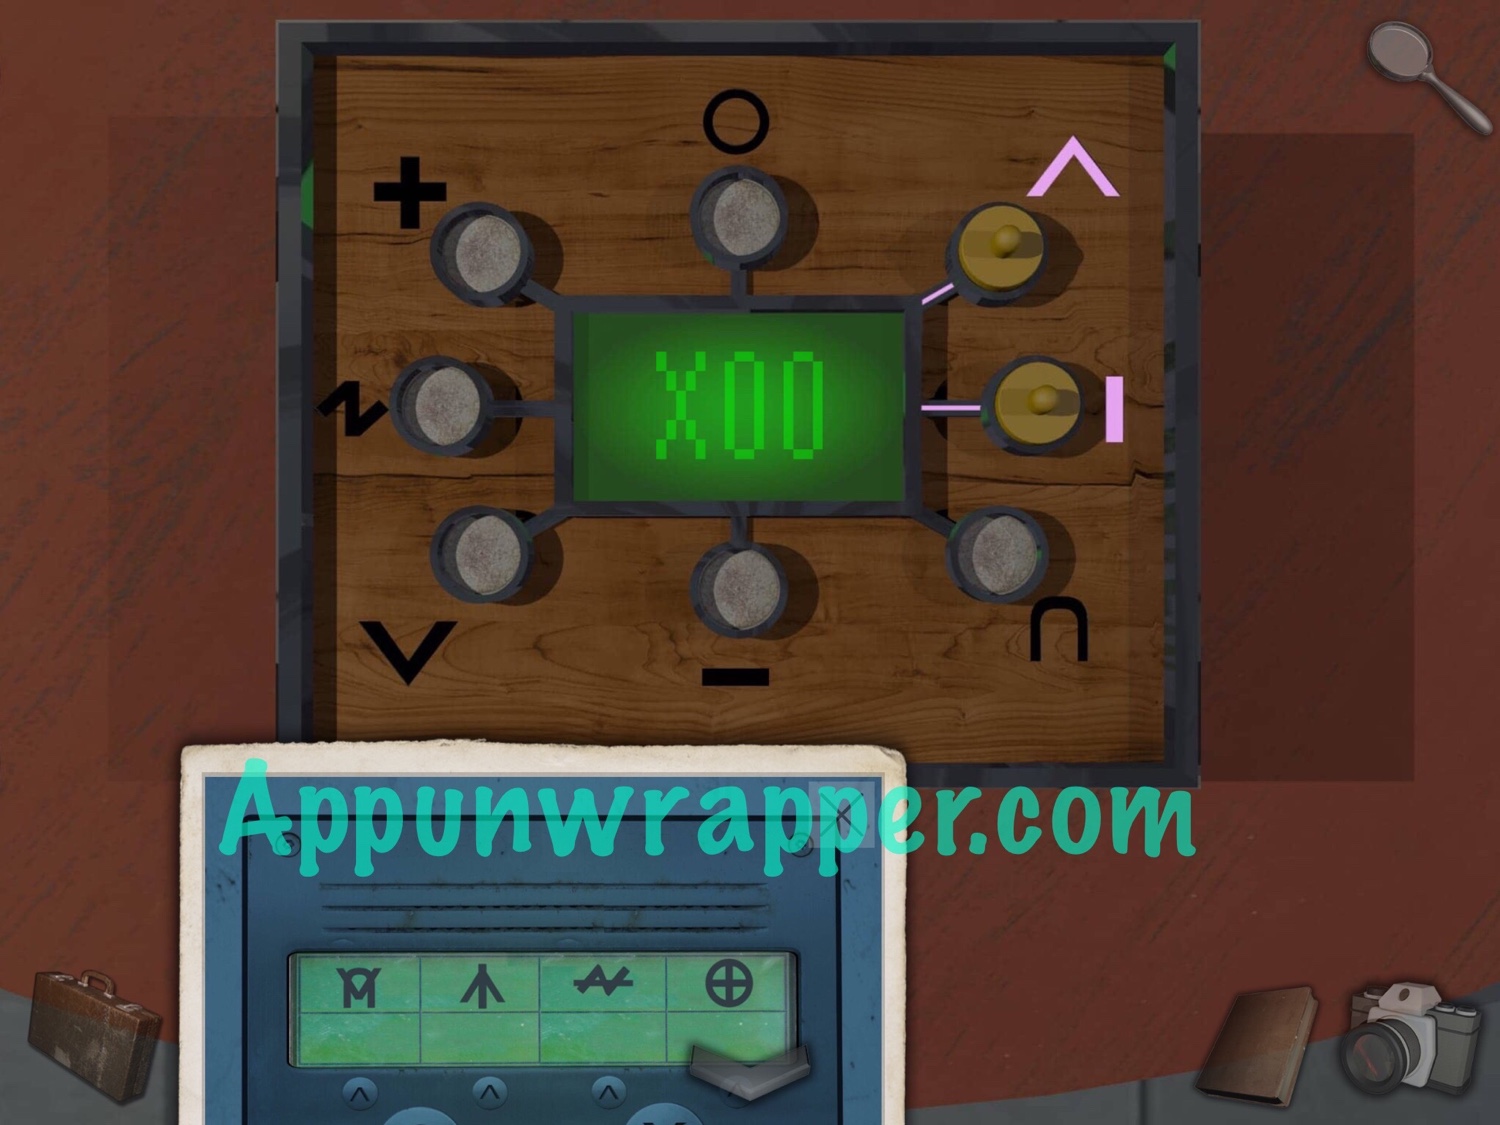
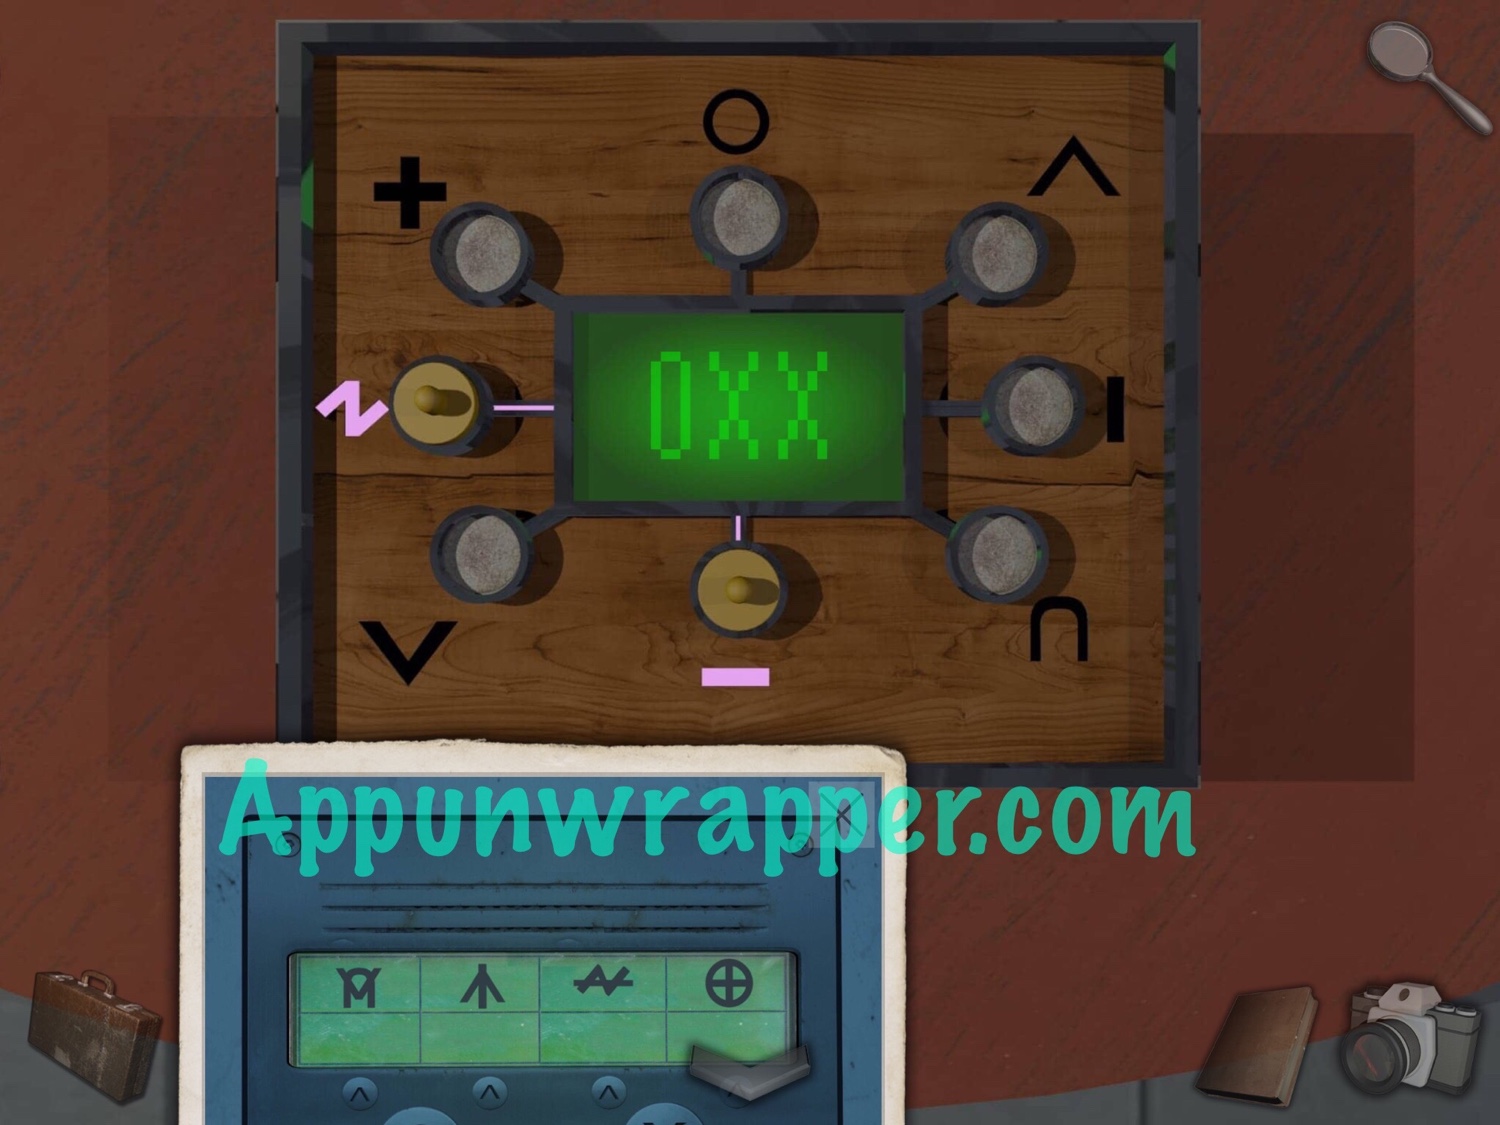
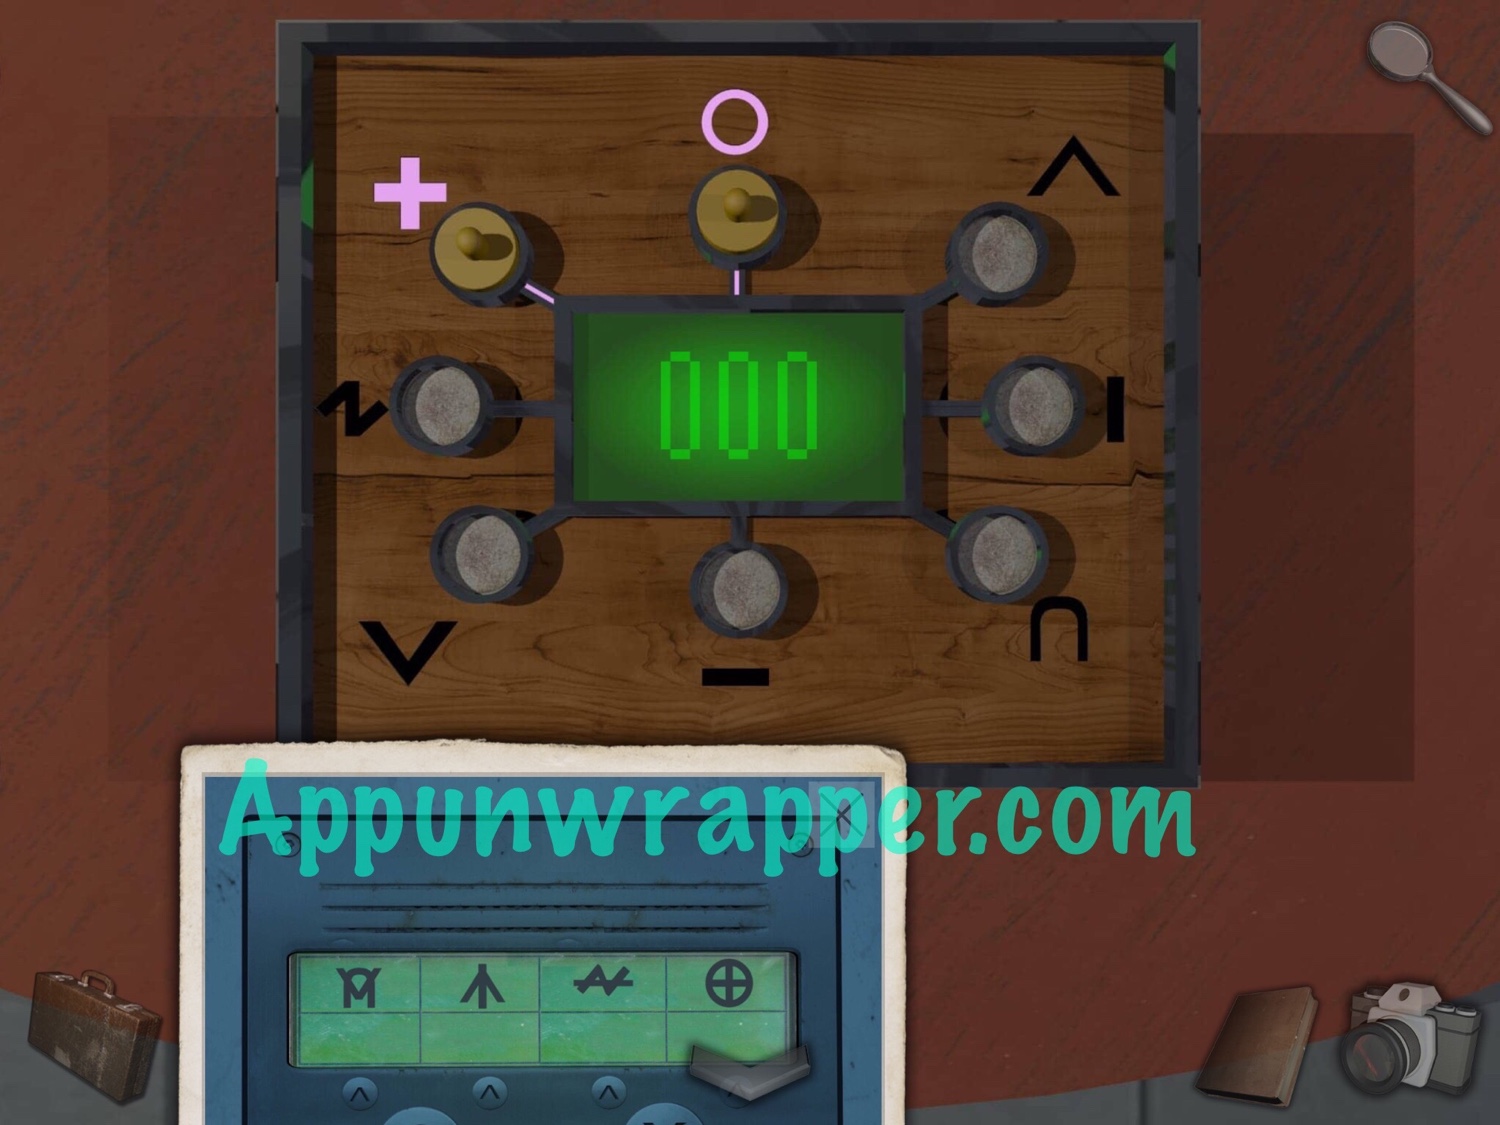
20. Go through the door. Then enter the Meeting Room. Look at the trash can. Grab another scrap of paper and take a photo of the pink piece of paper in the trash can.
21. While here, look at the orange mat on the table. There’s some scraps of paper. Add the other four and move them into position. We’ll come back when we have the rest.
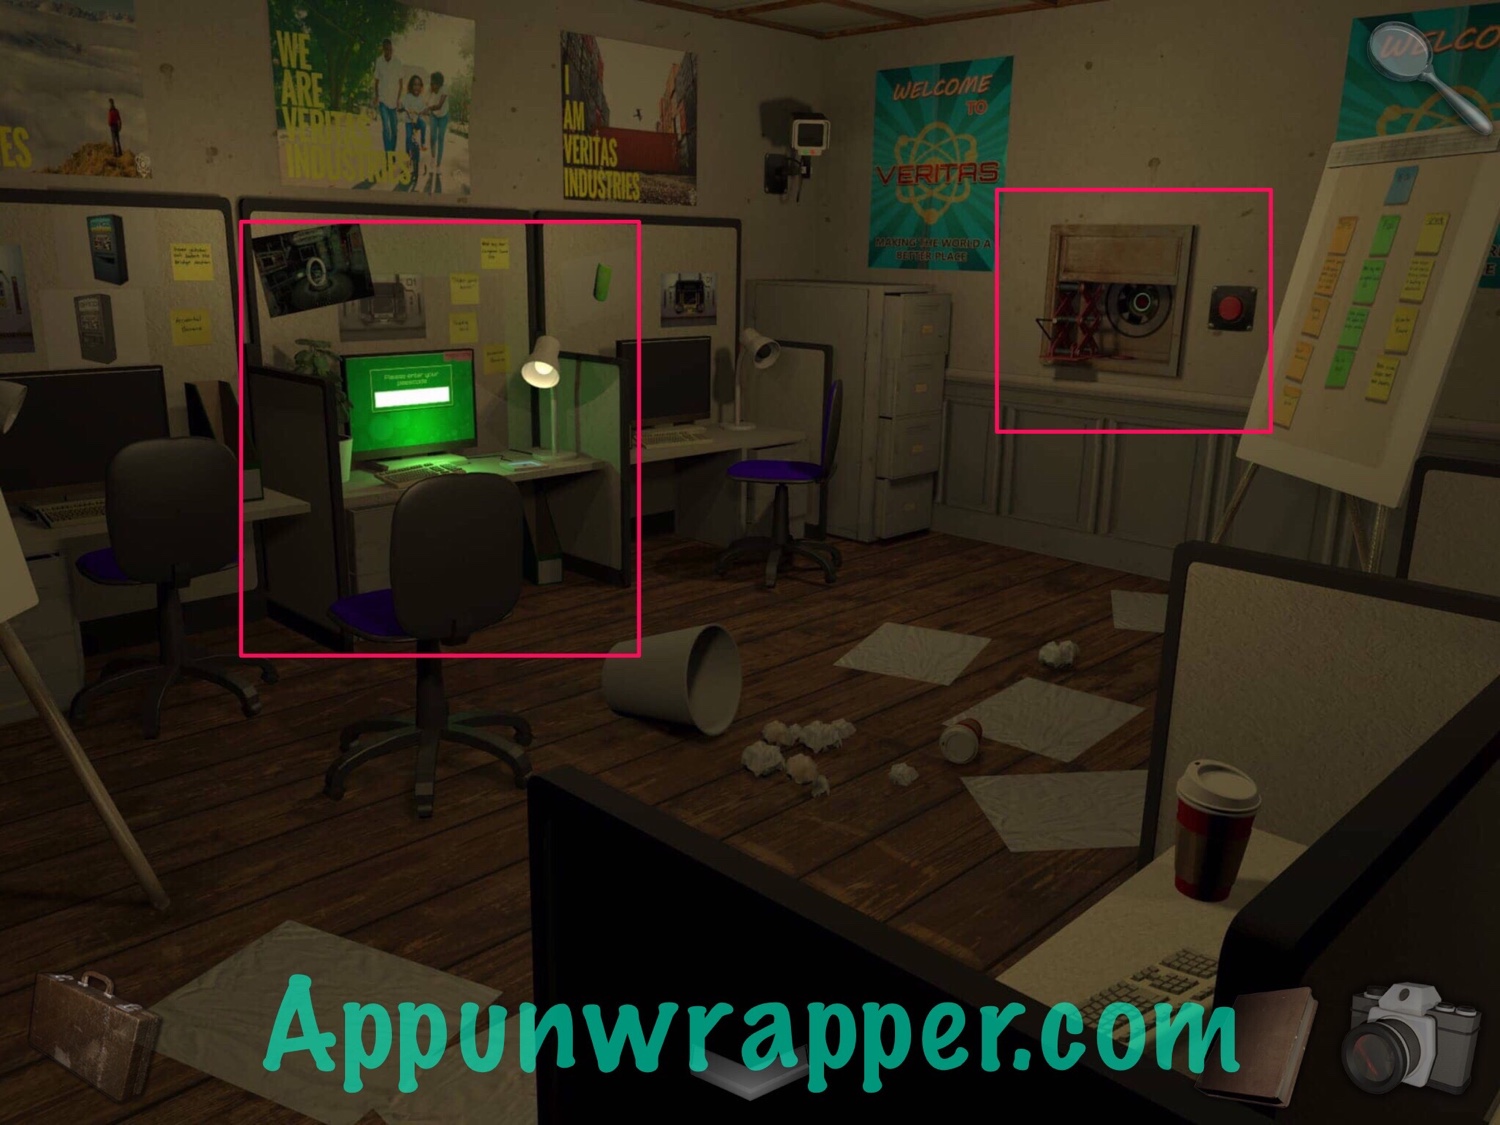
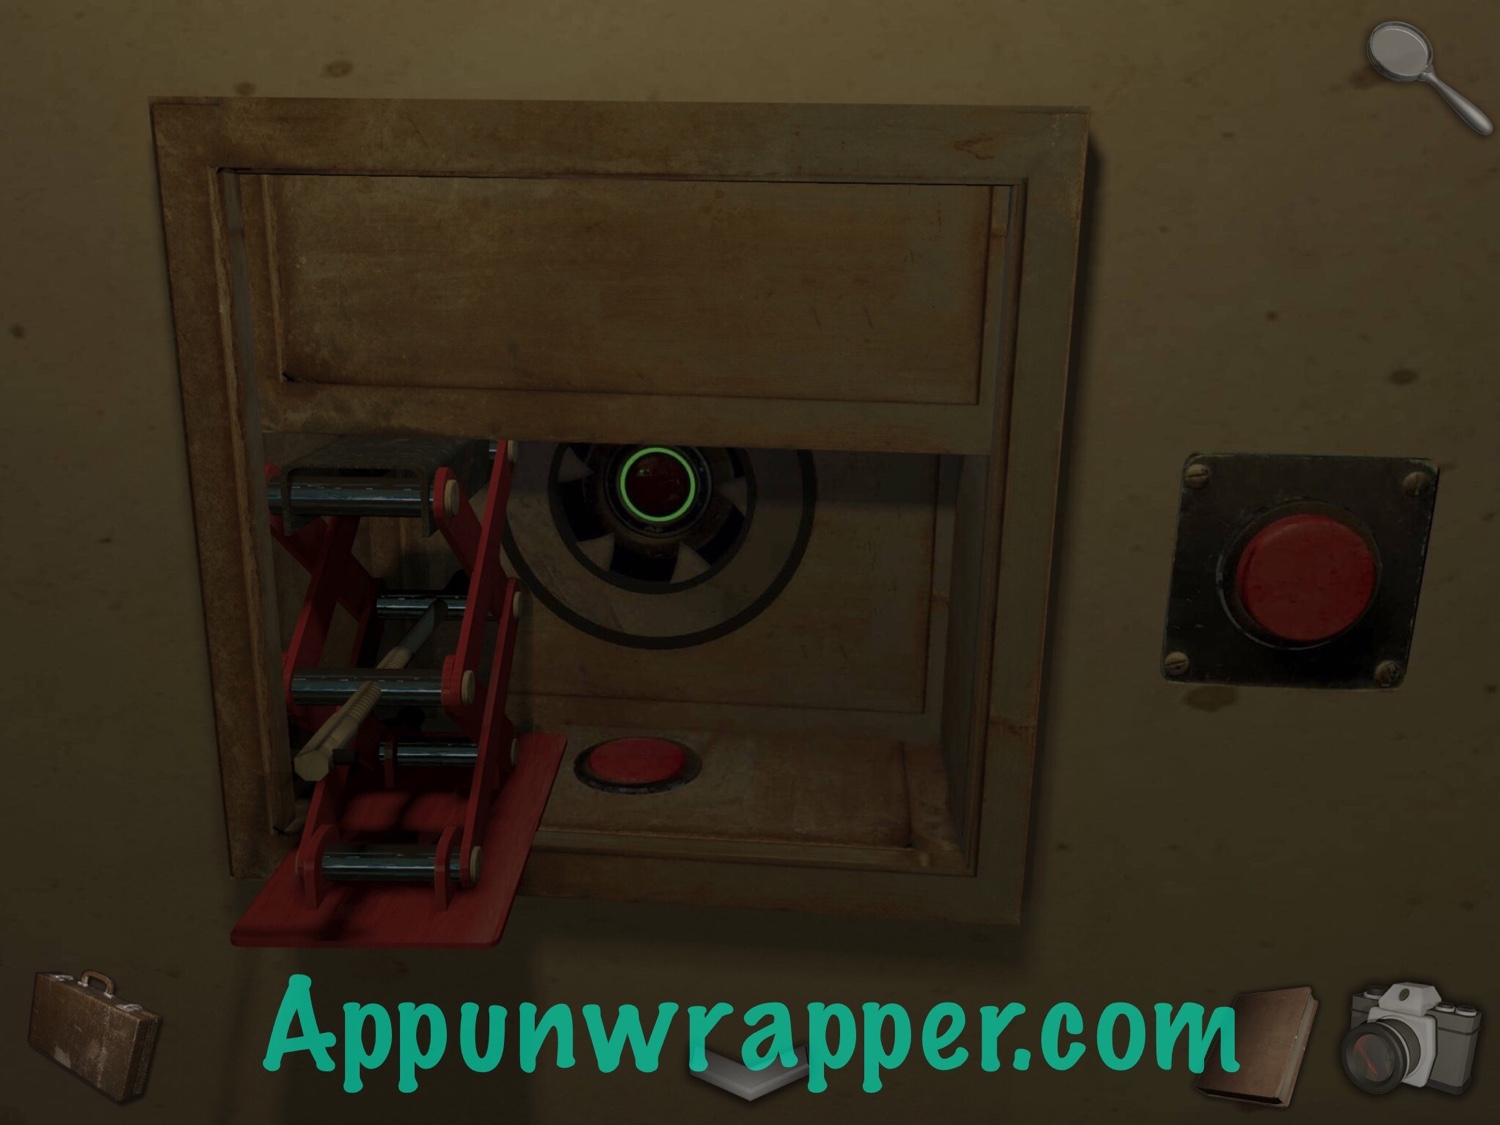
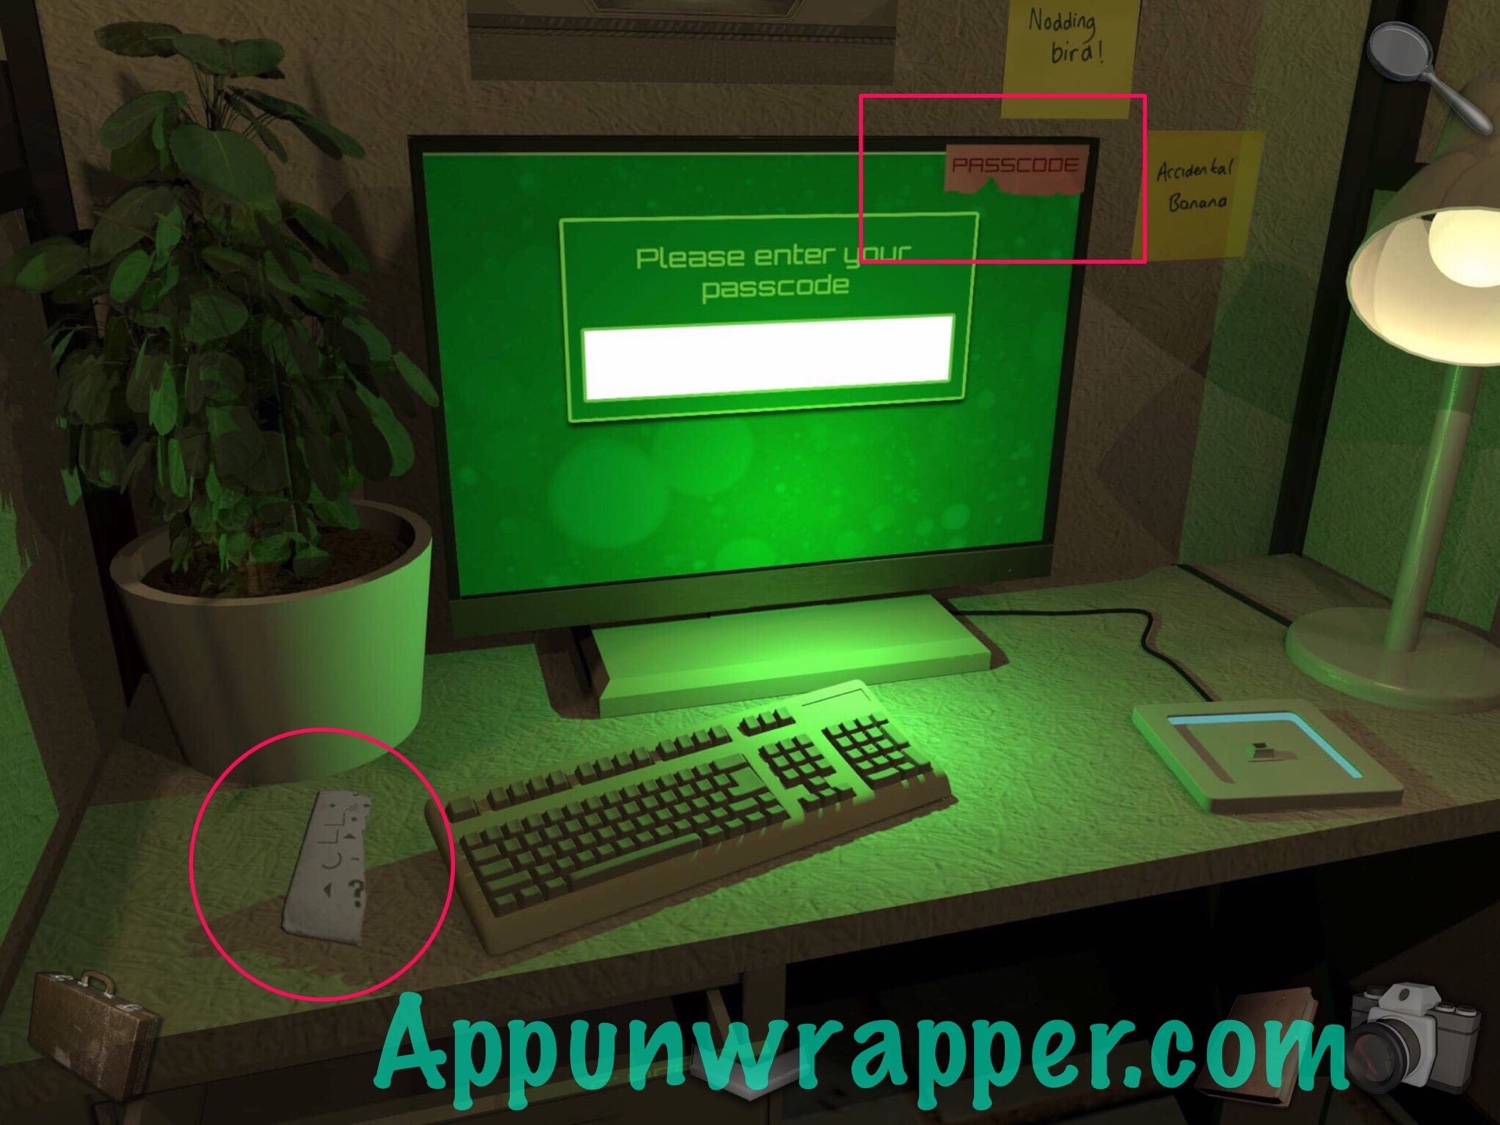
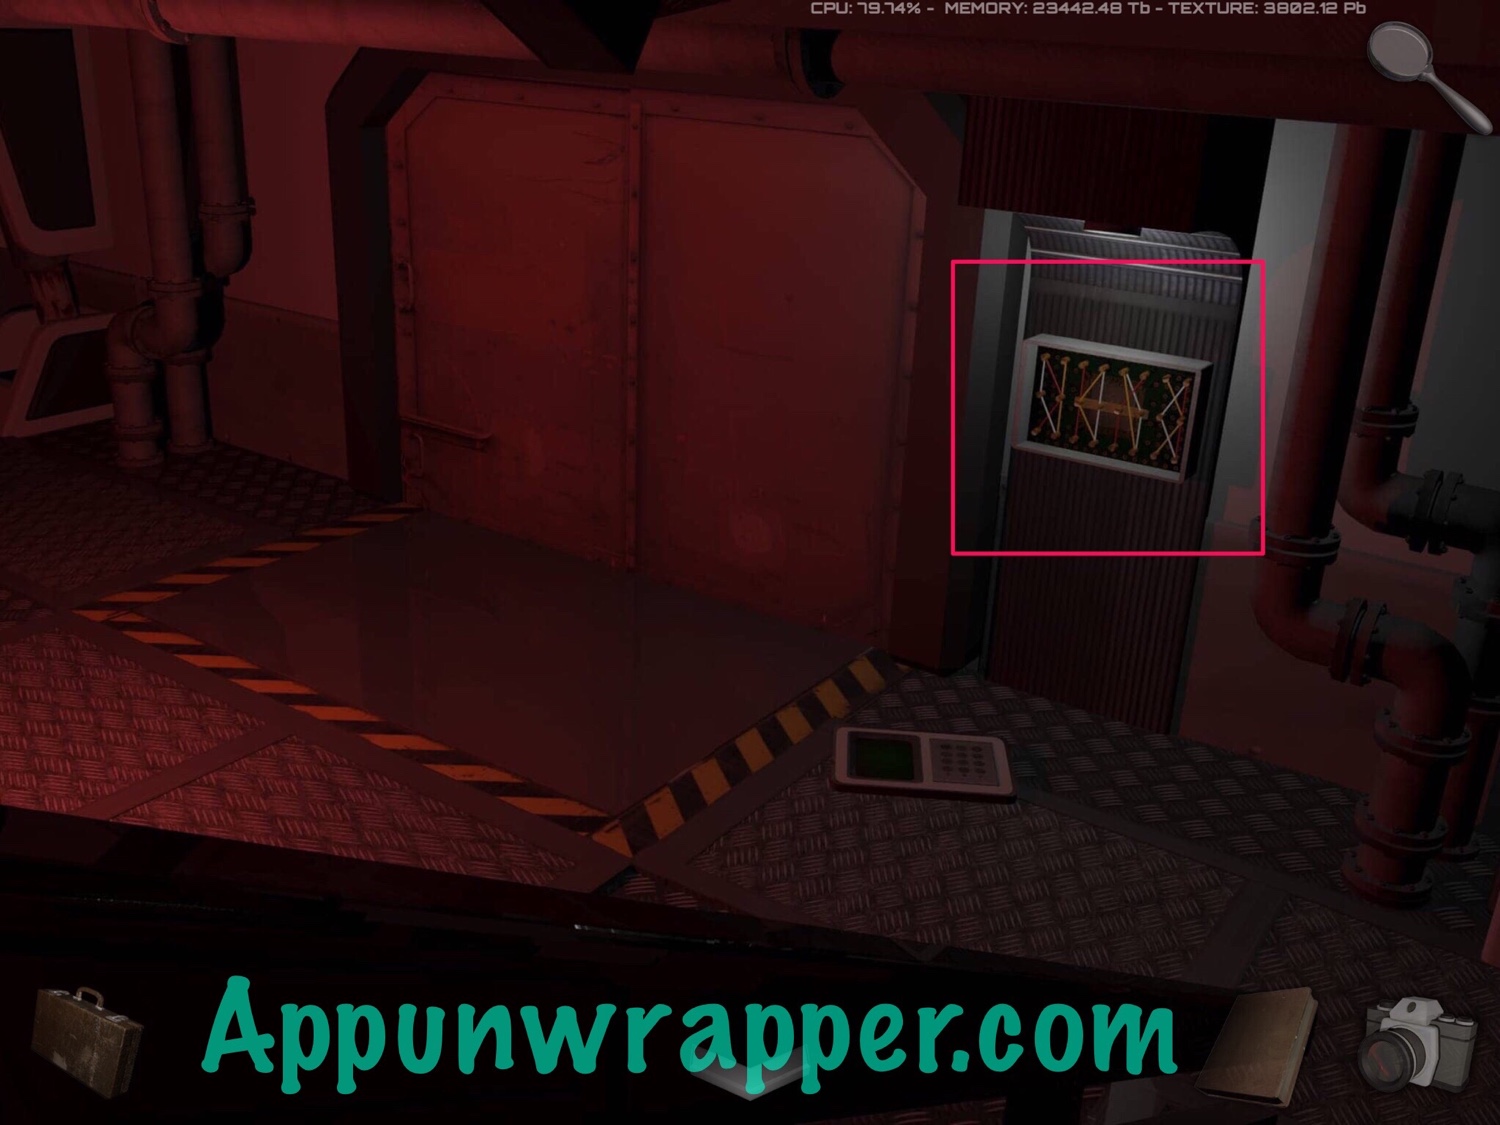
22. Leave and enter the Developers Room. Press the button to try and open the hatch. It drops again, so use the jack to keep it up. Then press the button to open the eye. That’s the last of the lasers! While here, take a look at the computer.
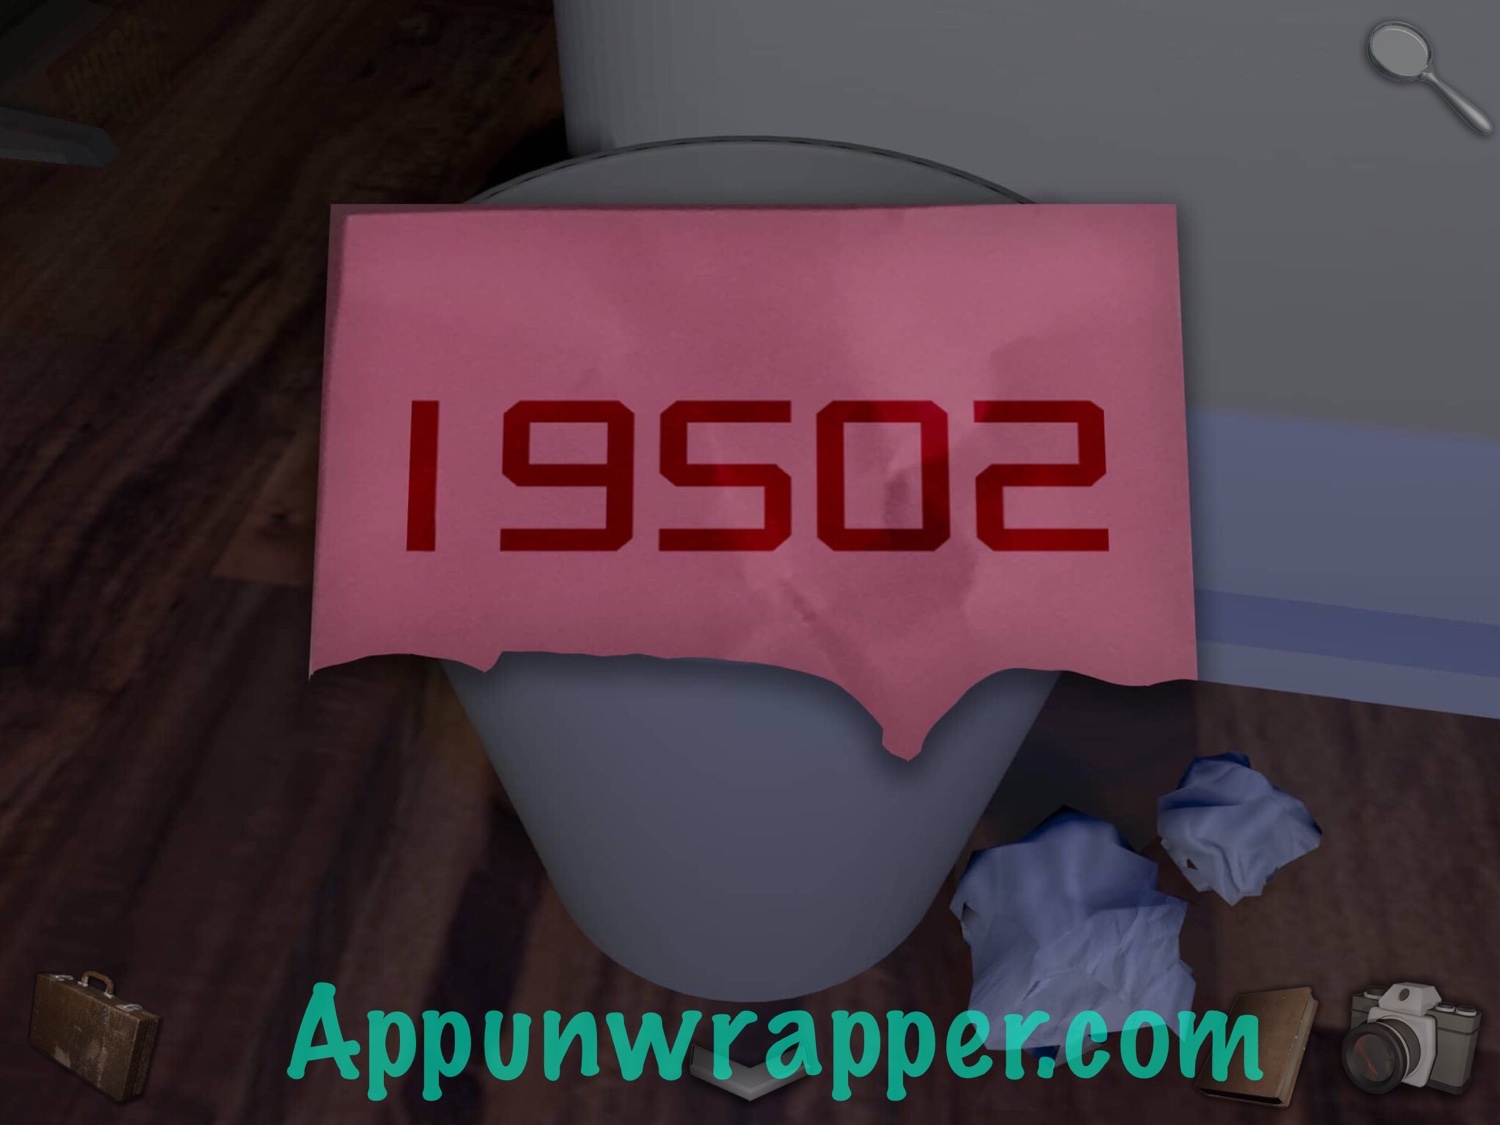
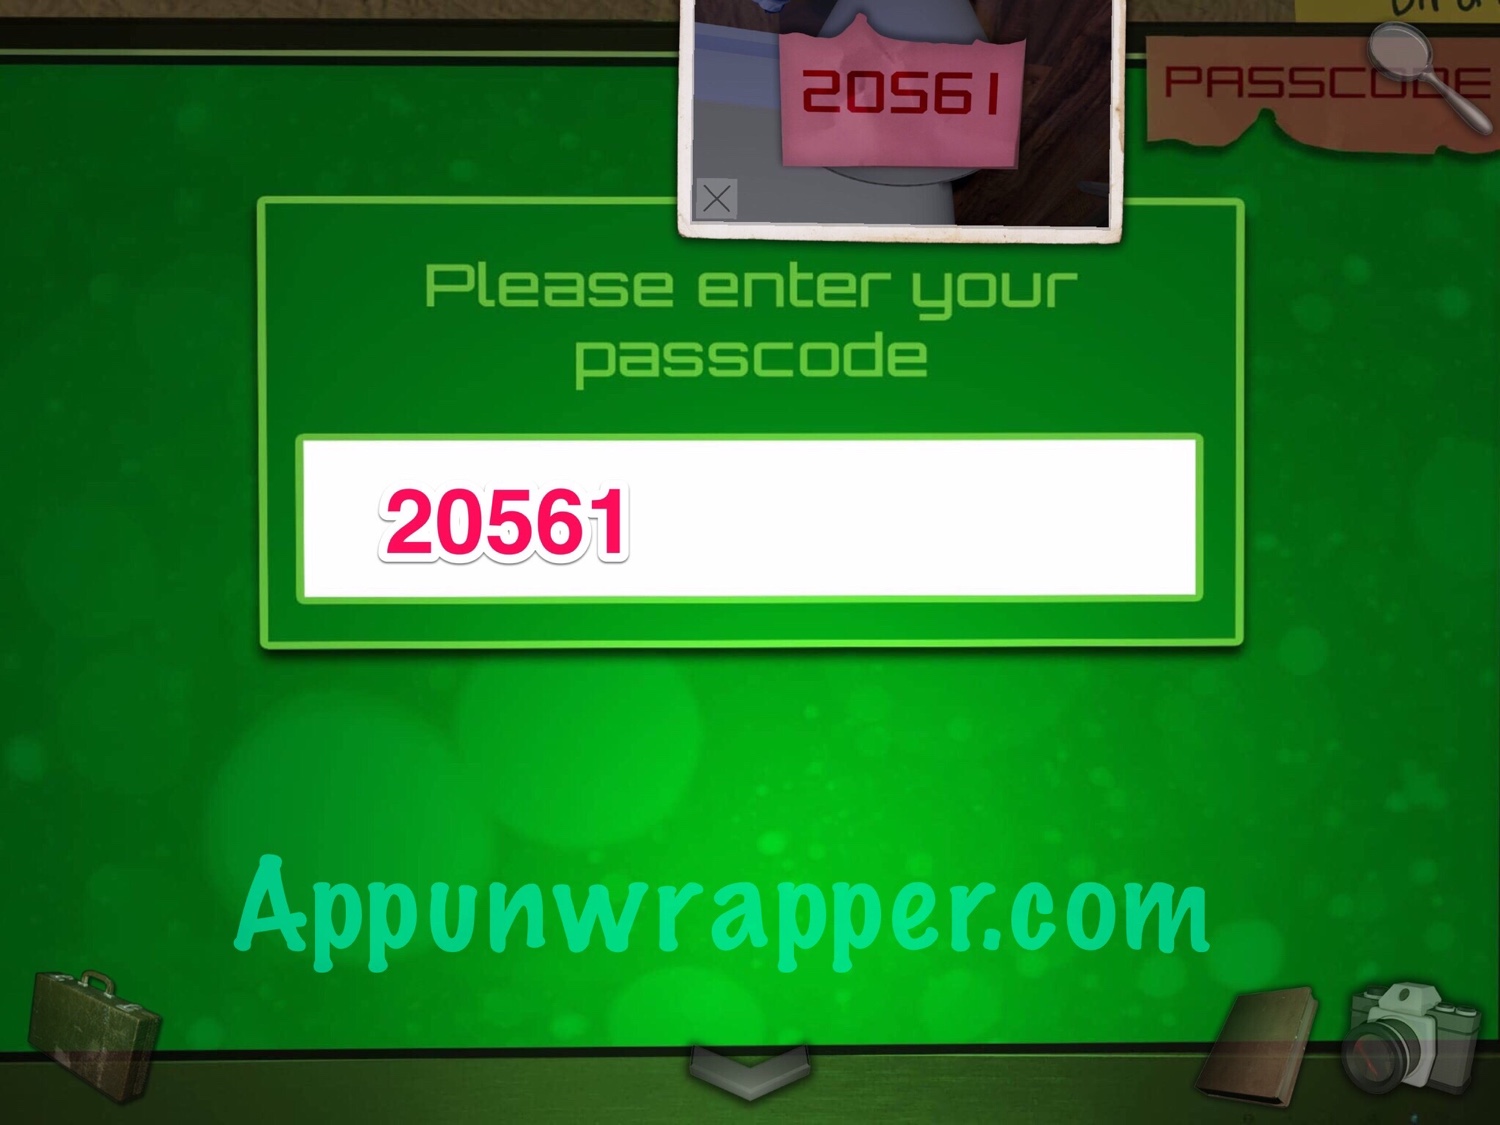
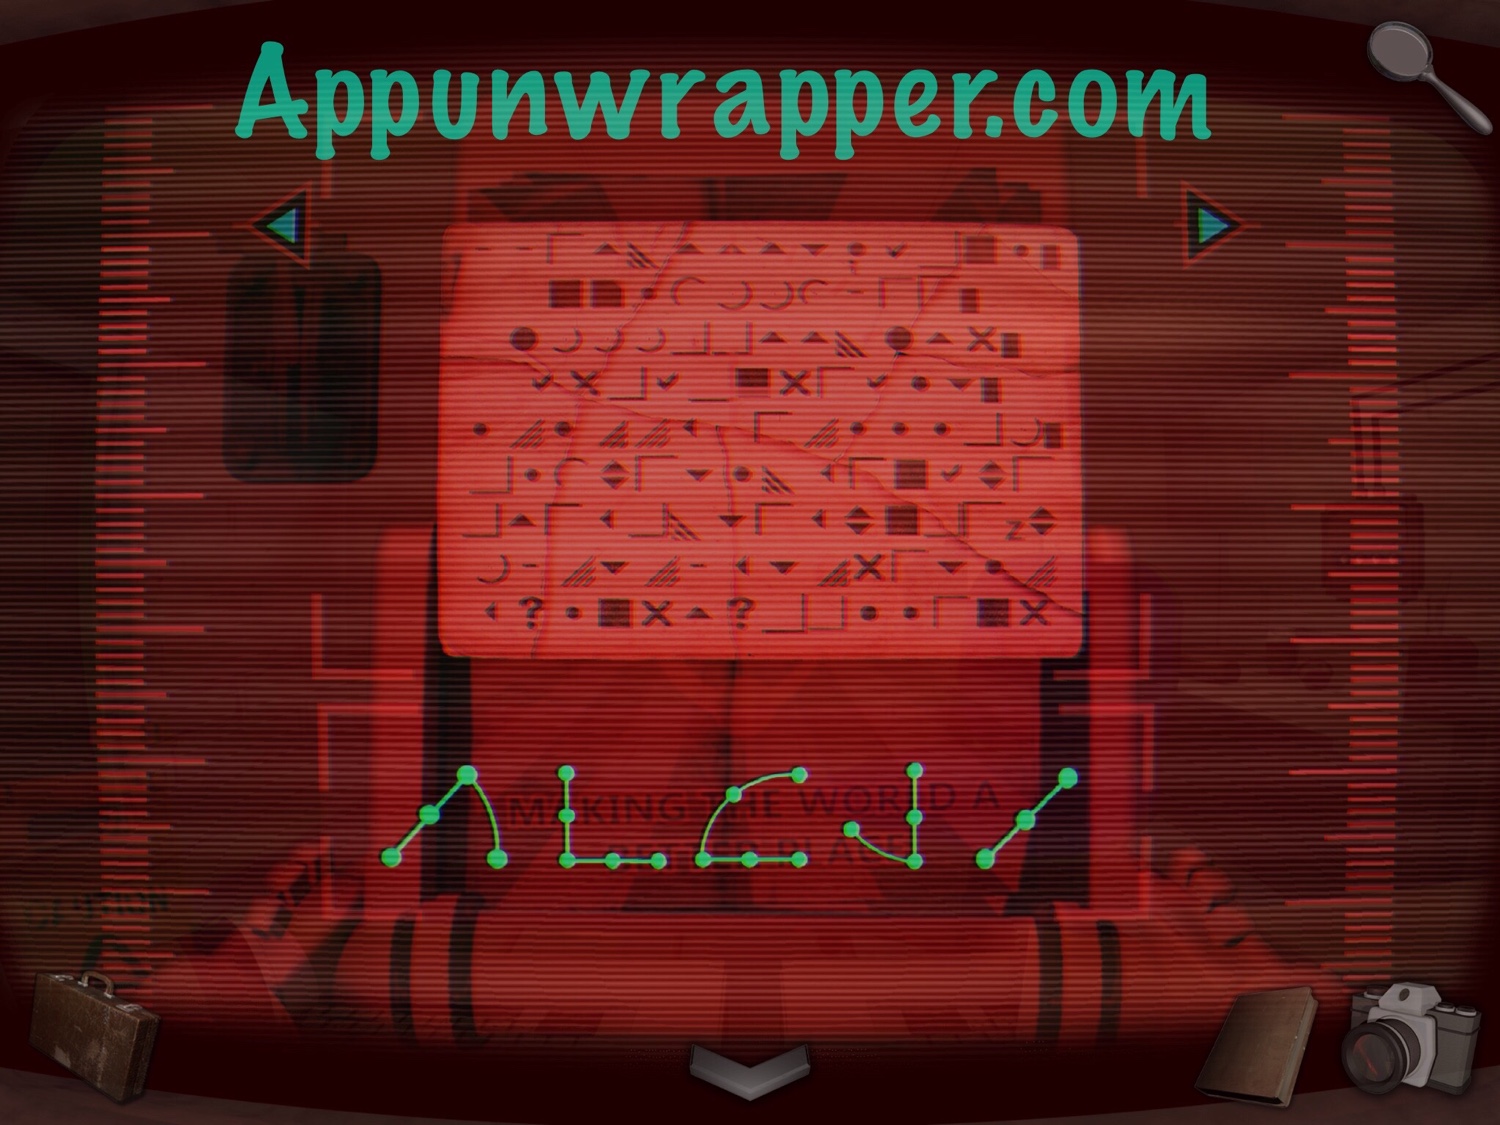
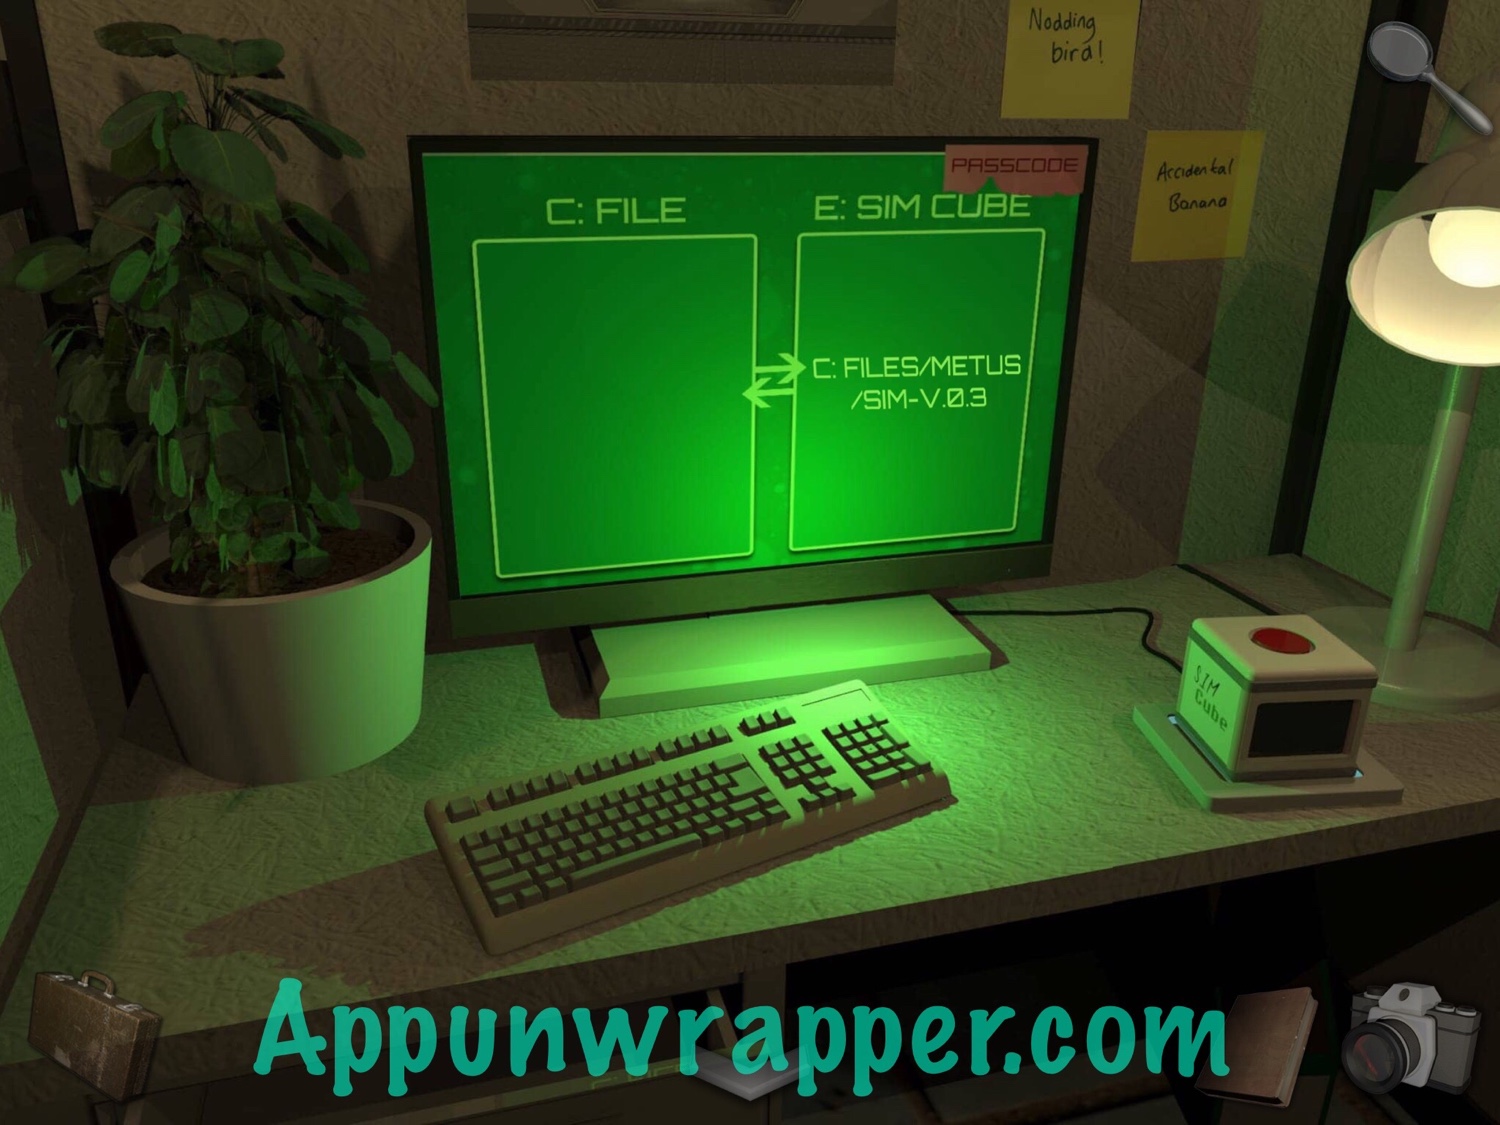
23. Pick up the scrap of paper and notice the pink piece of paper that says PASSCODE on it. Take out the photo of the pink piece of paper you found in the trash and turn it upside-down so it matches the tear. Elbow you can see the passcode is 20561. Enter that into the PC. We’re missing a SIM cube, so we’ll come back to this later.
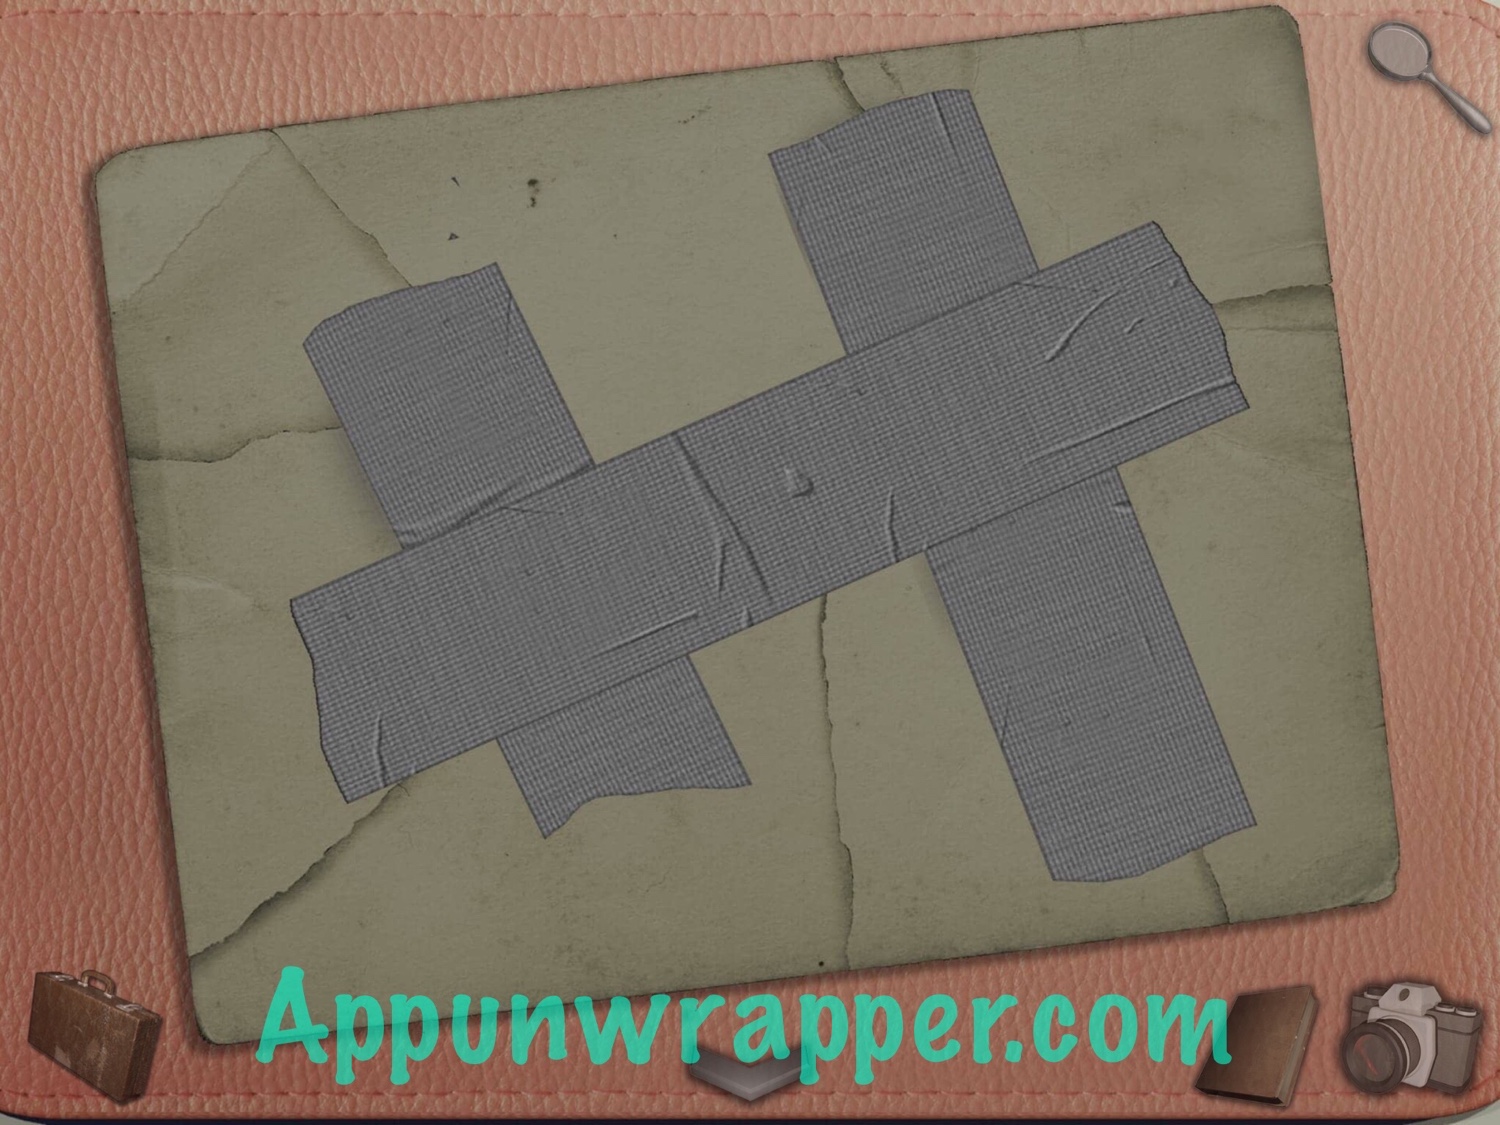
24. Go back to the Meeting Room. Place the final scrap of paper with the others and then turn it around. Use the duct tape to tape it together and then pick up the taped paper.
25. Go back to the robot and place the taped paper on its tray.
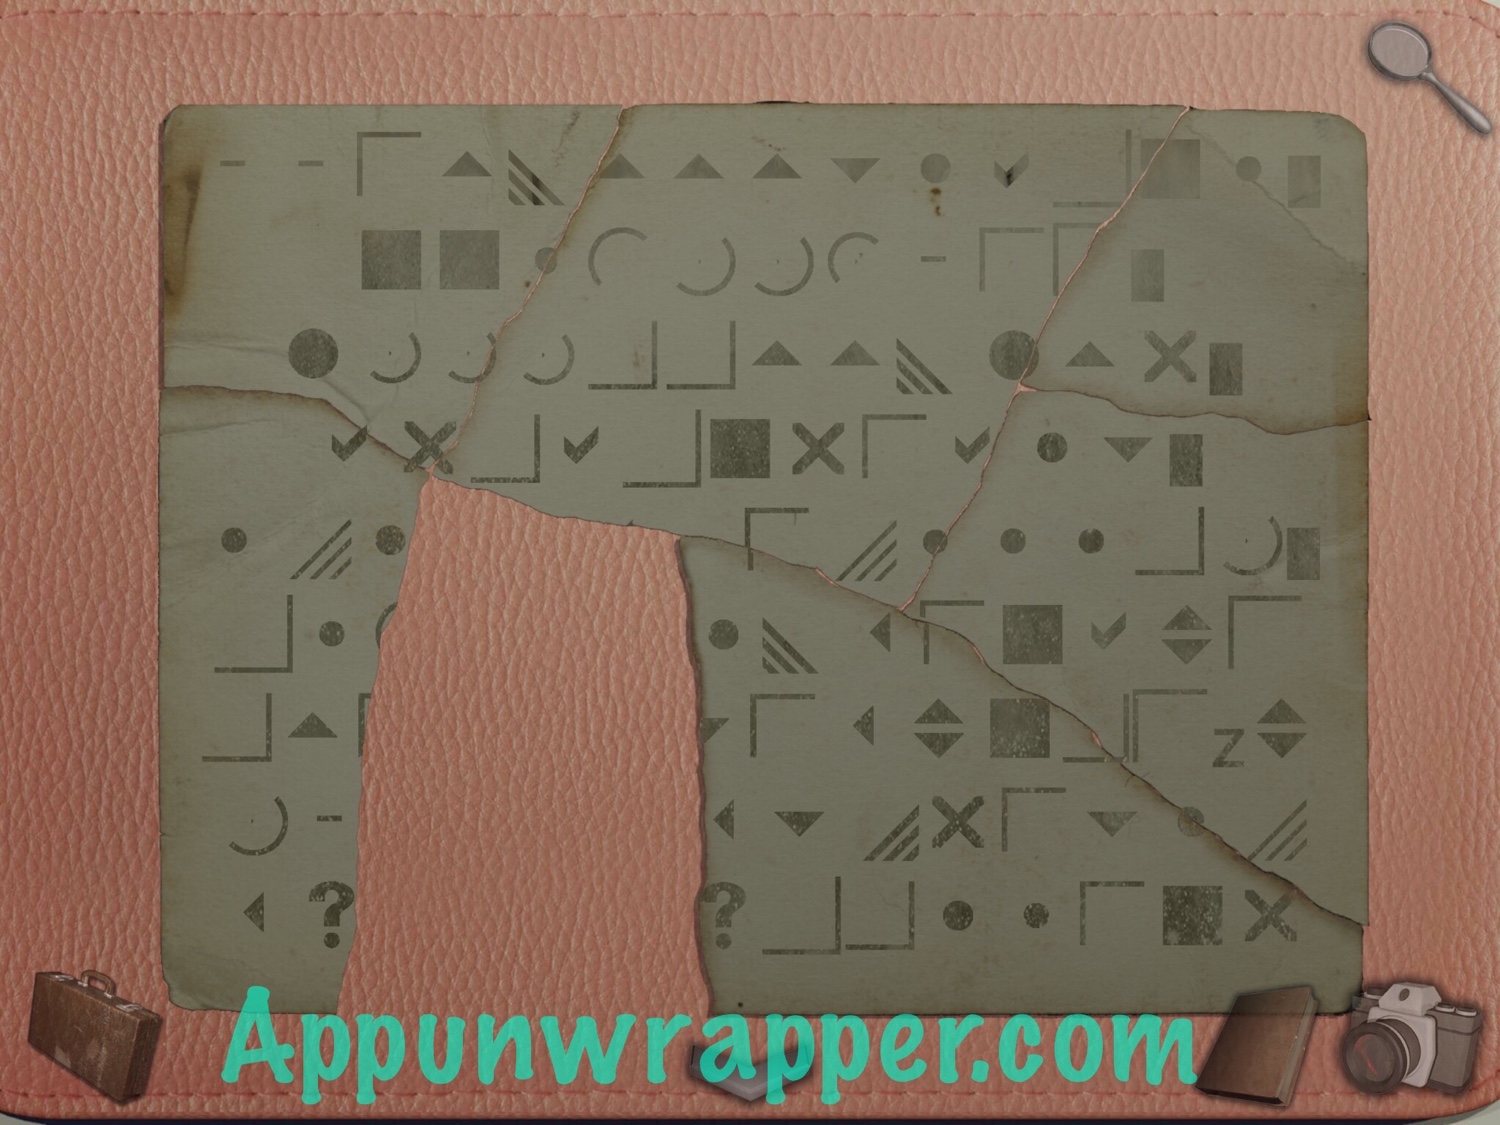
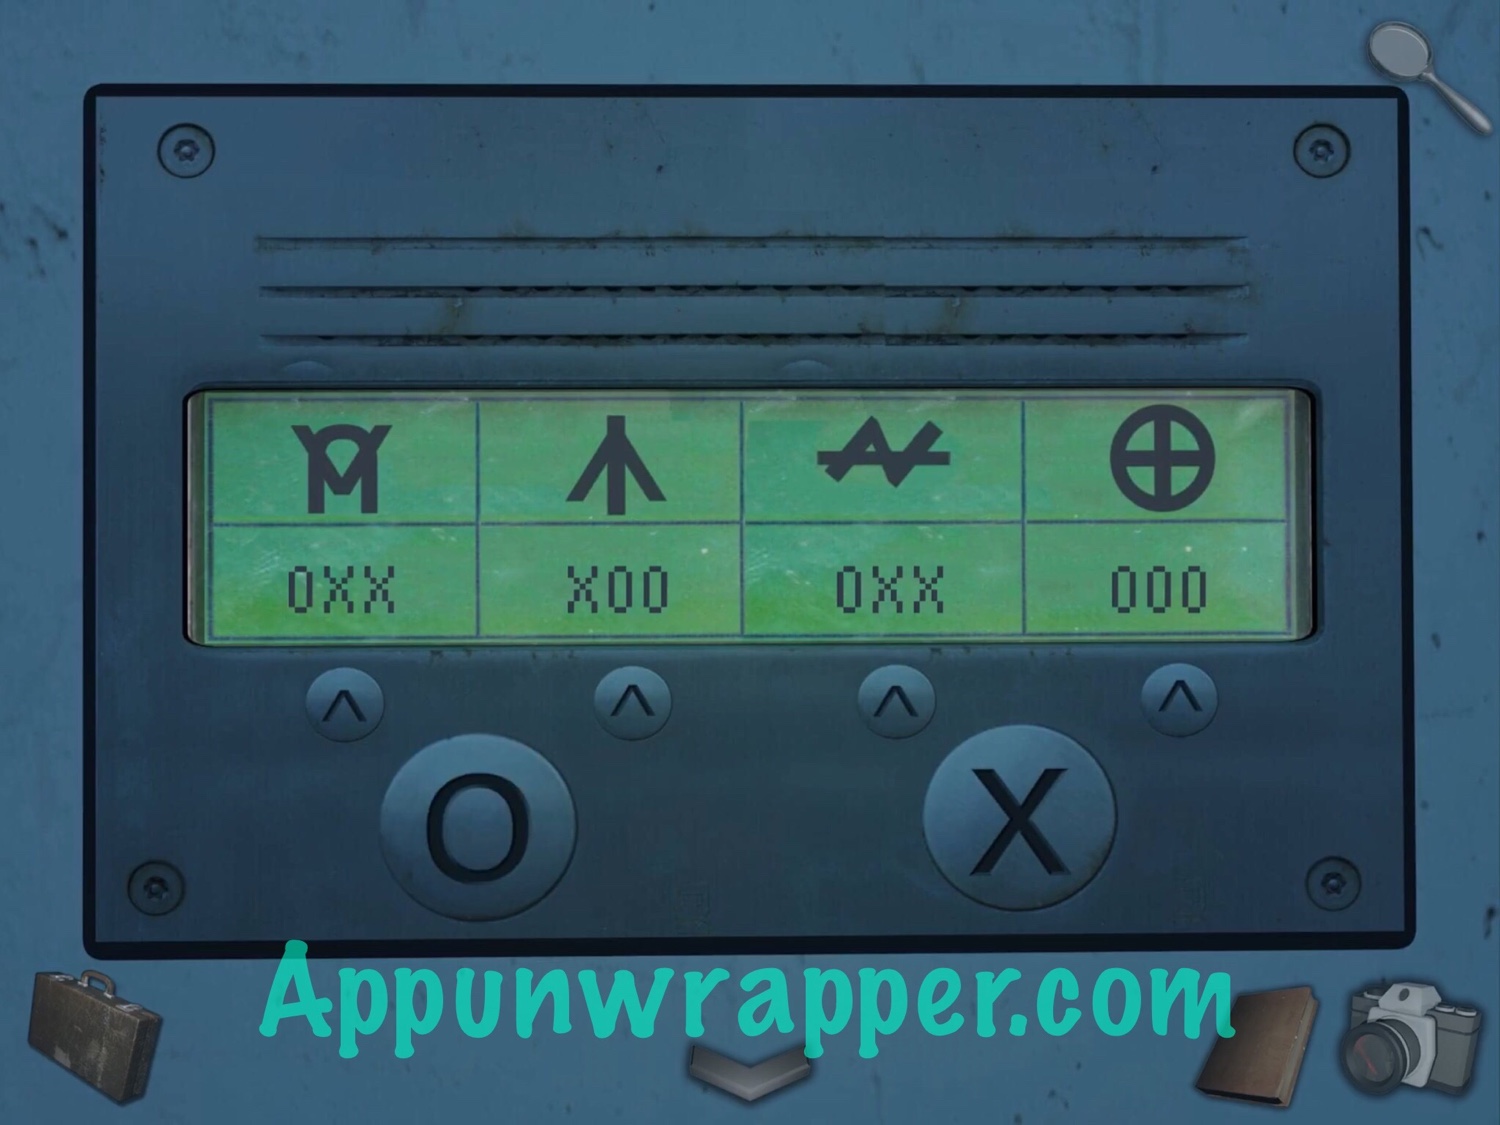
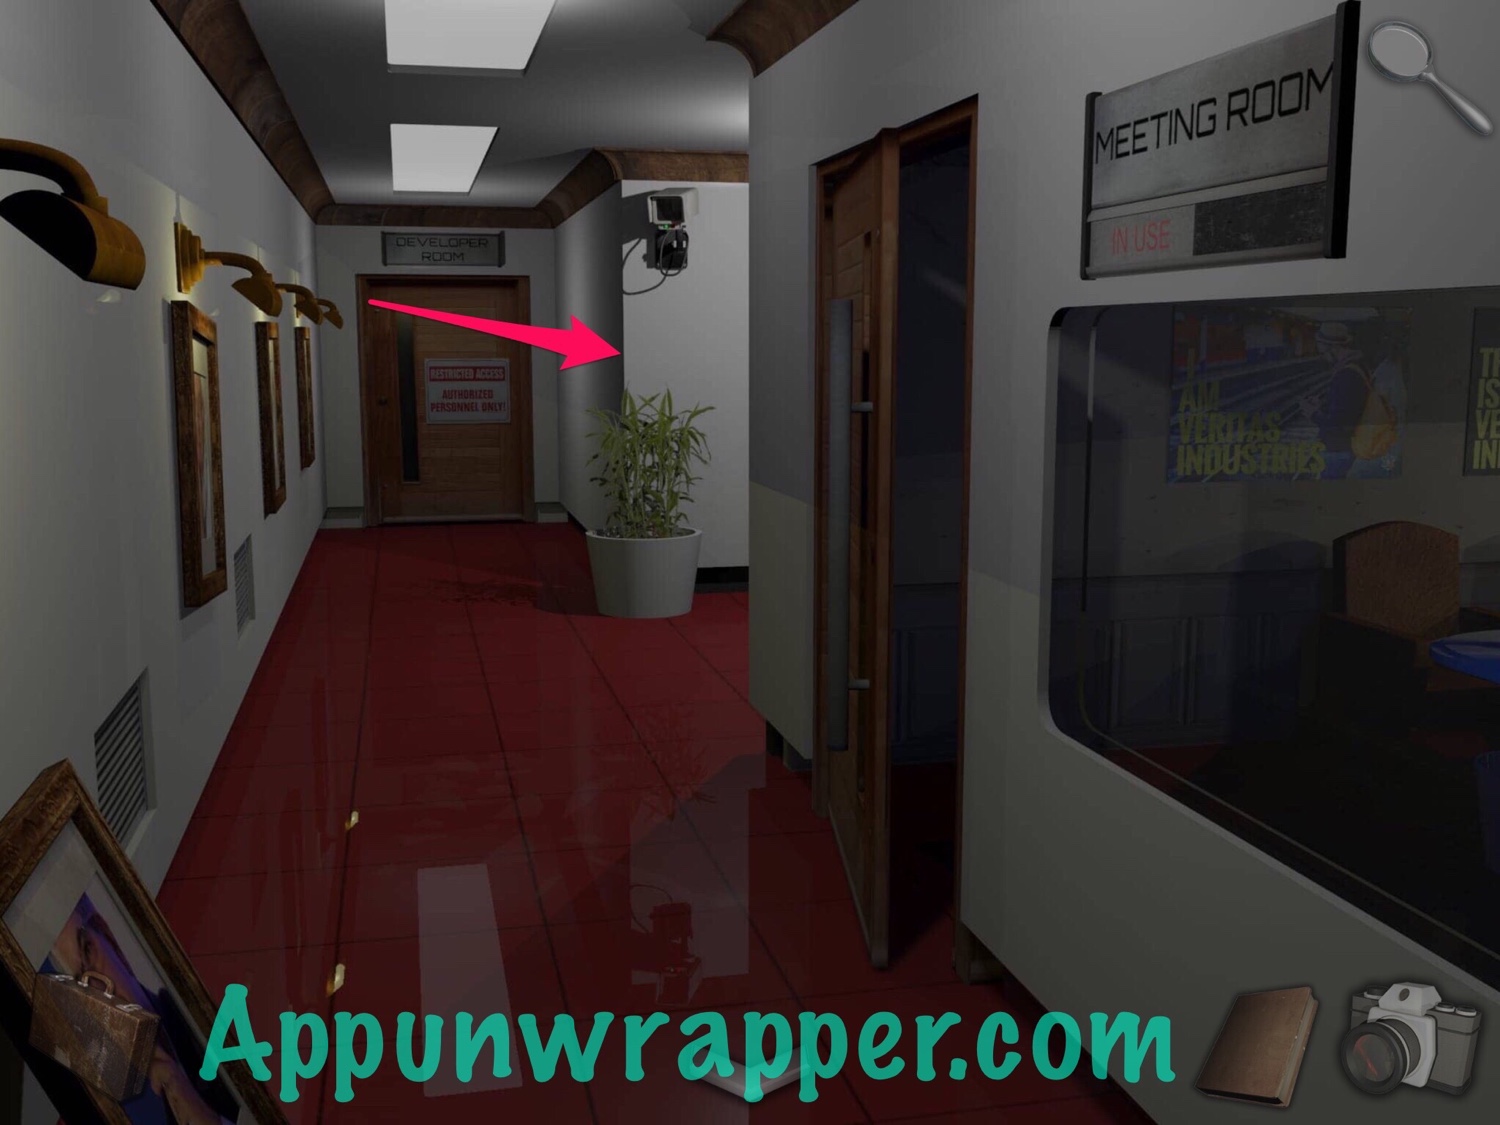
26. Go back to the clock room and tap on the puzzle box on the table again. Pull out the photo of the symbols on the panel. Notice that each symbol on the panel is made up of two symbols on the puzzle box. Move the two pegs to the two symbols to see what the digital code is for each. You end up with OXX, XOO, OXX, and OOO.
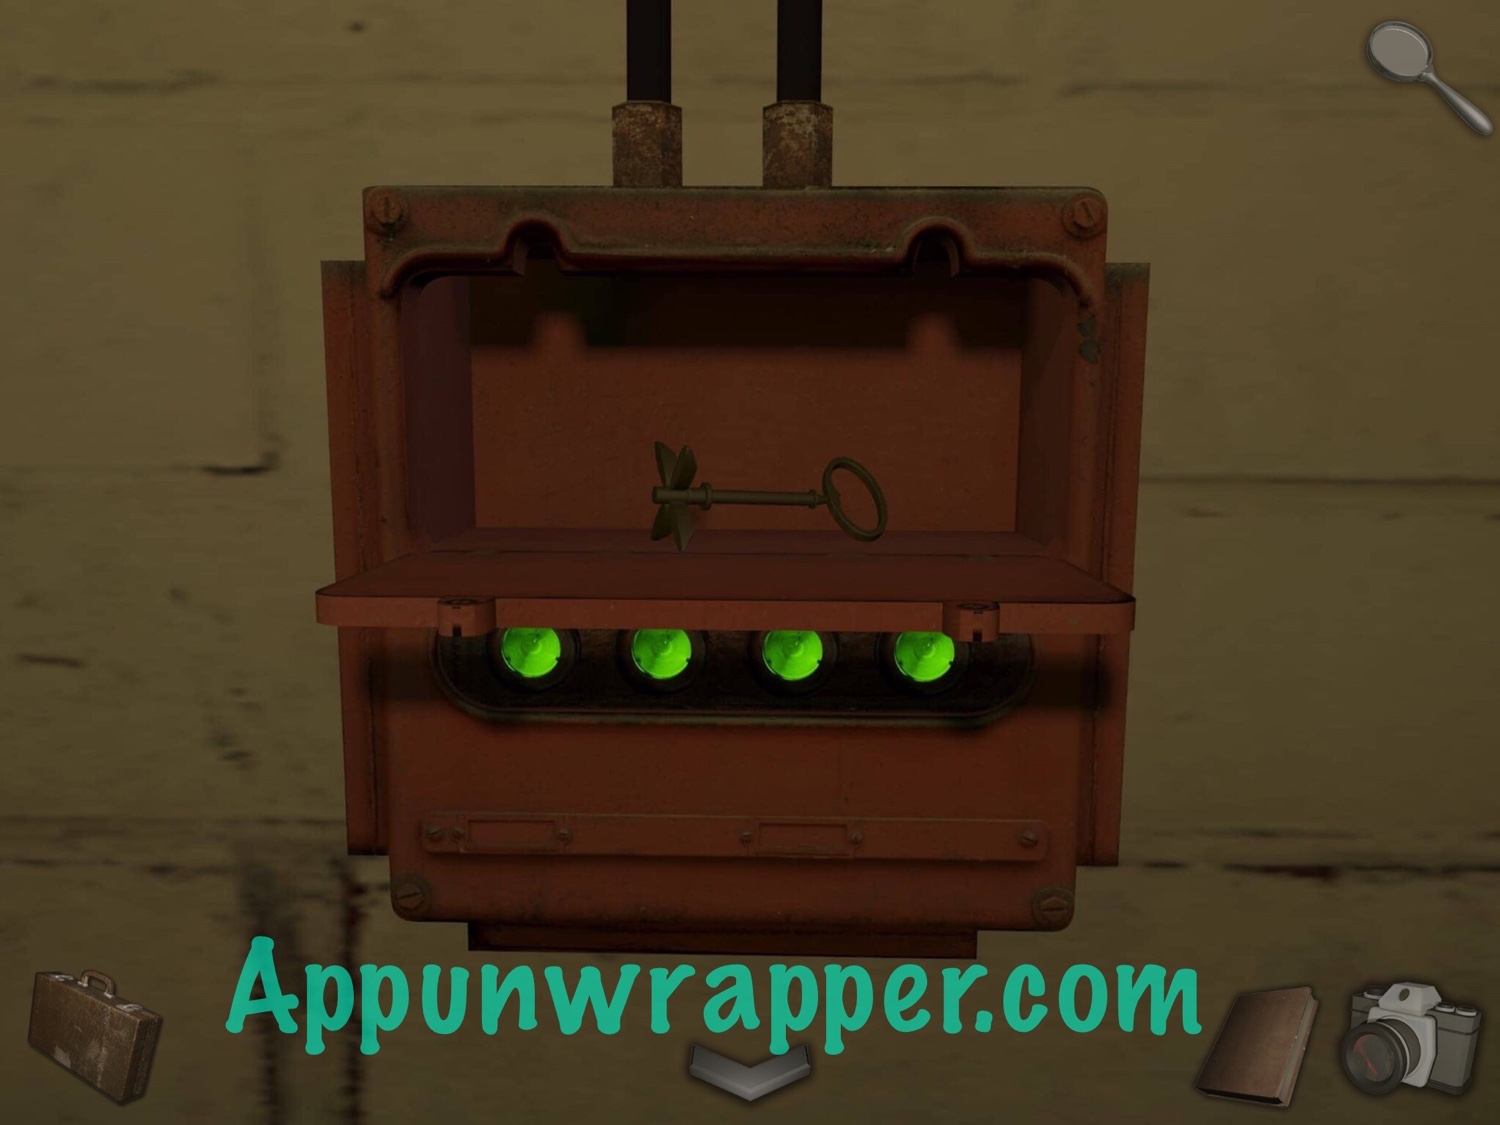
27. Go back to the robot and left through the doors to the hallway. Enter the security office again. First, take the key piece from the laser puzzle with the four green lights.
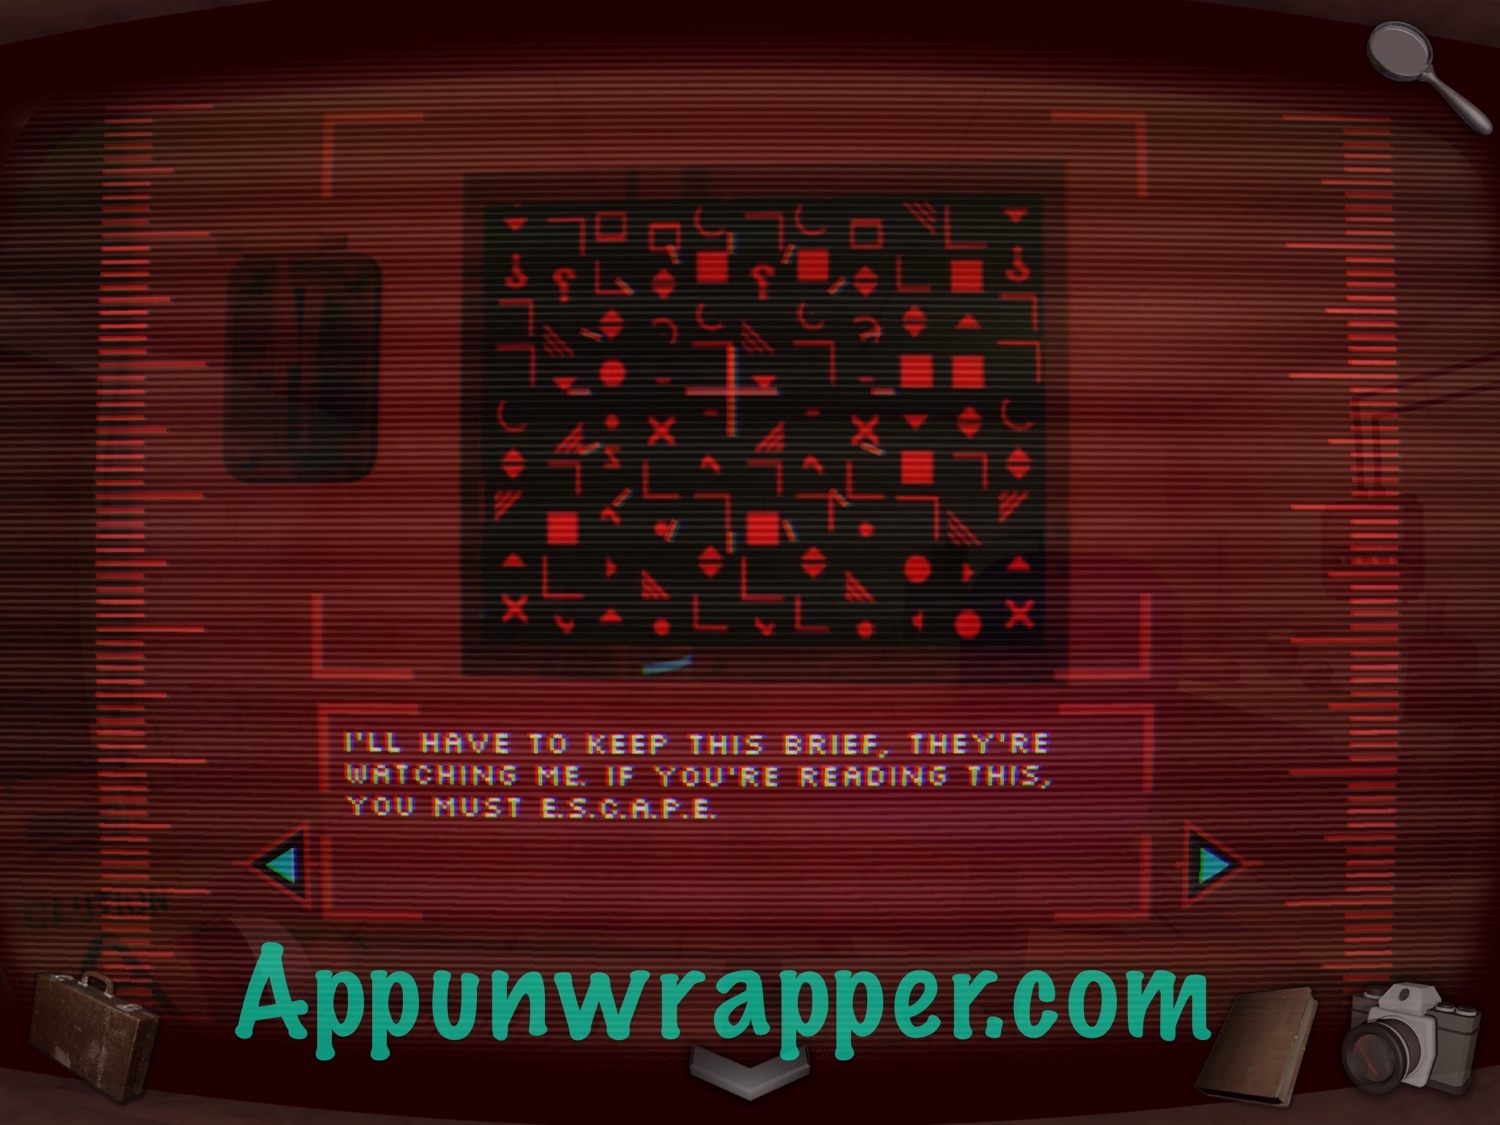
28. Look at the red computer screen. The symbols from the other room are on there and someone is communicating with you. Read through all of it, but pay attention specifically to the clue E.S.C.A.P.E.
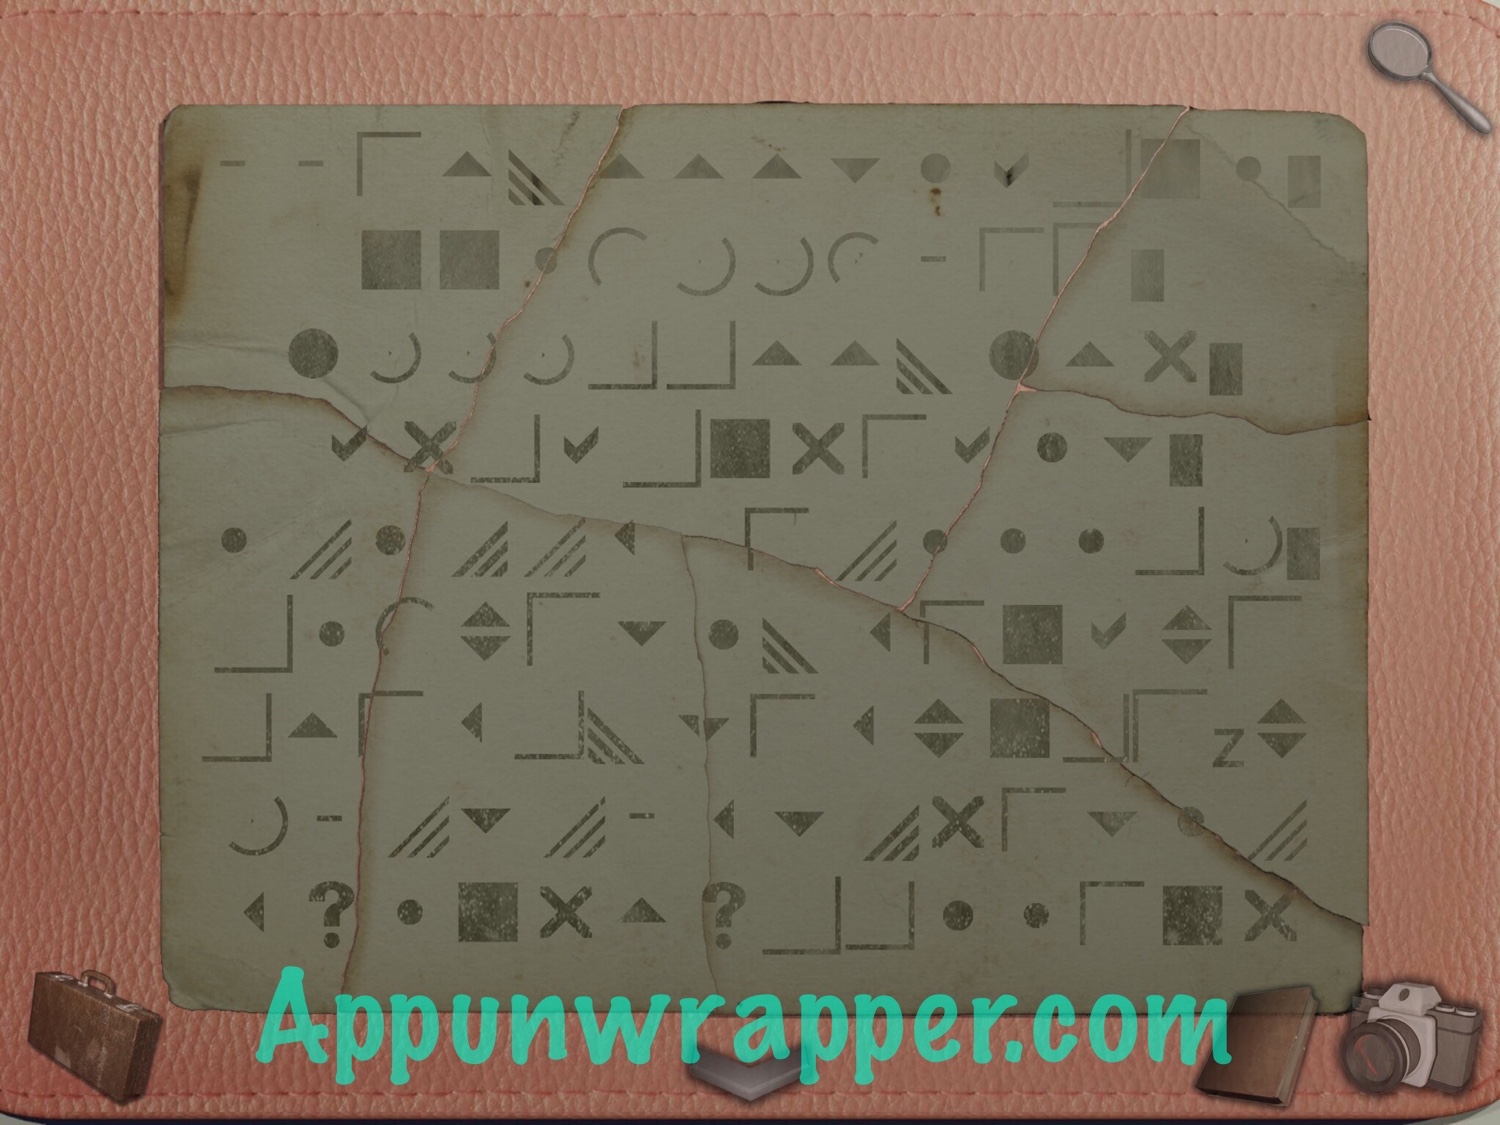
29. While here, pull the blinking blue arrows up to move the robot’s arms. Now the camera can read the paper you placed down on the tray. Take a photo of the lines and dots that appear. It’s a clue we’ll use later.
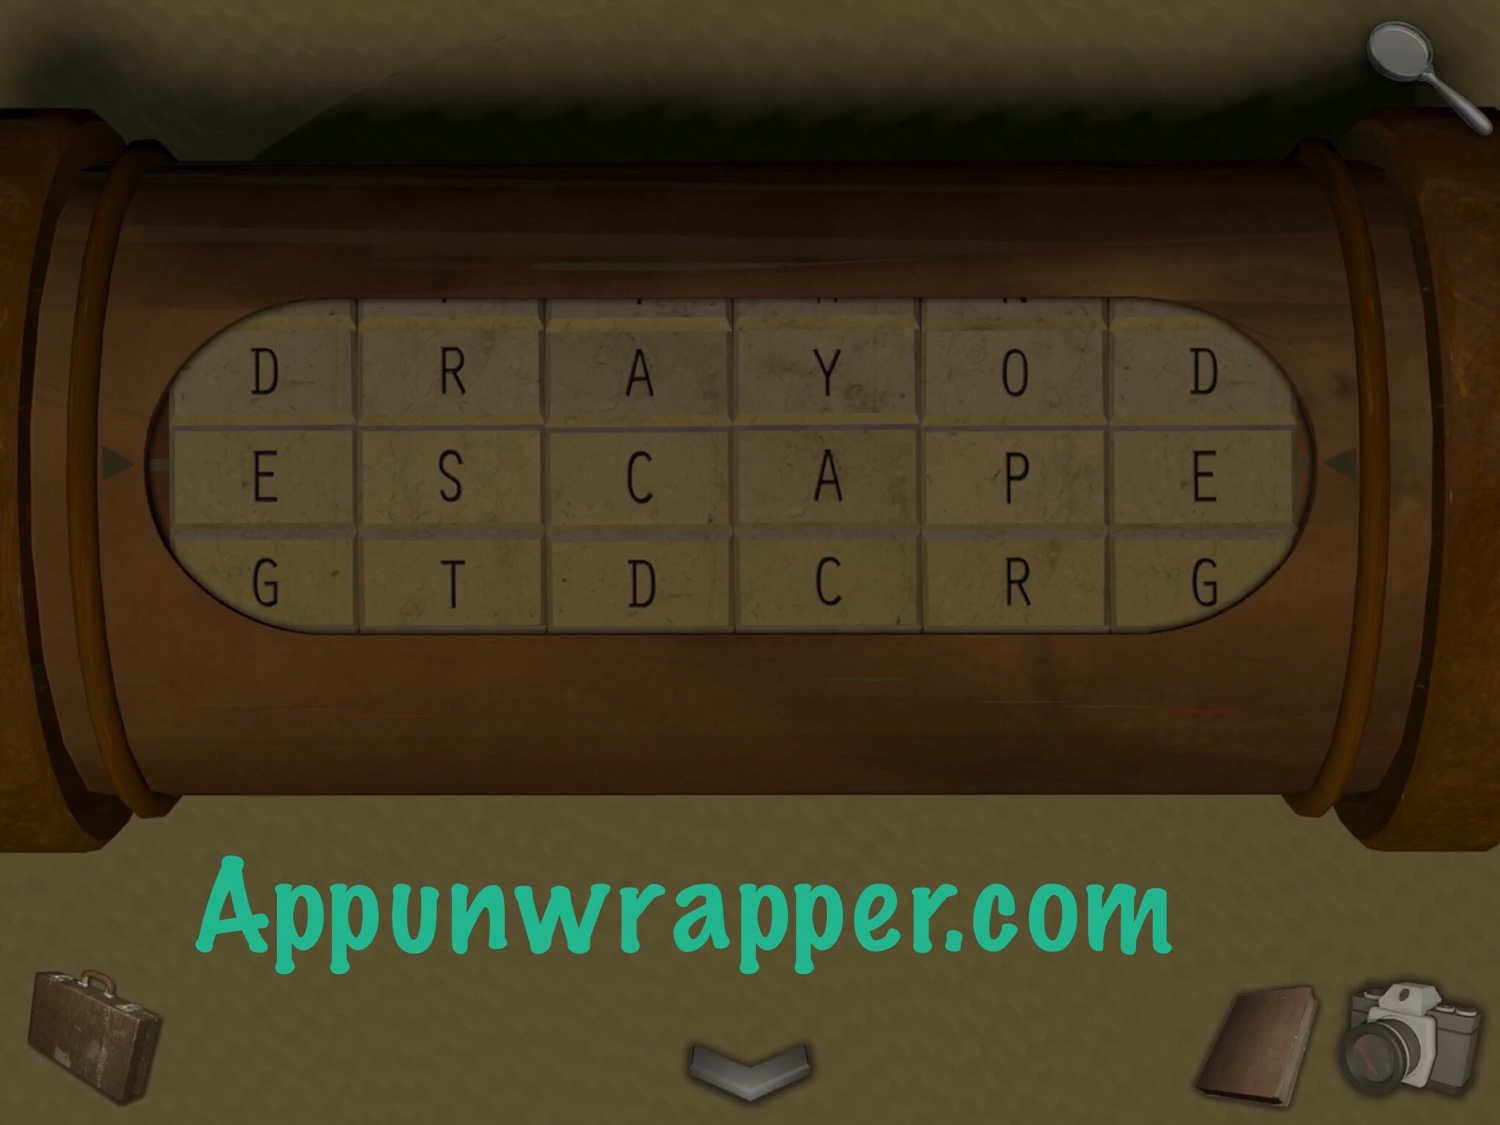
30. Go to the table and enter ESCAPE as the passcode to open the cryptex. Take the key piece from inside.
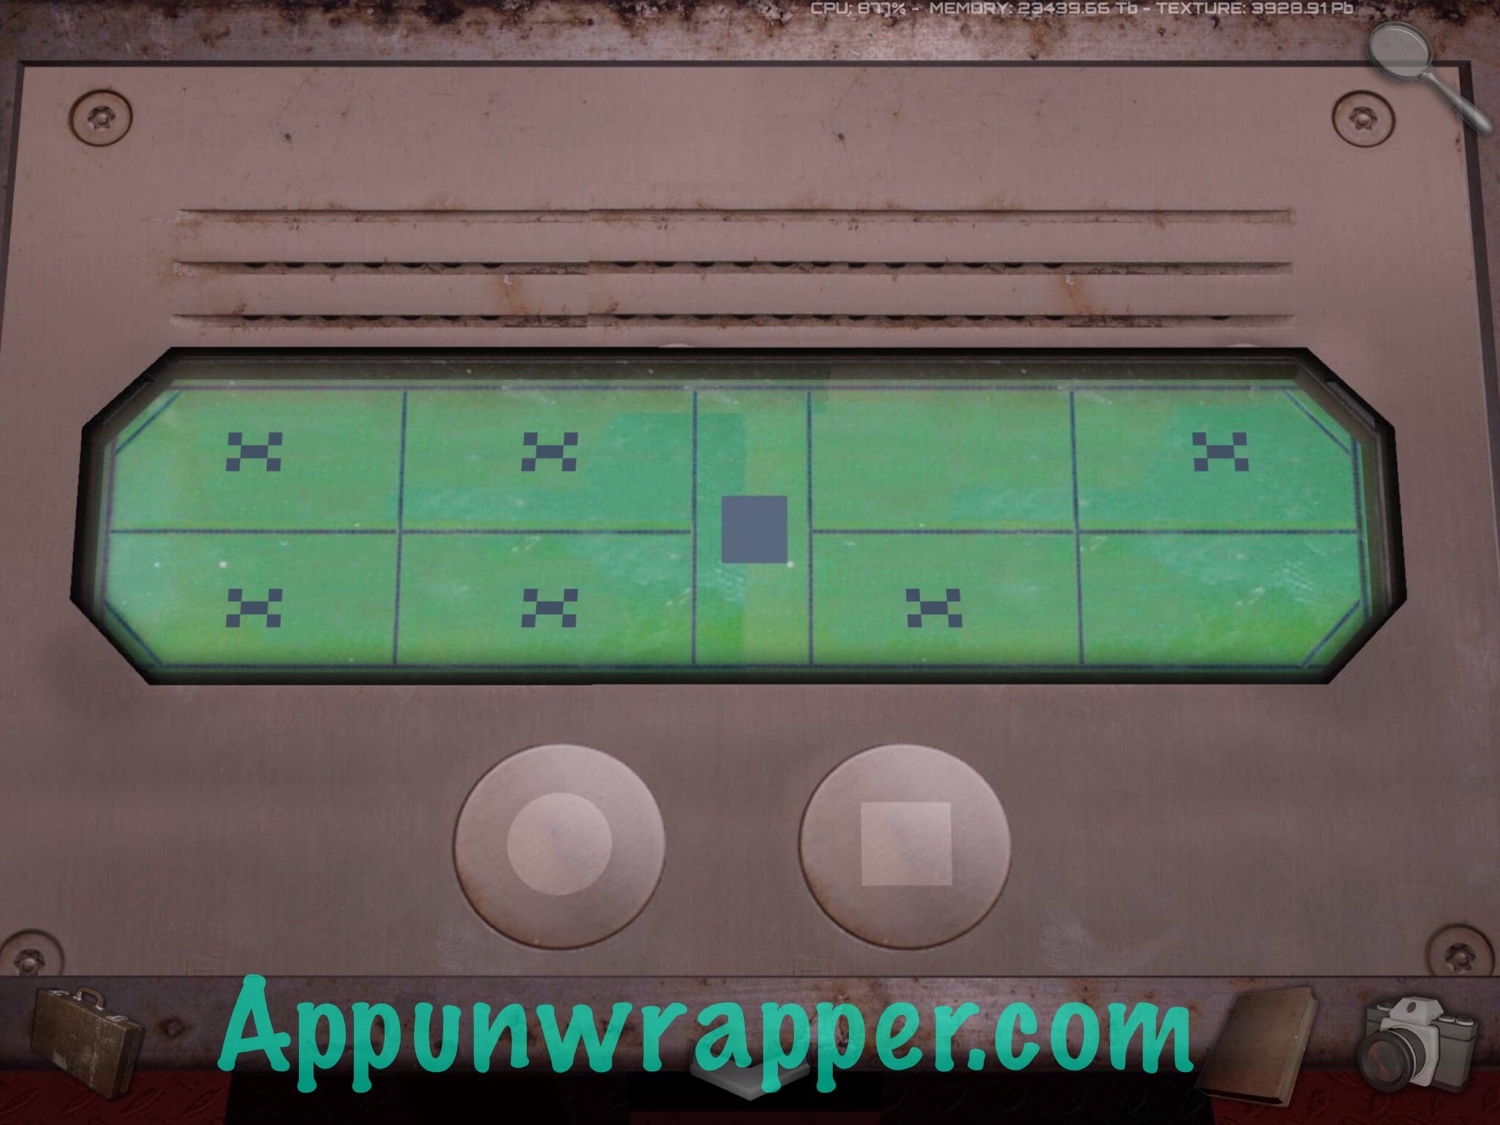
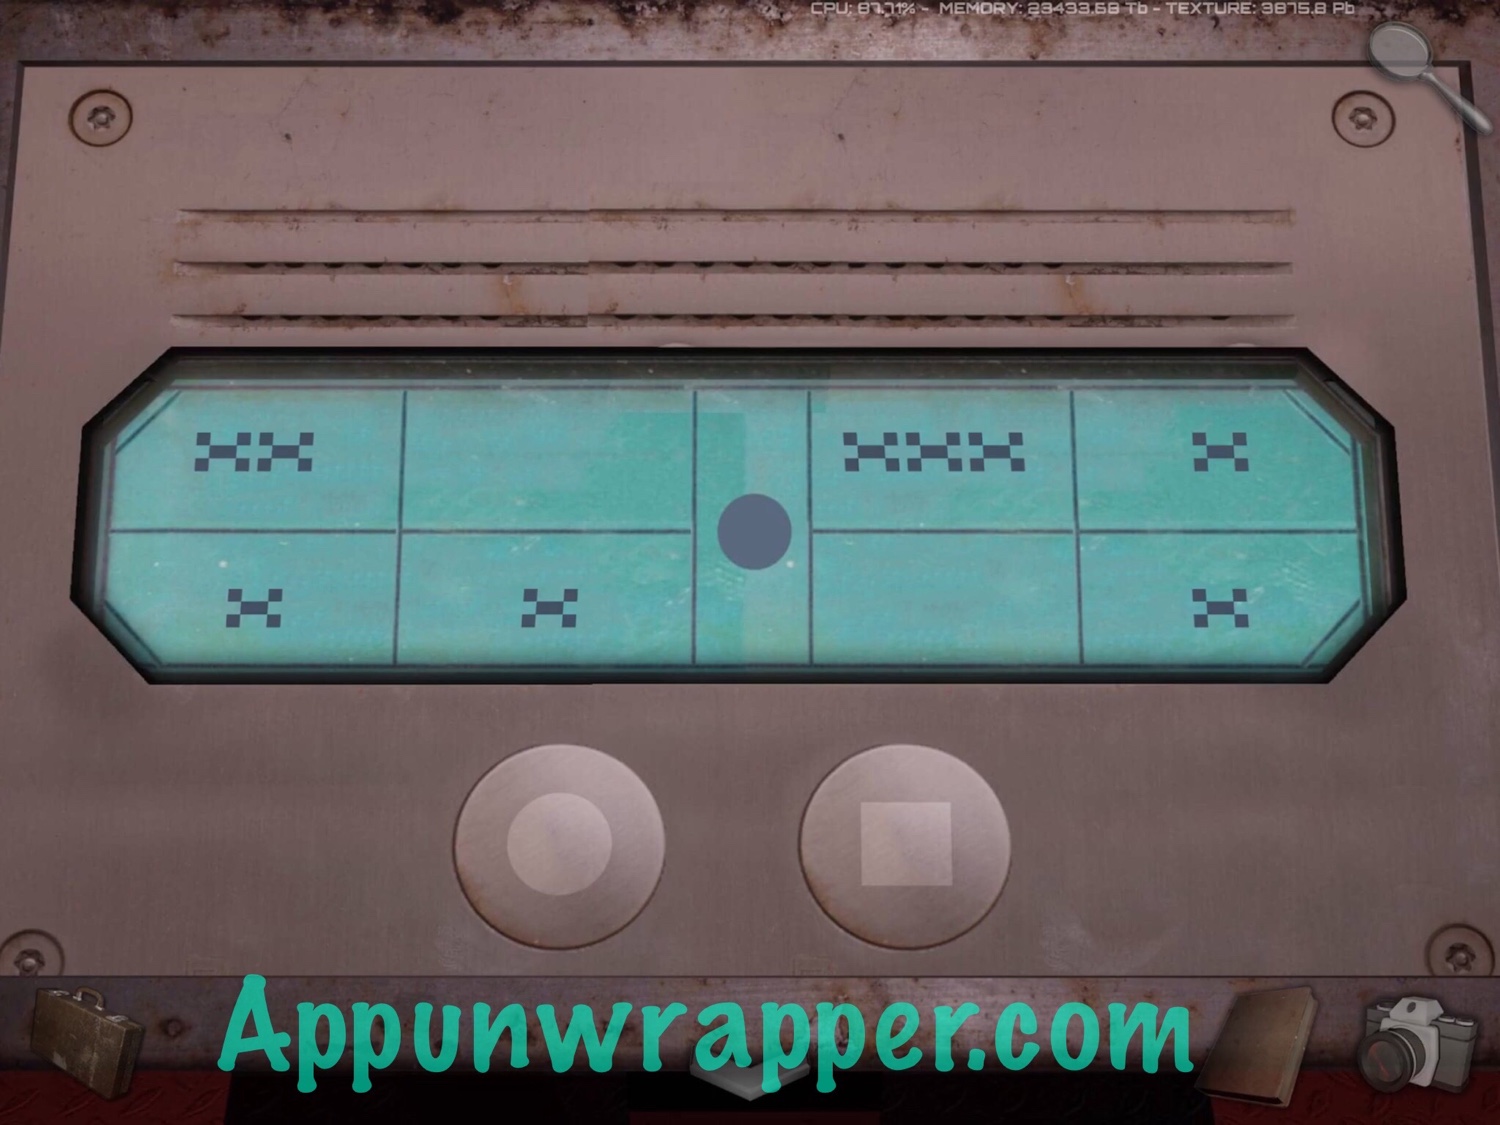
31. Go back up the escalator to the panel with the symbols. Enter OXX, XOO, OXX, and OOO. Take the key piece. We should now have all of them.
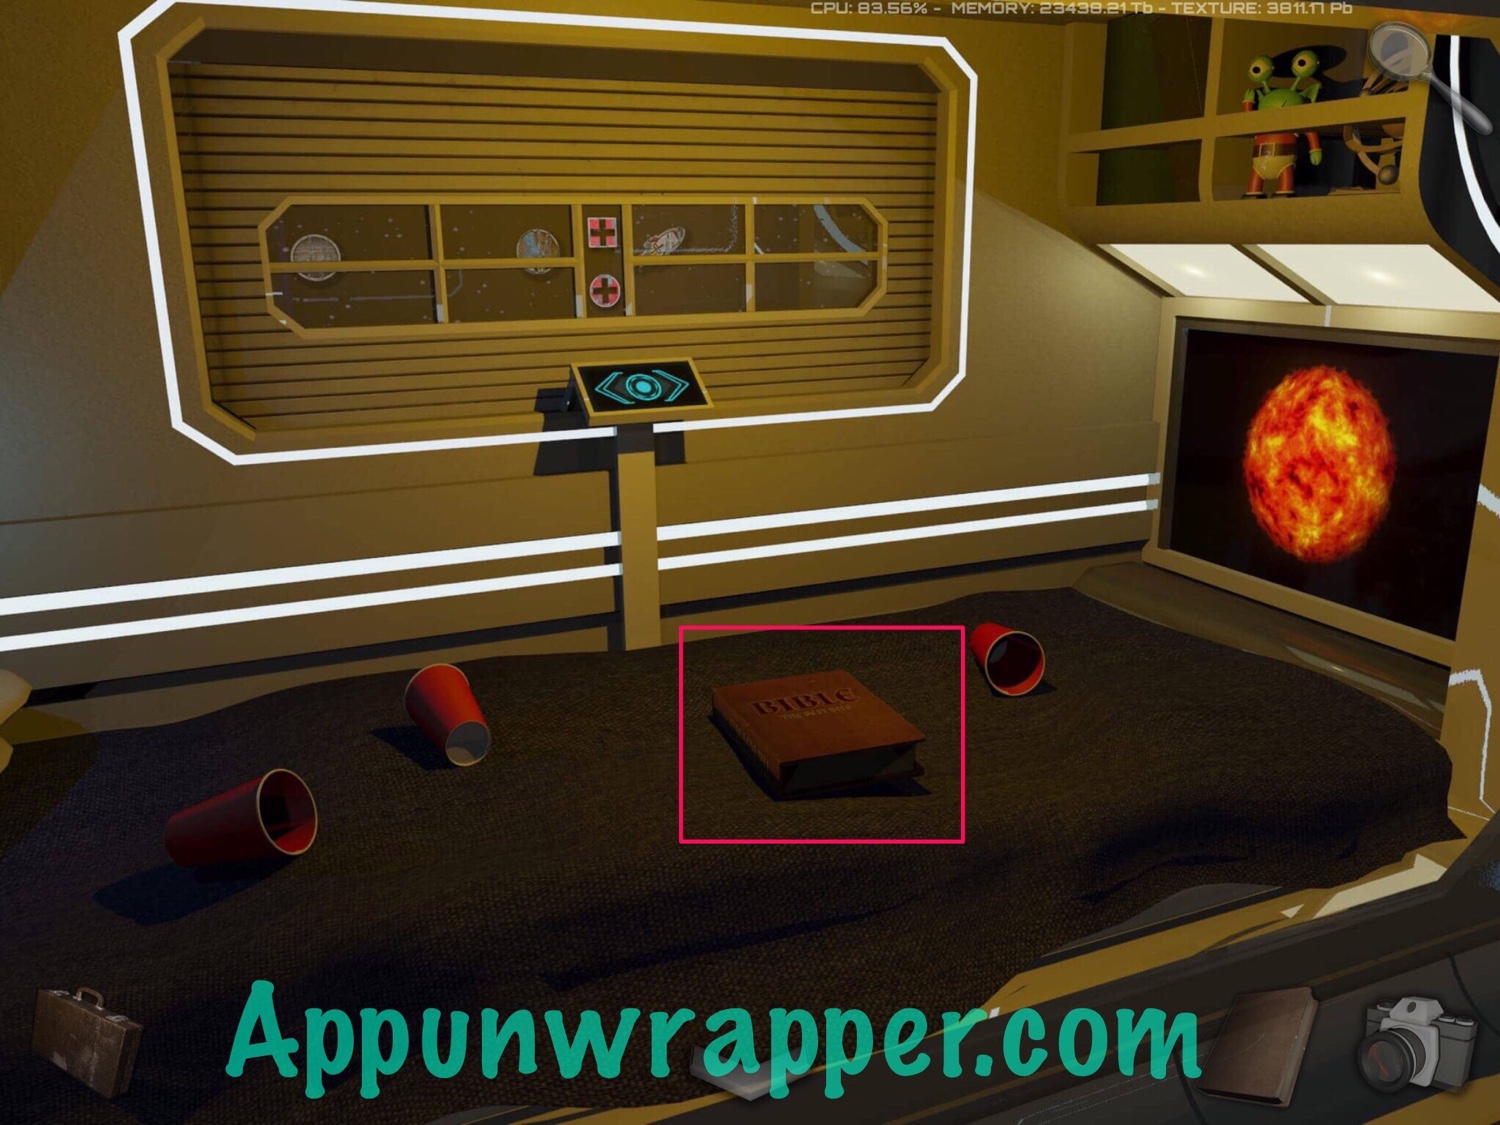
32. Head through the door again. Tap on the plant to head down the hall to a storage closet.
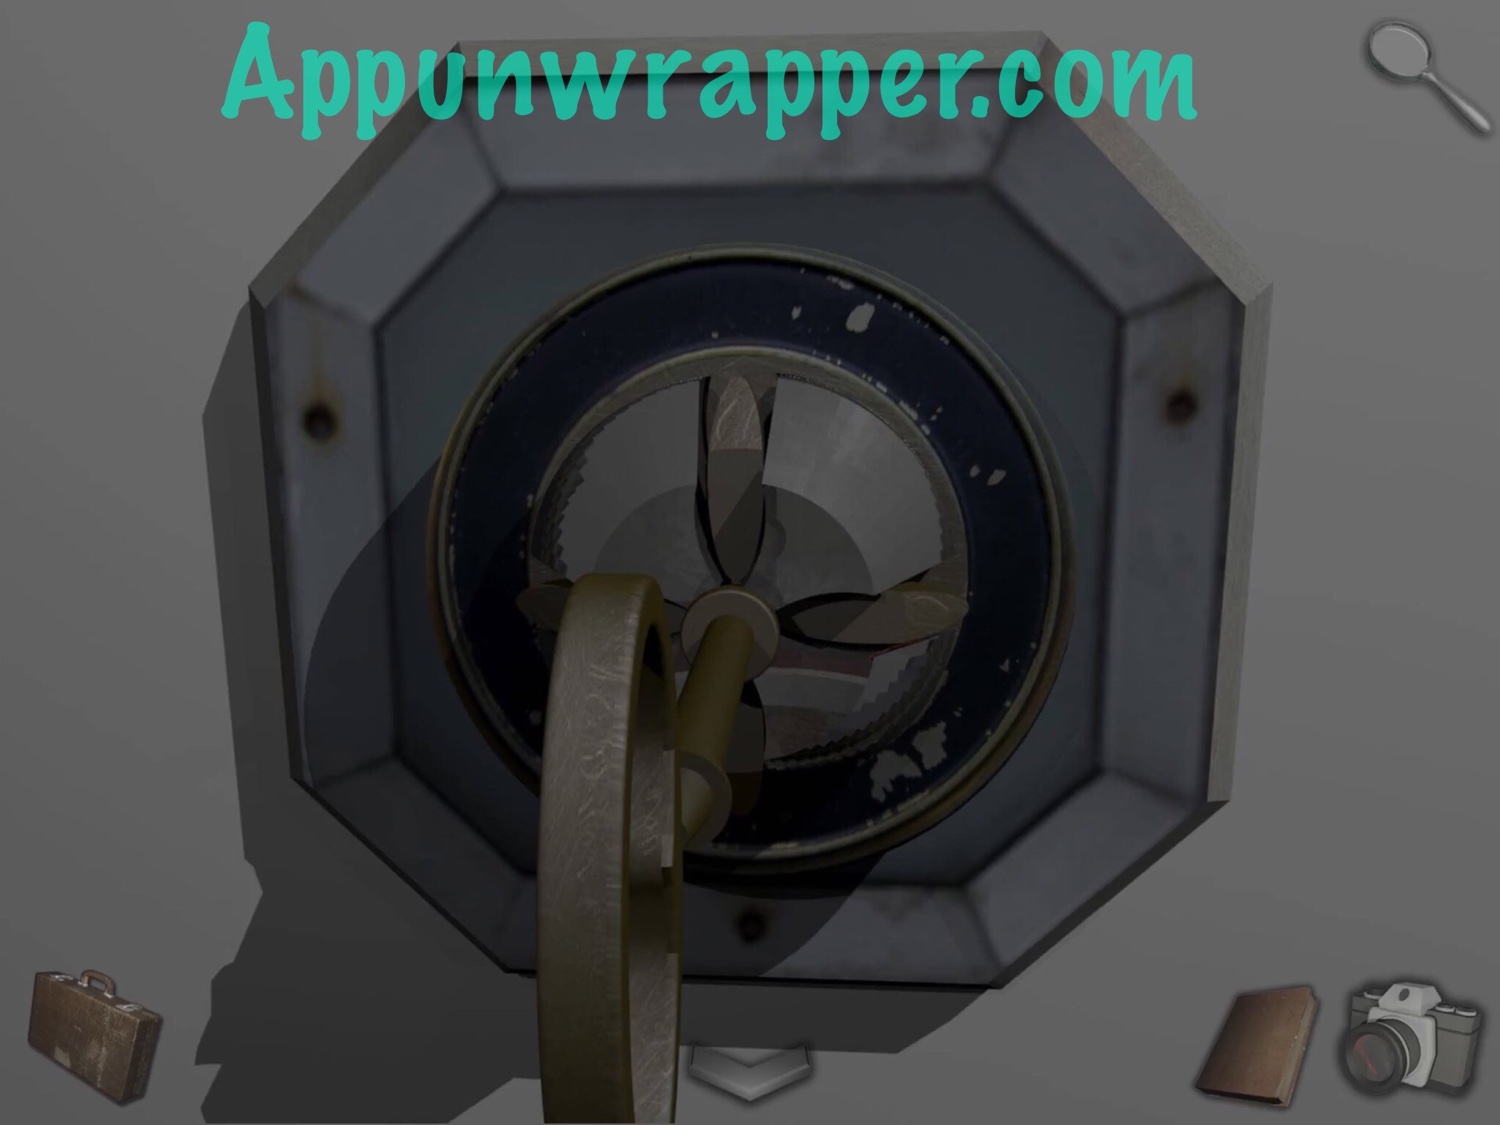
33. Place the four plastic key pieces in the lock to the left and then insert the key to unlock the door. Take a SIM cube from inside.
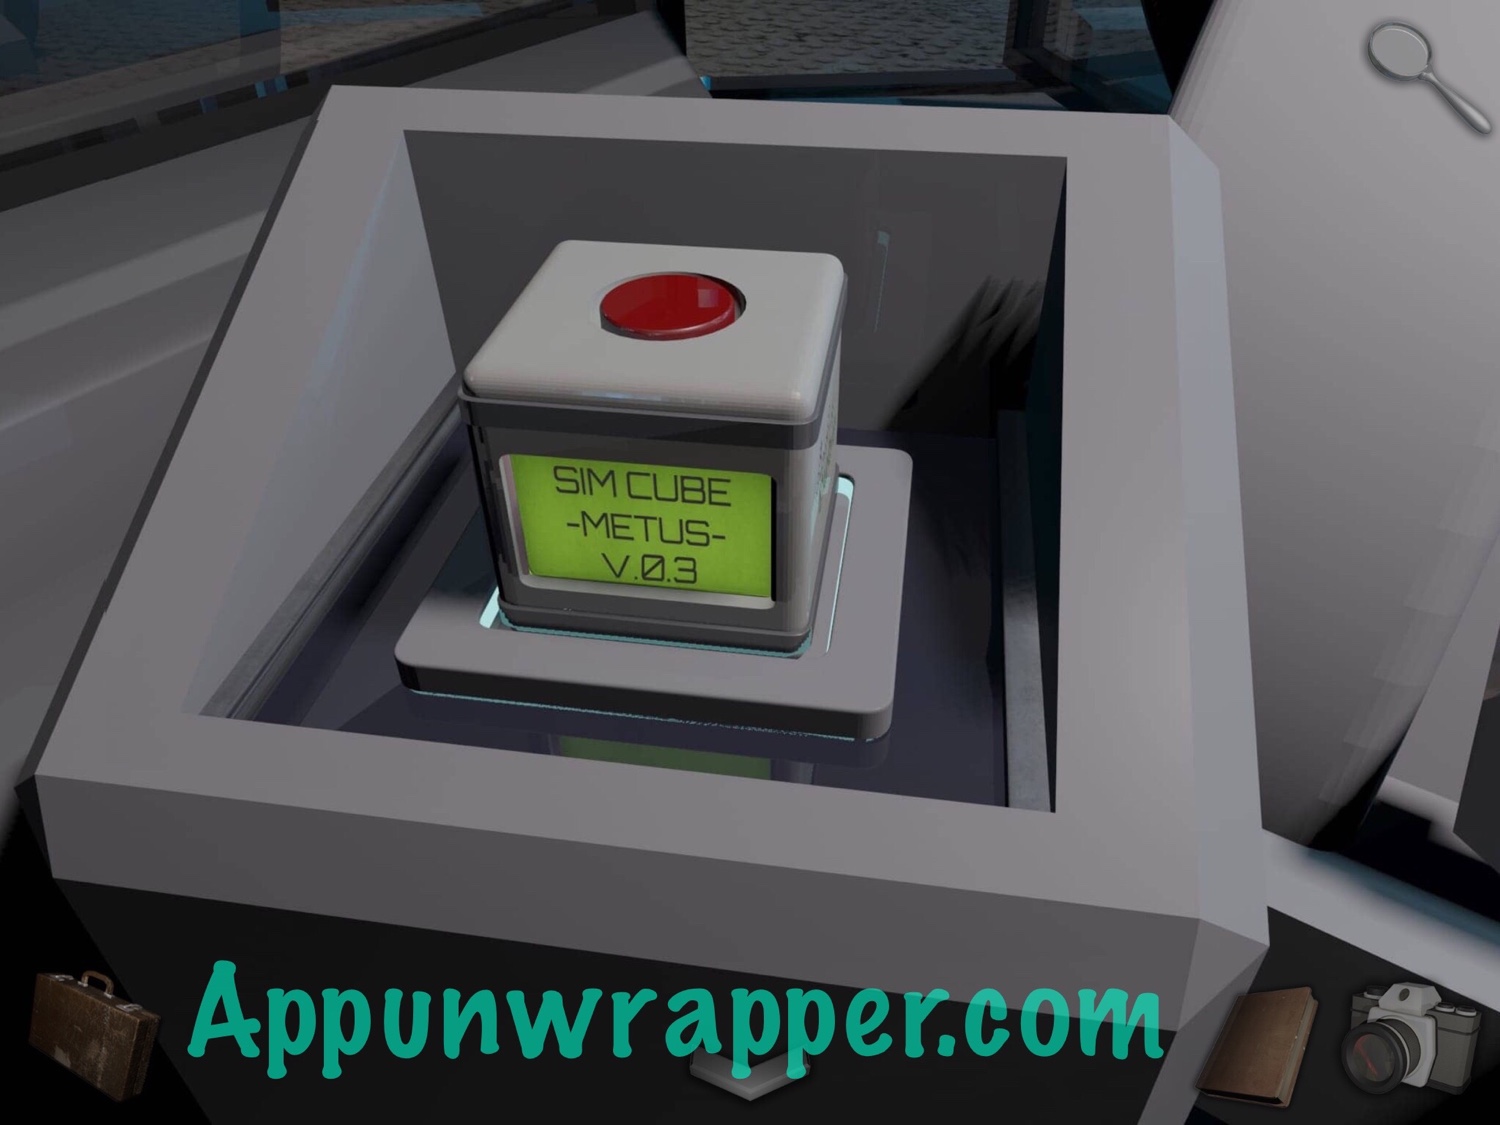
34. Go back to the Developer Room. Place the SIM cube by the PC and drag the Metus file to it on the screen. Then pick up the cube again.
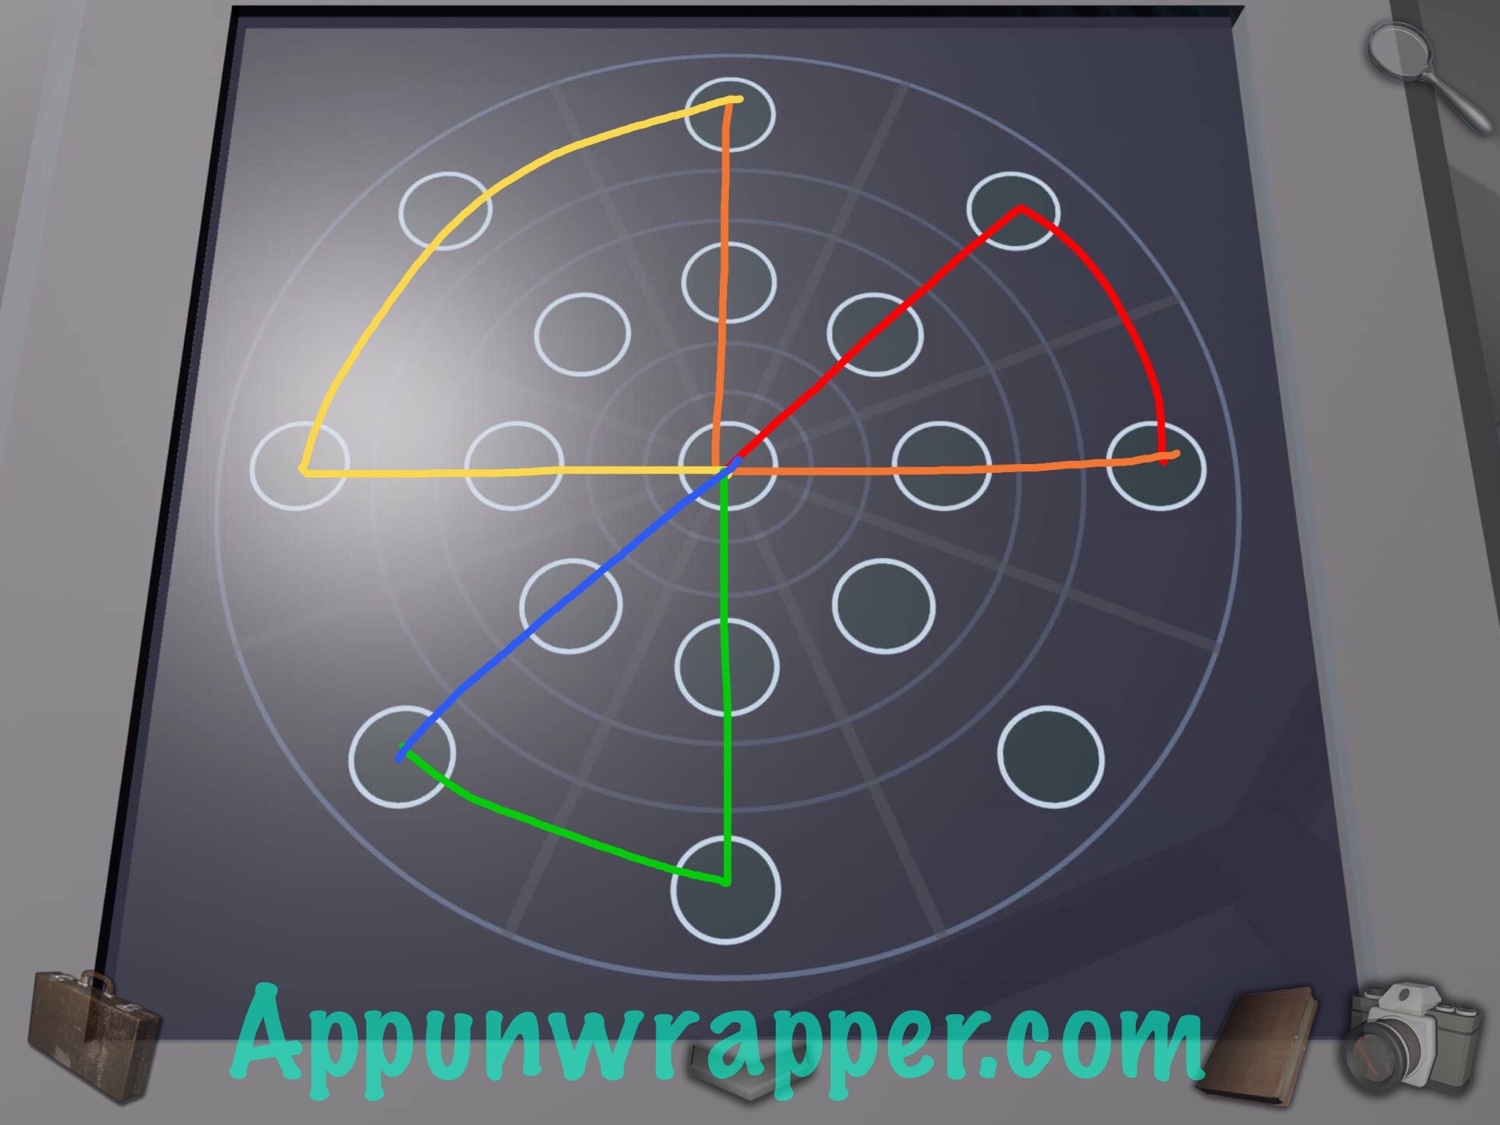
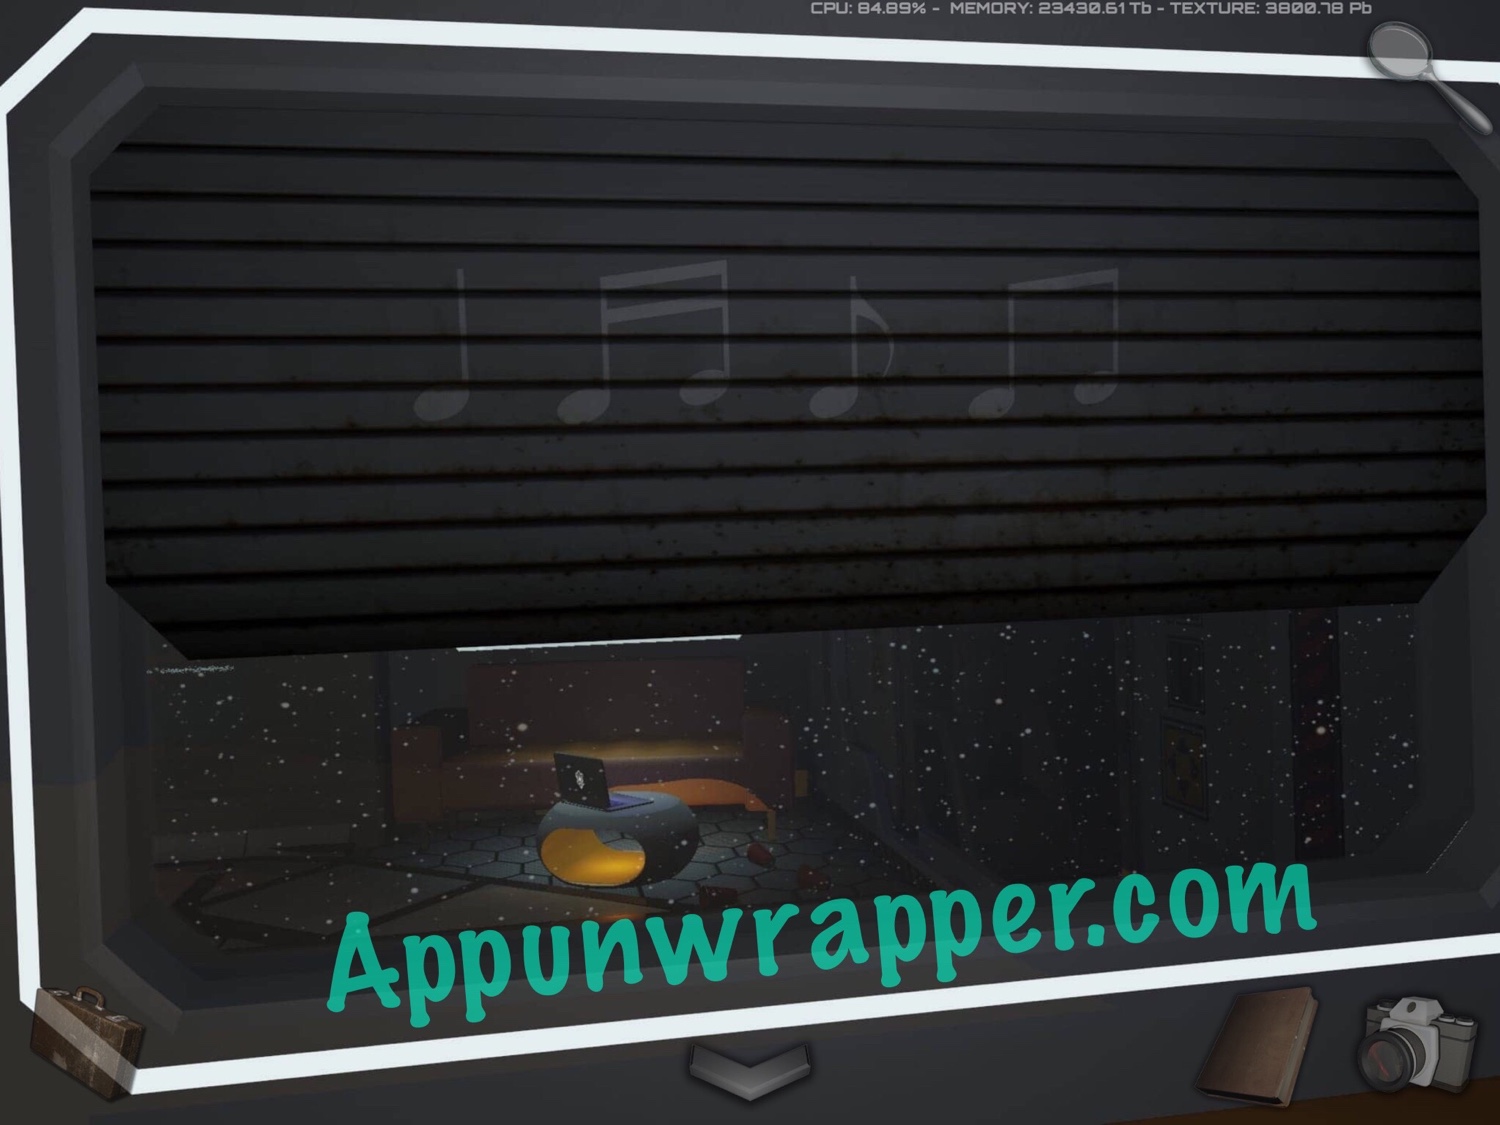
35. Go back and enter the restricted area. There’s a chair similar to the one you saw earlier in the game, but this one is still working. Take out the photo of the strange symbols you saw on the red monitor. You need to trace that pattern with your finger. I’ve mapped out the order for you below if you need help. Just start from the center and follow the rainbow — red to orange to yellow to green to blue.
36. Place the SIM cube in the slot that just unlocked and then get in the chair and start your VR experience!
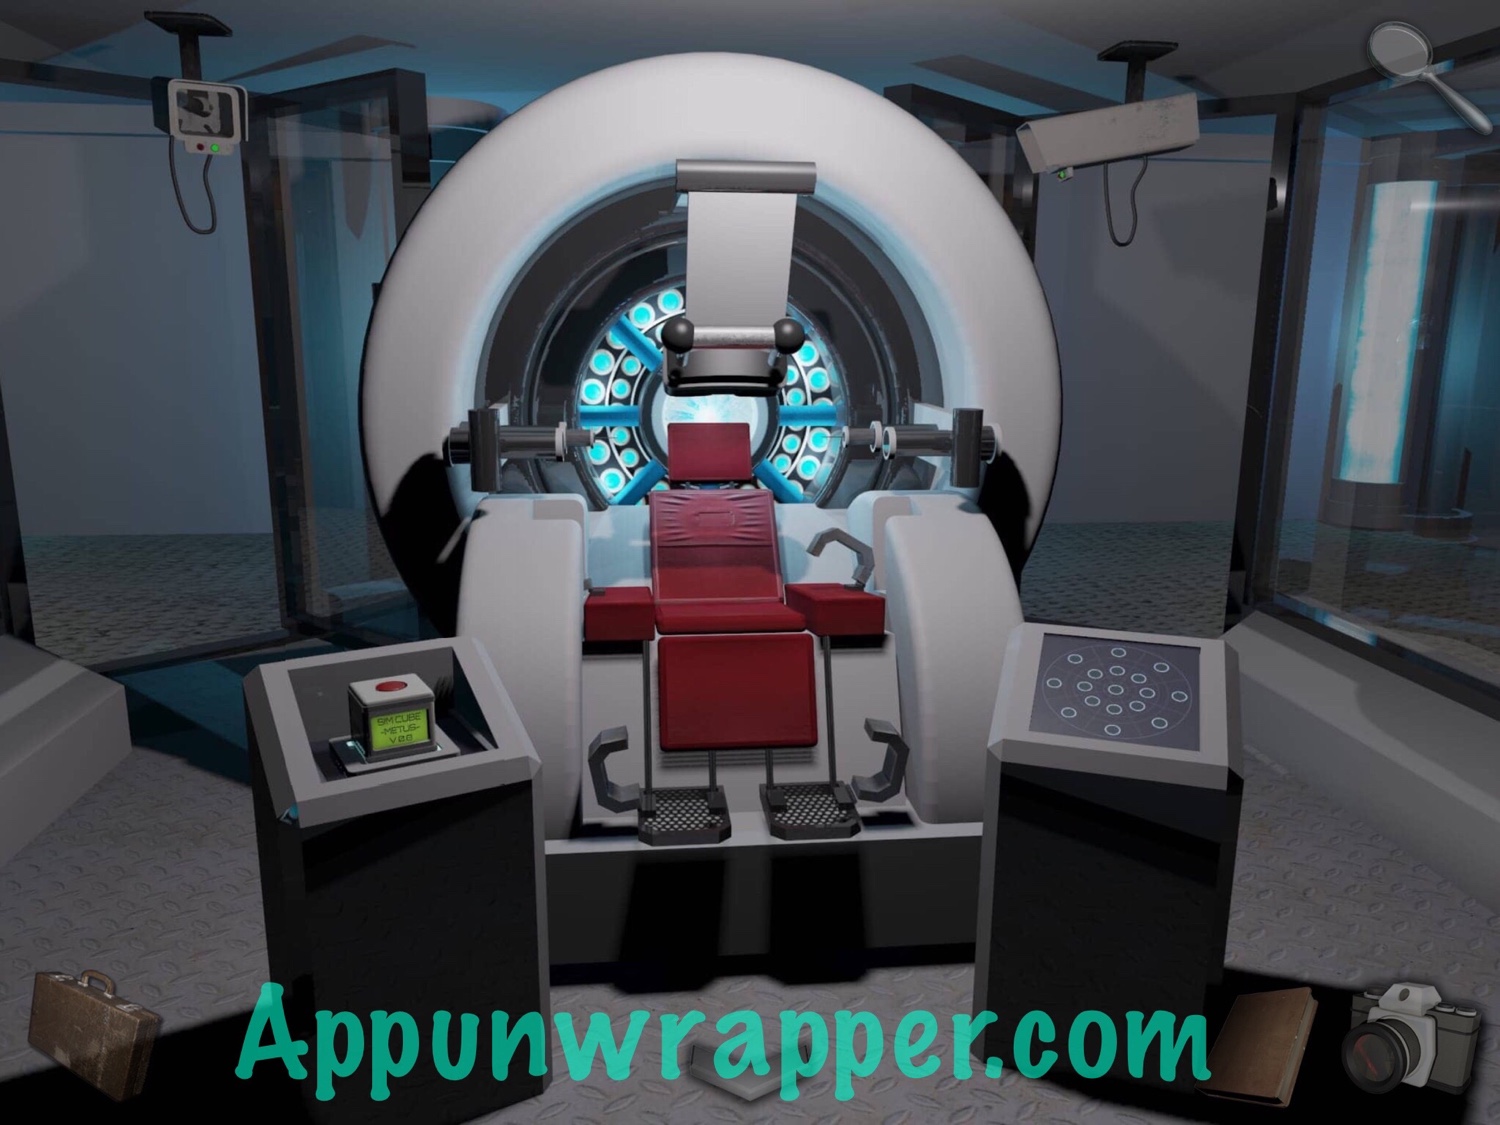

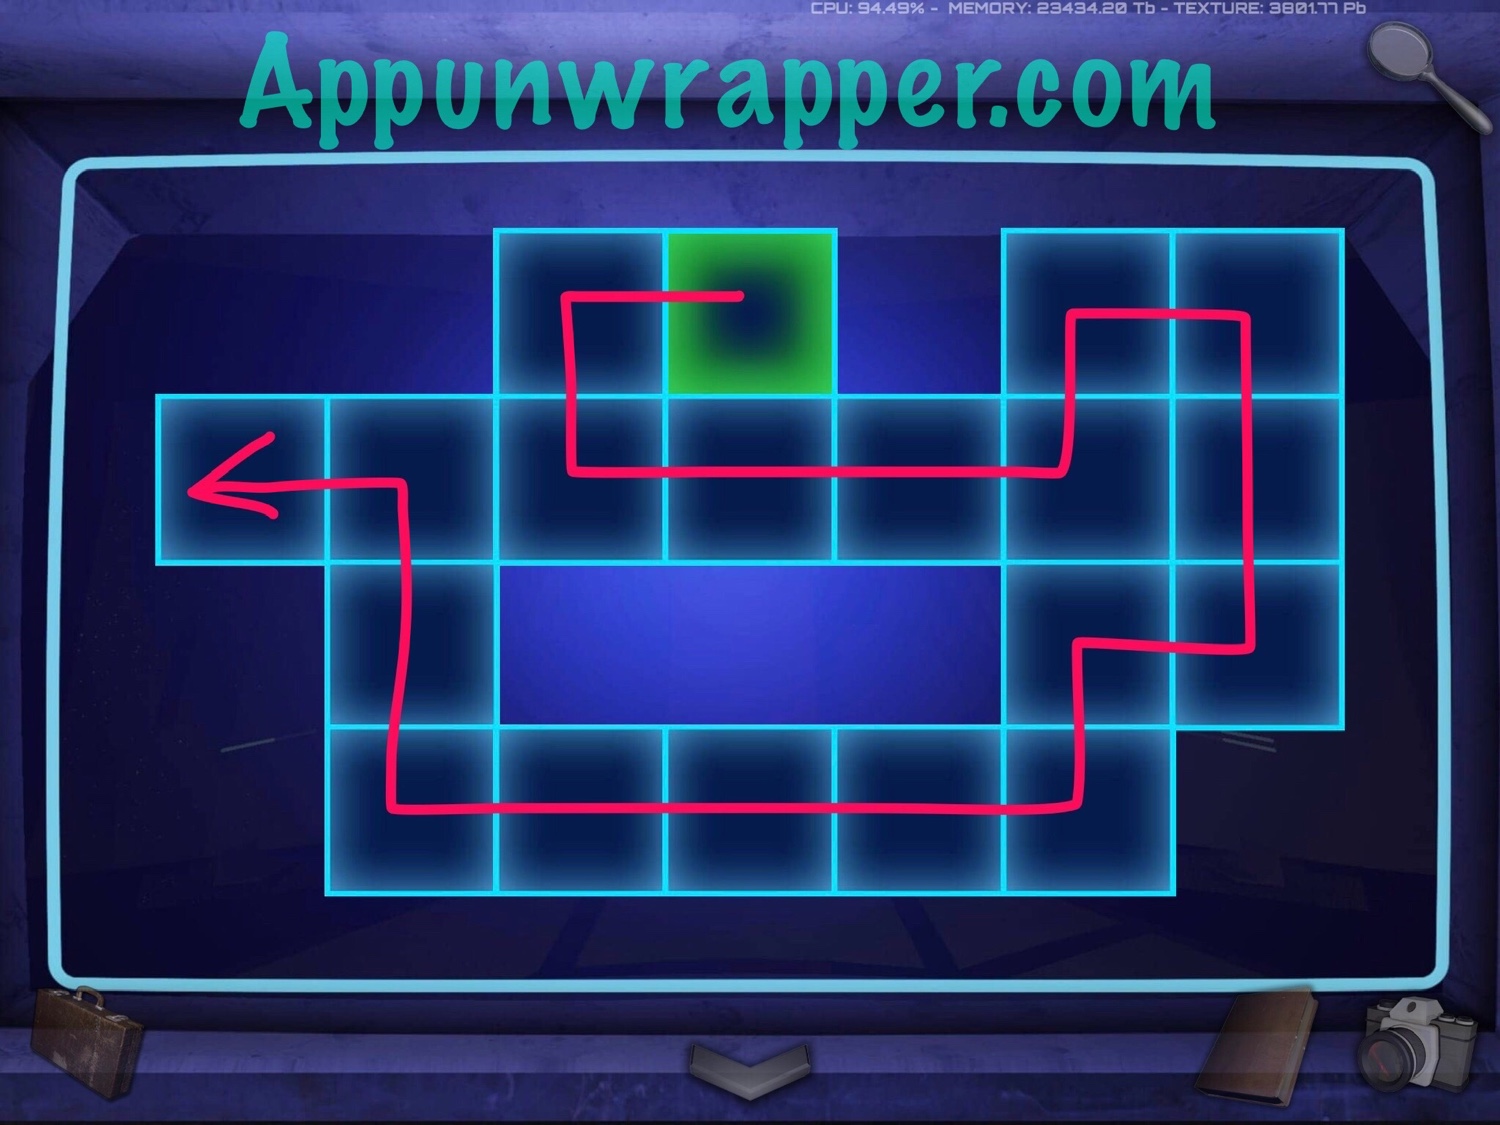
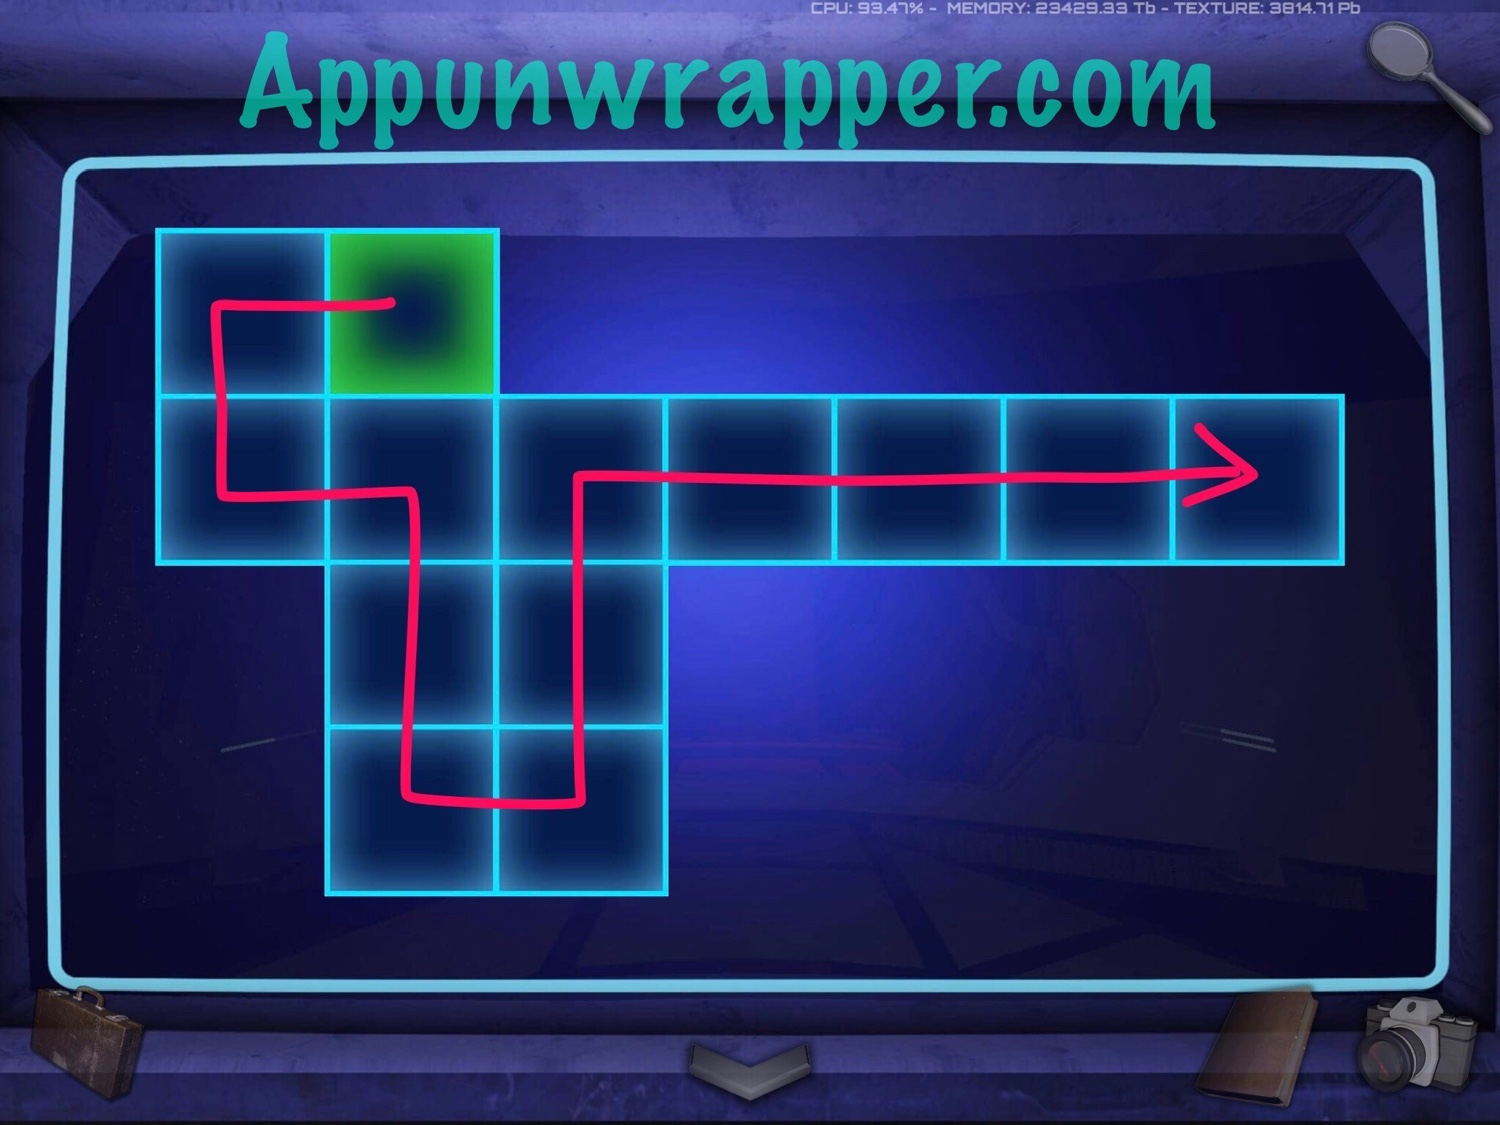
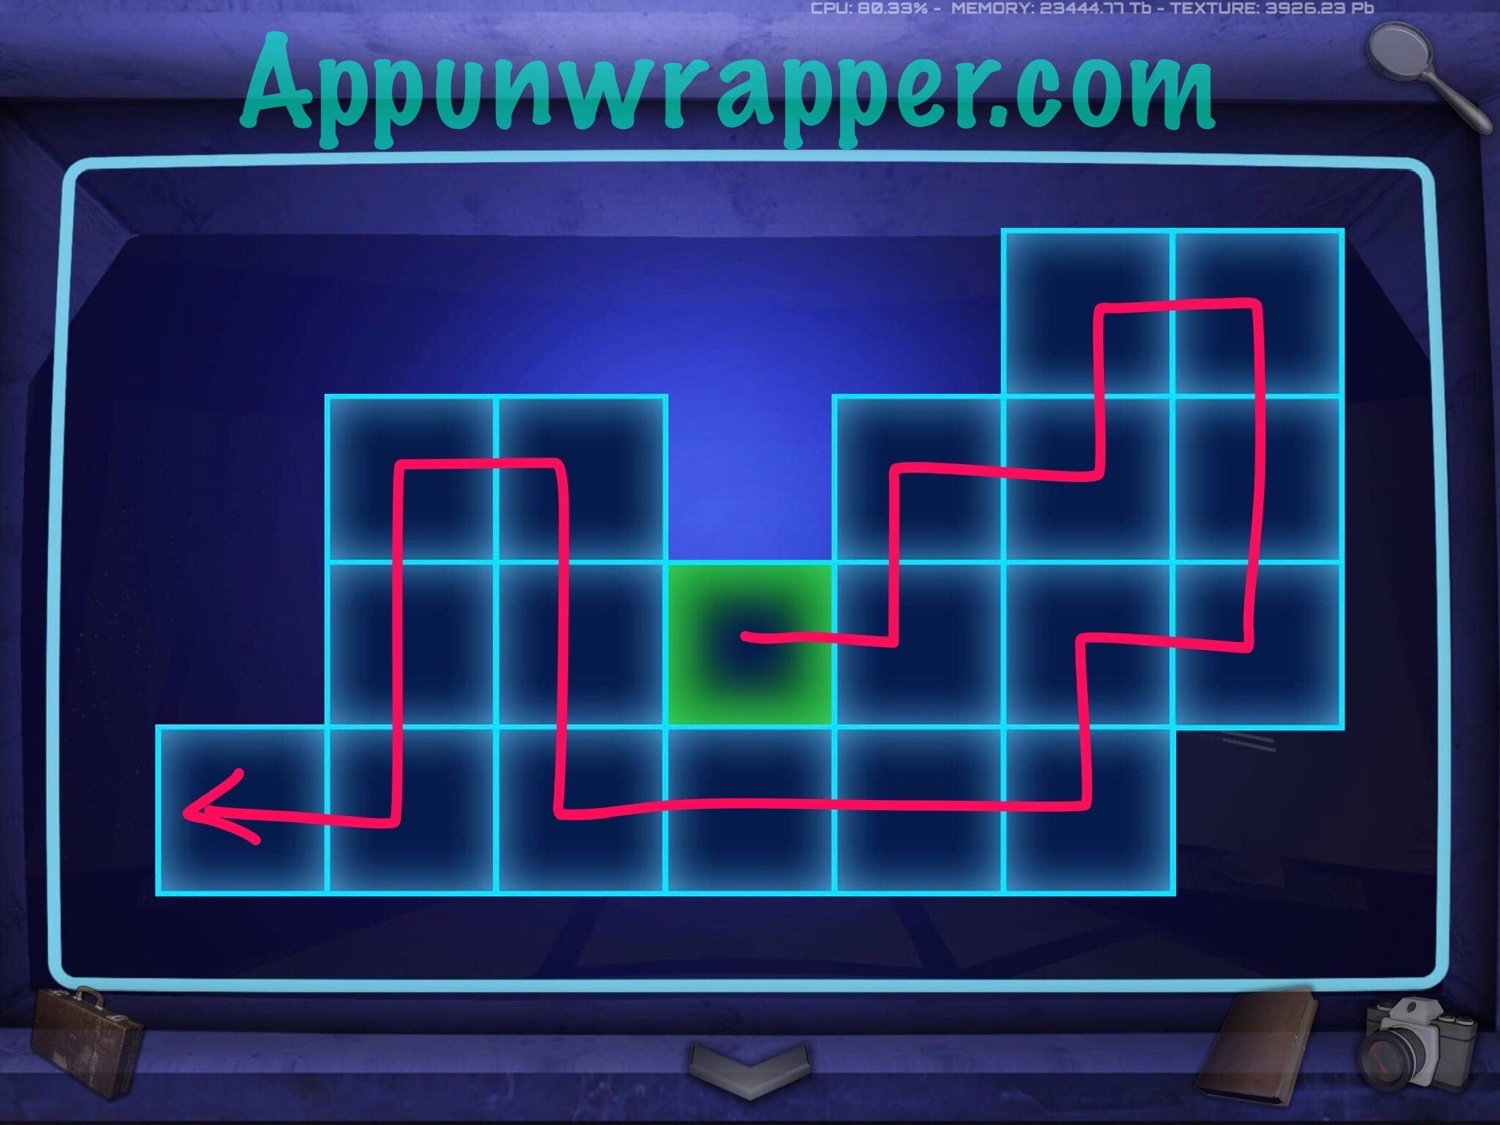
37. You’re now in a virtual reality (VR) game! On a spaceship! We have a new objective to access the bridge and send a distress signal to the surface. Go back a bit and then down the stairs to Bay 01. Head through. The first thing you want to do is solve a series of puzzles where you have to draw a path, starting from the green tile, that covers all tiles. I’ve posted images for each below. Then pick up the UV torch.
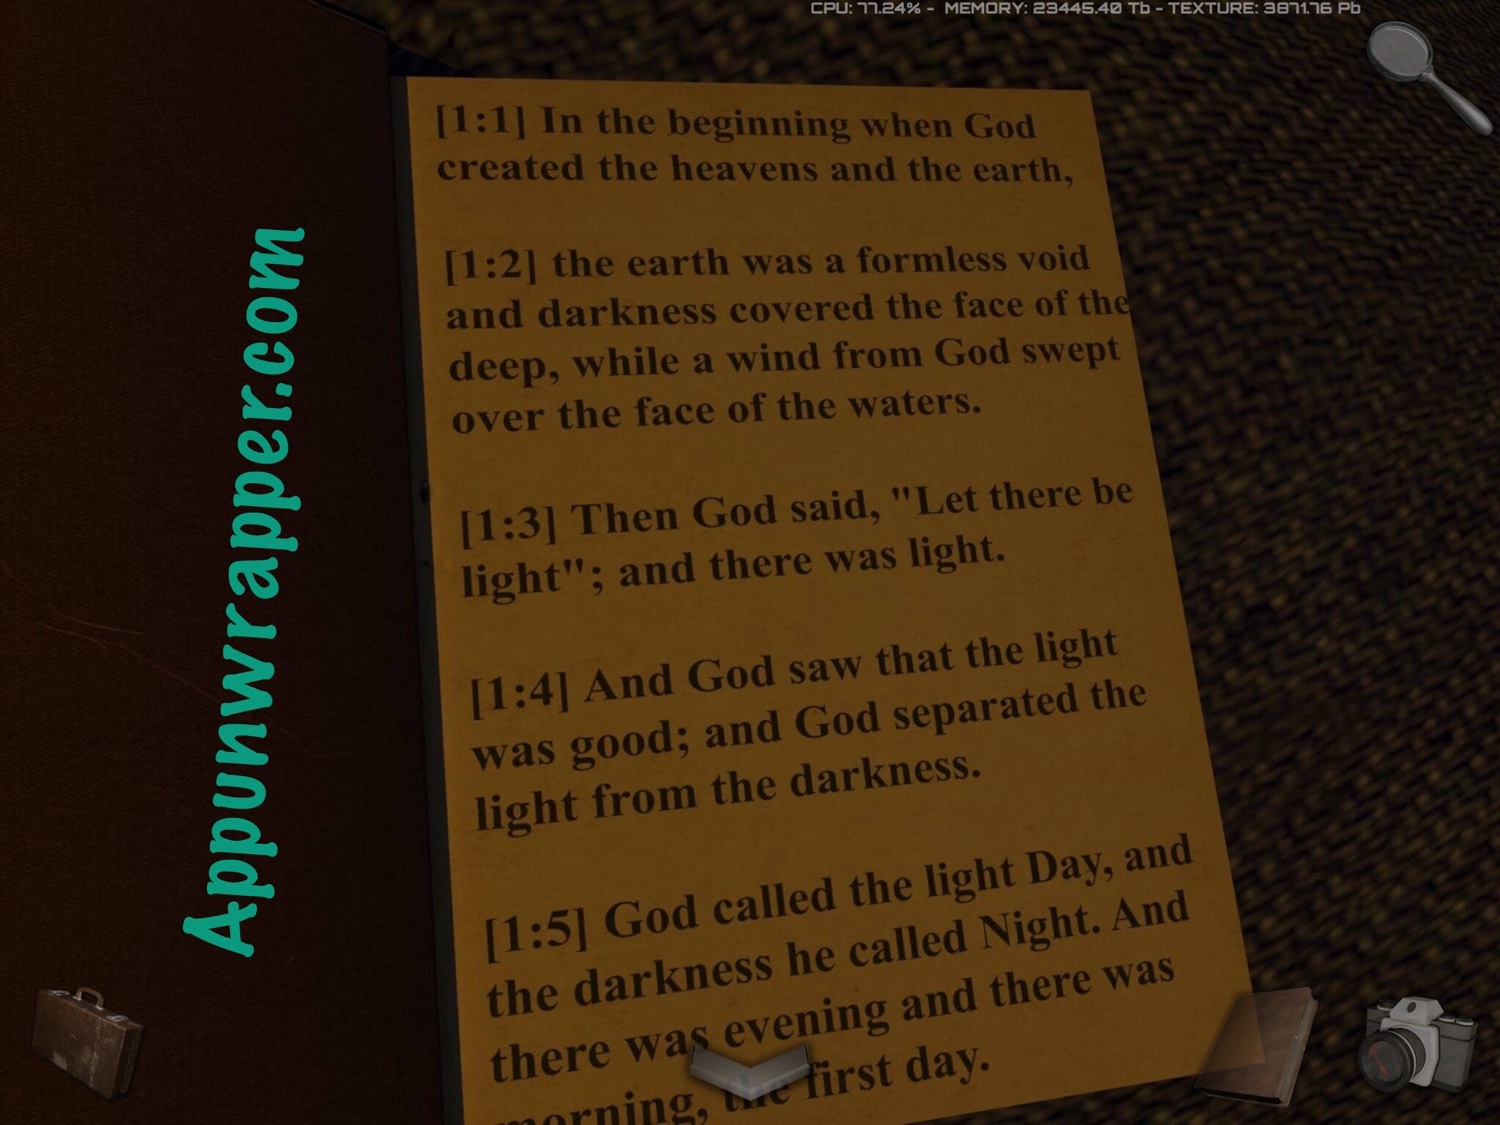
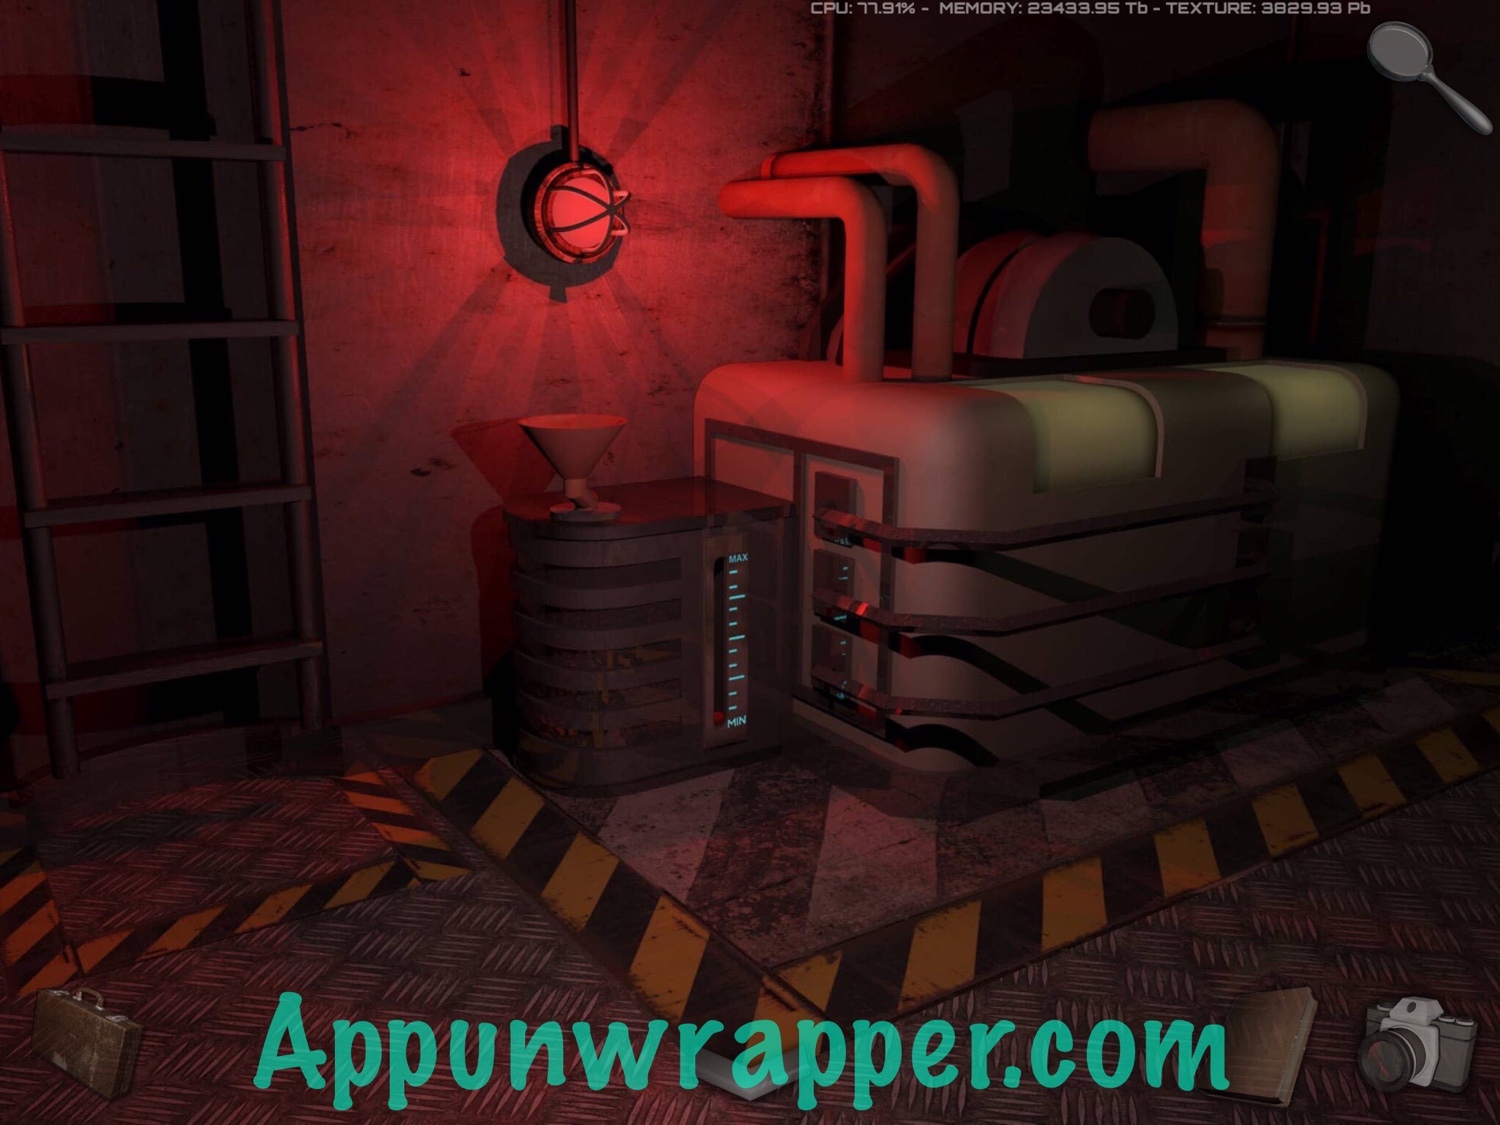
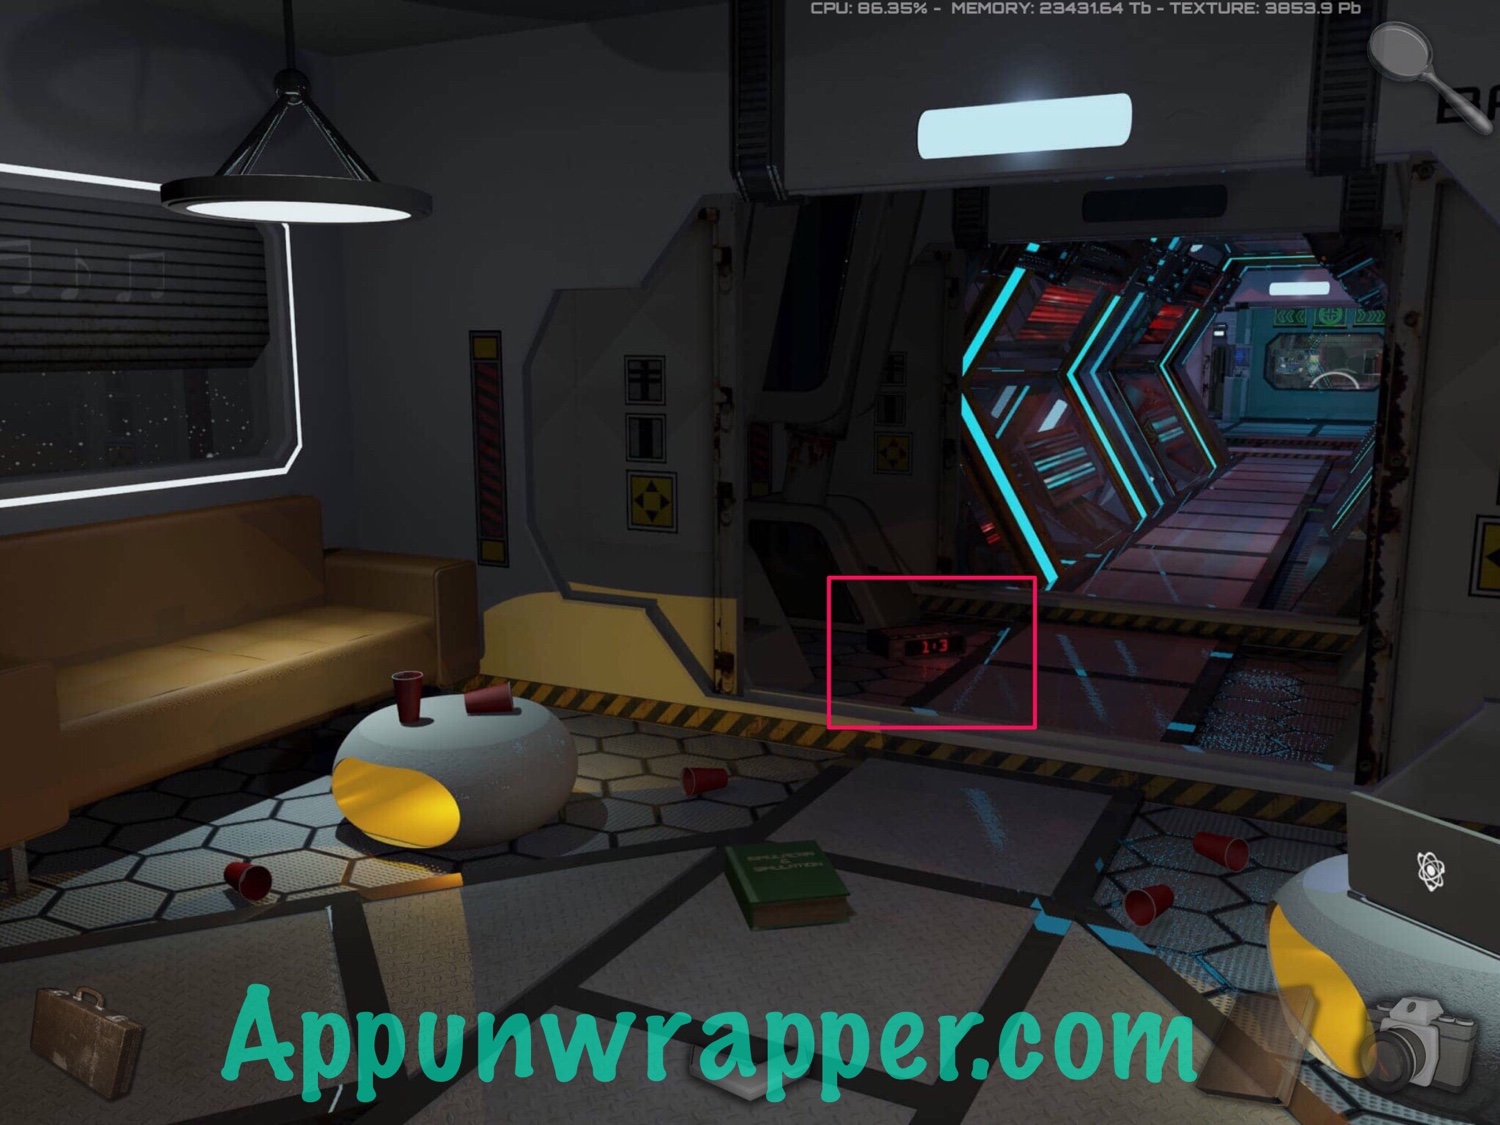
38. Turn to the left. Read through the Bible on the floor. If you tap on it, it tells you to focus on passage 1:3, which says, “Let there be light.”
39. Go to the window. Press the big button to make it slide up. Notice that there’s a plus sign in the middle, and as the window goes up and down, the plus sign lines up with a red square or a red circle. Take a photo of each one.
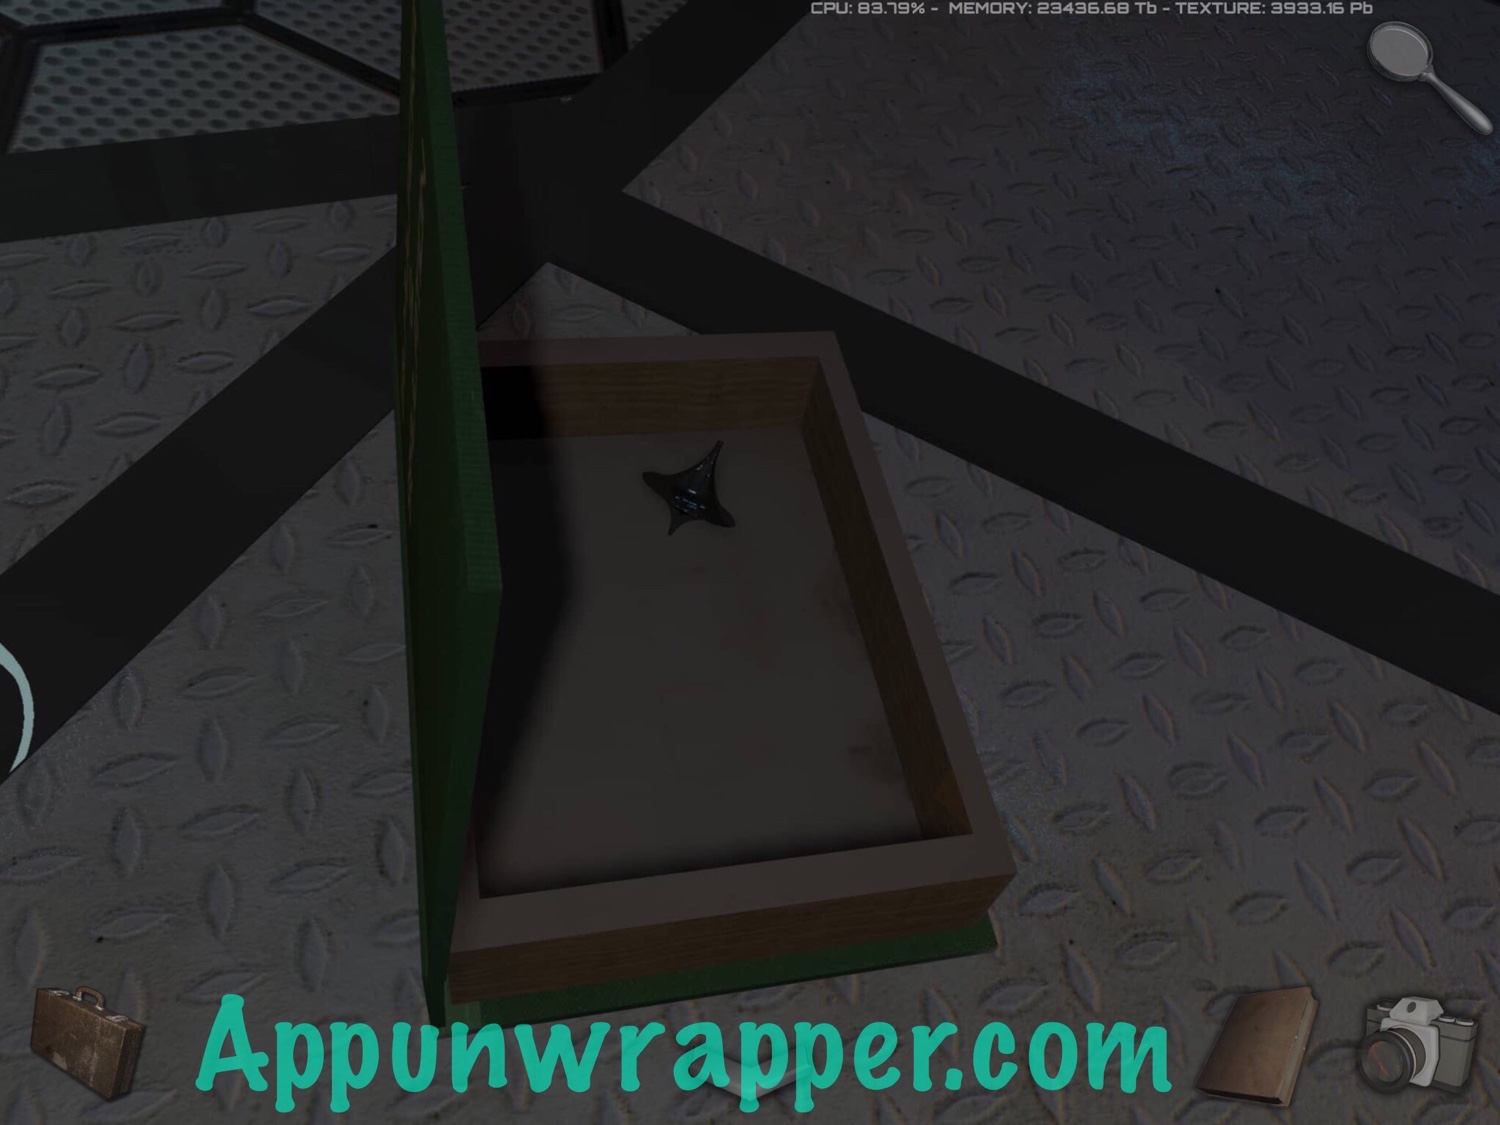
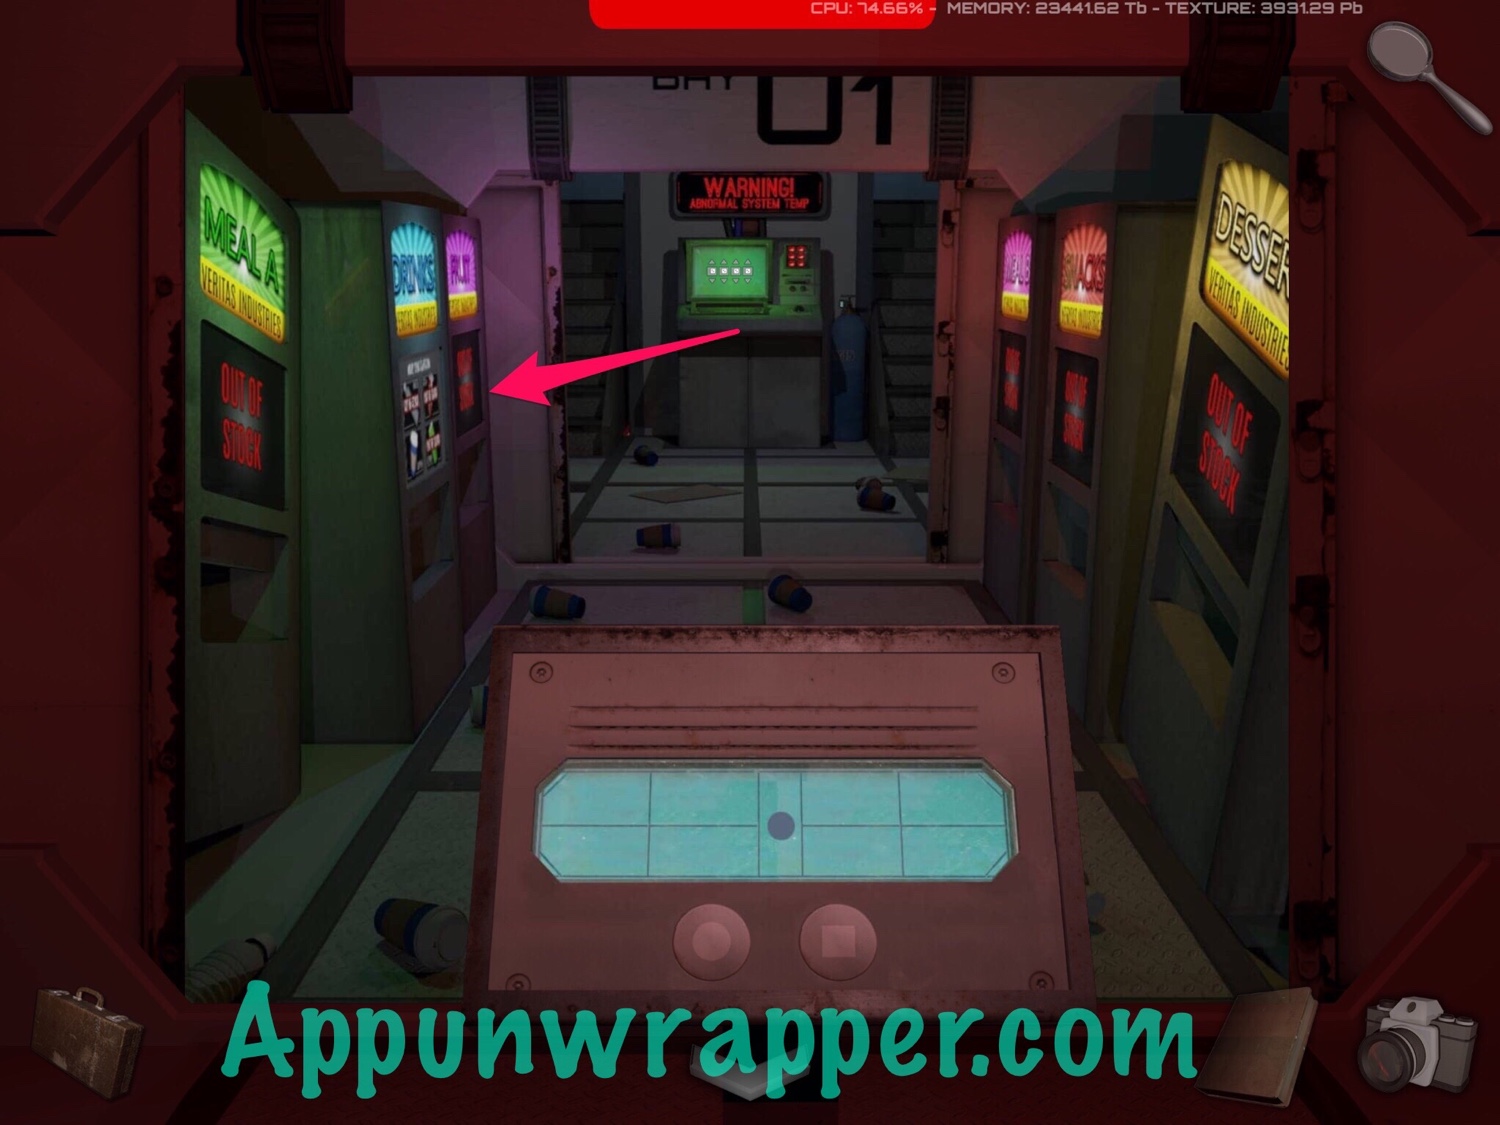
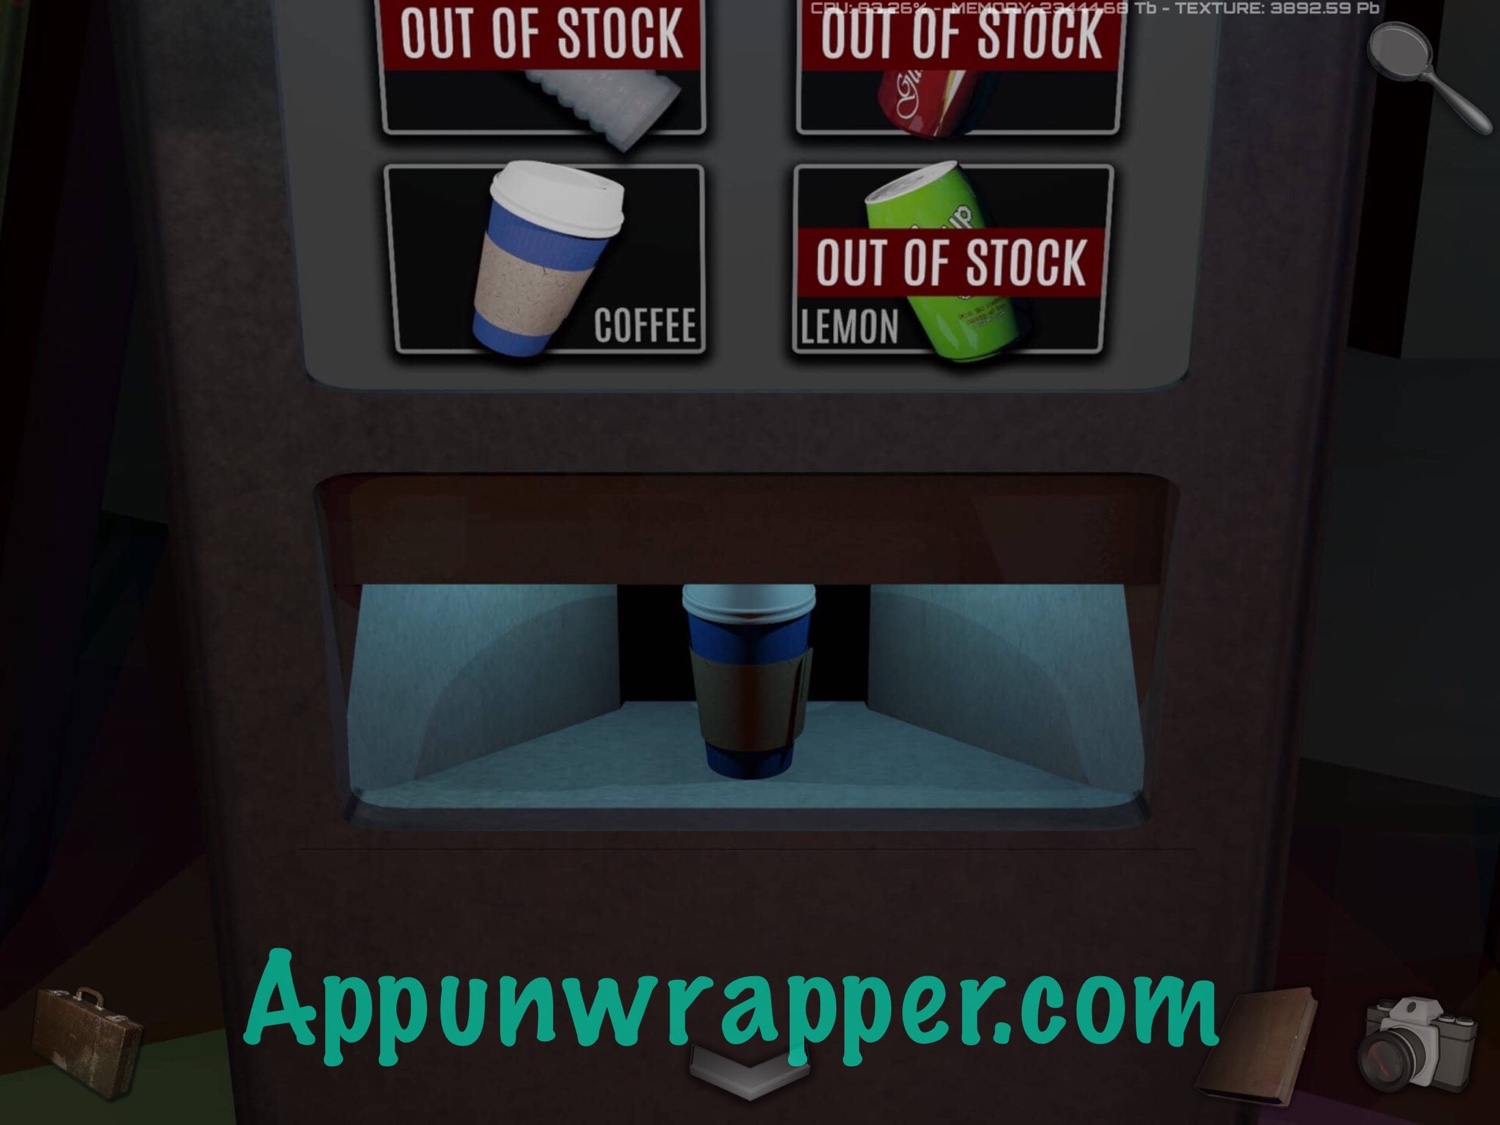
40. Go back and continue straight ahead. Open the green book on the floor and grab the spinning top from inside.
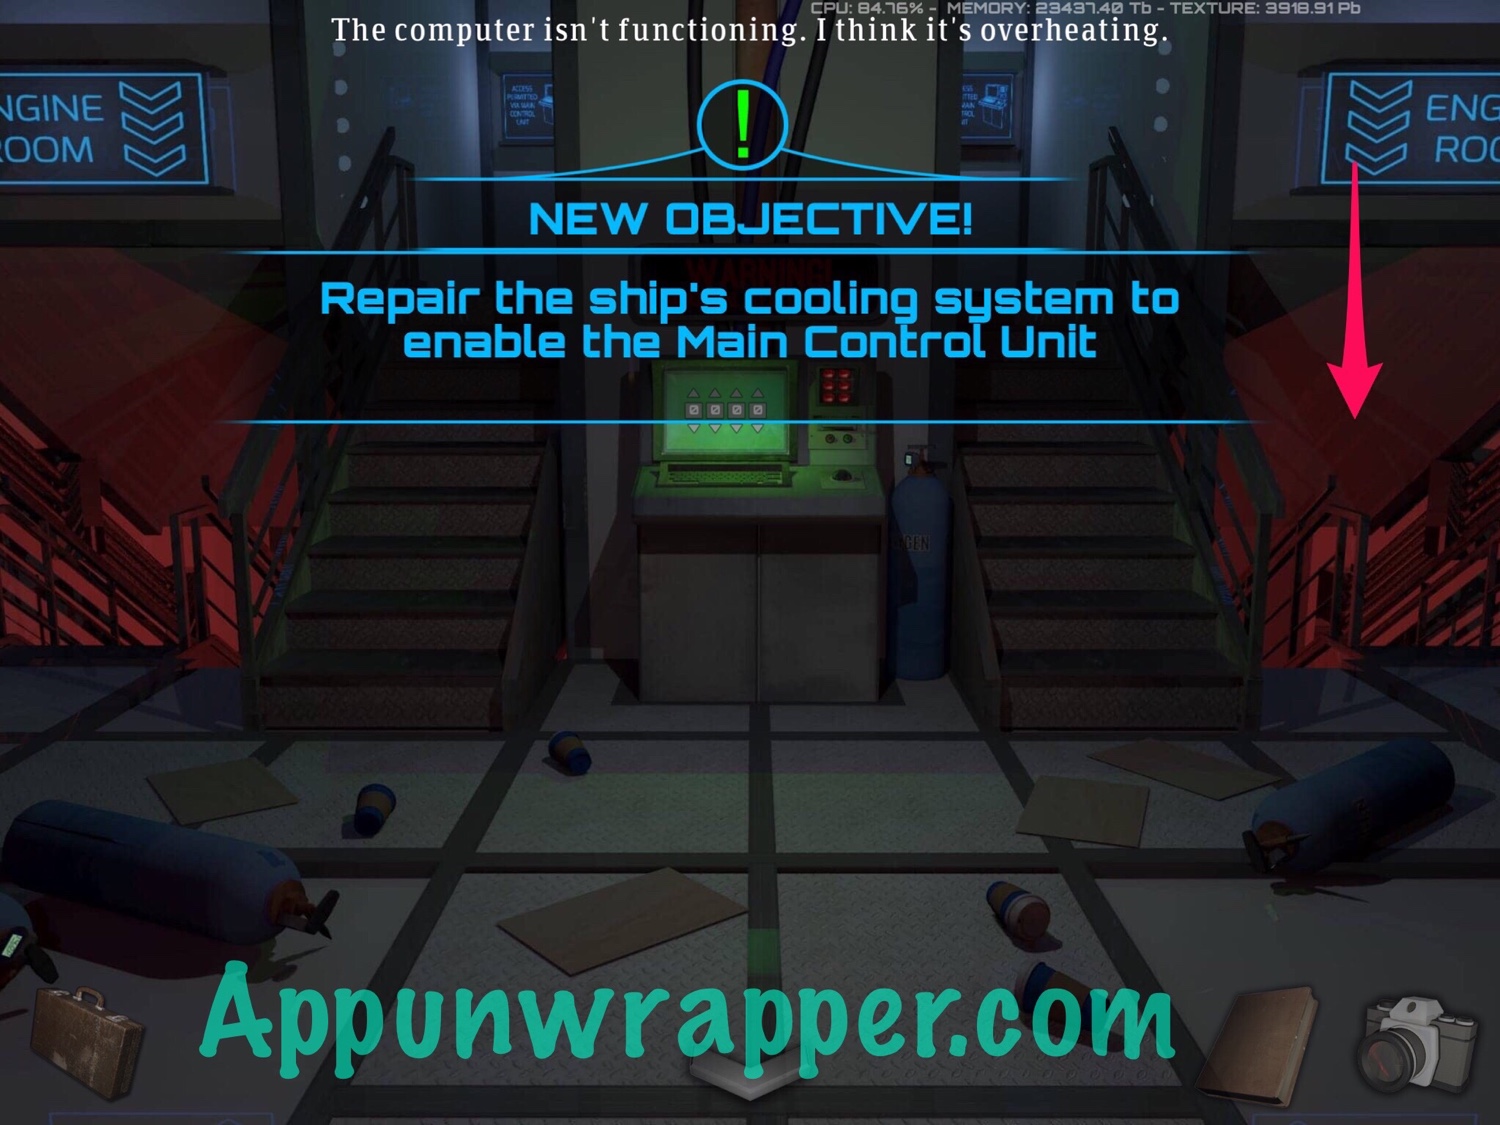
41. Notice the black blinds over the window to the left. Take a look and see some music notes. The UV torch has an ampersand on it. Shine the torch light on the music notes for a clue. It shows the Pi symbol, no rain, a wallet, and a hat. Take a photo of it.
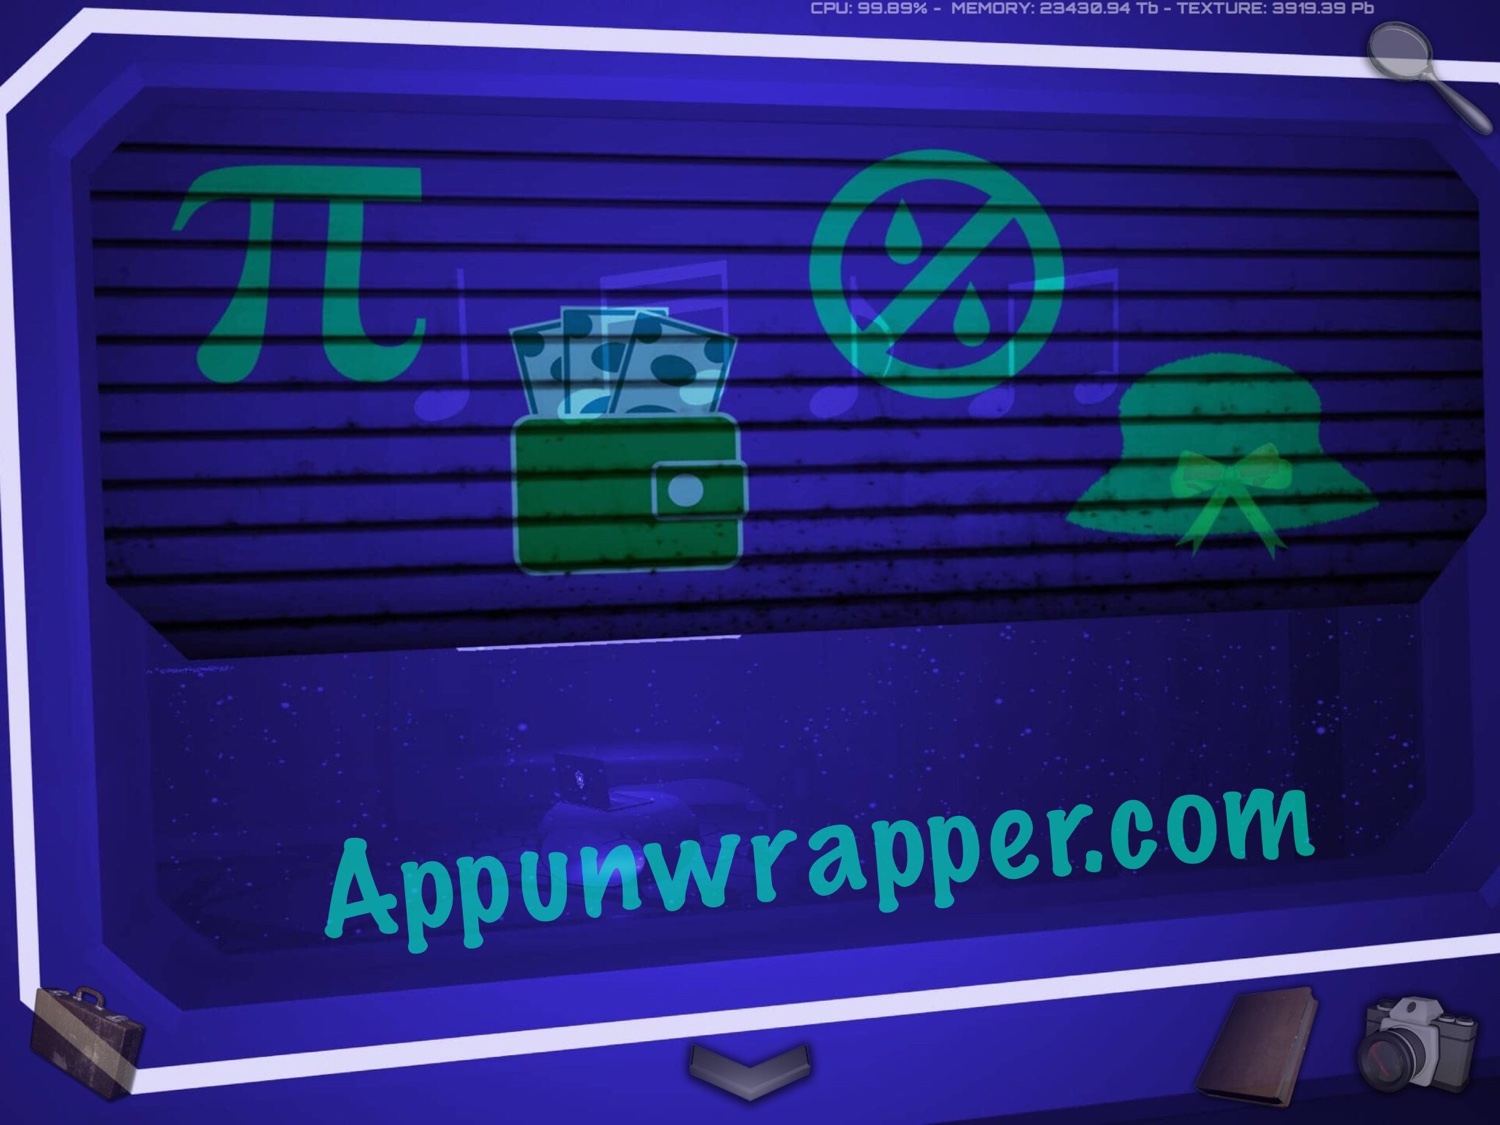
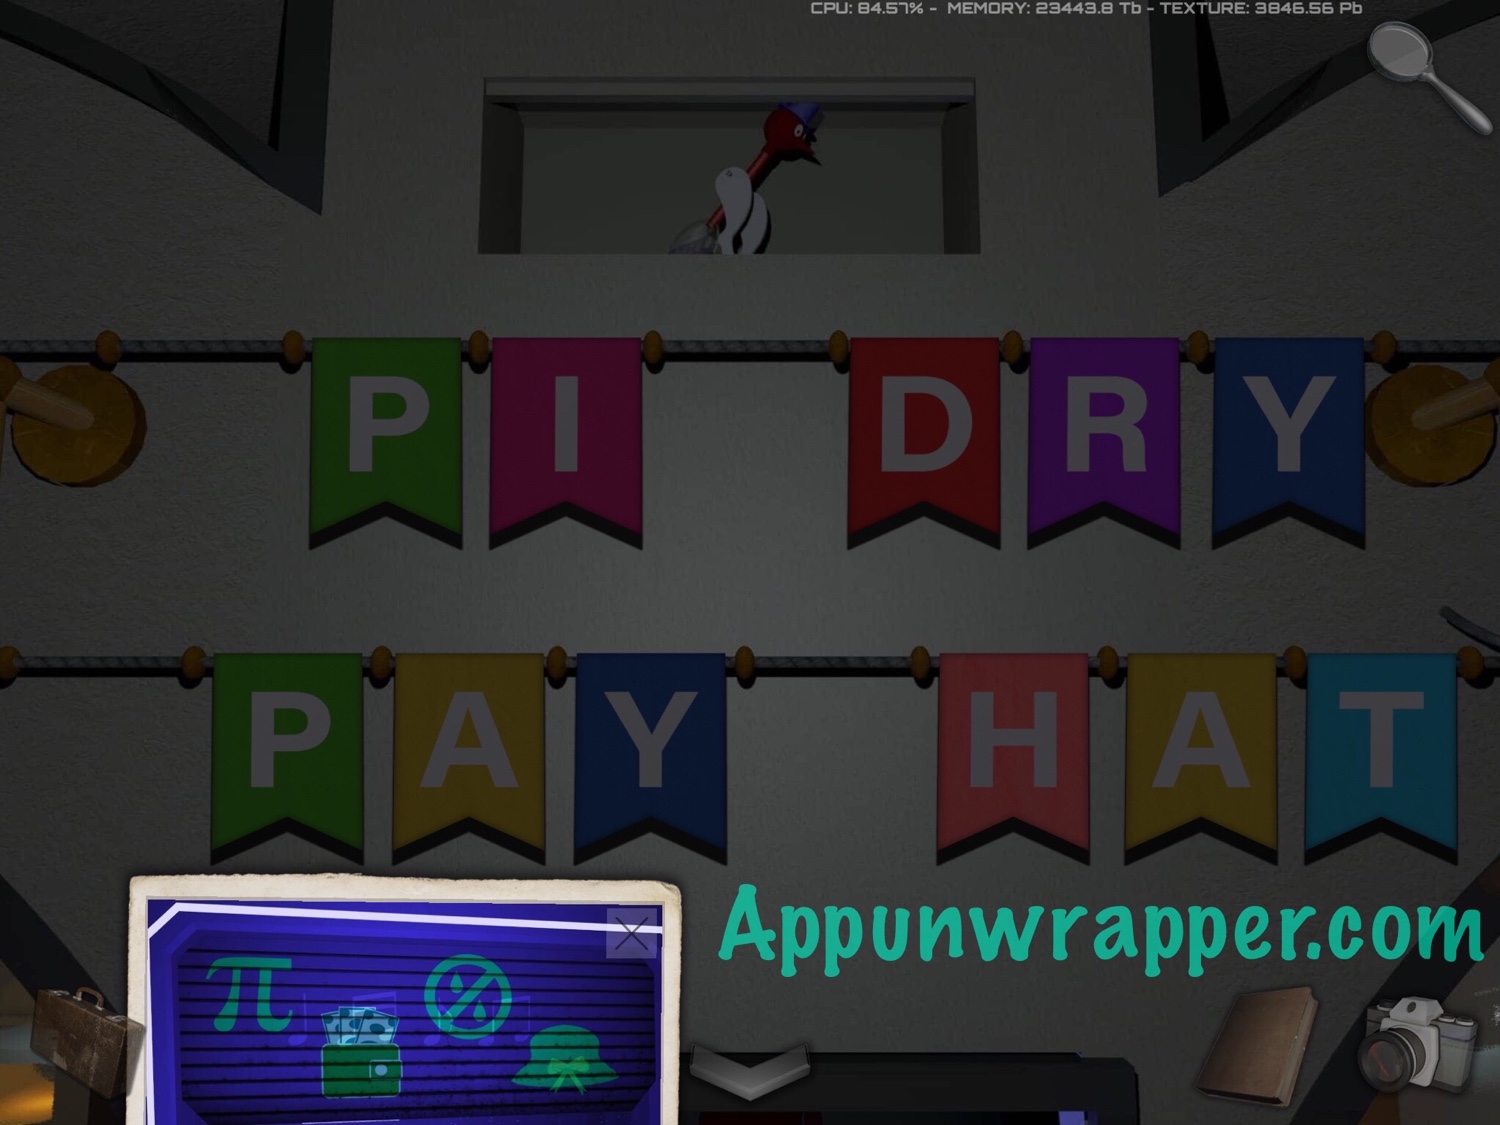
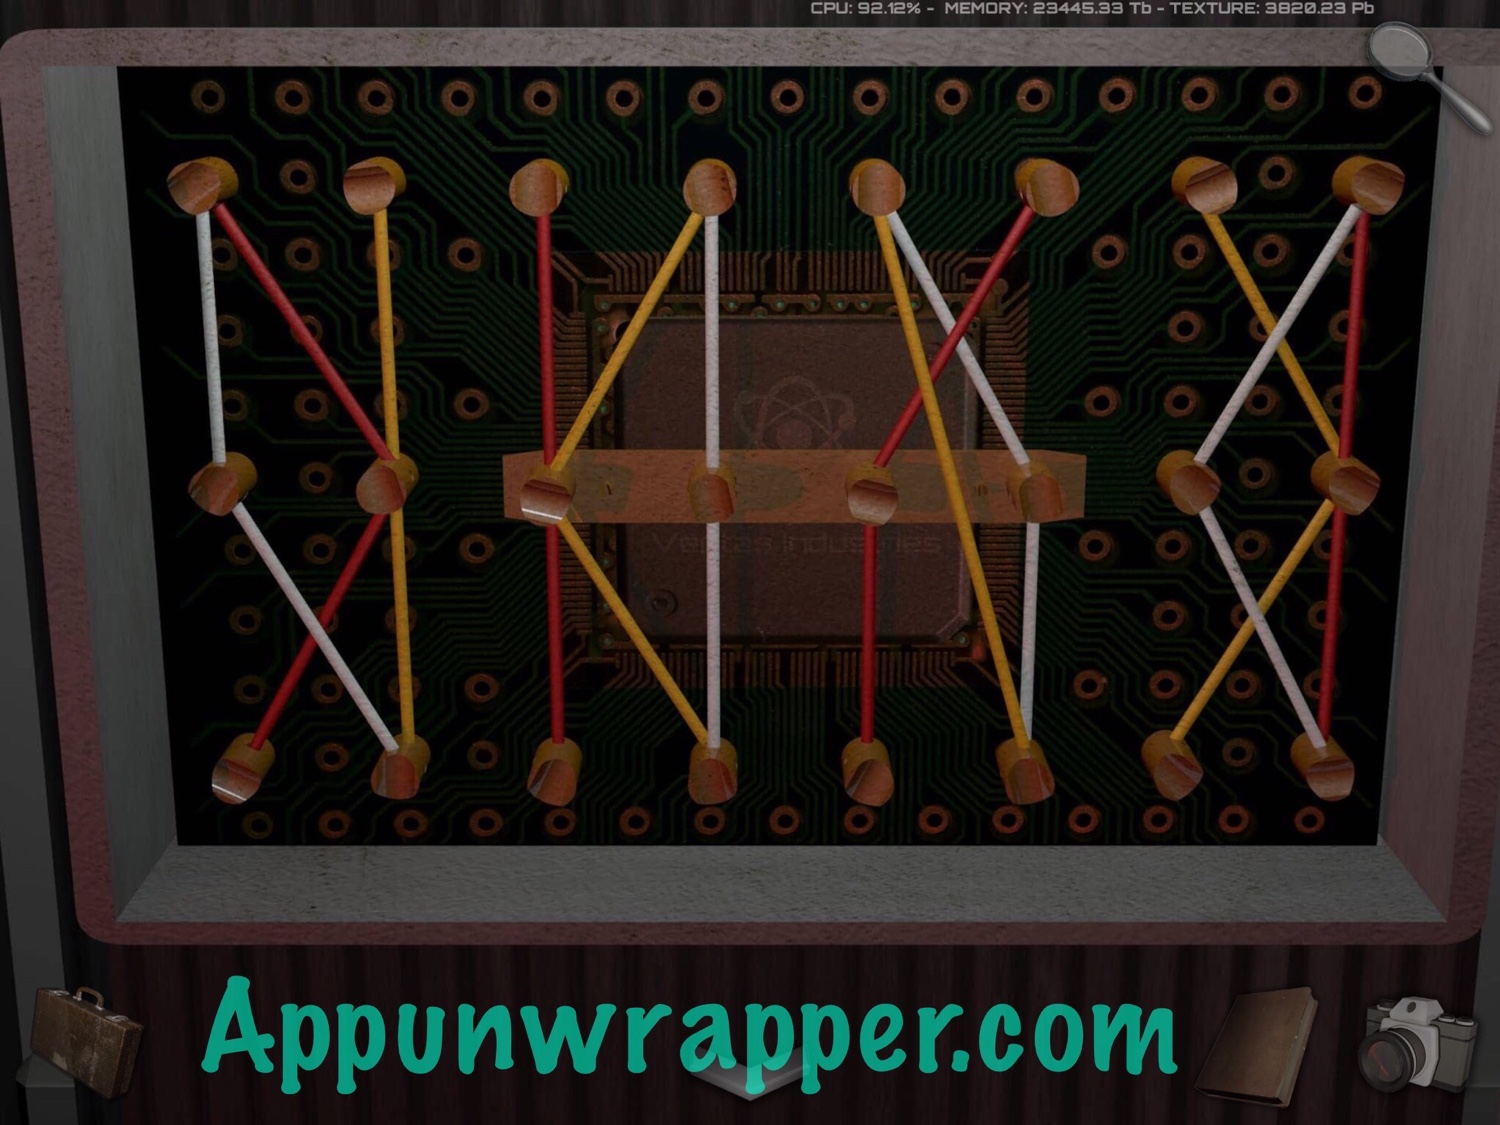
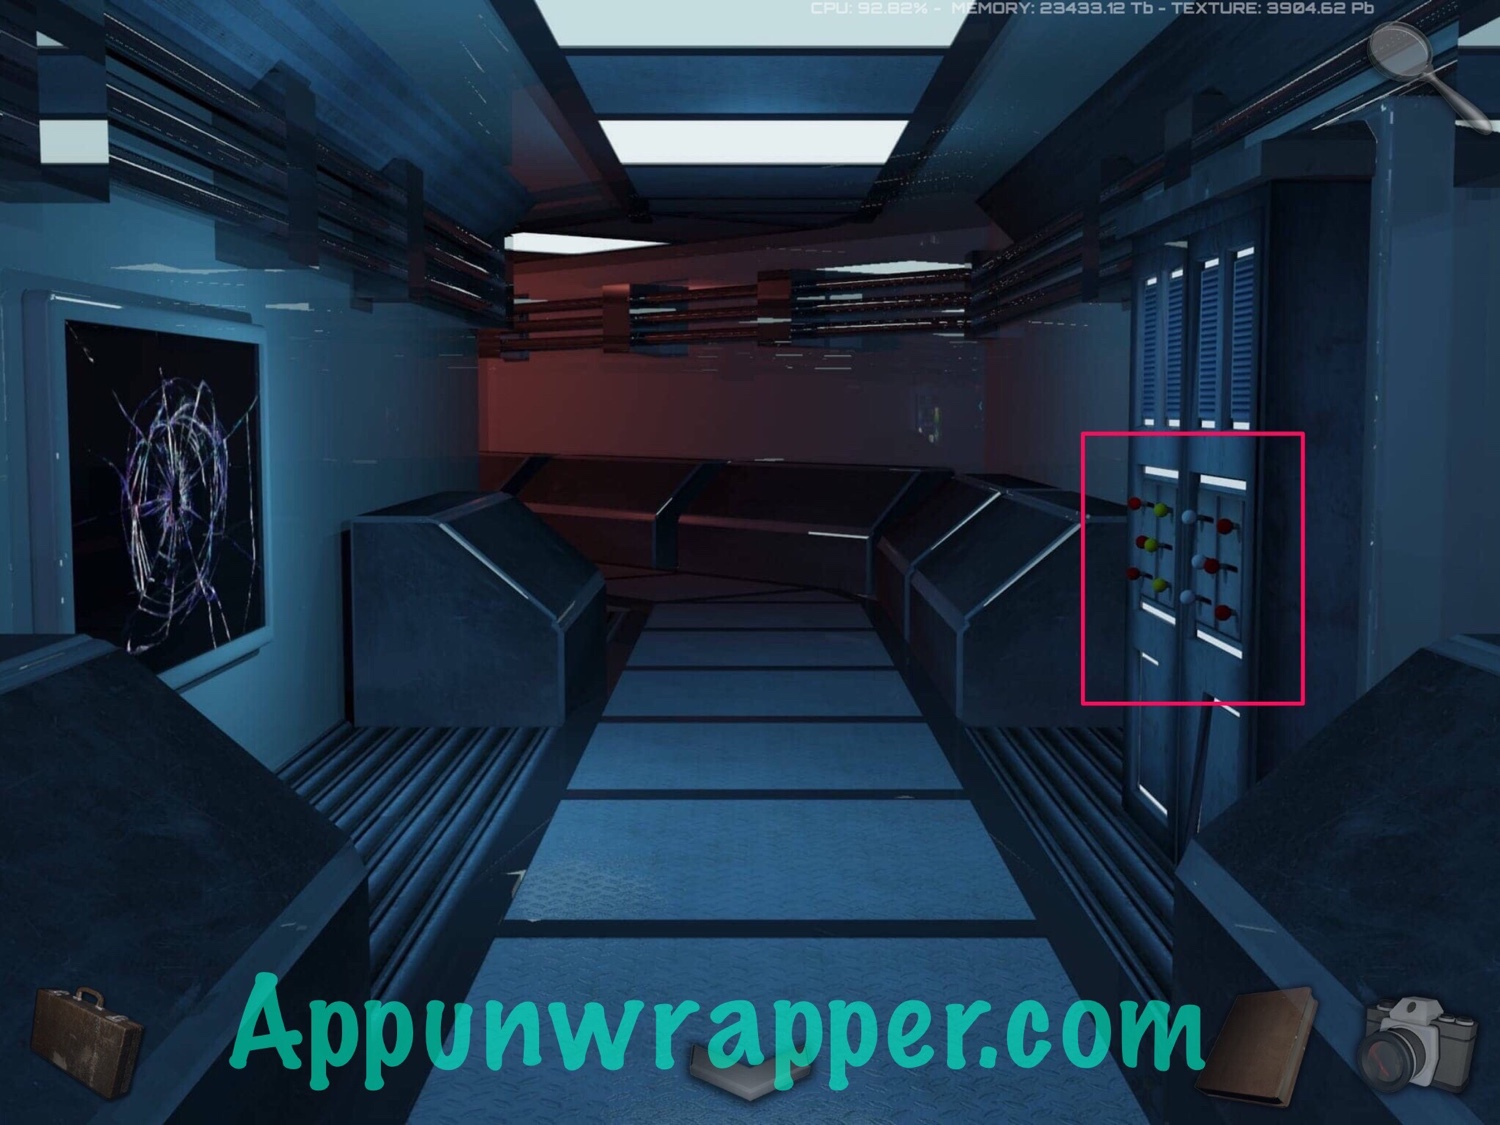
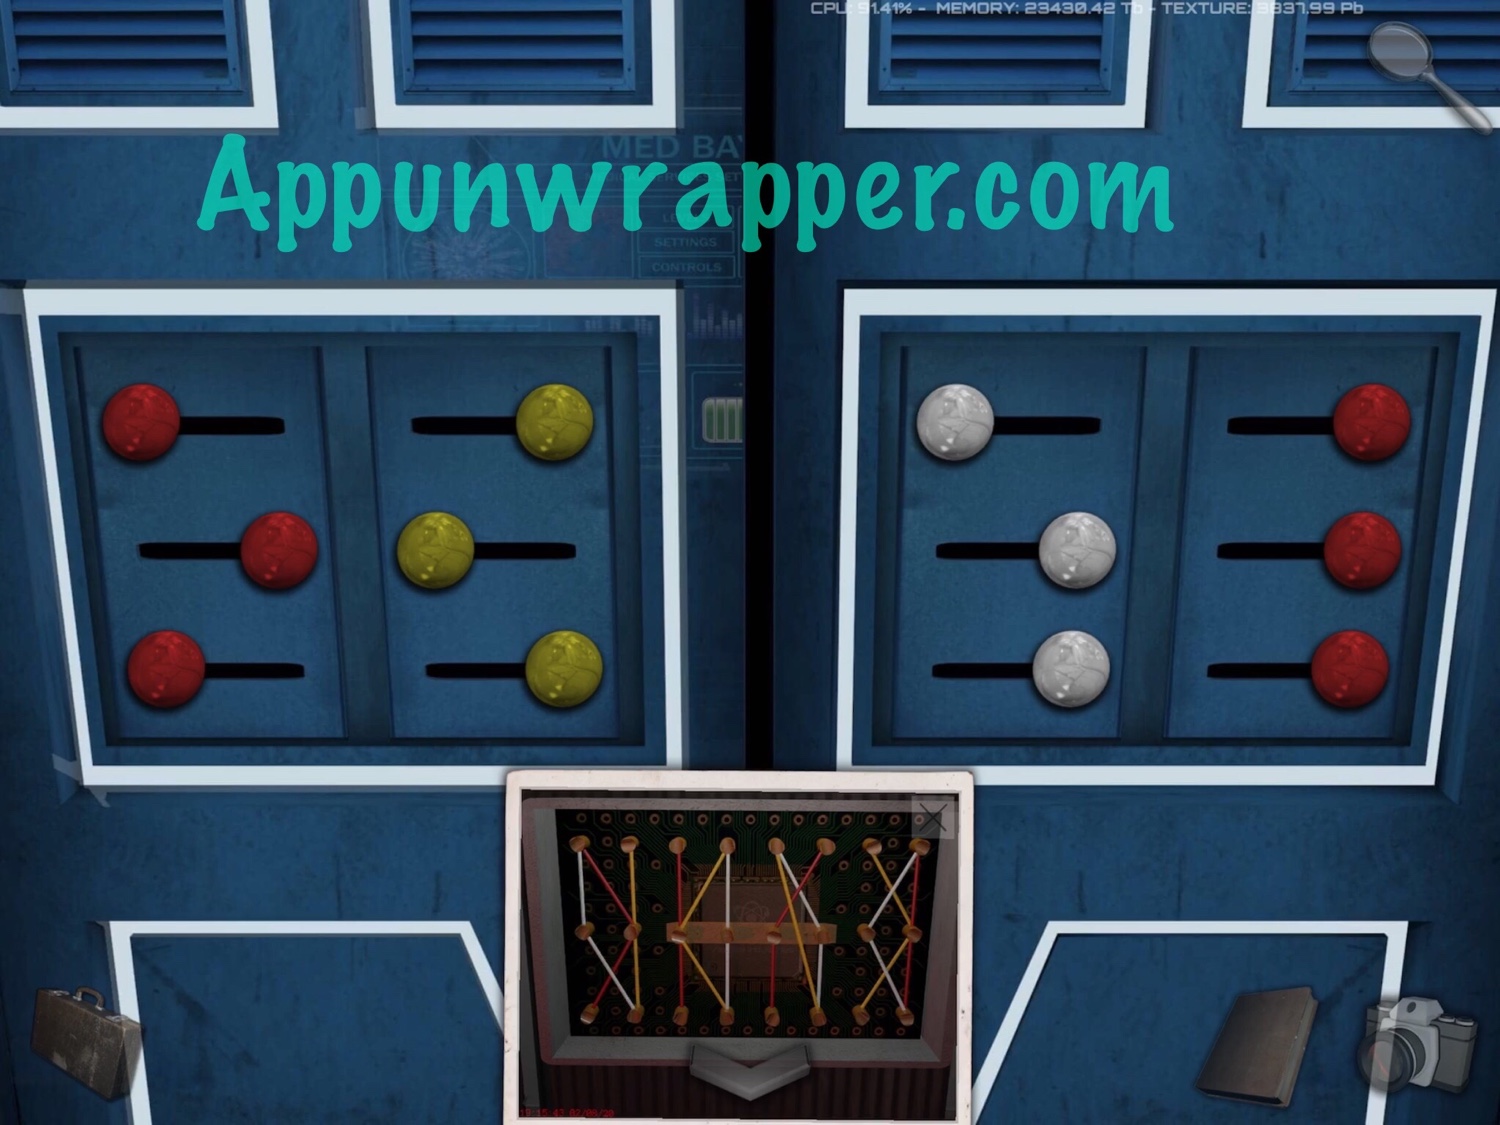
42. Go back a bit and notice the HAPPY BIRTHDAY flags. Arrange them so they match the clues from the window —
PI DRY
PAY HAT
Then take the drinking bird desk toy.
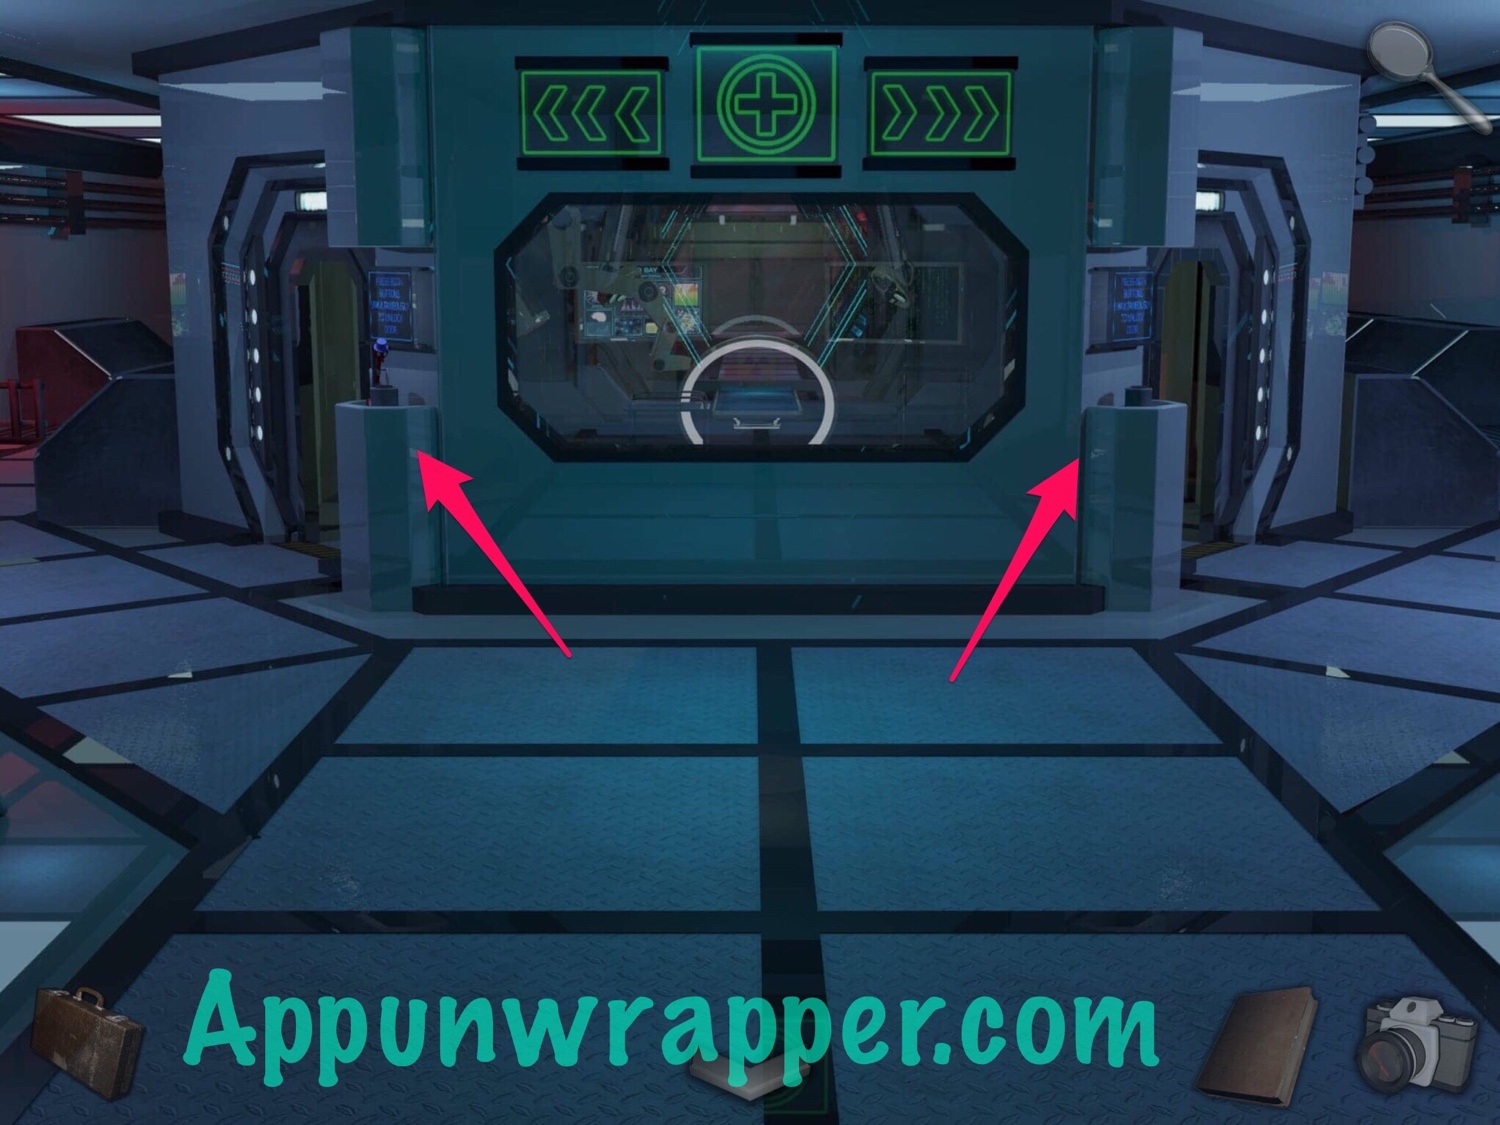
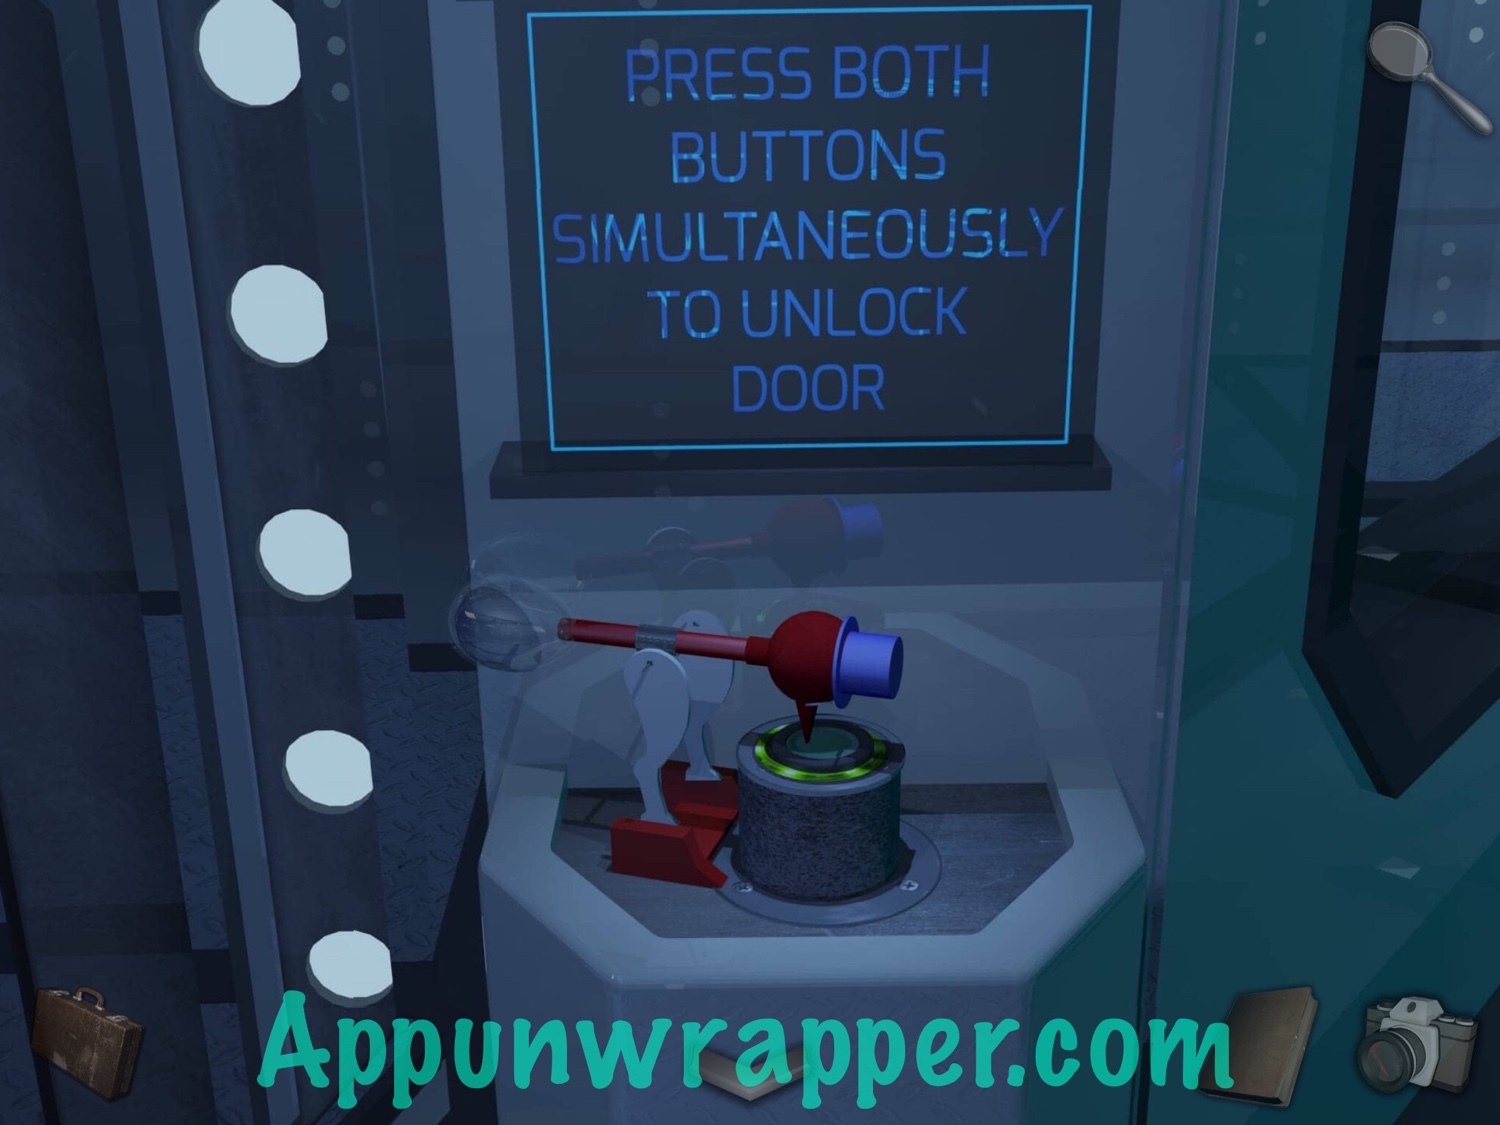
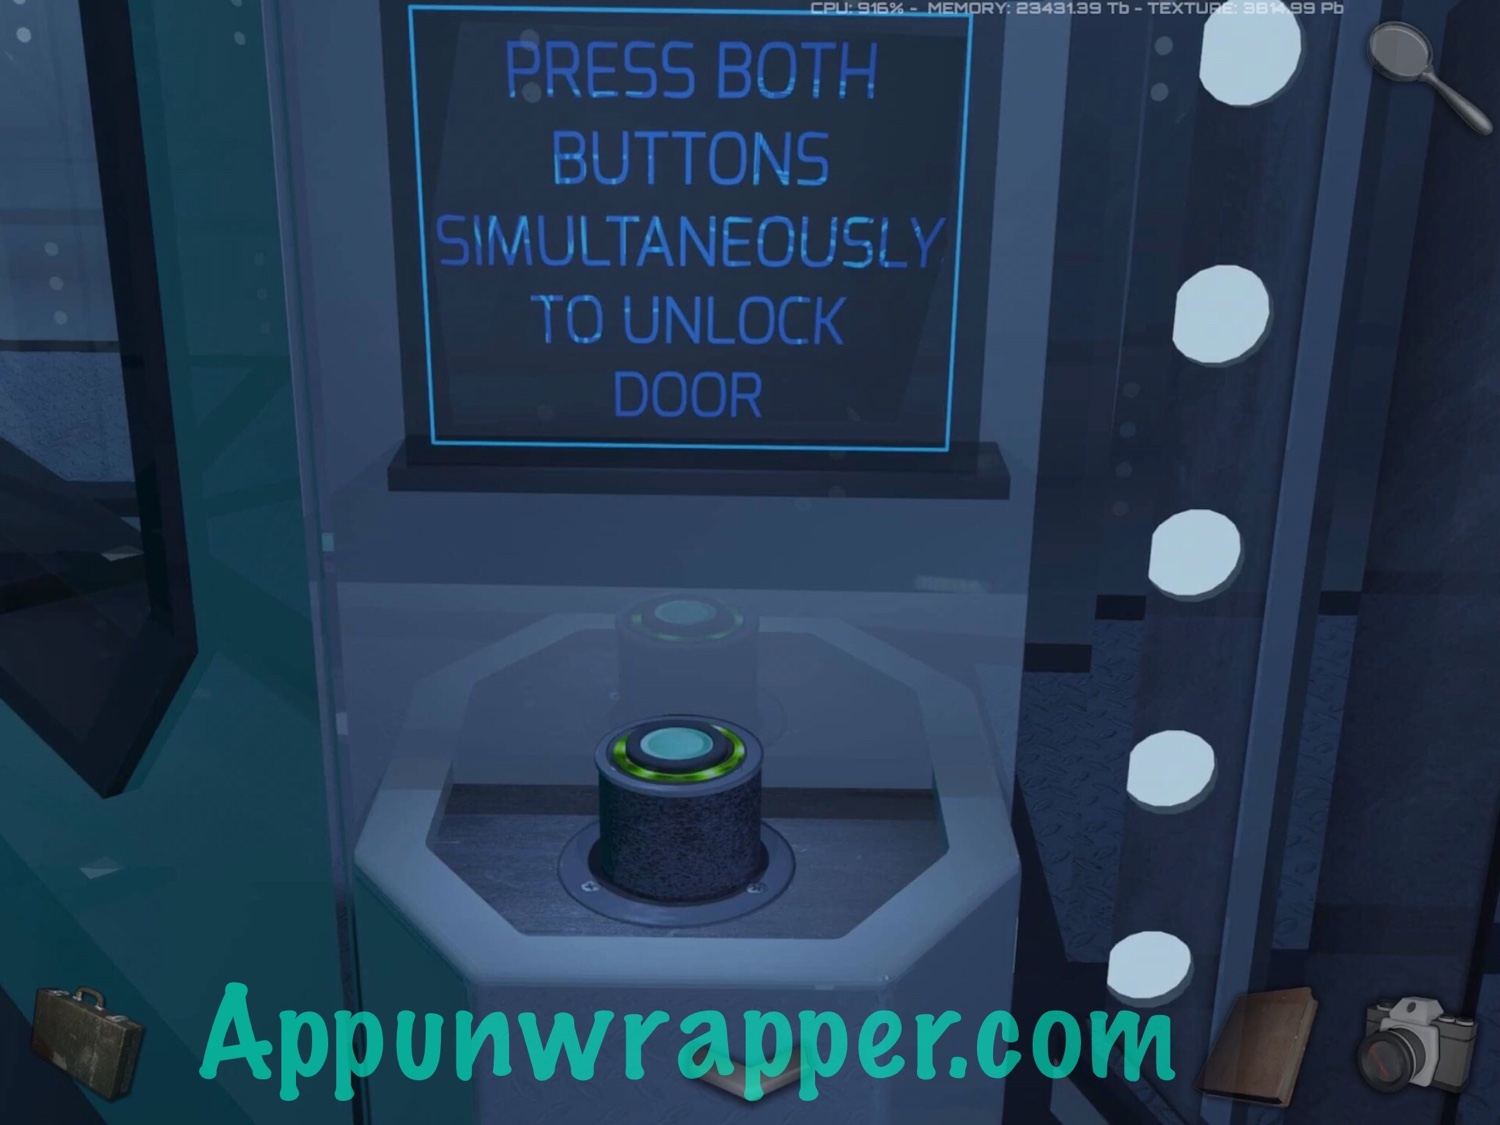
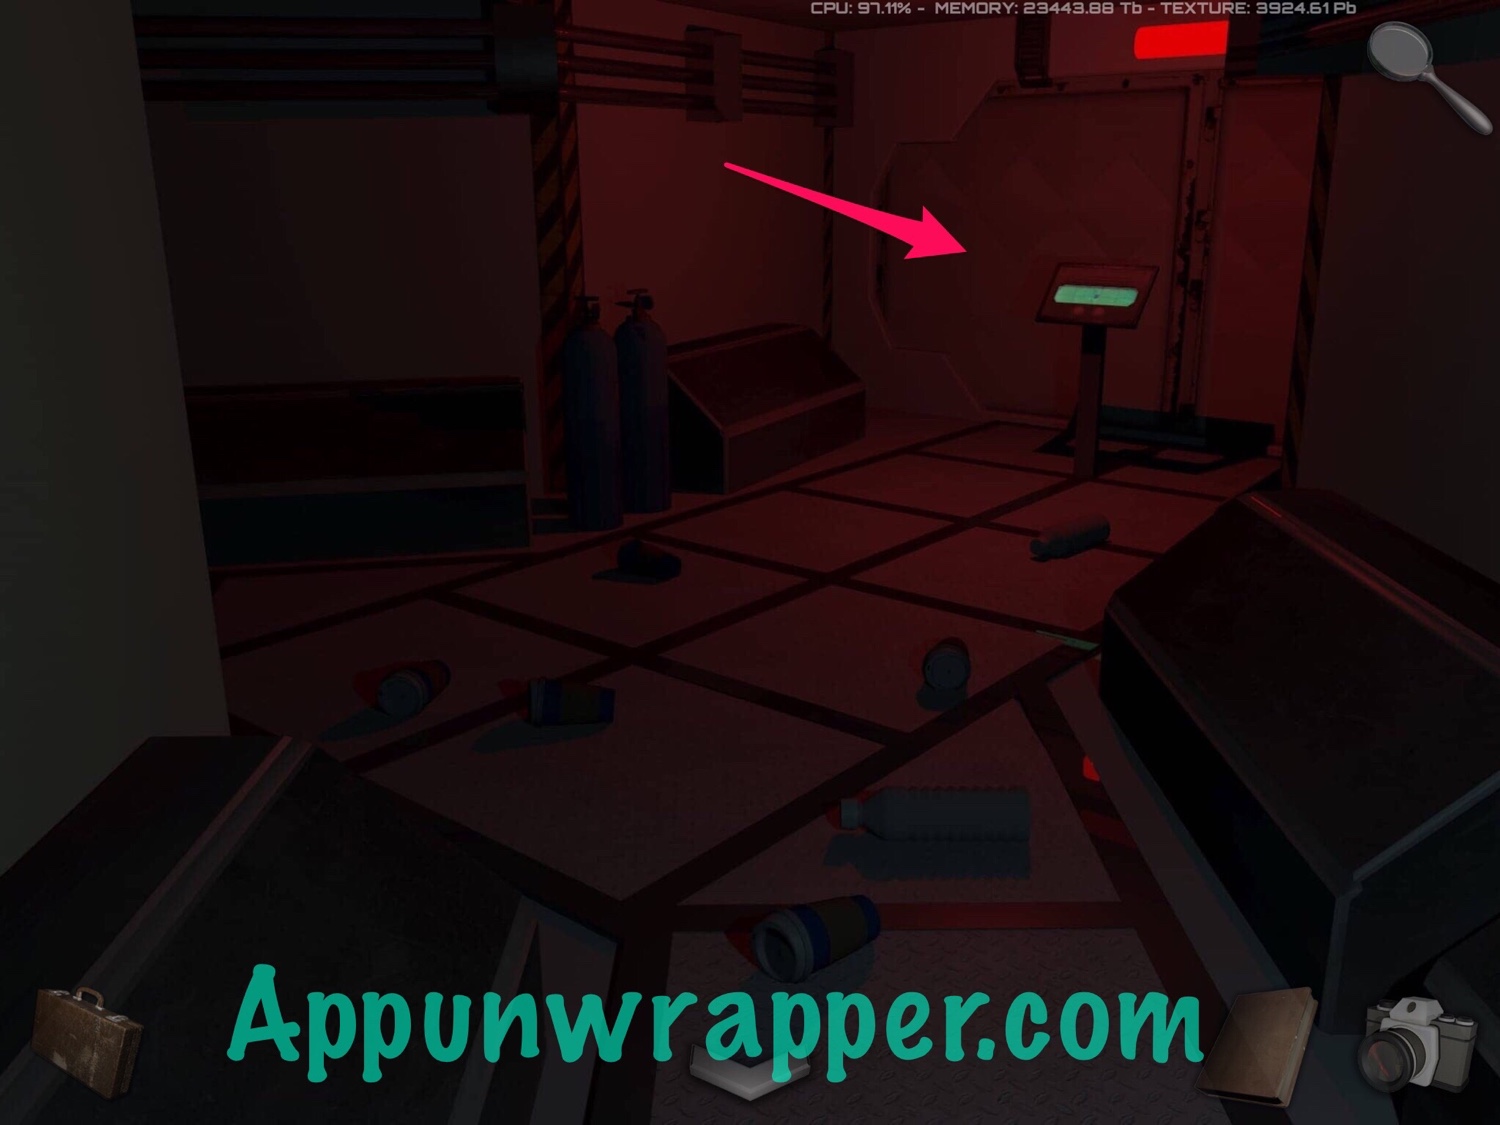
43. Continue ahead. There’s a blinking alarm clock on the floor. Ignore it for now, but we’ll come back to it later. There’s a medical bay up ahead. You need to press both buttons at the same time to open the door. So place the drinking bird on one button and press the other with your finger. But don’t go inside yet.
44. Instead, go along the left side of it until you come to a ladder that leads down. Head down to see a cooling system. It needs water, though, so head back up.
45. Continue around until you come to a panel in front of closed doors. Take out the photos from the window with the plus sign. Notice there are two buttons, one with a circle and one with a square on it. The panel is already set to square, so we’ll work on that first. Count up the number of stickers in each section on the window. Then tap them on the panel in those same spots, once for one sticker, twice for two stickers, and so on. When you’re done with the square, press the circle button and do the same thing based on the circle clue. It should look like the screenshots below.
46. Tap on the DRINKS vending machine, as it’s the only one that works. Select COFFEE and then press the arrow buttons so that there’s 0 milk, shots or sugar. Then press the check mark to brew a cup of hot water.


47. Continue ahead and tap on the computer to get a new mission to repair the ship’s cooling system to enable the Main Control Unit. Head down the stairs to the engine room. There’s a panel that’s loose. Pull it off and take a photo of the cables underneath.
48. Go back and around the left side of the med bay. There’s a puzzle with red, yellow and white round pieces. Zoom in on it and take out the photo of the cables. Now, notice there are four sets of cables. There are also four sets of round pieces. For each set of round pieces, copy the angles of the cable that’s the same color. You can also copy my solution below. Then take the rubber gloves from the closet.
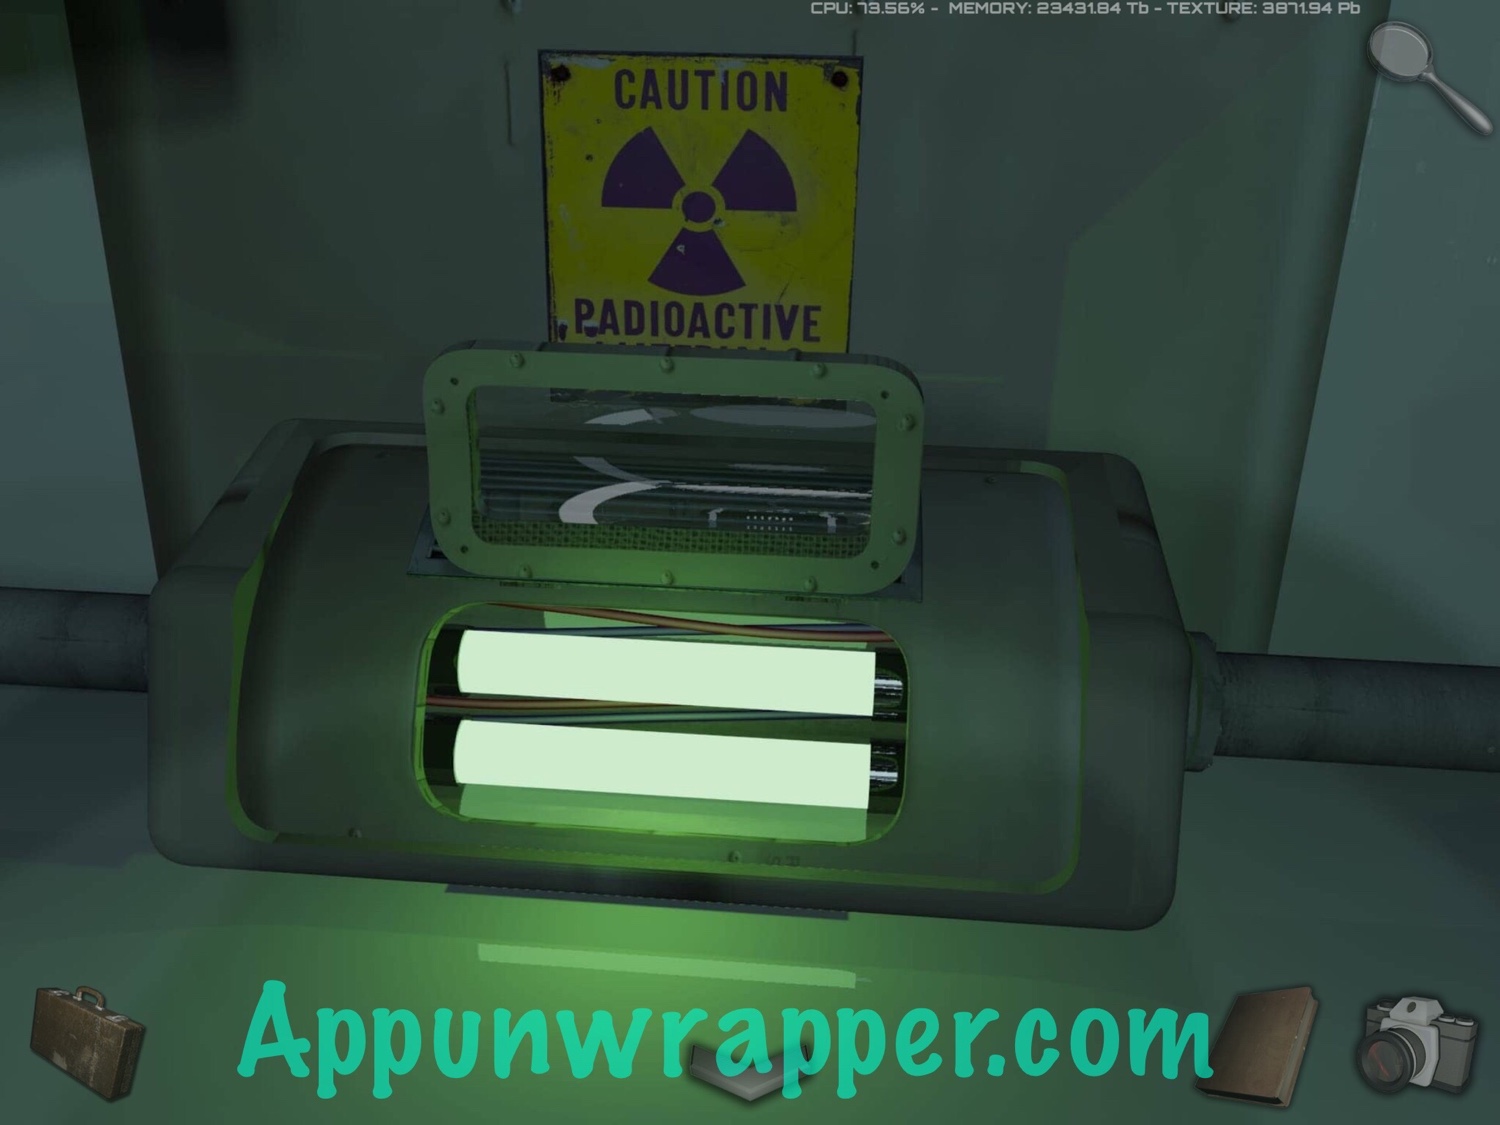
49. Go back and enter the med bay. Open the cryogenic tube and place the hot water inside. Close it and then take out the cold water. While you’re here, open the glowing creek compartment and use the rubber gloves to take the inanimate carbon rods.

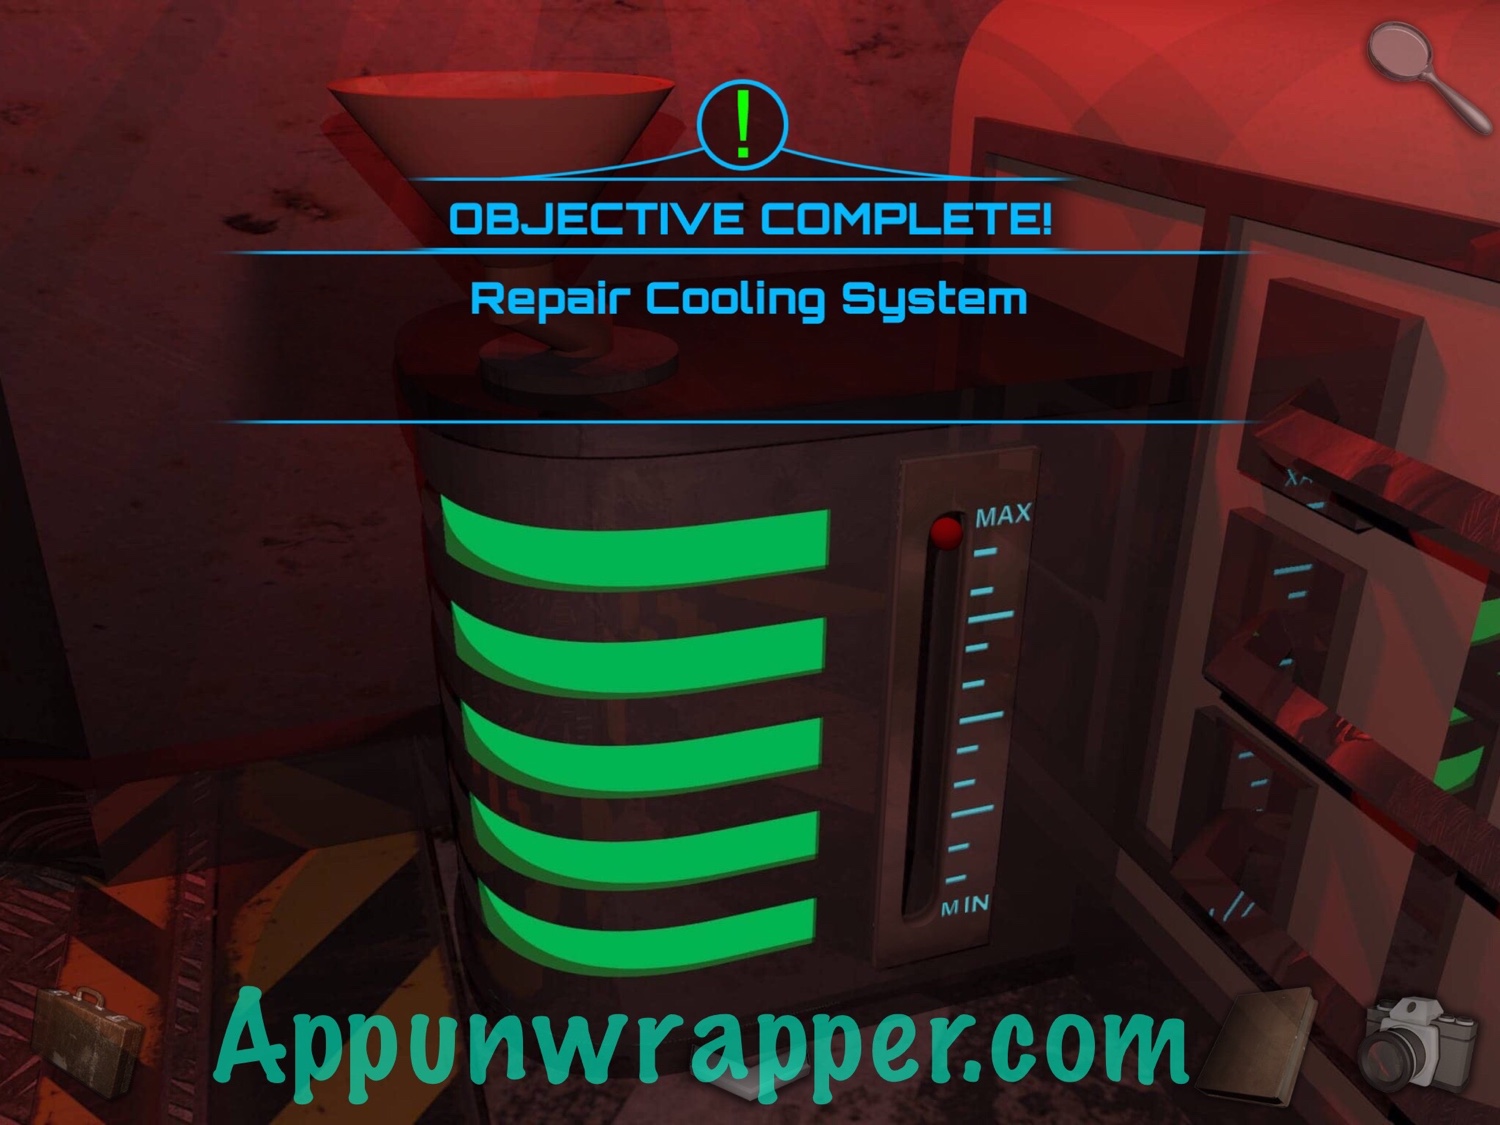
50. Go back to the basement and pour the cold water in the cooling system to repair it.
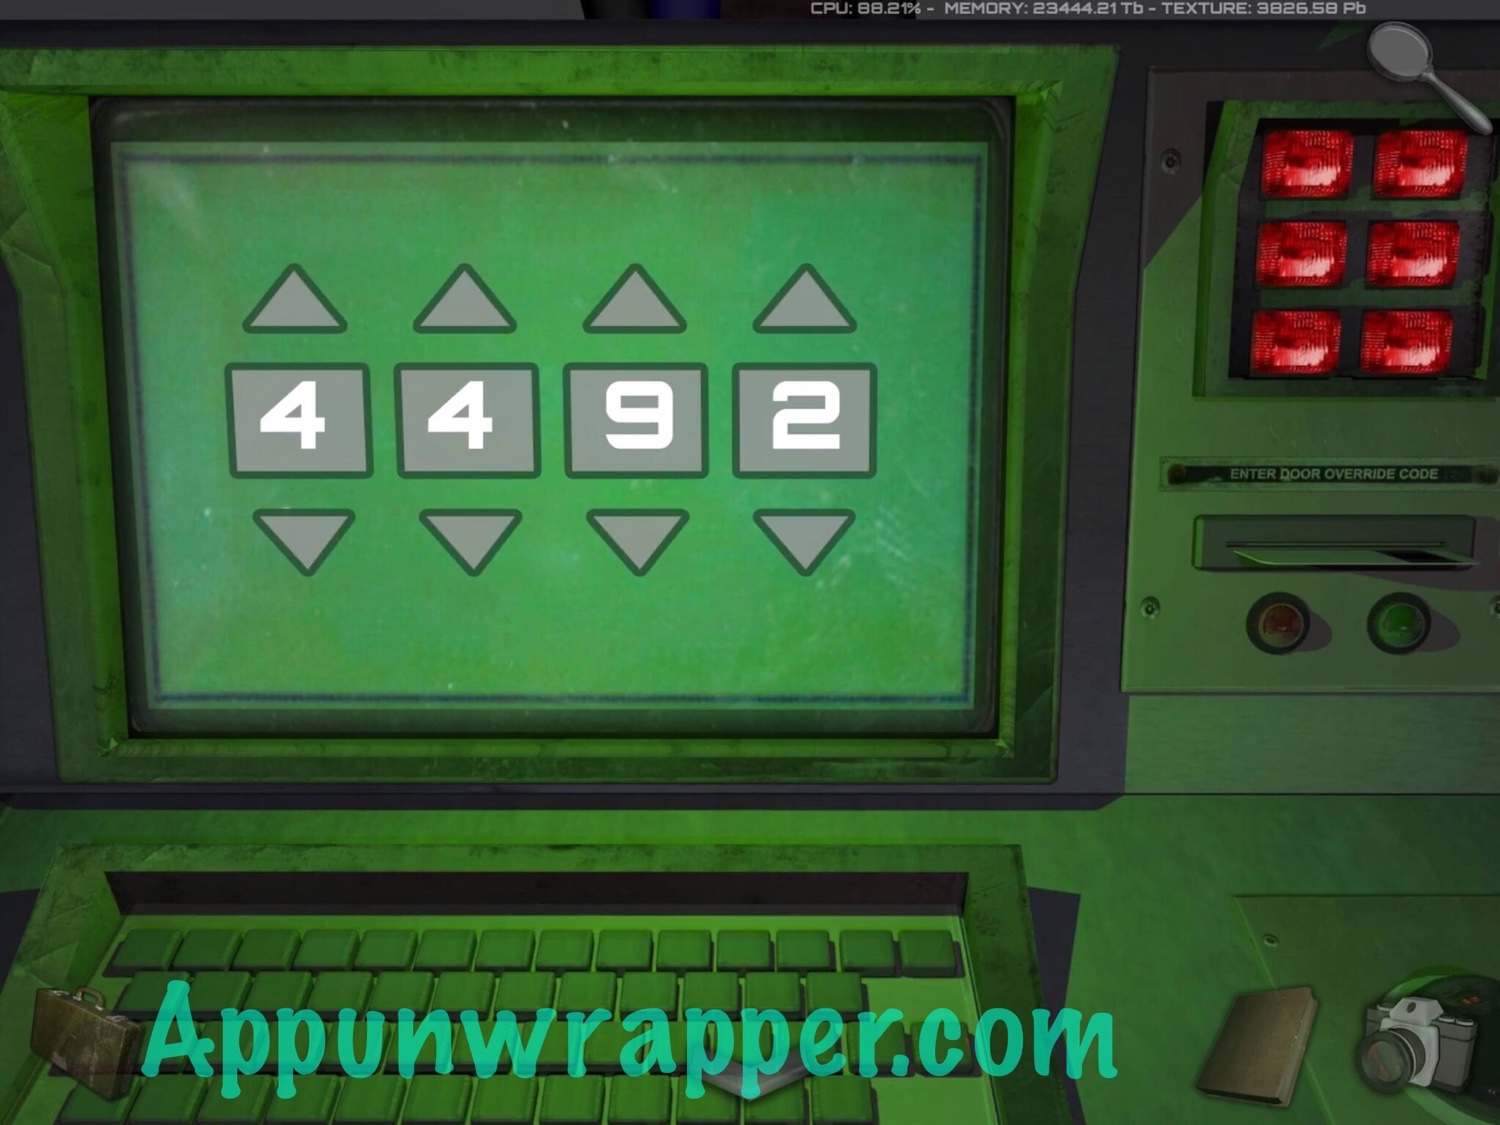
51. Go back to where you saw the black window blinds with the musical notes. There’s an alarm clock on the floor. Zoom in on it. Remember the Bible talking about verse 1:3, Let there be light? The alarm clock also says GENESIS 1:3 on it. So place the glowing rods down to light up the area. You’ll then see the numbers 4492 on the wall. Take a photo.
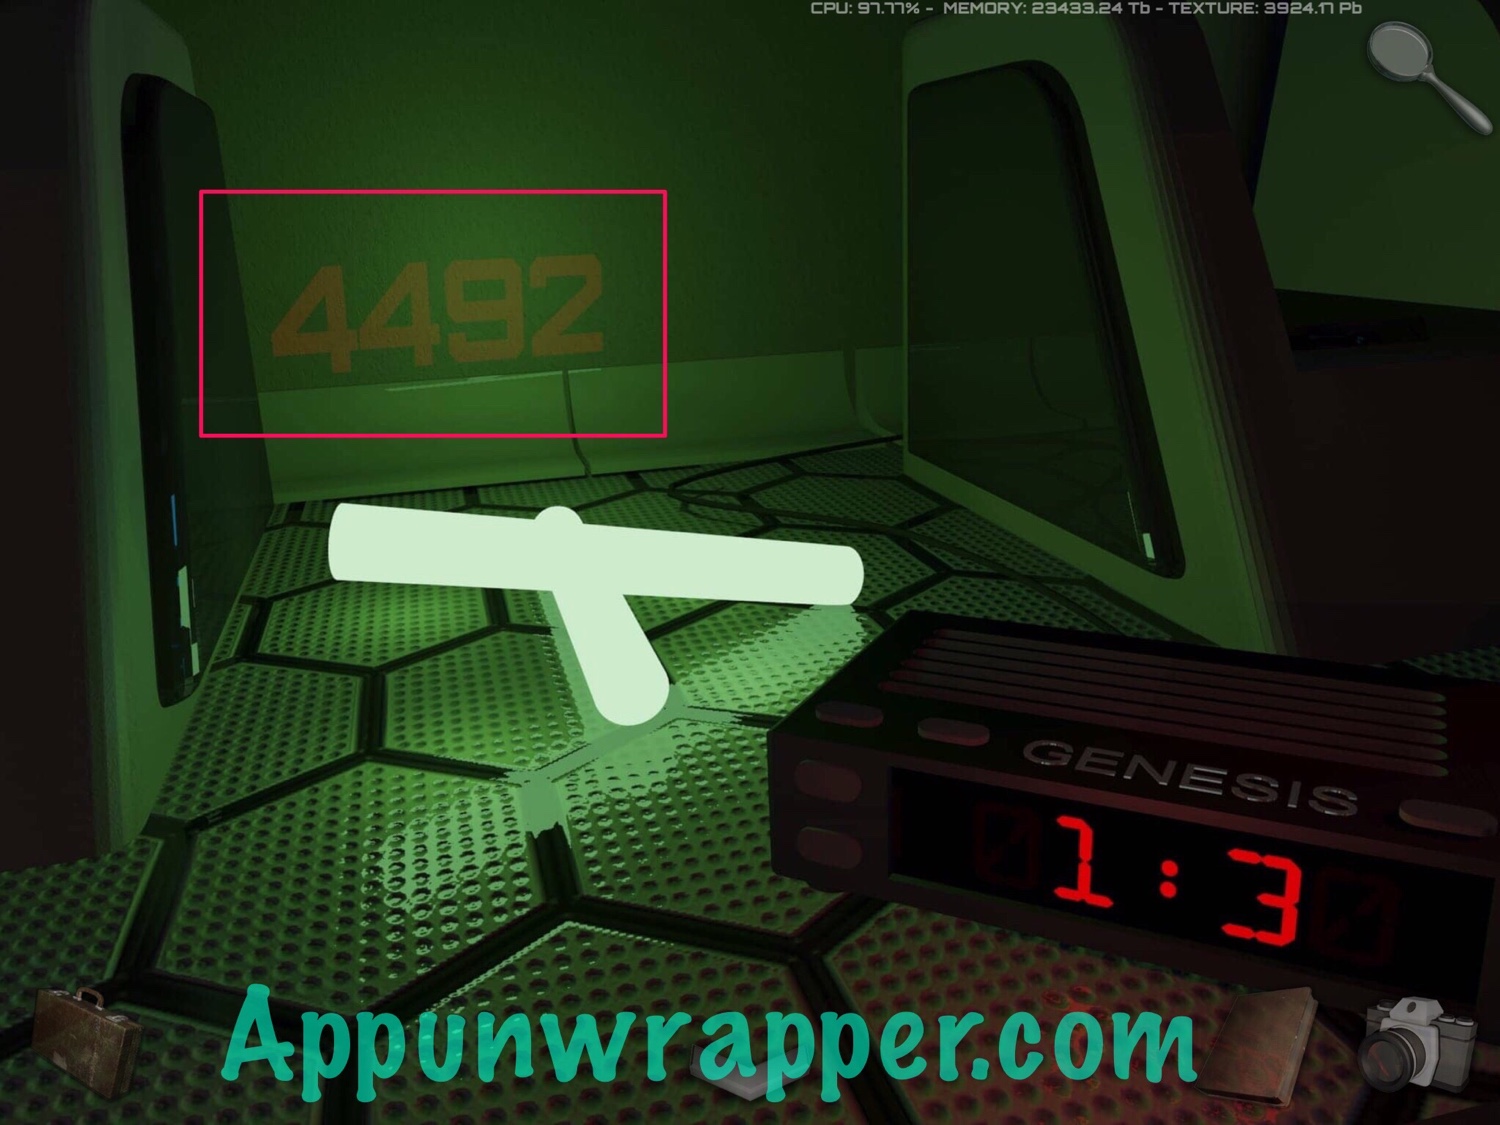
52. Head to the PC and enter 4492 to access the bridge. Go through the door and the game will glitch out.
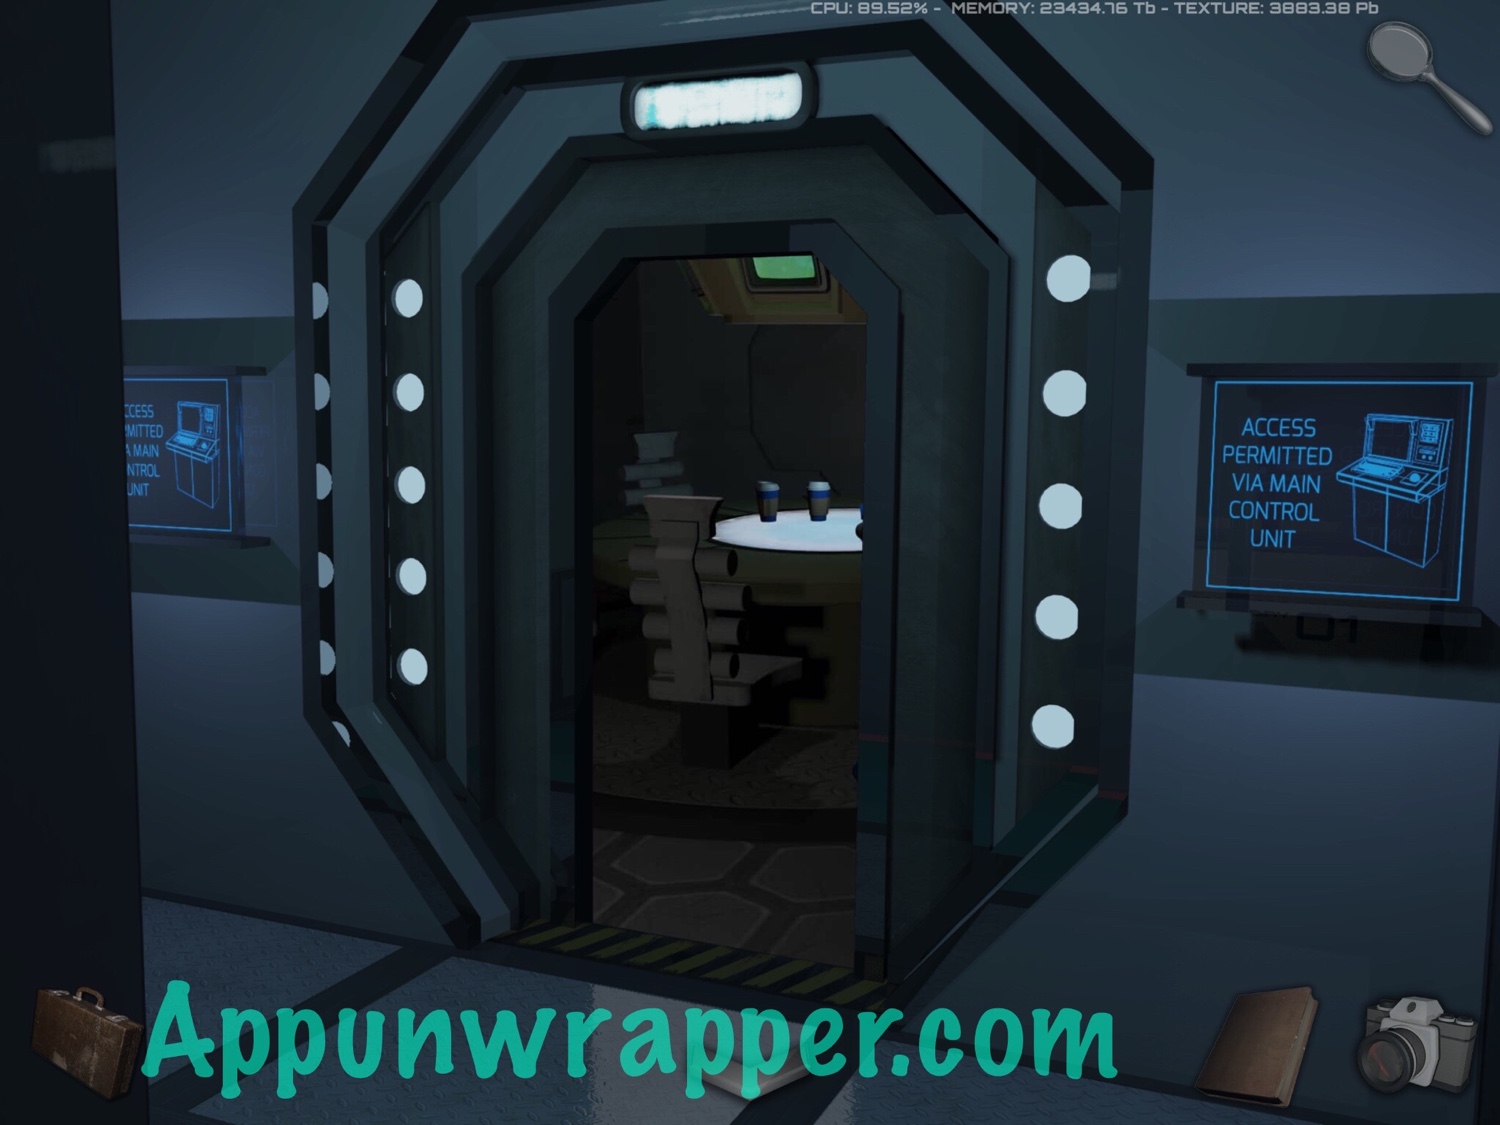
53. You’ll be back at the facility. Get out of the chair and follow the glow sticks to begin Chapter….8?
That’s all for Chapter 4! Click here to continue to Chapters 5 6 7 8 9 or choose a chapter below.
Prologue + Chapter 1 | Chapter 2 | Chapter 3 | Chapter 4 | Chapters 5 6 7 8 9 | Notes & Journal Entries
IΓÇÖve had multiple attempts to get the handle piece by using the clock hands to spell the word ONE but nothing happens.
I finished the game — was there anything ever to do with the spinning top?
Nope!
Glad I didn’t miss something, I can’t think of any other items in the game without a purpose (except the A car, I guess.) so it was disconcerting not having a purpose for the top
Playing Veritas makes me think of the movie in which this spinning top was important.
I’m at the beginning of chapter 4, but am stuck because I don’t have the rope in my briefcase. I can’t drop the bucket down the dumb waiter without the rope. Can anyone tell me where to get it?
Chapter 4. IΓÇÖm losing my mind. I canΓÇÖt get back to the Developers Room. In the hall outside the meeting room it seems to only go to the storage room
What is the spinning top for ?
I think just a wink to Inception.
IΓÇÖm stuck! The dumb waiterΓÇÖs motor is broken and I canΓÇÖt figure out how to get it moving to bring the artifact upstairs. What am I missing?
Can someone please tell me where I find the cryptex? i know I had it at one time!