Adventure Escape Mysteries – Legend of the Sacred Stones
By: Haiku Games

Haiku Games is back with a new Adventure Escape game, called Legend of the Sacred Stones. You play as Aila, who needs to take control of the elements and learn the truth about her past as she battles towering Stone Gods. This walkthrough guide should help you if you get stuck on any of the puzzles in Chapter 5. Feel free to ask for extra help in the comments section.
See all my other Adventure Escape guides here.
Walkthrough:
Chapter 1 | Chapter 2 | Chapter 3 | Chapter 4 | Chapter 5 | Chapter 6 | Chapter 7 | Chapter 8
Chapter 5:
You can watch my video for Chapter 5 or continue below for my step-by-step guide.
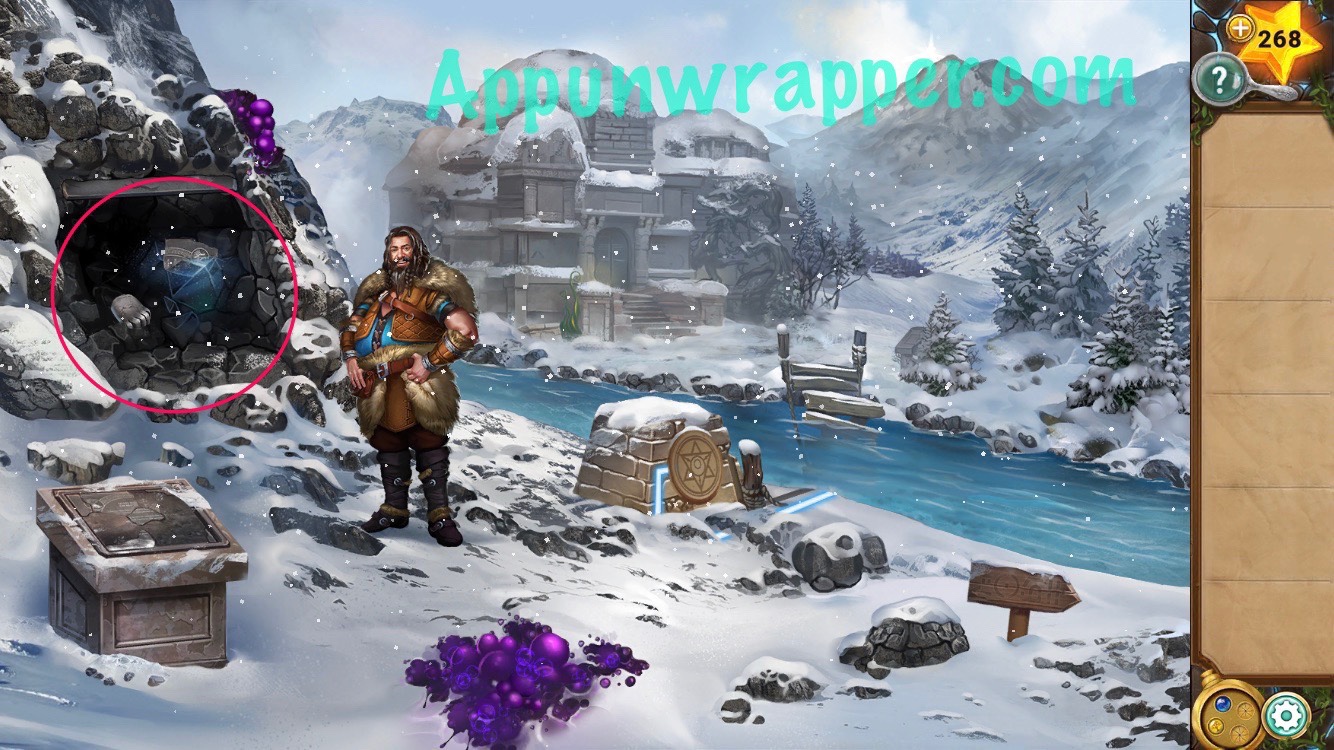
1. We’re headed to the Winter Temple now. You start off at Bruma Mountain. Pick up the stone plate and look at the pattern off to the right. Then continue along the path to follow Siegfried.
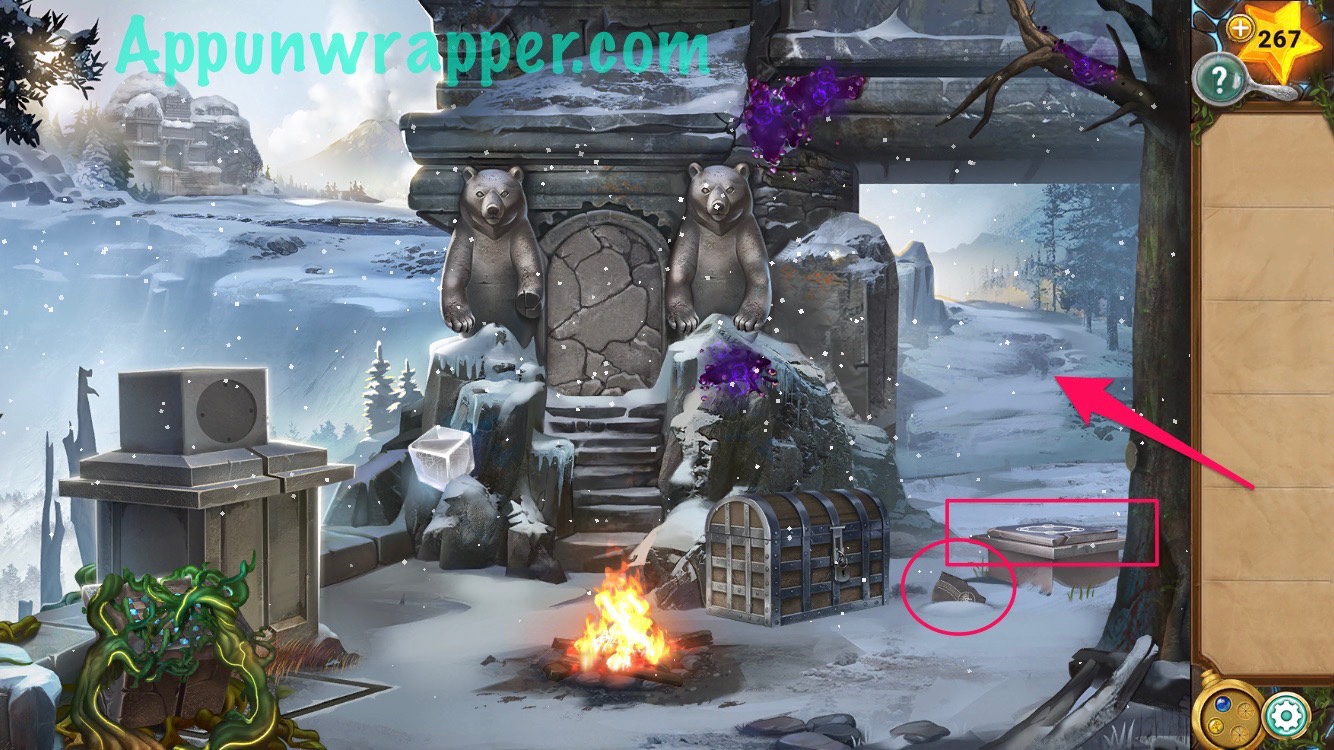
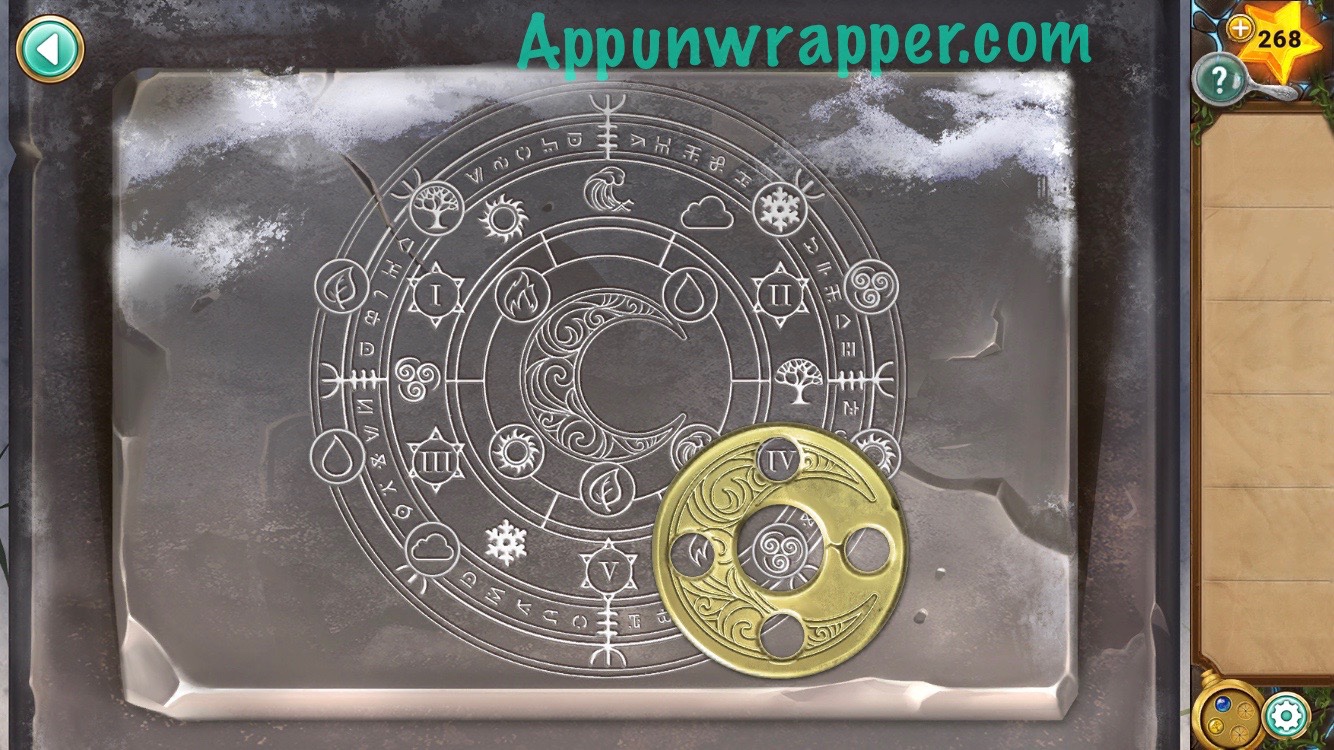
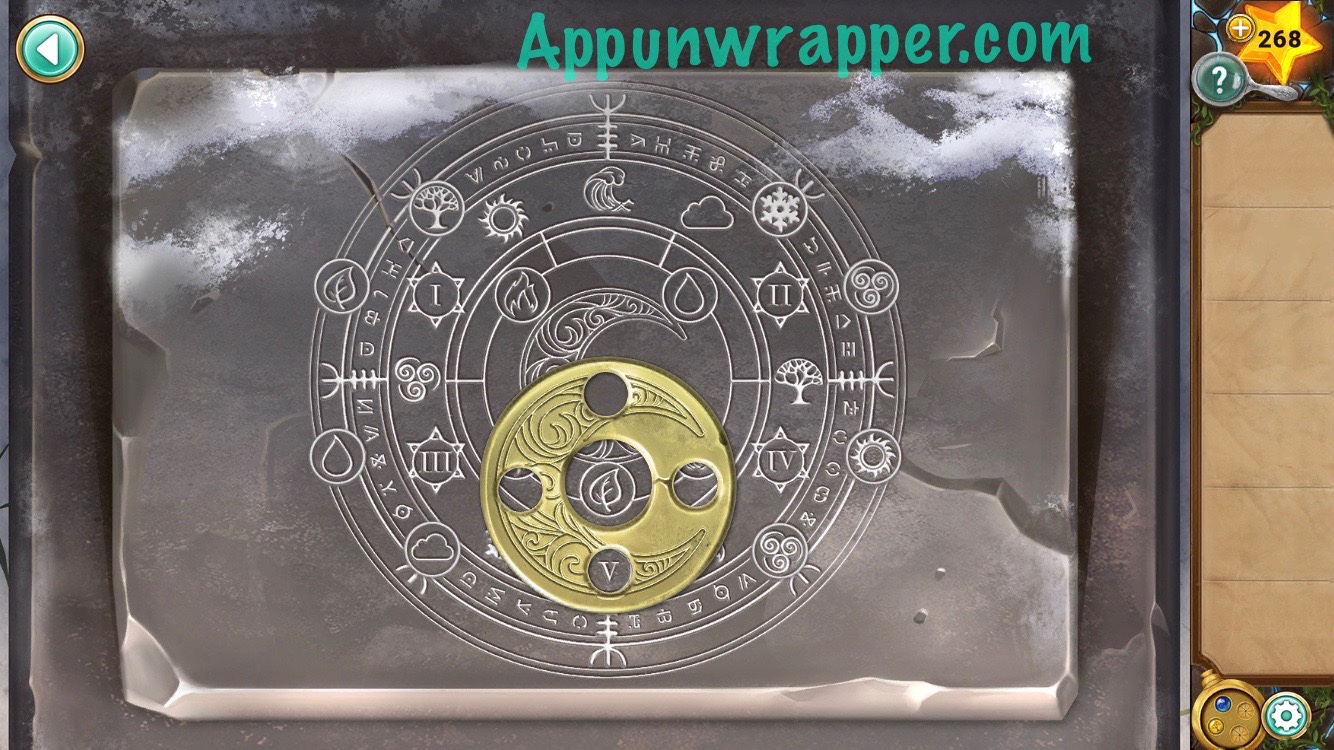
2. Use the water stone with the star emblem to fill the creek with more water. Pick up the moon disc. Place the stone plate with the other pieces. We’re still missing some. And last, notice the combination lock on the wall with arrows next to each symbol.
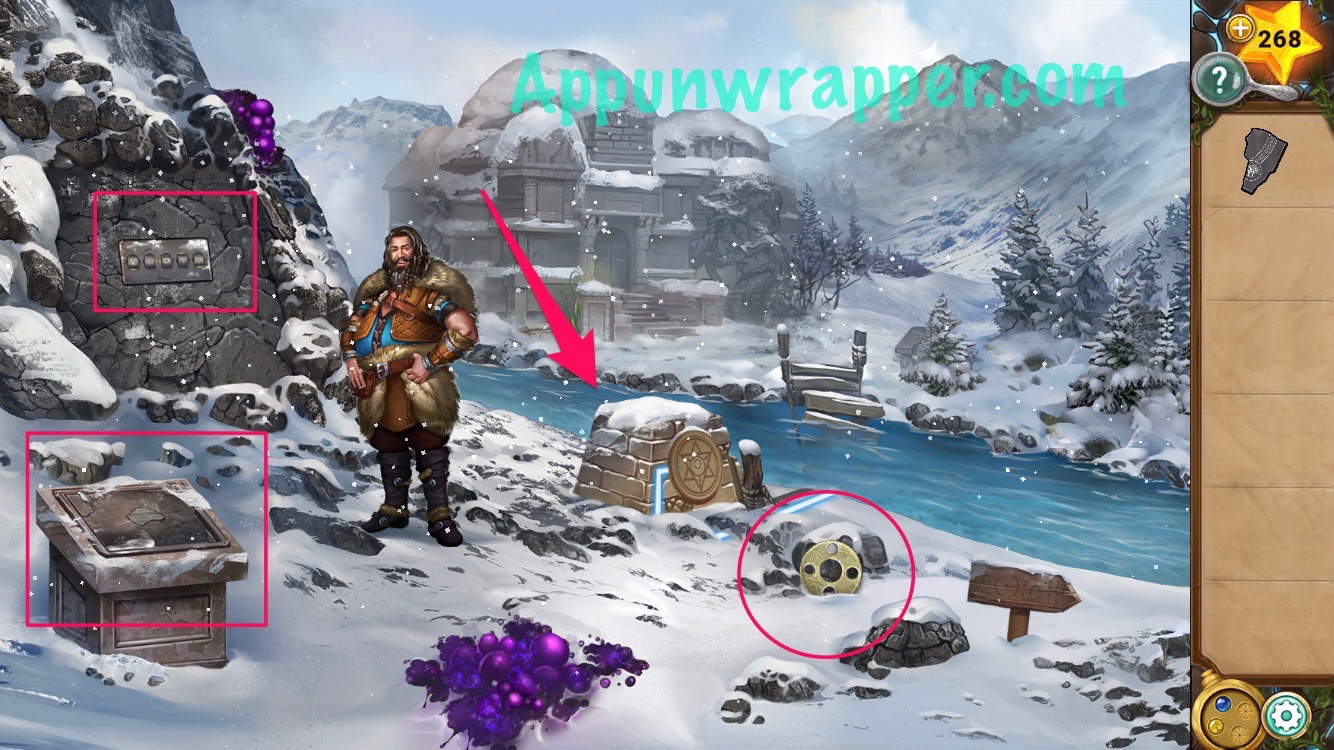
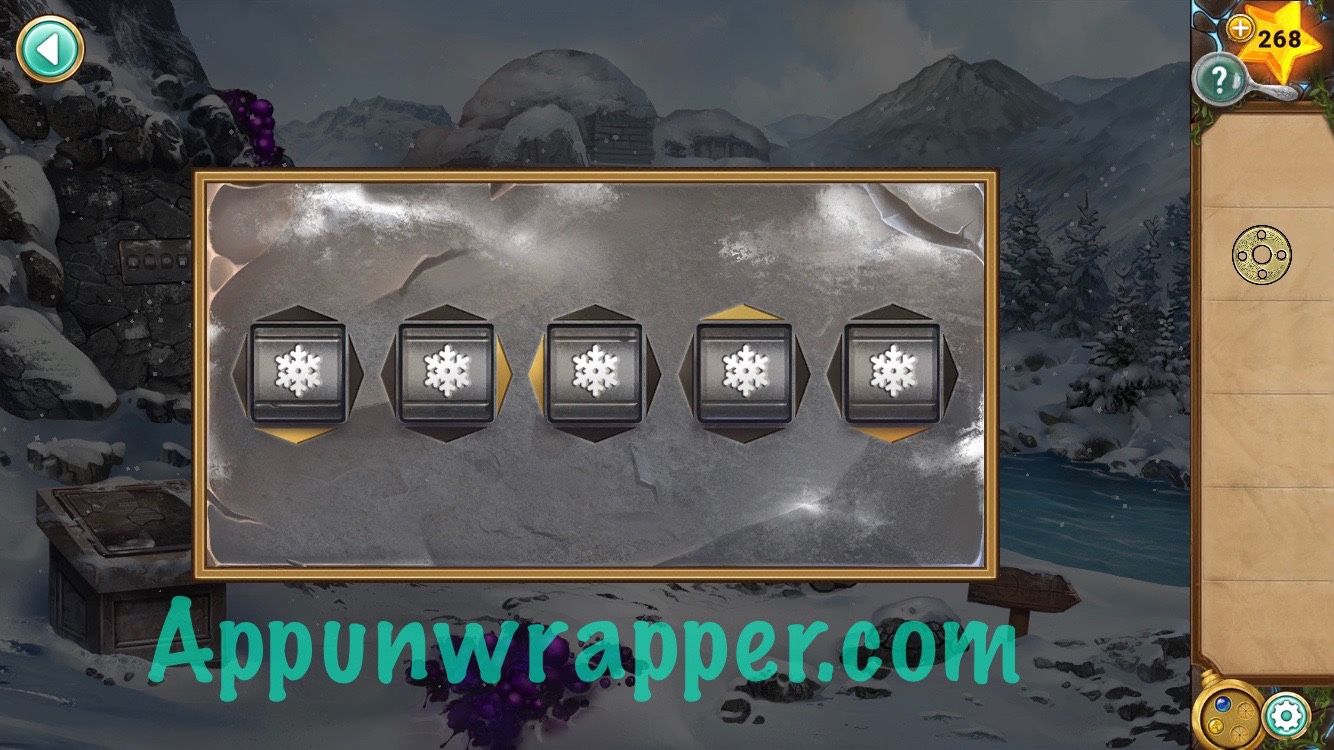
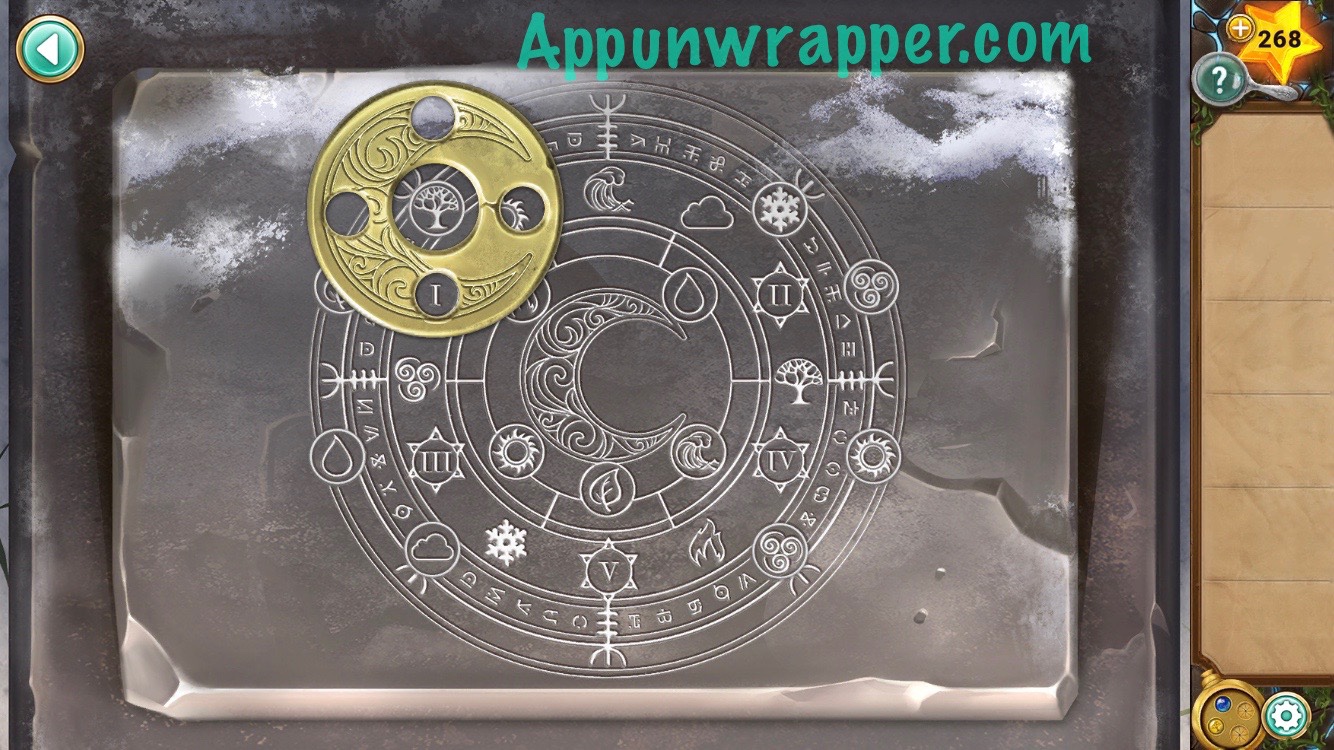
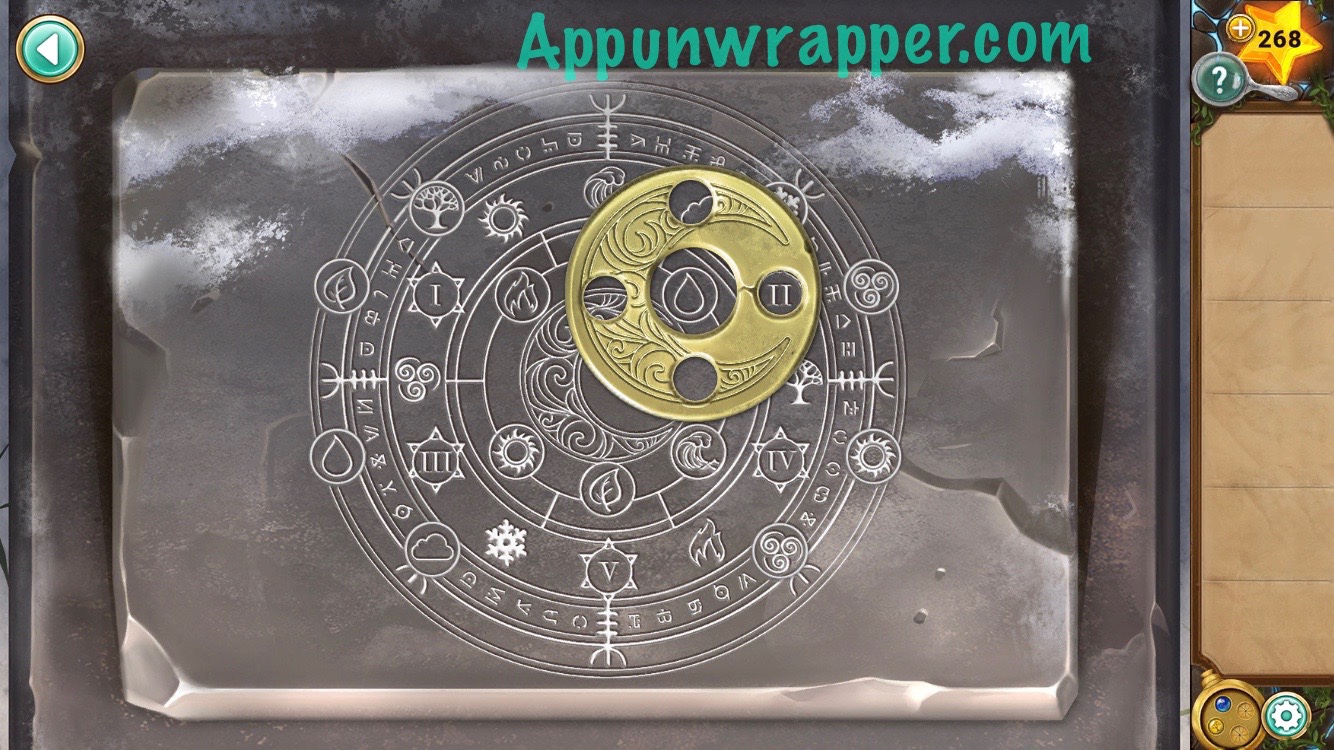
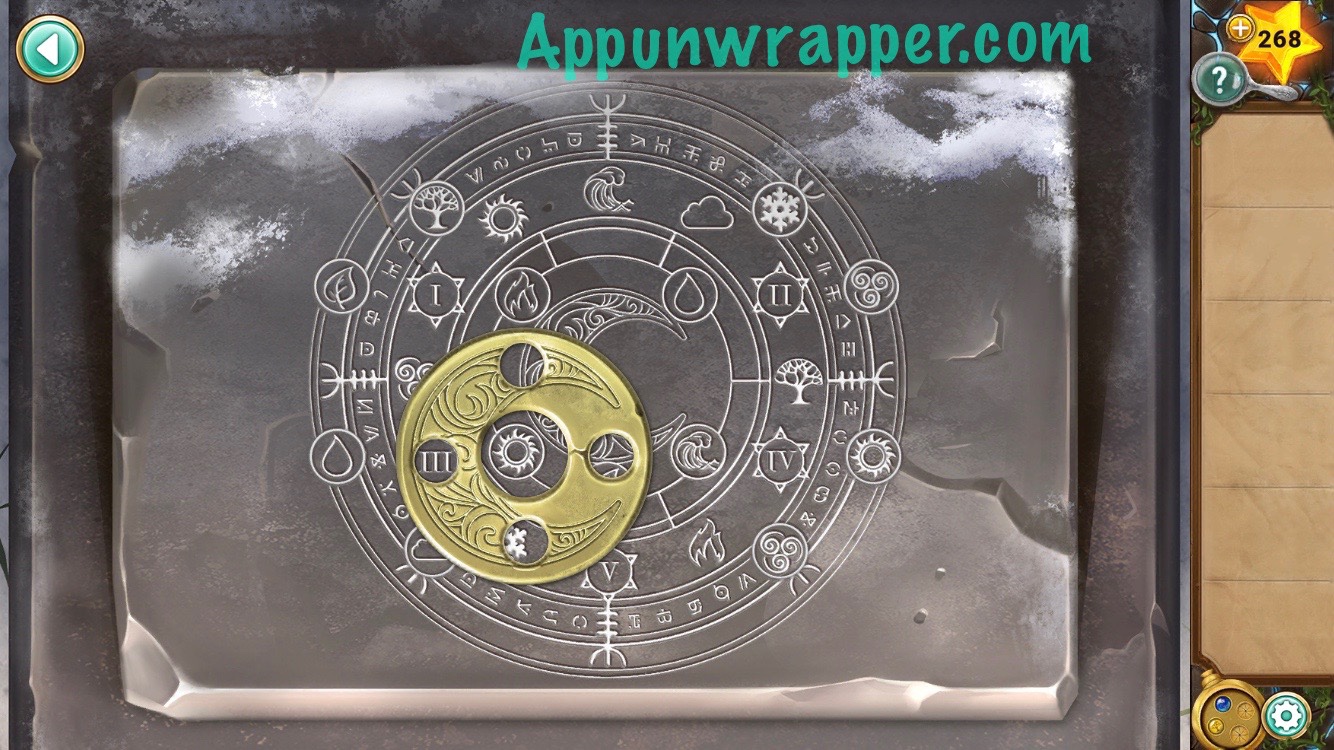
3. Go back to the first scene. Place the moon disc on the pattern from before. We can move it around. What you want to do is follow the arrows from the combination lock. So for the first one, there’s a down arrow. That means the I on the pattern should be in the bottom hole. Then note down the symbol in the center of the moon disc, as that’s the first symbol for the lock. Continue like this for all five until you have the passcode.
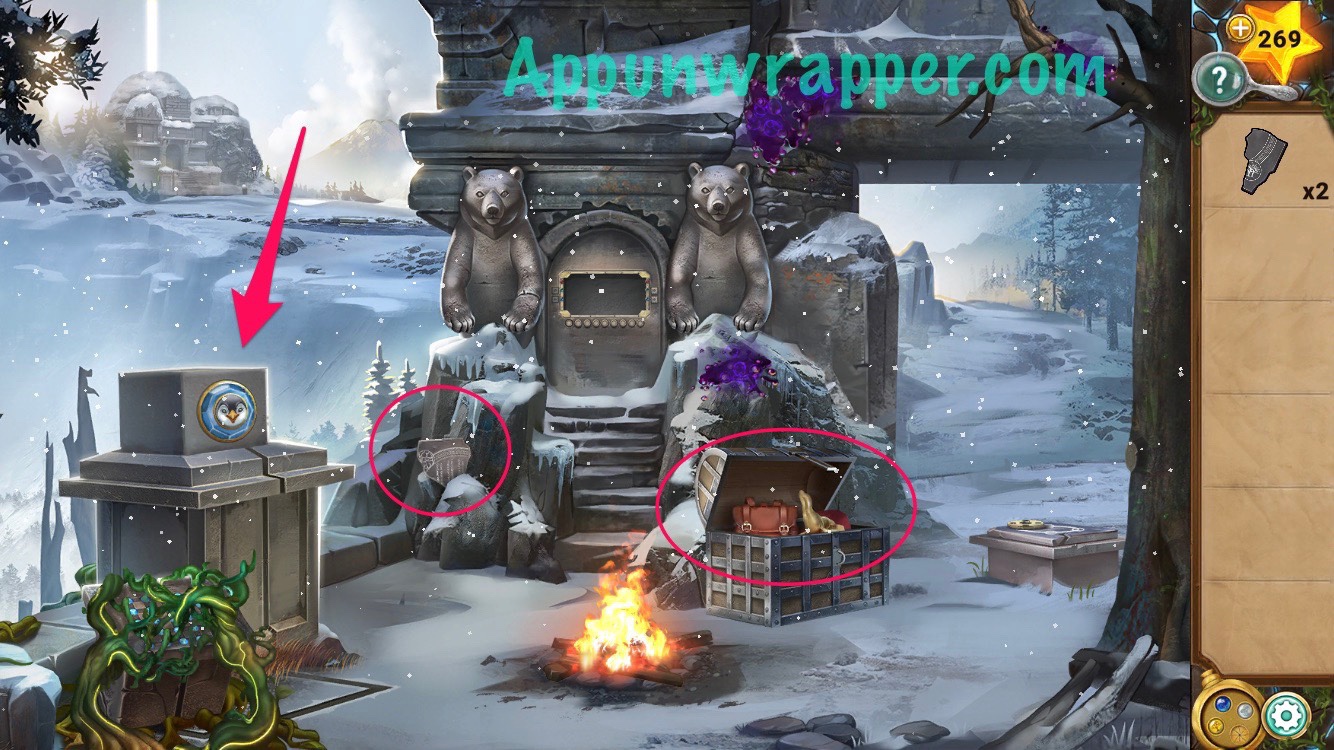
4. Go back and enter it on the wall. Then take the bear paw and stone plate from behind it.
5. Add the stone plate to the rest. Then back to the first area and place the bear paw on the bear statue to reveal a new puzzle.
6. Solve the Sliding Block Puzzle by moving all the red blocks to the top row, green blocks to the middle row, and blue blocks to the bottom row. Then take the stone plate from behind it.
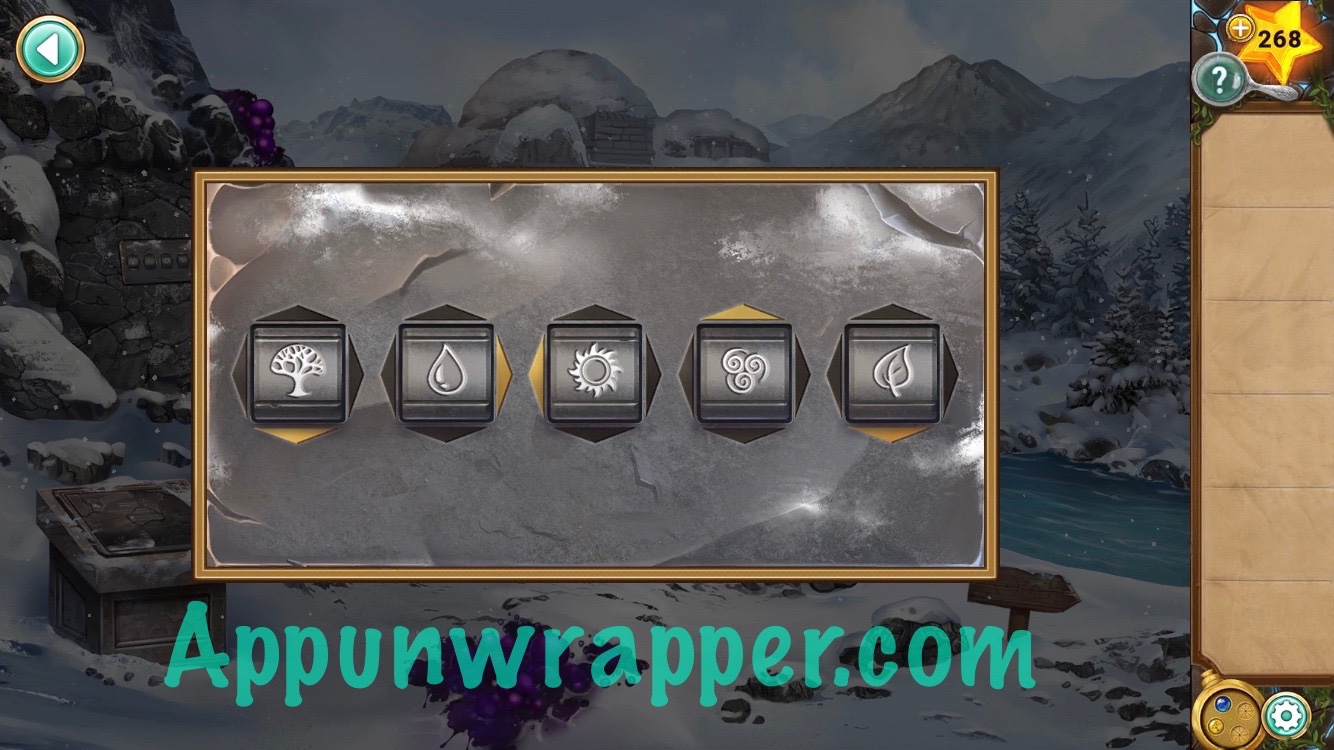
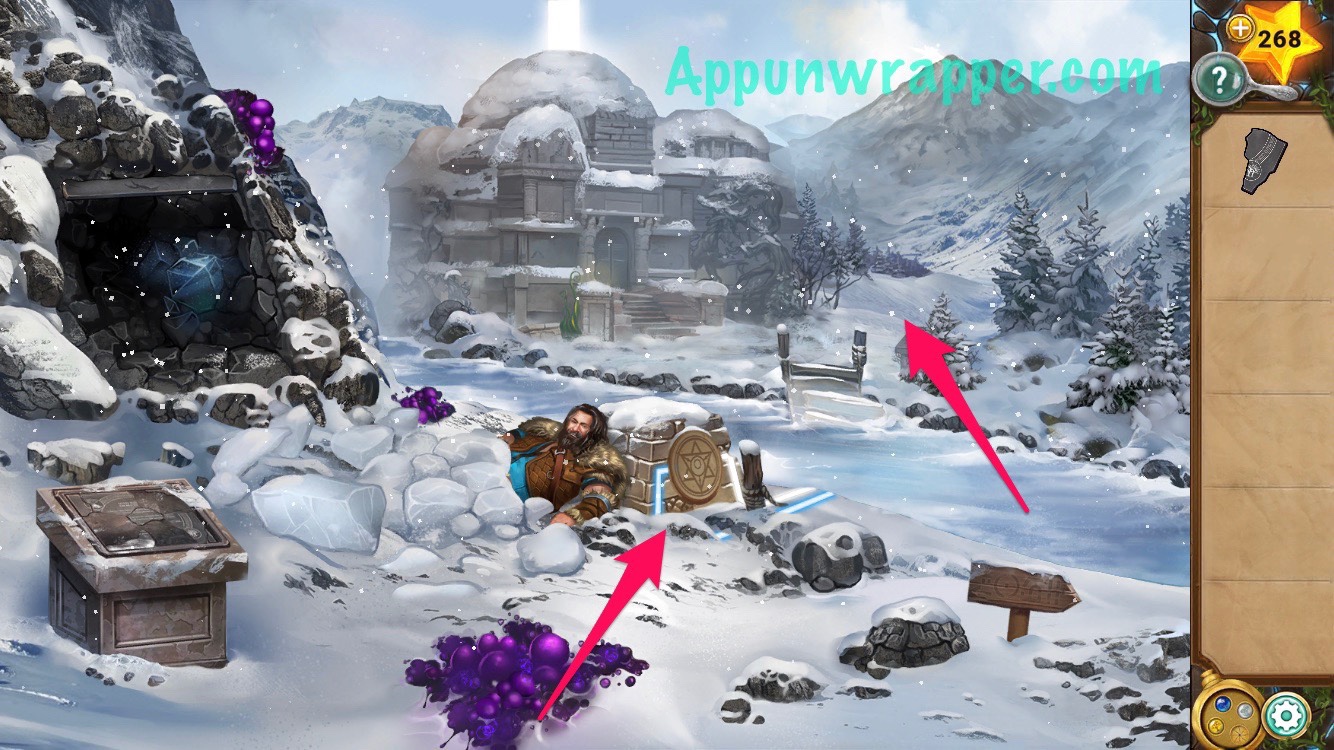
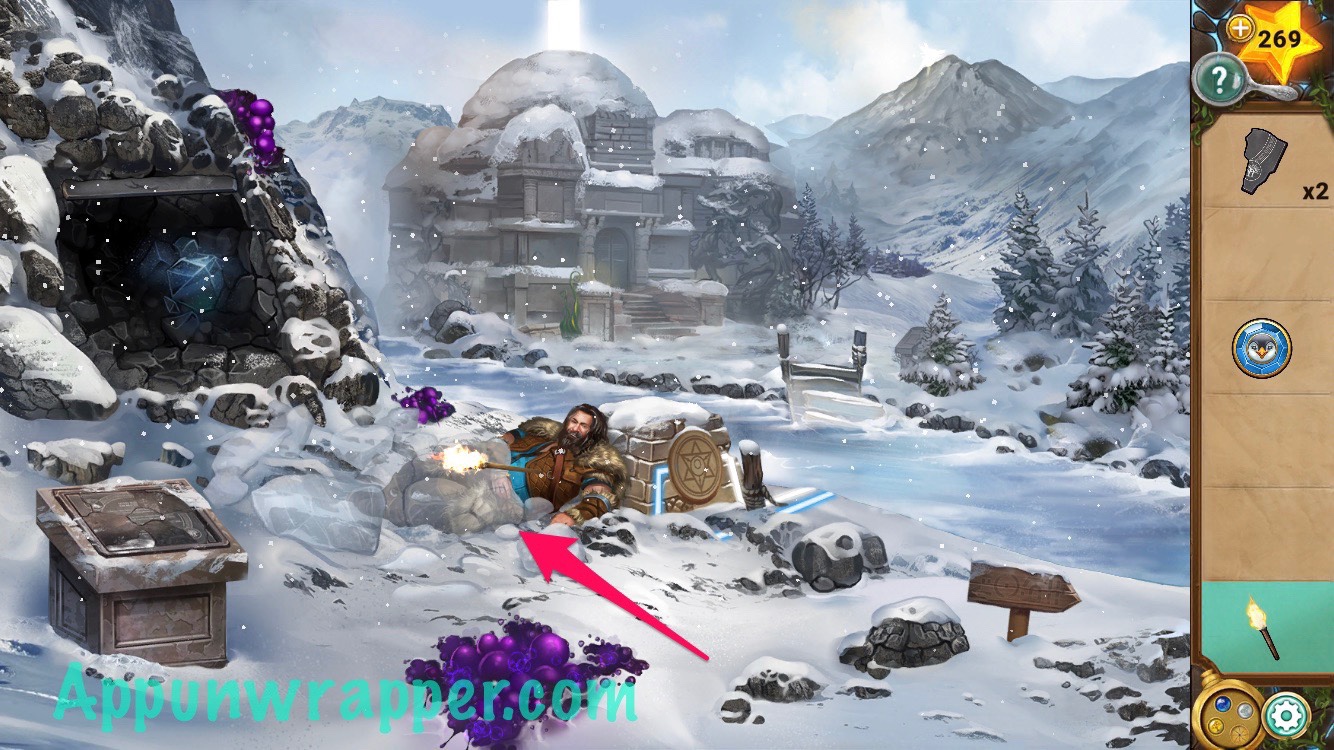
7. A beam of light shoots up from the temple. Now you have access to the wind stone on your locket, powered by Glacius, the God of Wind. Go back to Siegfried. He’s stuck under an avalanche! Use the wind stone with the star emblem to freeze the creek. Then cross over it to the front of the temple.
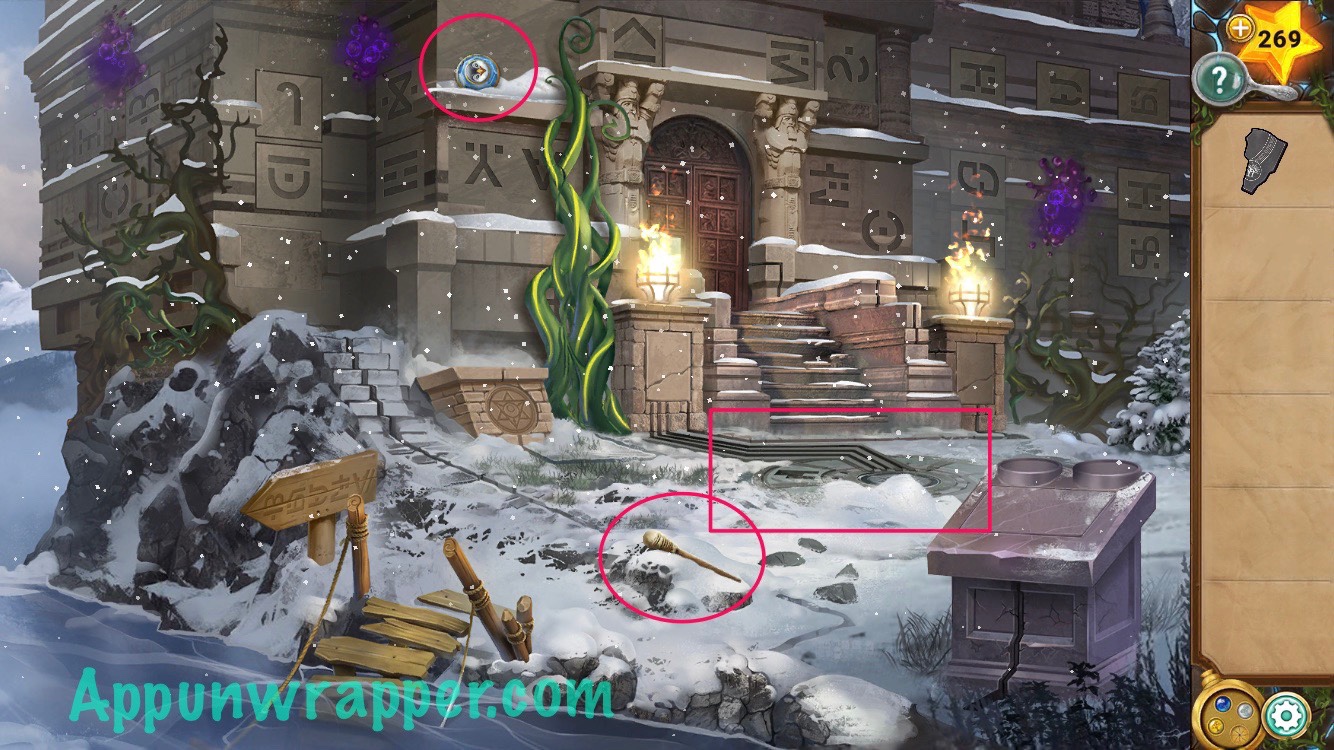
8. Grab the torch. Use the earth stone on the star emblem to make the vines grow. Then use them as a ladder to get the penguin gem. Also, notice the circle on the ground that’s a bit covered by snow. Grab the stone plate from it.
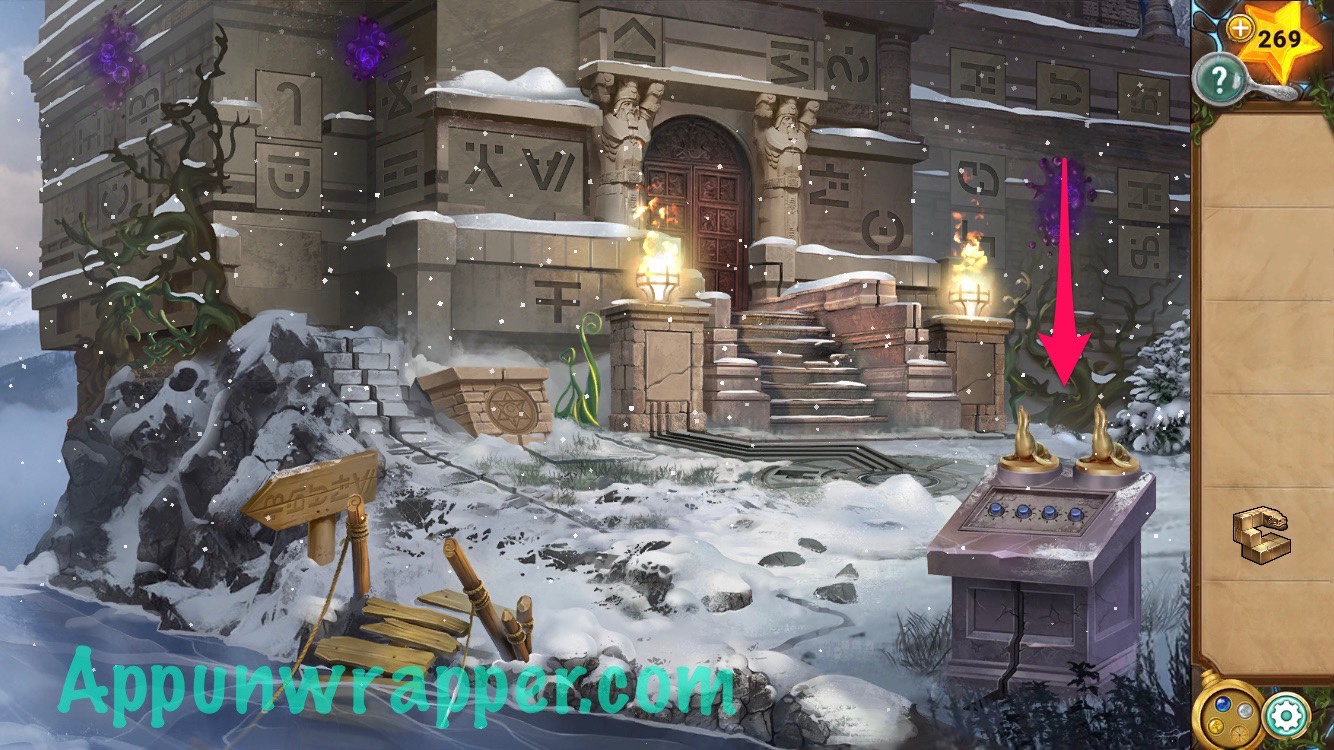
9. Light the torch on fire.
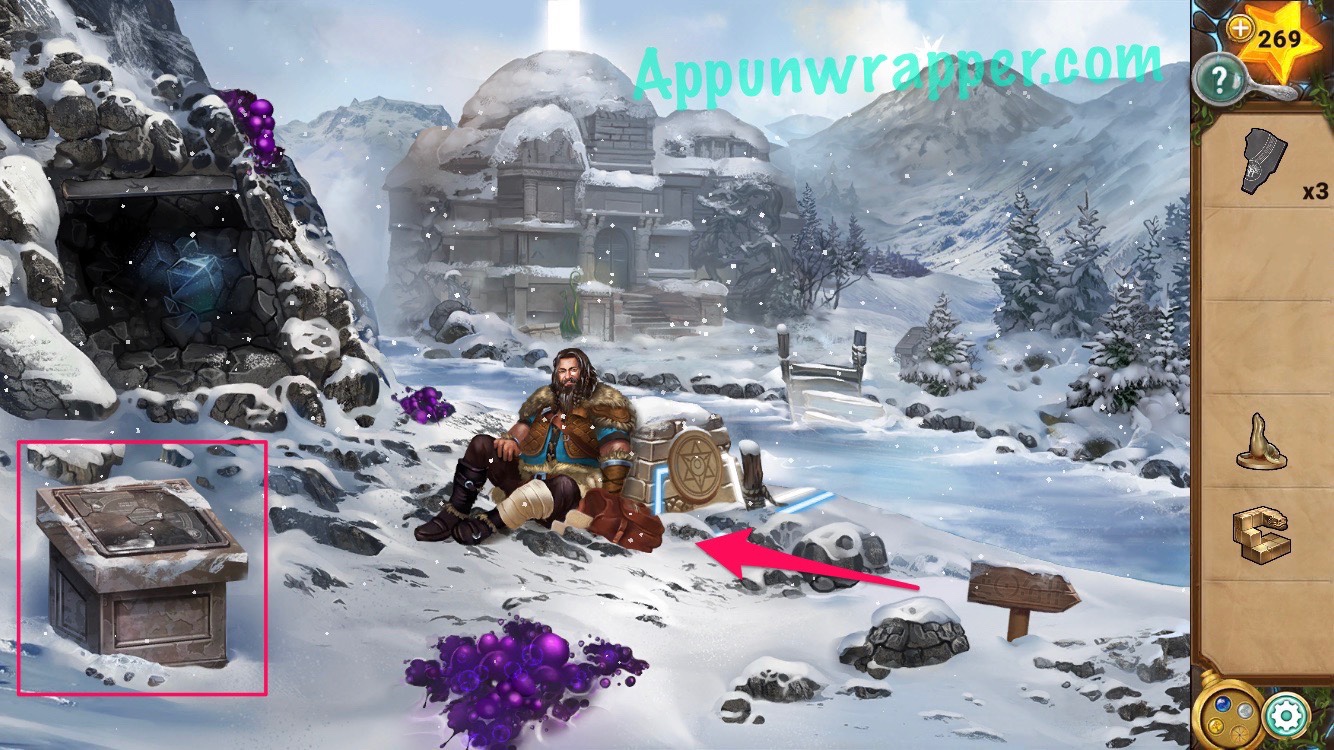
10. Go back to Siegfried and use the torch to melt the ice. Now he’s free but injured. He gives you a key and asks you to get his bag from the chest.
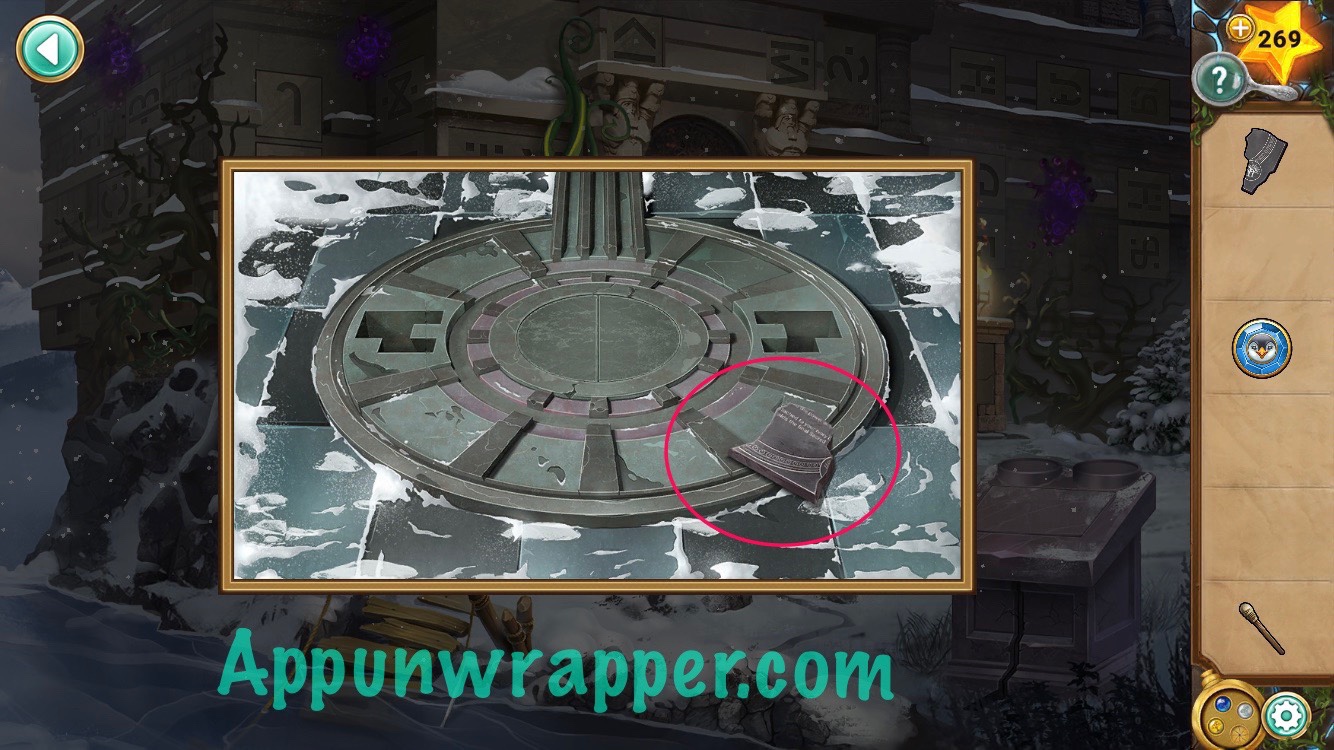
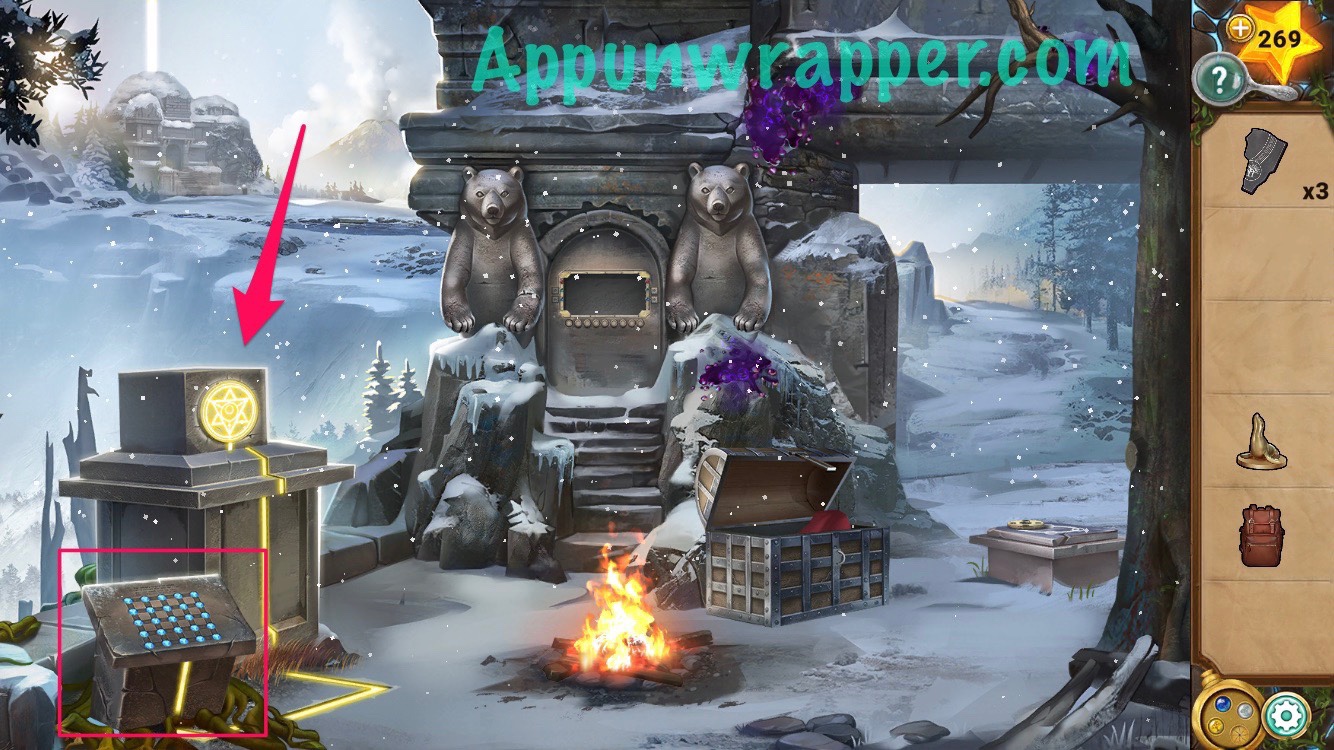
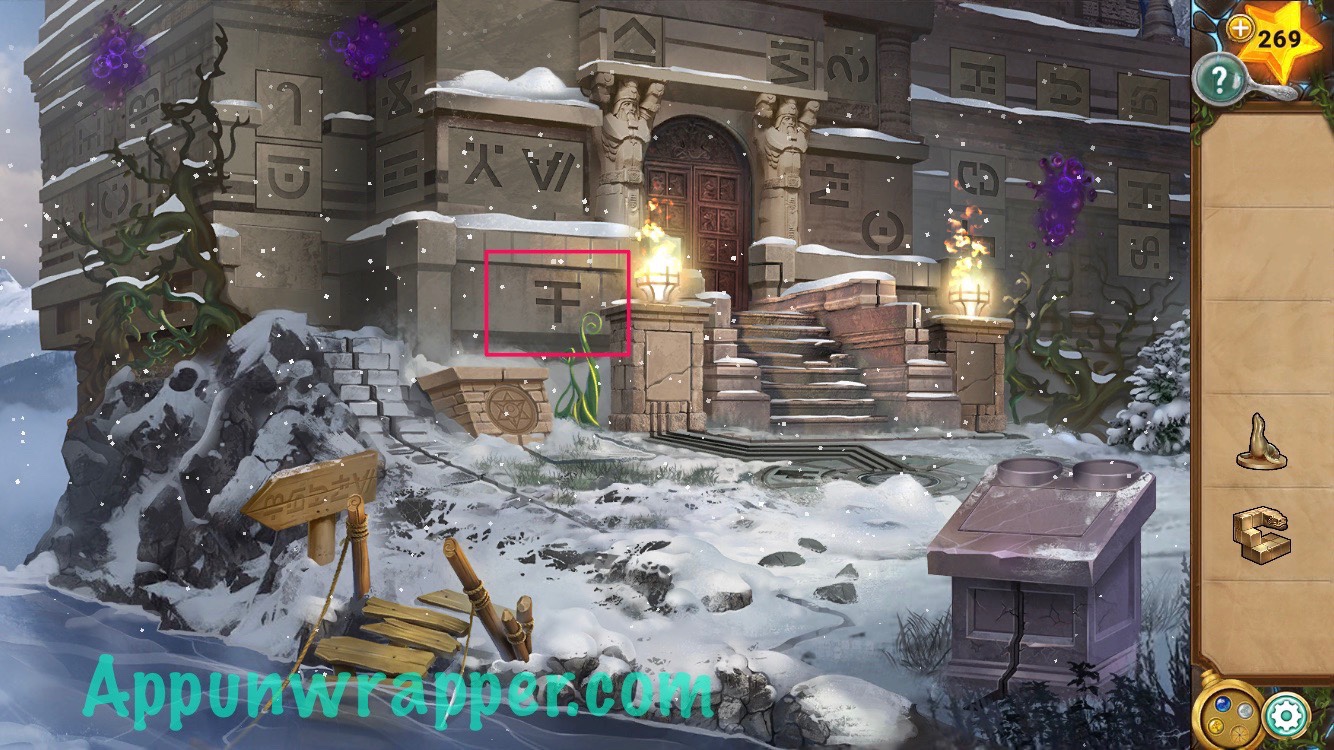
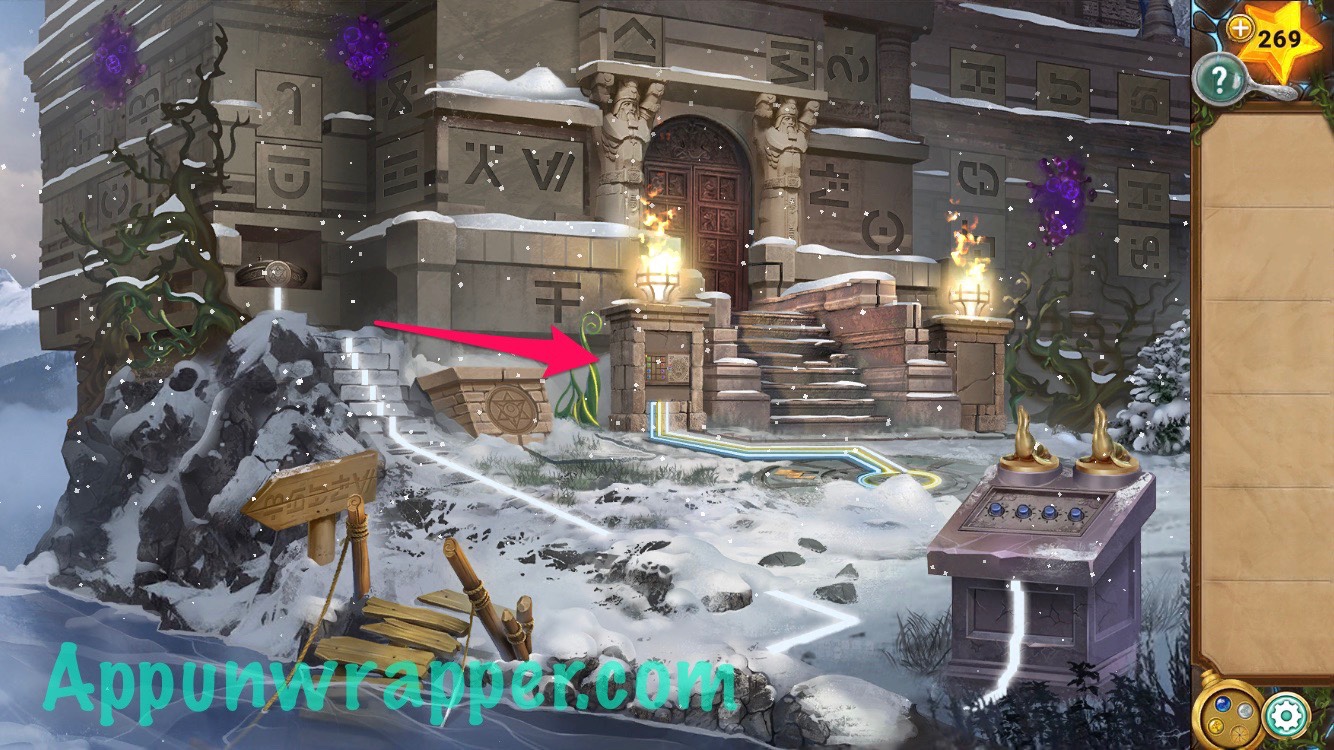
11. Go back to the first area and use the torch to melt the ice cube and get another stone plate. Use the key to unlock the chest and get the seal figuring and backpack. Also, place the penguin on the pillar to reveal another star emblem. Use the earth stone with it to get rid of the vines nearby to reveal a puzzle.
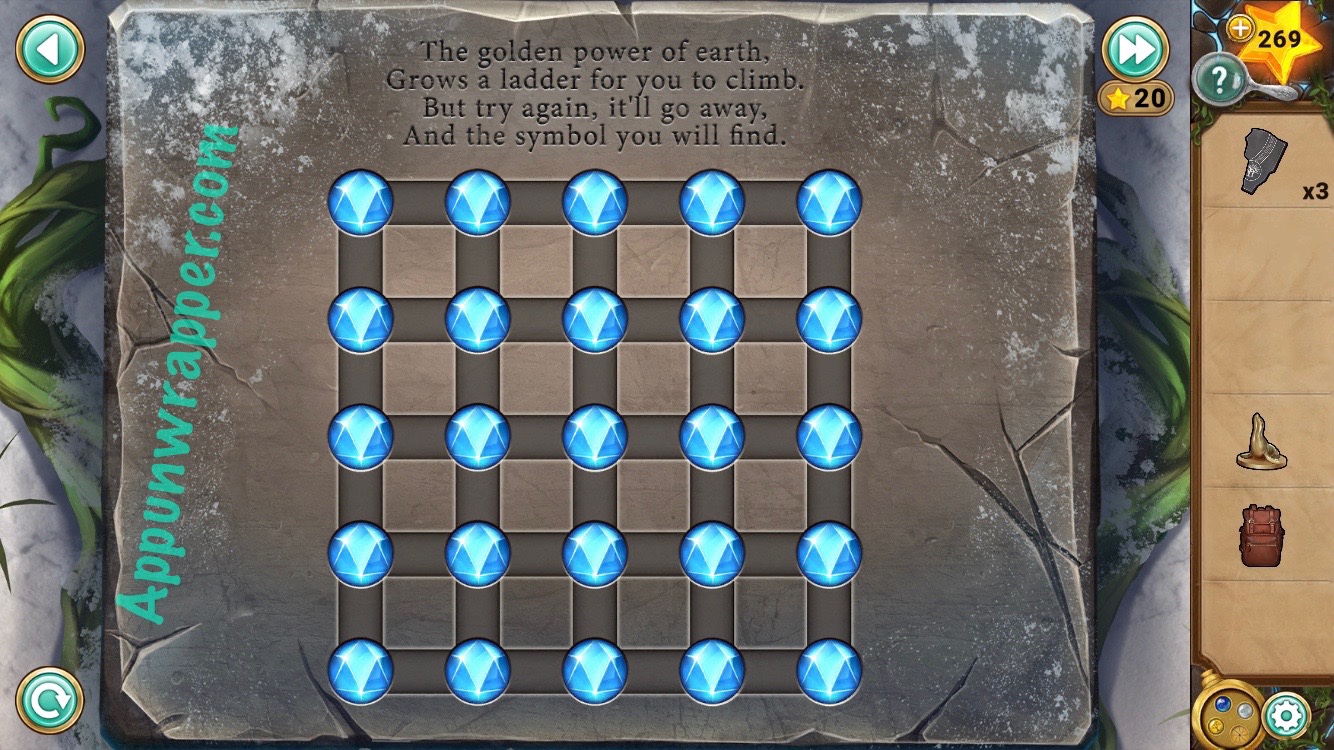
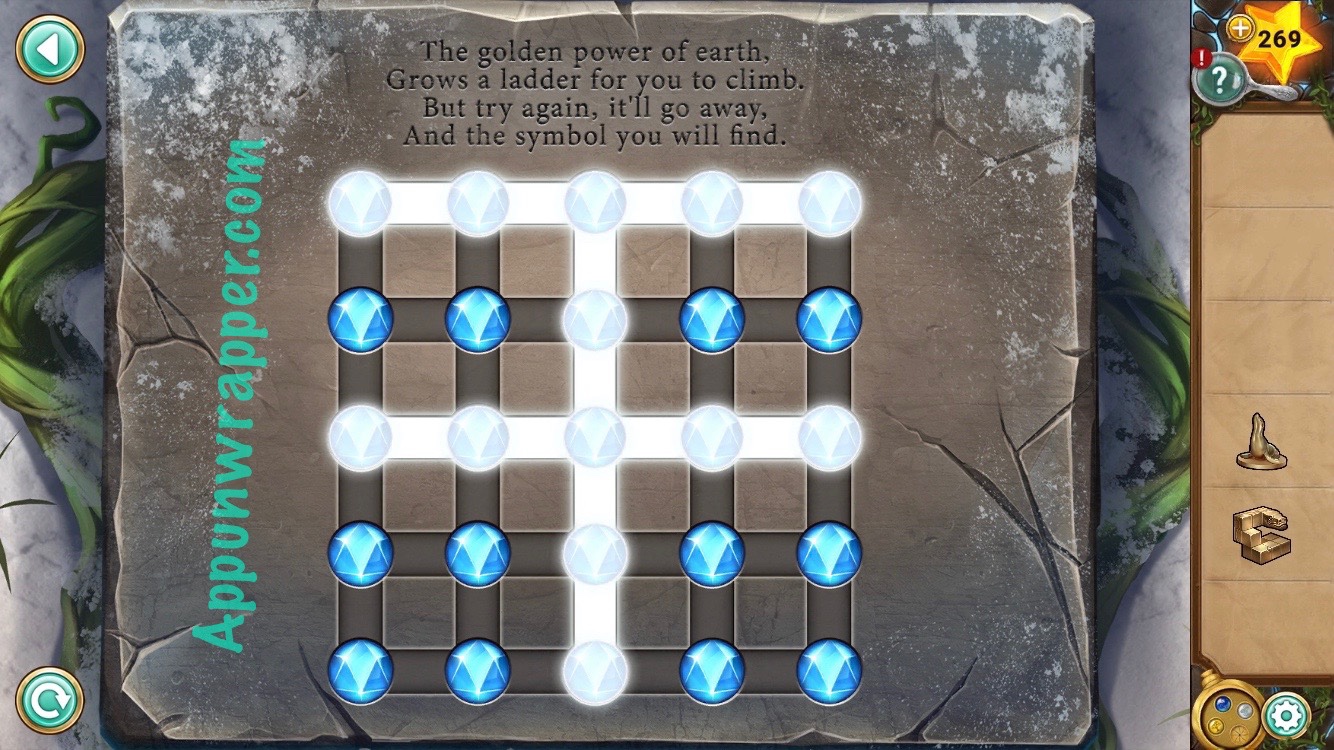
12. The clue on the puzzle says:
“The golden power of earth,
Grows a ladder for you to climb.
But try again, it’ll go away,
And the symbol you will find.”
It’s talking about the vines you grew across the creek.
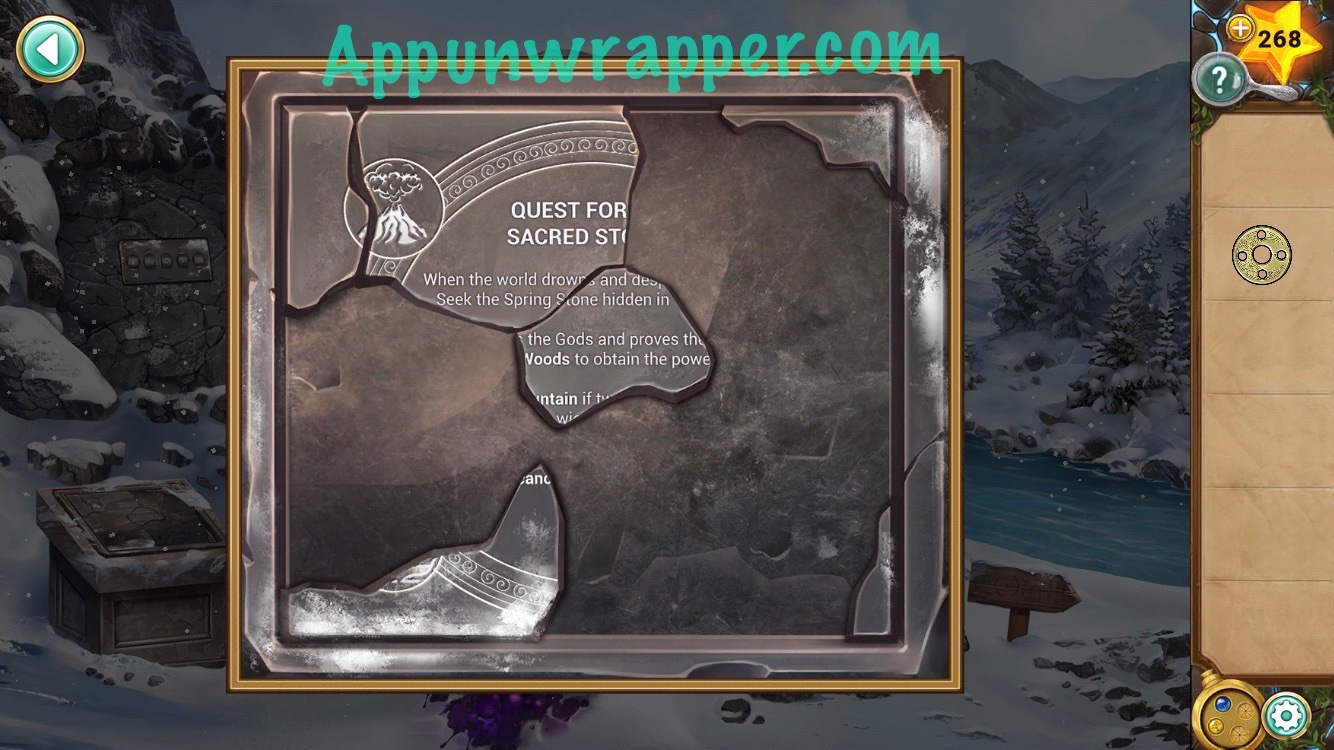
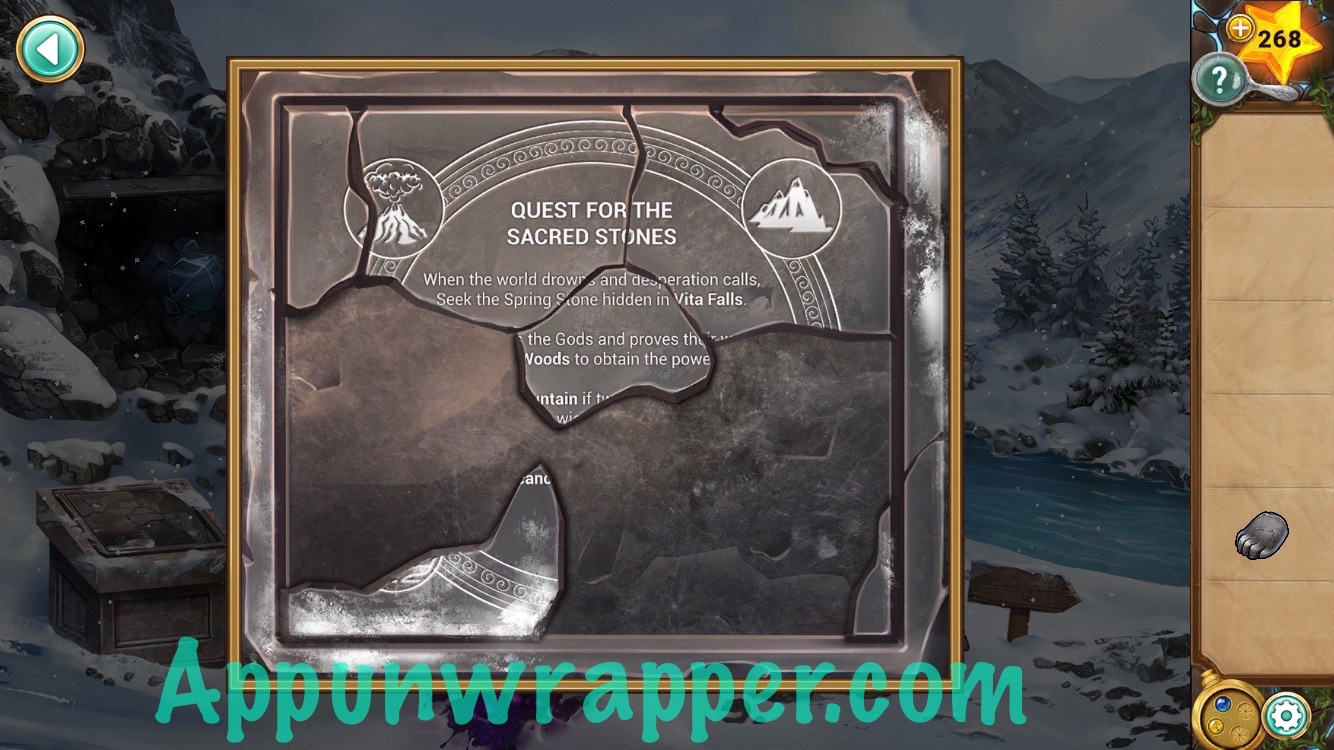
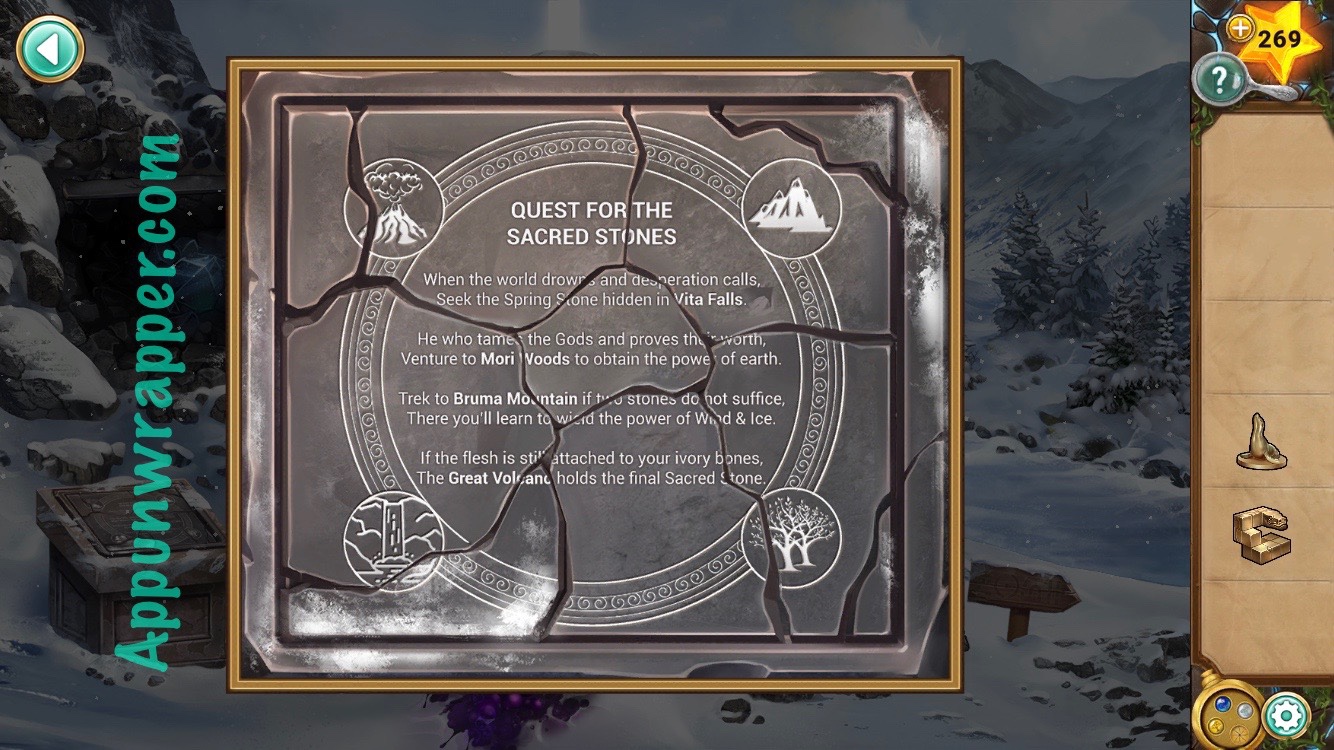
13. Go back to Siegfried and give him the backpack. He’ll give you a stone key. Also, place the rest of the stone plates with the others. There’s a poem on it called QUEST FOR THE SACRED STONES.
14. Continue across the creek and use the earth stone to get rid of the vines. Now you can see a symbol!
15. Go back to the first area and draw that symbol into the puzzle. Then take the seal figurine.
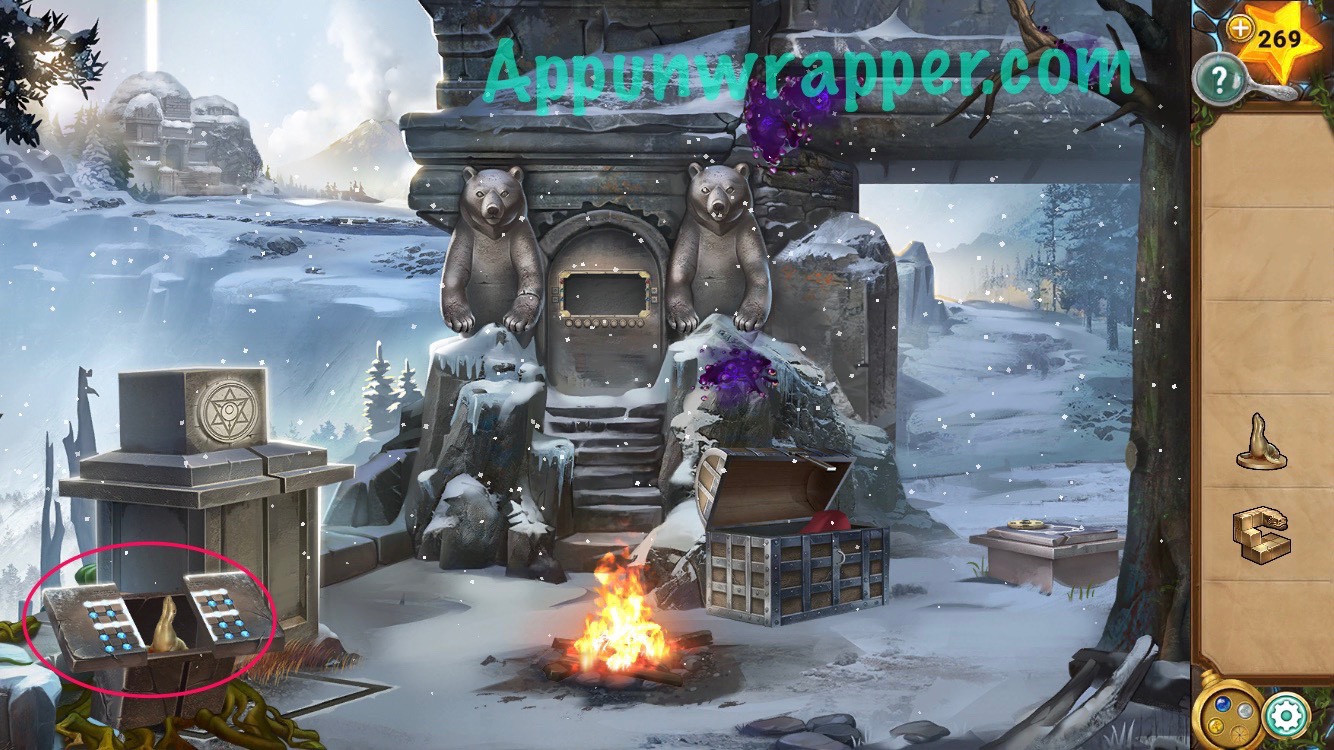
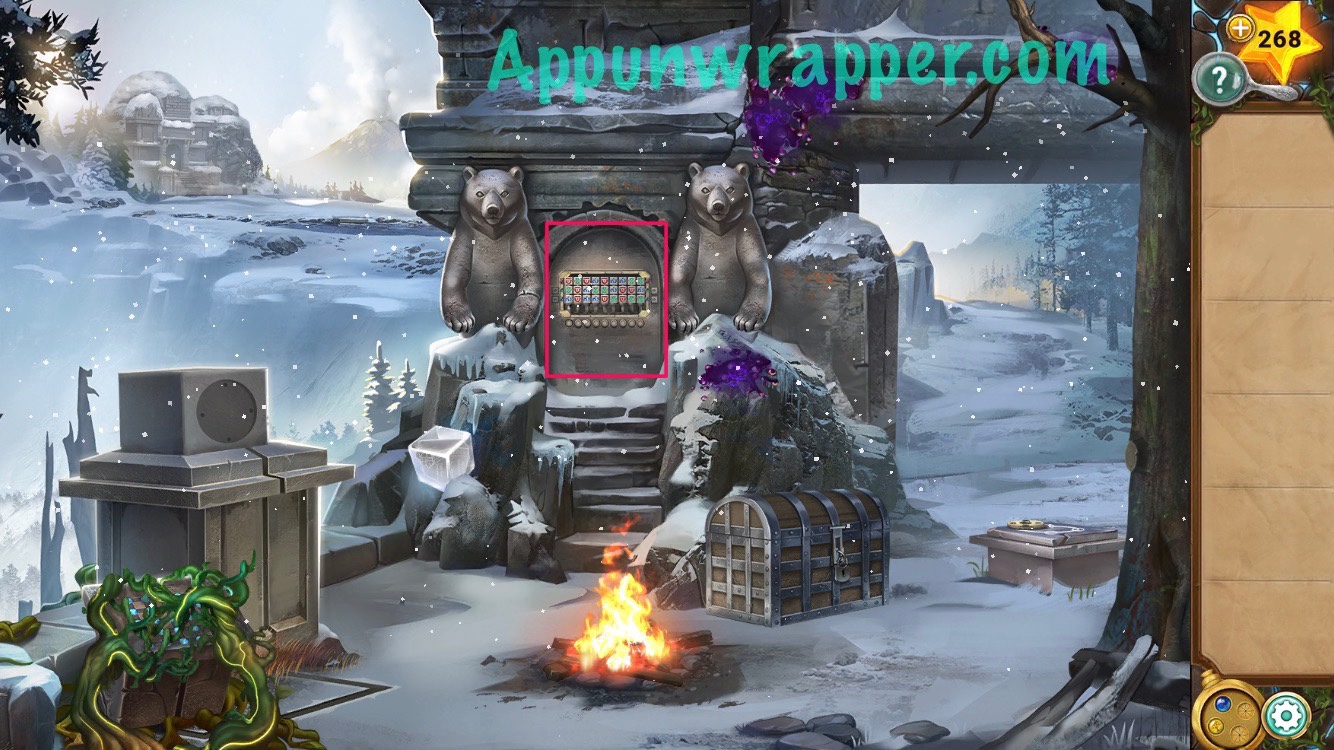
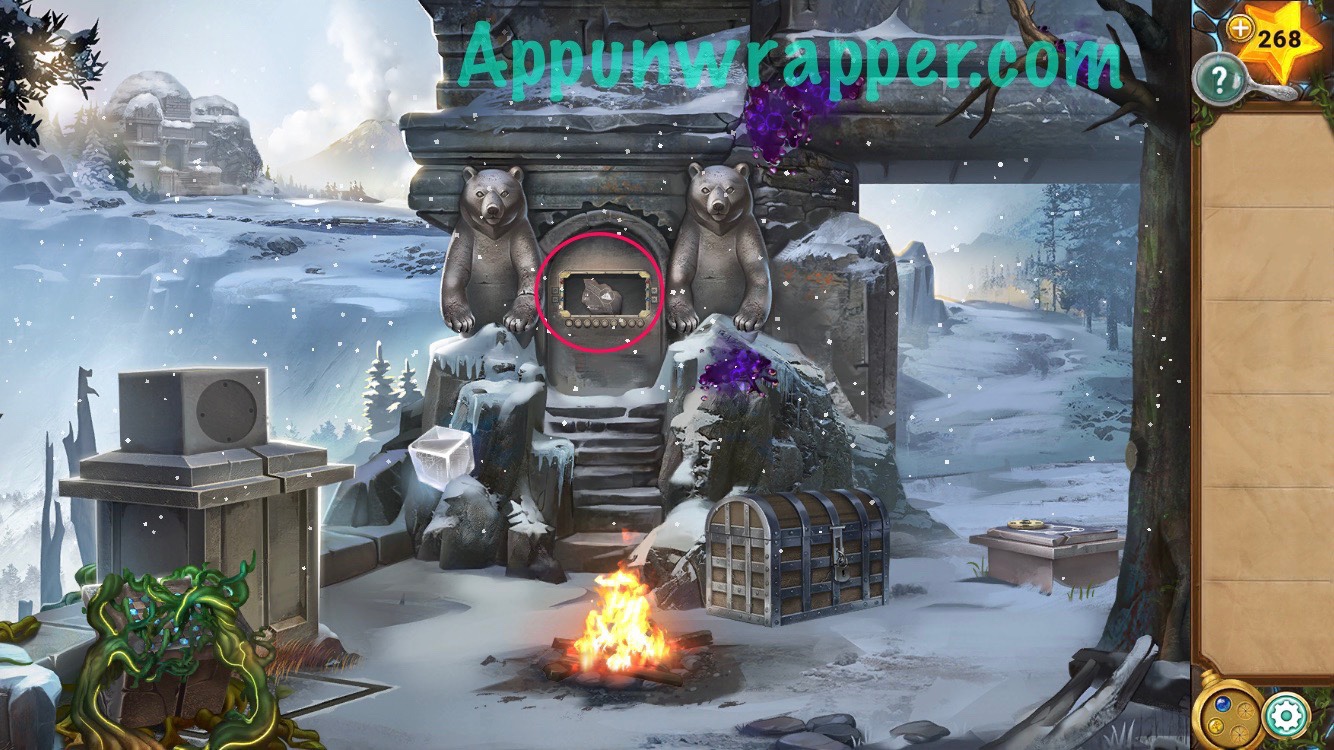
16. Go back to the temple. Place the two seal statues on the pedestal to the right to reveal another puzzle.
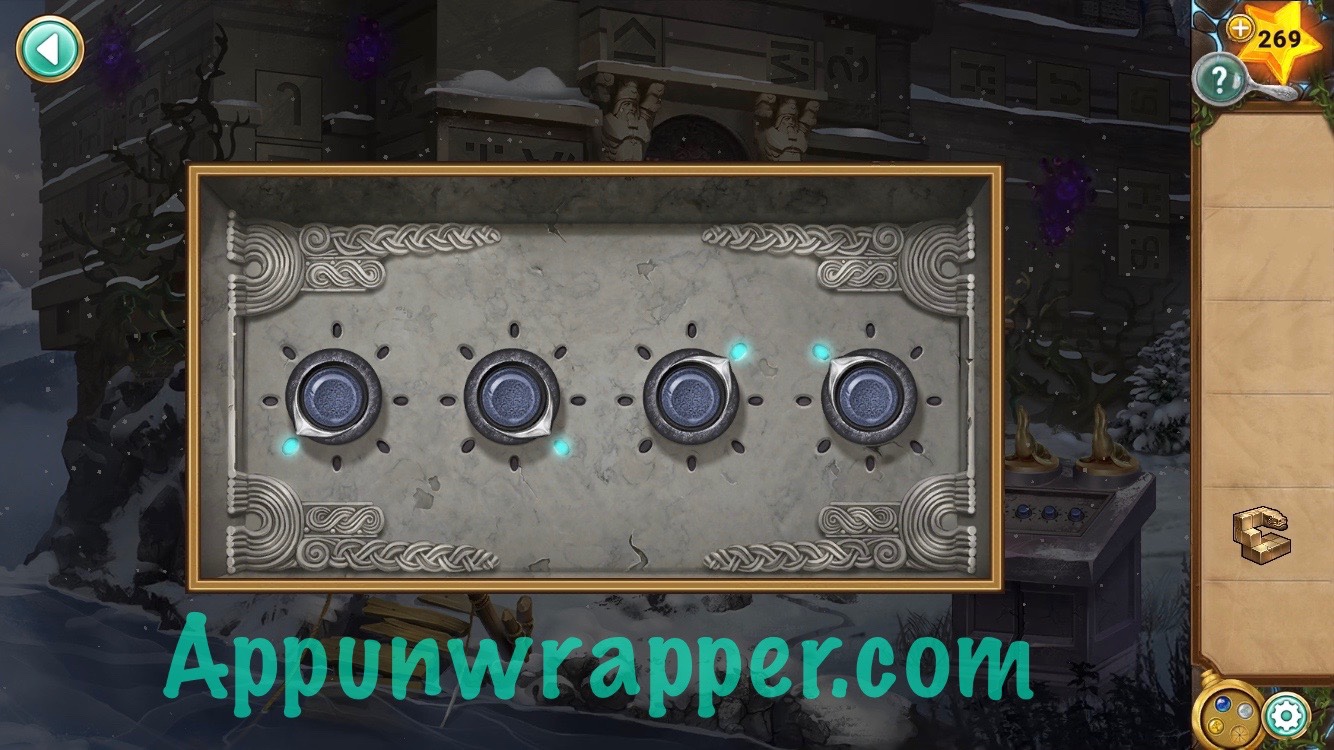
17. For the Dials puzzle, you want to look at the QUEST FOR THE SACRED STONES poem. Each line mentions a specific temple. The four temples are depicted in the corners. So you want the dials to point in the direction of the temples shown on the poem, as so:
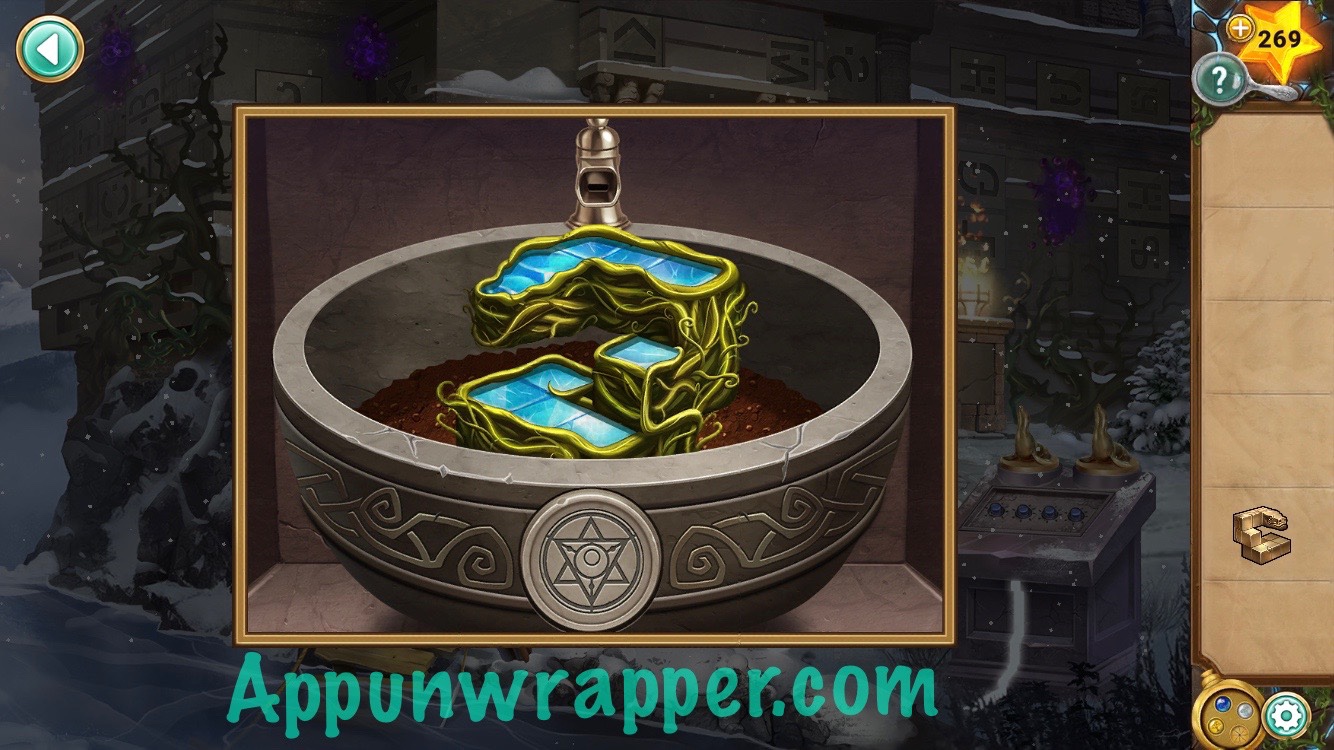
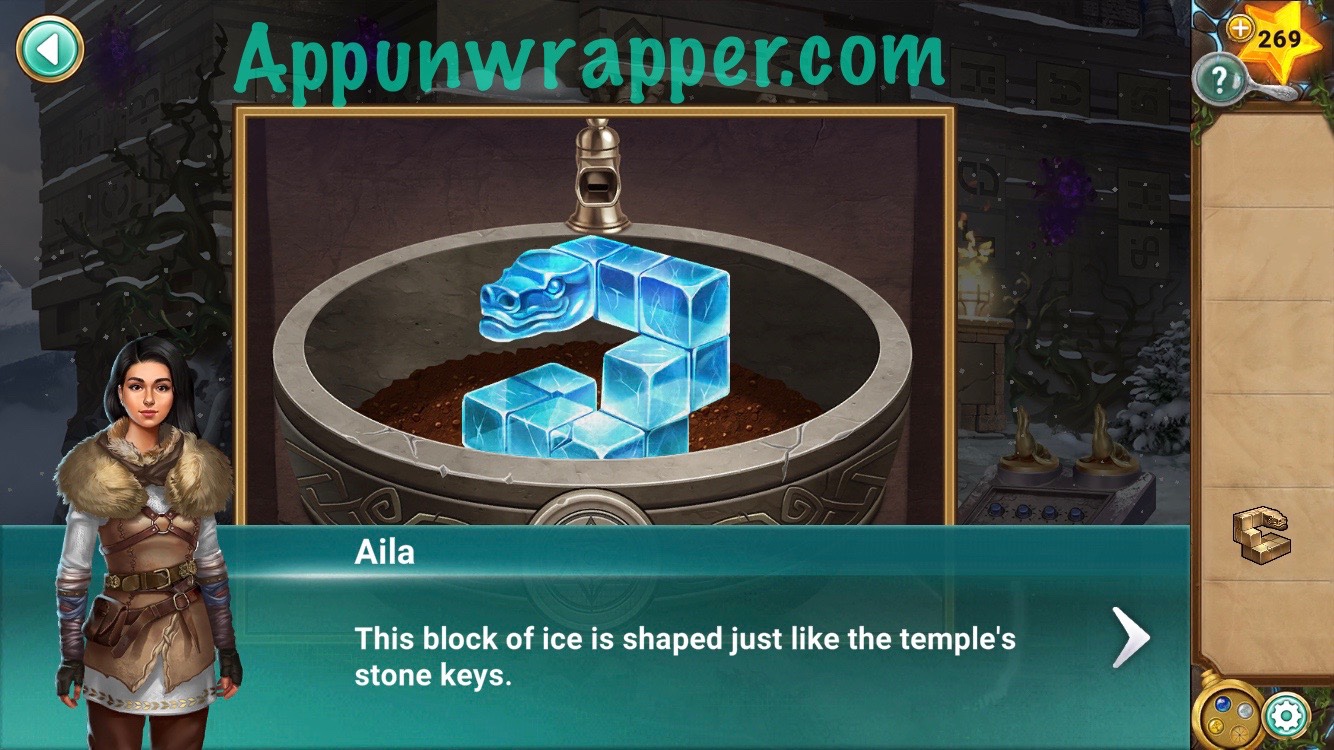
18. A pot of soil is revealed. Zoom in on it and use your locket on the star emblem. Start with the earth stone to grow some vines. Then use the water stone to fill them with water. Then use the wind stone to freeze the water. And finally, use the earth stone again to remove the vines. You’ll be left with an ice key that matches the temples’ snake keys!

19. Place both keys in the slots on the floor. Then use all three magical stones on your locket with the star emblem to unlock another pillar puzzle.
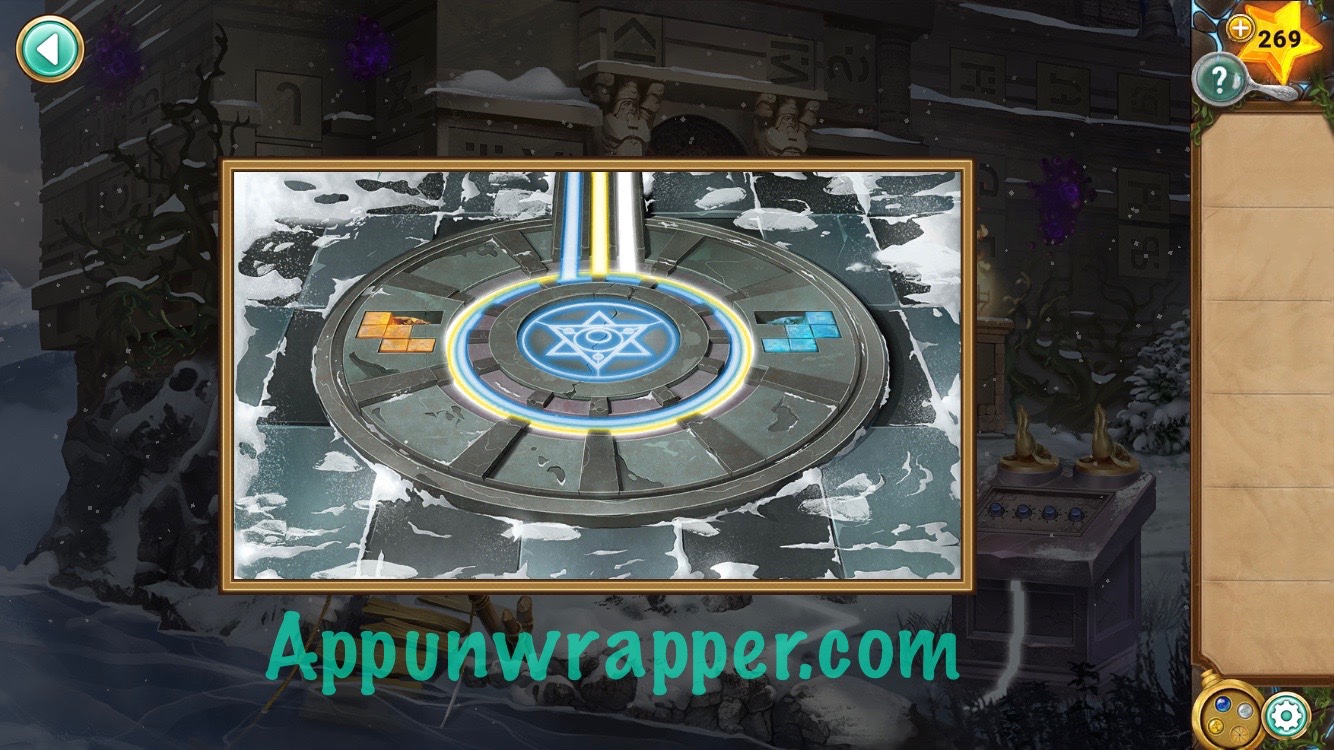
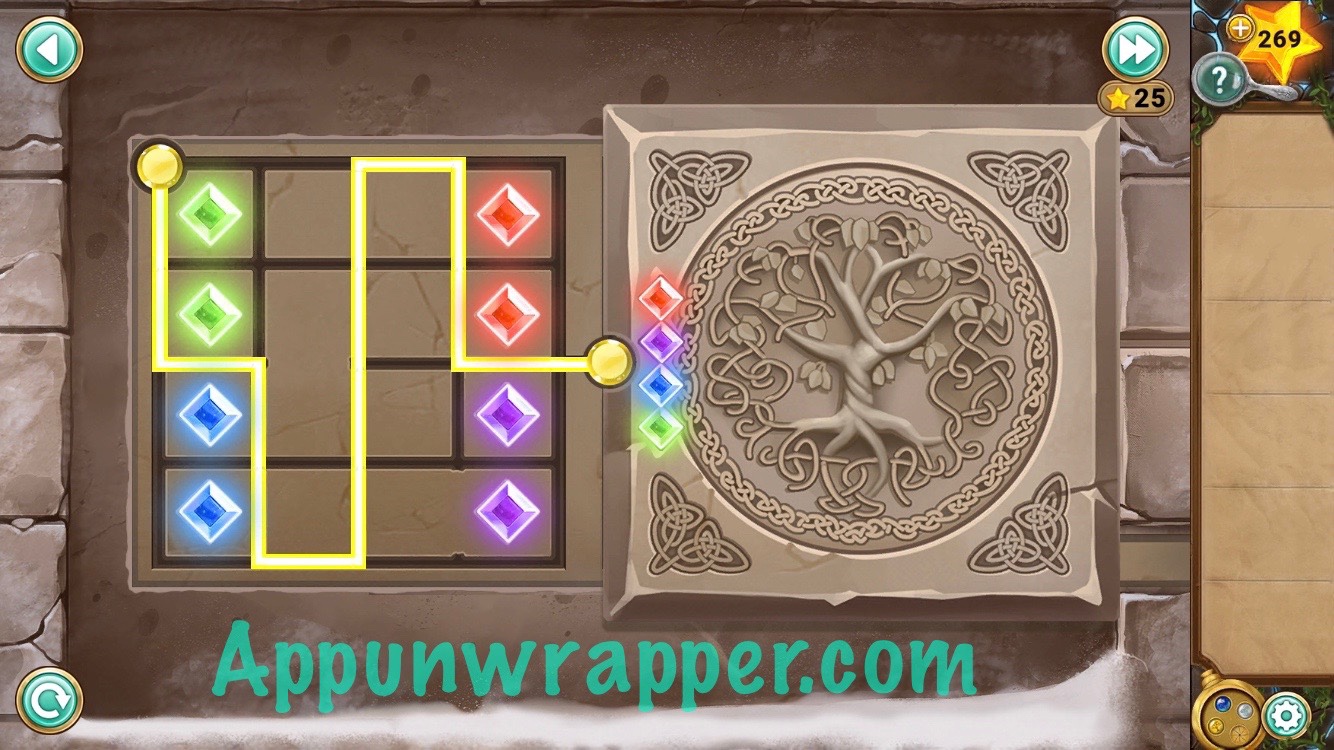
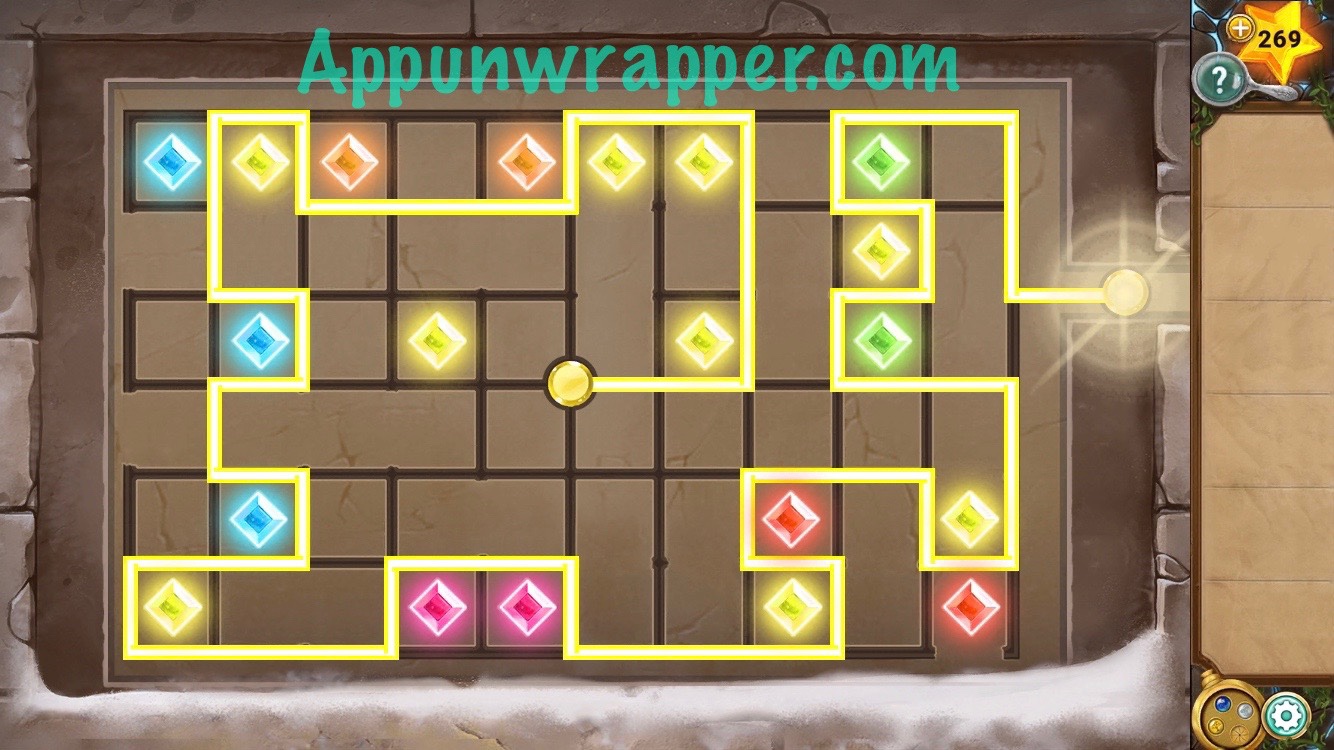
20. Let’s solve the fifth pillar puzzle. You need to draw a path that separates all the diamonds by color. There’s two puzzles to solve.
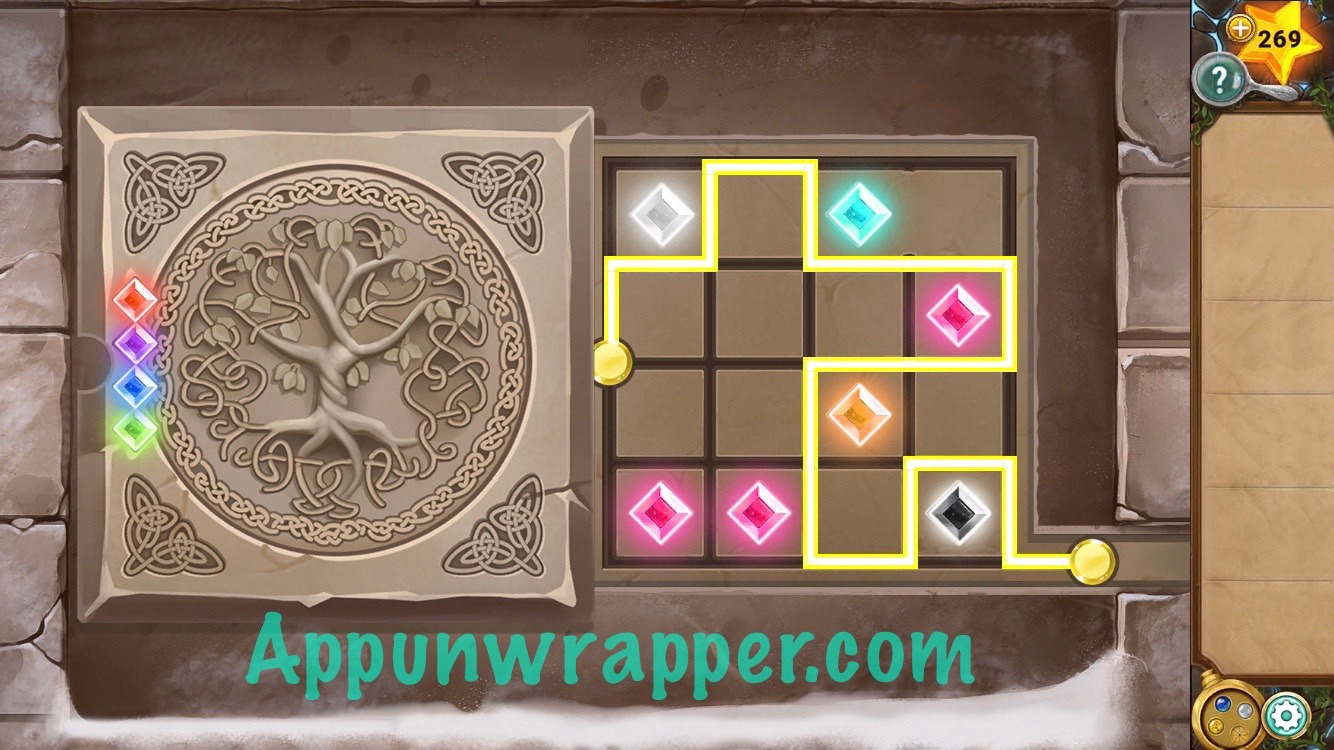
21. Now for the sixth pillar puzzle. It’s the same idea, but on a much bigger scale. It’s a tricky one! Then go through the door to complete the chapter.
And that’s the end of Chapter 5! Click here to continue to Chapter 6 or choose a chapter below.
Chapter 1 | Chapter 2 | Chapter 3 | Chapter 4 | Chapter 5 | Chapter 6 | Chapter 7 | Chapter 8
Anyone else have the puzzle where you get the second seal statue correct, but it wonΓÇÖt unlock it?
Yes!
Yes, same here!
thank you for the information
“For the Dials puzzle, you want to look at the QUEST FOR THE SACRED STONES poem. Each line mentions a specific temple. The four temples are depicted in the corners. So you want the dials to point in the direction of the temples shown on the poem, as so: ” wtf ?
The clues are ridiculous!!
I agree with you.
Where is this poem ?
I’ve searched for it but so far it’s not been found.