Another Tomorrow
By: Glitch Games

Glitch Games is back with another pun-packed point-and-click adventure. In Another Tomorrow, you wake up without any idea who you or where you are and need to solve puzzles to piece together your past. Like most games form Glitch Games, it can get very tricky, so this walkthrough guide should help you if you get stuck. Feel free to ask for extra help in the comments section.
Walkthrough:
Prologue & Chapter 1 | Chapter 2 | Chapter 3 | Chapter 4 | Chapter 5 | Chapter 6 | Chapter 7
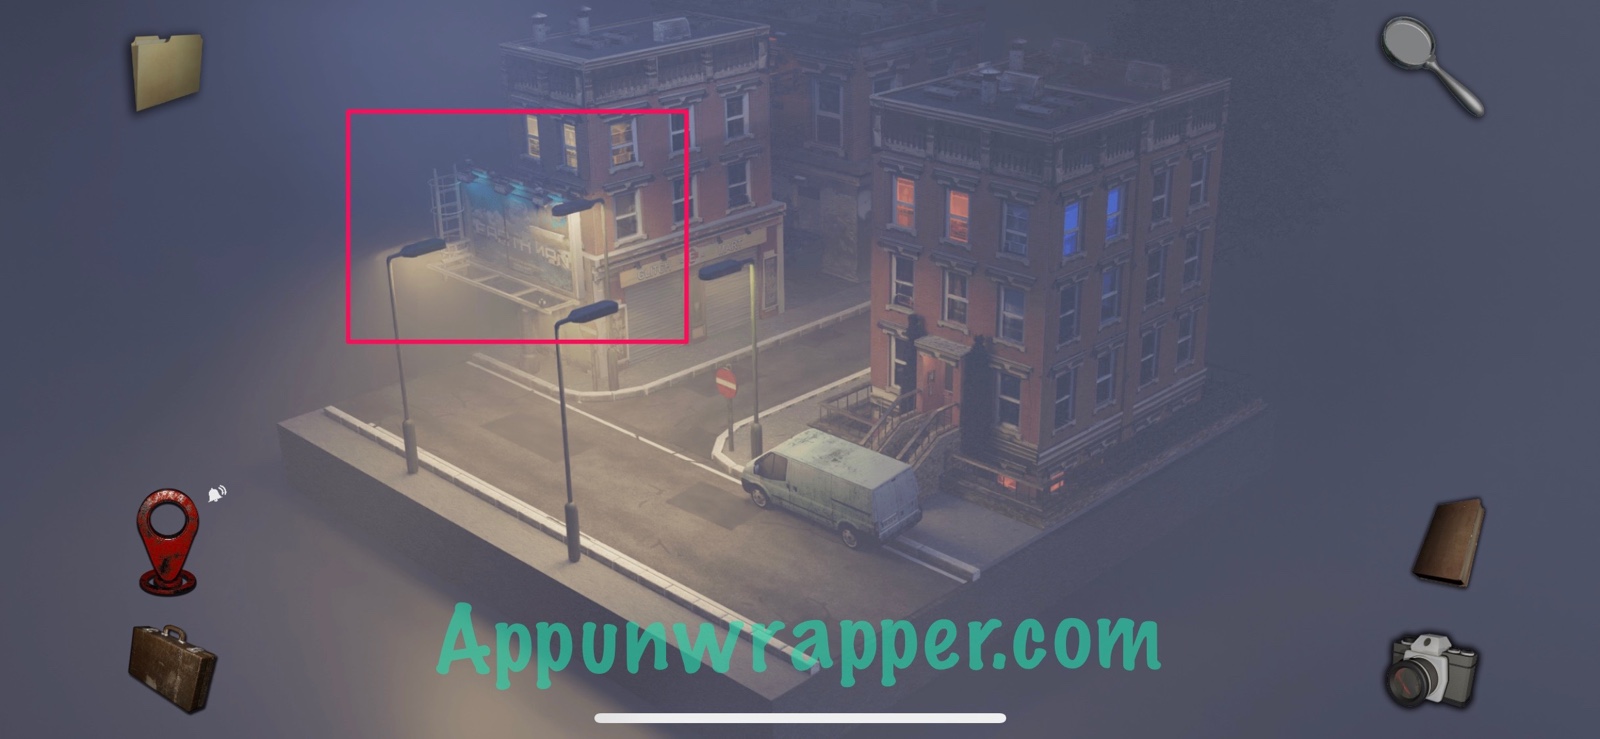
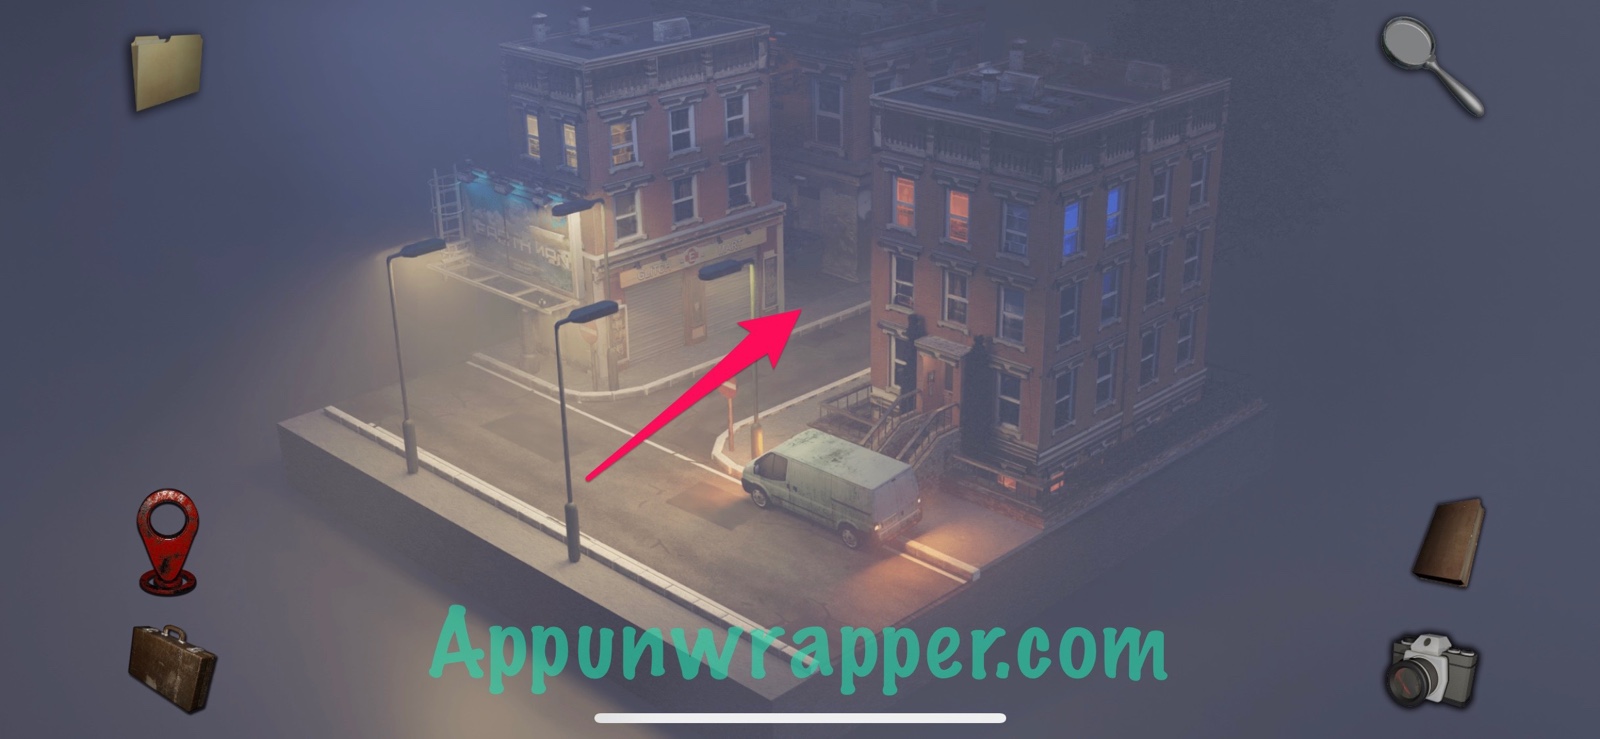
Chapter 2, Apartment:
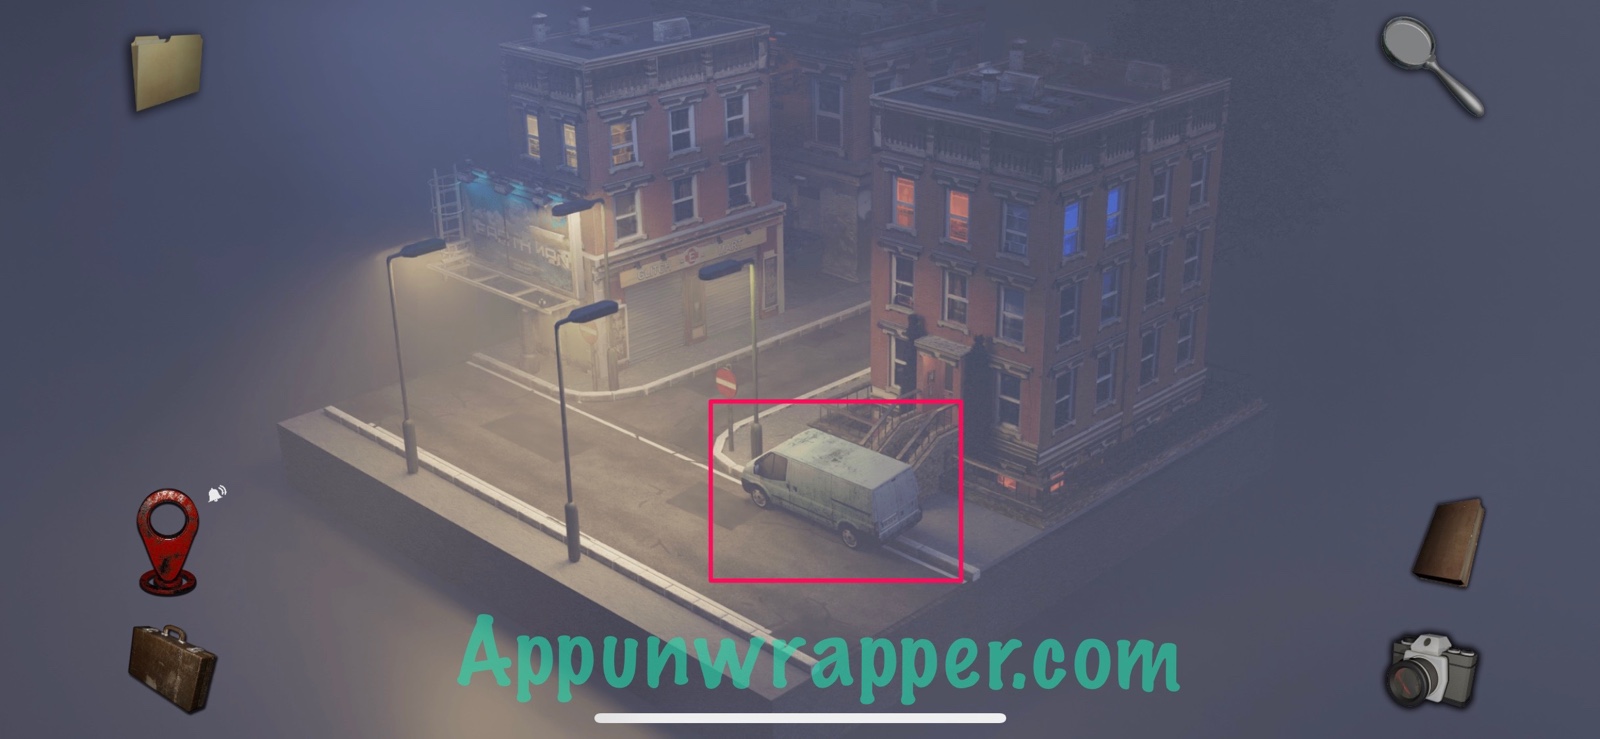
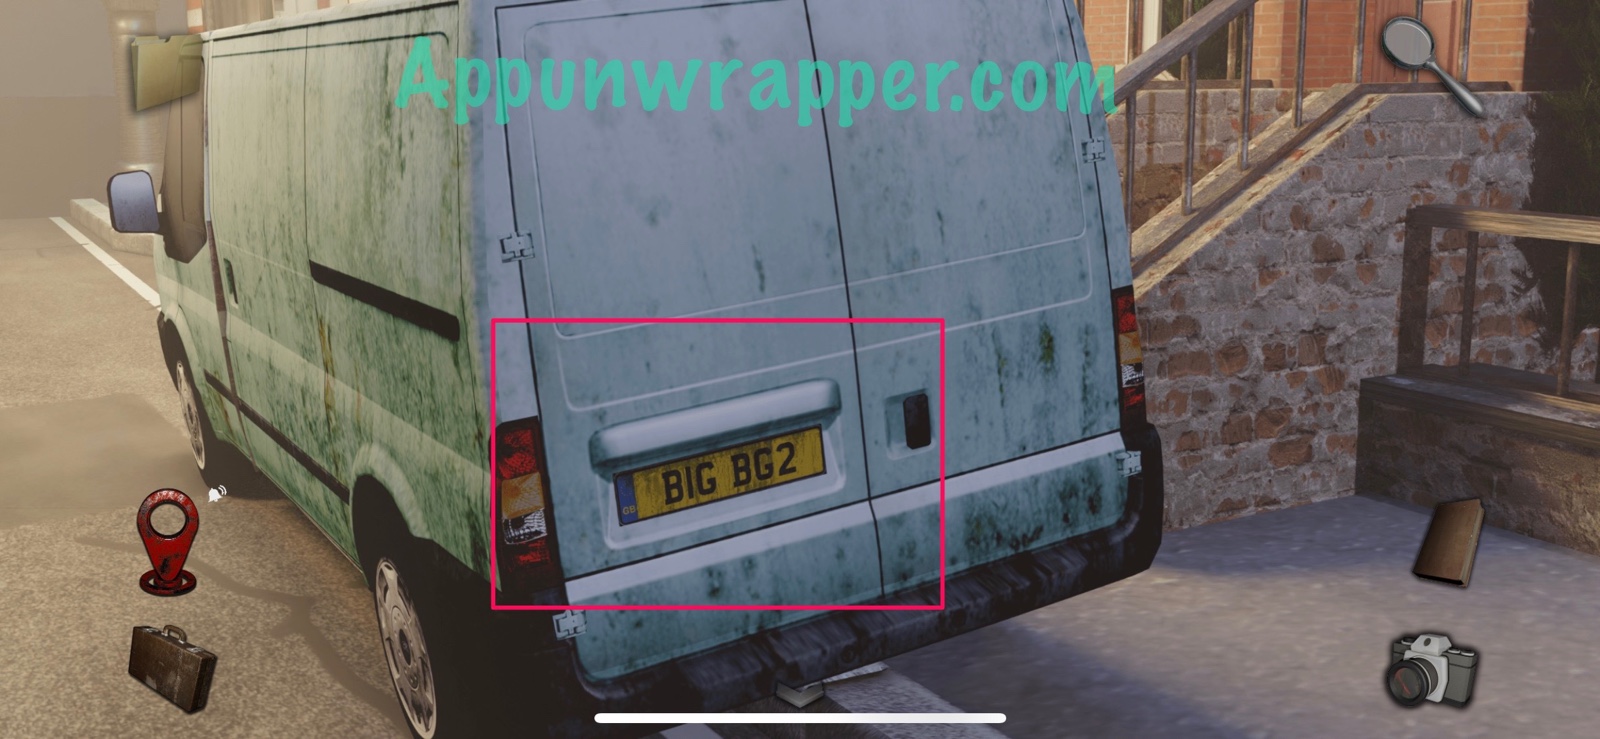
1. Tap on the van and take a photo of its license plate.
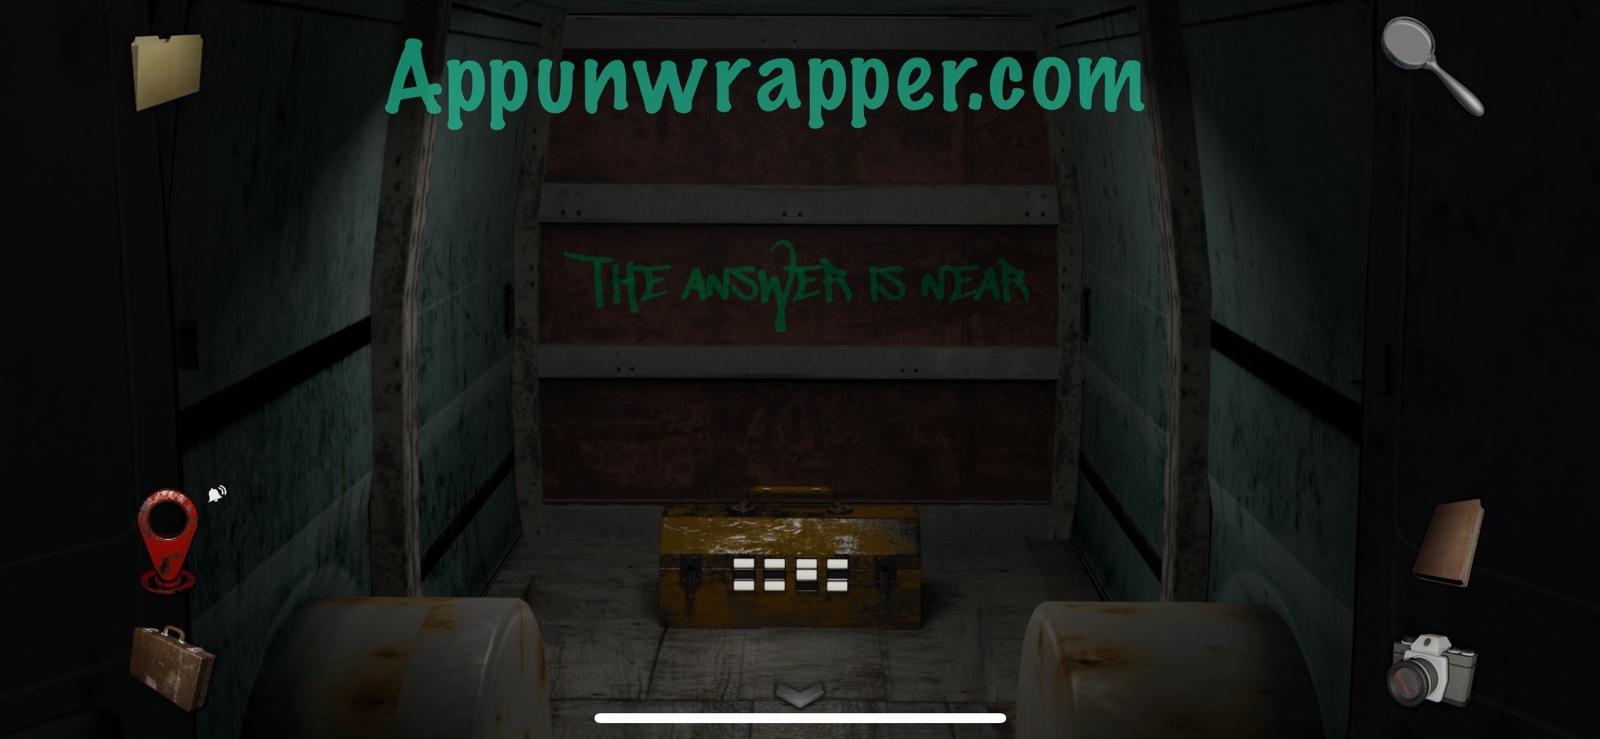
2. Open the van door to see a locked box and a clue that says, “THE ANSWER IS NEAR.”
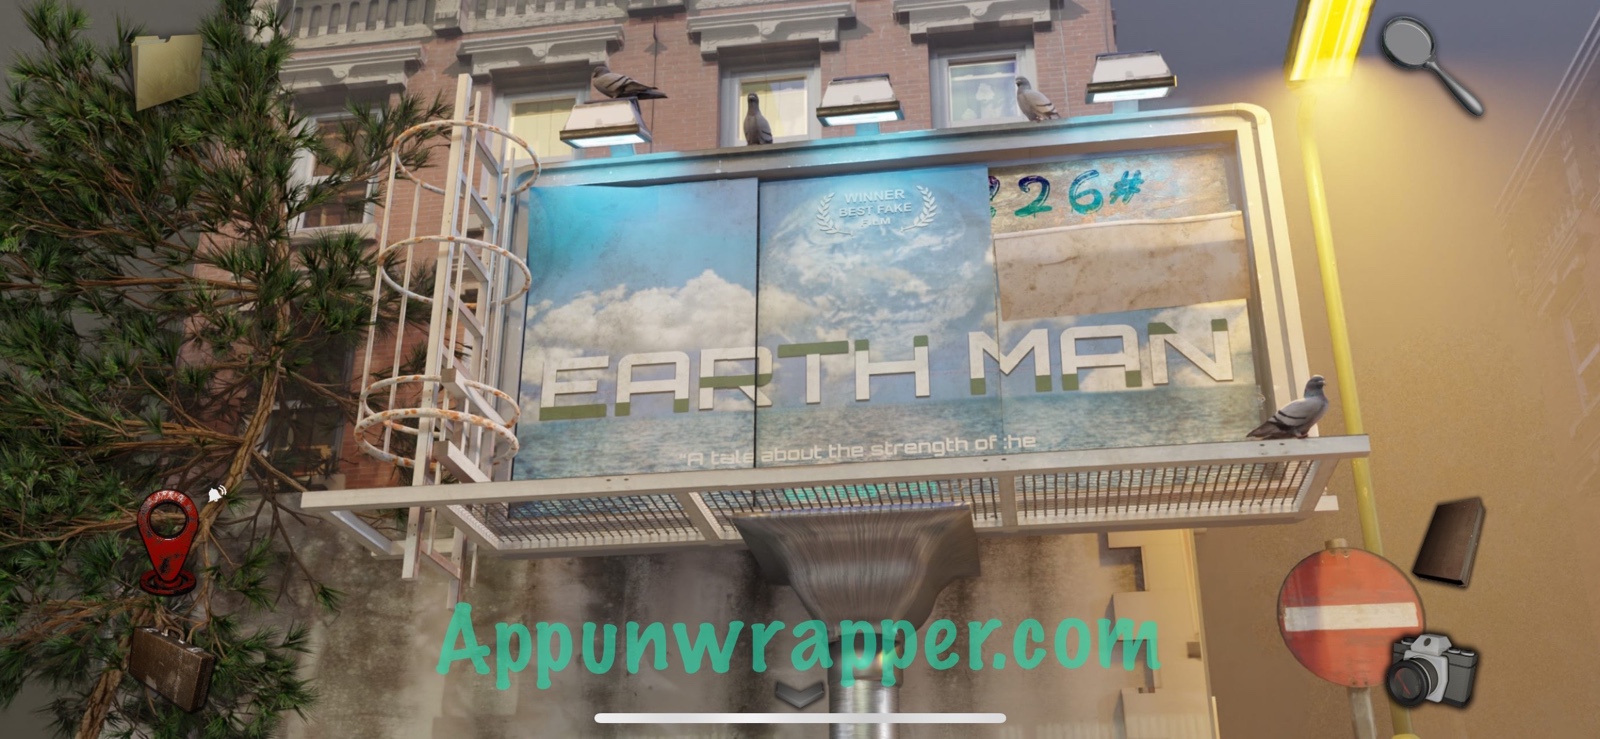
3. Leave the van and tap on the billboard. Take a photo of it.
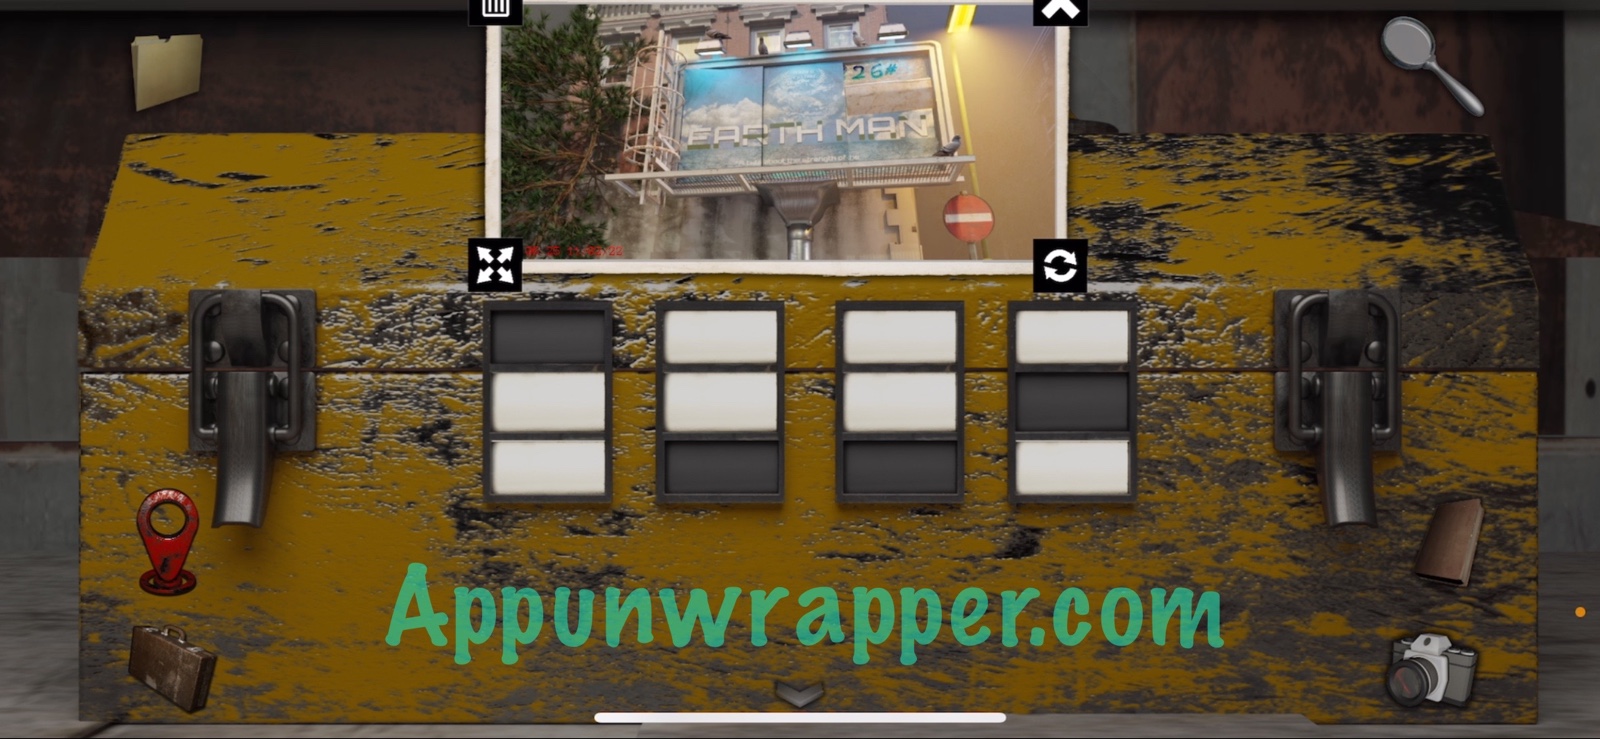
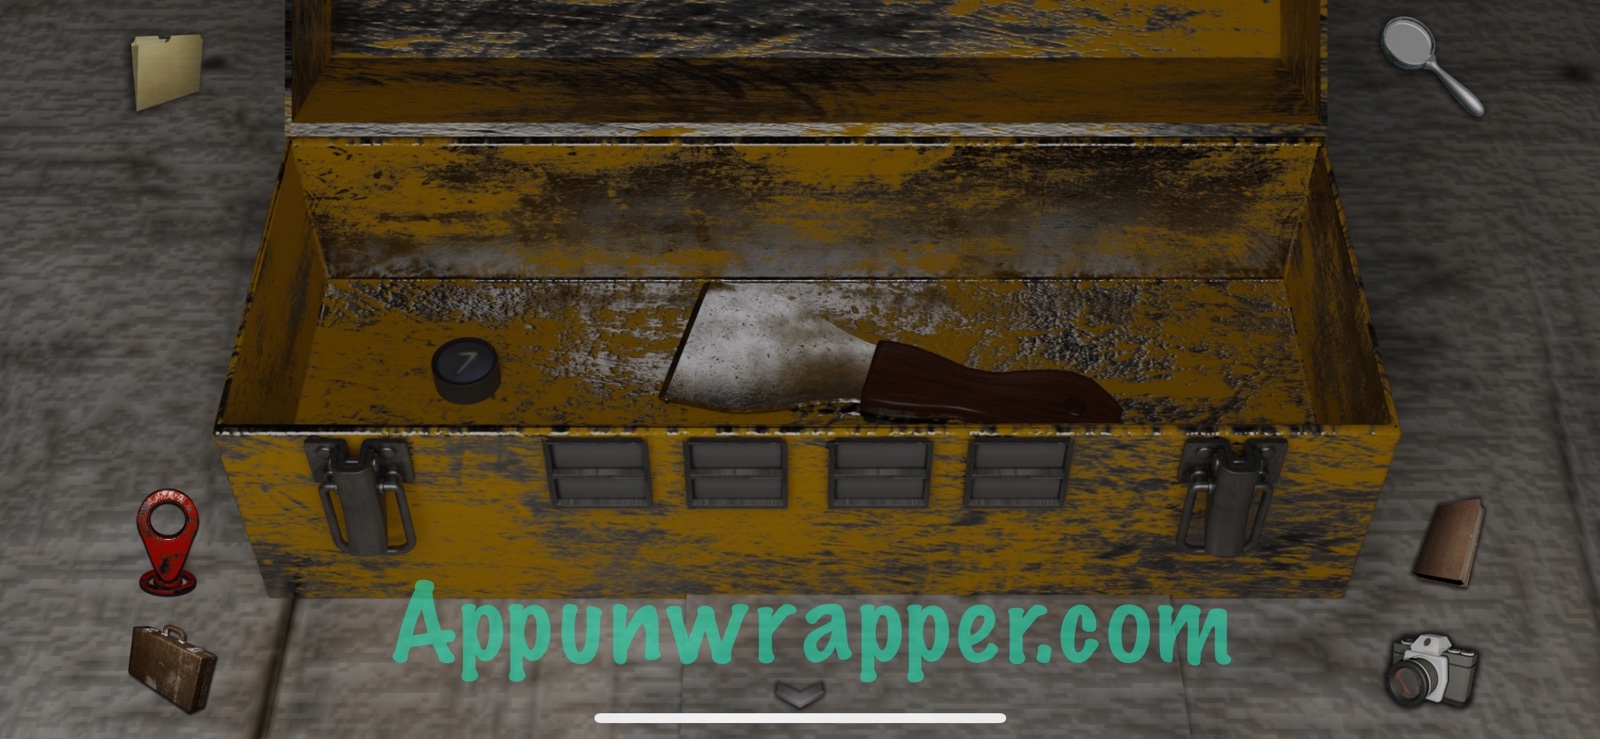
4. Go back to the van and tap on the box. Take out the photo of the billboard. Find the letters N E A R and match the pattern to them to unlock the box. Then take the keypad button and the paint scraper.
5. Leave the van. Enter the alley. Tap on the left trash bin and notice the lights are off so you can’t see. Notice the patterns and colors on the two wires connected to the light. Take a photo if you need to.
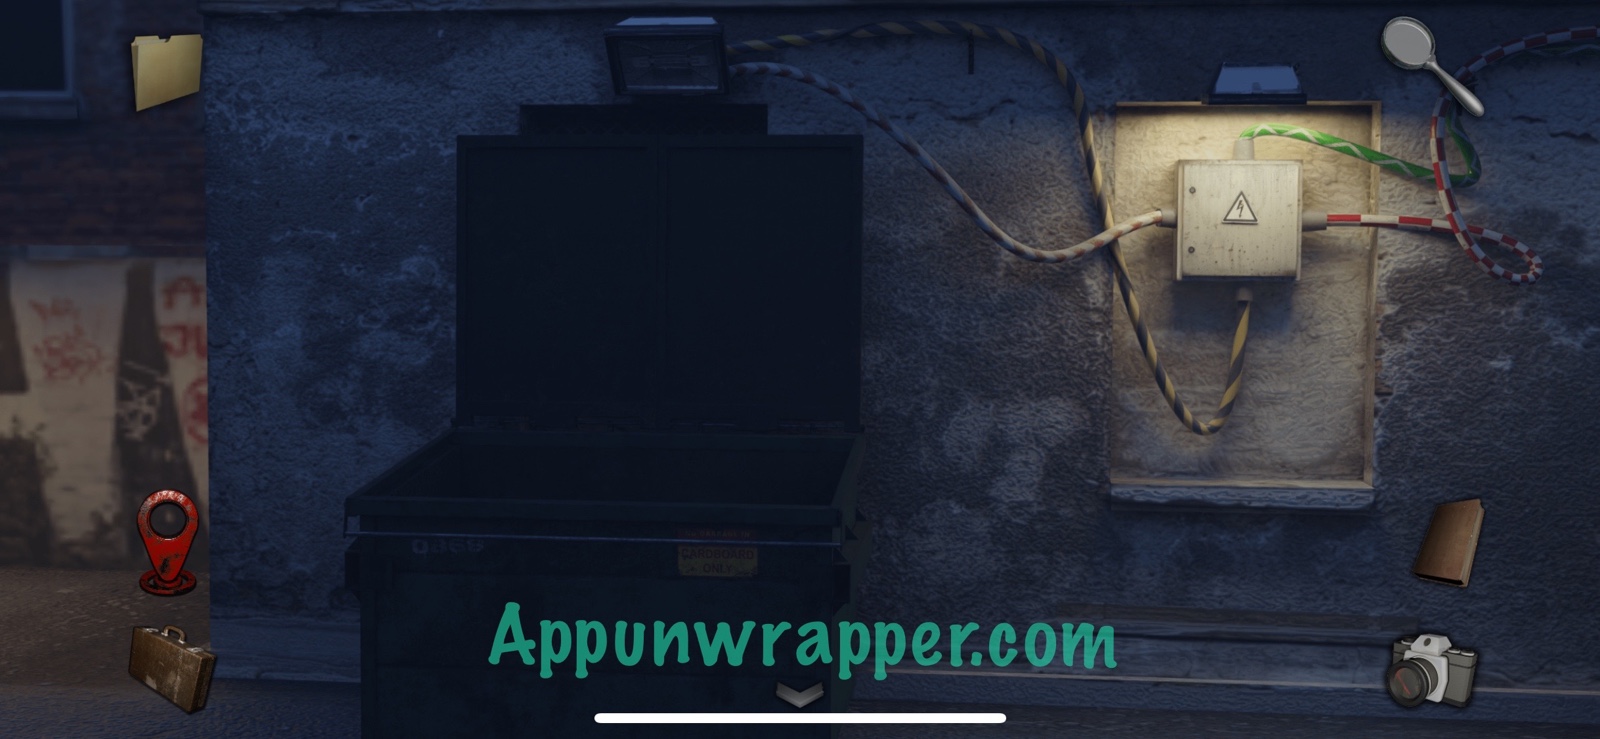
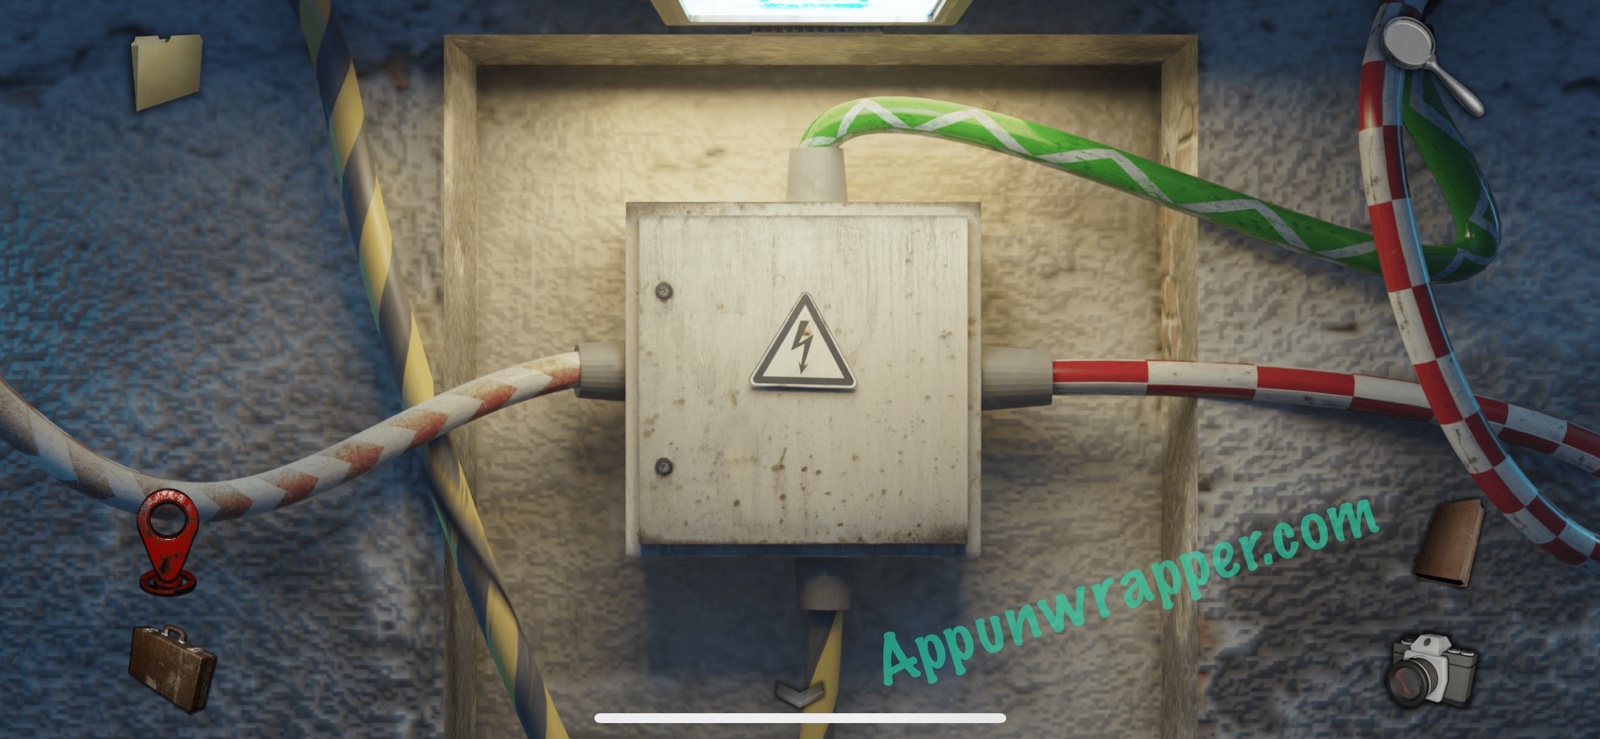
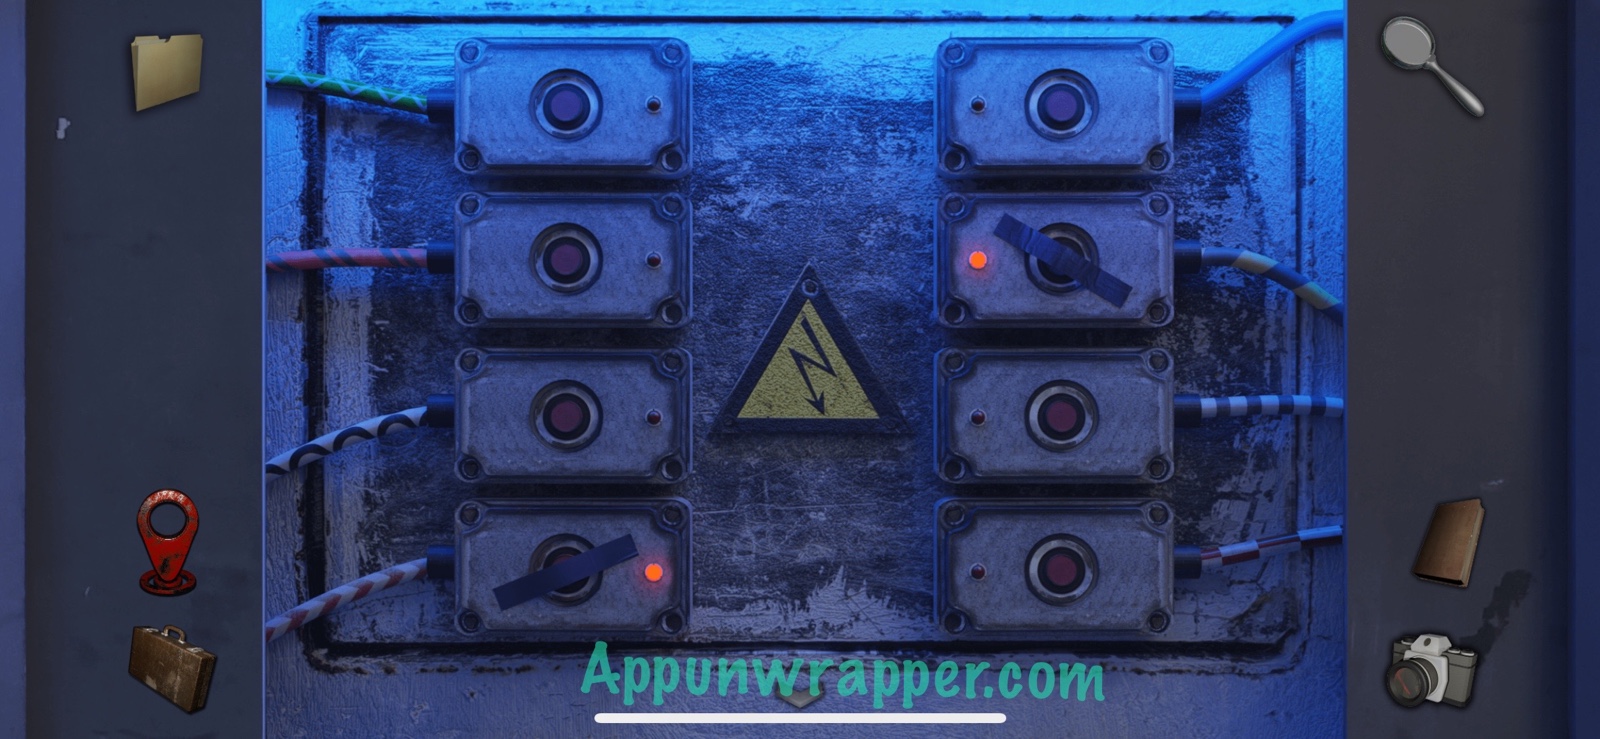
6. Head to the control box to the left of the flaming garbage can. Take the two pieces of tape and then place them on the buttons connected to wires that match the two connected to the light. If you got it right, the lights over the trash bin will turn on.
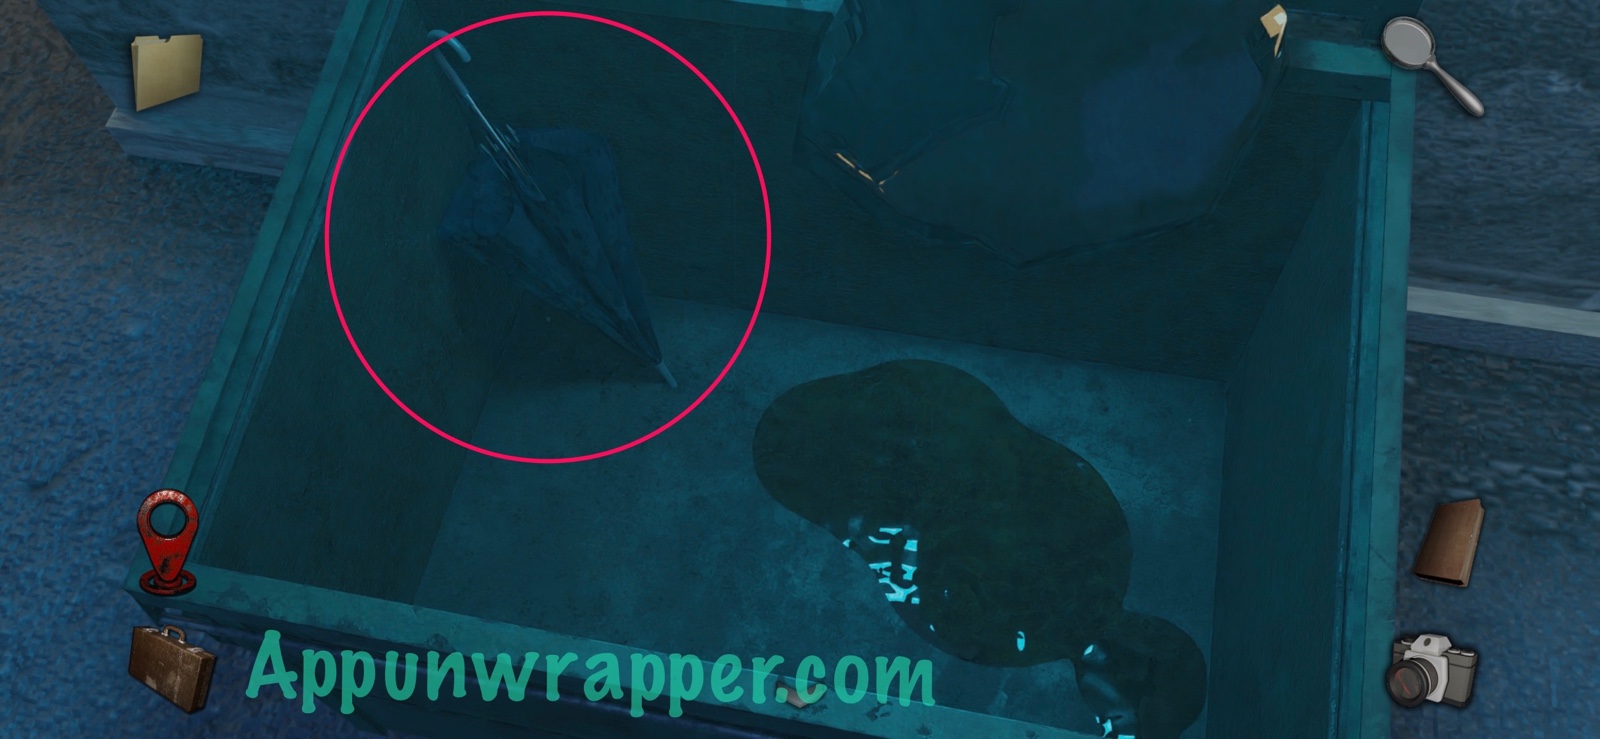
7. Go through the trash bin and grab the umbrella. Also, notice the garbage juice under the bag of trash. We’ll come back to that later.
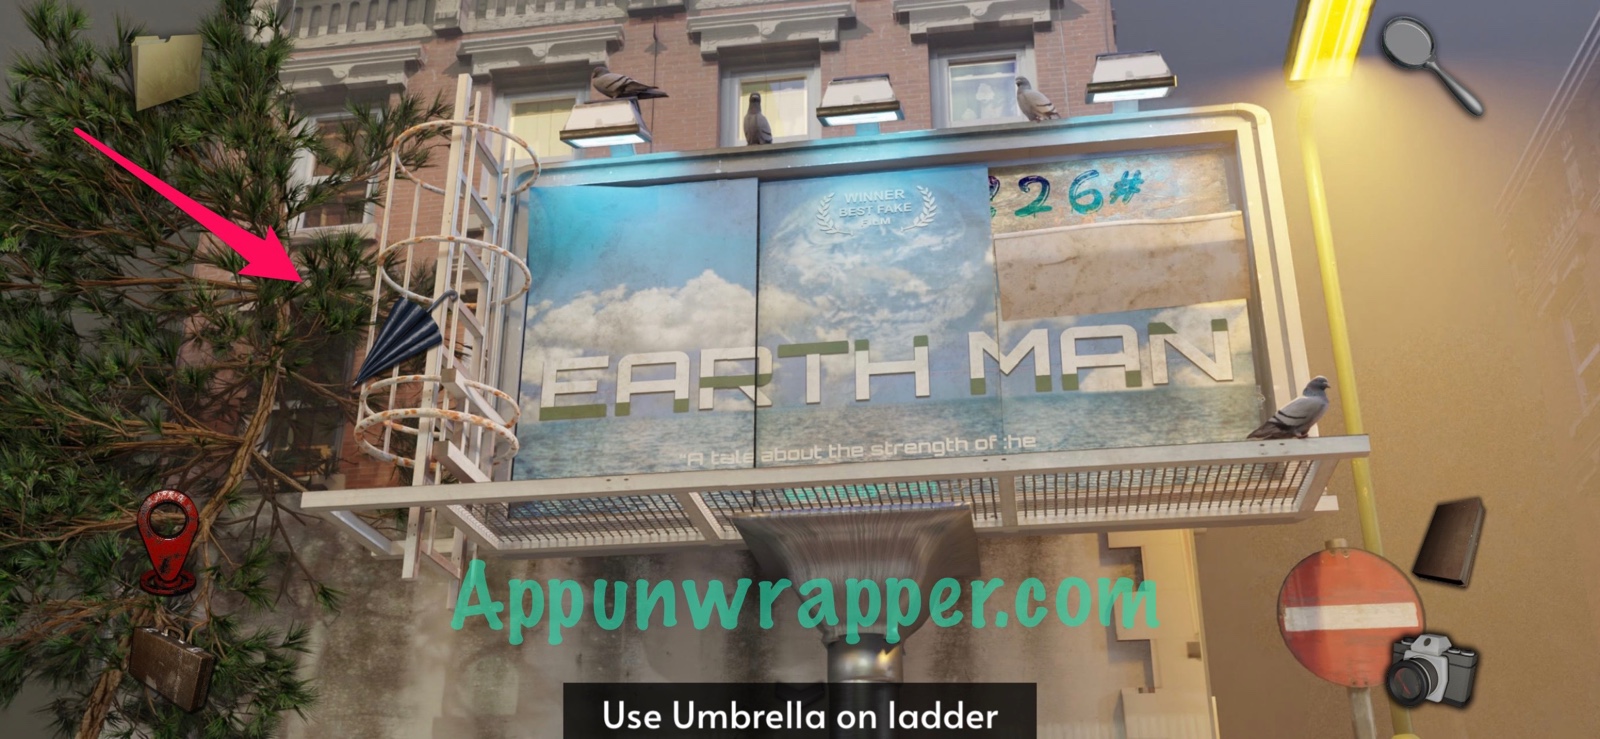
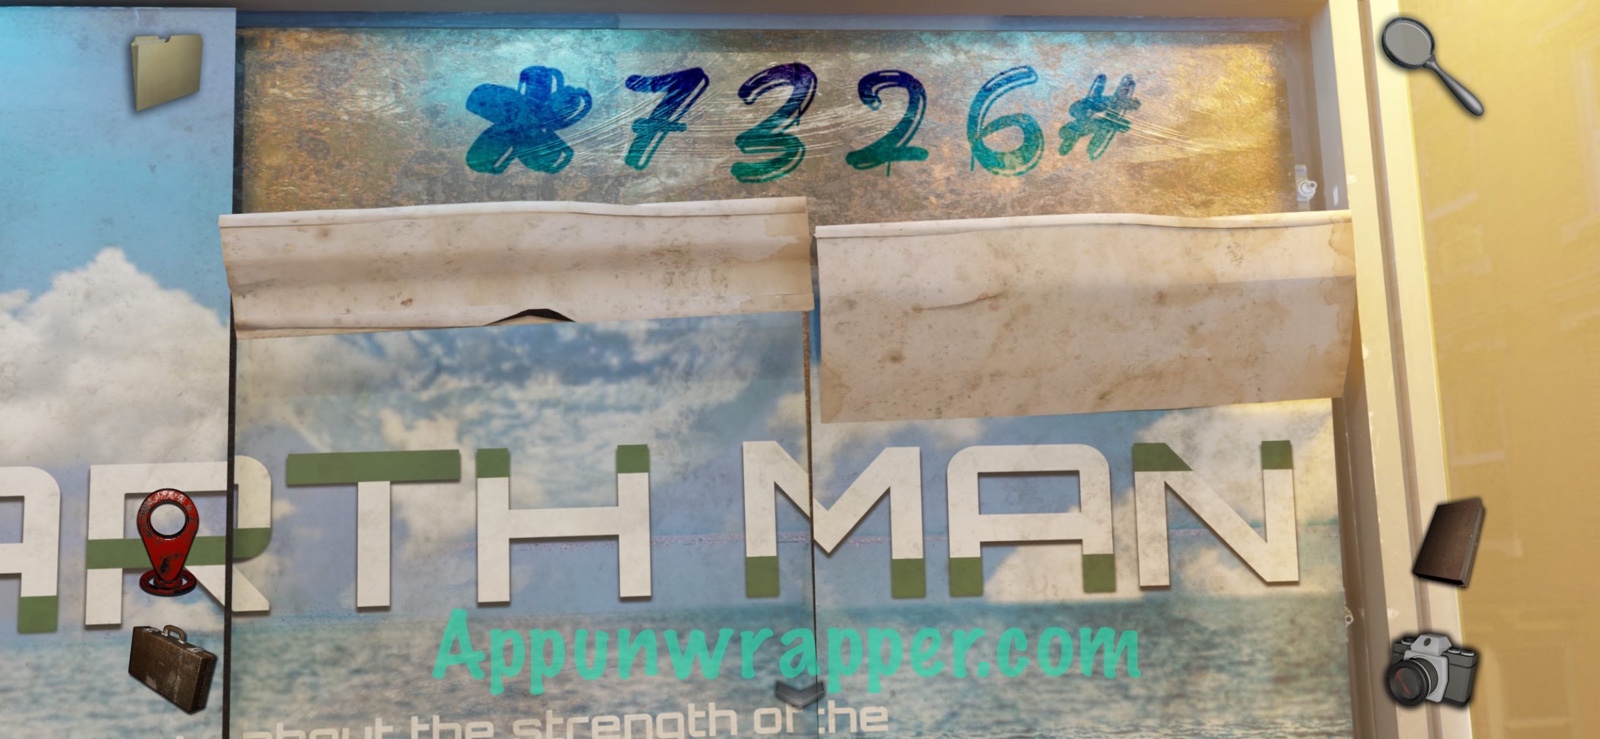
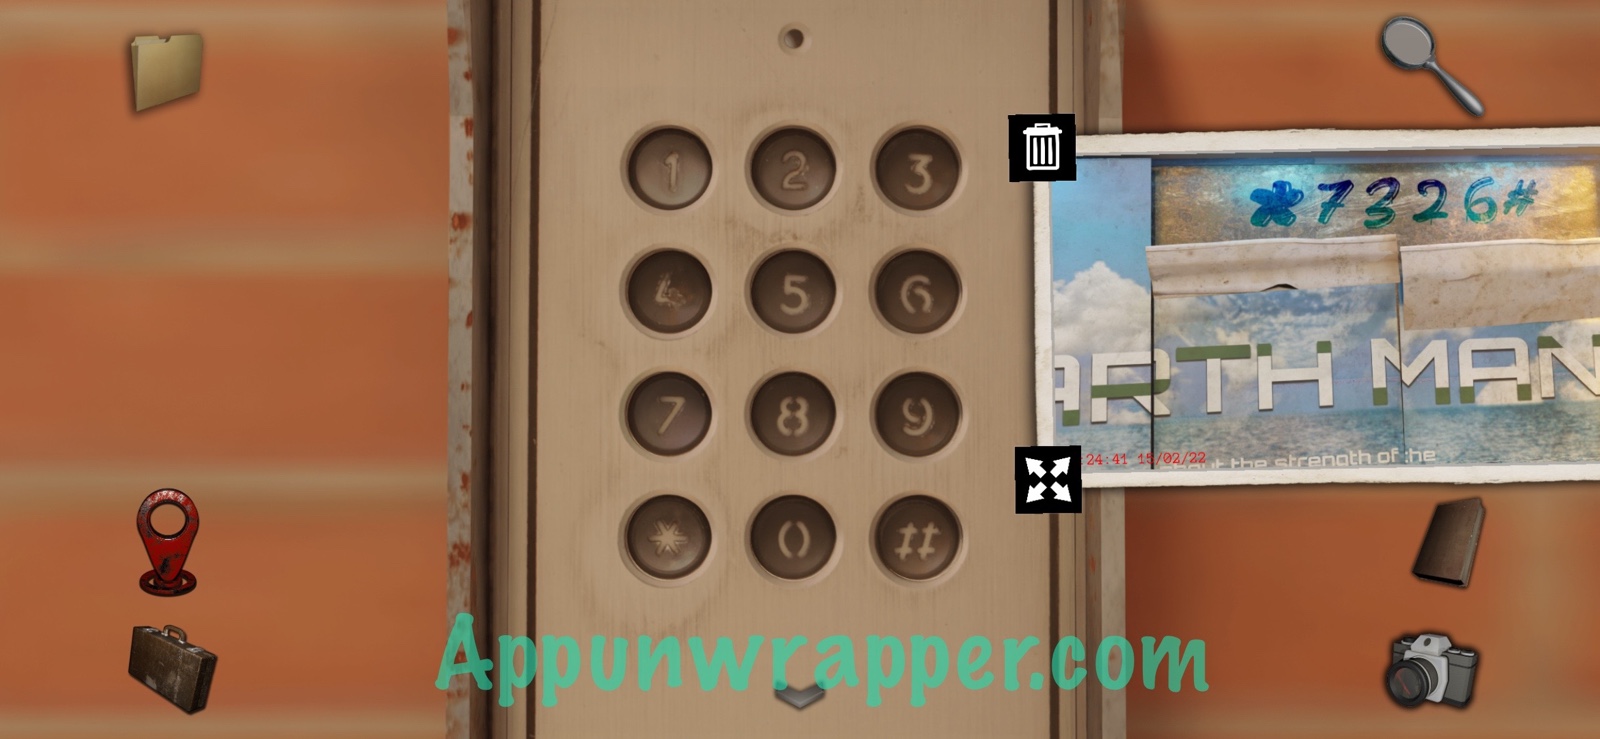
8. Go back to the billboard and use the umbrella to pull down the ladder. Then climb up and use the paint scraper to pull down the poster so you can see the numbers behind it. They say *7326#. Take a photo of it.
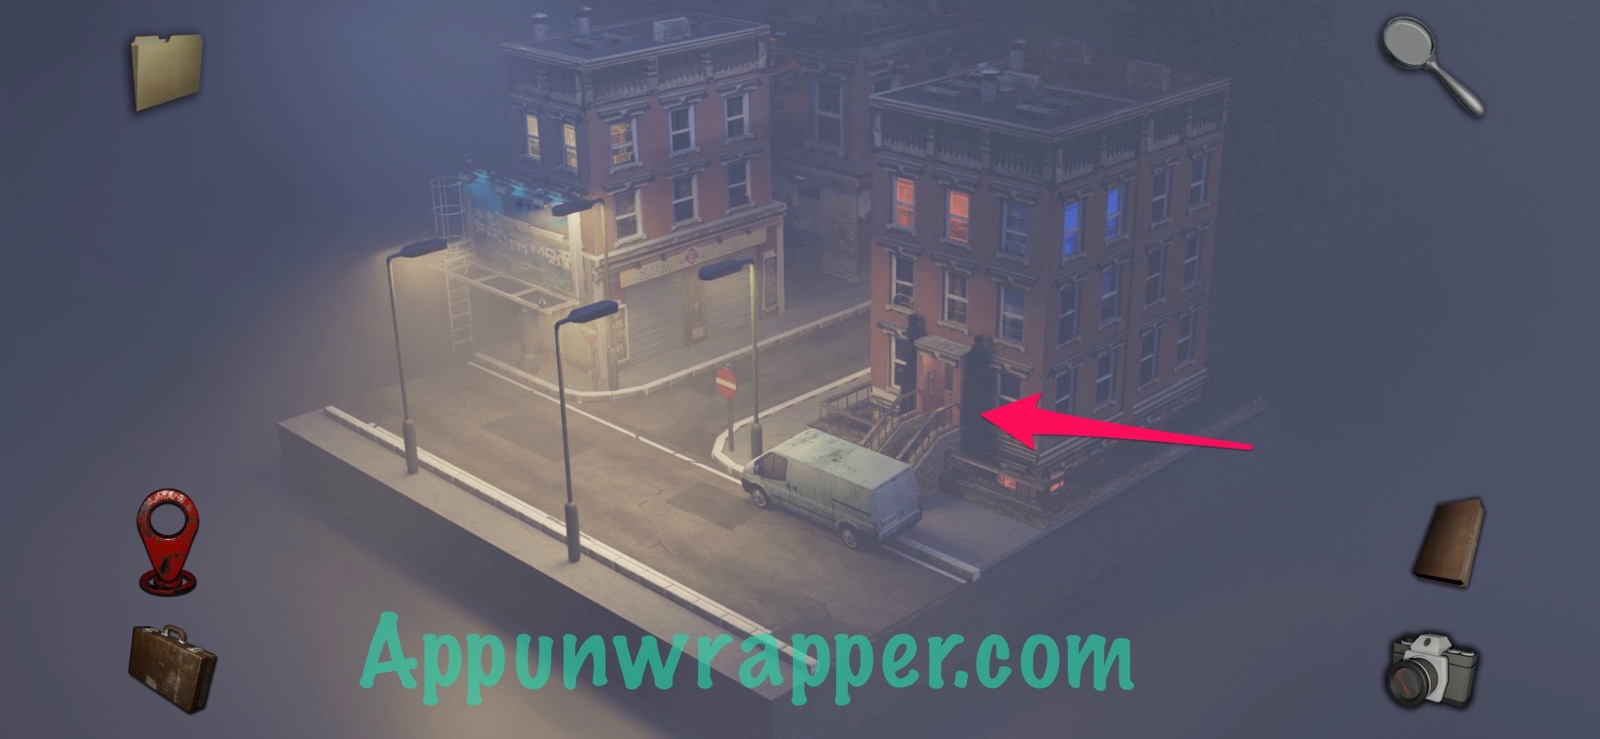
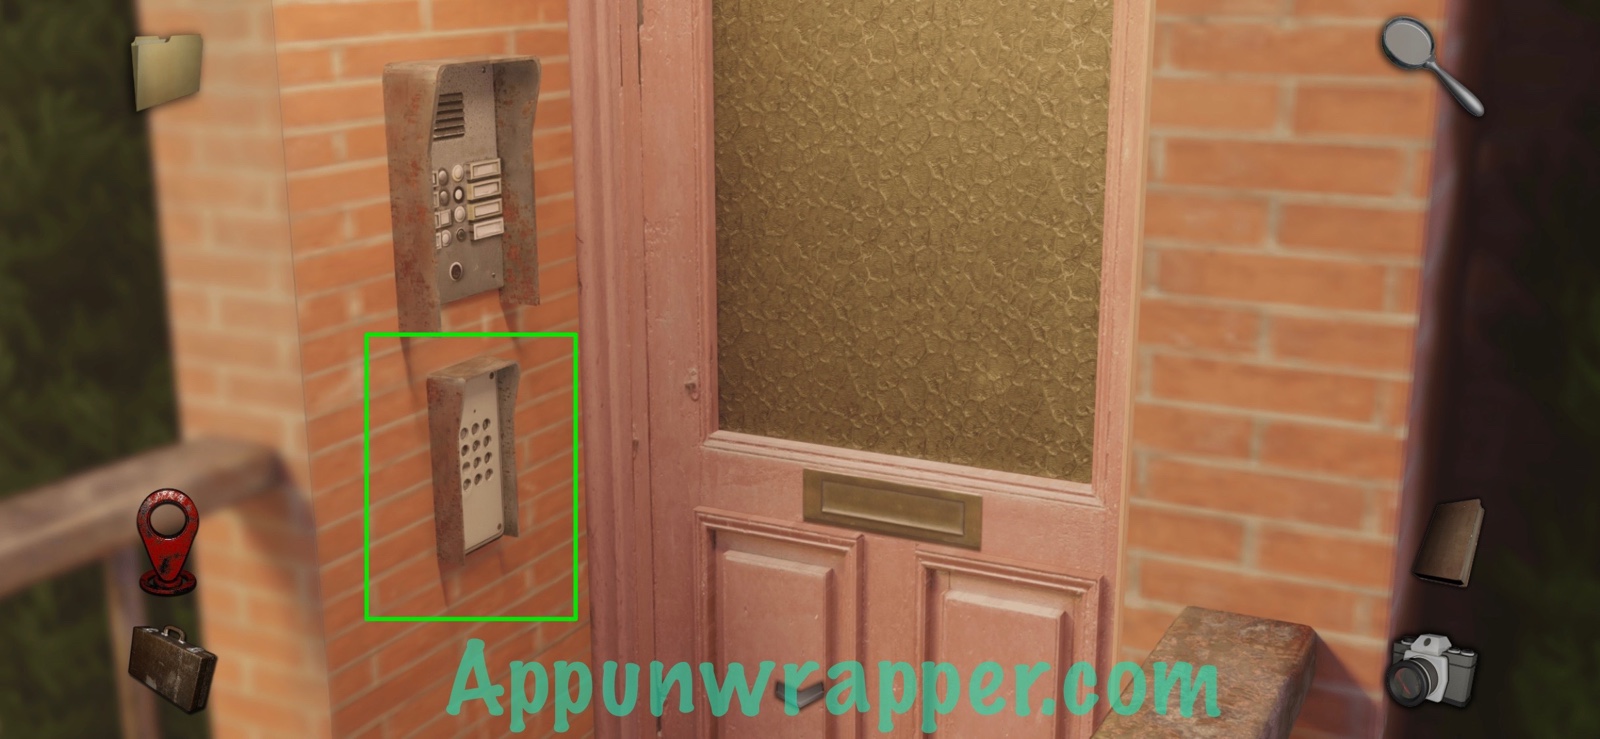
9. Tap on the door to the apartment building. Replace the button you found and then enter *7326# to unlock the door. Head inside.
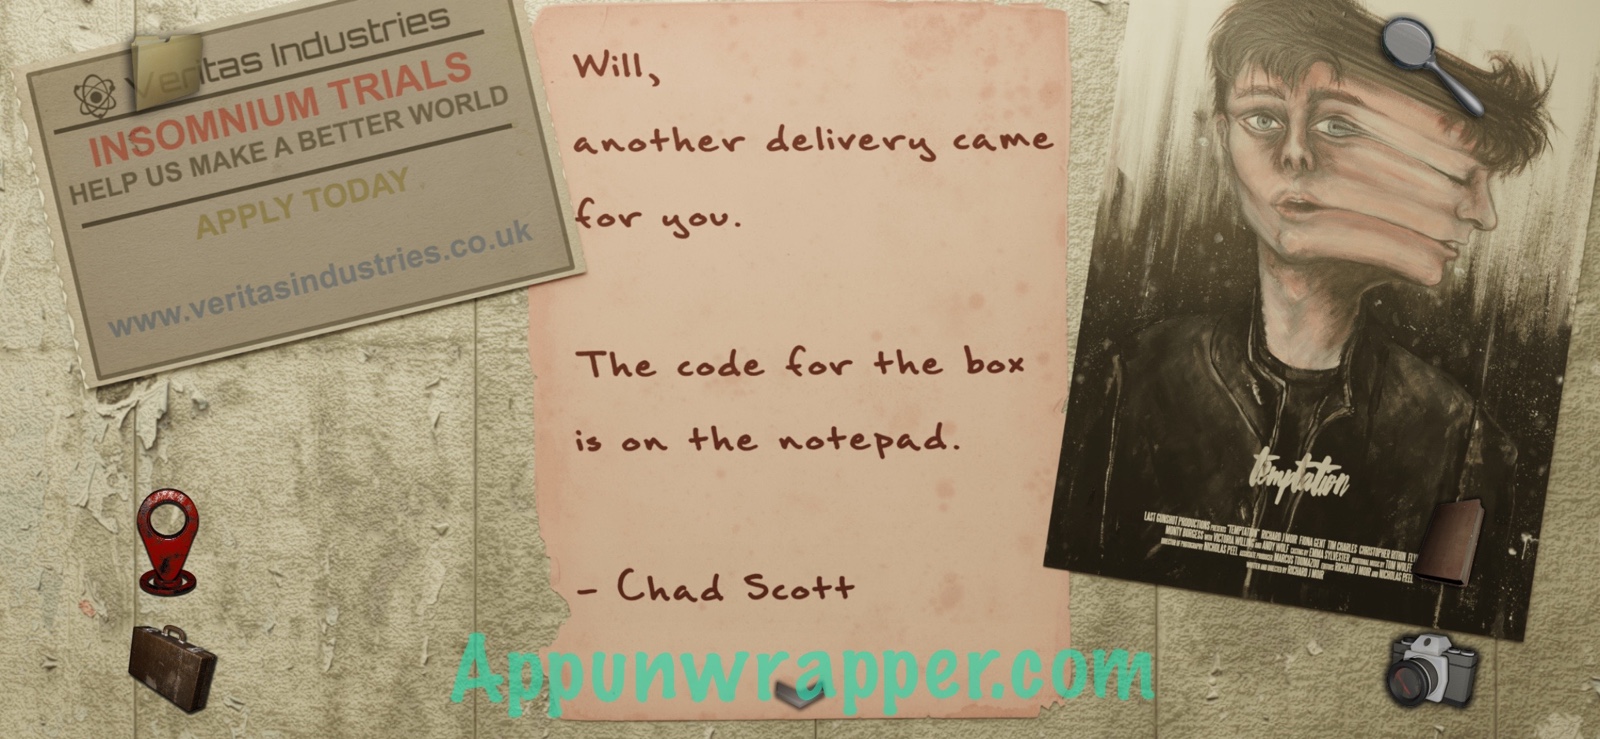
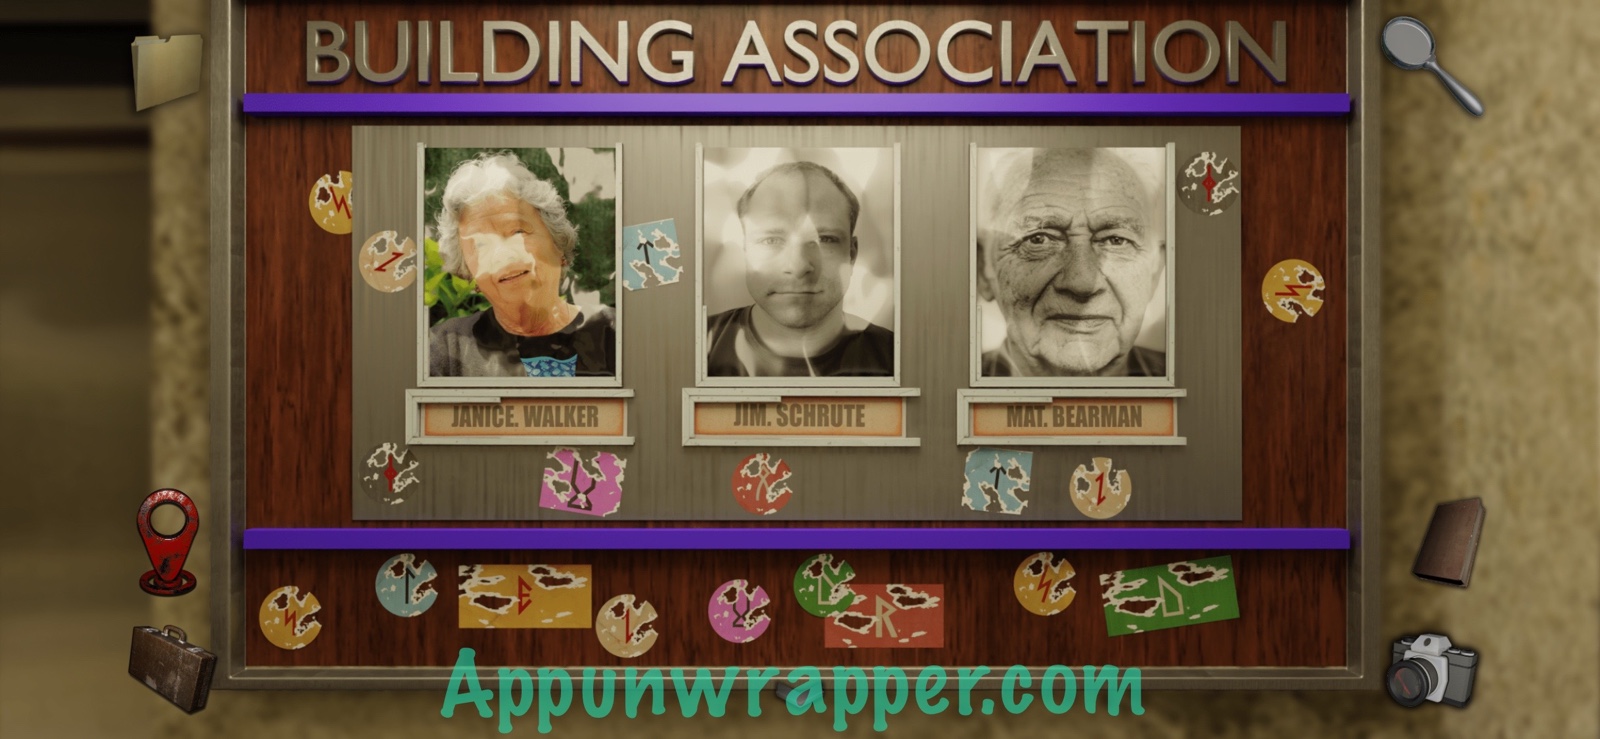
10. Look at the note on the wall. It says that there’s been another delivery and the code for the box is on the notepad. Grab the coffee cup from in front of the mailboxes and notice the page on the notepad is missing. Also, take a photo of the Building Association sign.

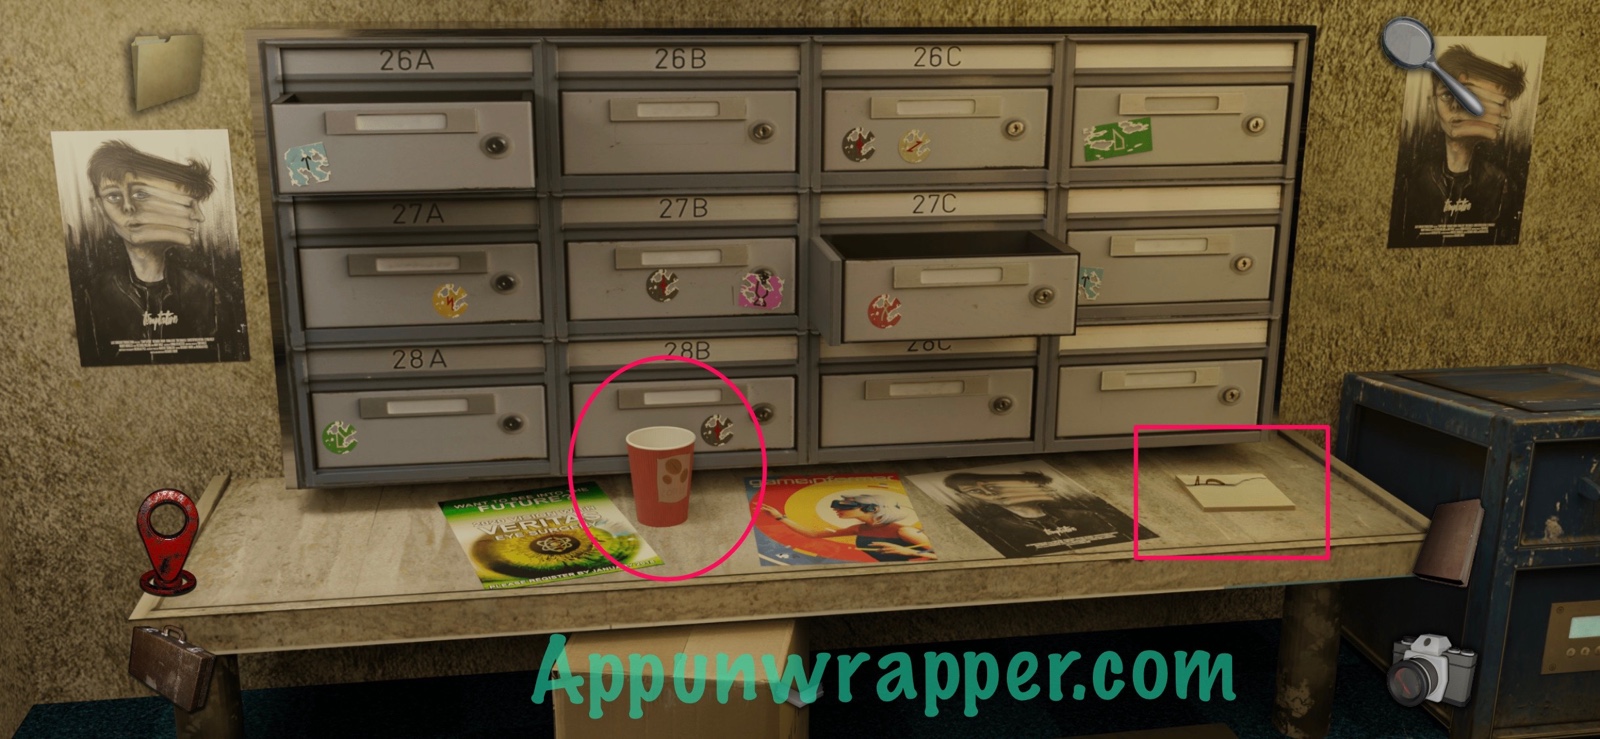
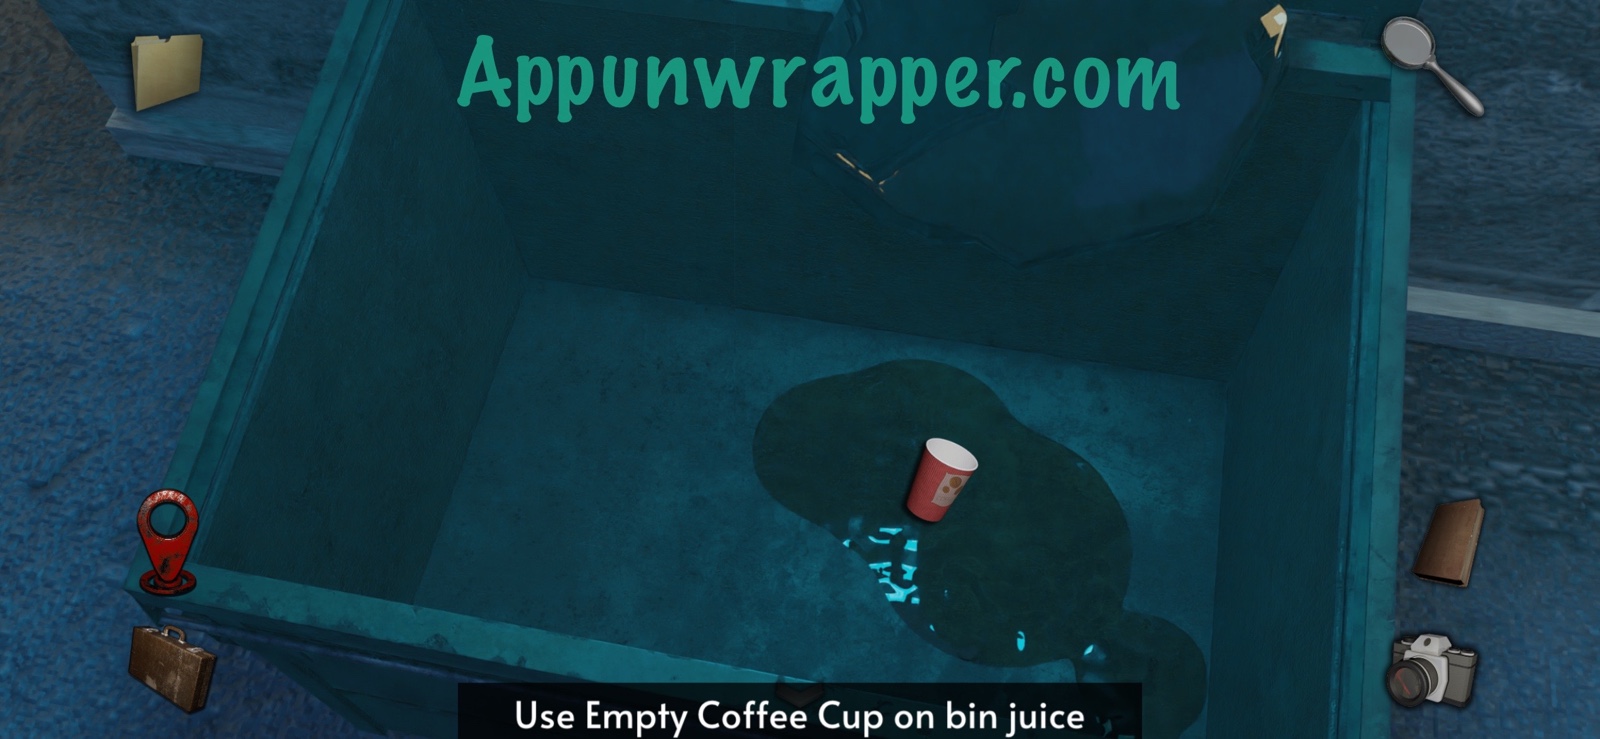
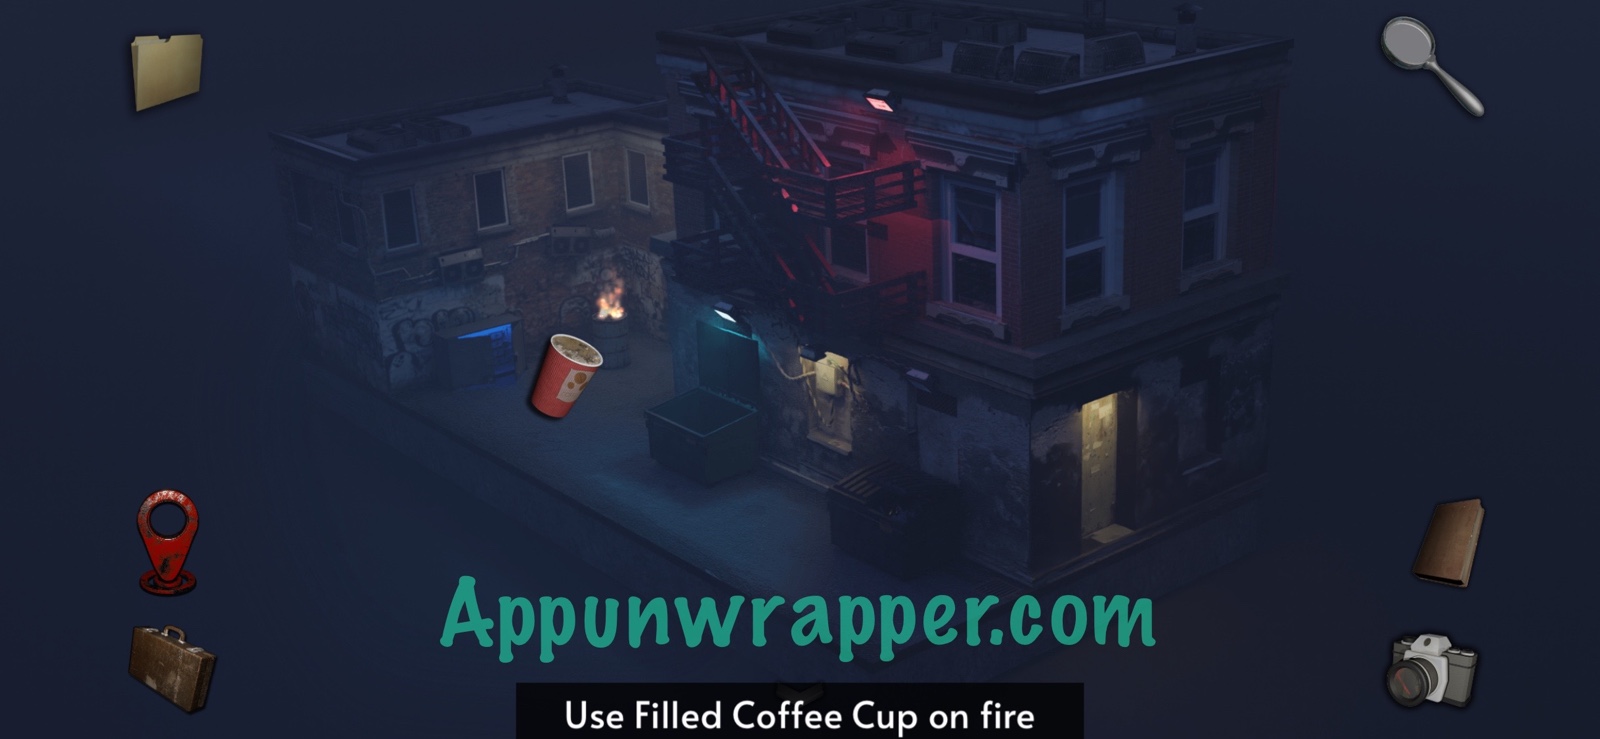
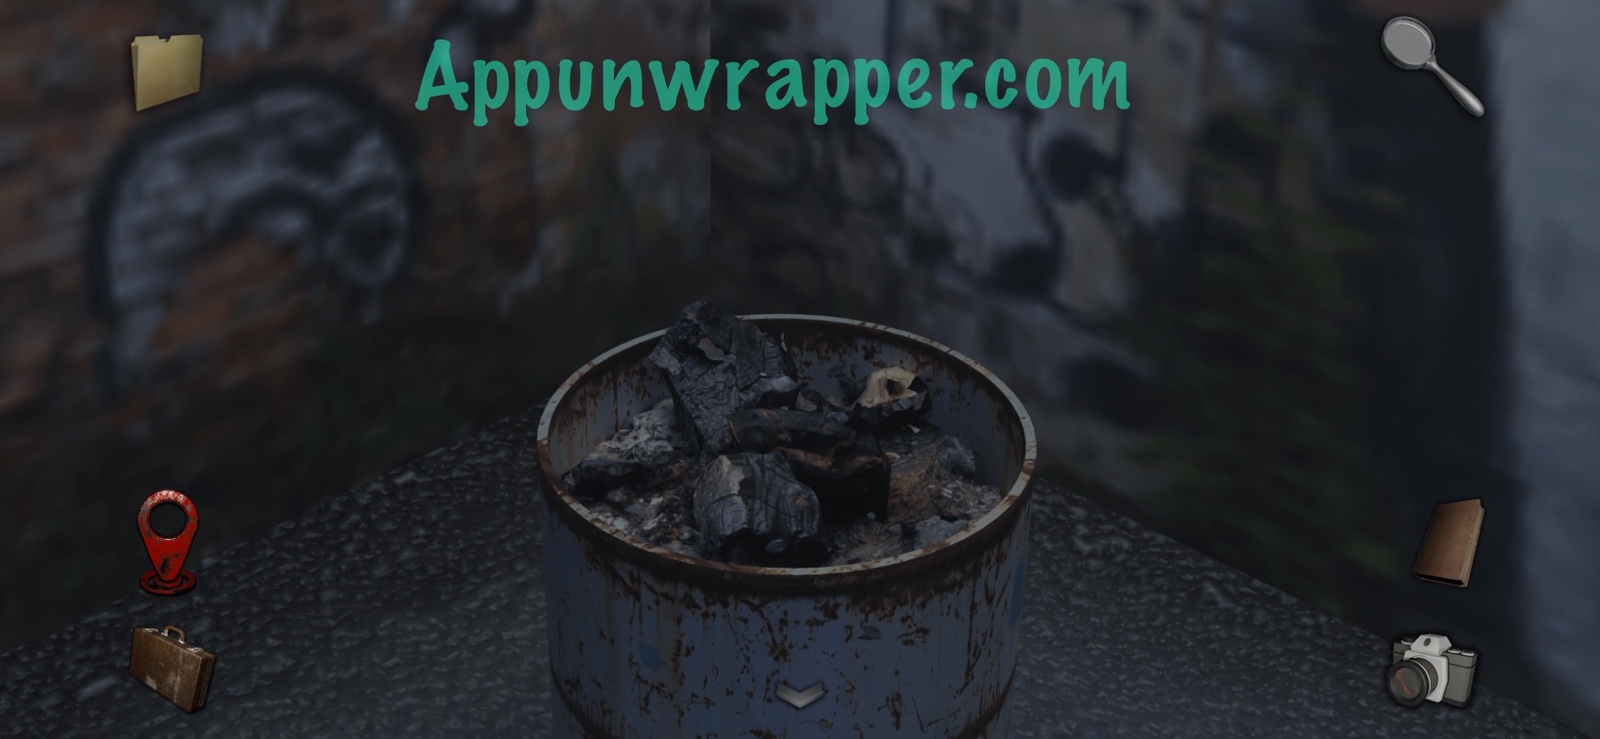
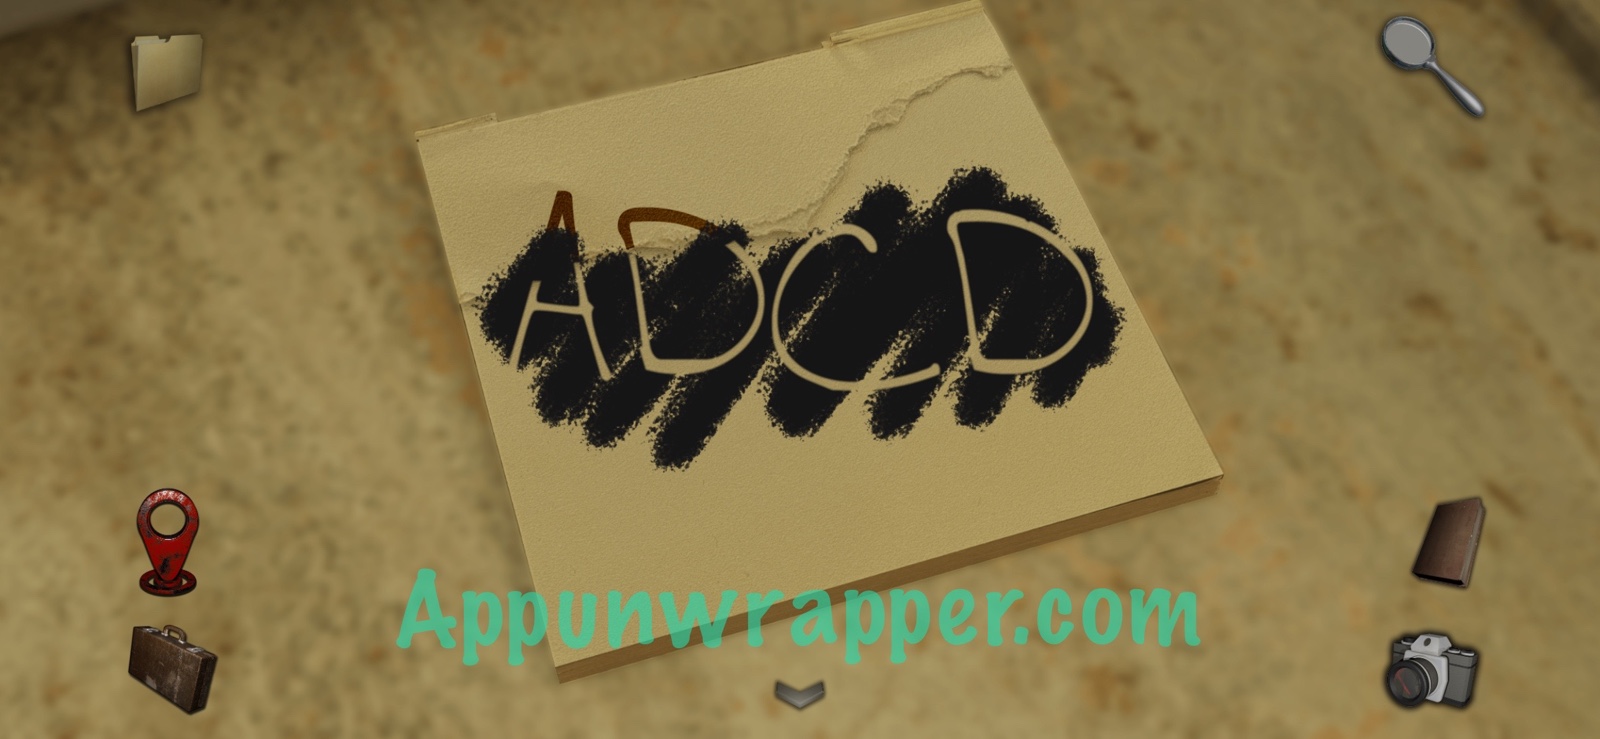
11. Go back to the alley and fill the empty coffee cup with bin juice from the trash bin. Then pour the bin juice on the flaming garbage can and take a piece of charcoal from it.
12. Go back inside the apartment and use the charcoal on the notepad to see the code is ADCD. You can take a photo of it if you need to.
13. Tap on the package locker to the right and enter ADCD to open it. Look at the address on the package to see your apartment number is 27C (it was rubbed off on the postcard).
14. Go up the stairs until you see apartment 27C. Tap on the door to see a note that says KEY UNDER MAT. But the mat won’t come up. The mat it’s referring to is the one downstairs, but we can’t get the plank up. We need a crowbar!
15. There’s a crowbar inside the elevator but it won’t stay open enough to grab it. But notice the numbers or letters that show on the elevator when you call it to a floor. They’re similar to those found on the van’s license plate. So here’s what you need to do. Take out your photo of the license plate. It says BIG BG2. The I is actually a 1. So first go down to floor -1, which is also B for basement. Call the elevator and you’ll see a B above it. Then go to floor 1 and call the elevator to see 01 above it. Then go back to the lobby (ground floor) and call the elevator to see a G over it. Then do floor -1 again for B, lobby again for G and finally, floor 2 to get 02 over the top. The elevator should now open all the way. Grab the crowbar from inside.
16. Use the crowbar to lift the plank from under the mat to reveal a combination lock. Notice the symbols. They’re similar to the ones on the Building Association sign. And one of the names is MAT. BEARMAN. Remember it said KEY UNDER MAT? It was referring also to this mat. The key for that puzzle is under his name. So take out the photo and copy the four symbols on the stickers below his name. Then take the apartment key.
17. Go back upstairs and use the key to unlock apartment 27C. Head inside.
18. Notice the newspaper article about a hit-and-run. There’s a few things to do in this room. Pull down the painting to reveal a safe. Notice the computer locked behind a key code. Notice the Glitch-E Assistant device by the lamp. Notice the locked box and pizza on the table. The pizza is a clue, so take a photo of it. And last, the TV is cracked so we can’t see the full sequence. We’ll have to figure out another way to view it. Go through the door to the hallway.
19. Read through the journal on the floor and take a photo of the framed art on the wall. Then go through the right door to the bathroom. Take a photo of the jars of sand in the medicine cabinet and another photo of the chess board. Look at the round locked box on the floor. Take out the photo of the pizza and press the wedges that match the slices of pizza. Then take the stone tile from inside.
20. Leave the bathroom and go through the left door to the bedroom. Look at the framed painting above the wardrobe and take a photo of it. Grab the video tape from inside the wardrobe. Also, notice the locked dresser, row of books, and locked box.
21. Let’s work on the row of books first. Take out the photo of the jars of sand. Organize the books by the numbers of layers of sand in each jar. You’ll then get some letters and numbers on each. Take a photo.
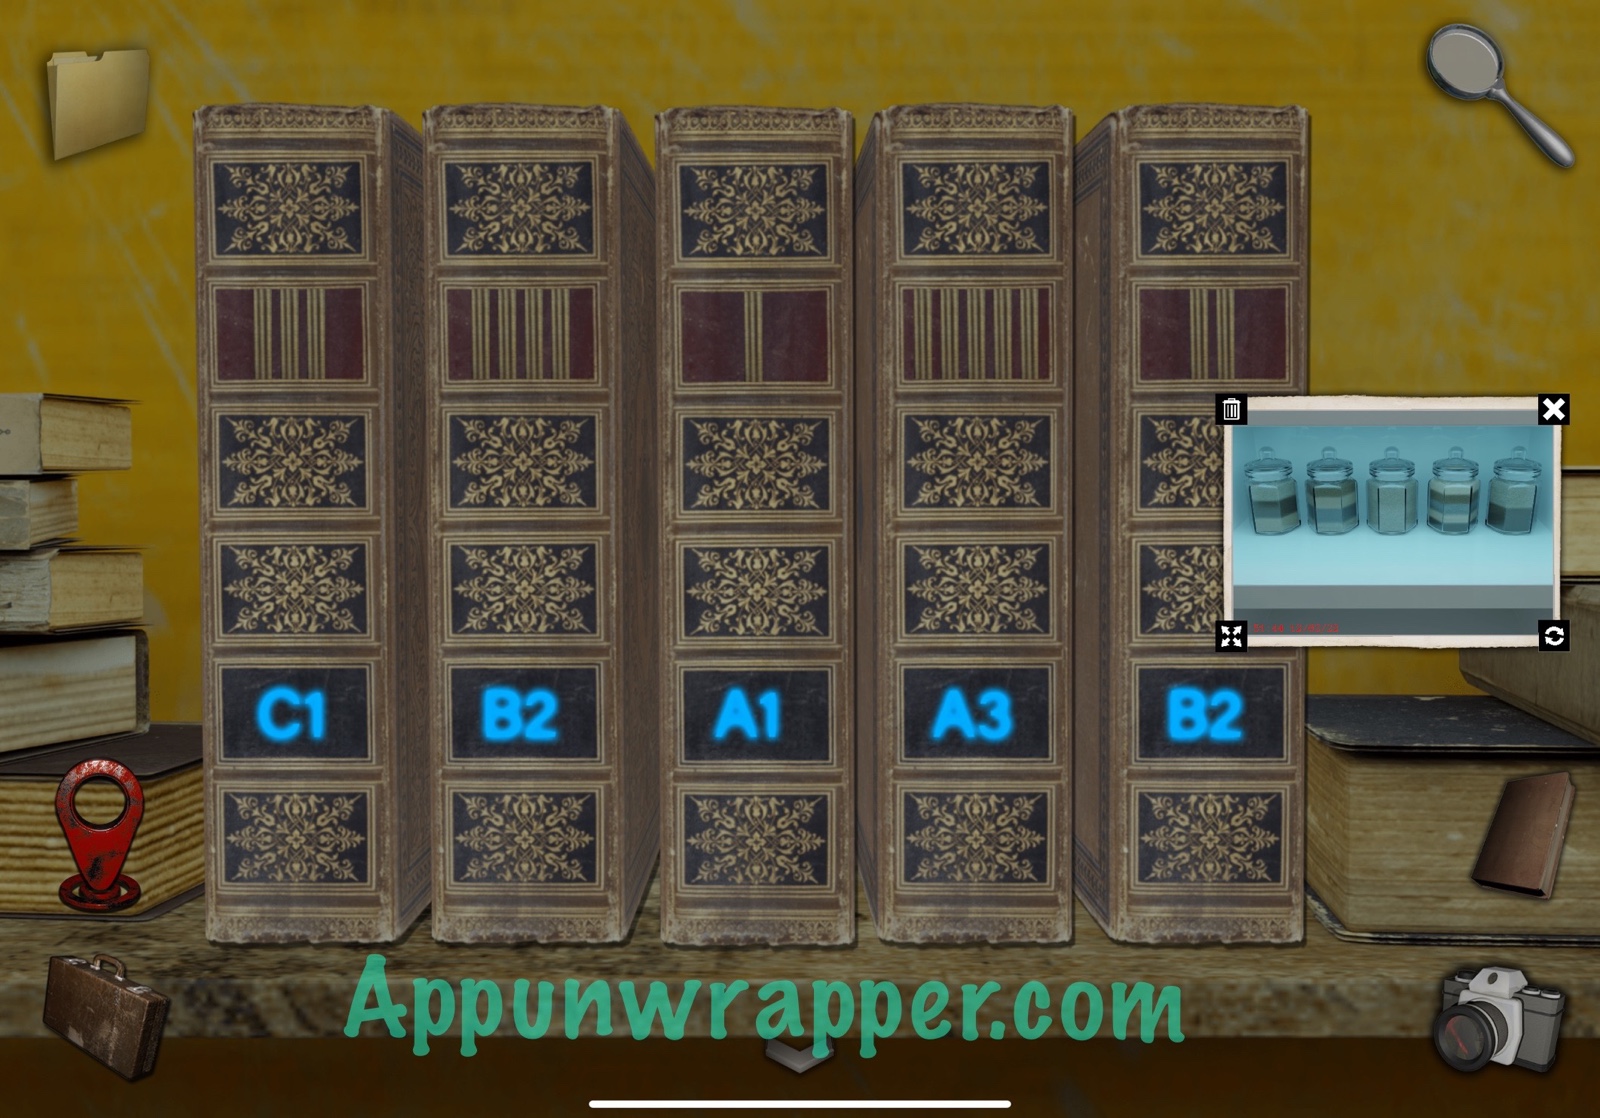
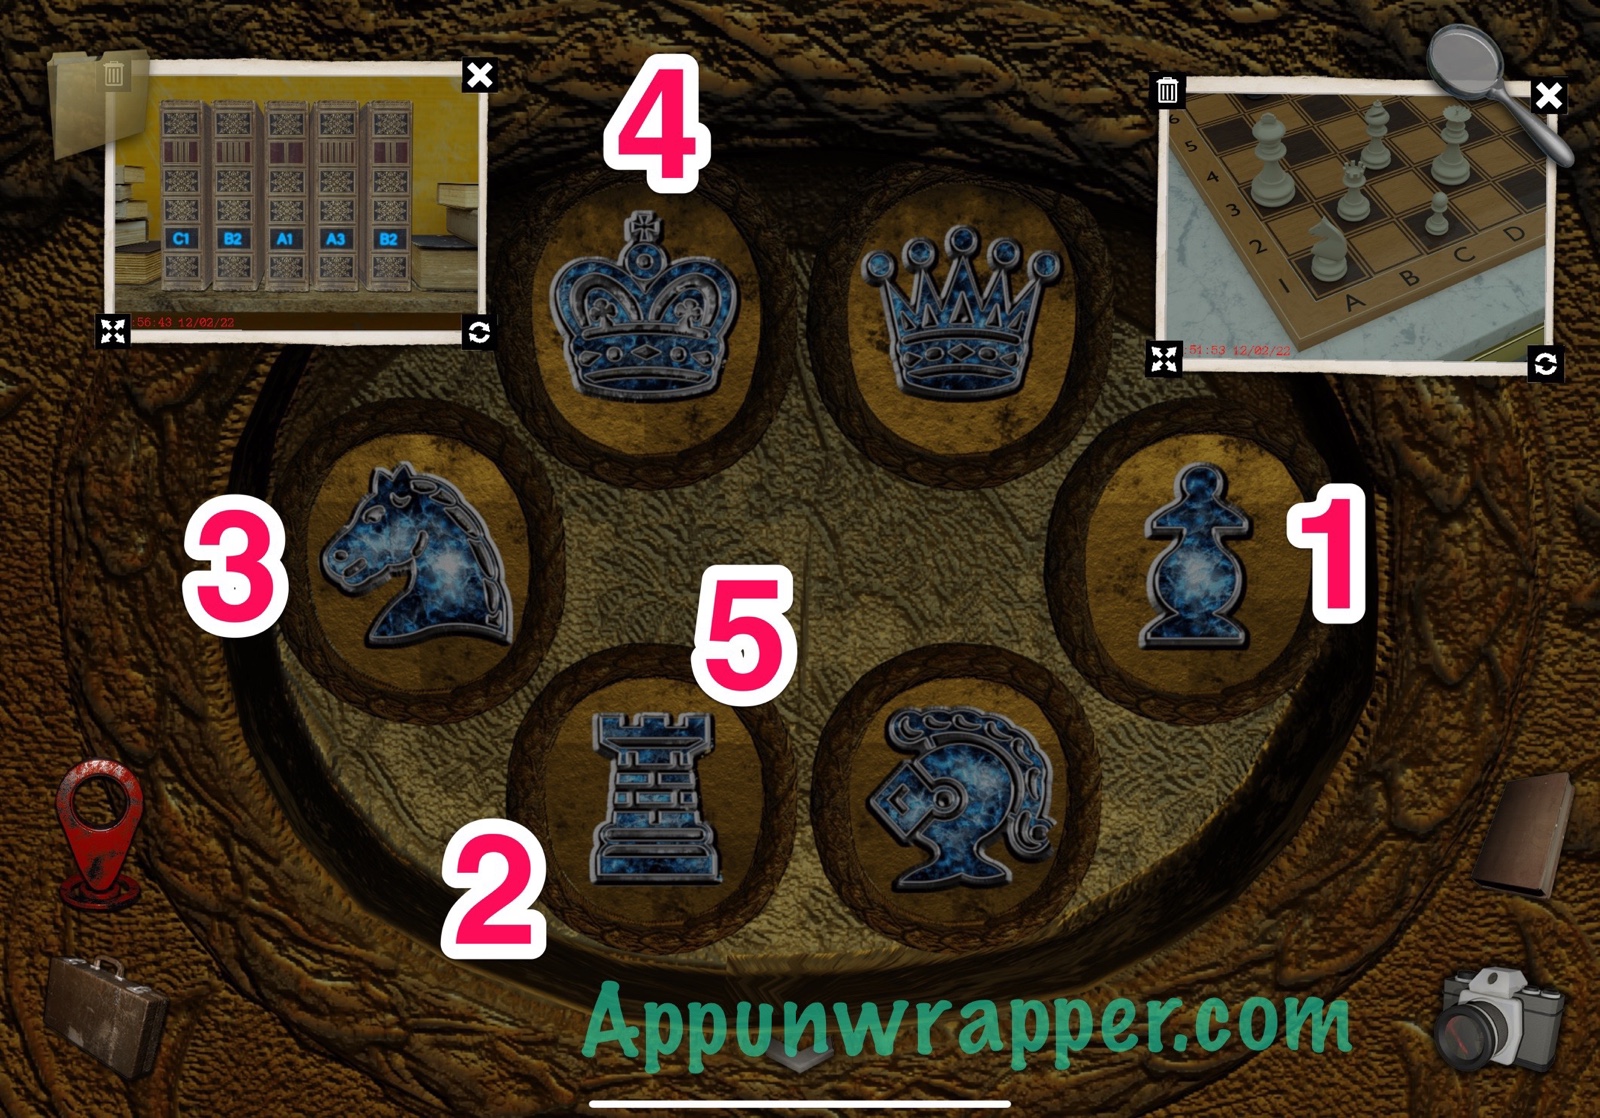
22. Now let’s open the locked box. Use the photo of the books together with the photo of the chess board. Go in order of the books from left to right and find the piece on the chess board, then press that button. So it goes like this:
C1 = Pawn
B2 = Rook
A1 = Knight
A3 = King
B2 = Rook
Then take the strong key from inside.
23. Go back to the hallway and use the strong key on the door that says KEEP OUT. Go through for a cutscene. When it ends, take the strange key and stone tile from the table. Also, look at the bulletin board and also read the journal on the couch.
24. Go back to the living room. Insert the video tape into the VCR and press RECORD. Then remove it. Now we need a way to watch it!
25. Go back to location called The Room, where the game started. Insert the tape into the VCR and watch the pattern that plays. Make note of it. You can also take a photo and draw on it.
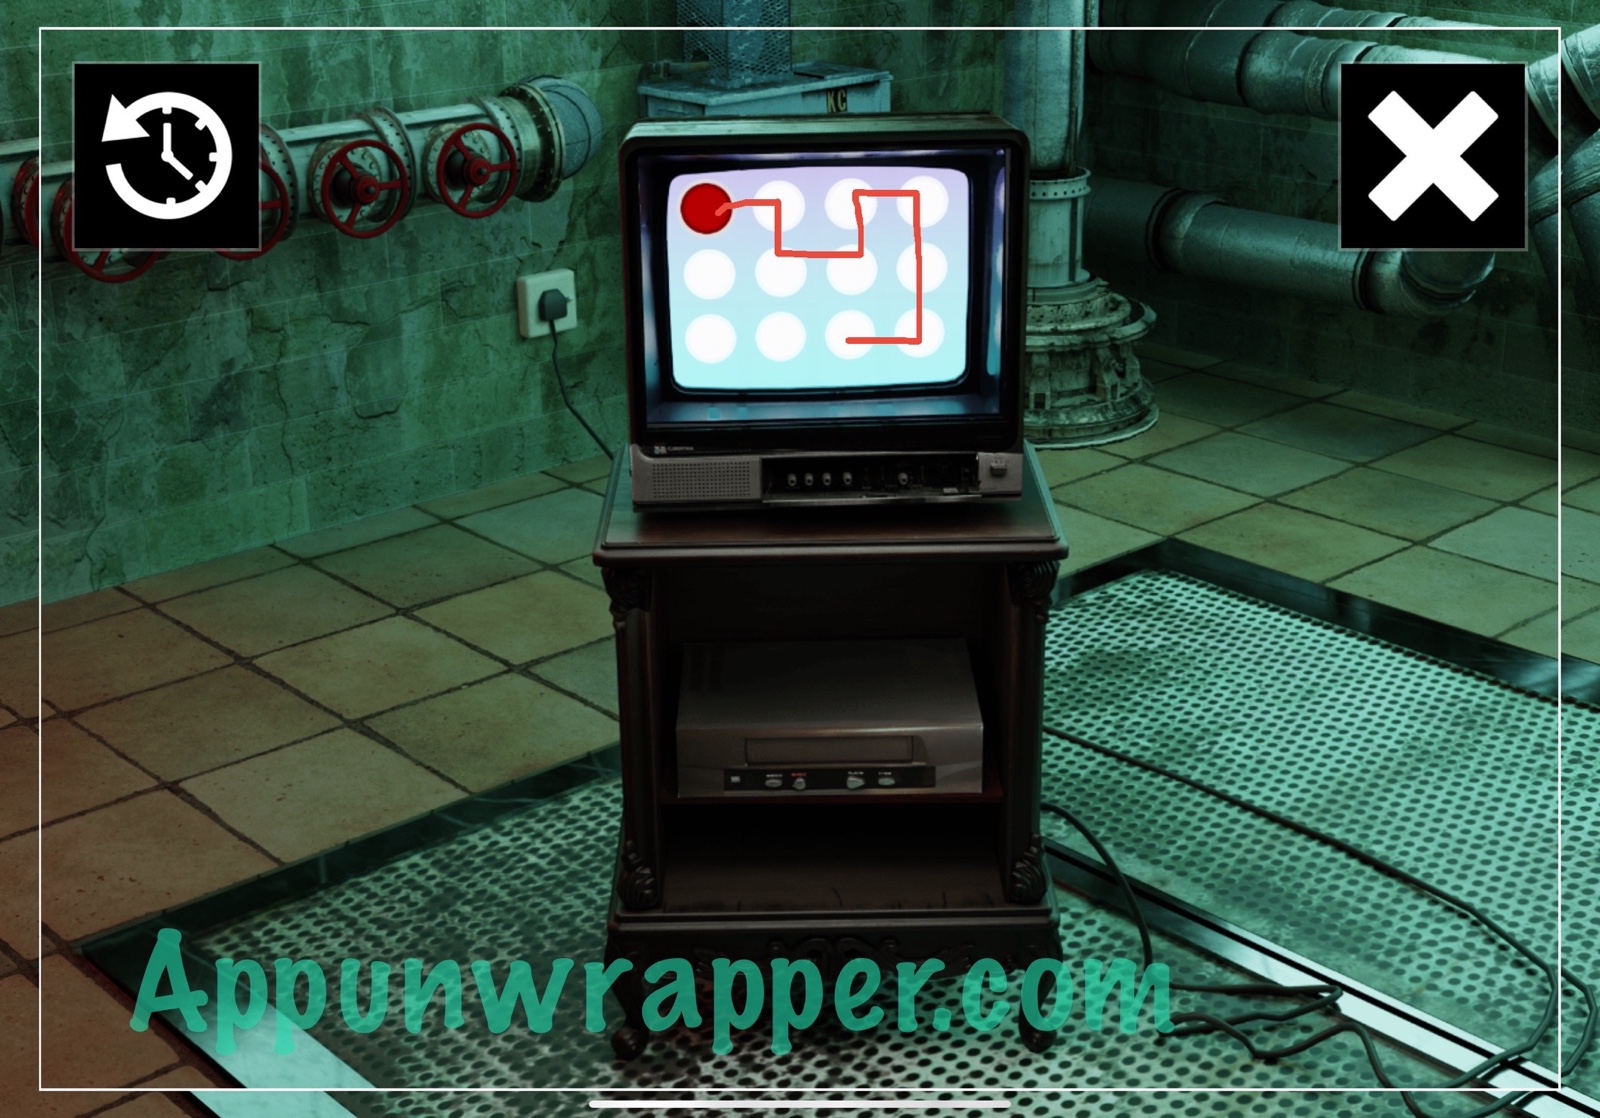
26. Go back to the apartment and tap on the computer. Copy the pattern from the video to unlock the PC.
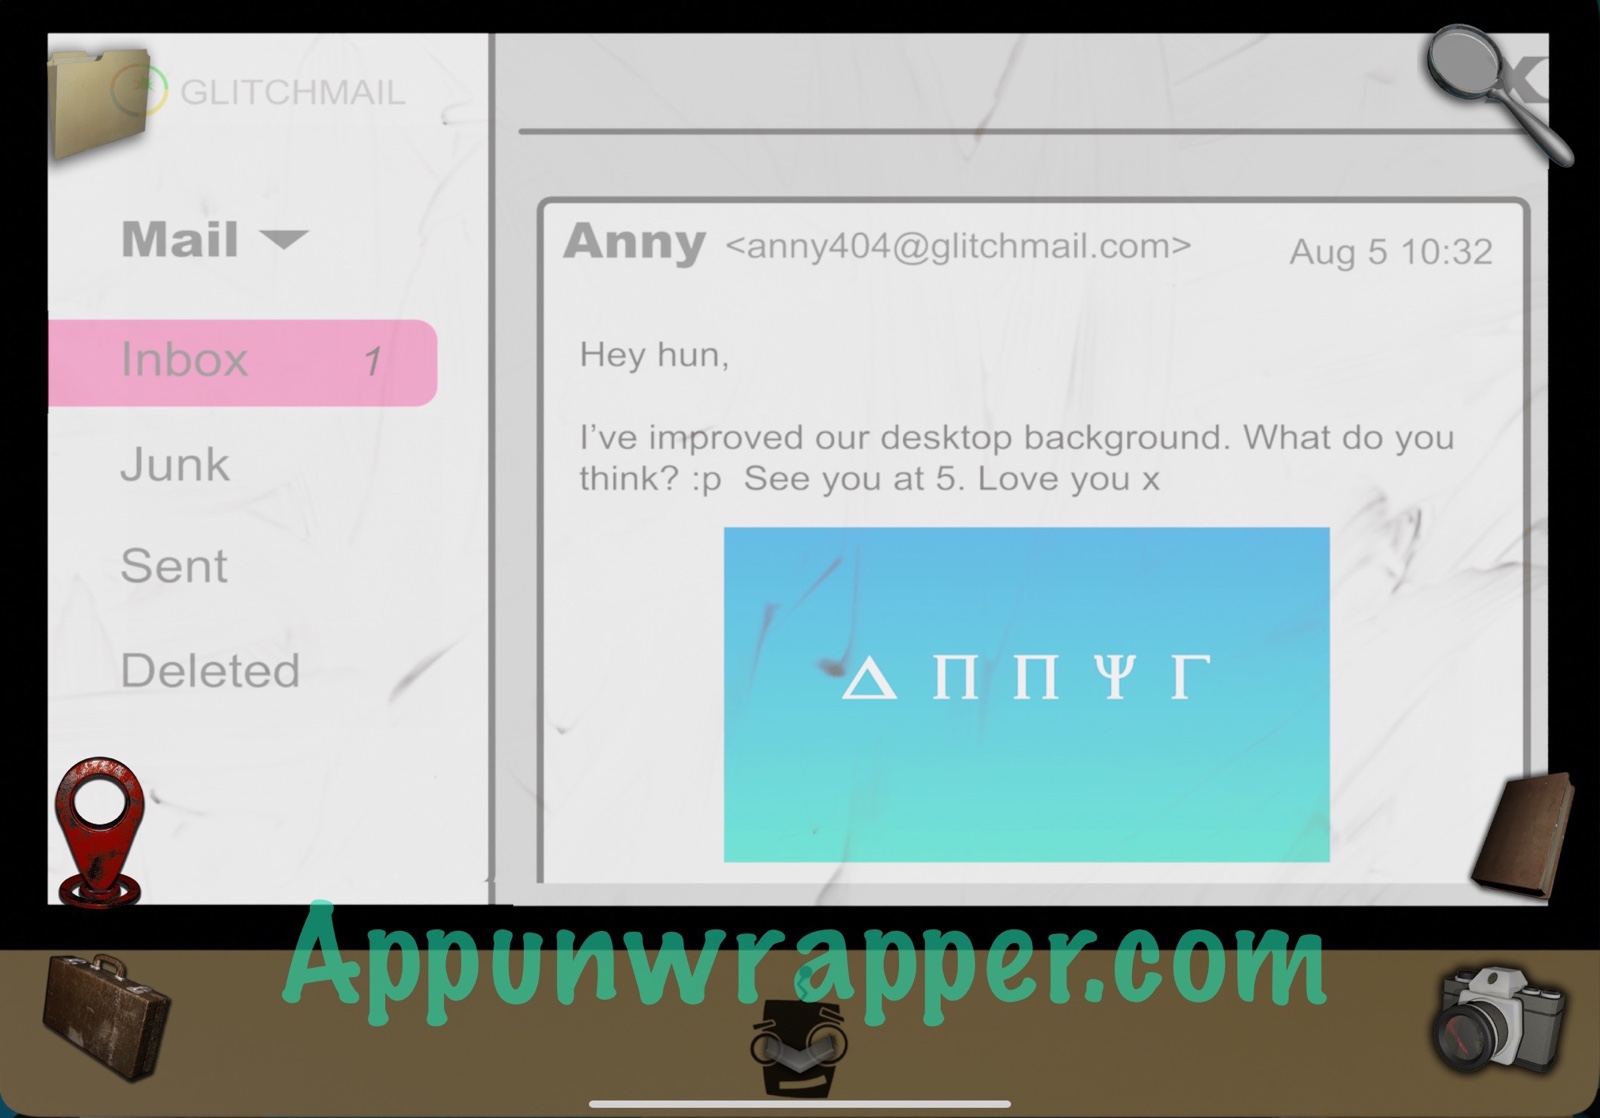
27. Tap on Glitch Email and then choose Smart Device – W&A from the drop-down menu. Go look at the device next to the lamp. It shows the numbers 355921. Take a photo.
28. Go back to the PC and enter 355921 to gain access to the email. Then read the one email in the inbox and take a photo of it.
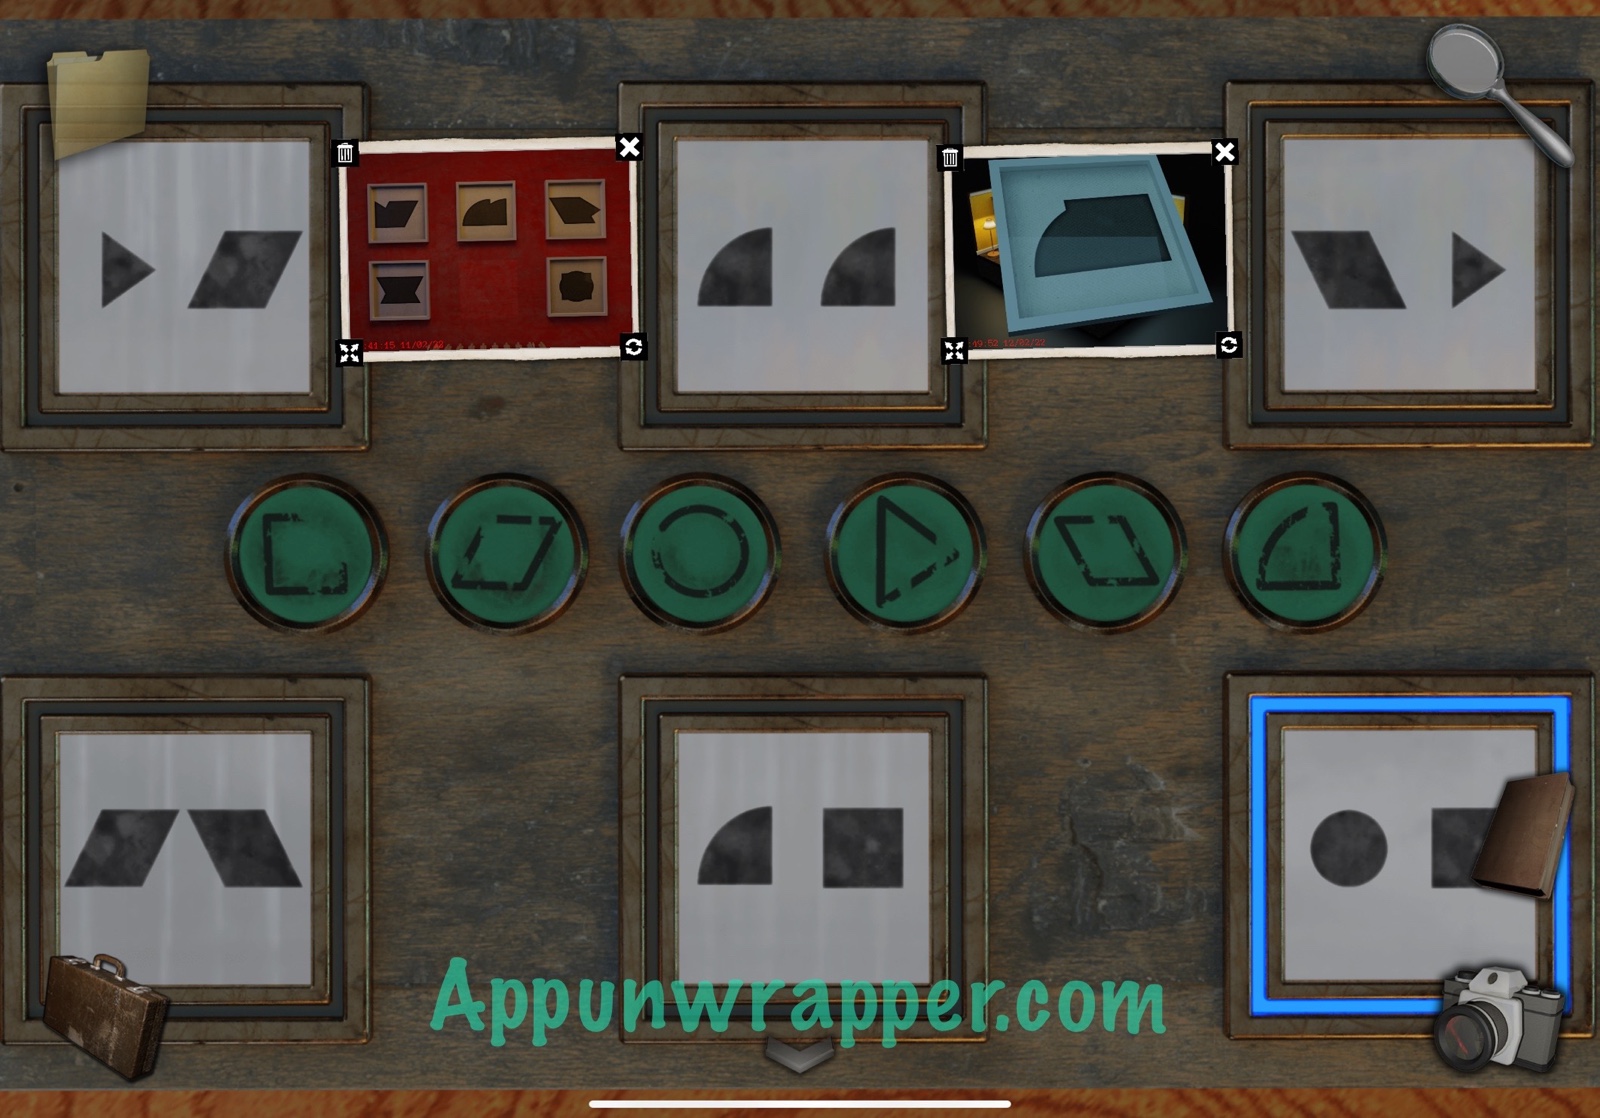
29. While here, tap on the locked box next to the pizza. Take out the two photos of the framed art. You now have to choose two shapes for each box that will make the shape in the artwork. It should look like the photo below. Then take the stone tile from inside.
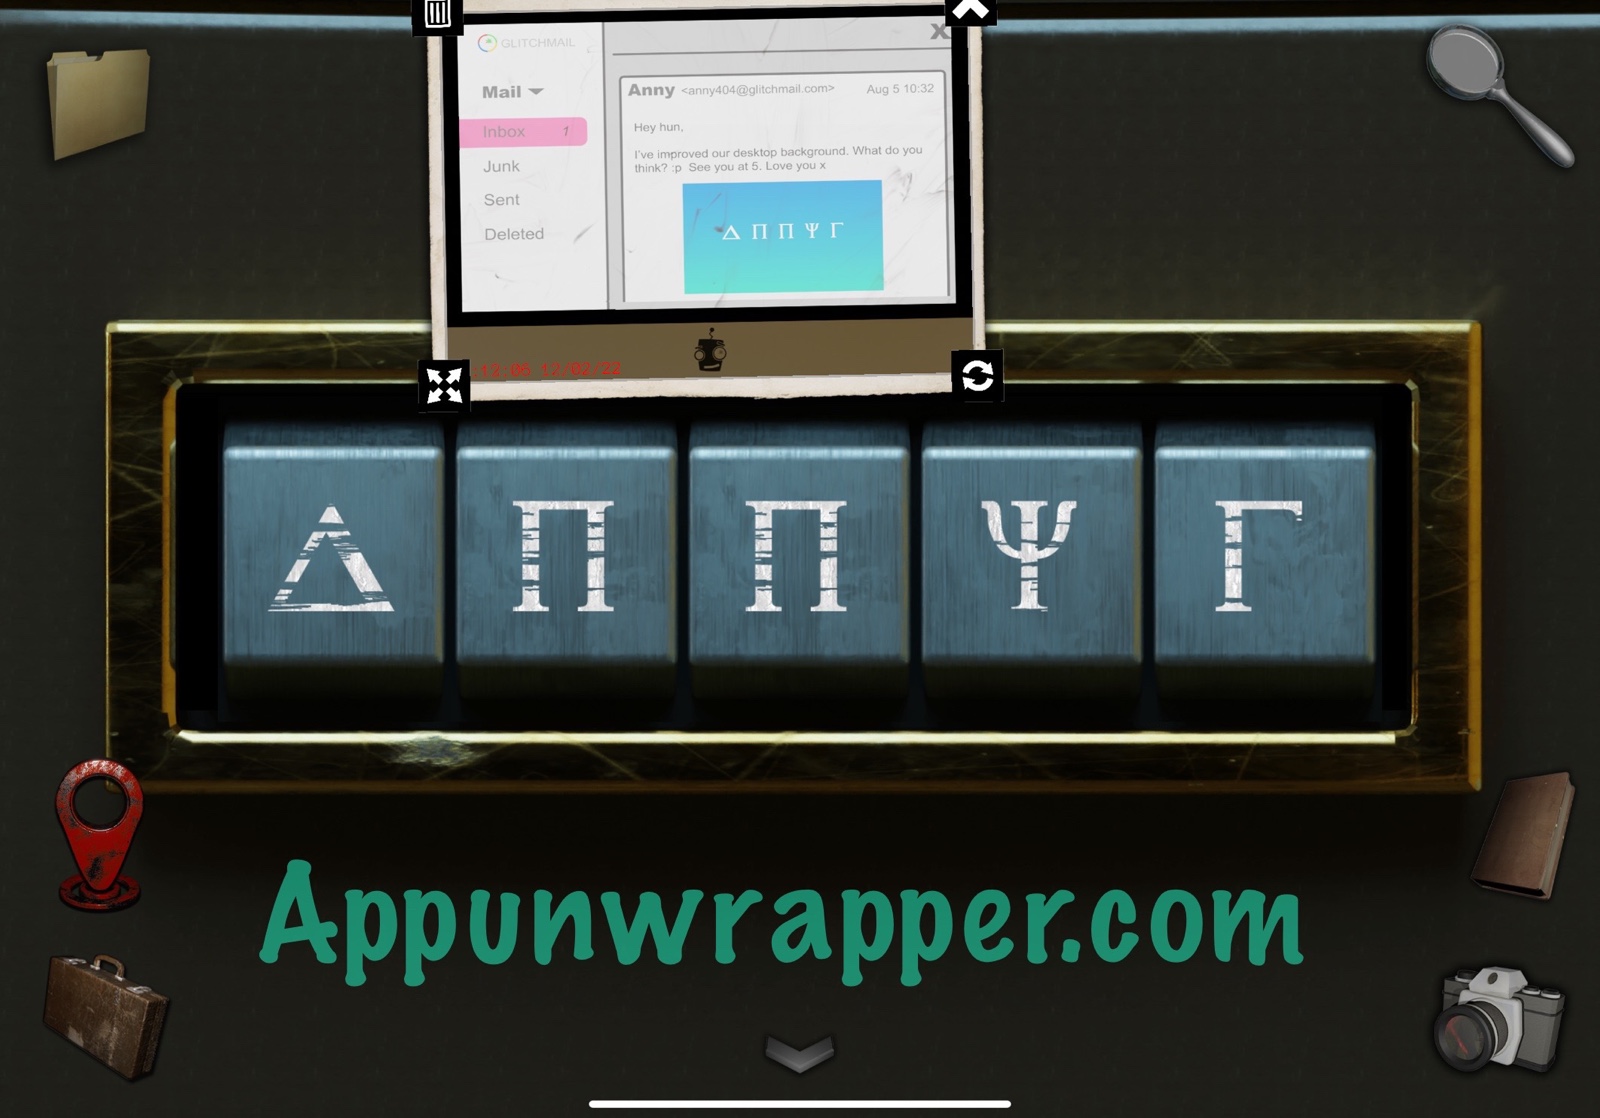
30. Go back to the bedroom and tap on the lock on the dresser. Take out the photo of the email and match the symbols to those in the email. Then take the stone tile from the drawer.
31. Go back to the living room and place all four stone tiles in the safe on the wall. Then take the matchbook from the Luna Bar to unlock a new location. Go to the Bar to complete the chapter.
More coming soon!
I wish Appunwrapper had completed the walkthrough, or even videos, for Another Tomorrow.
I canΓÇÖt get the computer buttons to respond to me
Im stuck. The hint 120 says:go to The next place…?
I’m stuck in the same place! Somehow we were supposed to have unlocked another location, but I can’t see how! I’m going to check with the company.