Adventure Escape Mysteries – Lost Ruins: Revenge on Atlantis
By: Haiku Games

Haiku Games is back with a new Adventure Escape game, called Lost Ruins: Revenge on Atlantis . When Professor Burns gets possessed by an ancient desert artifact, he sets out to destroy the underwater city of Atlantis. You need to stop him before Atlantis is lost forever. This walkthrough guide should help you if you get stuck on any of the puzzles in Chapter 4. Feel free to ask for extra help in the comments section.
See all my other Adventure Escape guides here.
Walkthrough:
Chapter 1 | Chapter 2 | Chapter 3 | Chapter 4 | Chapter 5 | Chapter 6 | Chapter 7 | Chapter 8
Chapter 4:
You can watch my video for Chapter 4 or continue below for my step-by-step guide.
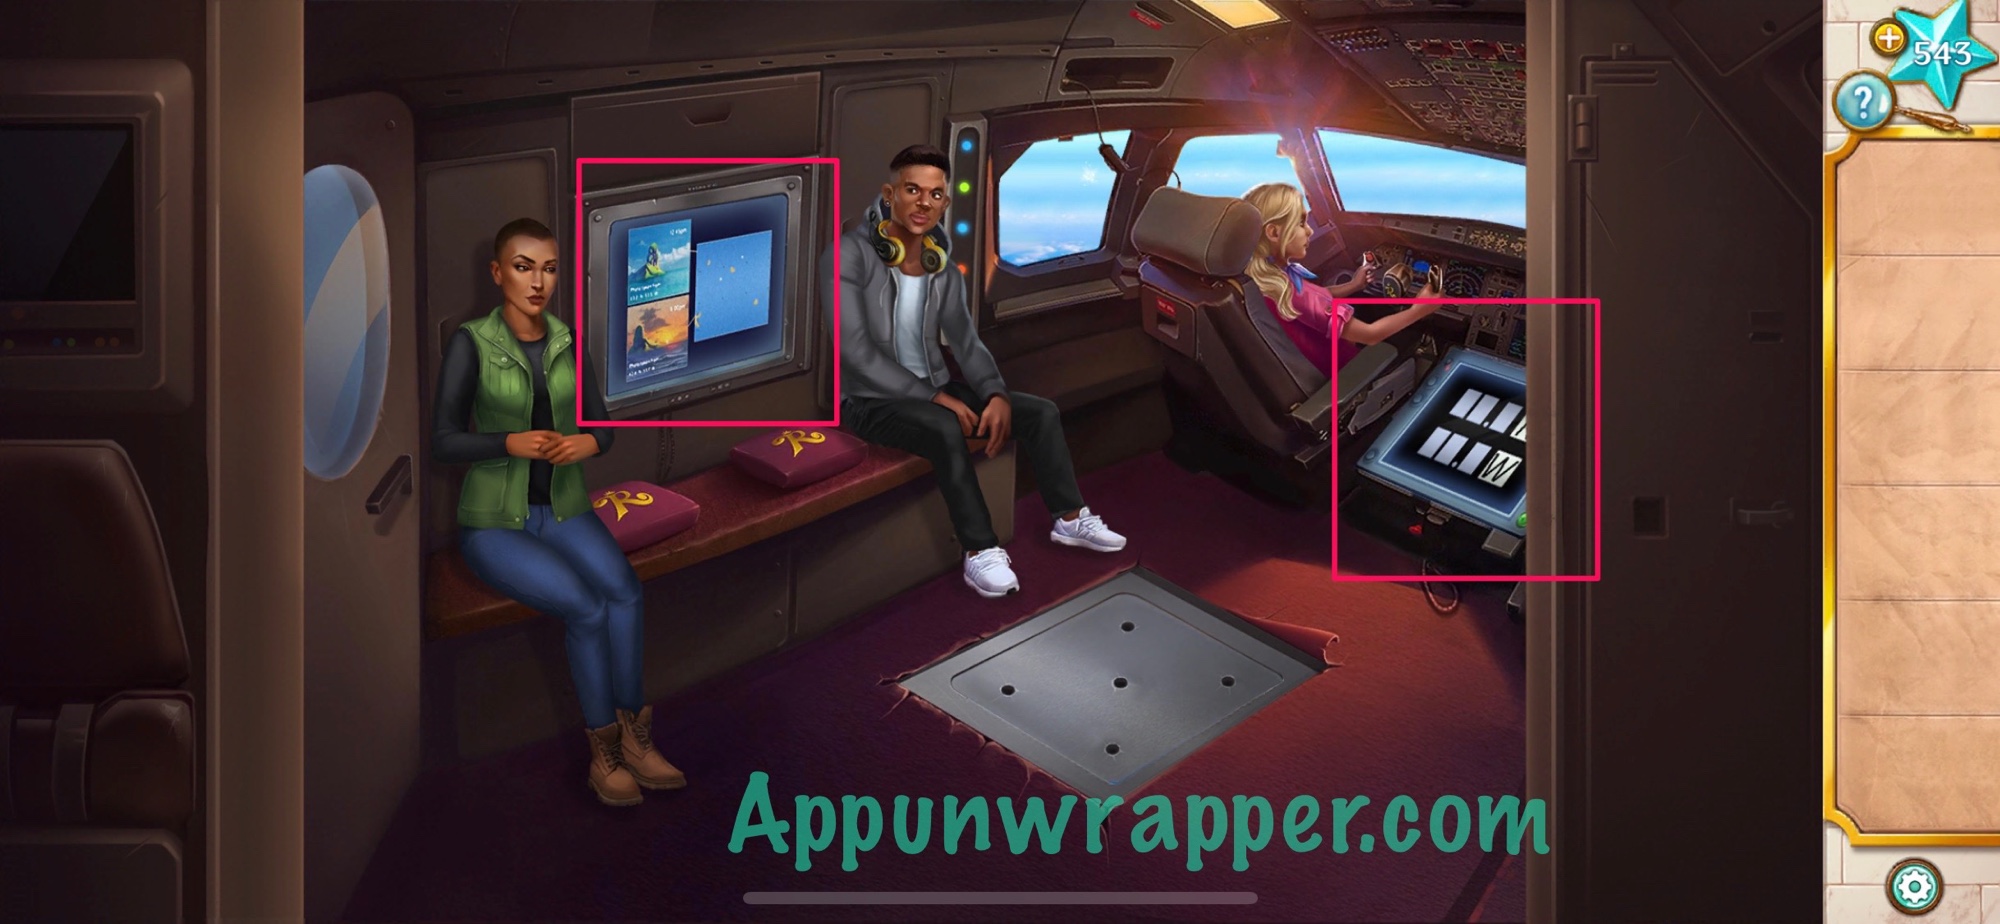
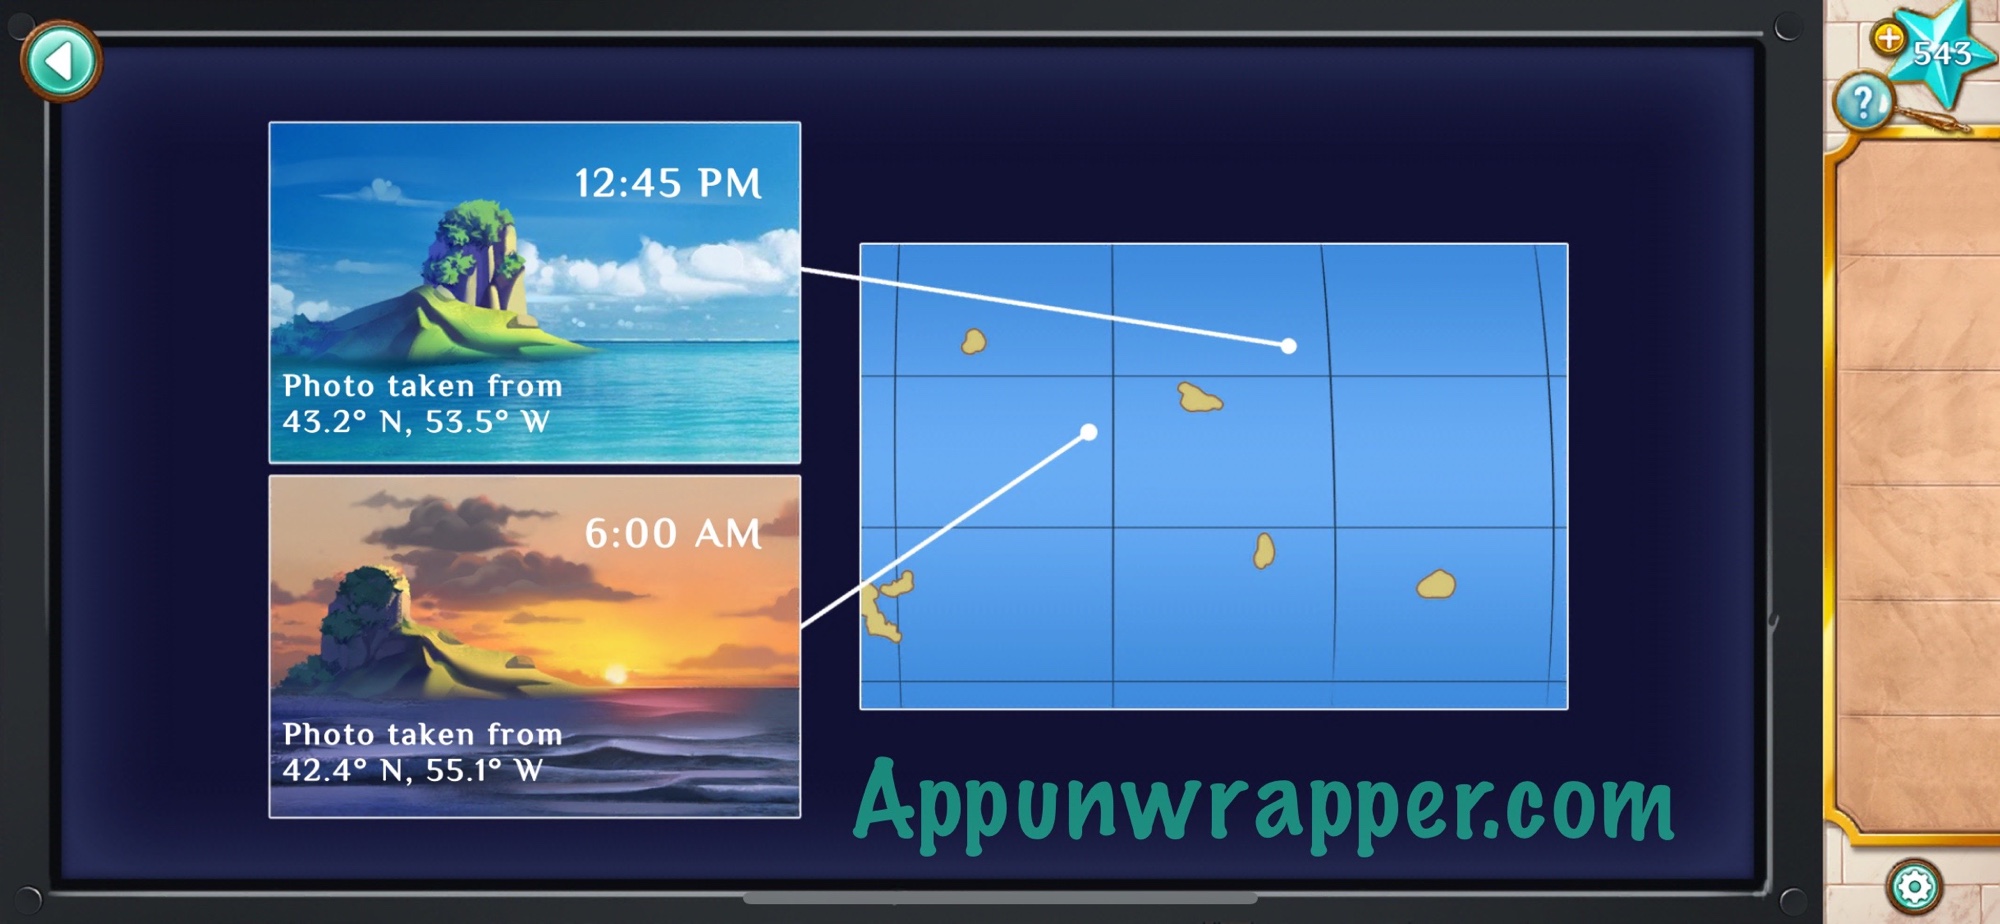
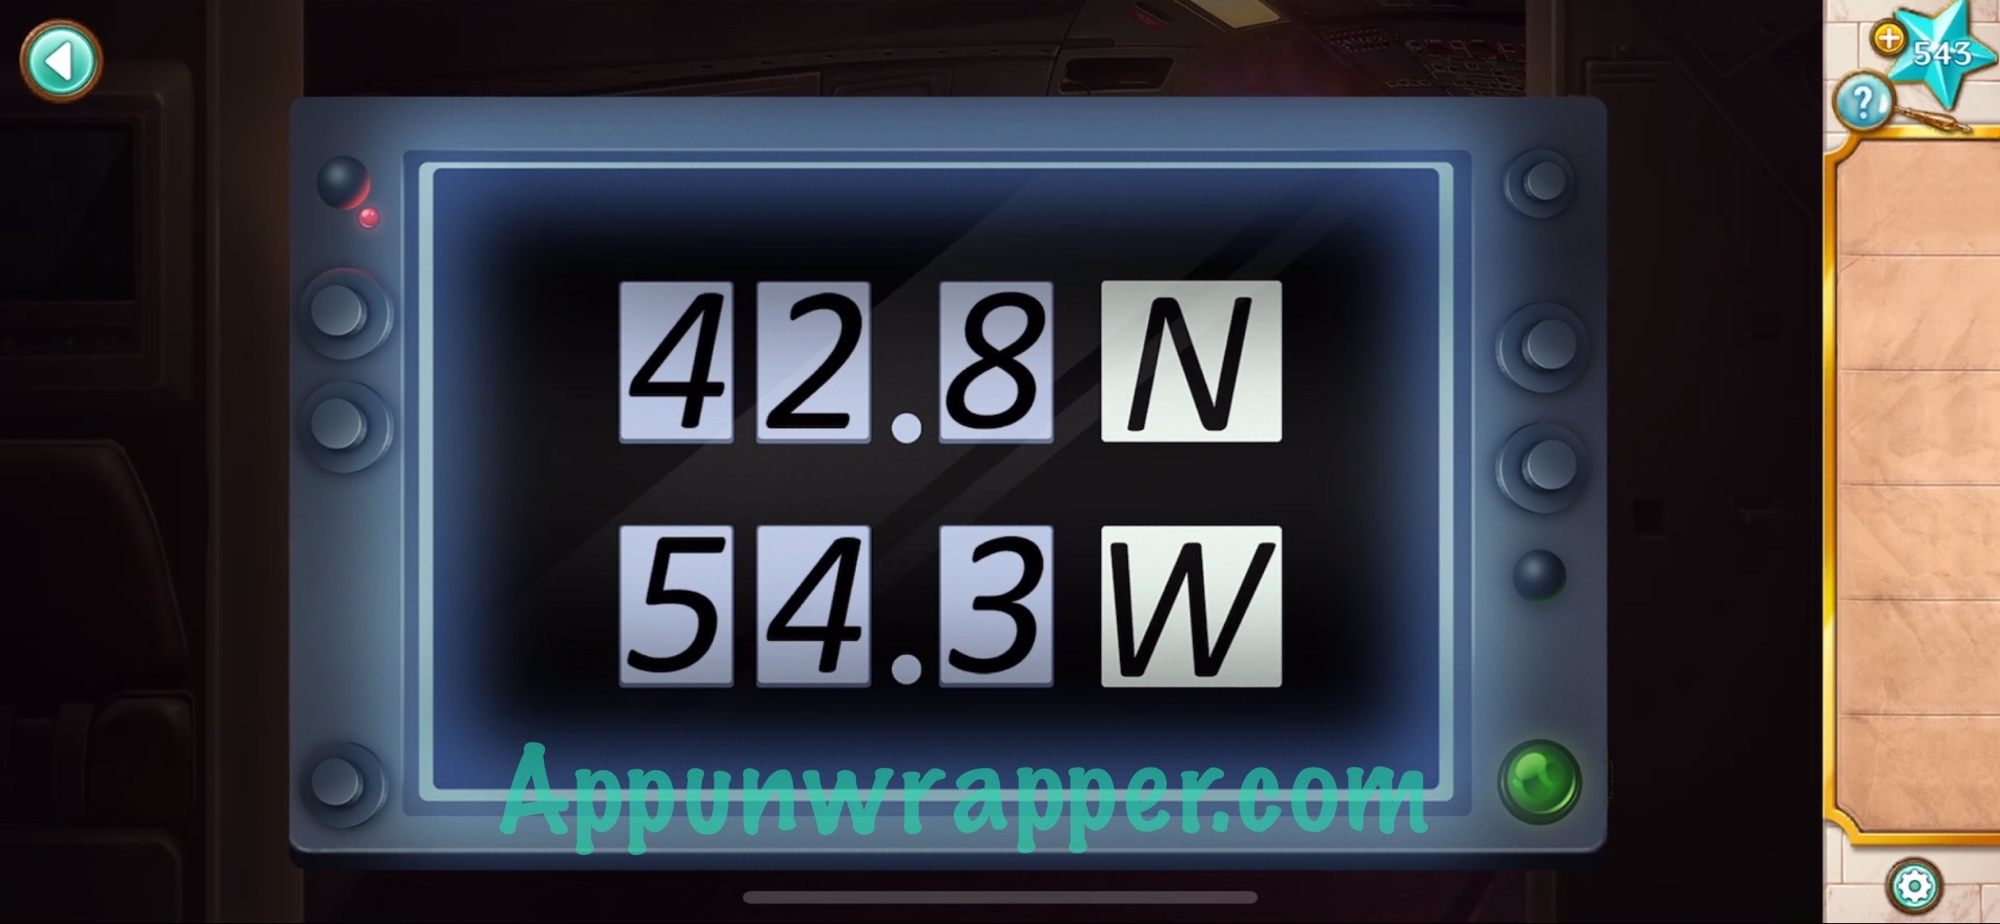
1. Xochi and Peter ask Rachel to fly them and Dr. Okoya to Atlantis. Everyone’s on her plane. Look at the map and then use the information to enter the coordinates for Atlantis. The island is between the two points shown on the wall. So the North coordinate will be halfway between 42.4 and 43.2, which is 42.8. The West coordinate will be halfway between 53.5 and 55.1, which is 54.3.
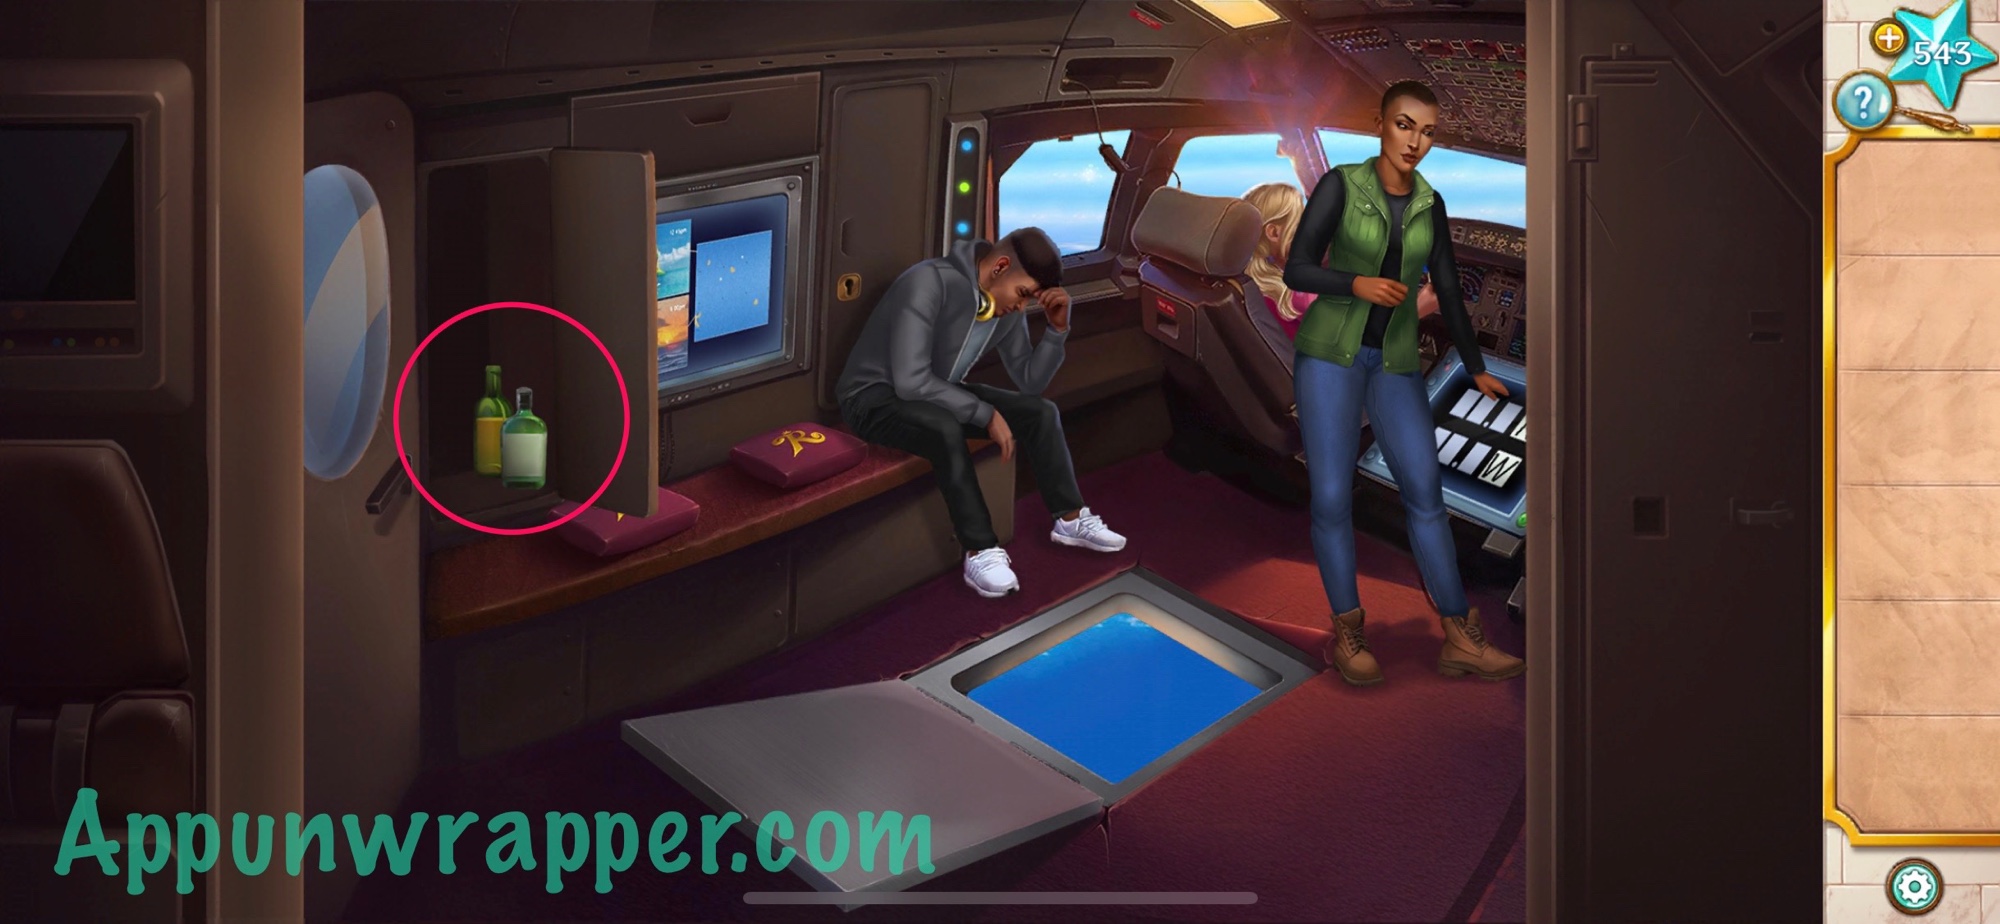
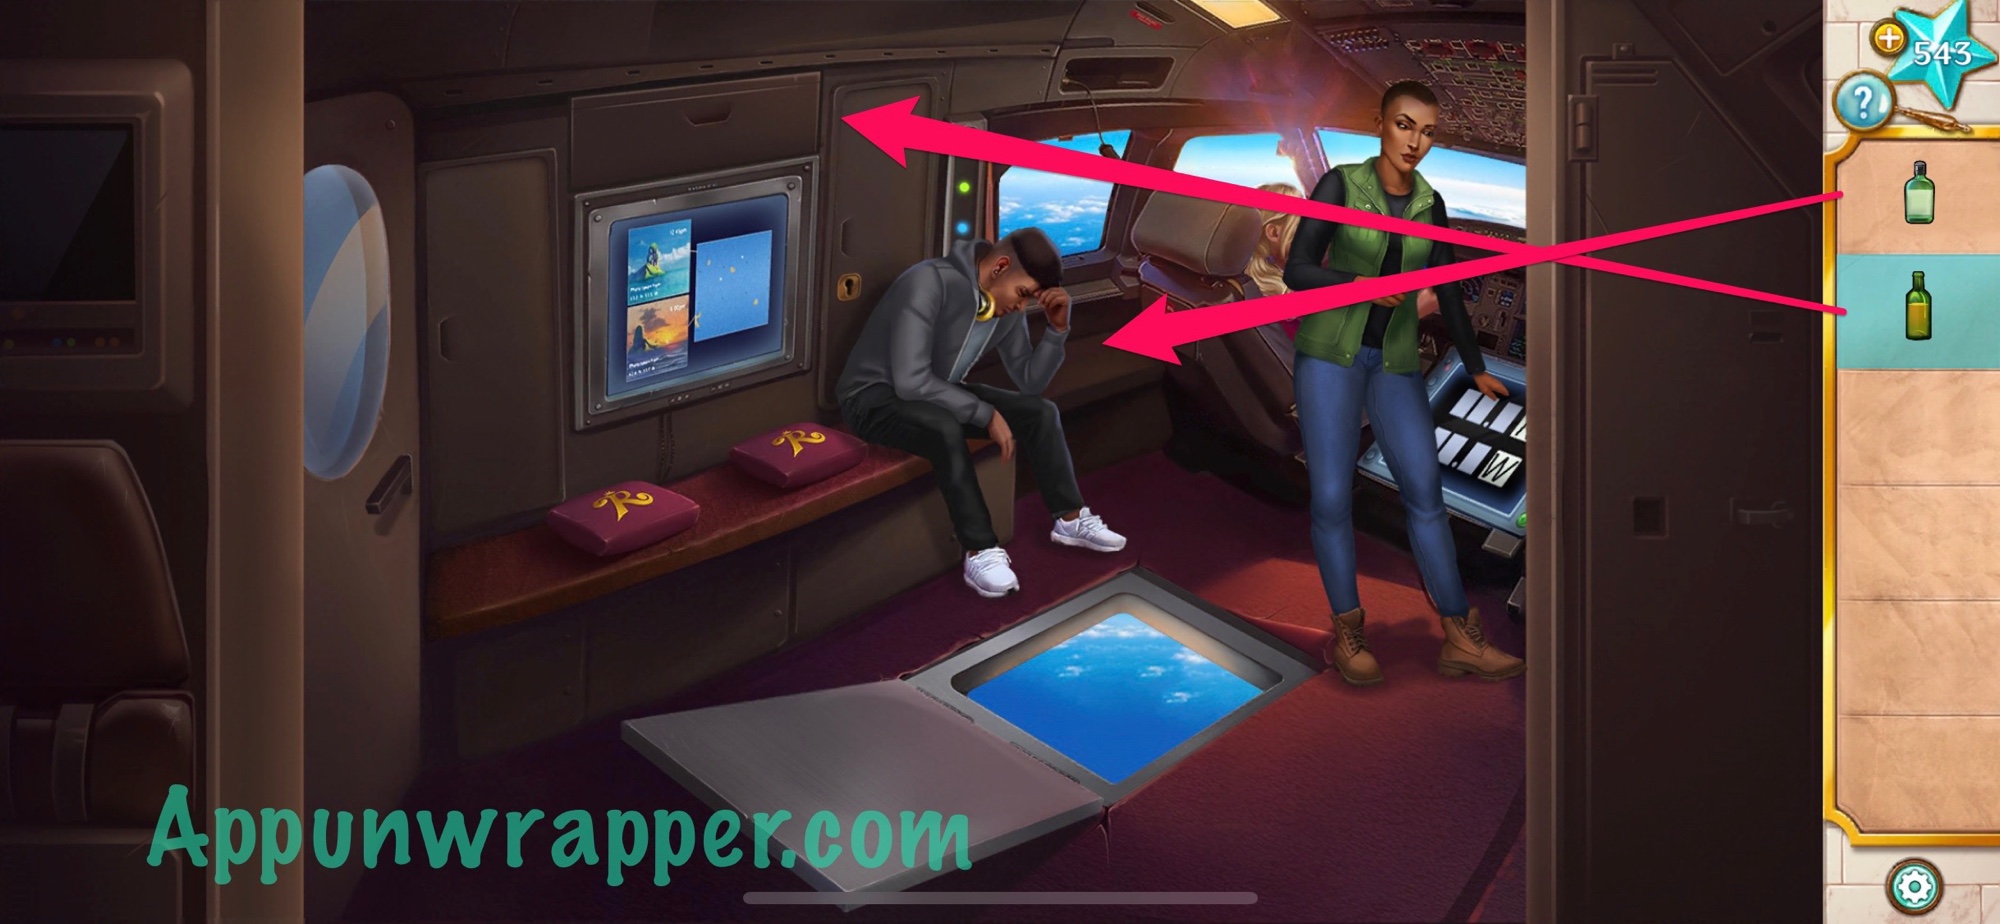
2. Rachel opens the hatch and tells everyone to skydive out of the plane. But first we need to find the parachutes! Open the cabinet and grab the bottle of alcohol and the cooking oil.
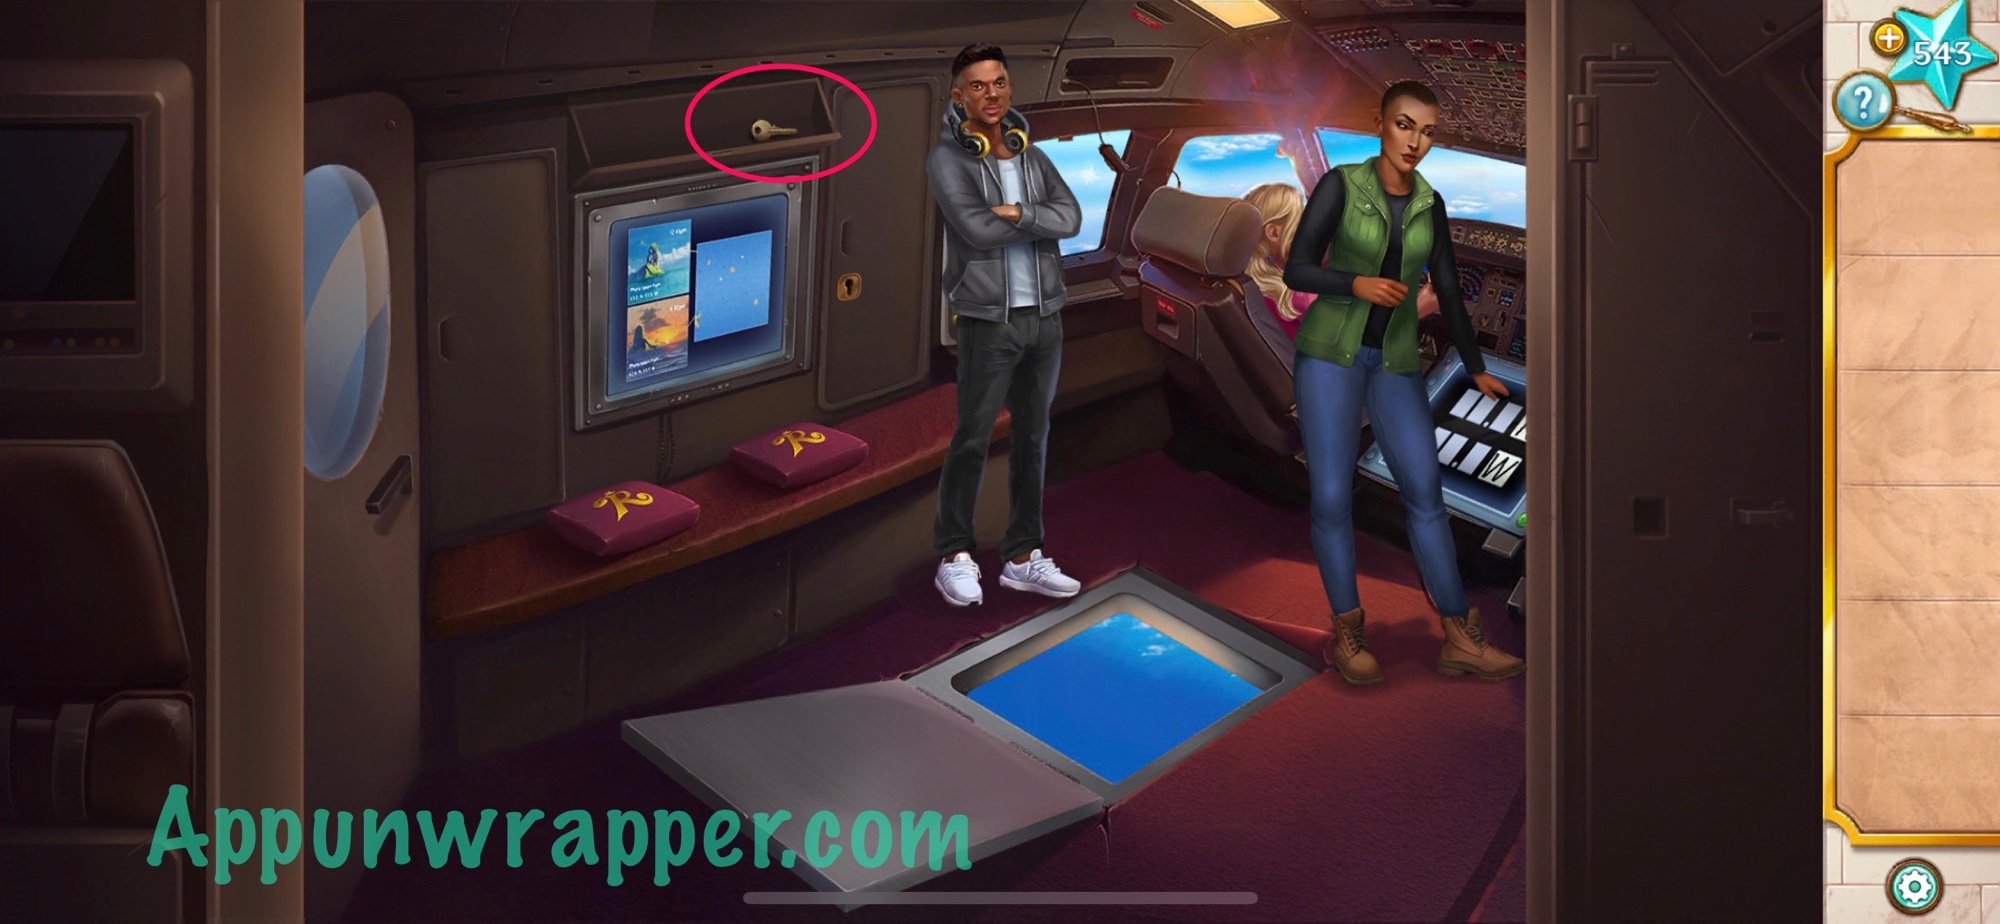
3. Use the cooking oil to open the stuck compartment and grab the key from inside. Also, give the bottle of alcohol to Peter so he stands up. Use the key to unlock the cabinet and take the parachute bags.
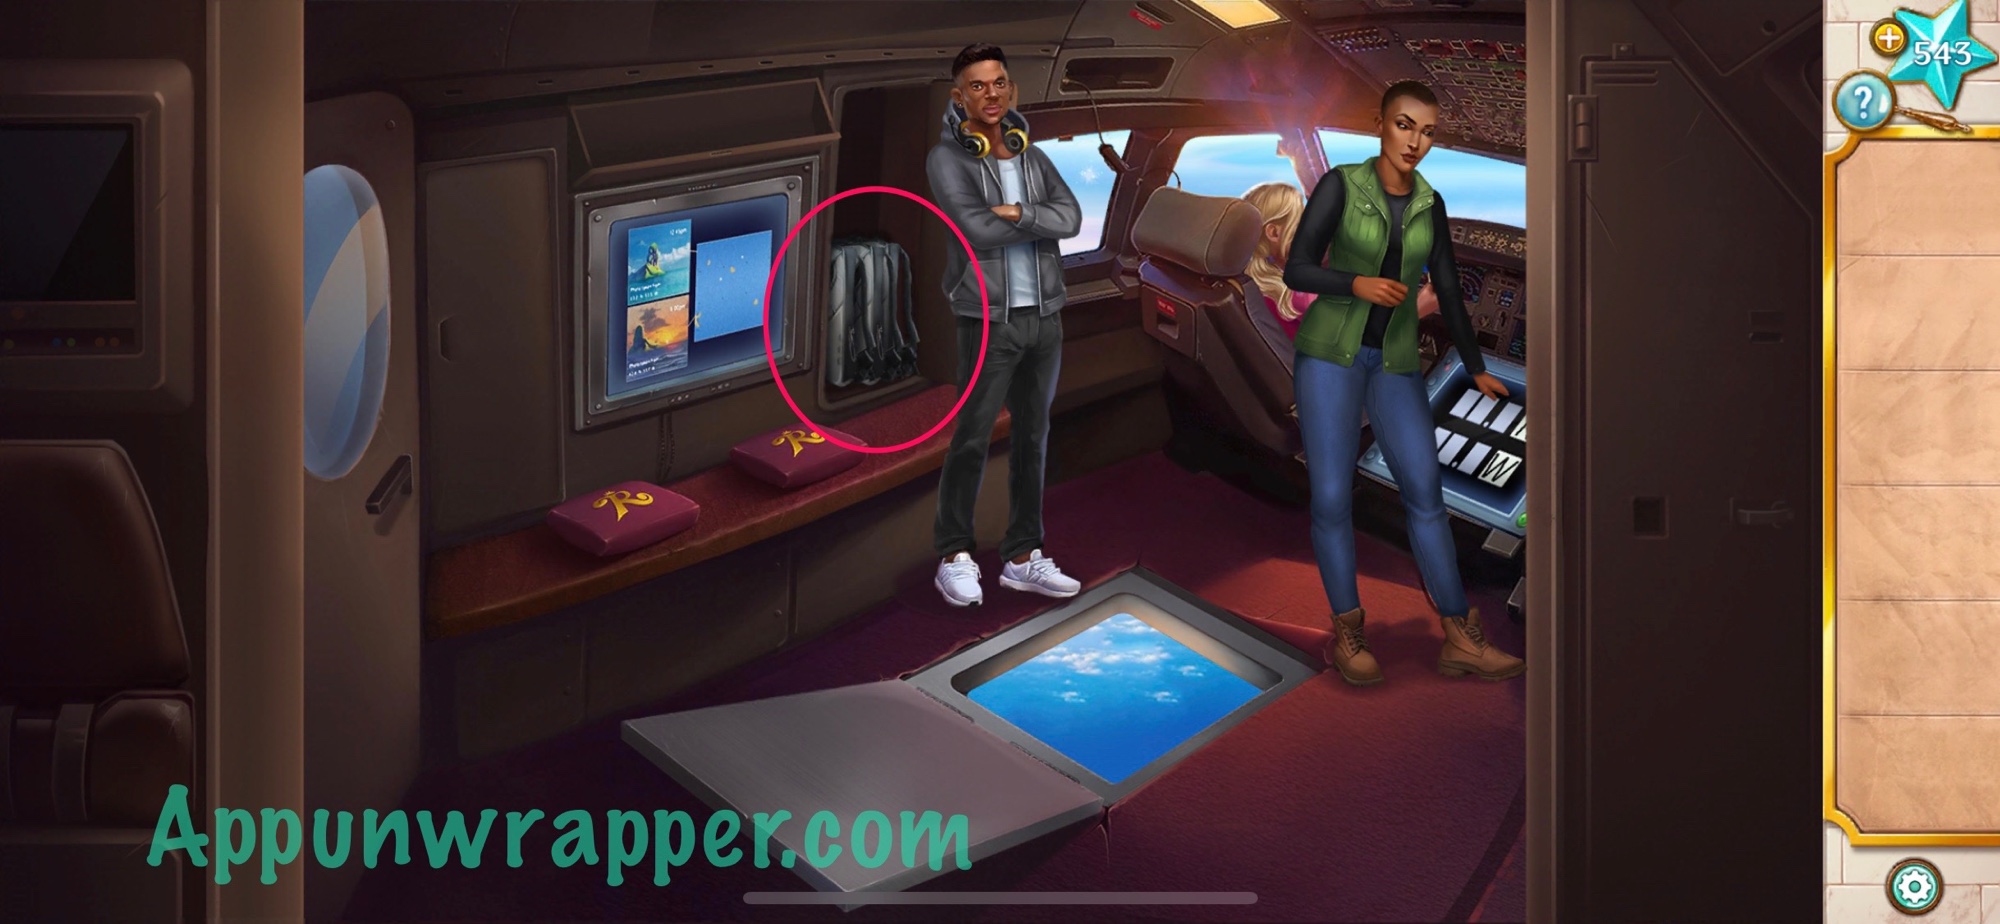
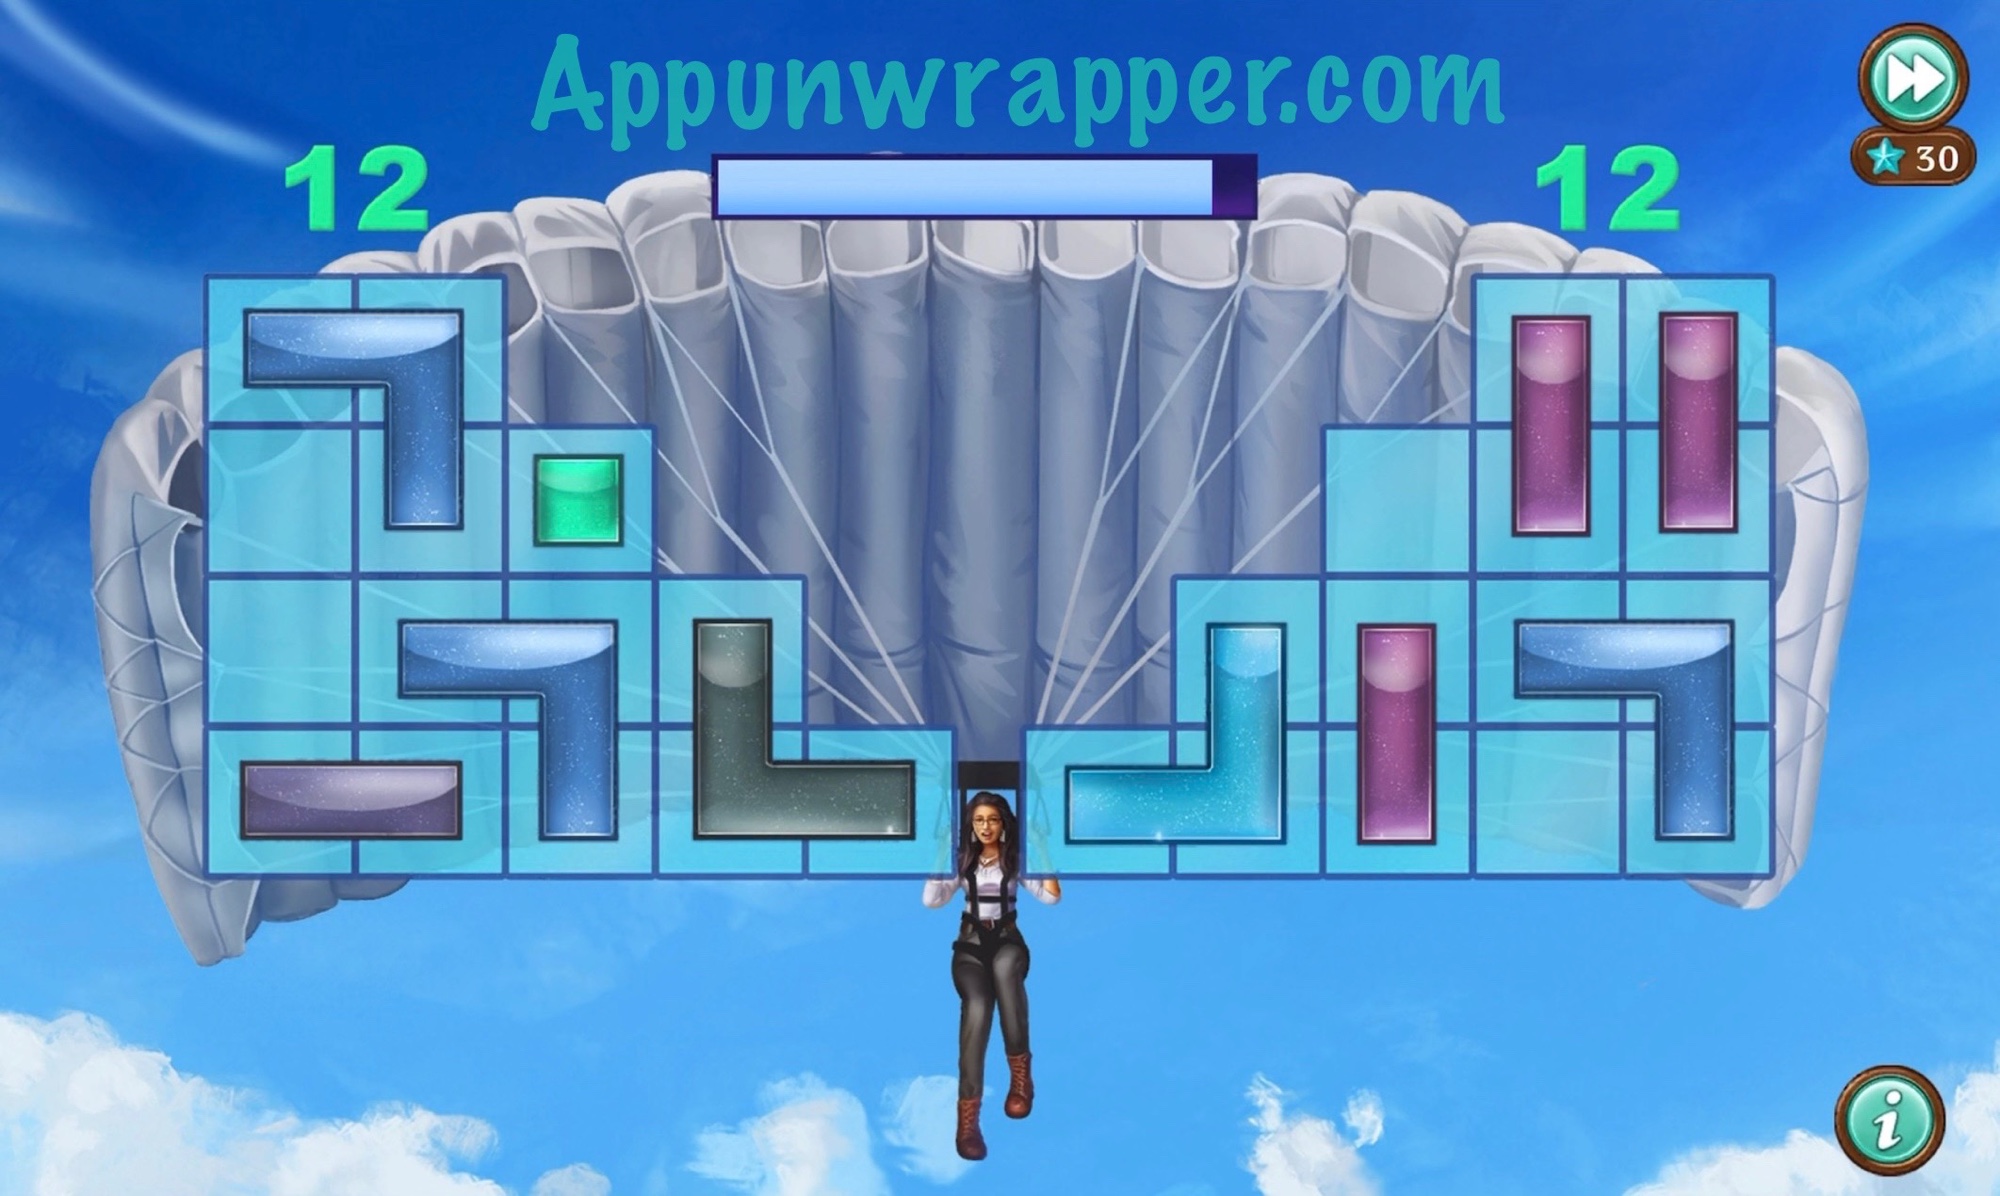
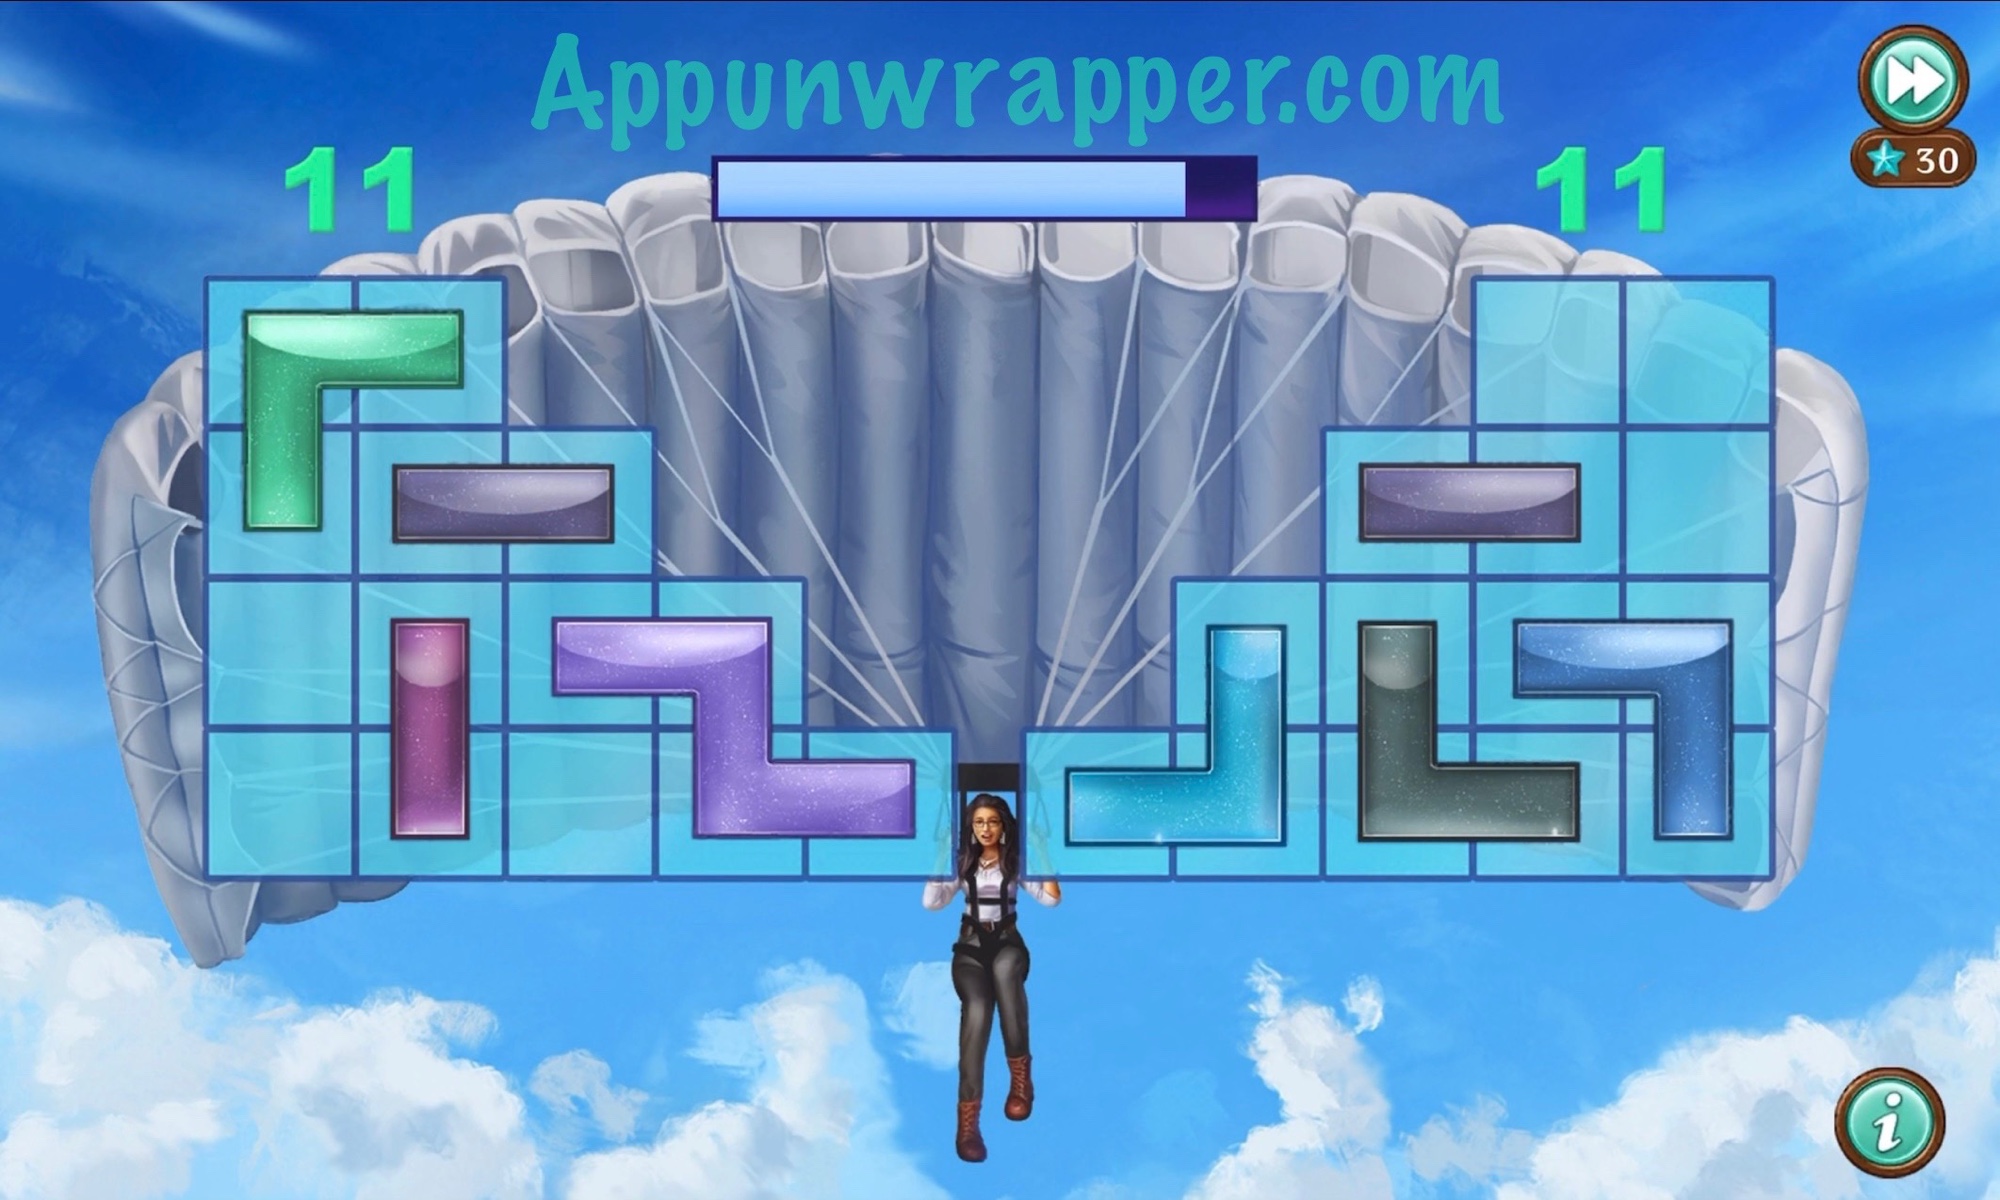
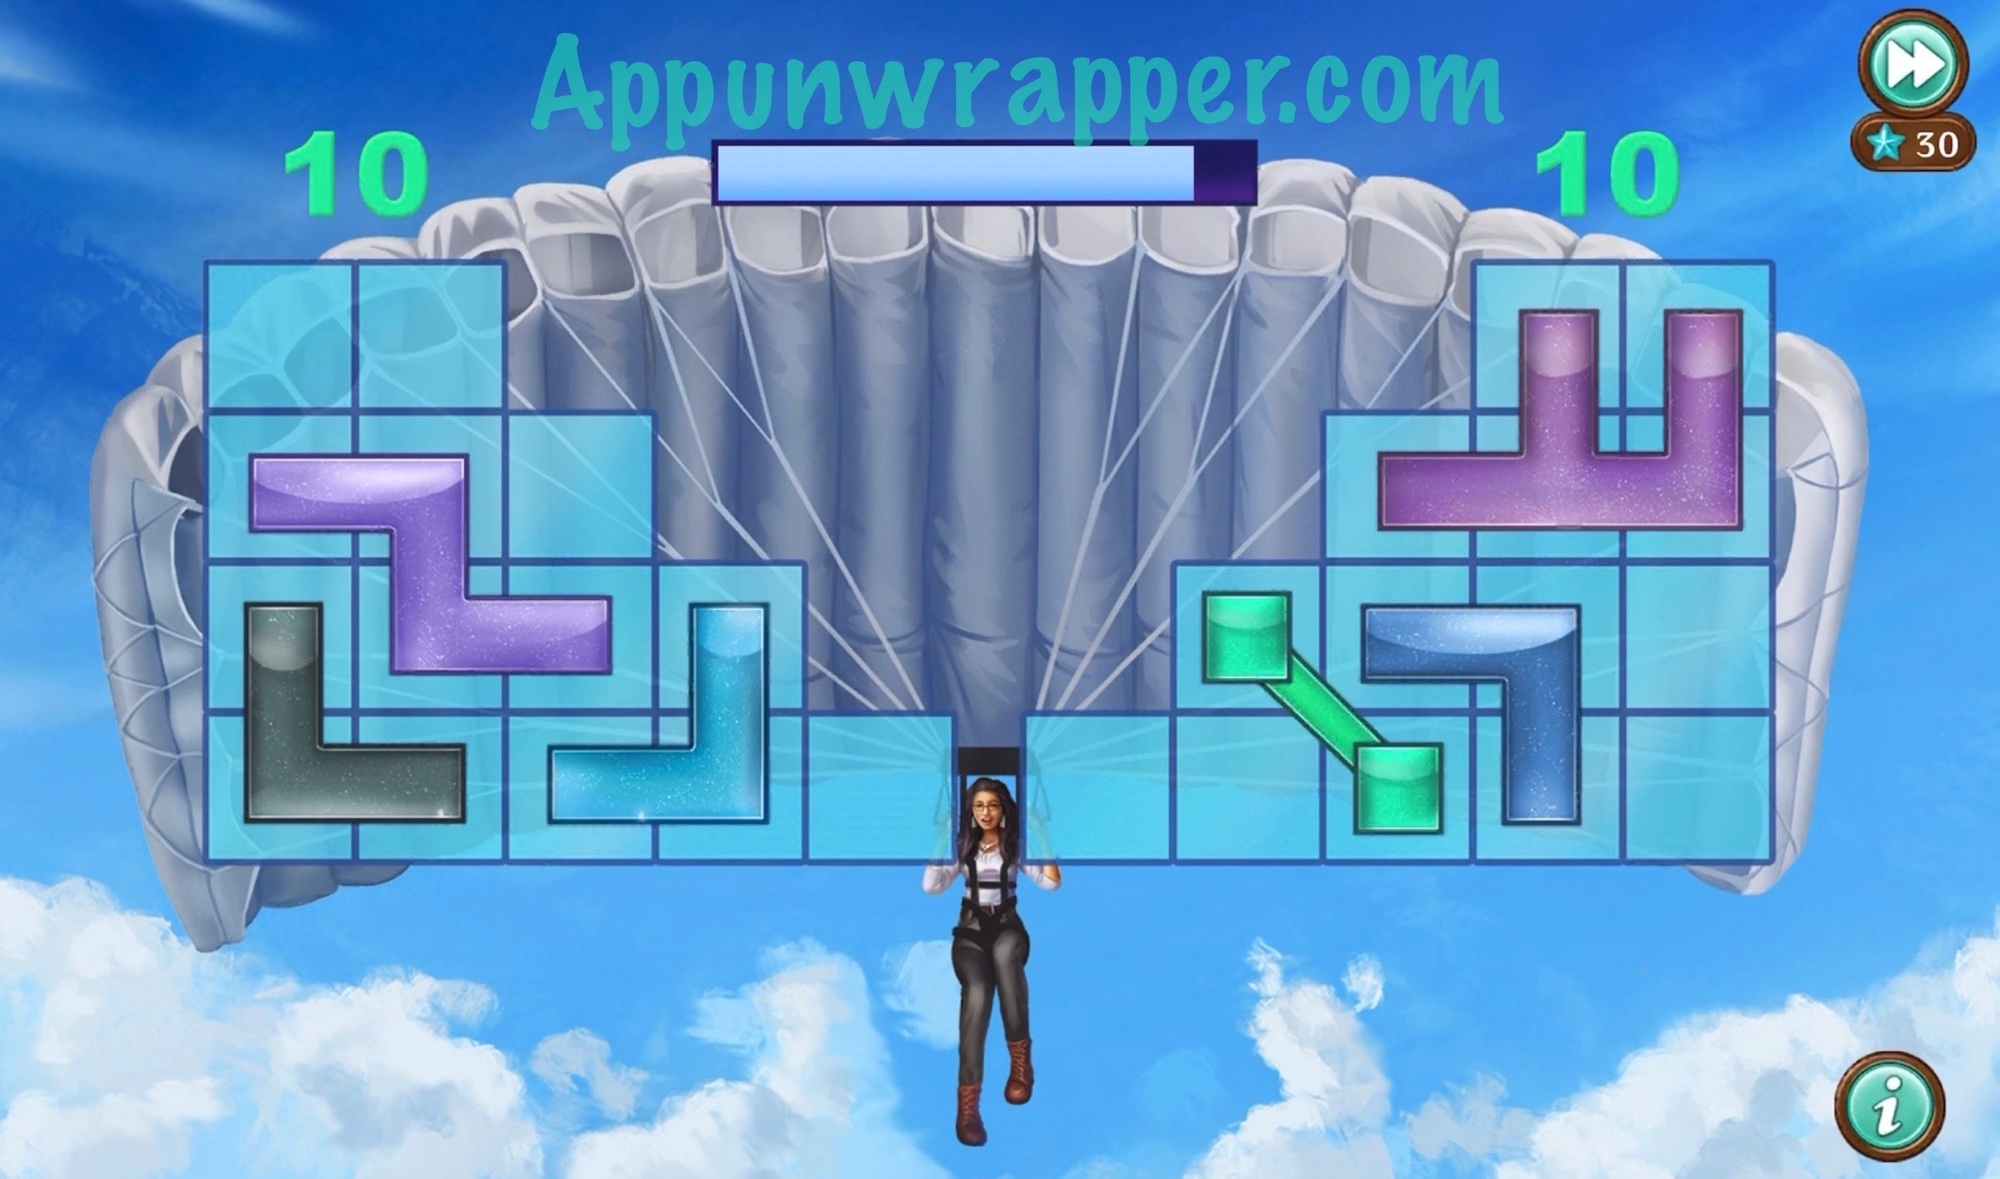
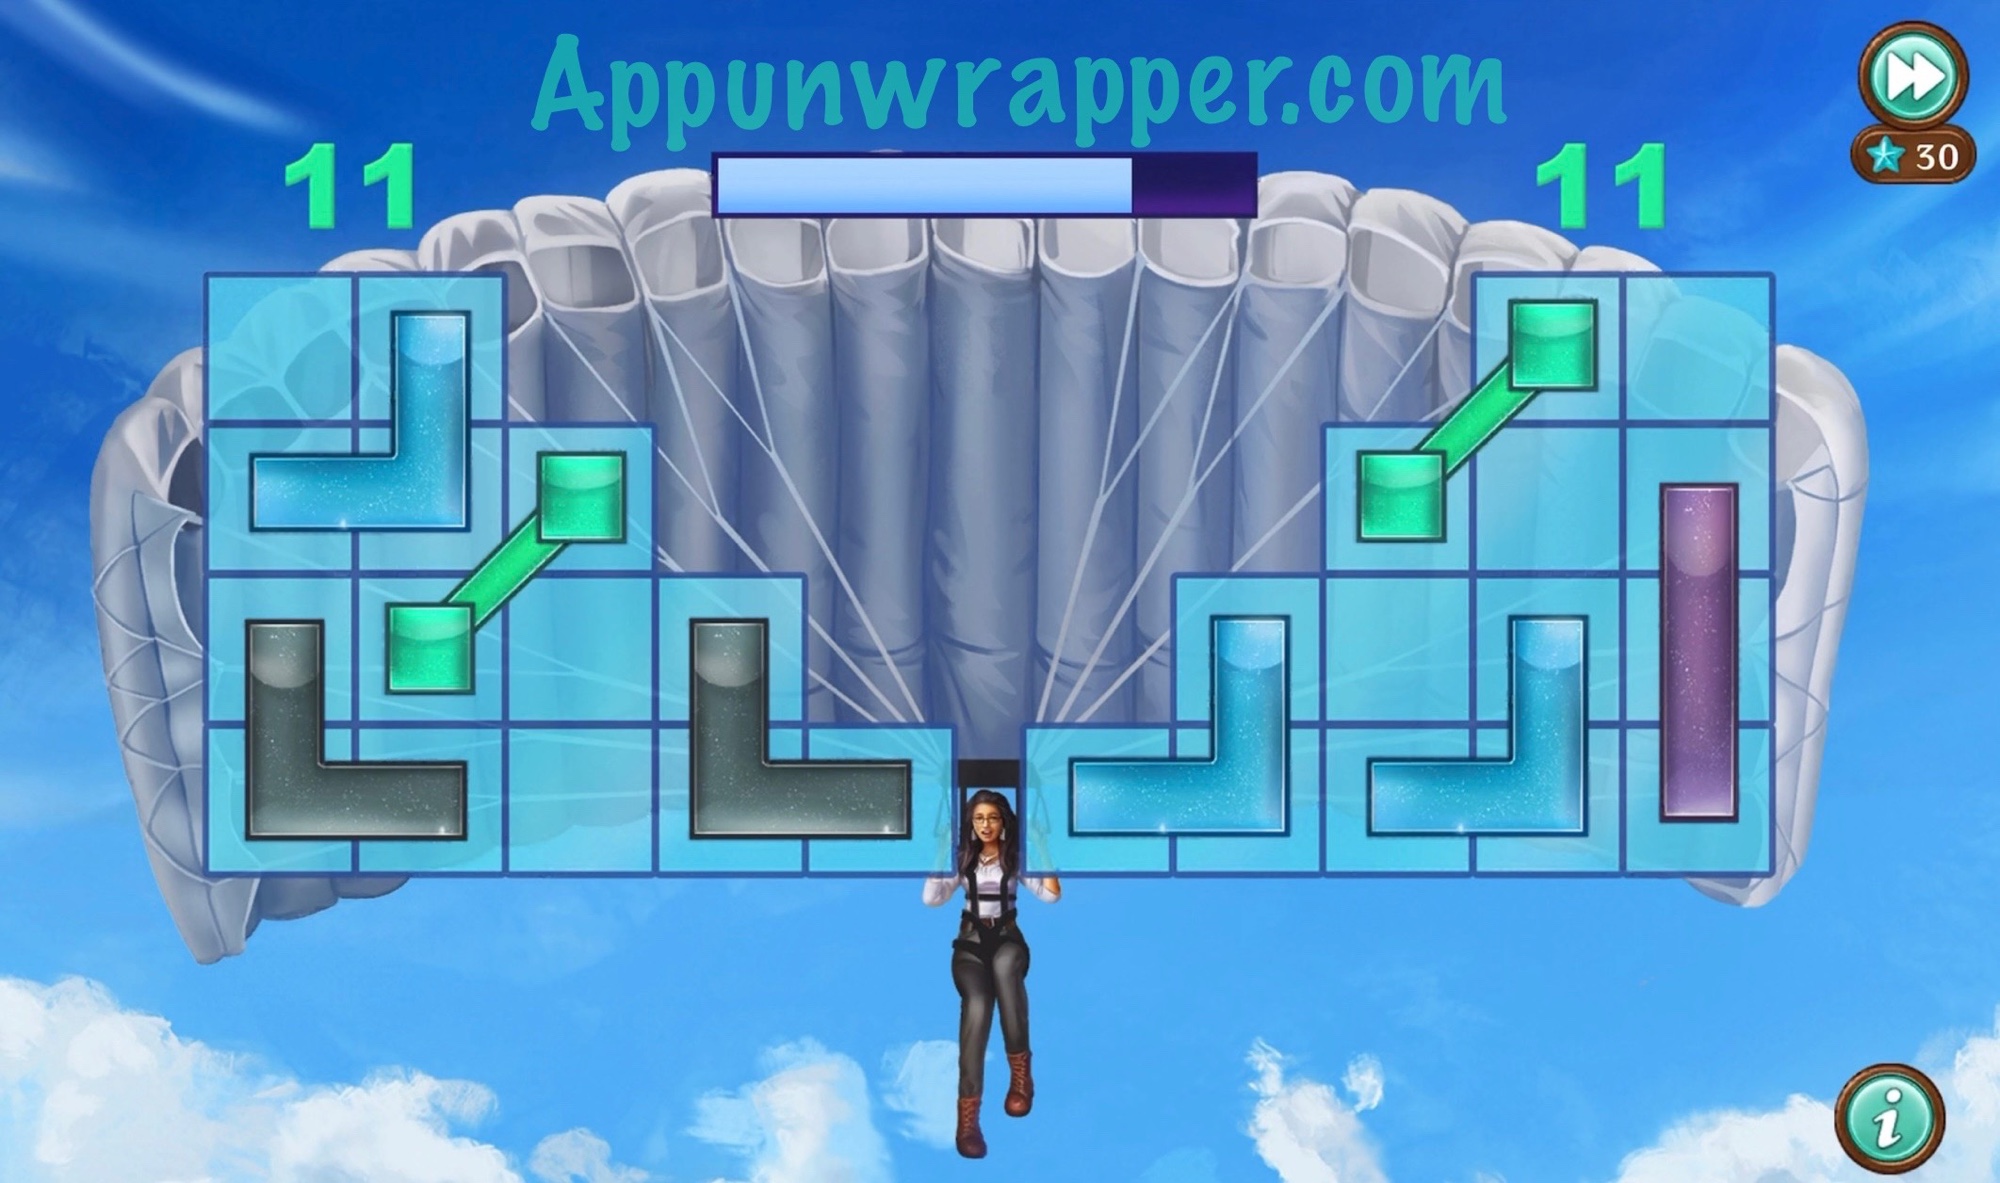
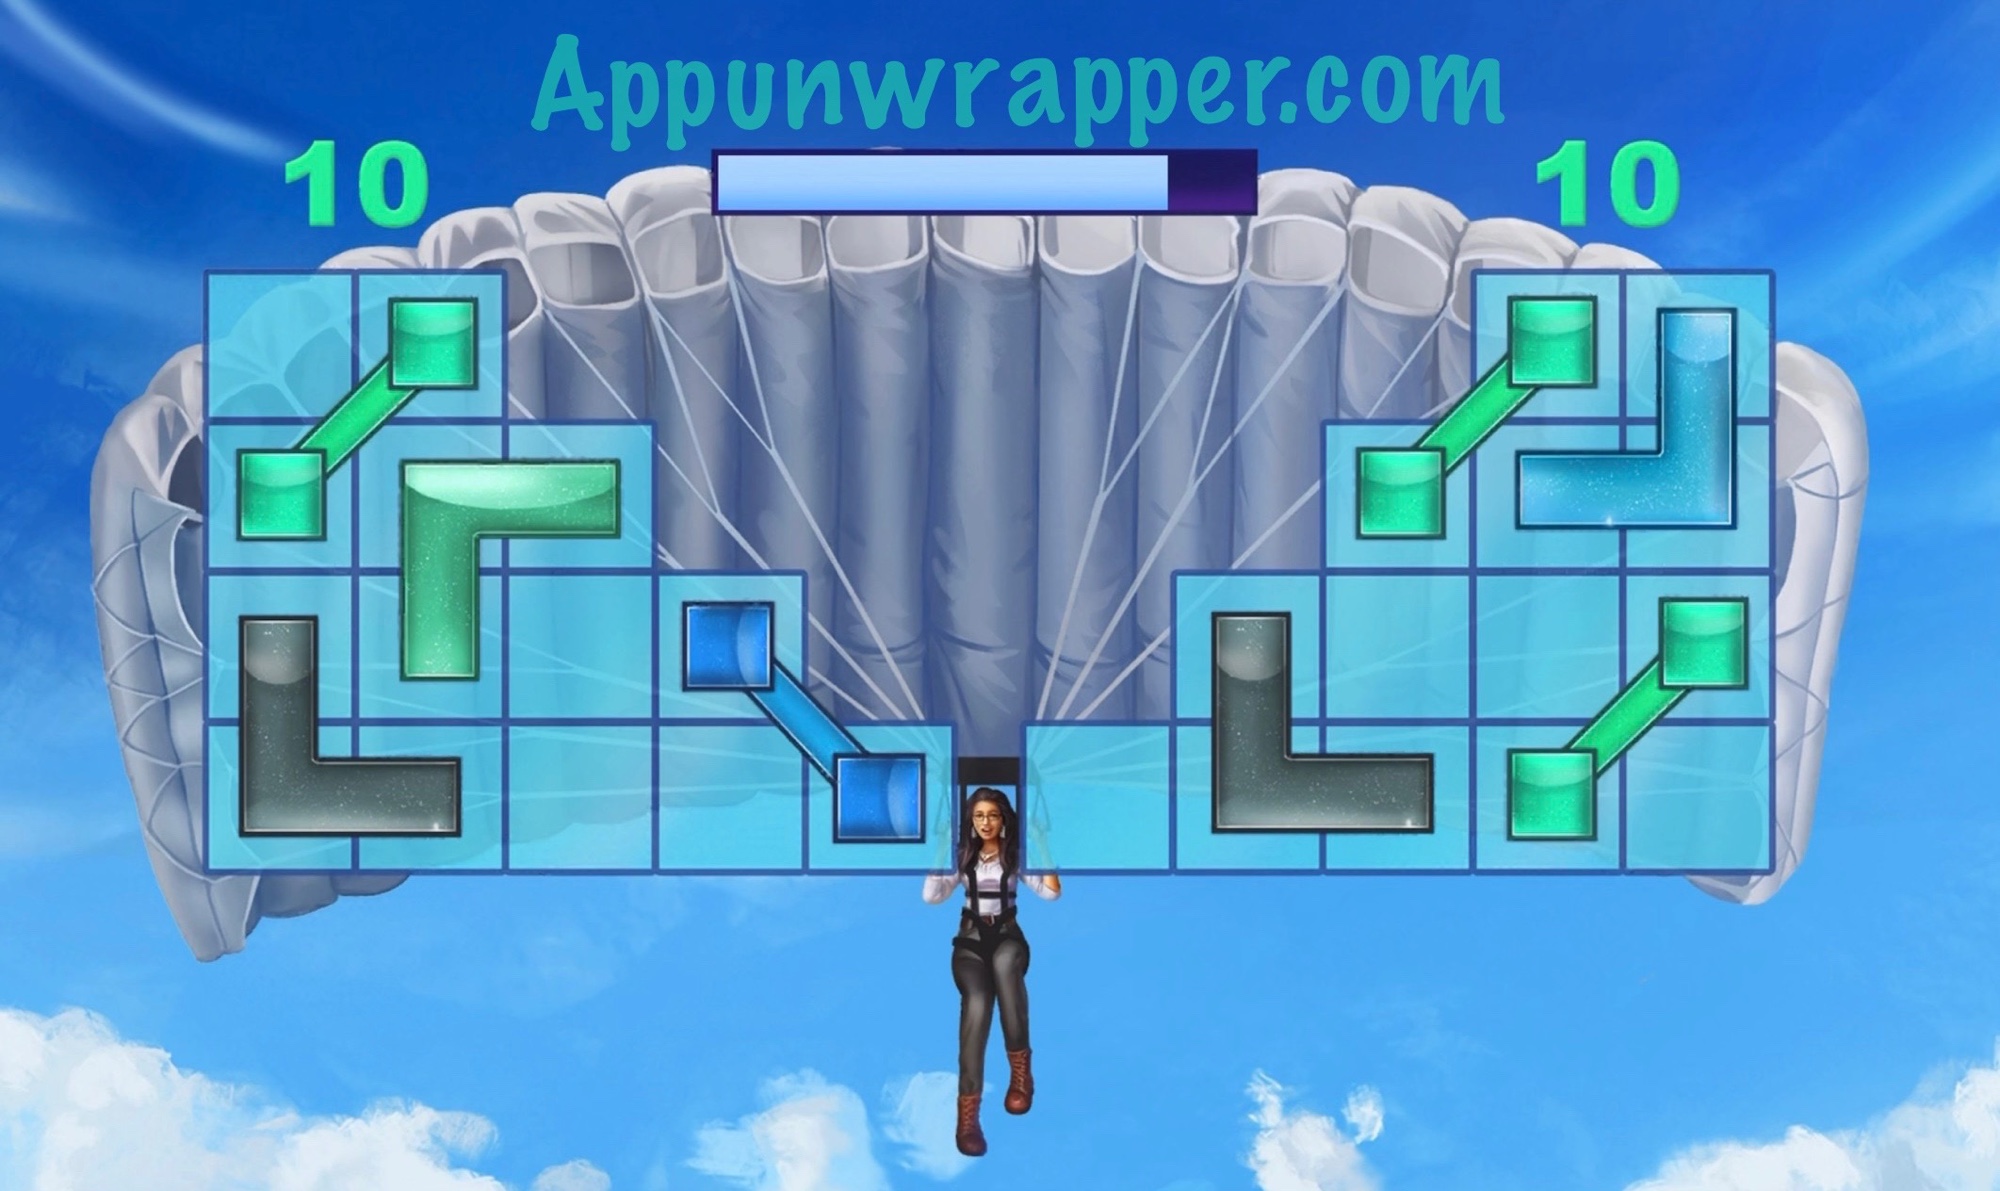
4. Give a parachute to Peter and another to Dr. Okoya. Then they’ll all jump out and we have to solve the Skydiving puzzle. This one is on a timer! You need to move the shapes around to balance each side. Do it a total of 5 times to land safely on the island. I posted screenshots and a video.
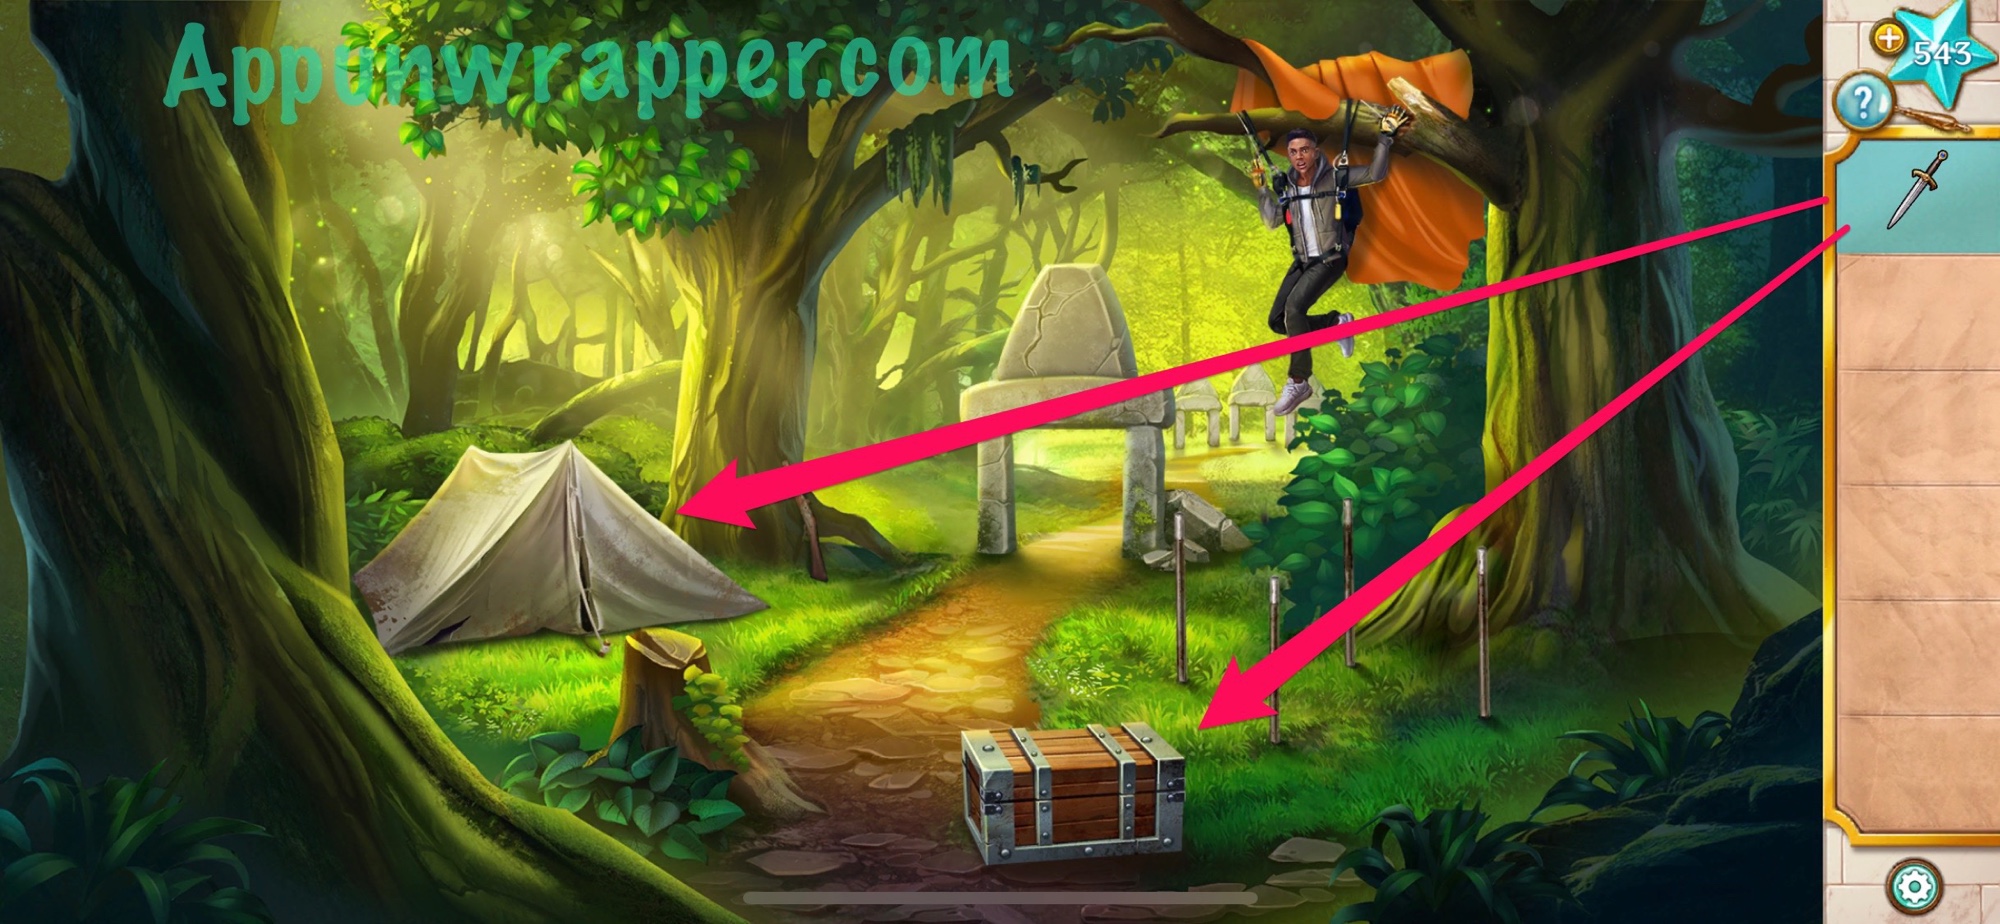
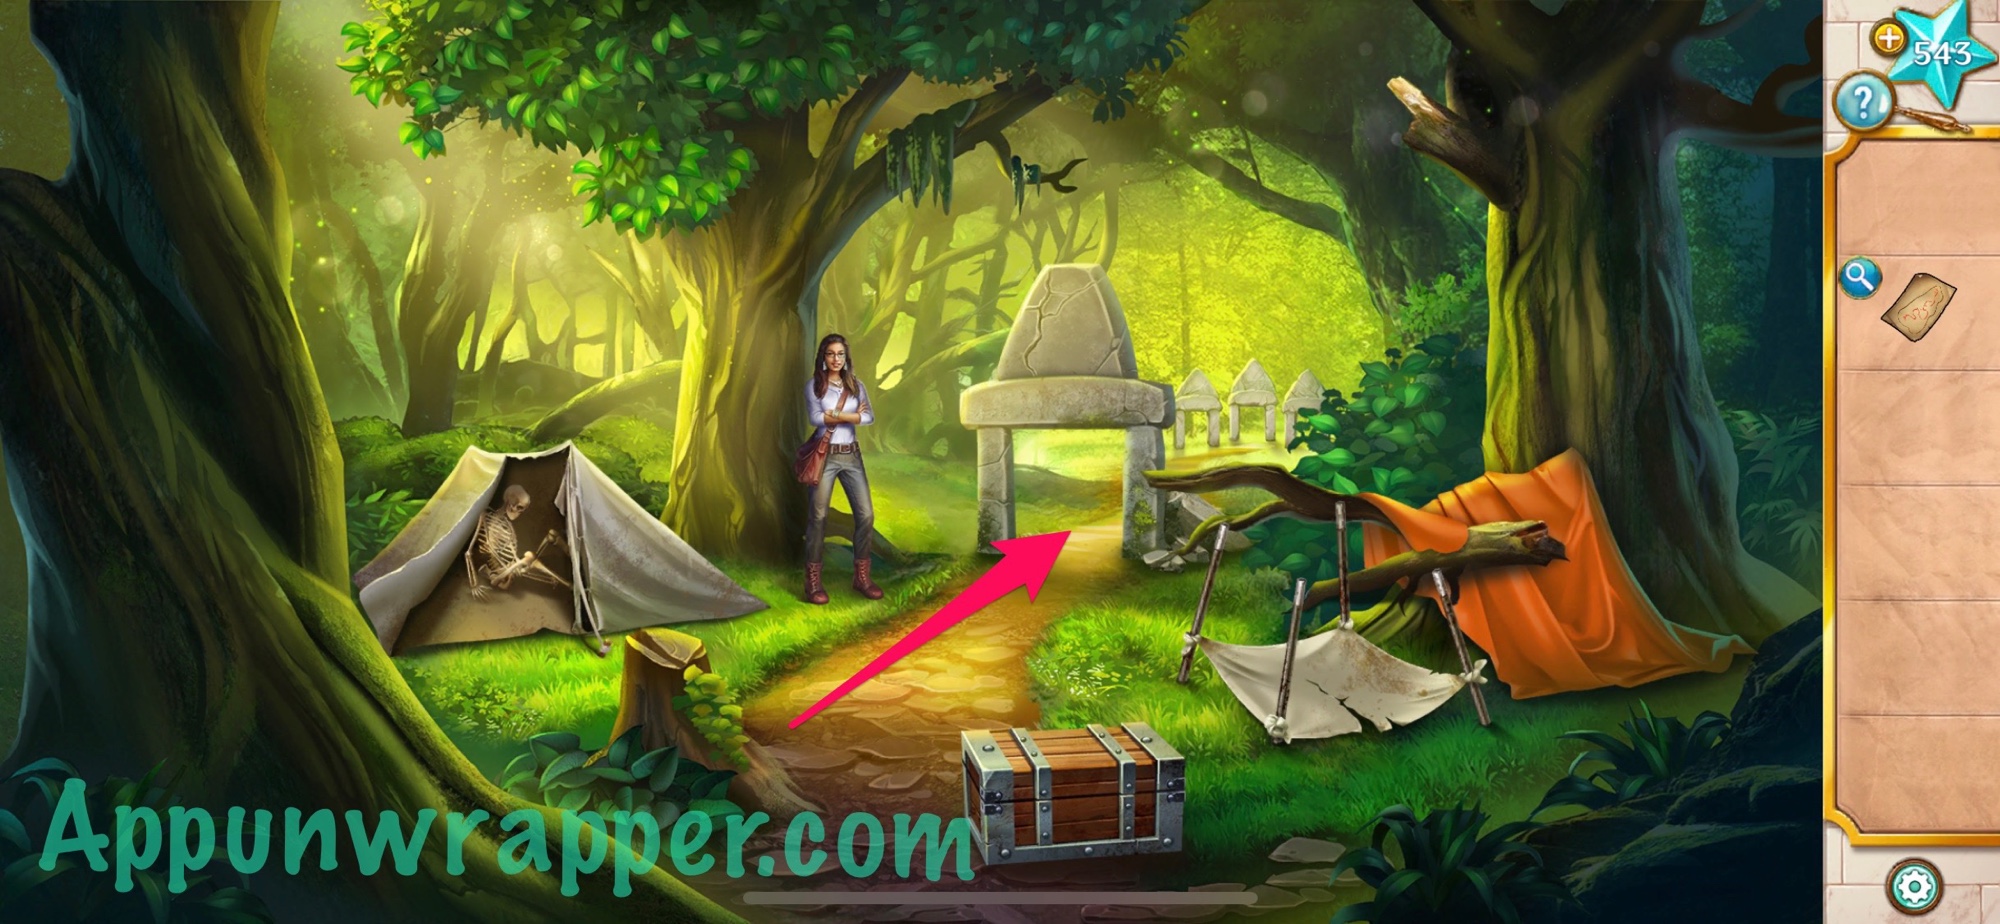
5. Peter gets stuck in a tree! We have to help him down. Pick up the dagger and tent poles.
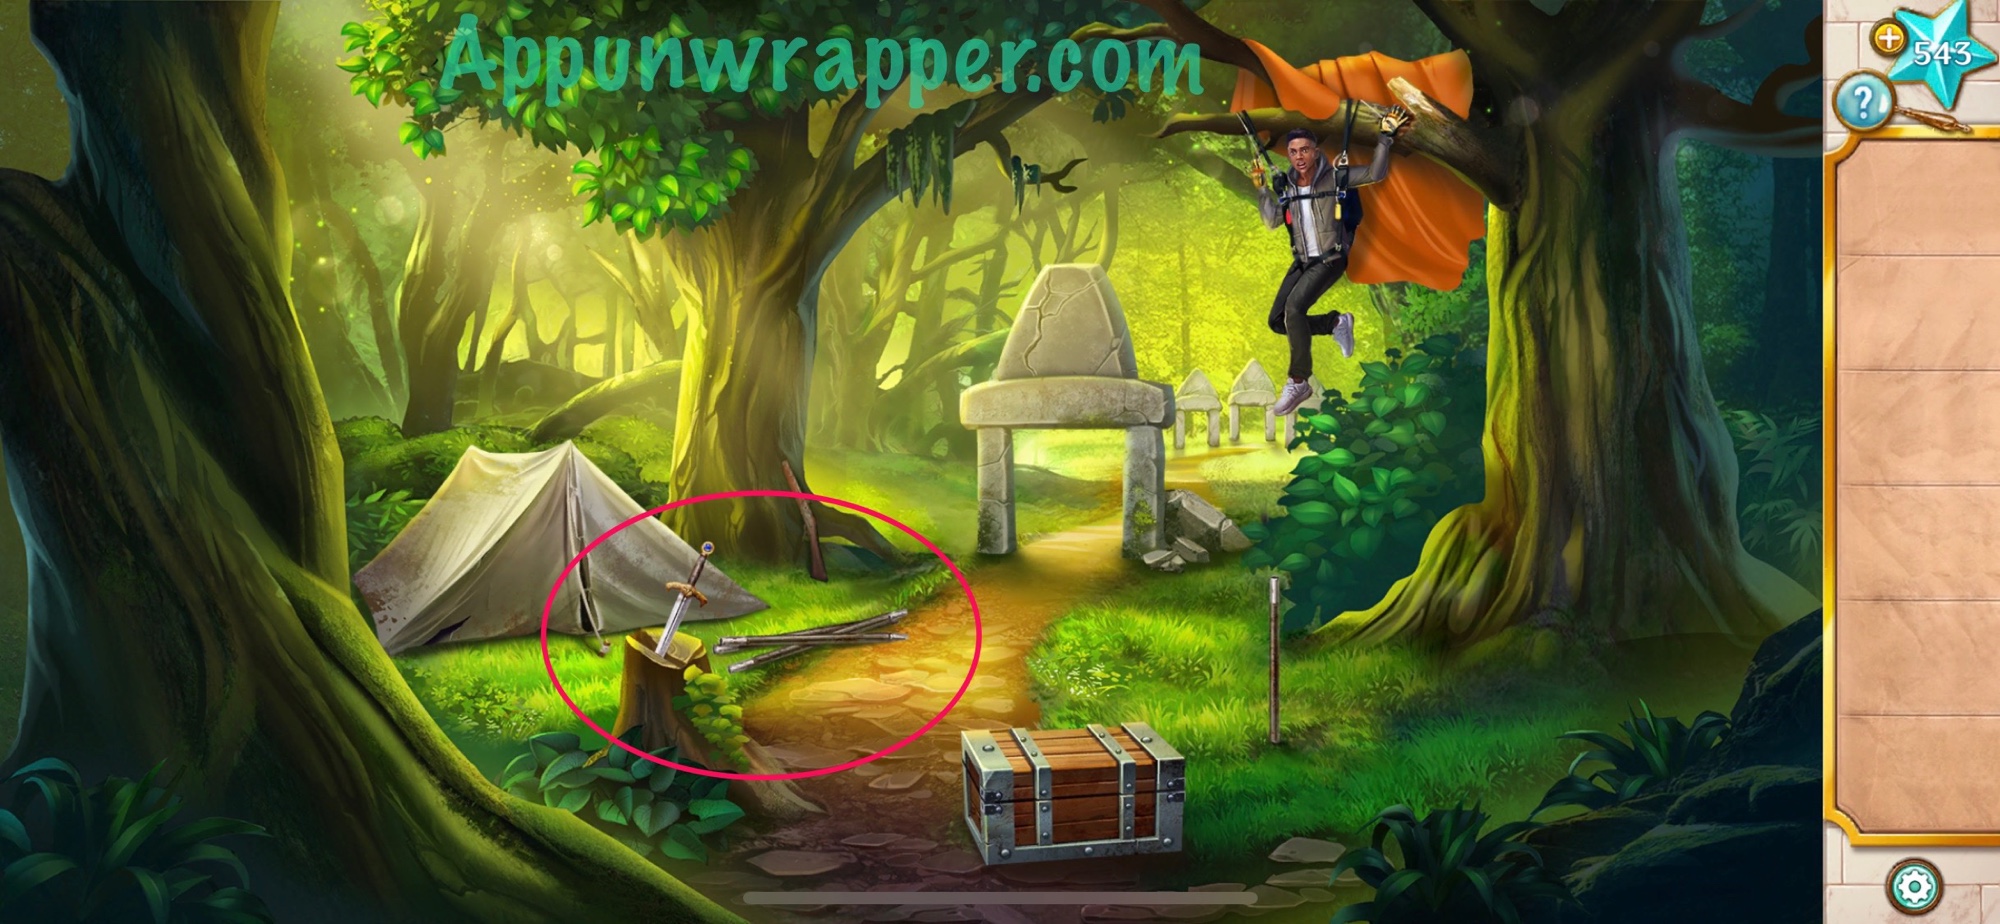
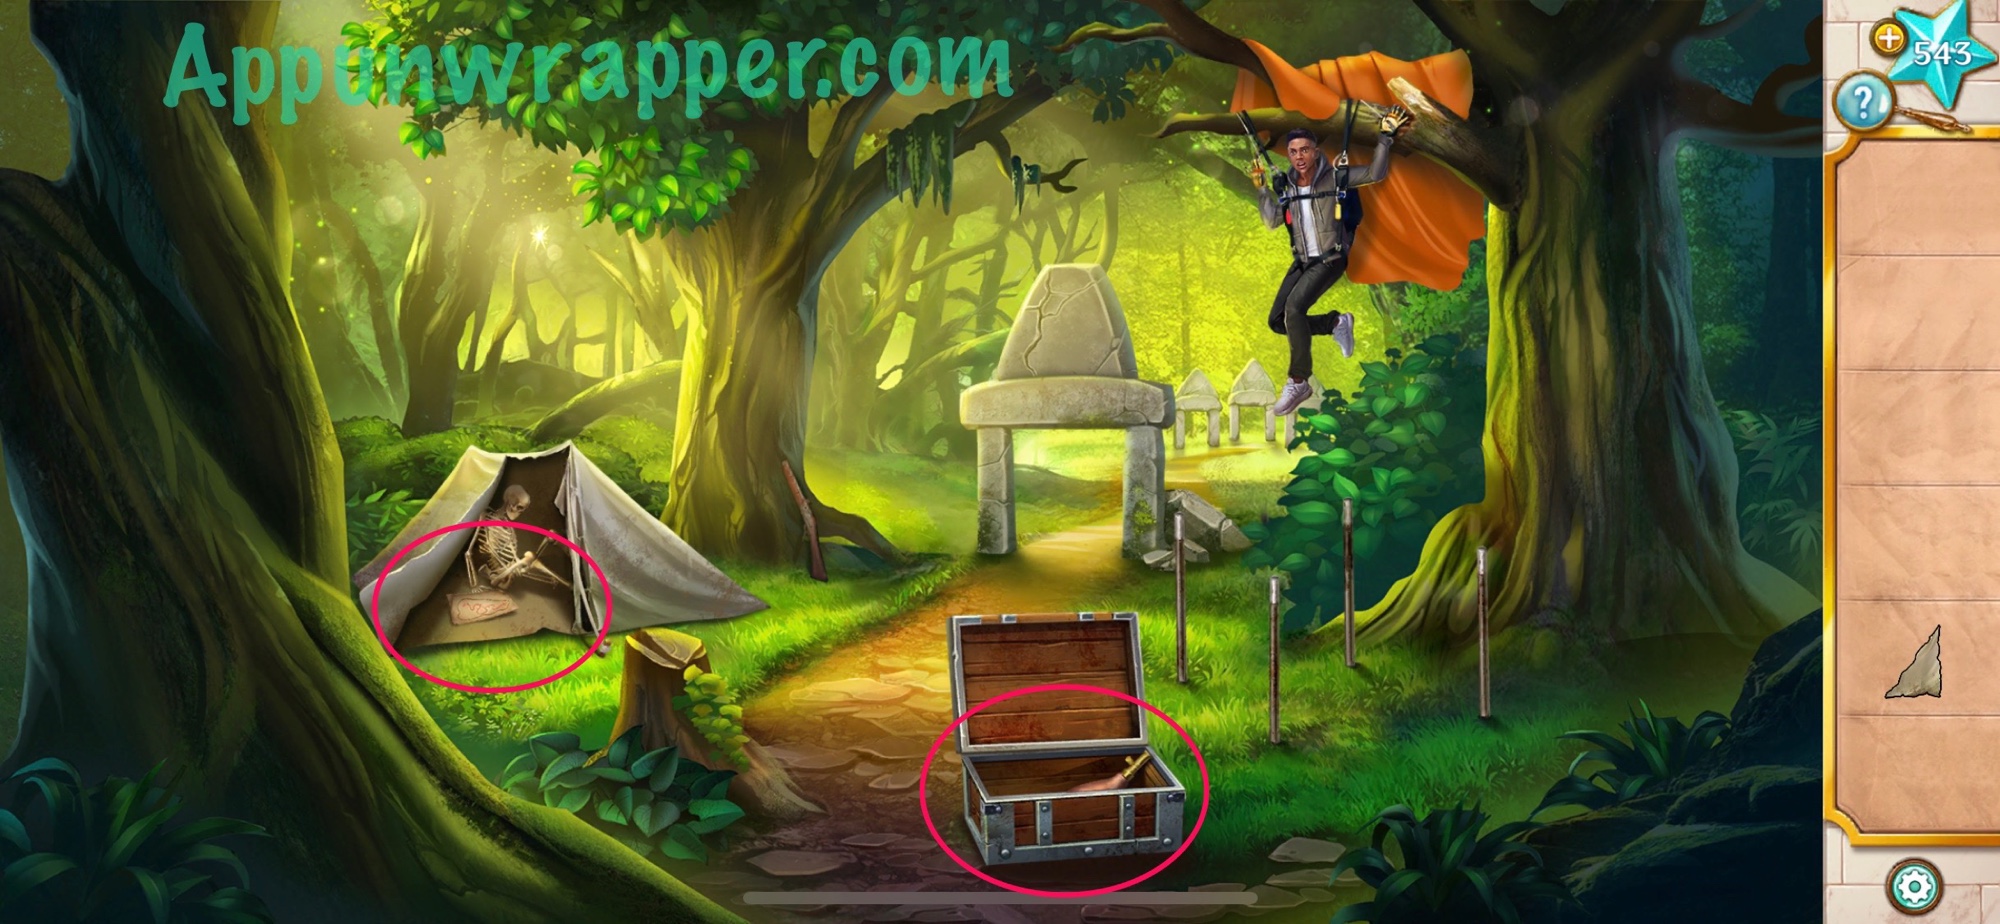
6. Place the tent poles down below Peter. Use the dagger open the chest and get some gunpowder. Also, use the dagger to cut off a piece of tent fabric. Take the old parchment from inside the tent and look at it. It’s a map! Make sure to look at both sides.
7. Tie the tent fabric to the tent poles and fill the gun with gunpowder.
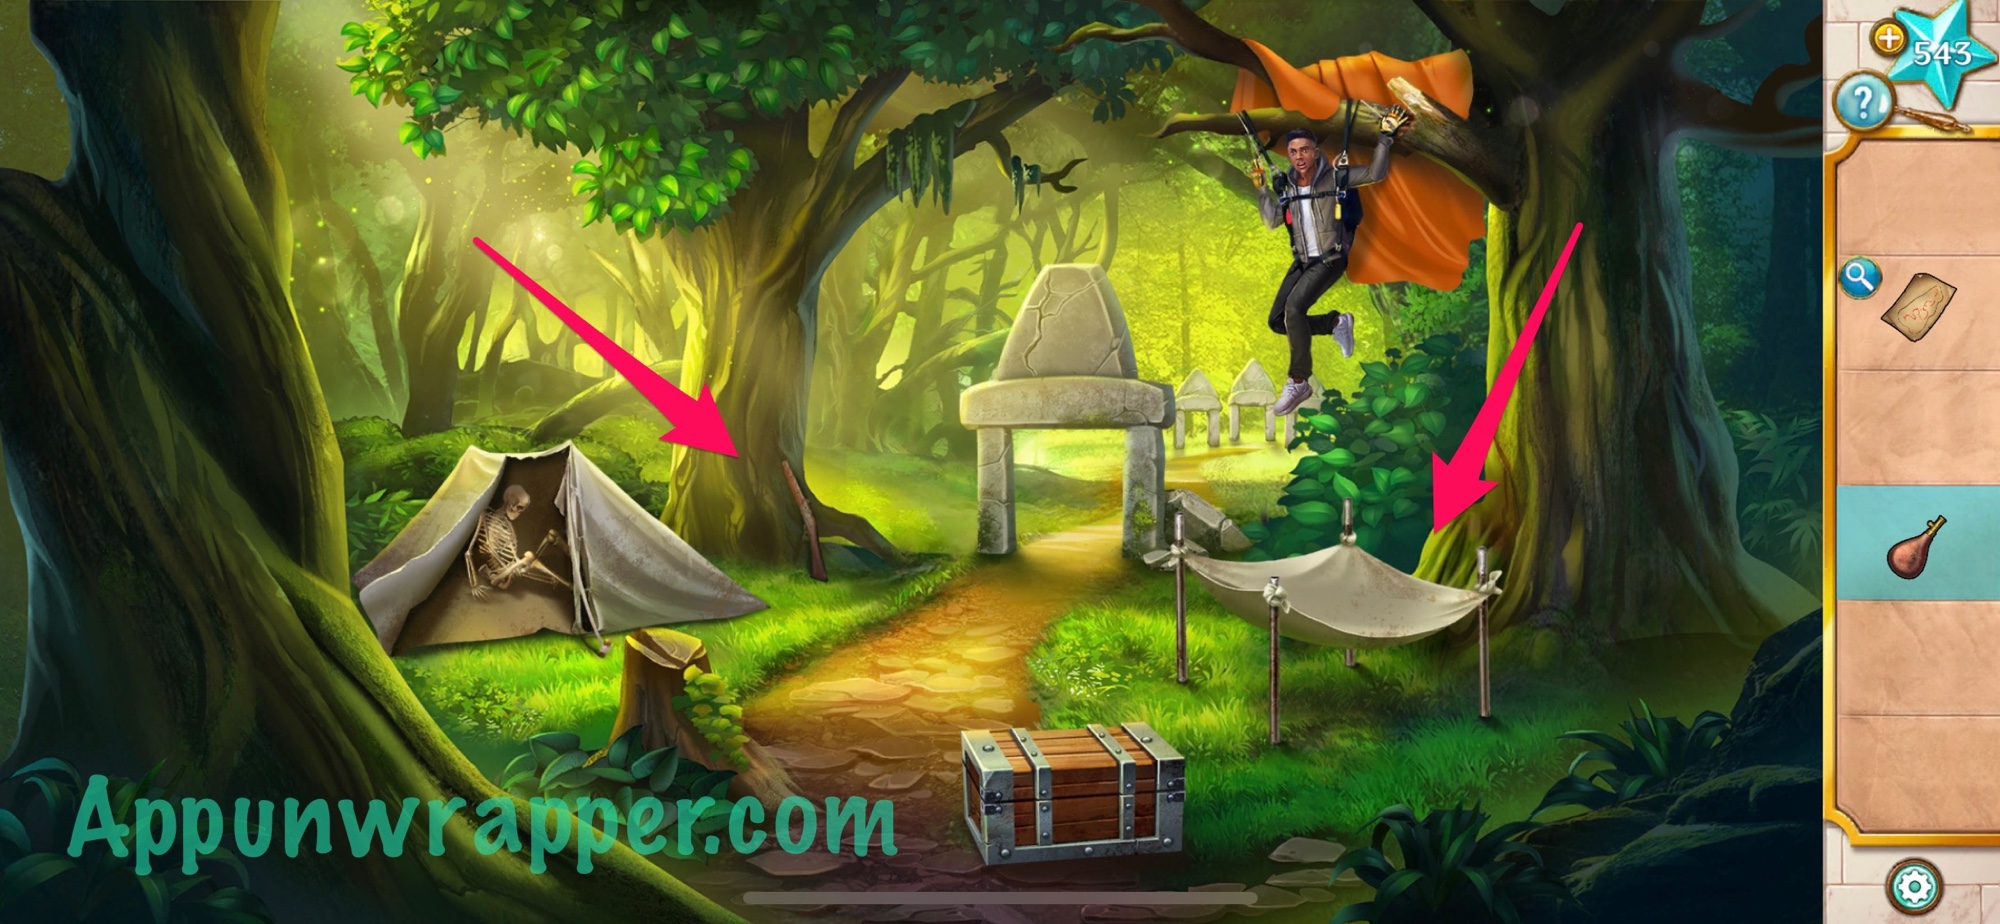
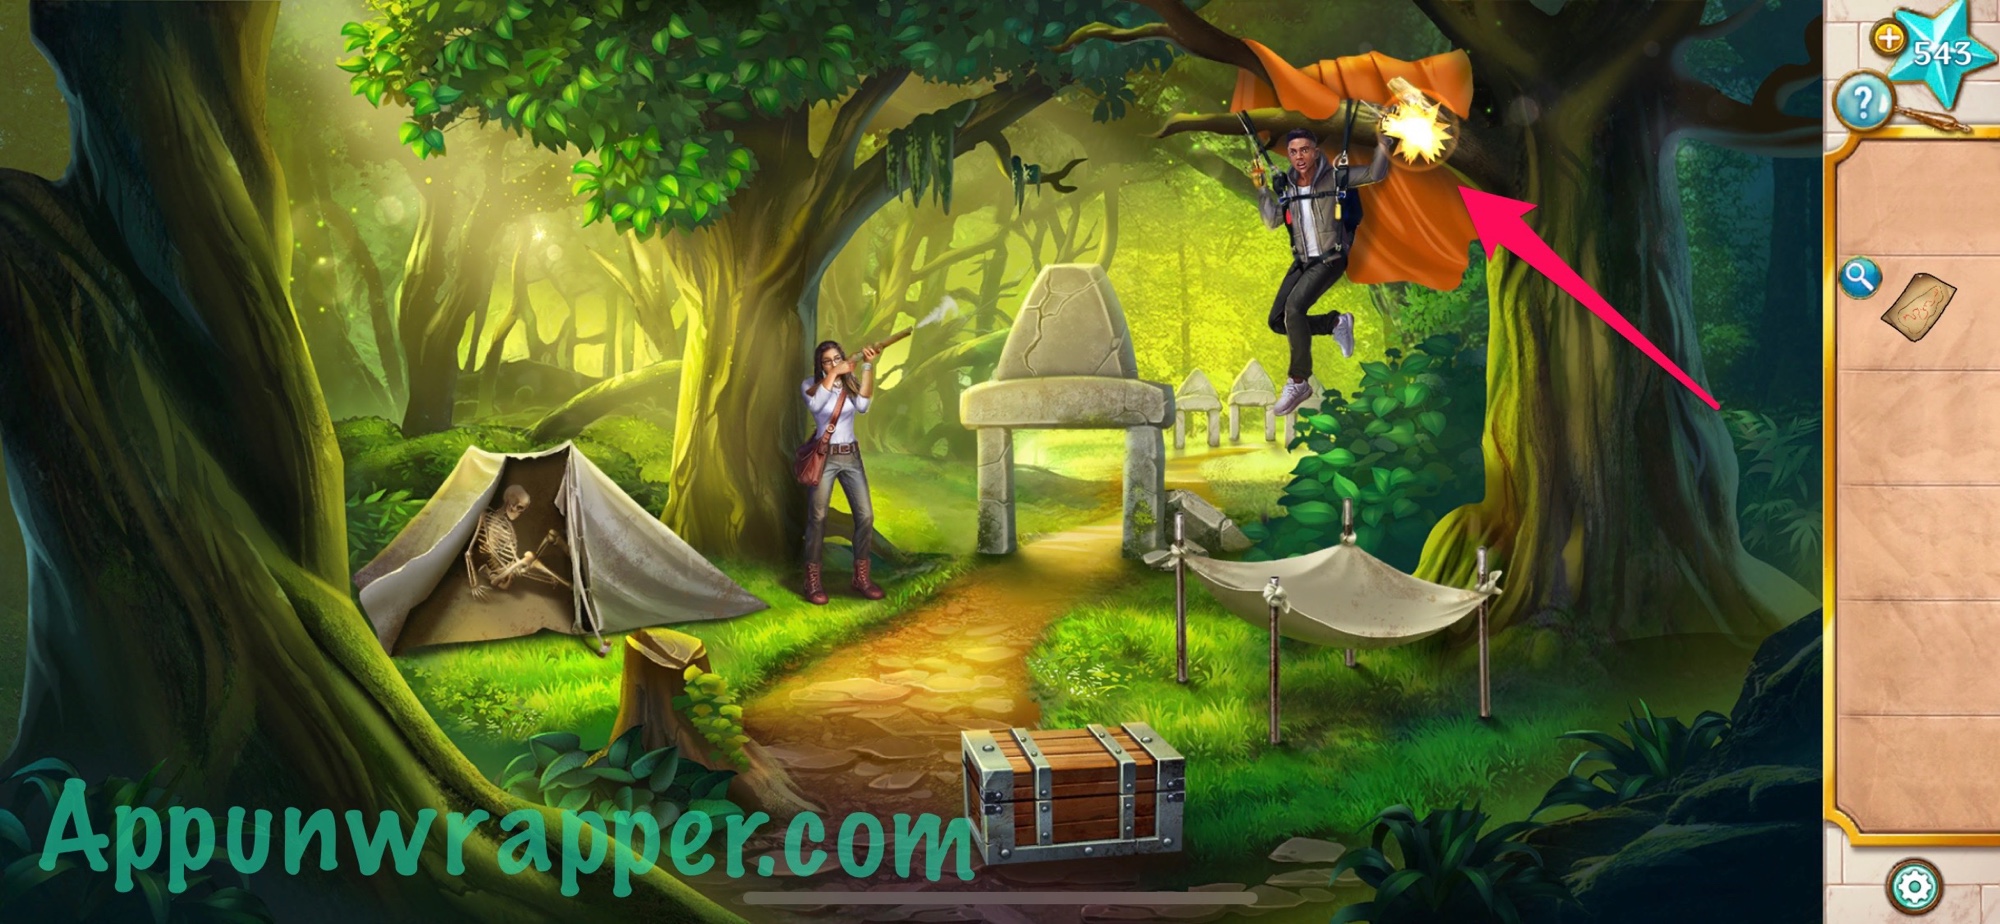
8. Use the gun to shoot at the branch holding Peter so it breaks and he falls into the safety net.
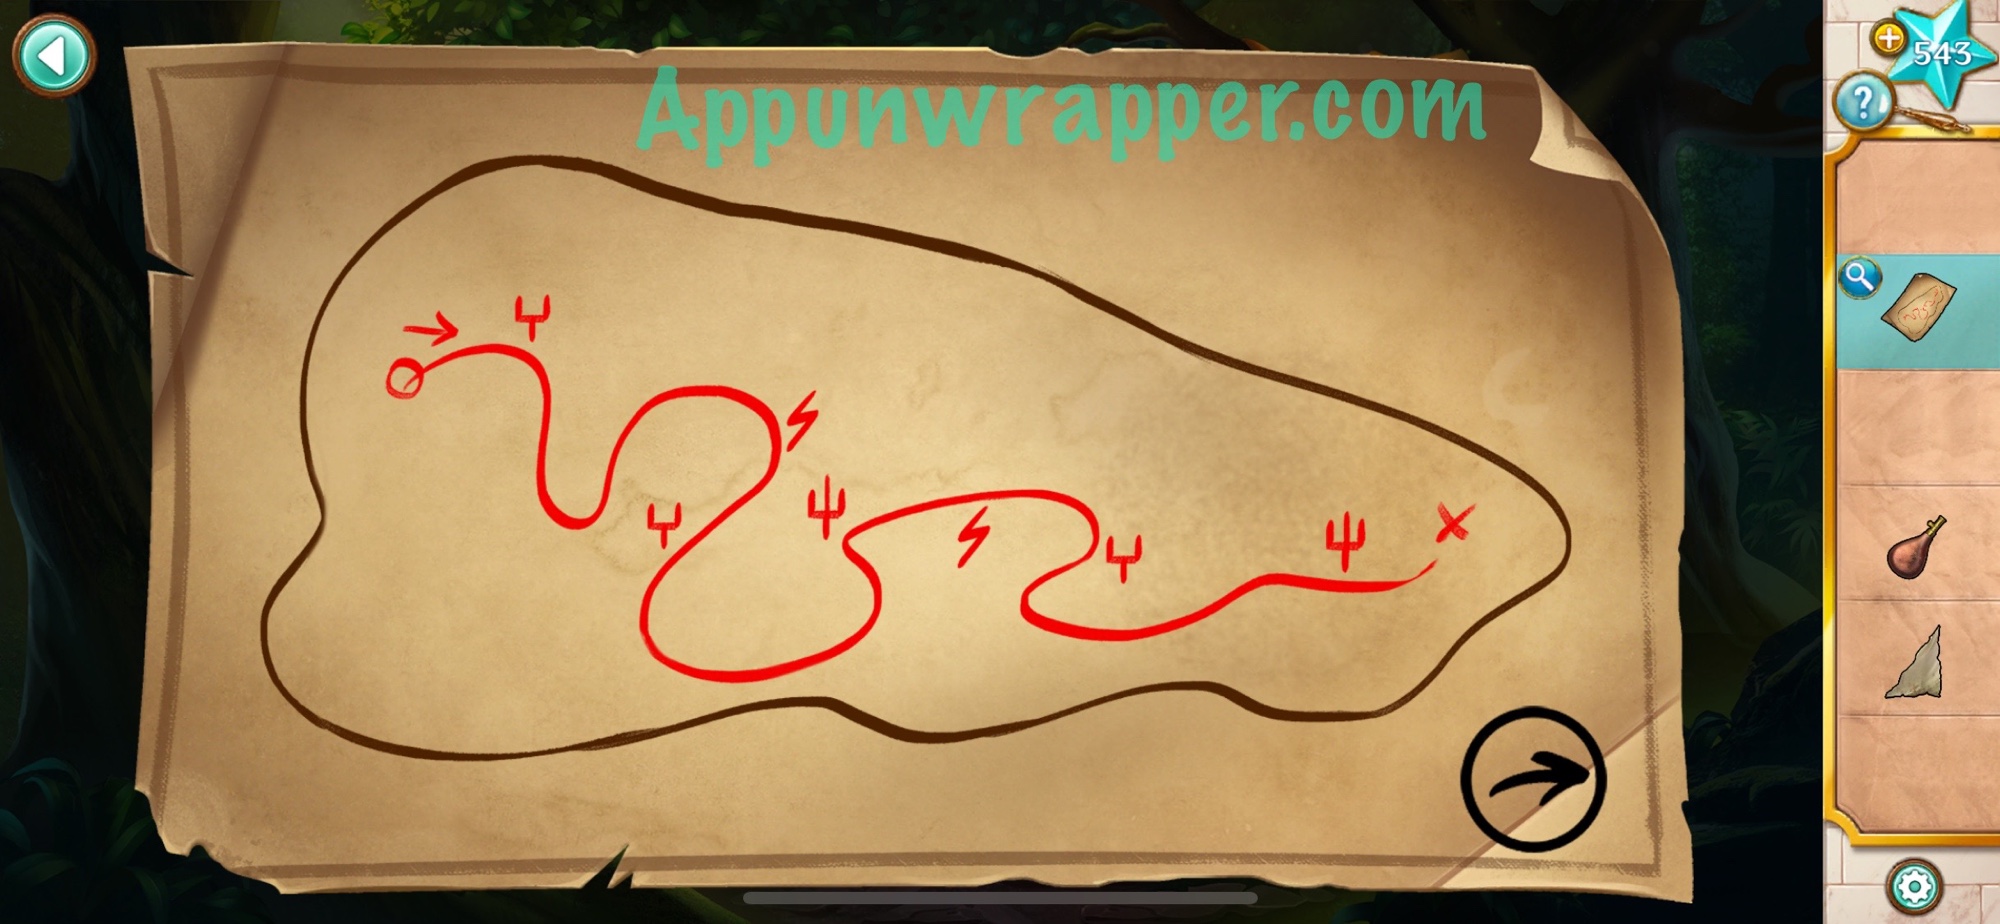
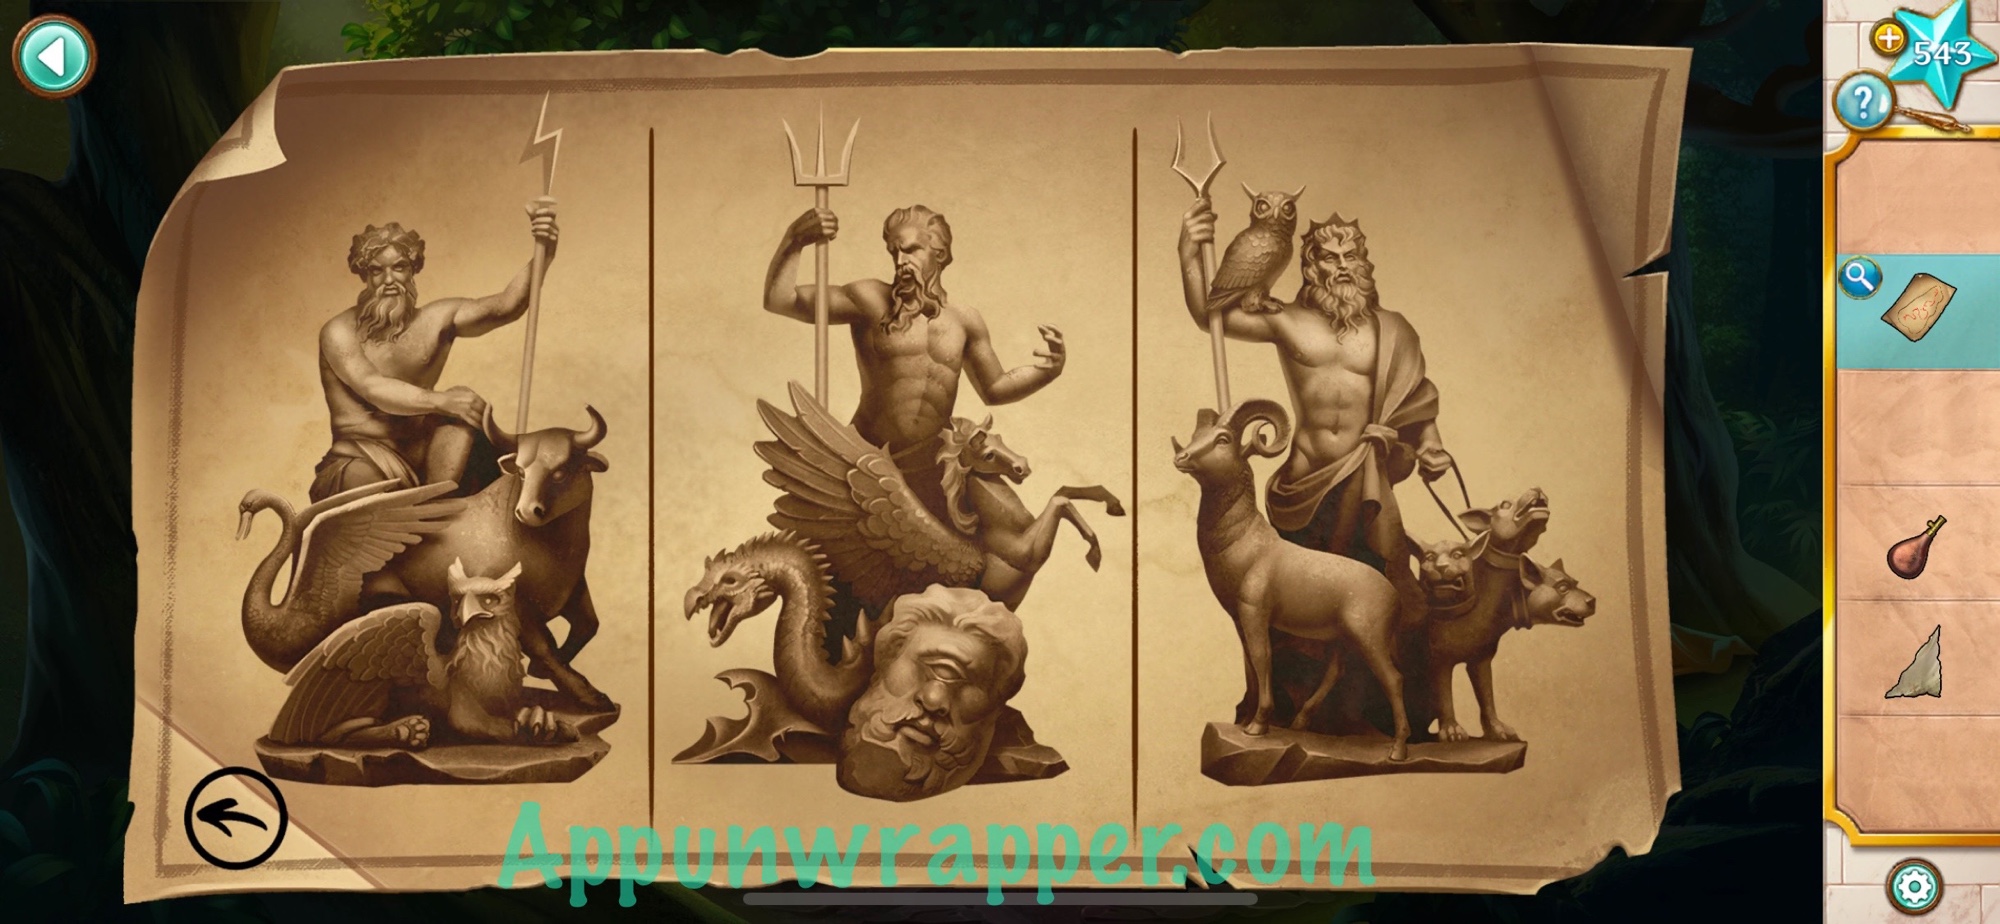
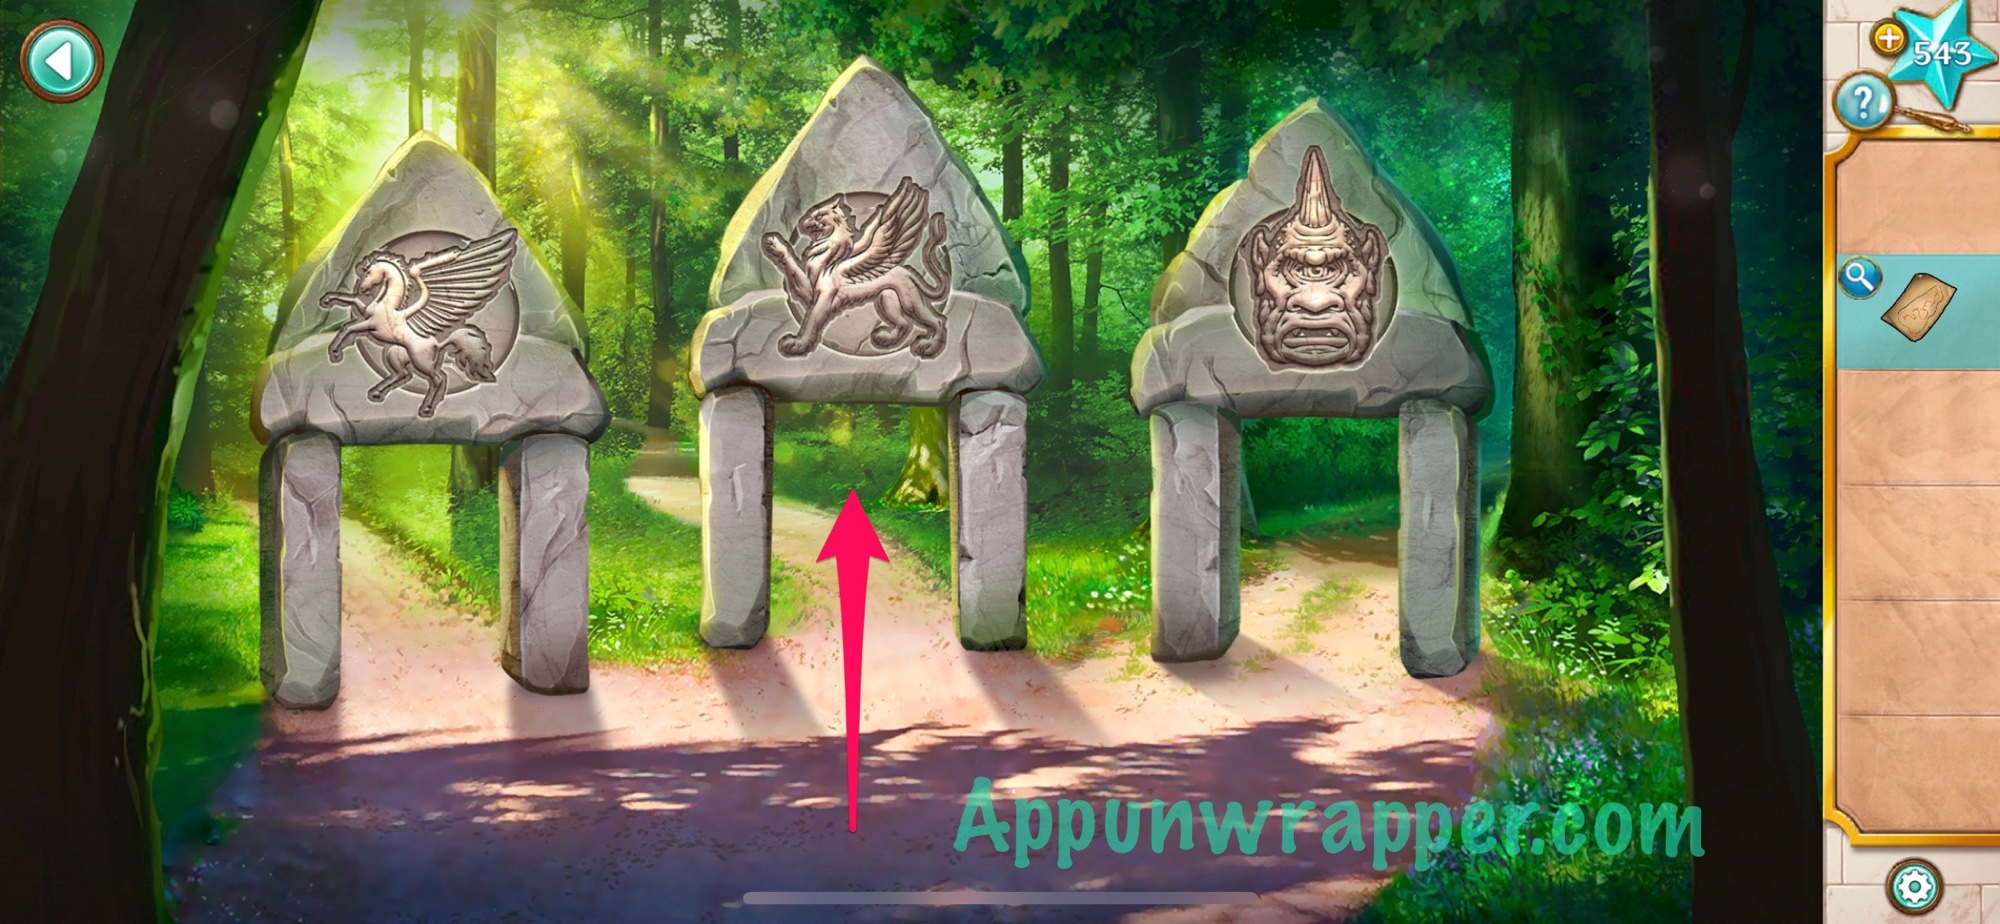
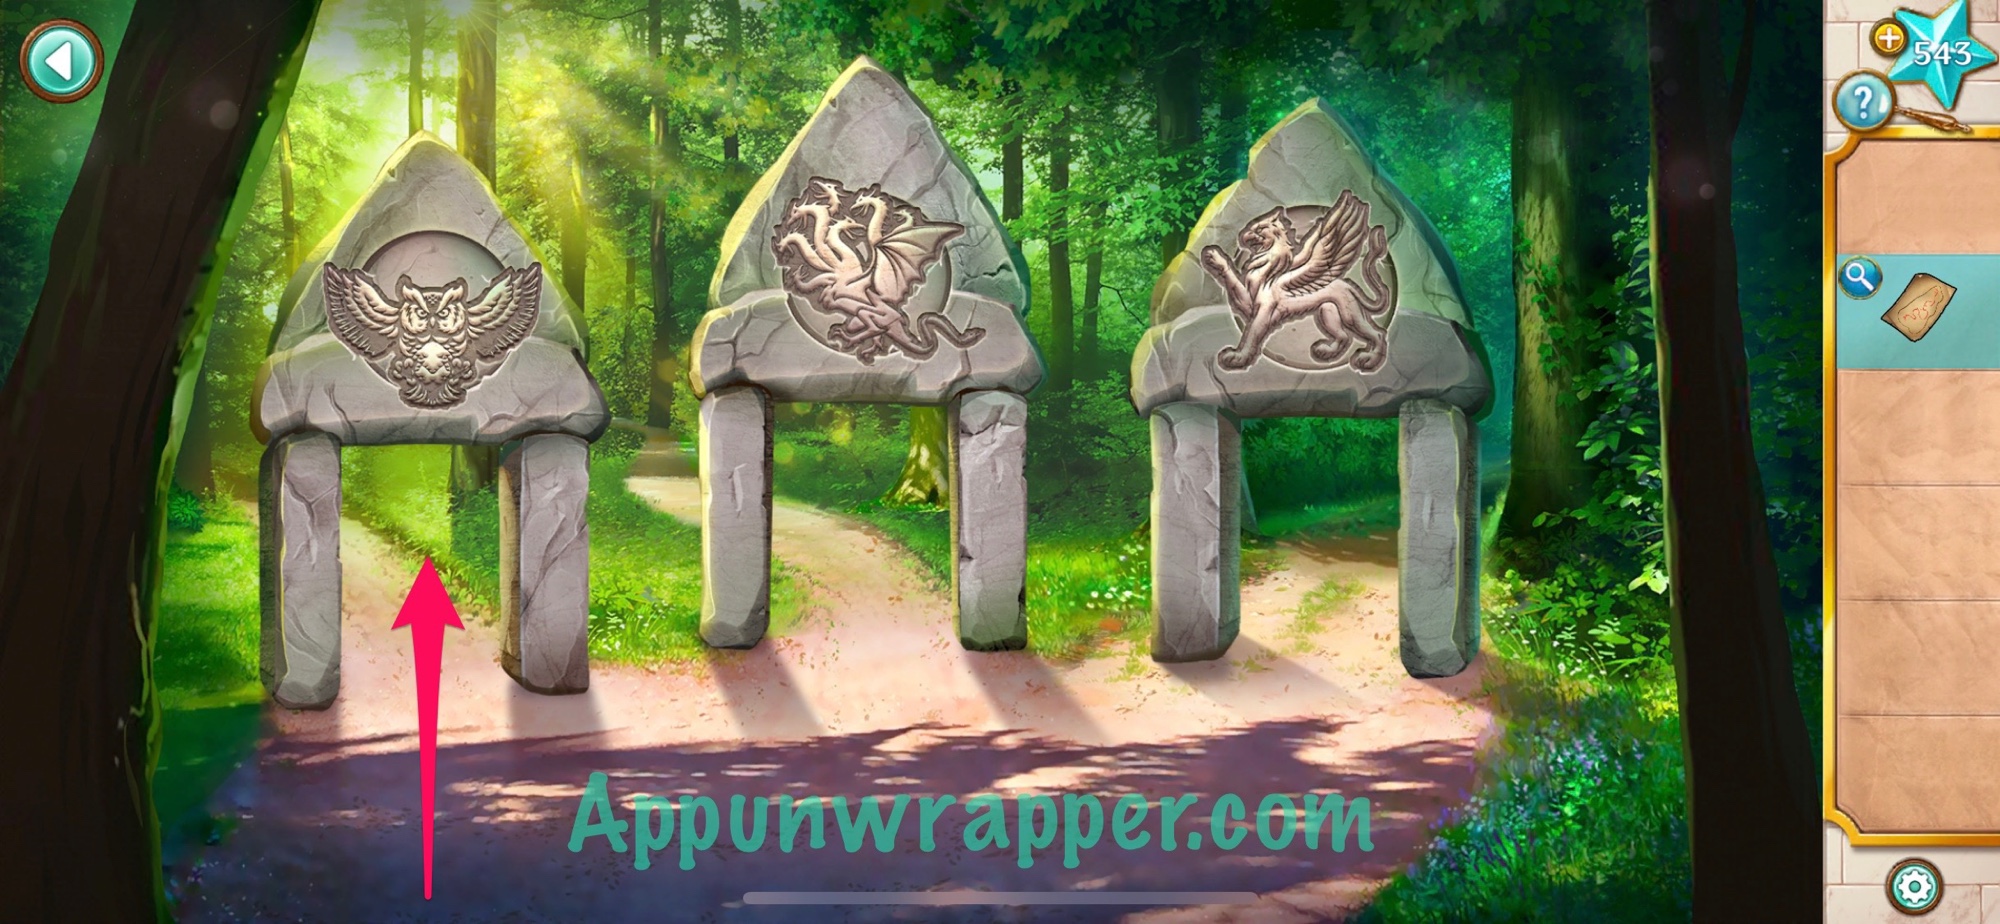
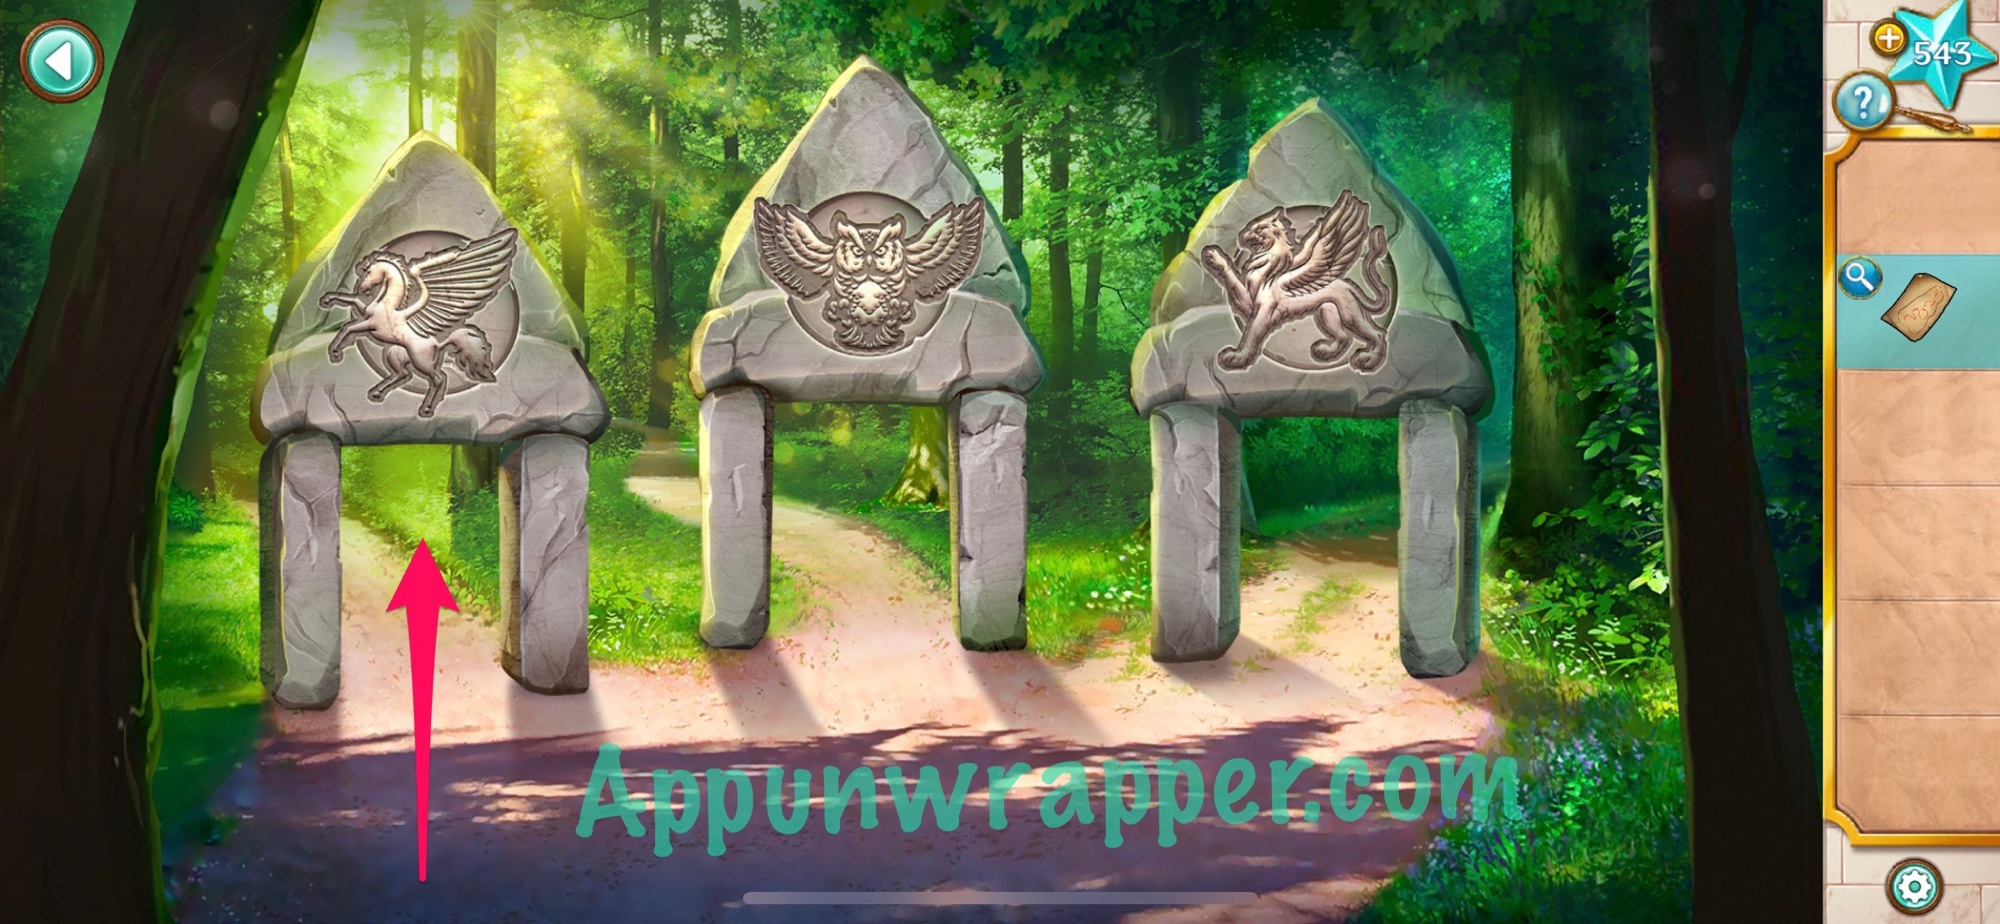
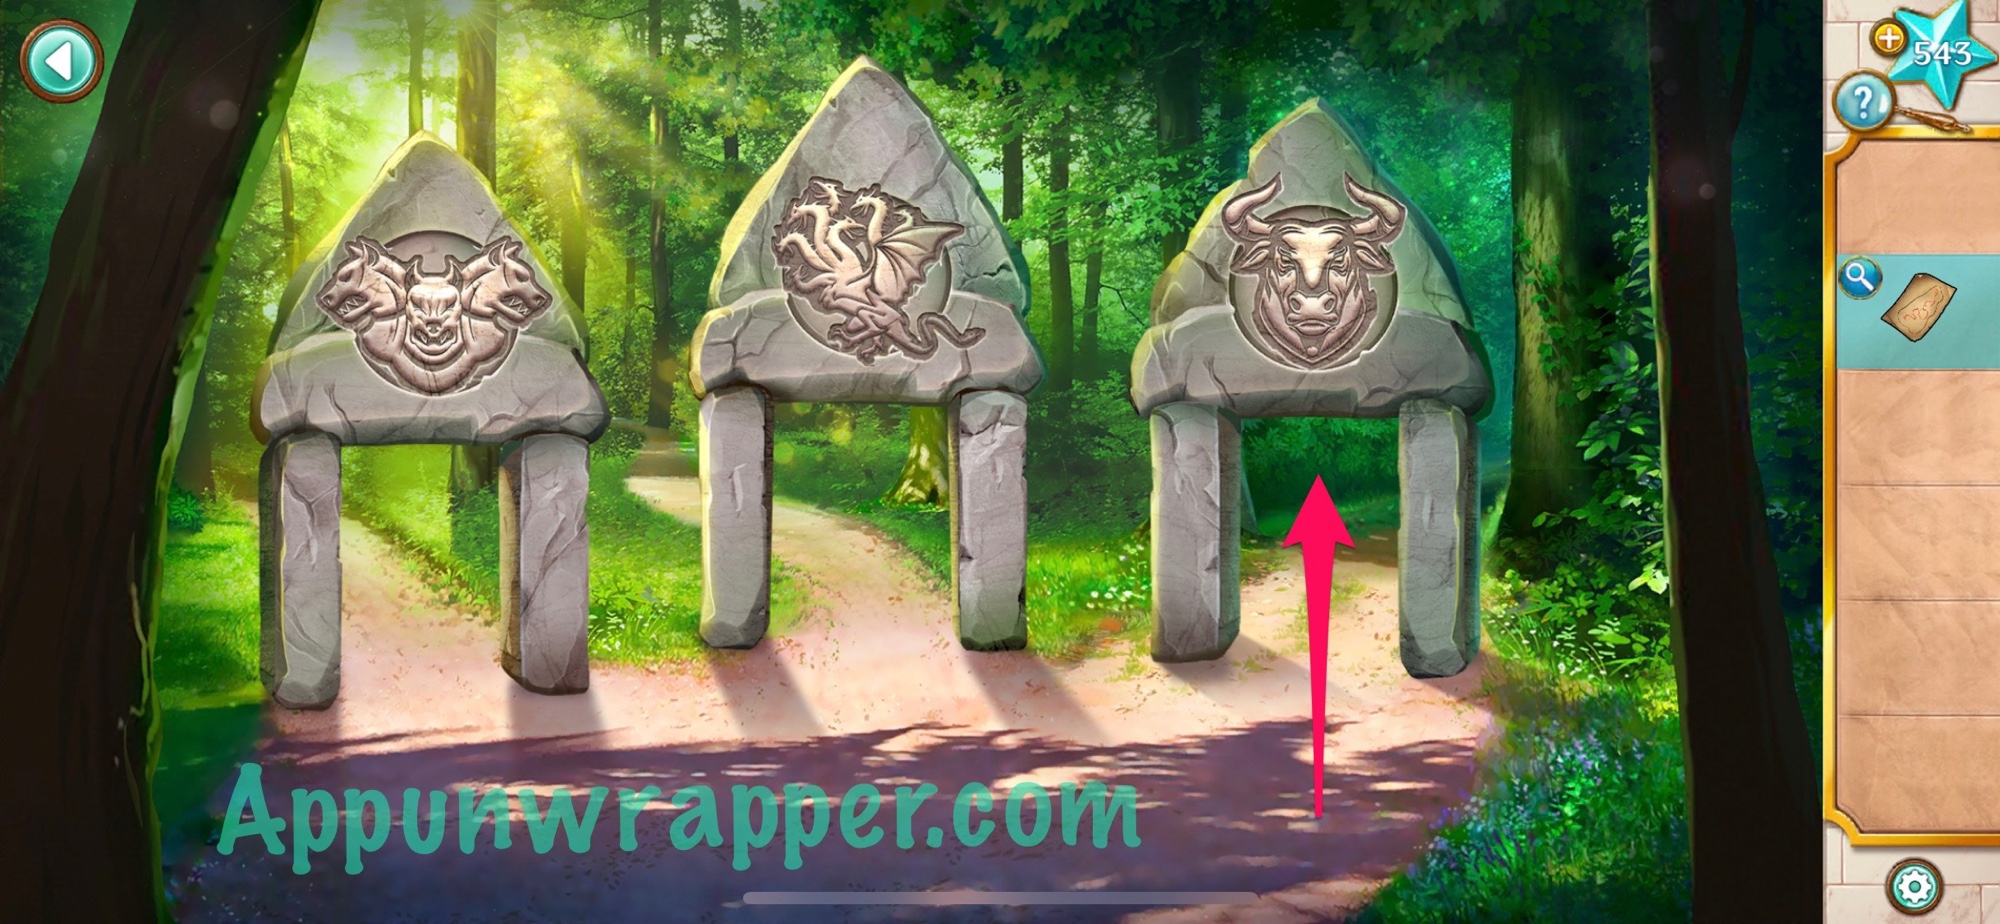
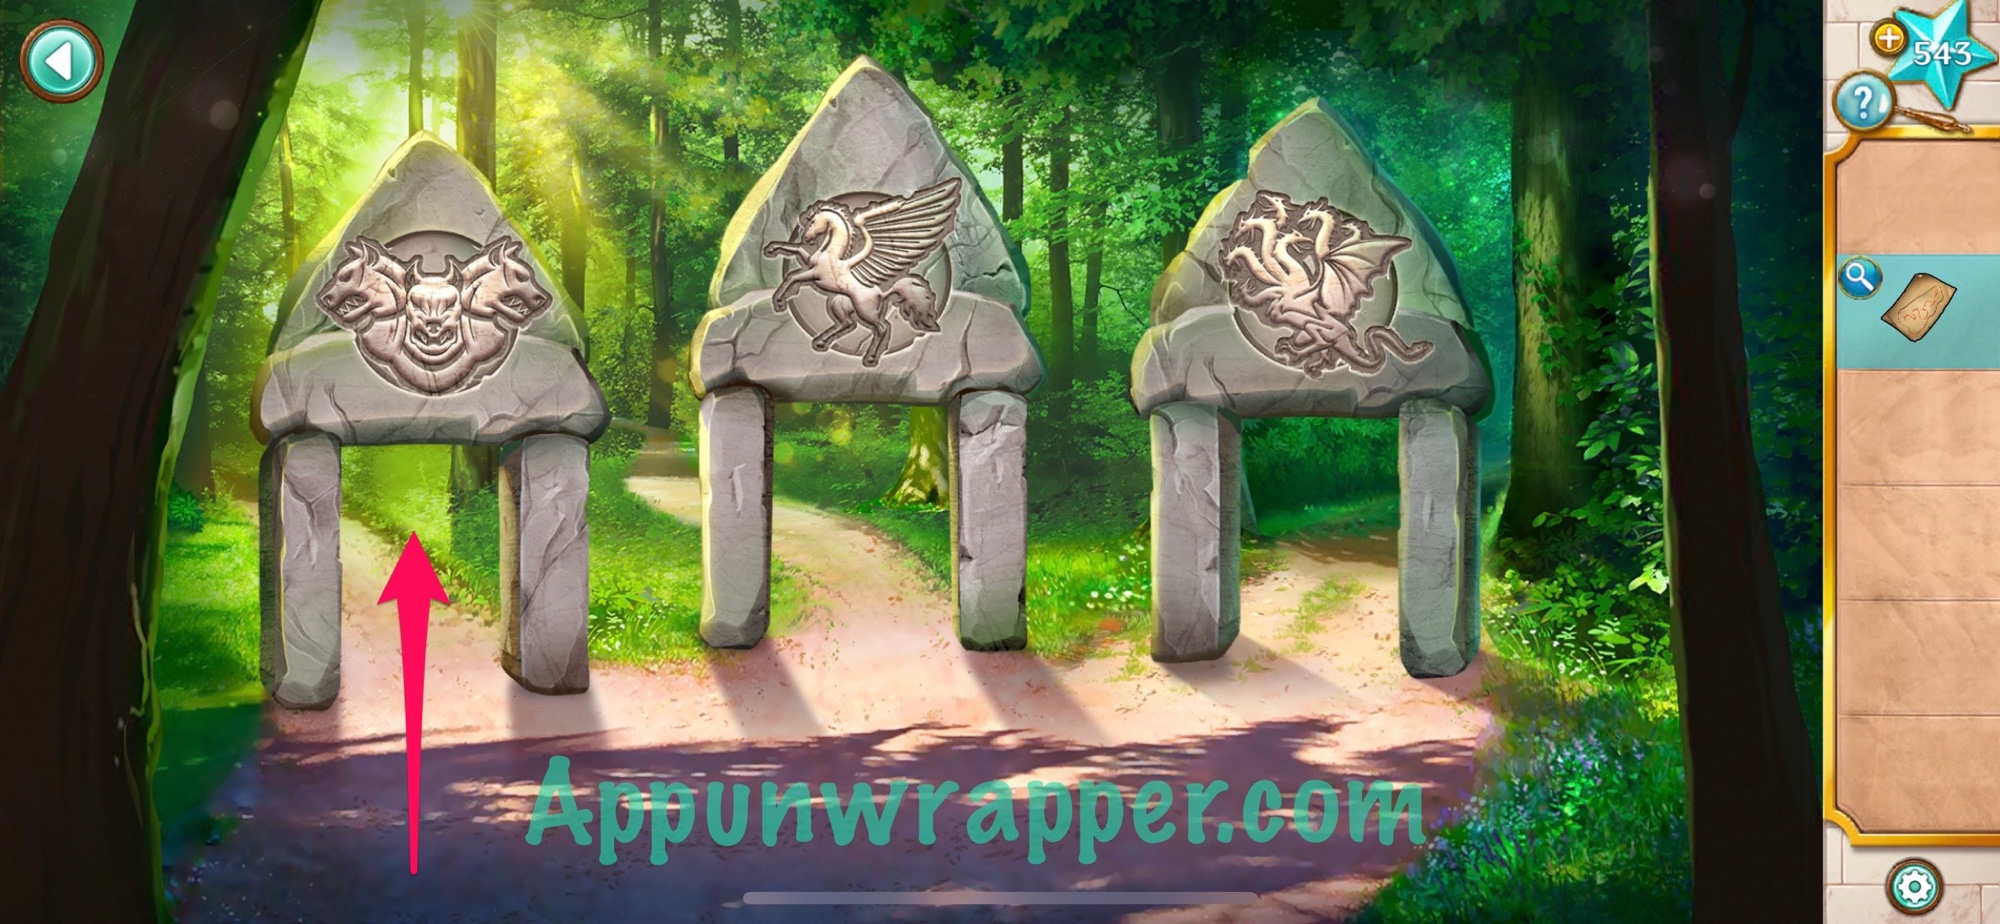
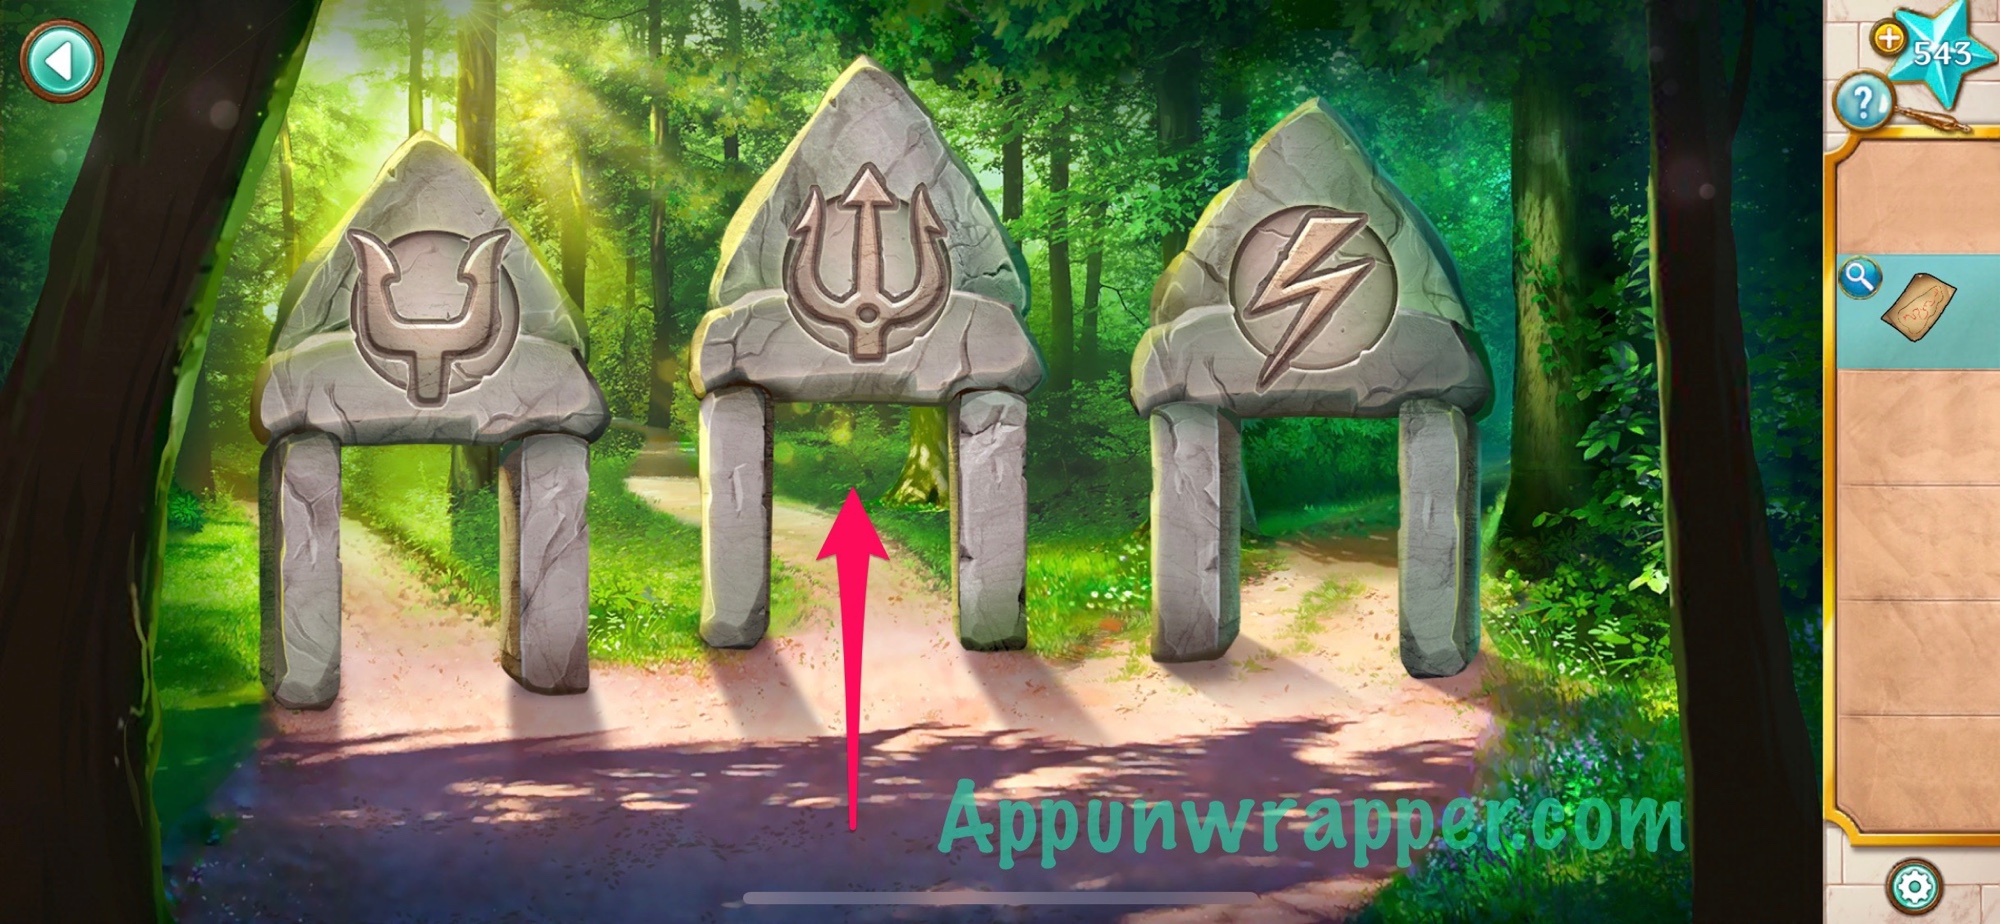
9. Head through the stone gate. Time to solve the Stone Gates puzzle. We need to follow the map and choose the right gate at each junction. First, look at the symbol on the map and then find the god on the back with the matching staff. Choose the gate with one of creatures with that god. So the first one will be the Ram. The second is the gryphon. The third is the owl. The fourth is Pegasus. The fifth is the Bull. The sixth is Cerberus. And the seventh and final gate is the trident.

10. Xochi and Peter find Dr. Okoya chased up a tree by a sea lion! Pick up the stick and use it to spear a fish. Then use the fish to distract the sea lion. Now Dr. Okoya can come down. She’ll also give you her spyglass.
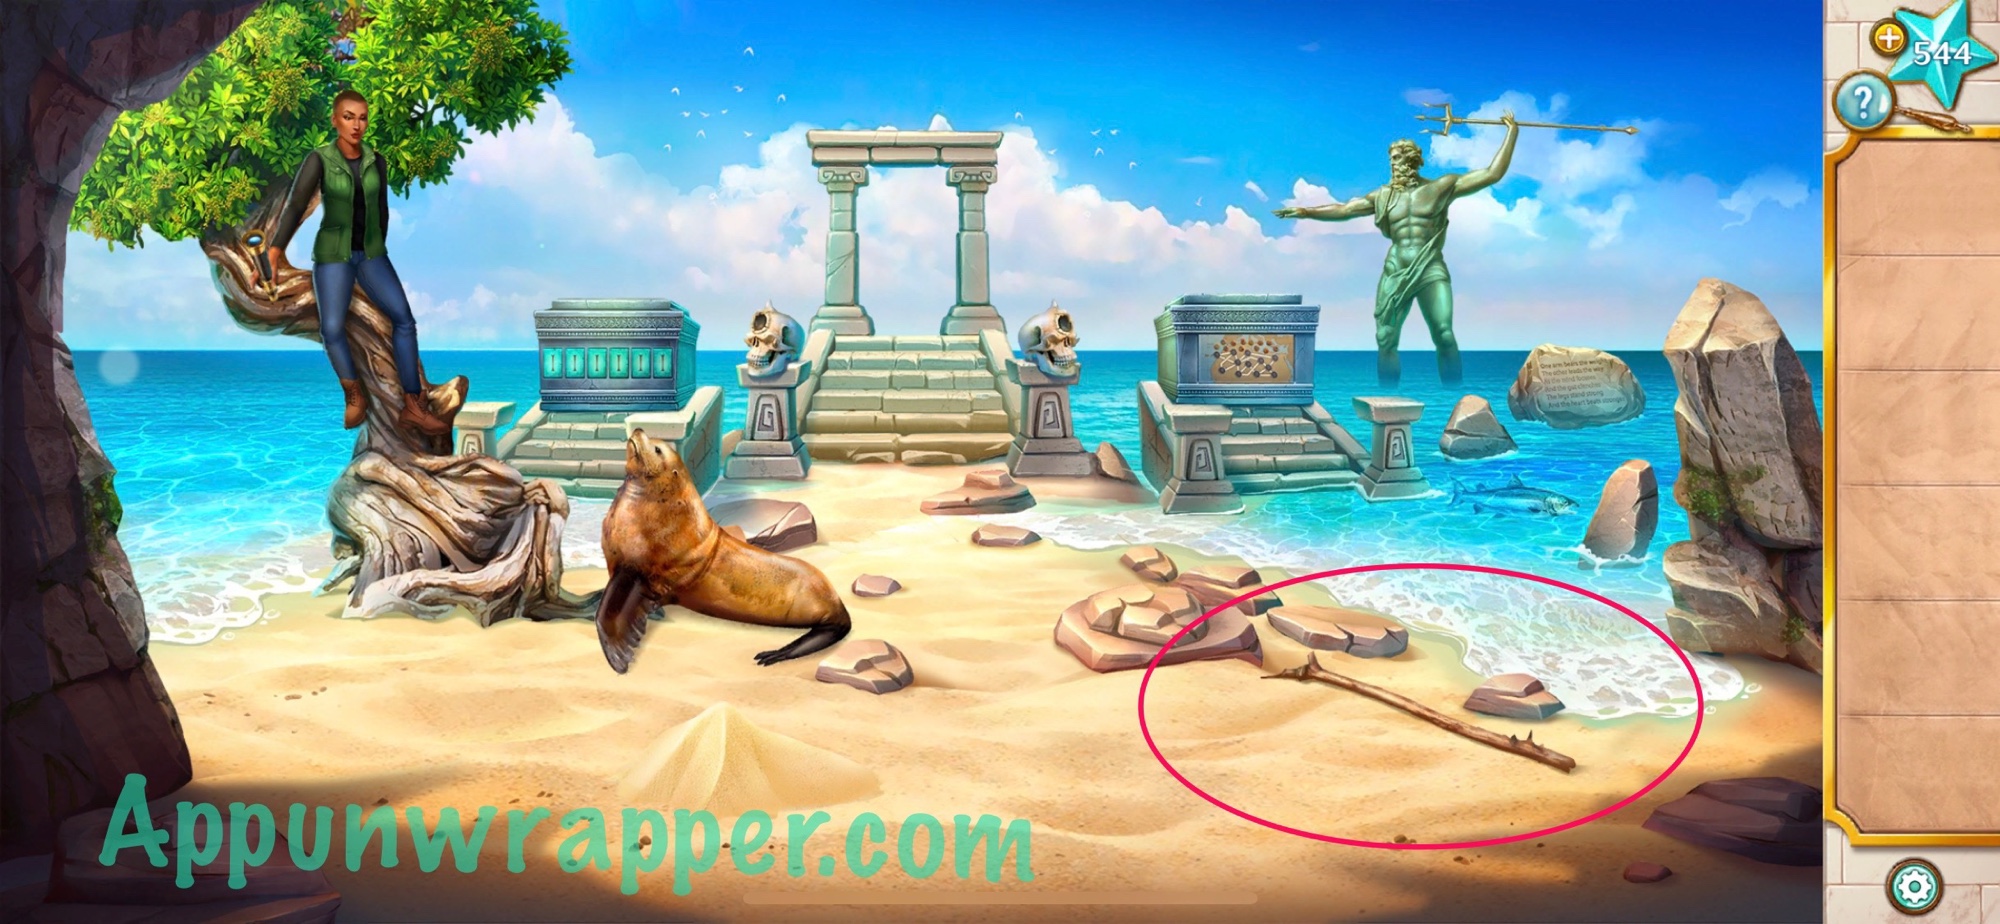
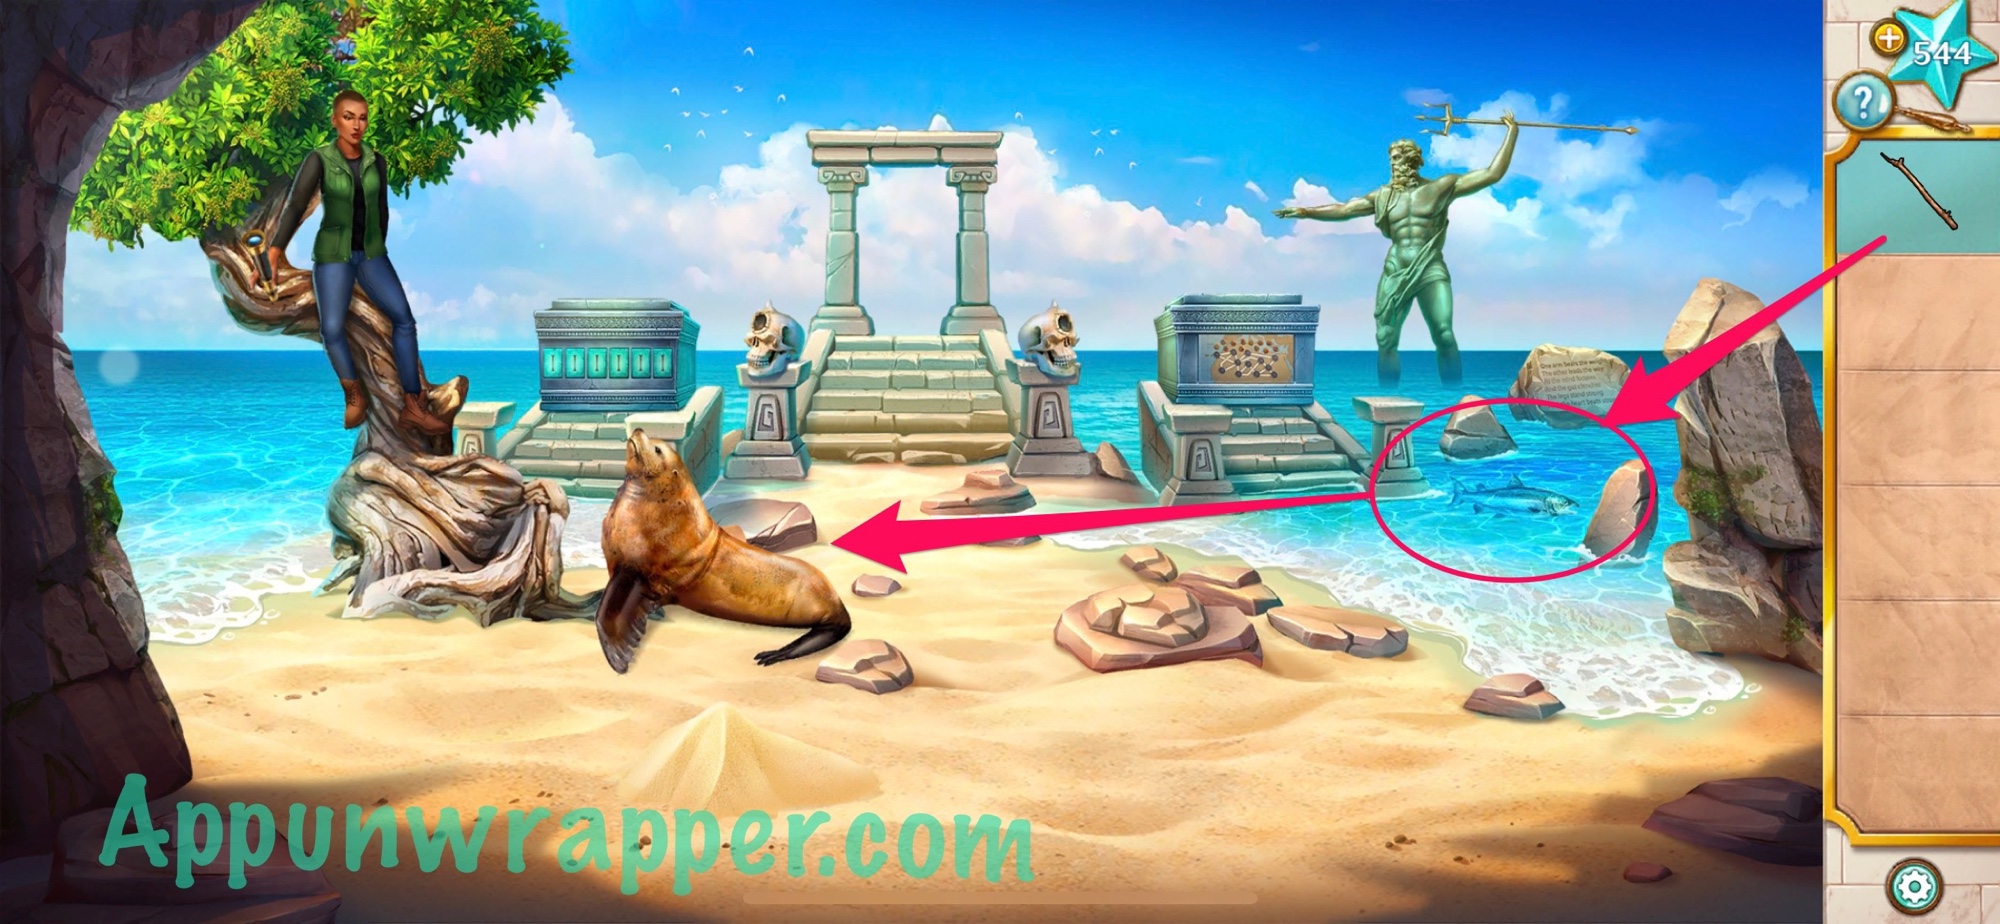
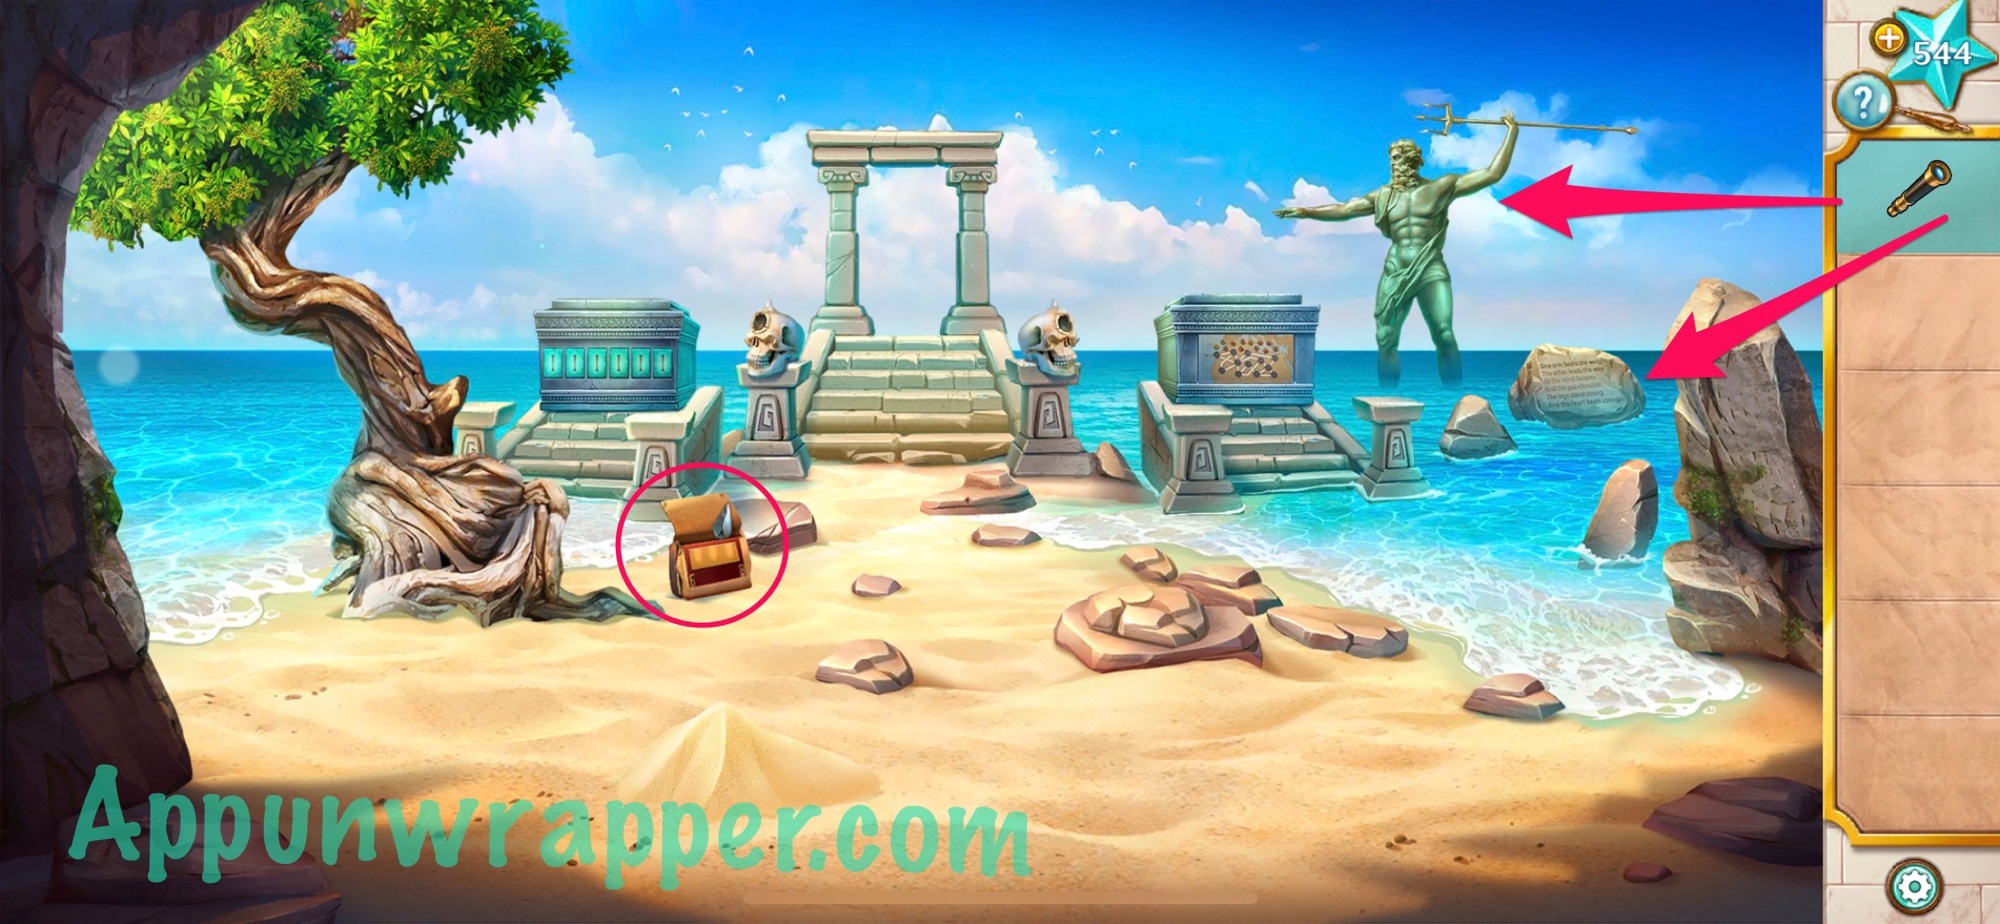
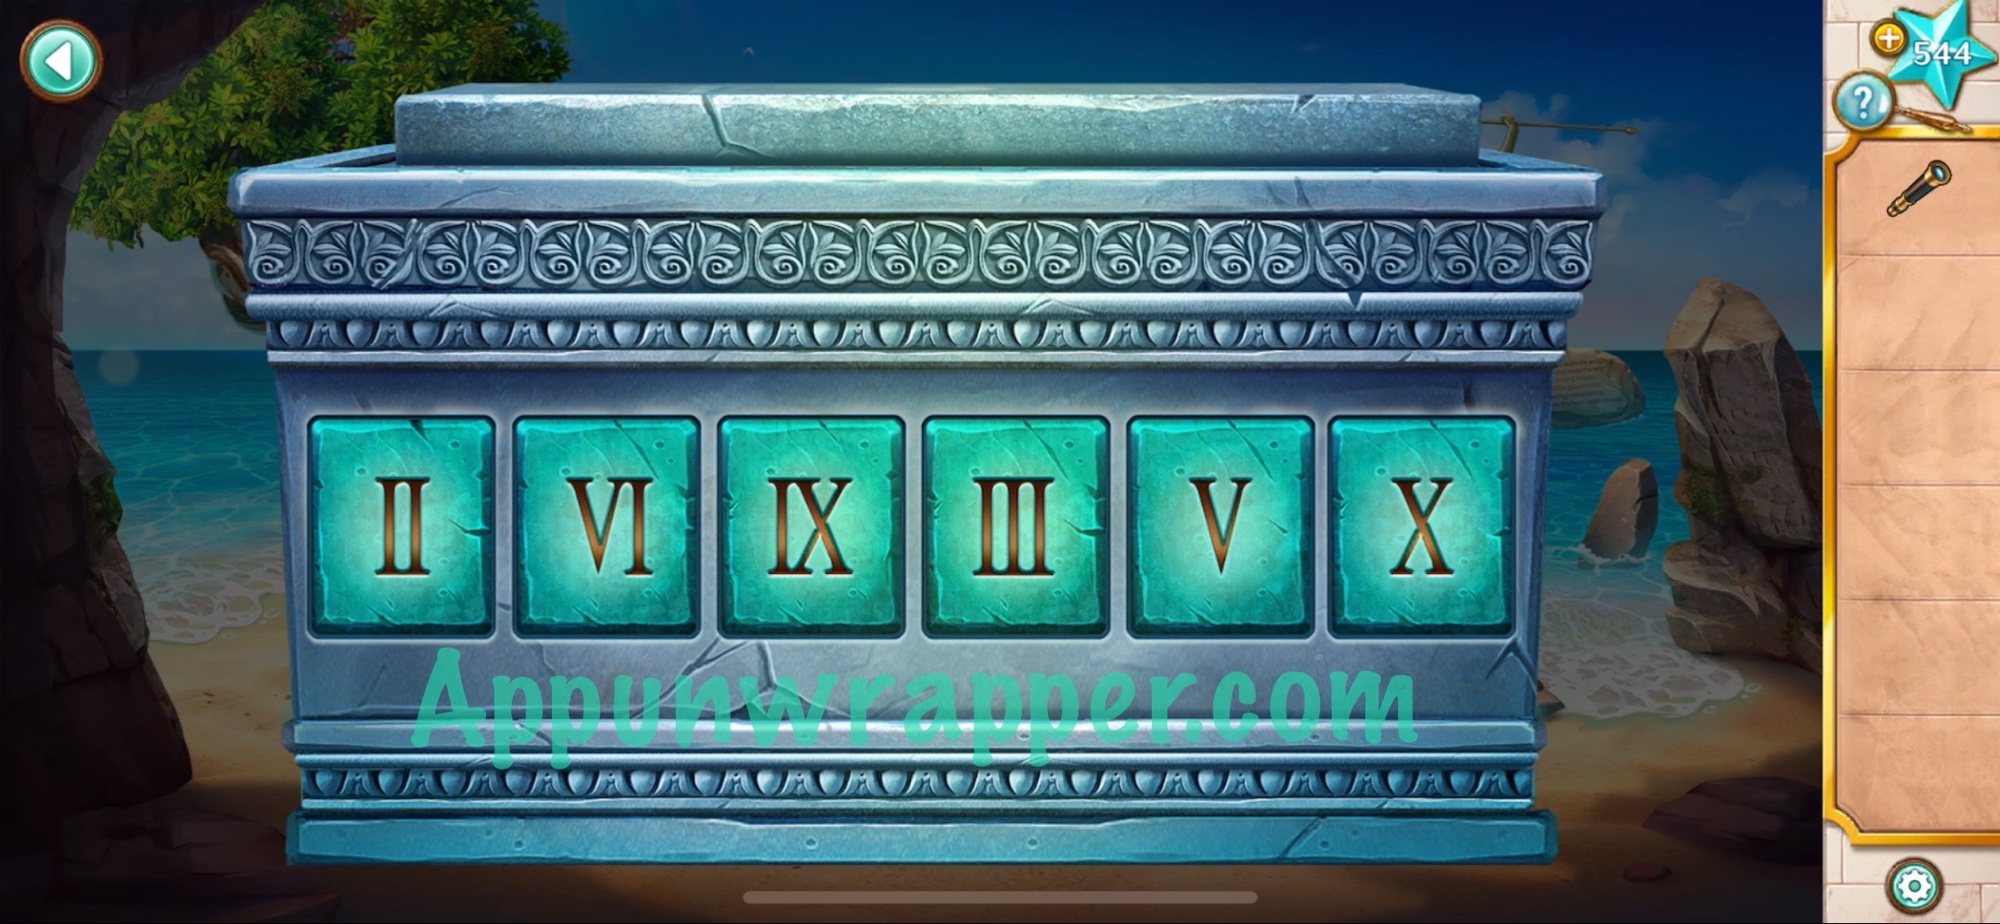
11. Open her bag and take the shovel. Also, use the spyglass to take a closer look at the Poseidon statue. There are Roman numerals on every body part. Also, use the spyglass to read the words on the stone in the distance.
12. Use the information you just got to unlock the combination lock on the left. The poem tells you the order of the body parts and the statue tells you their numbers. It goes:
One arm bears the weight = II
The other leads the way = VI
As the mind focuses = IX
And the gut clenches = III
The legs stand strong = V
And the heart beats stronger X
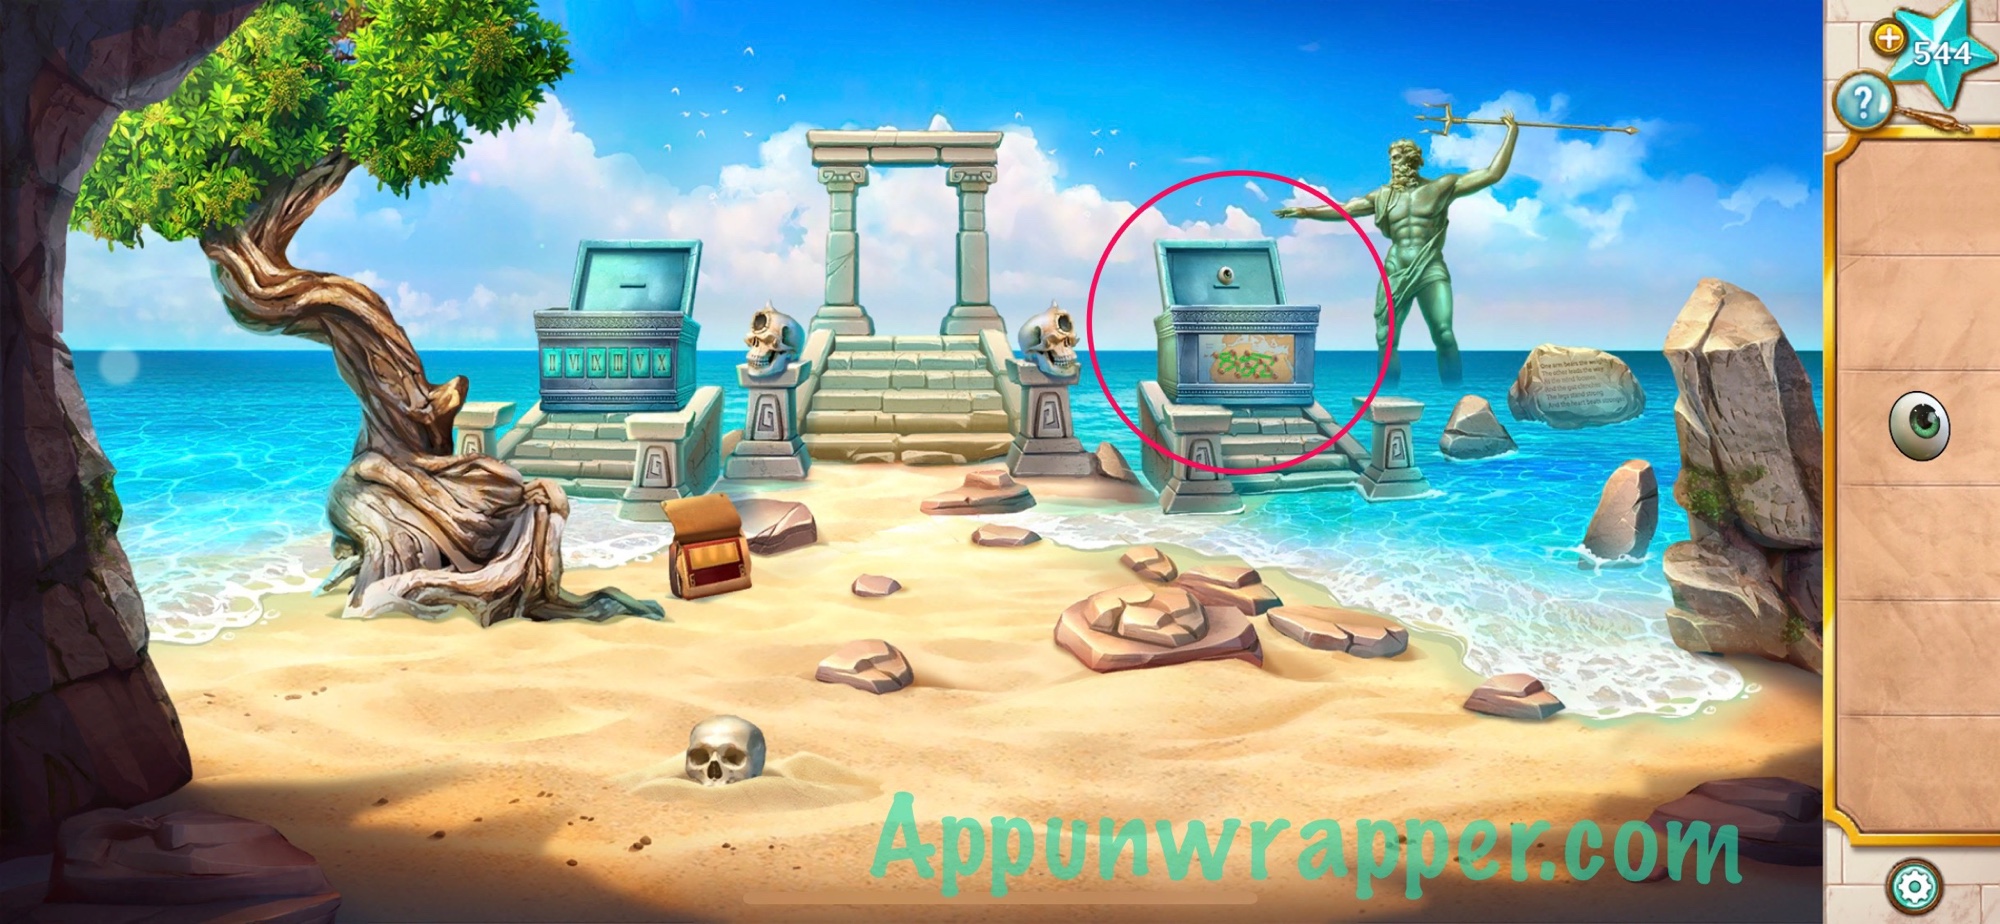
13. Take the cyclops eye from inside. Also, use the shovel to dig up a skull in the sand and take the two wooden tokens from its eyes.
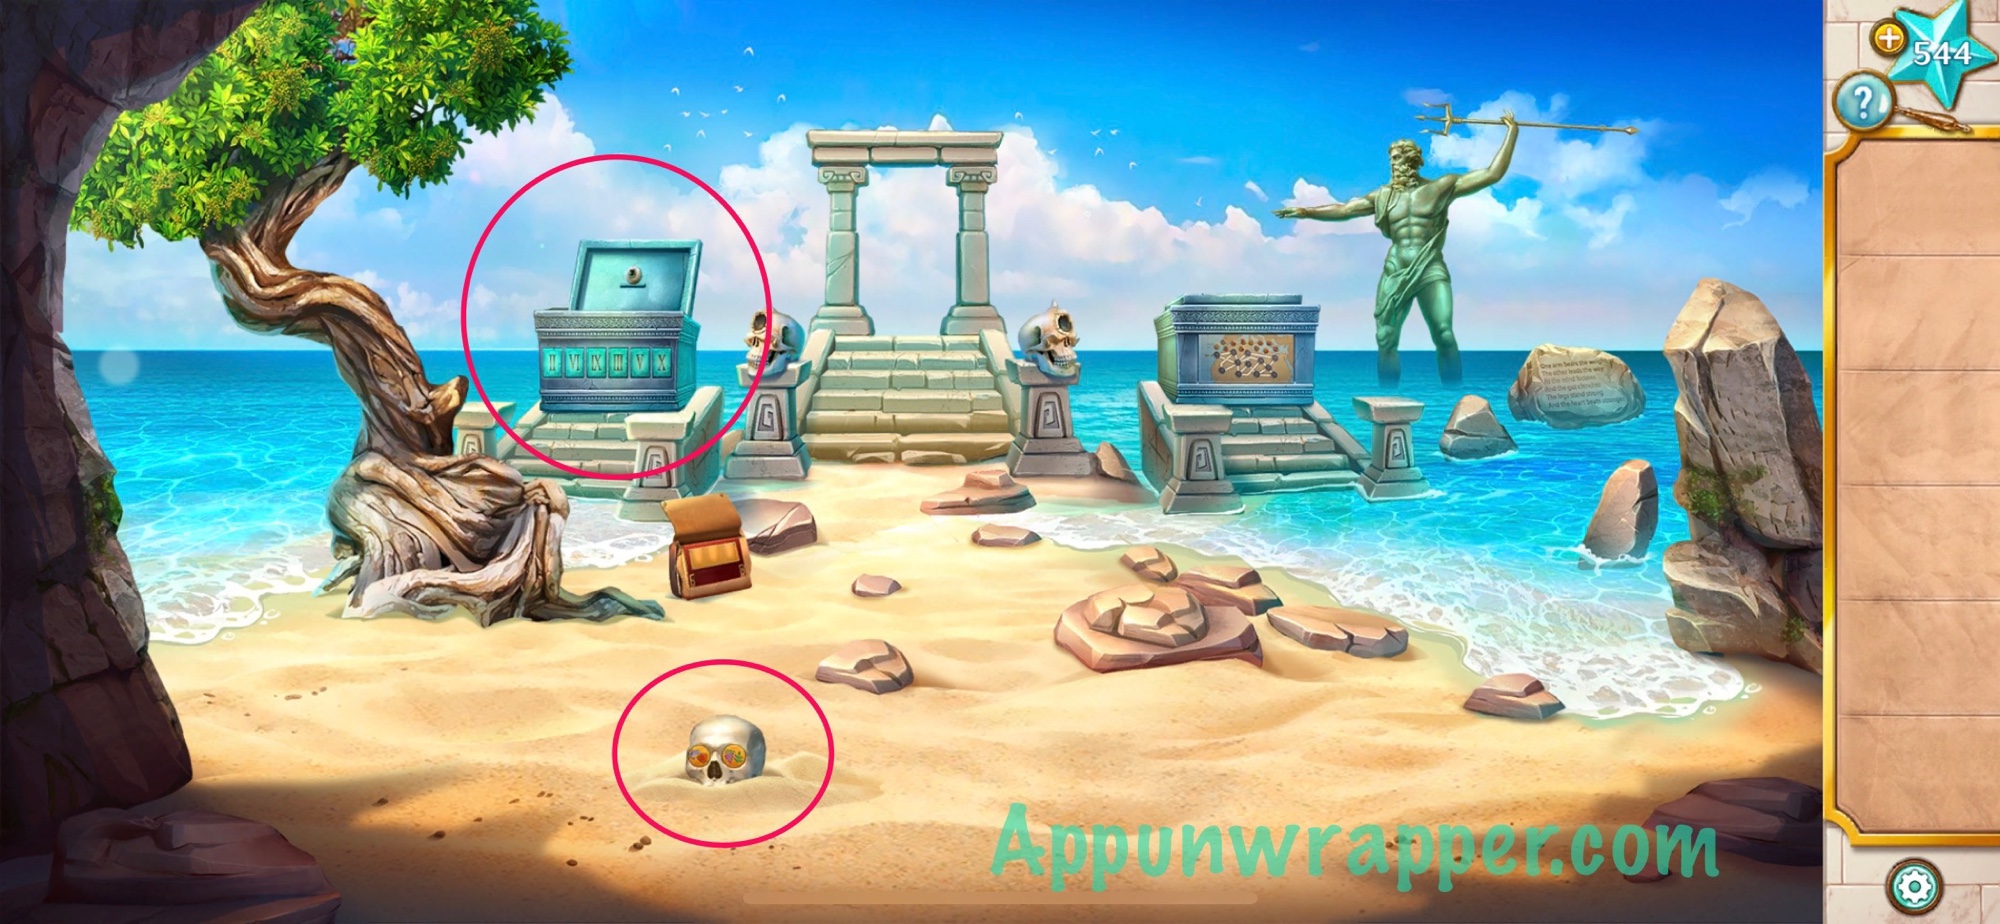
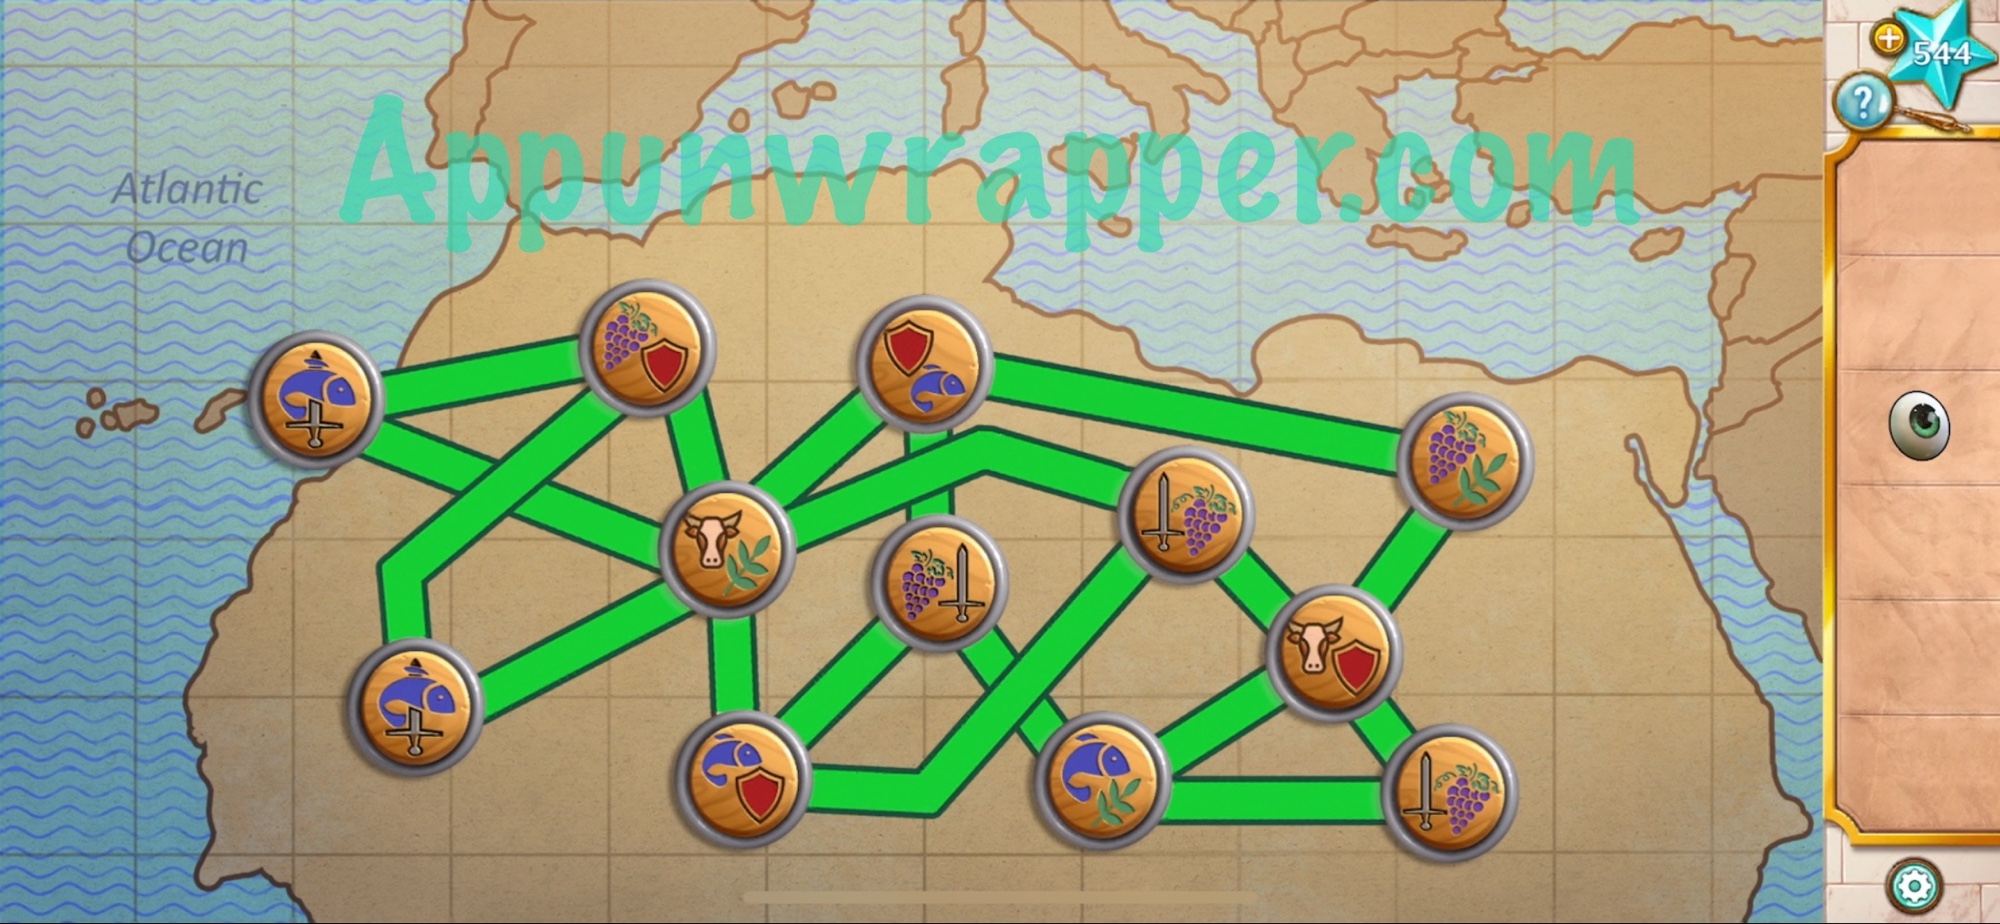
14. Place the tokens with the others. Now let’s solve the Trade Routes puzzle. You need to arrange the tokens on the map so that no token has the same product as any of its adjacent tokens. Then take the other cyclops eye.
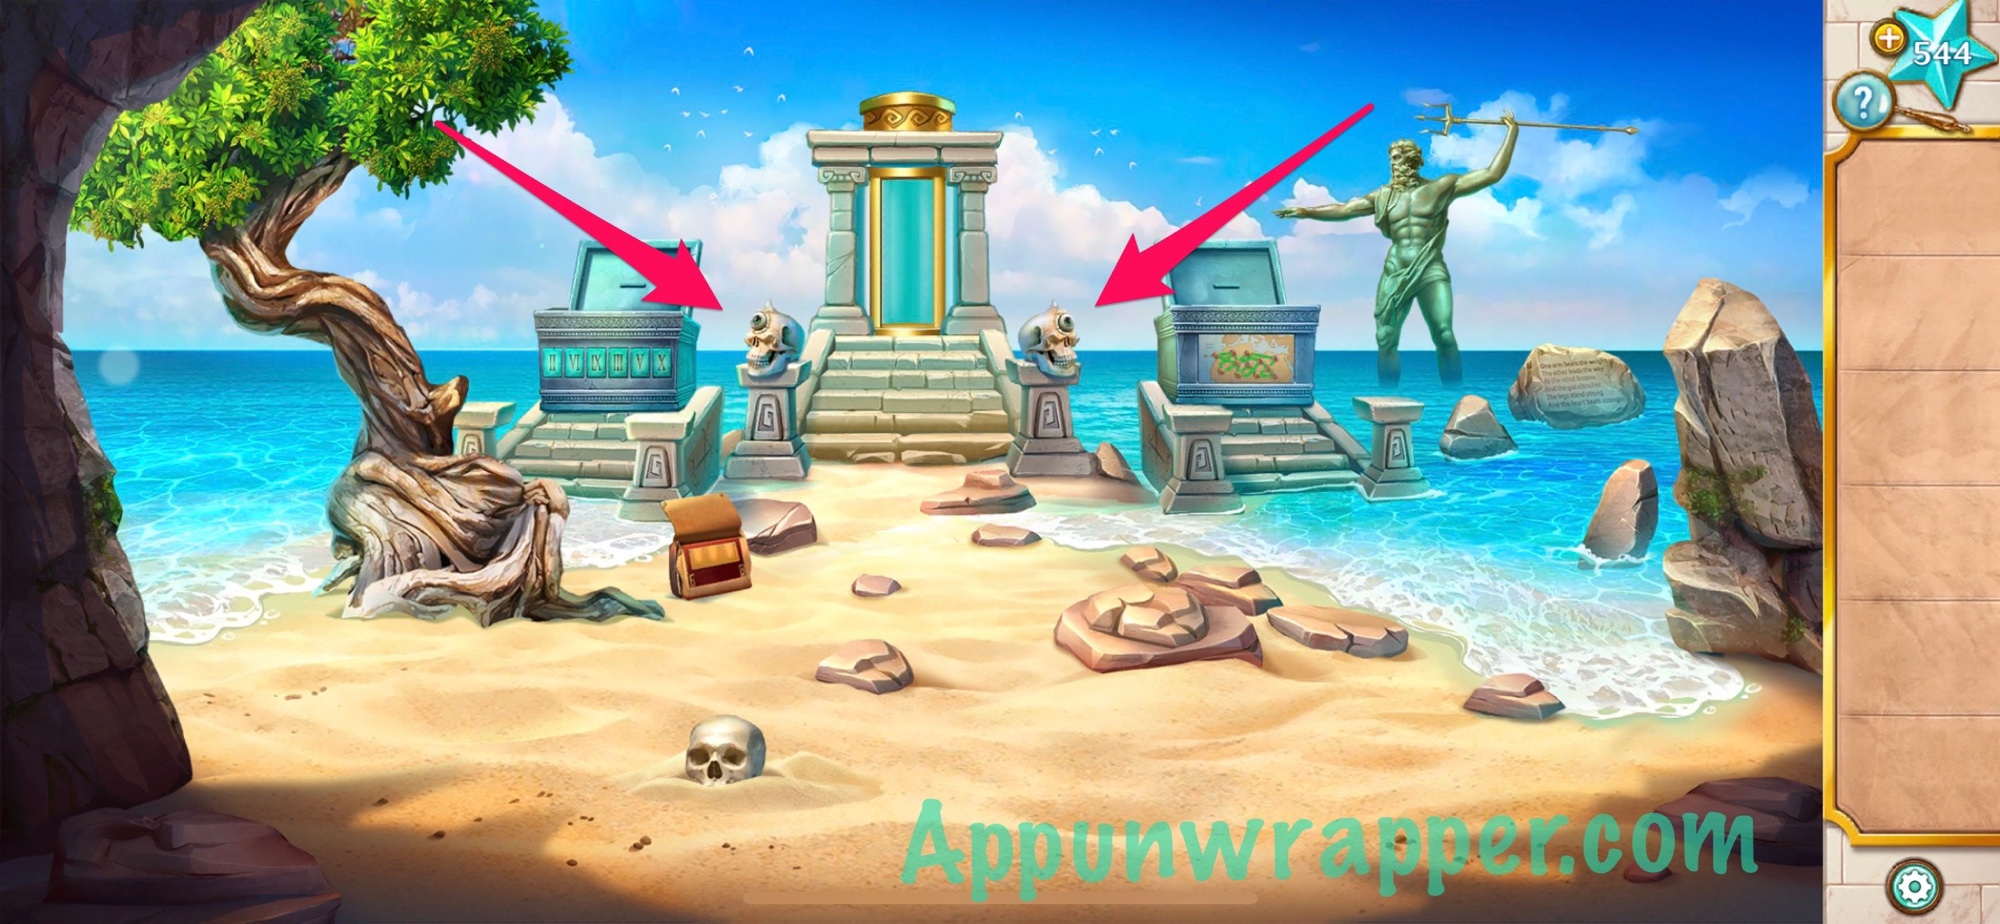
15. Place the two cyclops eyes in the skulls to activate a portal. Then get inside and take a ride to complete the chapter.
And that’s the end of Chapter 4! Click here to continue to Chapter 5 or choose a chapter below.
Chapter 1 | Chapter 2 | Chapter 3 | Chapter 4 | Chapter 5 | Chapter 6 | Chapter 7 | Chapter 8

If the pictures and times are to be correct the evening picture should be on the right of the Island vice versa with midday picture.