Adventure Escape Mysteries – Lost Ruins: Revenge on Atlantis
By: Haiku Games

Haiku Games is back with a new Adventure Escape game, called Lost Ruins: Revenge on Atlantis . When Professor Burns gets possessed by an ancient desert artifact, he sets out to destroy the underwater city of Atlantis. You need to stop him before Atlantis is lost forever. This walkthrough guide should help you if you get stuck on any of the puzzles in Chapter 7. Feel free to ask for extra help in the comments section.
See all my other Adventure Escape guides here.
Walkthrough:
Chapter 1 | Chapter 2 | Chapter 3 | Chapter 4 | Chapter 5 | Chapter 6 | Chapter 7 | Chapter 8
Chapter 7:
You can watch my video for Chapter 7 or continue below for my step-my-step guide.
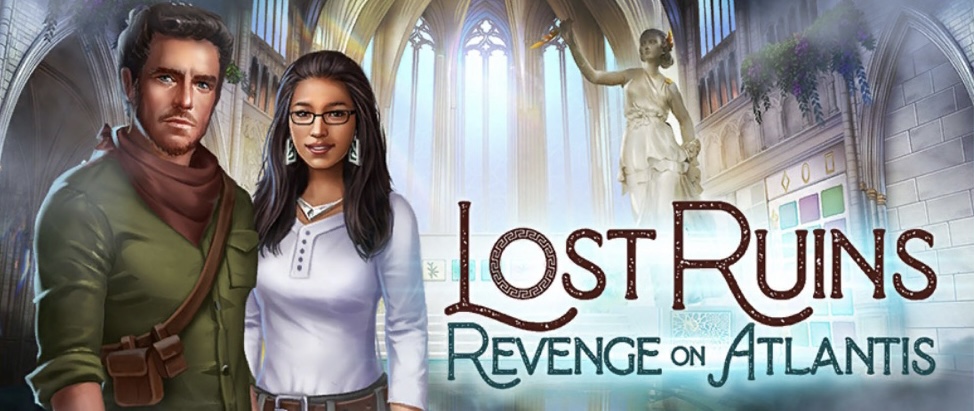
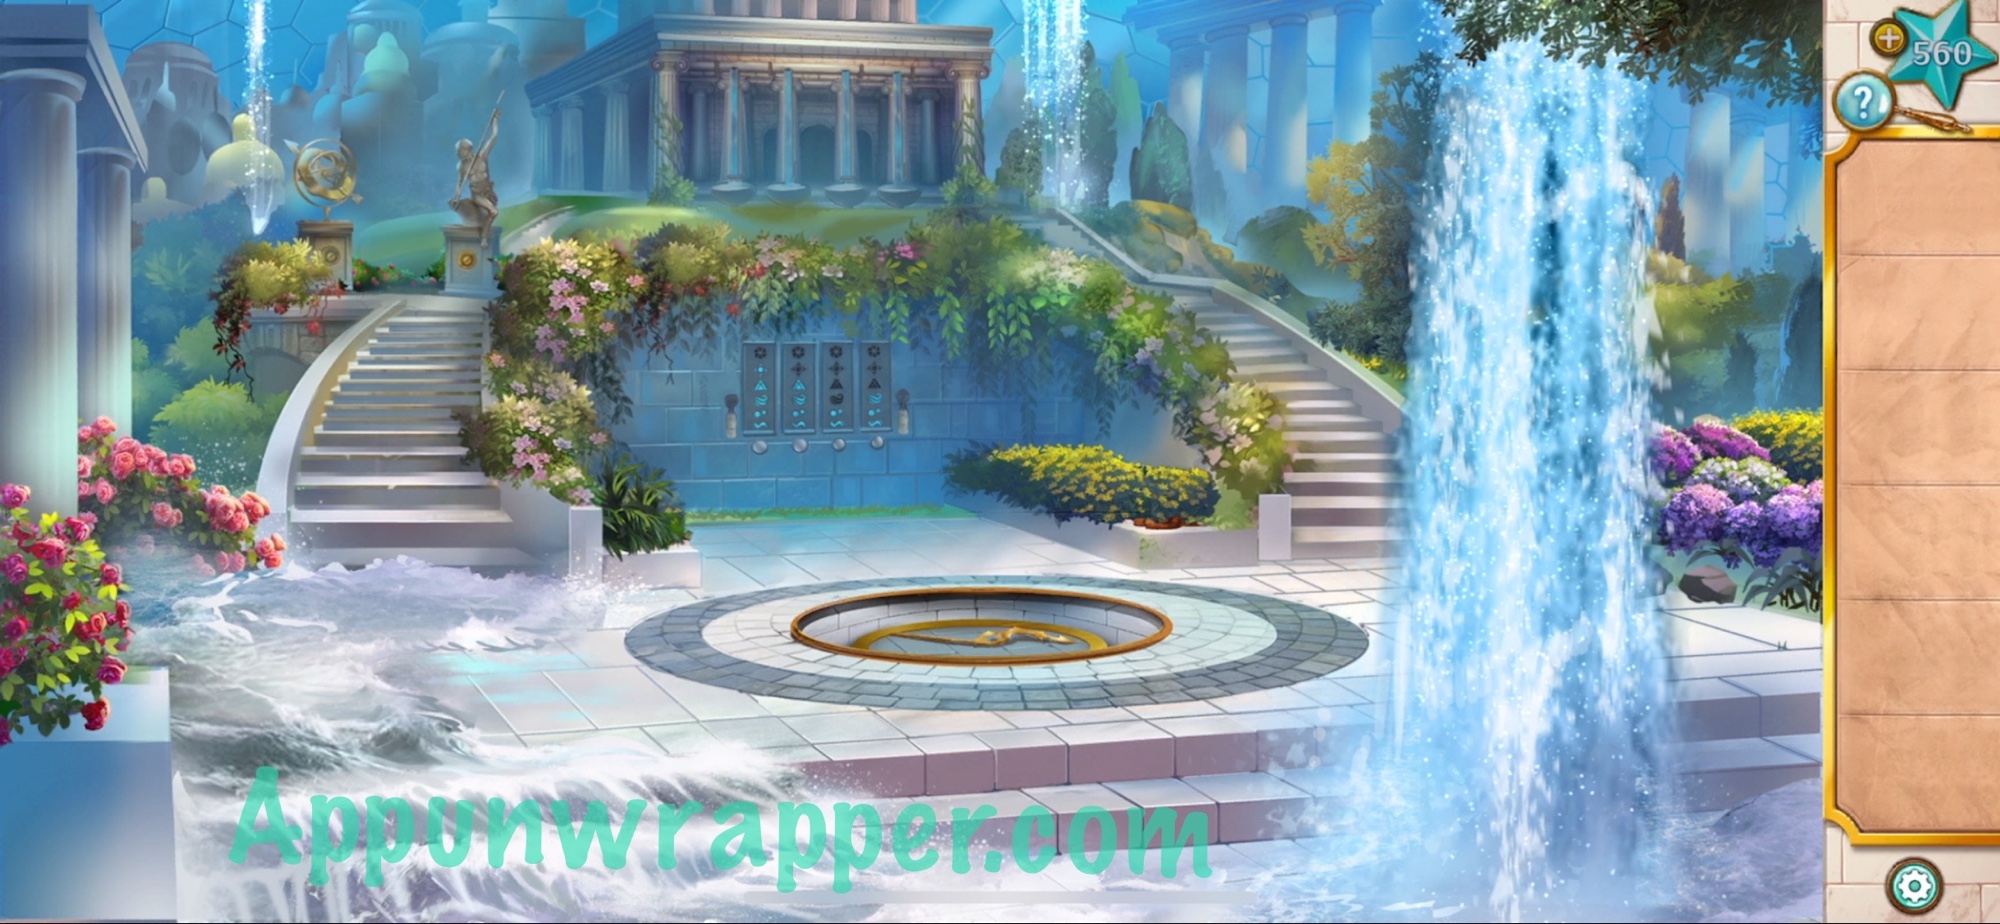
1. We’re now playing as Peter and Dr. Okoya as they take a submarine from Atlantis to look for another piece of Poseidon’s trident. Look at the scroll. It’s supposed to tell us which coordinates to put into the sub.
2. For the first location, it says go to the volcano, which is NW. So enter NW. The volcano is between 10 and 20 degrees, so enter NW 15 to get to the first location.

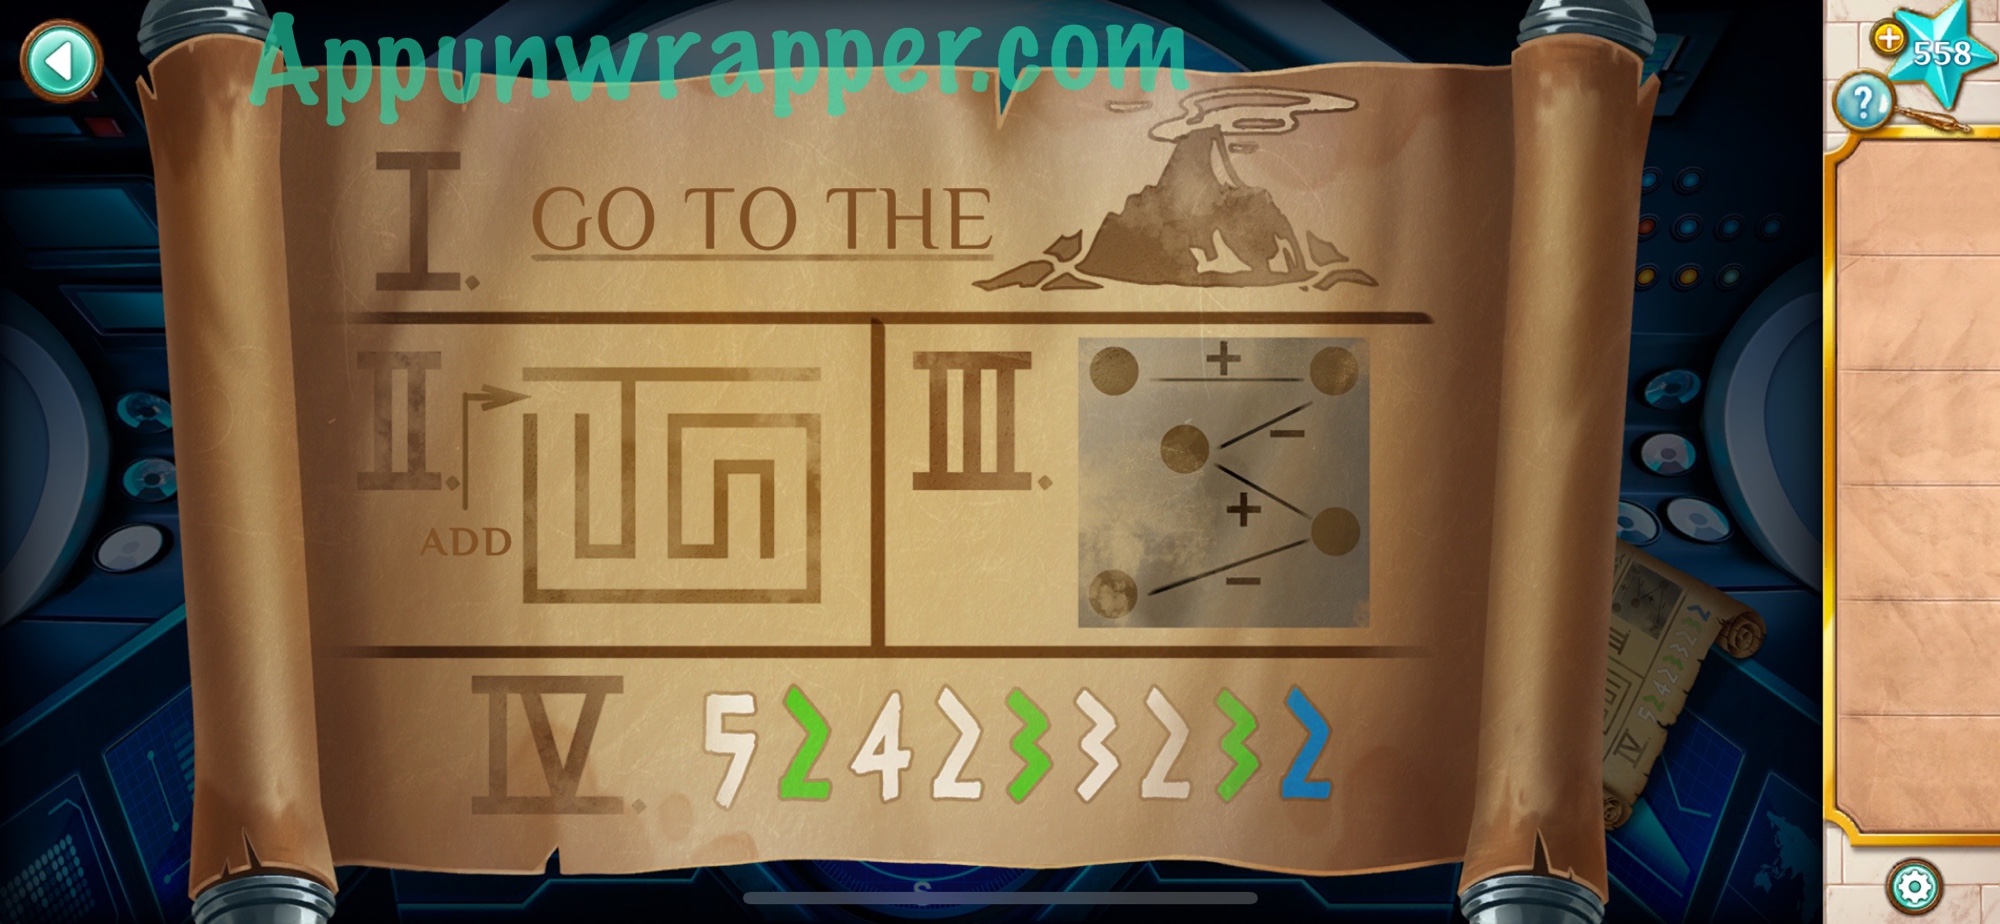
2. For the second location it shows a maze and says to ADD. Follow the maze shape through the numbers and add them up — so 1 + 2 + 3 + 5 + 2 = 13. The statue is pointing East, so set the coordinates to E 13 to get to the second location.
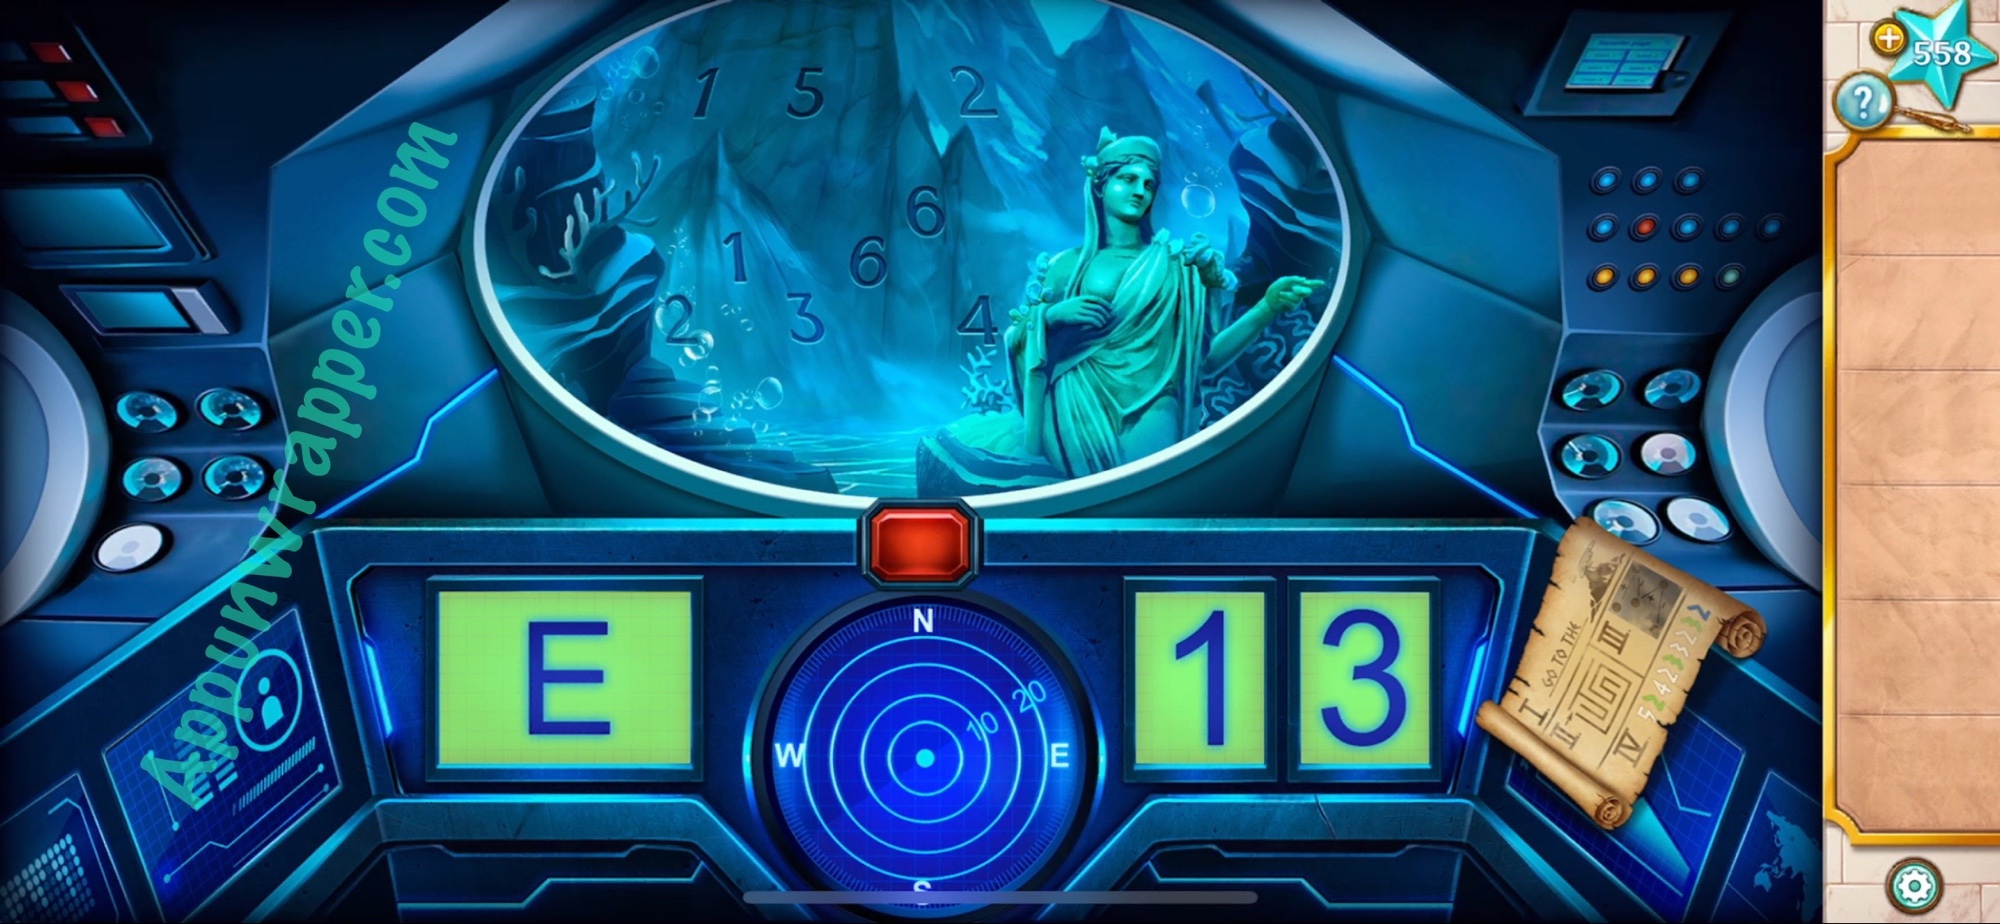
3. The instructions for the third location tell us to add 4 + 1, subtract 4, add 6, then subtract 2. So 4 + 1 – 4 + 6 – 2 = 5. The big 6 to the right of the rows of numbers looks like an E combined with an S. So enter SE 05 for the coordinates to get to the third location.
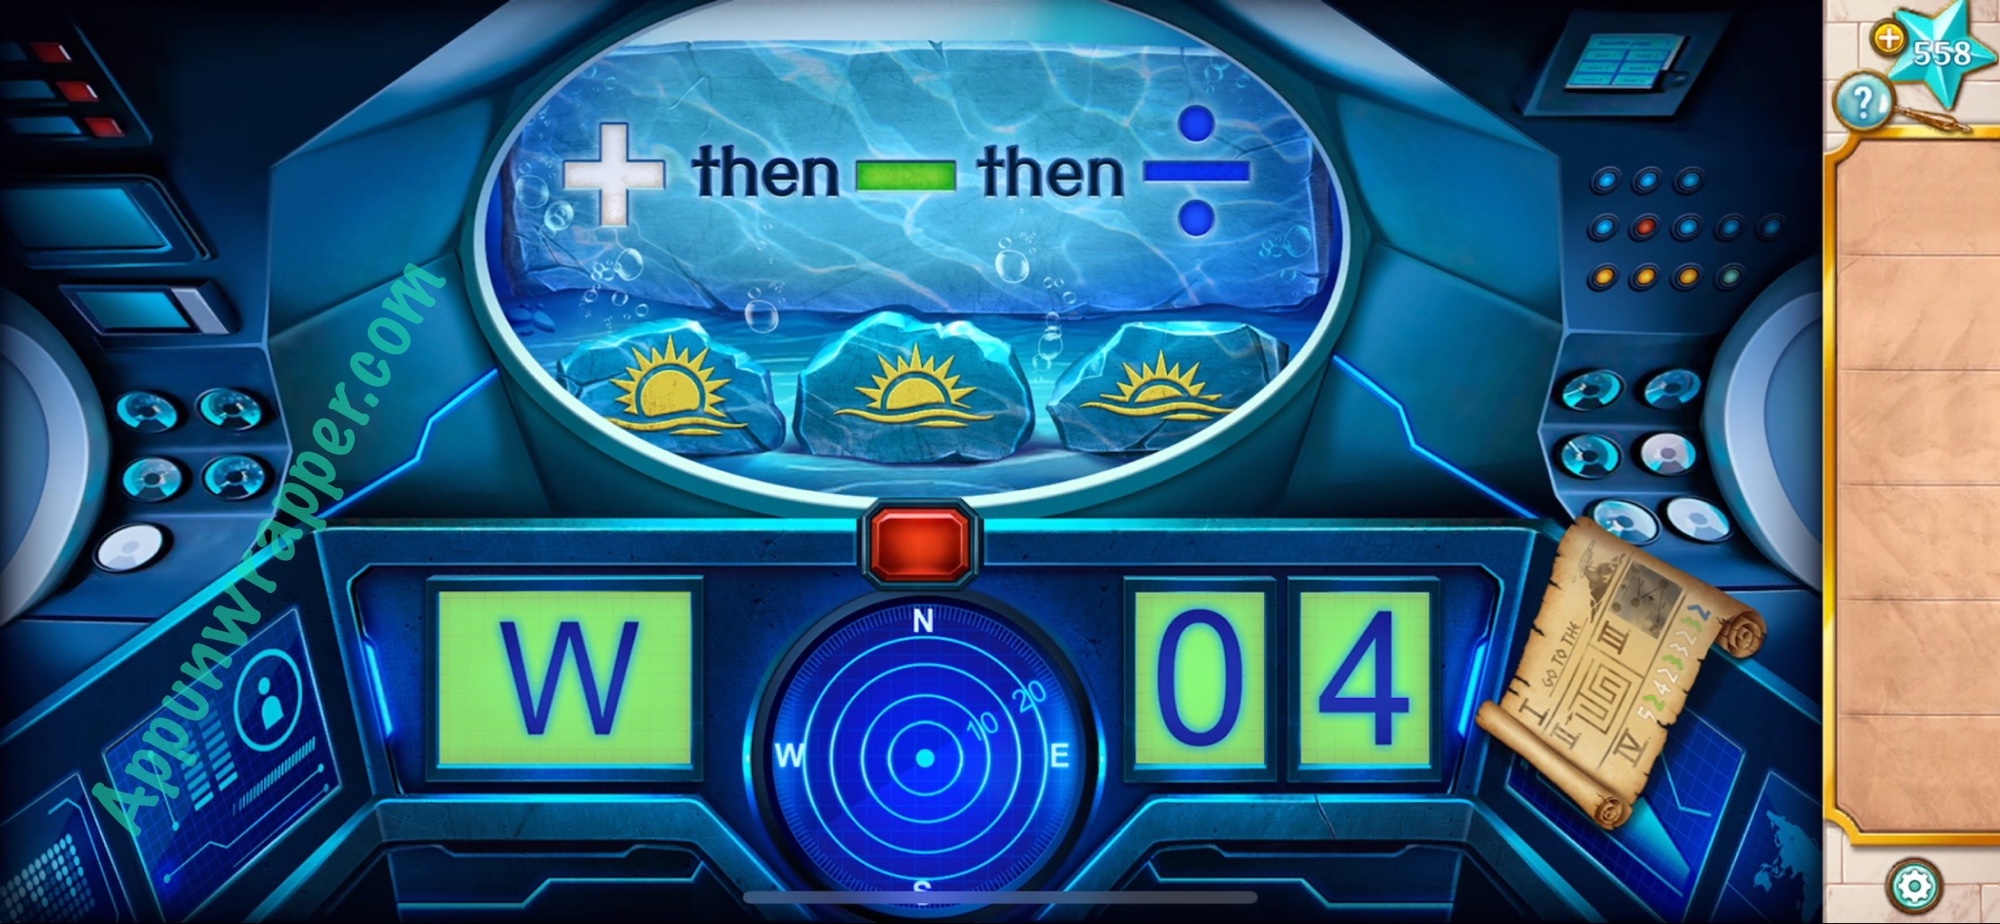
4. And last, let’s work on the fourth location. It shows the sun setting, and the sun sets in the west. So set the direction to W. It also tells you that white is add, green is subtract, and blue is divide. So let’s turn that into an equation using the numbers on the scroll.
+ 5 – 2 + 4 + 2 – 3 + 3 + 2 – 3 / 2 = 4
So set the coordinates to W 04 to get to the fourth location.
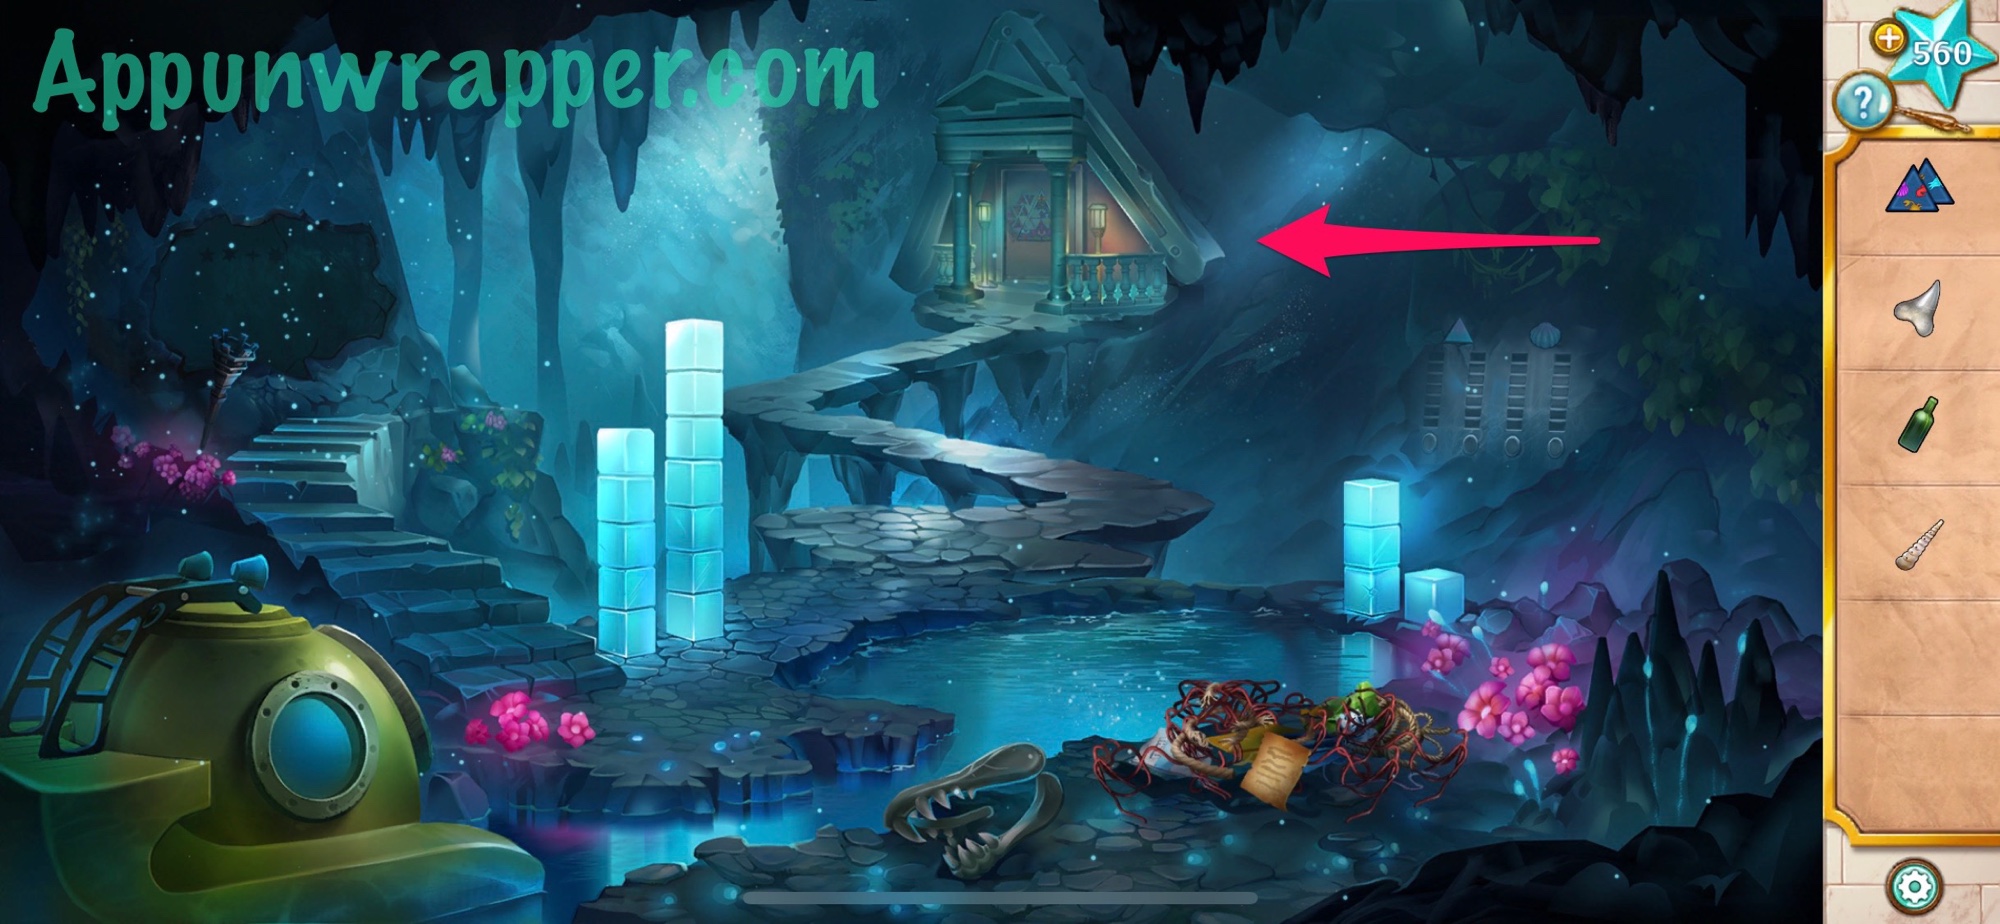
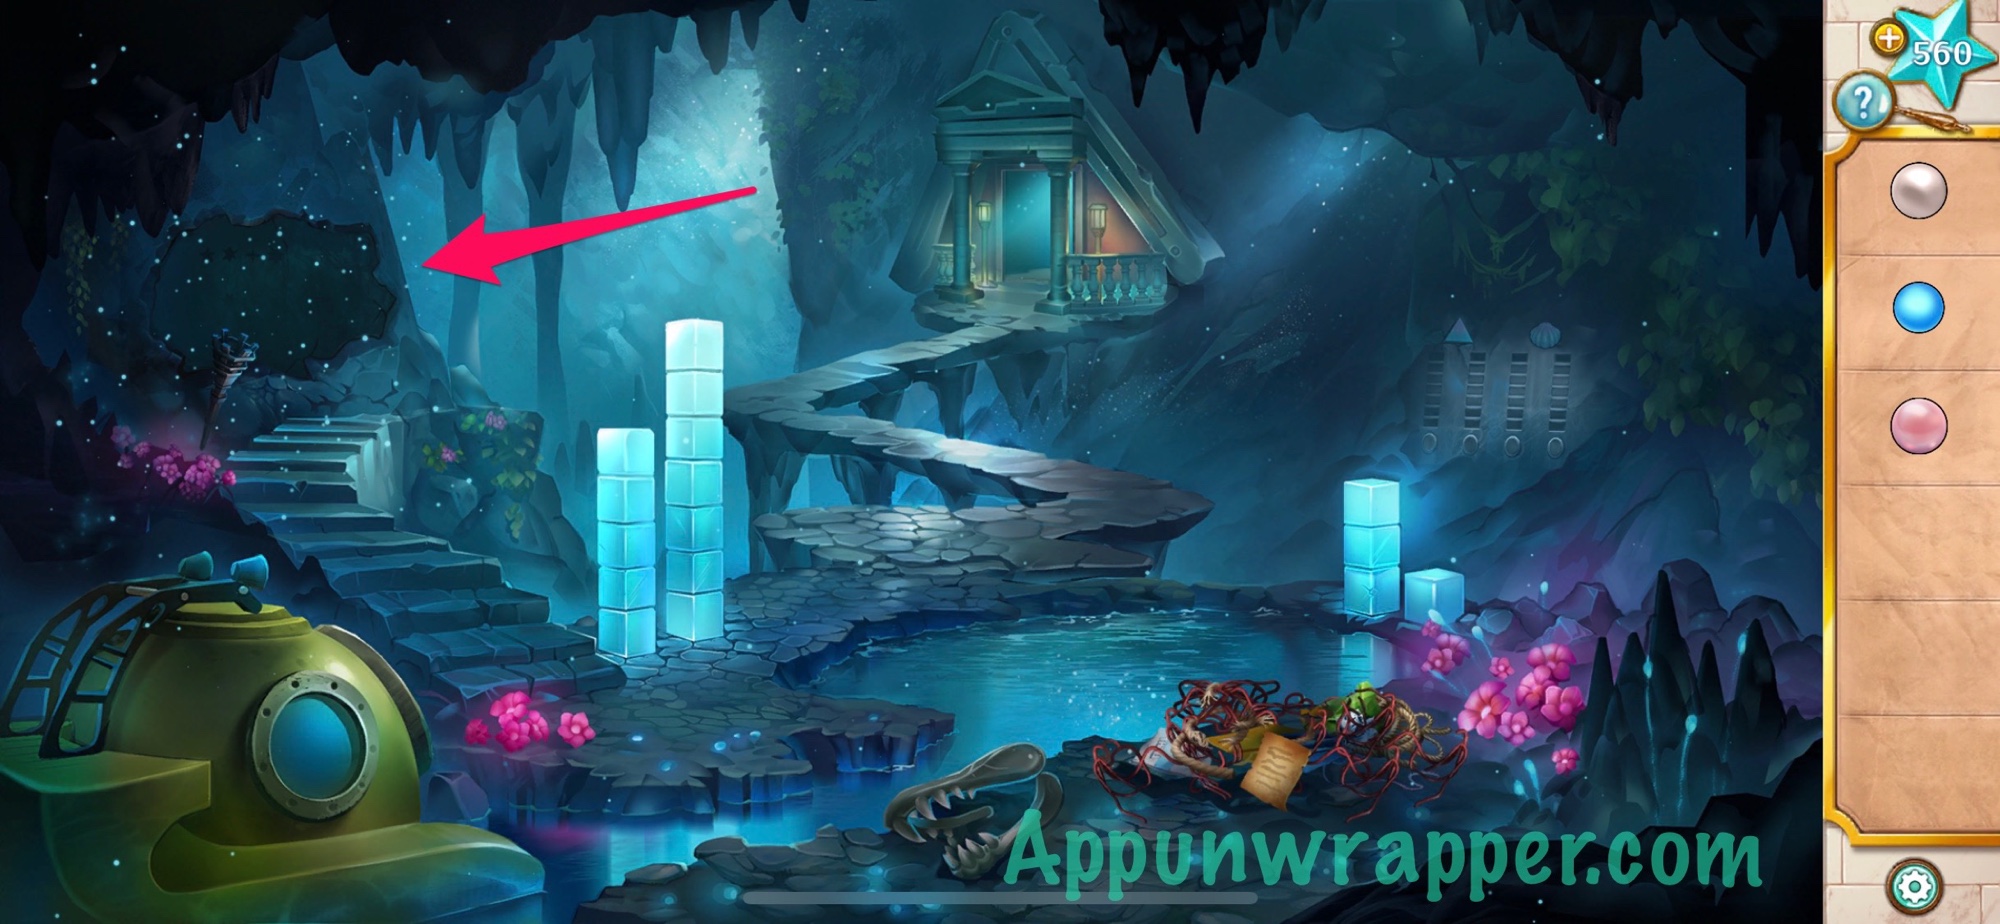
5. Pick up the shark tooth. Notice the four glowing pillars and the tangled items. There’s also a puzzle to the right.
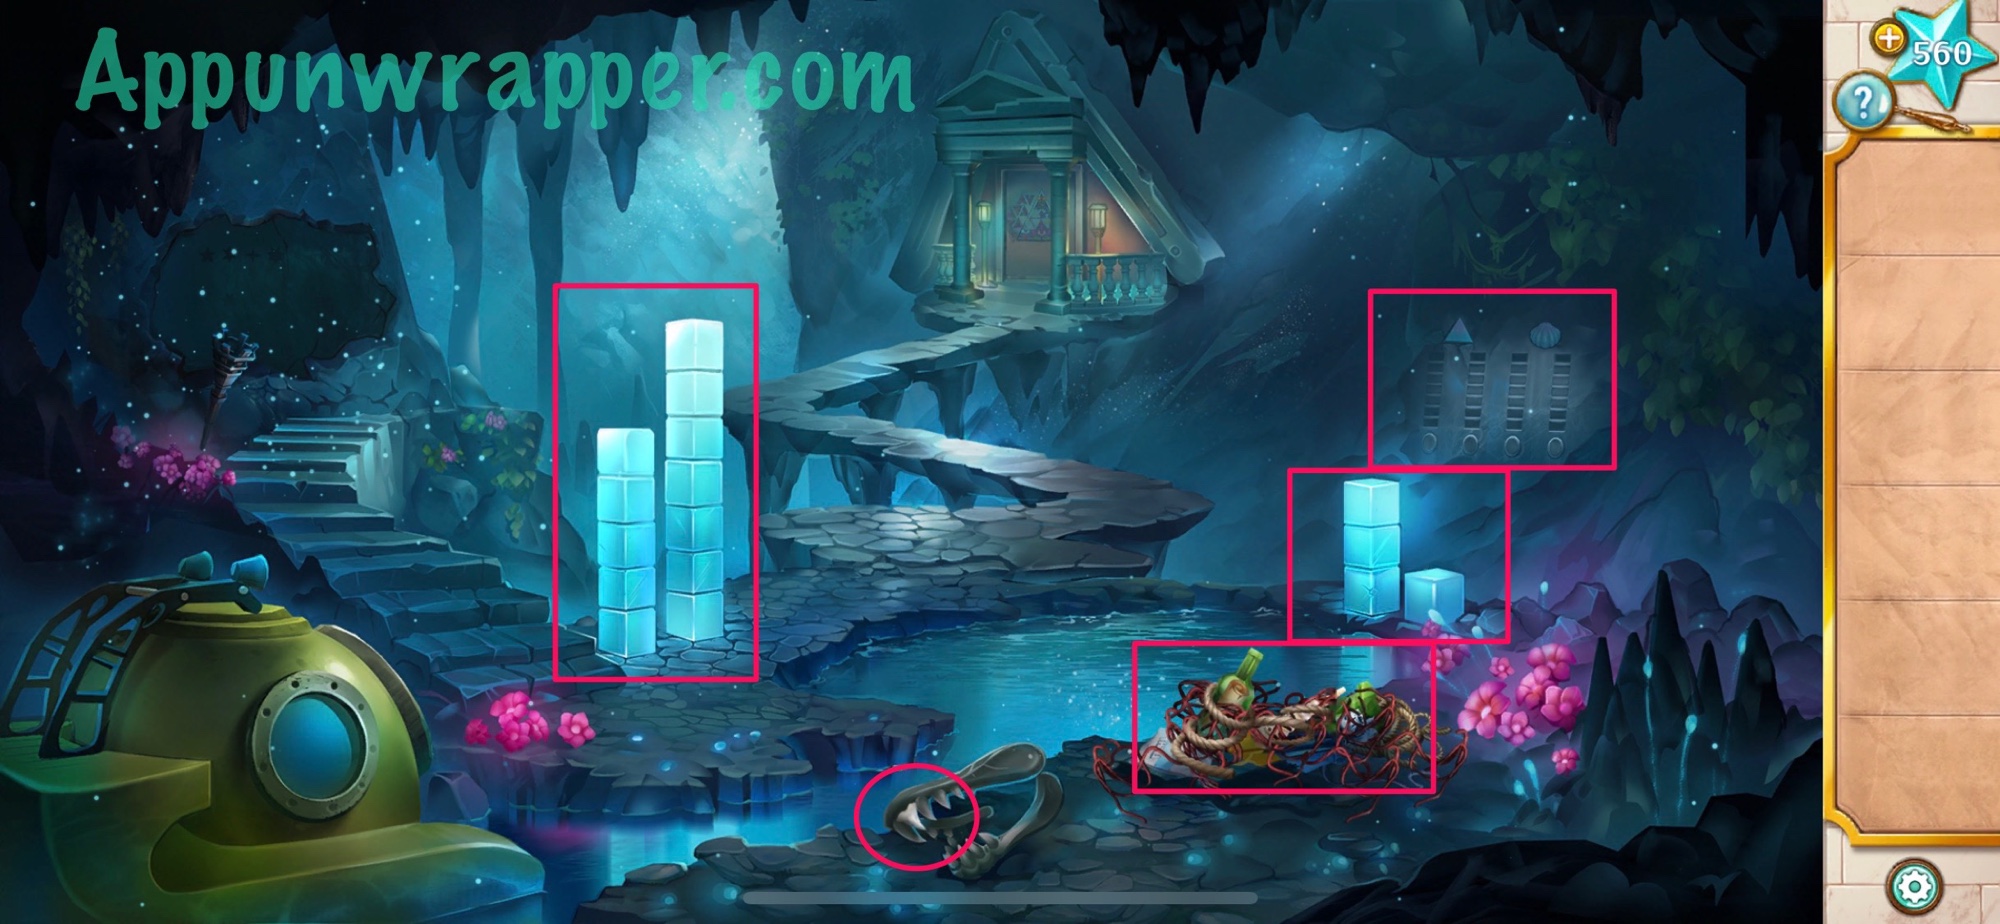
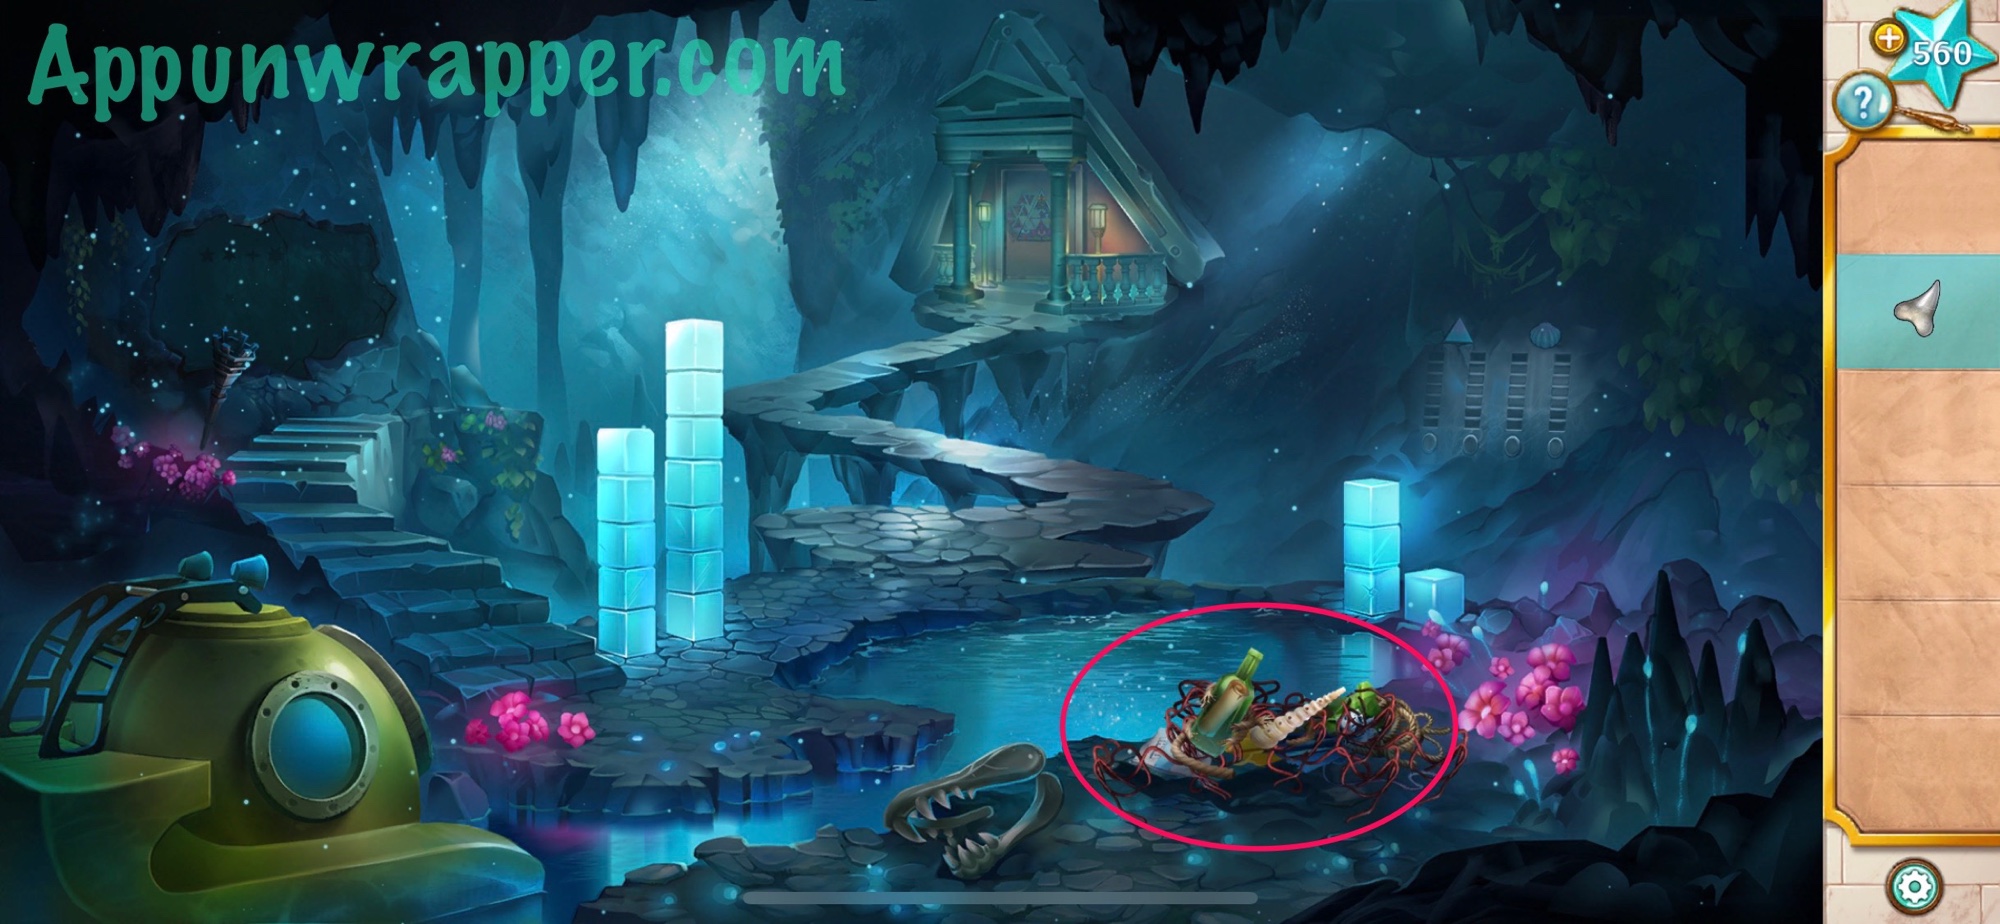
6. Use the shark tooth to cut through the tangled mess and get an empty bottle, a shell flute, and a note that says music makes all things bloom.
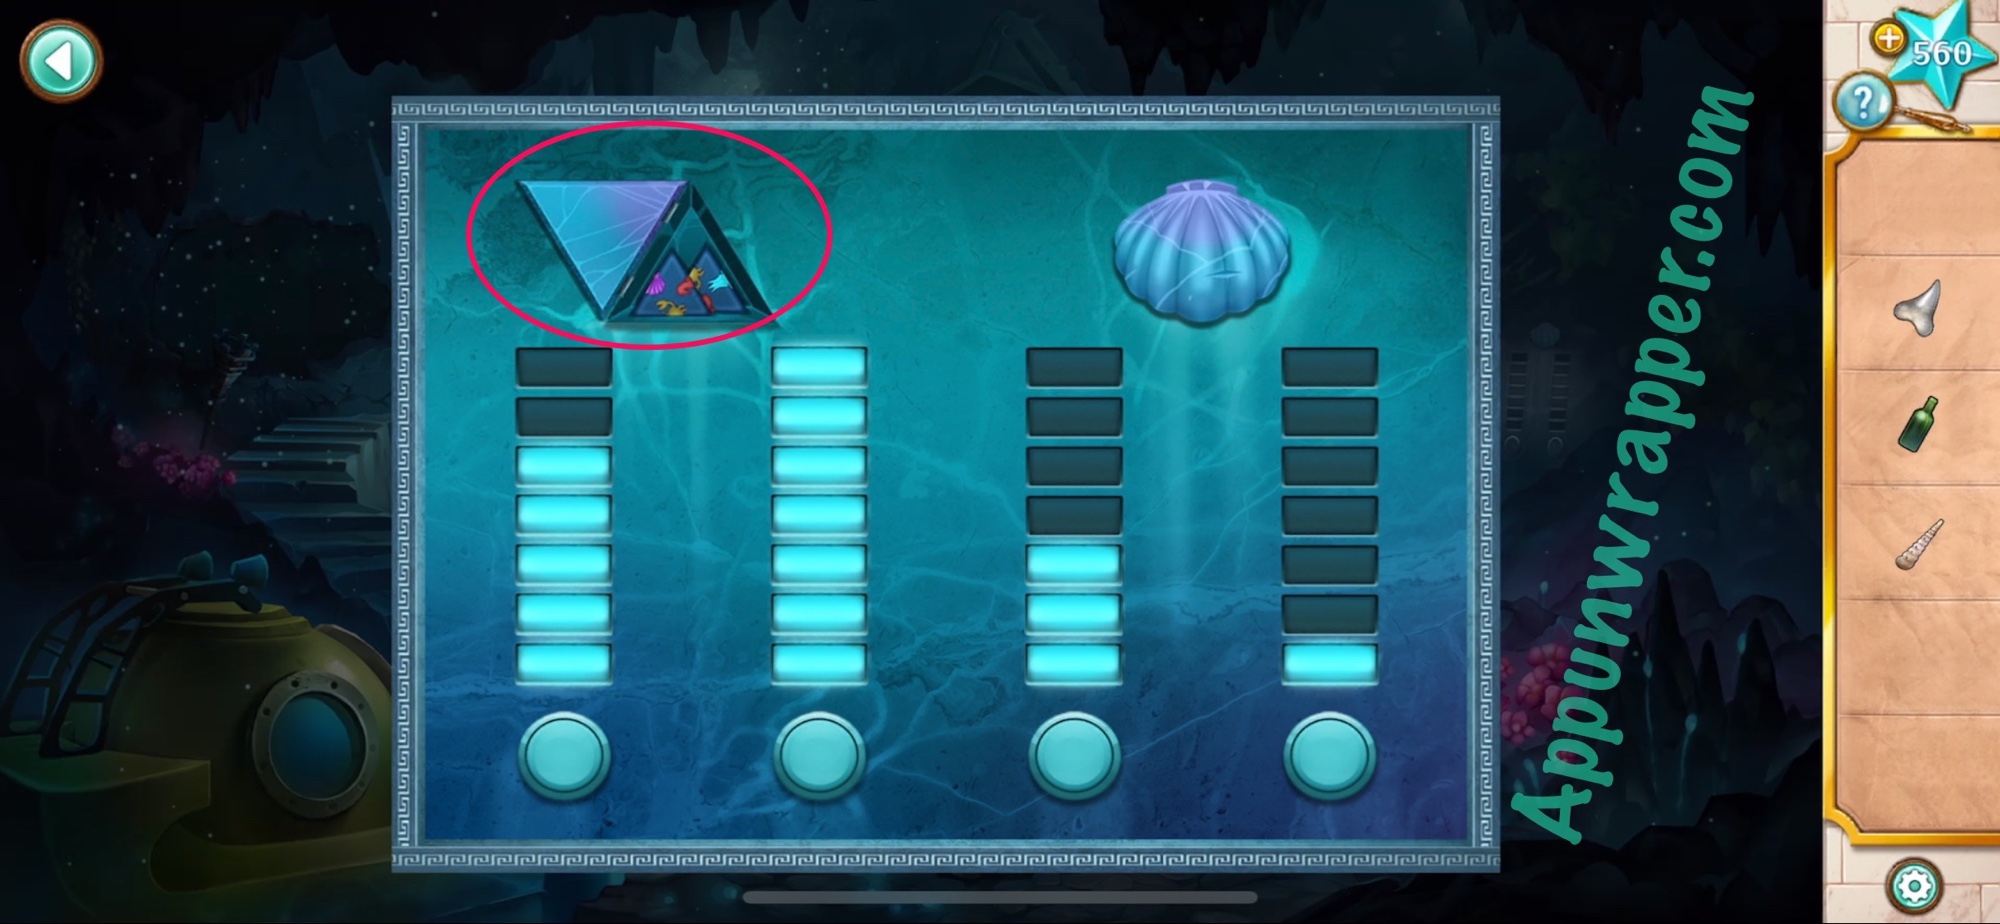
7. Let’s solve the puzzle on the right. Just enter the same number of lights as the number of cubes in the pillars — 5 7 3 1. Then take the two triangle pieces.
8. Now follow the path ahead to another puzzle. Place both triangle pieces down and solve the Triangle puzzle. You need place all the pieces so that complete images are correctly formed along their borders. You can tap pieces to rotate them. It should look like the image below in the end. Then go through the door.

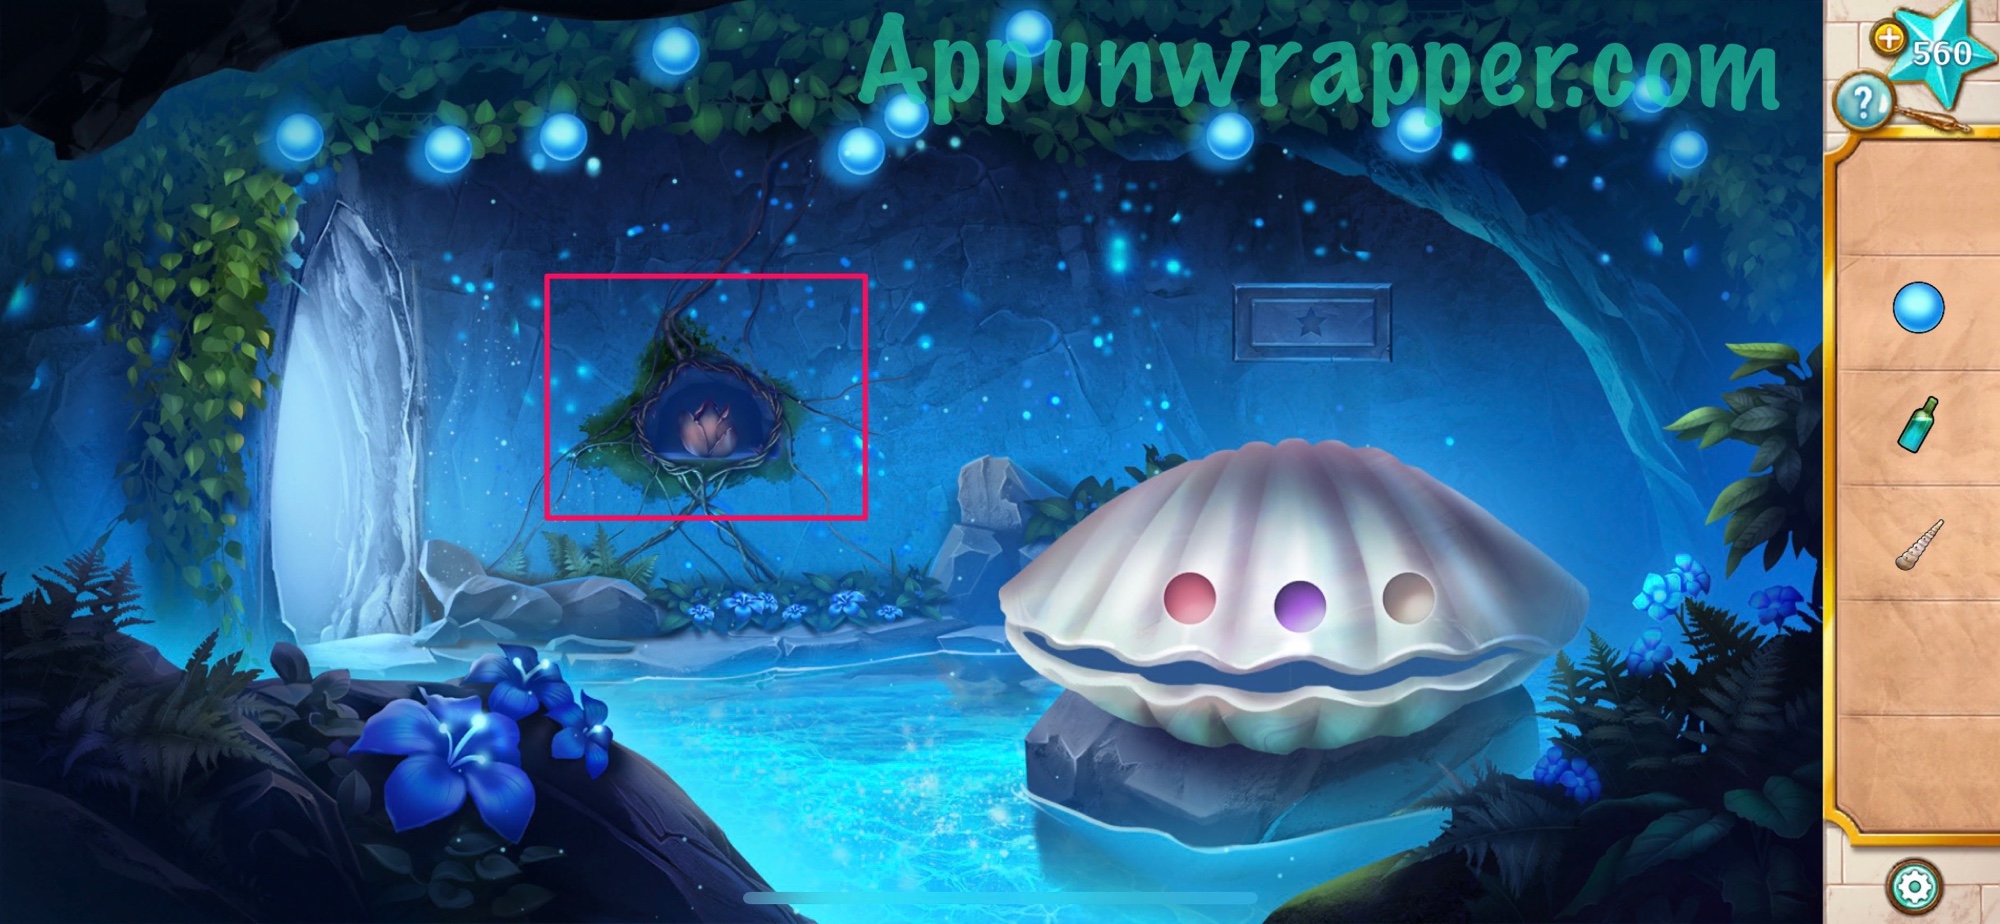
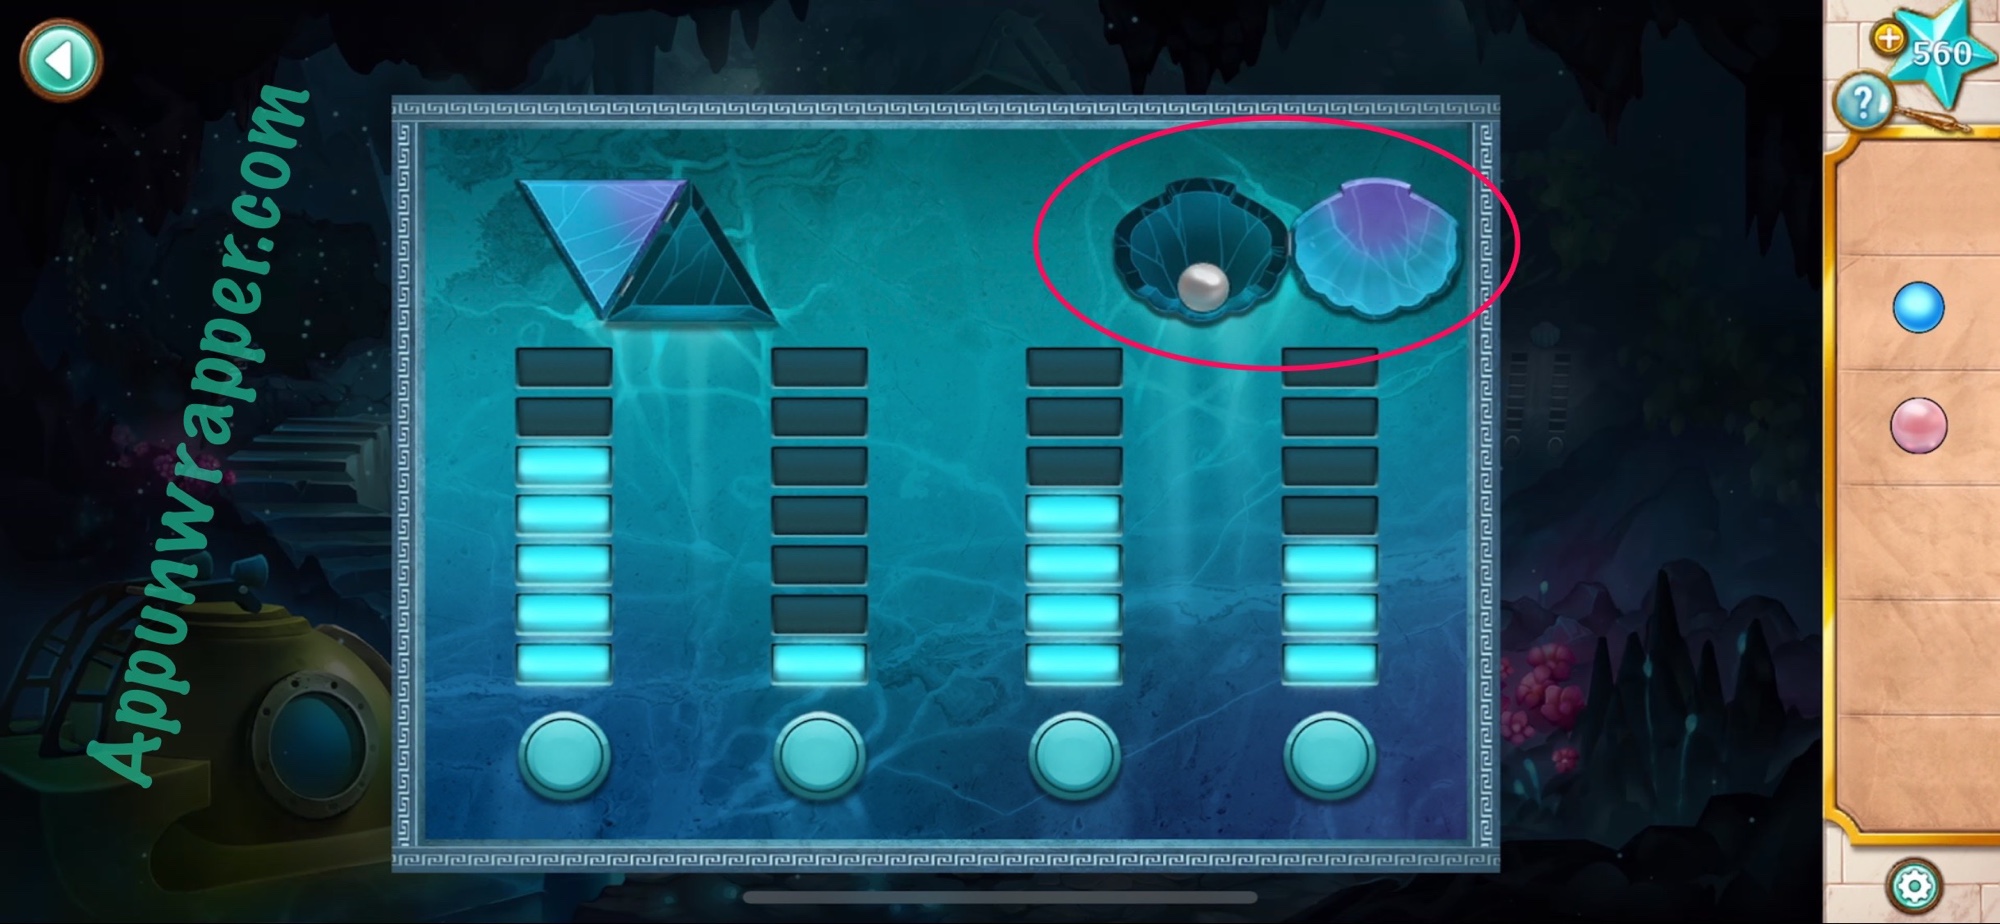
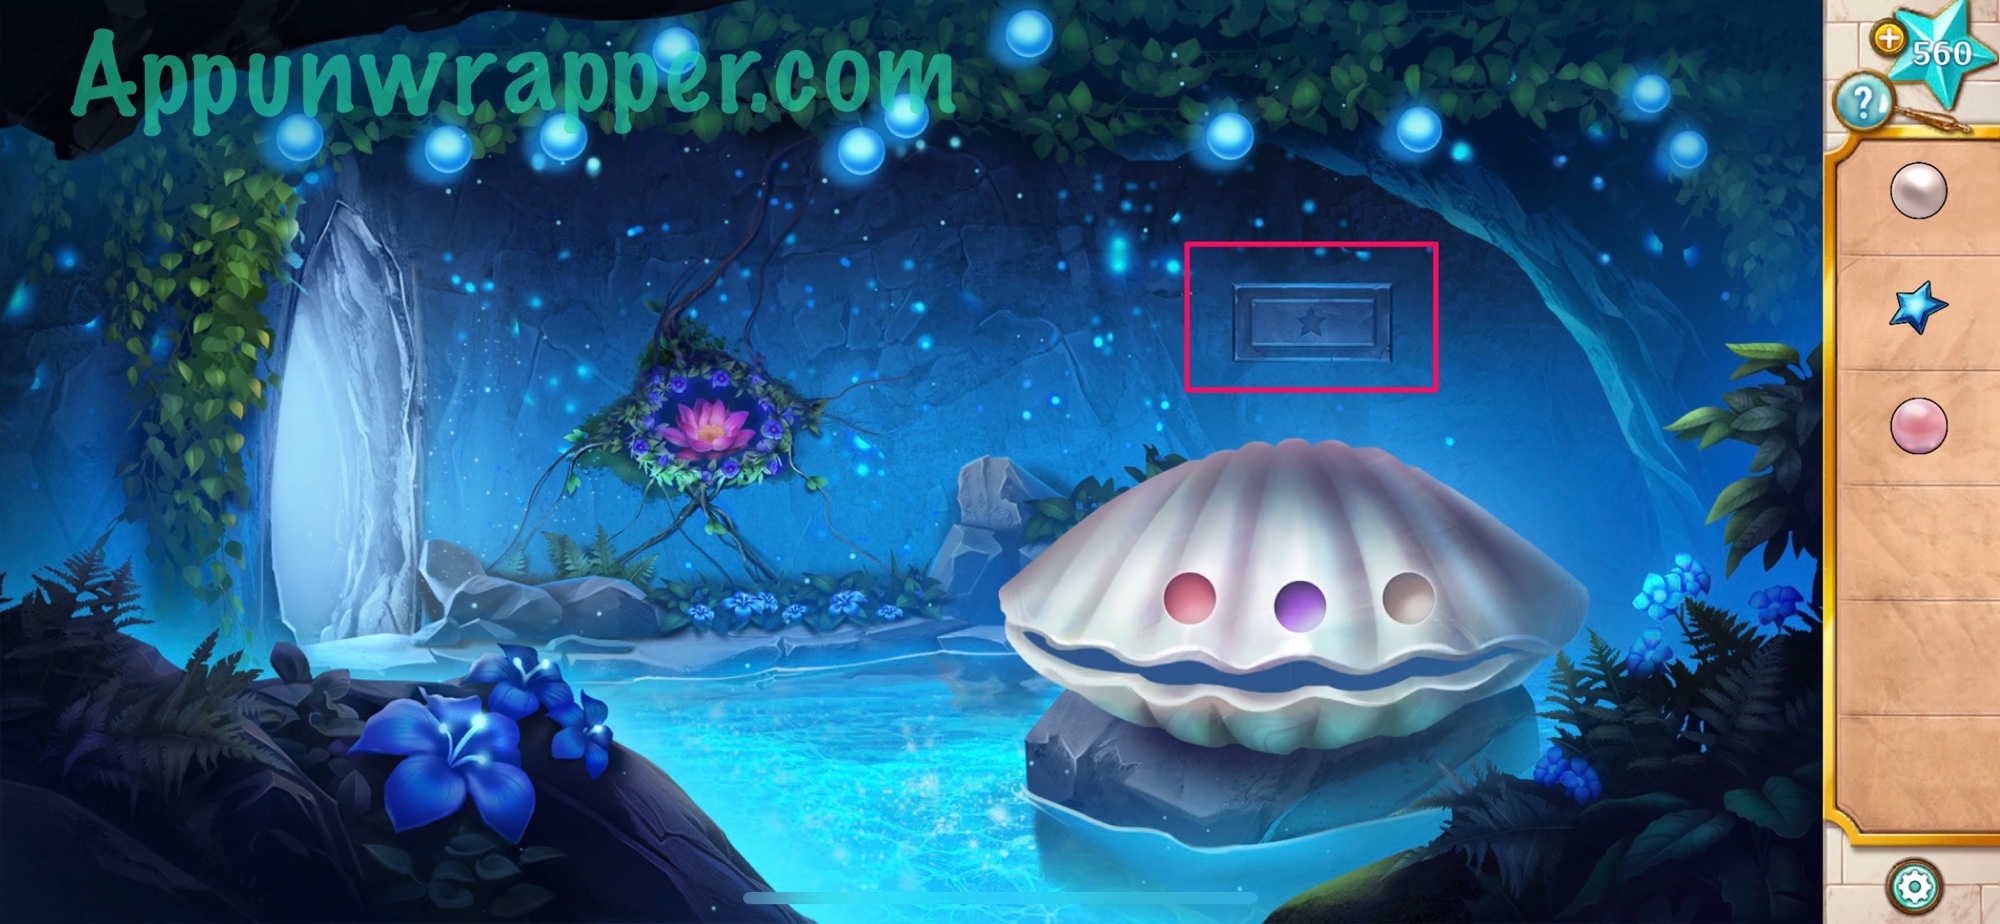
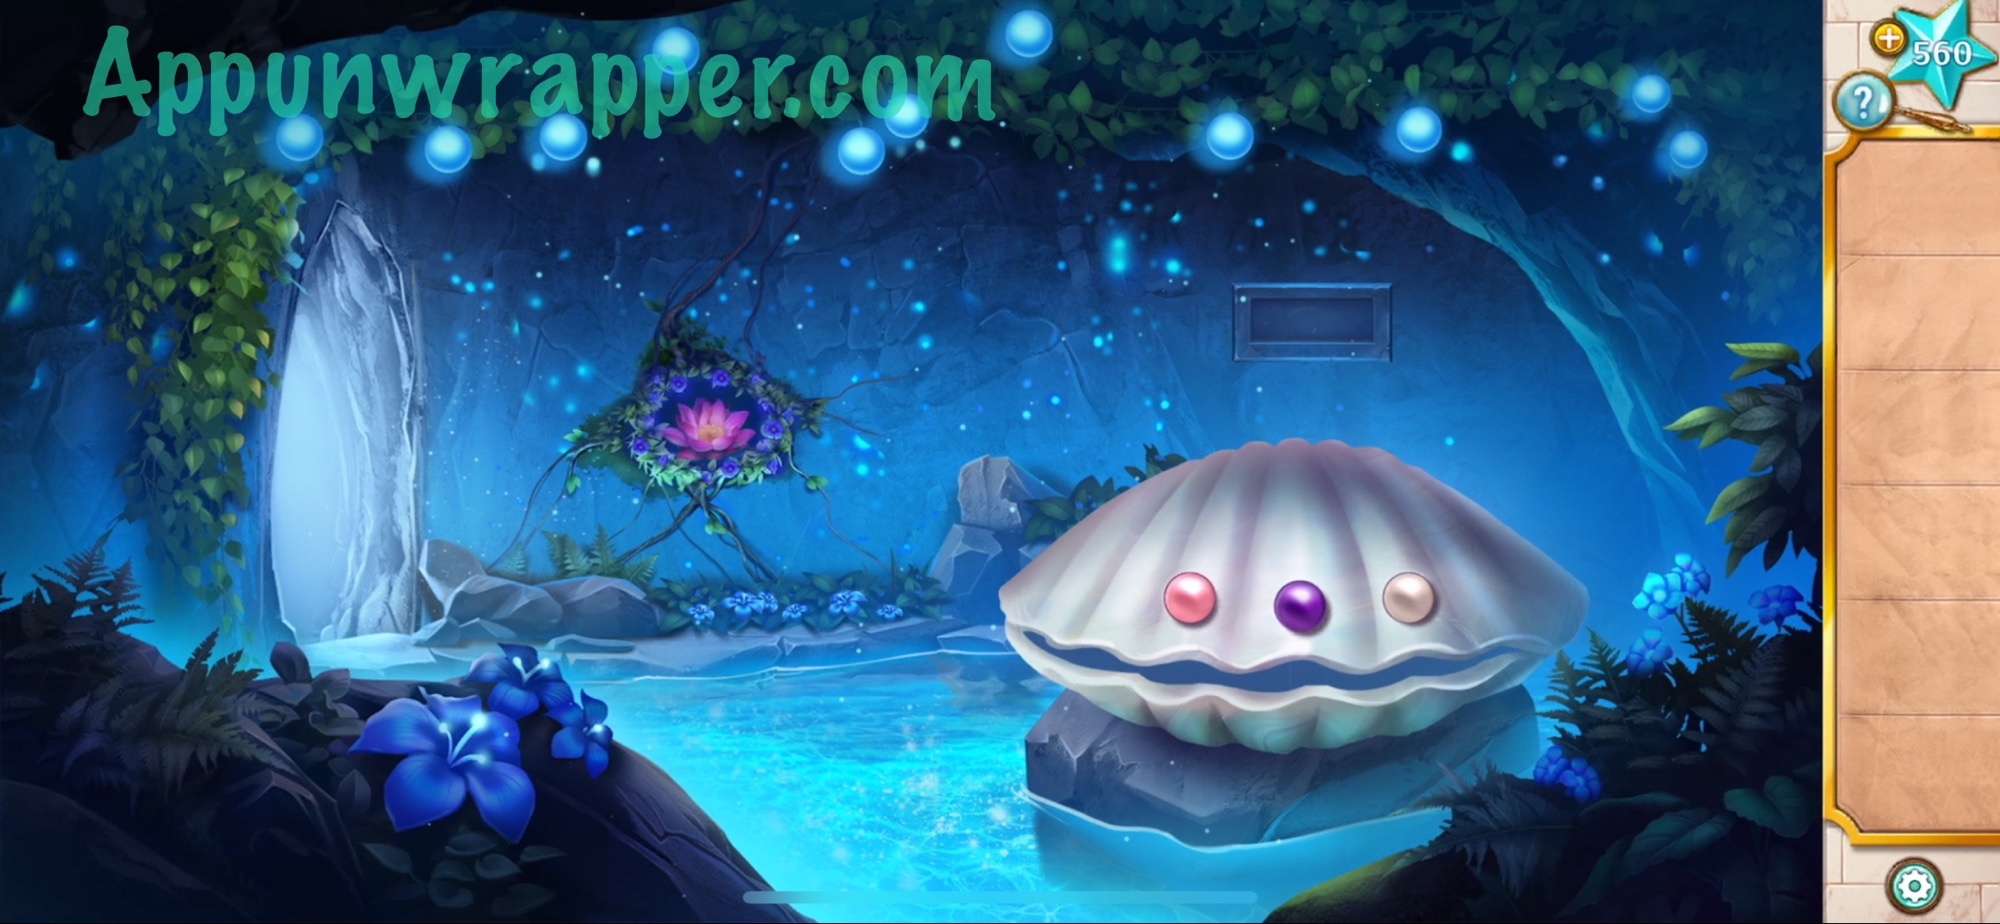
9. Use the shark tooth to cut off one of the blue pearls. Collect some of the healing water in the bottle. Also, tap on the giant clamshell to see some lights turn on and off. It’s a clue to opening the shell.

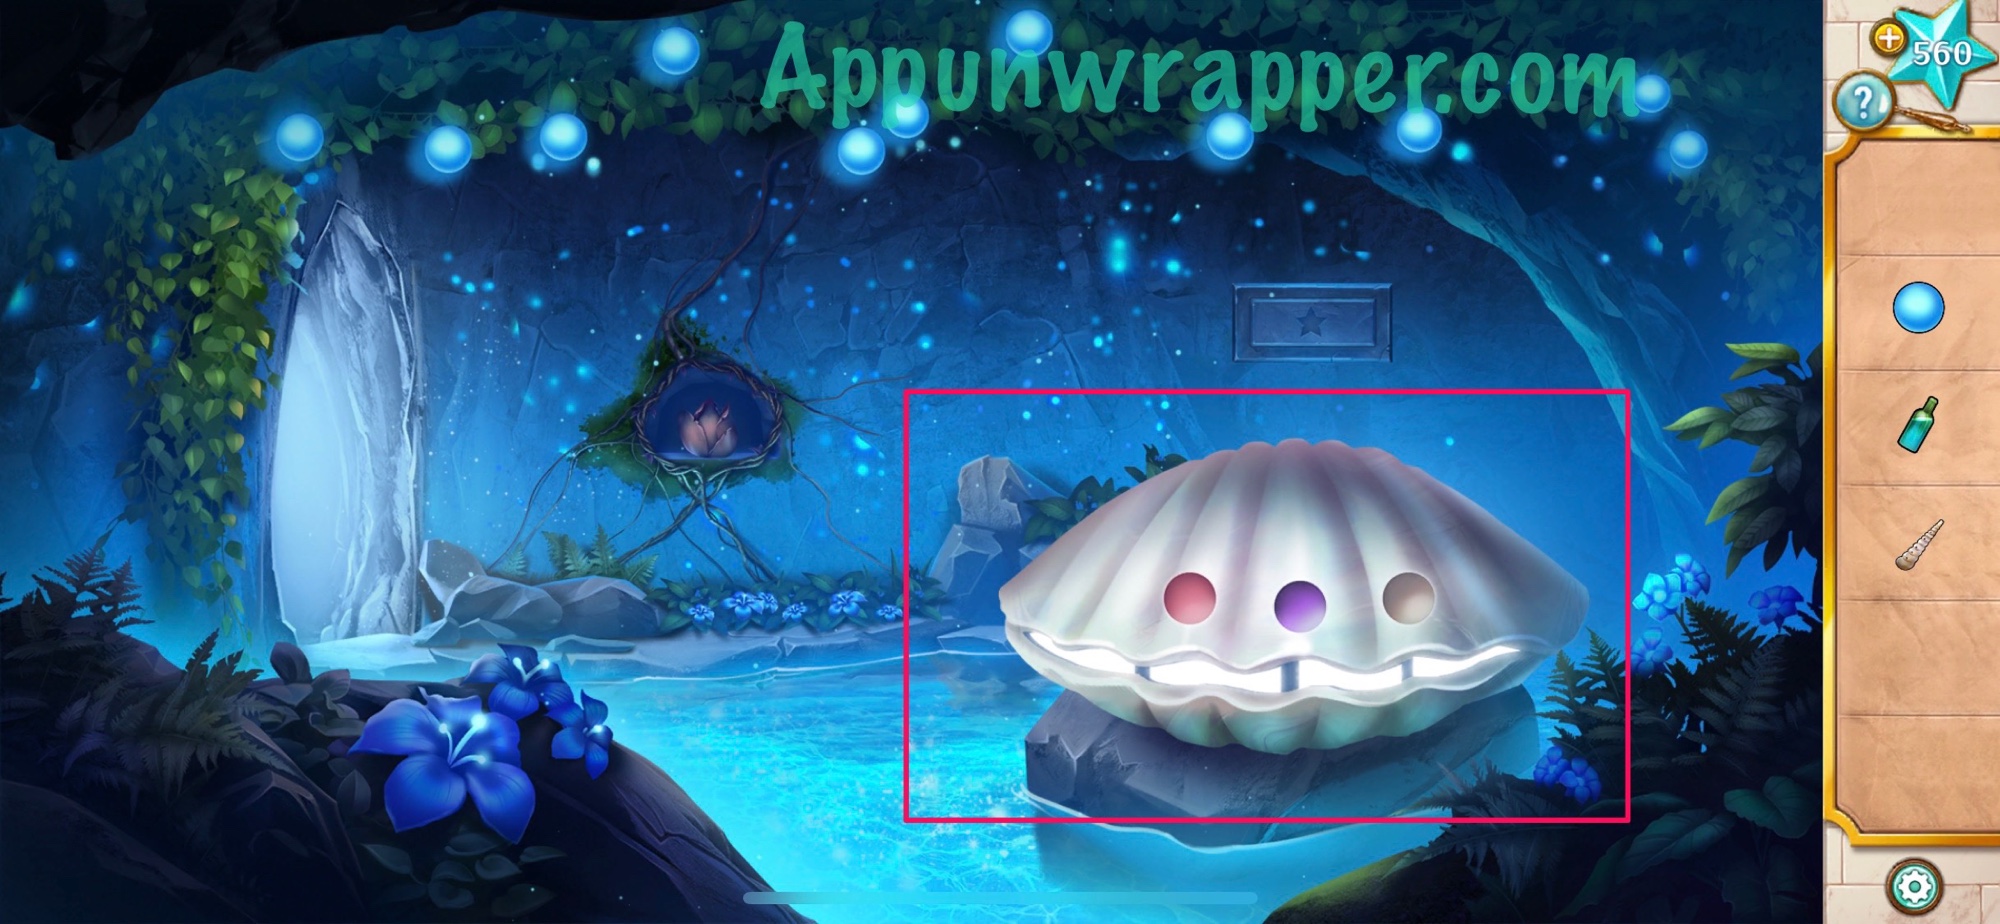
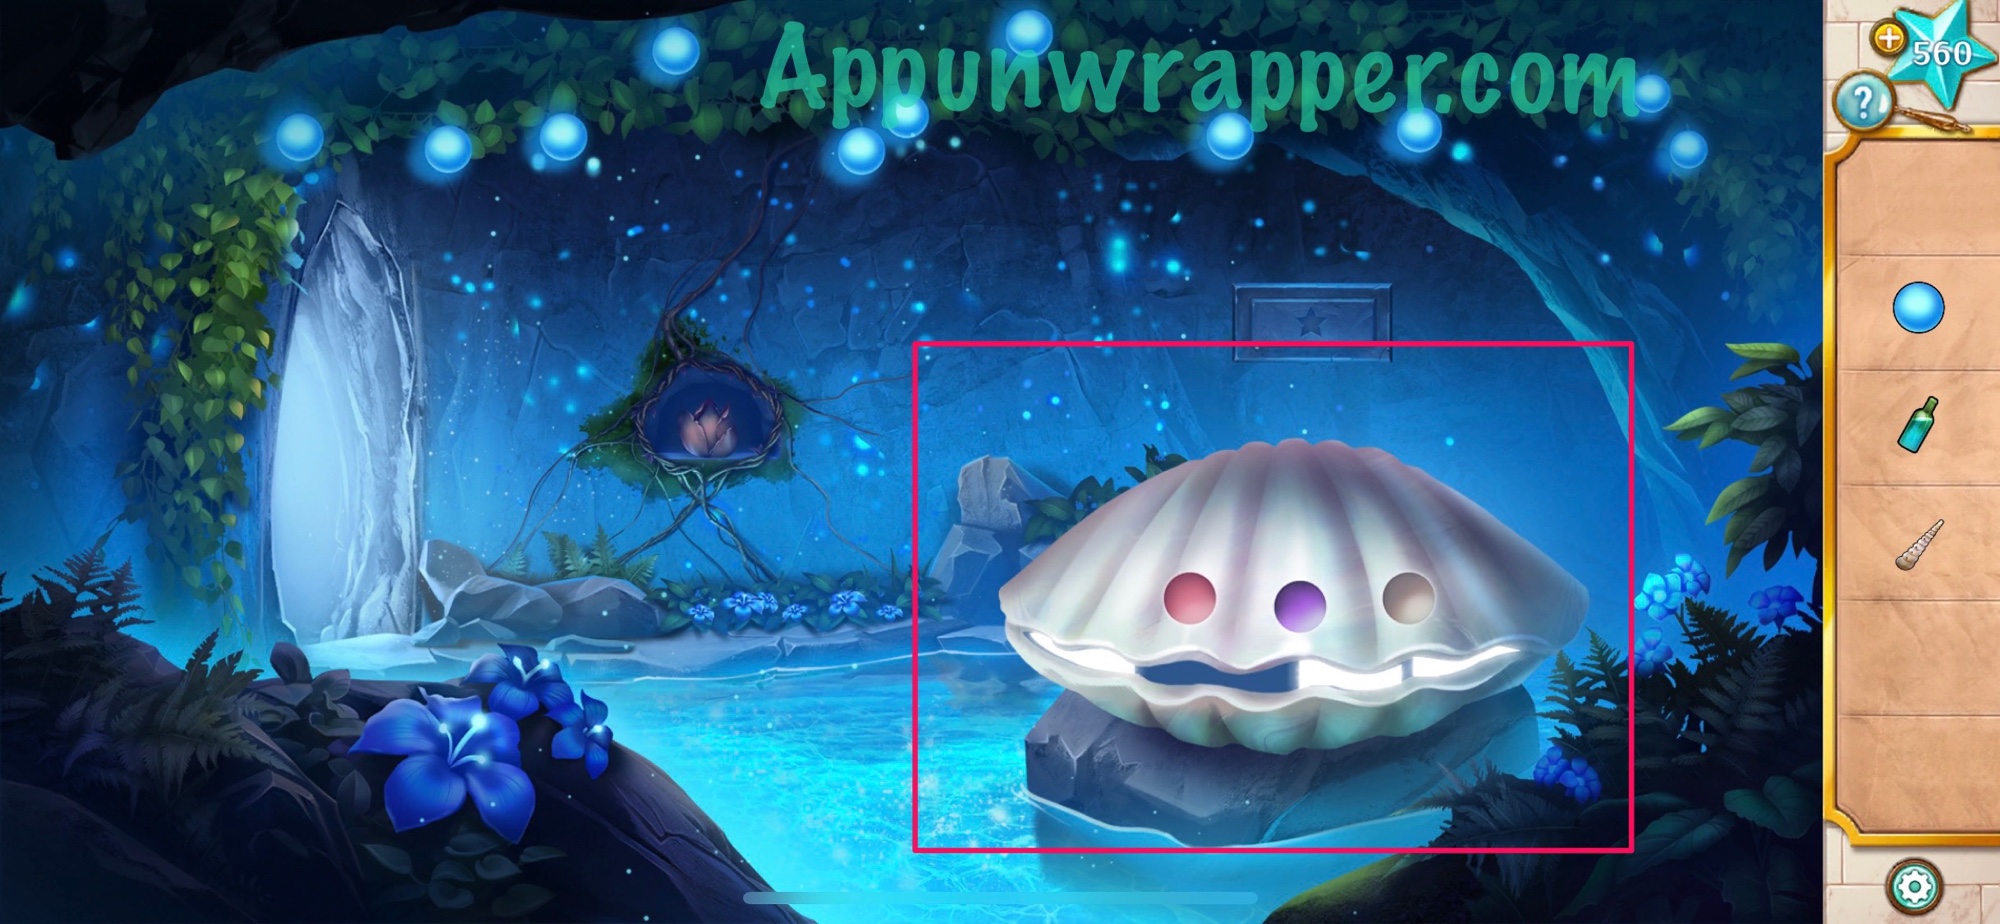
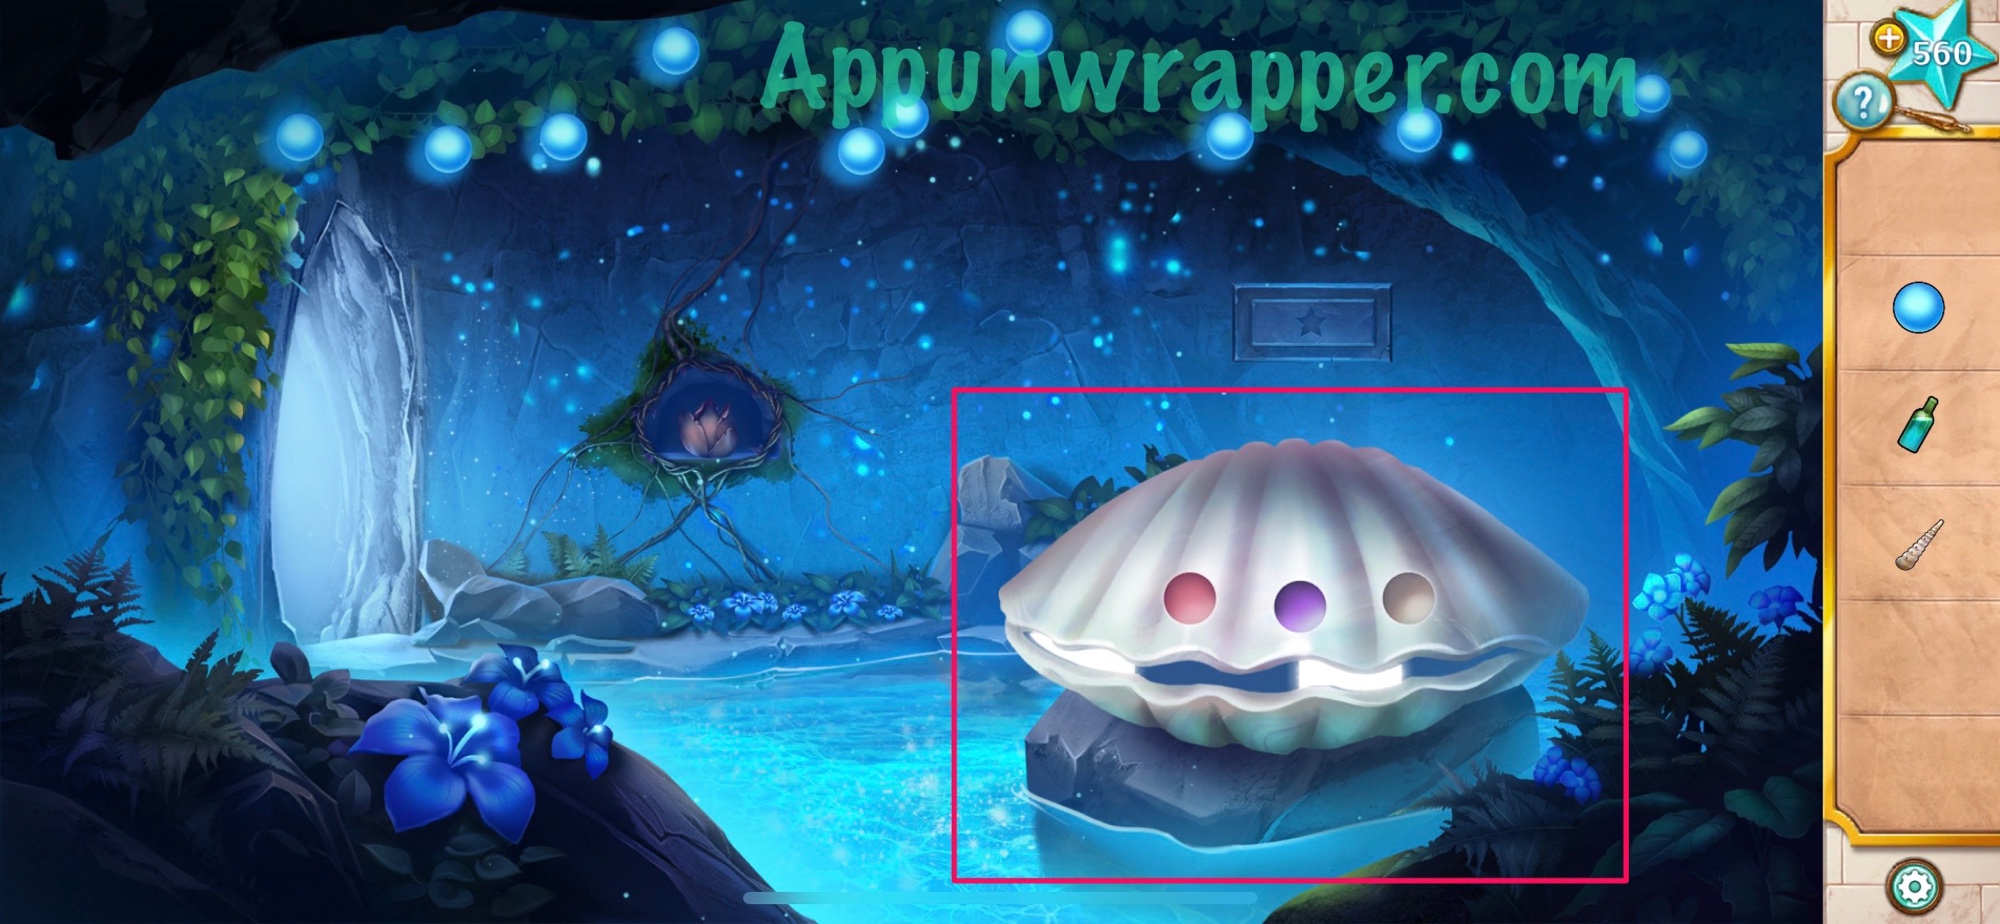

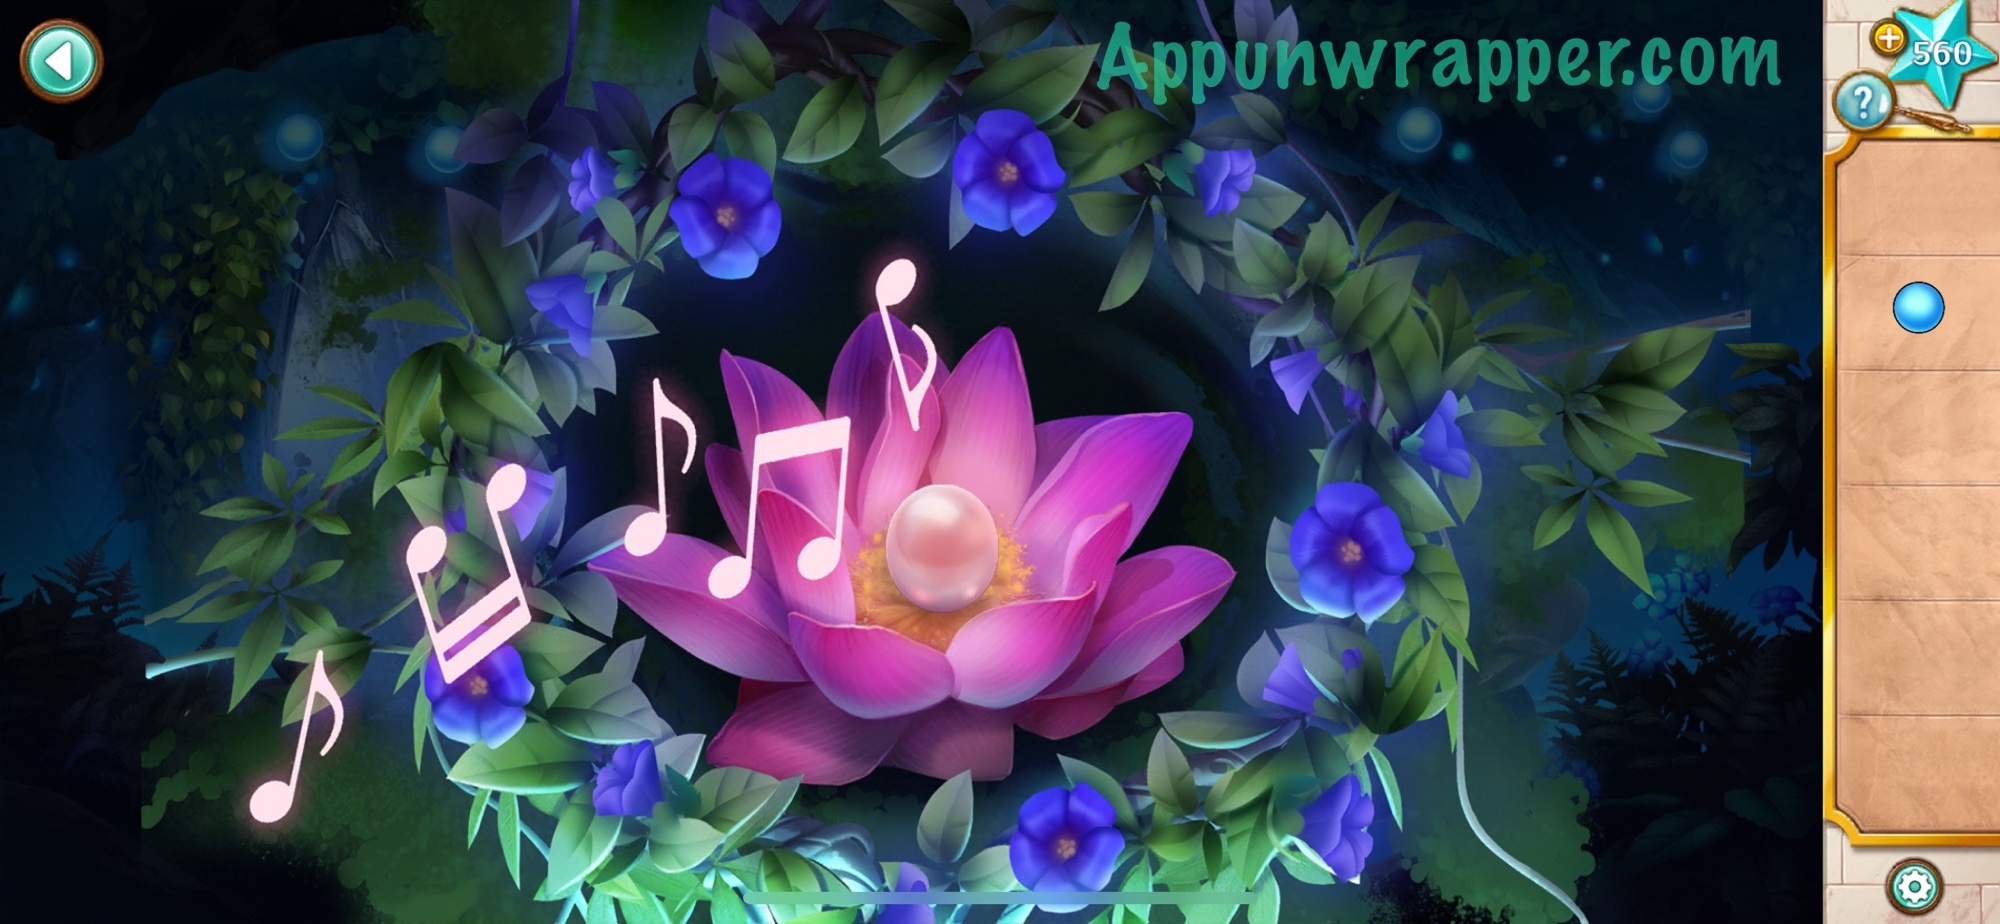
10. Pour the healing water on the dead flower to revive it. Then use the shell flute to make it bloom. Take the pink pearl.

11. Leave the room and tap on the puzzle to the right again. Now let’s use the lights from the clamshell to enter a second solution. Use them to figure out which lights to turn on, based on which lights light up each time inside the clam. First, press all four buttons once. Then press the first, third and fourth. Then the same again. Then first and third. And then just the first. I’m other words, 5, 1, 4, 3. It should look like the image below in the end. Then take the white pearl.
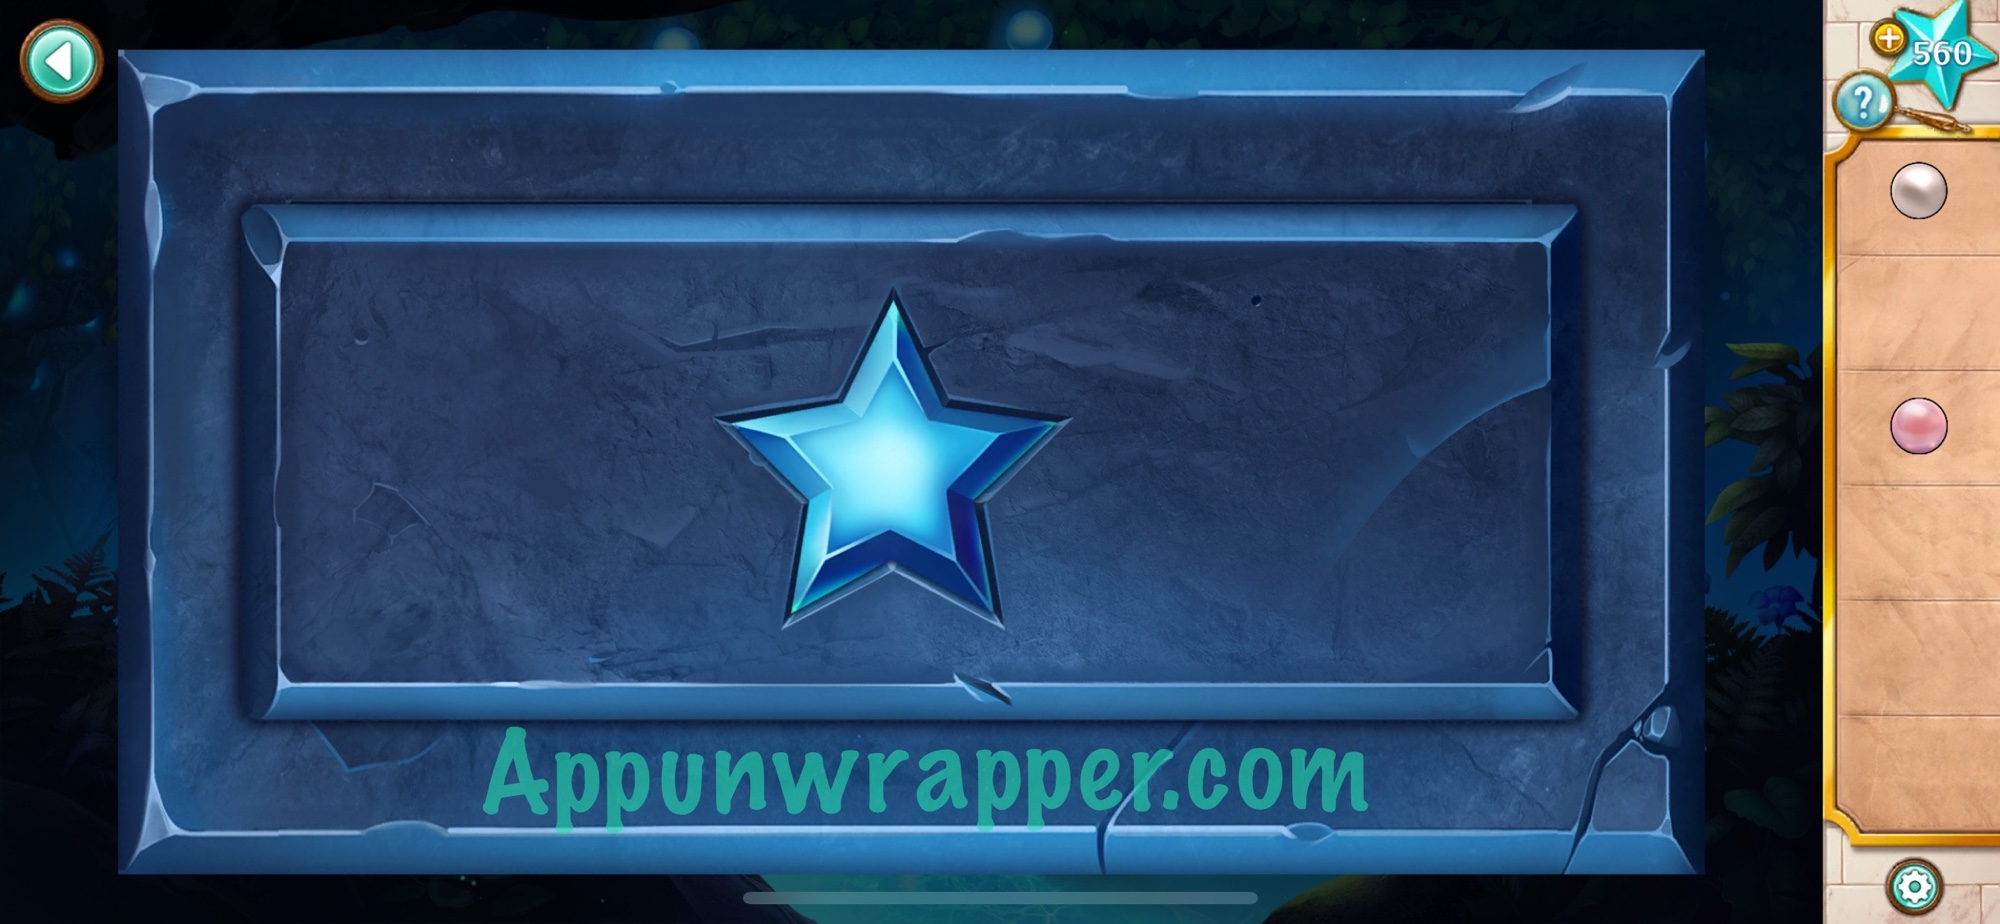
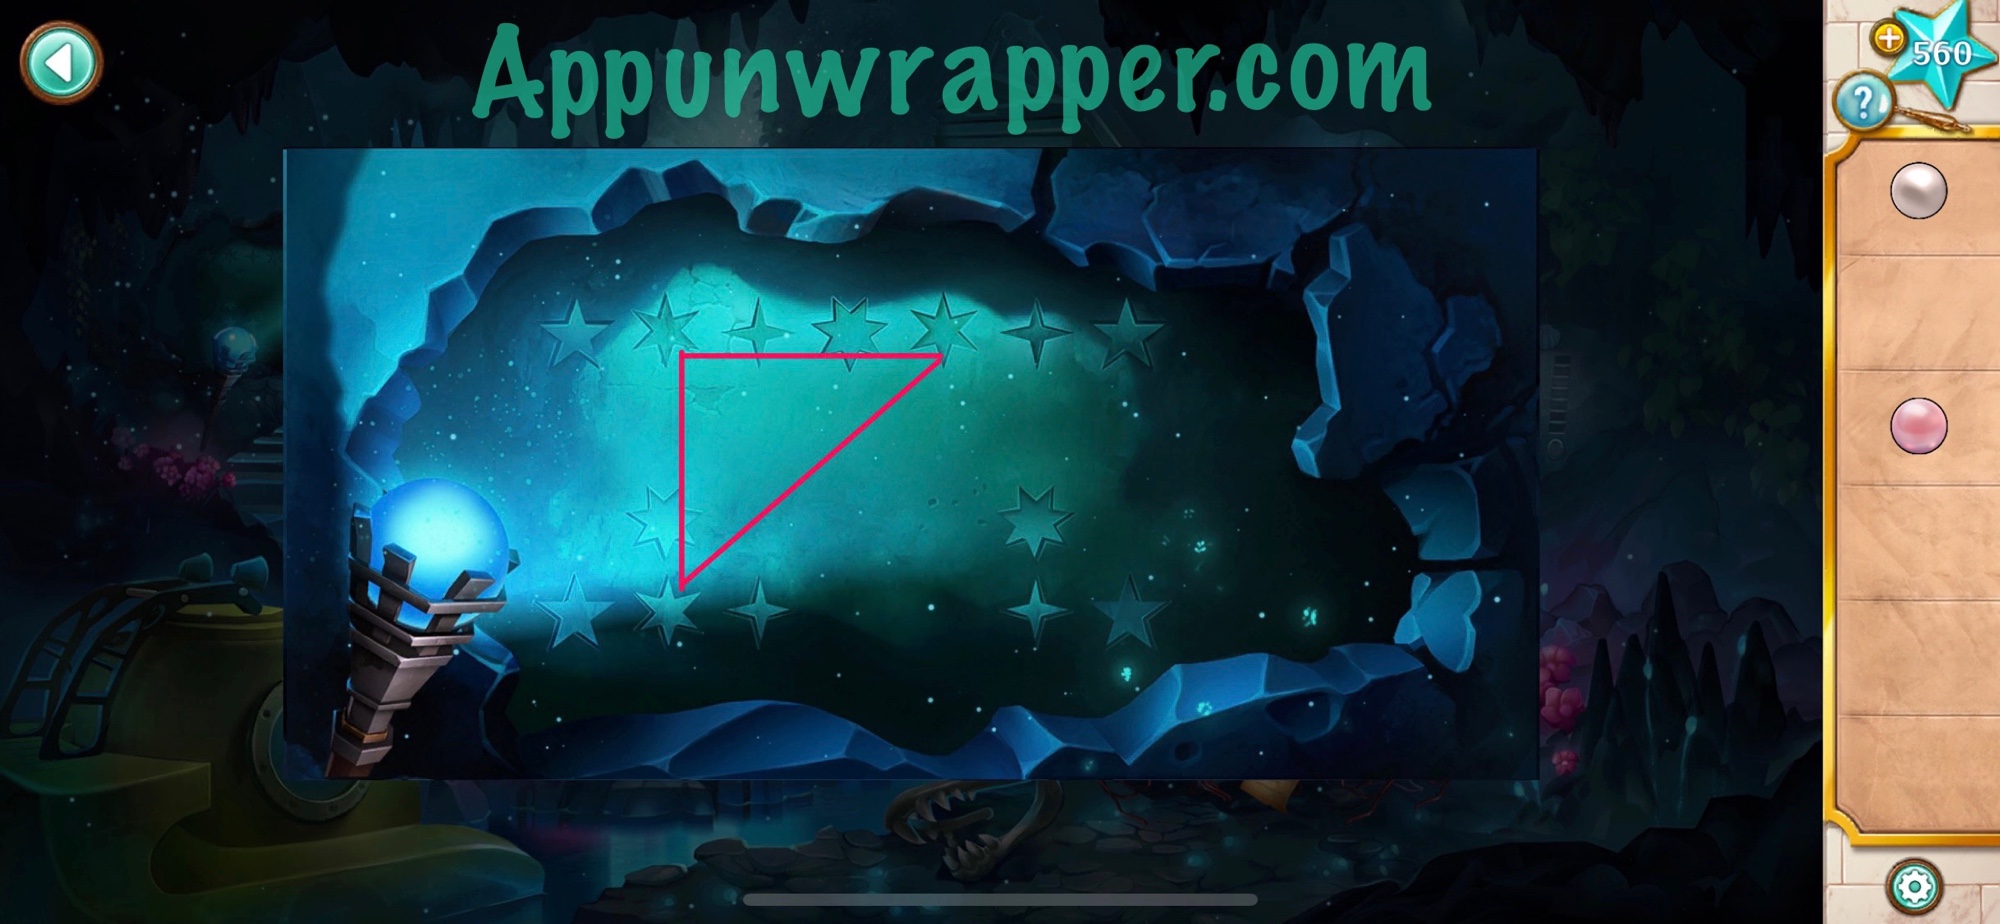
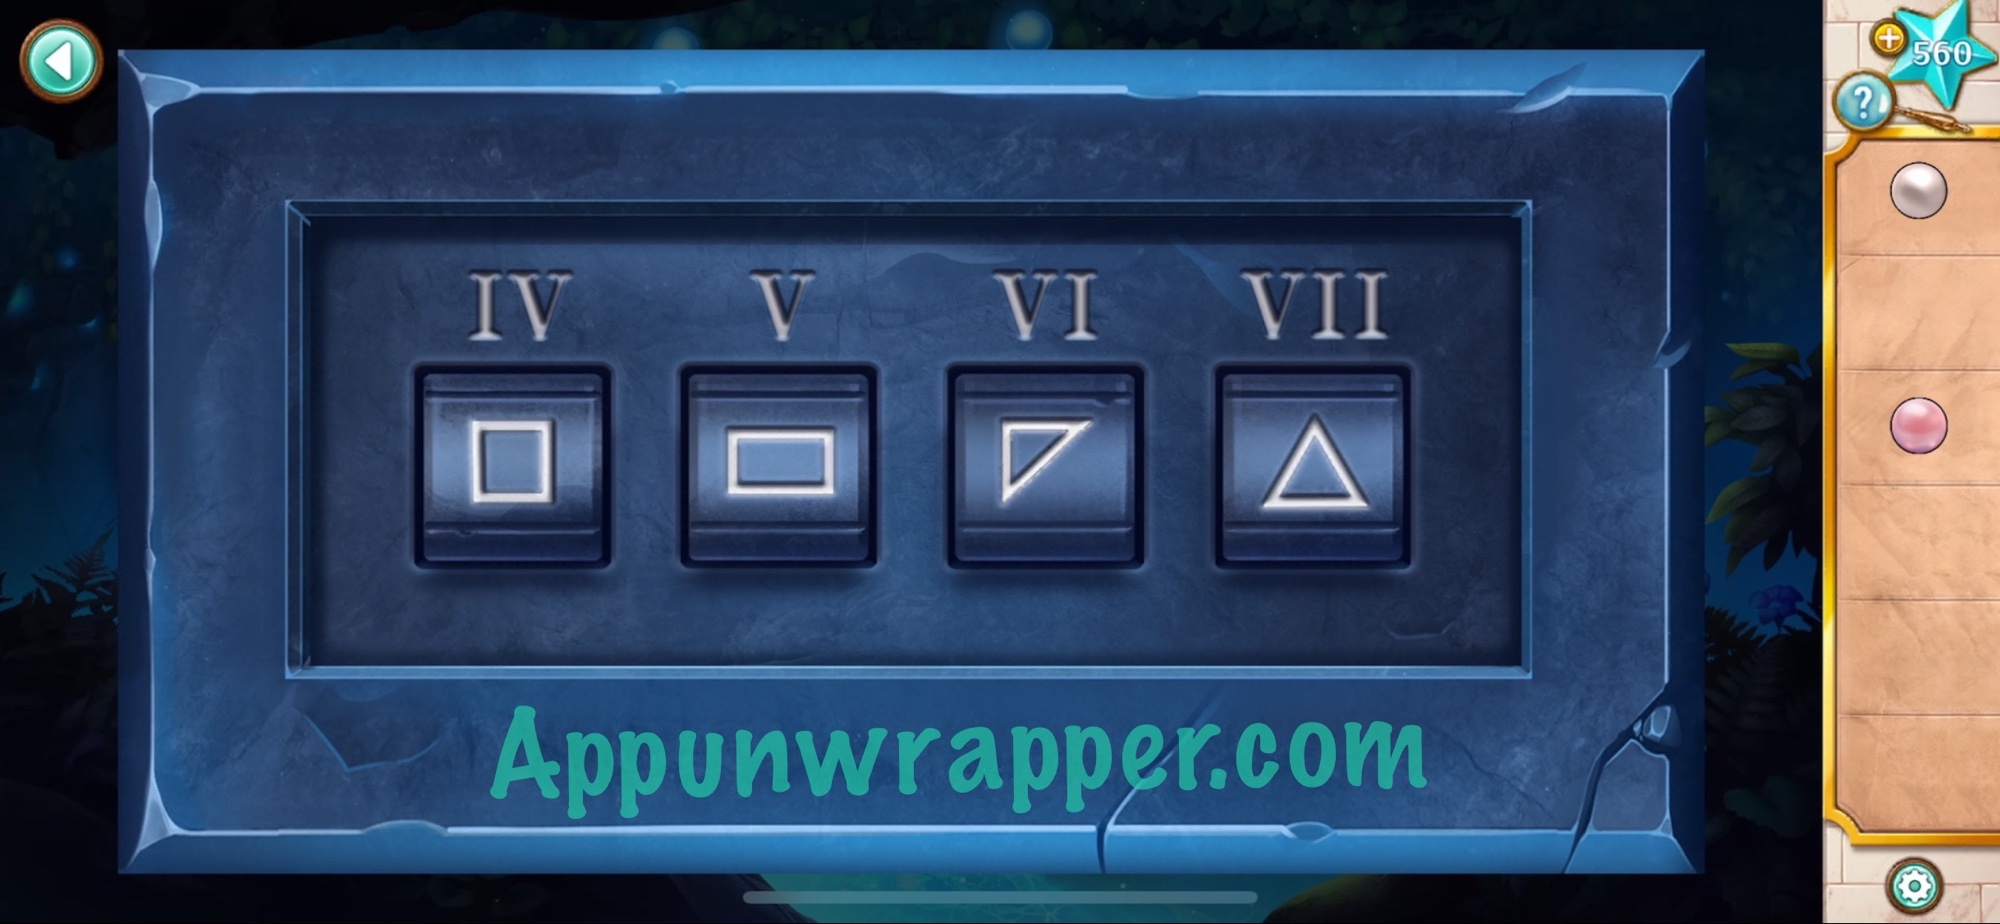
12. Now take the left path to a dark room. Place the blue pearl in the torch to light up the room. Take the star key and make note of the other stars.
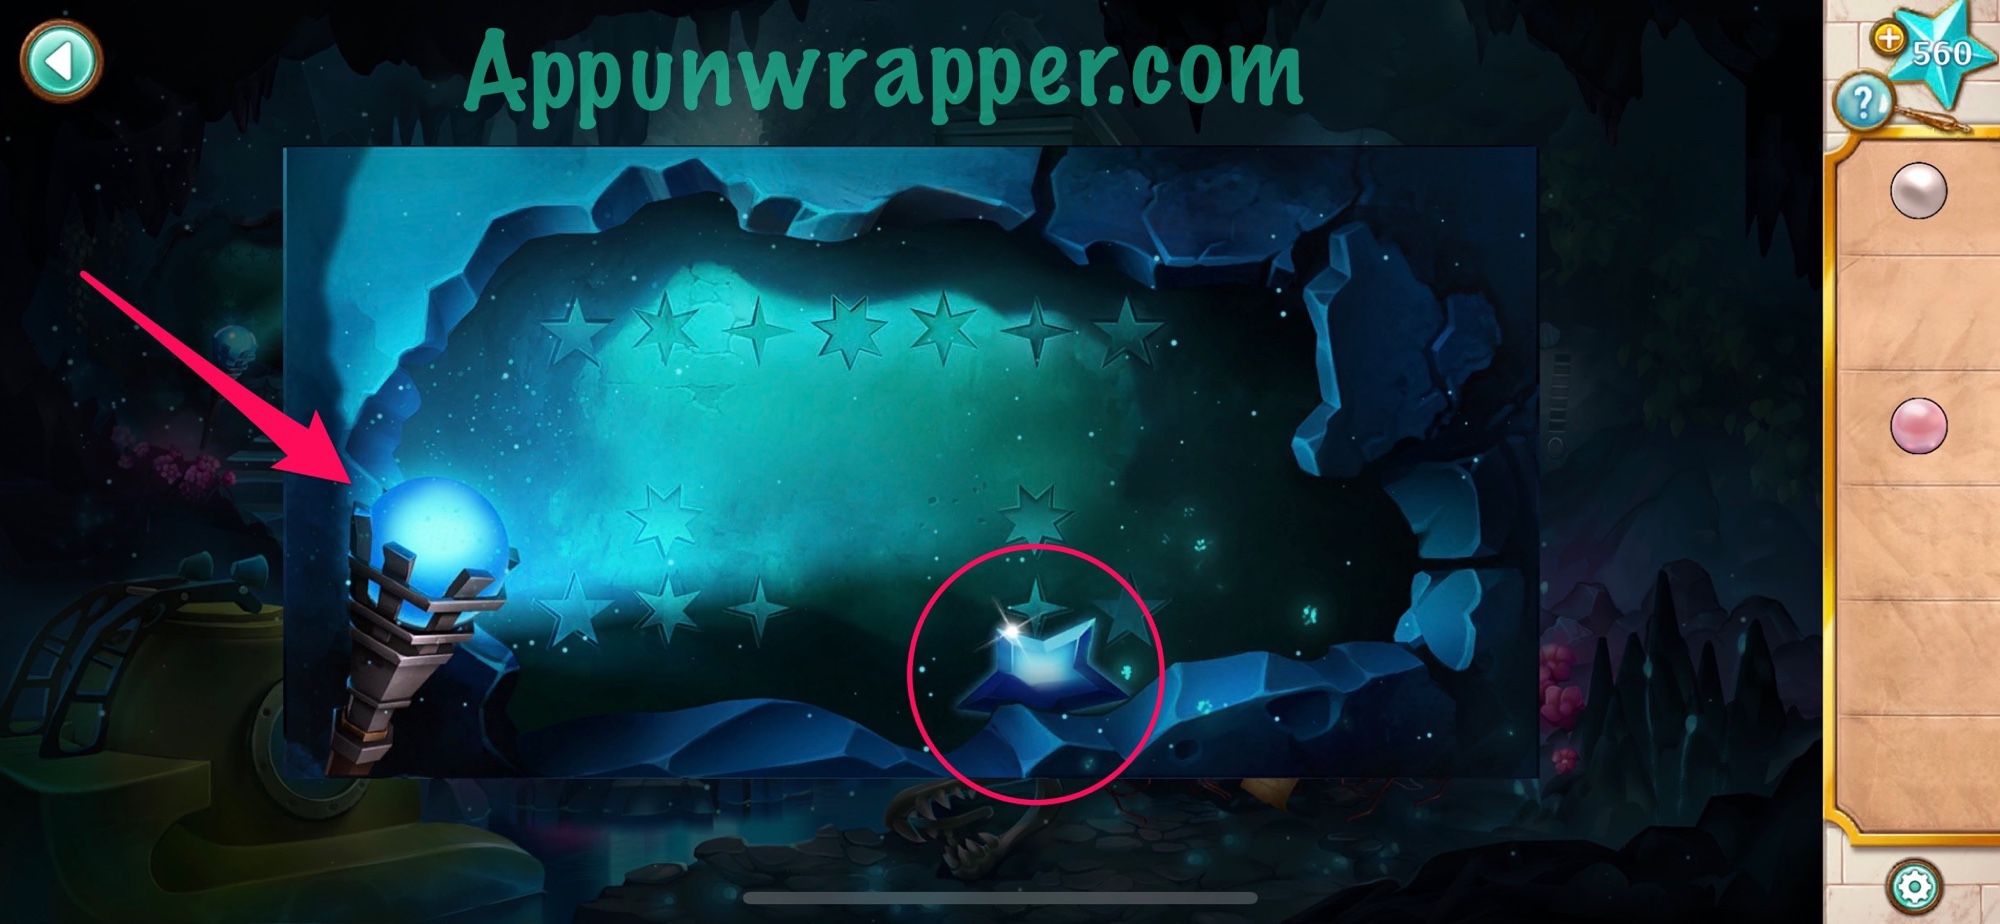
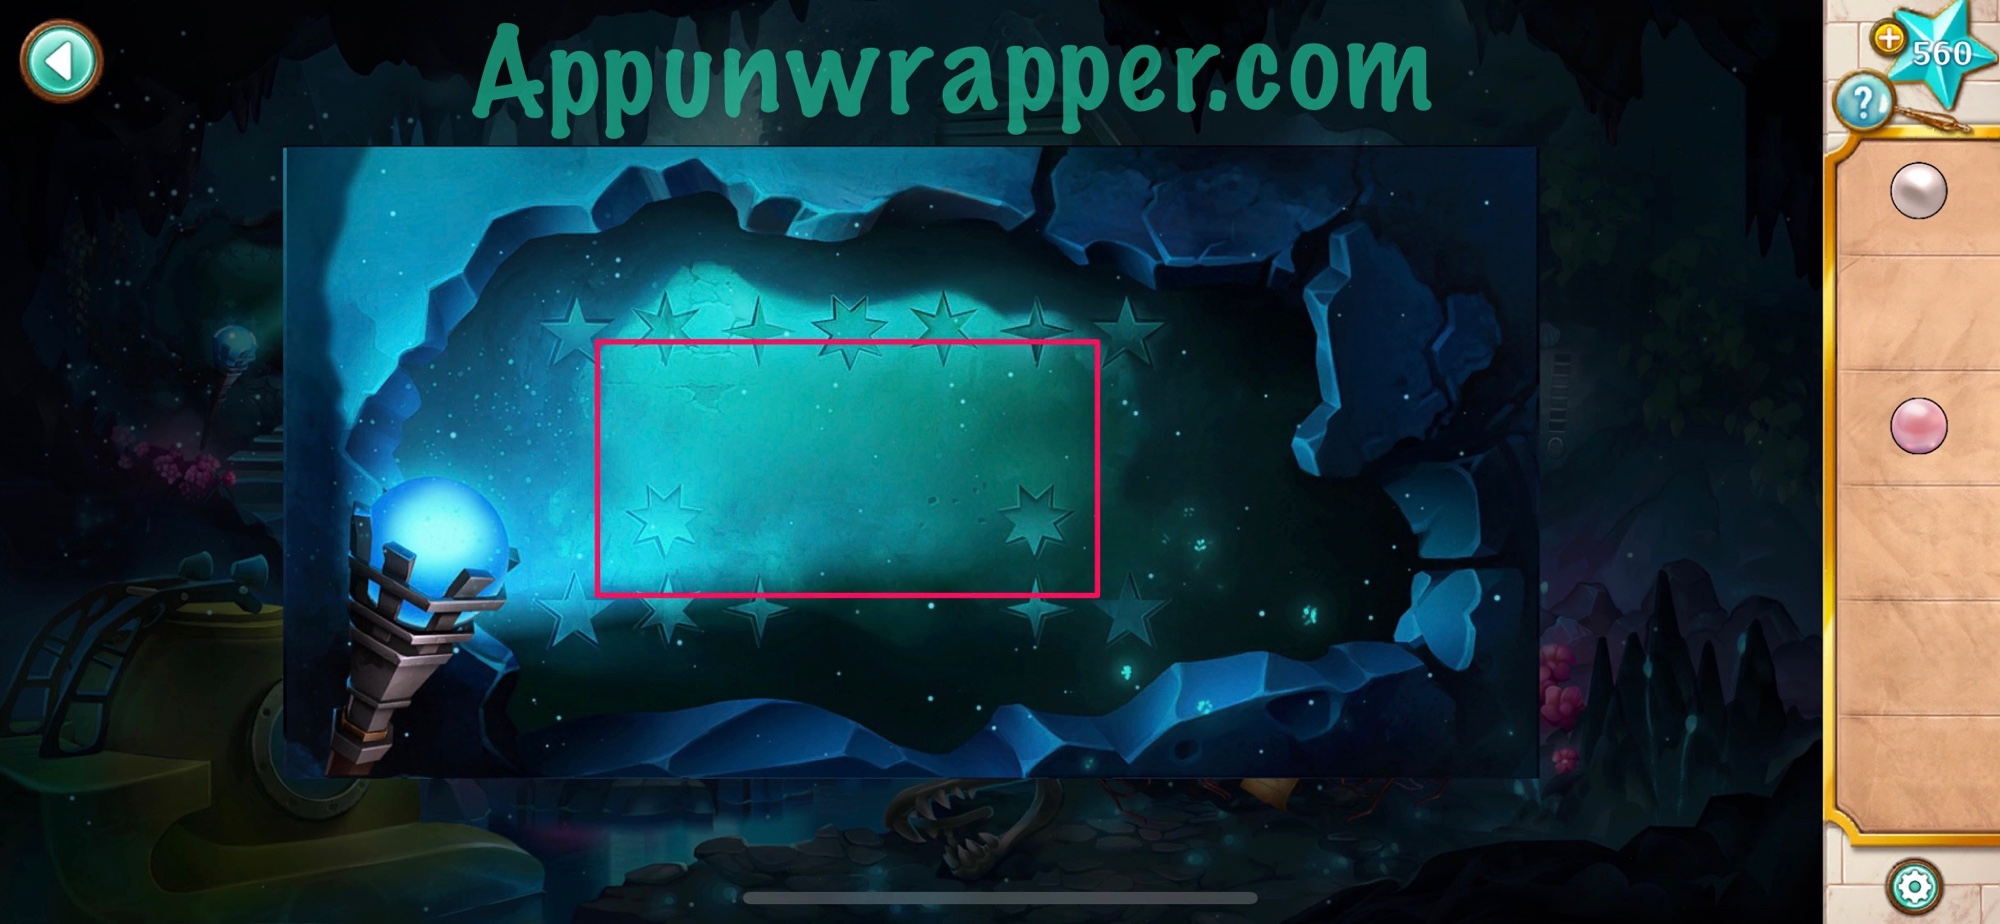
13. Go back to the room with the giant clamshell. Place the star key in the slot on the wall to open the panel. It’s a combination lock with Roman numerals for 4, 5, 6 and 7. Basically, find the stars in the other room with that number of points on it and then connect them to see what shape they make. I drew the shapes for you below so you can see. Then take the purple pearl.


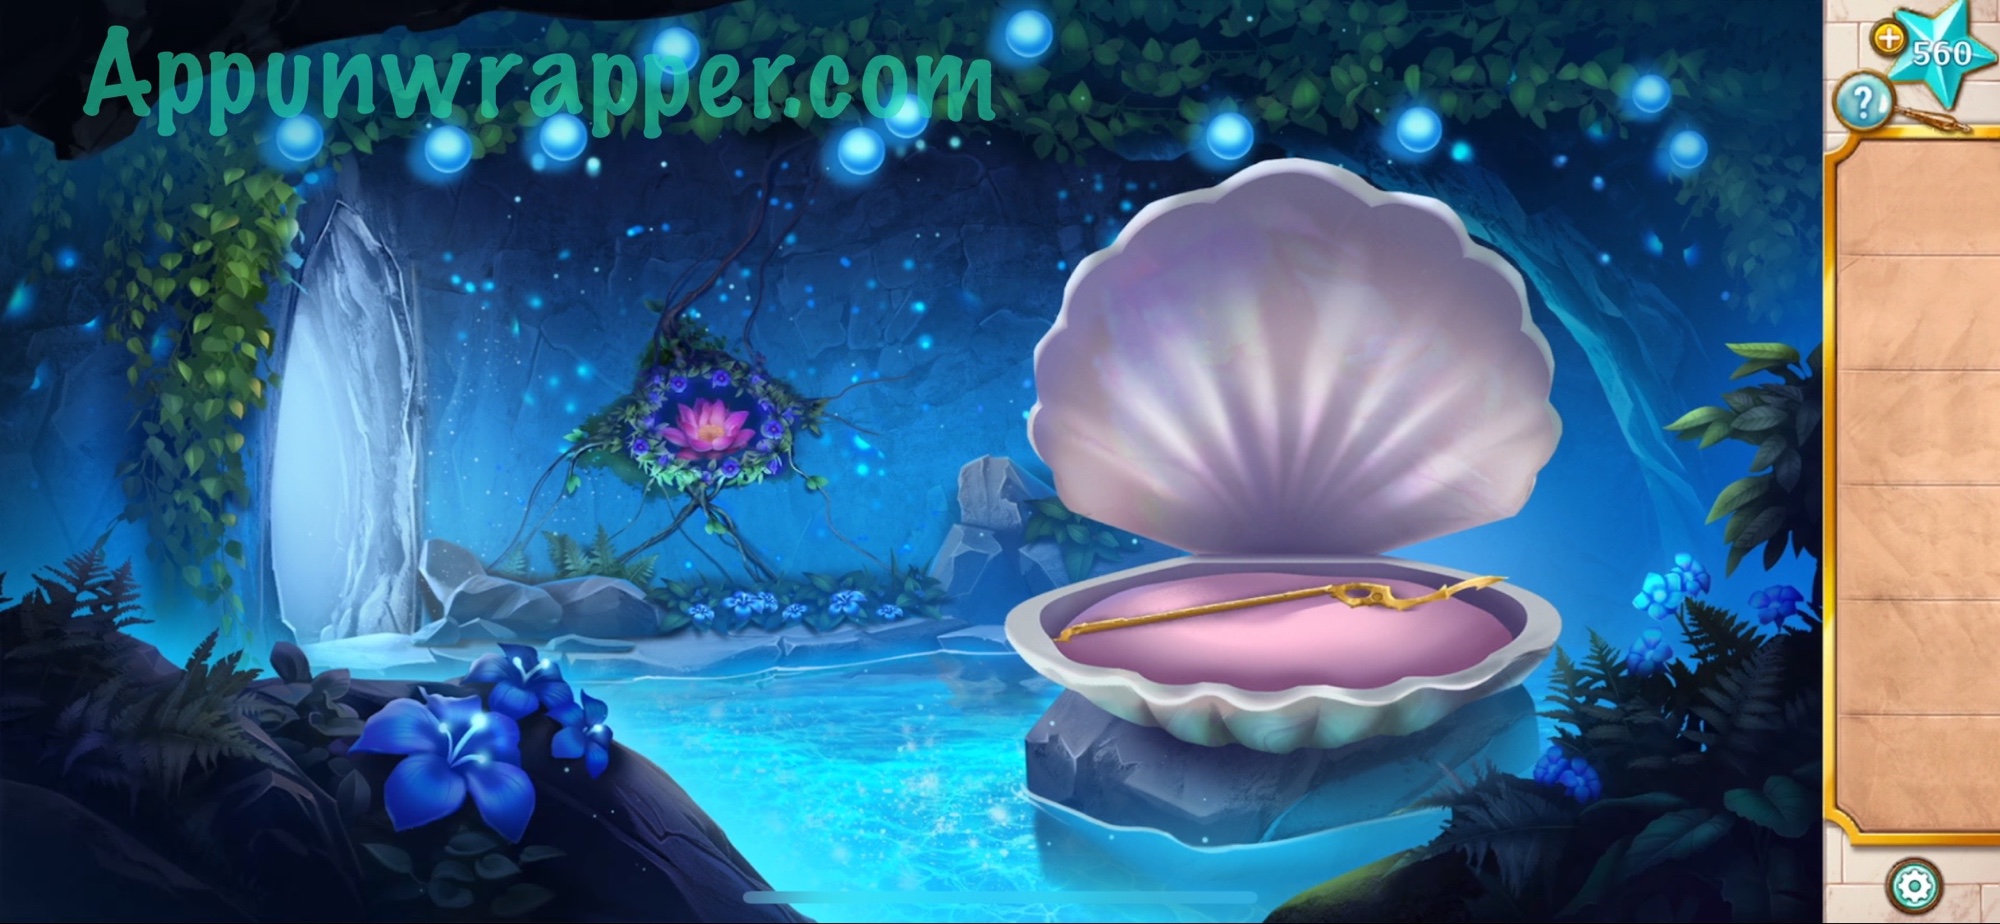
14. We now have all three pearls. Go back to the clamshell and place them in the slots to get the next piece of Poseidon’s trident.
15. Now we’re back with Xochi. Pick up the disc, spade and gold coin.

16. Examine the wall in front of you and pull down ten left lever. We’re missing the other. Head up to the structure at the top of the stairs. Take the handle from the ground. Also, drain the left basin and grab the coin.
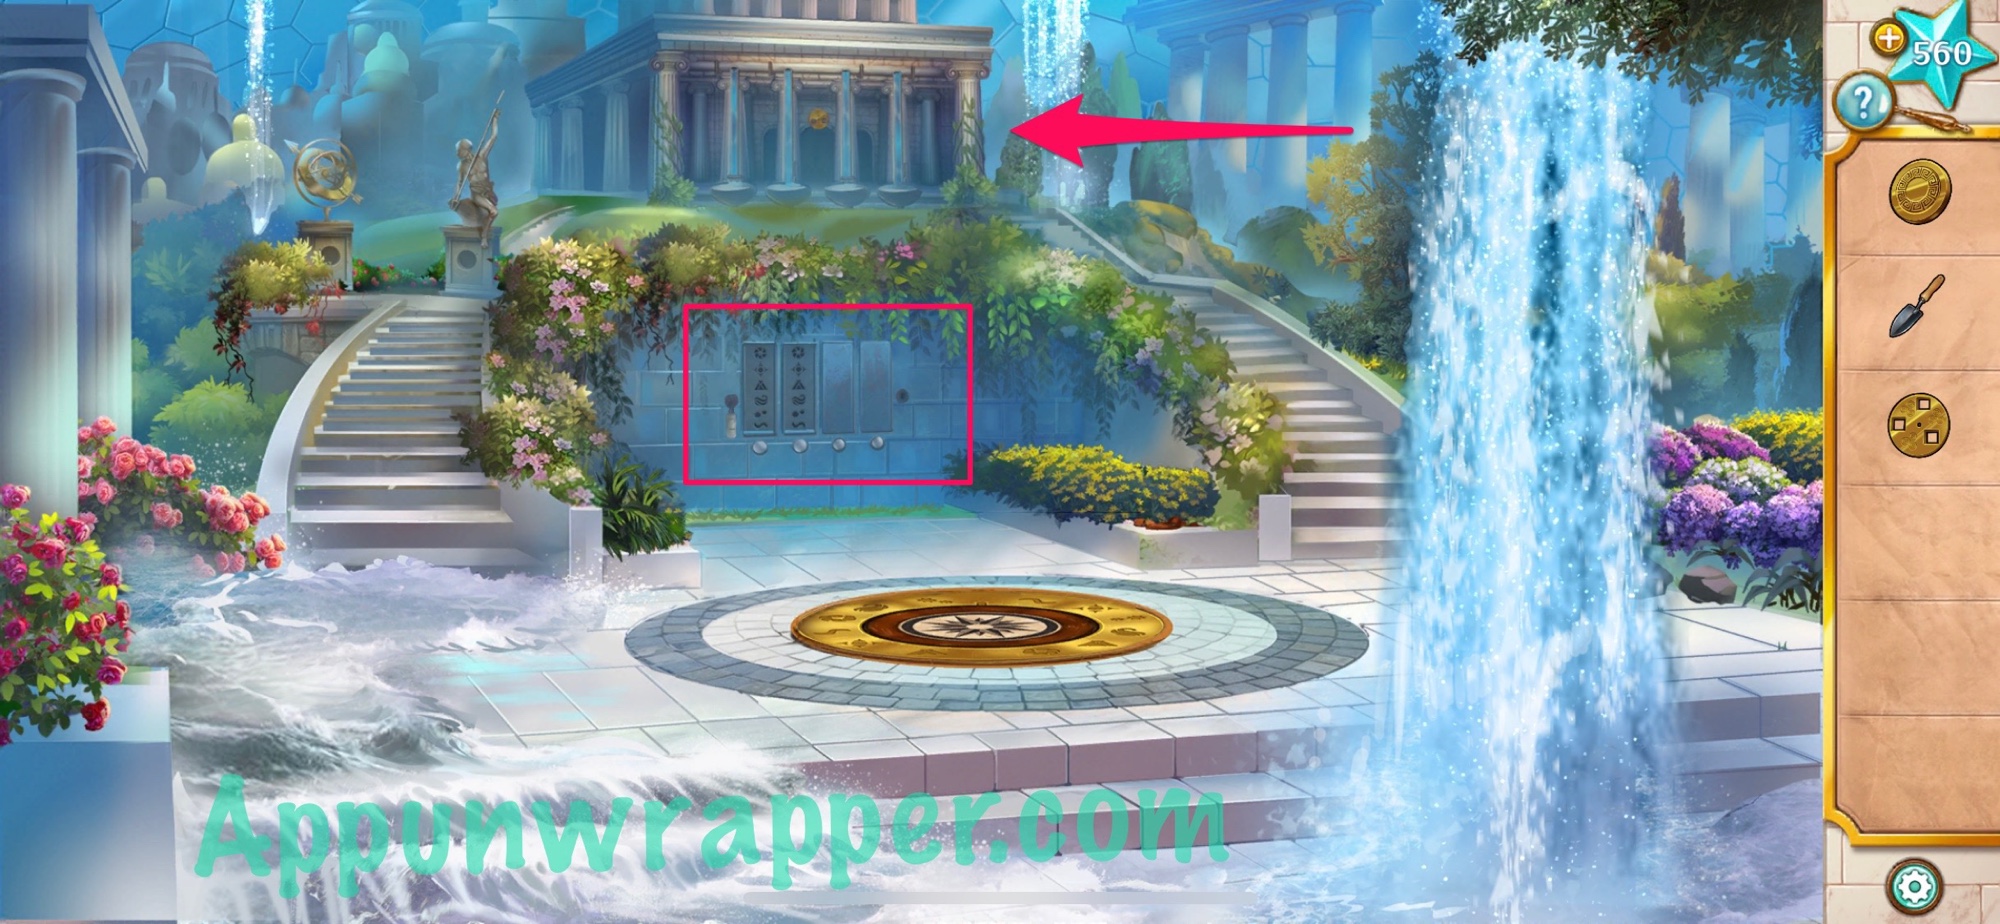
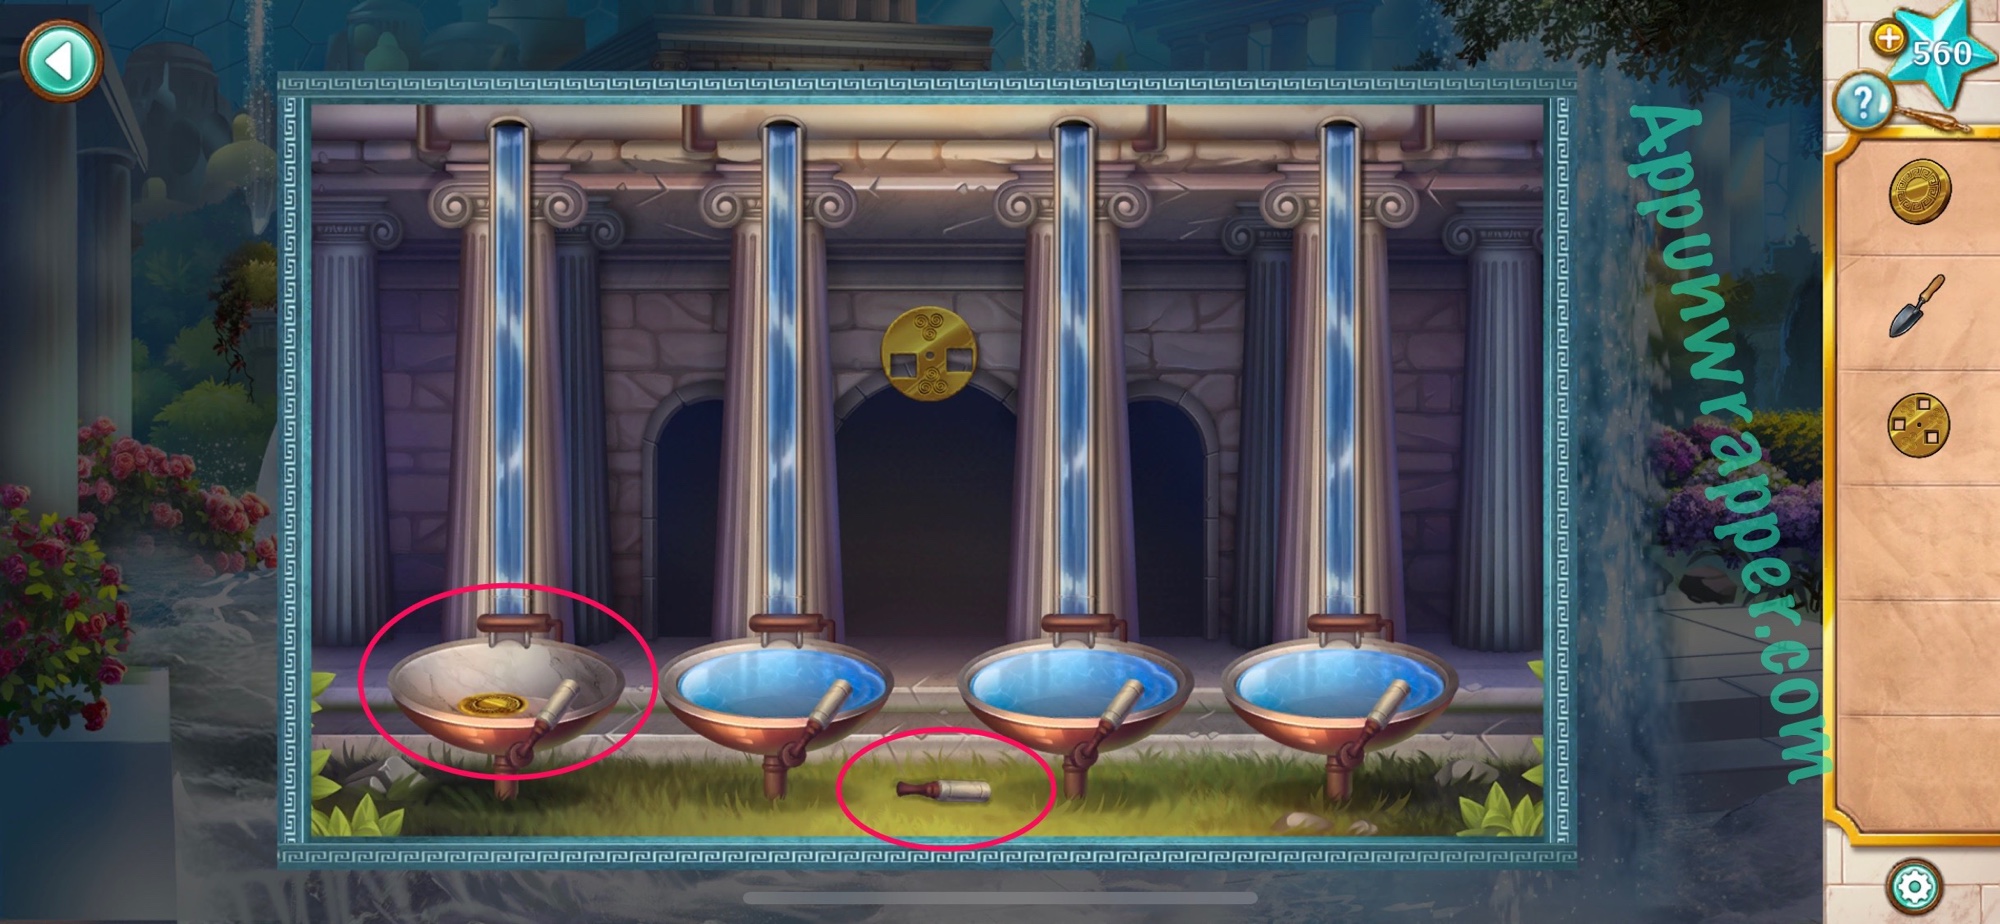
17. Go back downstairs. Place the other lever on the wall and pull it down. We’ll come back to it later. Head up the left stairs and use the shovel to dig up another disc. Also, place a coin below each statue and take the spear and the golden circle.

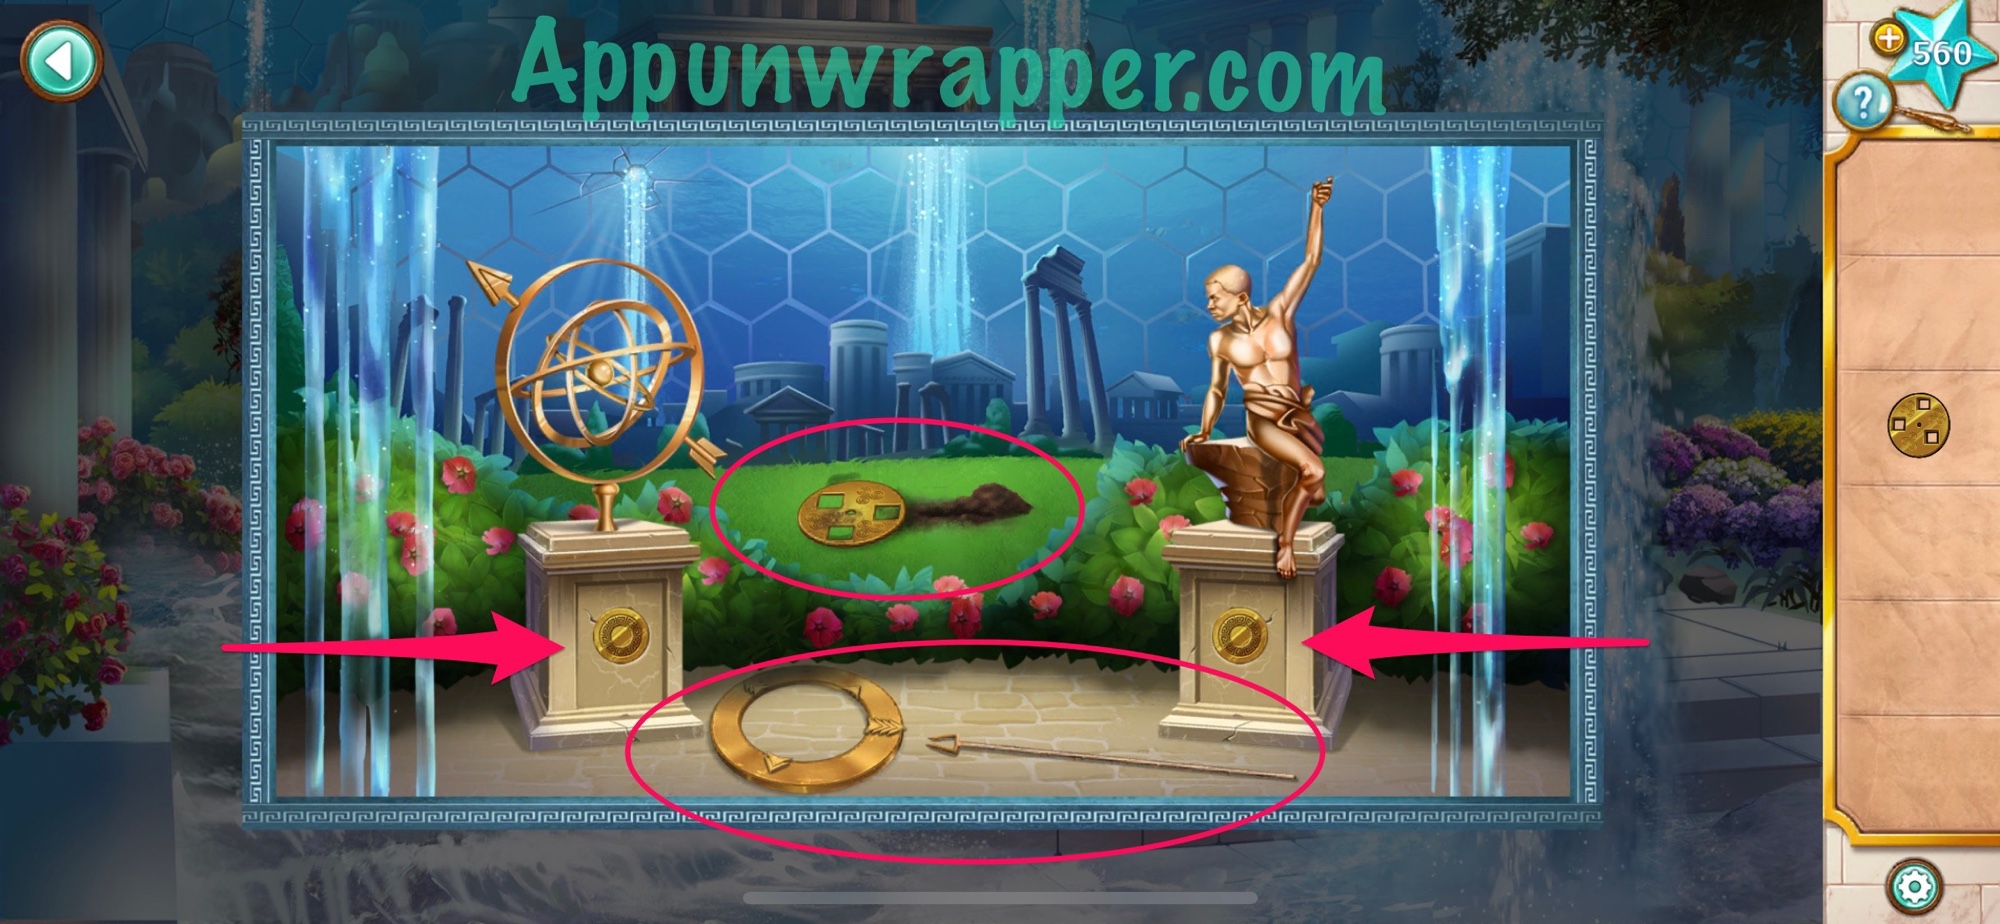
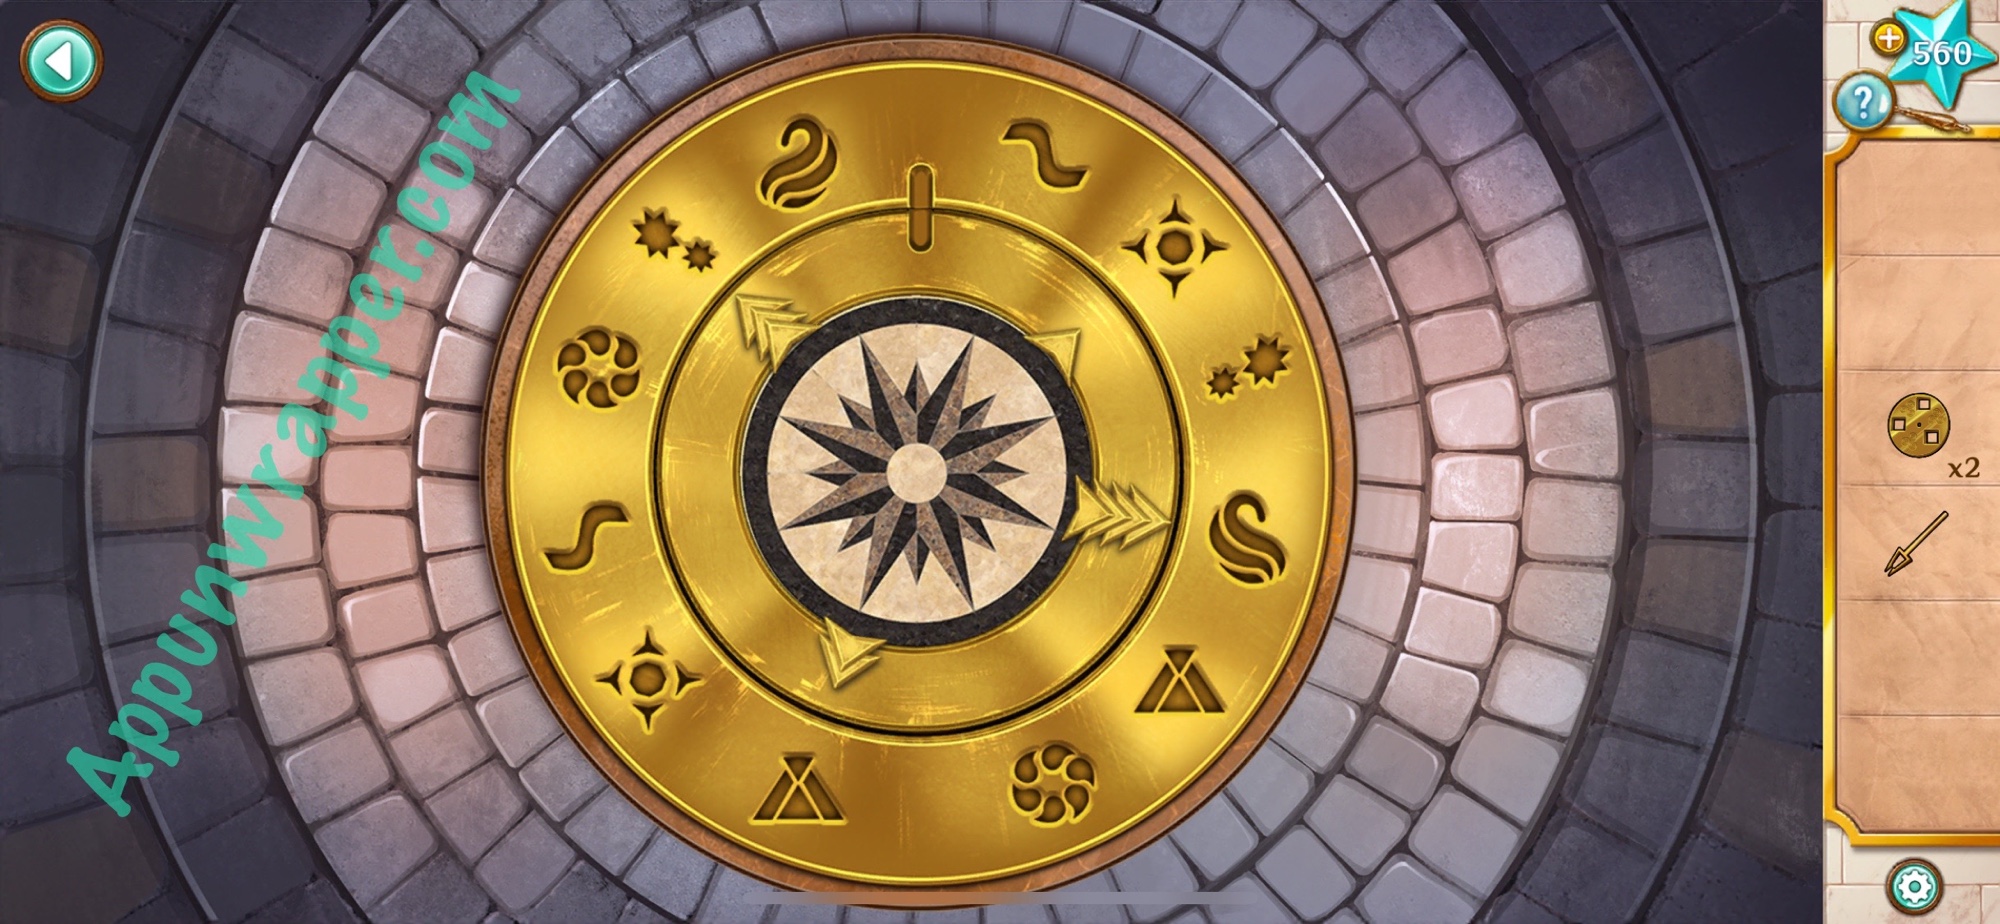
18. Go back down. Place the golden circle in the center of the big mosaic with symbols. Lock the ring into place to see where the arrows should be pointing.
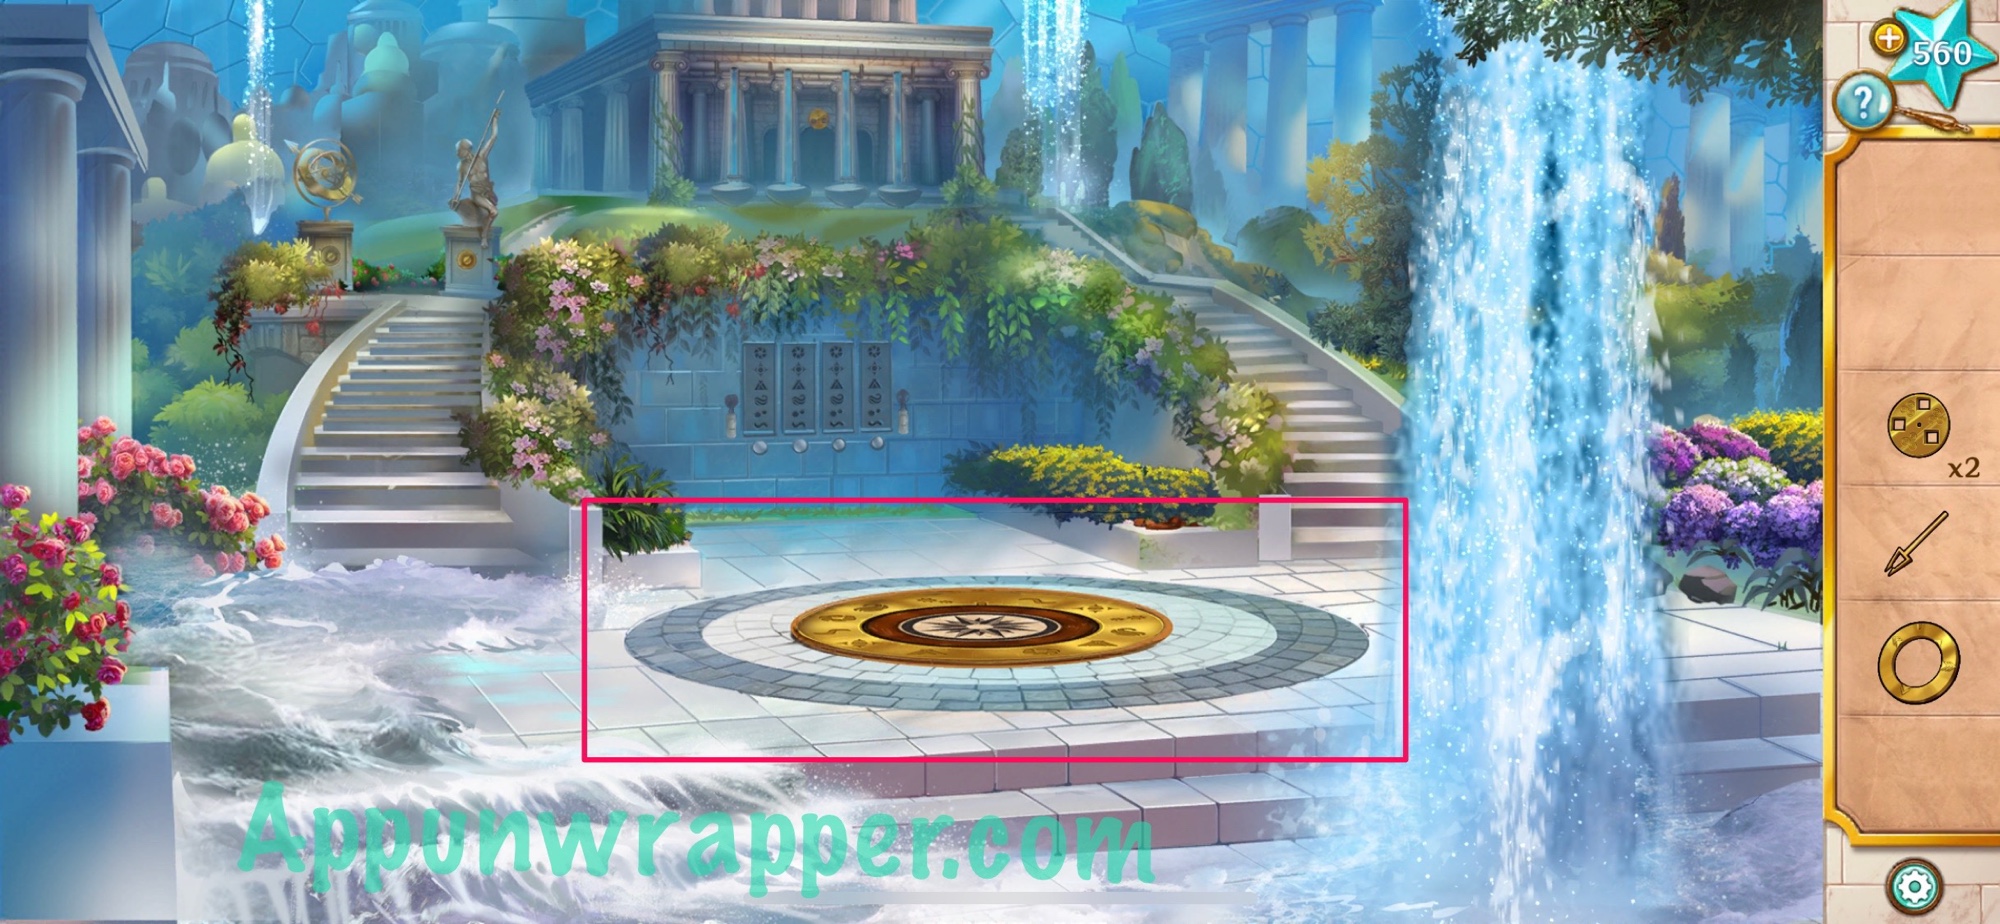
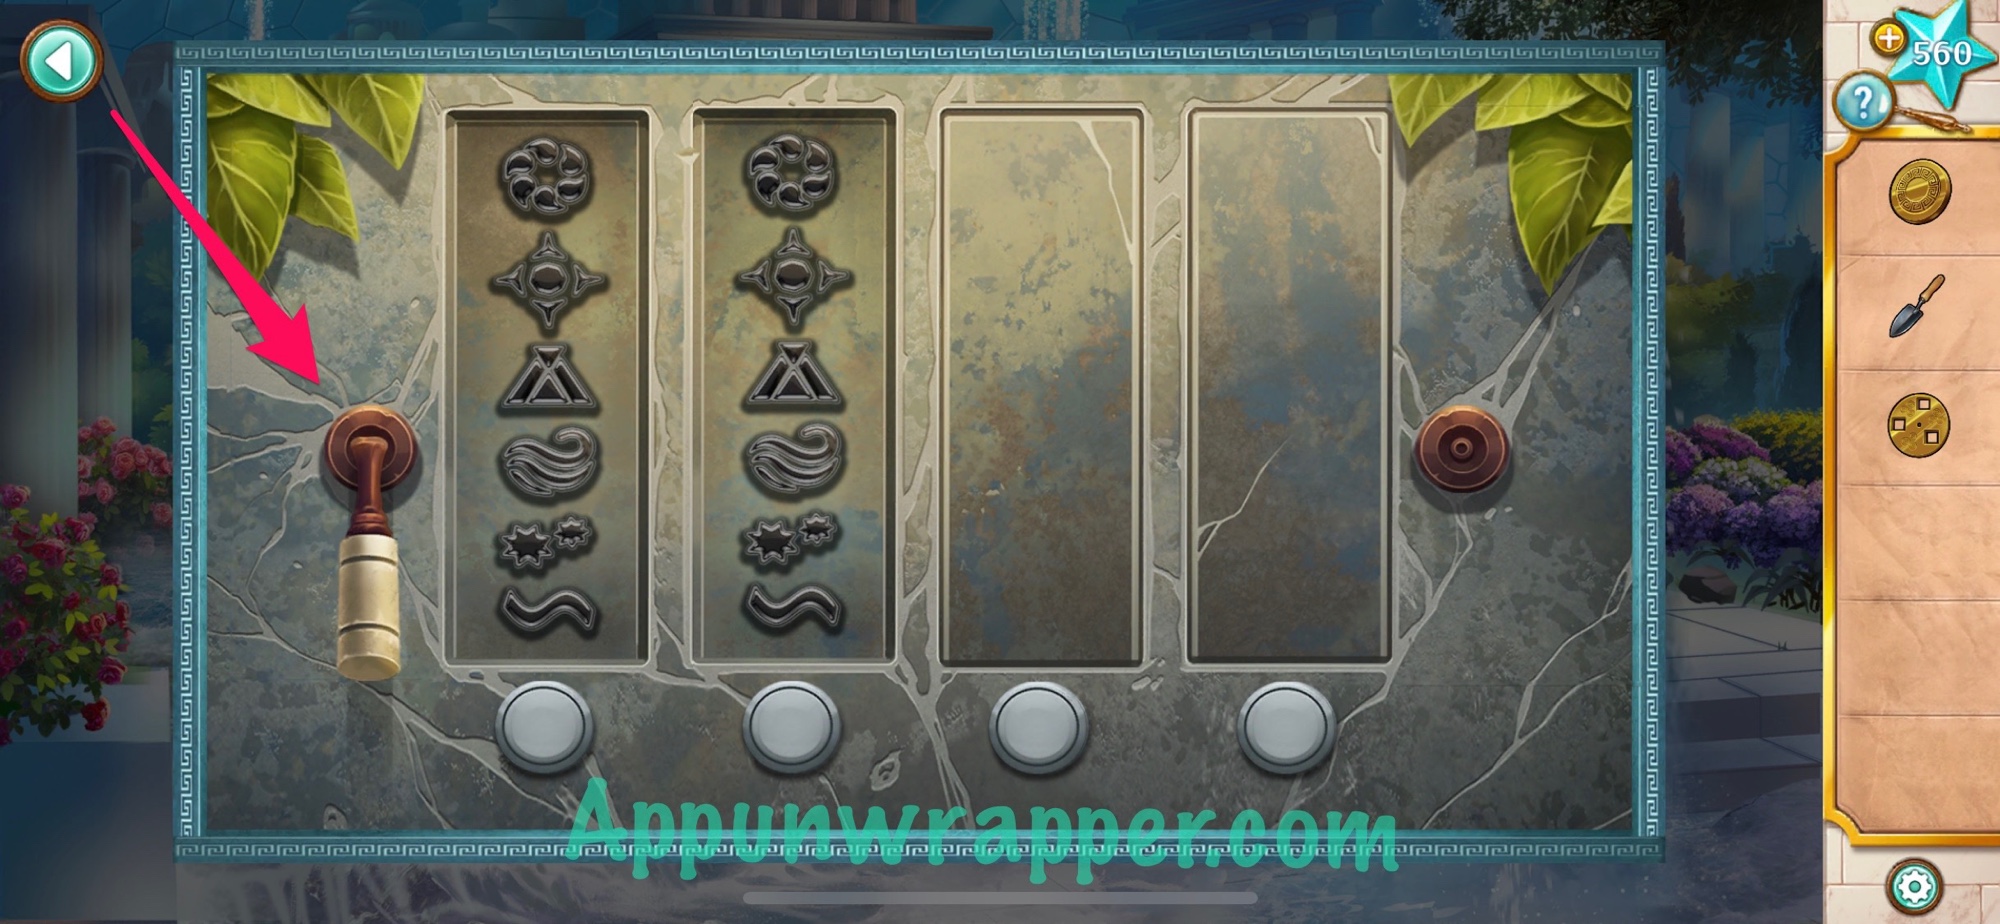
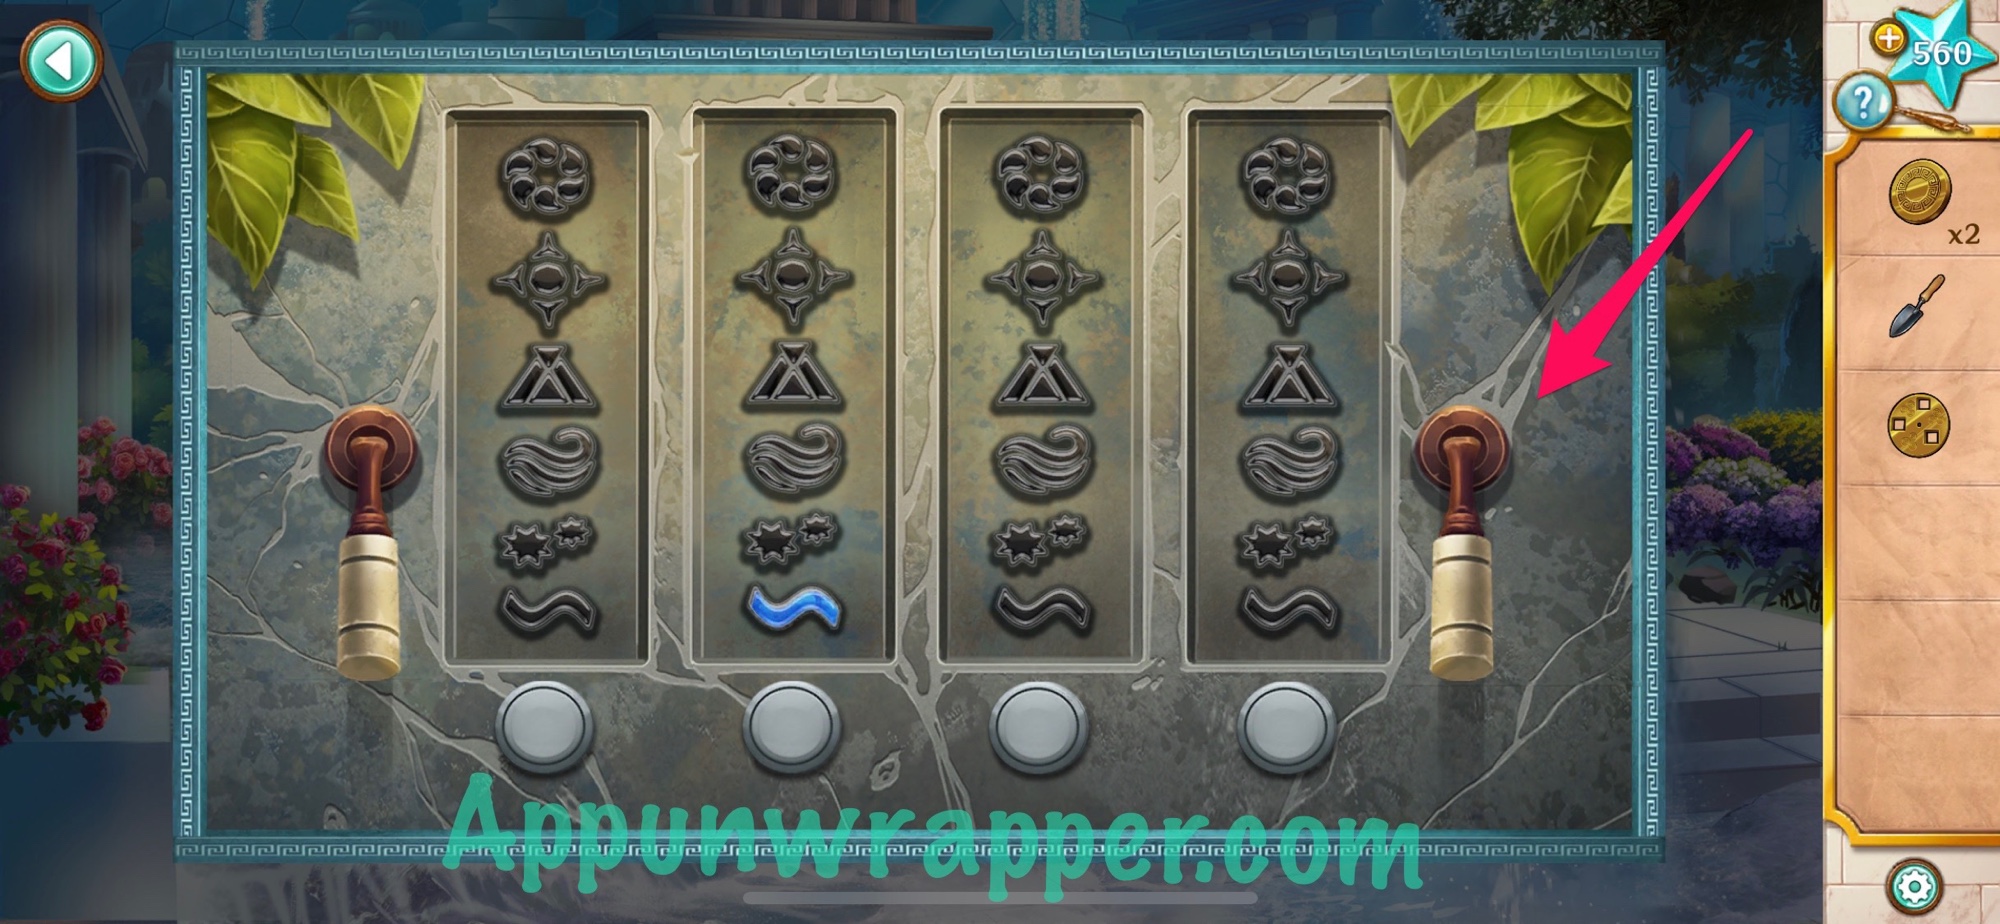
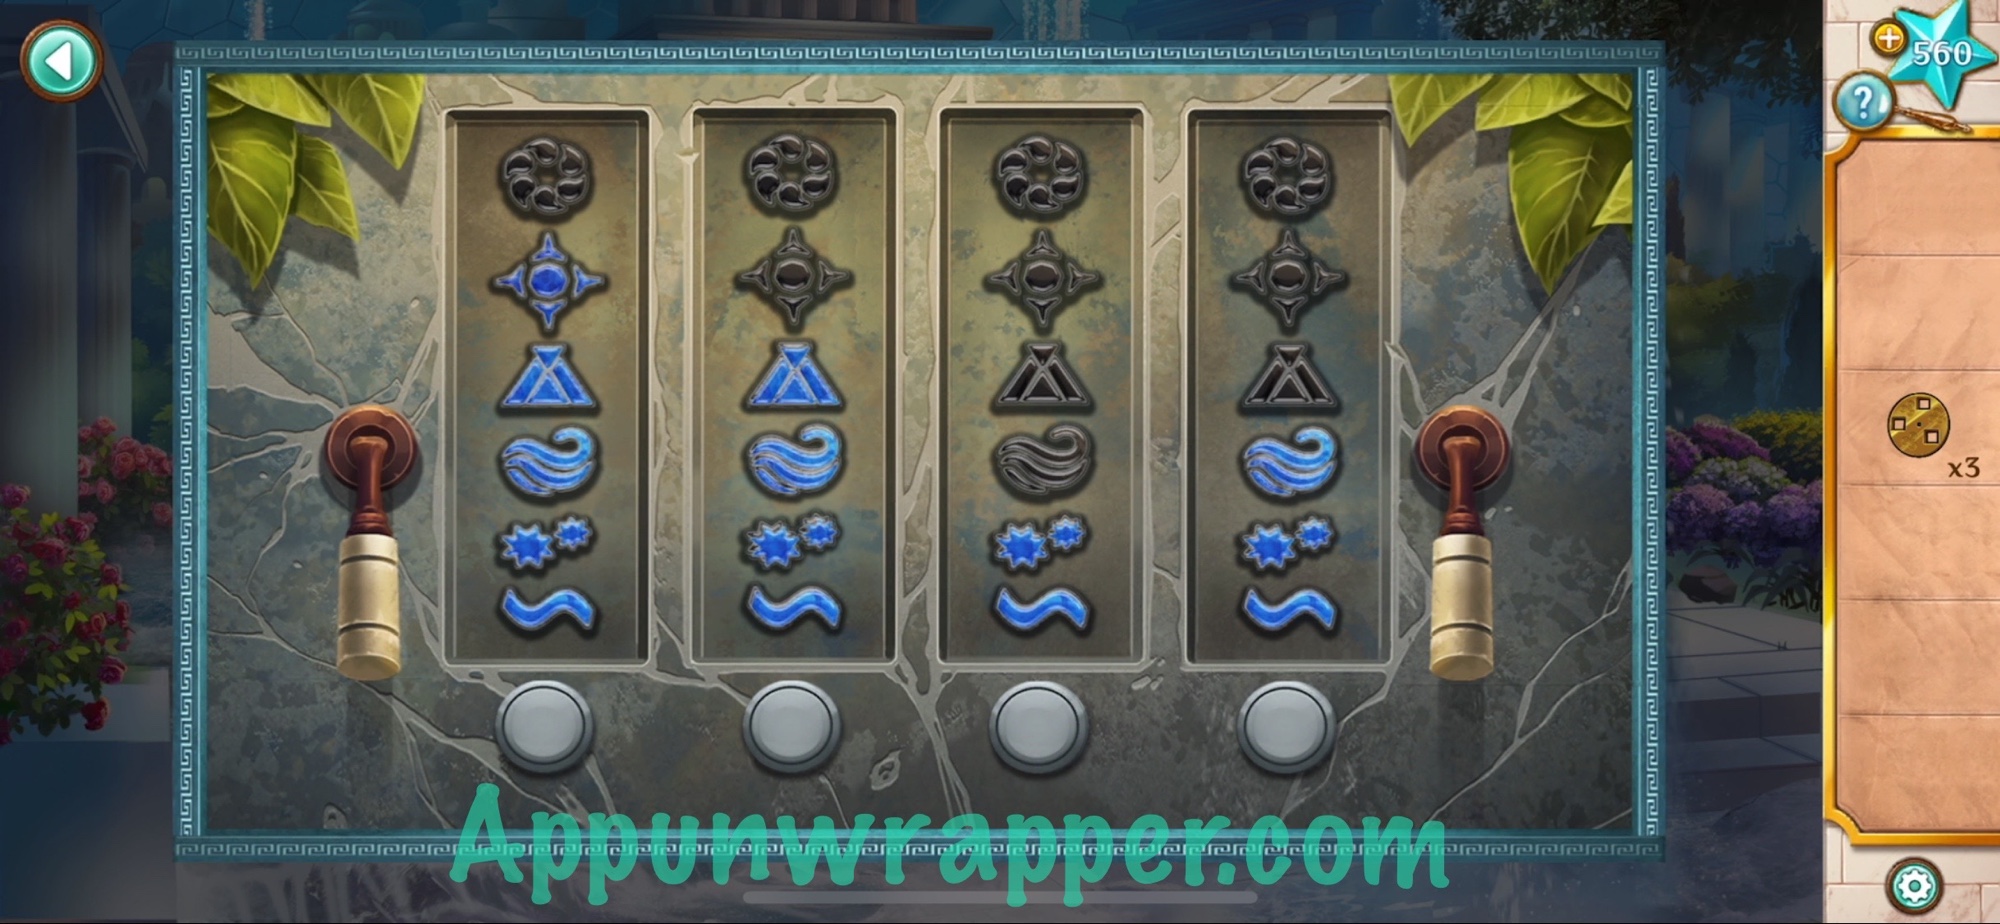
19. Go back to the top of the stairs and use the spear to reach the disc above the four basins. While here, pull all the levers as much as you can in order to fill all the symbols on the wall below with water.
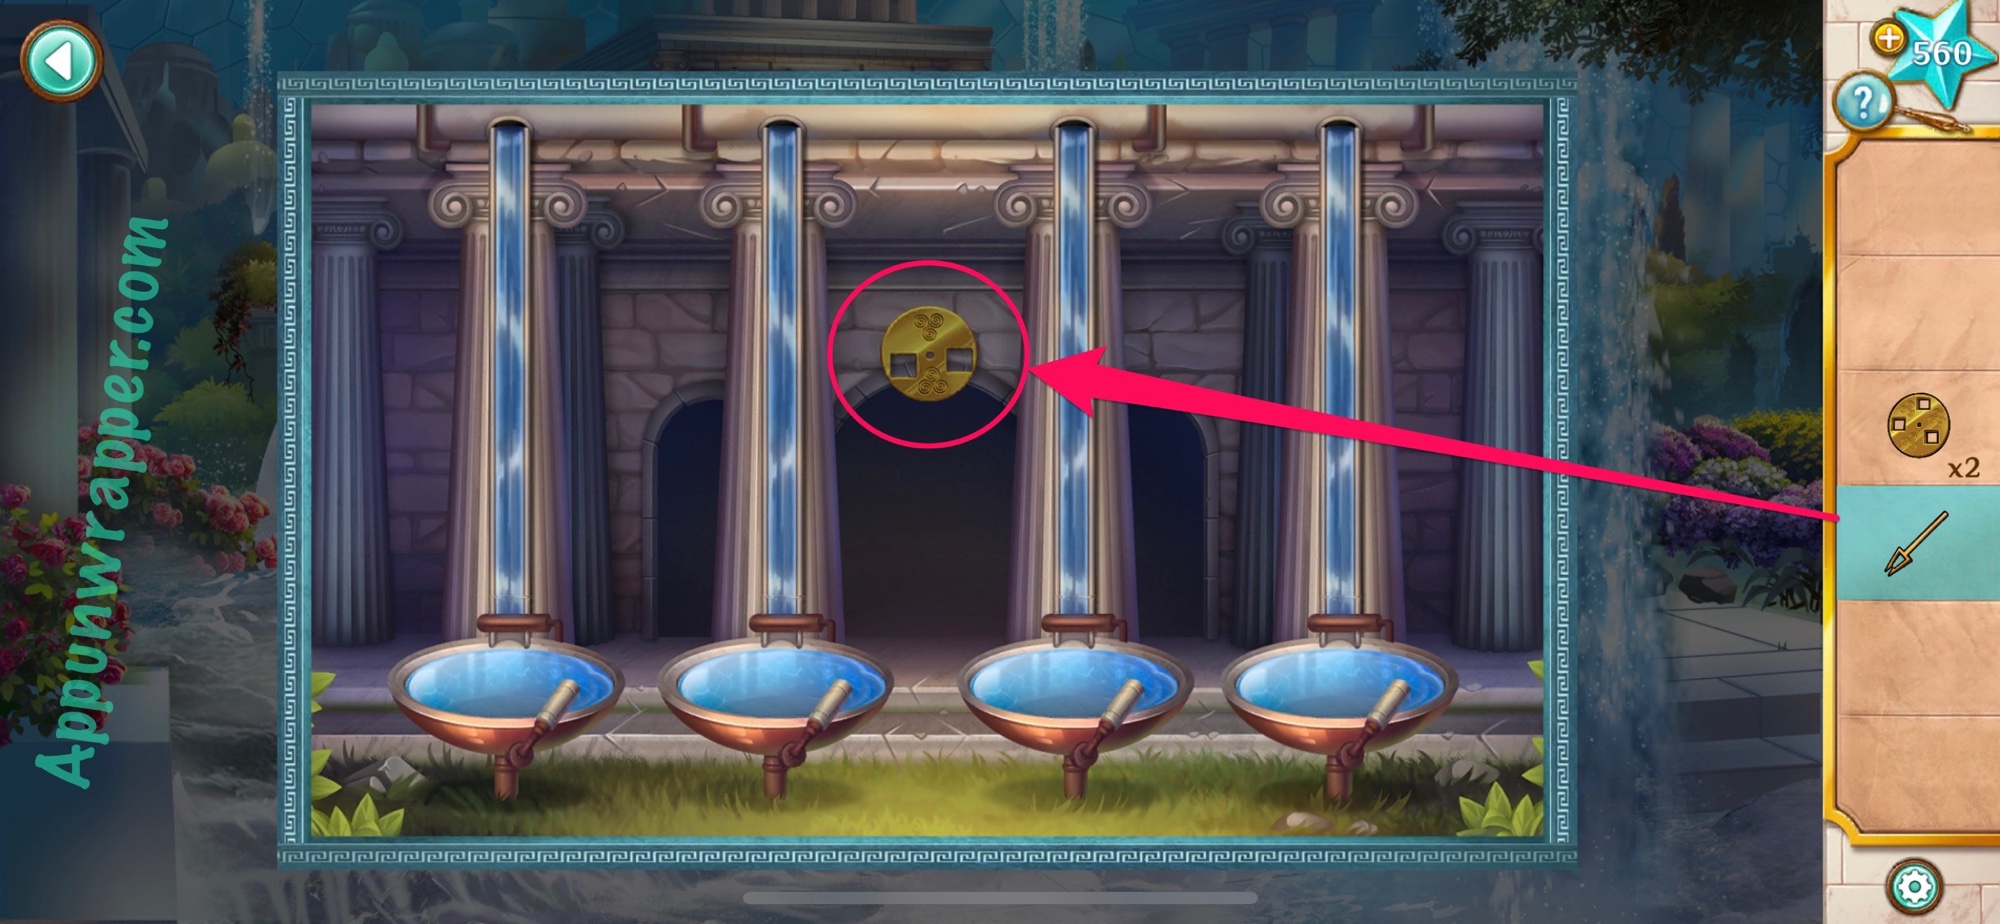
20. Now, use the buttons below each column of symbols to drain water from one symbol at a time until the columns match the symbols the arrows were pointing to on the ground. Make sure to pay attention to the number of arrows by each symbol to figure out the order. It should look like this in the end:
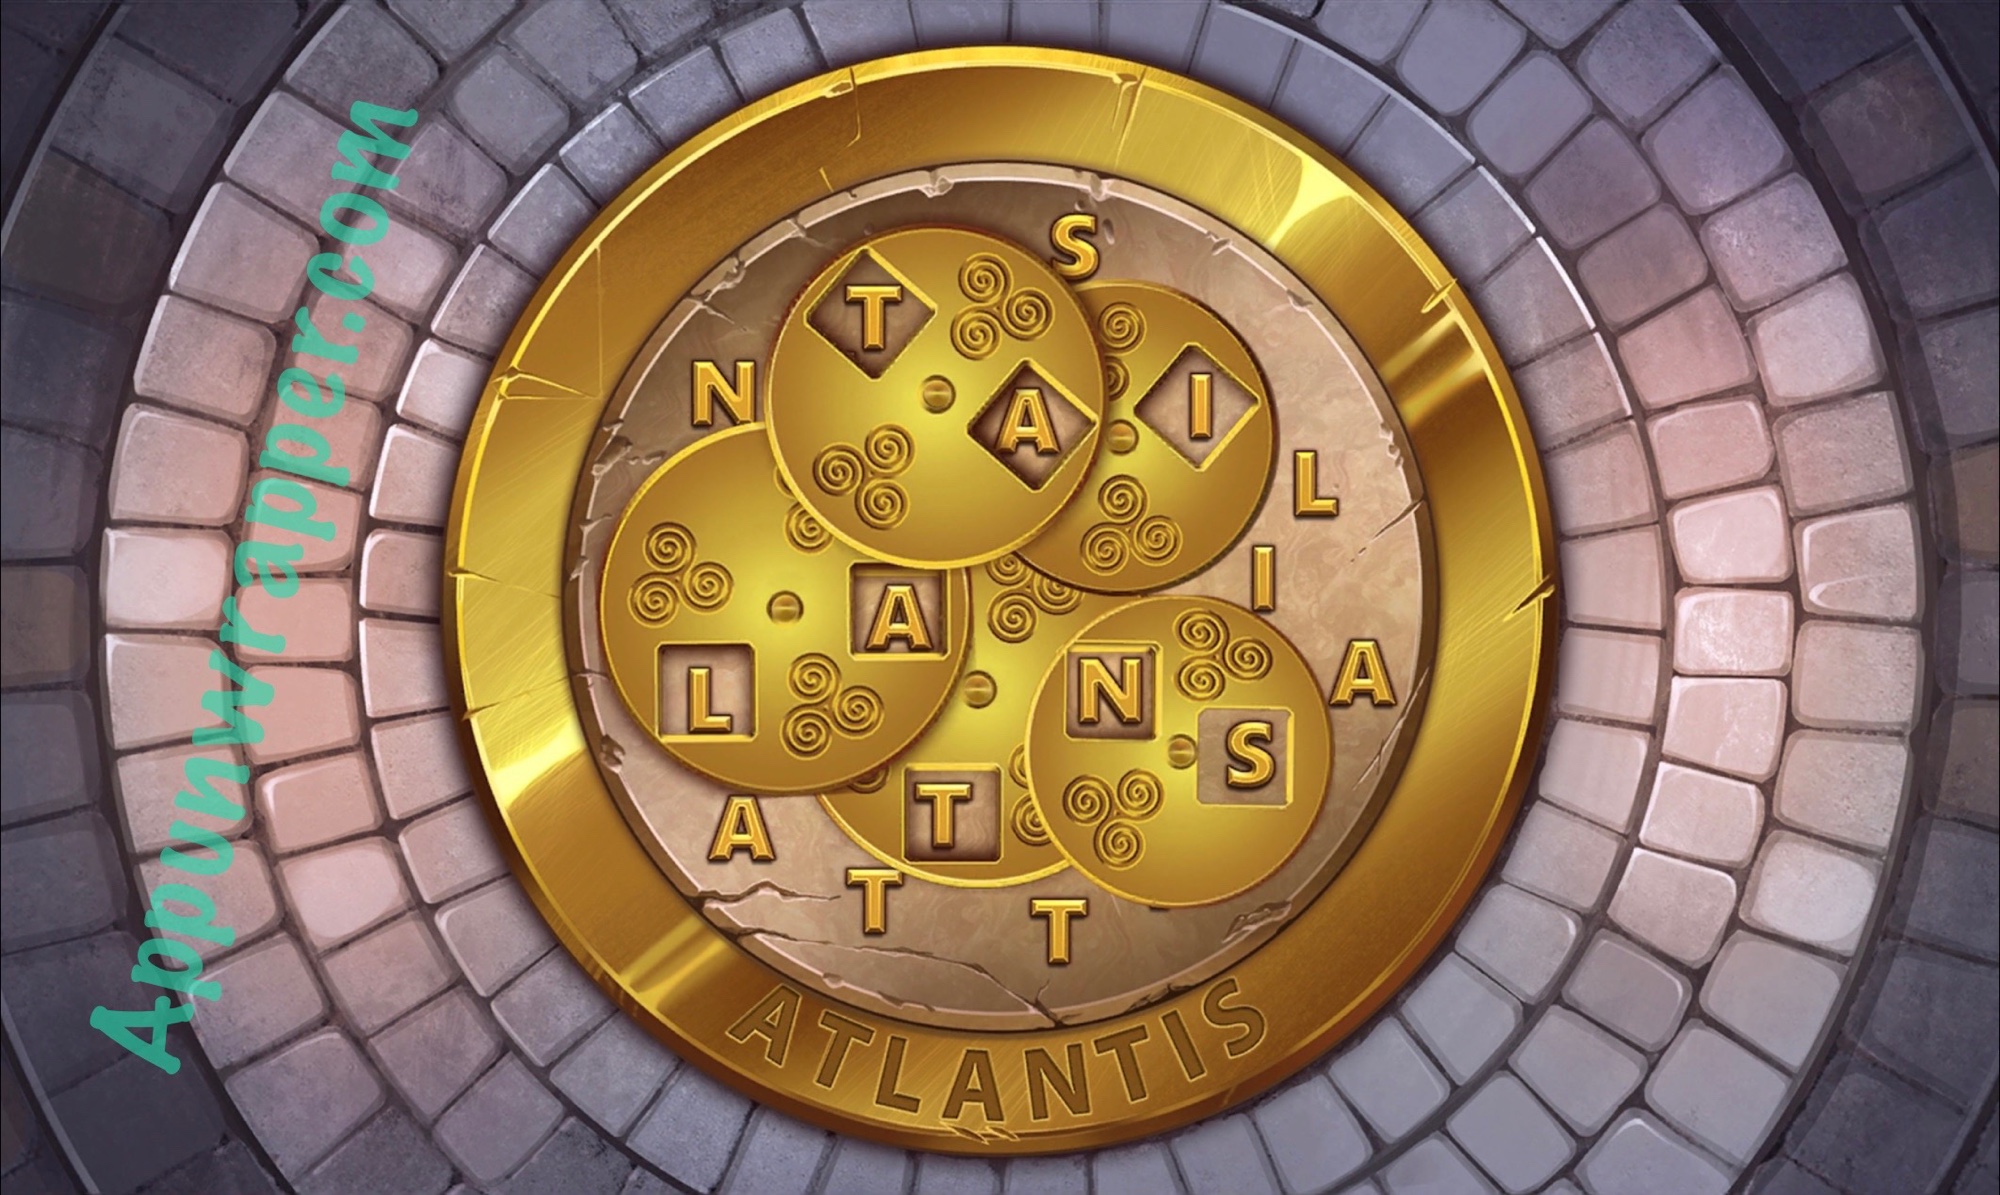
21. A new puzzle is revealed! Let’s solve the Disc Puzzle. Place all three discs down with the rest. We need to place them all so that the holes in the discs reveal the letters of the word ATLANTIS. The discs can overlap, and can be rotated with a tap. There should be no other letters visible within the holes of the disc besides those in ATLANTIS. Now we have the third piece of the trident!
22. Professor Burns shows up and takes Xochi’s part of the trident! Oh no!
And that’s the end of Chapter 7! Click here to continue to Chapter 8 or choose a chapter below.
Chapter 1 | Chapter 2 | Chapter 3 | Chapter 4 | Chapter 5 | Chapter 6 | Chapter 7 | Chapter 8

I is easy, look at the radar and choose the direction and the coordinate it’s in. In between 10 and 20 so it’s 15. In NW direction so NW.
II – I passed too quickly I don’t remember the answer. But I think it was E 13? E for east, direction arrow is pointing to. 13 possibly the number of lines in the shape.
III – don’t remember
IV – addition of white numbers, subtract green numbers, divide by 2. Should be 3. Not sure how to figure out direction so just clicked through them all
II – add the numbers up as indicated by the pathway in the map, direction is as per the way the statue is pointing
III – overlaying the scroll on the numbers, do the math to arrive at the answer, direction is SE (the S and E overlap each other to form the symbol on the right)
IV – work out the sum as described by M, but the answer is 04. The direction is W as shown by the pictures of the sun setting (sun sets in the West)
Someone forgot how order of operations work….+ 5 ΓÇô 2 + 4 + 2 ΓÇô 3 + 3 + 2 ΓÇô 3 / 2 = 9.5