Station 117
By: Glitch Games

Station 117 is the latest adventure game from Glitch Games. It has you exploring a secret underwater research facility to try and learn what they were studying there. As usual, there’s lots of British humor and tricky puns, but this walkthrough guide should help you if you get stuck. Feel free to ask for extra help in the comments section.
Walkthrough:
Prologue | Chapter 1 | Chapter 2 | Chapter 3 | Chapter 4 | Epilogue
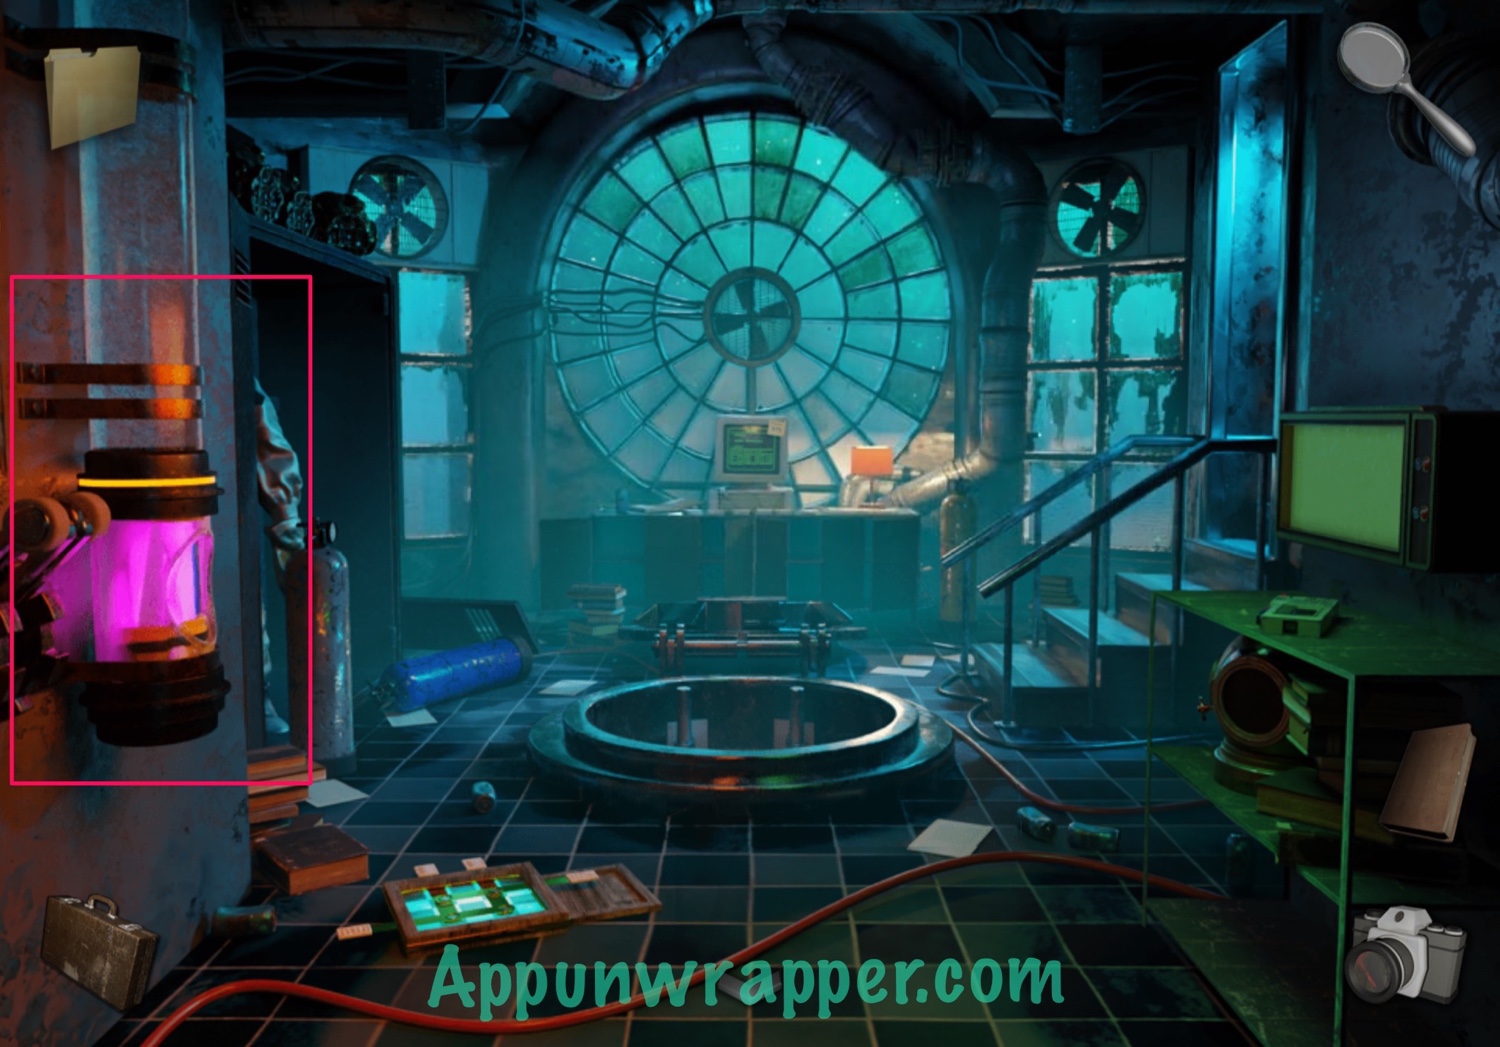
Chapter 4:
1. We’re in the lab. Locate all points of interest. Look at the playing. Arda on the floor and take a photo.
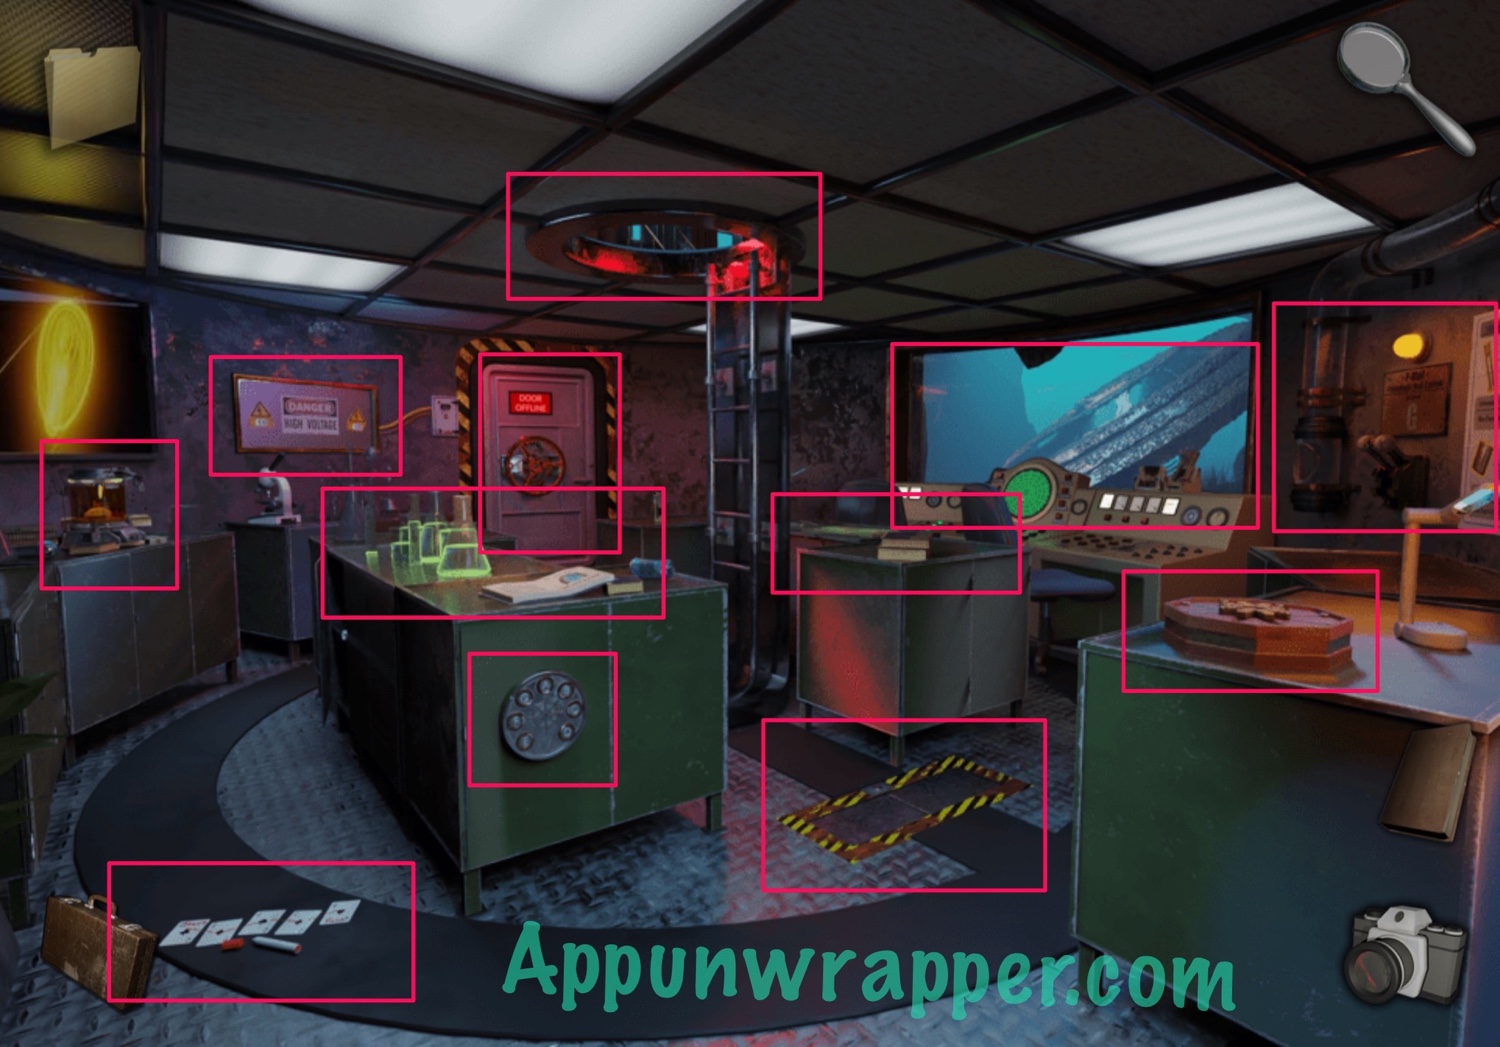

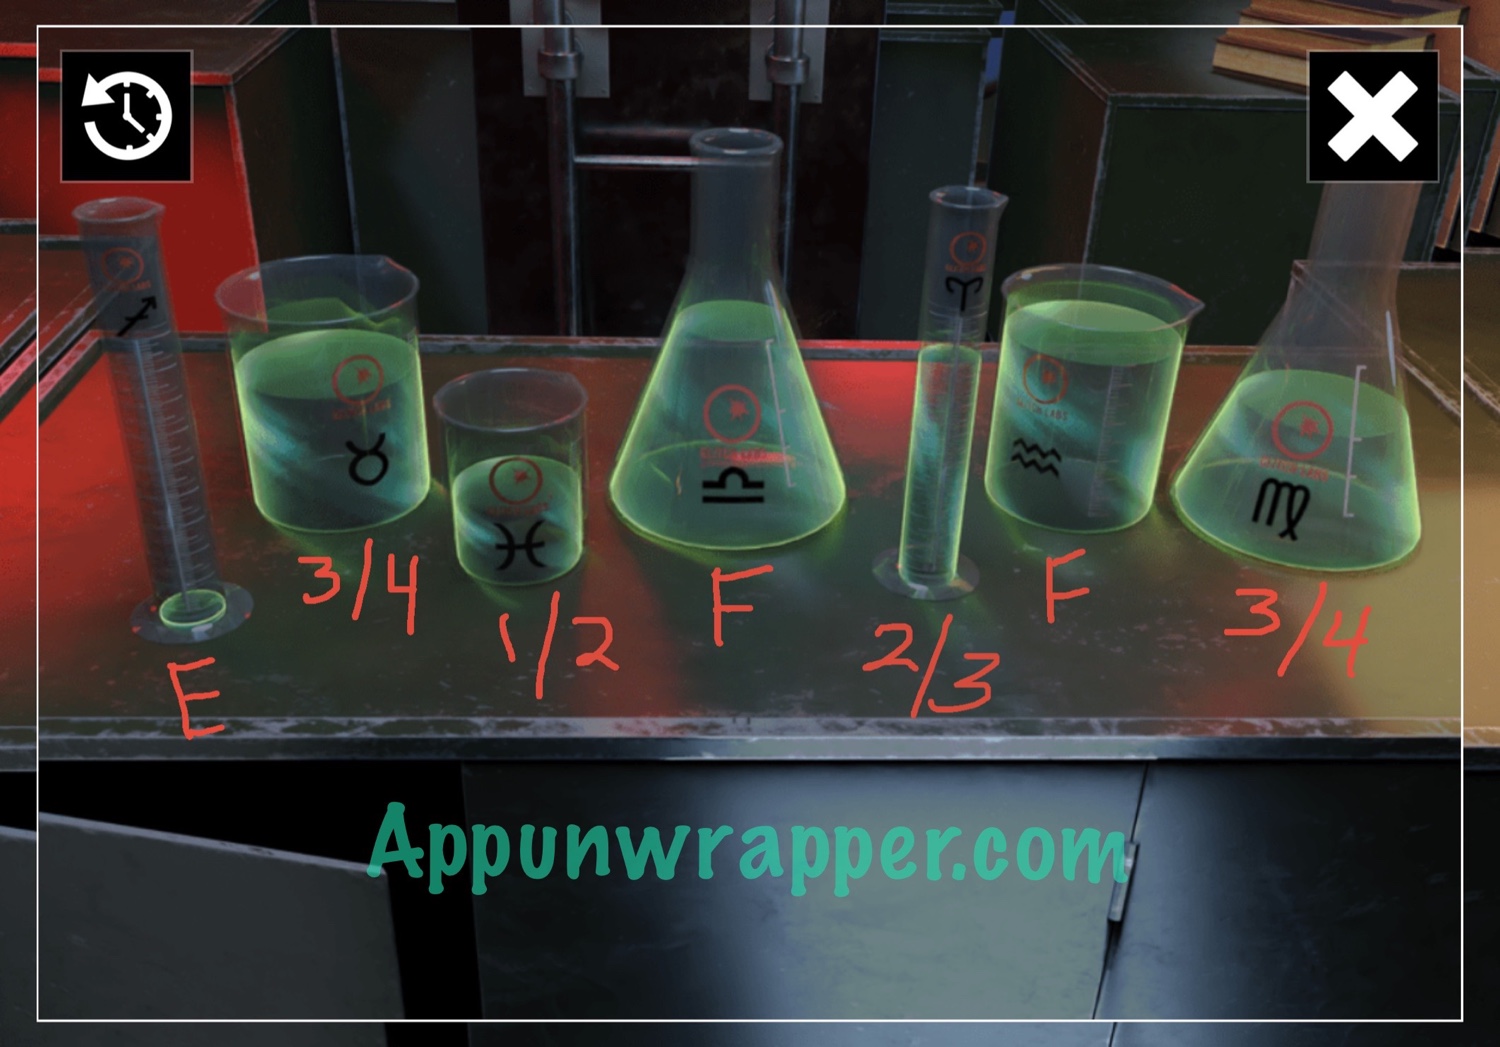
2. Read the book on the table and then look at the chemistry set. Tap on each bottle of liquid to see how full it is. Then take a photo and write those numbers below each bottle.

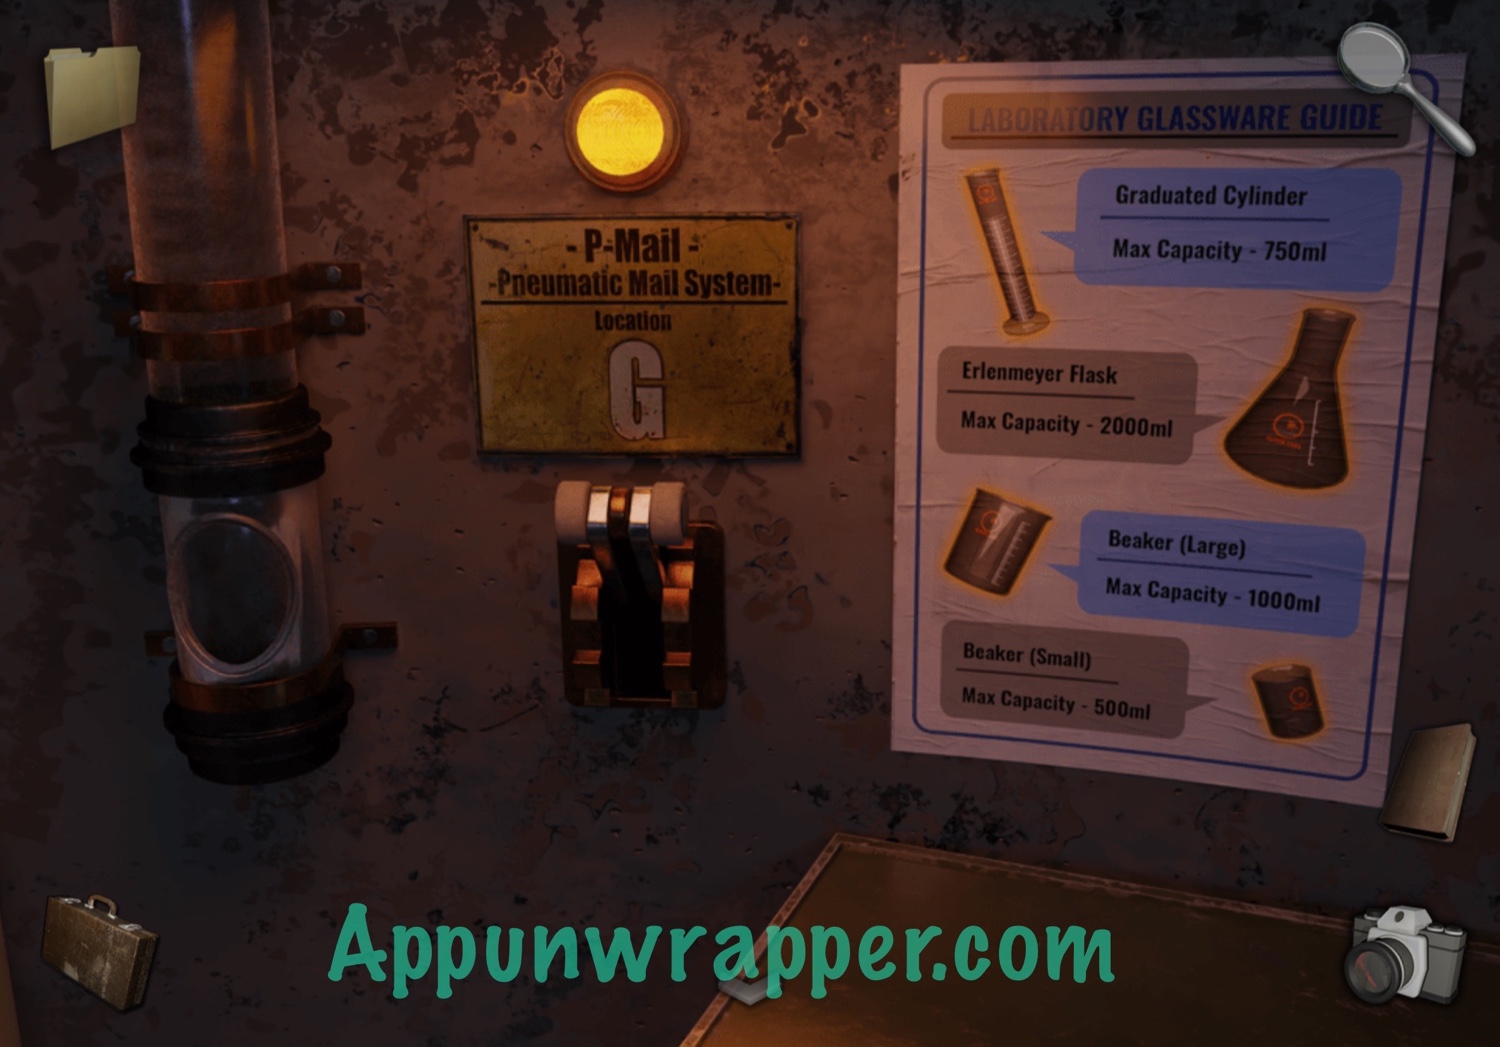
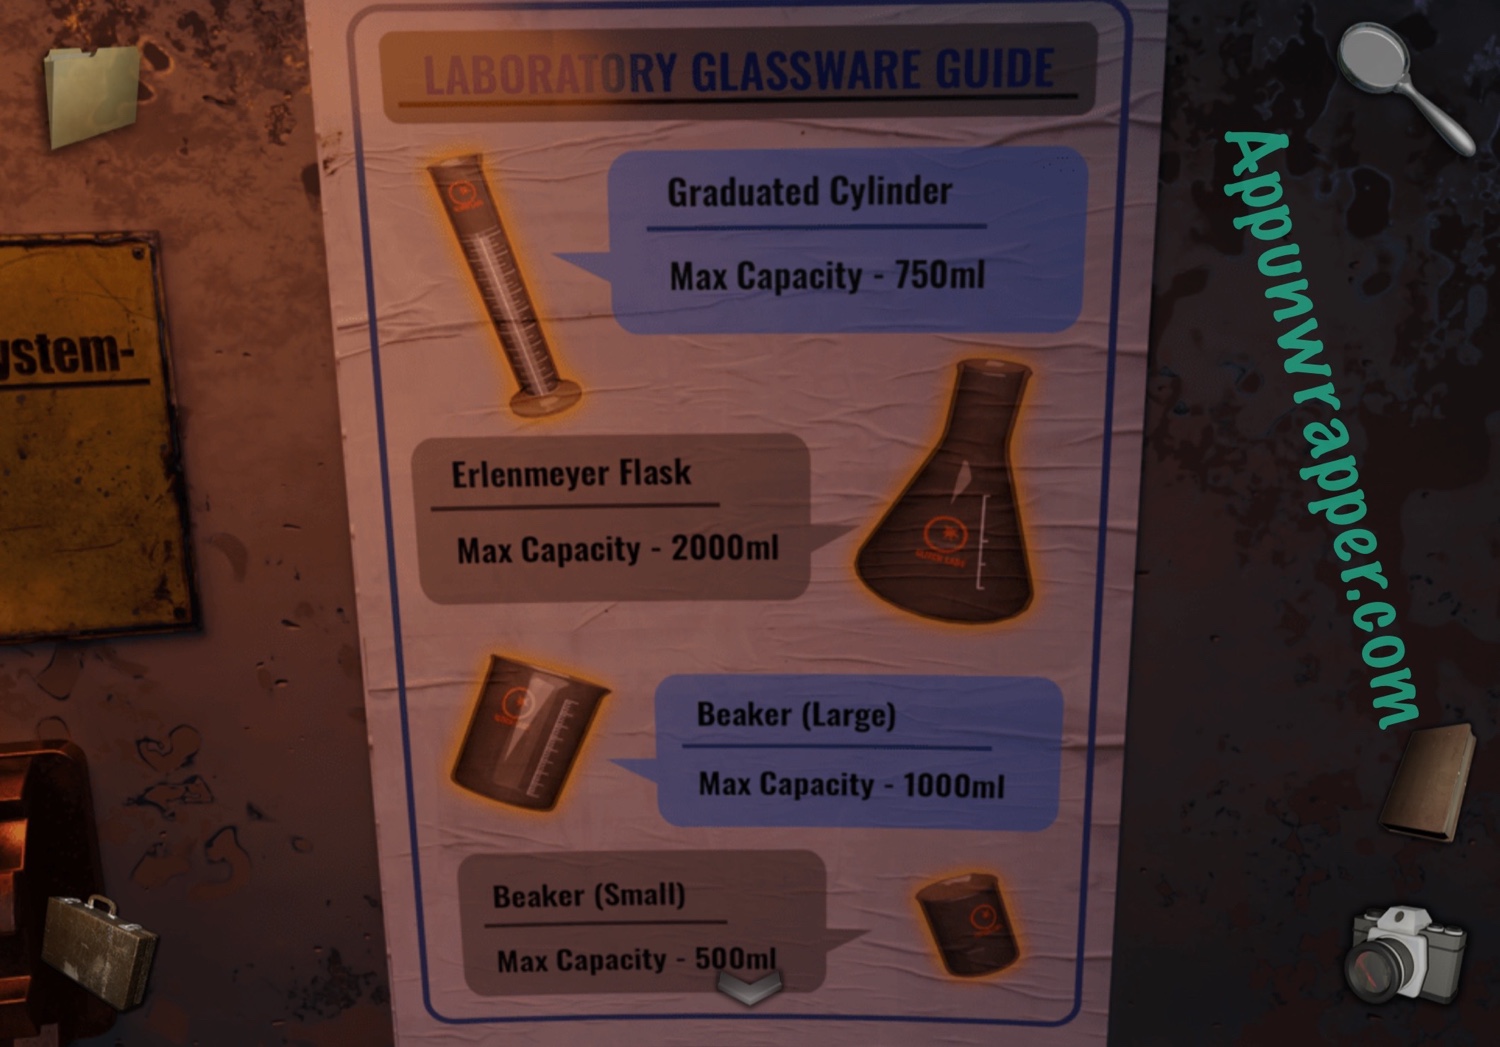
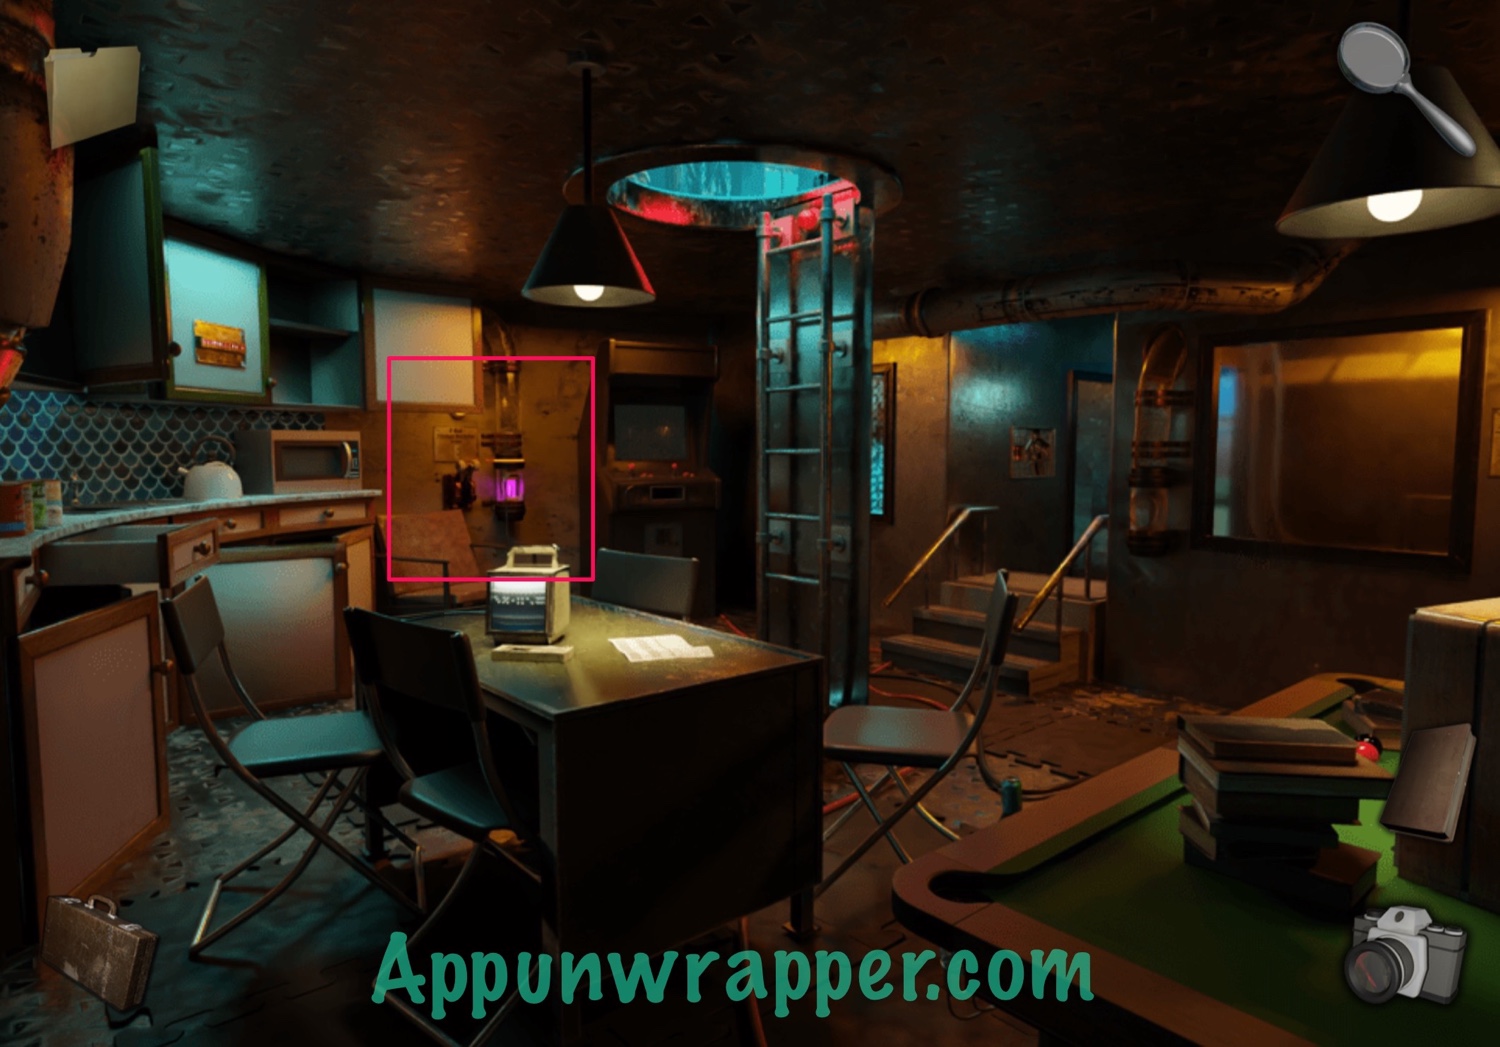
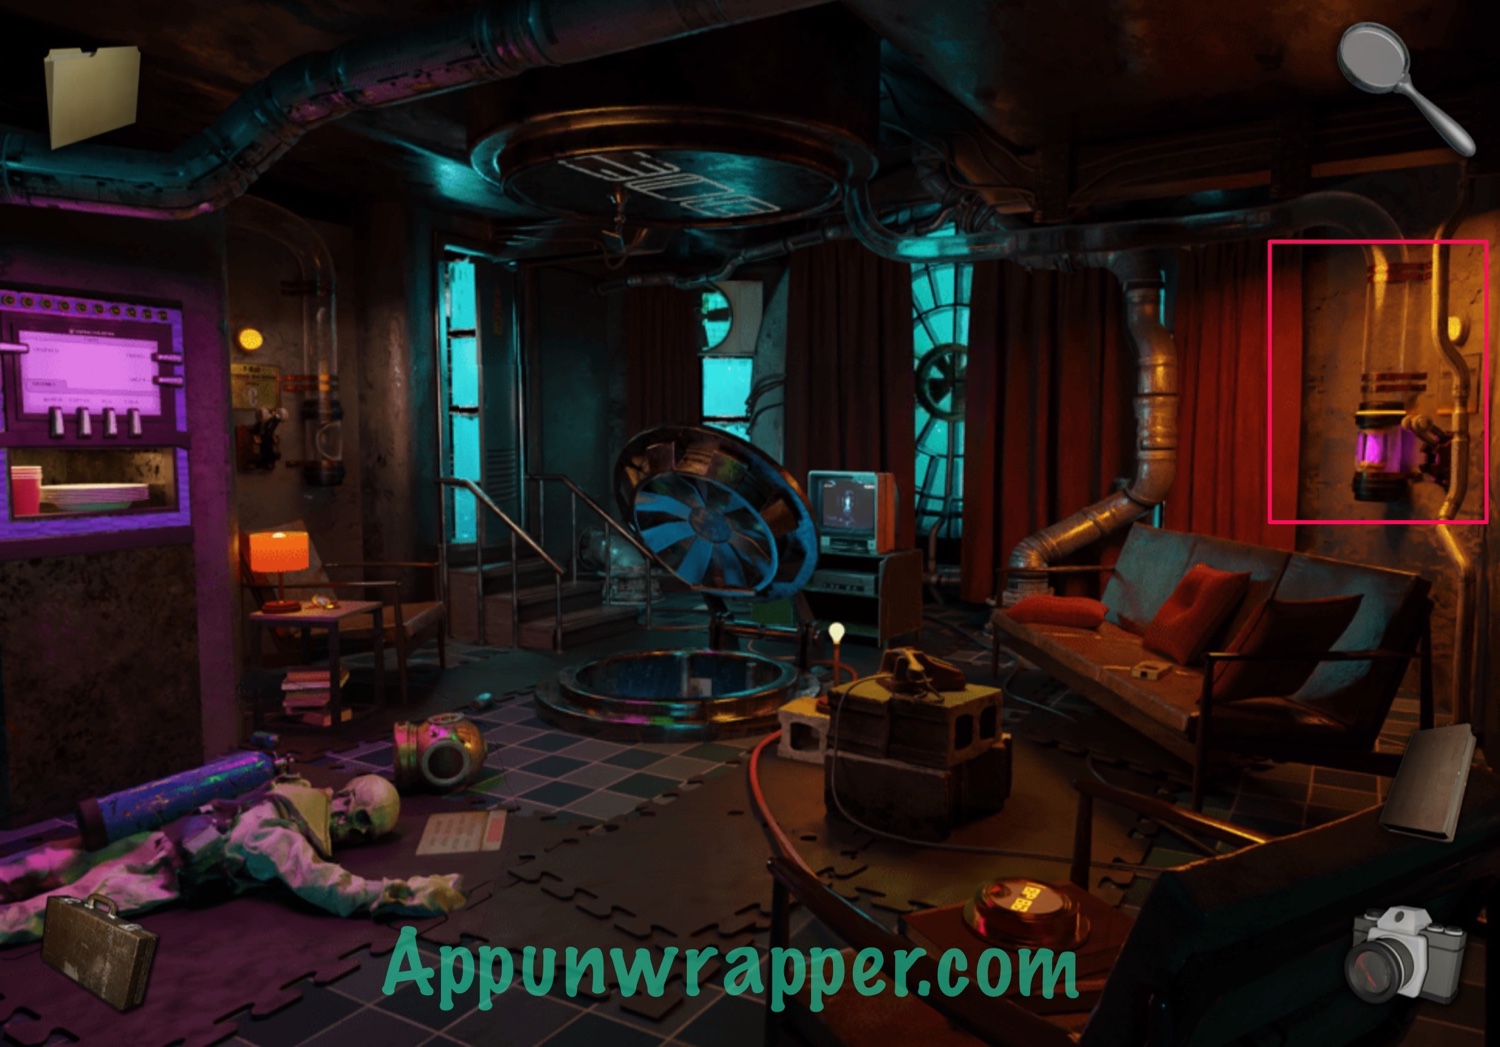
3. Zoom back out and look at the pneumatic mail system all the way on the right. There’s a poster here with a Laboratory Glassware Guide. Take a photo of it.
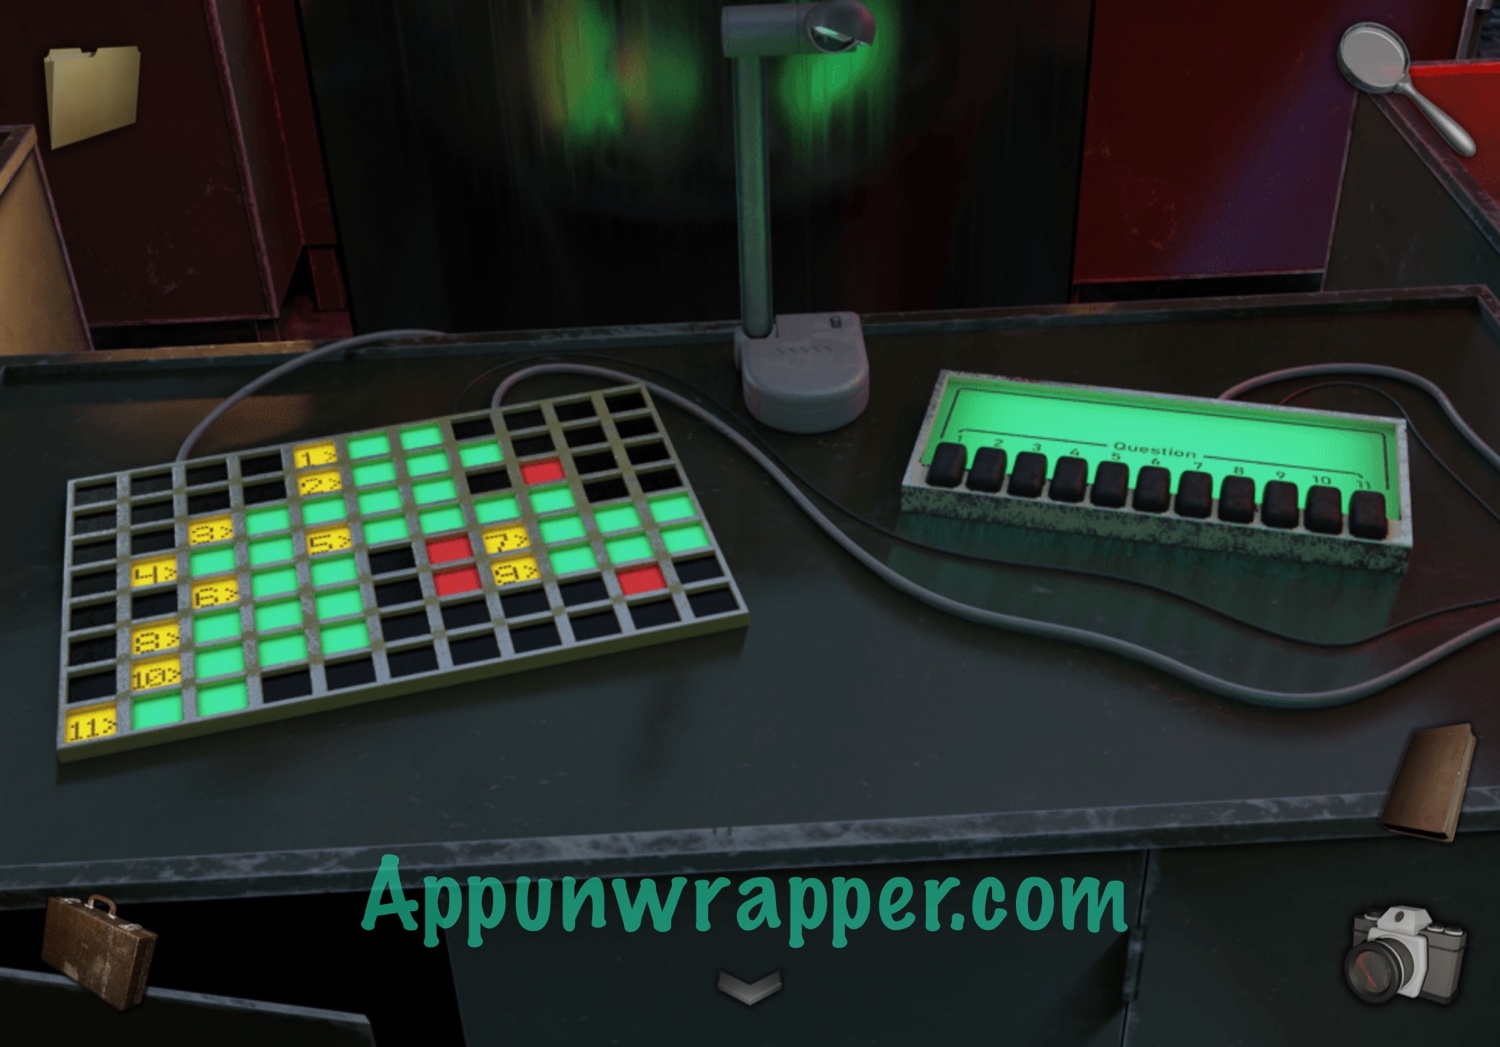
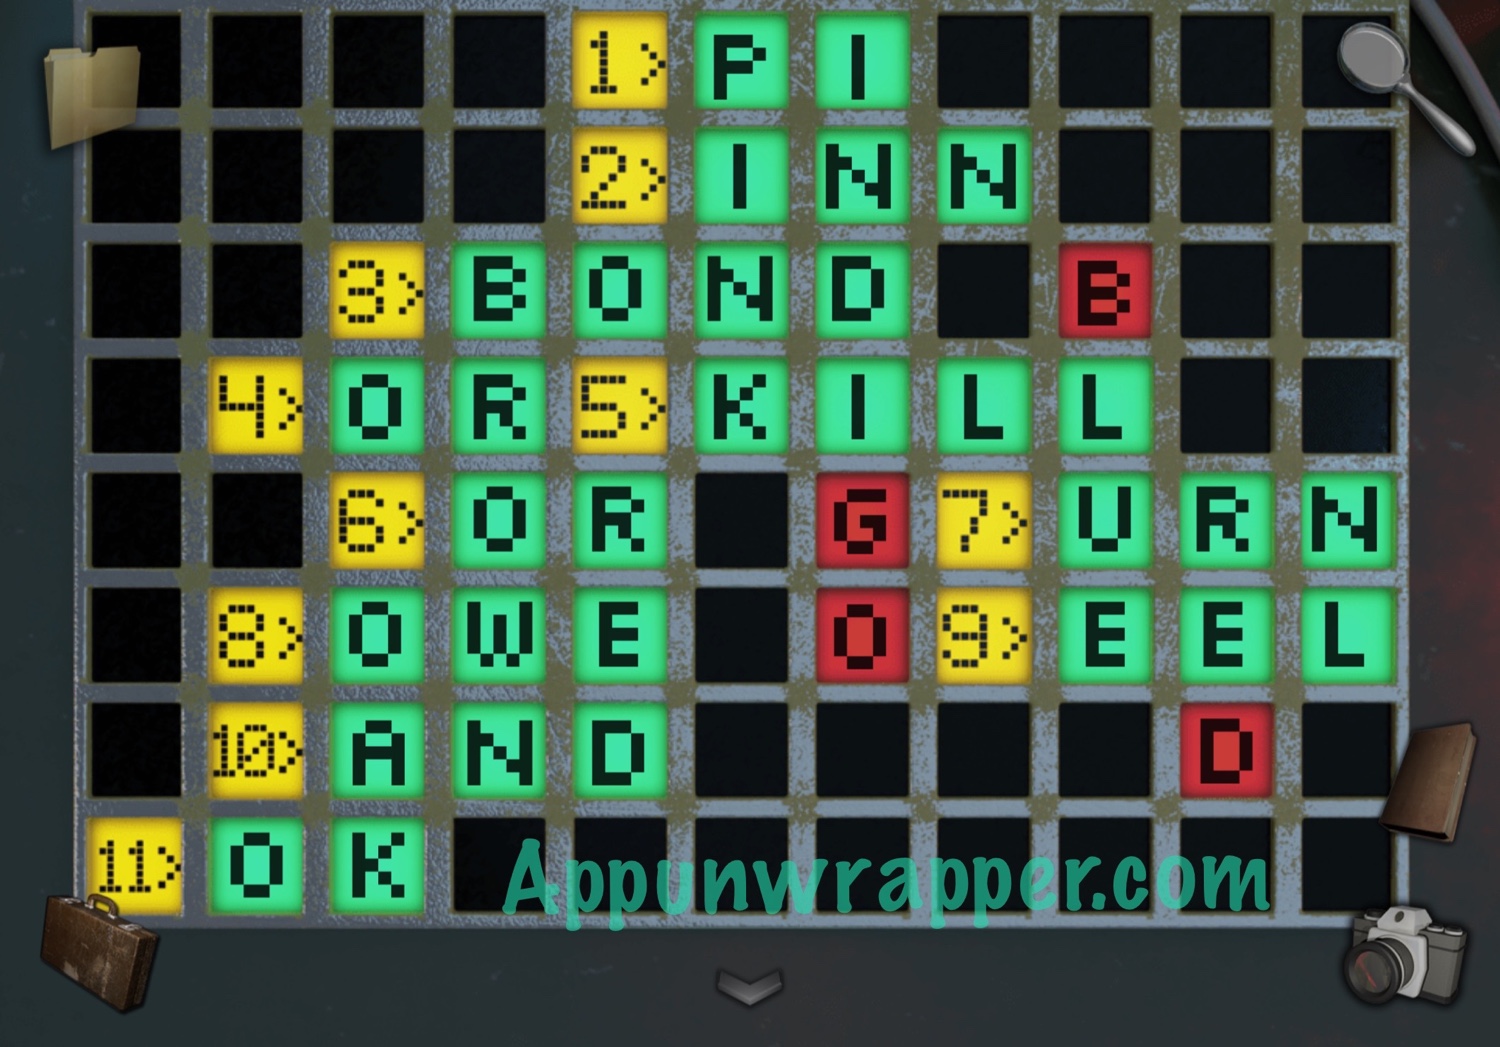
4. Tap on the small table to the right of the ladder. There’s a crossword puzzle next to a devices that shows 11 questions. Read each question and then fill in the answer on the crossword puzzle. It goes like so:
Q1: The number π is a mathematical constant that is the ratio of a circle’s circumference to its diameter, approximately equal to 3.14159.
A1: PI
Q2: An establishment or building where travelers can seek lodging, and usually, food and drink.
A2: INN
Q3: A British spy named James.
A3: BOND
Q4: Used to link alternatives. E.g. Would you like a cup of tea … coffee?
A4: OR
Q5: To cause the death of a person, animal, or other living thing.
A5: KILL
Q6: Used to link alternatives. E.g. Do you prefer poached … scrambled?
A6: OR
Q7: A tall, rounded vase with a stem and base, especially one used for storing the ashes of a cremated person.
A7: URN
Q8: Have an obligation to pay or repay someone in return for something received.
A8: OWE
Q9: A snake-like fish with a slender elongated body and poorly developed fins, proverbial for its slipperiness.
A9: EEL
Q10: Used to connect words of the same part of speech, clauses, or sentences, that are to be taken jointly.
A10: AND
Q11: Used to express agreement or acceptance. Satisfactory but not especially good.
A11: OK
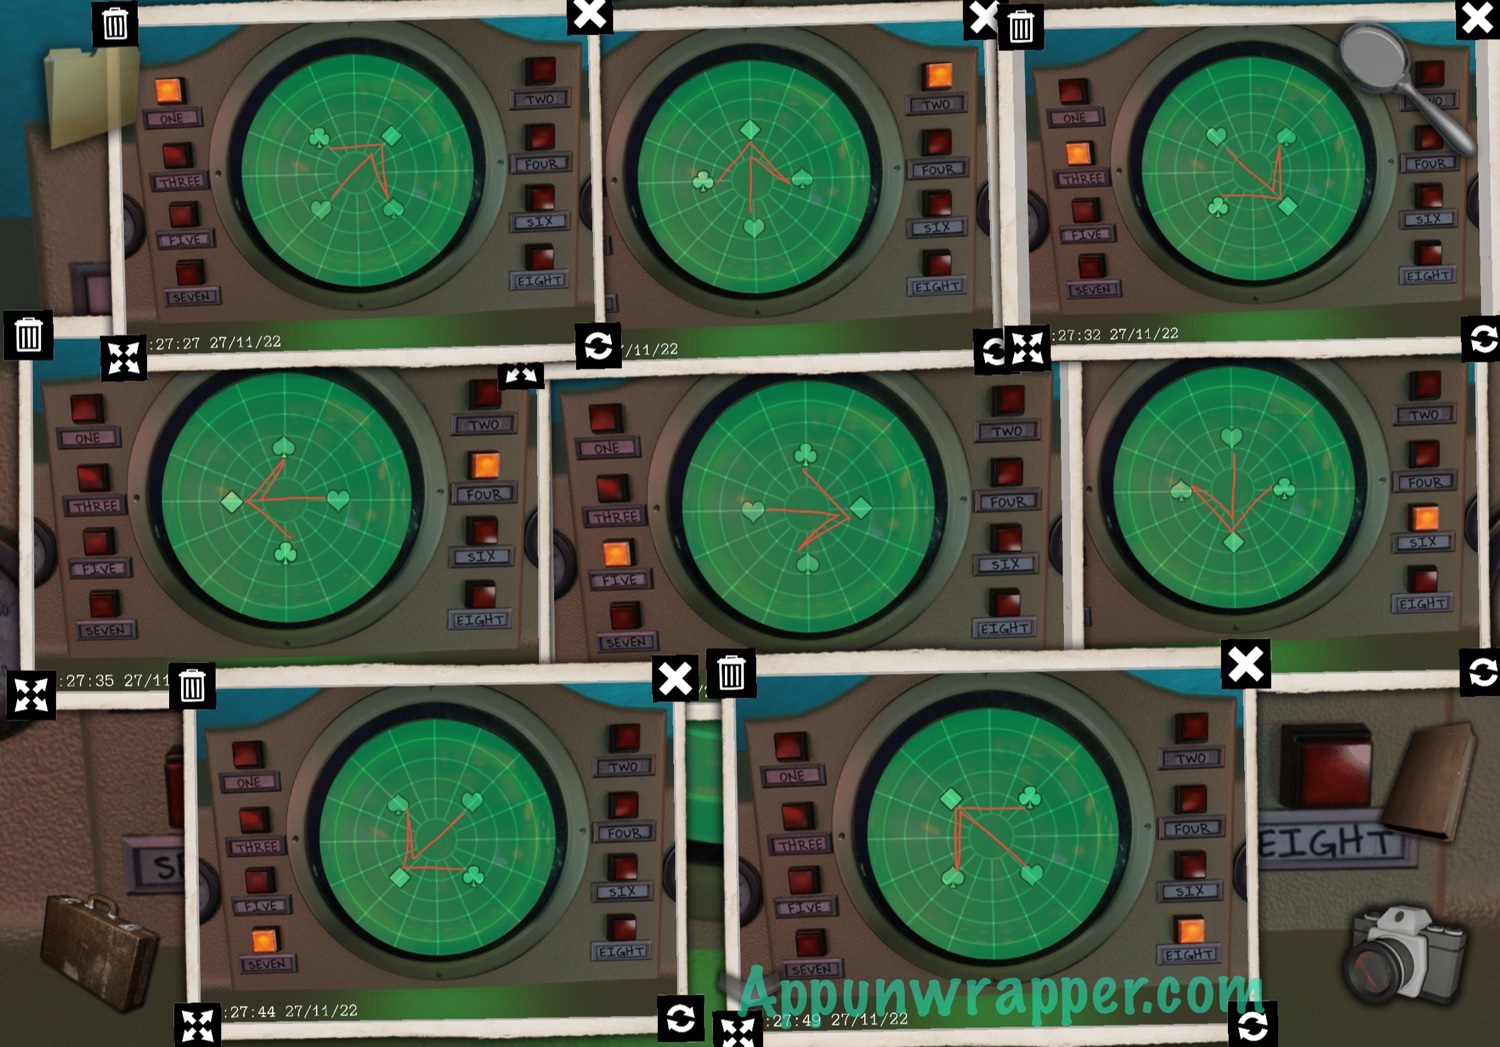
5. Now look at the sonar display by the window. First, play the tape recorder. Then press each of the 8 buttons next to the sonar and take photos of them. Use the playing cards clue to draw a path between the different card suits. You should end up with 8 different arrows.

 k
k
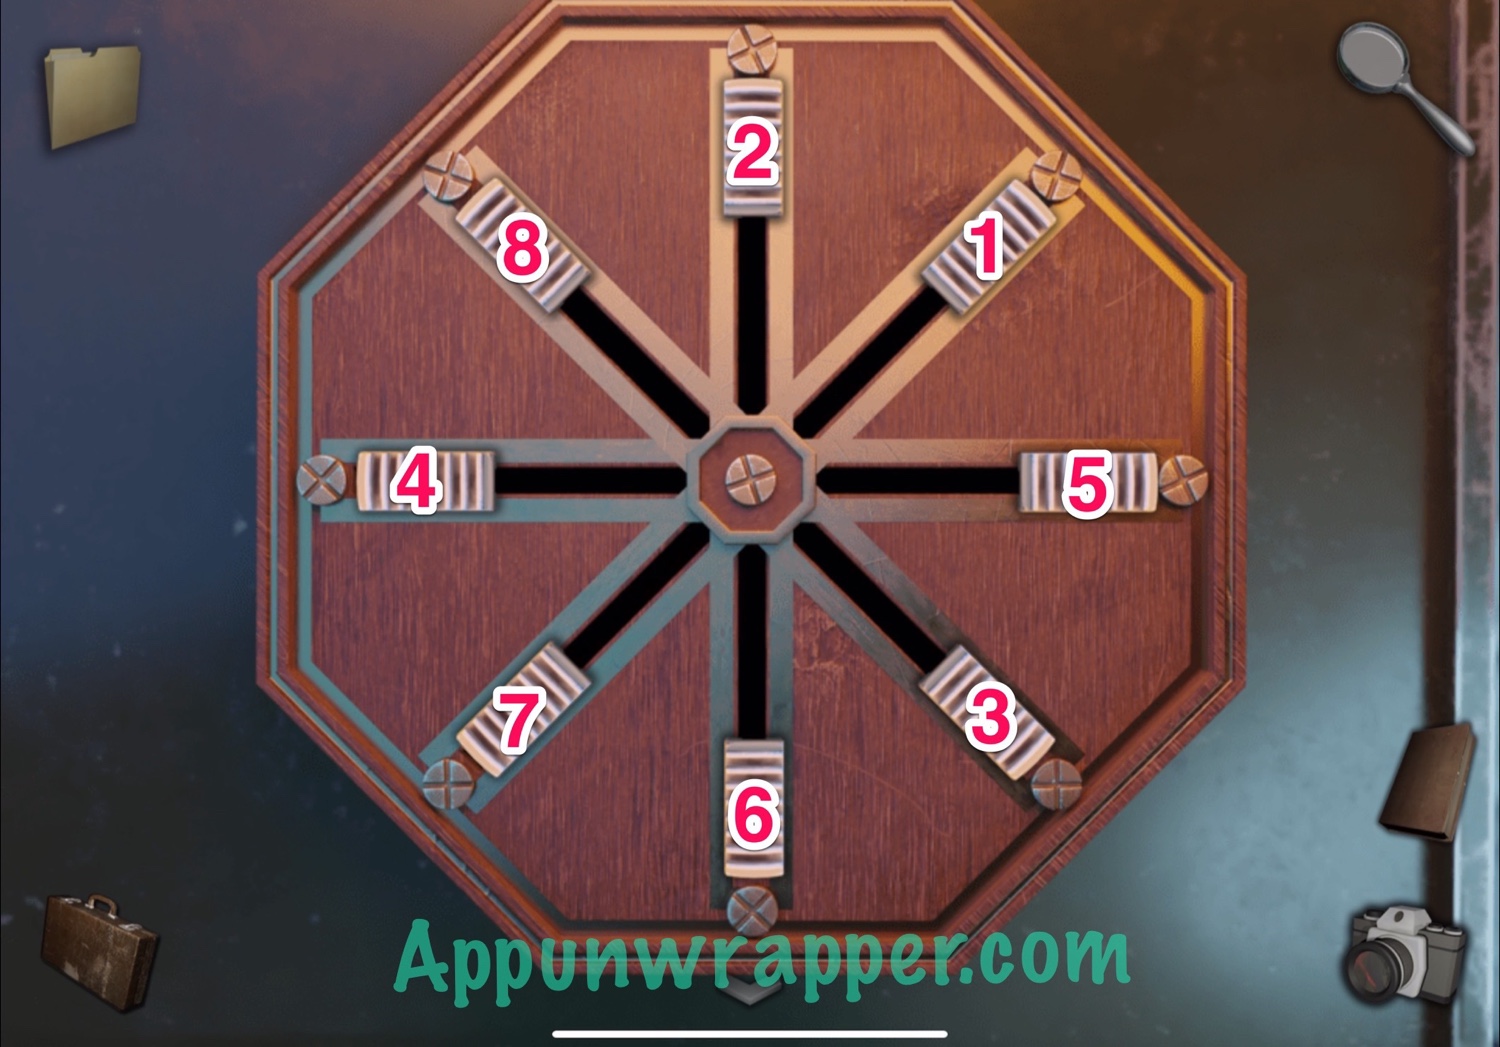
6. Now go to the table on the right and pull the sliders in the order that you got from the sonar arrows. I numbered them for you to make it easier. Then take the glow sticks.
 k
k
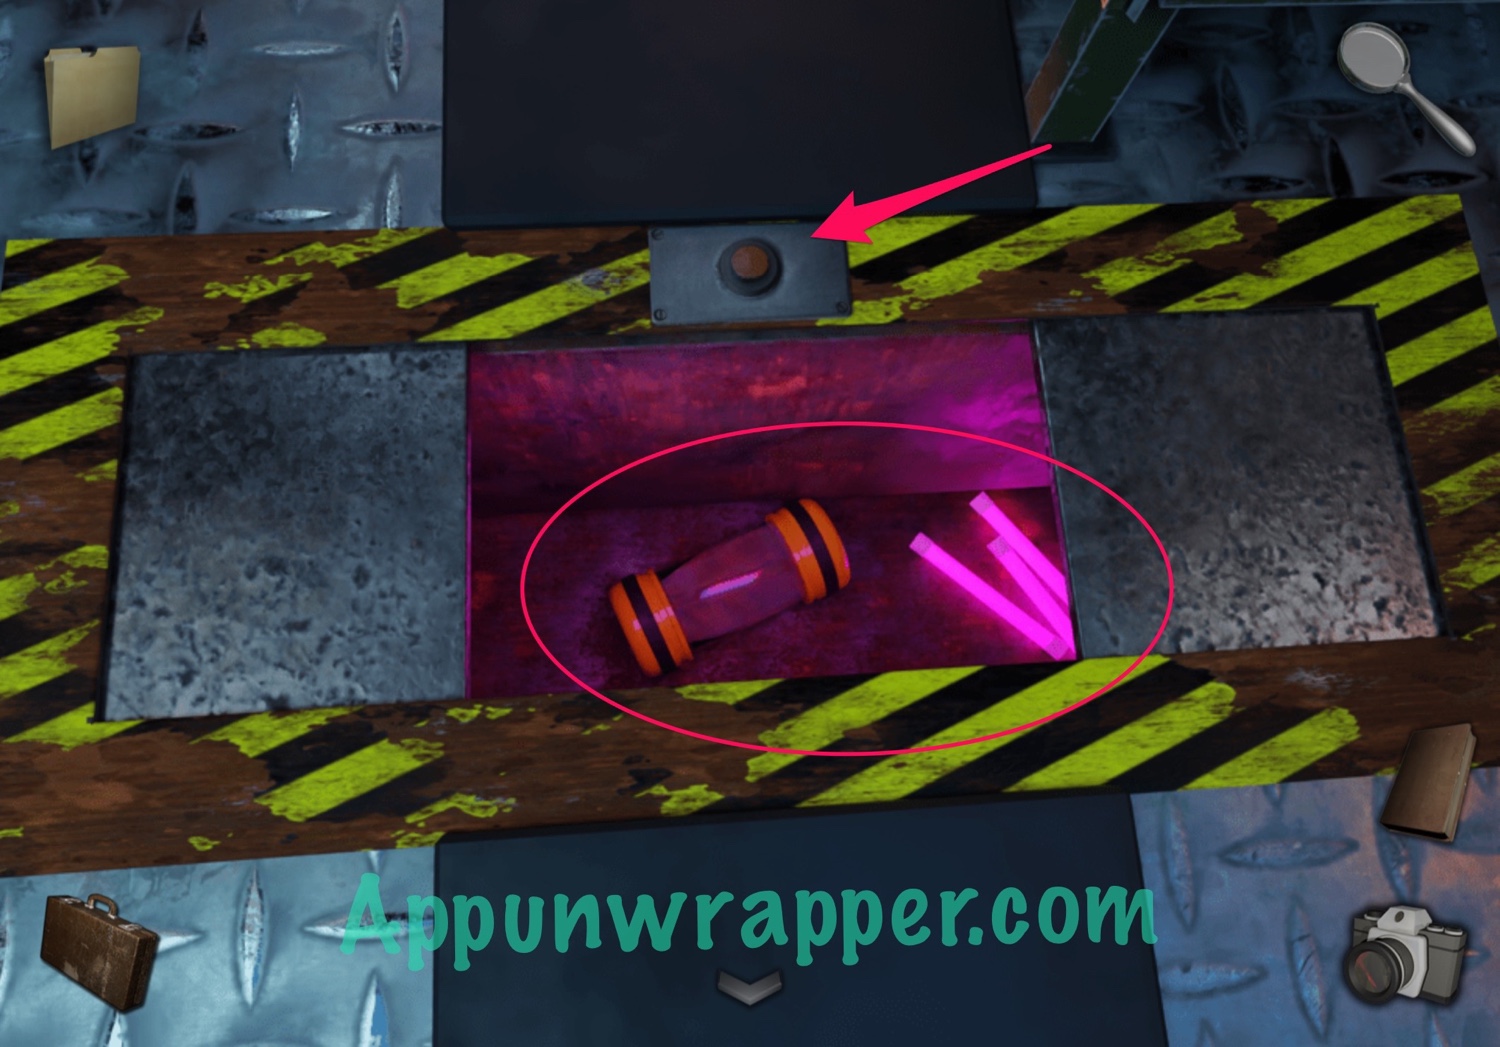
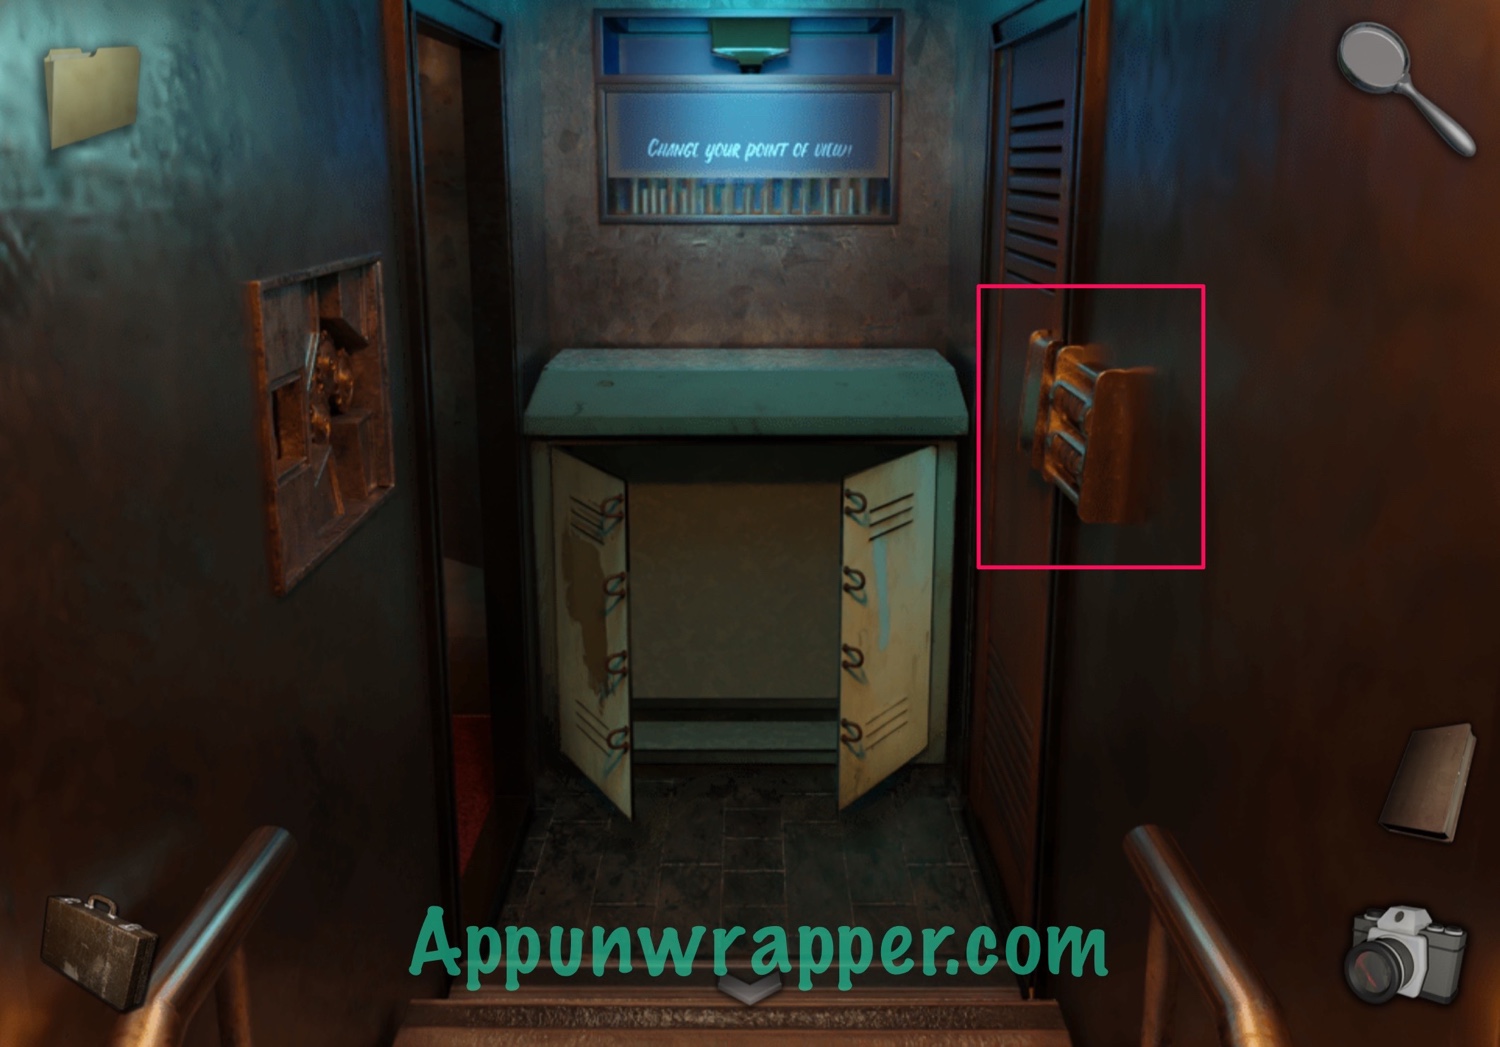
7. Look at the hatch on the floor. Press the button to open it and throw the glow sticks down. Then take the capsule and retrieve the glow sticks.
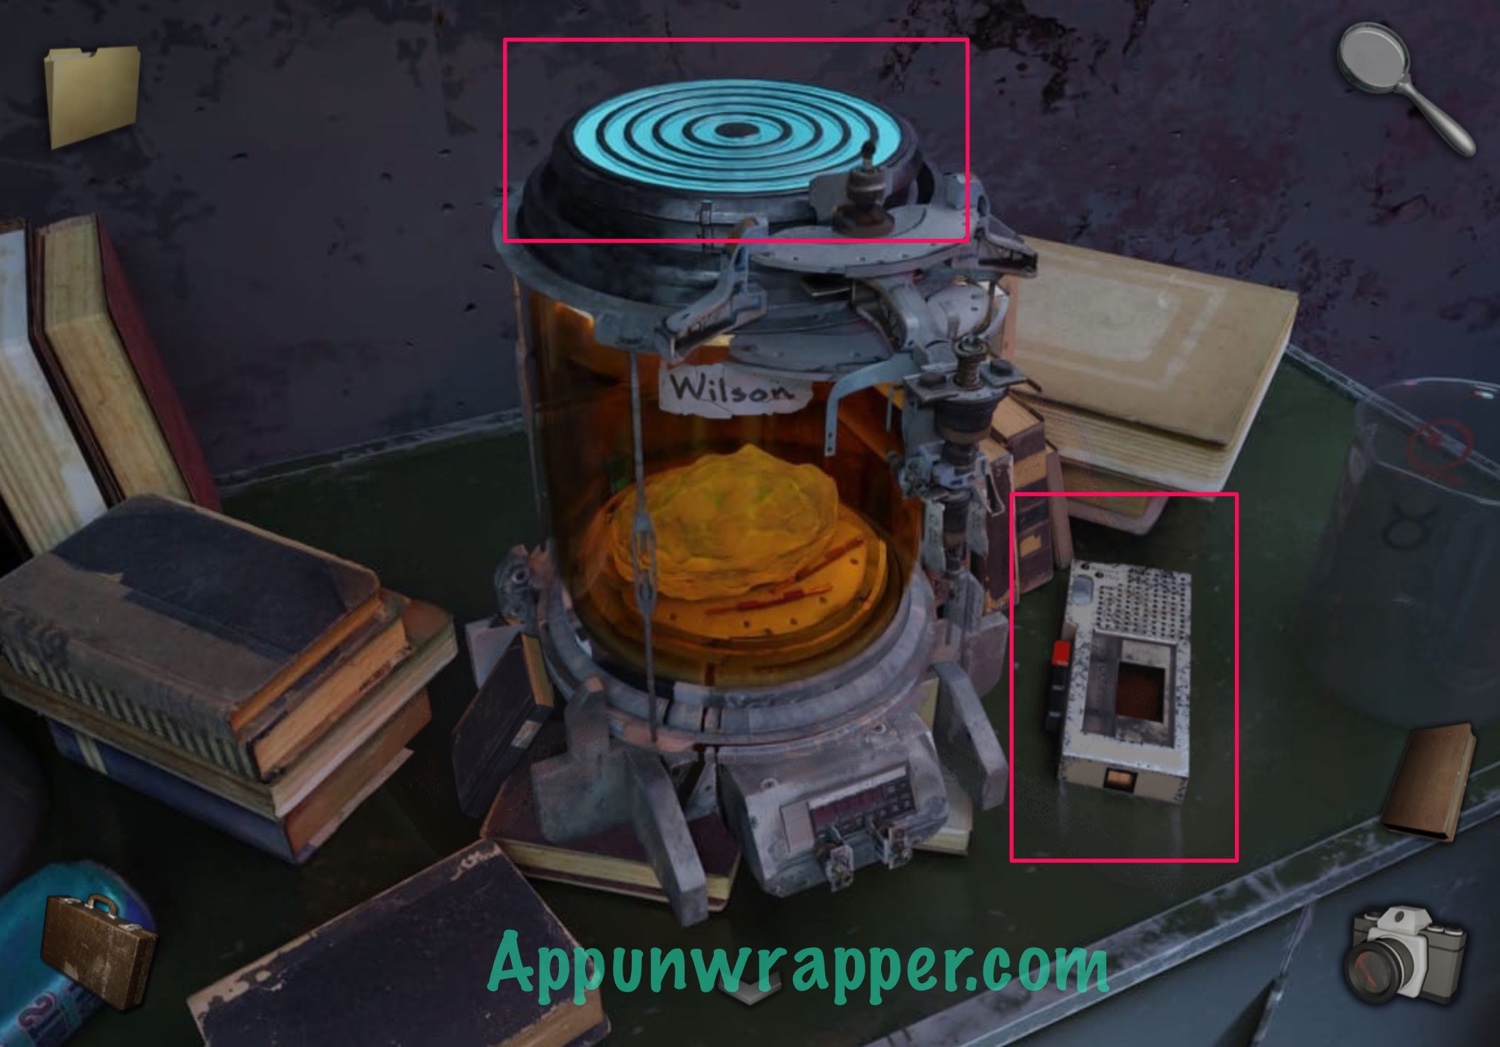
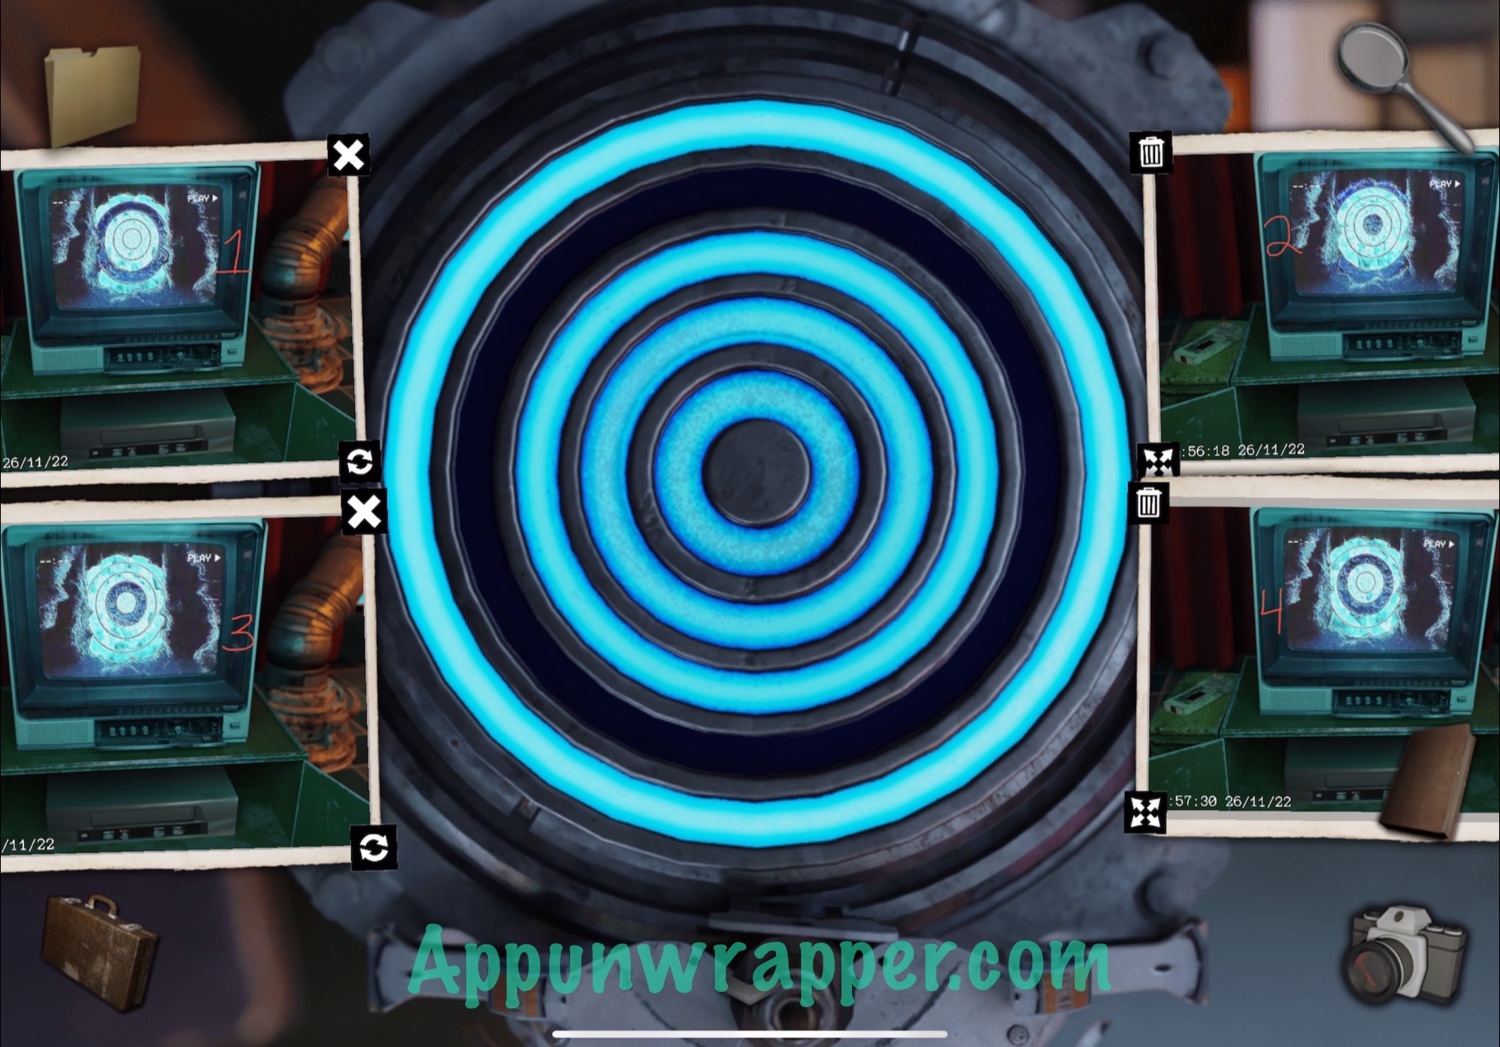
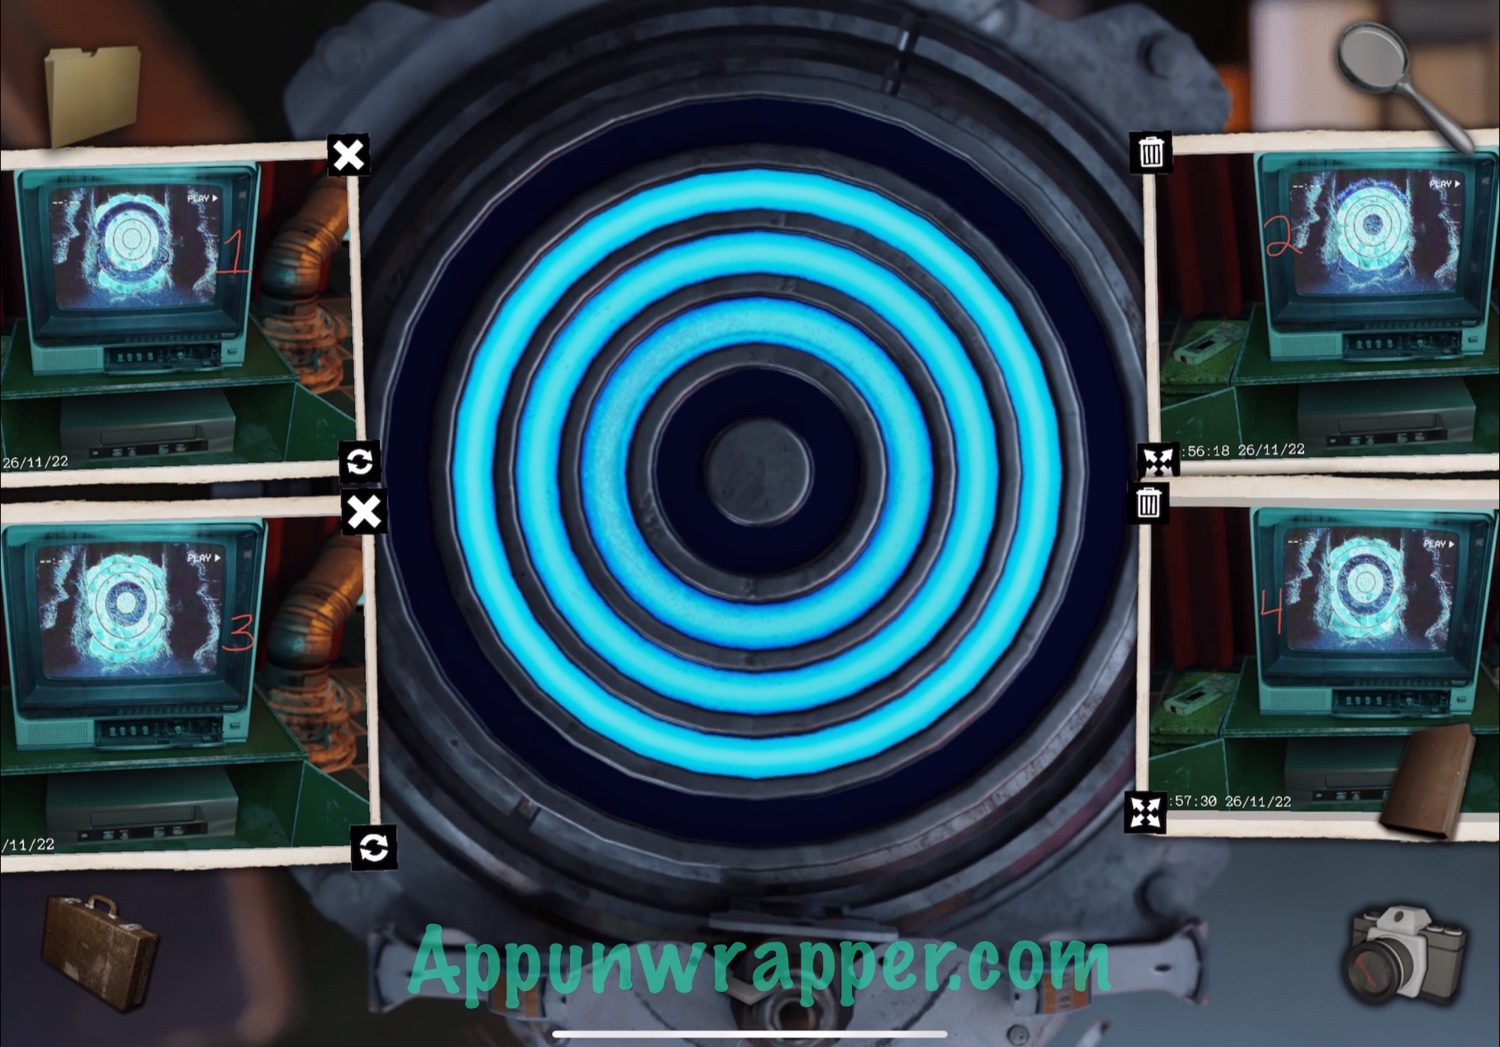
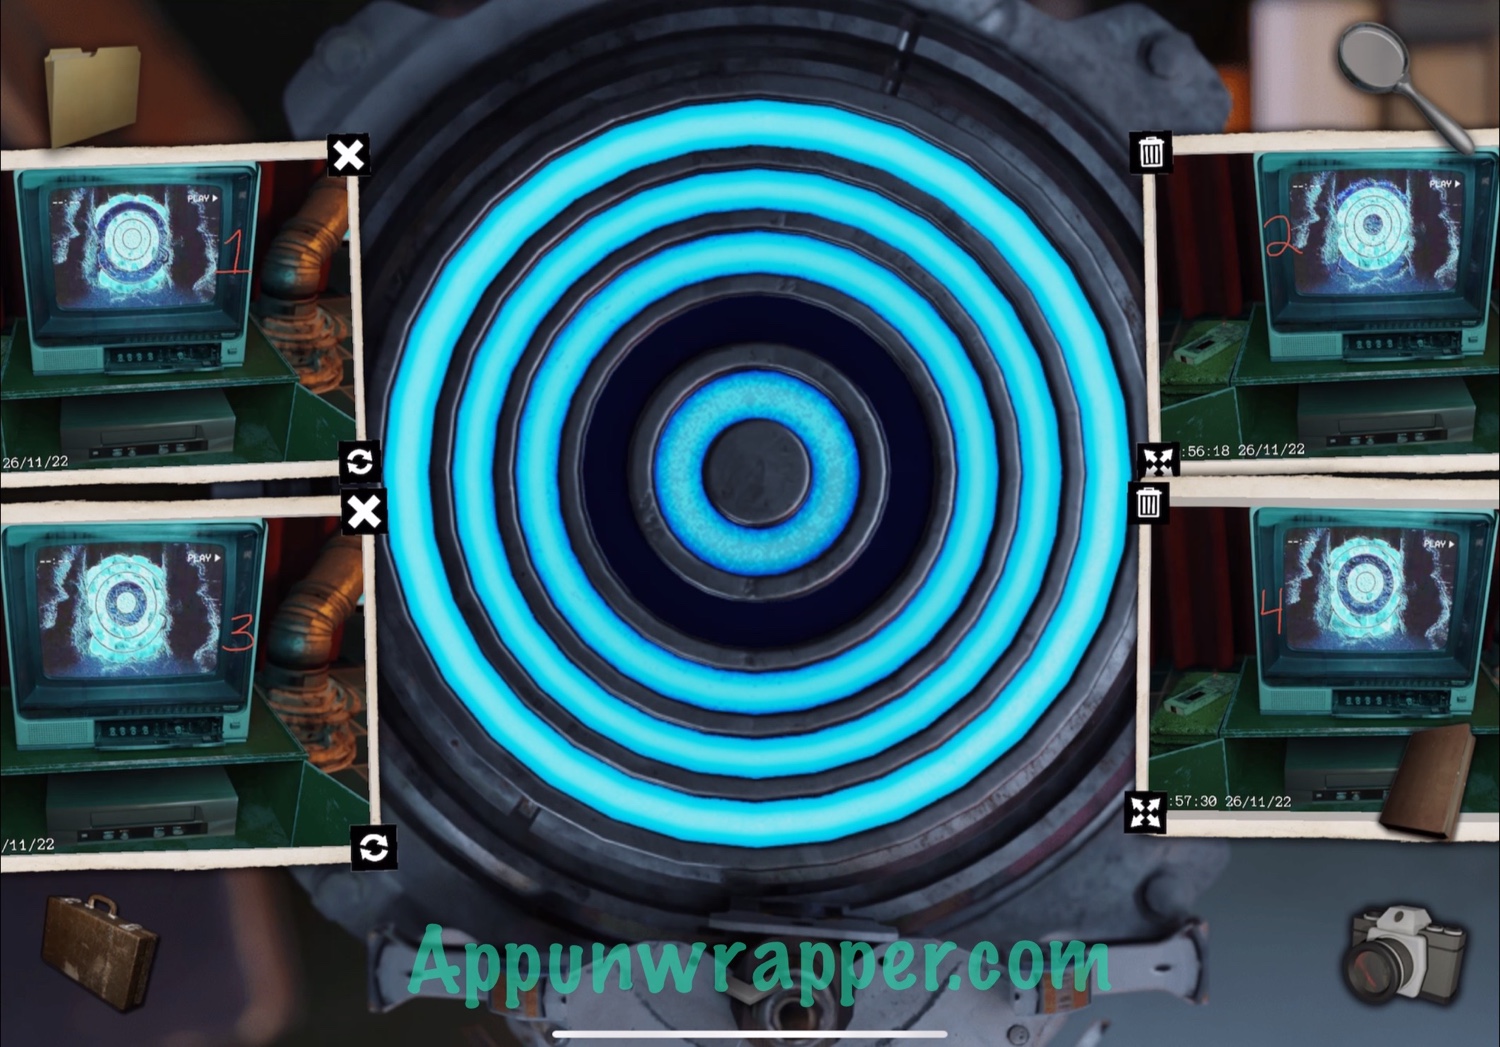
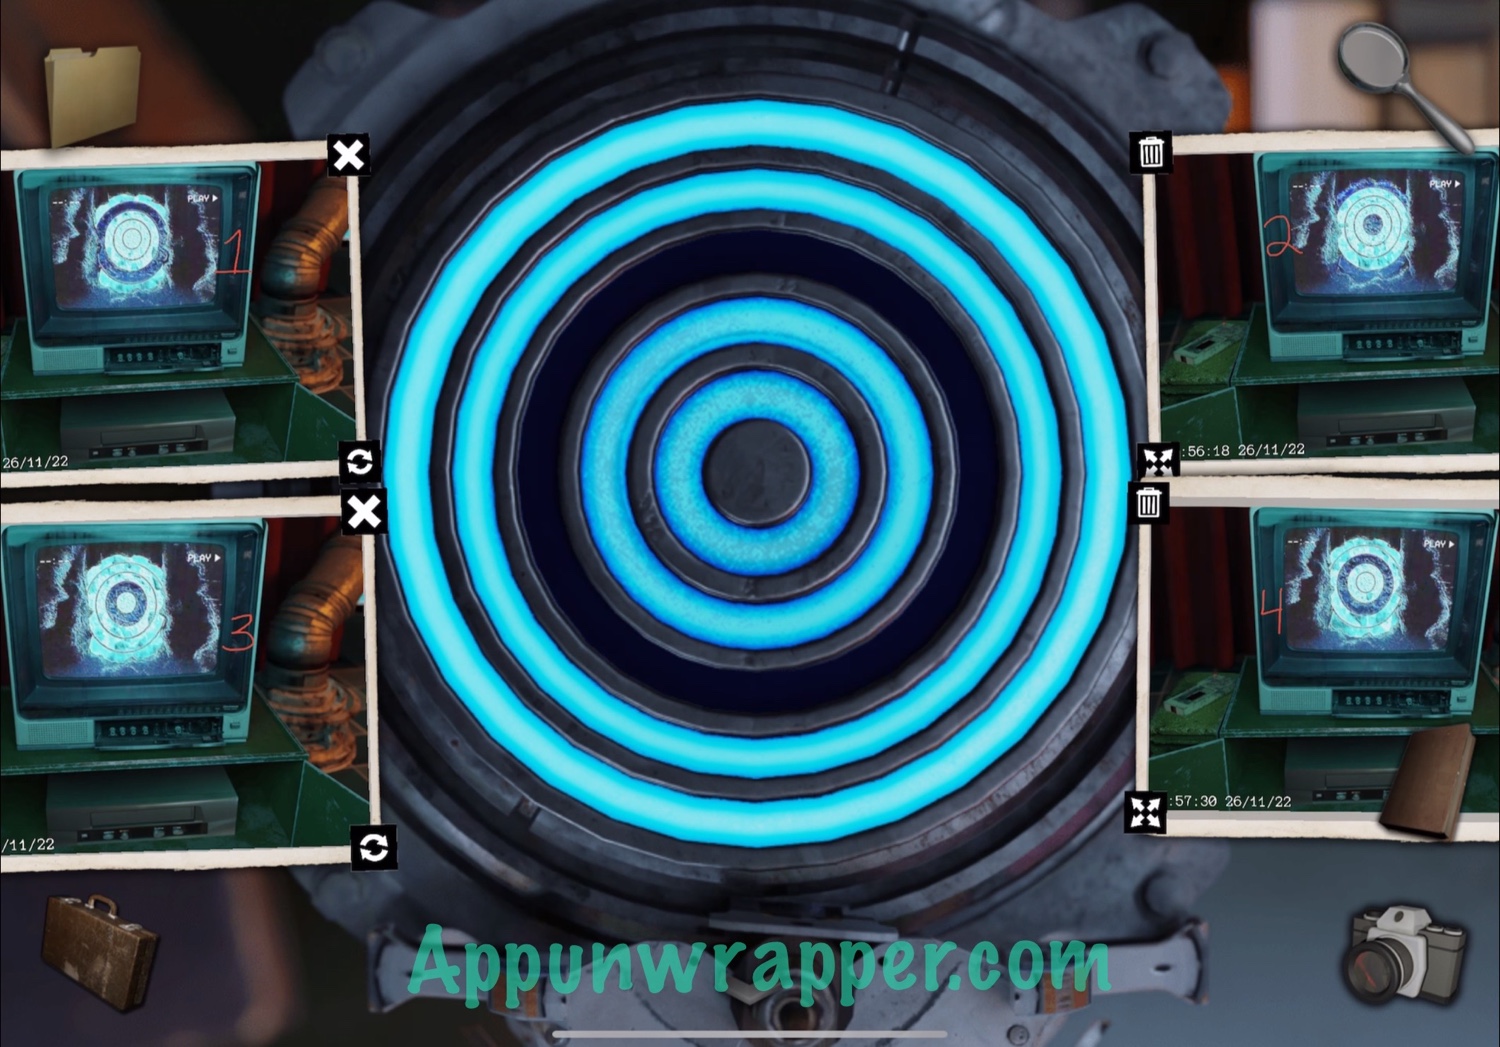
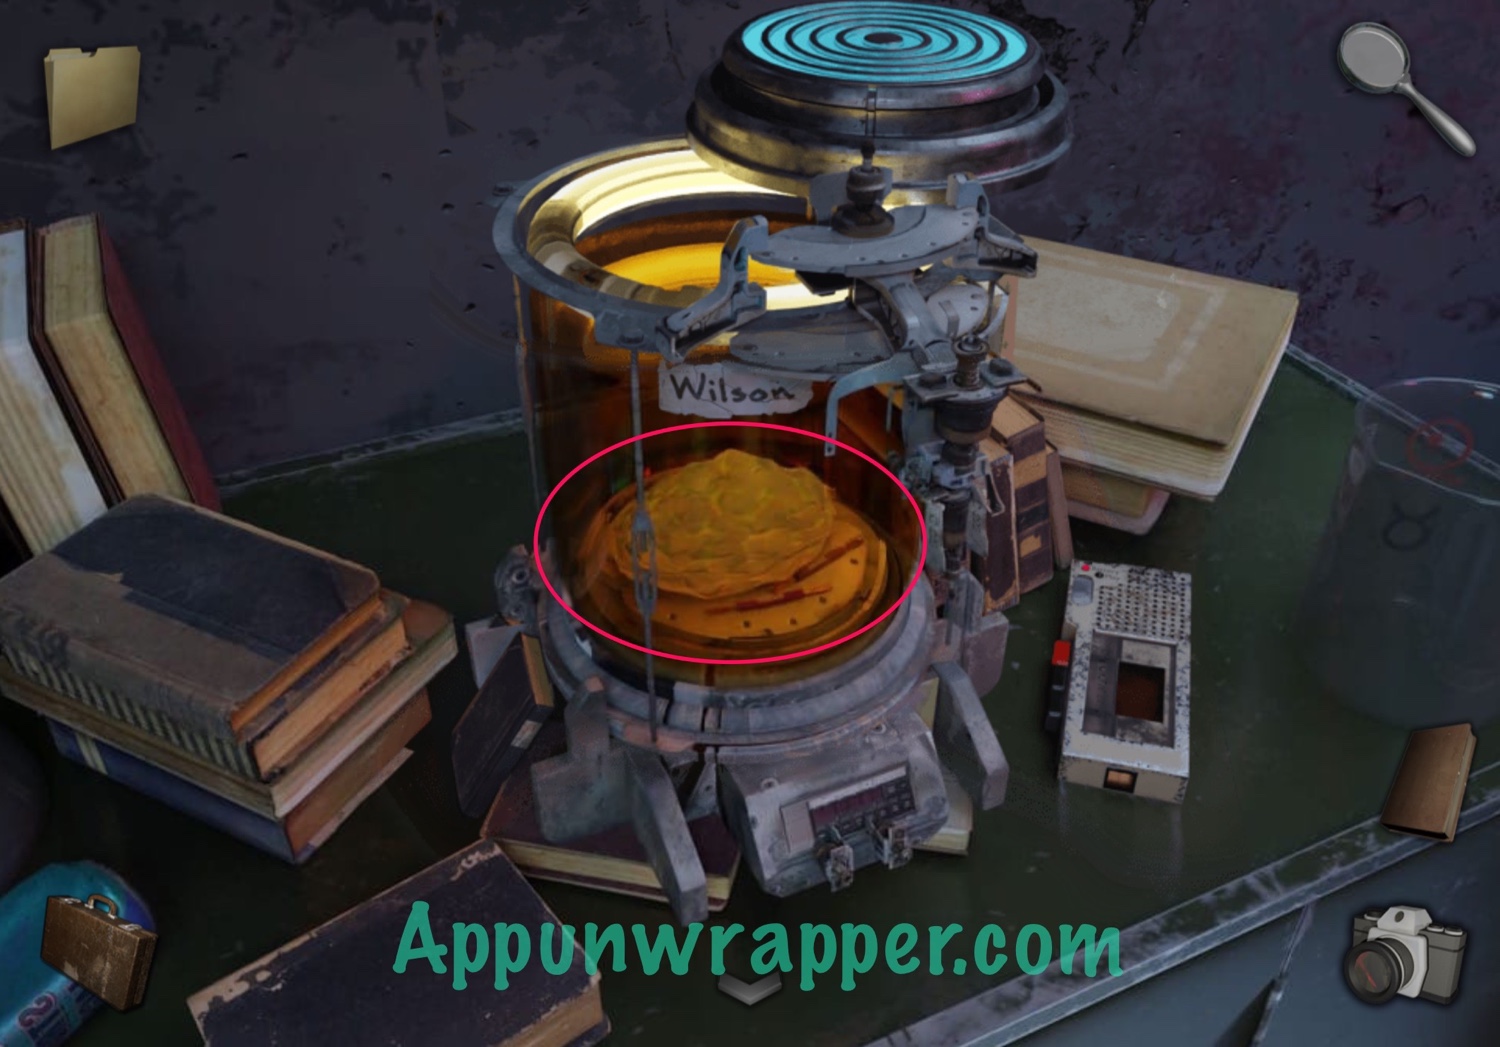
8. Zoom back out and look at the table all the way to the left. First, play the tape recorder. Then tap on the top of Wilson’s containment vessel and press the circles based on the order you saw on the video earlier. I numbered them to make it easier. Then take Wilson and two wires.
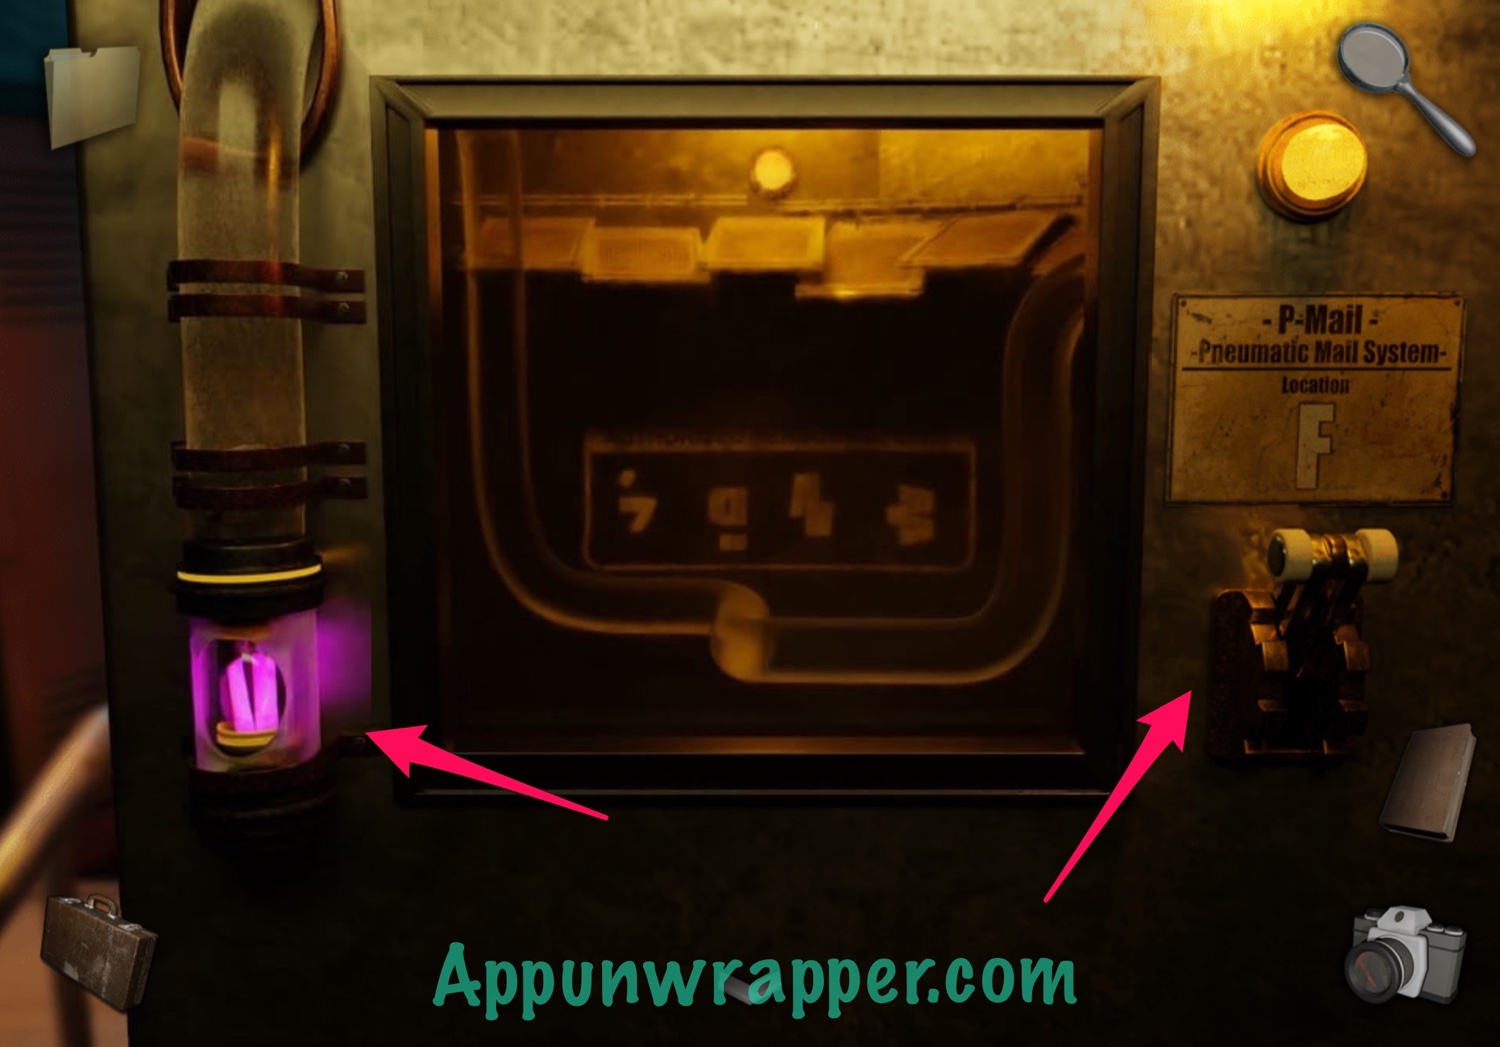
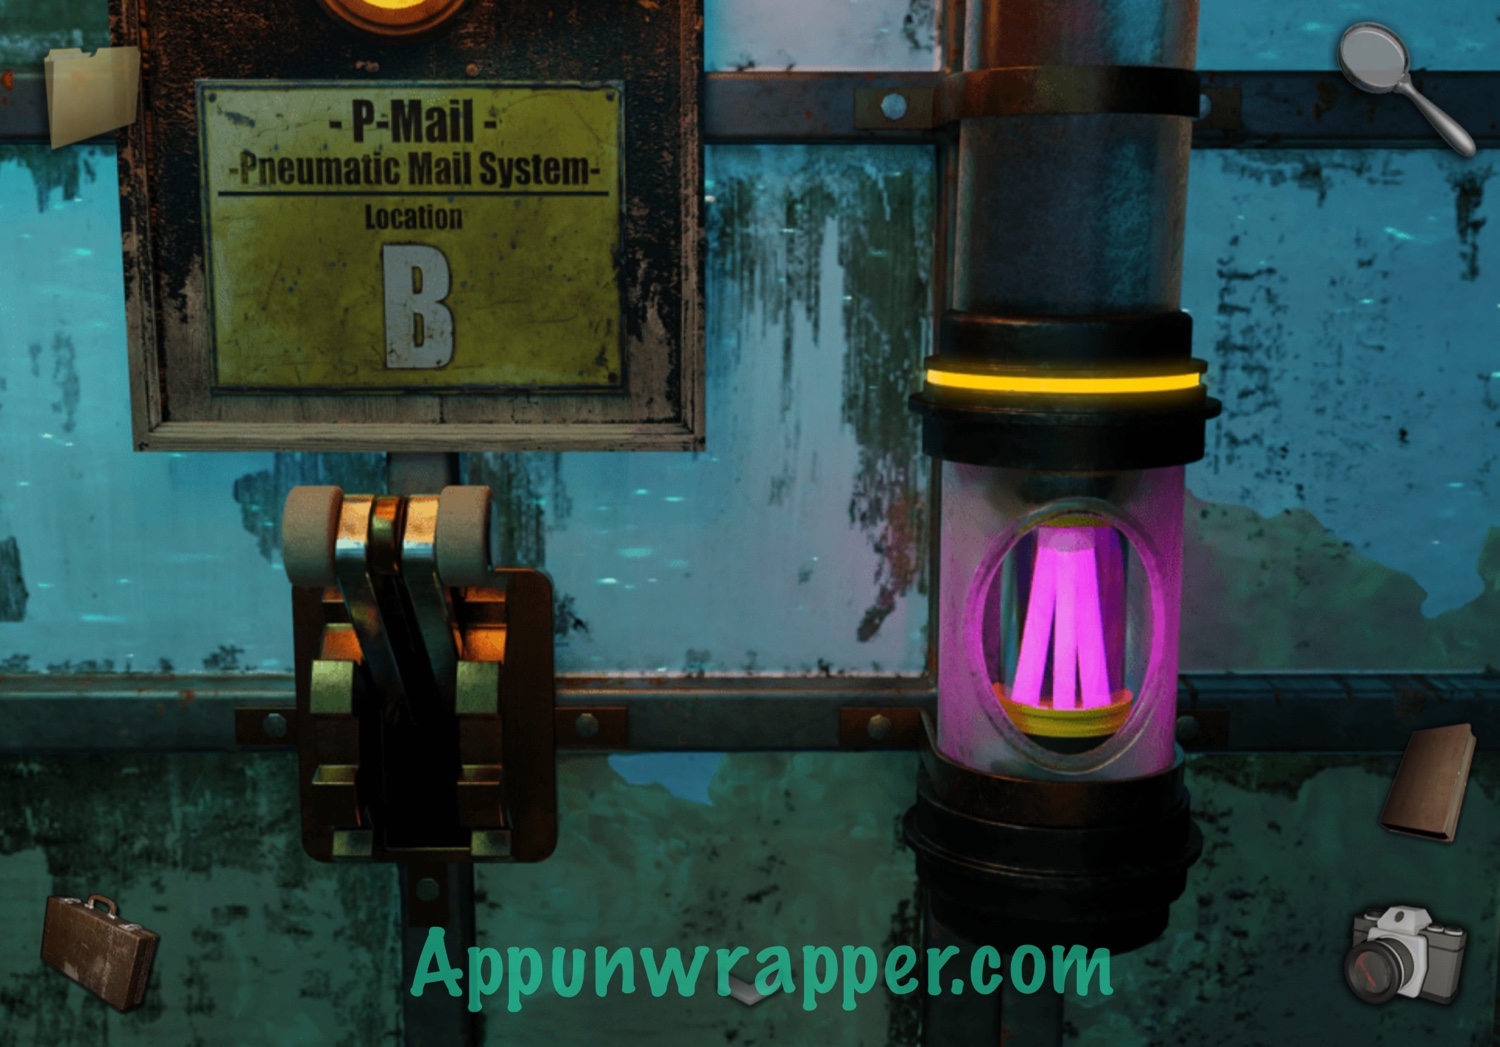
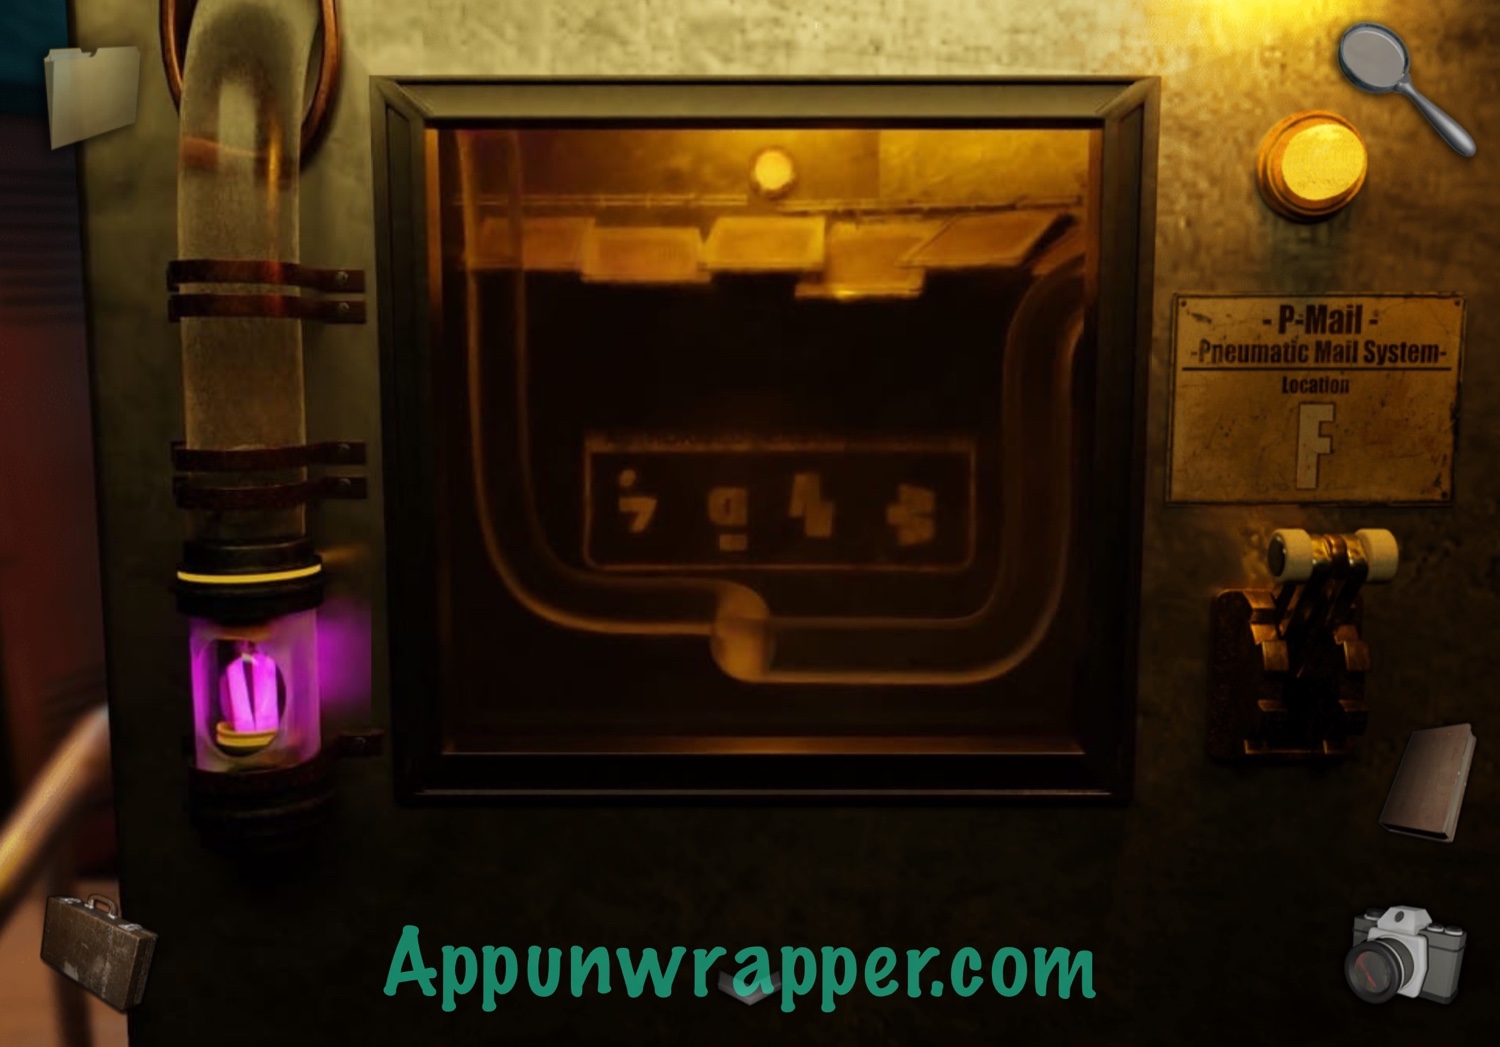
9. Combine the capsule with the glow sticks. Then go back to the game room and tap on the wall to the right to view P-Mail F. Place the canister with the glow sticks in it inside the mail tube and then pull the lever. Take a photo when all the symbols are lit up and clearly visible.

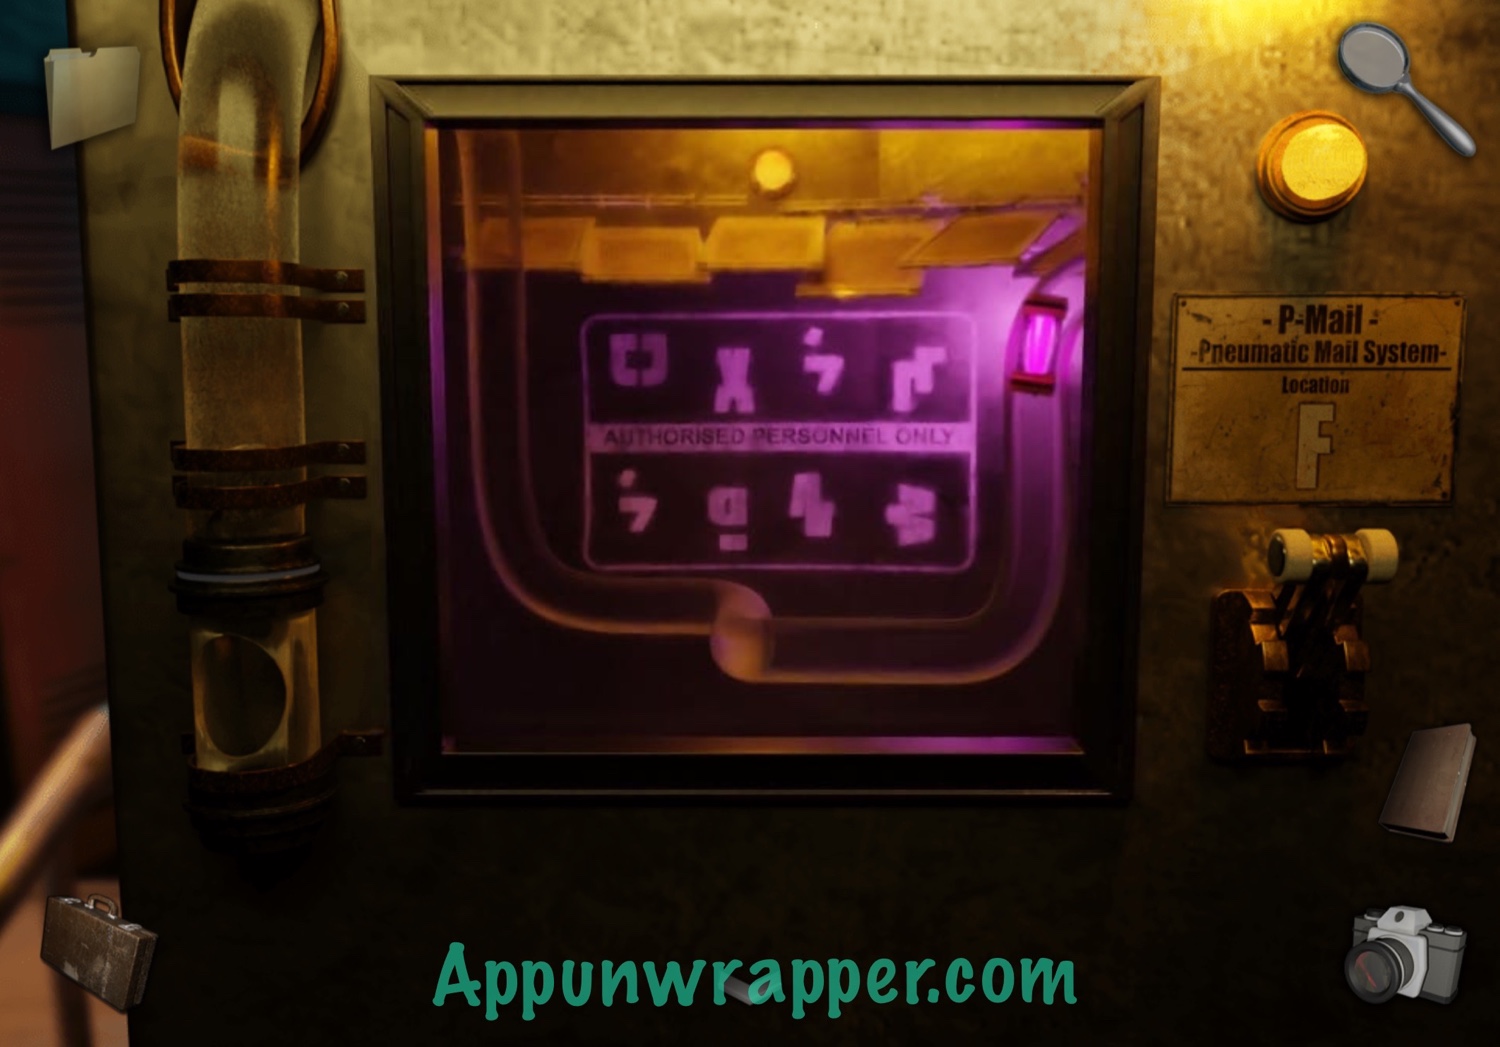
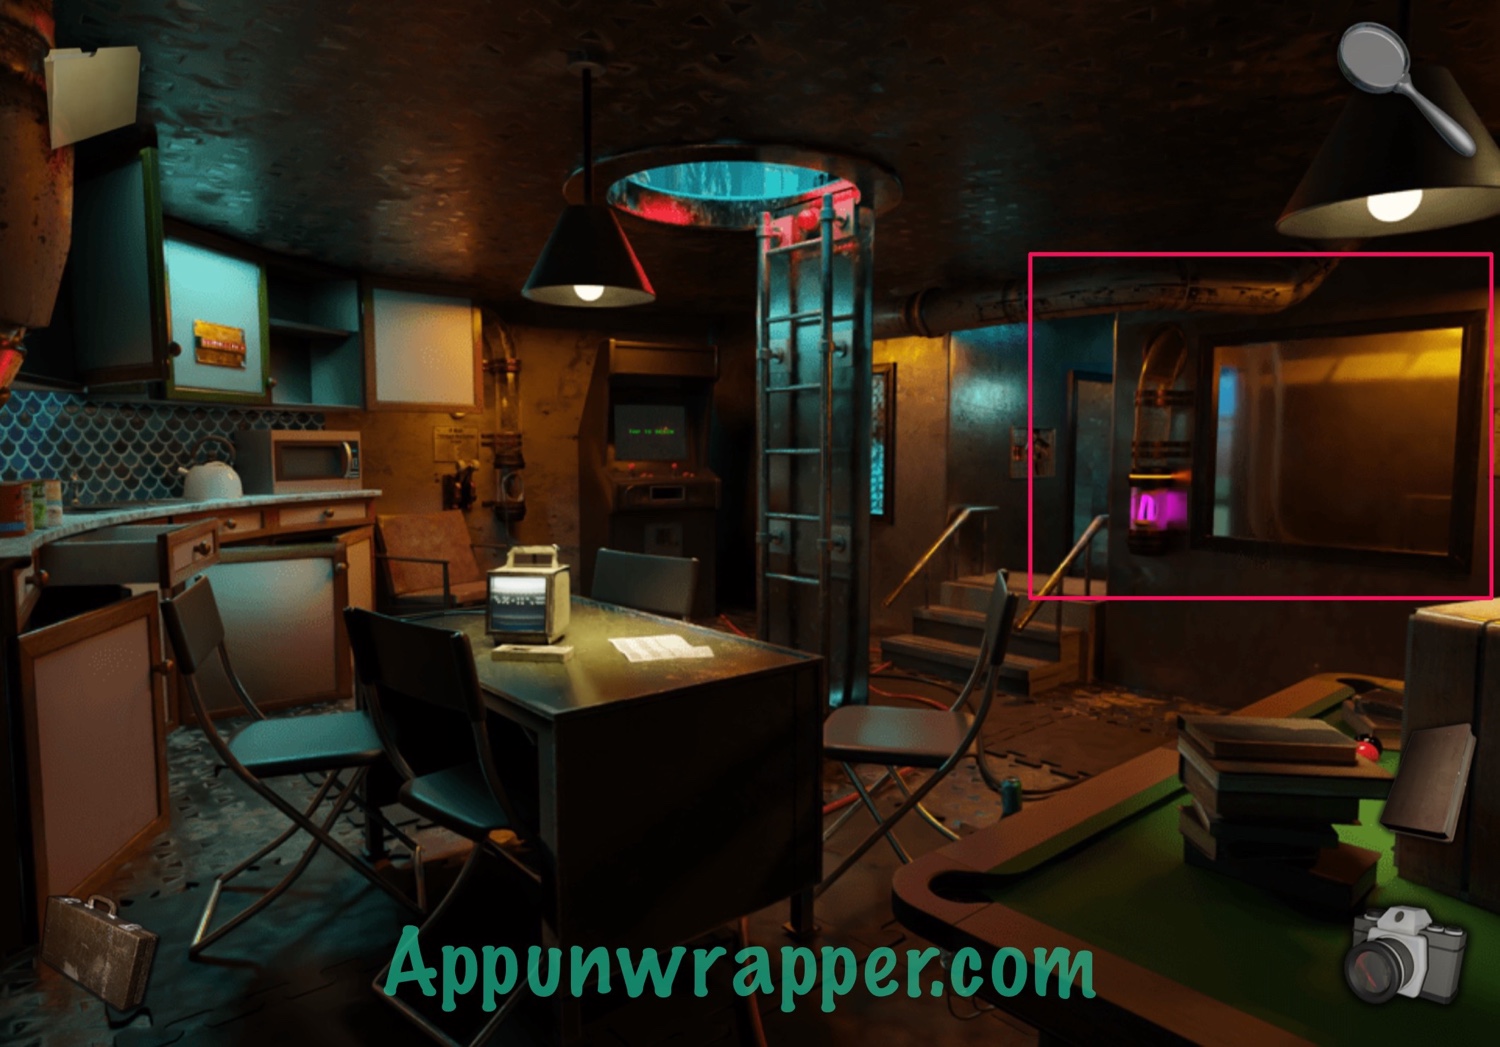
10. Go to the back room again and tap on the puzzle to the right. Take out the photo of the pink symbols and match the puzzle to them to unlock the door.
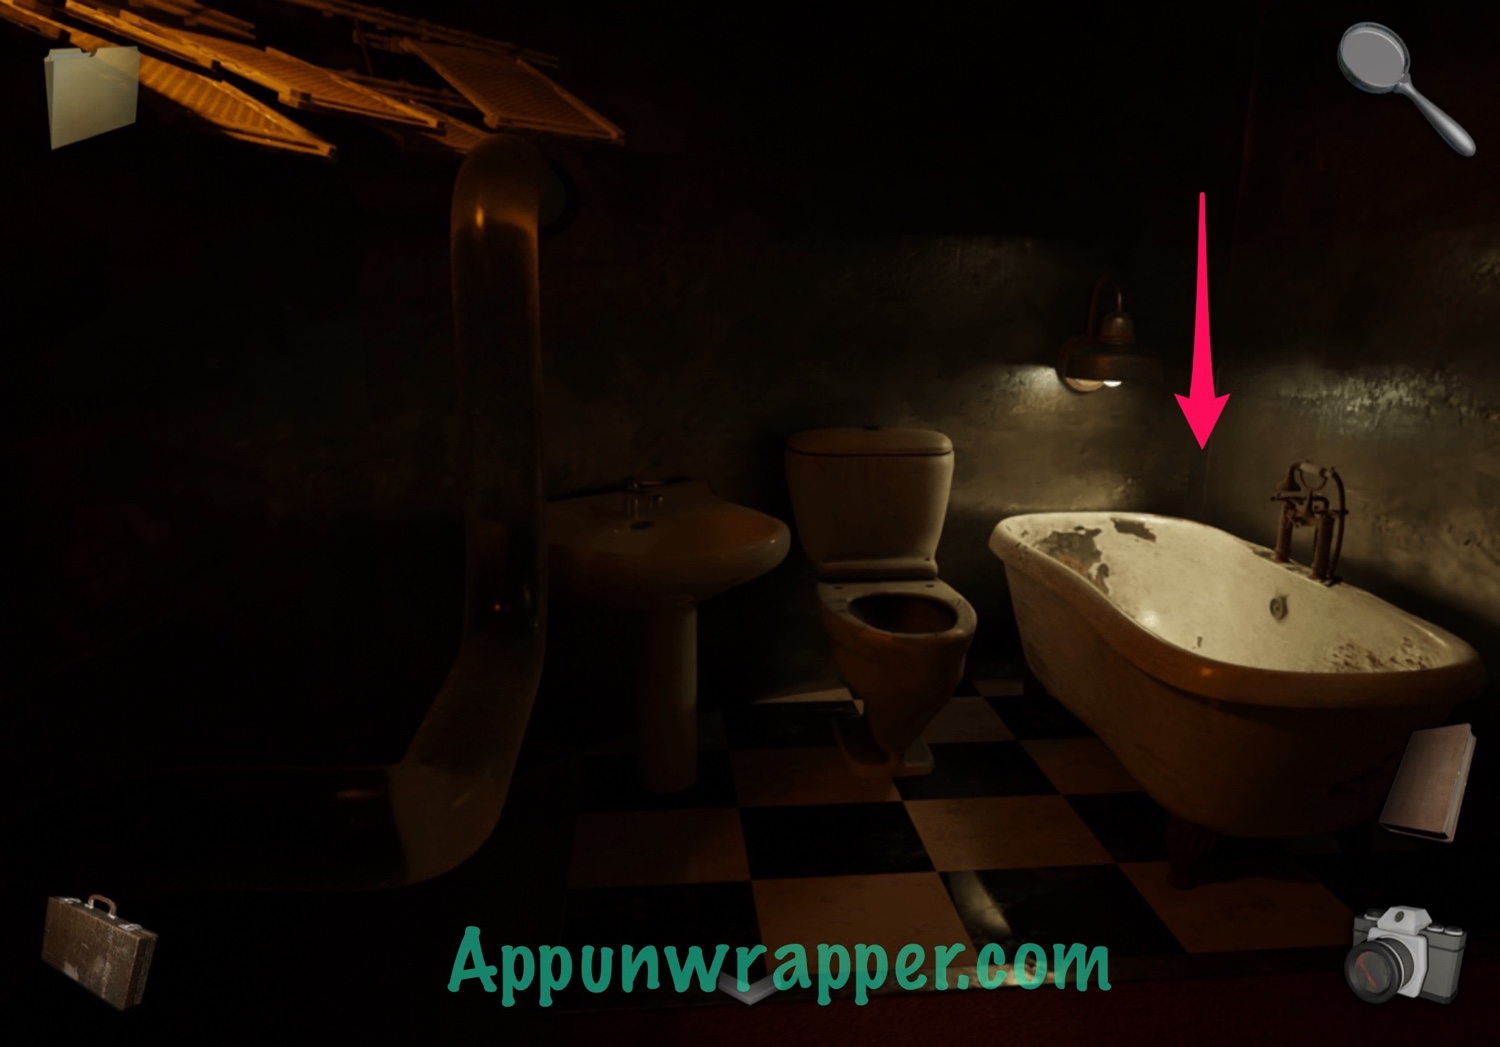
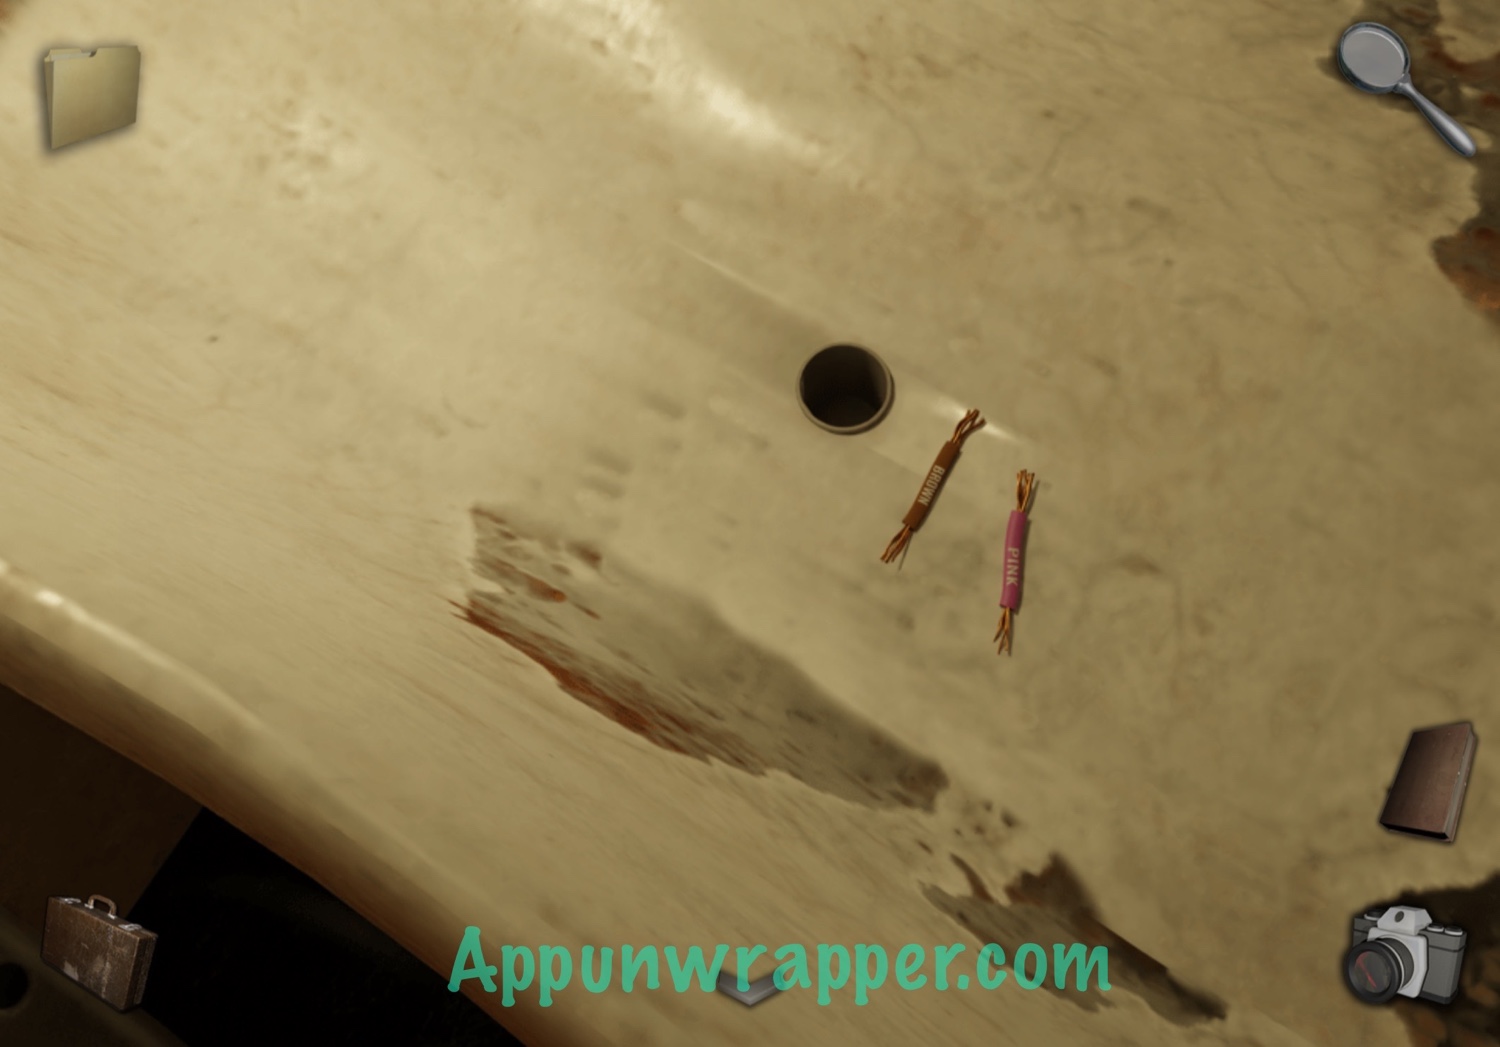
11. Go through the door and look inside the bathtub. Grab two more wires.
12. Leave the bathroom and go back through the left door. Let’s solve the puzzle with the pink liquids. Take out the photo of the laboratory glasses and also the poster about them. You need to use them together to figure out which glasses have the most liquid. Let’s start with the empty one first, since that’s easiest. Look for the symbol on the empty graduated cylinder and bring the pink line all the way to the bottom. Now let’s work on the others. The Erlenmeyer flask holds 2000ml, which is the largest amount for any of the glassware. So the full flask should have the pink line all the way to the top. The other flask is 3/4 full, which would still be 1500ml and bigger than any of the other glassware. So that should be the second tallest. The small beaker is only 500ml and it’s half full at 250ml, making it the smallest amount besides the empty cylinder. So that one should have only one pink segment. Now, the large flask has 1000ml when full, so that should be the third tallest, or 4 pink segments. The other large flask is 3/4 full at 750 ml, so that should be 3 pink segments. And last, the cylinder that’s 2/3 full would be 500ml and 2 pink segments. It should look like the photo below. Then take the two wires.

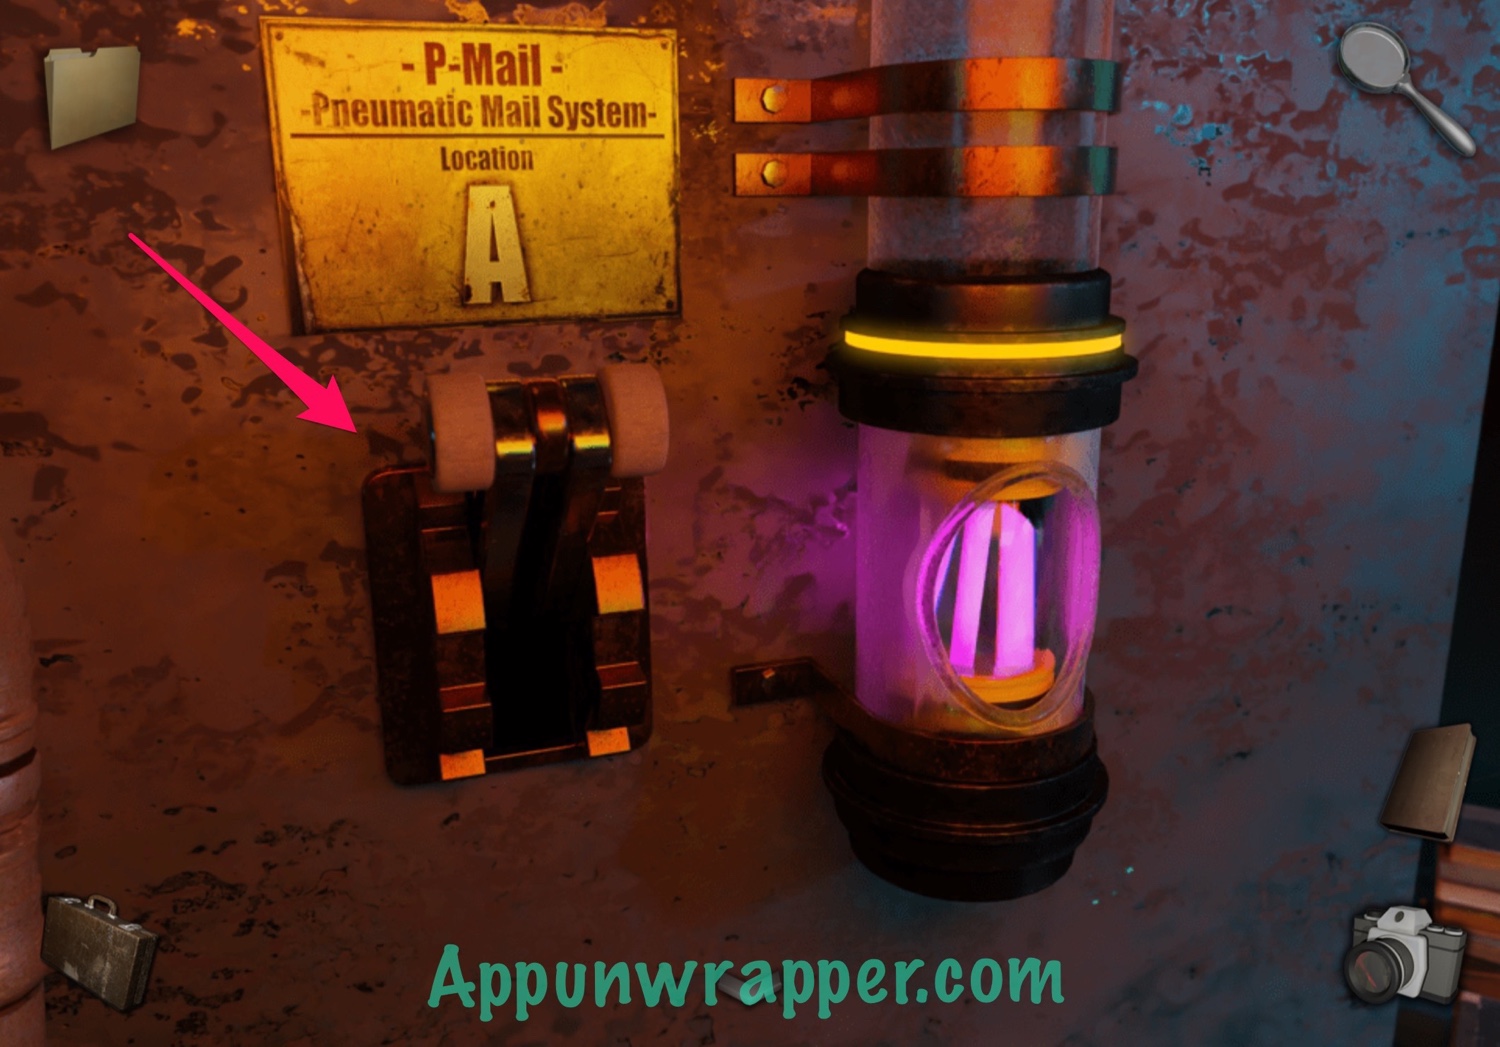
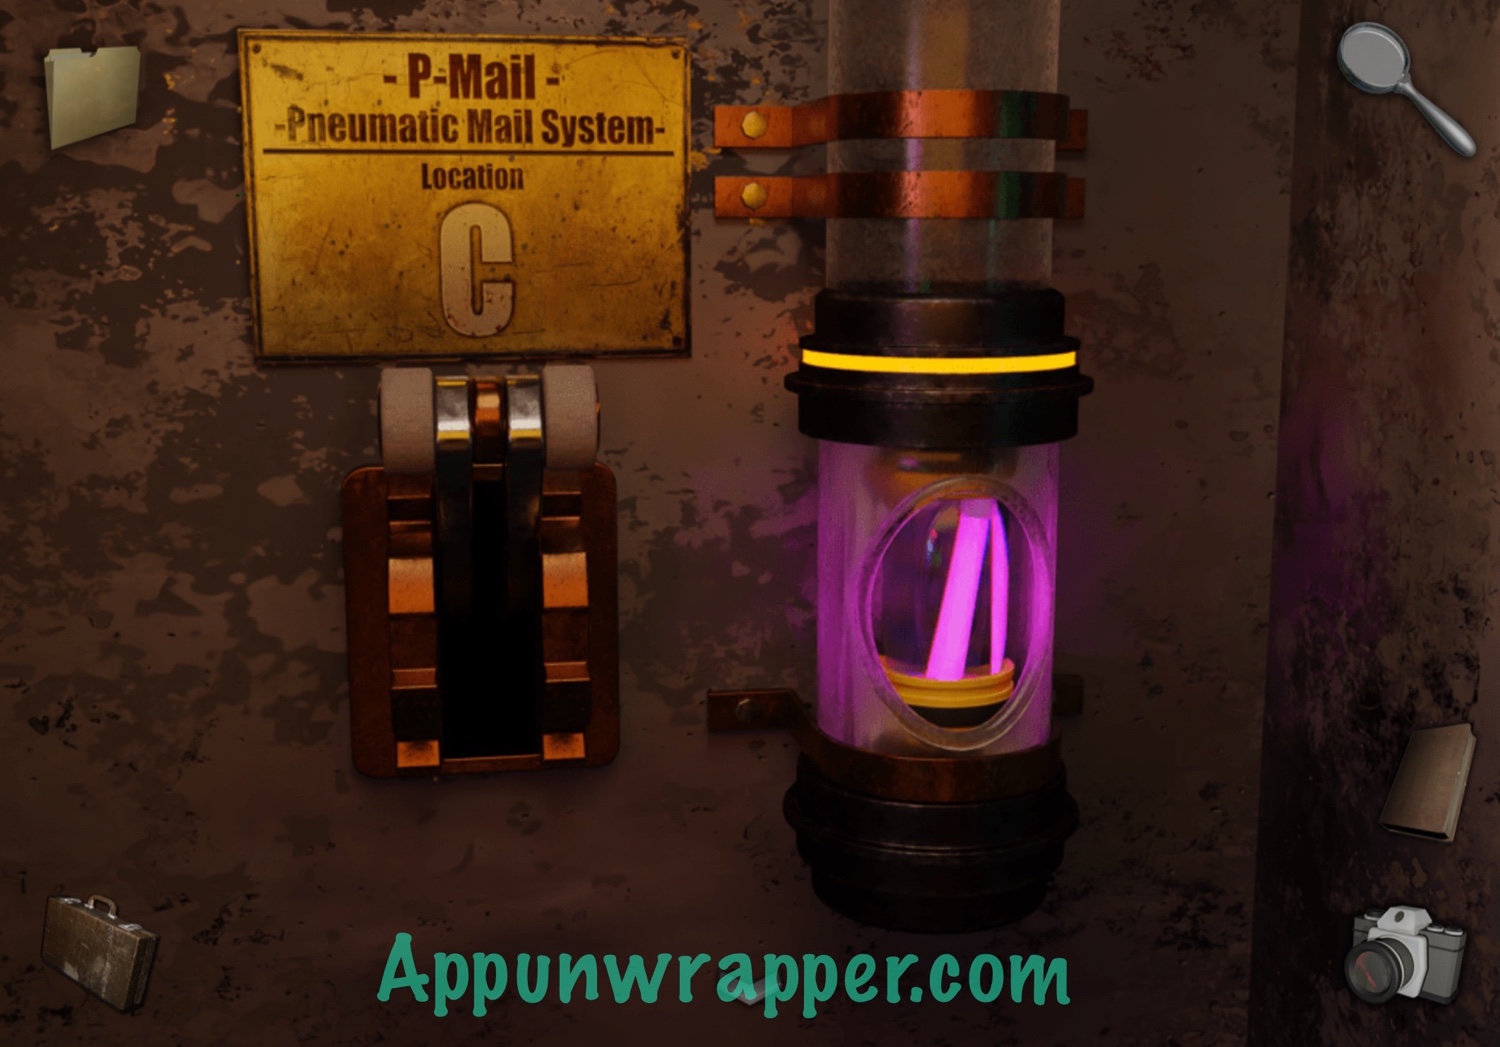
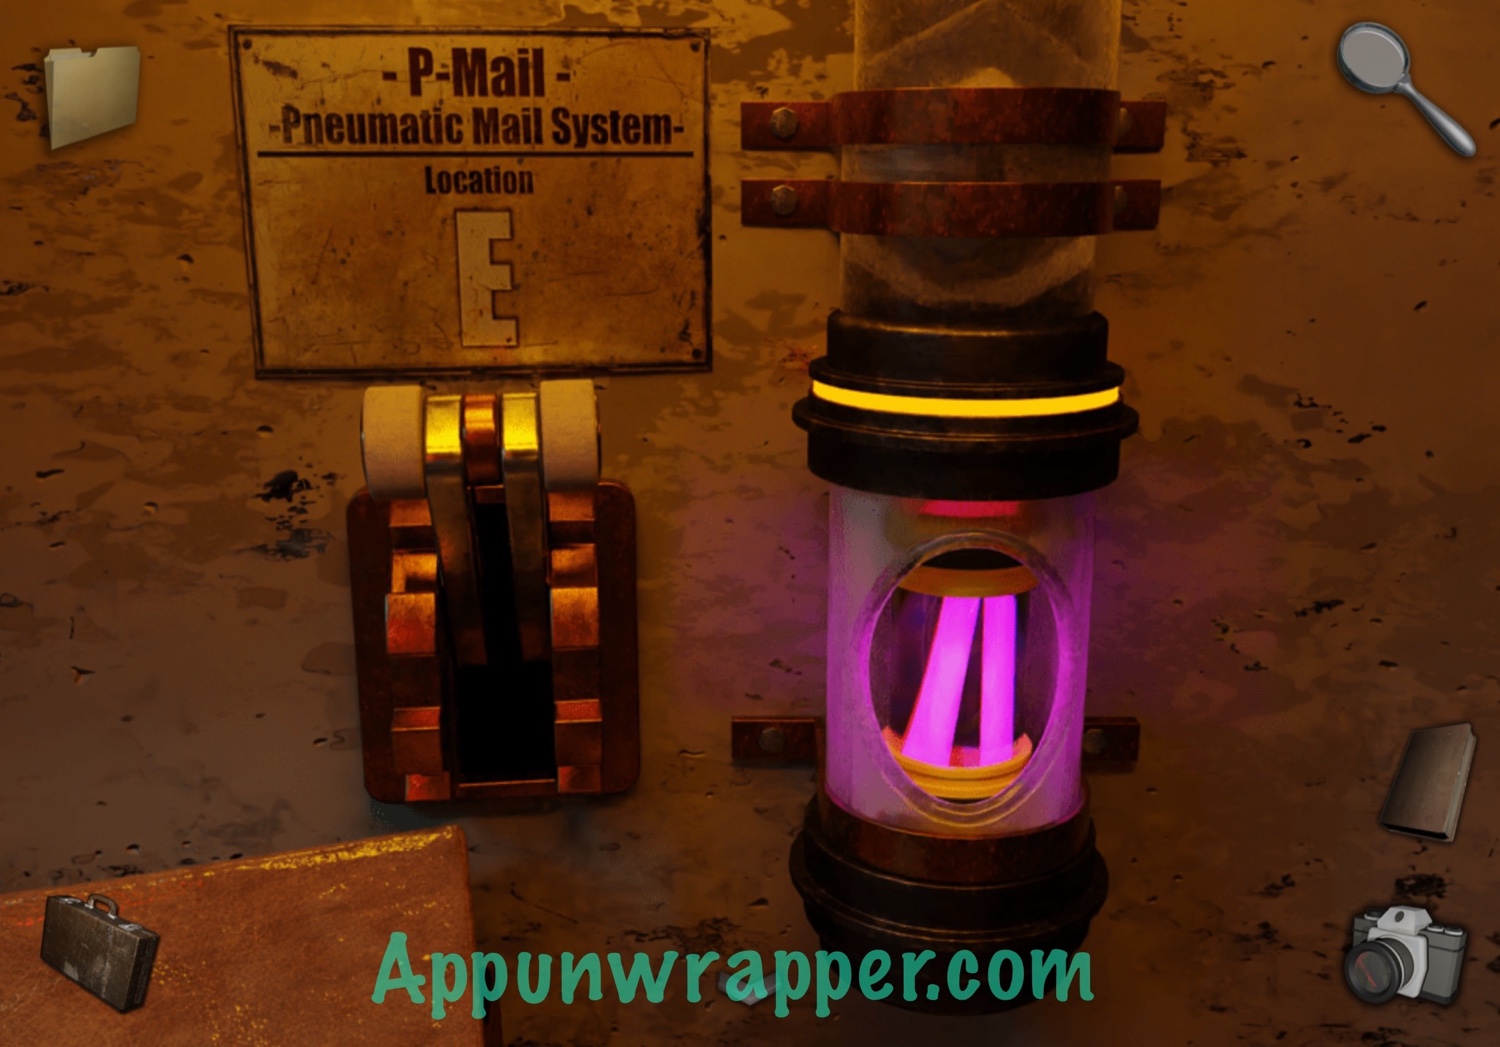
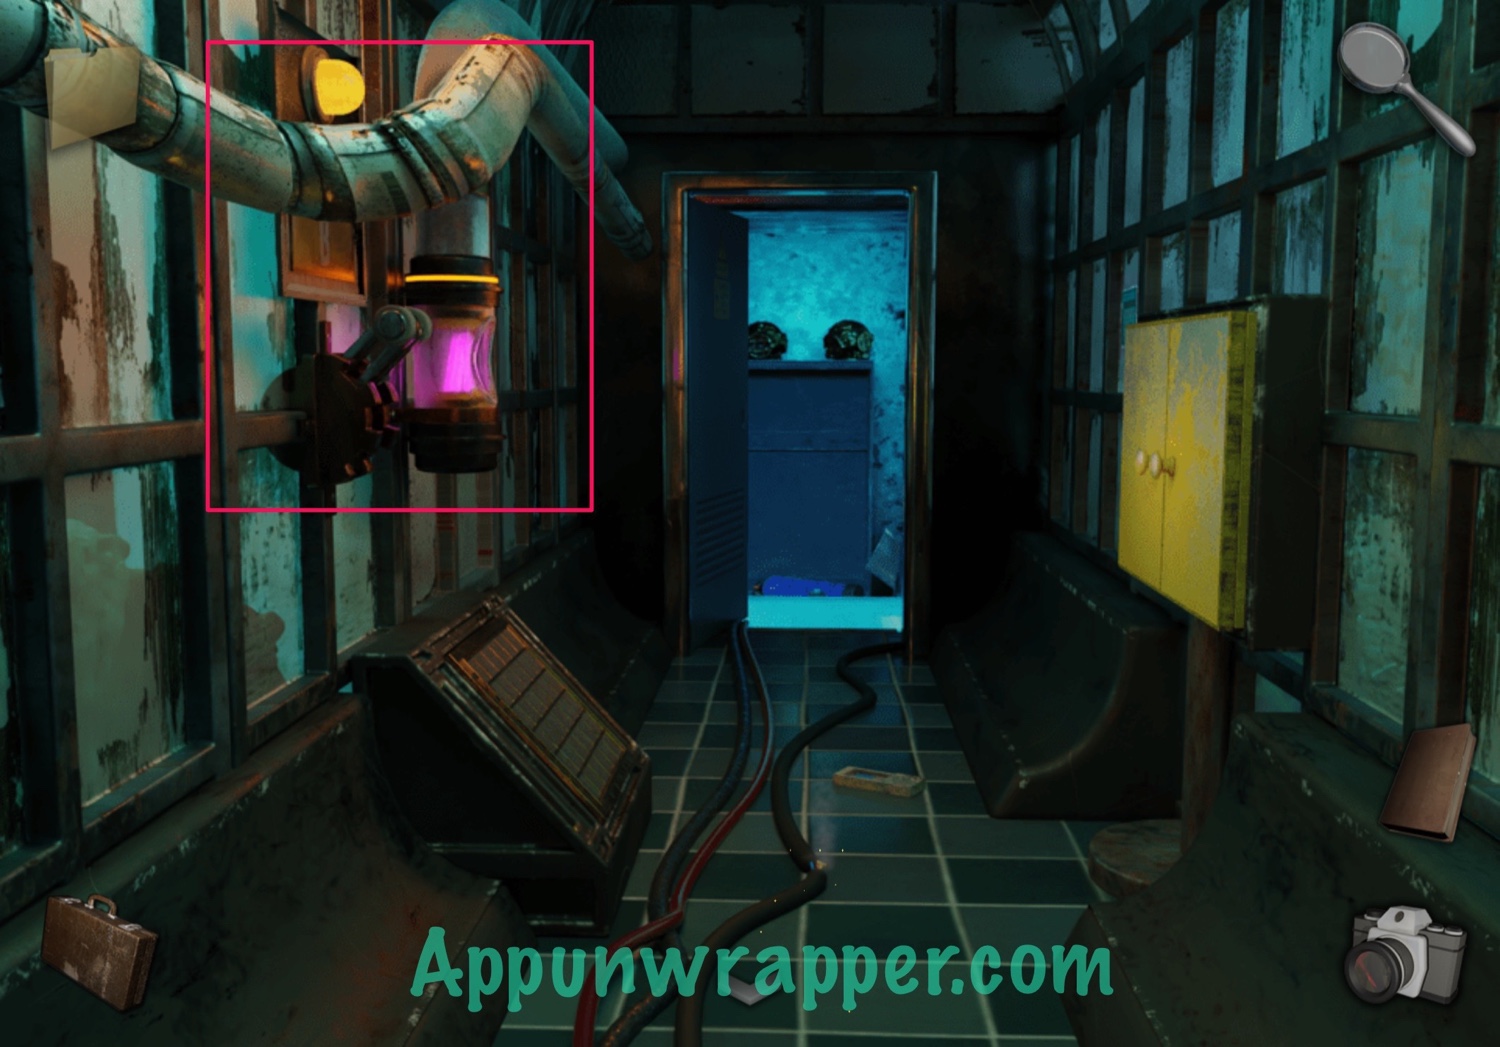
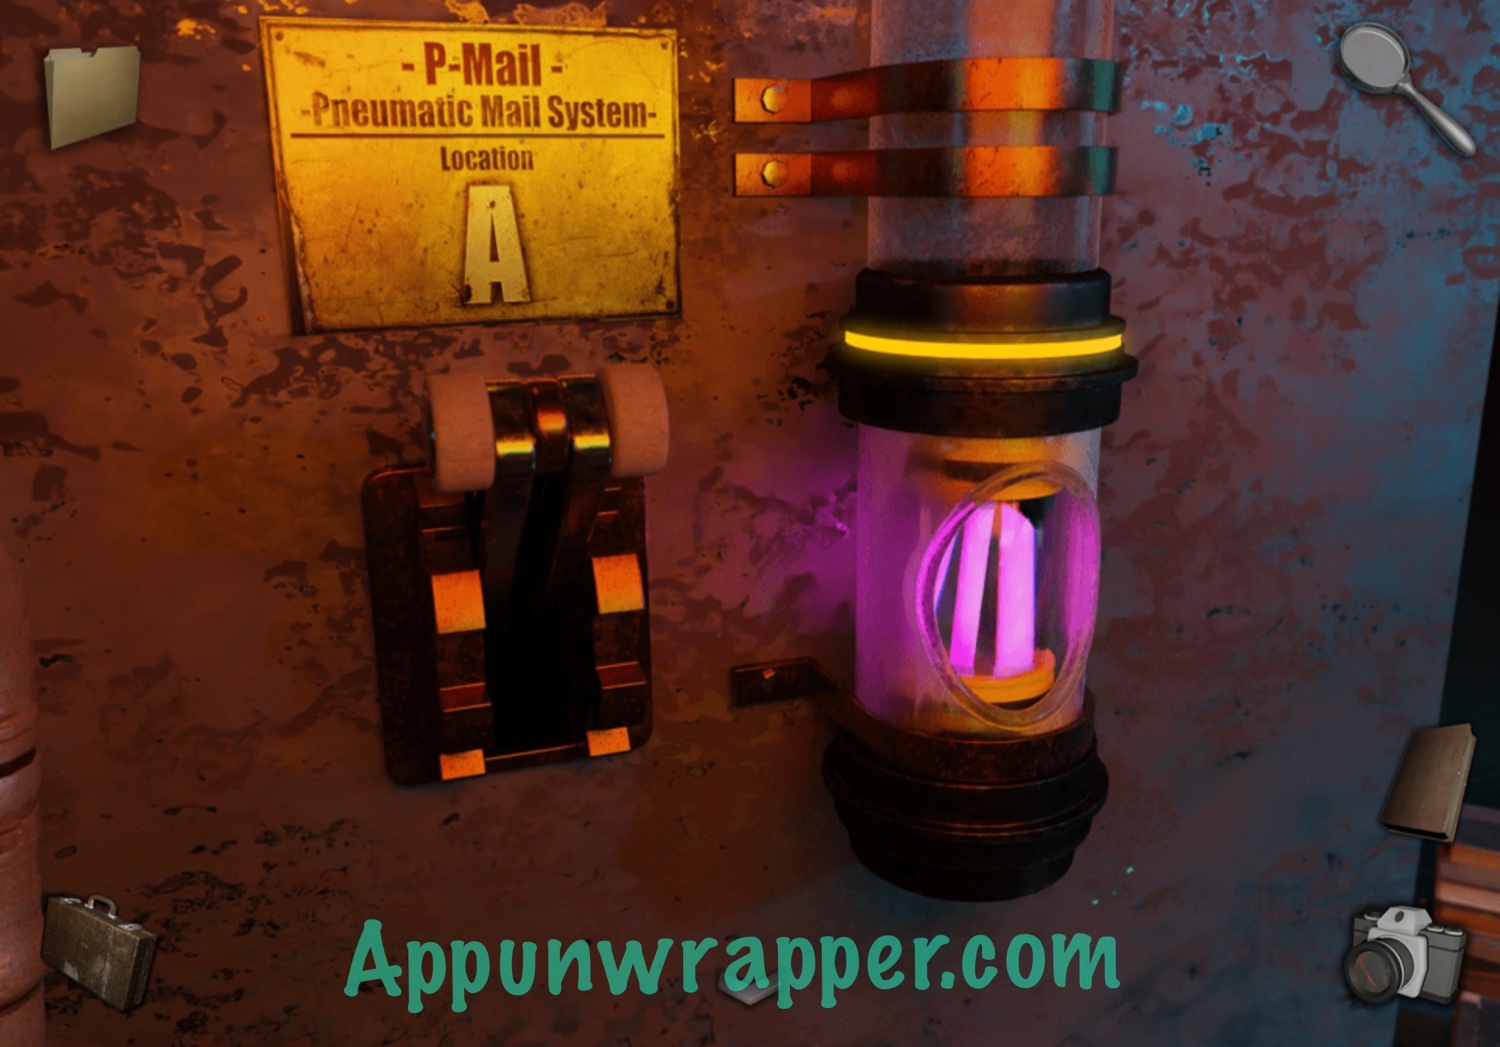
13. Let’s go fetch the capsule and glow sticks. Go back up the ladder to find it inside P-mail A. Don’t pick it up, though. Instead, pull the handle and send it through the mail system. Then find it again and mark down the order. Keep doing it until you end up back at A again. It goes:
A > C > E > D > B > G > F > A


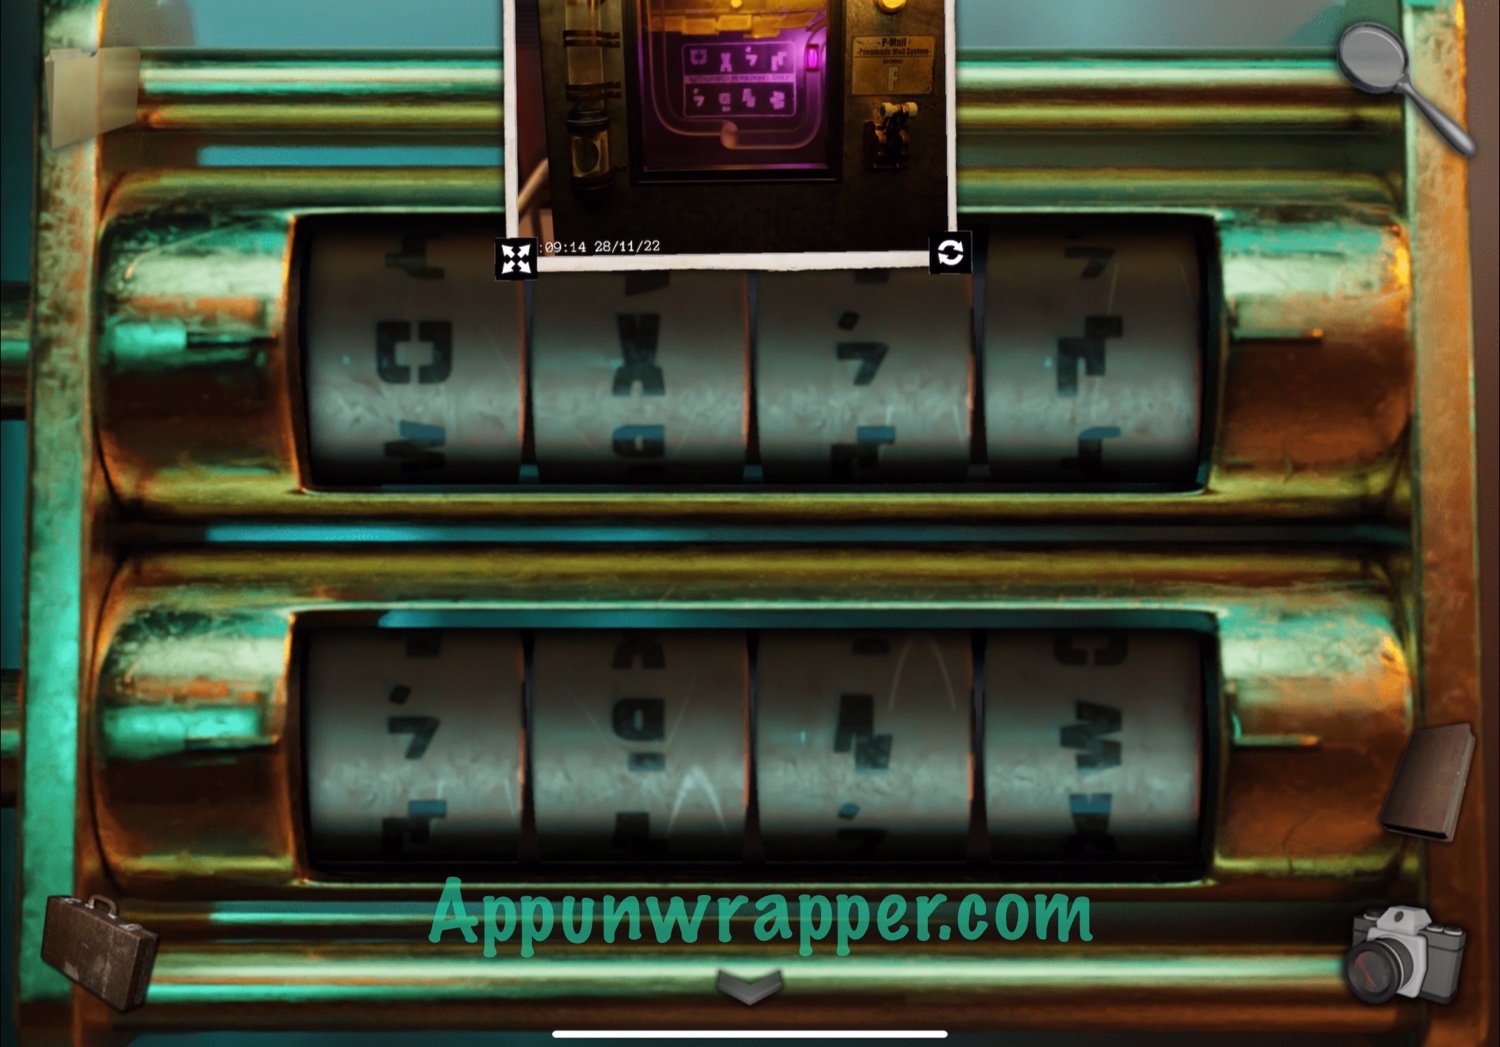
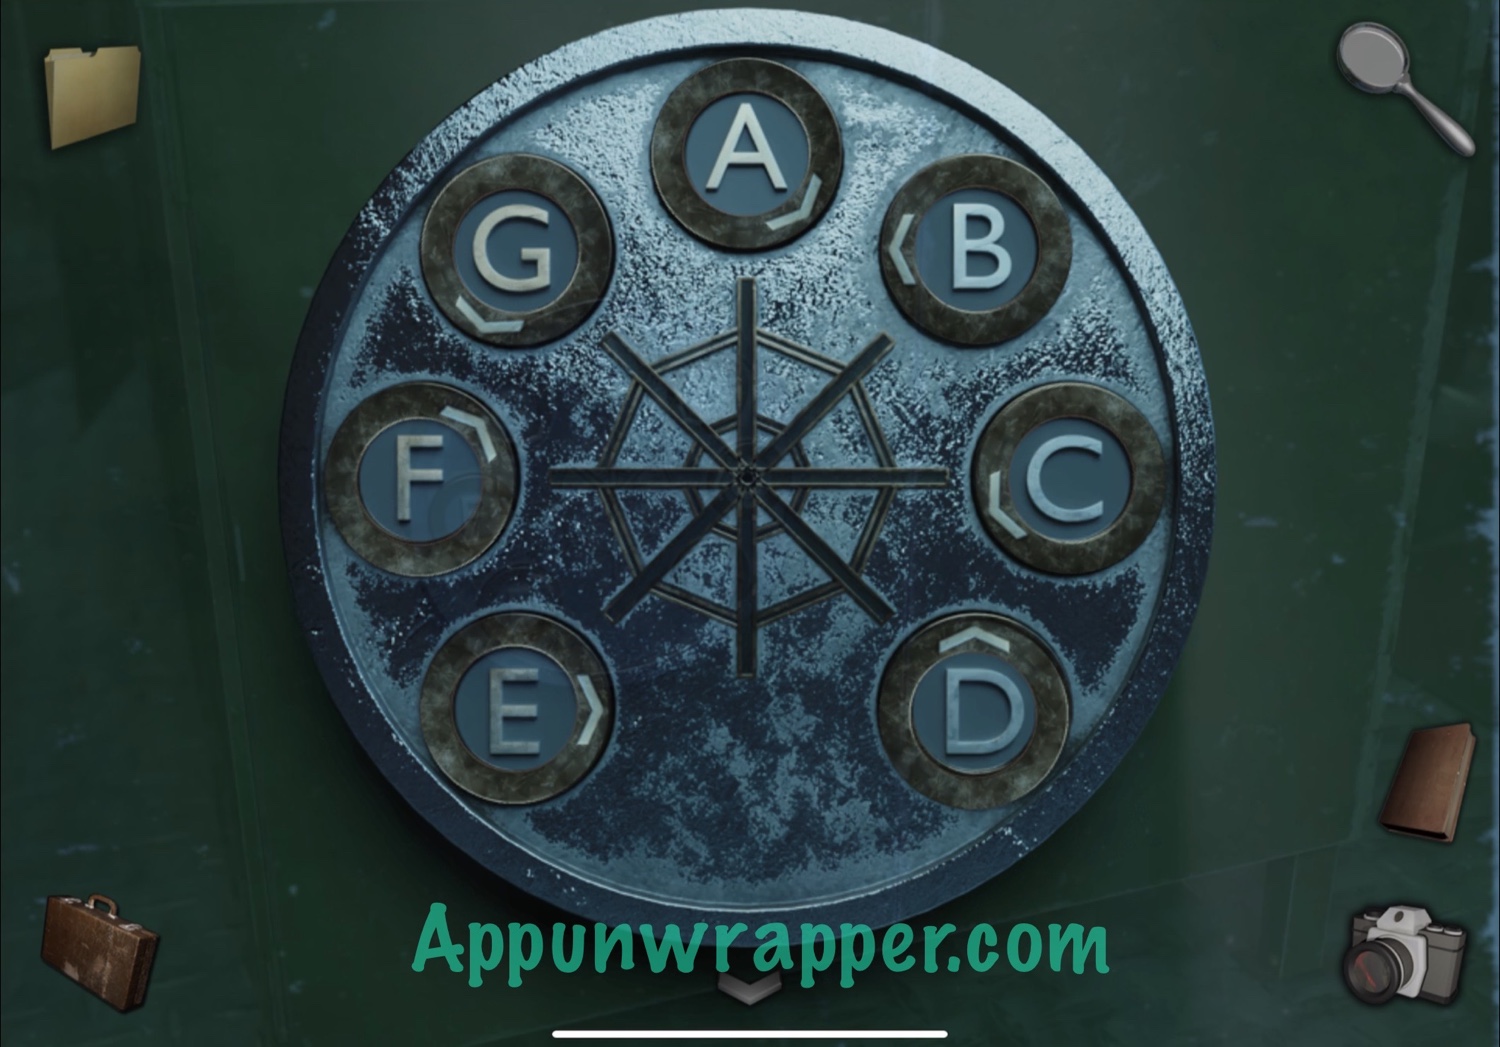
14. Now go back to the laboratory and let’s solve the puzzle on the side of the desk. Point the letters at each other in the order of the mail chutes:
A > C > E > D > B > G > F > A
It should look like the photo below in the end. Then take the last two wires.

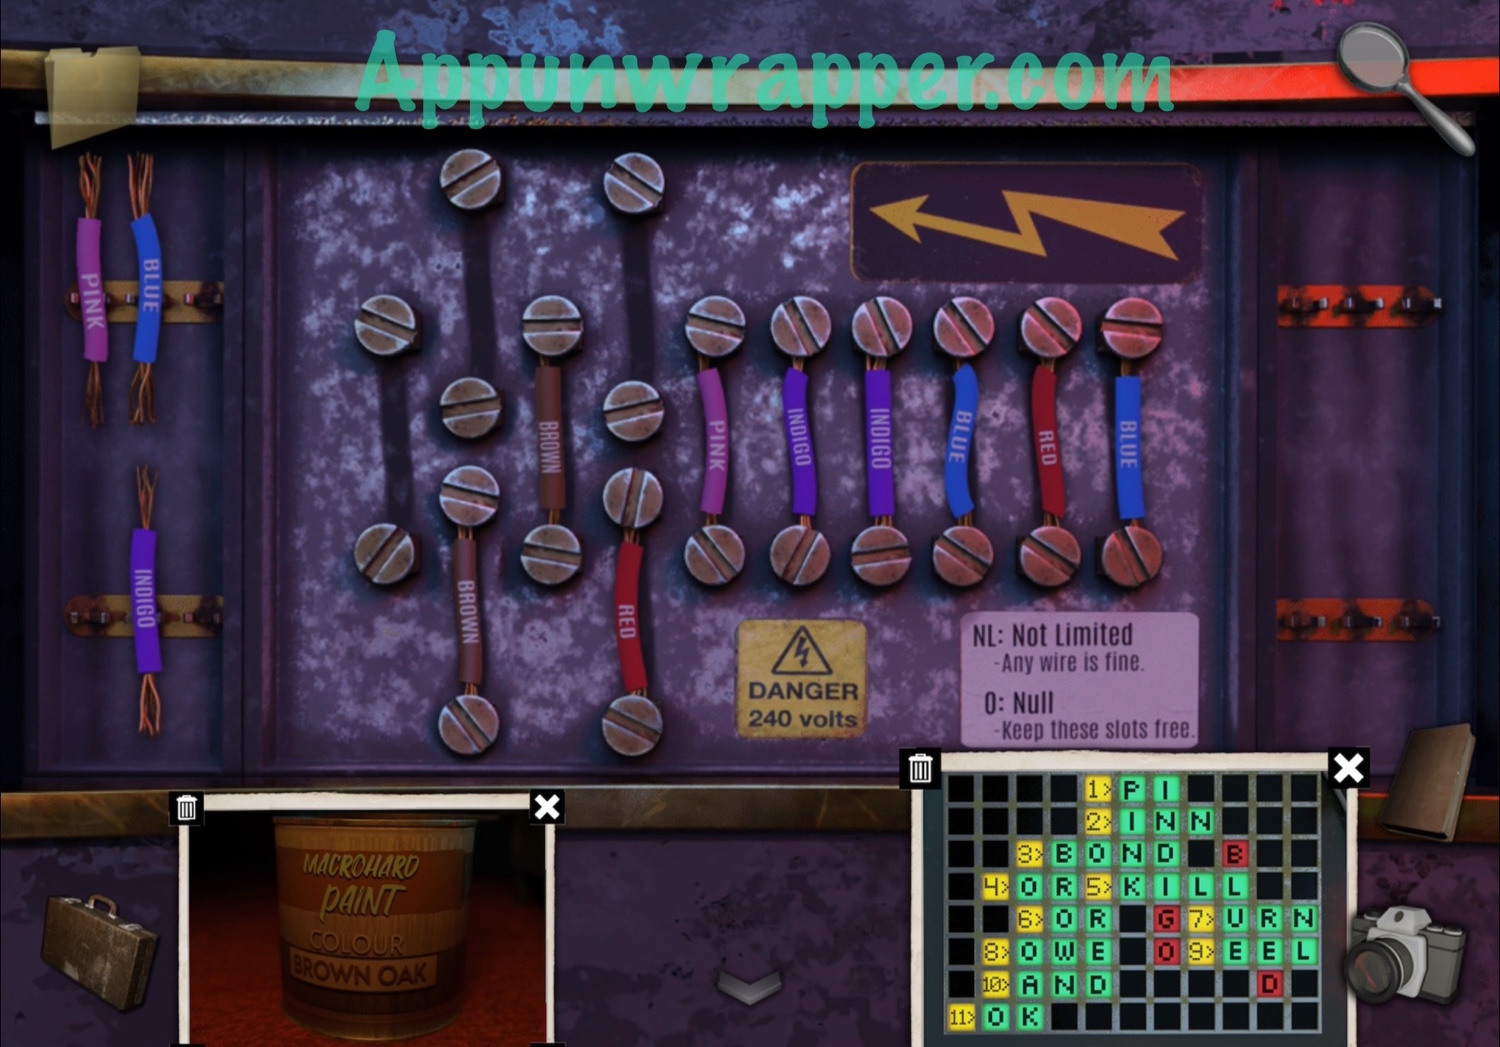
15. Now let’s solve the wires puzzle. First, find it behind a panel on the back wall. Then place all the wires on the side and take out the photo of the crossword puzzle. Place the wires where you see colors on the crossword puzzle. O means leave that slot empty and NL means any wire is fine. Now also, remember the paint can? It said BROWN OAK on it. So we know oak is brown. In the end, it should look like the photo below.

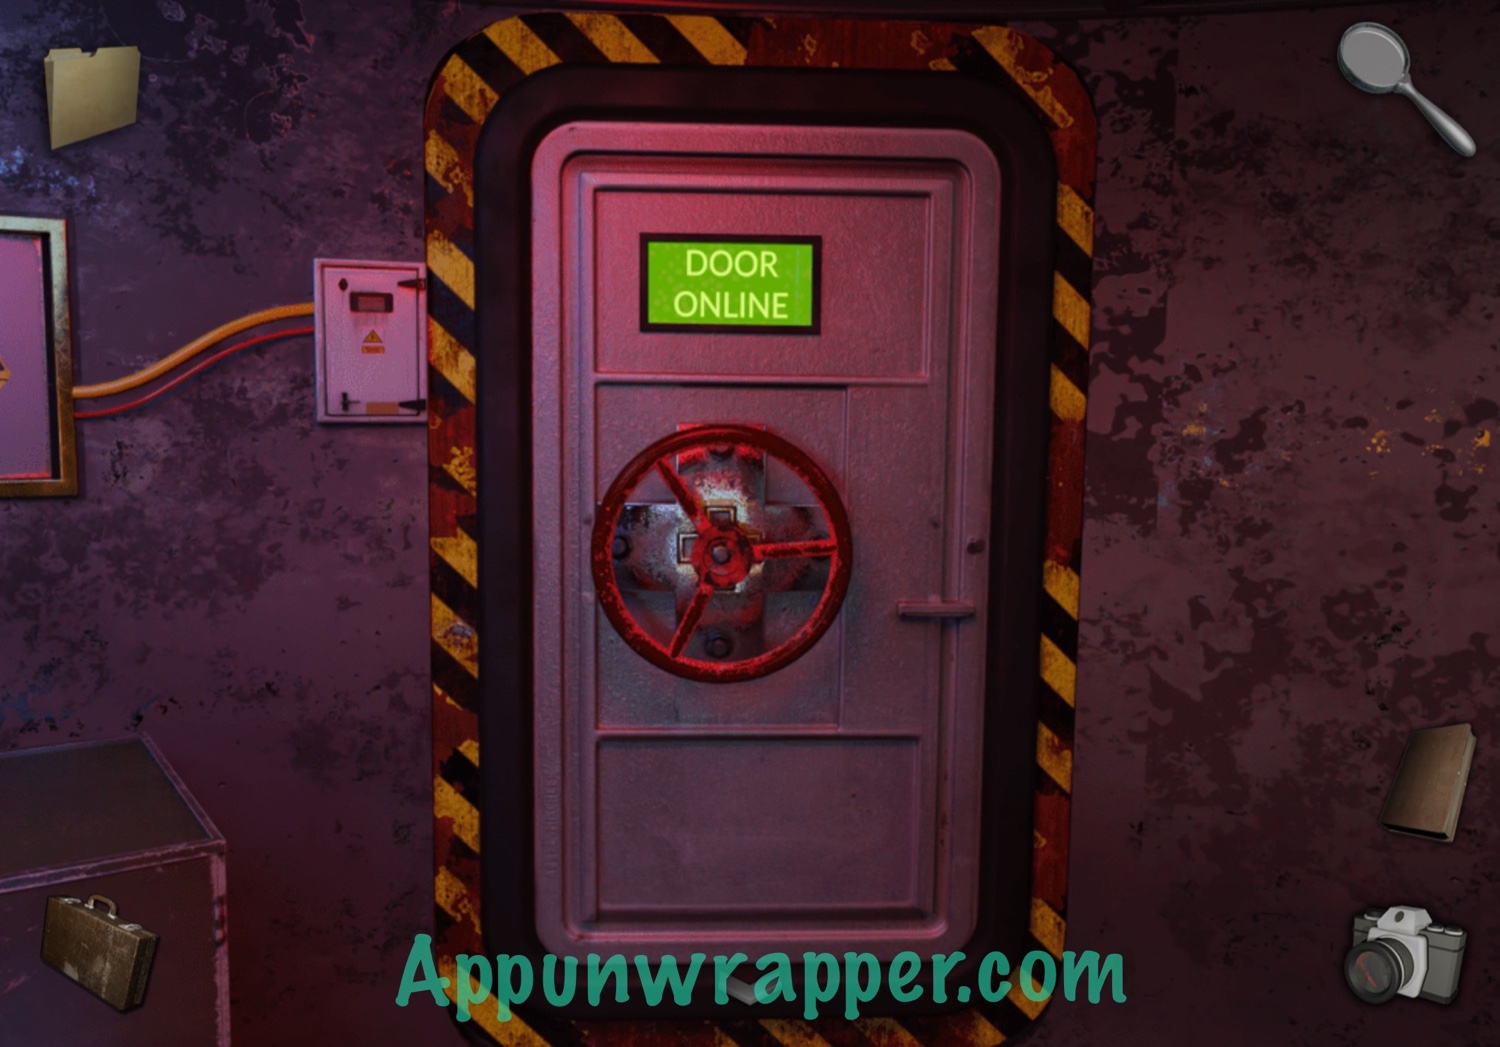
16. Now the door is unlocked. Open it and go through.
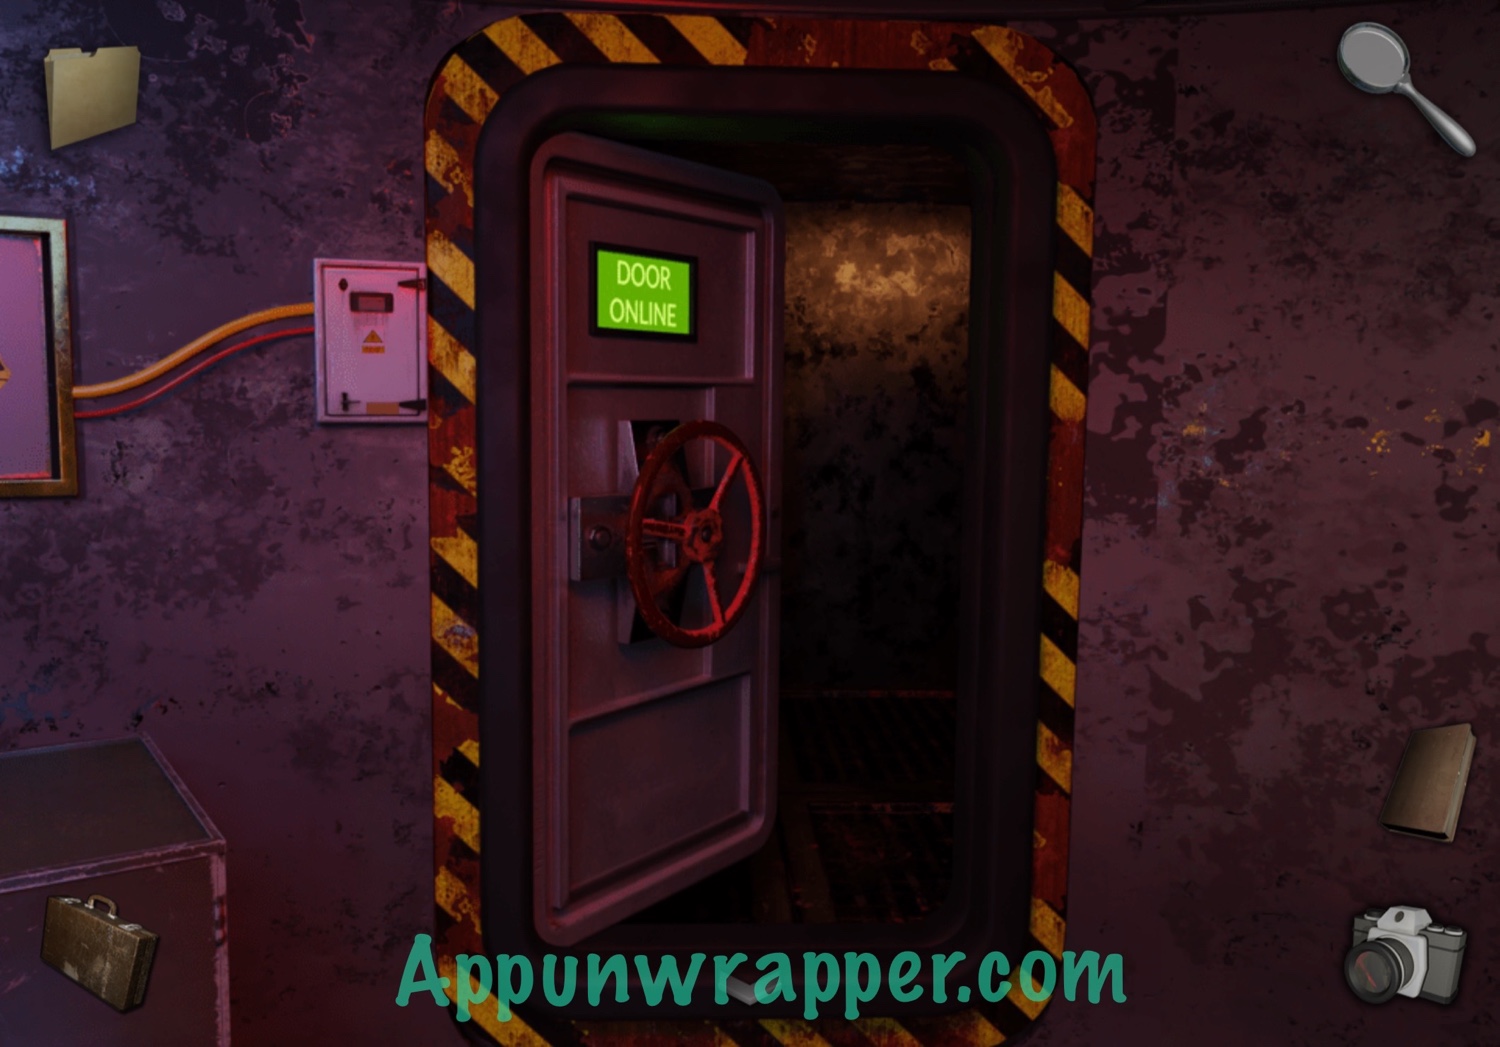
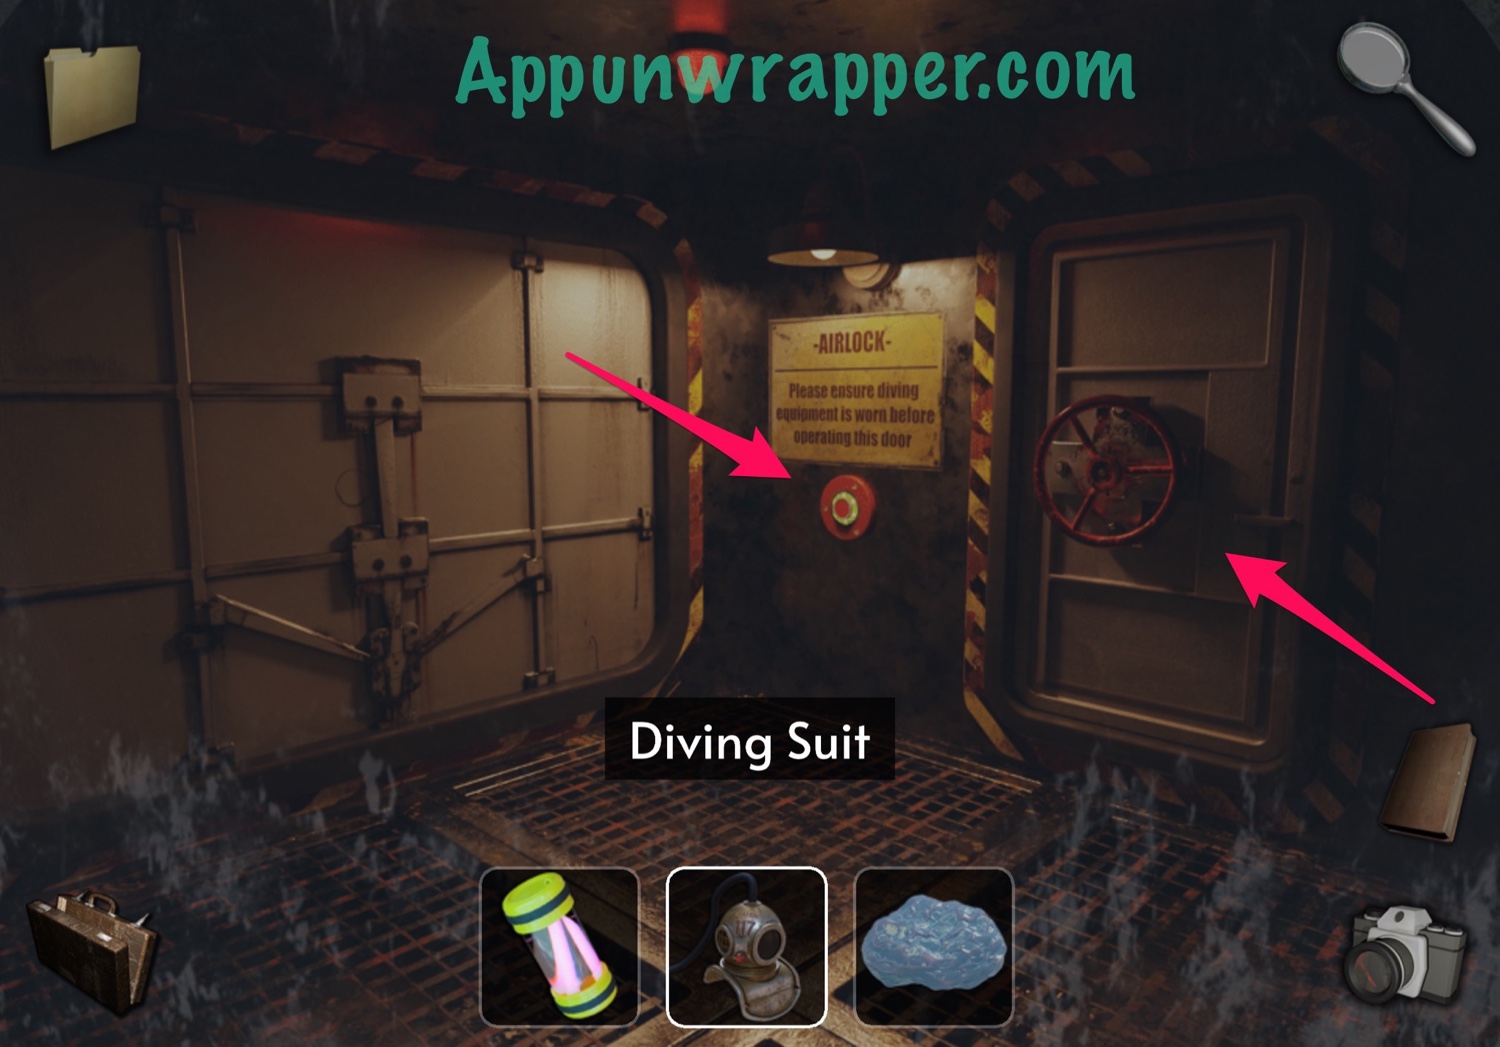
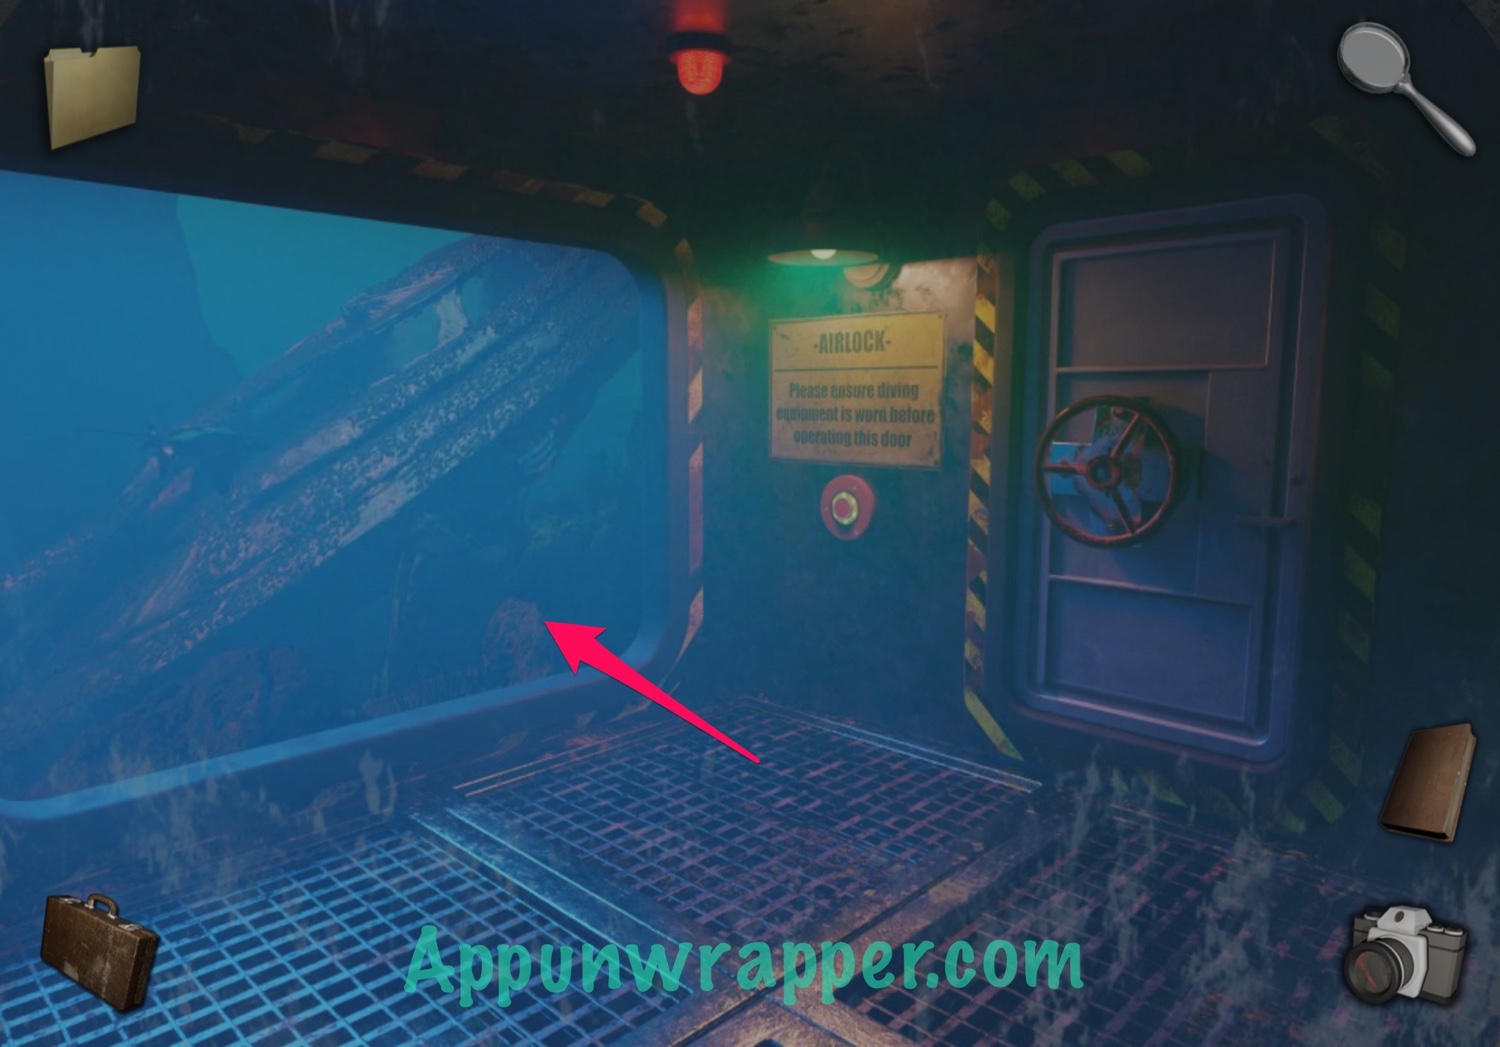
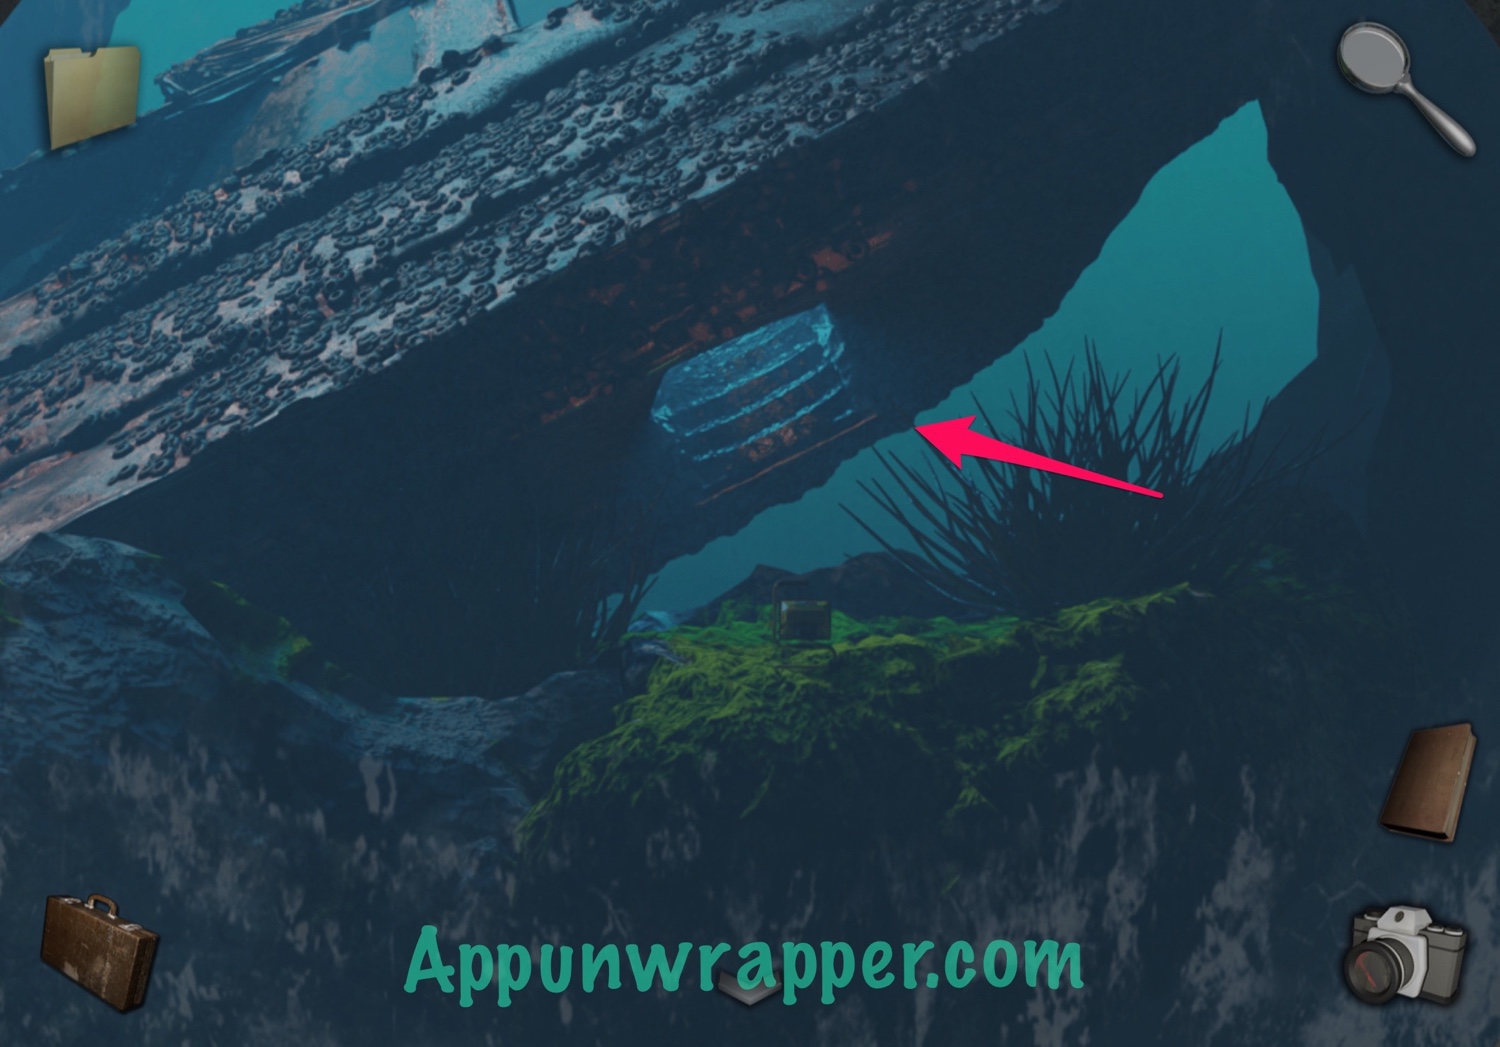
17. Close the door, then put on your diving suit. Press the button to open the airlock button and then head out. Lee tapping through to complete Chapter 4.

Click on the little numbers below to continue to the walkthrough for the Epilogue or click here.

Does anyone get her the crossword puzzle and wire colors tie together?
I’m really confused by the logic of the puzzle near the end with the crossword puzzle and wires. I see how the puzzle gives hints for most of the color sequence but there seem to be two spots where you just have to guess?? I’m hoping someone will have a video to explain that part.
The NL and O tell you how the rest go — either empty or any color works.
On the plate where you place the wires it says O is empty and NL is any wire on the bottom right. Those show up in the crossword so you leave them blank or use any random wire left over
thank you very much!!
Hi
Do you know that your website doesn’t work properly any more because of all the ads?
I cant see any of your walkthroughs any more. The only things that appear are ads 😢
Anyone else having these issues?
Can you email me a screenshot? I only see ads between paragraphs or the one that creates a border for a couple of seconds and then disappears. I can see all the content fine?
I can’t for the life of me figure out the blue rings. I watched the “TV” several times and still can’t get it. It looks like it’s the 4th ring (from the inside) first then both the fifth and 1st ring? Then 2 then 3? I have tried it backwards and forwards any guidance would be great thank you
There are screenshots in my walkthrough you can copy.
I Tried this a hundred times, But it doesnt work 😩
The Solution is (From inside to outside) 4 – 1 – 2 – 3, Or ?
I press 4 – 1 – 2 – 3, Bit it doesnt work 😩
I Play it on an IPad IOS 16
Can anybody help me
You have to hit the second to largest ring then wait for the dark color to go away before the next step.
Then hit the center ring and largest ring one right after the others and wait for the color to disappear and so on…
I’m very confused by the beaker puzzle. Essentially the beakers are dealing in 8ths (250, 500, 750…2000) and the slots in the bedroom are in 6ths. So how do you indicate 3/4th?
Also, in your solution, you show the Taurus sign halfway full (3 of 6) but the ratio given is 3/4th.
I just don’t get it! This is the kind of unintuitive stuff that drives me crazy about Glitch games. Another example: why only count the striped balls in the pool puzzle?
Anyway I’d appreciate any explanation you could give.
Use the poster on the wall to determine the amounts in each beaker, cylinder, or flask. Then number the containers with the signs in the order of their amounts 0-2000 ml, 0ml being 1st and 2000 ml being 7th. Then fill the pink thing accordingly. The cylinder with nothing in it is 1 so that stays empty, the container with 250 is next so take the pink liquid up one notch in the slot that has the same sign. The next container has 500 so the slot with the same sign as the container that has 509 goes up one notch from the previous one which was 250. And so on. Hope that makes sense. It took me a while to realize the ratio is only to help you figure out the measurements of the liquid in each container, and the measurement of the liquid in each container helps you determine the order of the signs and each sign is just one more section of pink filled than the last.
I was so angry at the pink liquid trying to mathematically figure out the heights of each notch. So mad that didn’t matter at all, finally had to do a reveal in the puzzle and still didn’t get why they did it that way. Basically just order smallest to largest so thanks for explaining that!
me too. i don’t get it, just make it one more…
Curious if the flashing lamp and flashlight spell something in Morse code?
Can’t get the Wilson puzzle to work despite reading the hints above.
Same here, have tried it about 10 times with no li
Uck
You need to click on two of the rings at the same time. Look at the video, then it’s clearer.
Yep, can’t get through the Wilson puzzle.
i can only find 1 red wire???
where is the second one?
I’m having issues with my photos developing in Station 117. They only spear black.
Check permissions for the app. I had to allow phone and files before the photos worked.
Maybe I’ve just confused myself, but re the clock puzzle: Surely 4.50 is ten to five, not ten to four. Same with some of the other times. How are you supposed to know that the hands for 4.50 are in the “It’s ten to four” position? That really annoyed me.