Recursion
By: Glitch Games

Recursion is Glitch Games’ latest adventure game and it’s part of the Glitch Broken Dreams Collection. What sets it apart from their other games is that it’s on a time loop and resets back to the start every few minutes. But your photos stay with you and that allows you to skip past puzzles you already solved. It can still get quite tricky, so this walkthrough guide should help if you get stuck on any of the puzzles. Feel free to ask for extra help in the comments section.
Walkthrough:
Prologue + Chapter 1 | Chapter 2 | Chapter 3 + Epilogue
You can watch my video for the full game or continue below for my step-by-step guide:
Chapter 2:
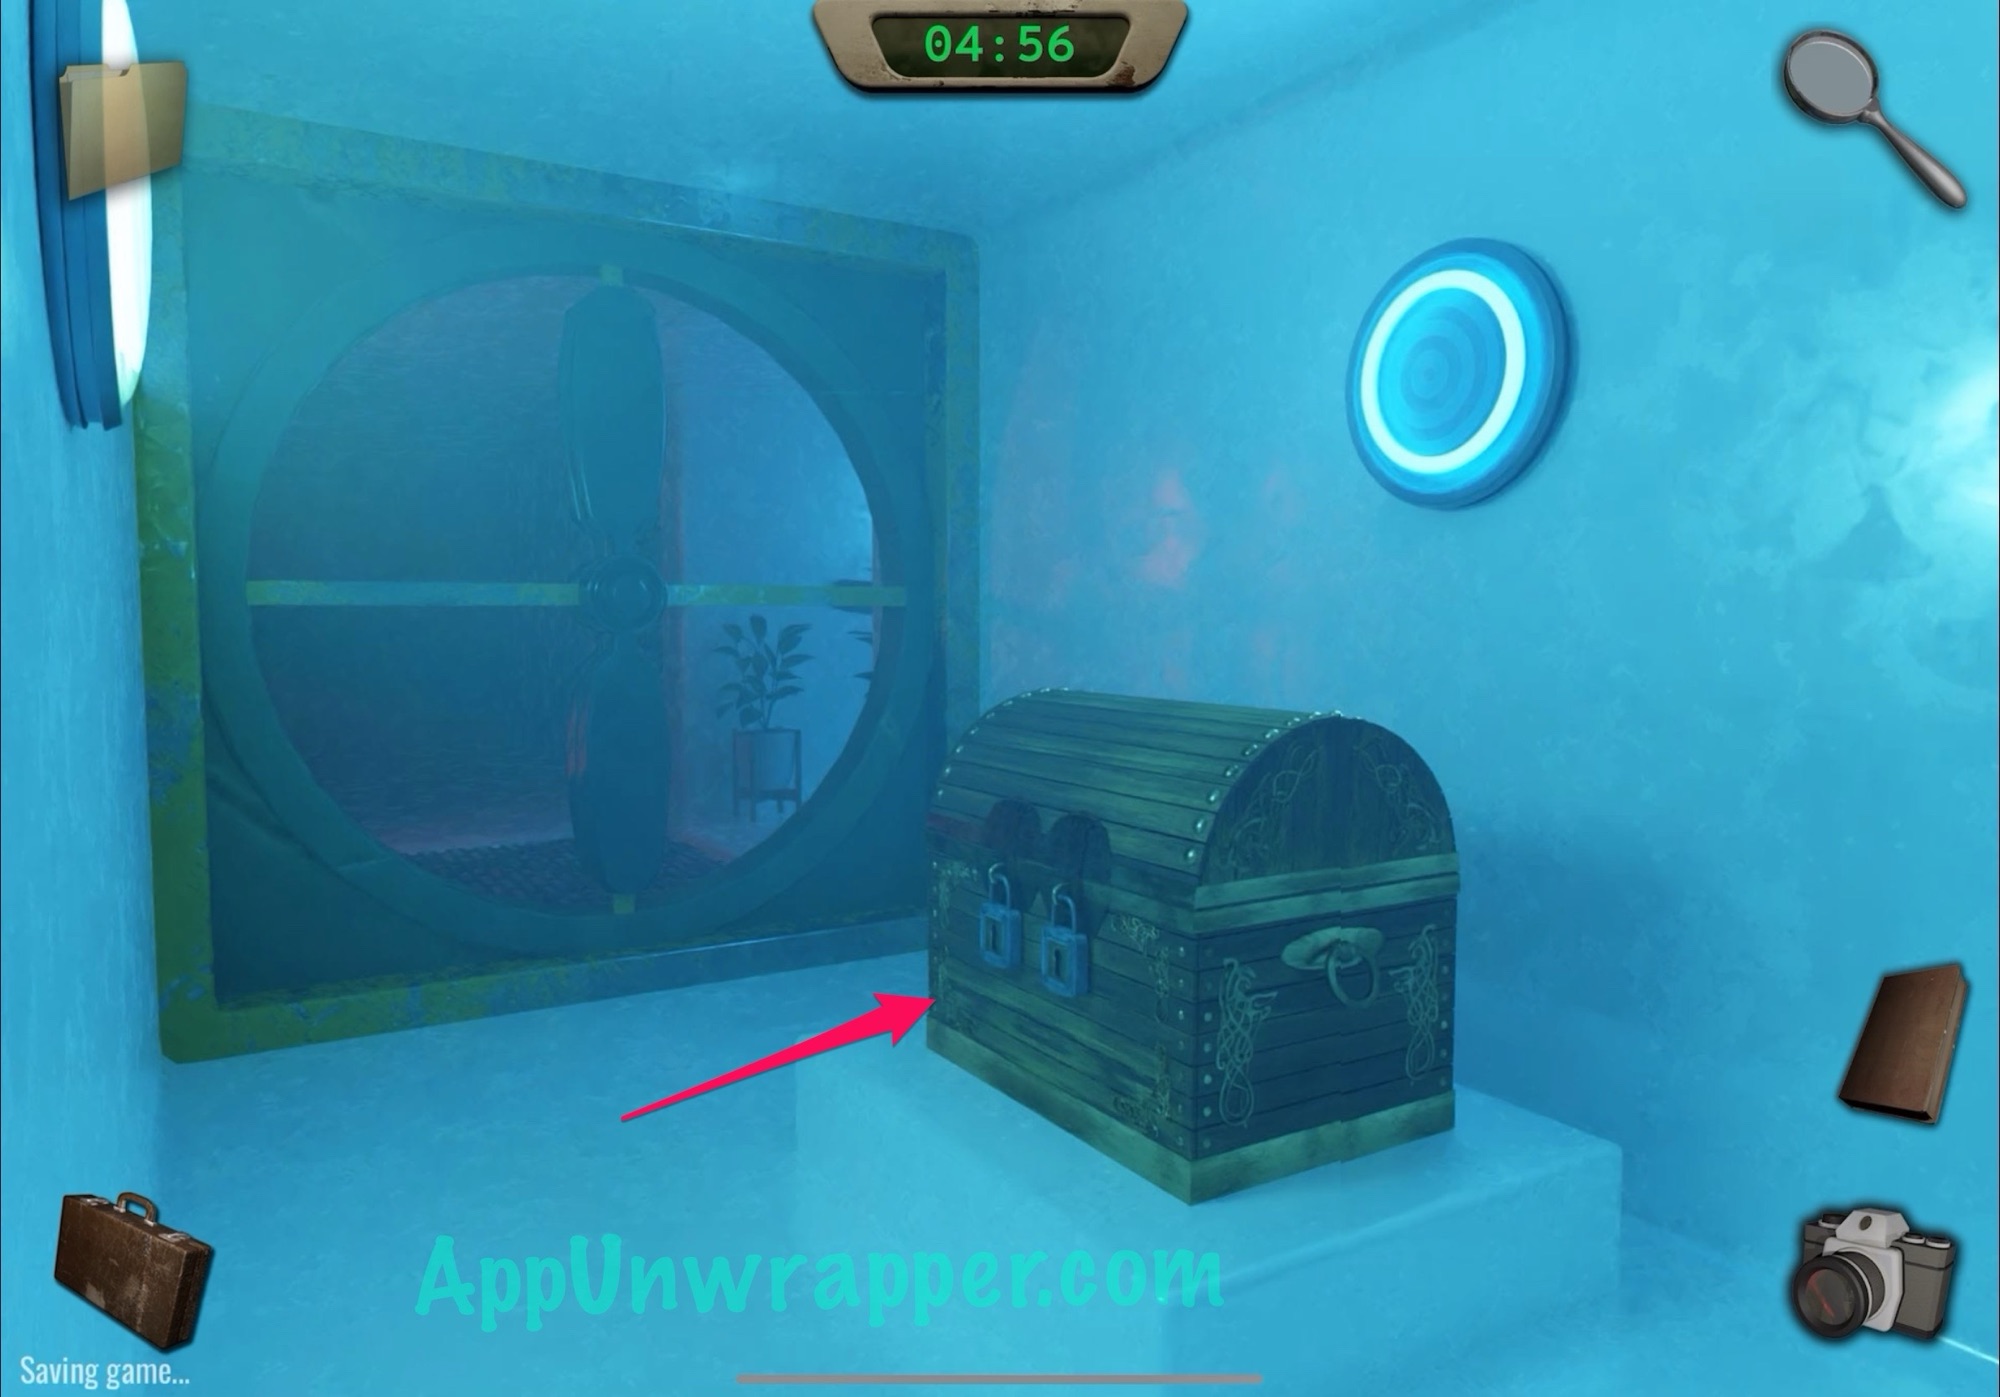
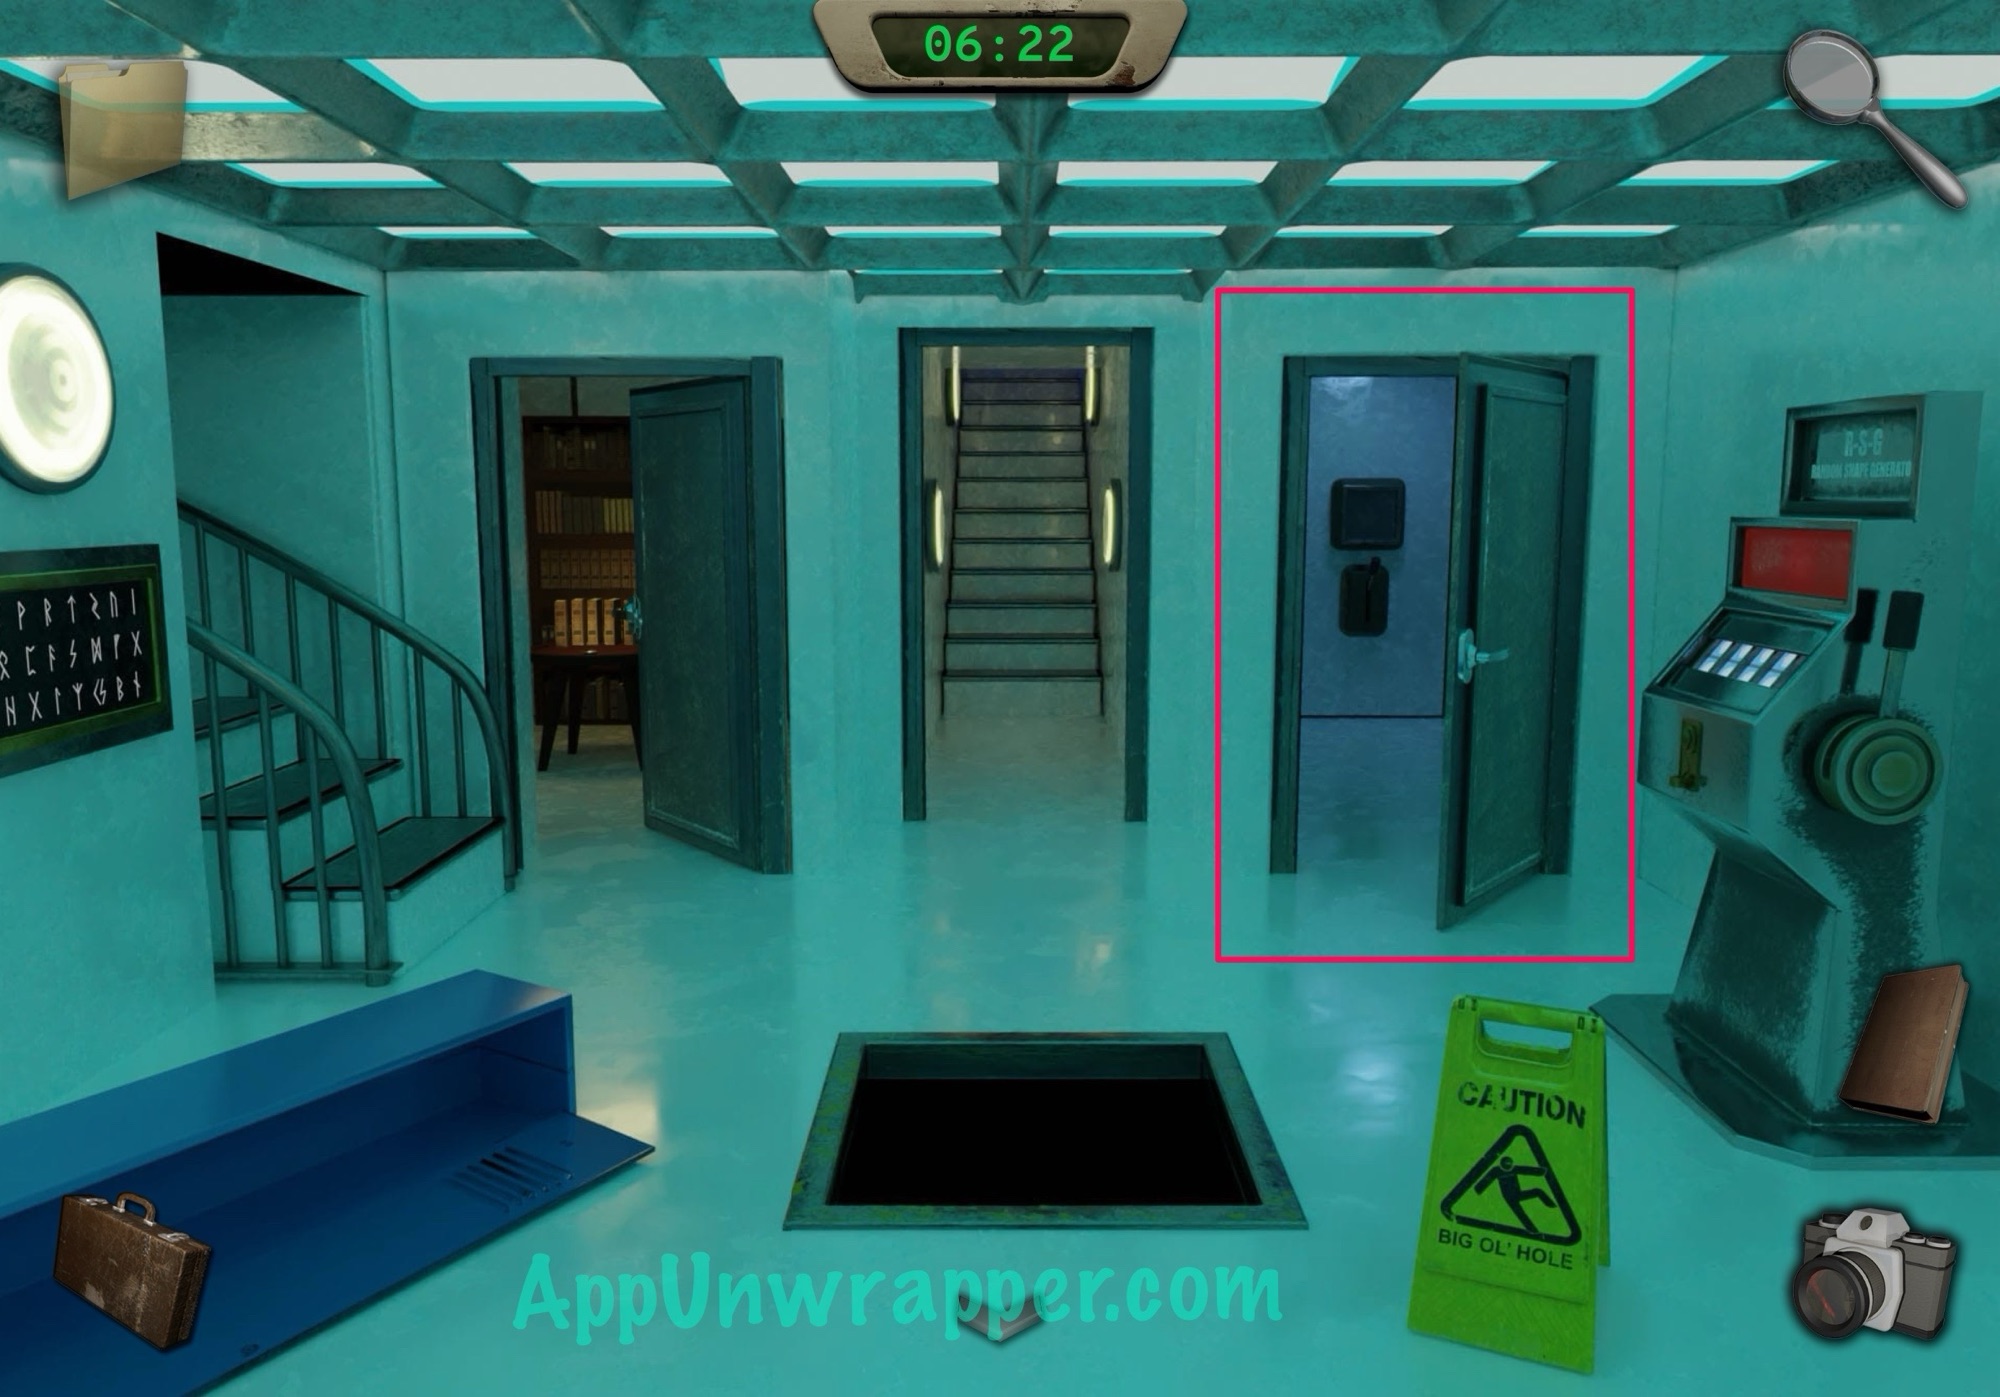
1. First off, open the locker and grab the ball. Then head up the stairs.

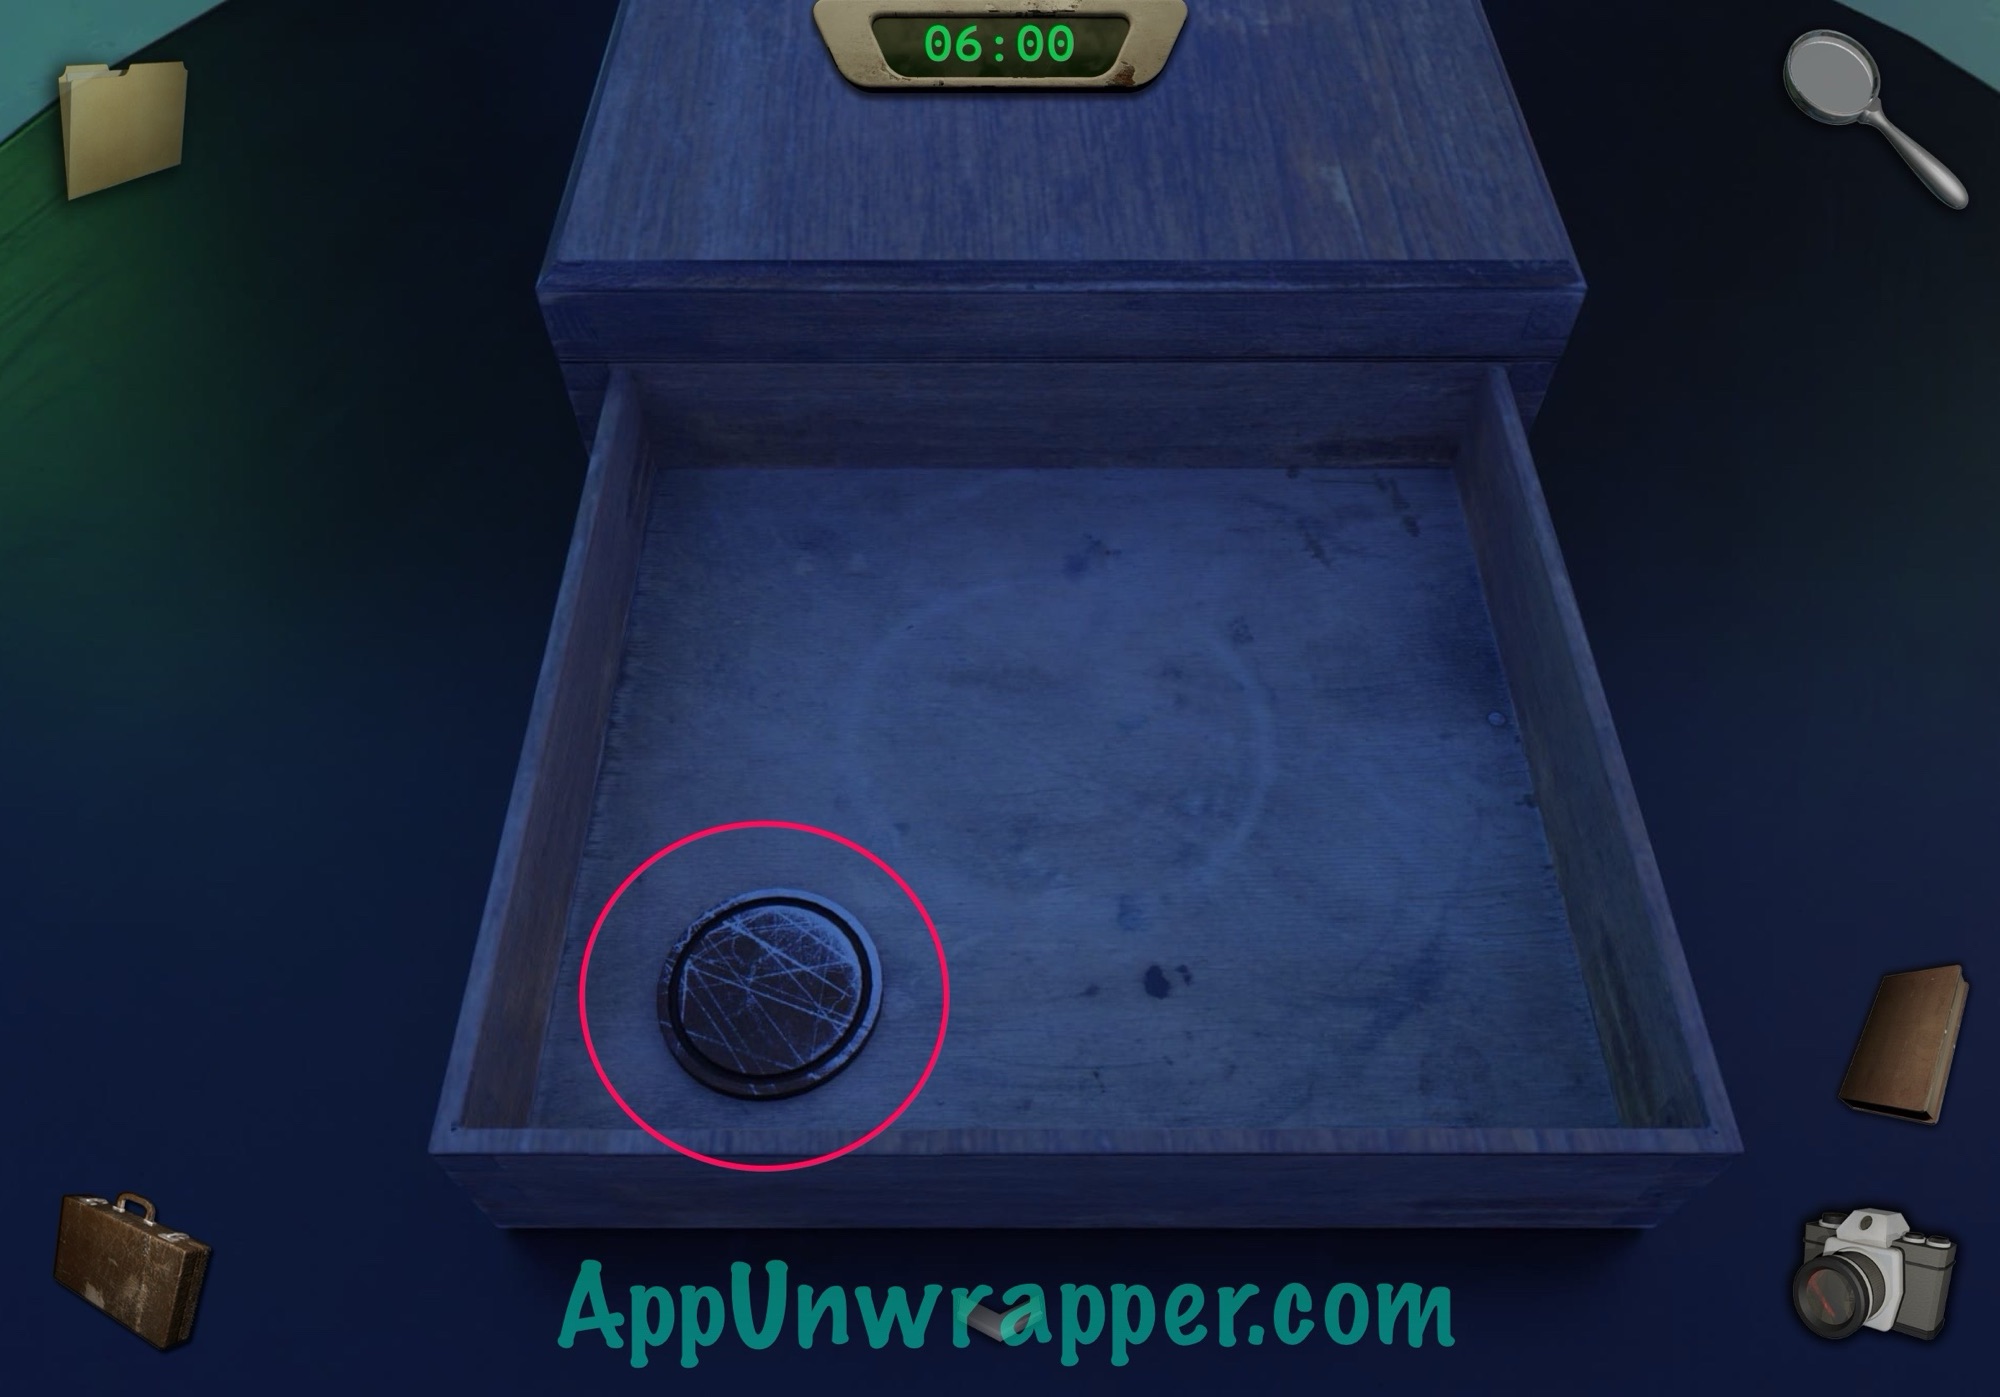
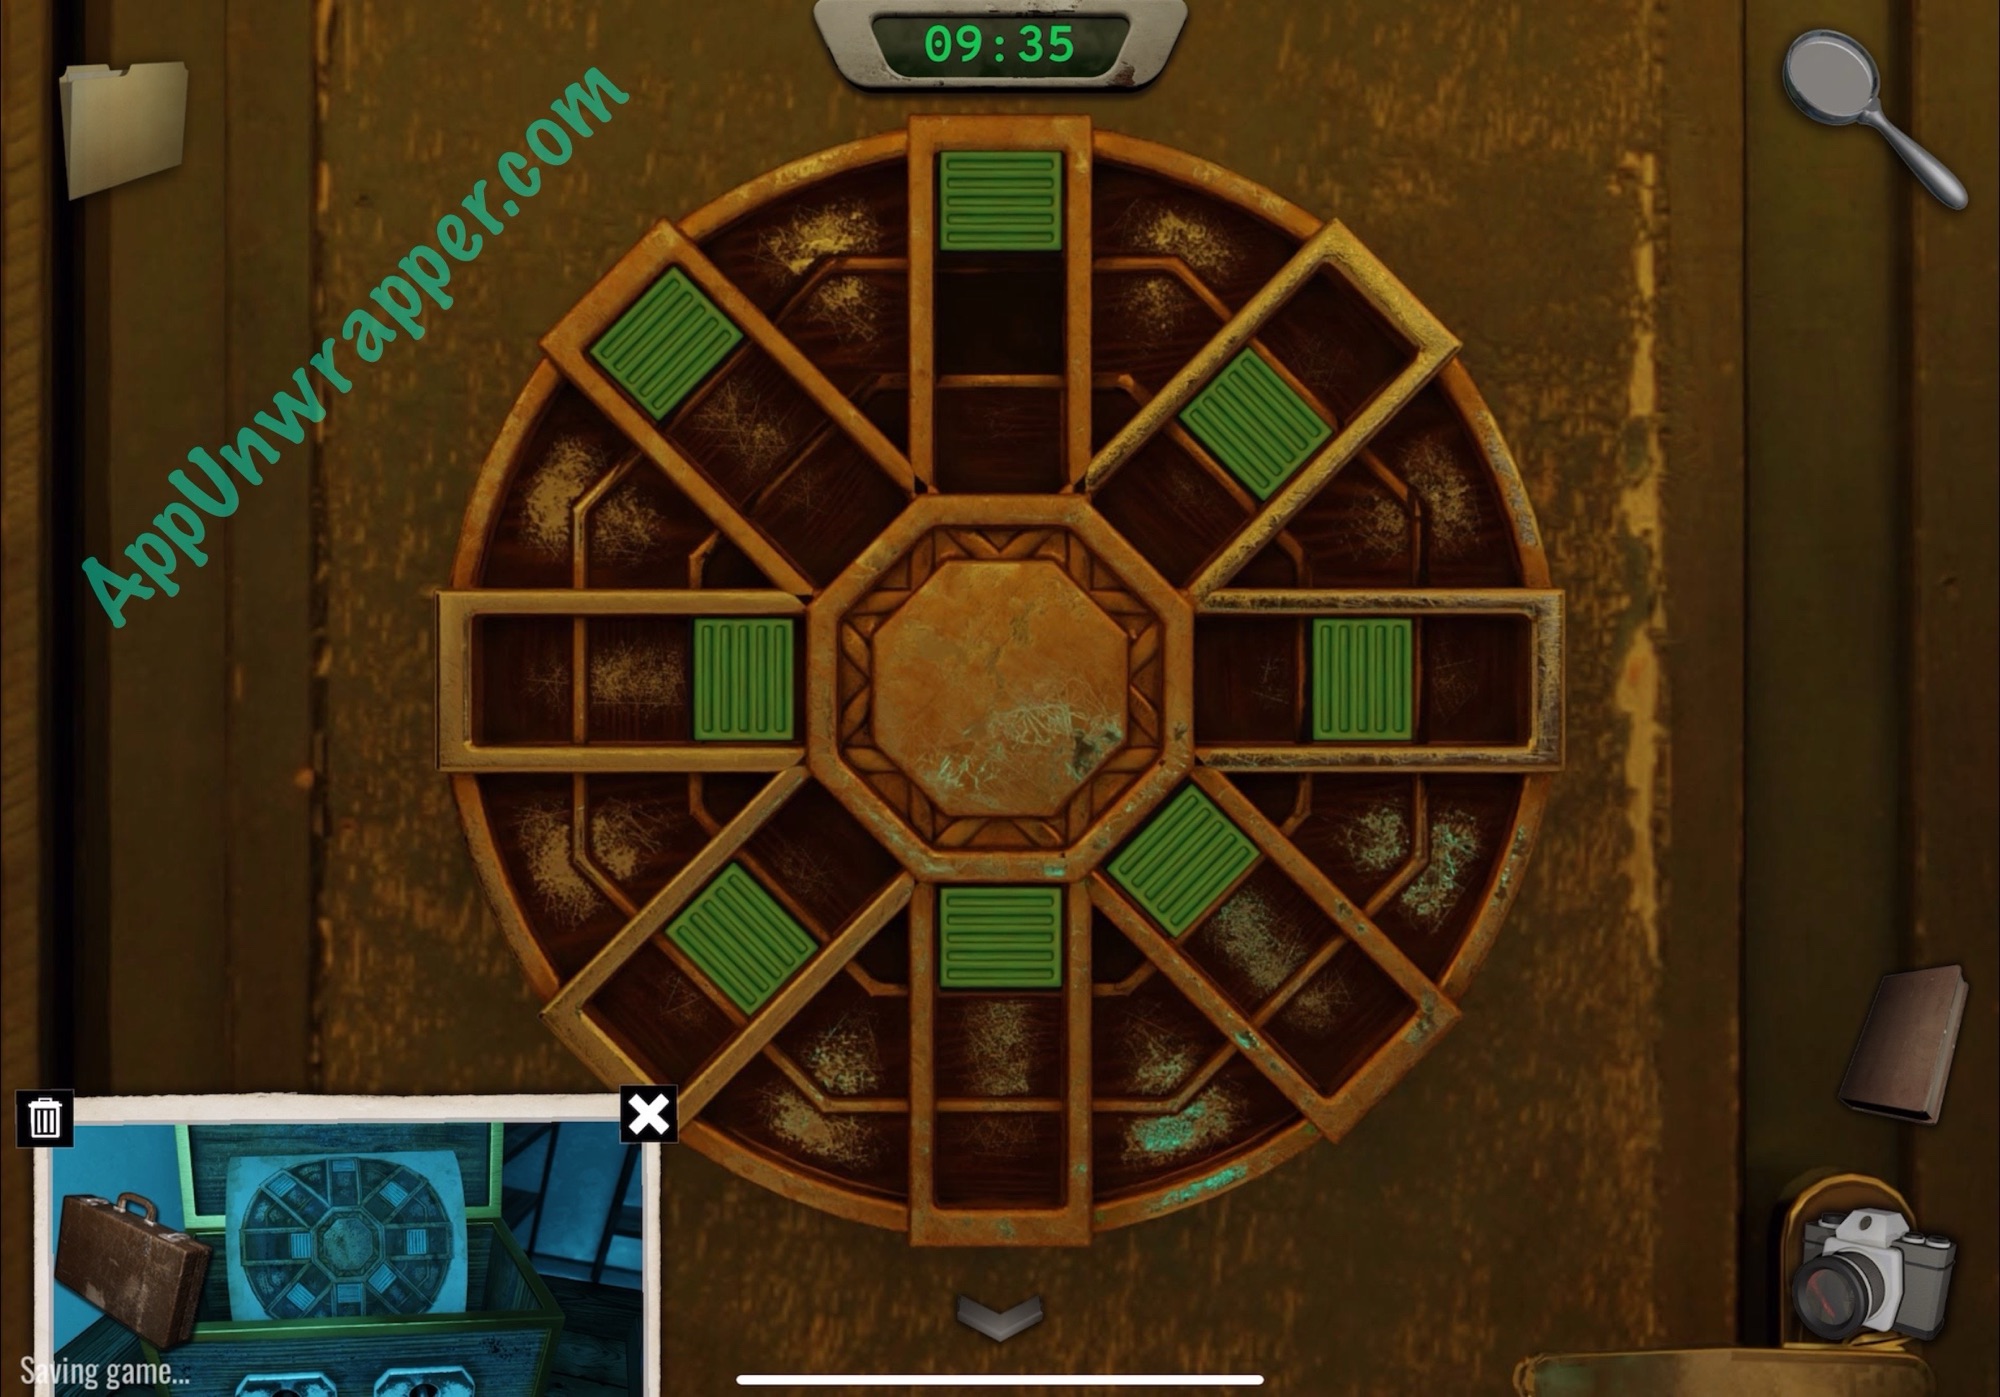
2. Grab the token from the box. Then look at the map to the right and take a photo of it. Then go to the computer on the left.
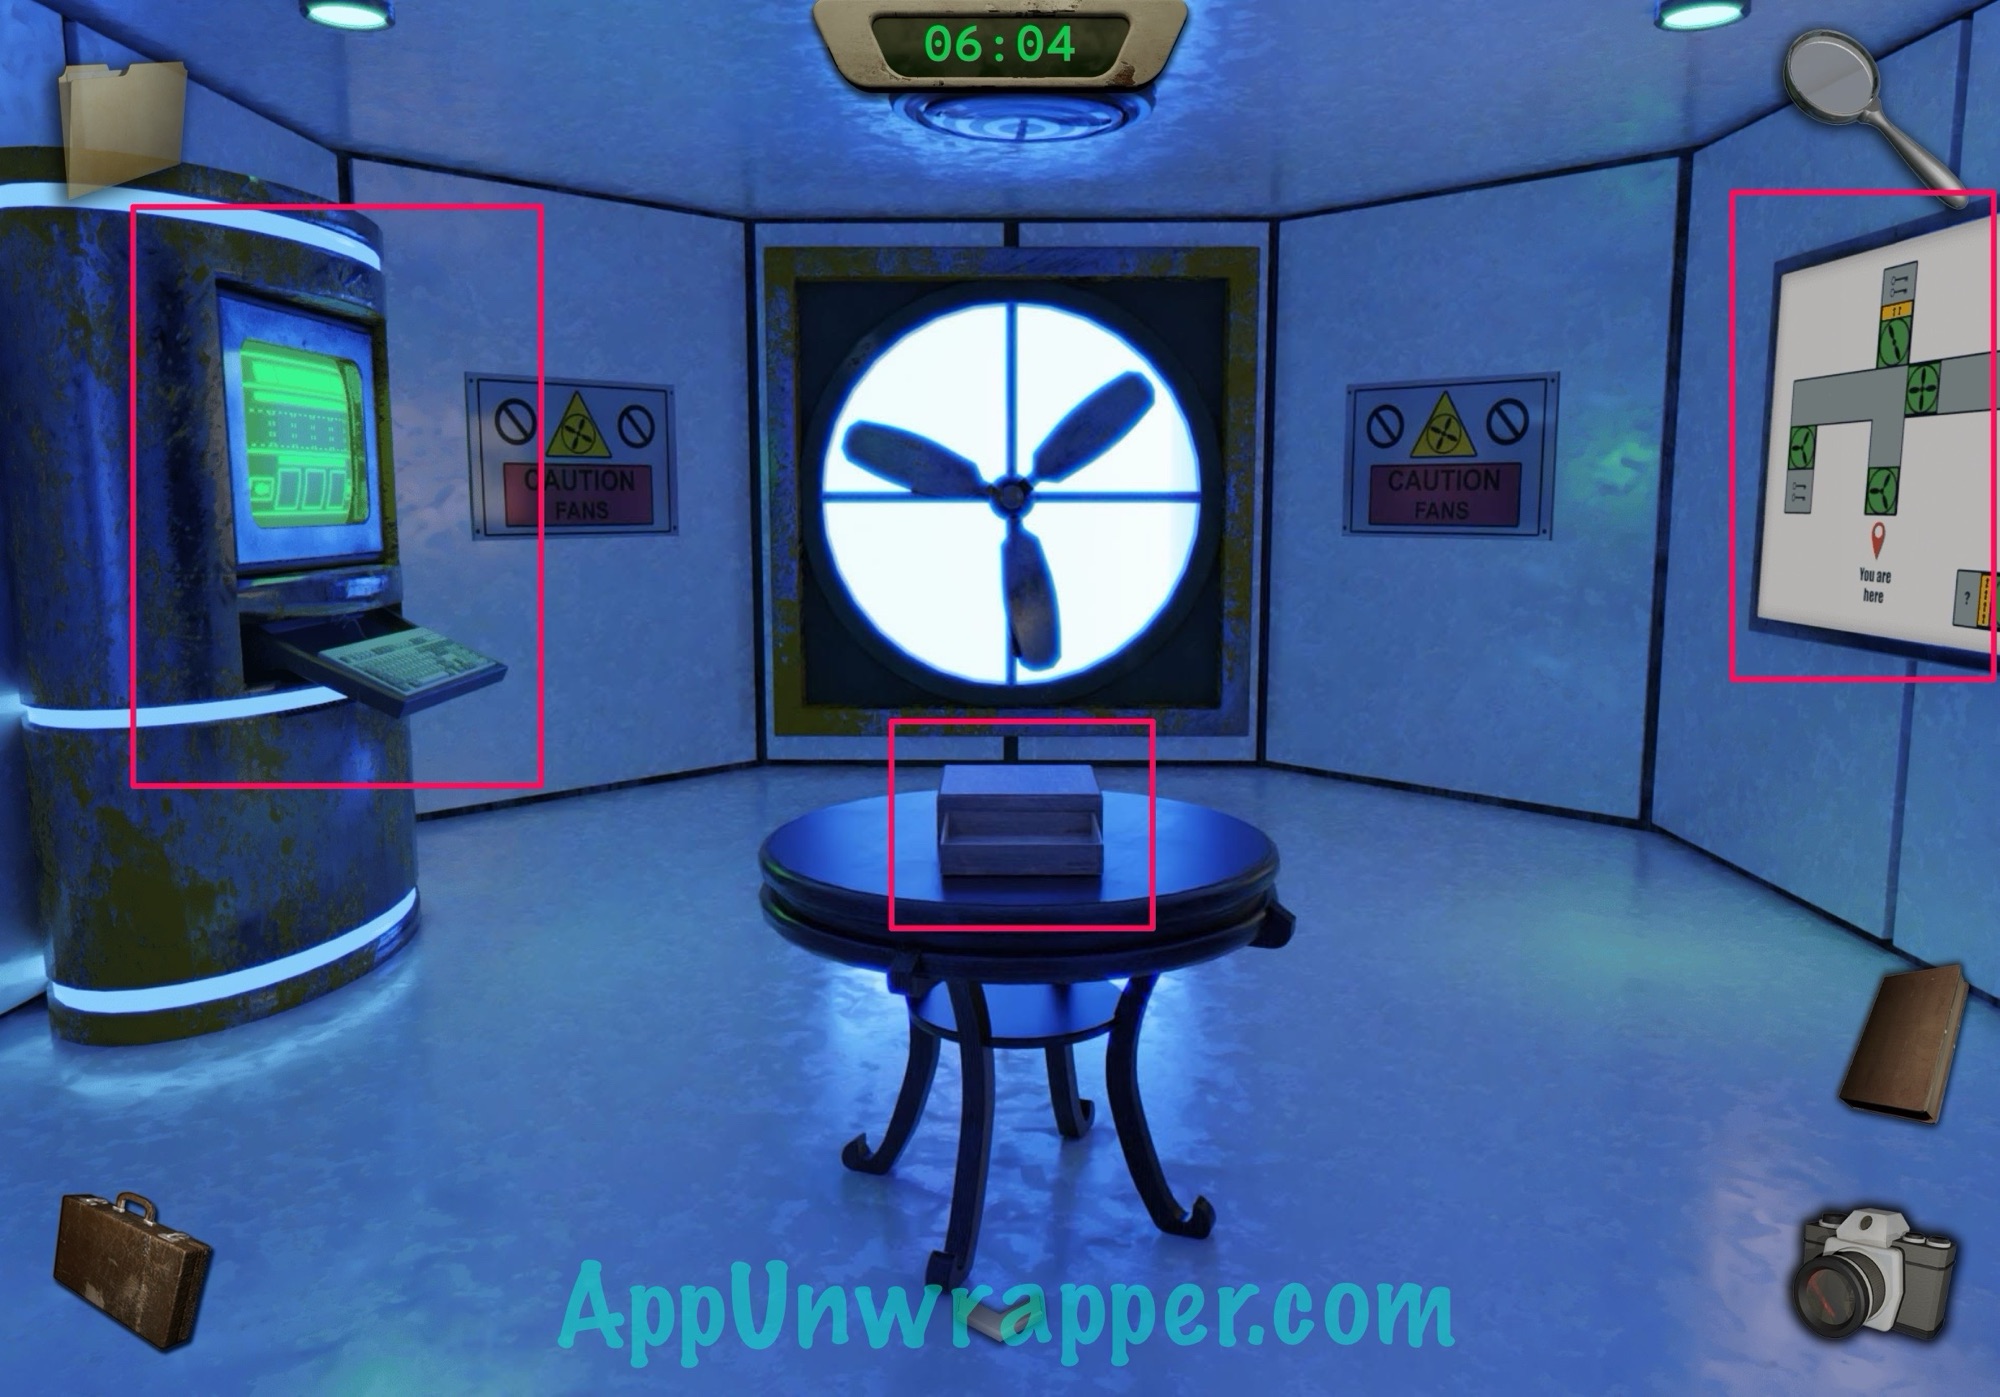

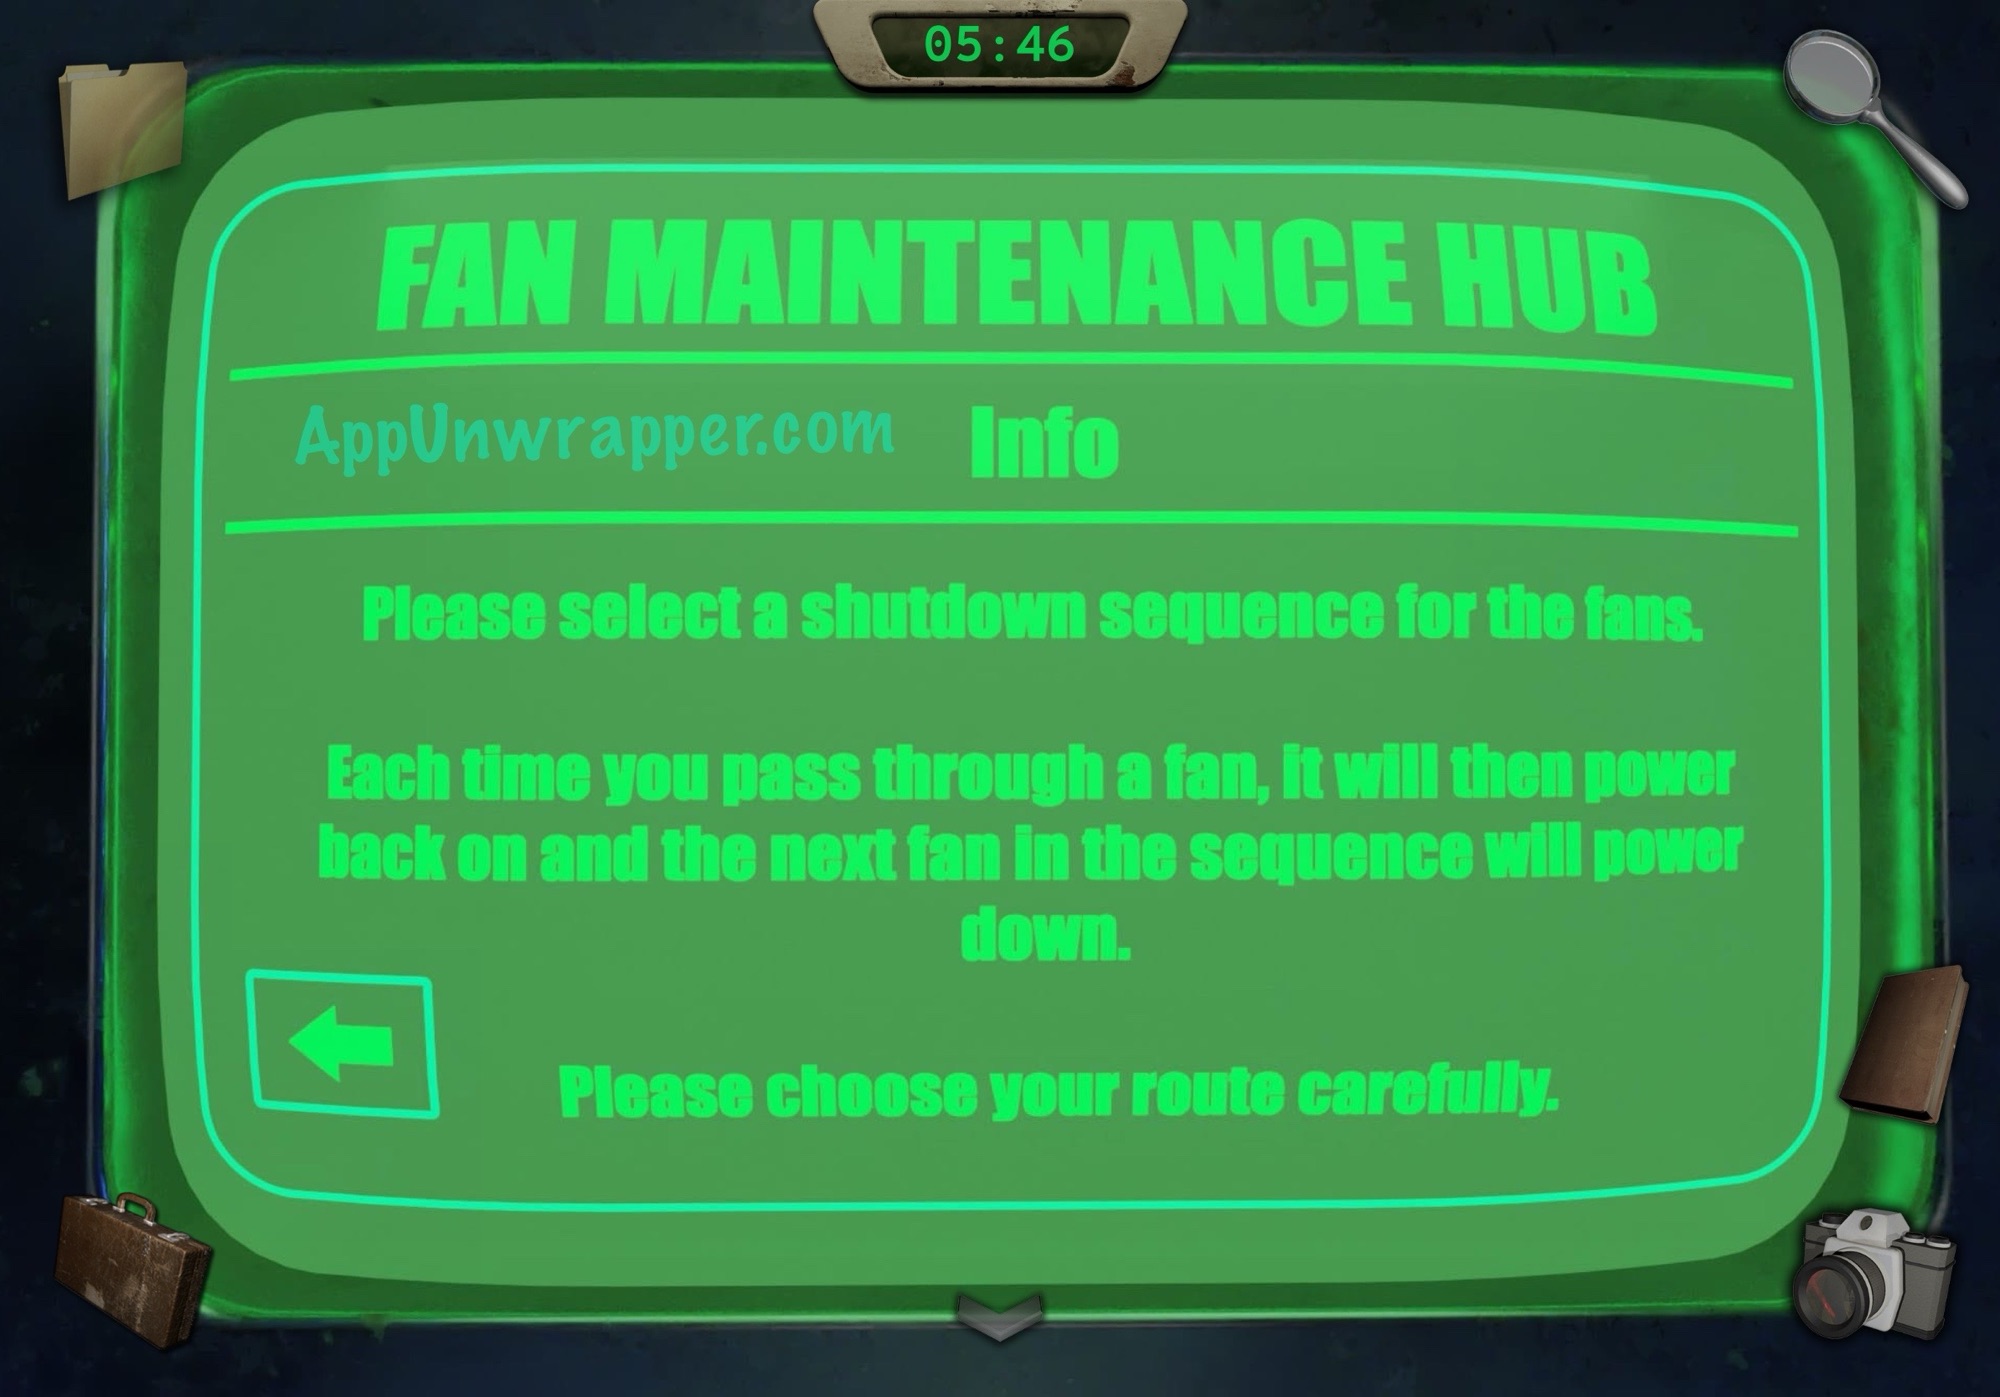
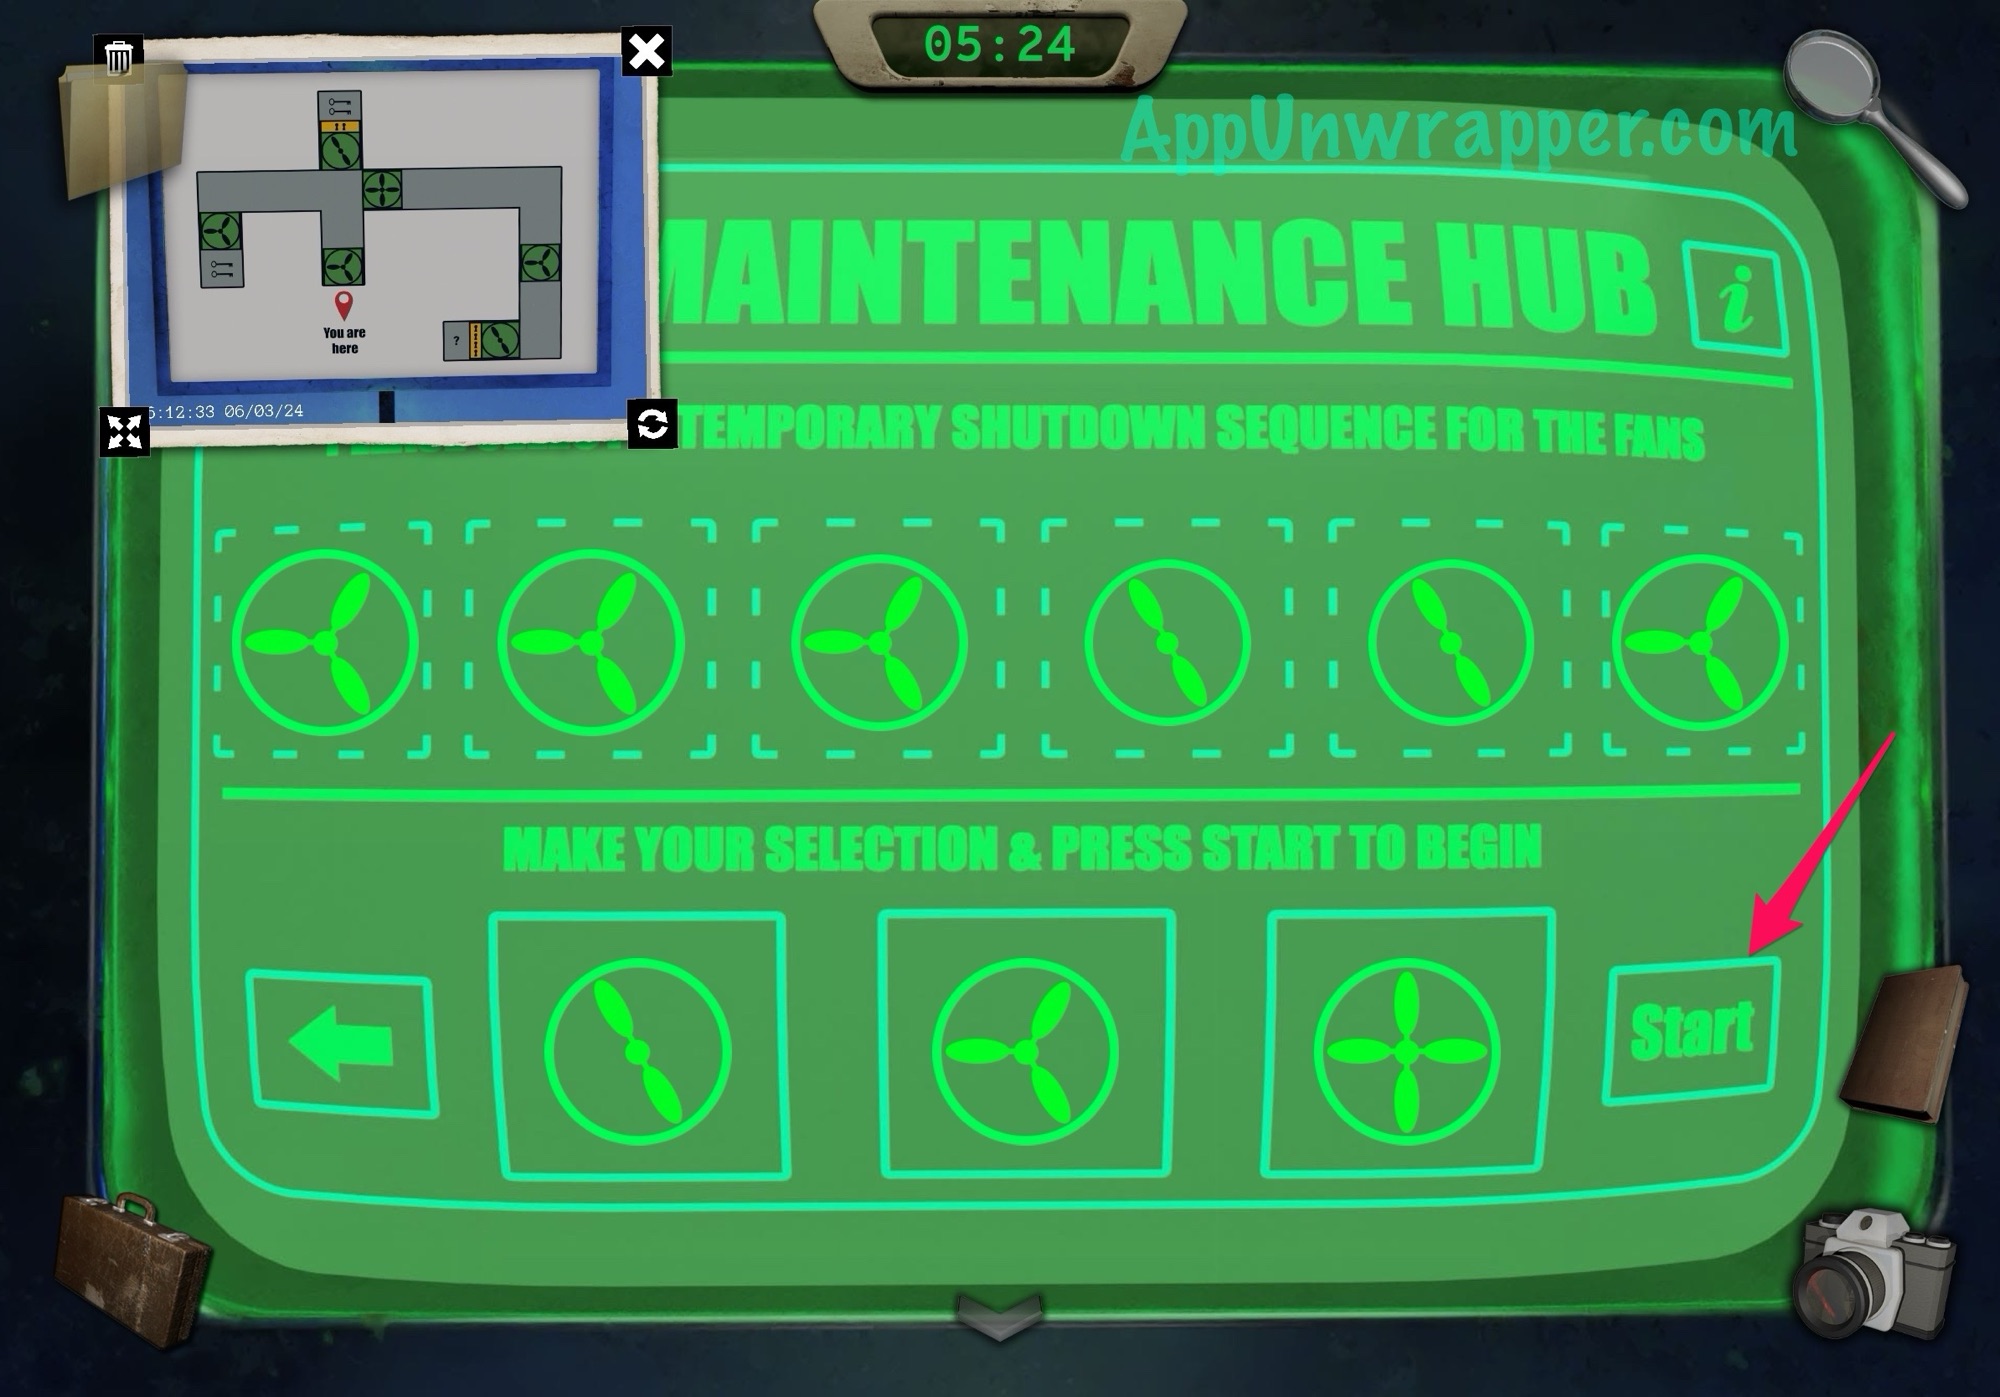
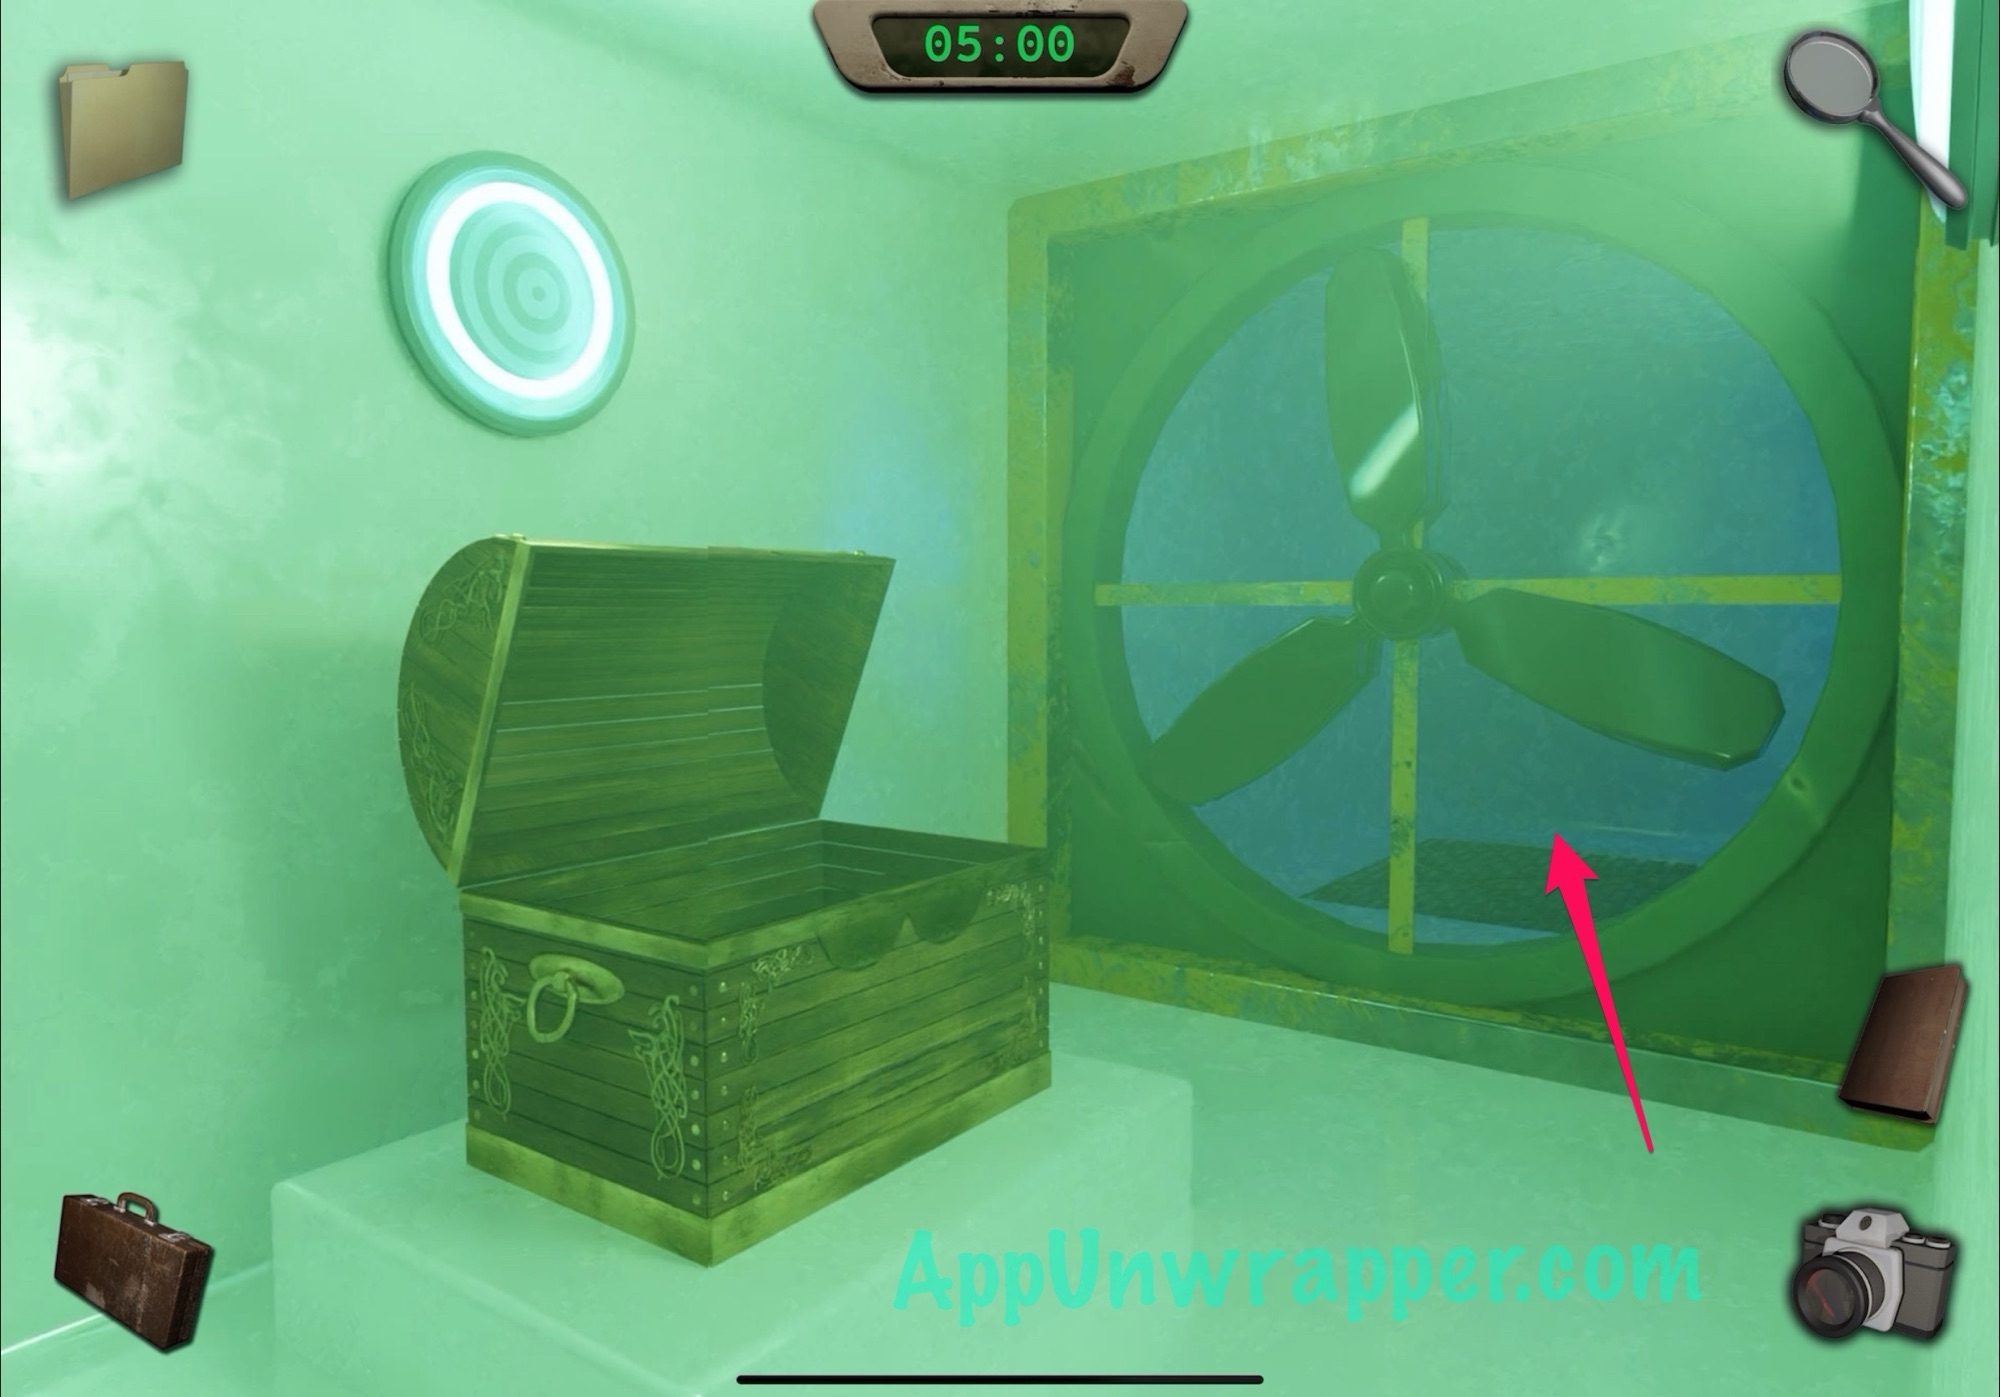
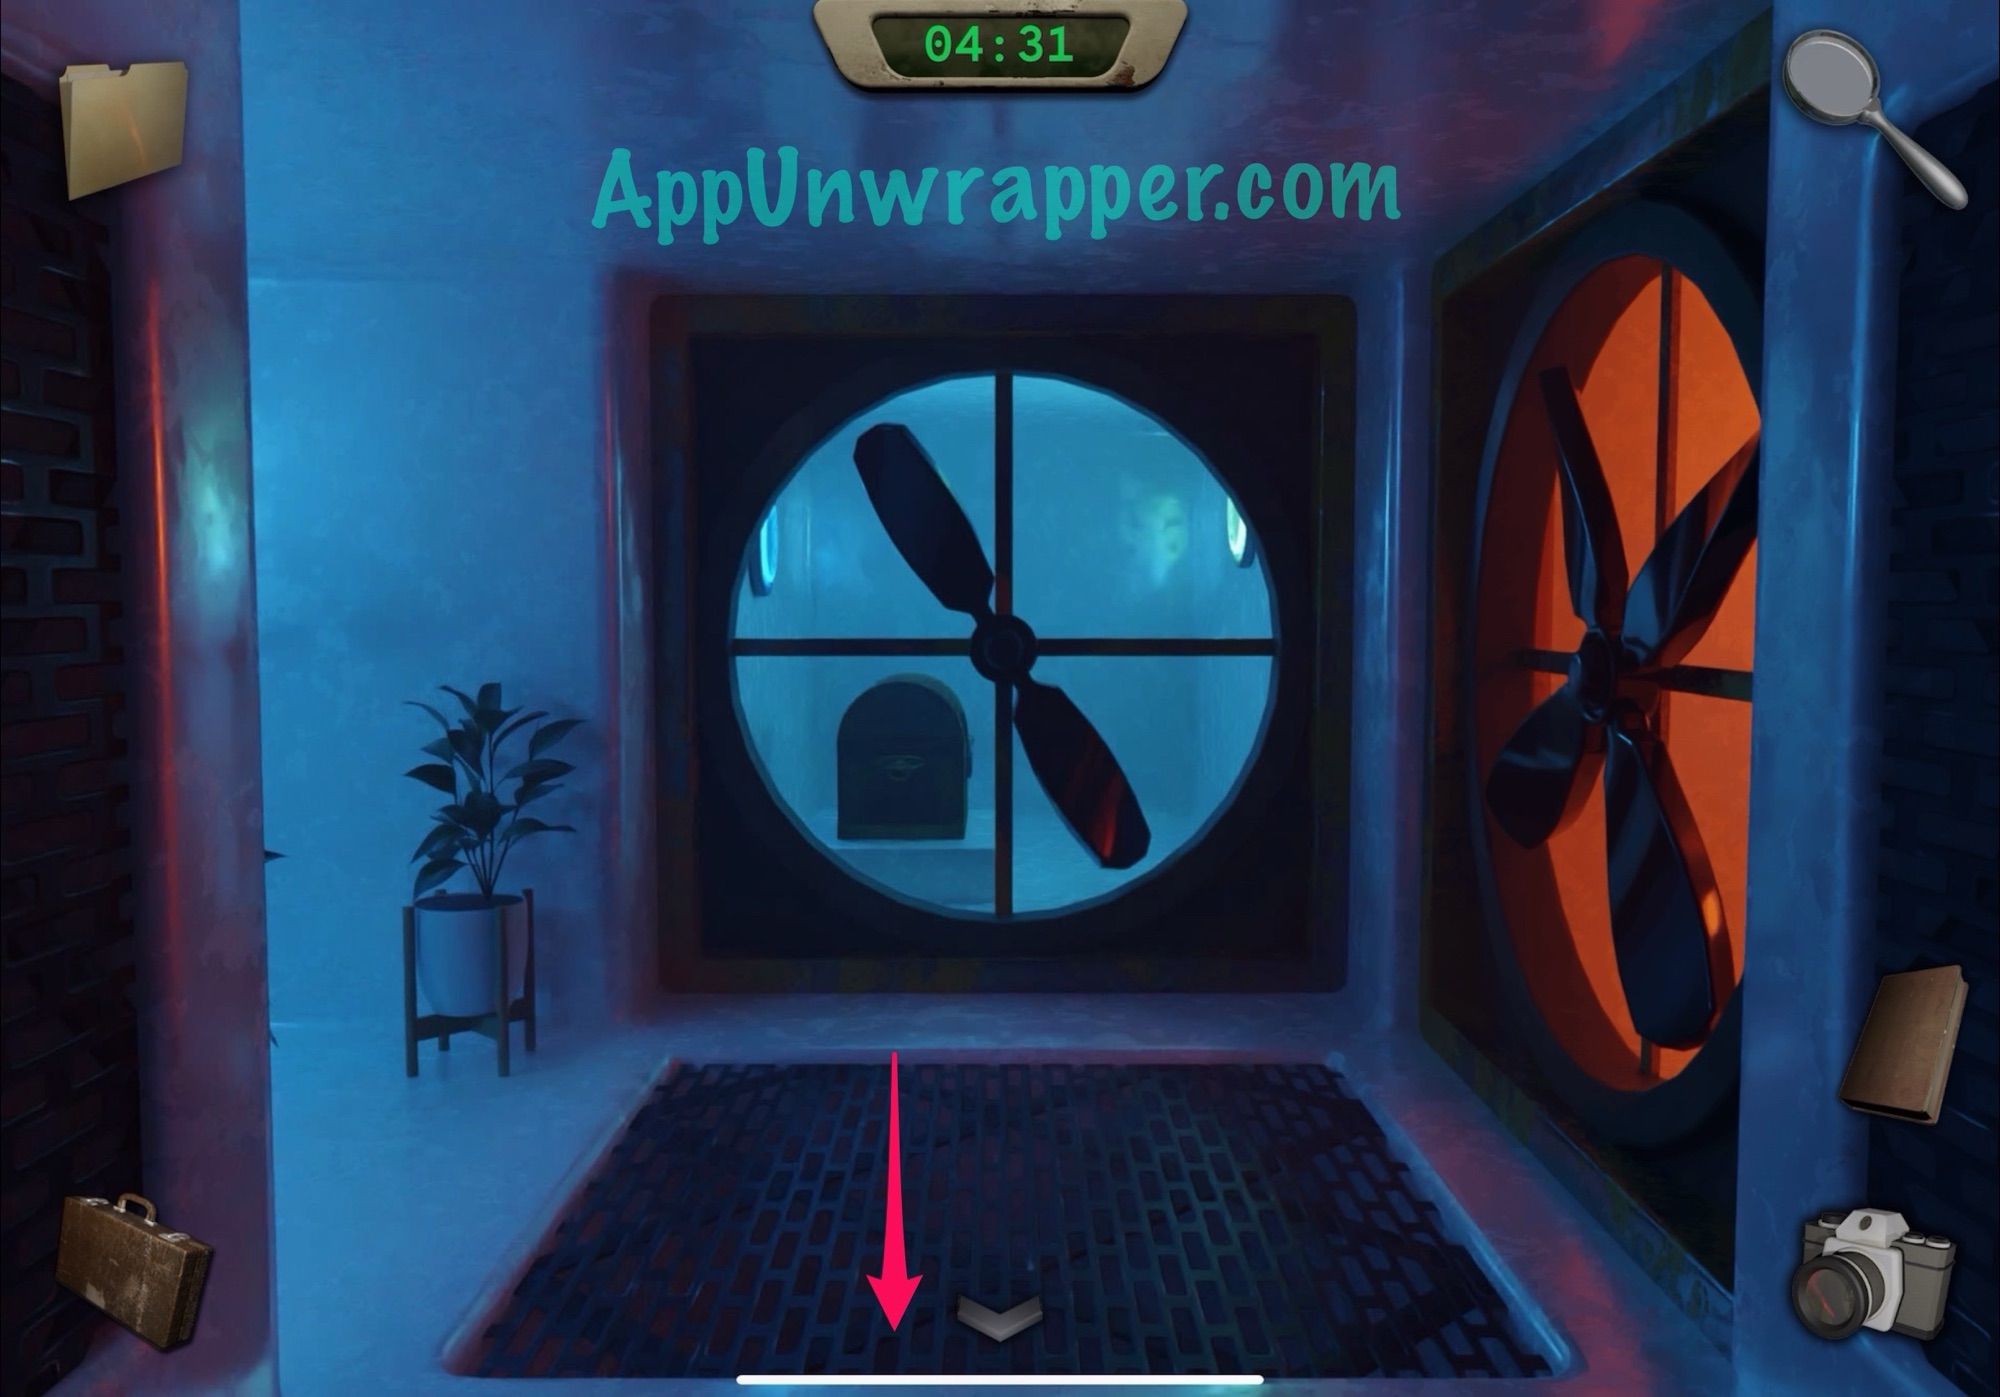
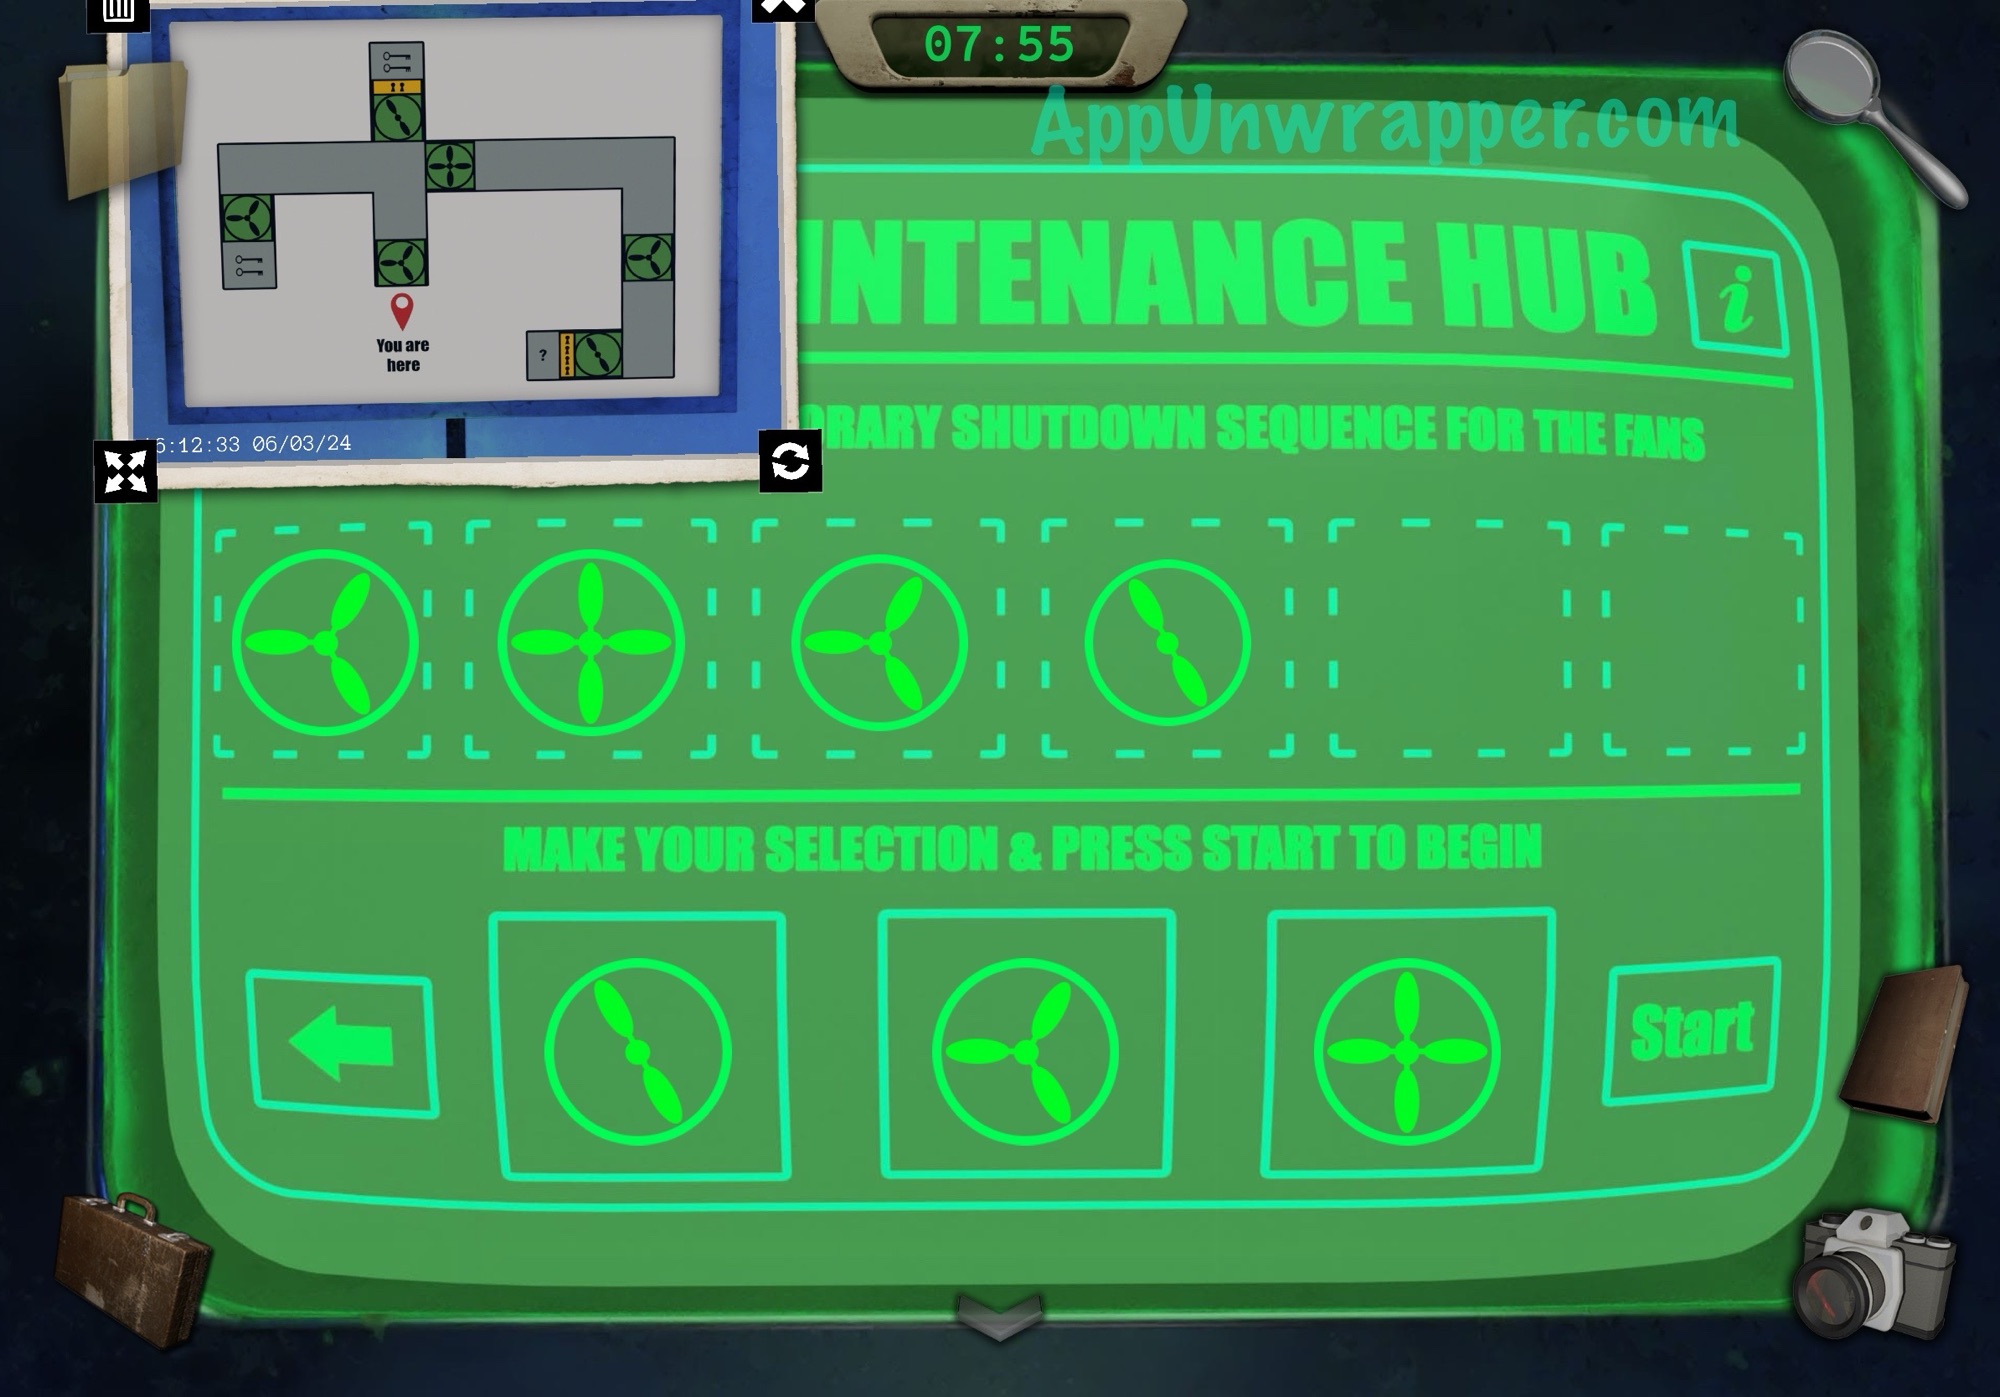
3. (Make sure you have a few minutes on the clock for this, because you’re going to get an item that needs to be stored in the TAD and it would suck to have to redo it because you ran out of them.) First, press on the information button to get instructions for the fan maintenance hub. You need to select a shutdown sequence for the fans. Each time you pass through a fan, it will power back on and the next fan in the sequence will power down. So we can’t make the whole trip to the four locks in one go. Take out the photo you just took of the map and figure out a route in order to safely get all four keys and make it back. We need to split it up by first getting the four keys and coming back out, then set up a new sequence to get to the four locks. You can see the first sequence below.
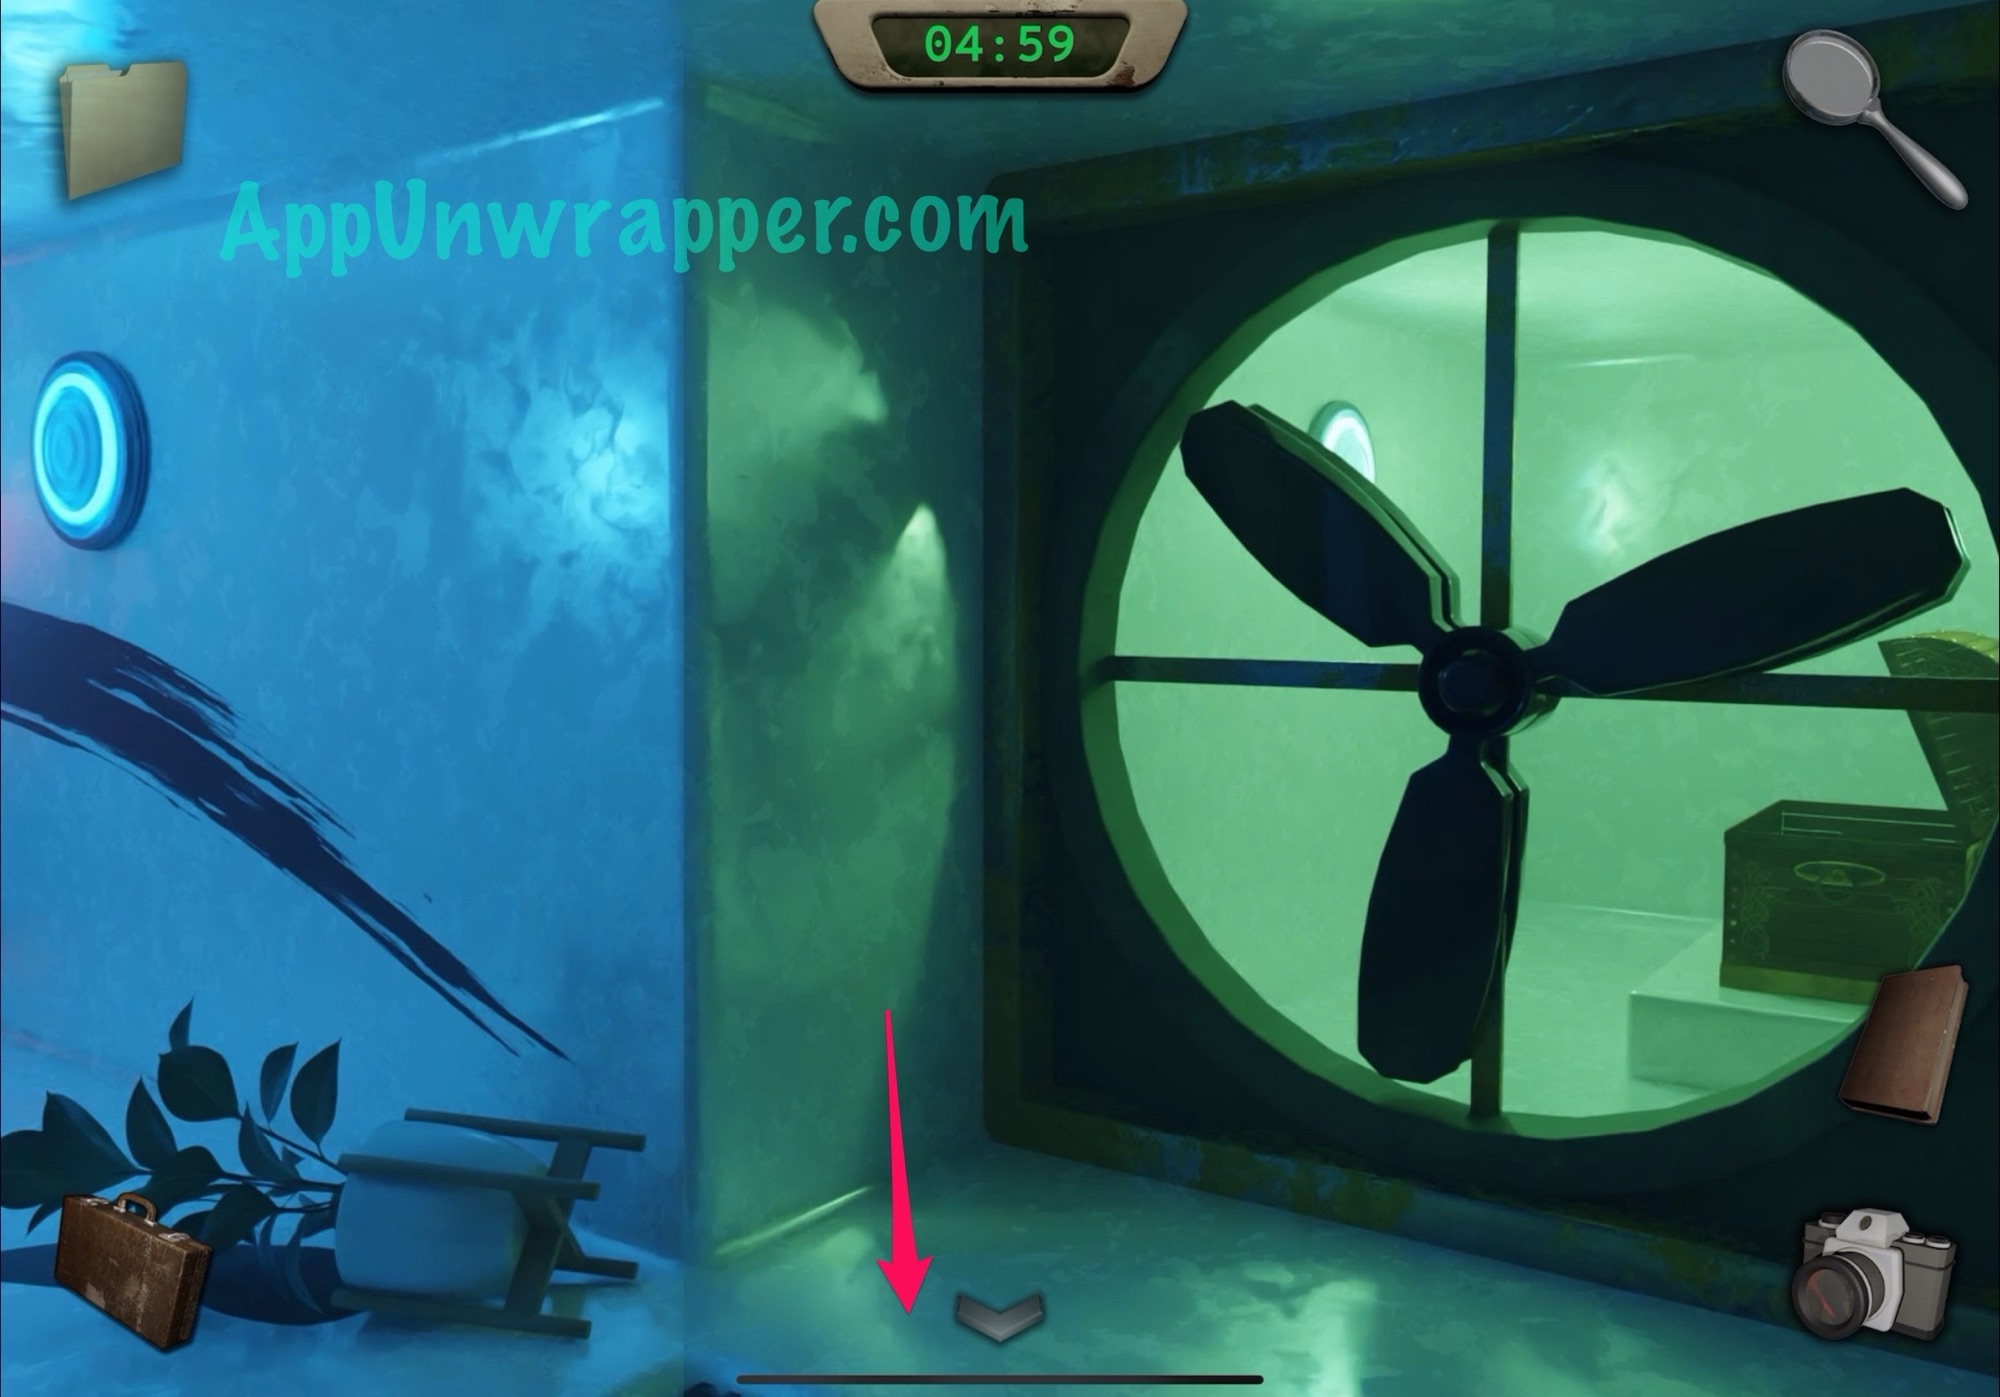
4. Now, the first fan should have stopped spinning. Step through.
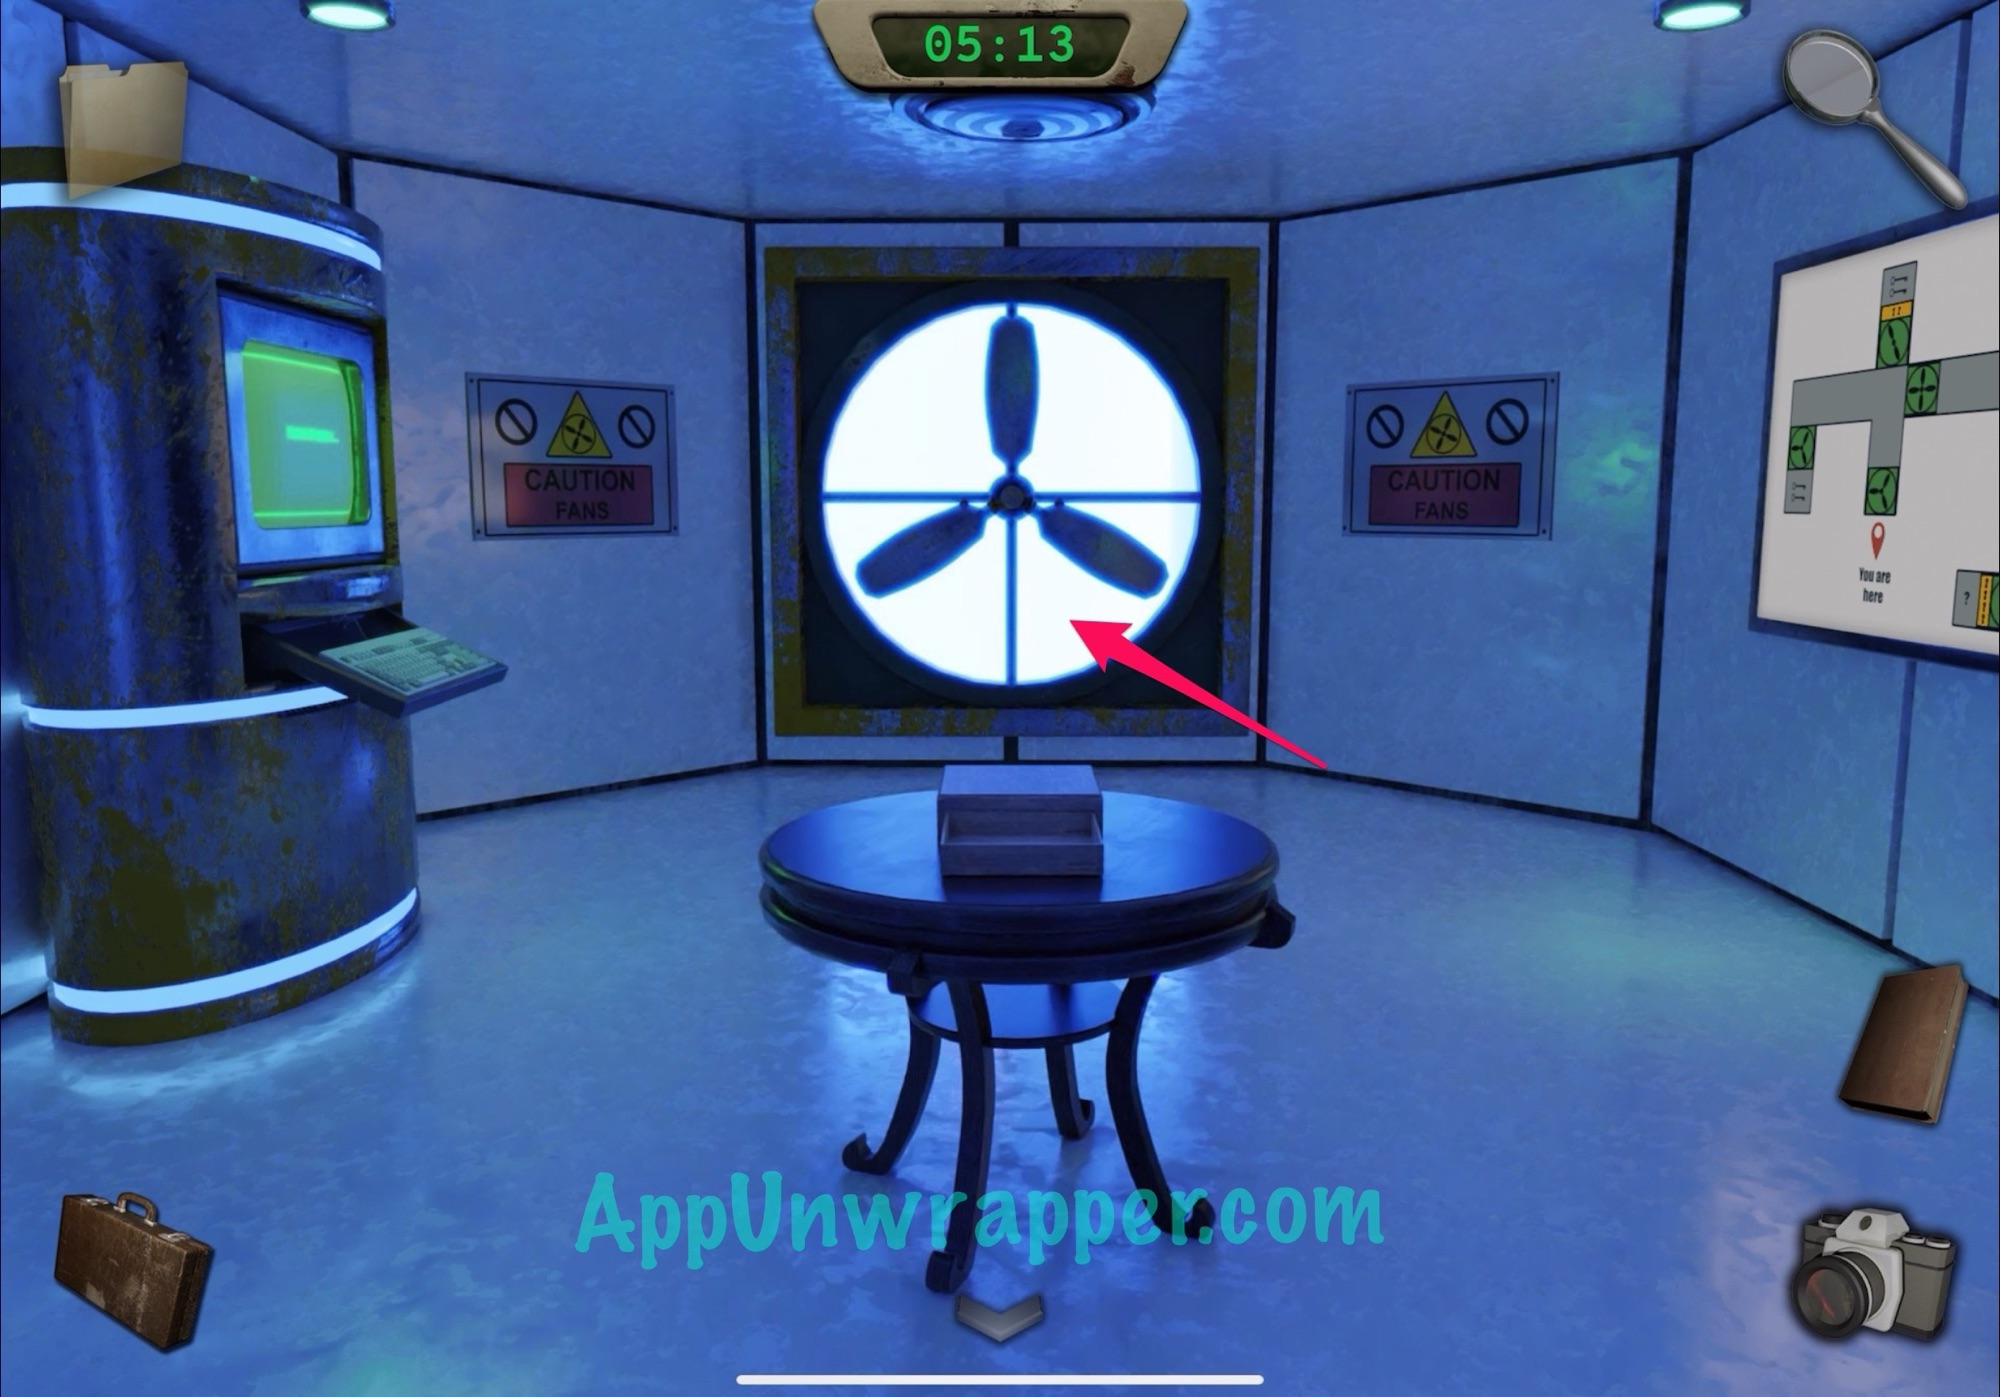
5. The next two in front of you are still spinning, so don’t go through. Instead, head left.
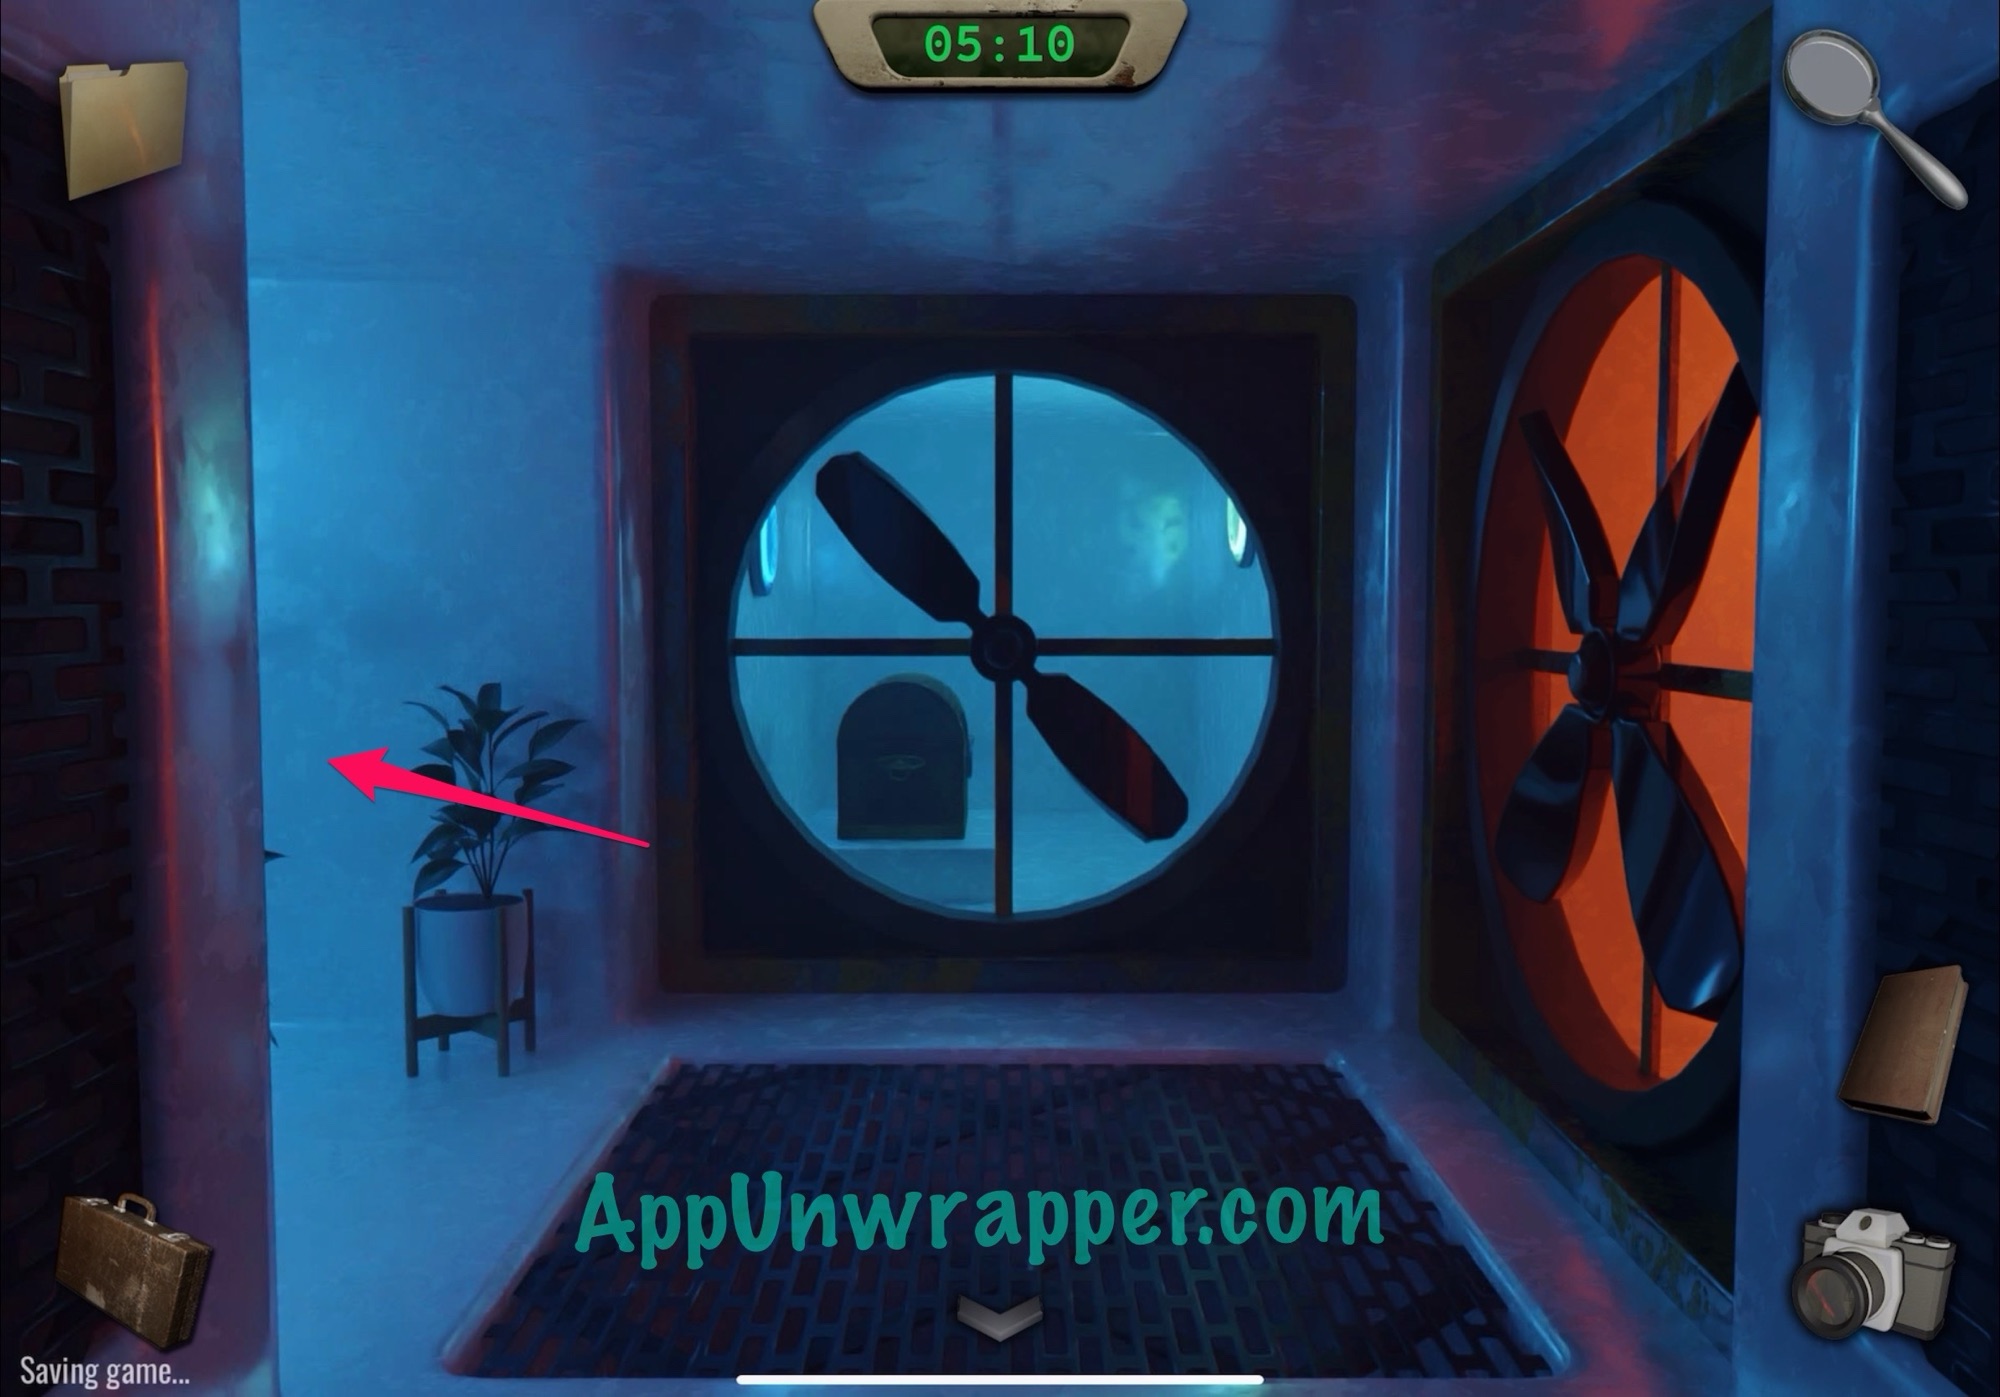
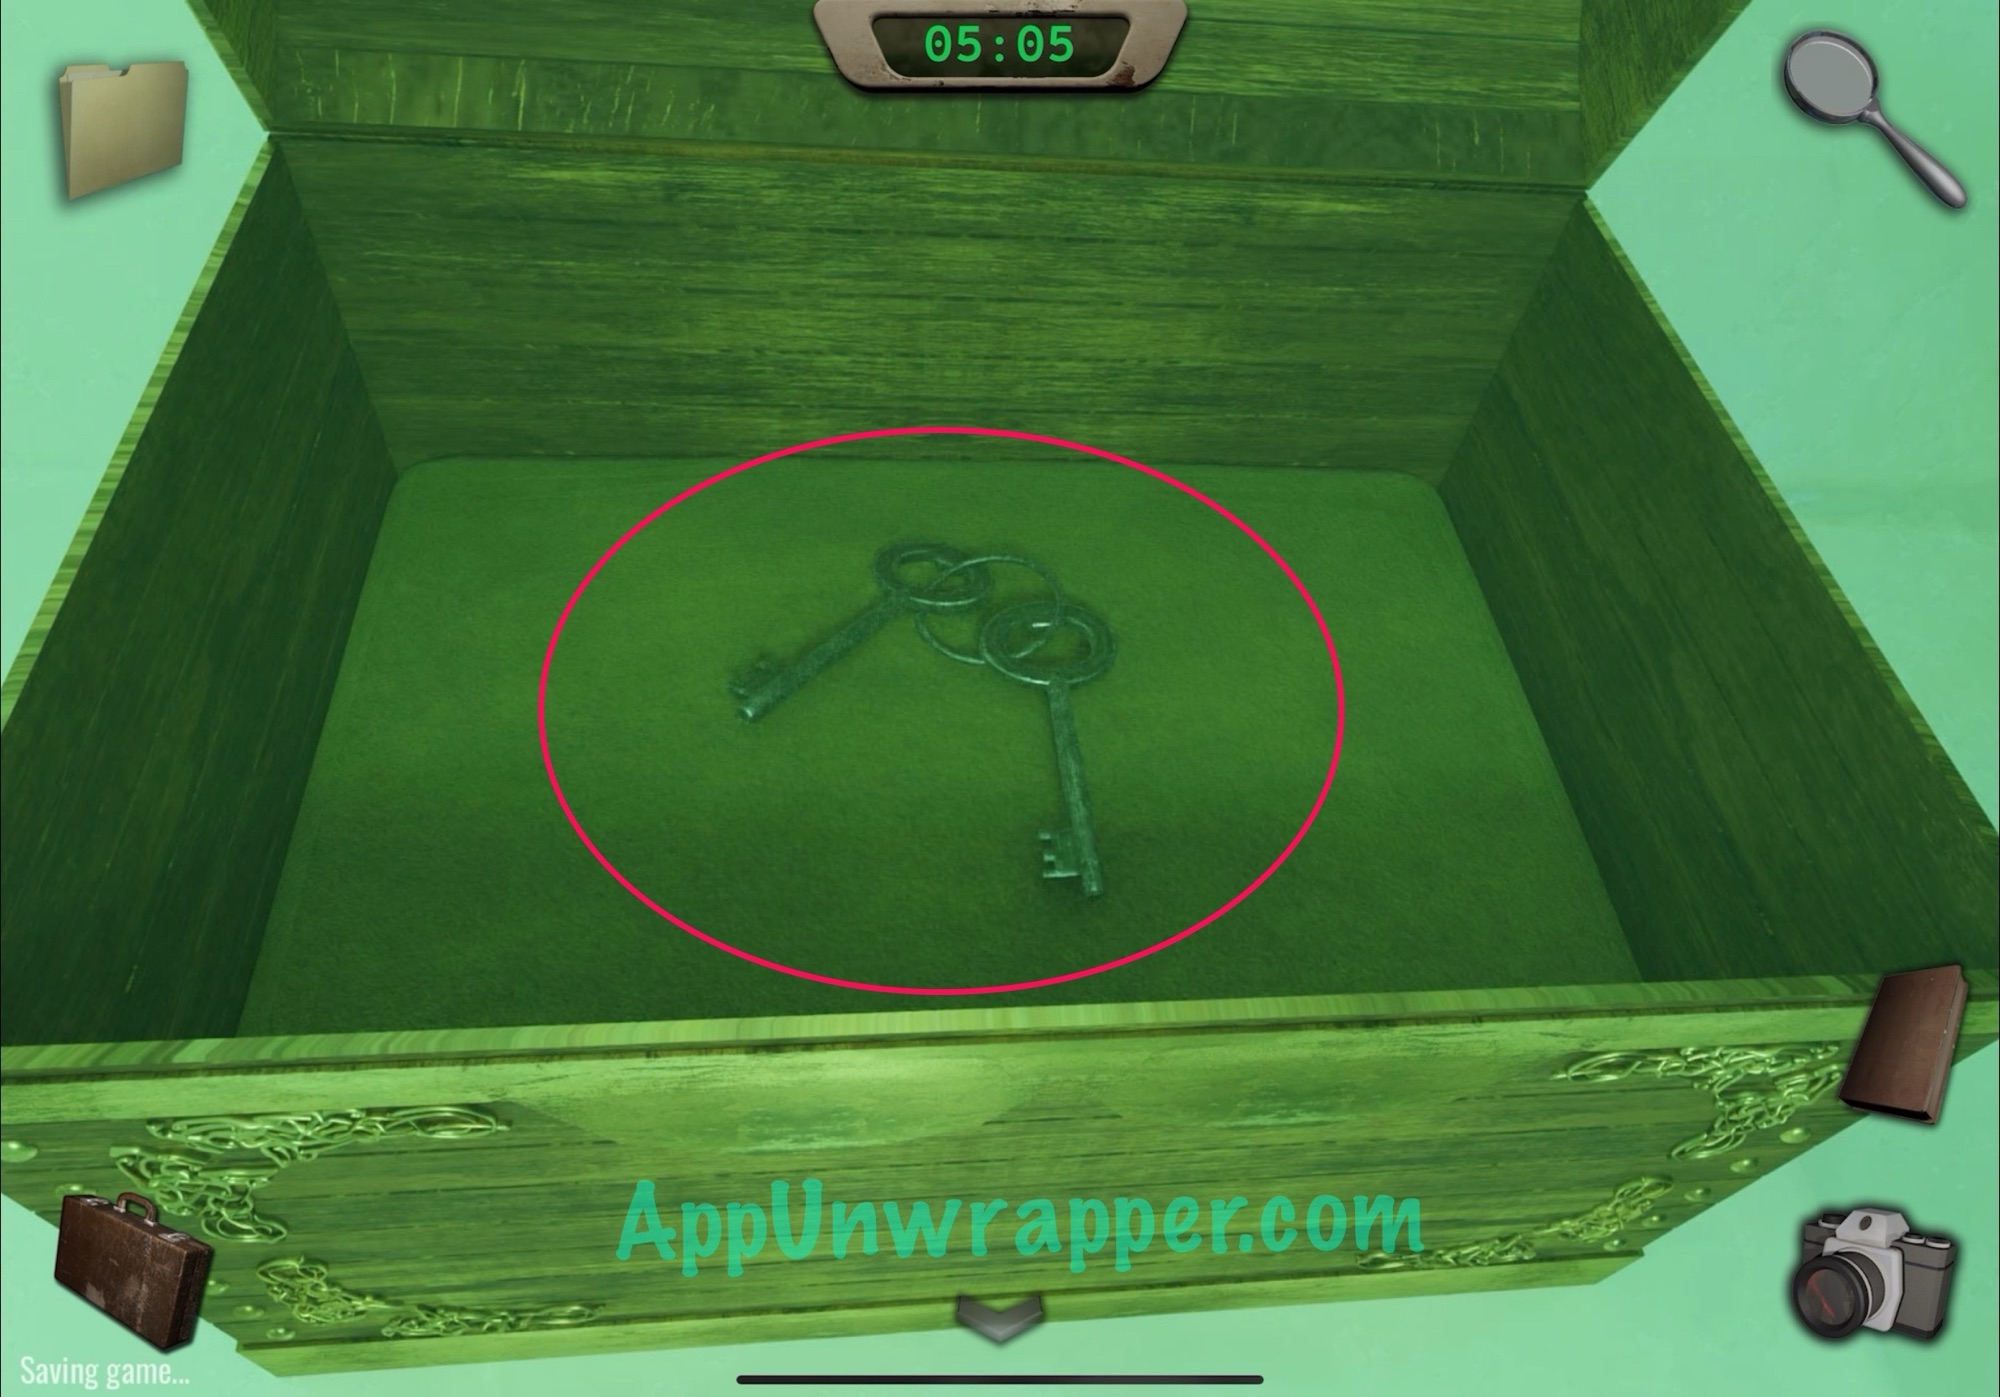
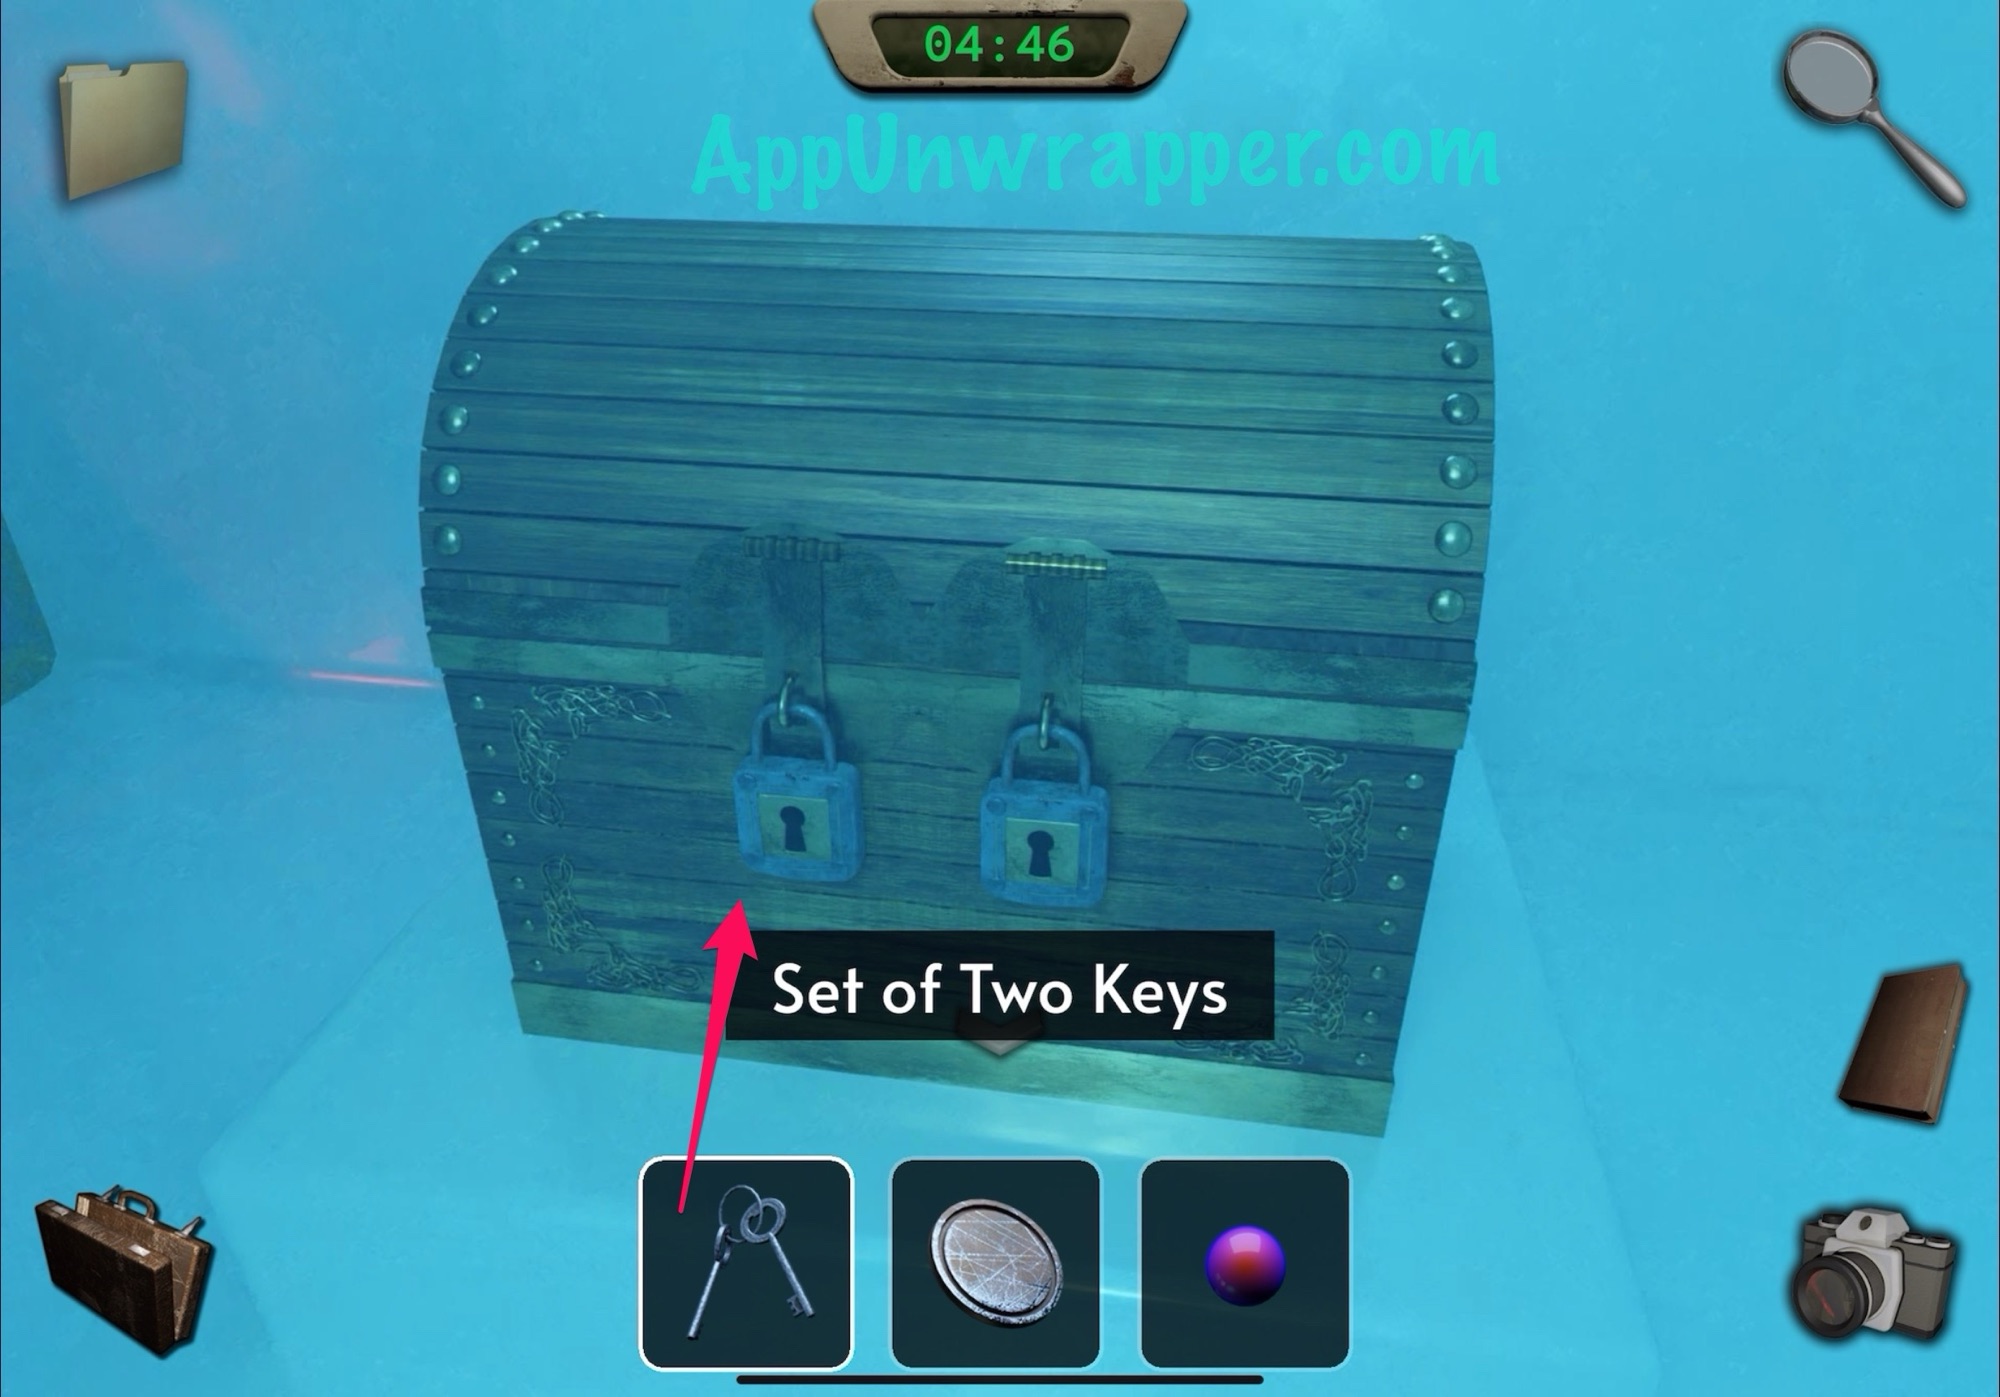
6. The next fan should be off now. Go through and take the two keys from the chest.

7. Go through the same fan again, since we had the foresight to shut it off again.
8. Next, you want to press the little arrow to move back.
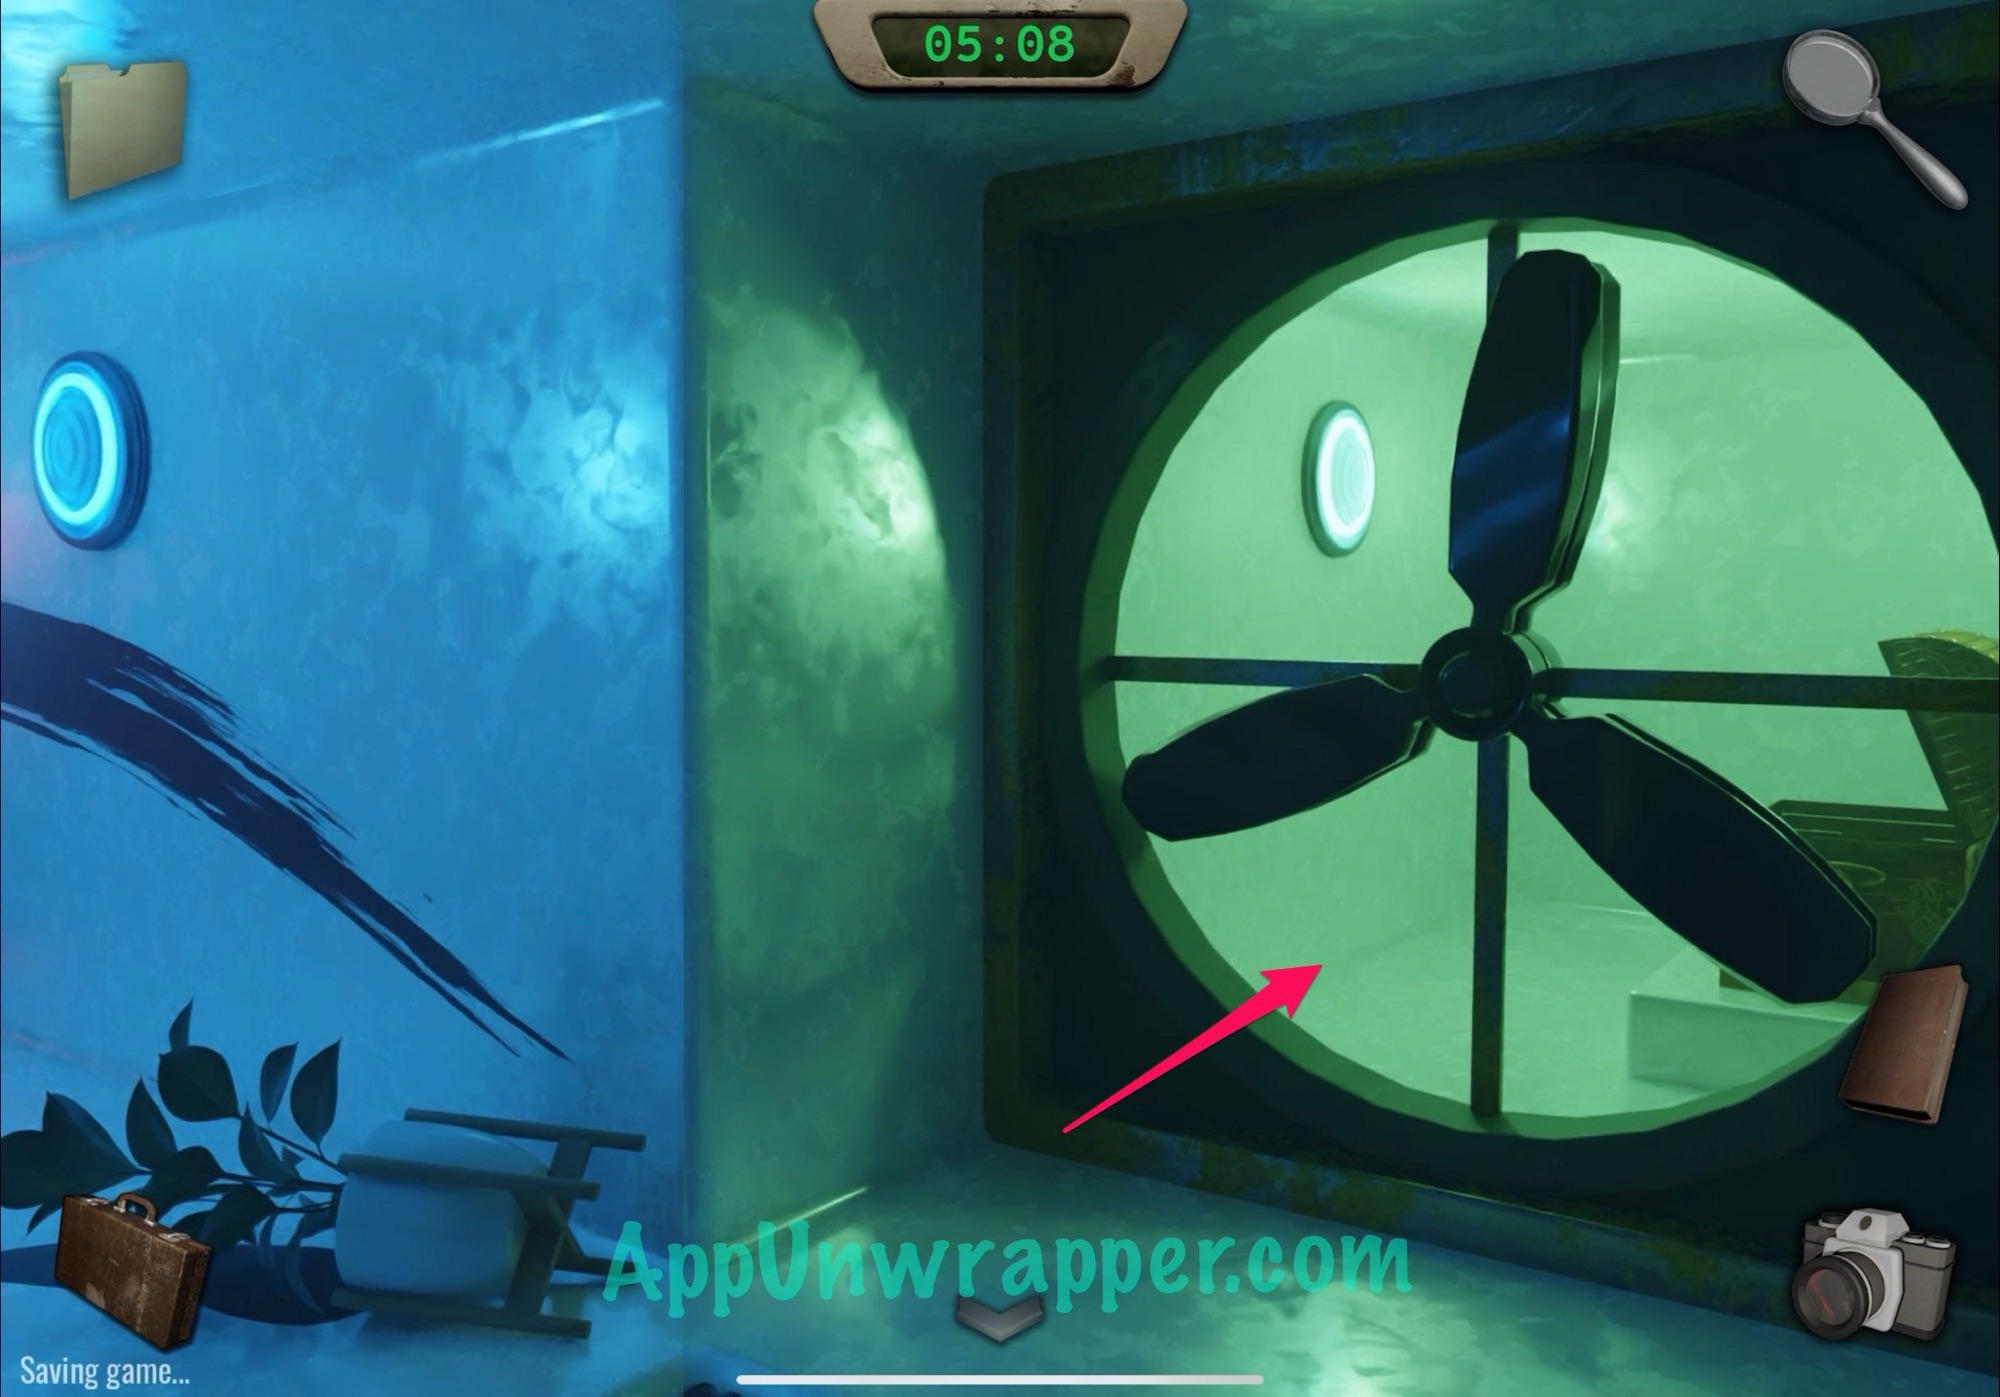
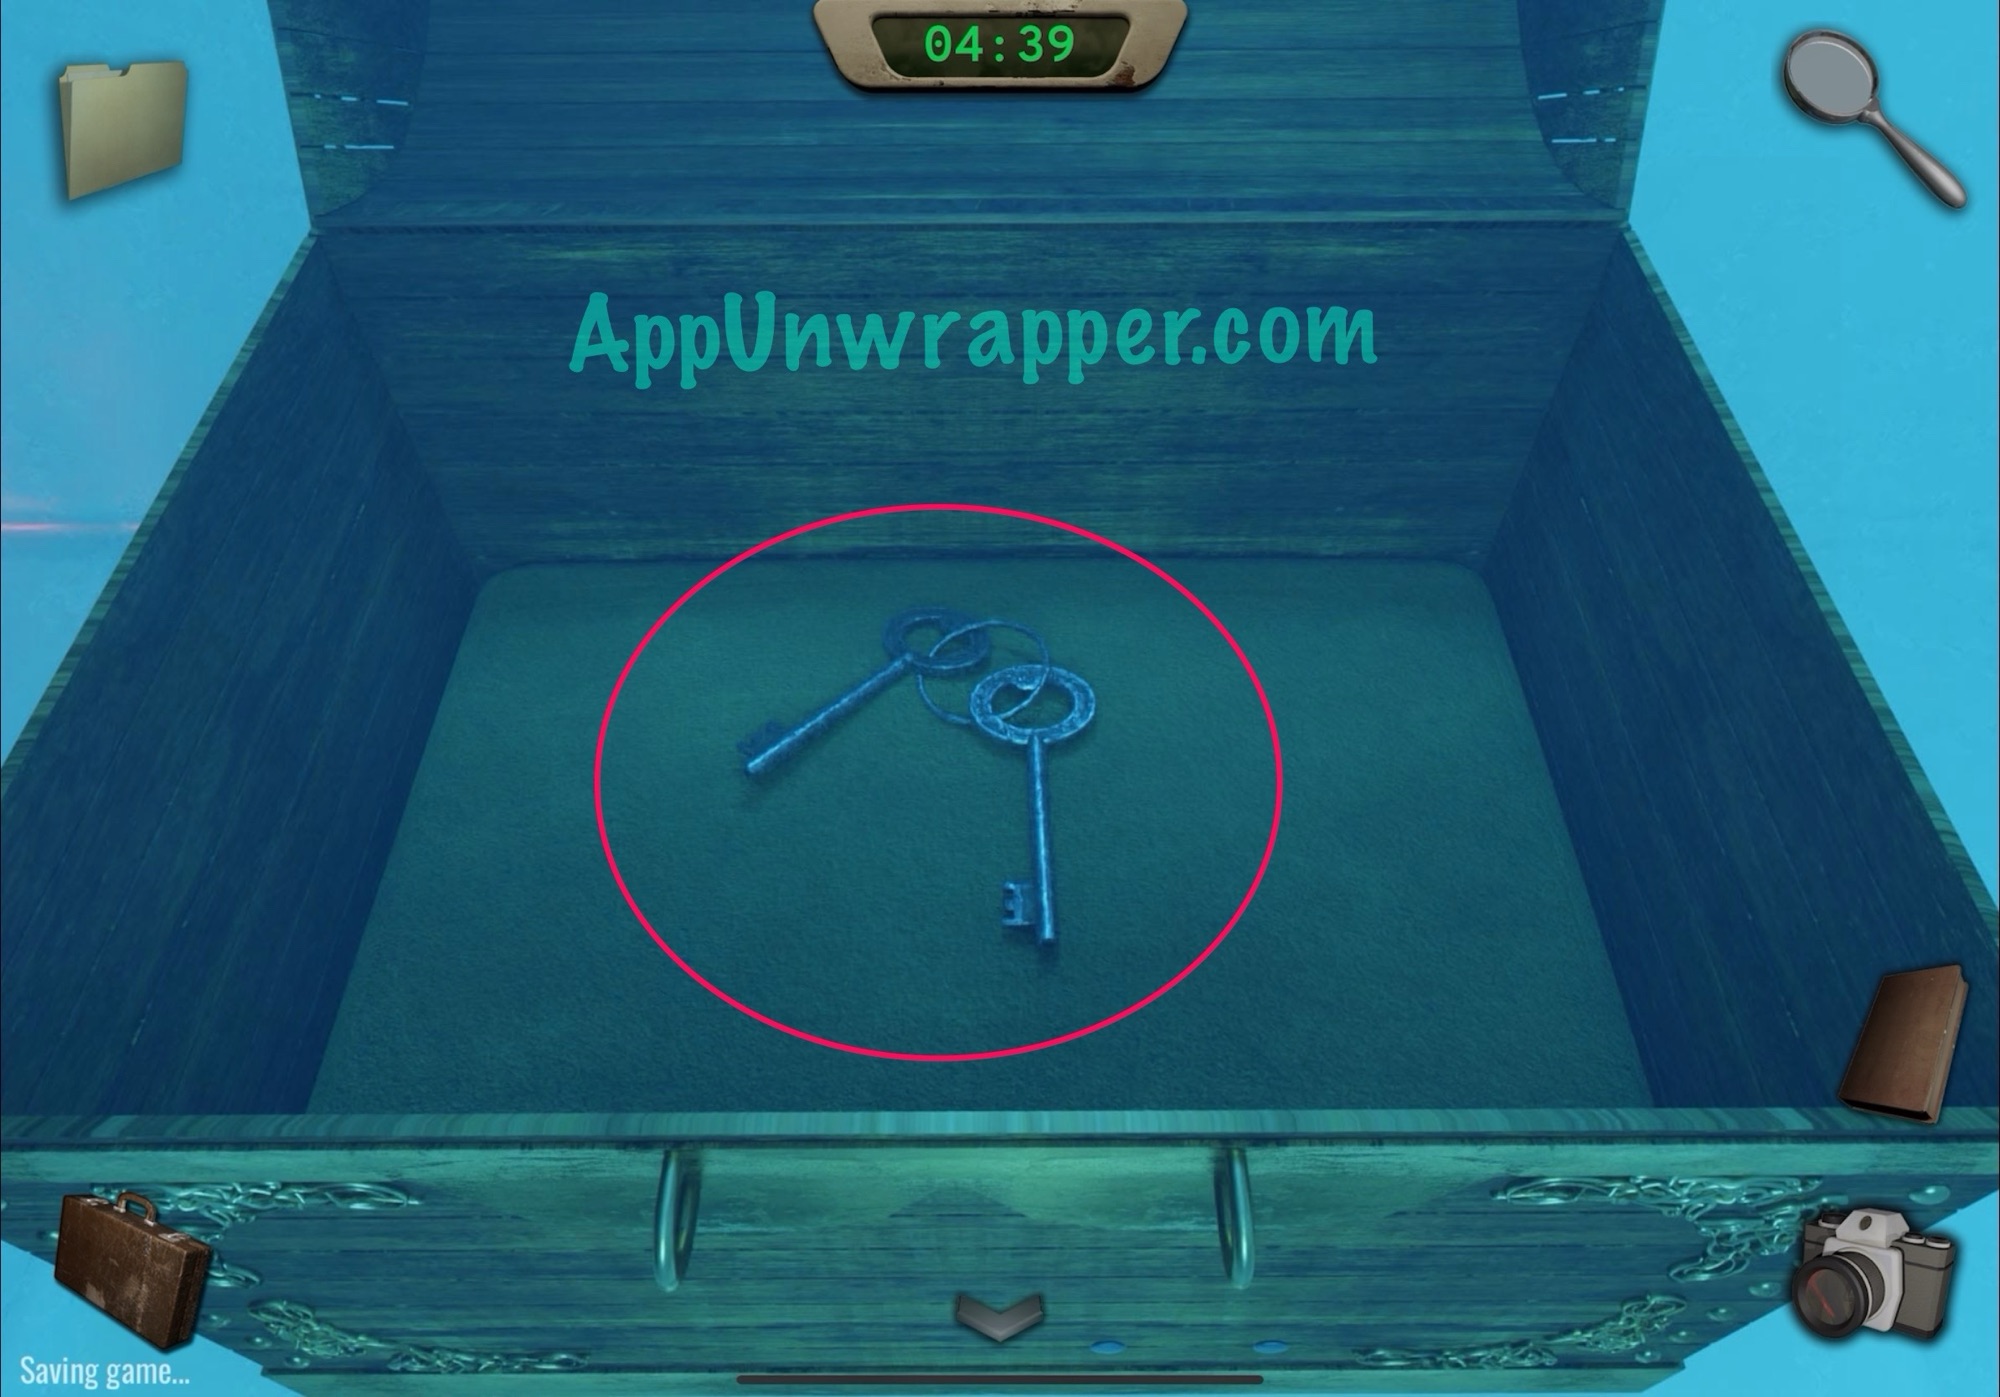
9. The fan again should have stopped now. Go through and use the two keys to unlock the chest. Then grab the two other keys inside.
10. The fan should still be off, so go back through it.
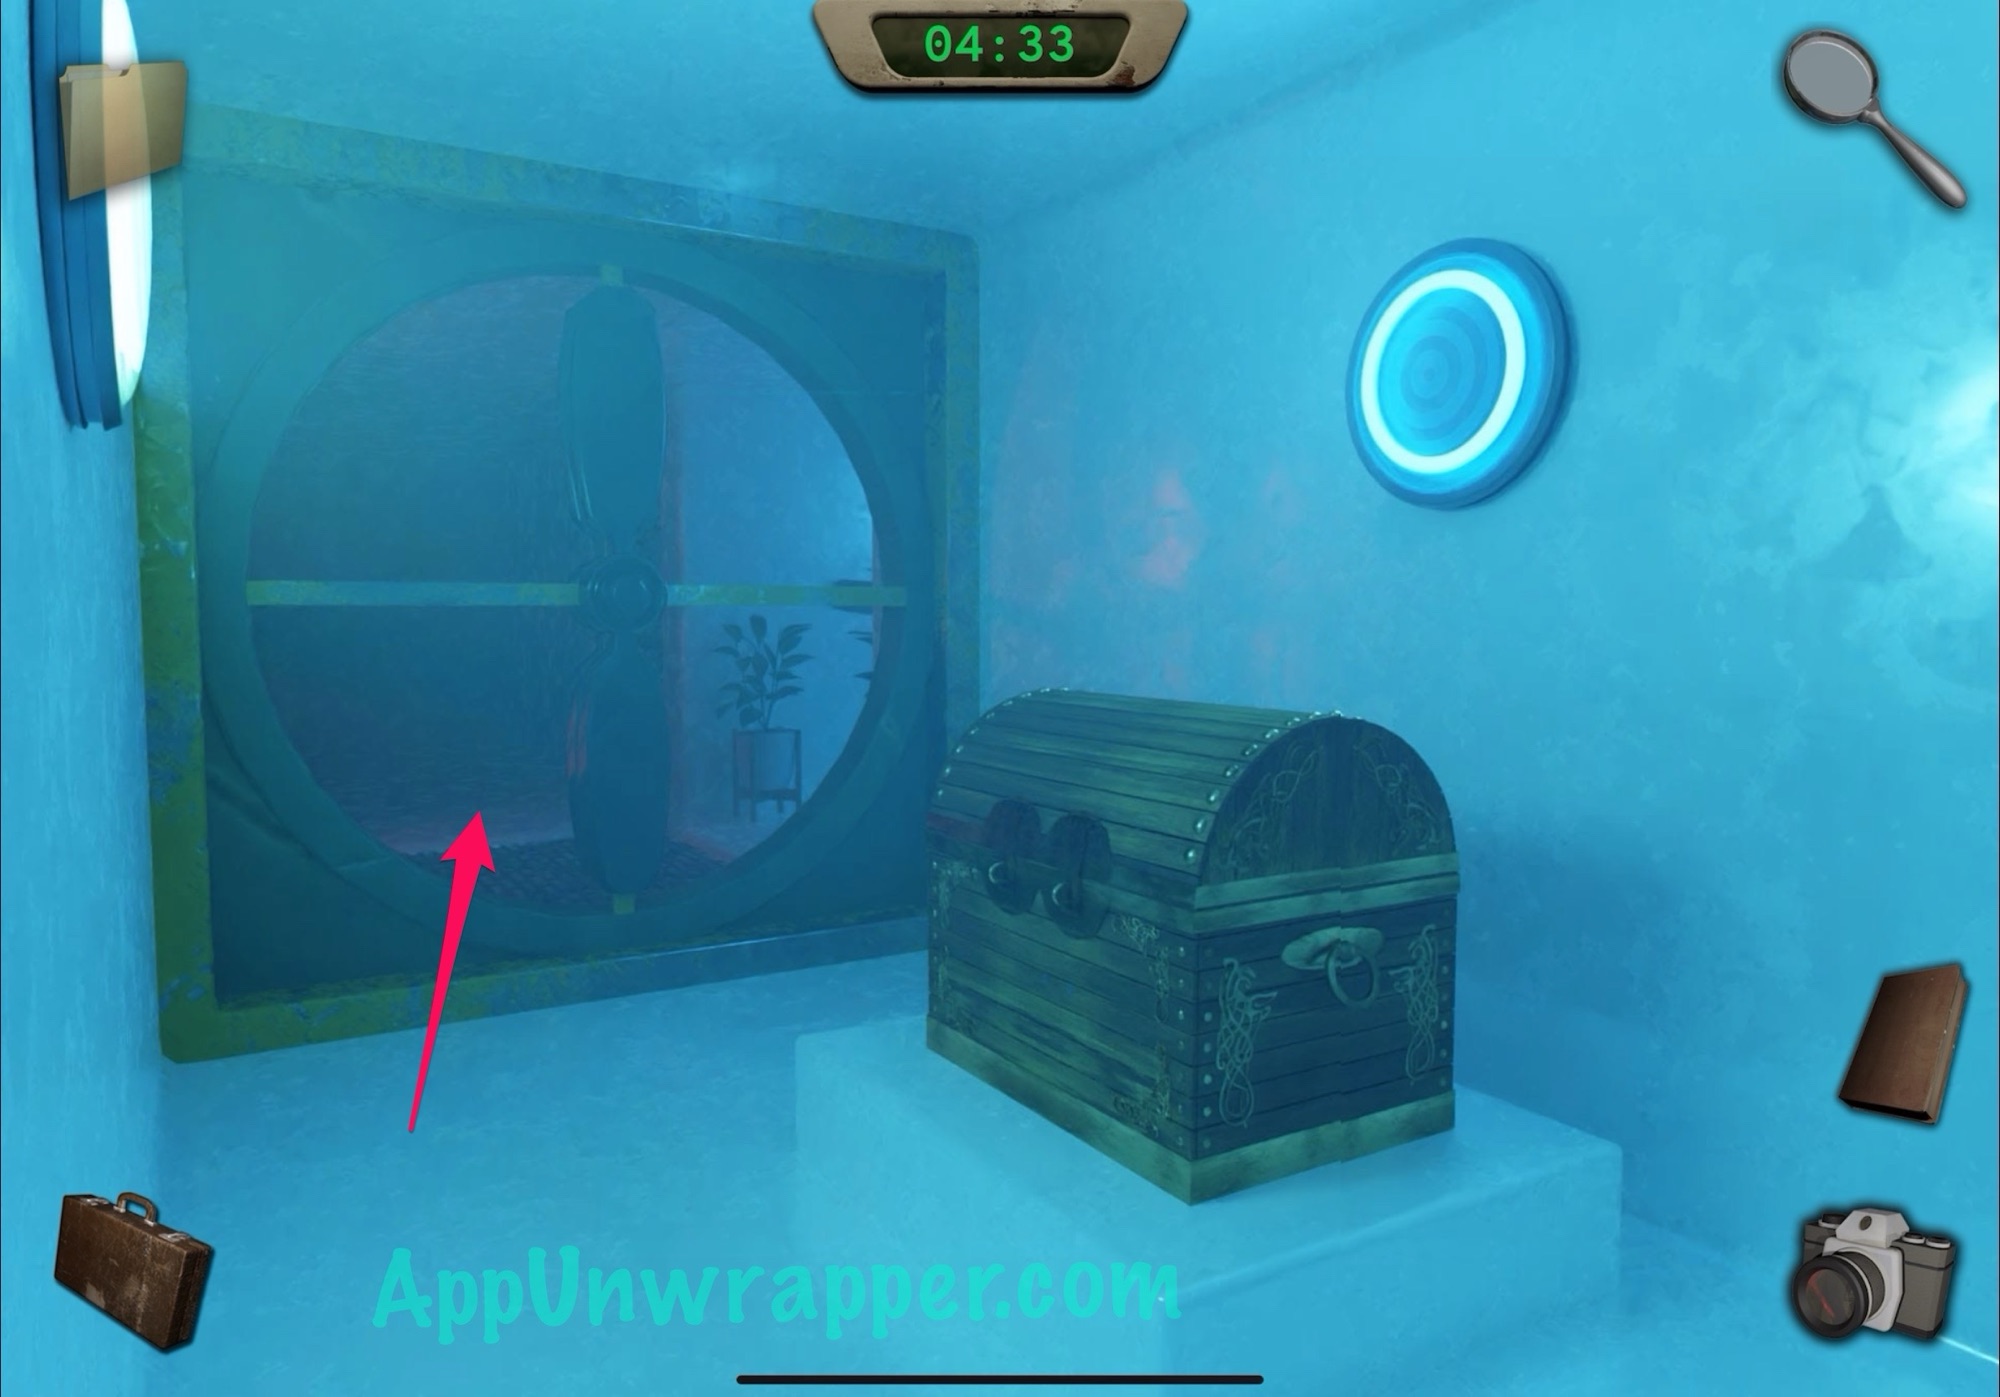
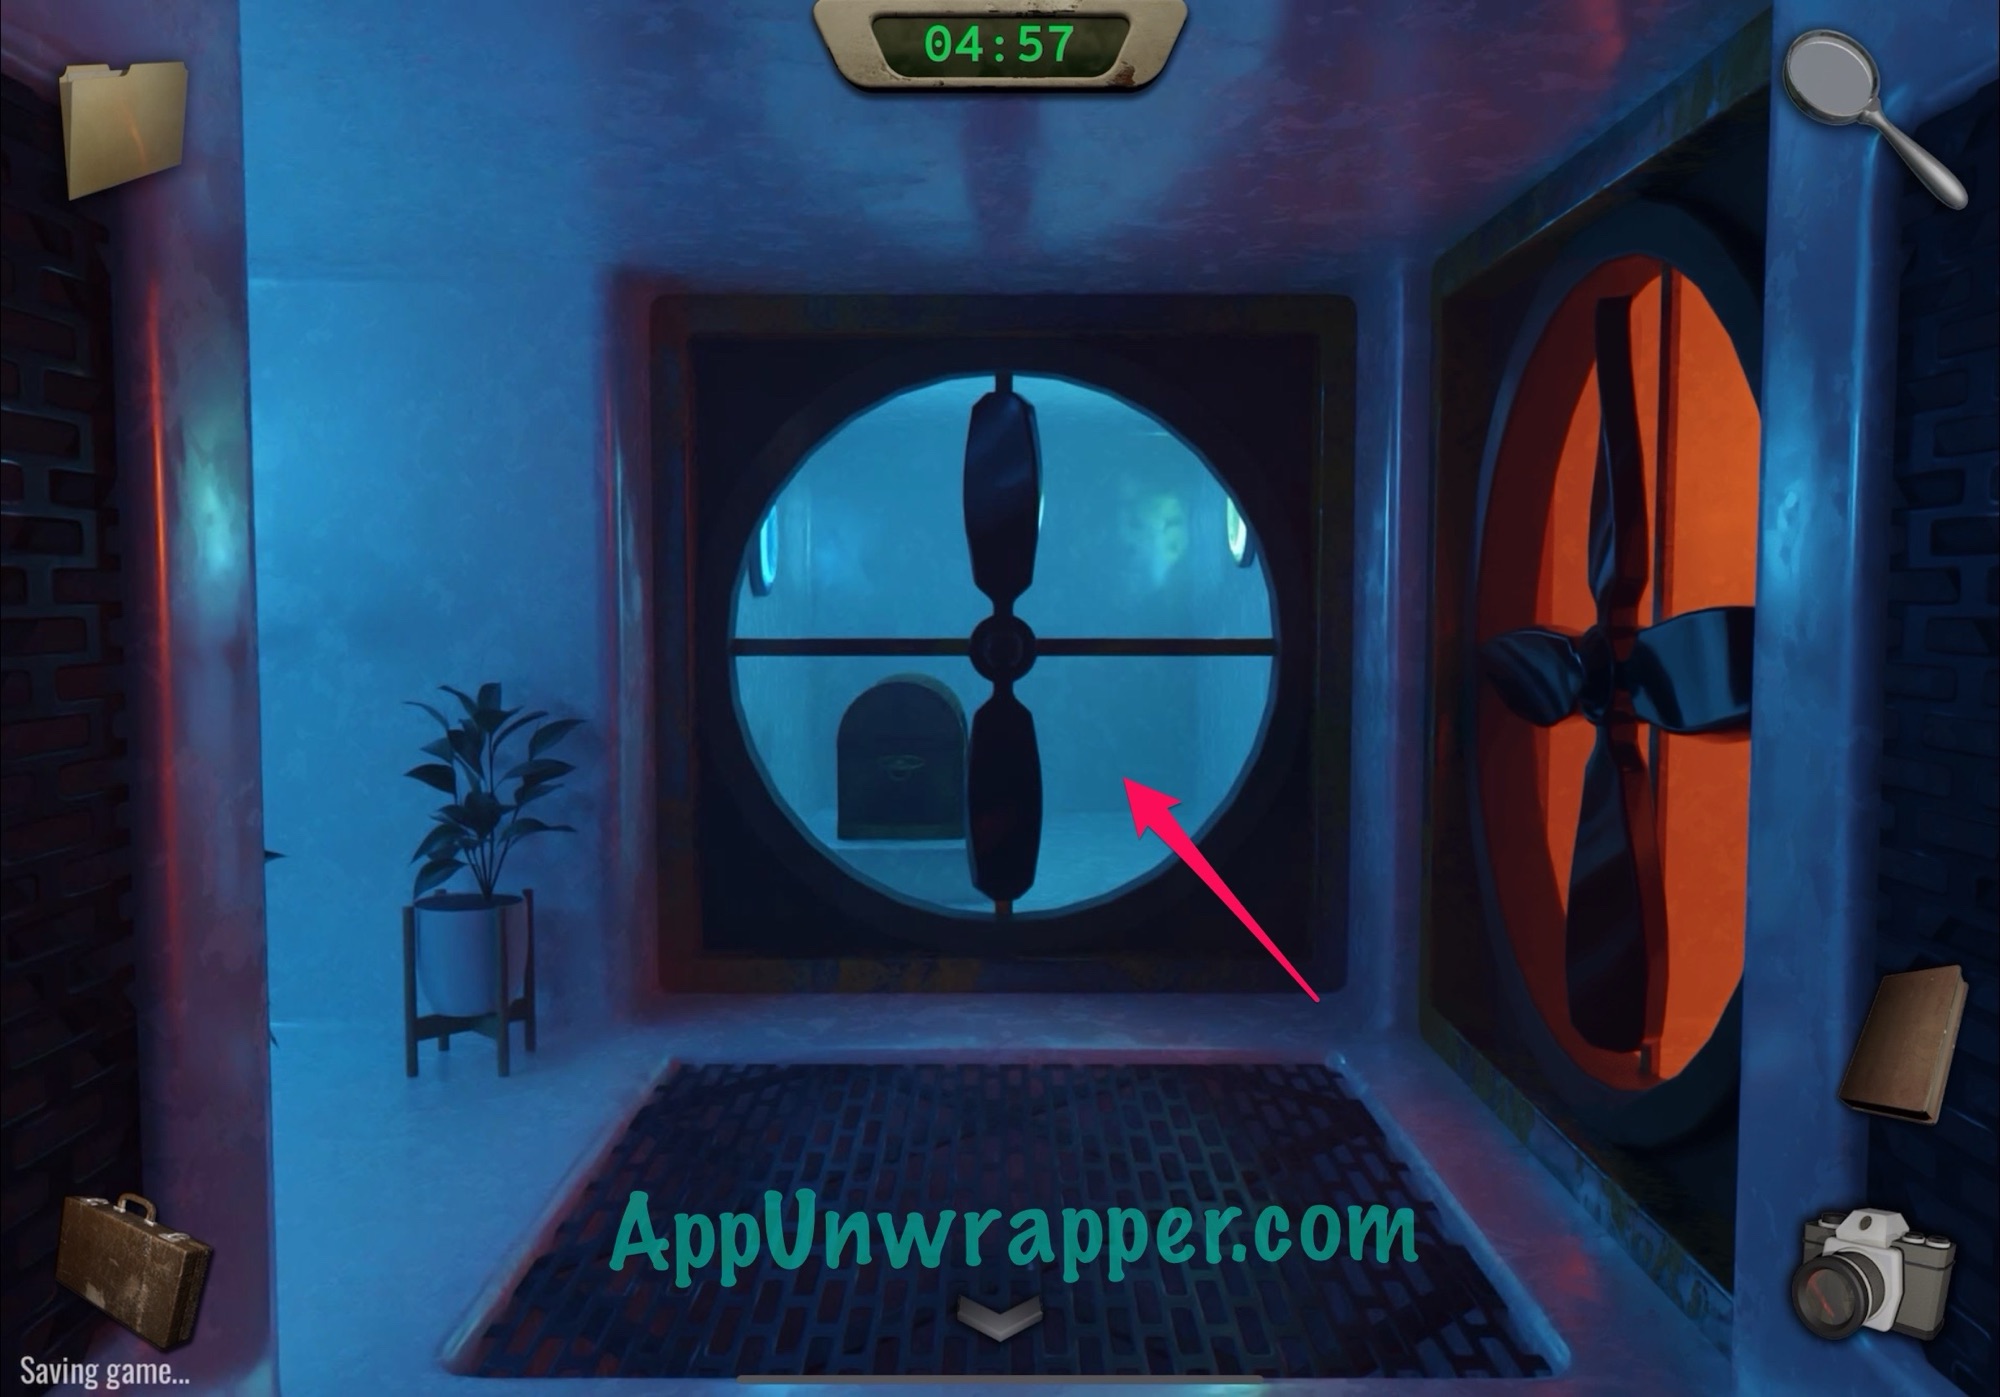
11. The sequence we entered made sure that the starting fan would be off at this point. You can’t see it, but if you press the arrow button to go backwards, you’ll go through it, now holding all four keys.
12. Now we need to make a new sequence, but we can’t do so inside the same time loop. So first, let’s stash the four keys so we don’t lose them. Go back downstairs and then up the stairs to the left.

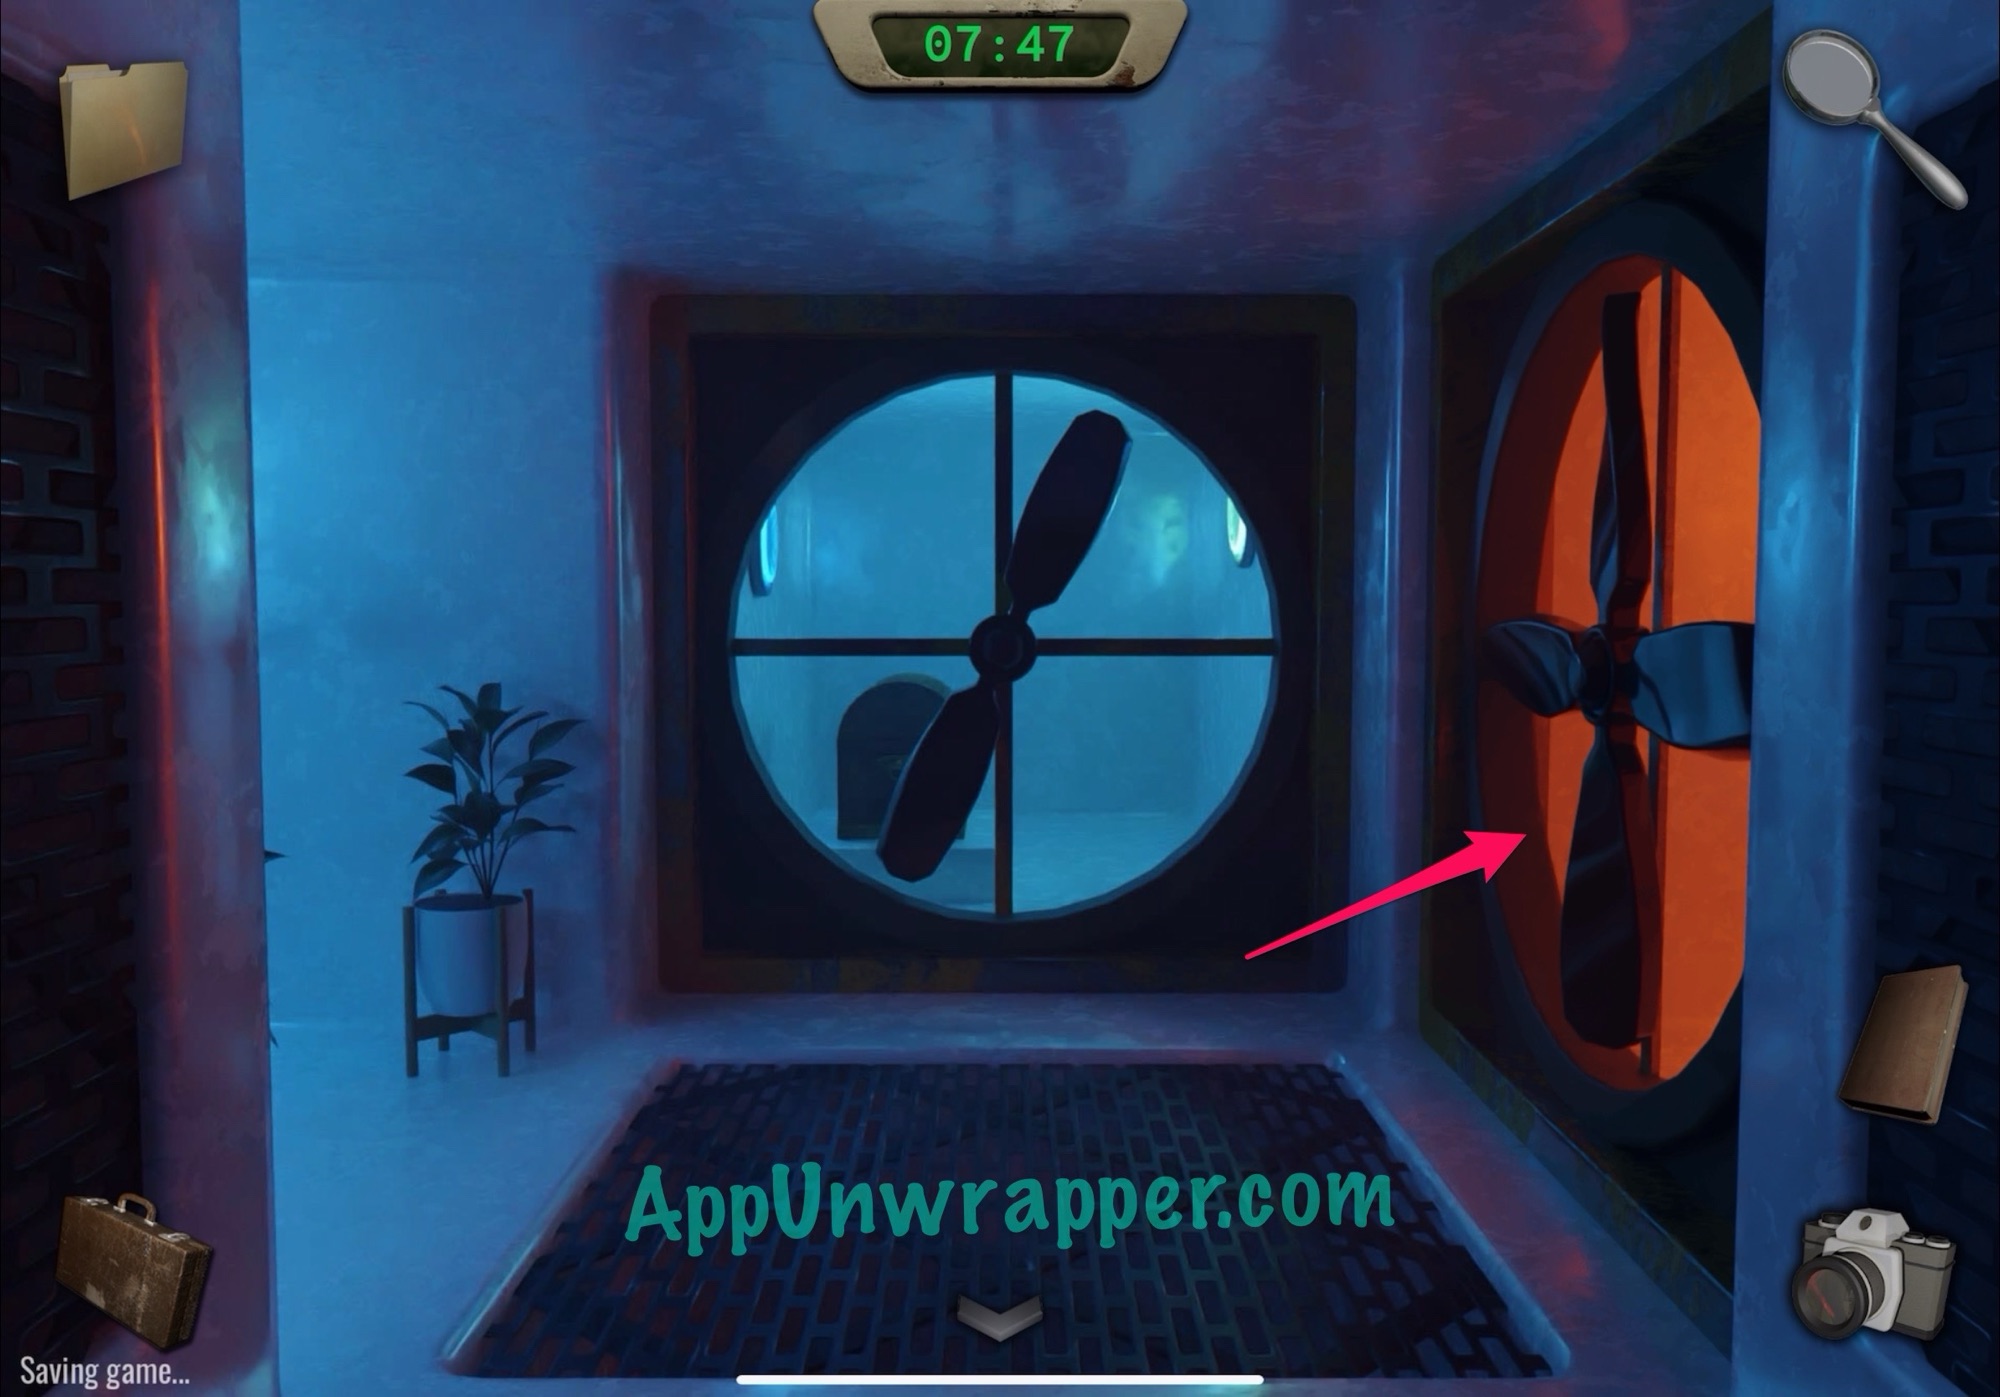
13. Look at the clue on the floor and take a photo of it for later. Then tap on the yellow door and slide open the lock. Head through.
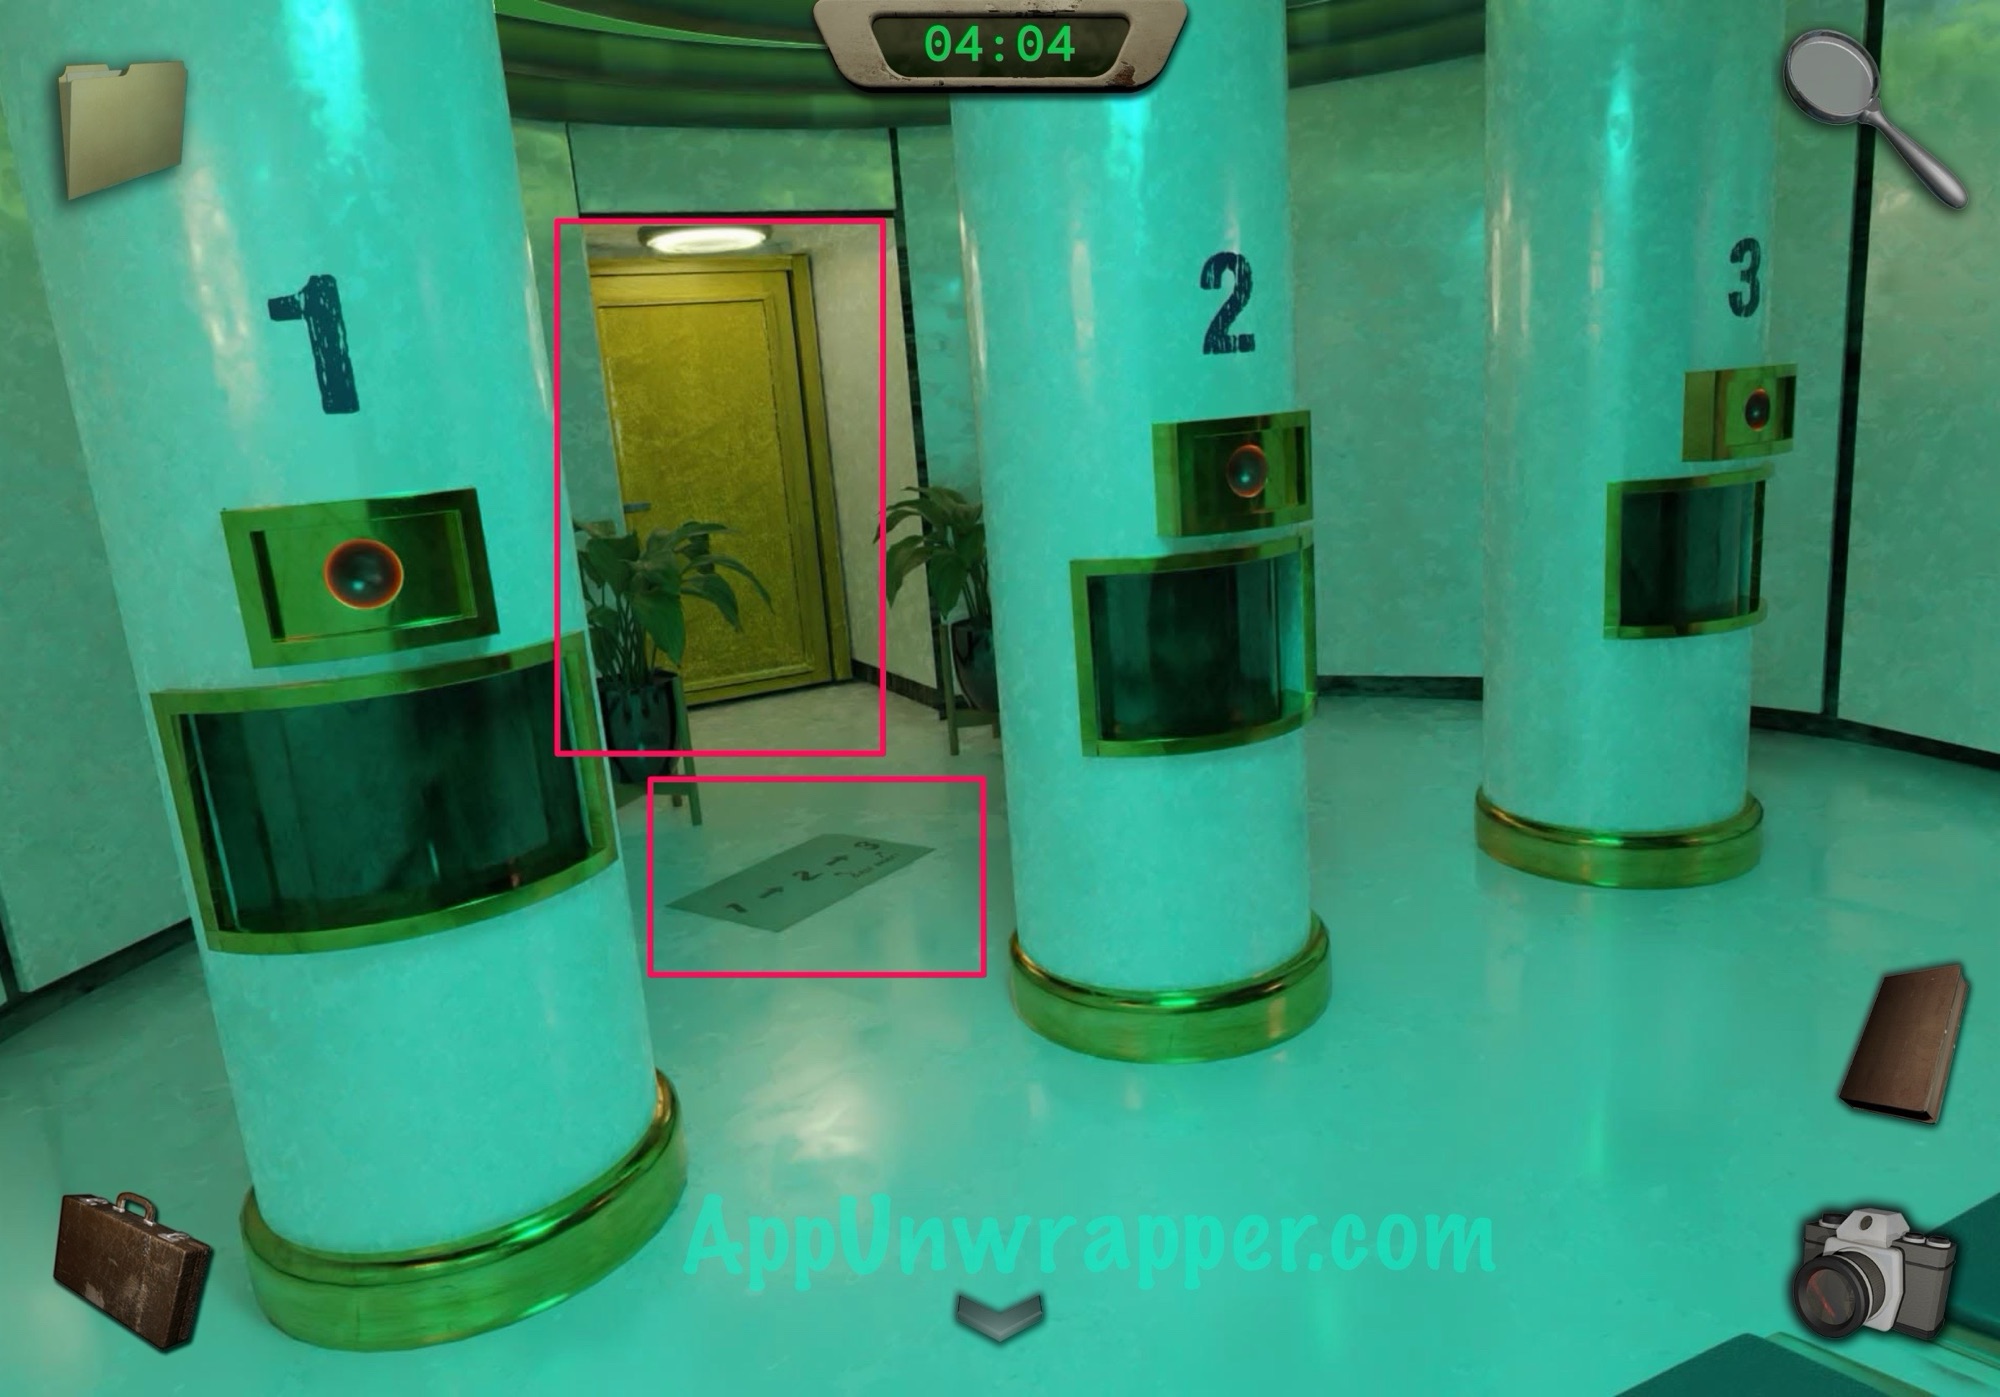


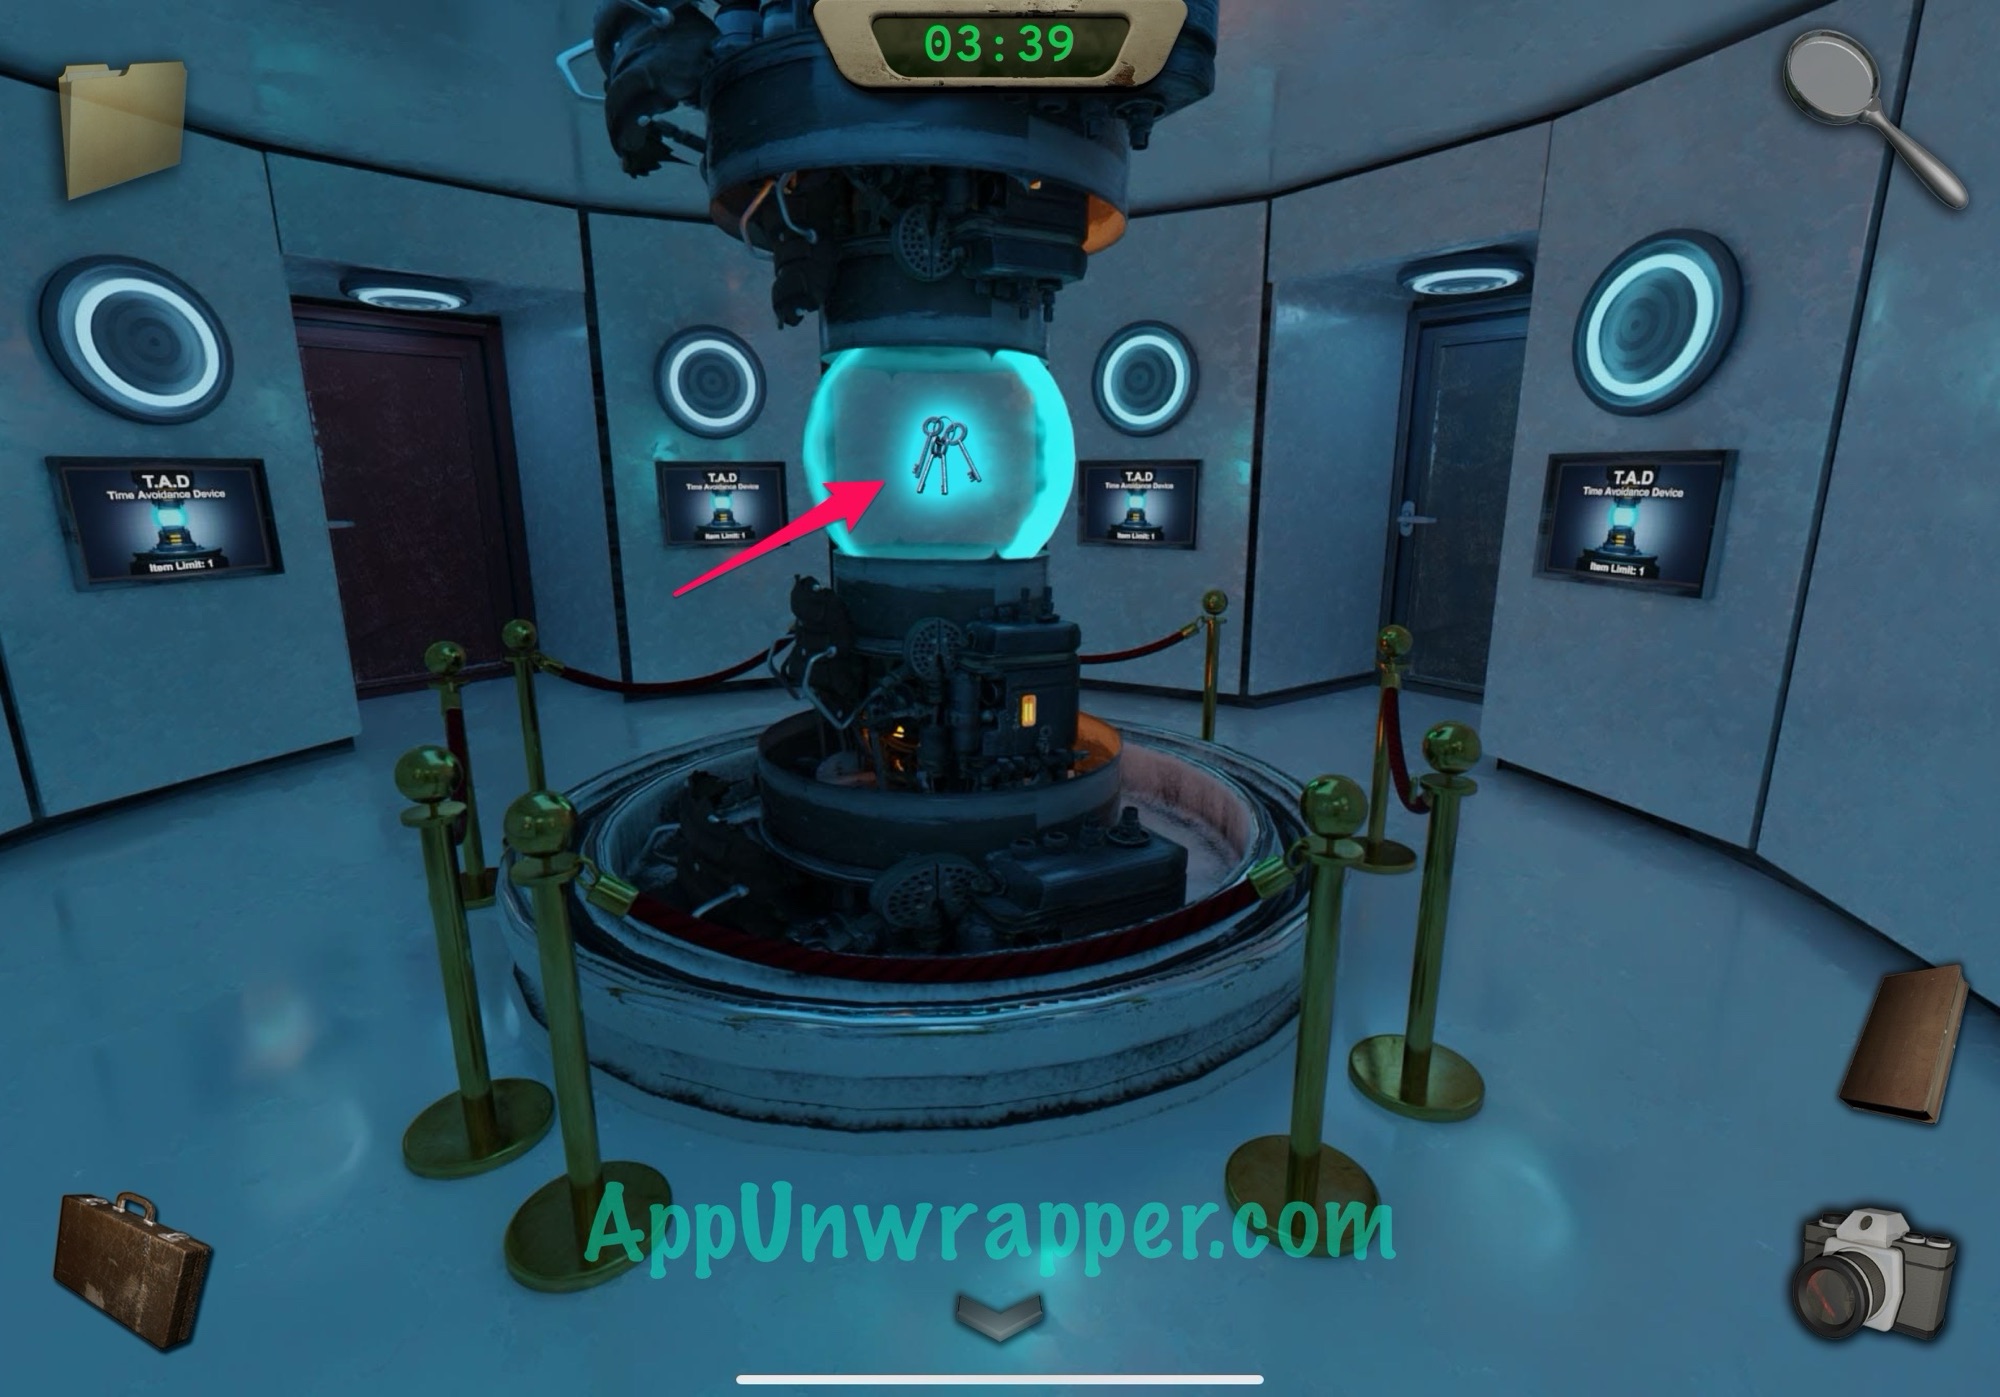
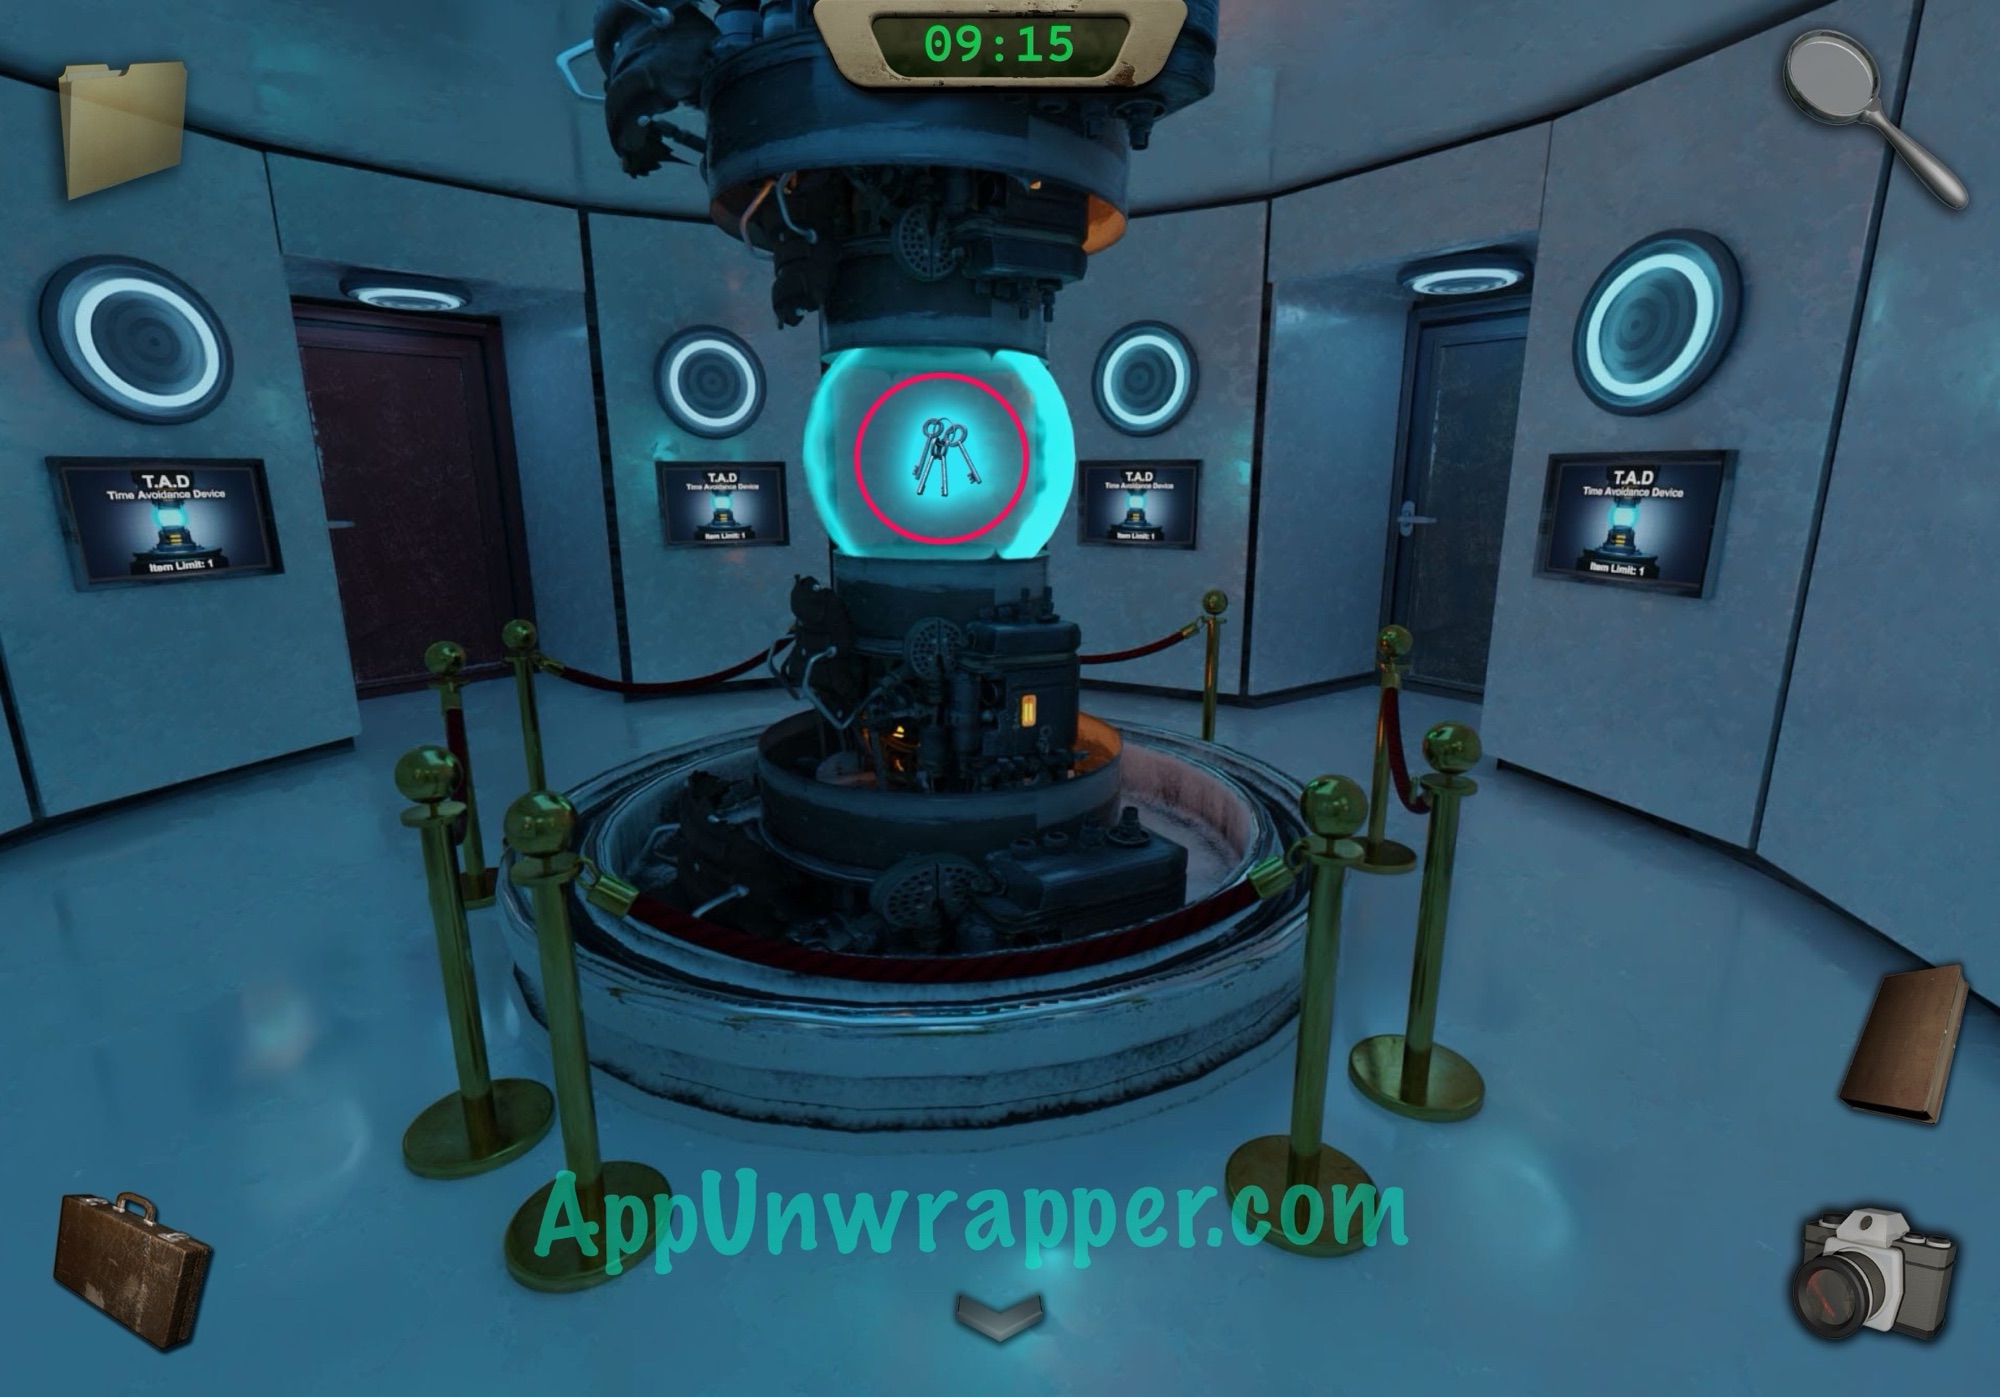
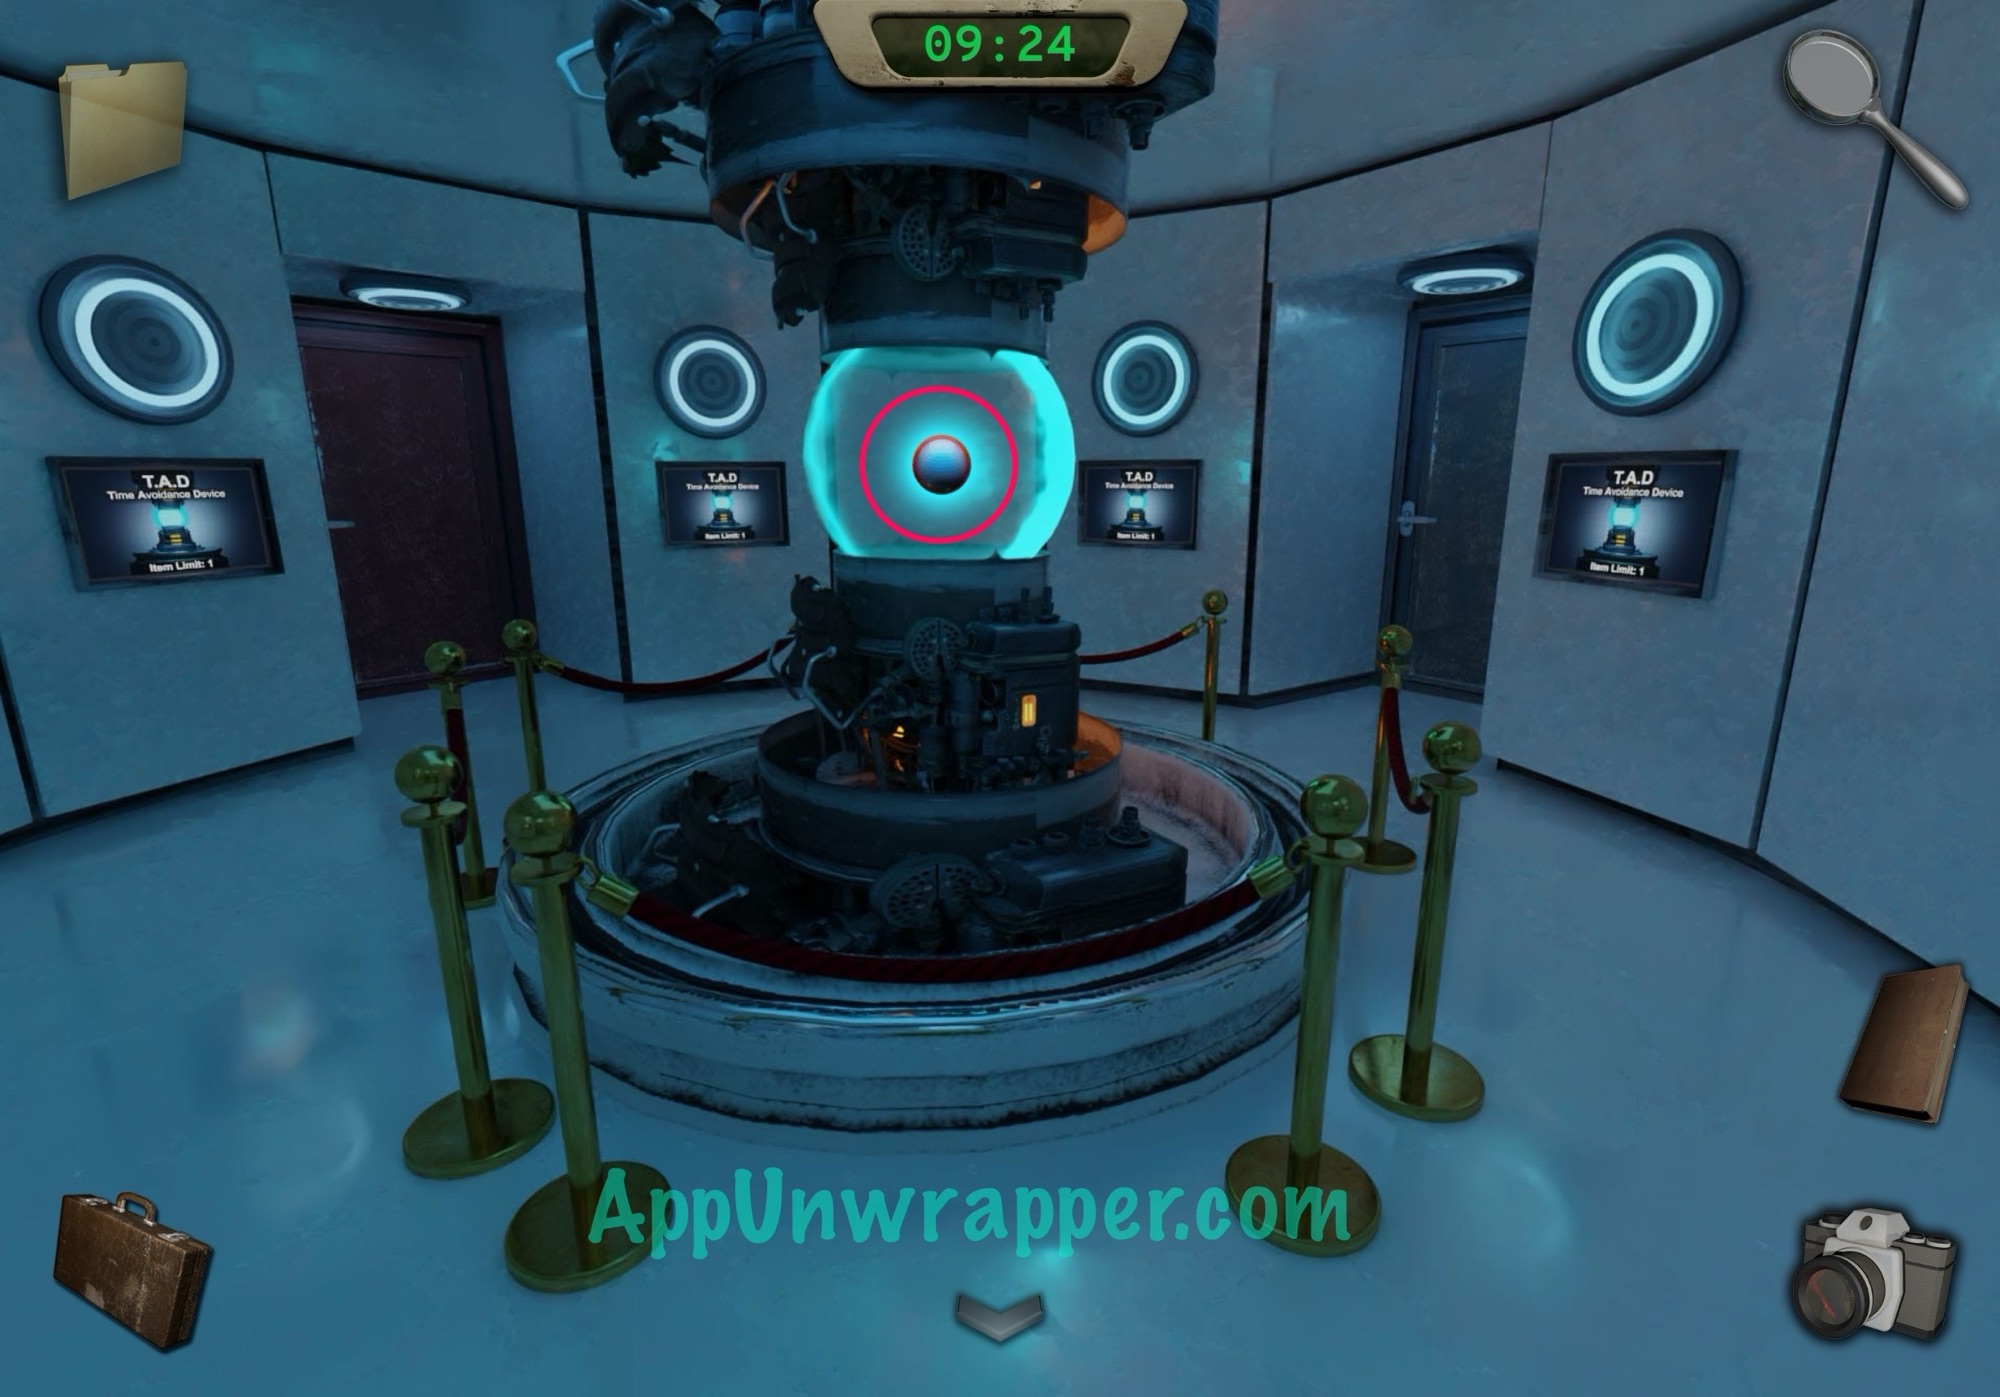
14. Place the four keys in the TAD so you can access them again after a reset.
15. Now we just have to reset the time loop, and the easiest way to do that is by going back downstairs and jumping down the big ol’ hole.
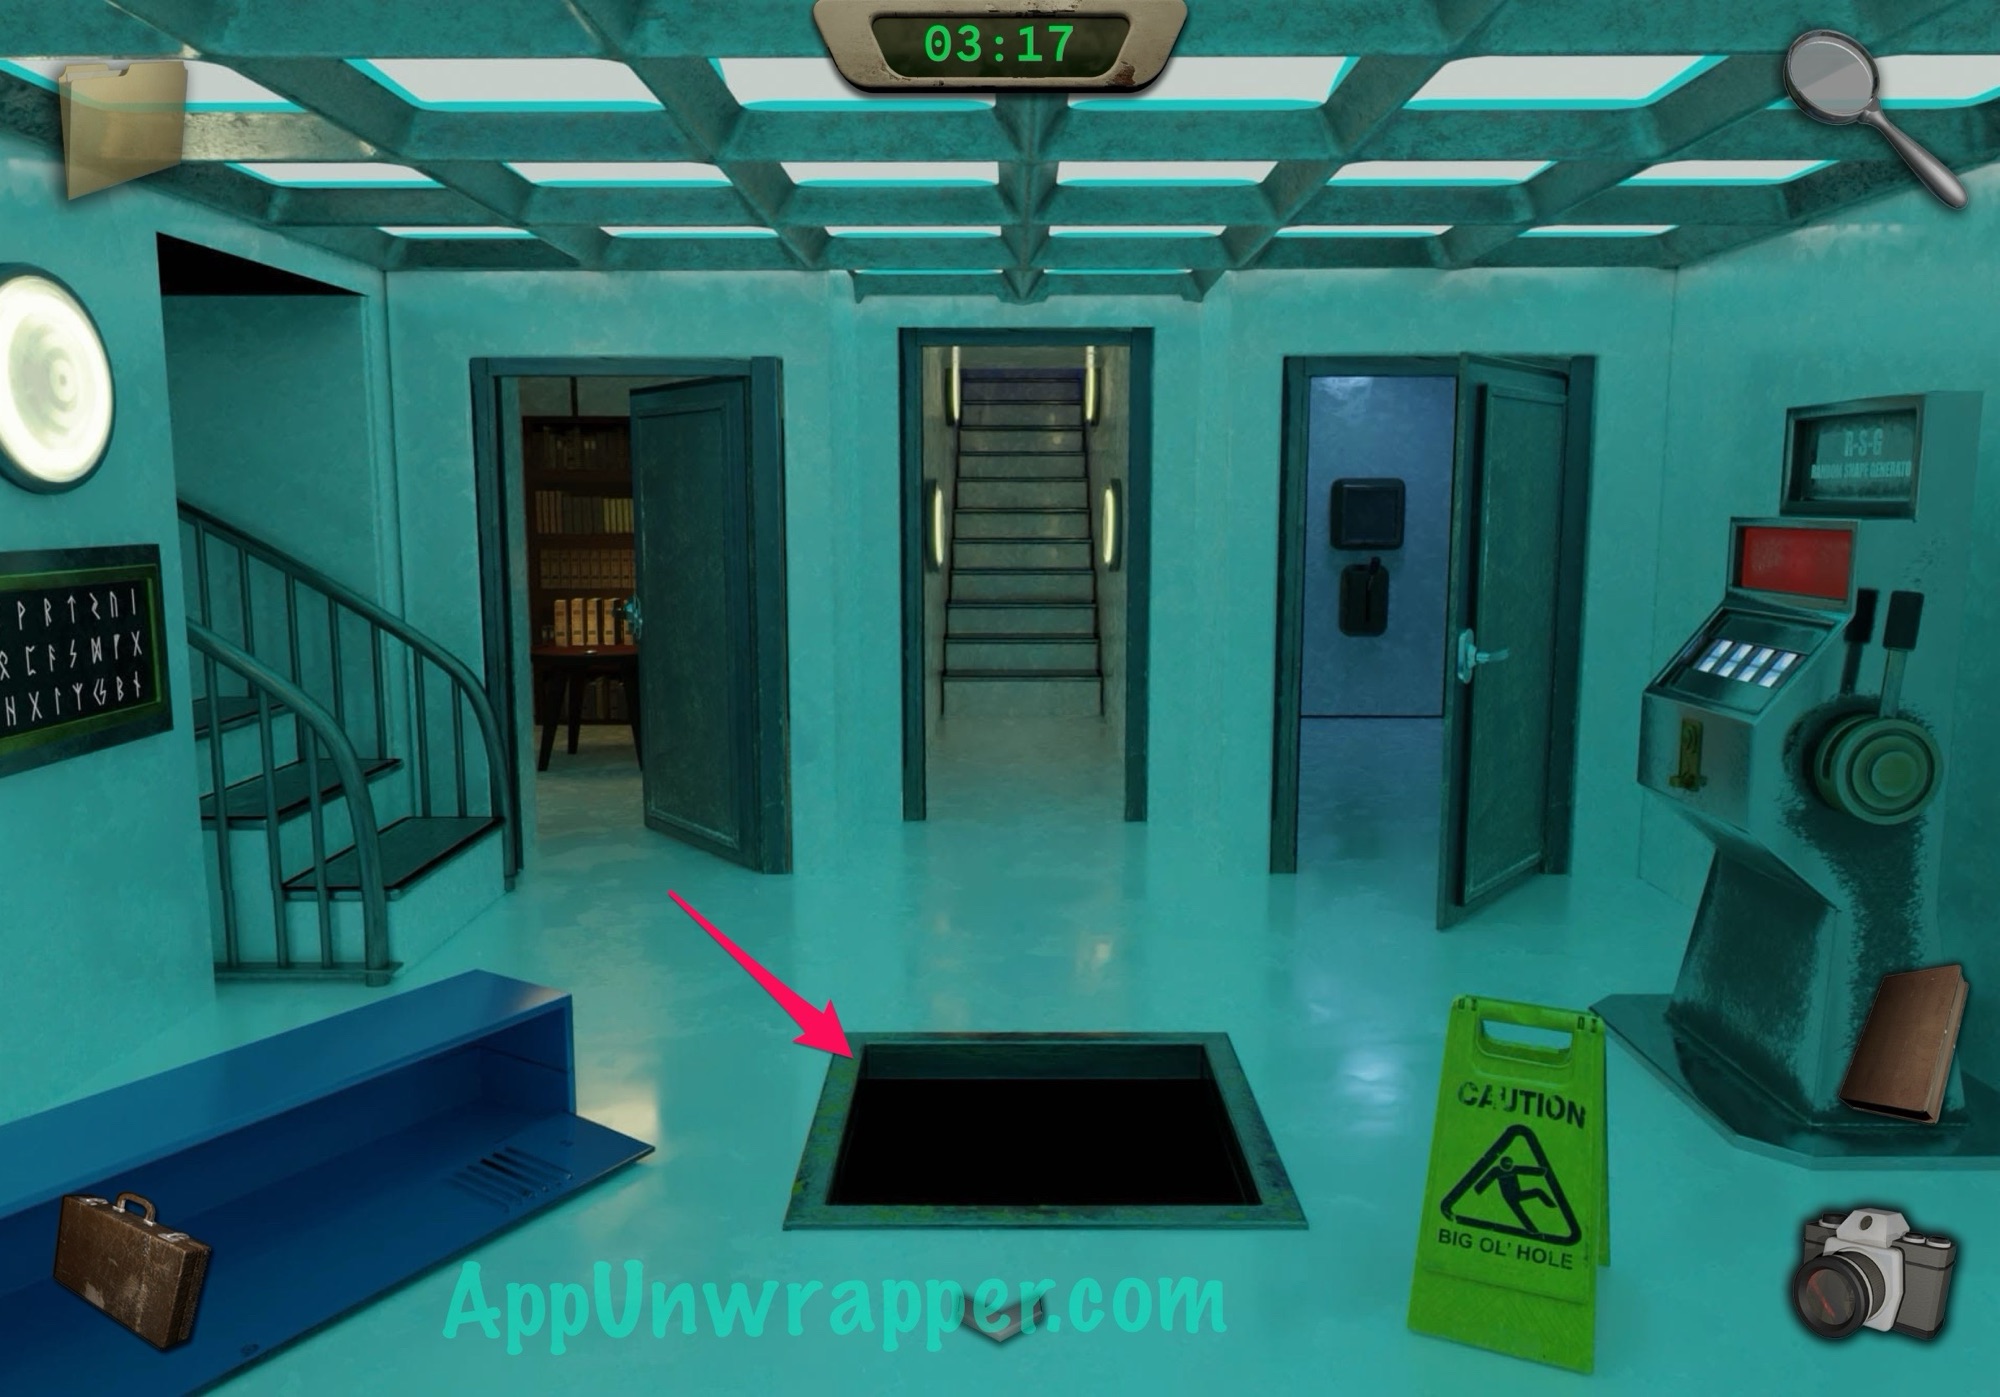
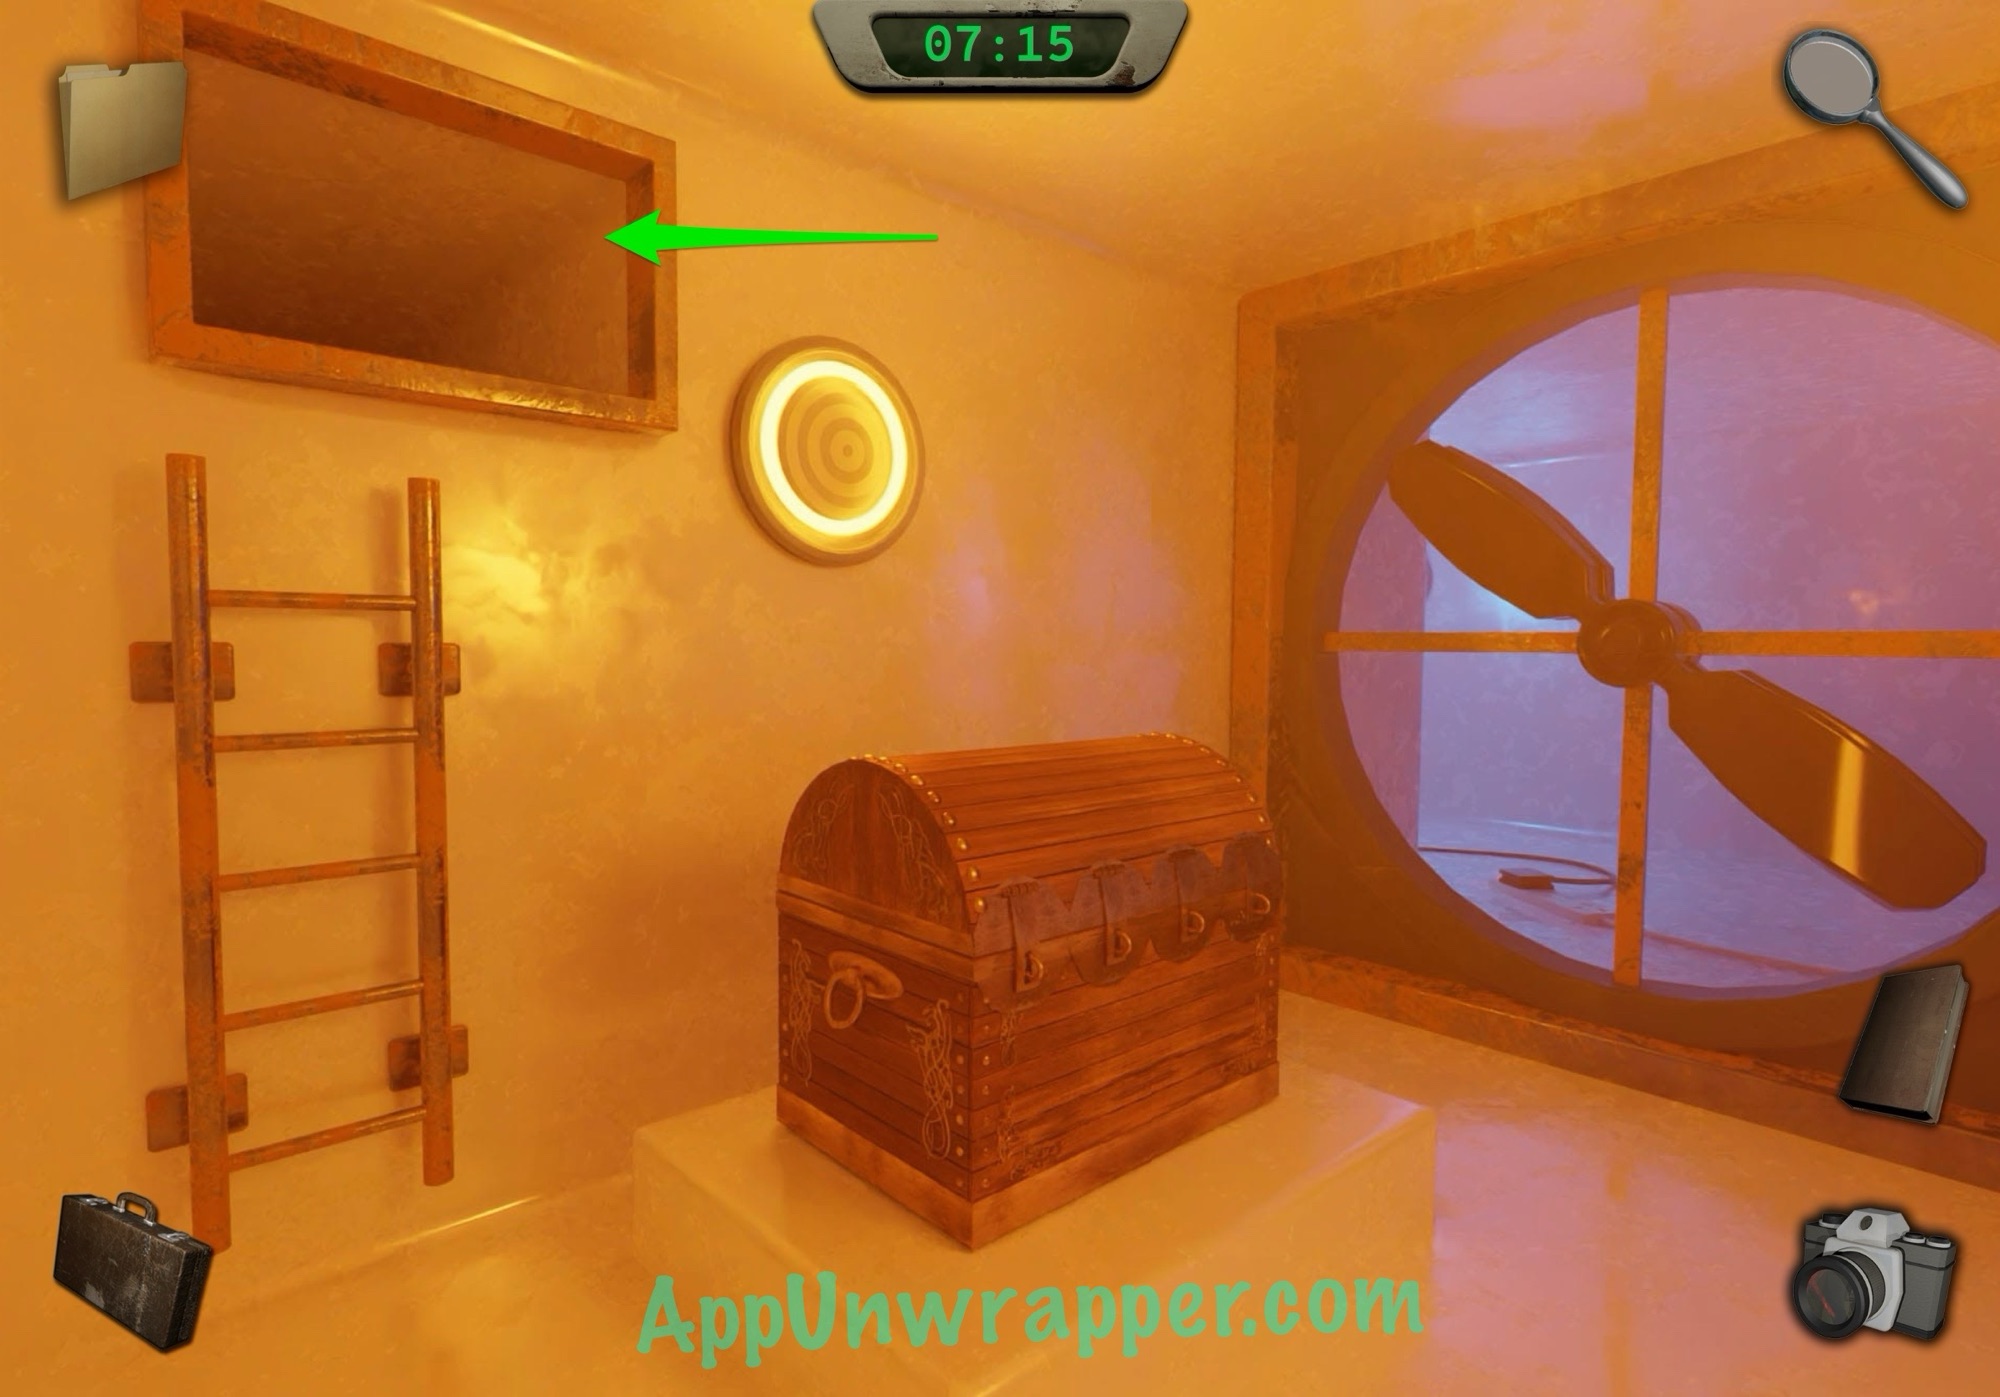
16. Use the photo again to open the right door and continue through. Again, grab the ball from the locker. Head up the left stairs and open the yellow door to get the keys from the TAD.

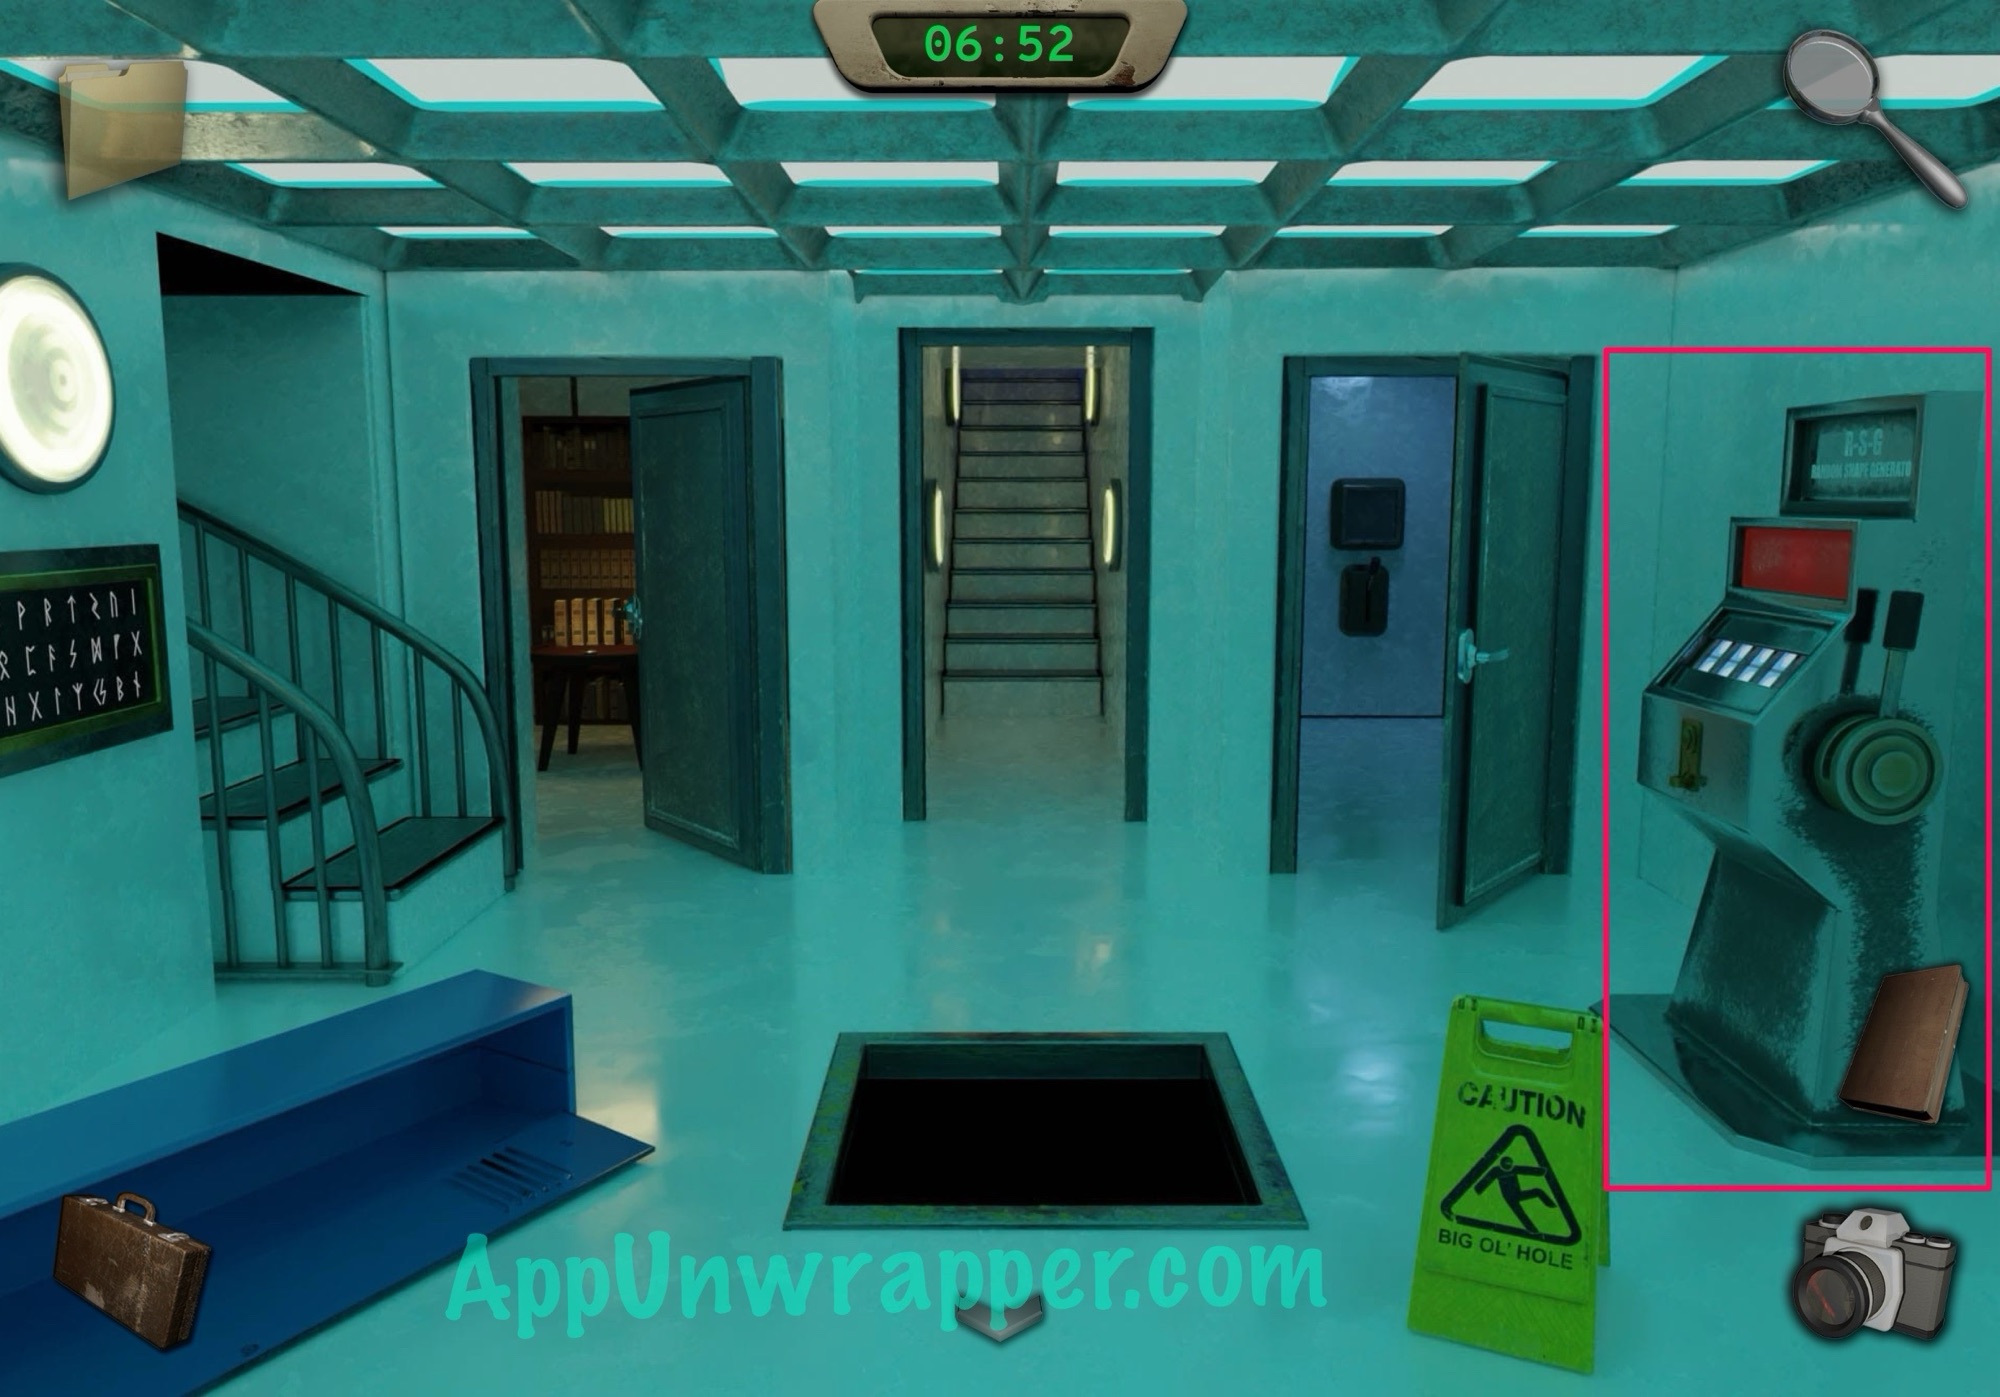
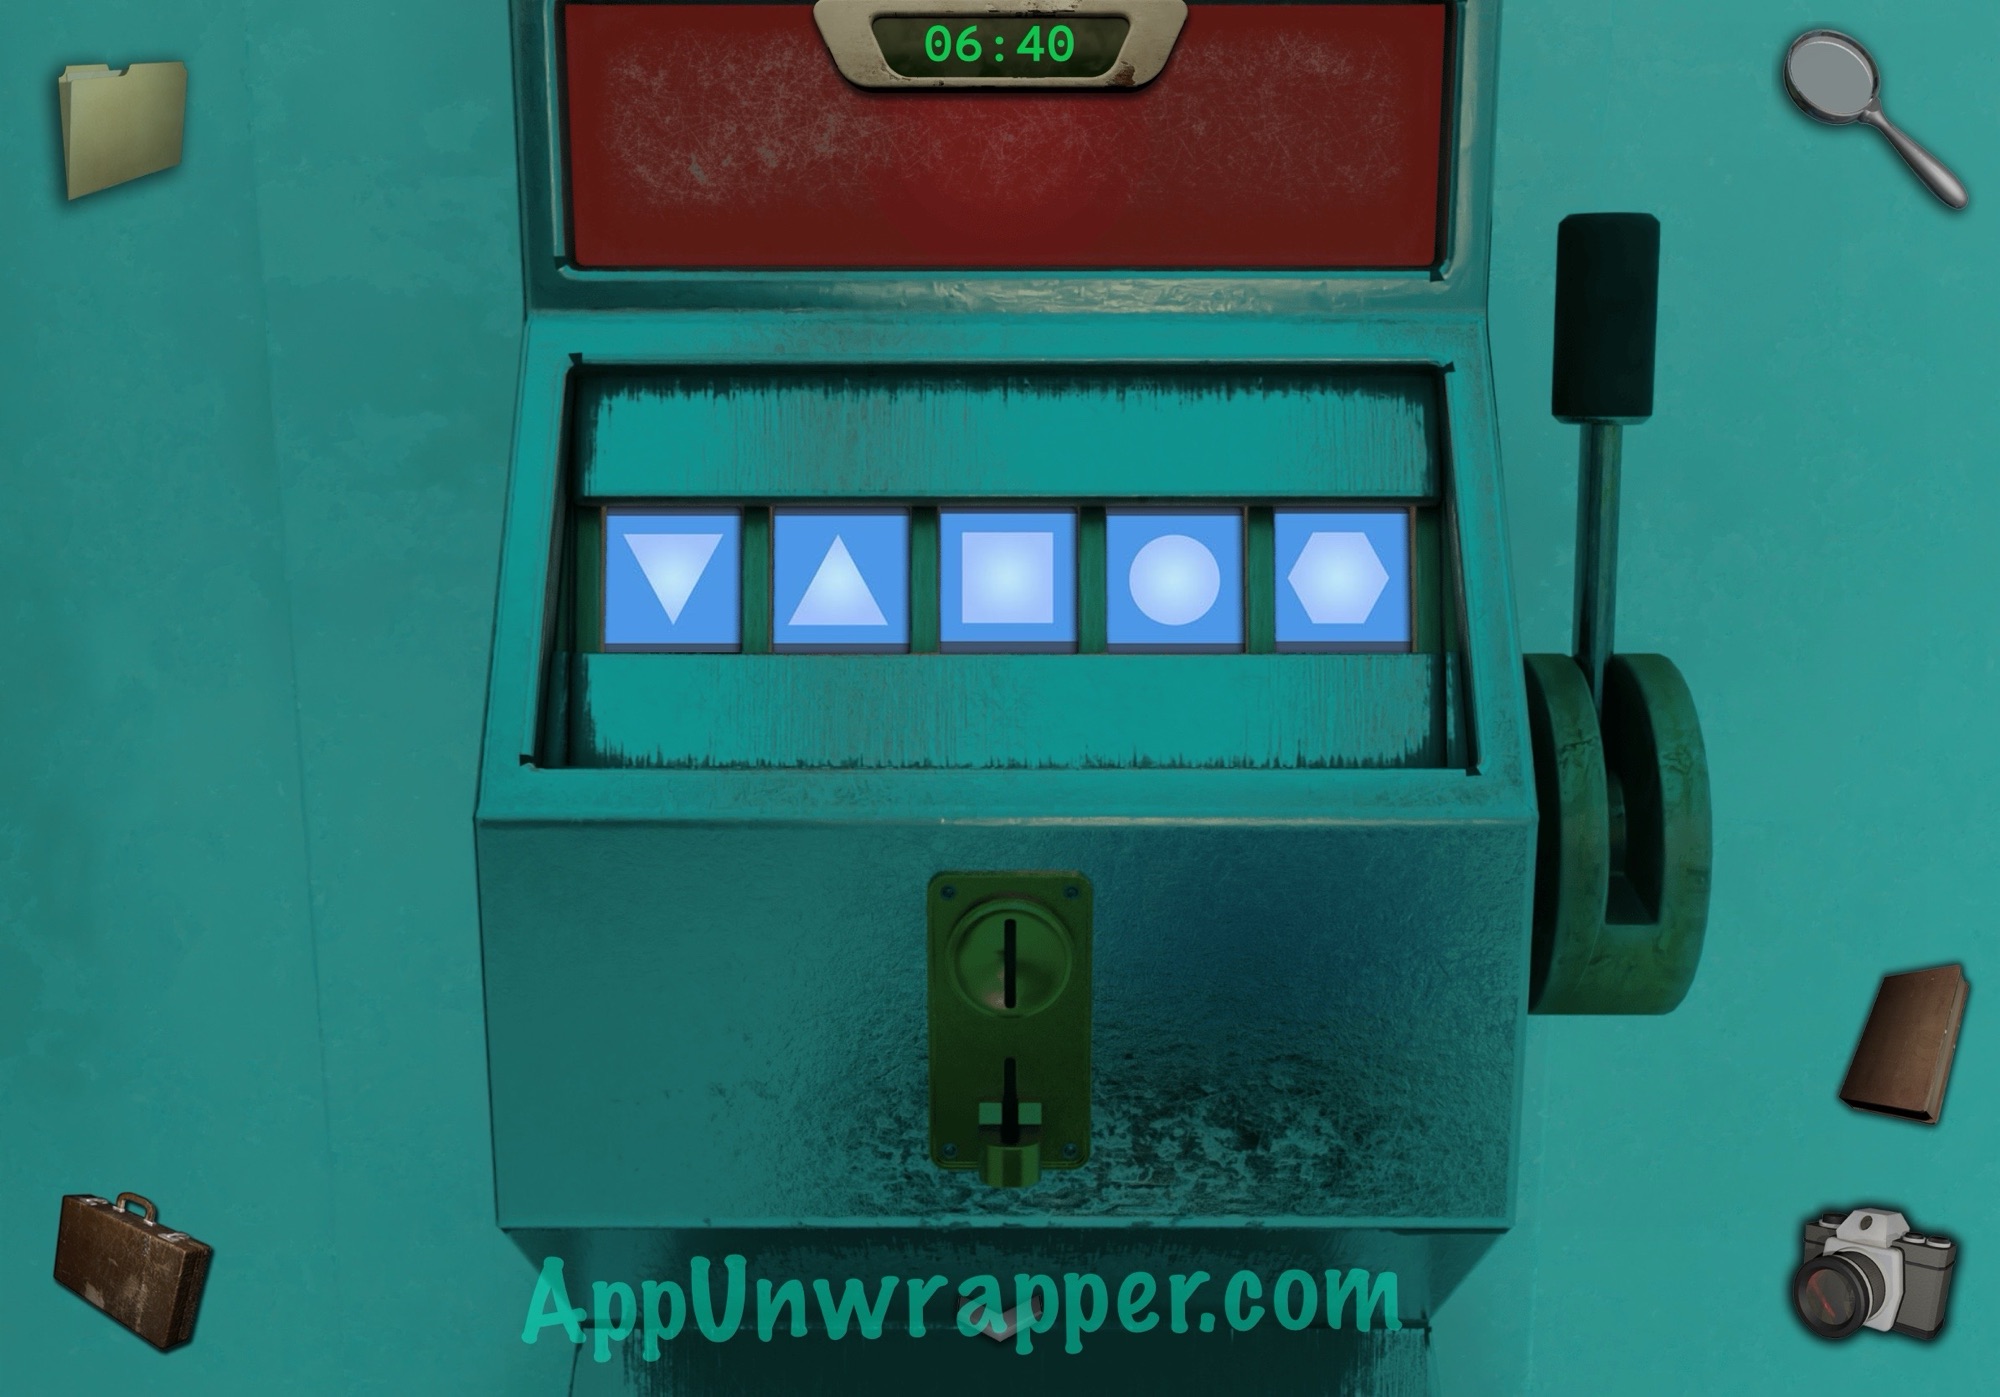
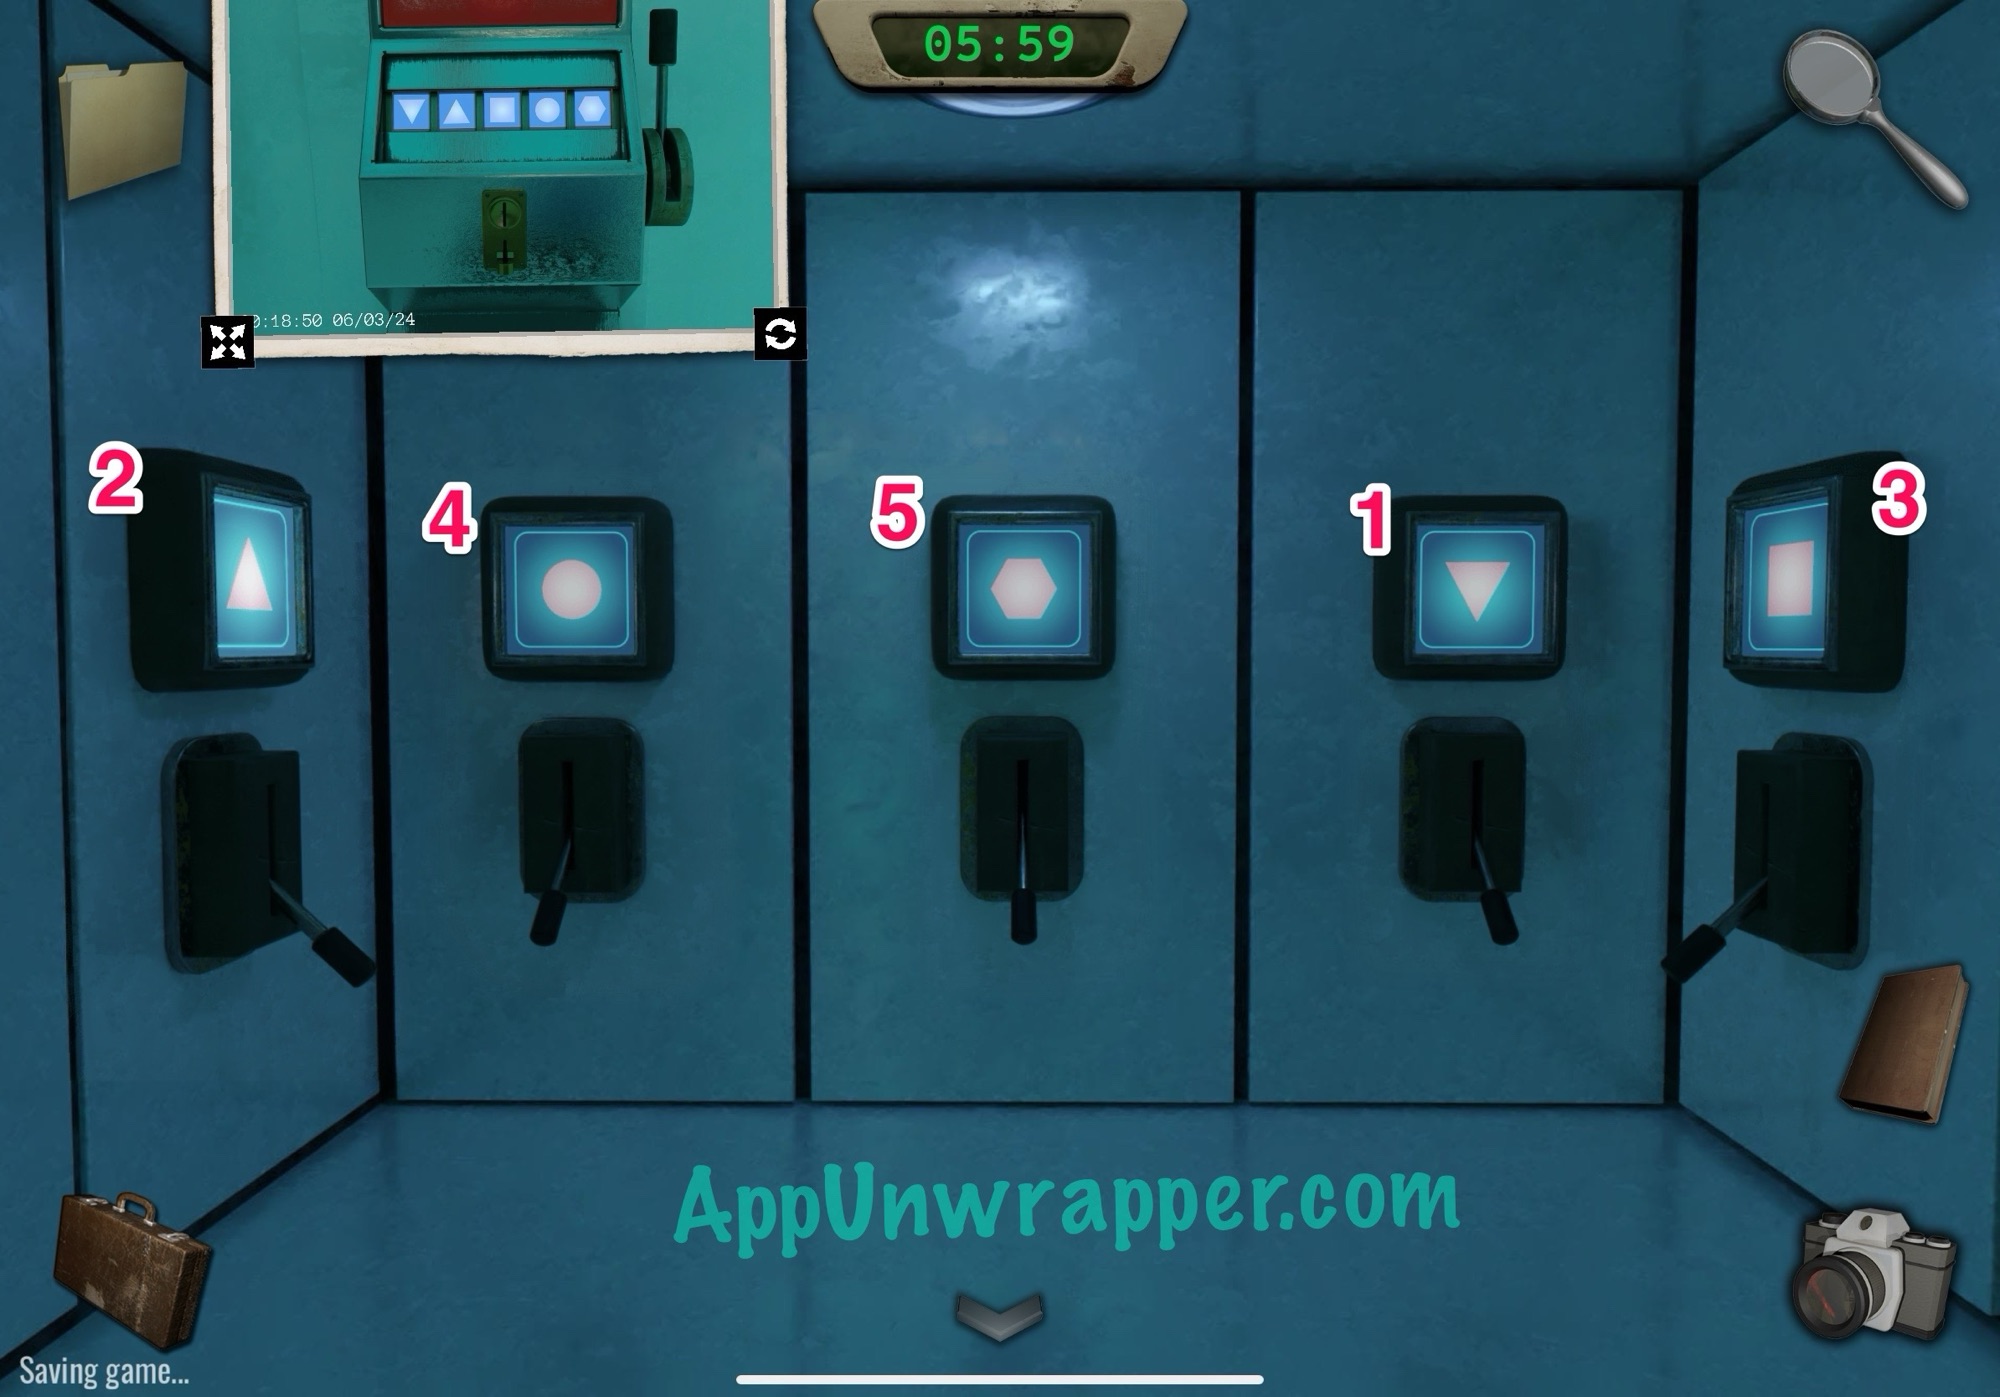
17. Go back up to the fan room. Grab the token again while you’re here. Look at the computer and pull out the photo of the map to work out a new sequence that will let you get to the spot with four locks. You only need four fans this time. Then press START.
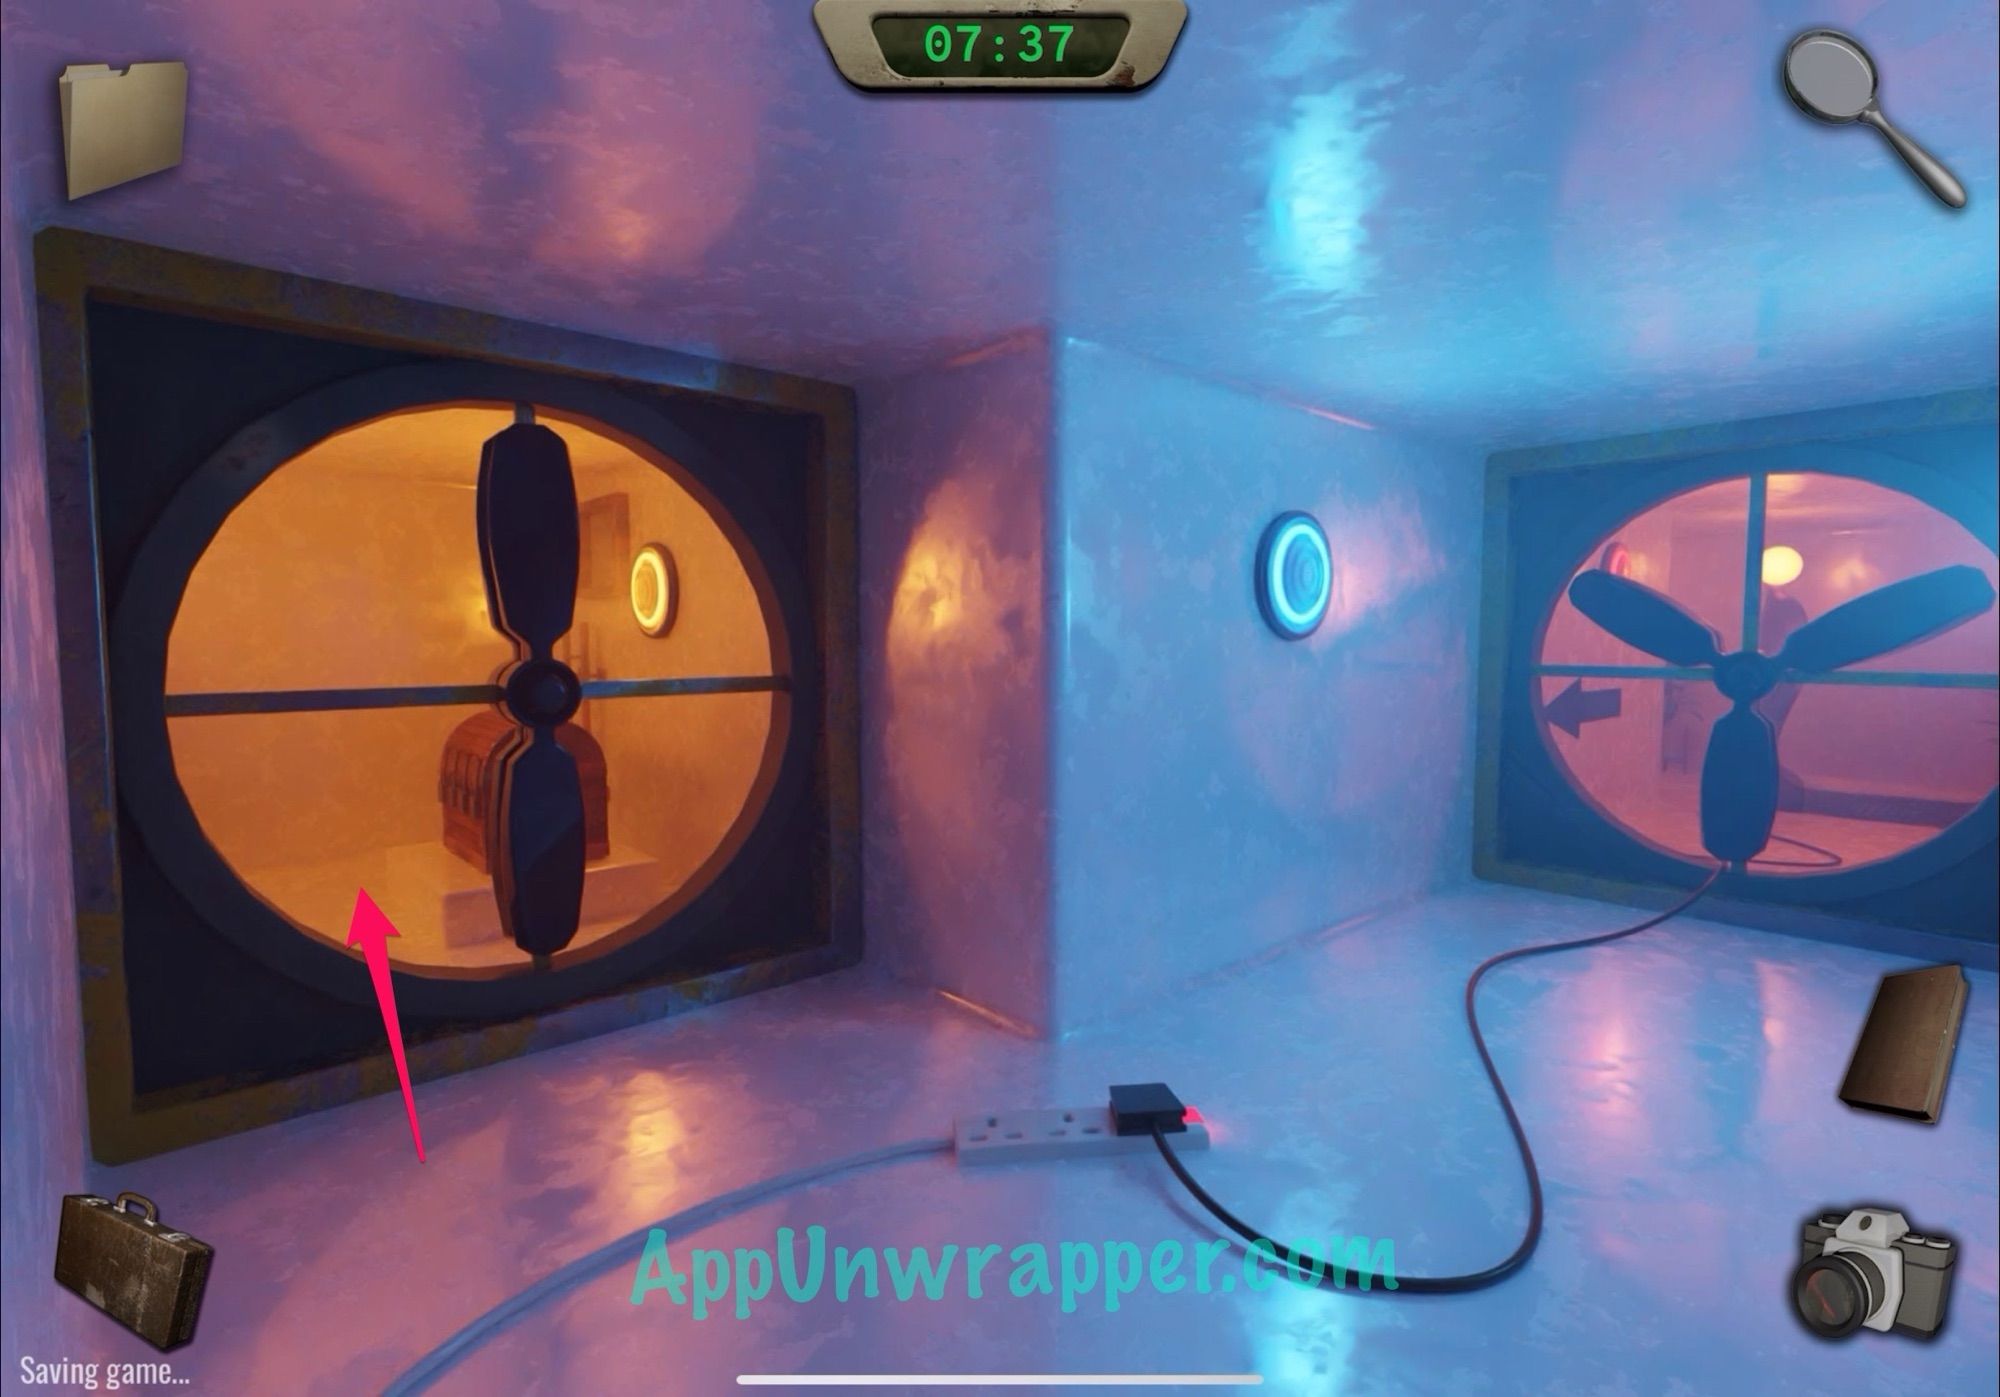
18. Go through the first fan again.

19. Next, go through the orange one to the right.
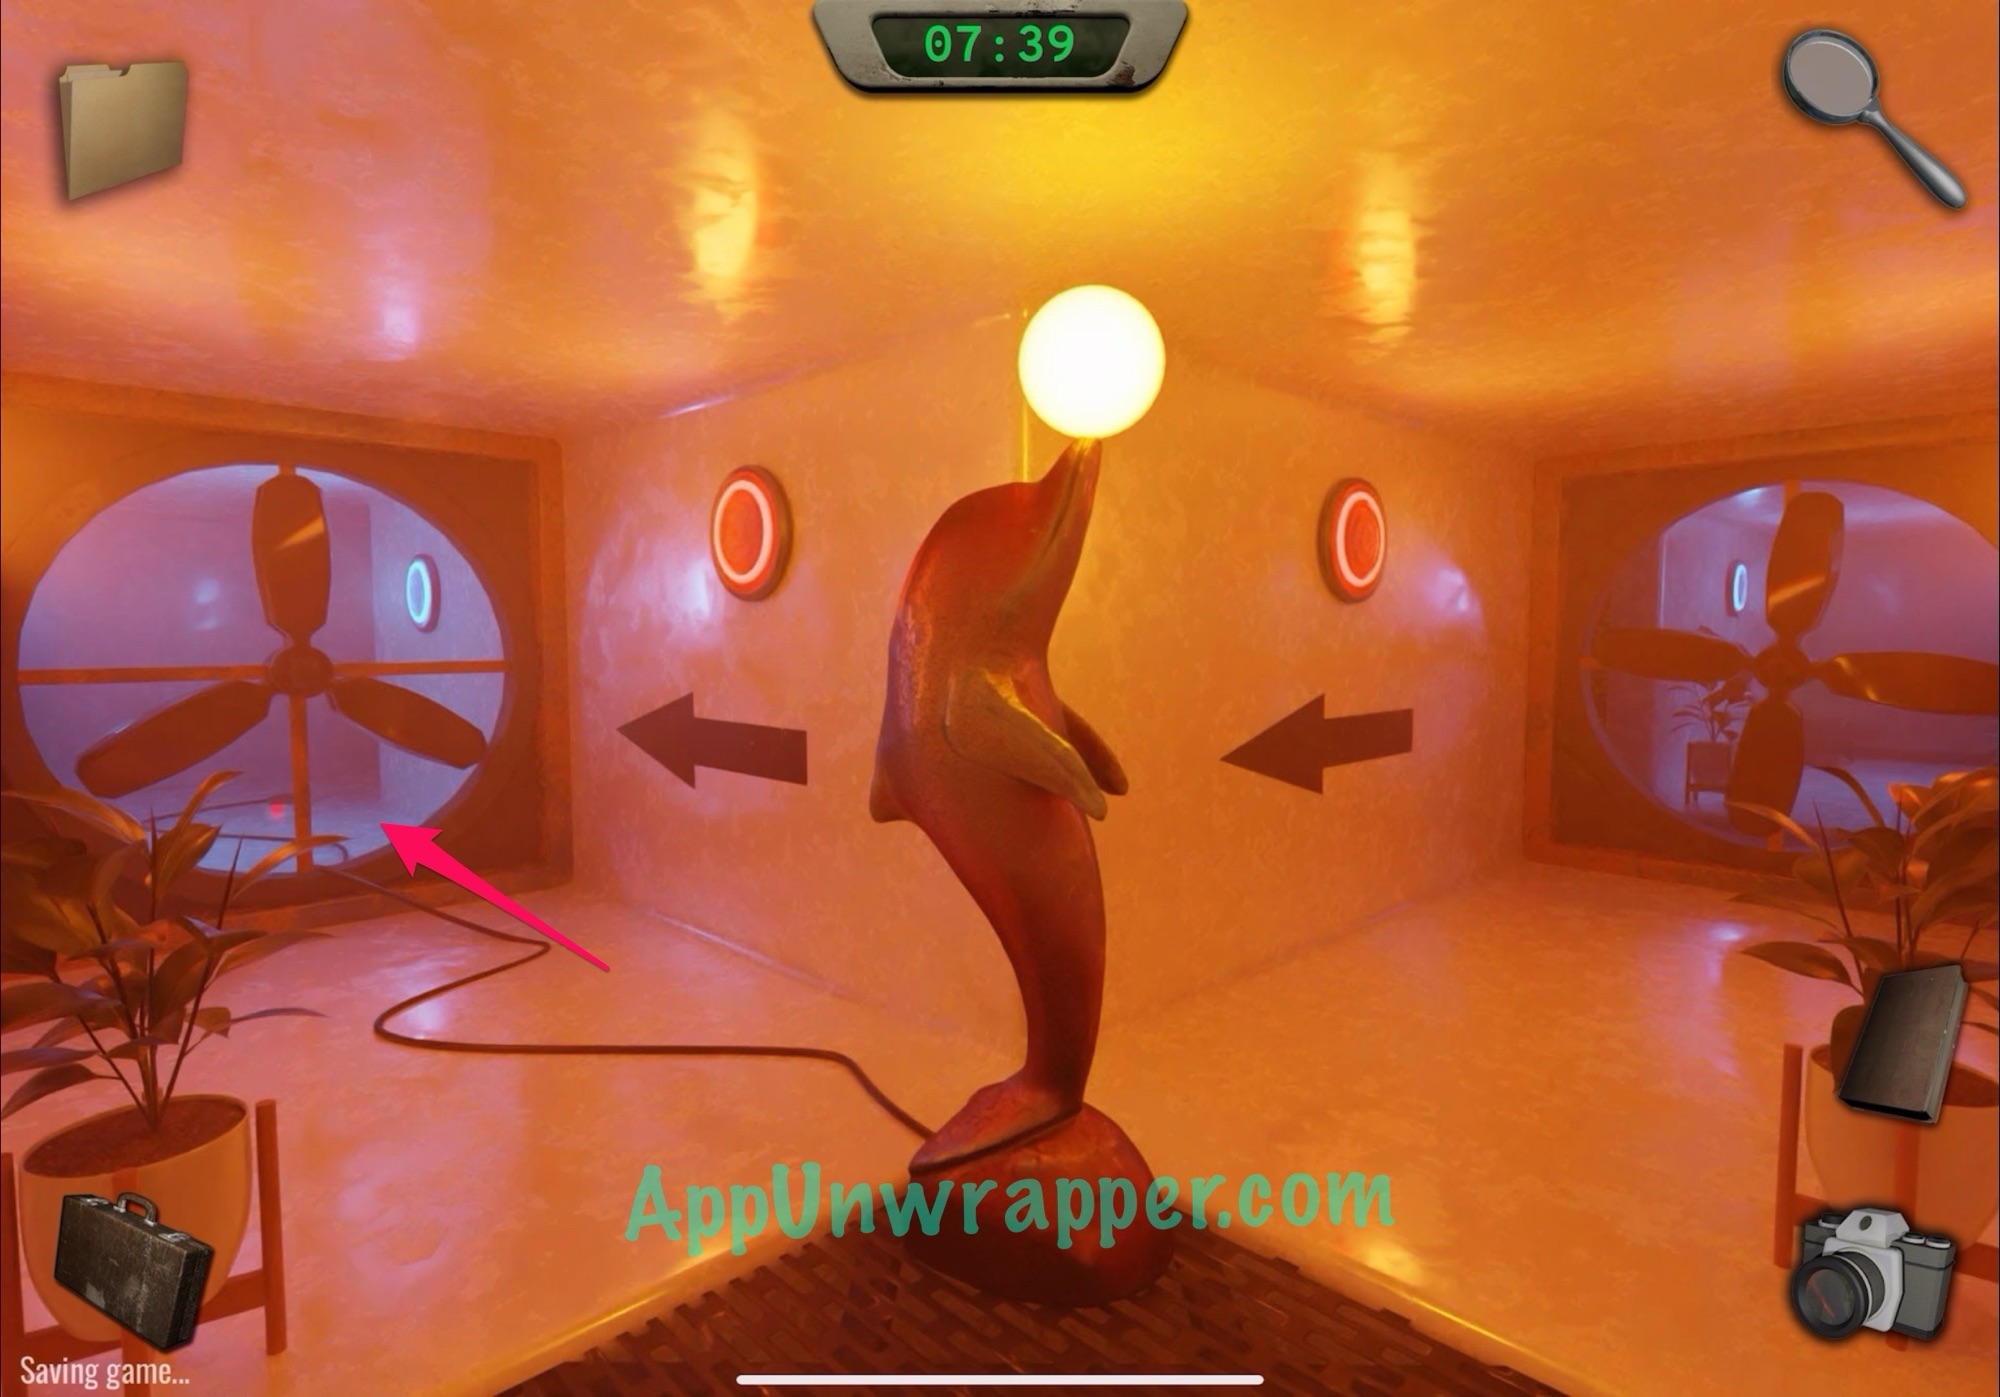
20. Follow the arrows past the dolphin statue and through the next fan on the left.

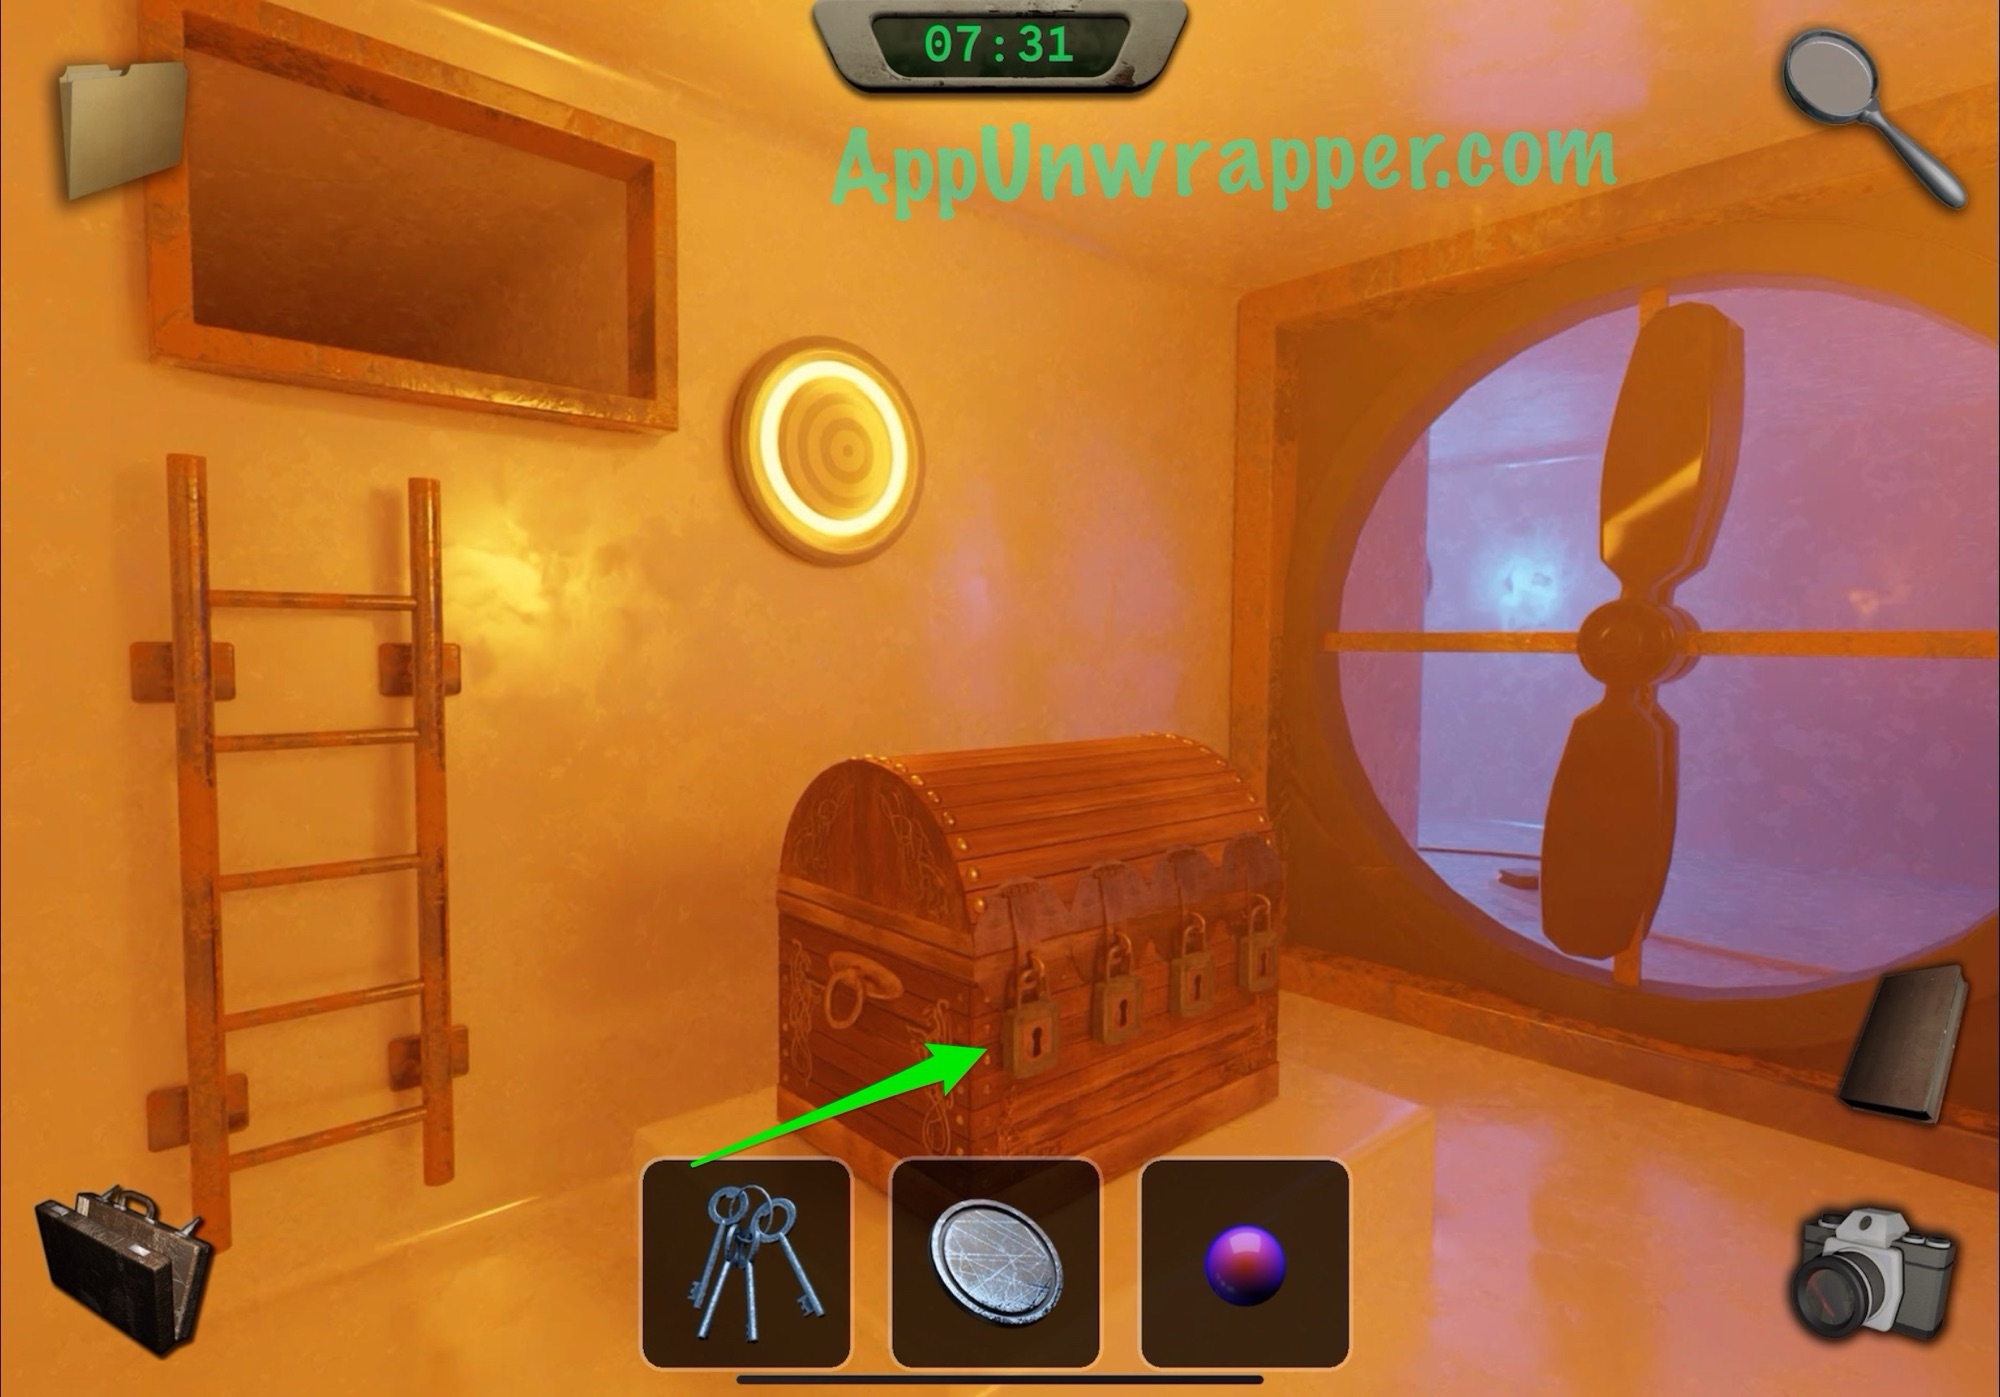
21. Continue through the next fan on the left and use the four keys to open the chest. Take a photo of the clue inside.
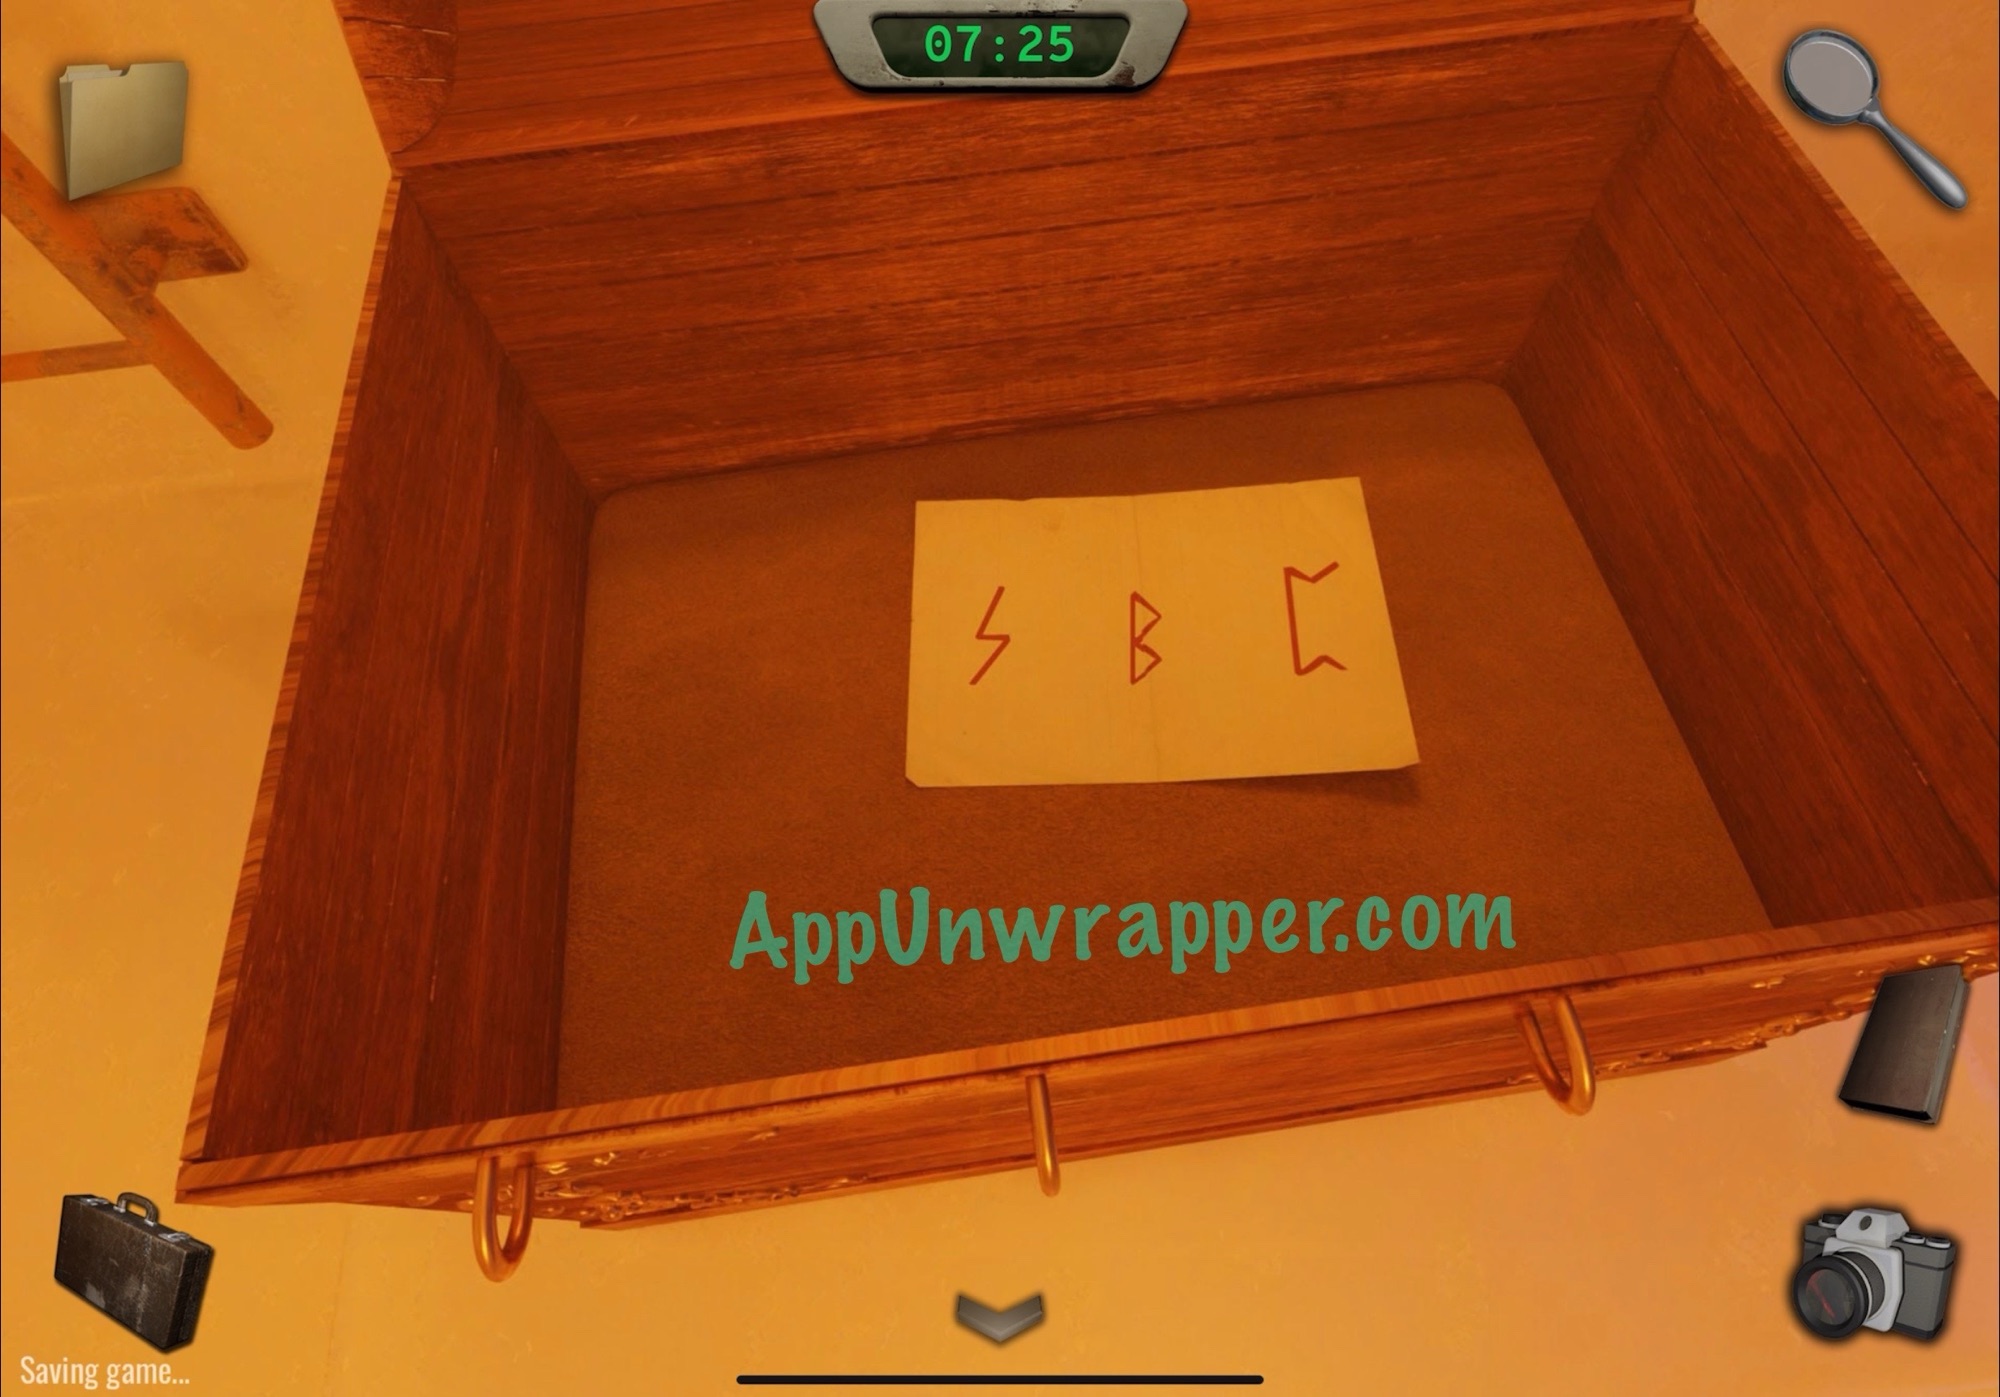
22. Zoom out from the chest and then climb up the ladder and go through the hole to the room where it all started. Now we have everything we need from there and never need to go back in.

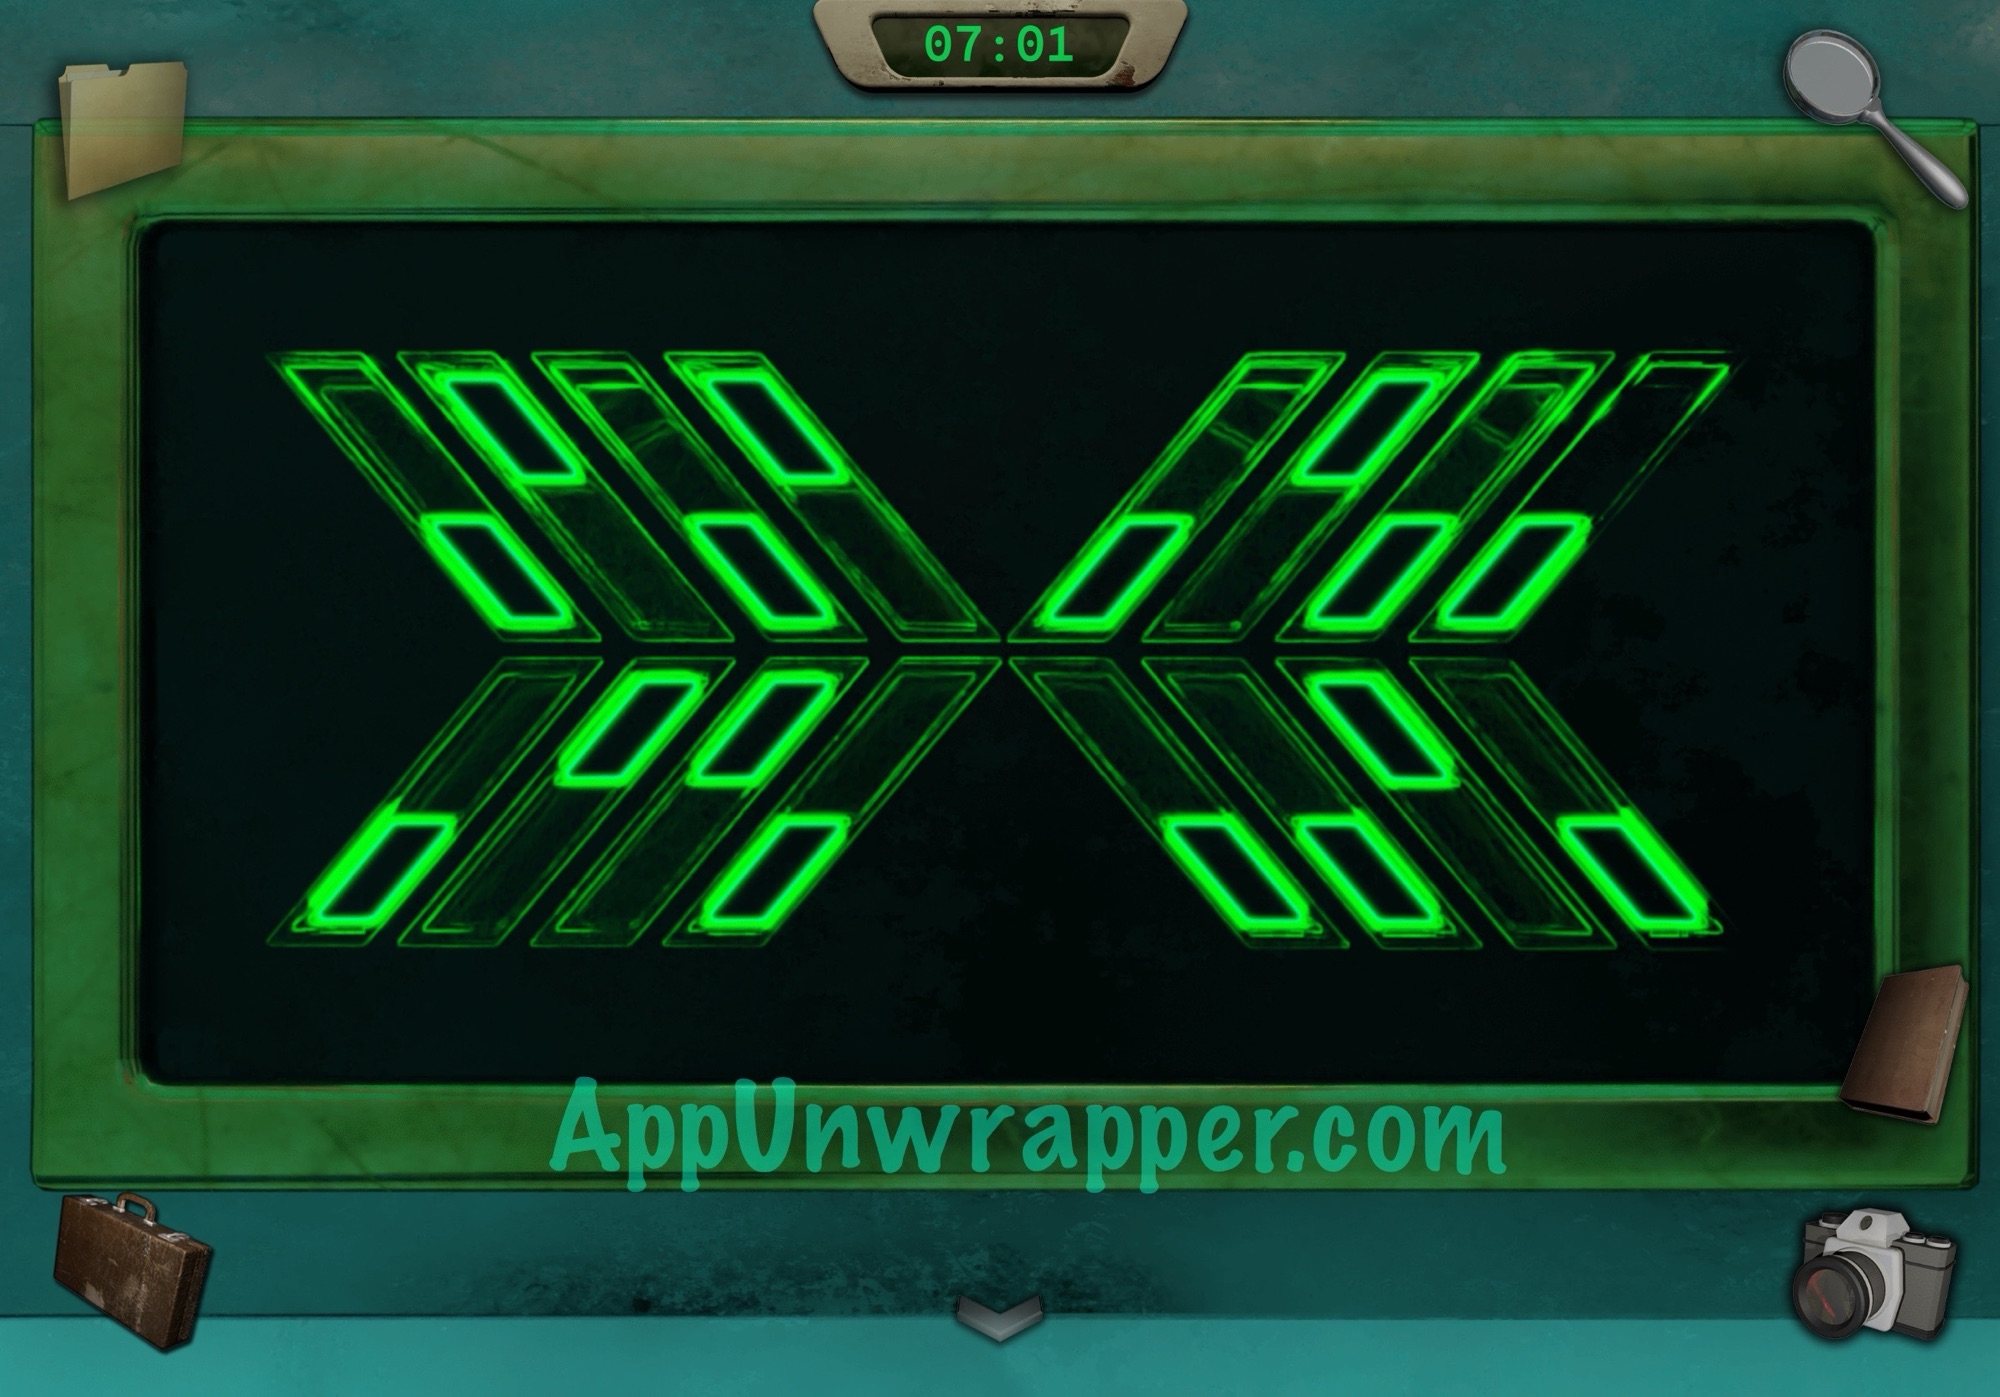
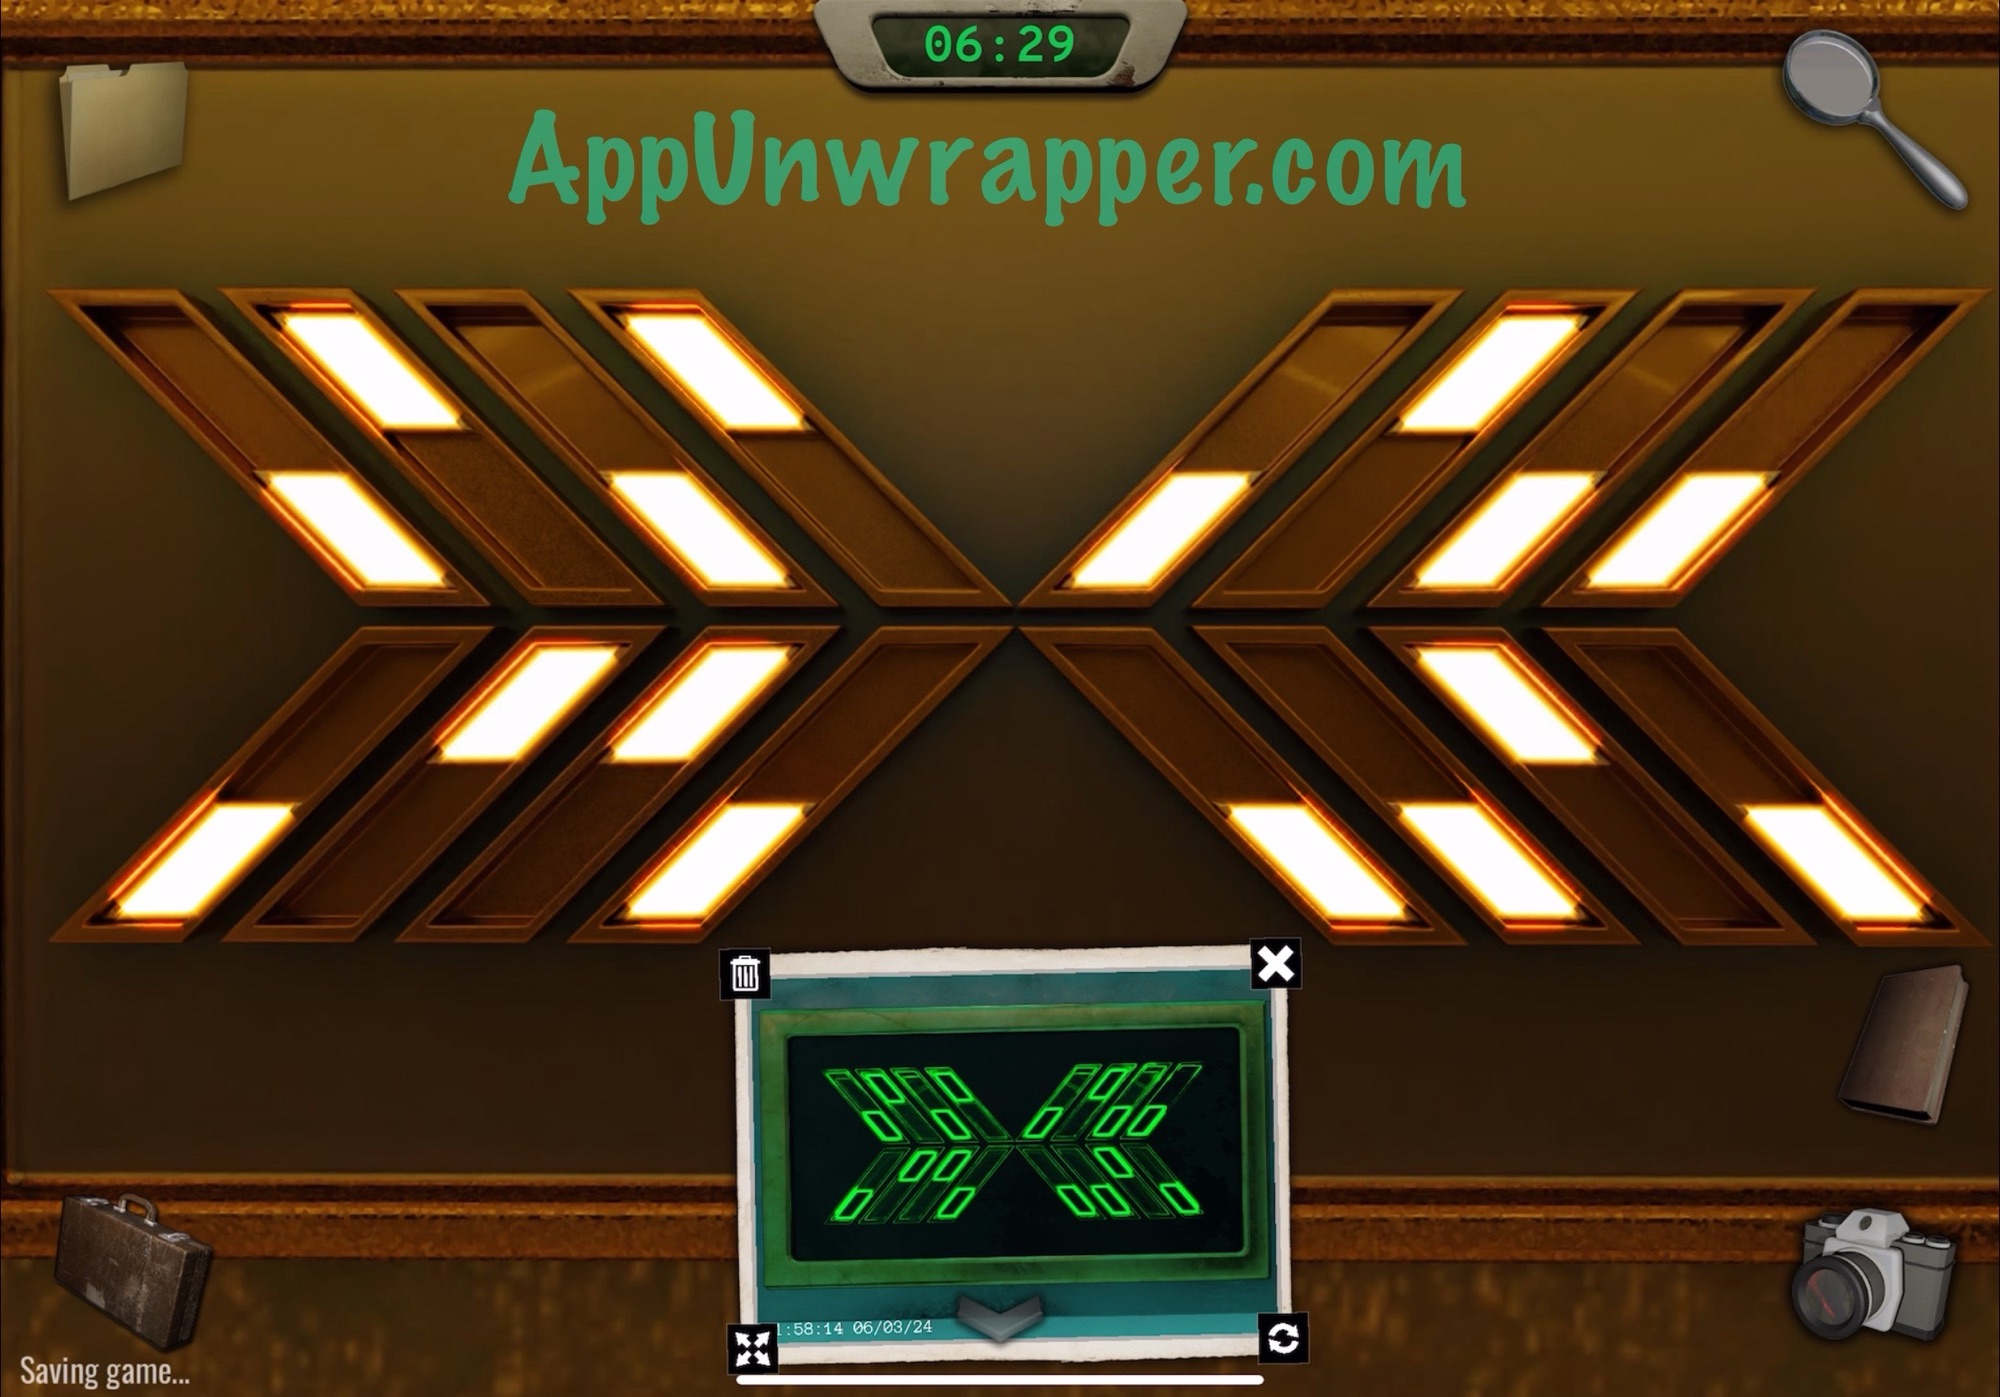
23. If you didn’t do so already, pick up the token. Then head back downstairs. Look at the slot machine to the right and insert the token. Pull the lever and take a photo of the shapes you see. (NOTE: The order of the shapes seems to be different each playthrough, so don’t follow mine unless yours matches it.)
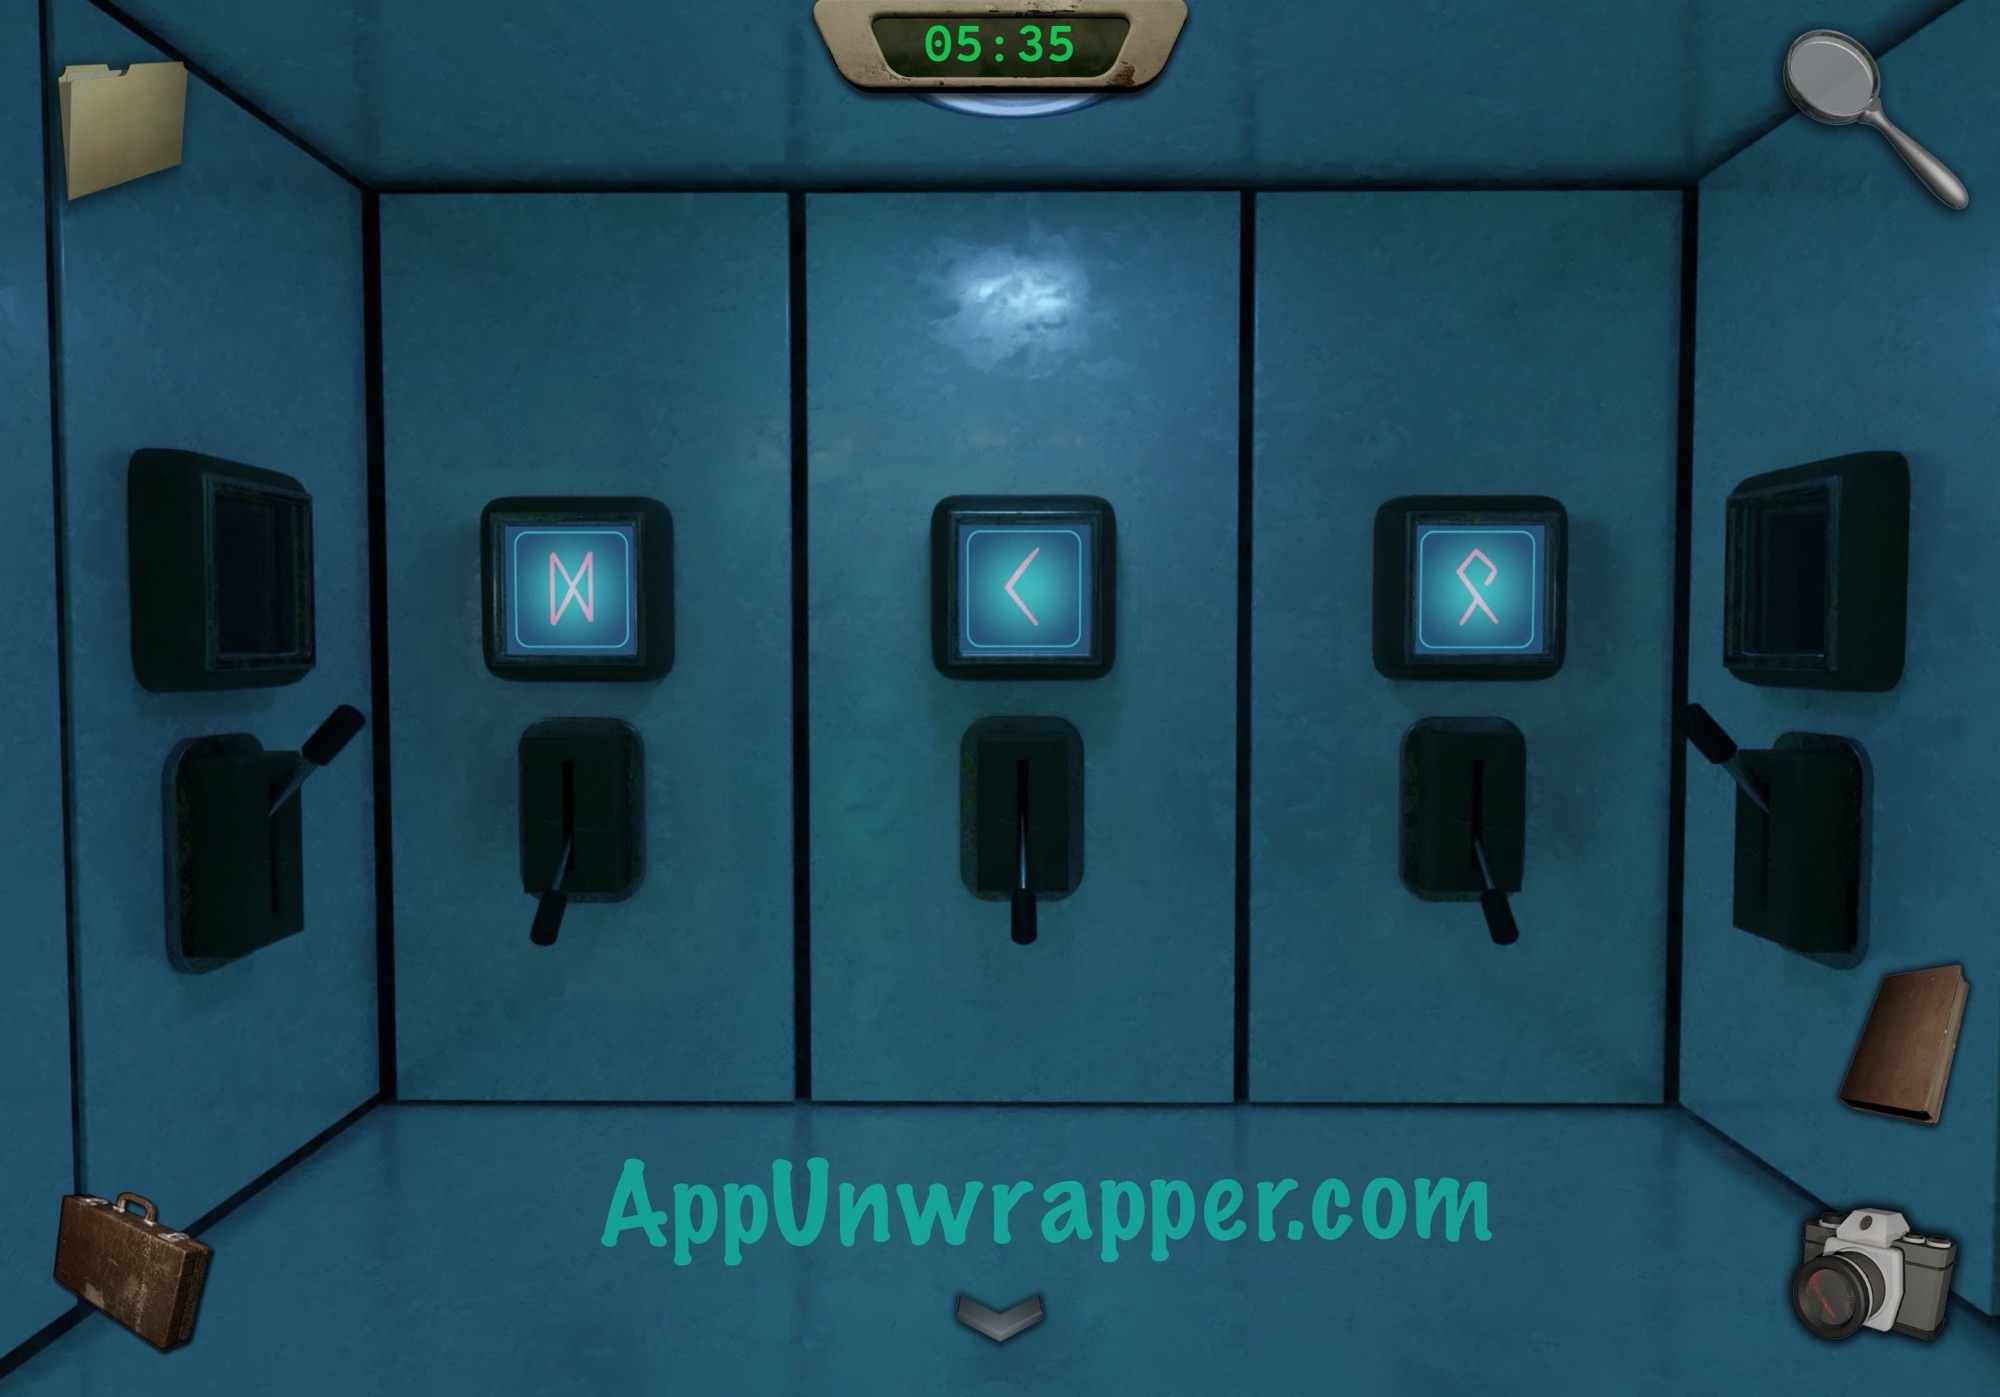
24. Zoom back out and go through the right door. Pull all the levers to see which shapes are where and then take out the photo of the slot machine. Pull the levers in the correct order as shown below and then take a photo of the runes that appear on the screens. (NOTE: Your shapes from the slot machine might be in a different order than mine. So use my screenshot but compare it to your clue to figure out the order to go in.)
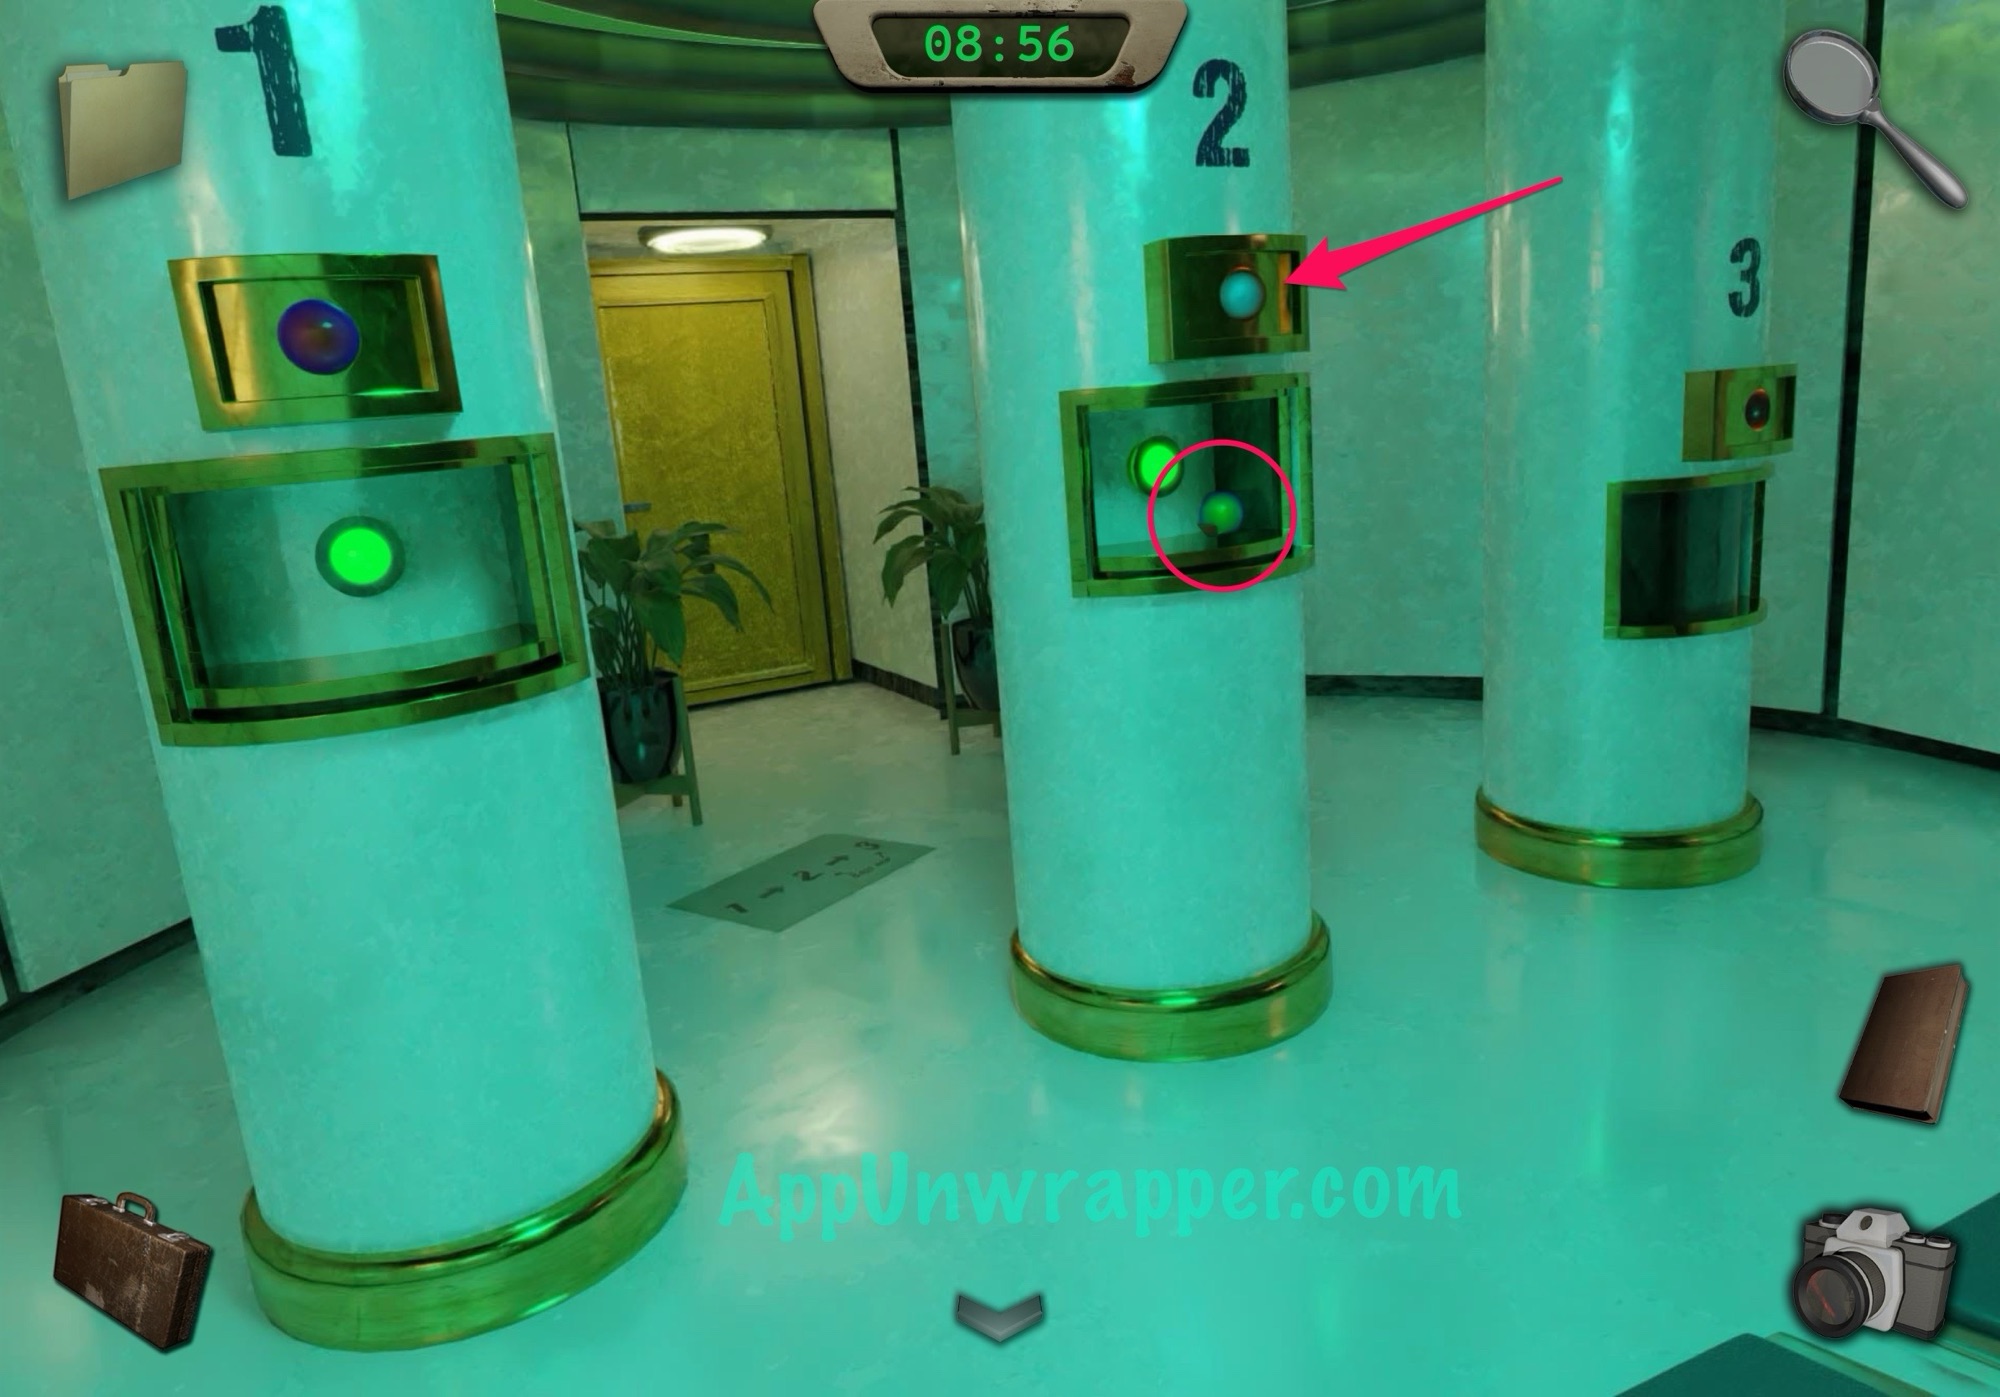
25. Leave the room. Now head through the left door. Notice the three riddles, each asking for a book as the answer.
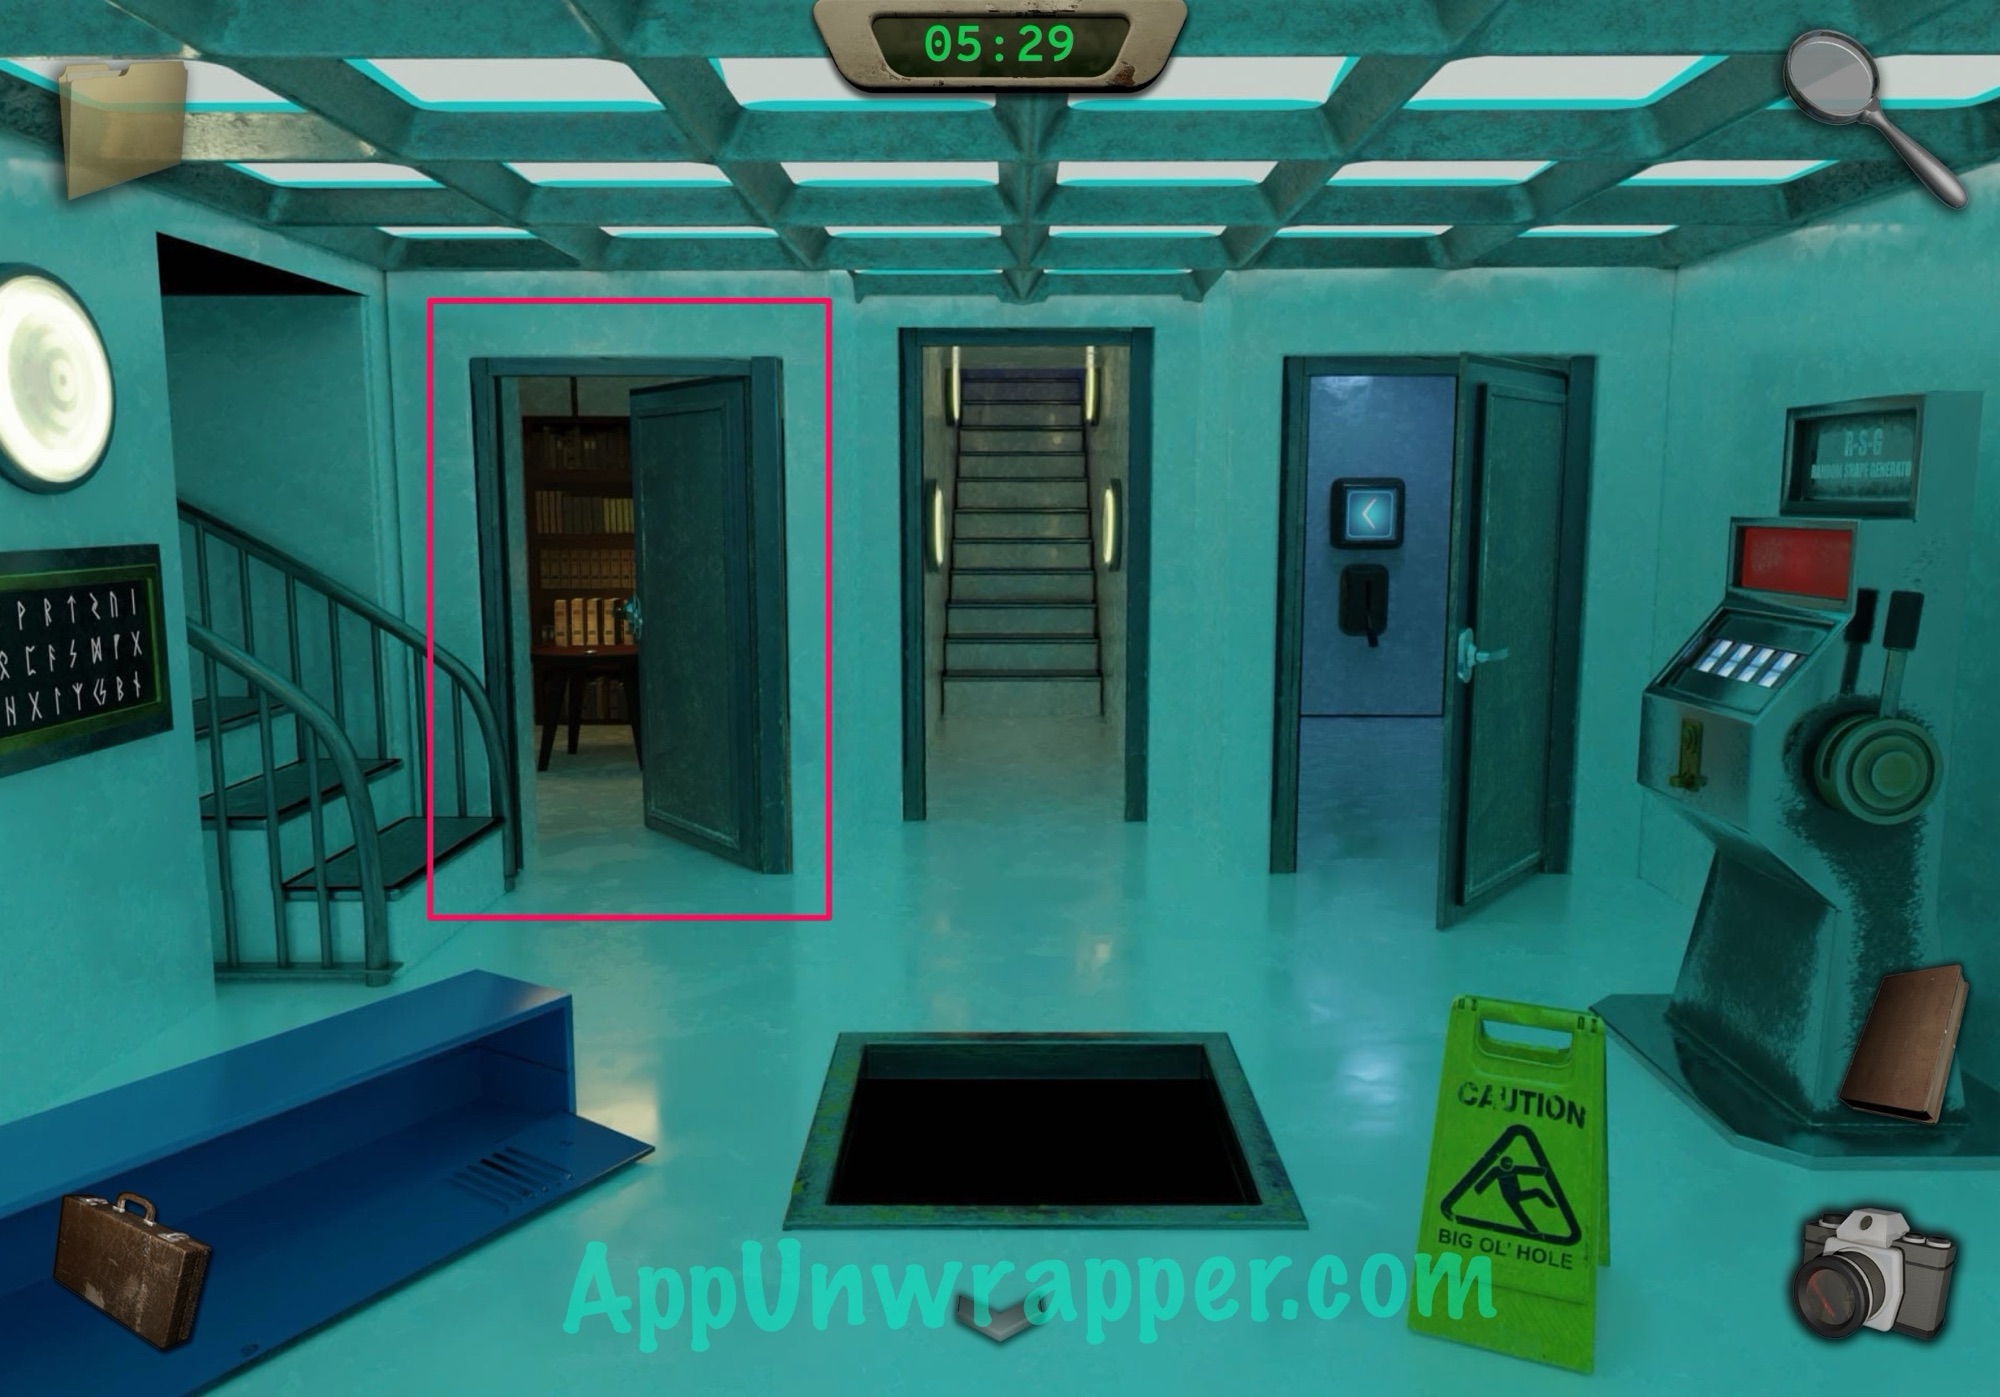
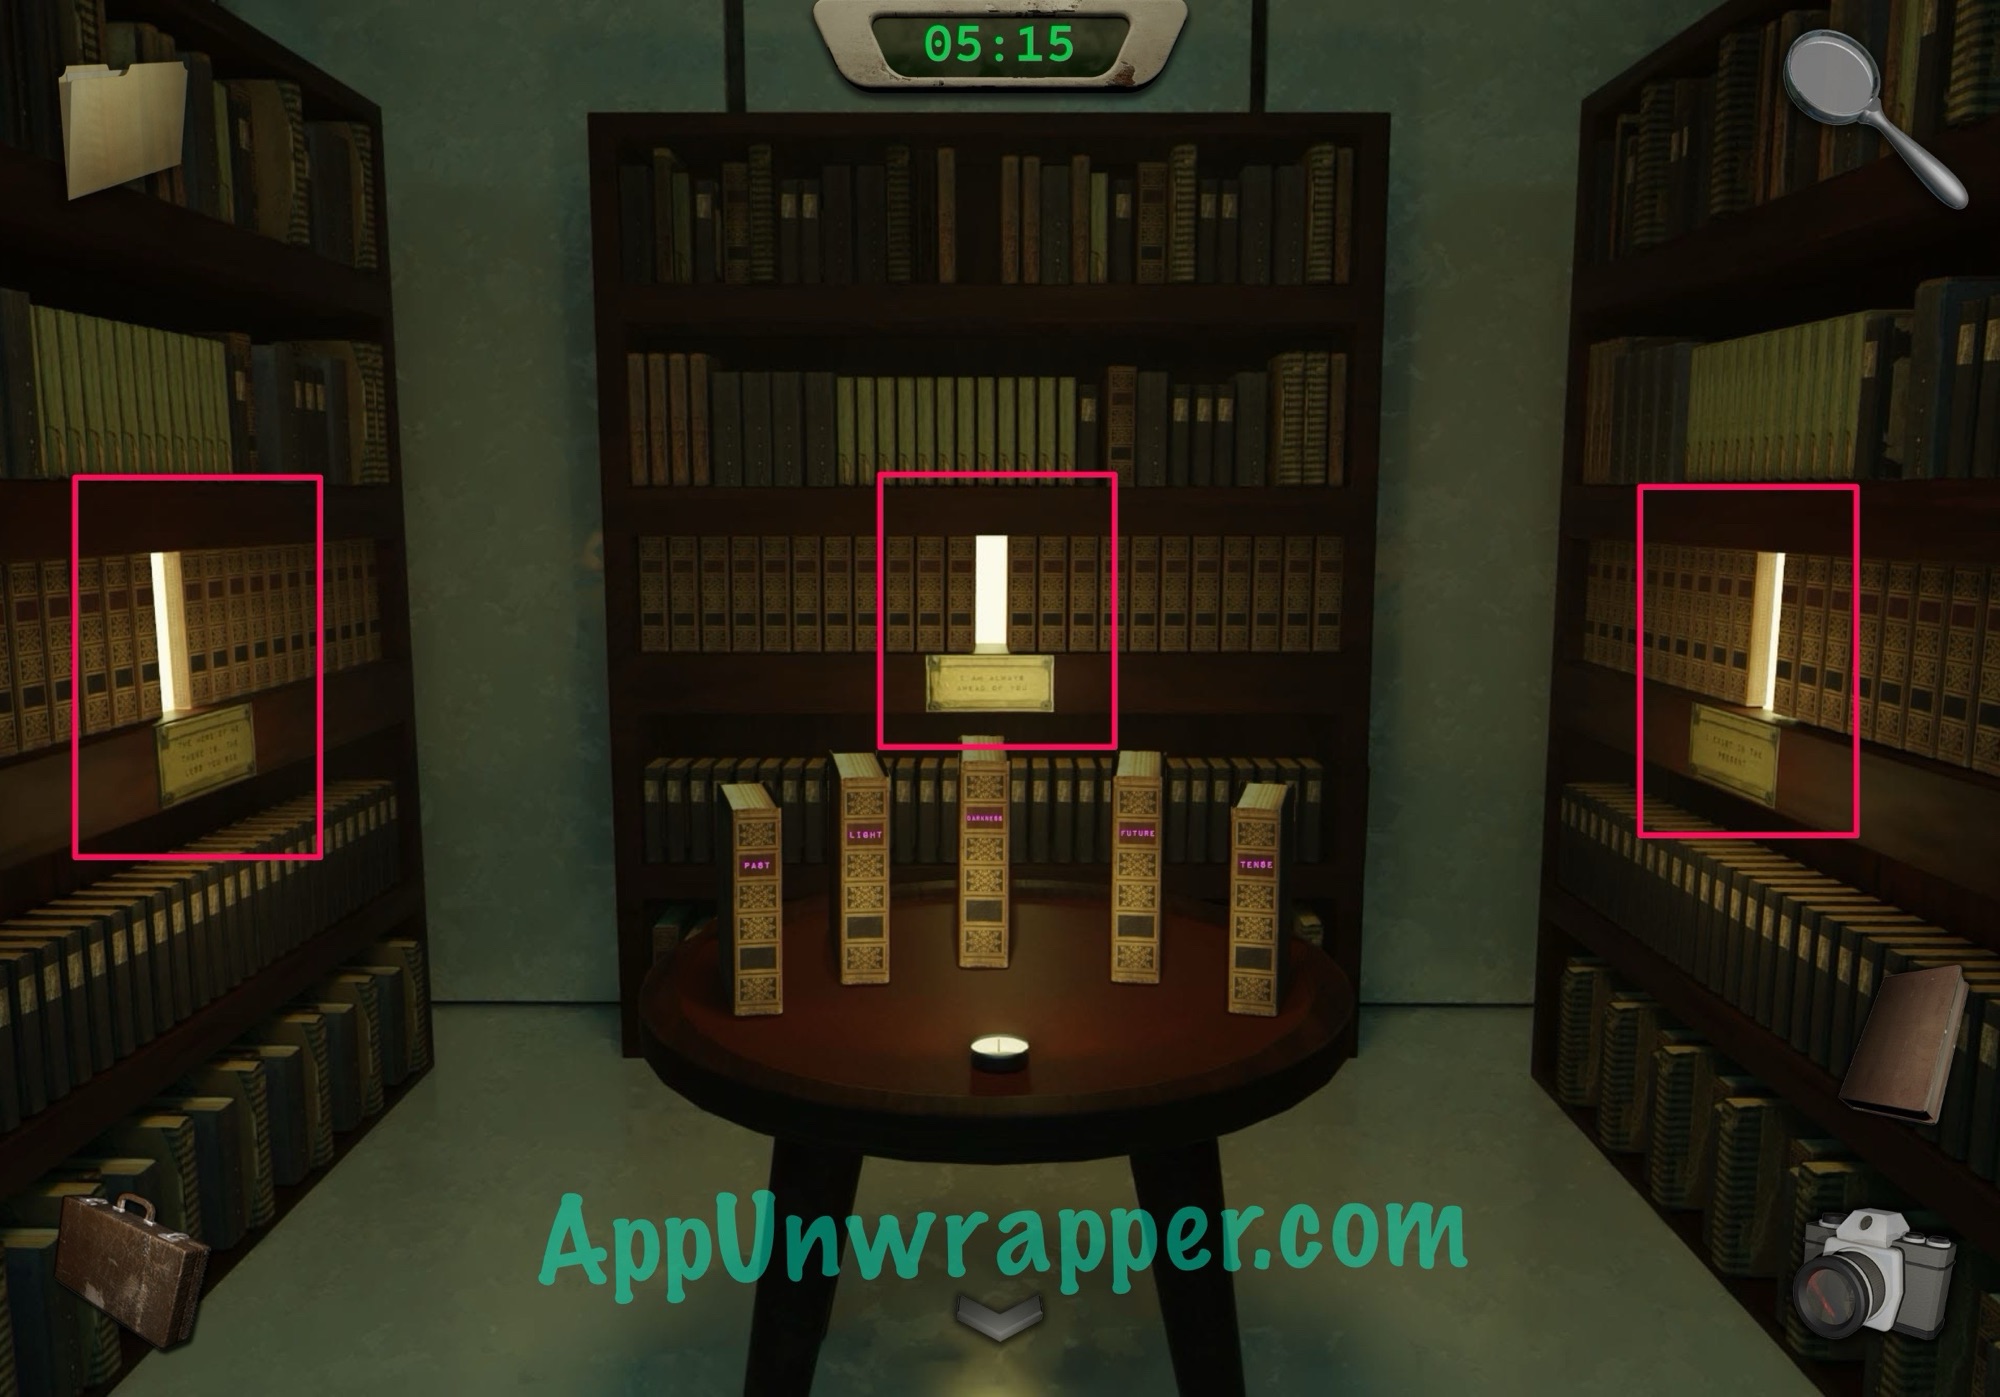
26. The left riddle says, “The more of me there is, the less you see.” The answer is DARKNESS. Select that book to insert it in the slot.

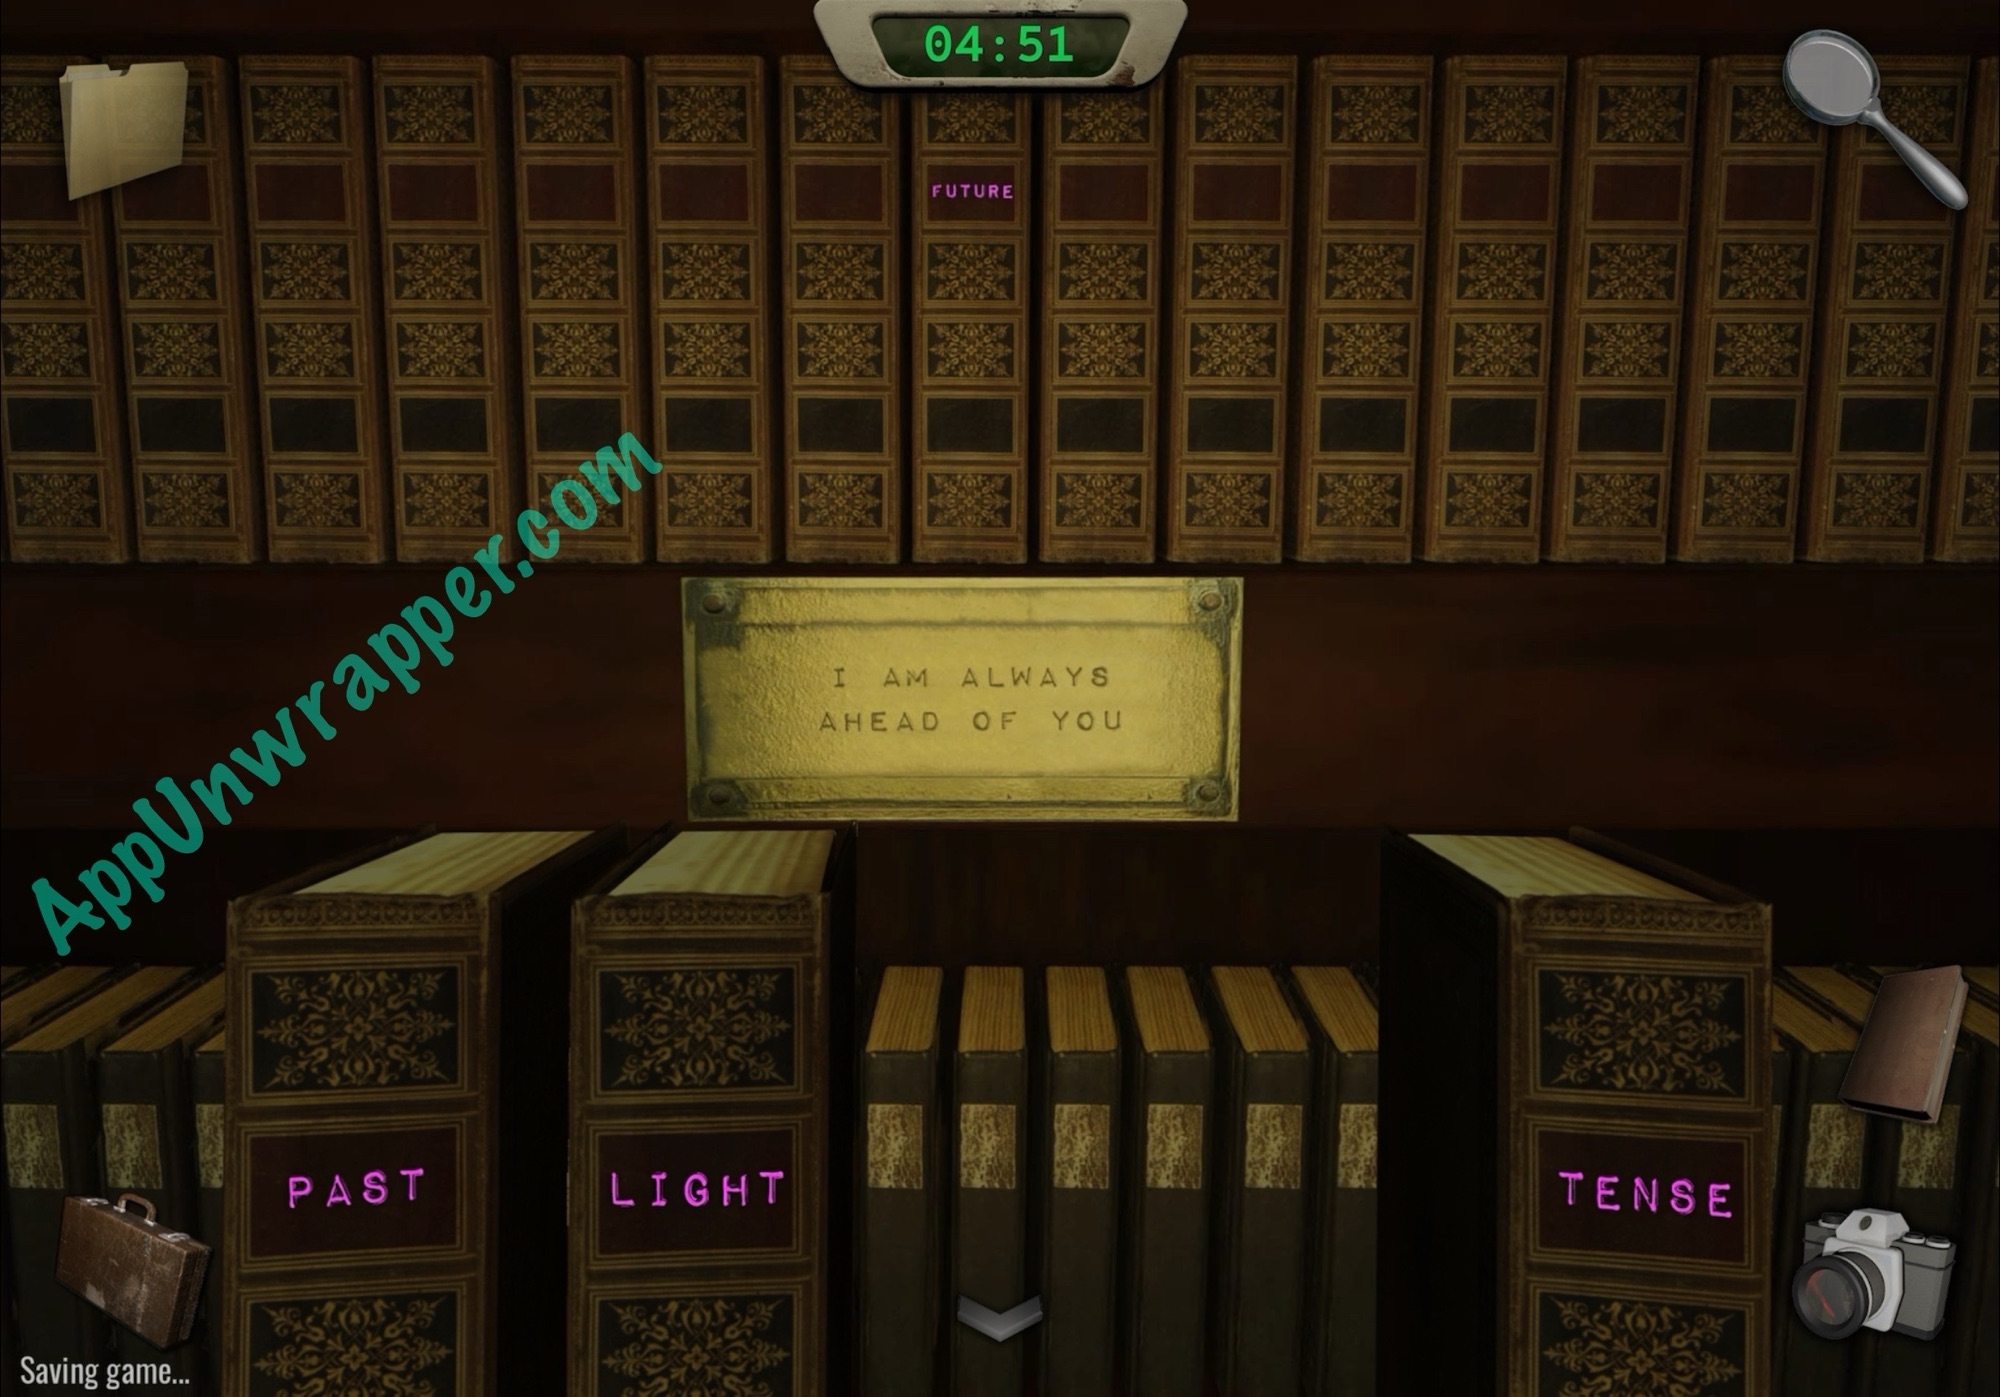
27. The middle riddle is “I am always ahead of you.” The answer is FUTURE, so select that book.
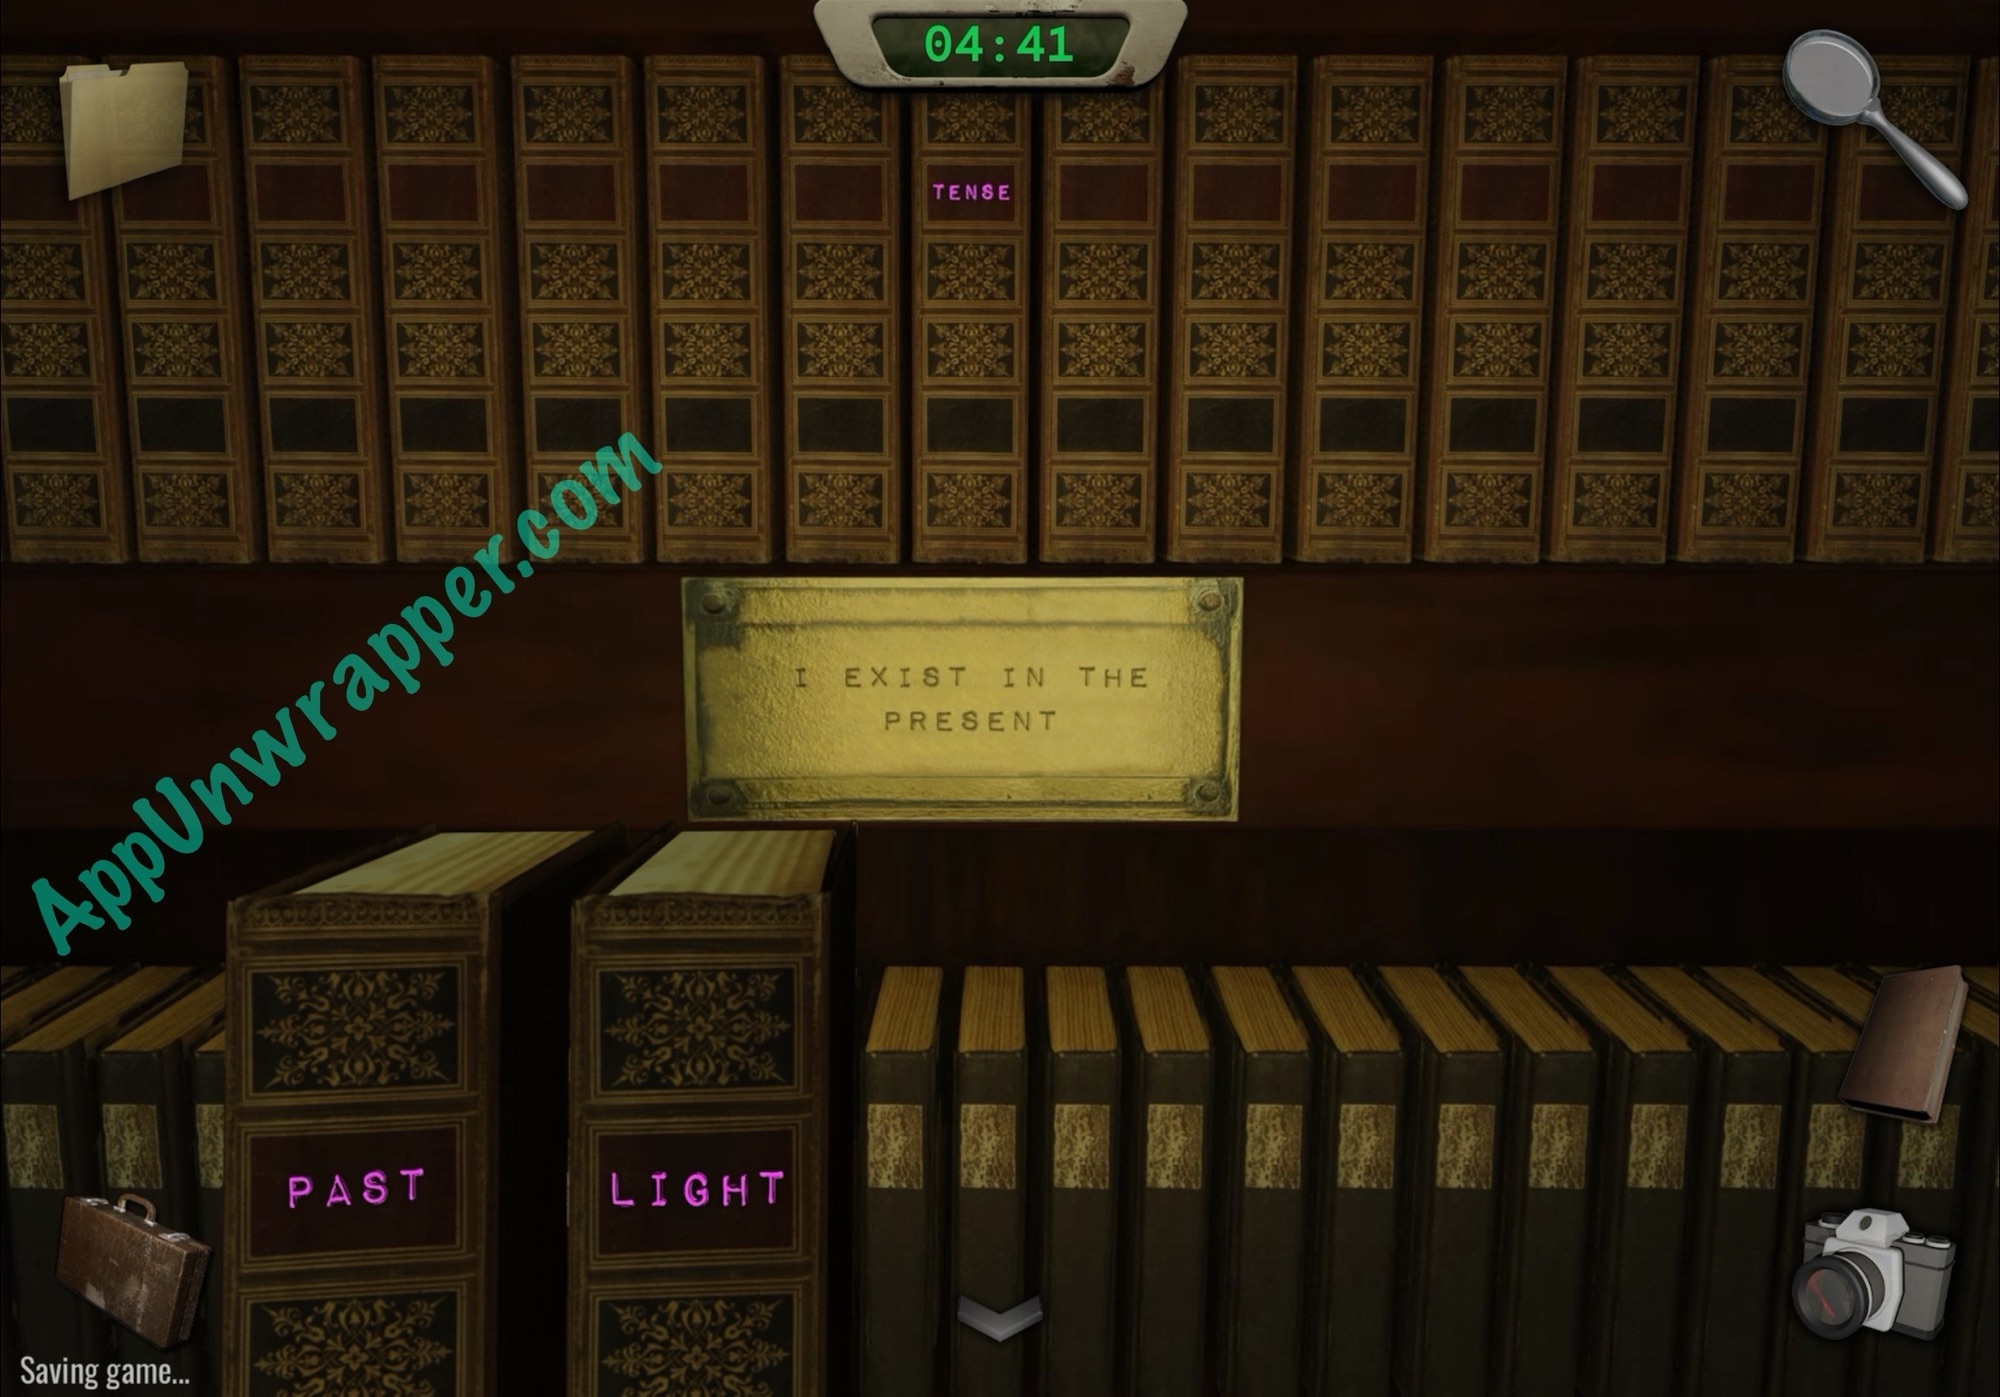
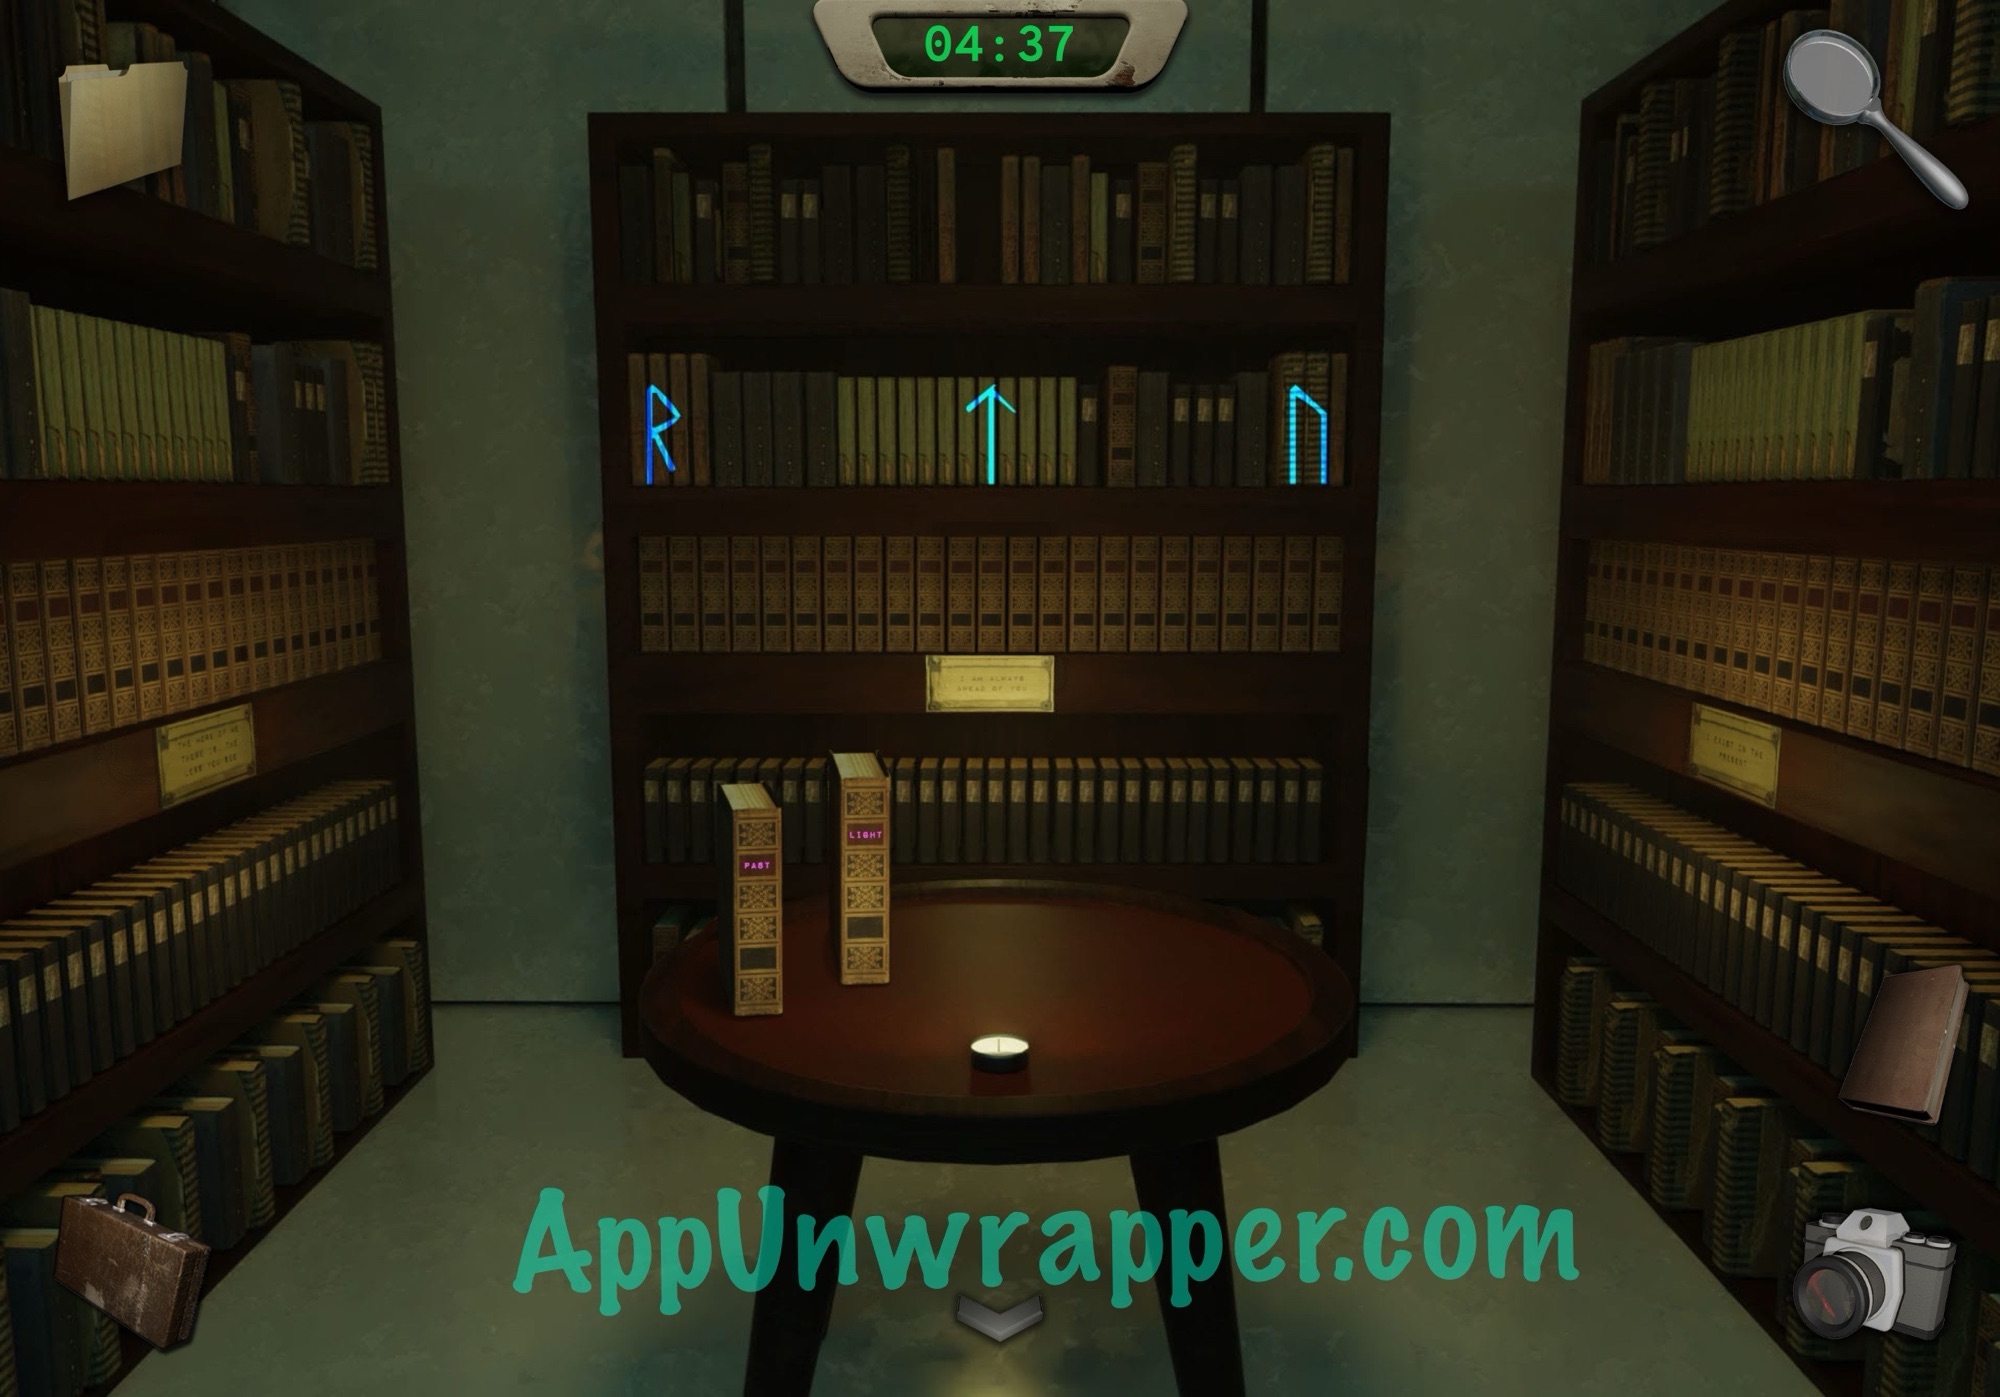
28. And the last riddle is “I exist in the present.” The answer is TENSE. Now, you should see three runes. Take a photo of them.
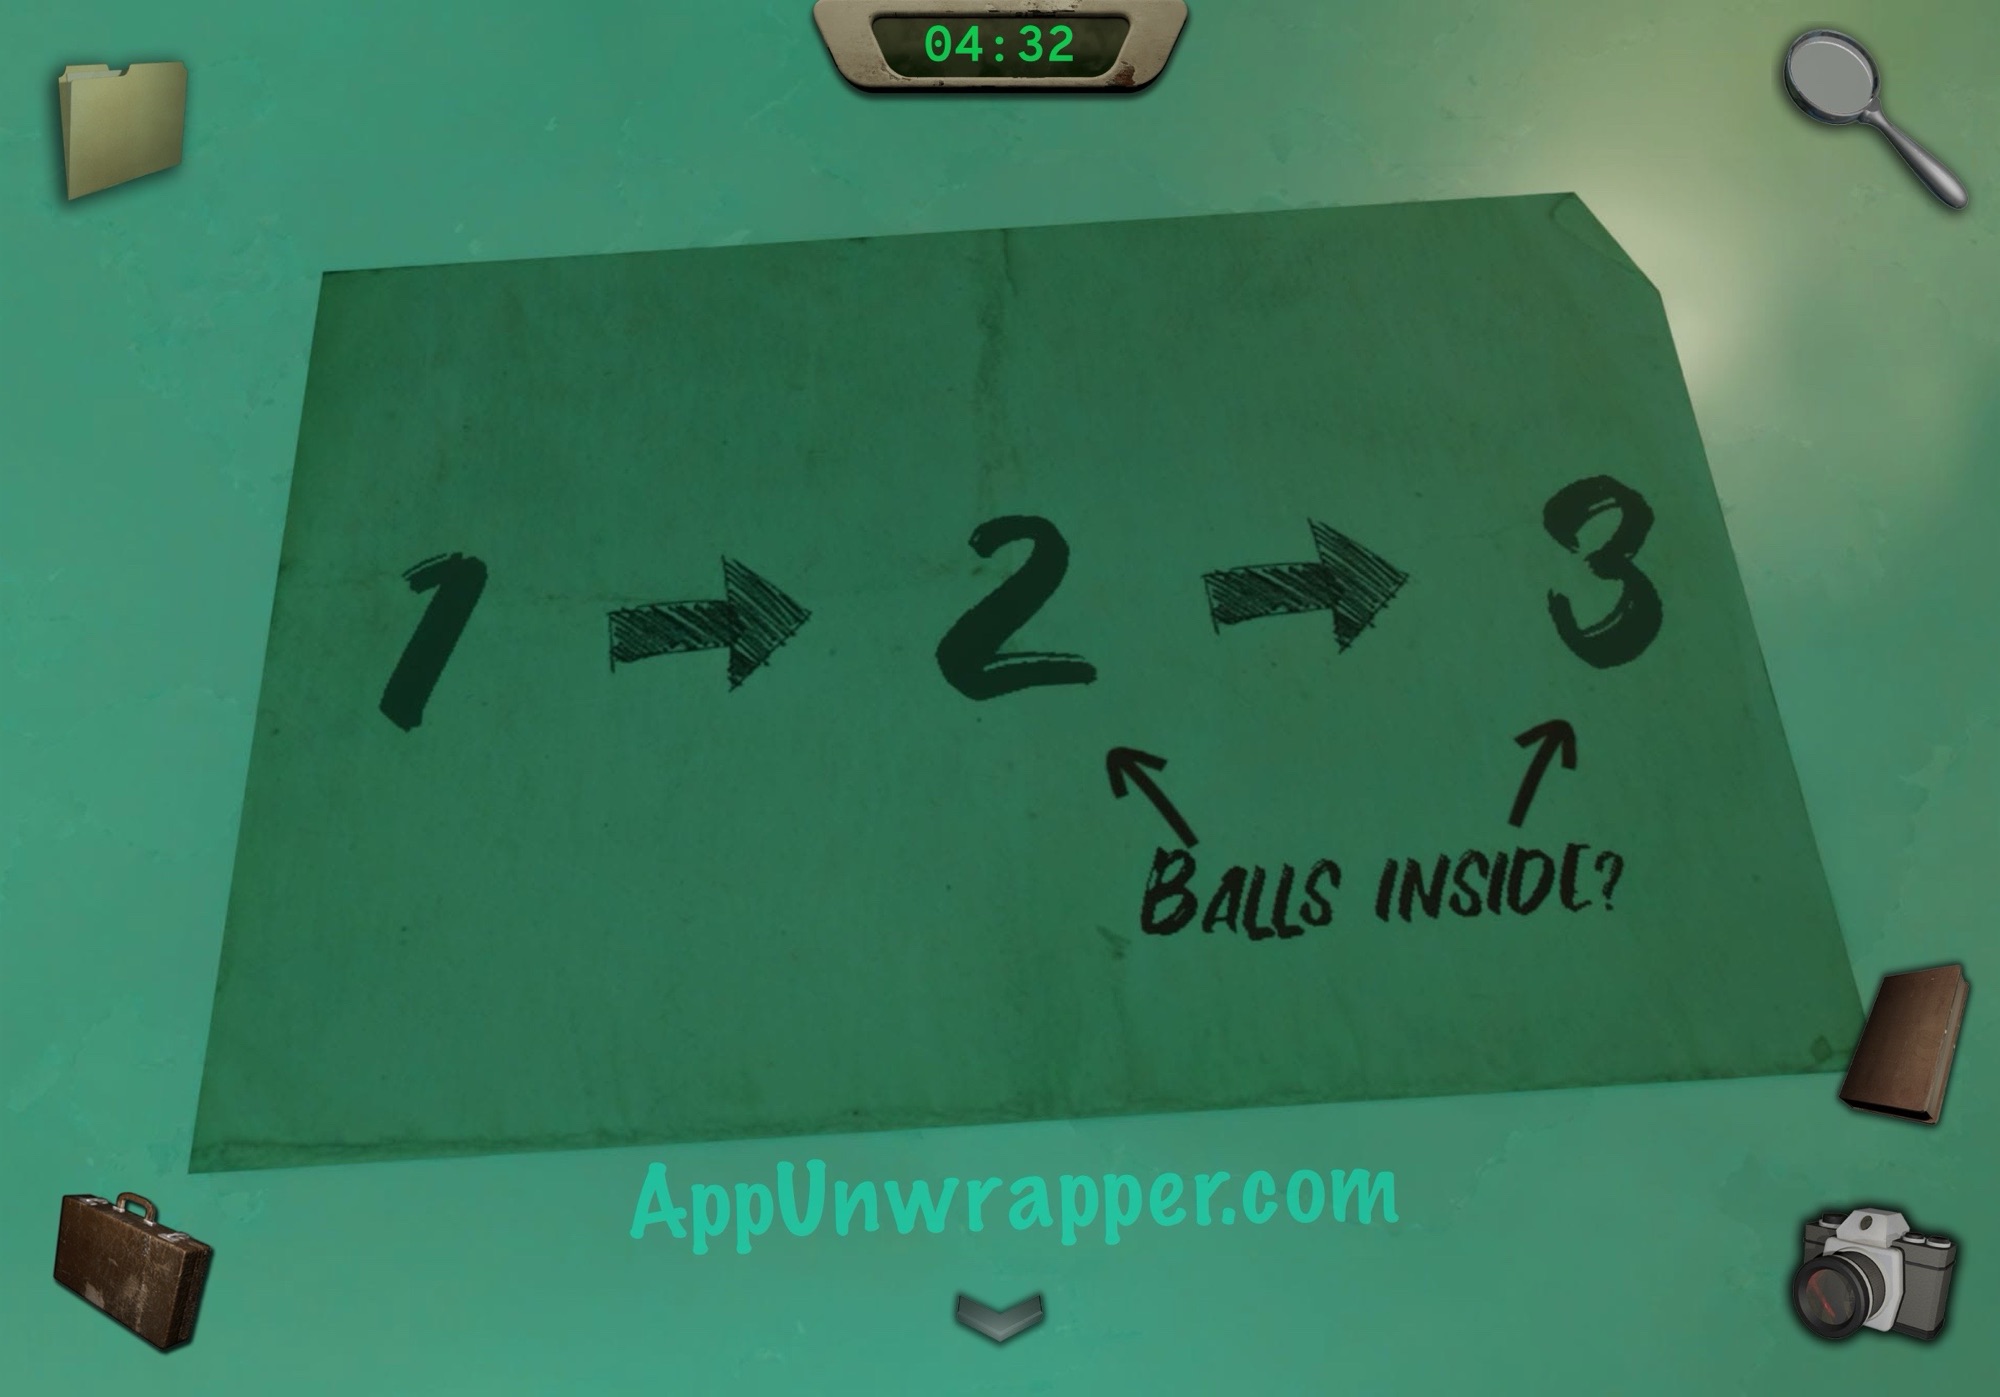
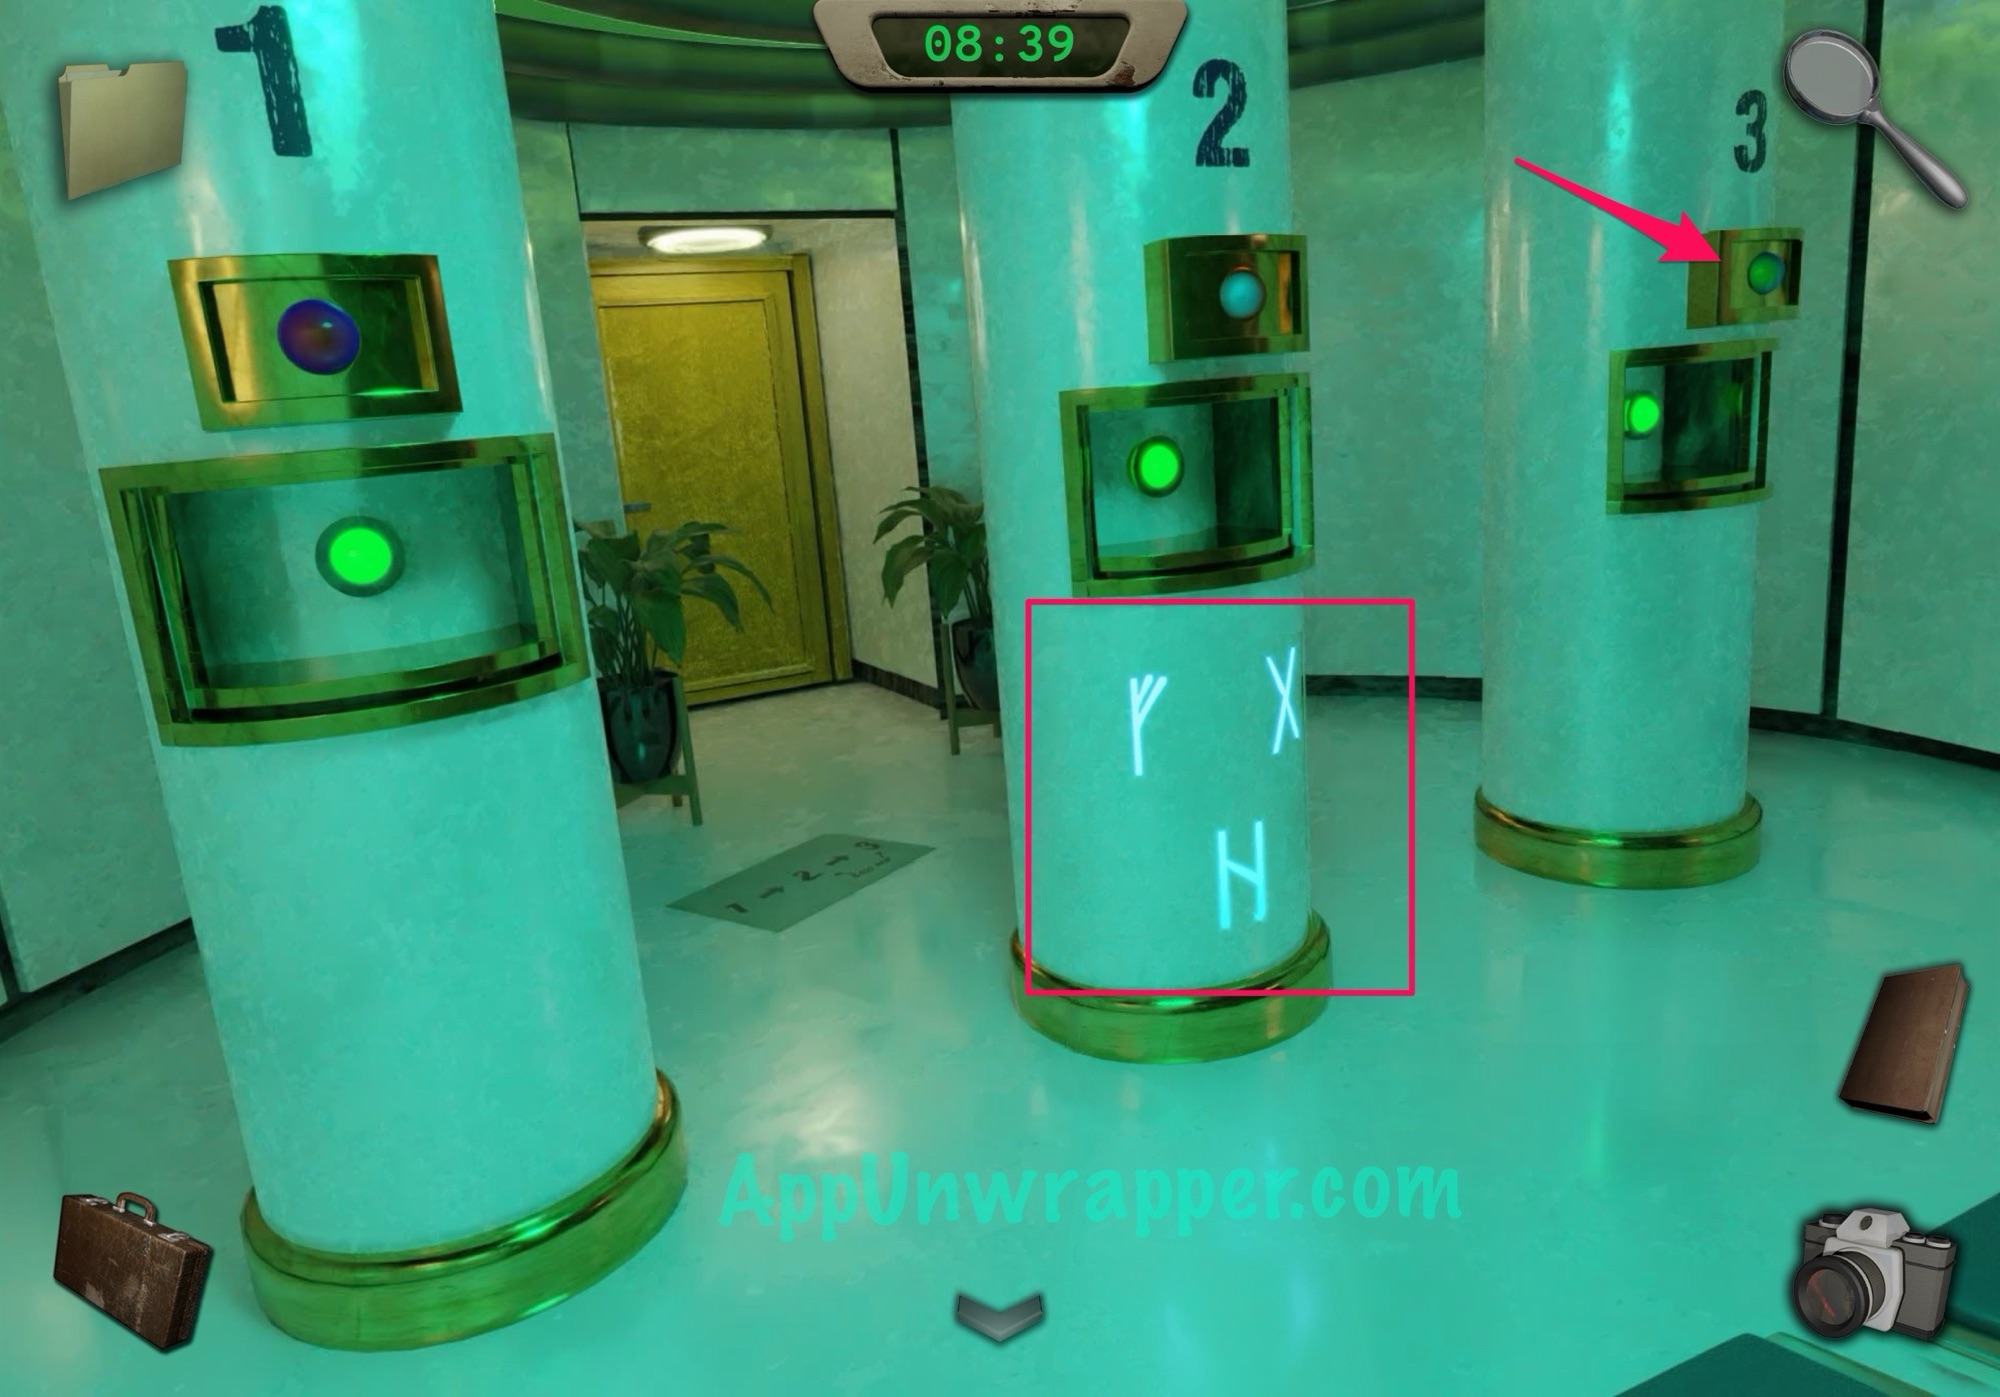
29. Now we just need one last set of runes. Head up the left stairs again and look at the clue on the floor. It’s telling us to insert the ball first in 1, then 2, then 3. 2 and 3 have balls inside them, but we need one of them before we open 1. So what you want to do is insert the ball in 3 and take the ball inside. Then go through the yellow door to the TAD and place that ball inside it. Reset the time loop. Y jumping down the hole.
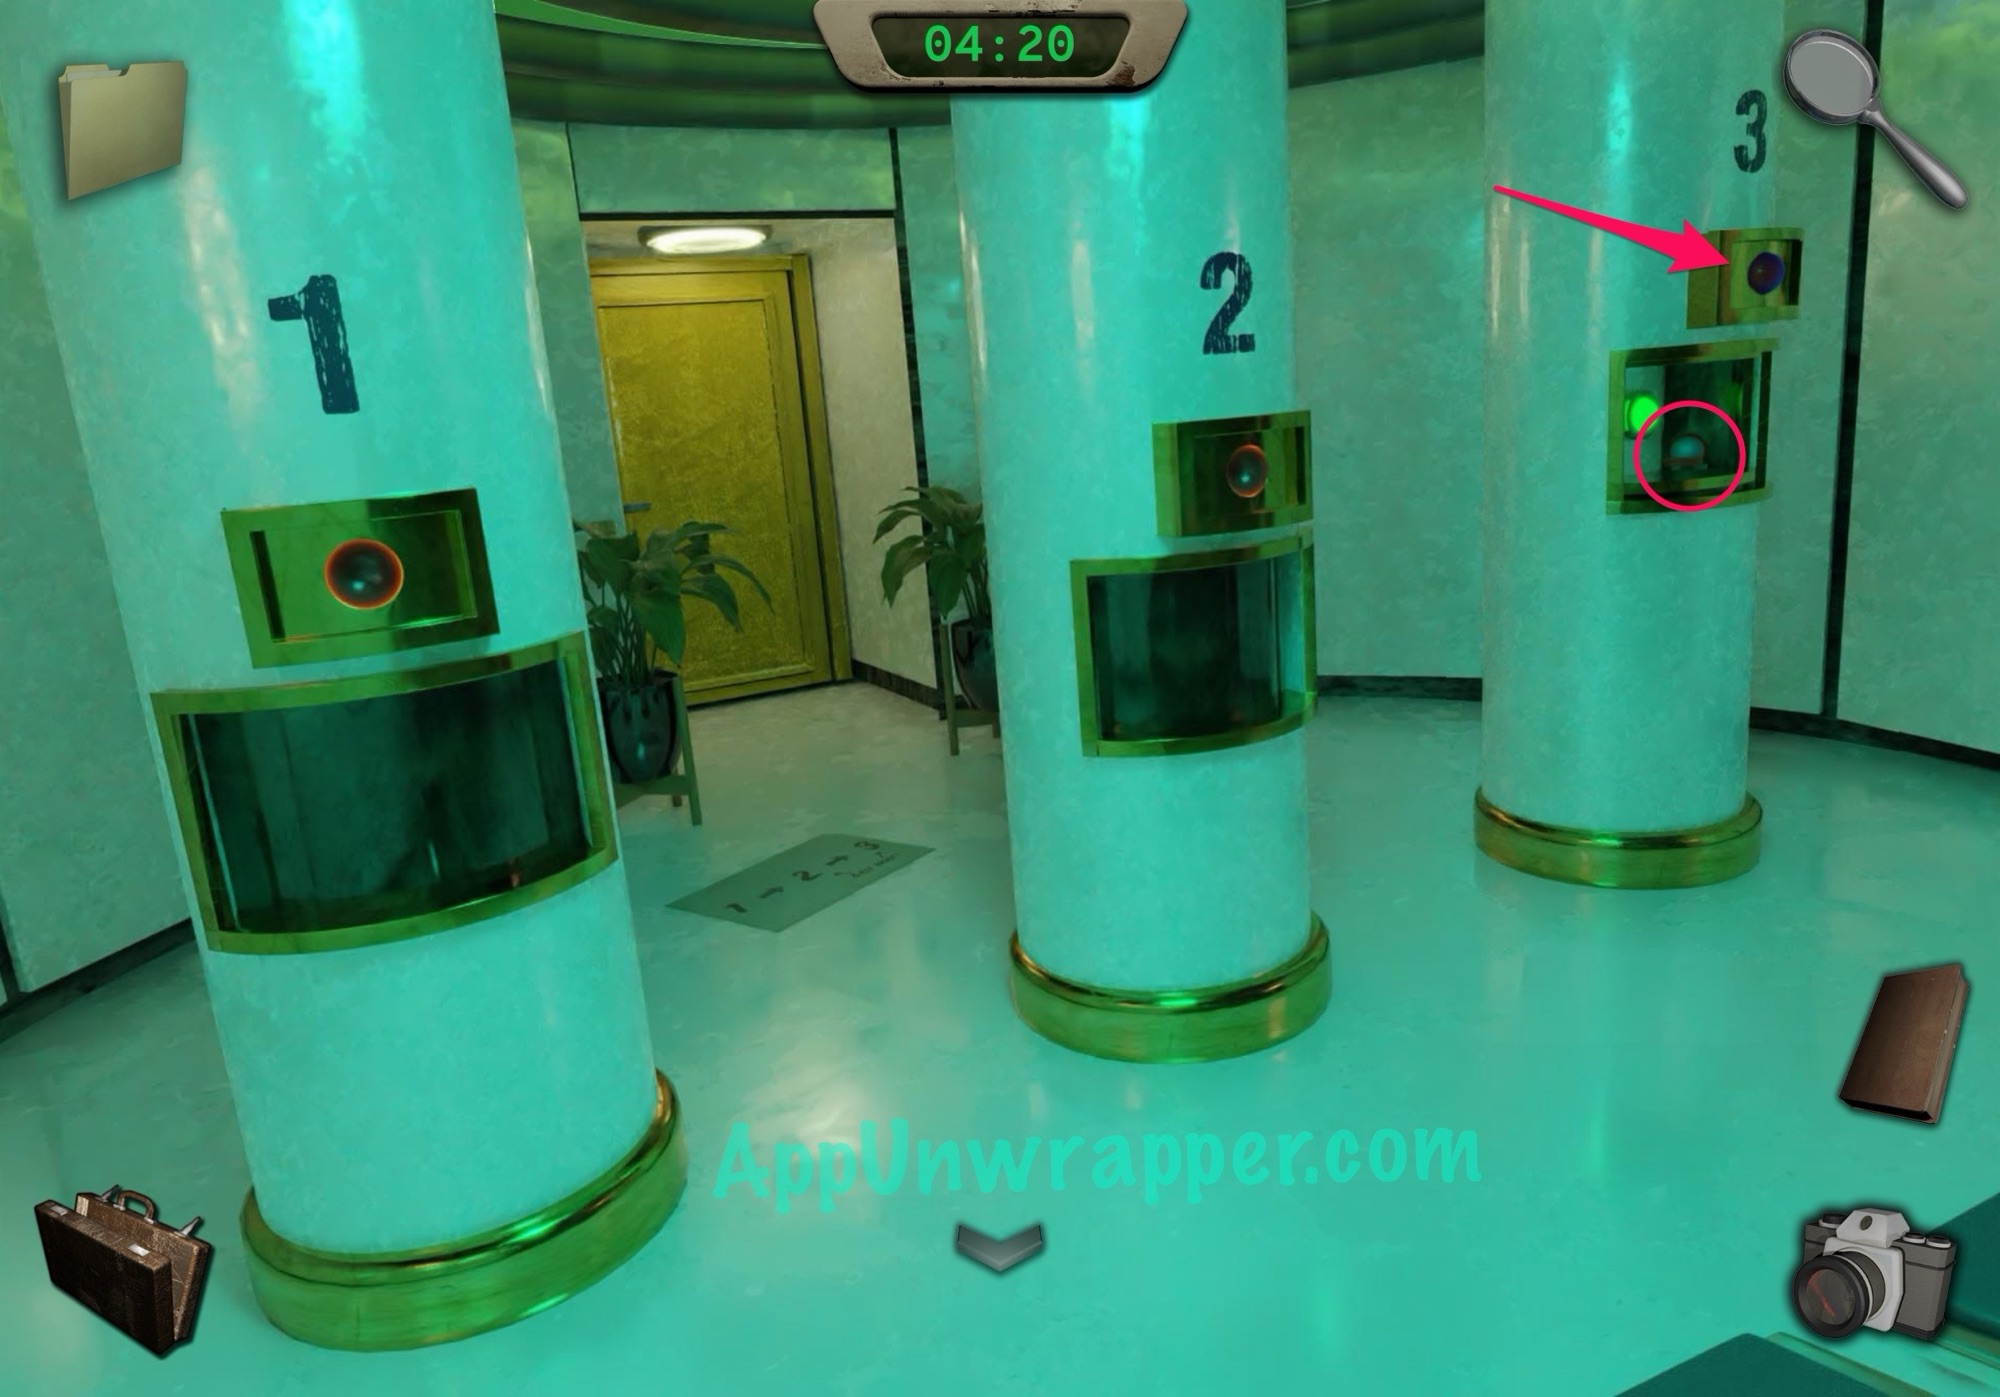

30. Use the clue to open the right door again. Grab the ball and head up the stairs to the left. Go through the yellow door and get the other ball from the TAD.
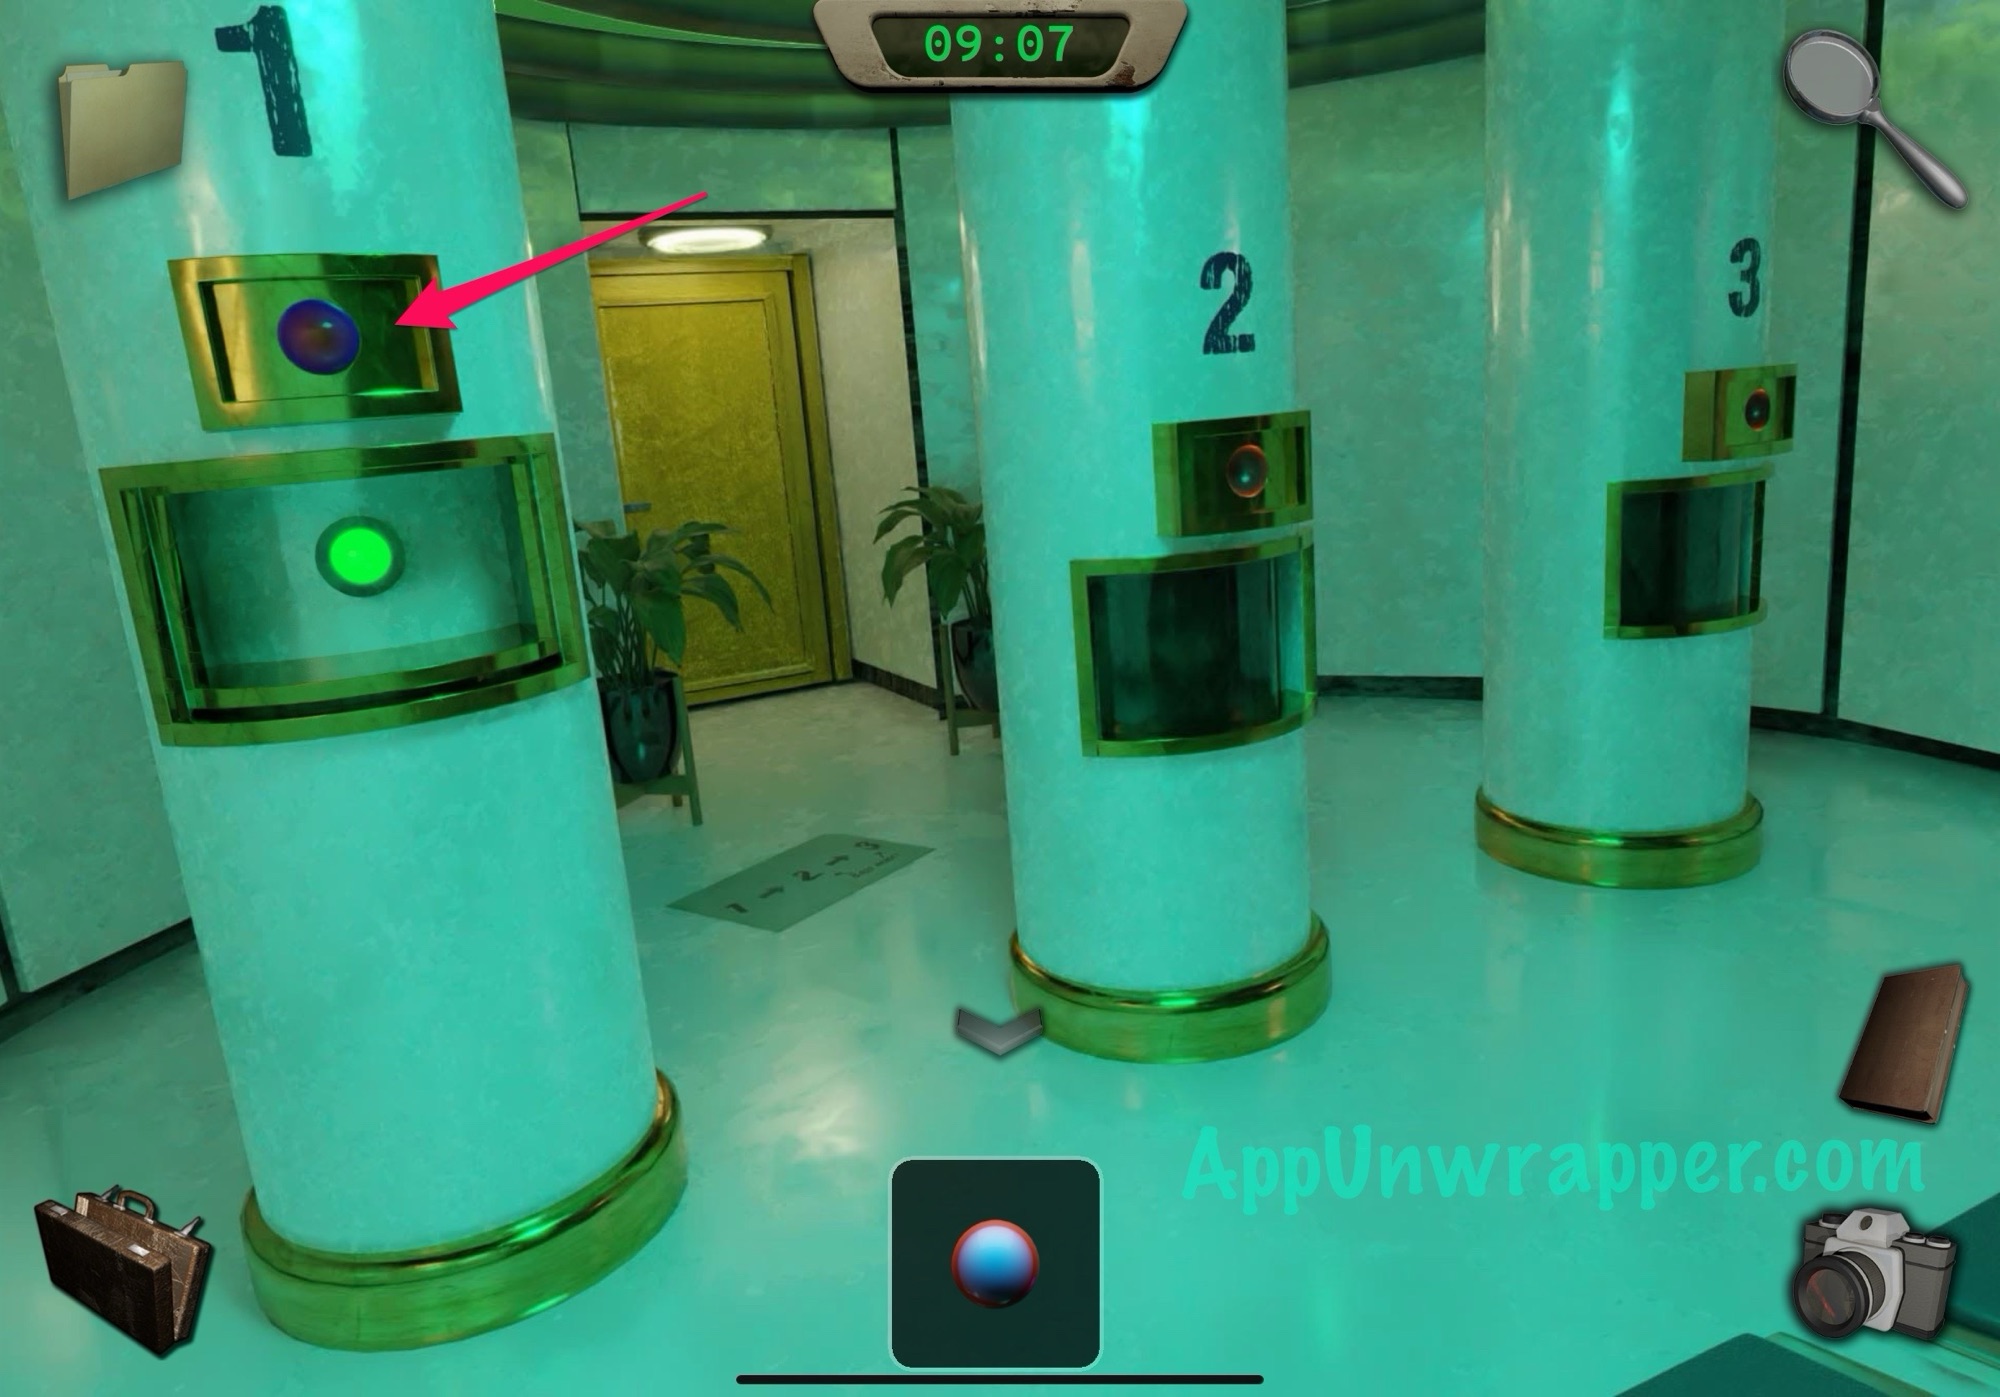
31. Now we have two balls. Place one in 1, and then another in 2. Take the ball from inside 2 and place it in 3. Take a photo of the runes.
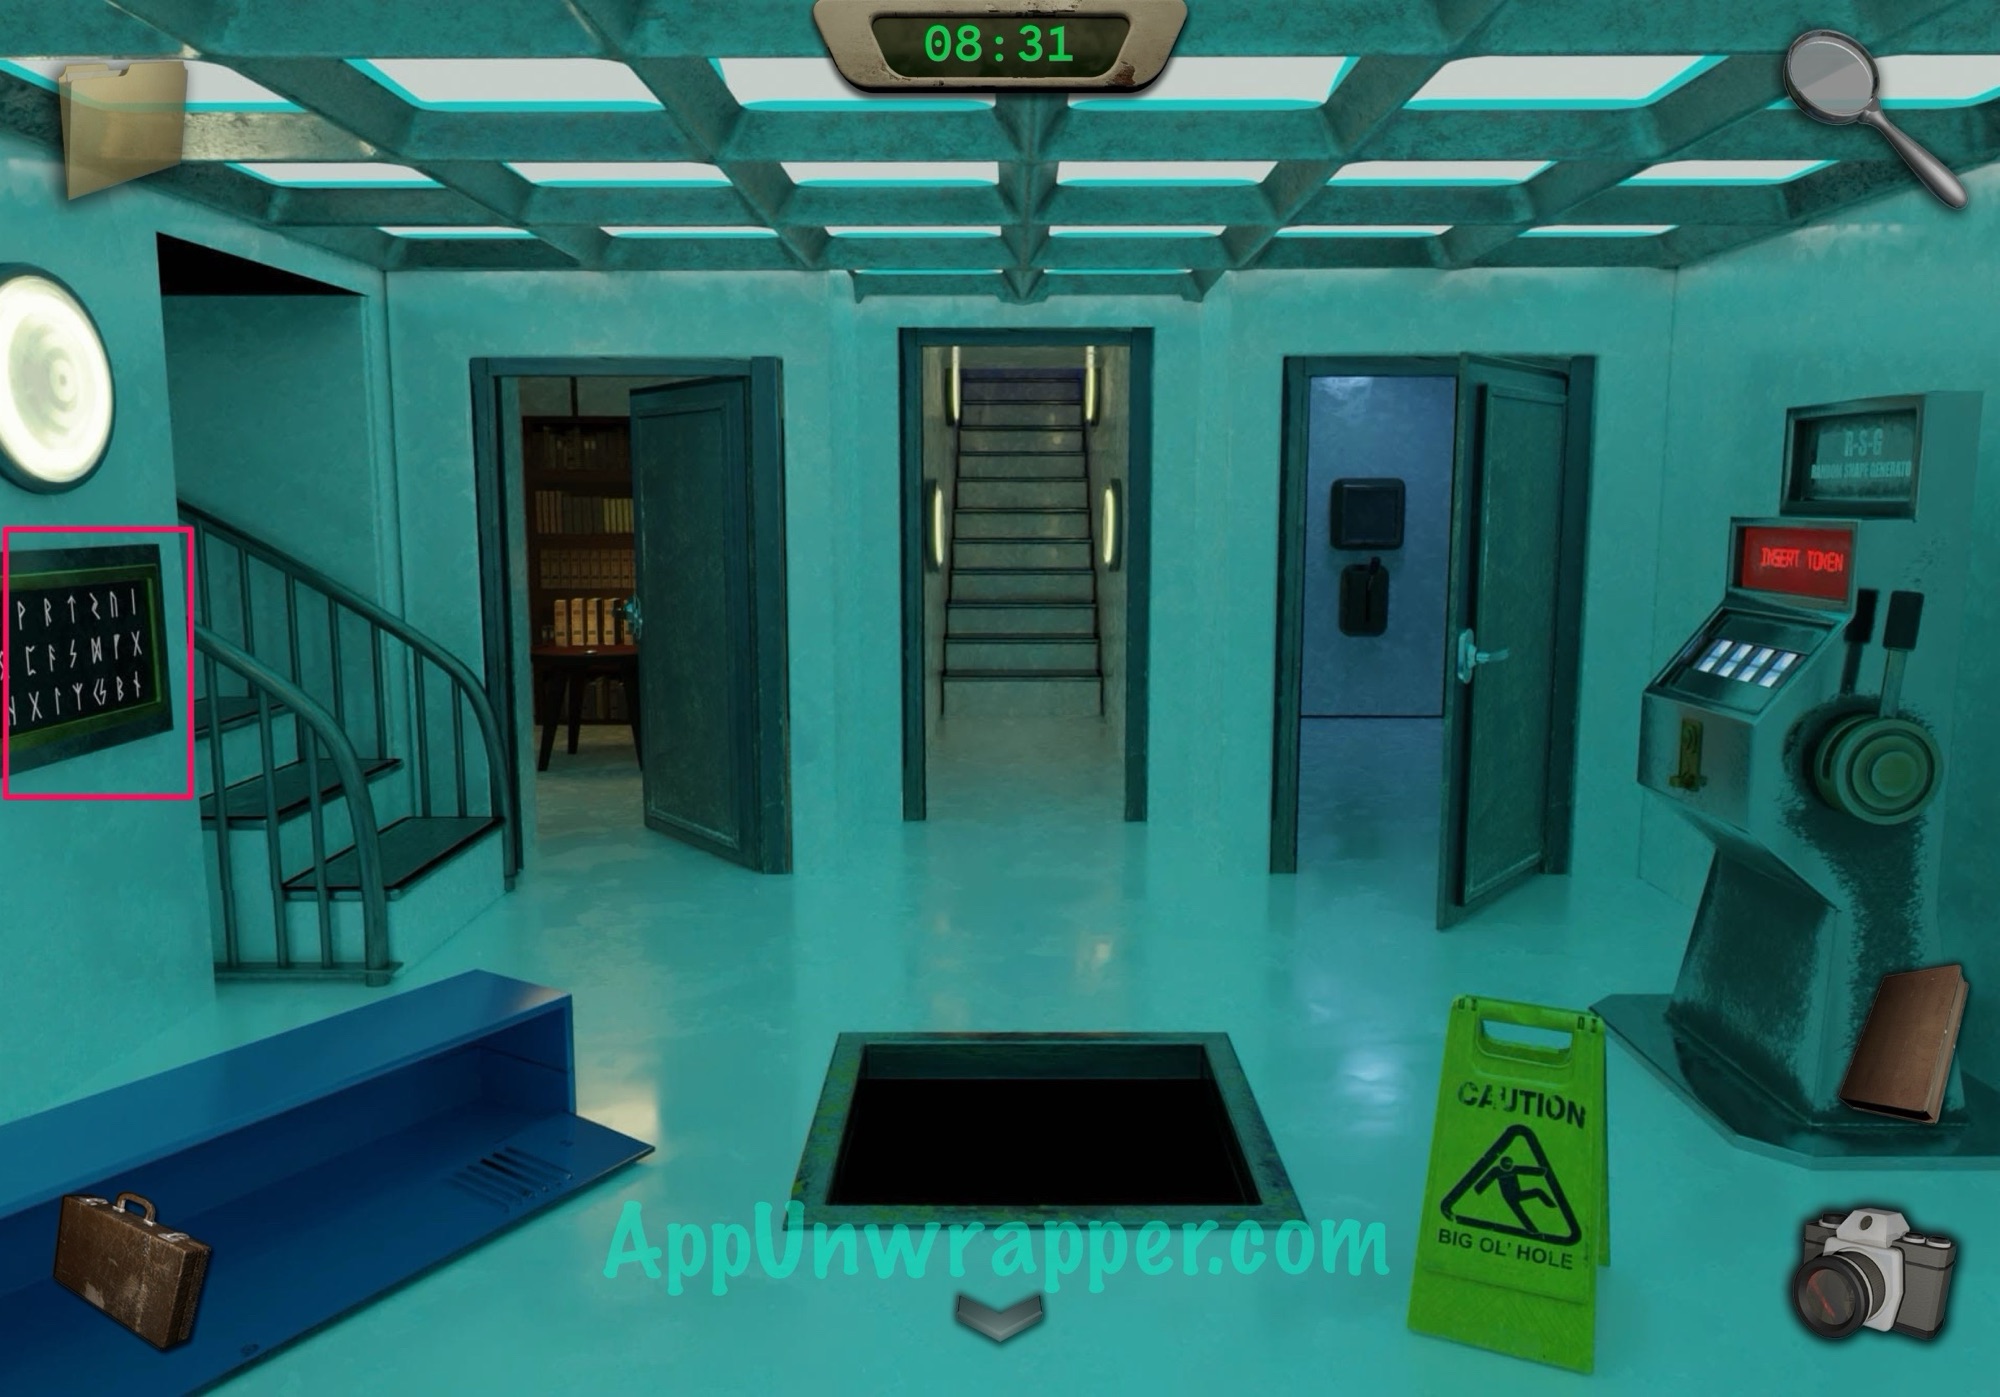
32. Go back downstairs. On the left wall, there are some runes. Tap on them and then take out all four photos of the runes you found. Press all those runes to get another clue. Take a photo.
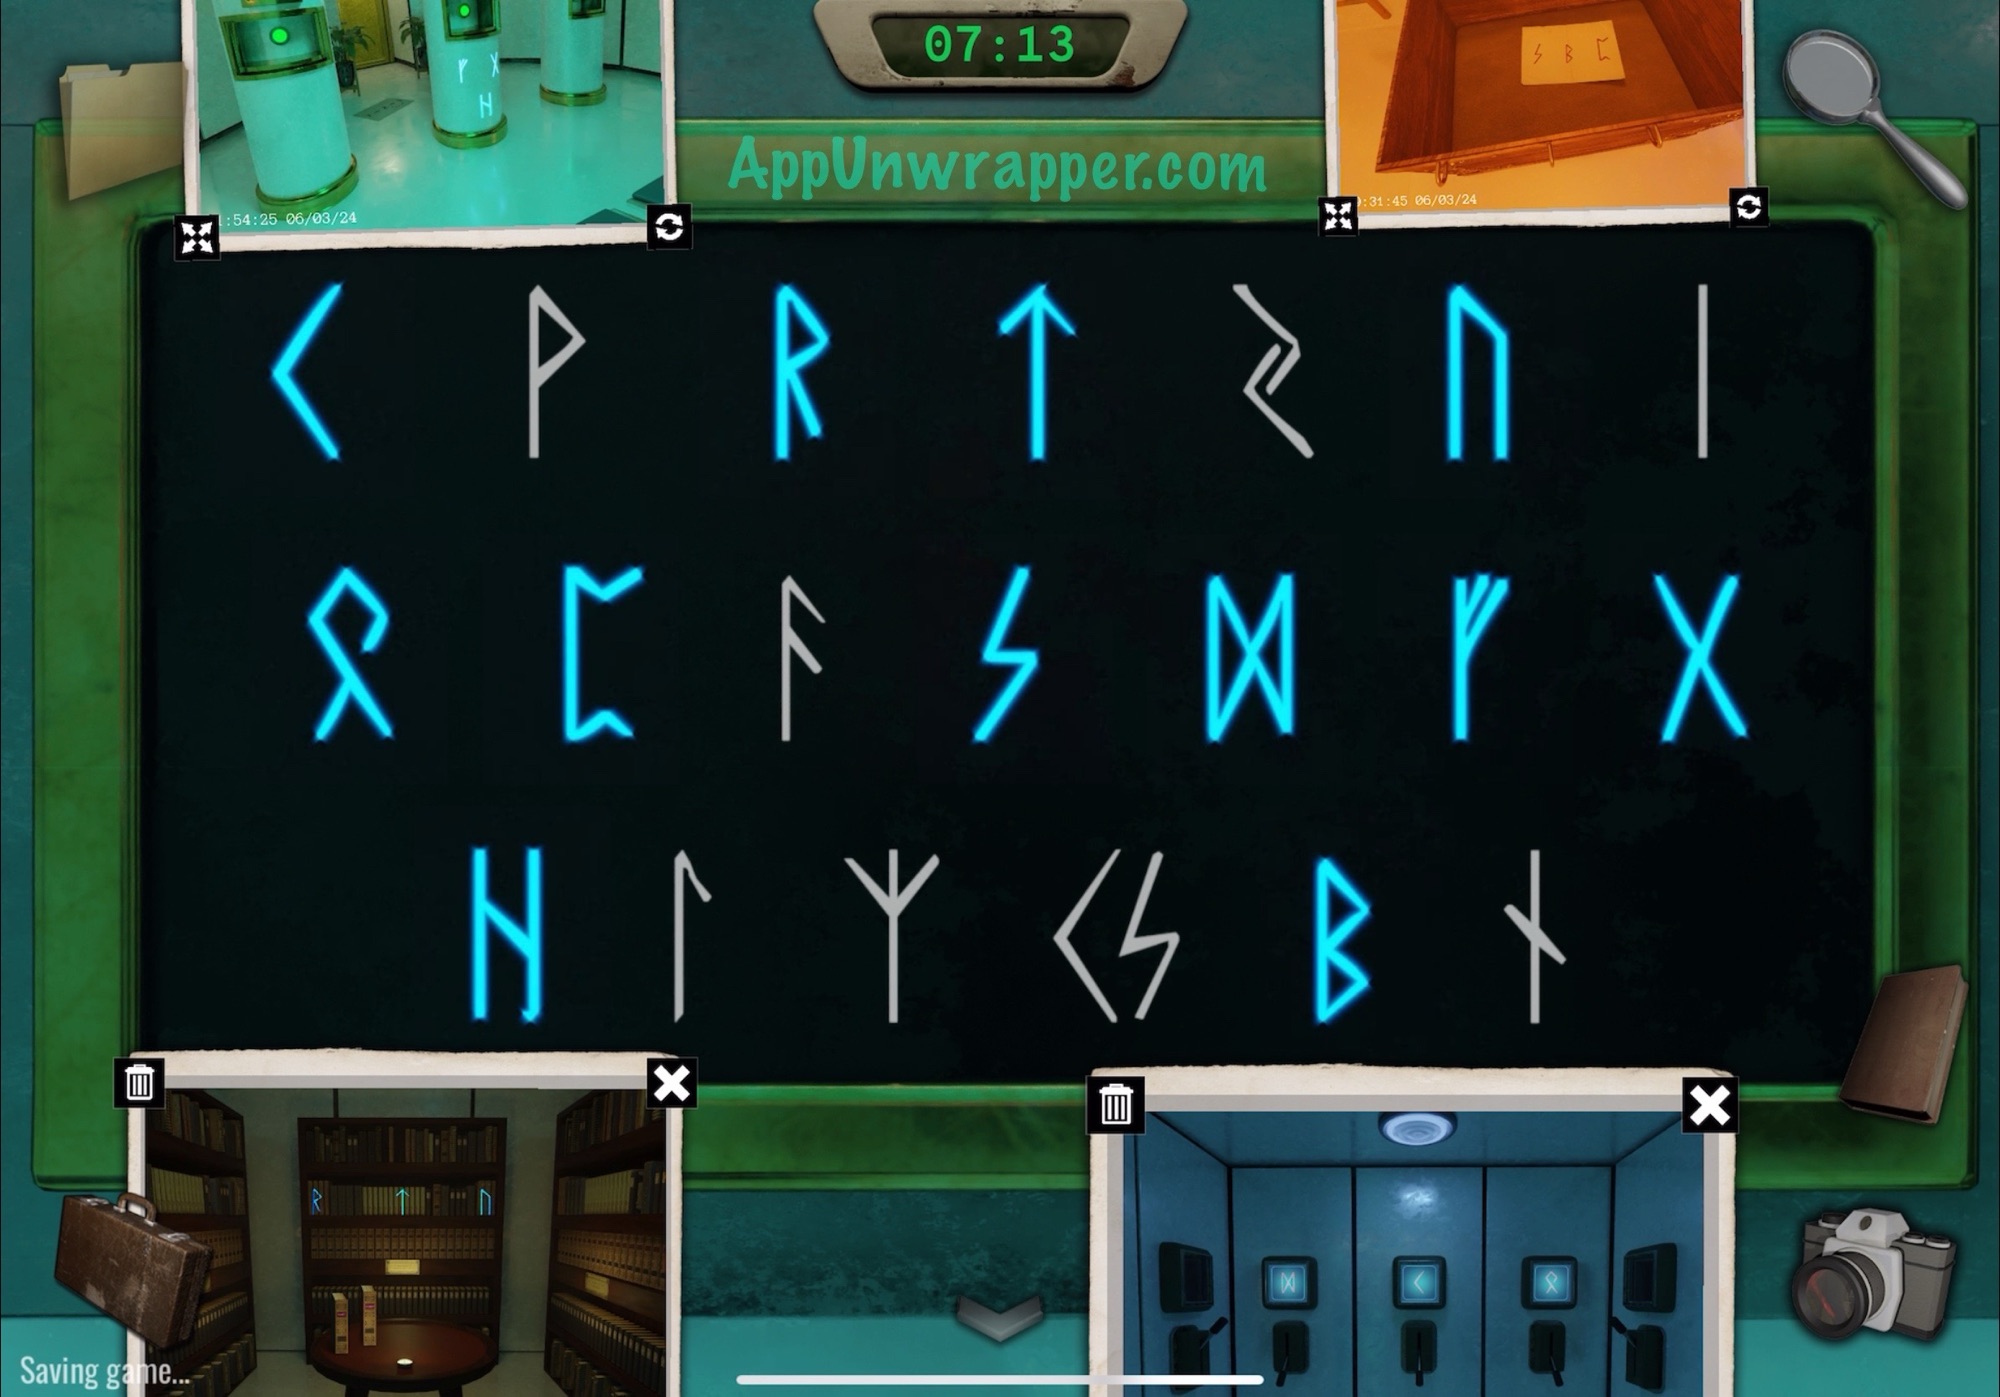
33. Go back all the way to the first room and tap on the middle door. Take out the photo of the clue you just found and copy it onto the door. Go through and down the hallway to complete Chapter 2. If the time loop resets after this point, you can just use this clue to head straight back into chapter 3.

And that’s the end of Chapter 2! Click here to continue to Chapter 3 or choose a chapter below.
Prologue + Chapter 1 | Chapter 2 | Chapter 3 + Epilogue