Recursion
By: Glitch Games

Recursion is Glitch Games’ latest adventure game and it’s part of the Glitch Broken Dreams Collection. What sets it apart from their other games is that it’s on a time loop and resets back to the start every few minutes. But your photos stay with you and that allows you to skip past puzzles you already solved. It can still get quite tricky, so this walkthrough guide should help if you get stuck on any of the puzzles. Feel free to ask for extra help in the comments section.
Walkthrough:
Prologue + Chapter 1 | Chapter 2 | Chapter 3 + Epilogue
This is a time loop game, meaning you’ll have to keep restarting from the beginning to make progress. I recommend choosing the 10-minute timer and then finding a way to die instantly if you need to.
You can watch my video for the full game or continue below for my step-by-step guide:
Prologue:
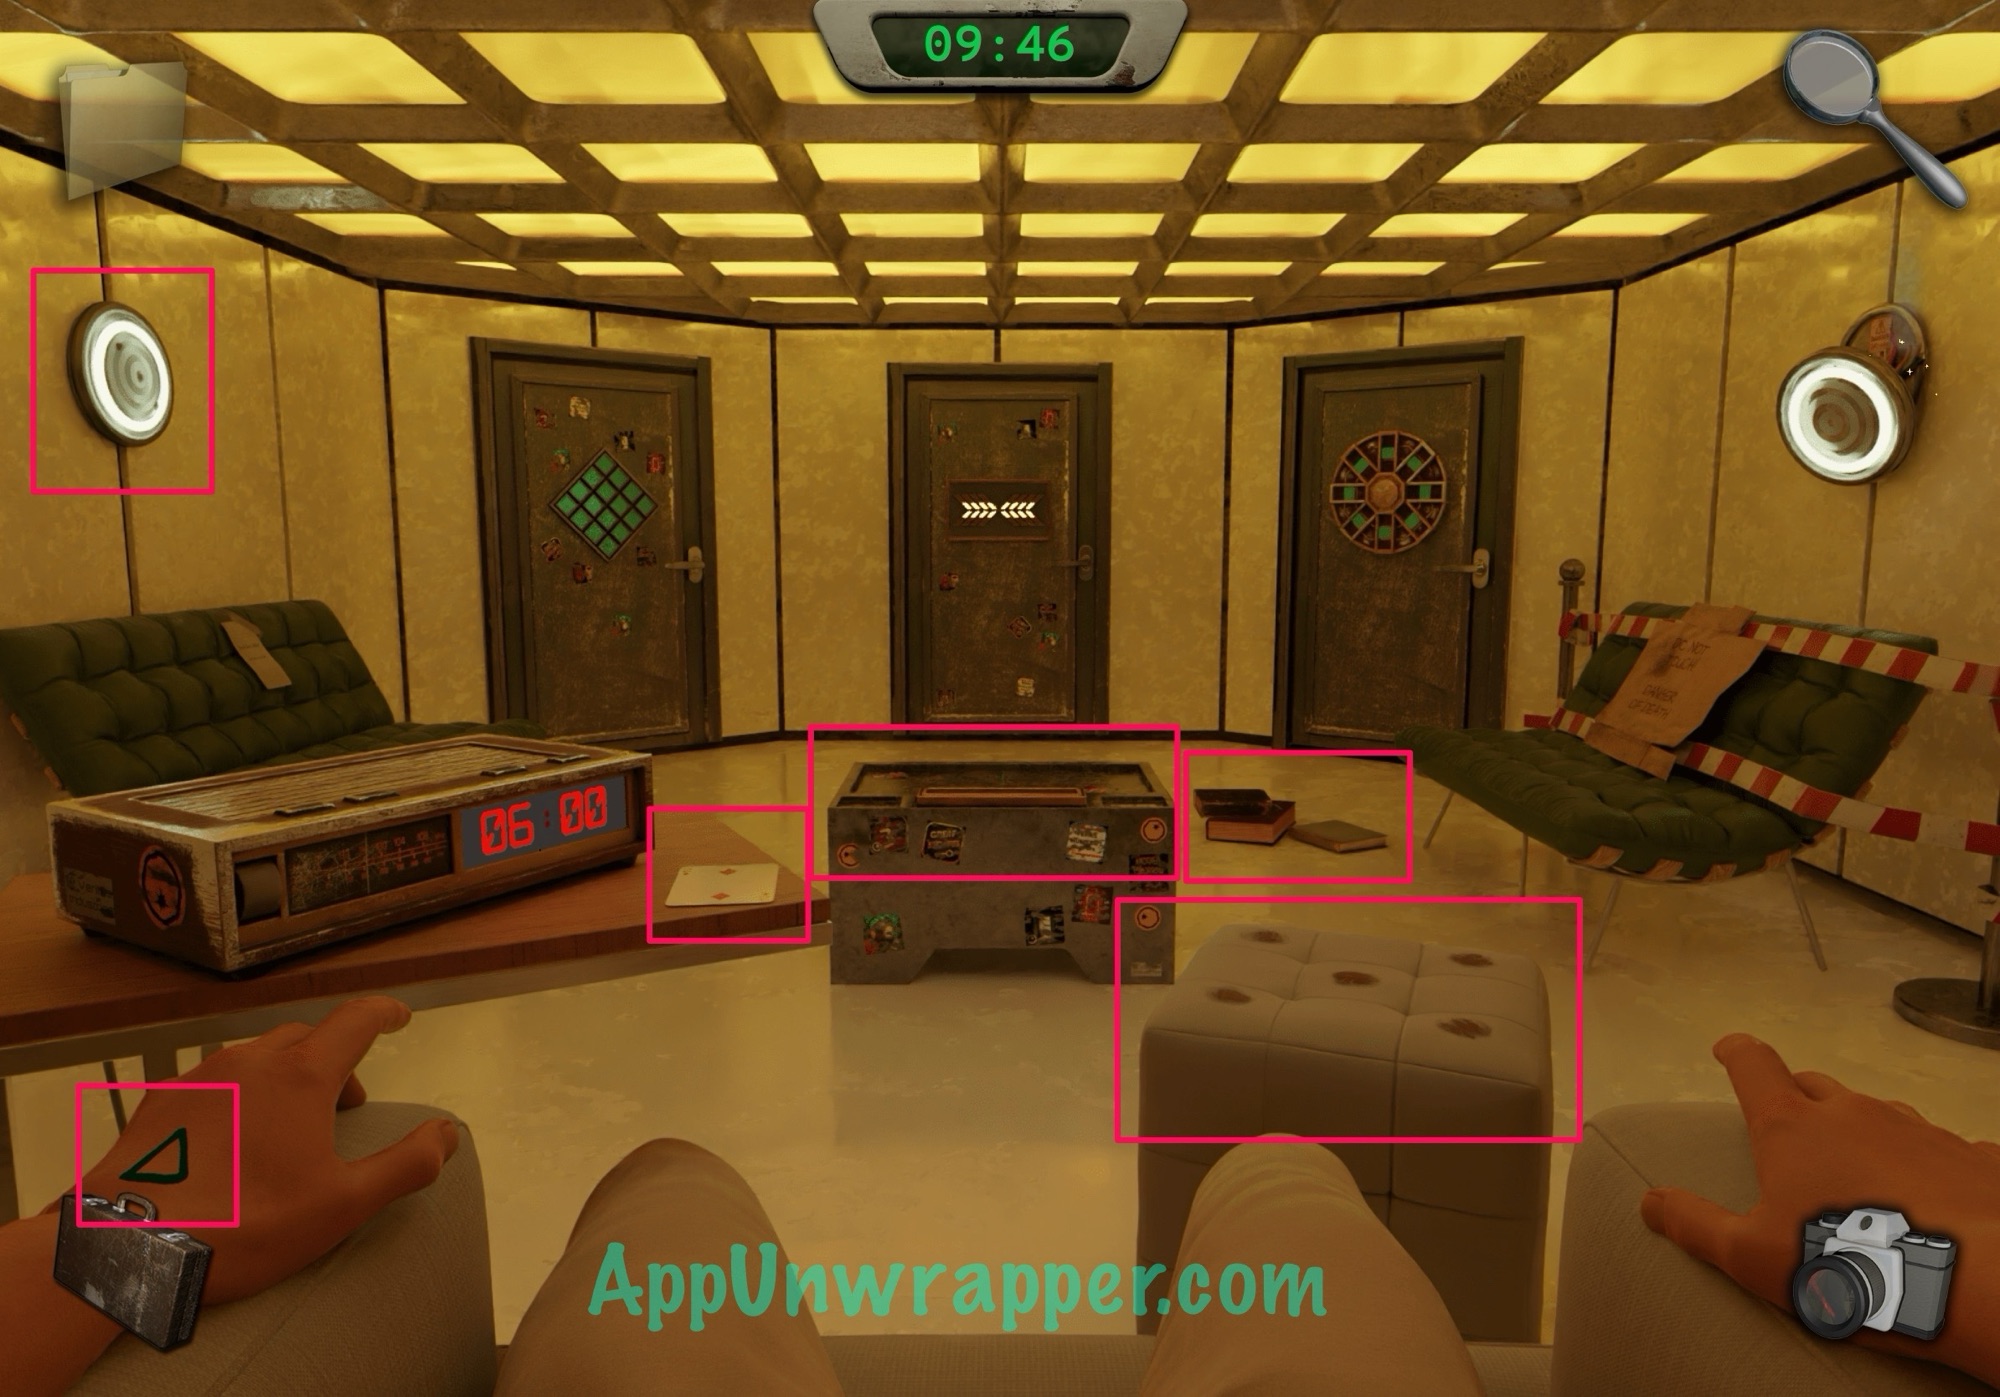
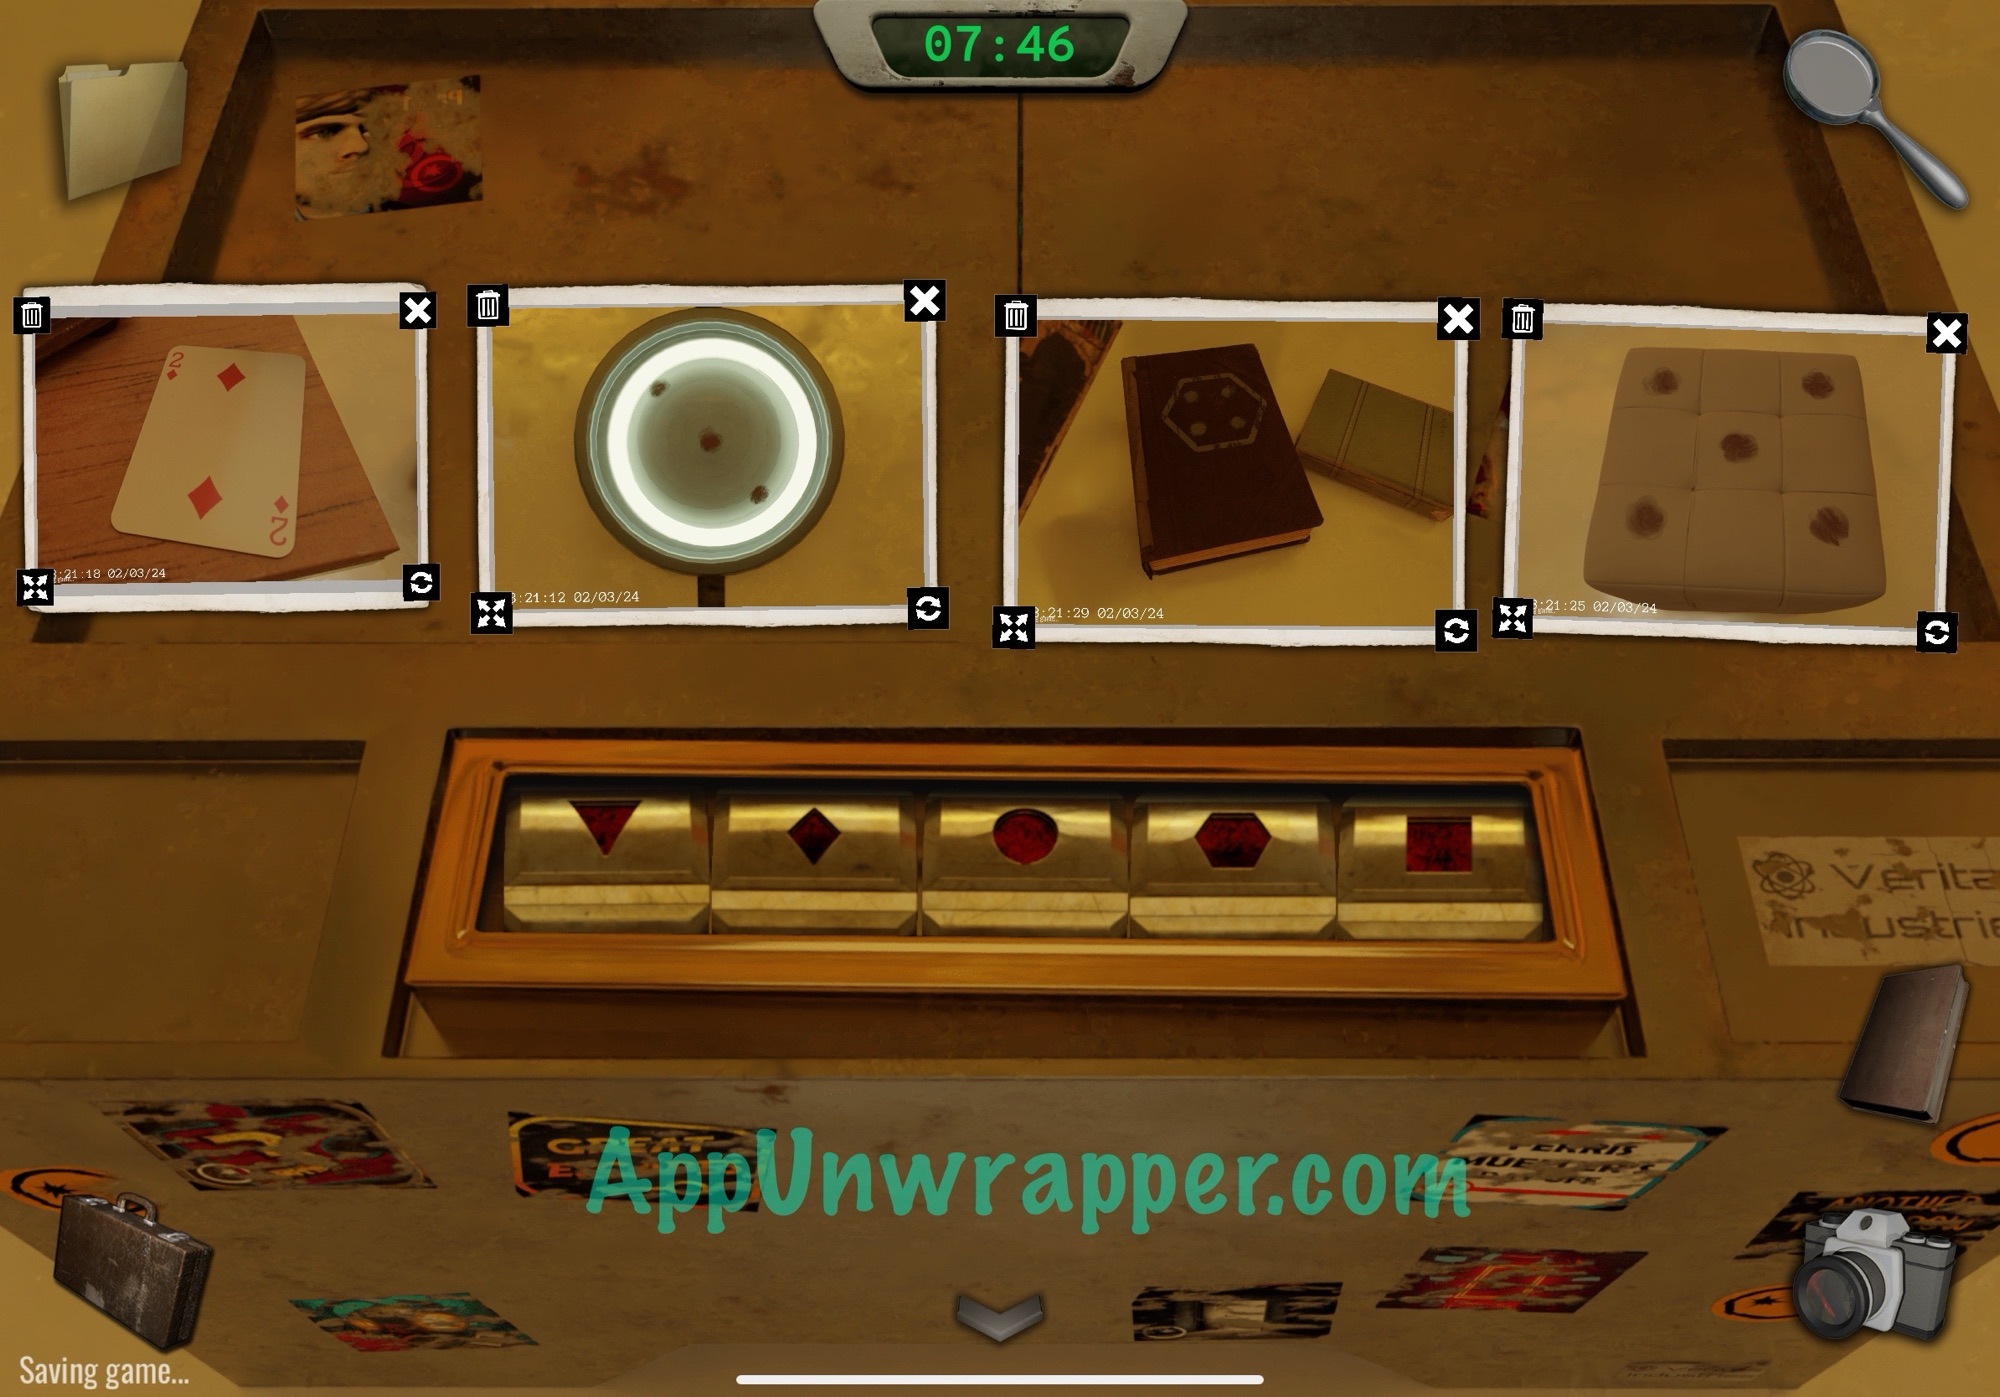
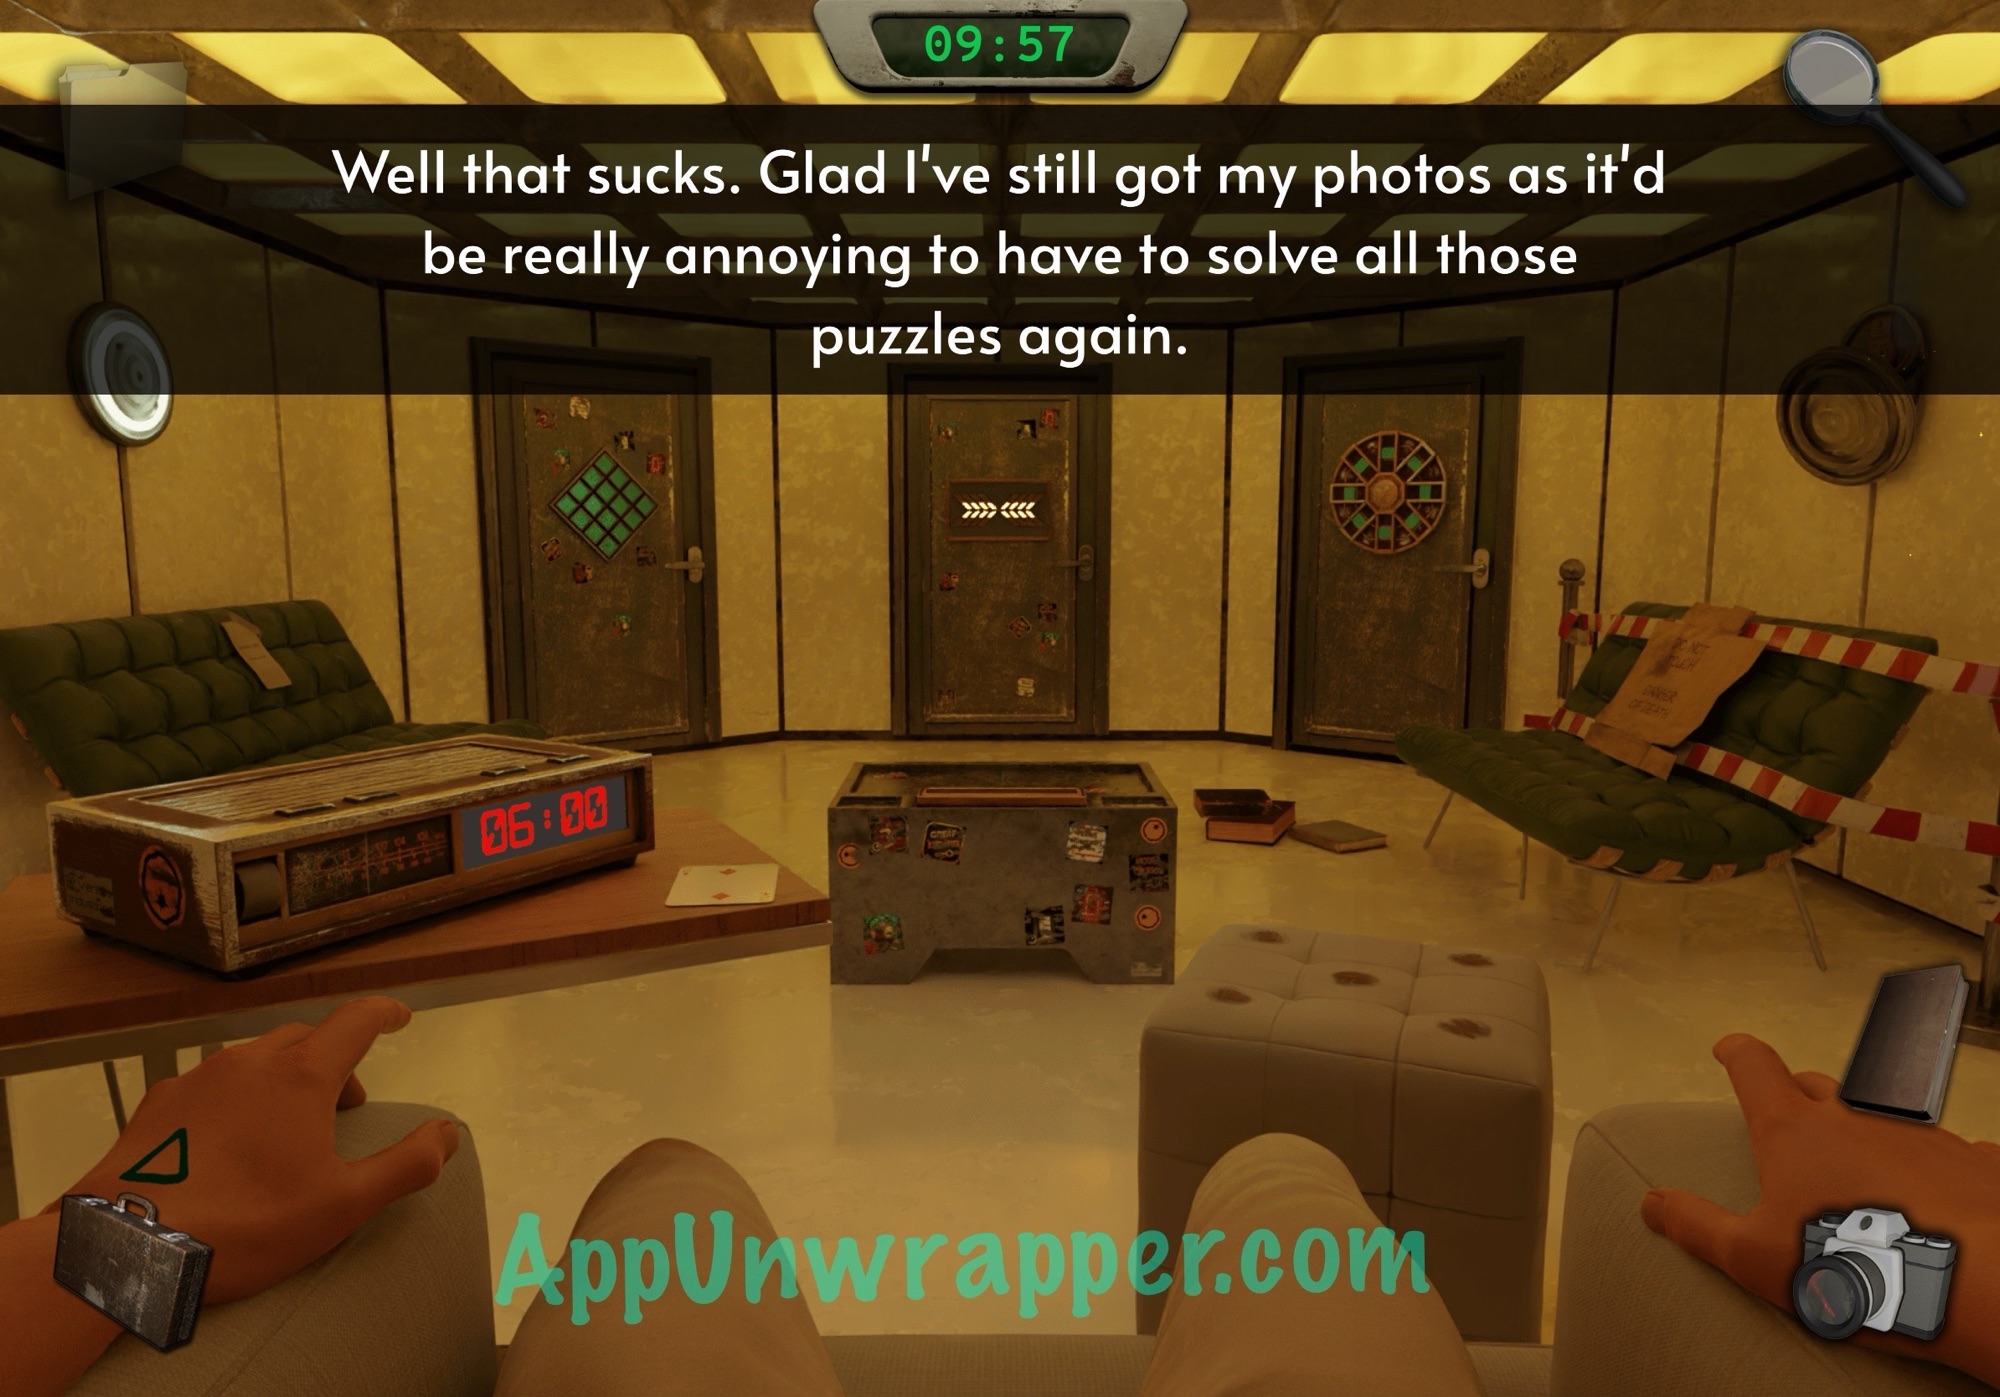
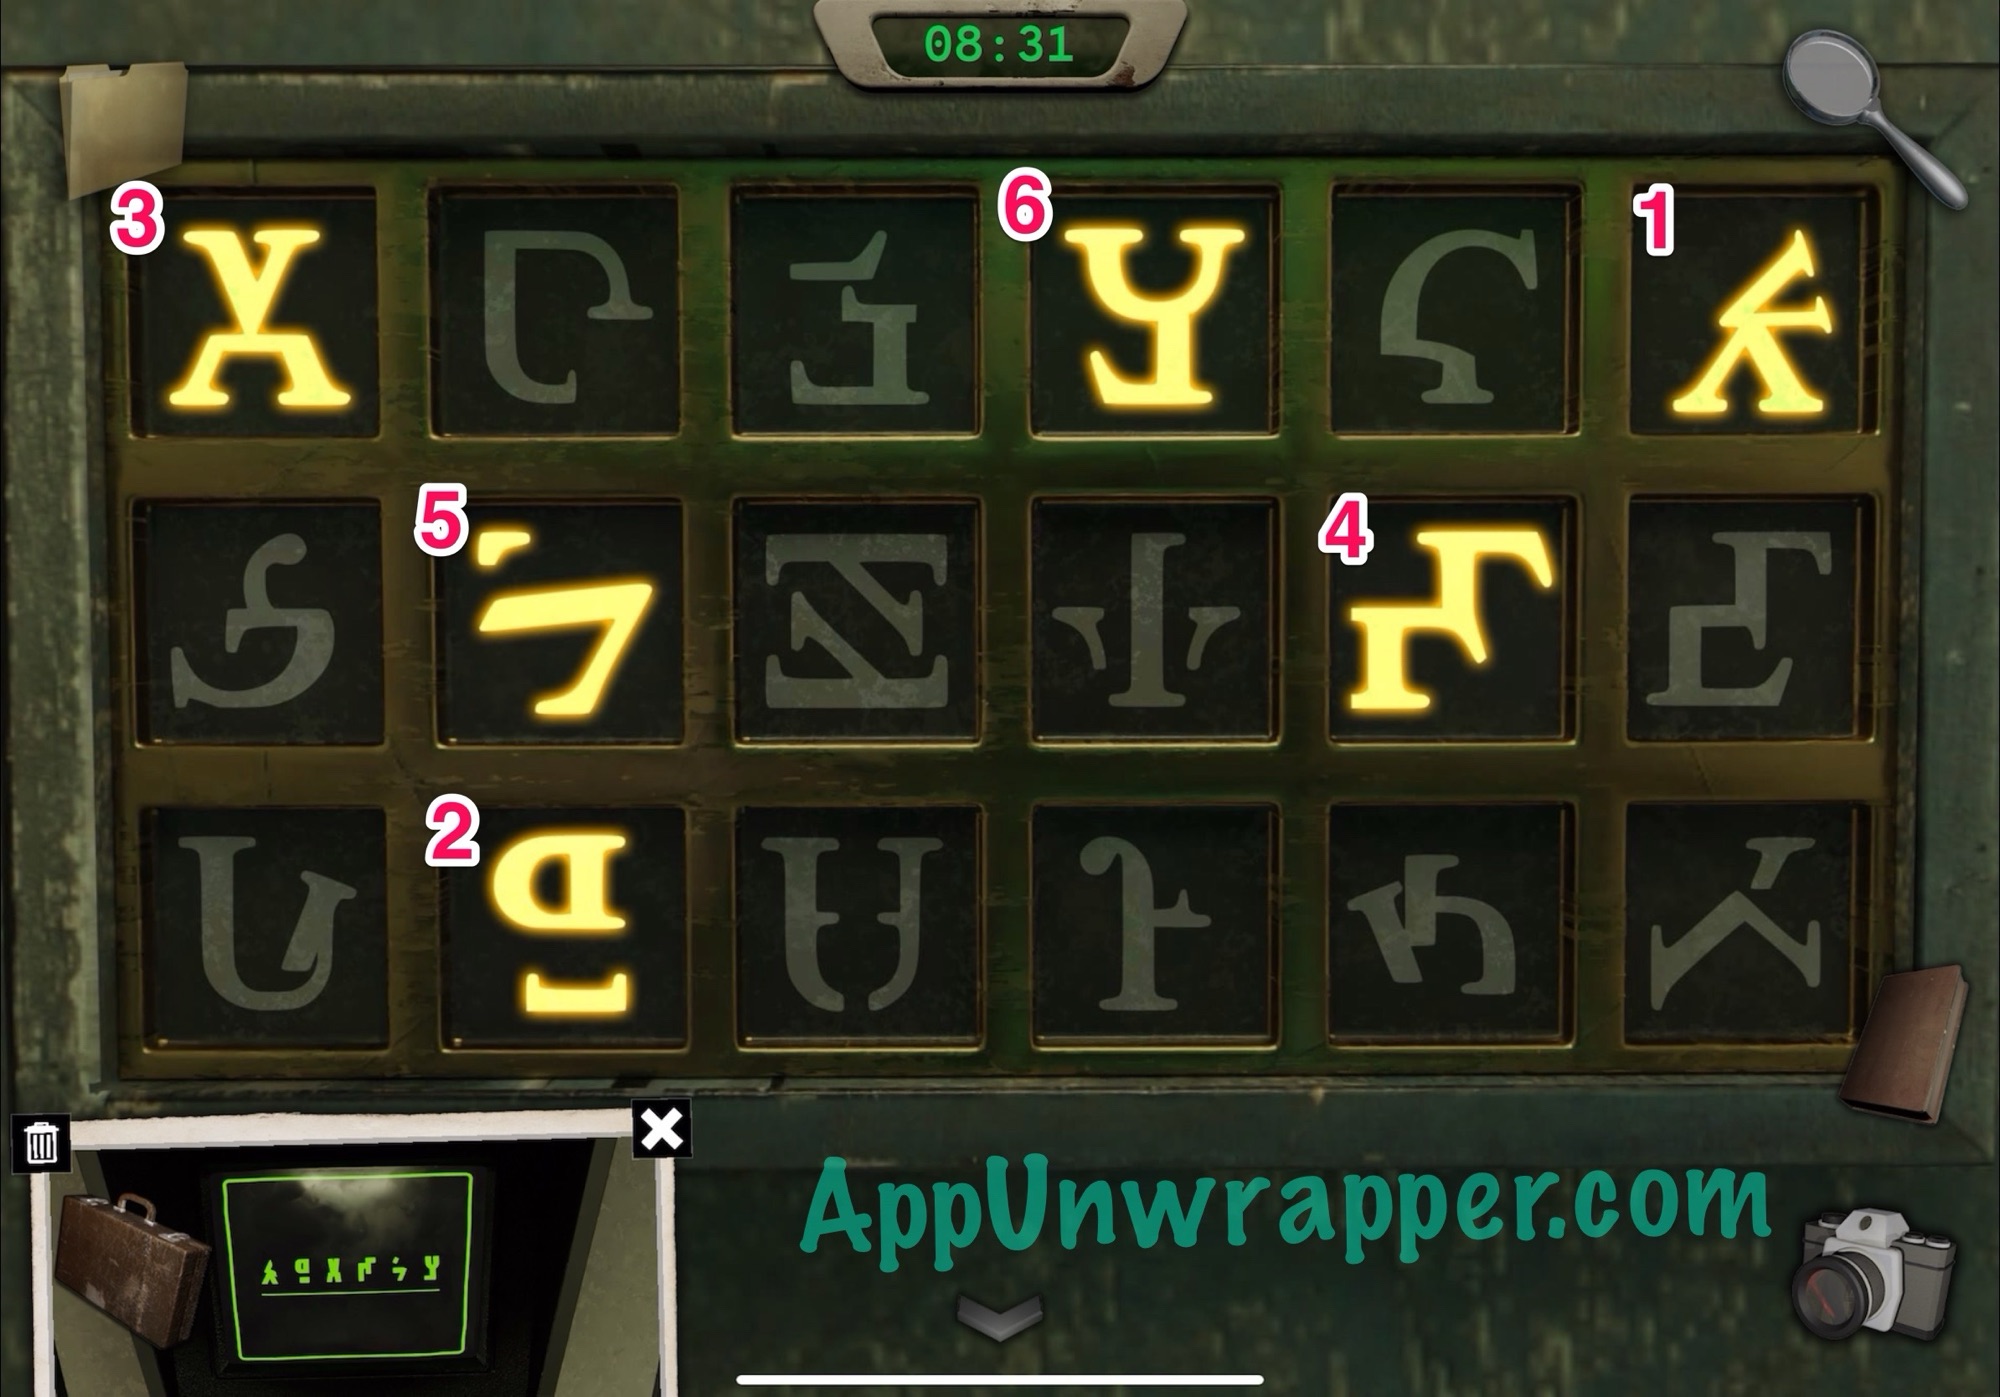
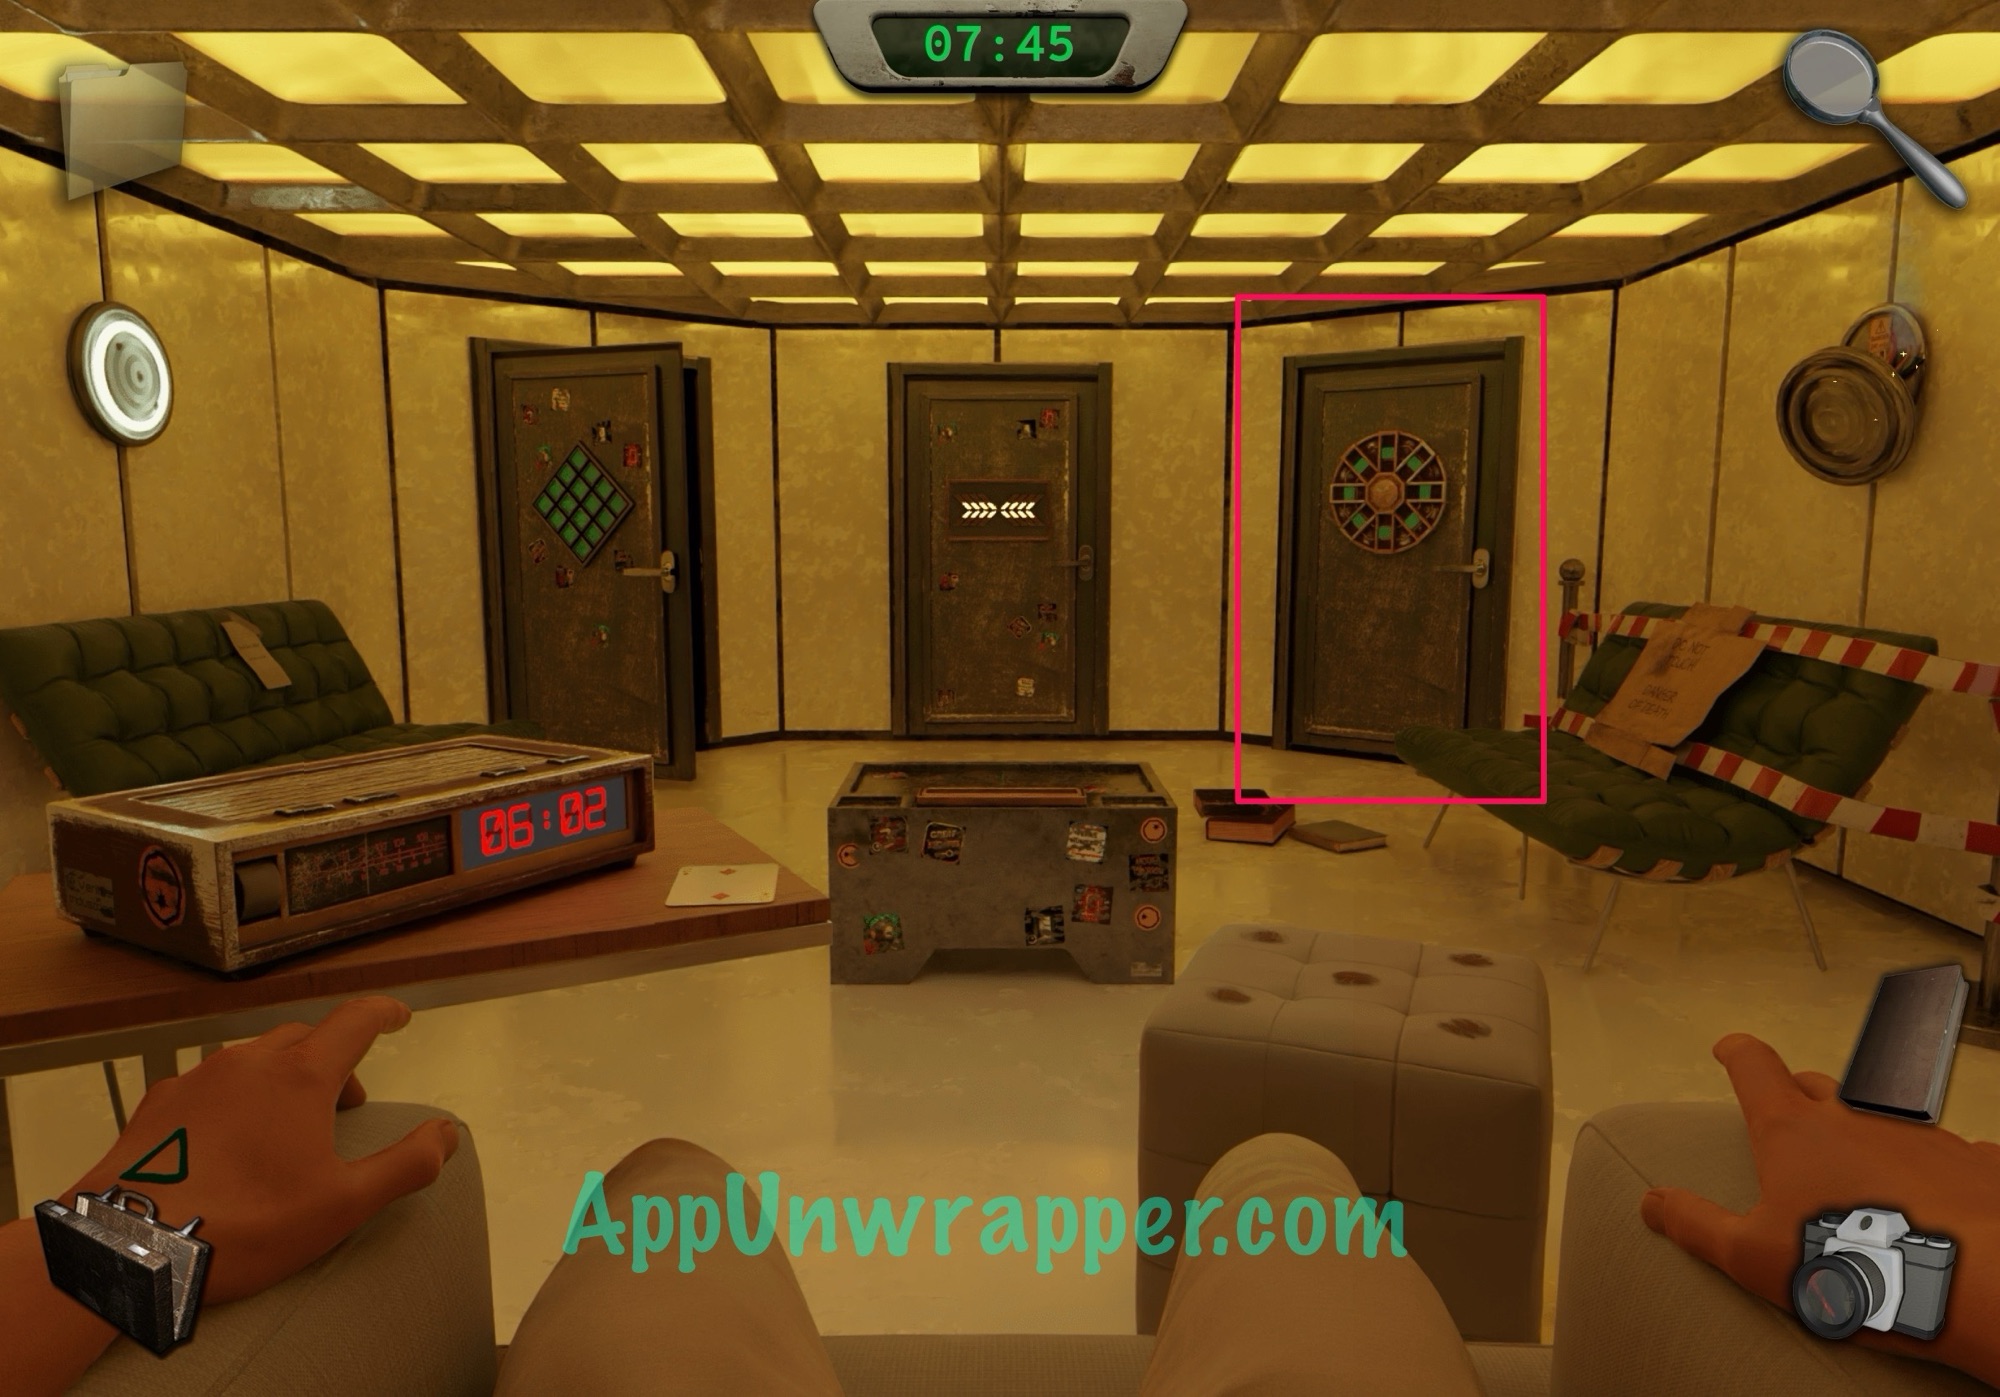
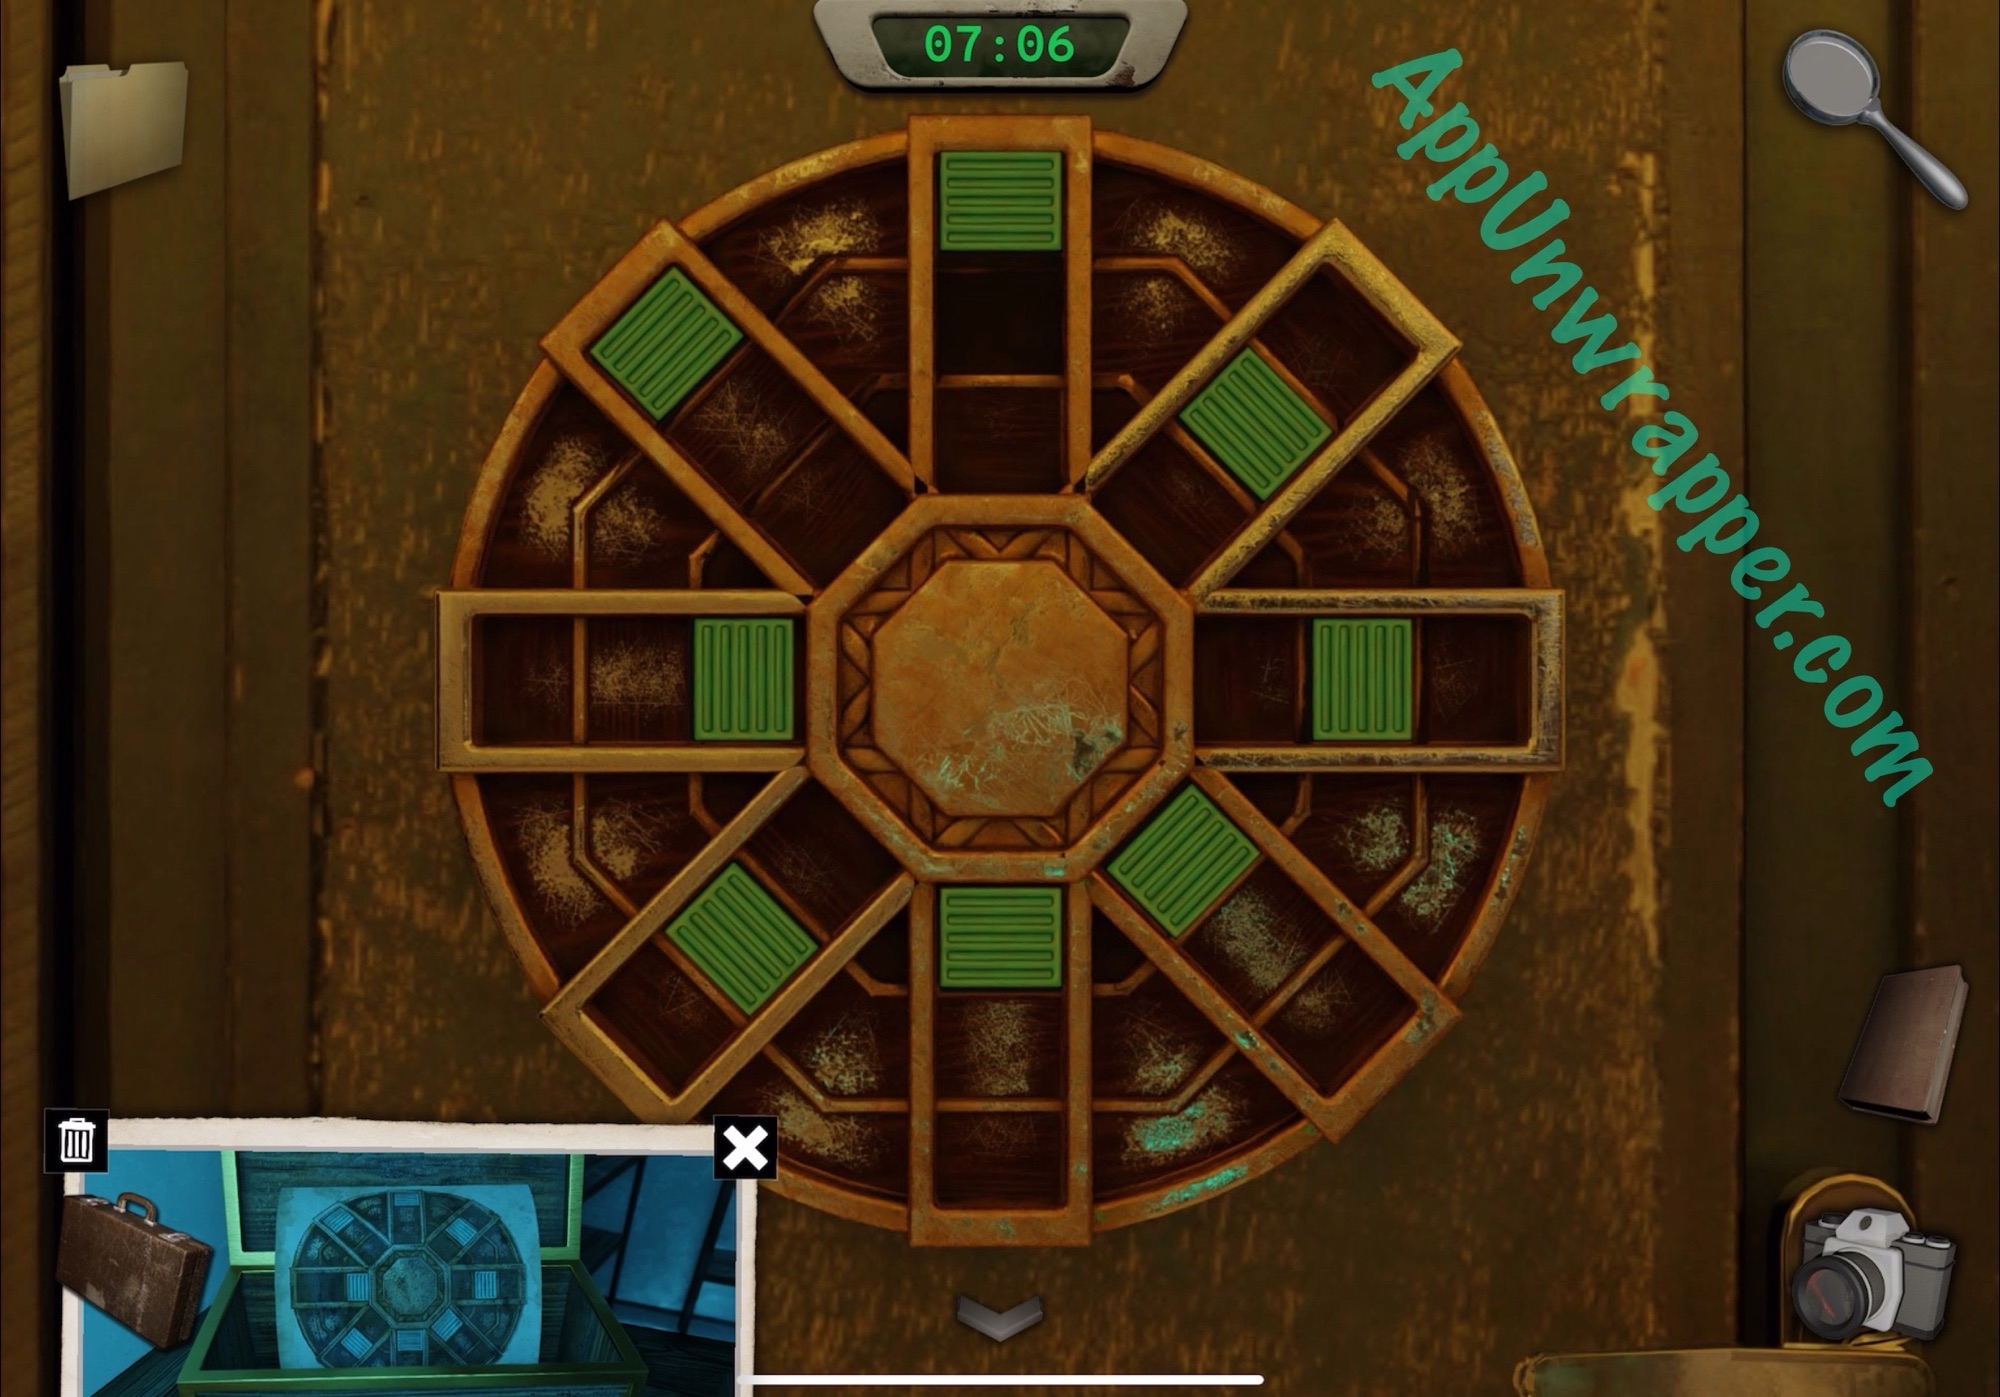
1. You’re seated in a room with three doors in front of you. Notice the single triangle on your hand. There’s also a card with 2 diamonds on it. The round light on the left has 3 dots on it. One of the books has a hexagon with 4 dots in it. And last, the ottoman is a square with 5 dots on it. I recommend taking photos of them all. Then we’re going to use them to solve the puzzle in the center of the room.
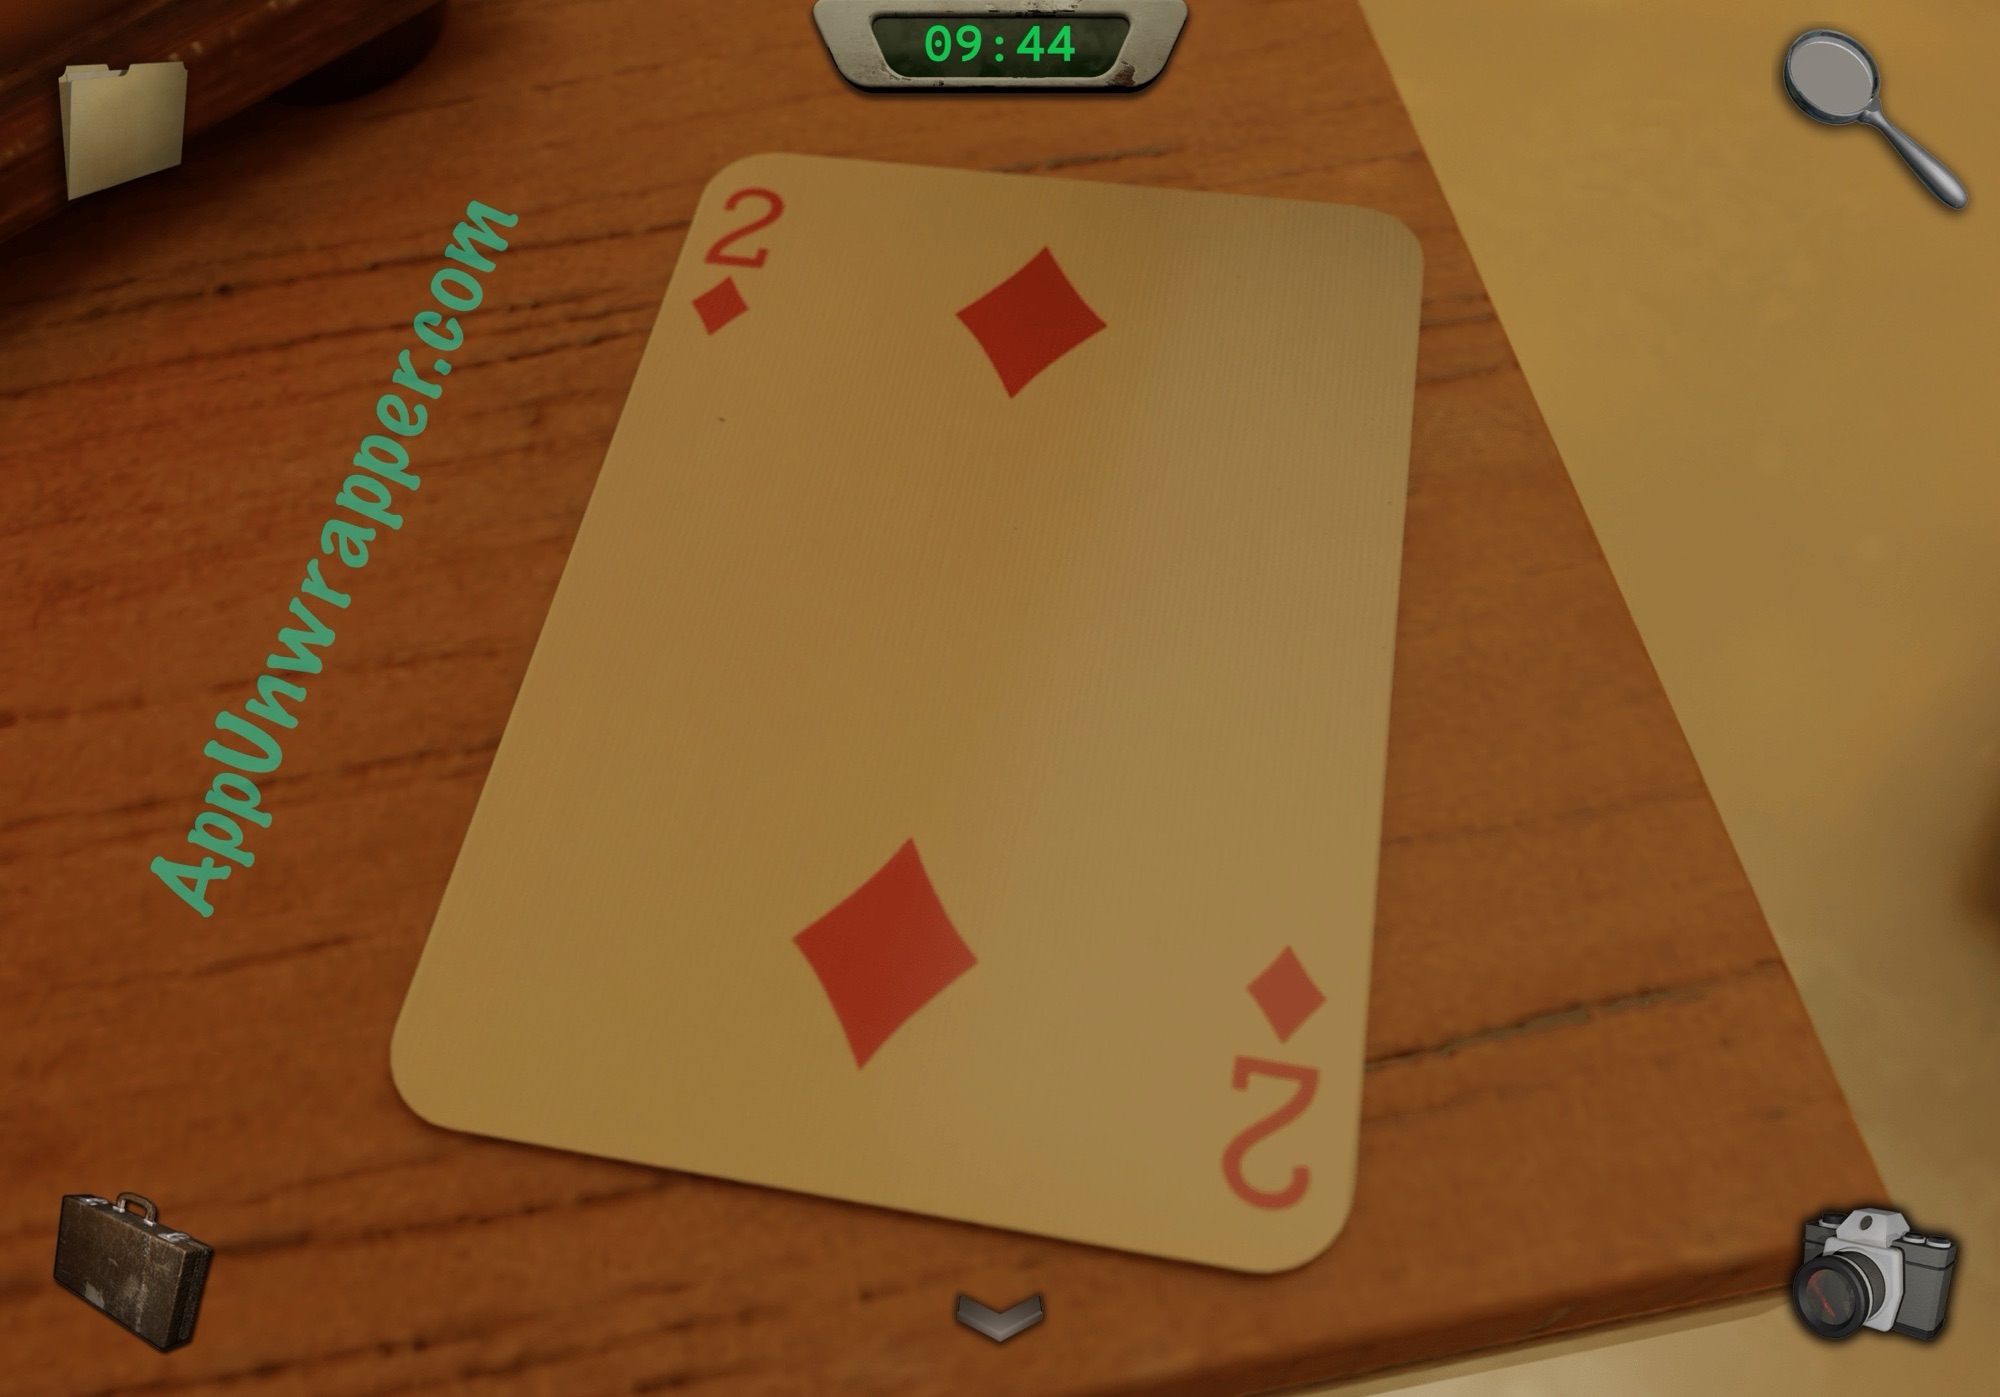
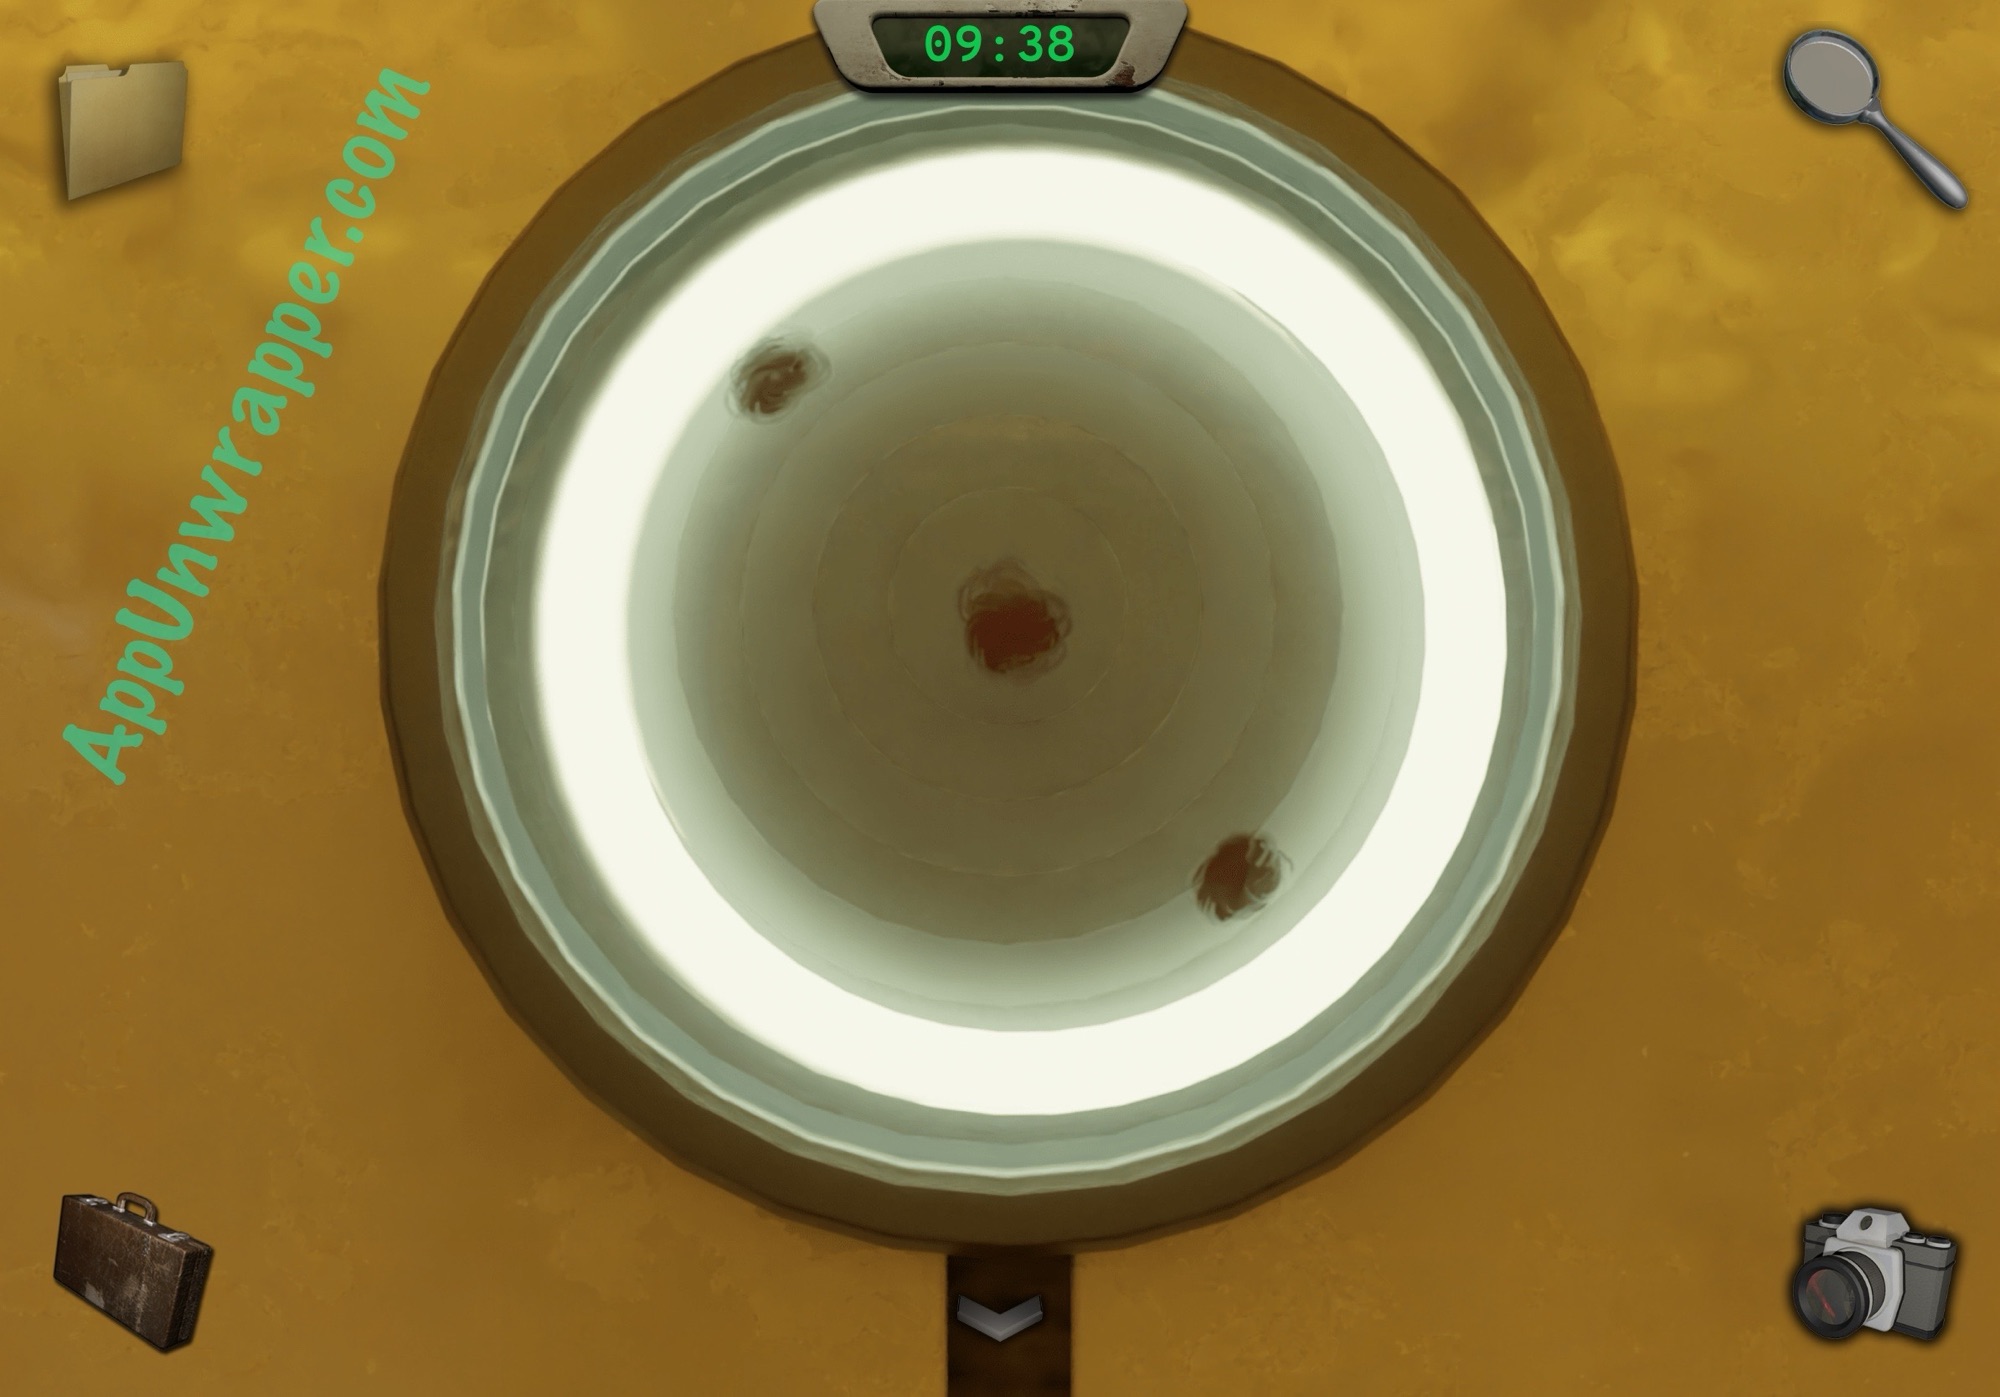
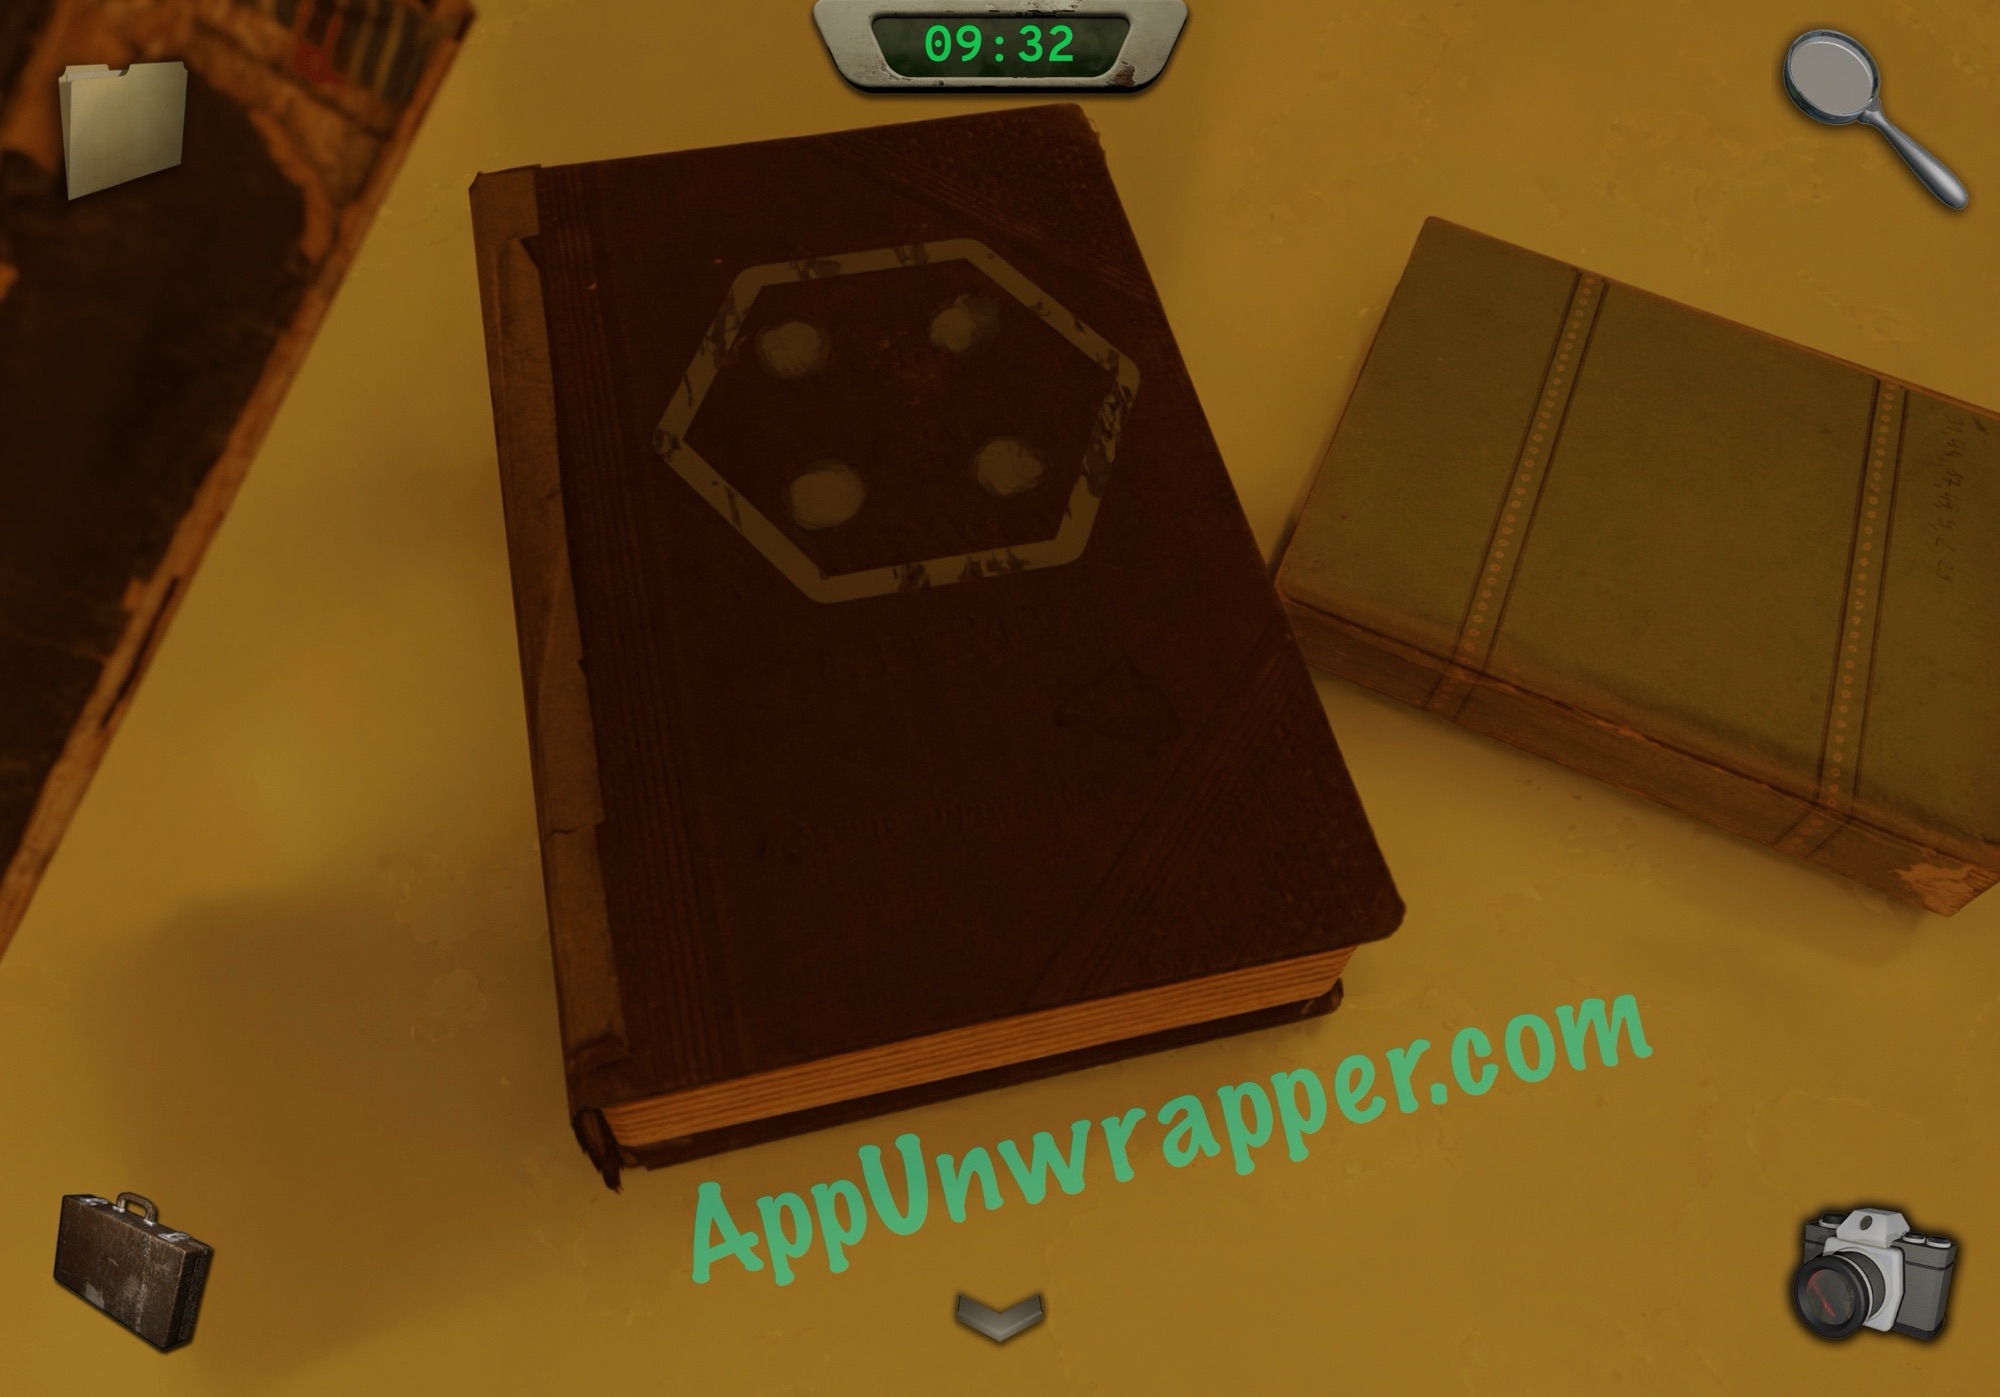
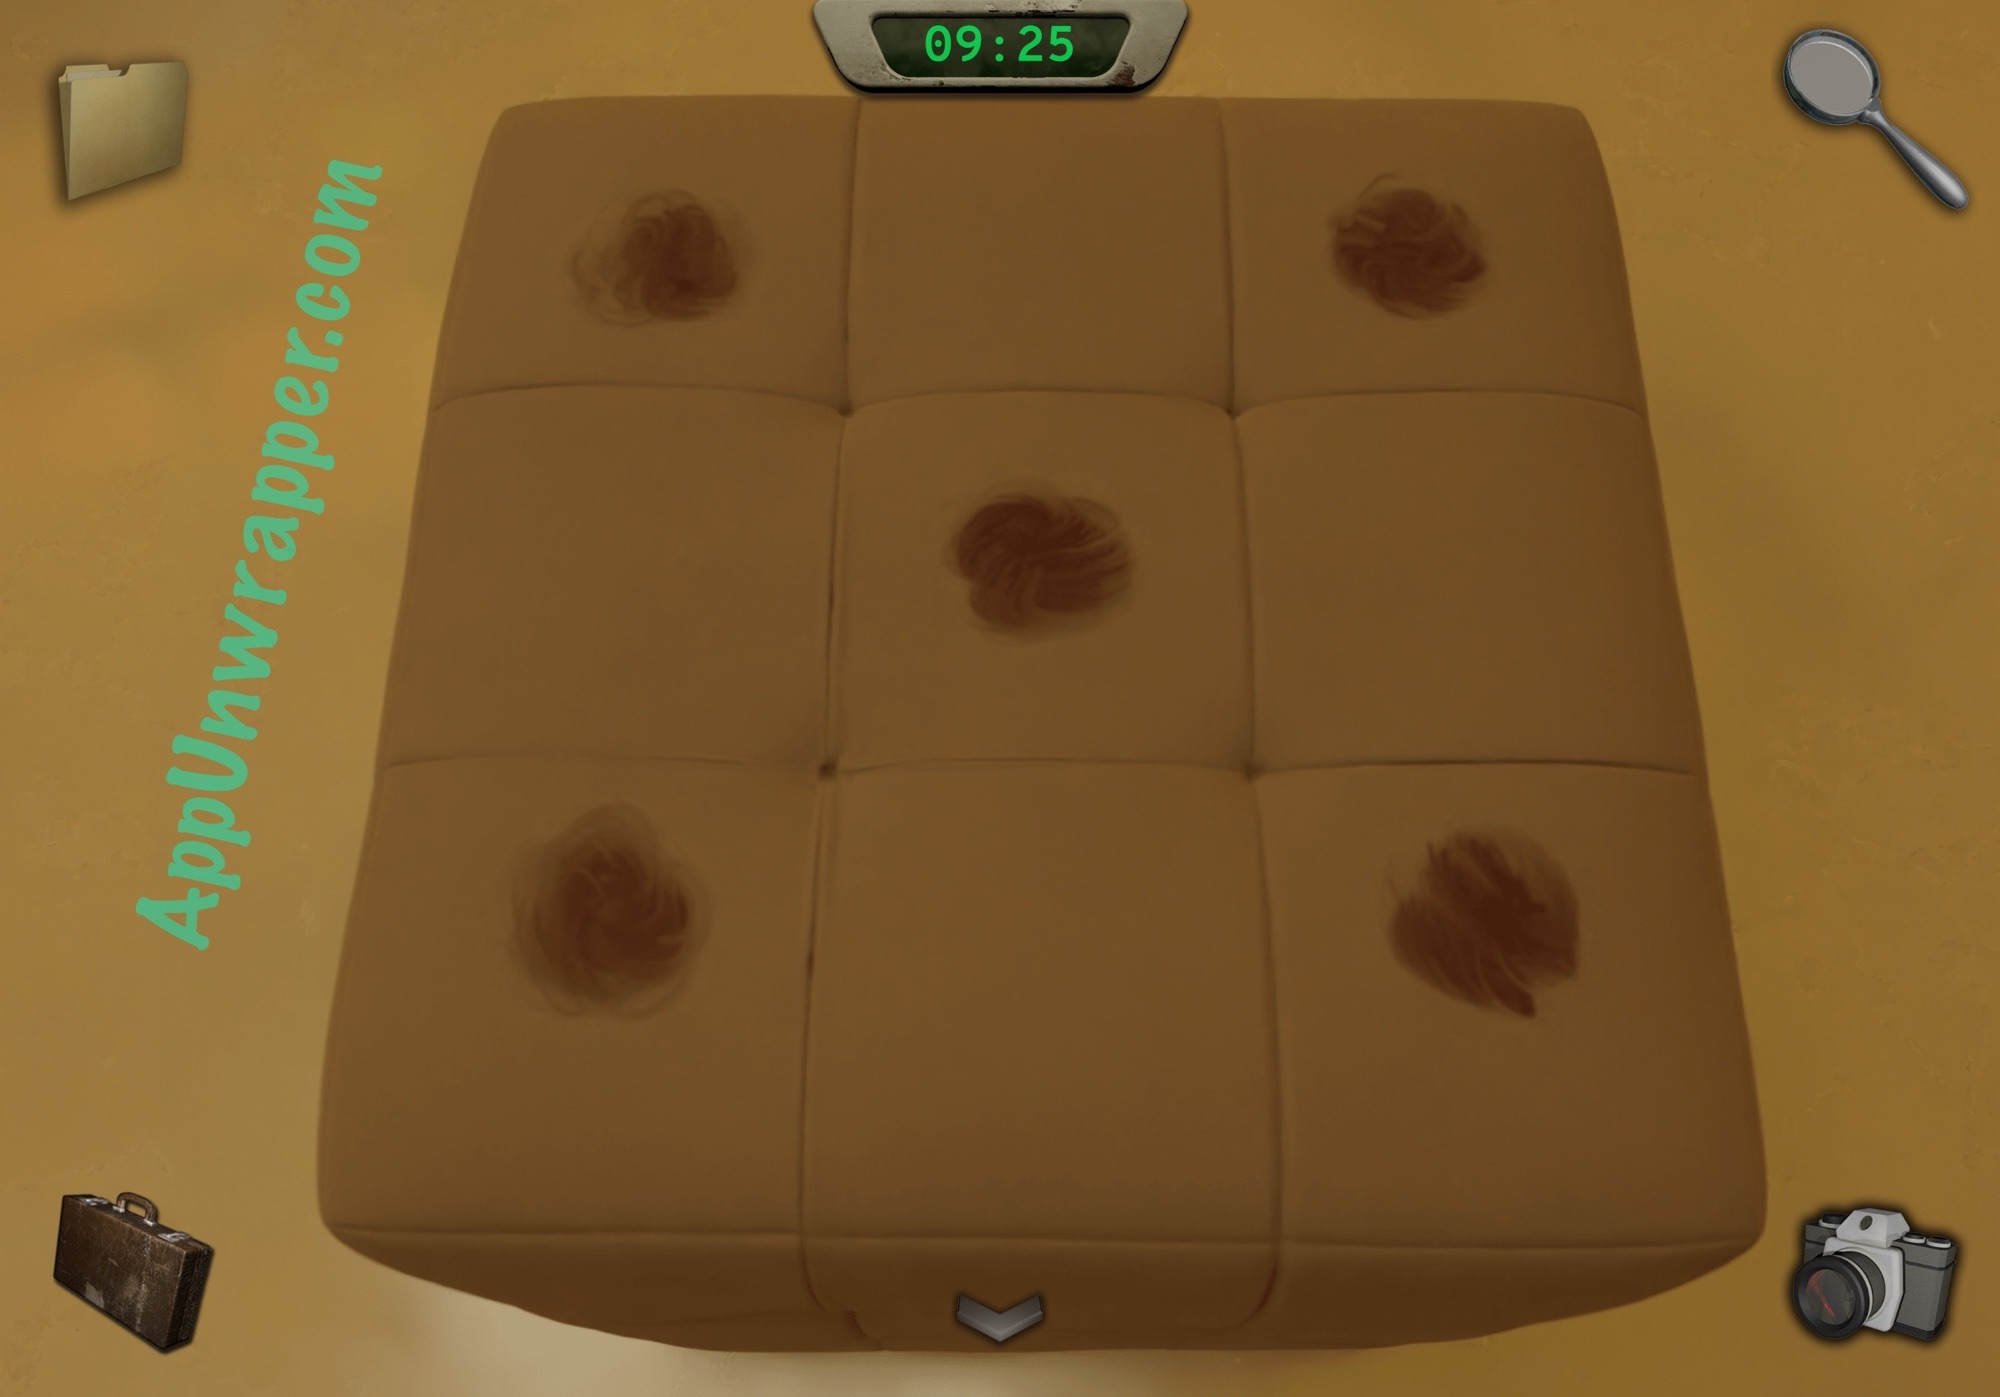
2. Take out the photos you took of the four objects. Remember, your hand has one triangle on it, so that’s the first shape. Then 2 is diamond, 3 is circle, 4 is hexagon, and 5 is square. Take a photo of the clue inside the box.
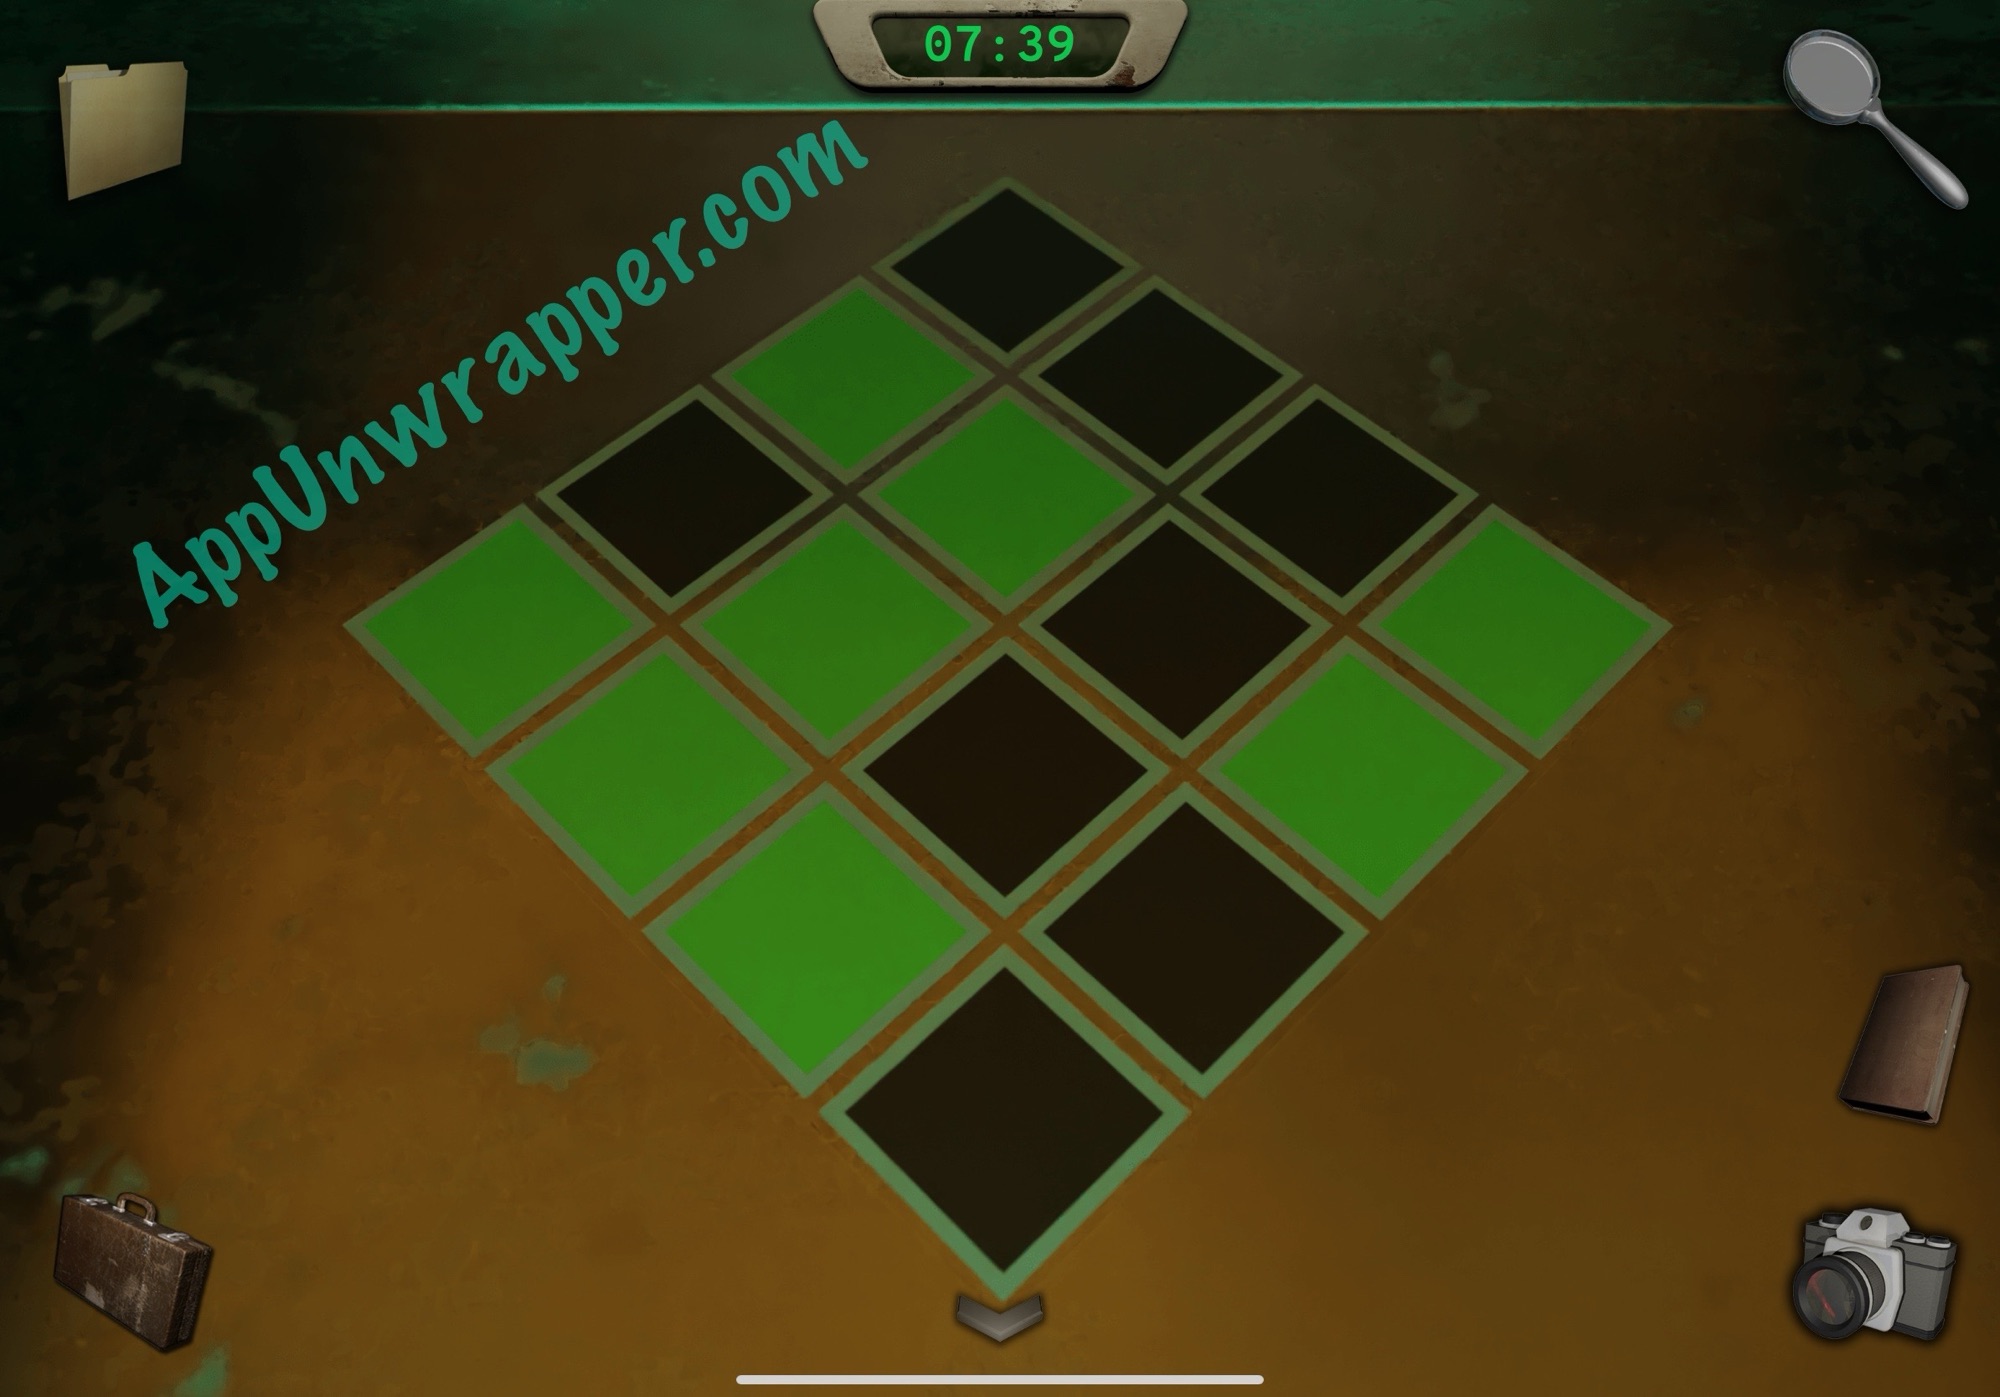
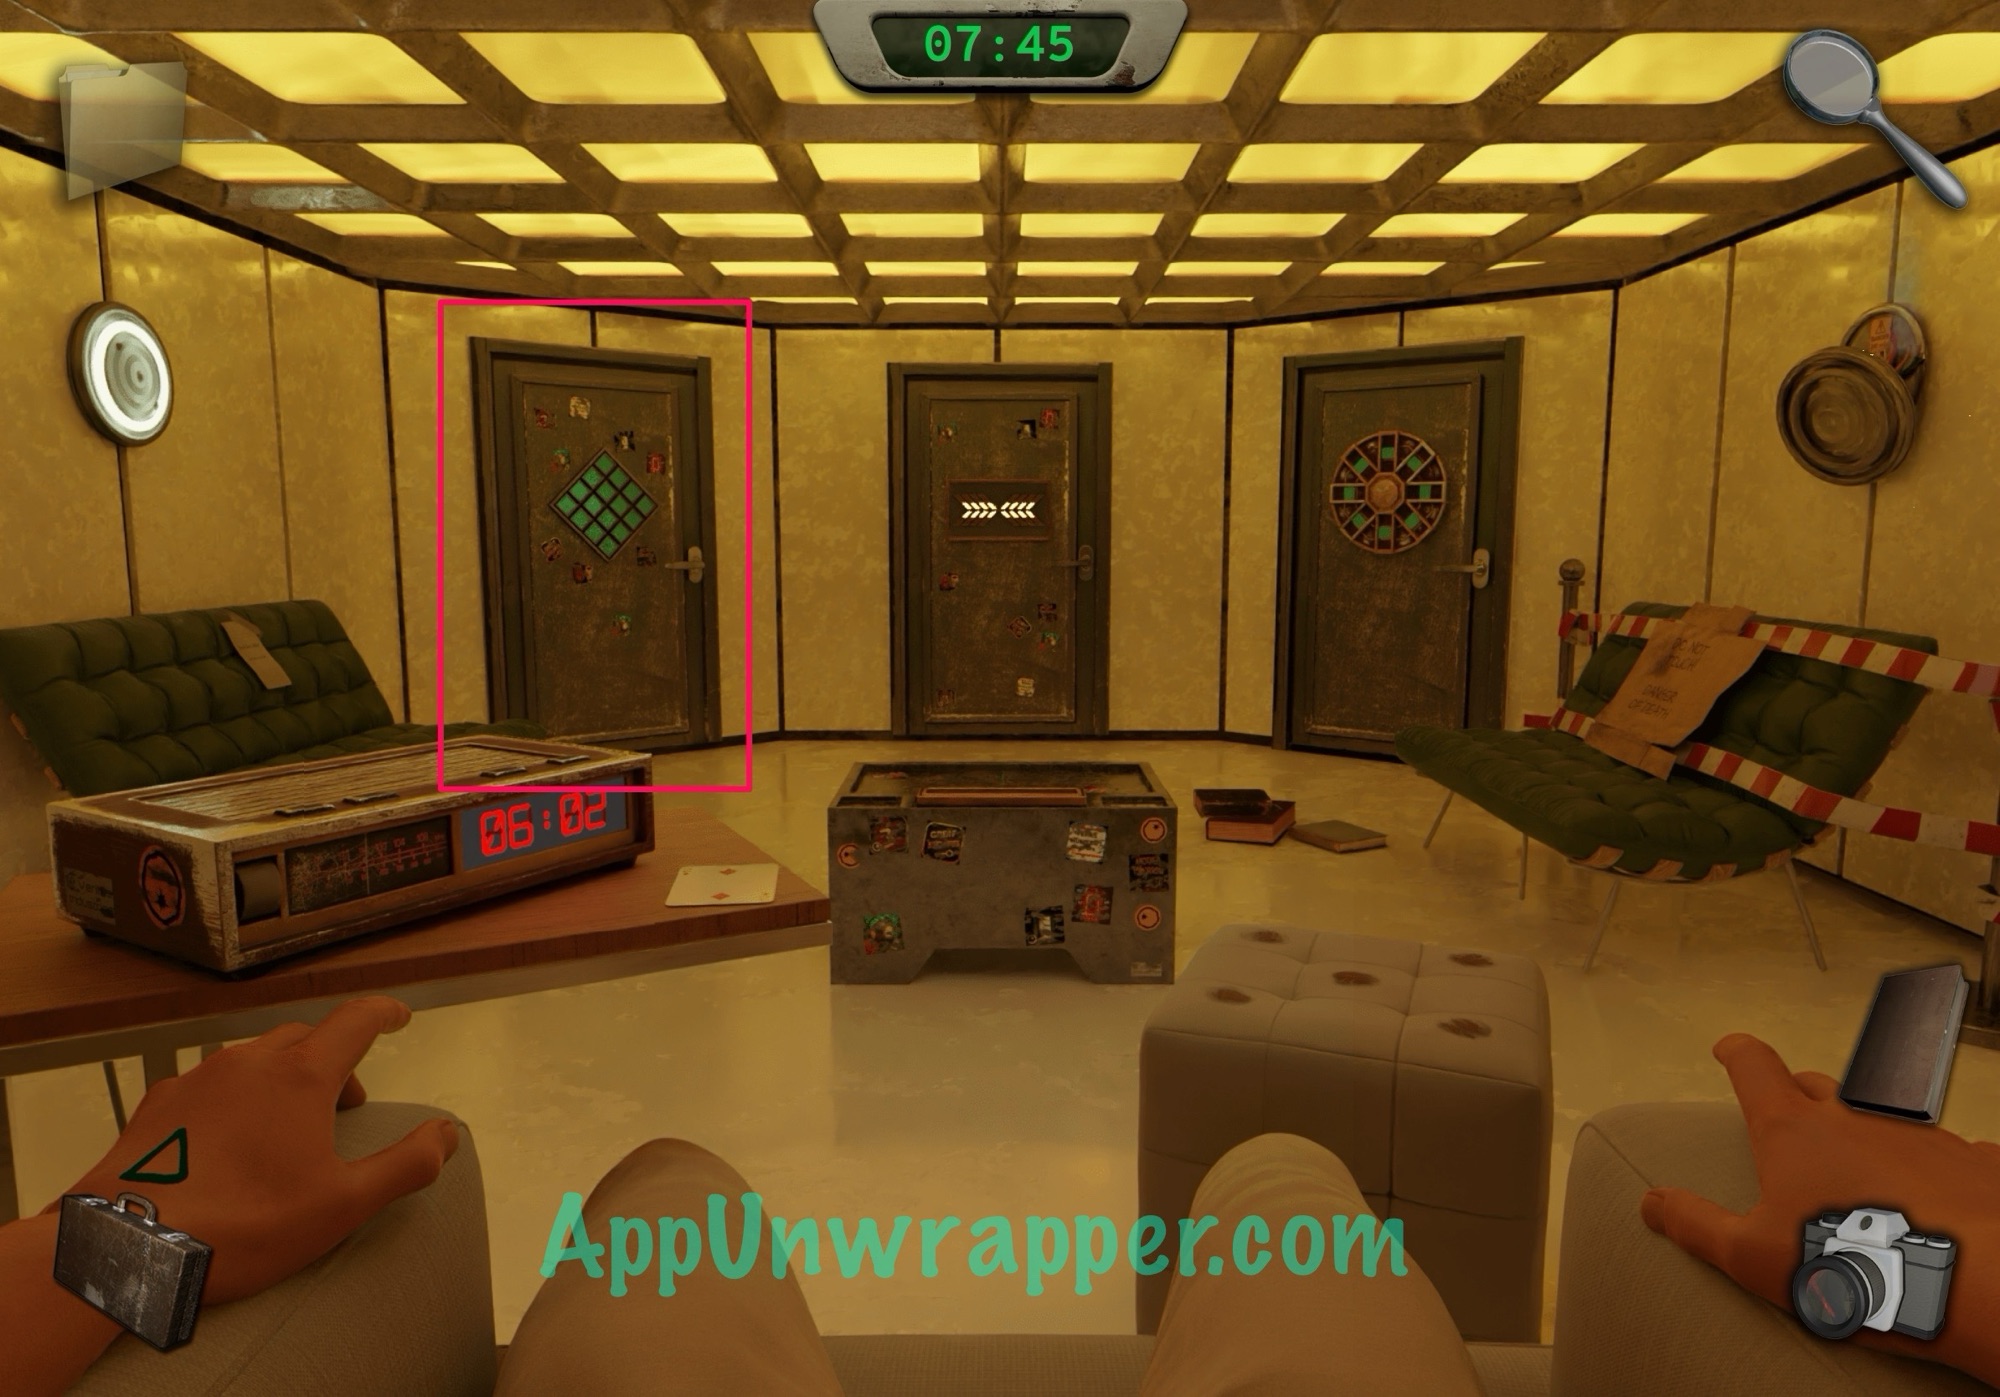
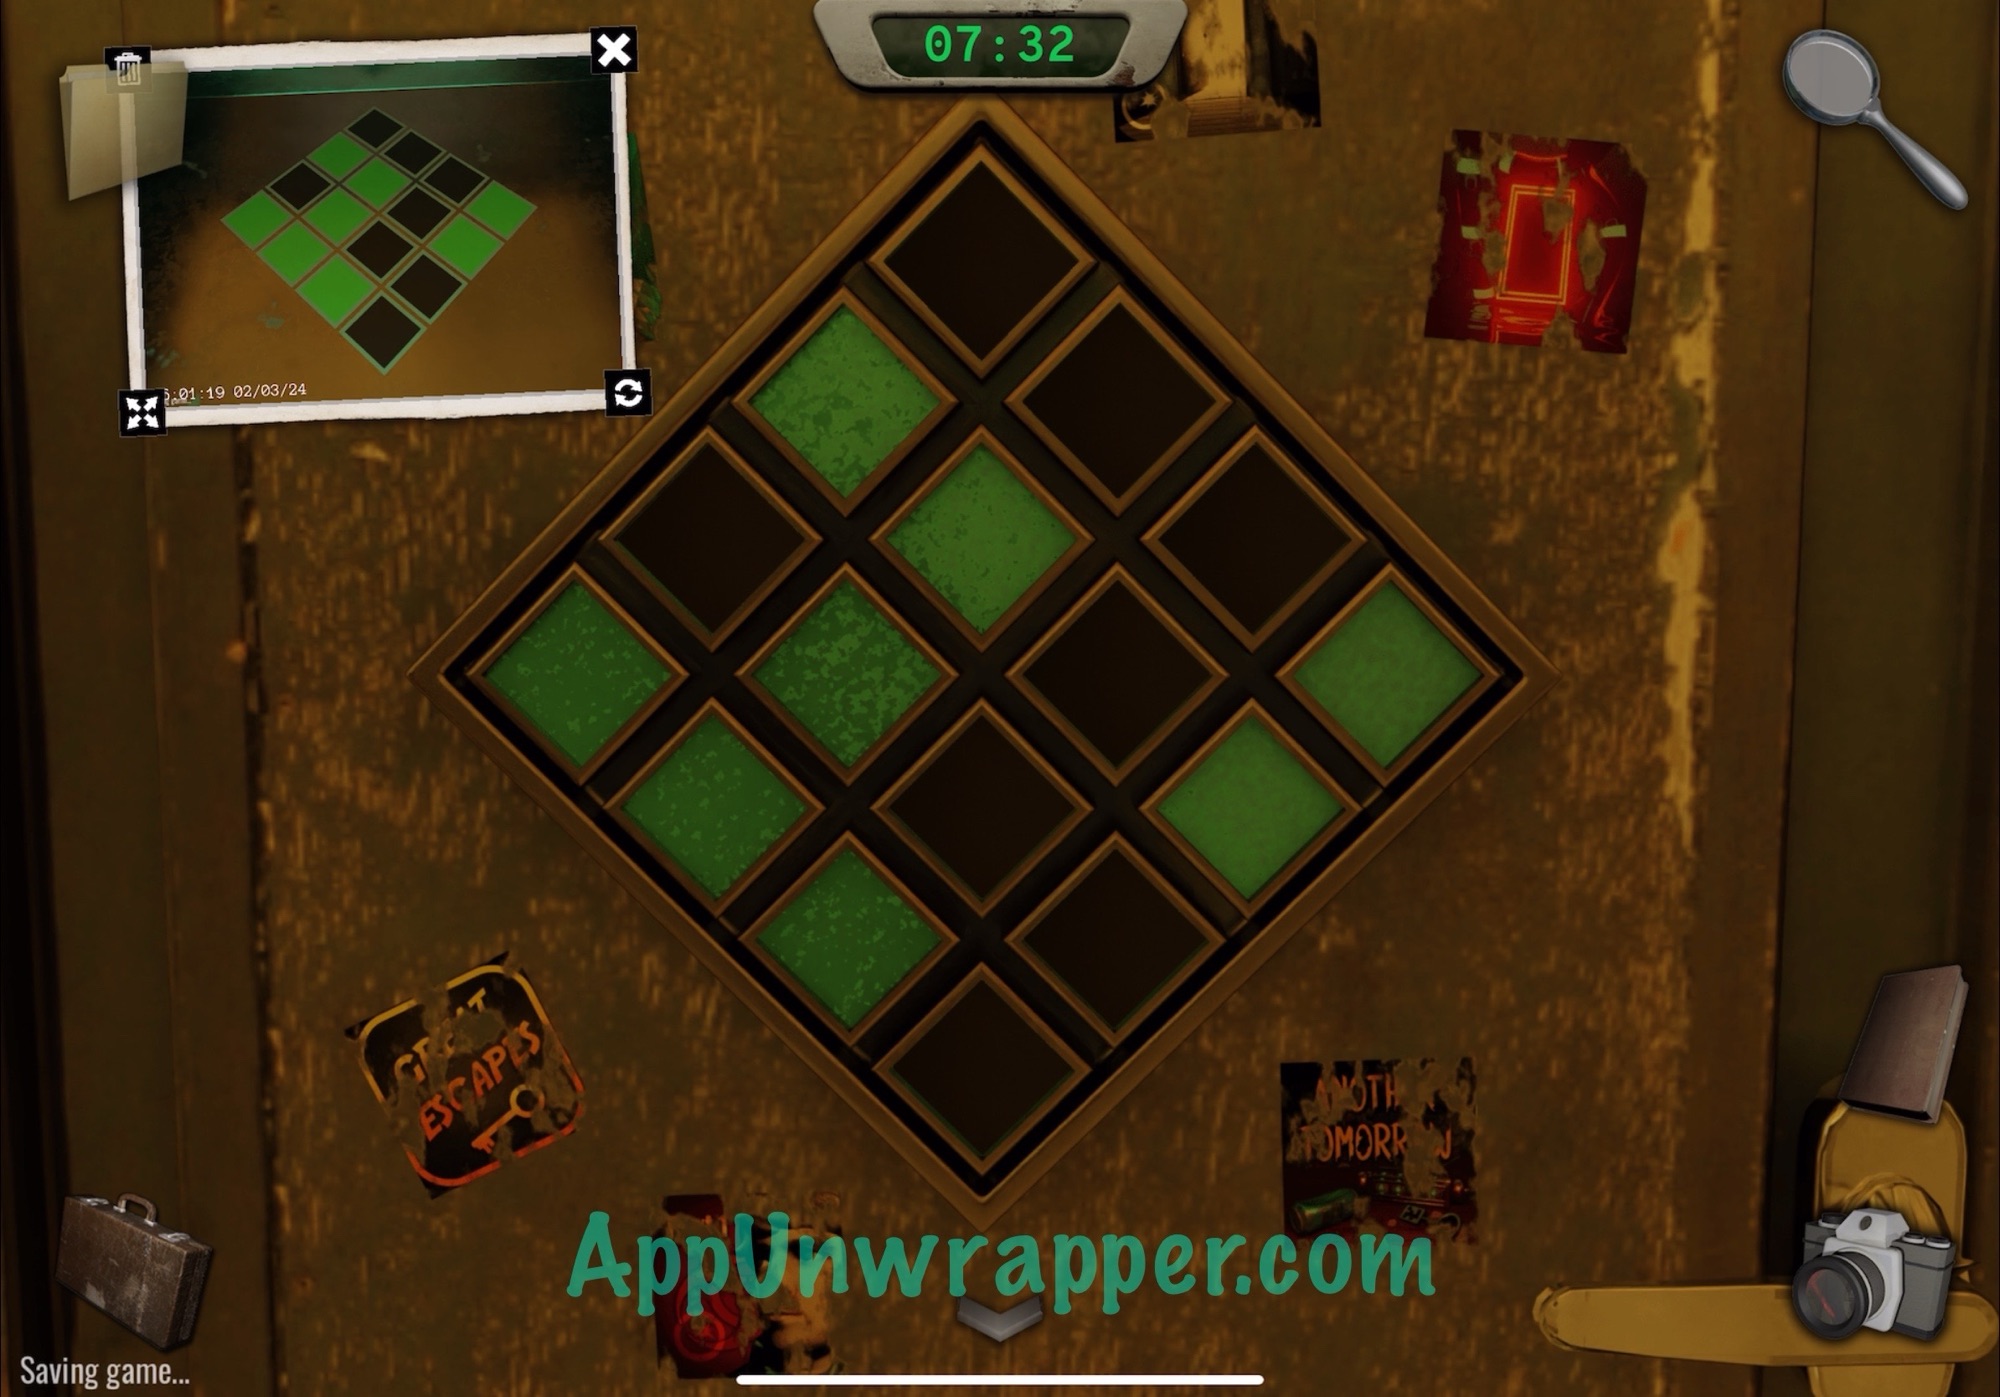
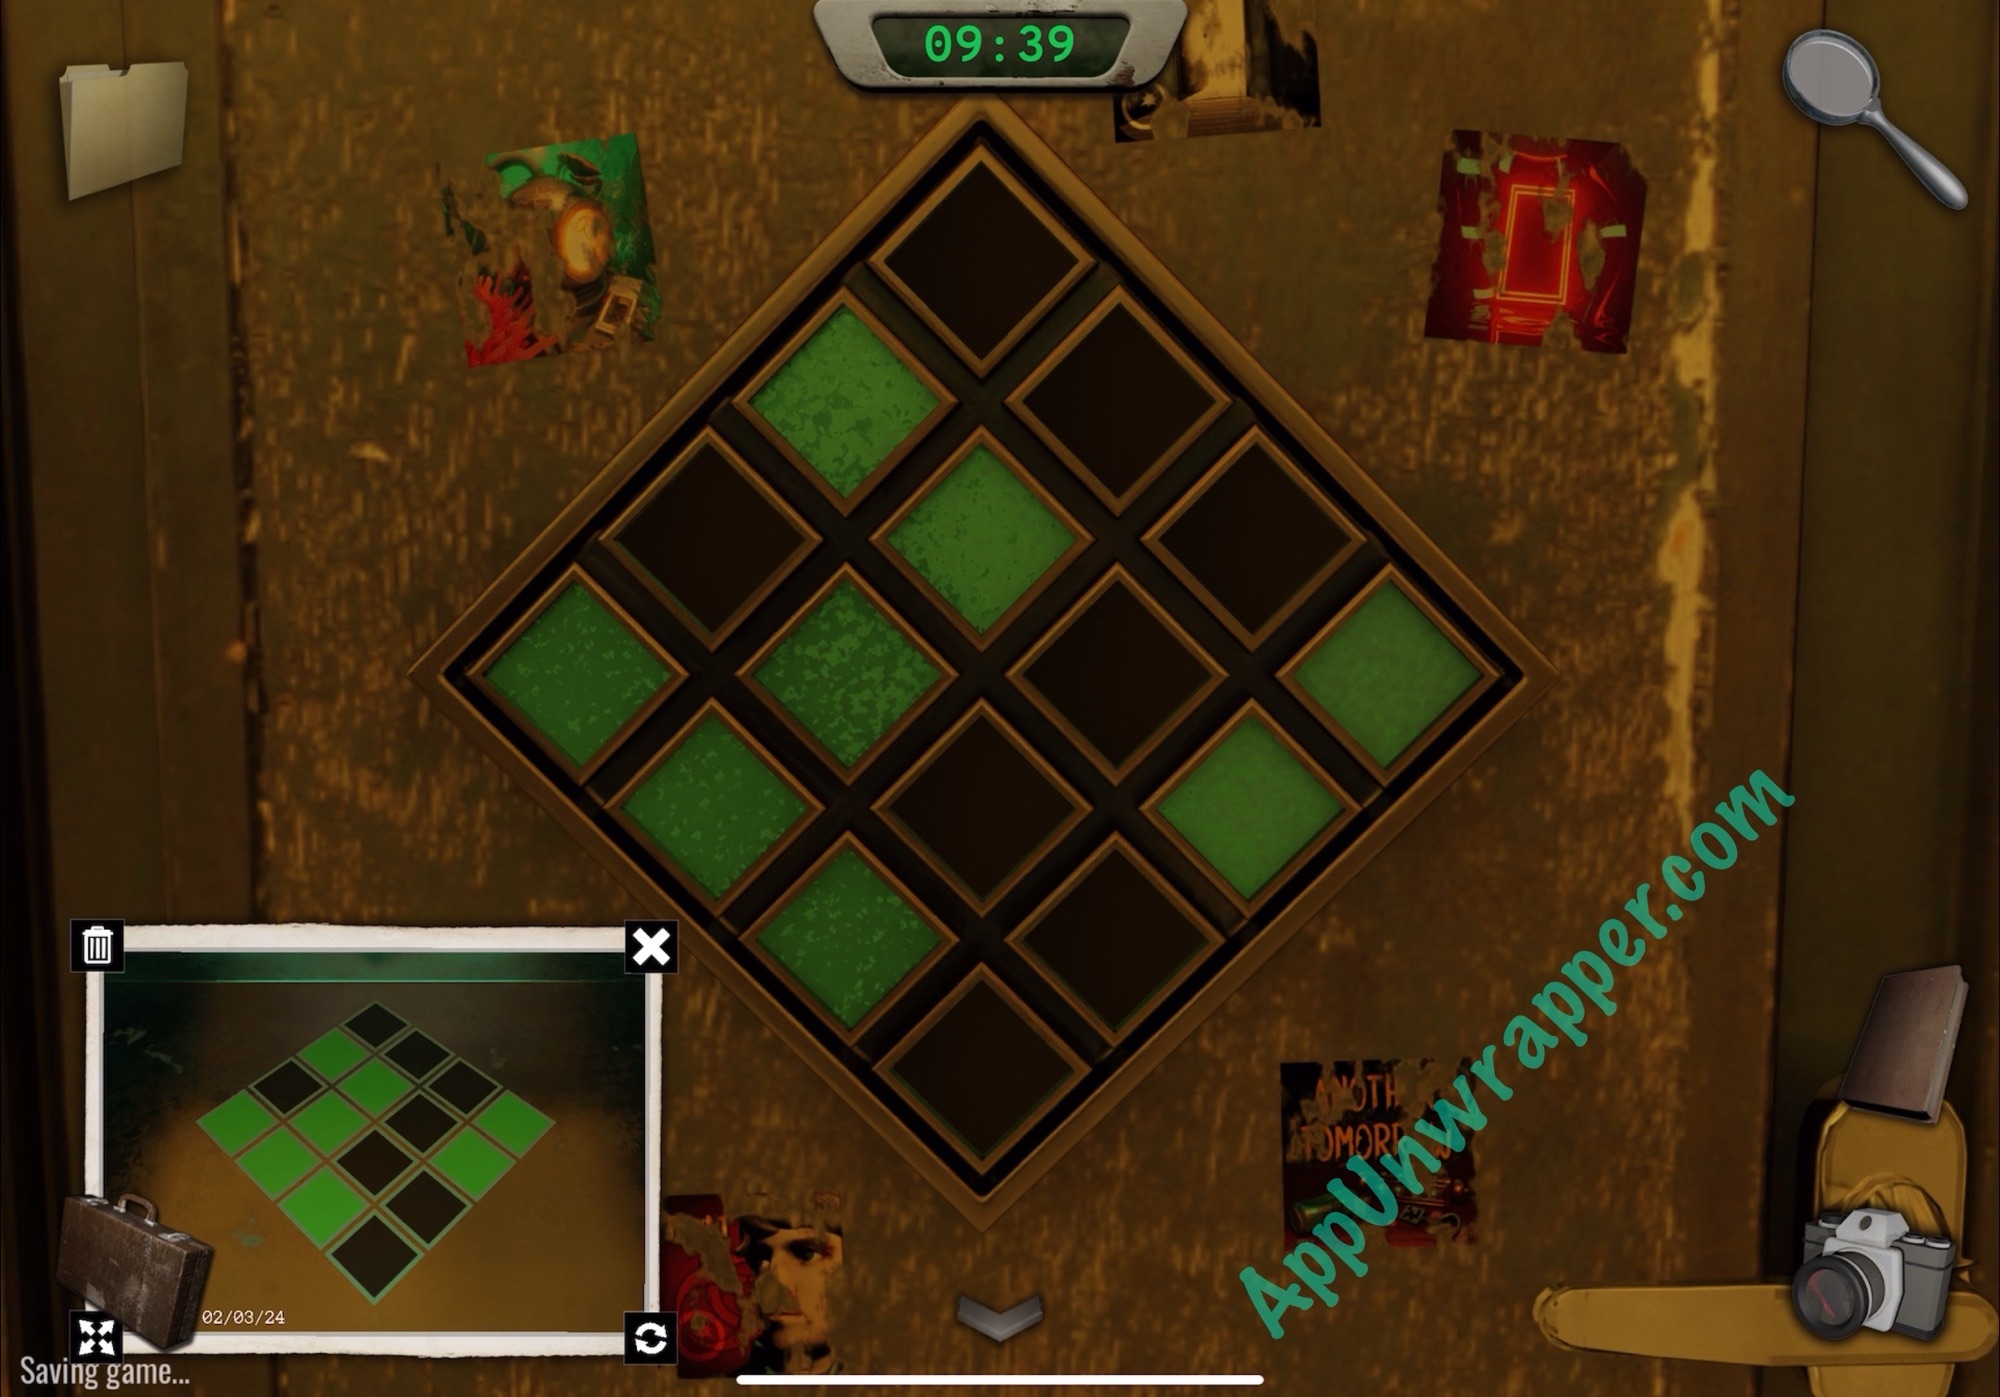
3. Now, go to the left door and take out the photo you just took of the green and black squares. Copy the pattern onto the door to open it. (If you die past this point, you can skip everything before this step and just use the clue to open the door.) Continue on down the hall to complete the prologue.
Chapter 1:
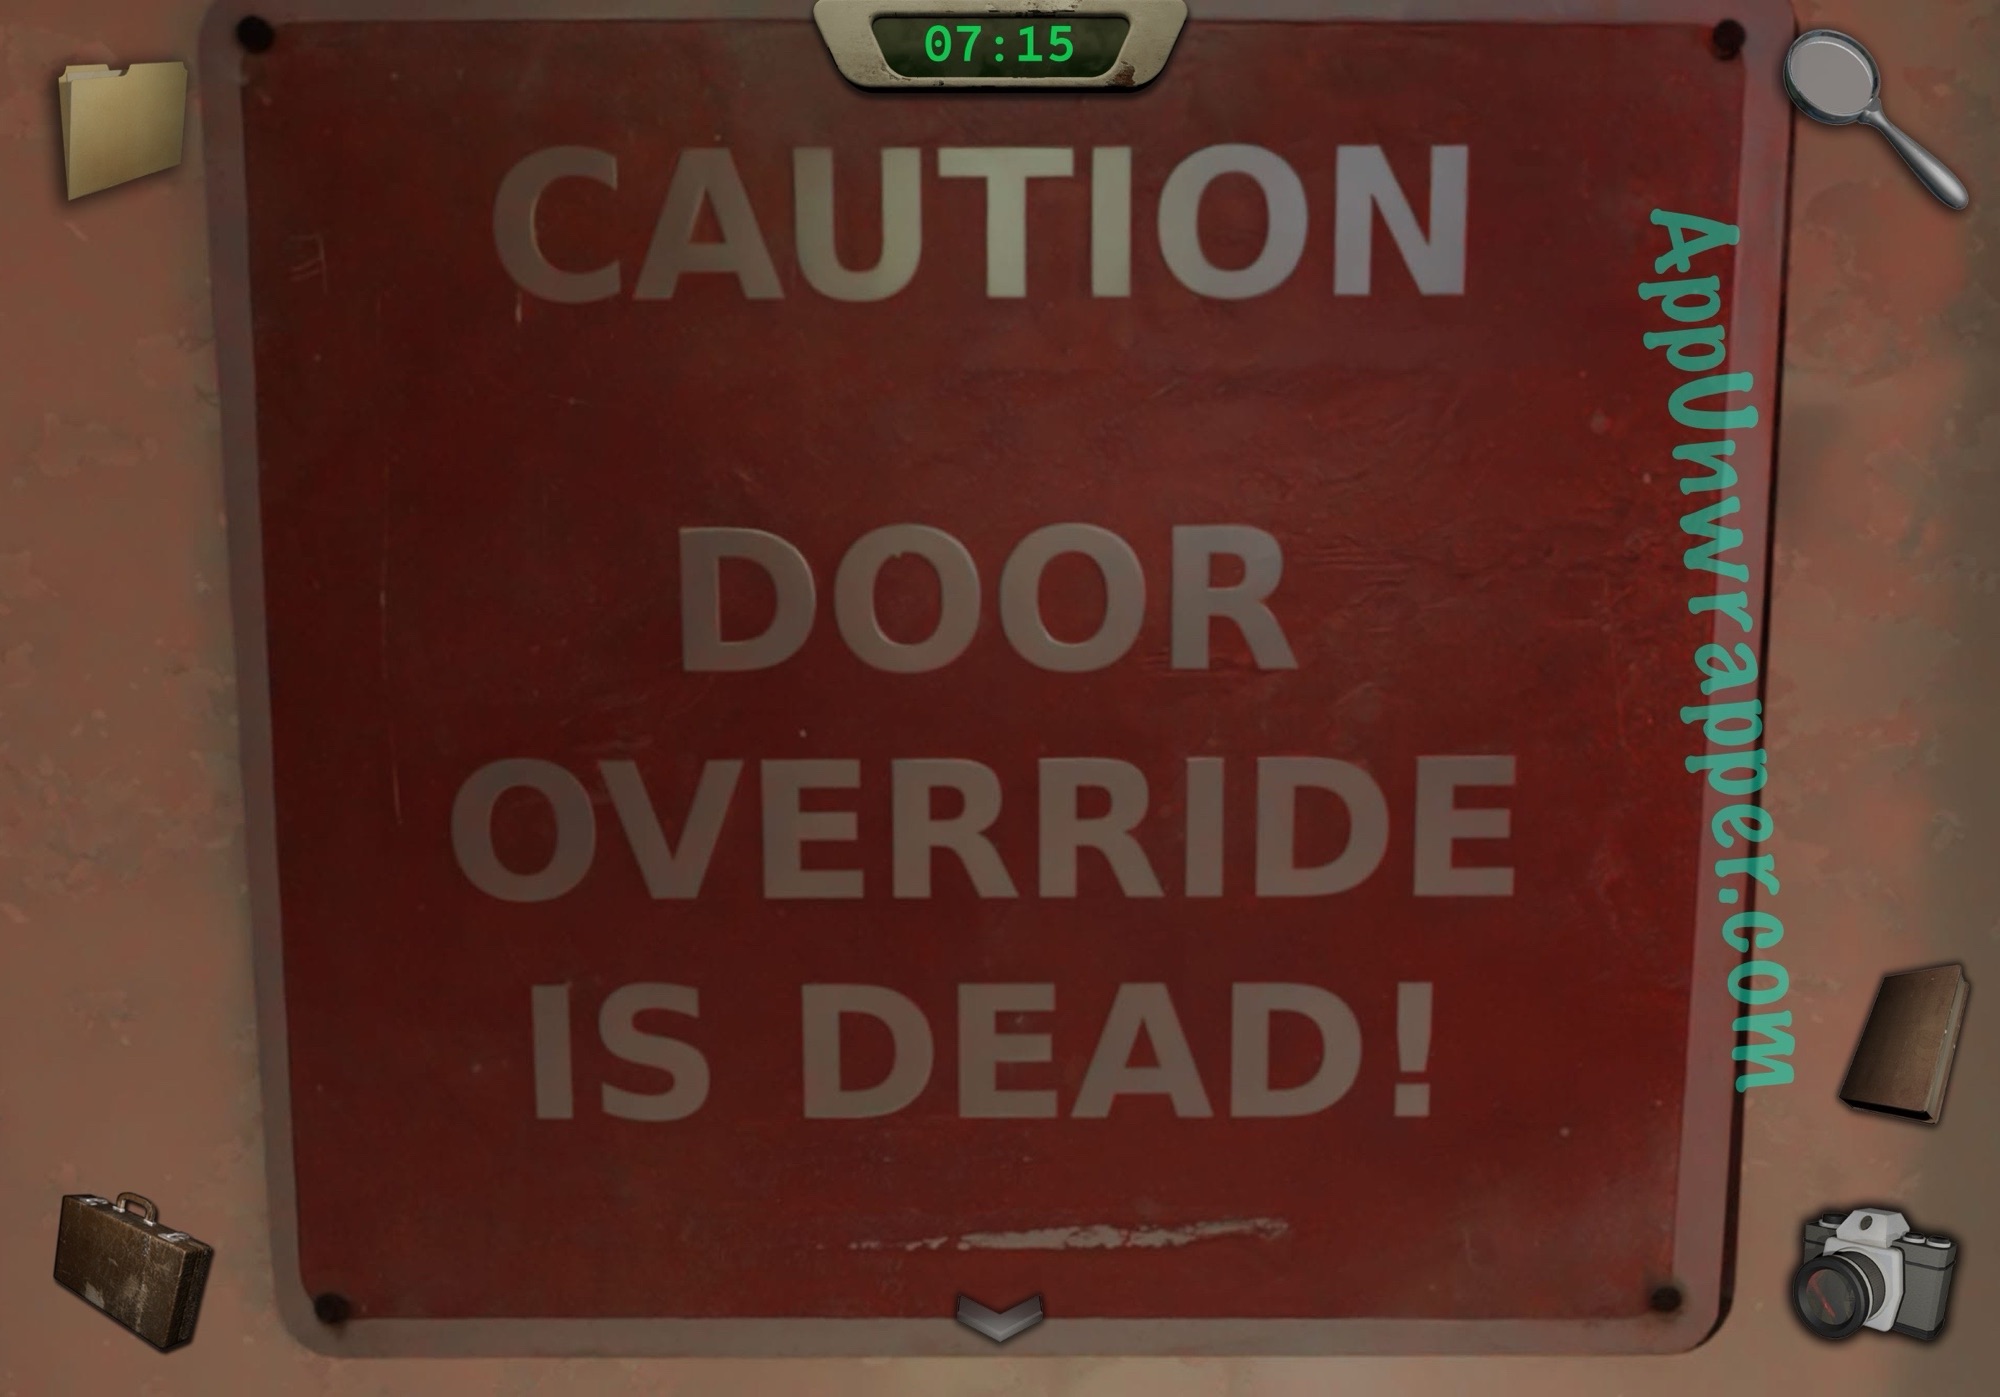
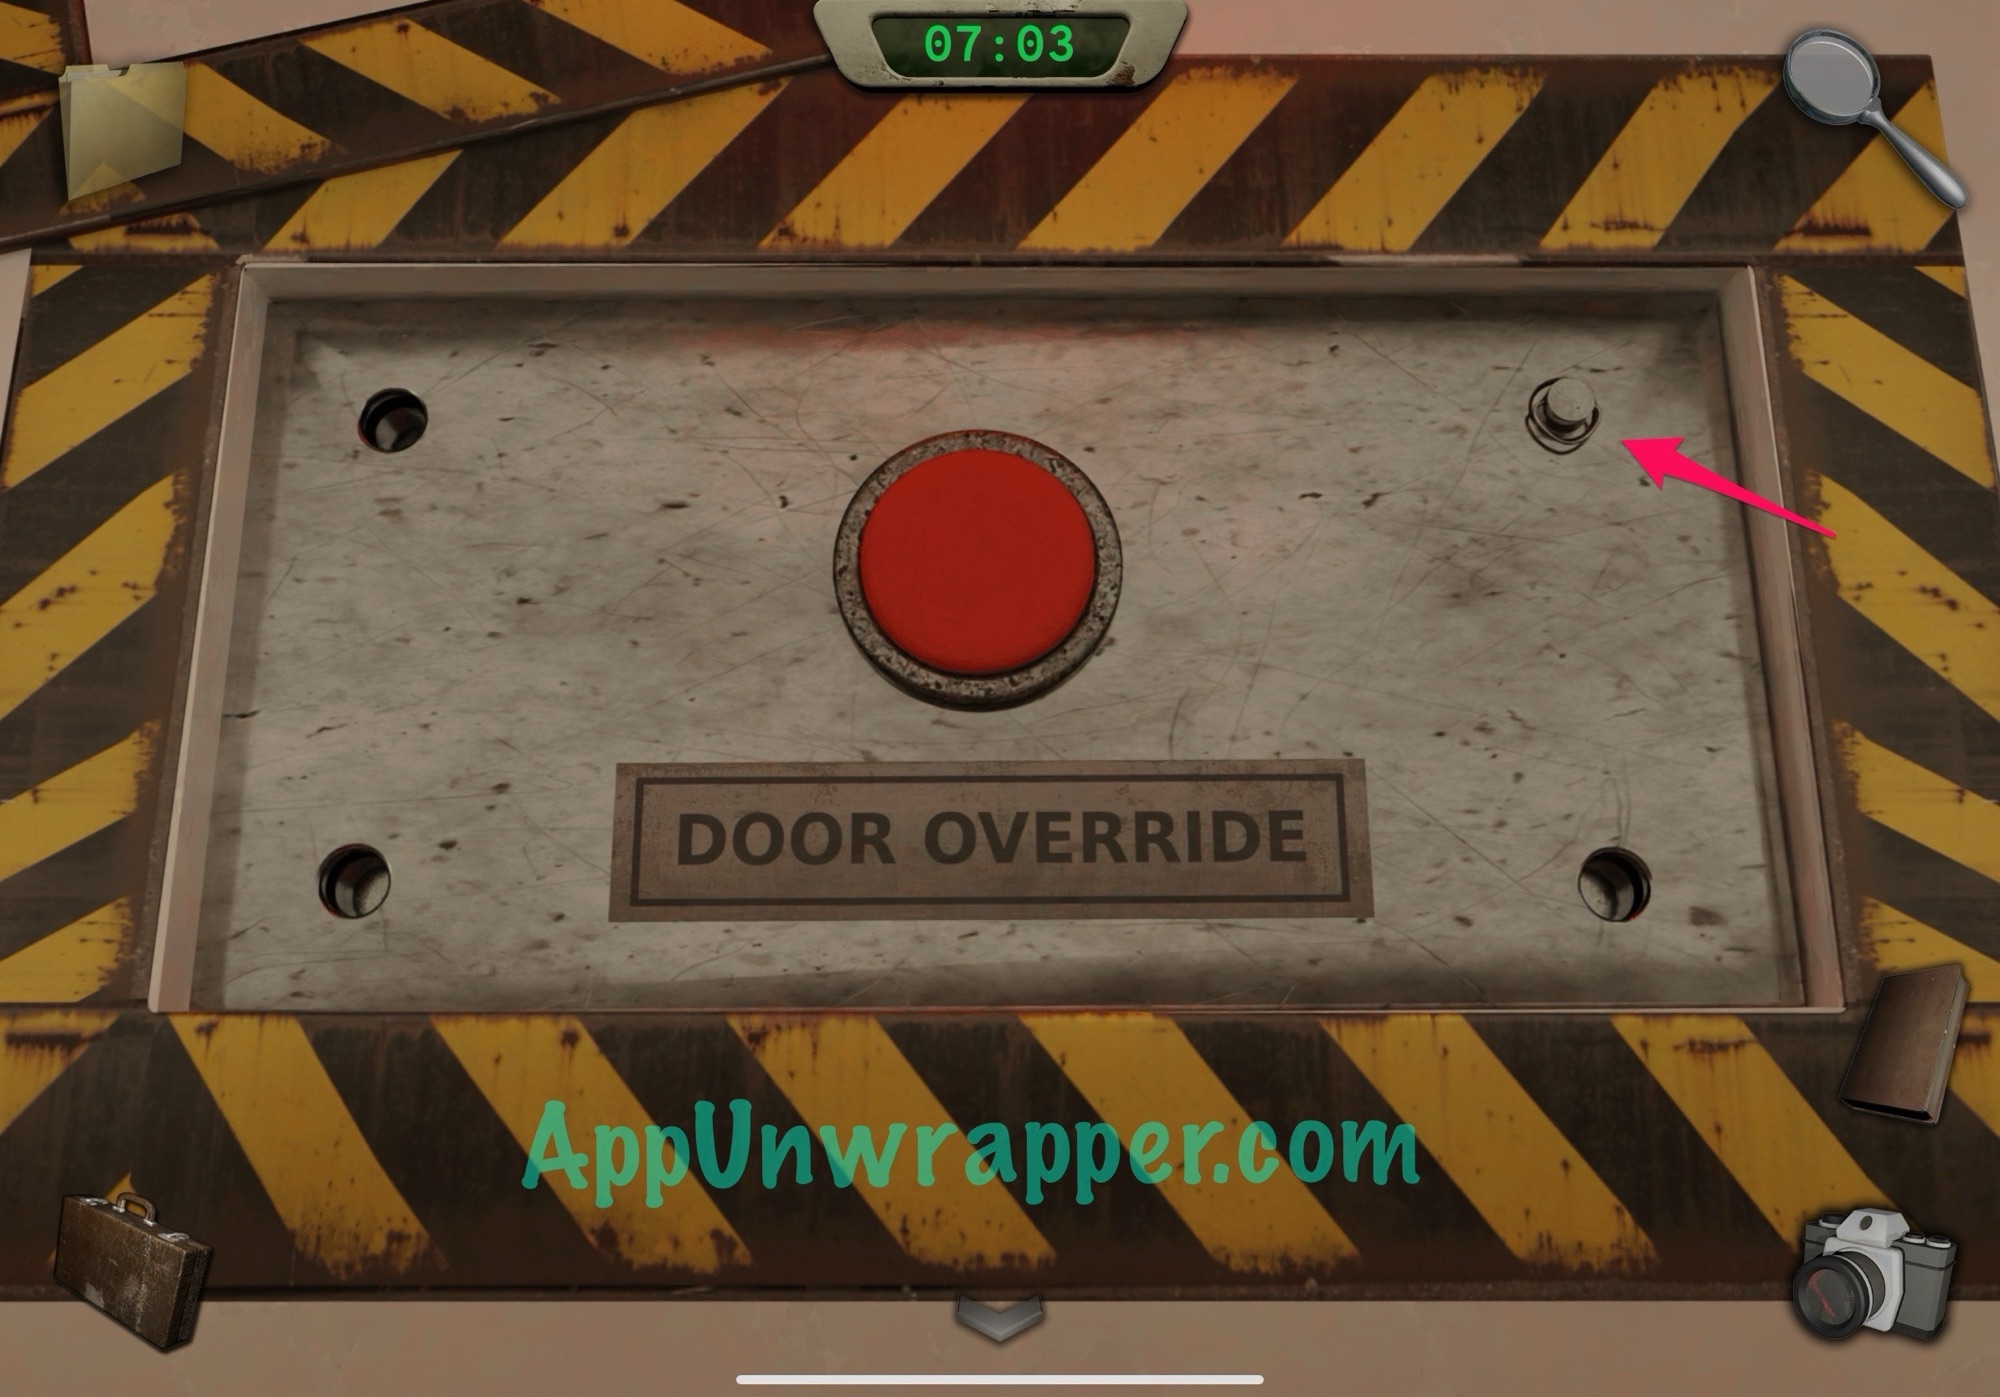
1. There’s a lot to do in this next area, but let’s start with shutting off the lasers. (Note that touching the lasers will kill you and restart the loop.) Notice the sign that says CAUTION: DOOR OVERRIDE IS DEAD! Take a photo of it if you’d like. Then look at the big red button on the floor. It says DOOR OVERRIDE on it and pressing the button does nothing. Tap each of the metal things in the corners and then open the panel. Set the code to DEAD to turn off the lasers.
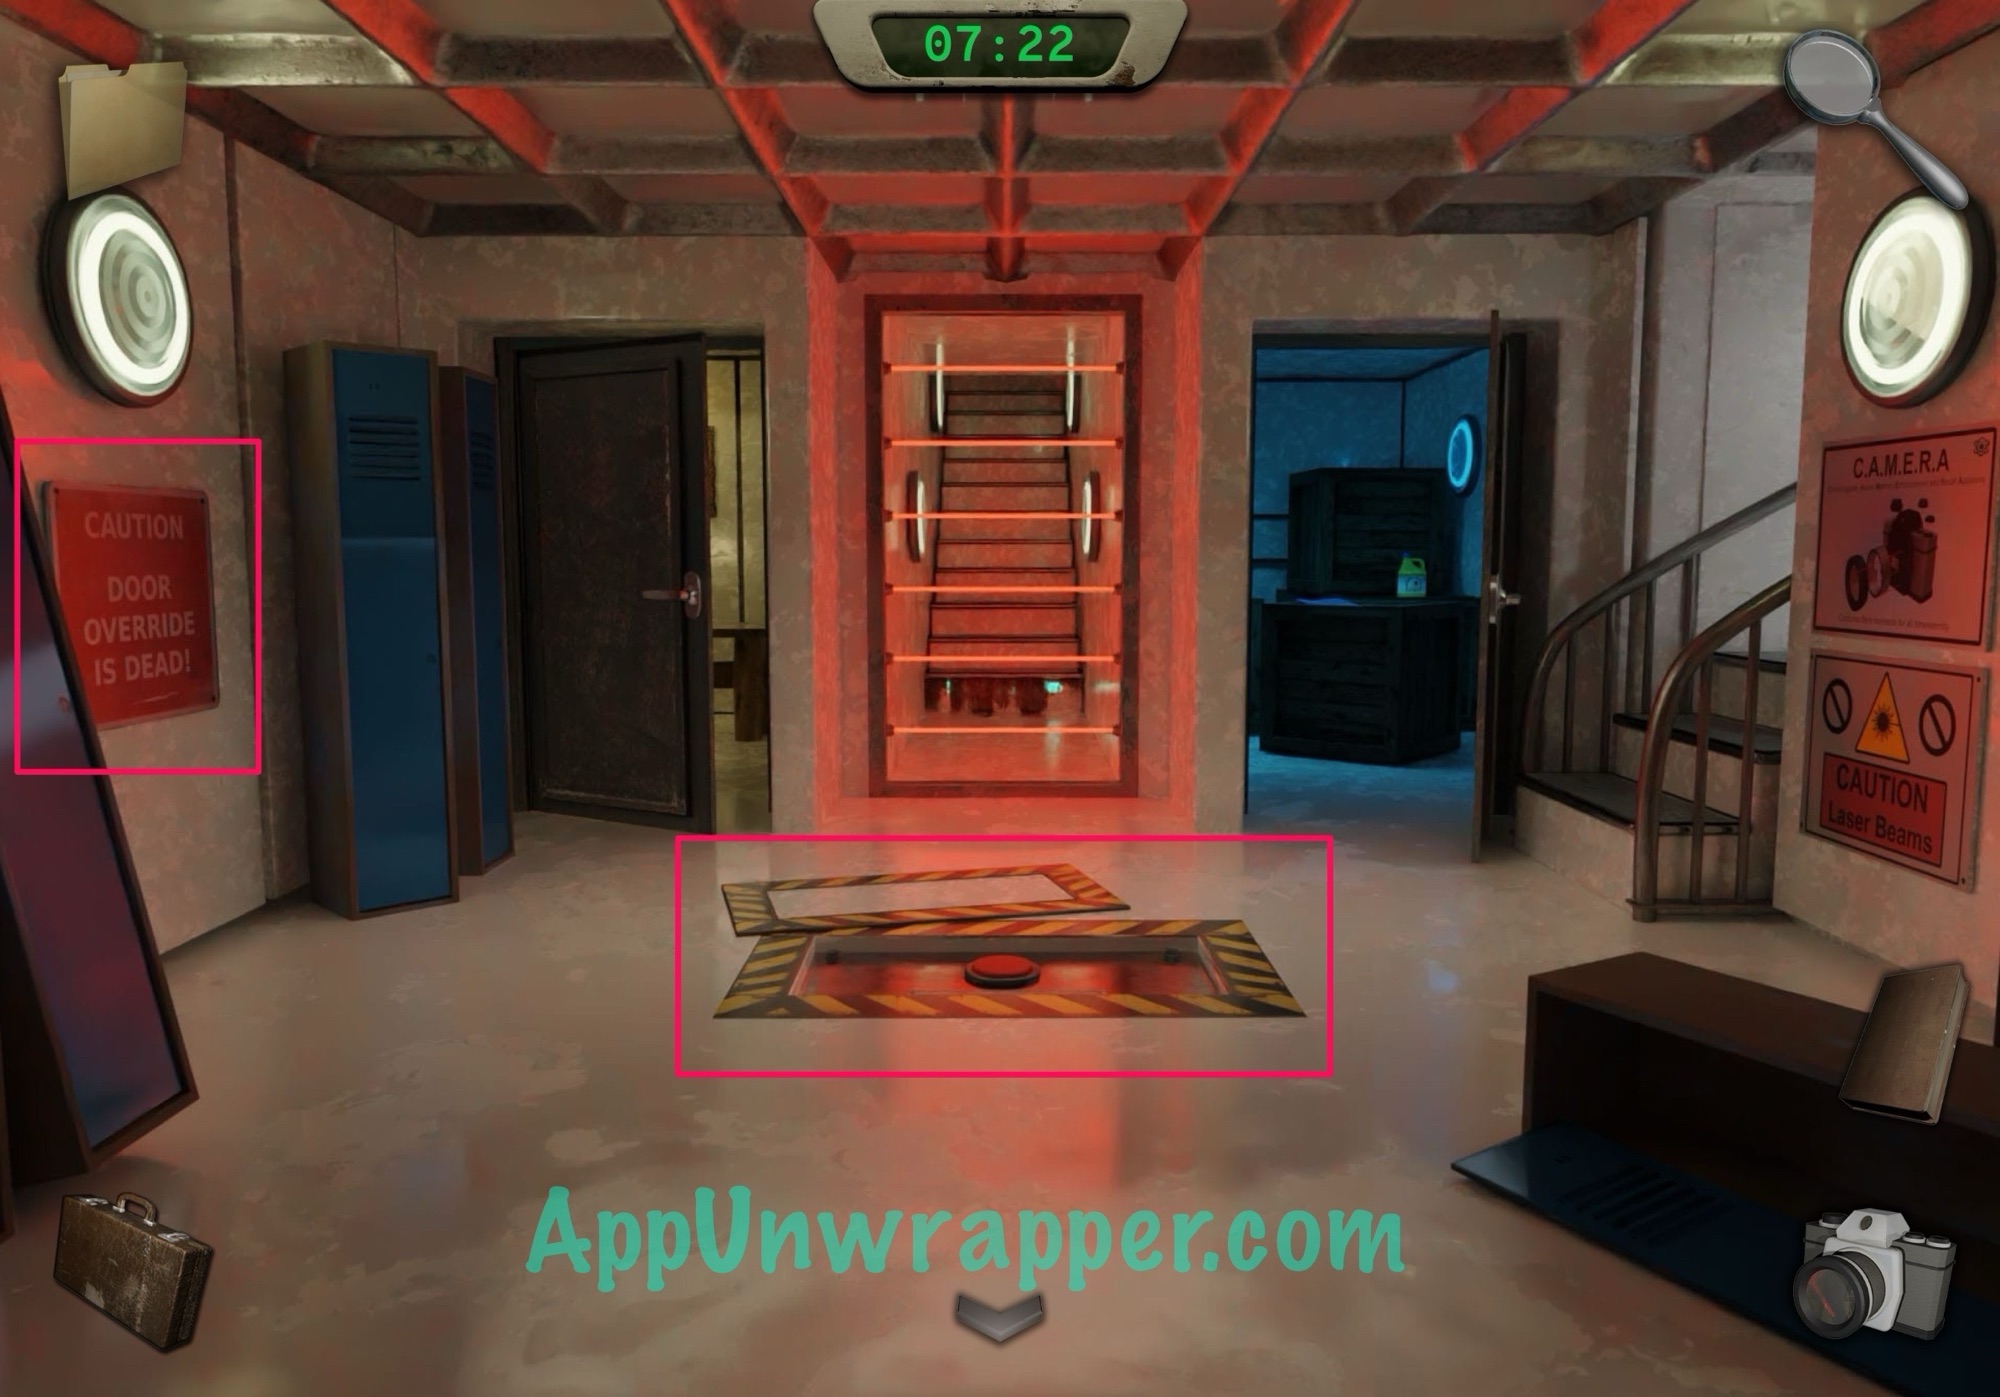
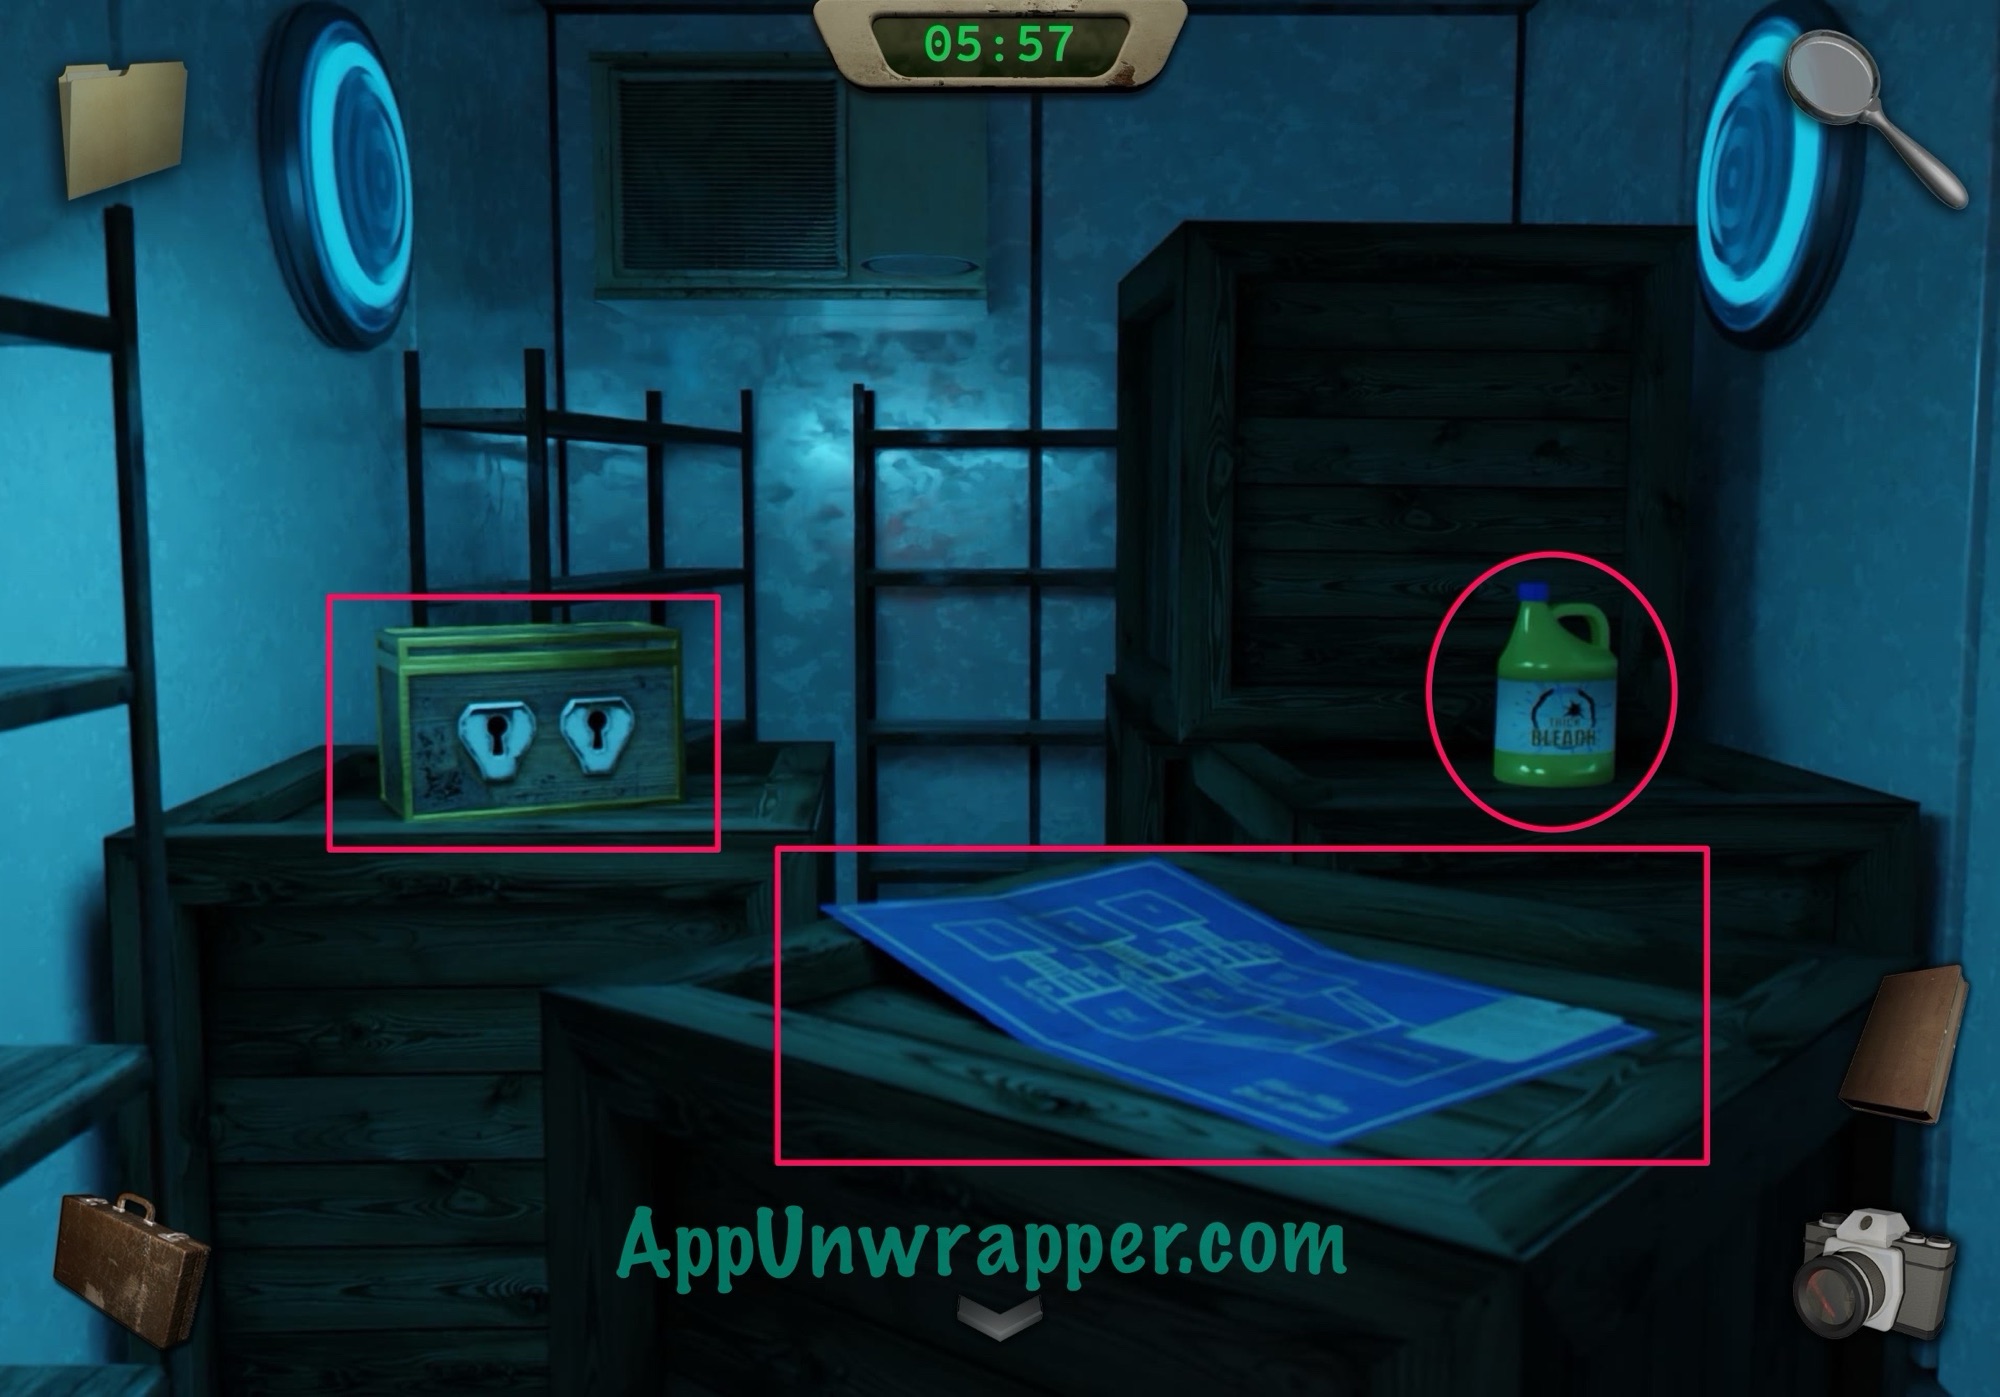
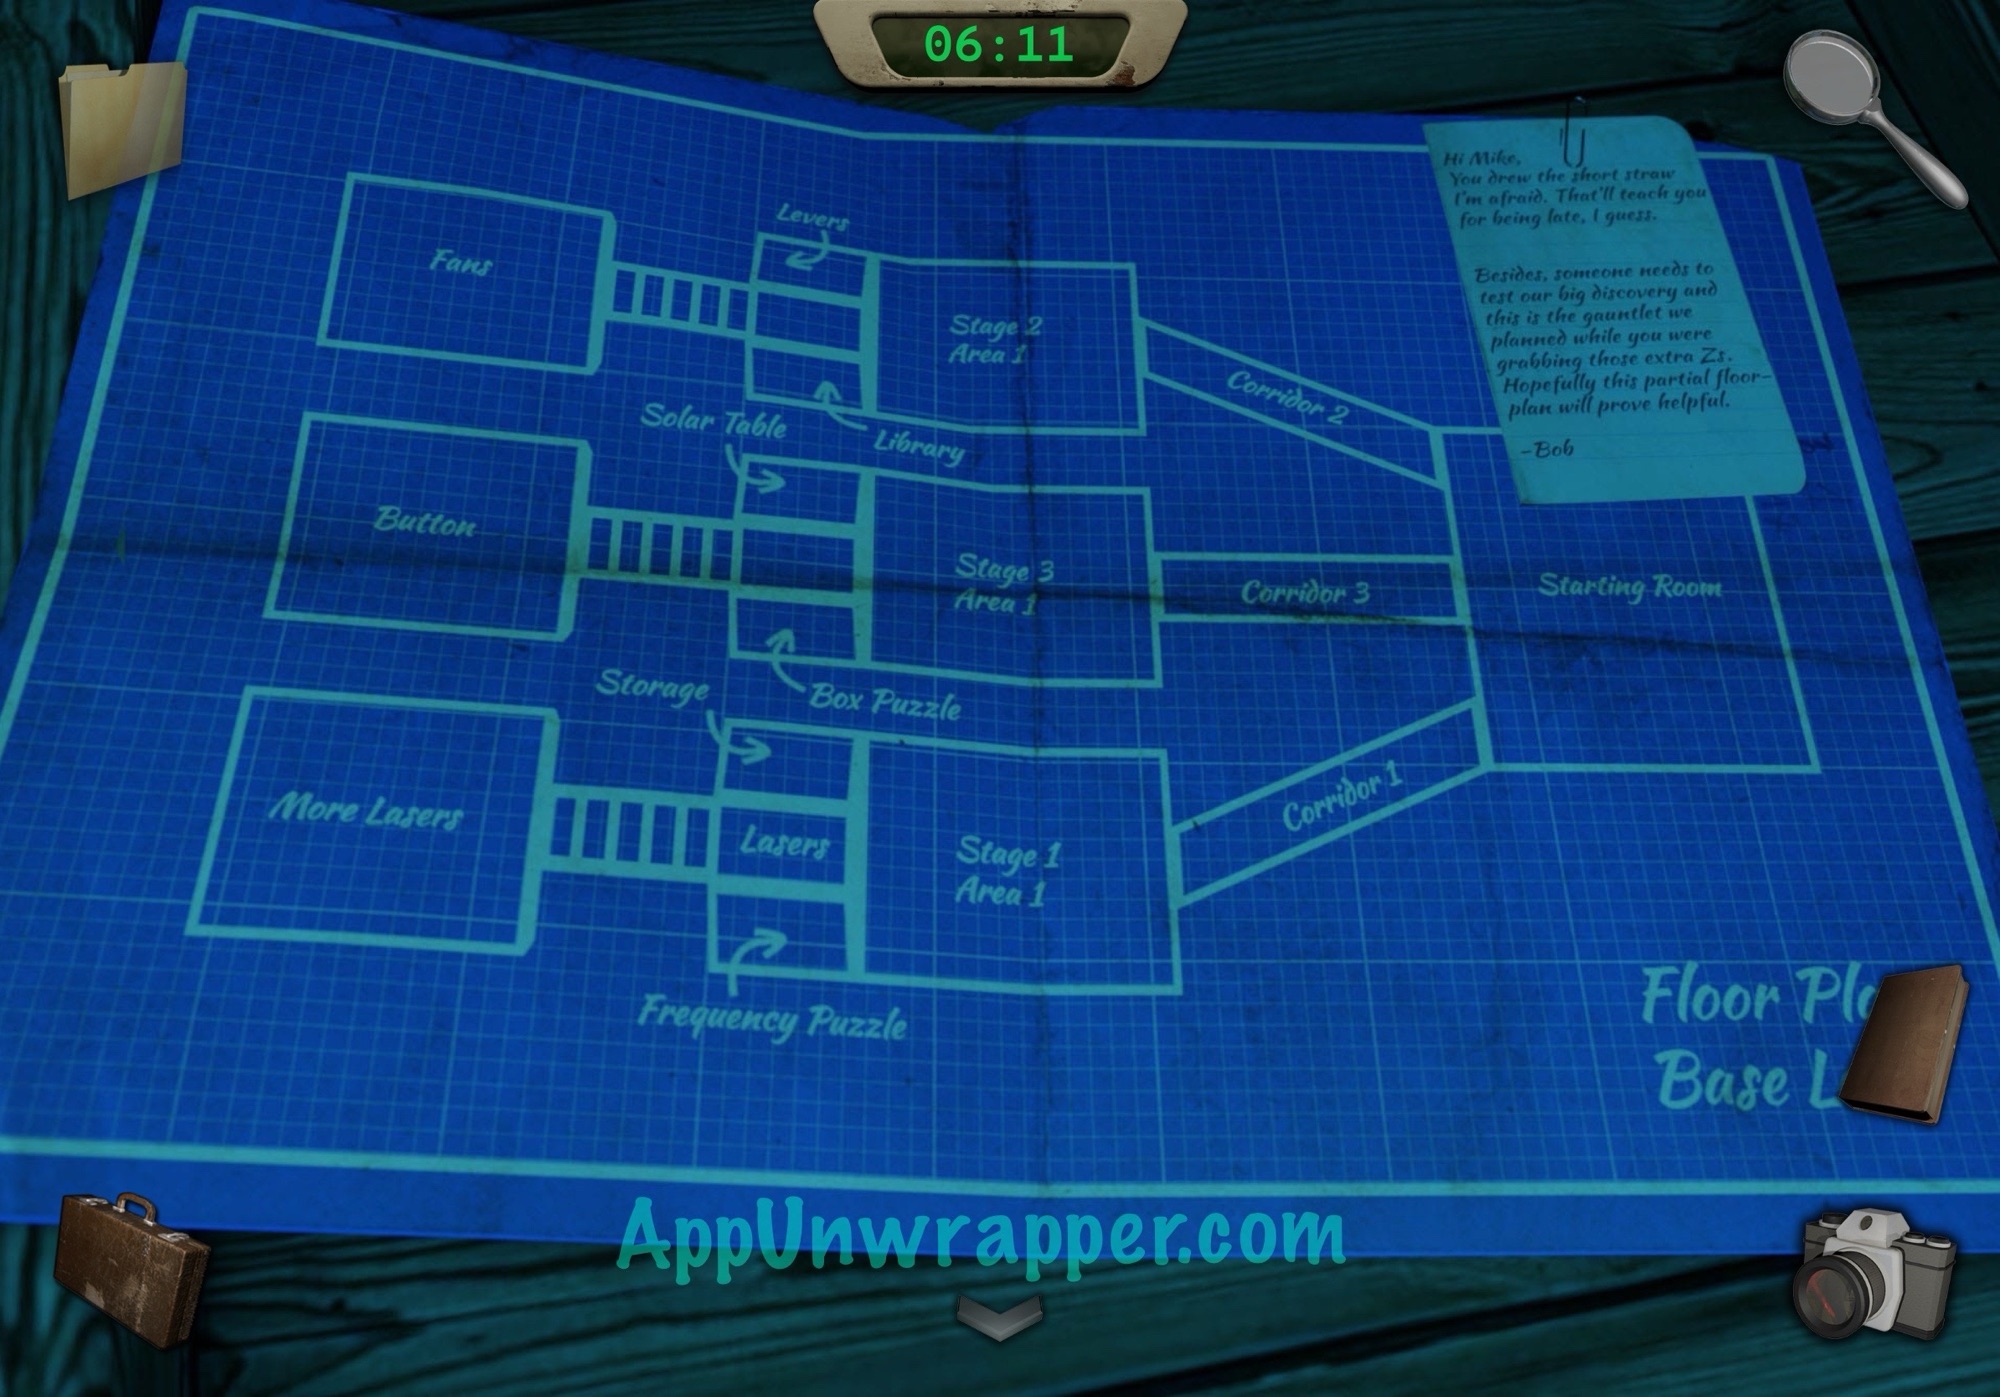
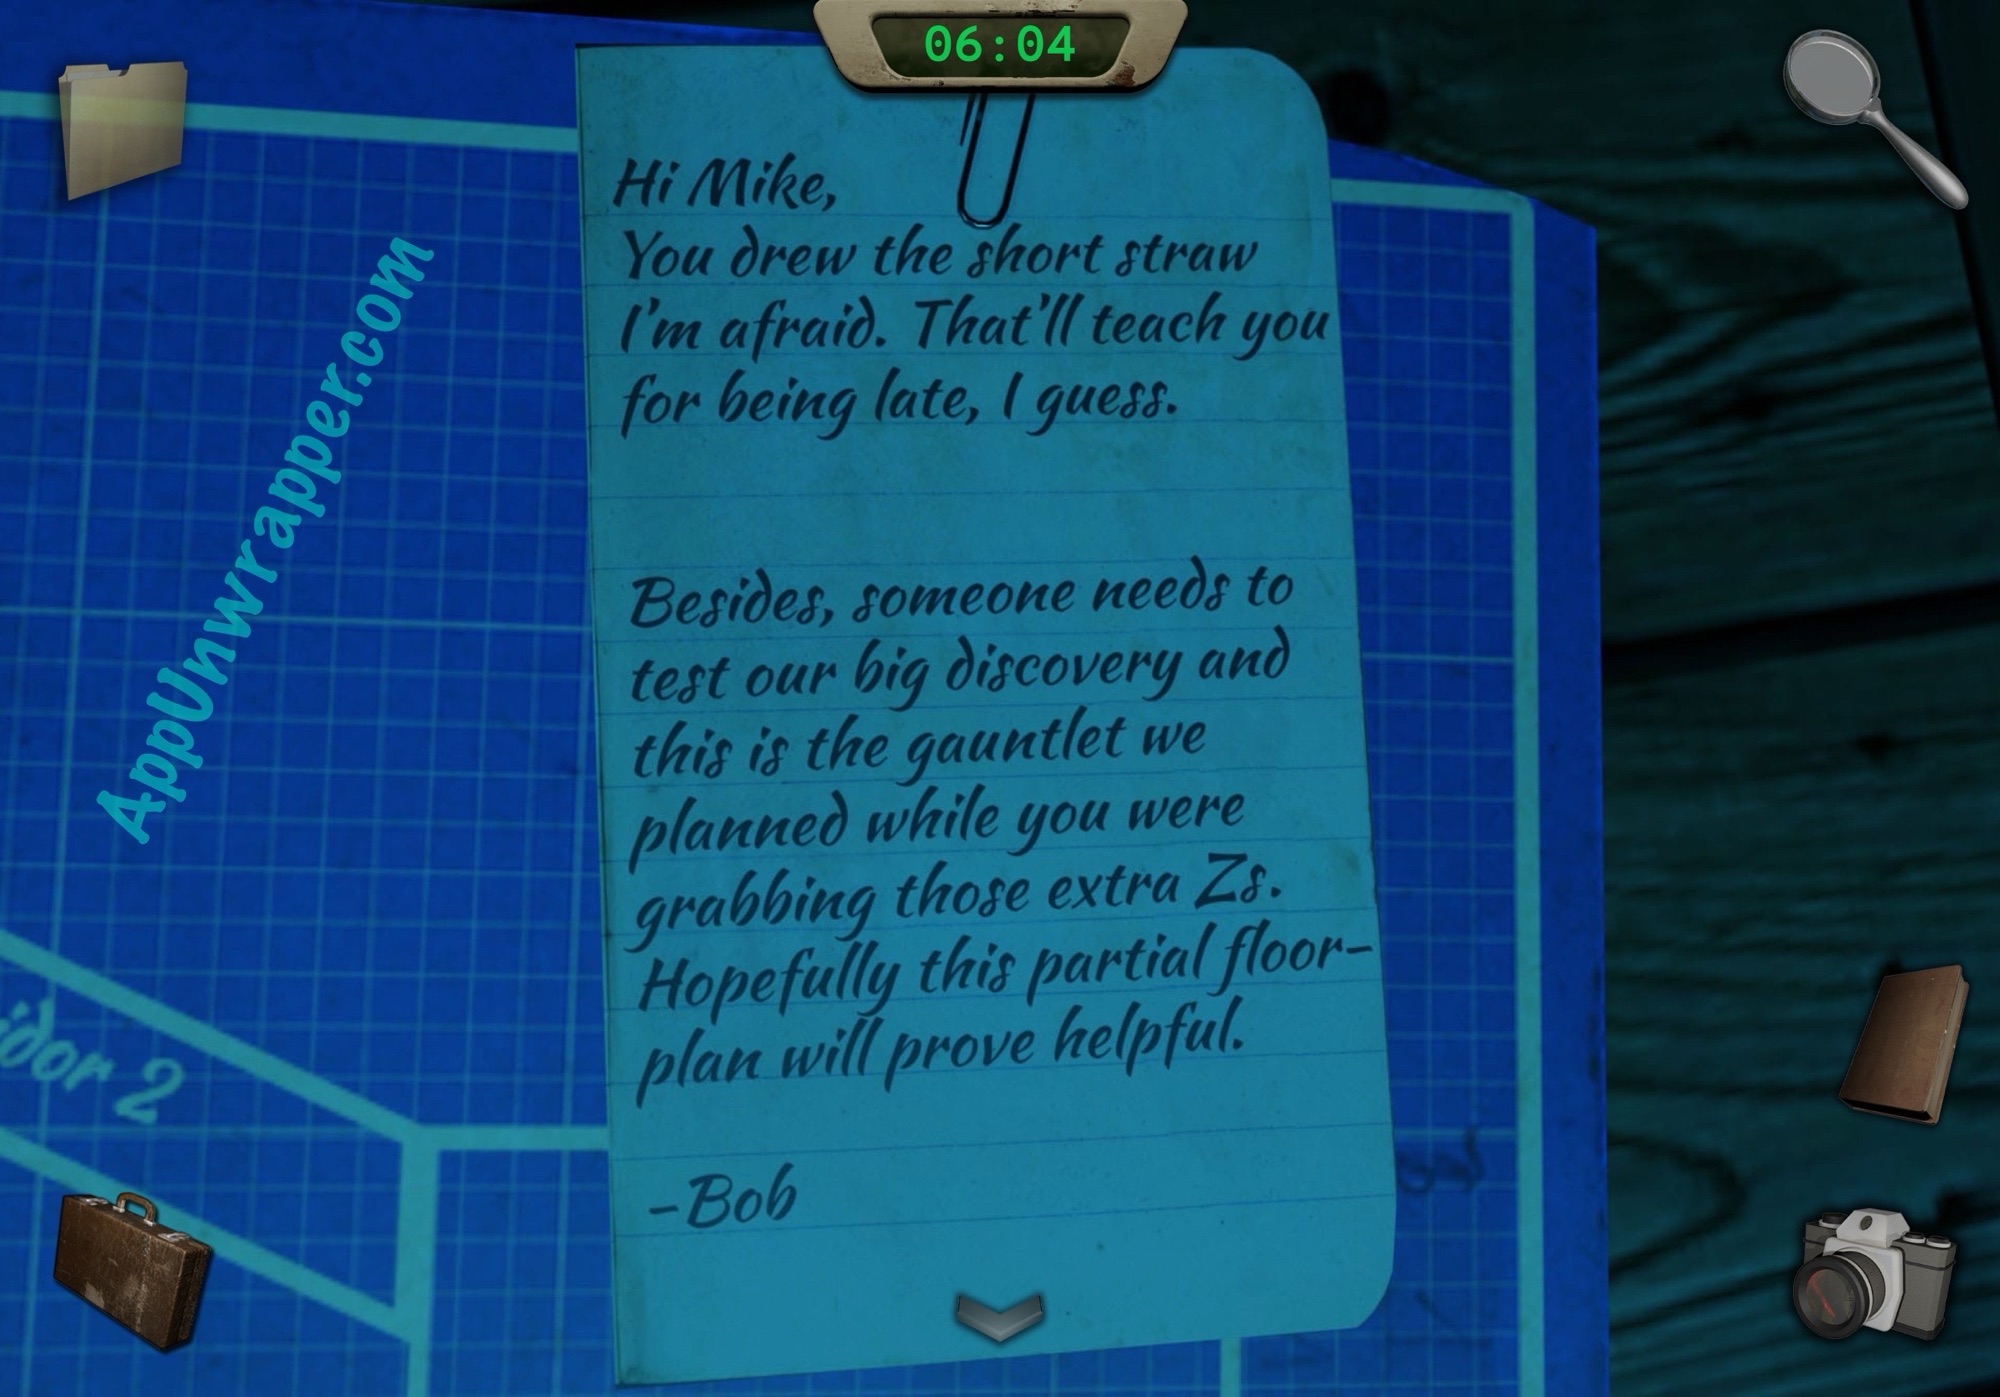
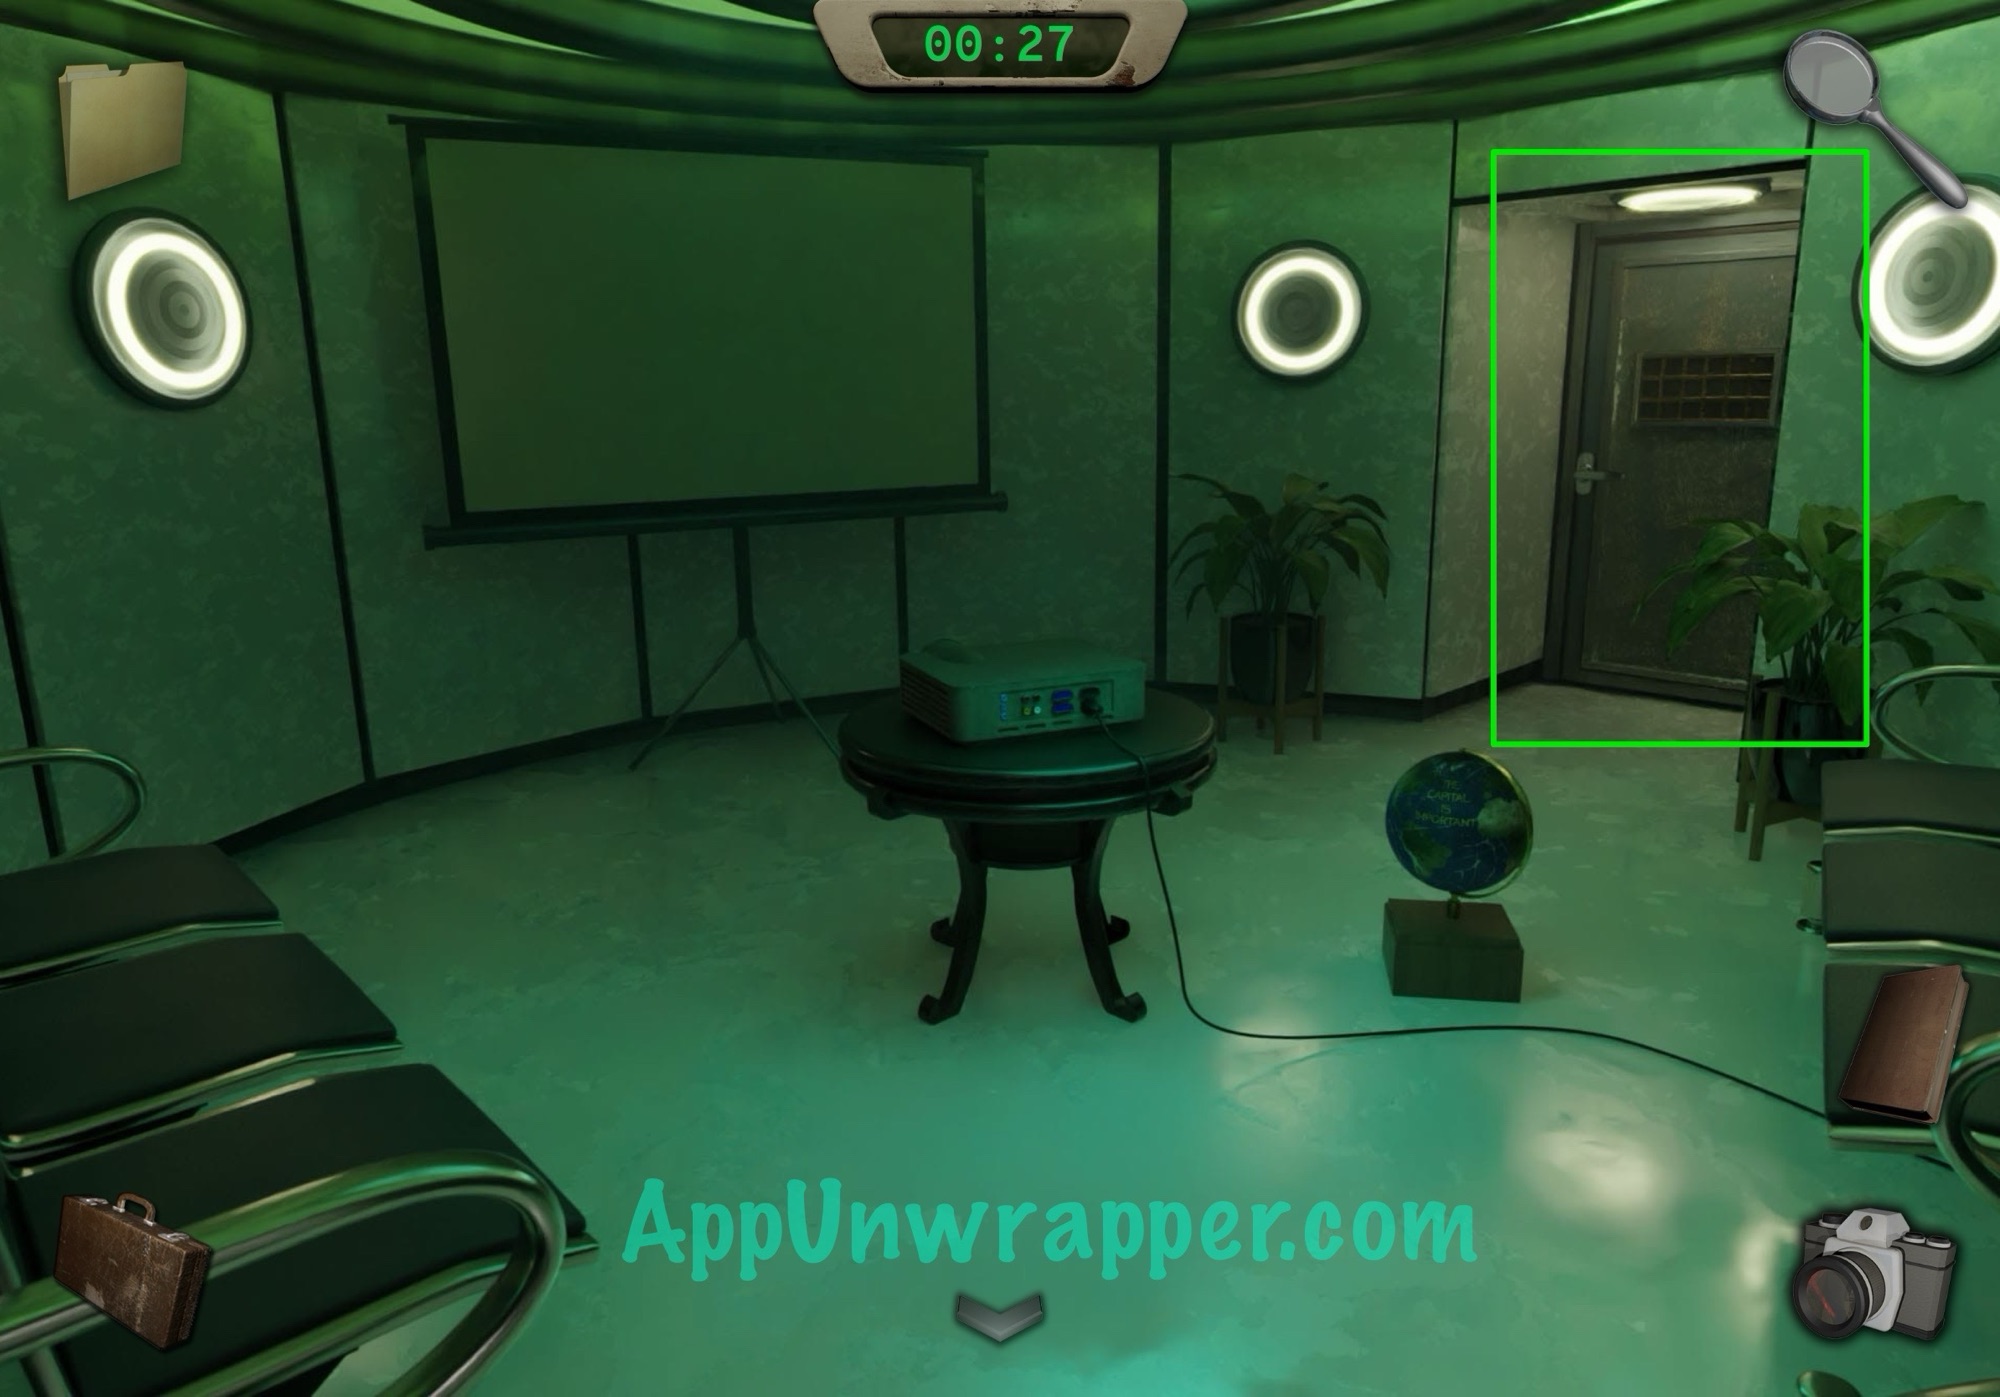
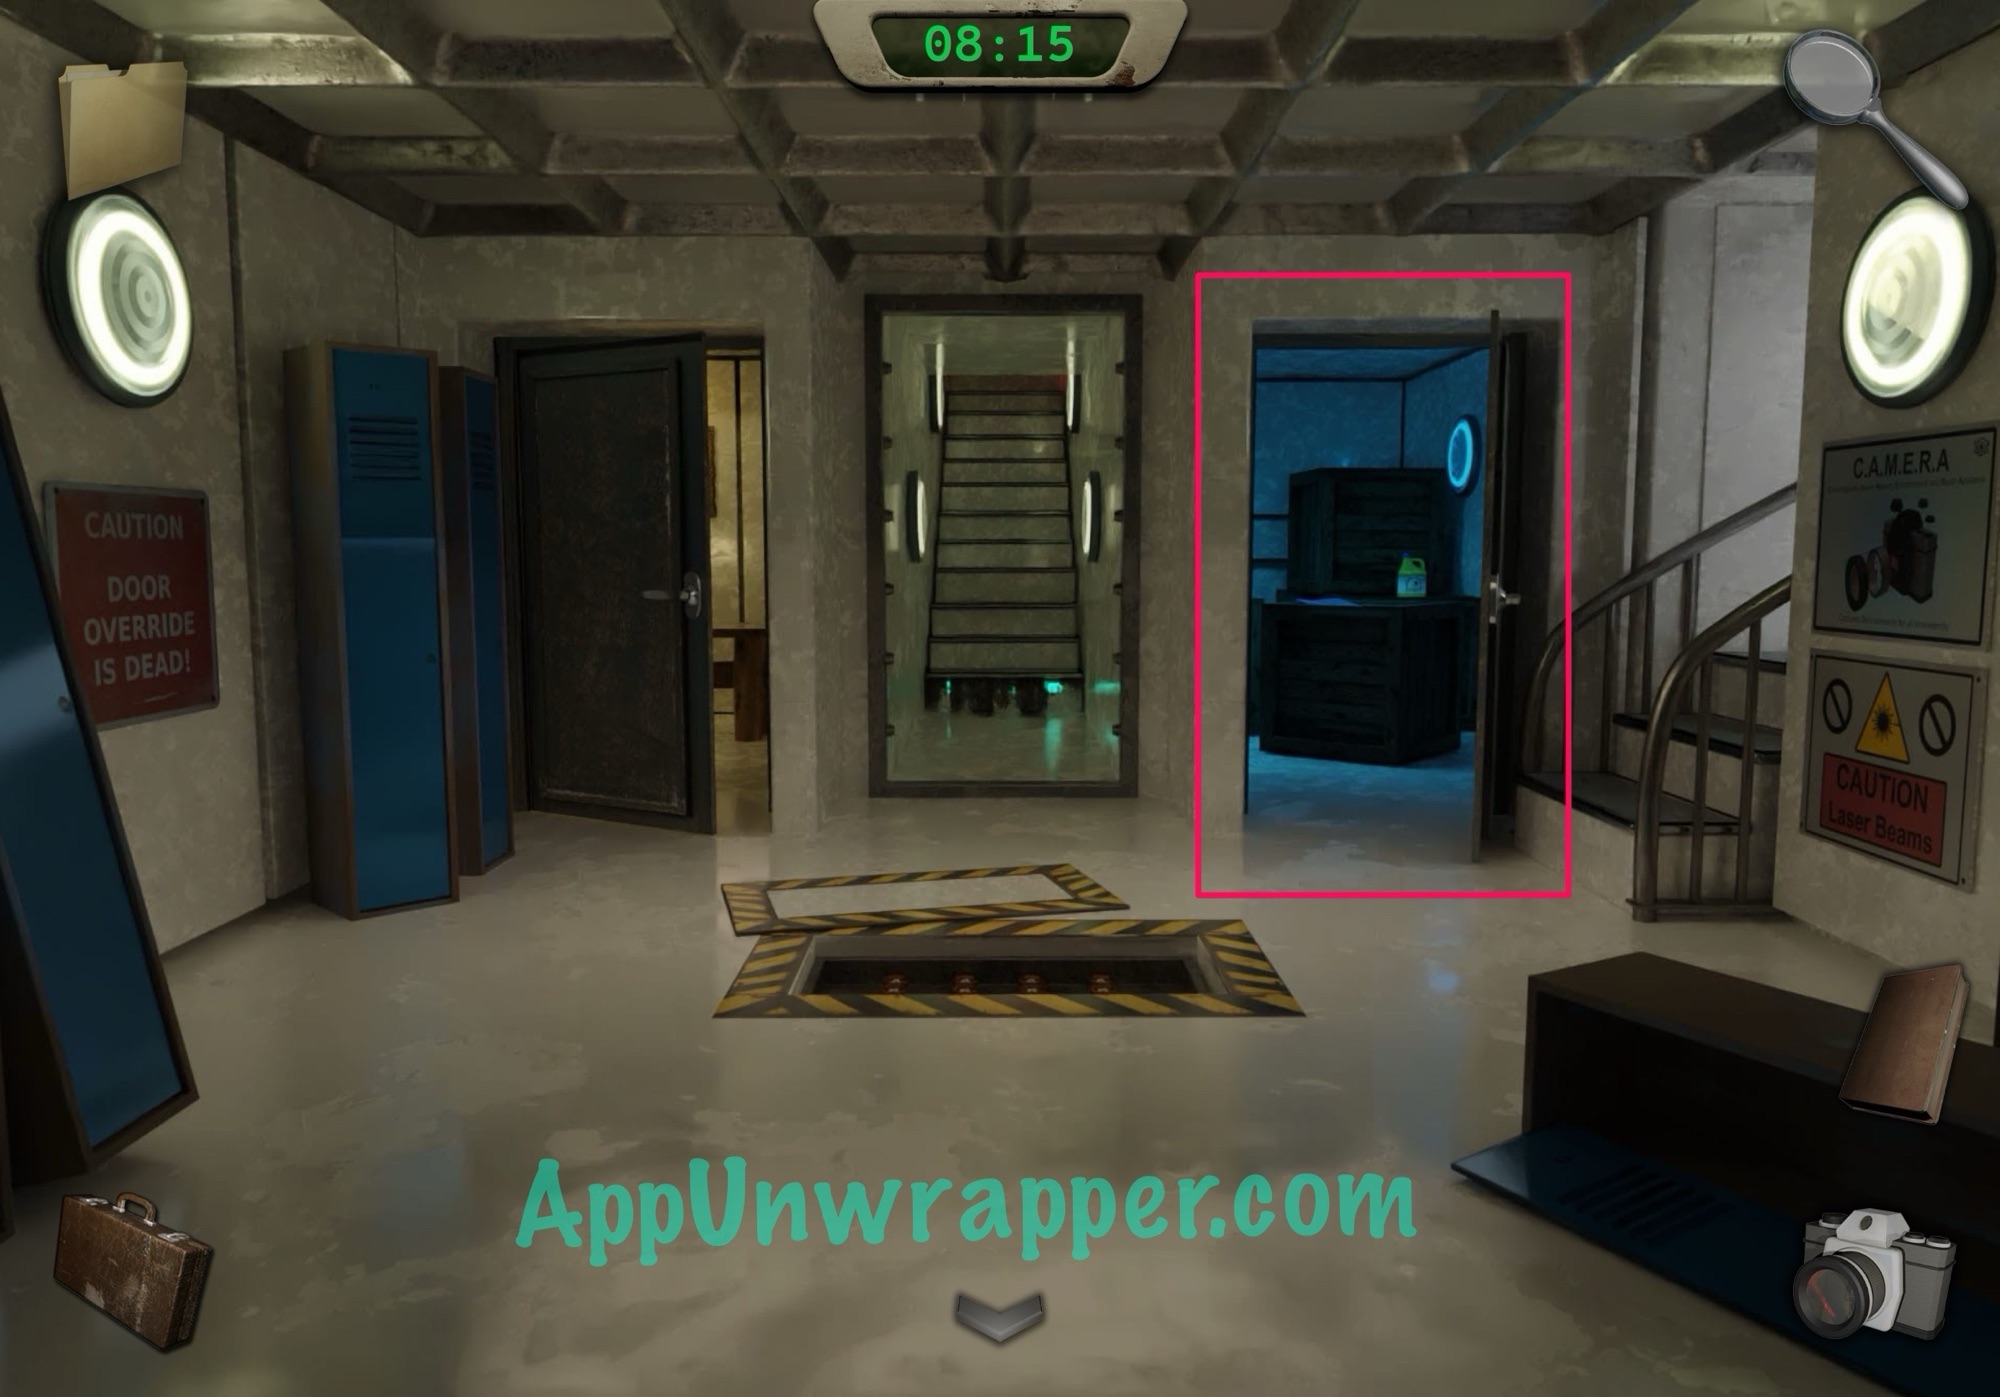
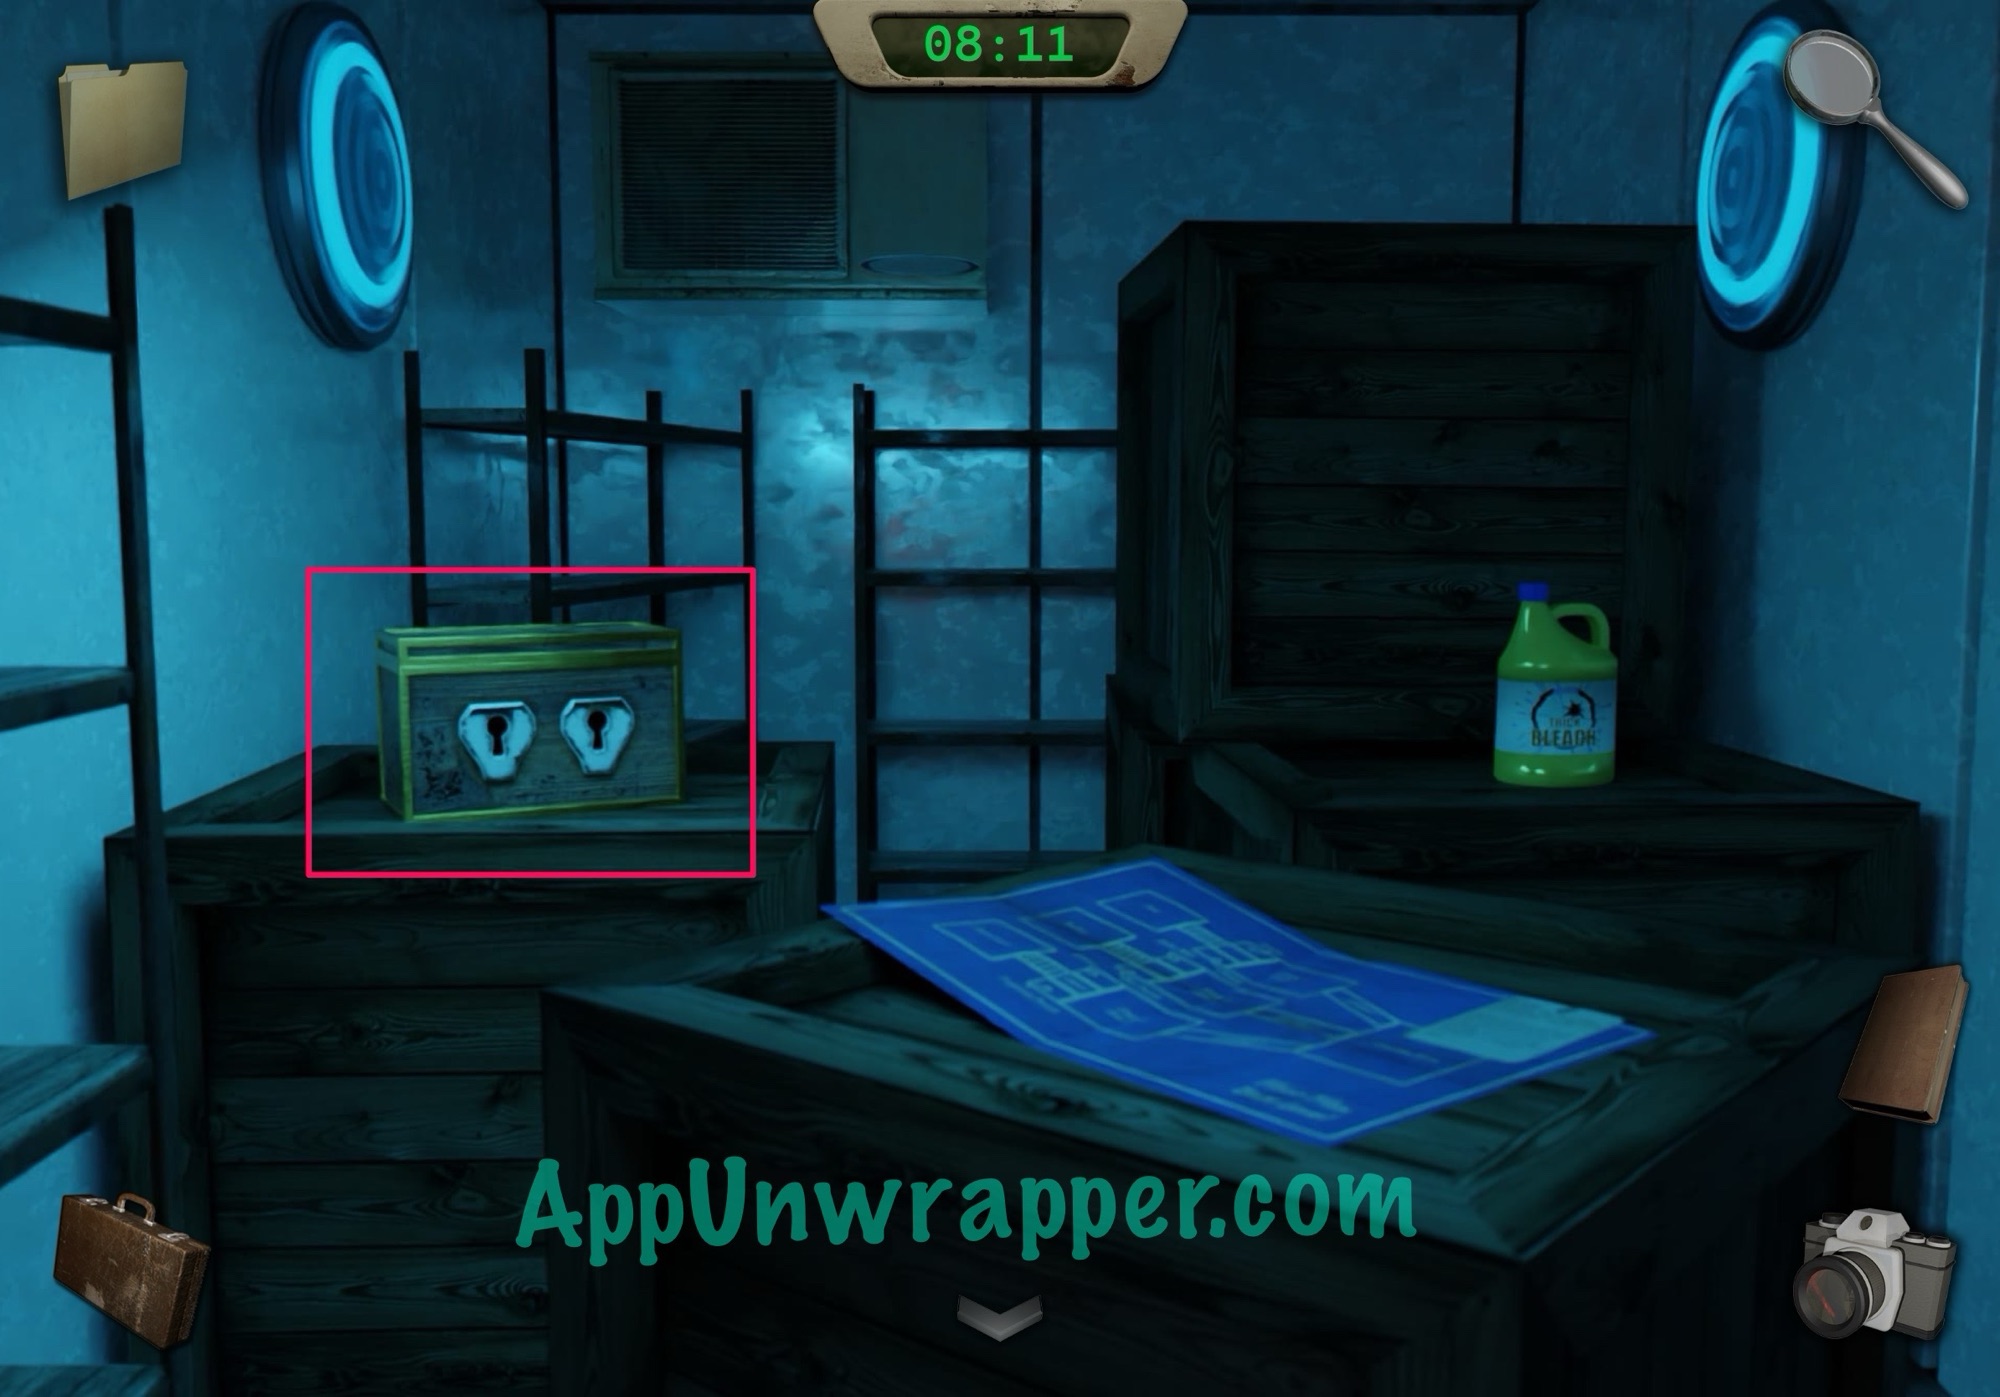
2. Don’t go up yet. First, go through the right door and grab the bottle of bleach. Also, notice the blueprints and the note attached to it. They’re just environmental stuff but the blueprints show you a basic map of the game and you should read all the notes you see so you have an idea of what’s going on. There’s also a locked box that requires two keys, but we’ll come back to that.

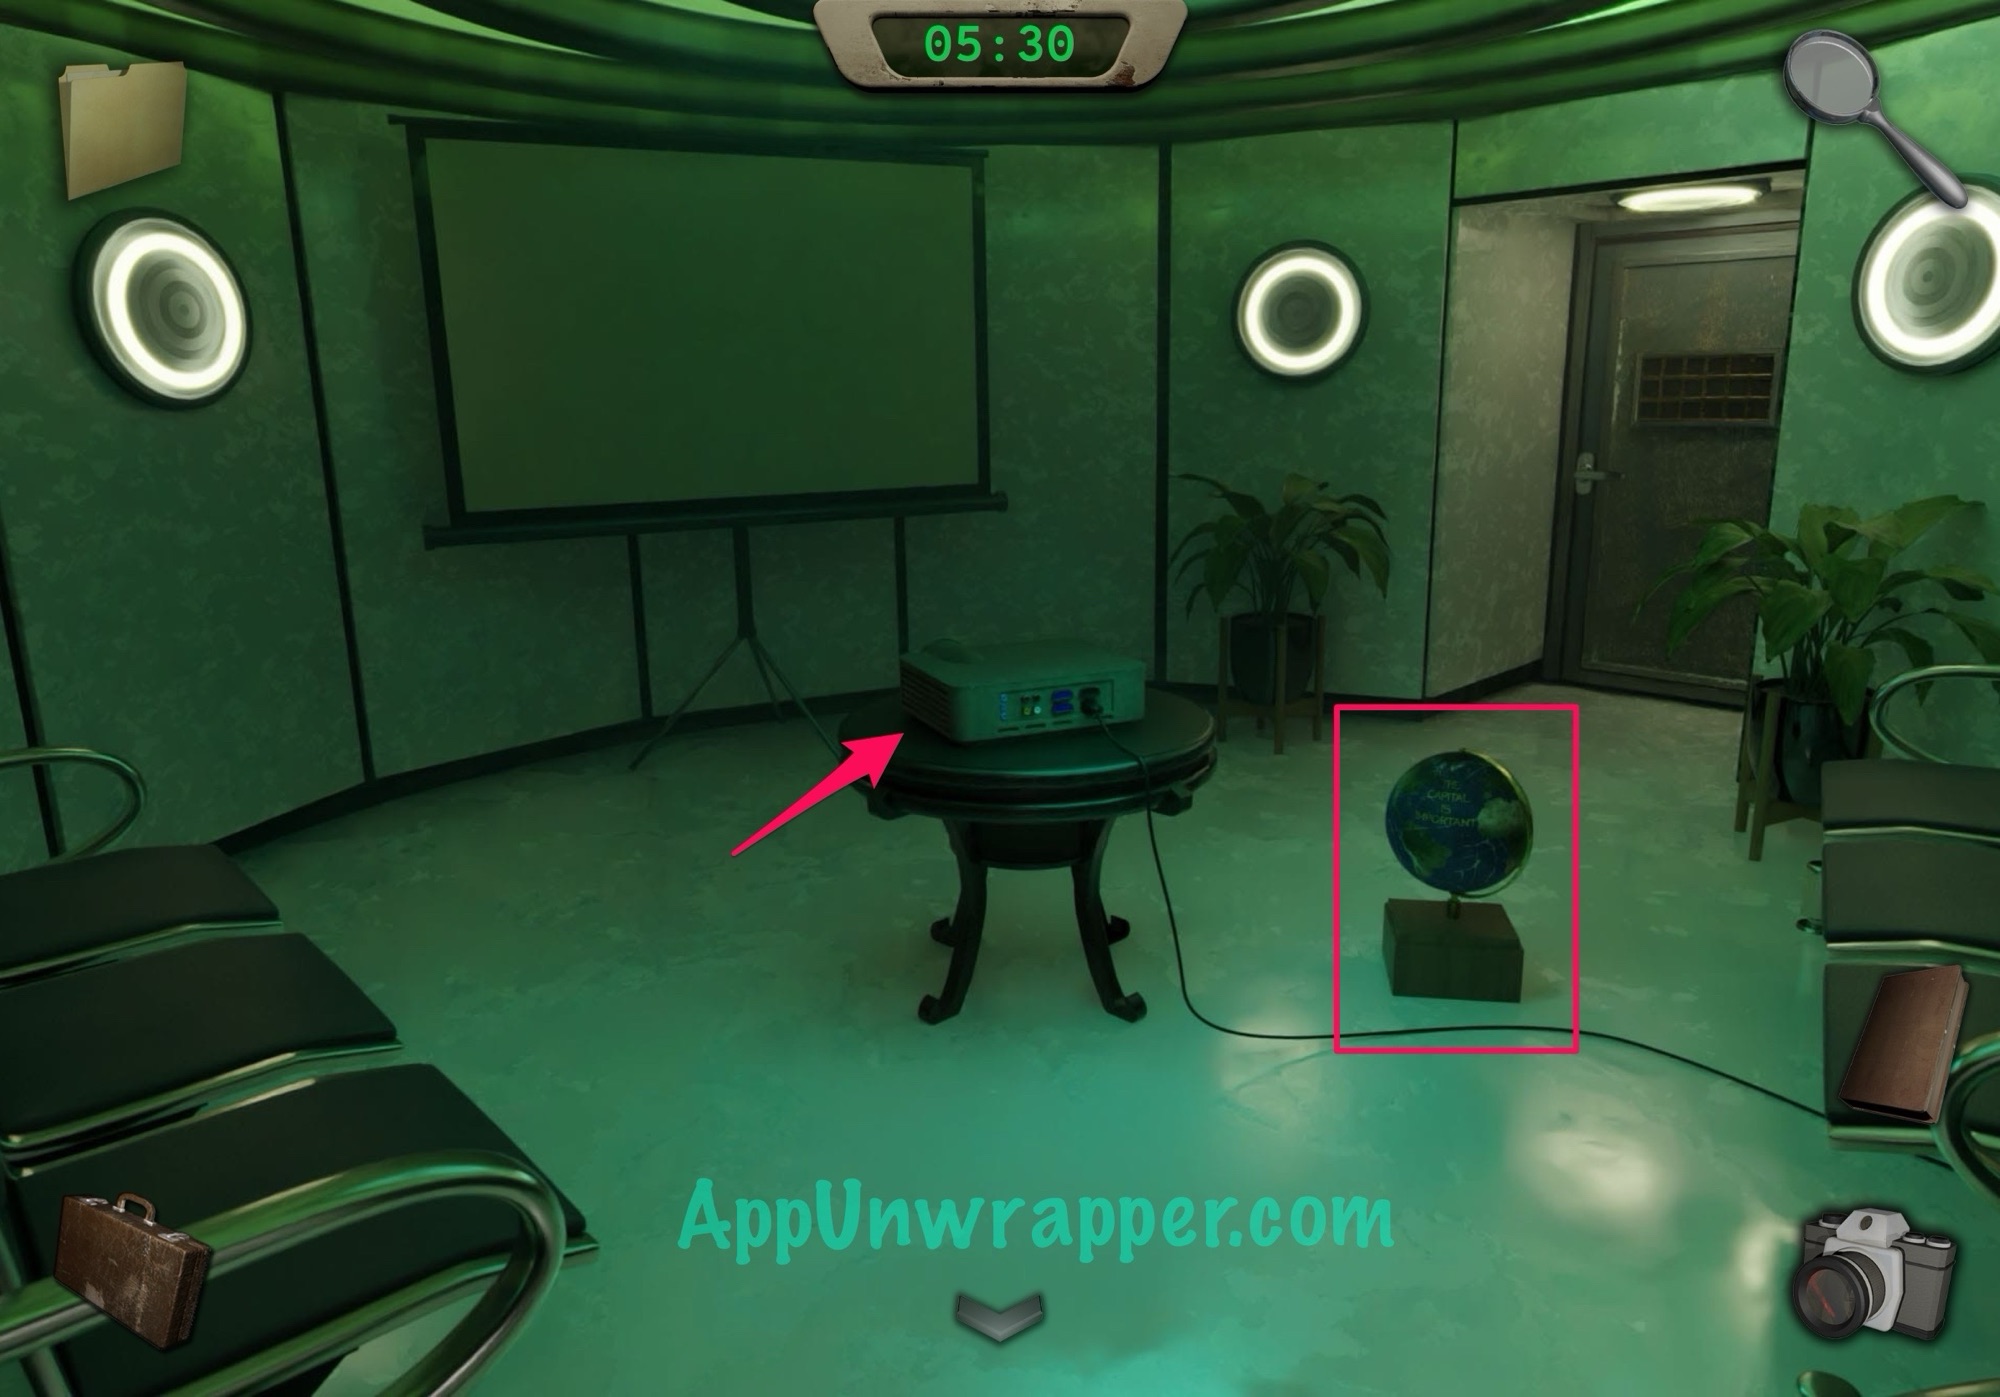
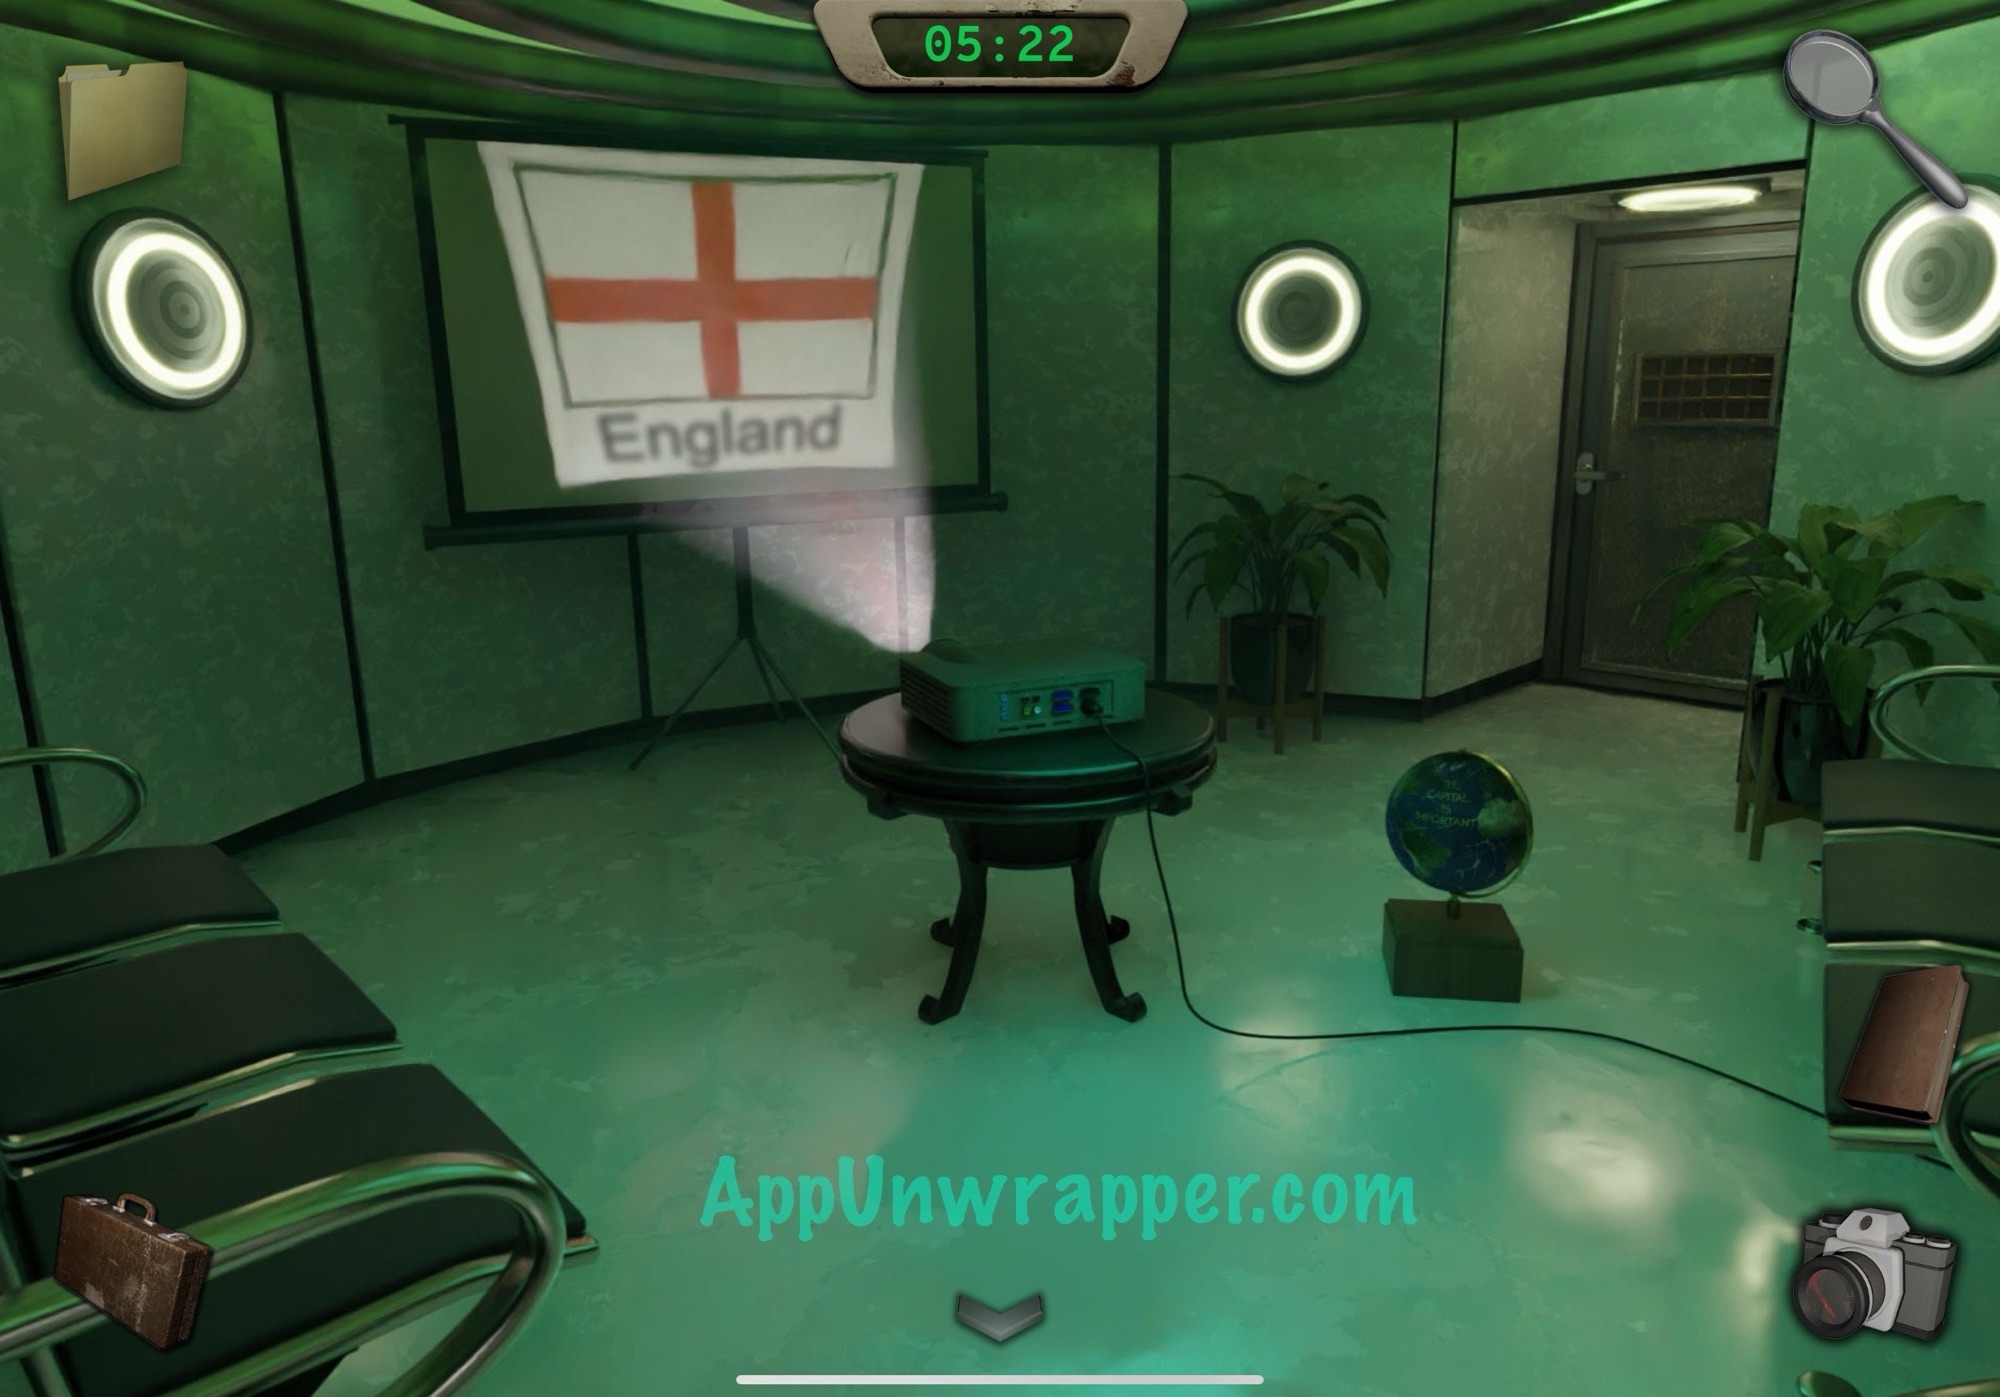
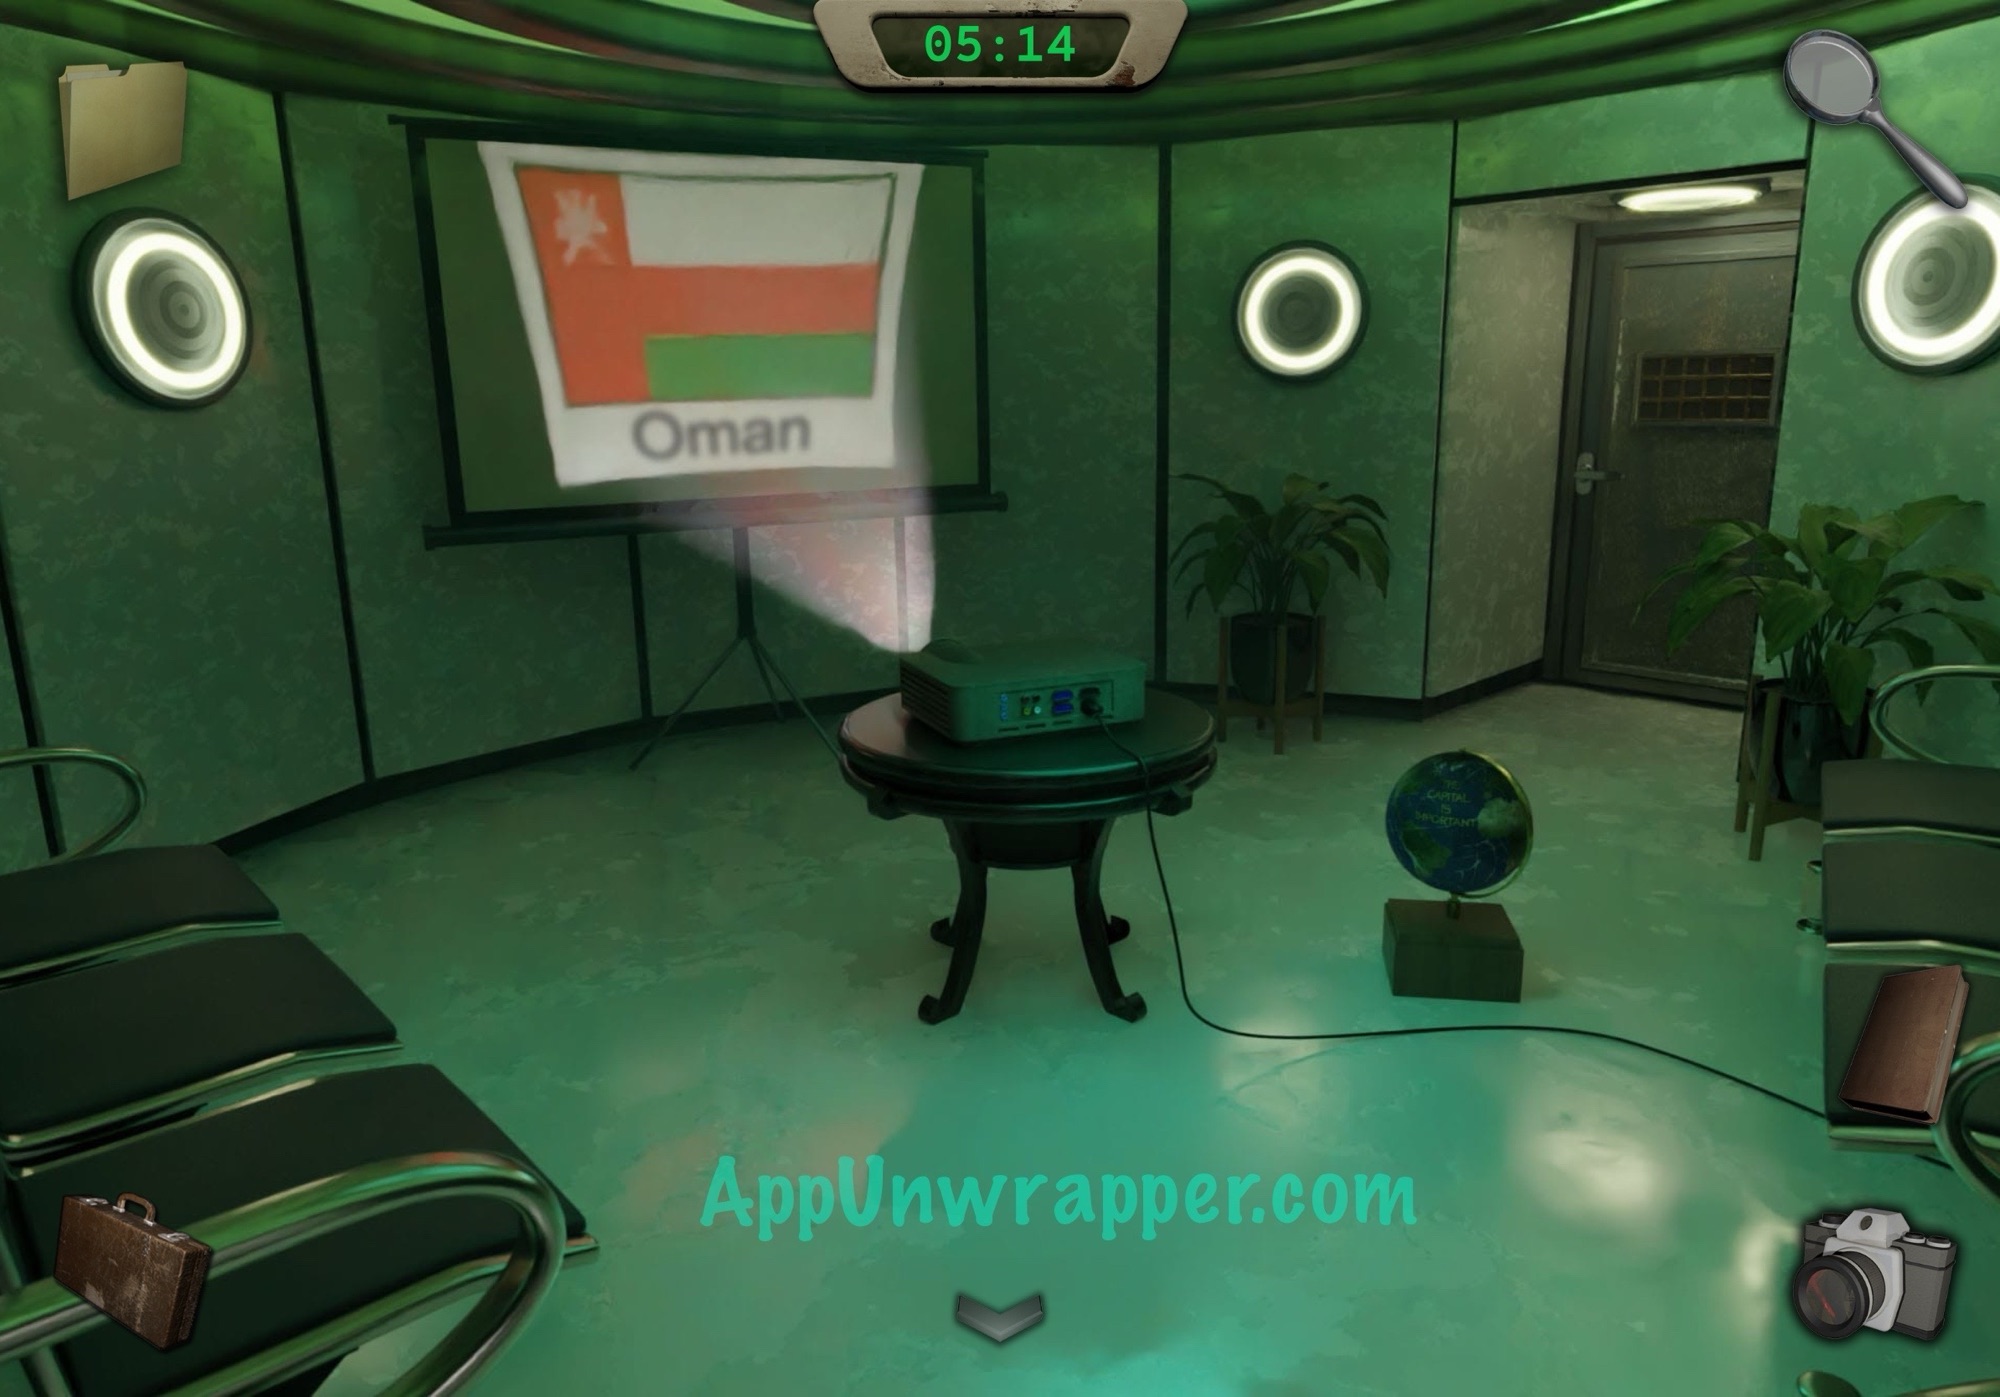
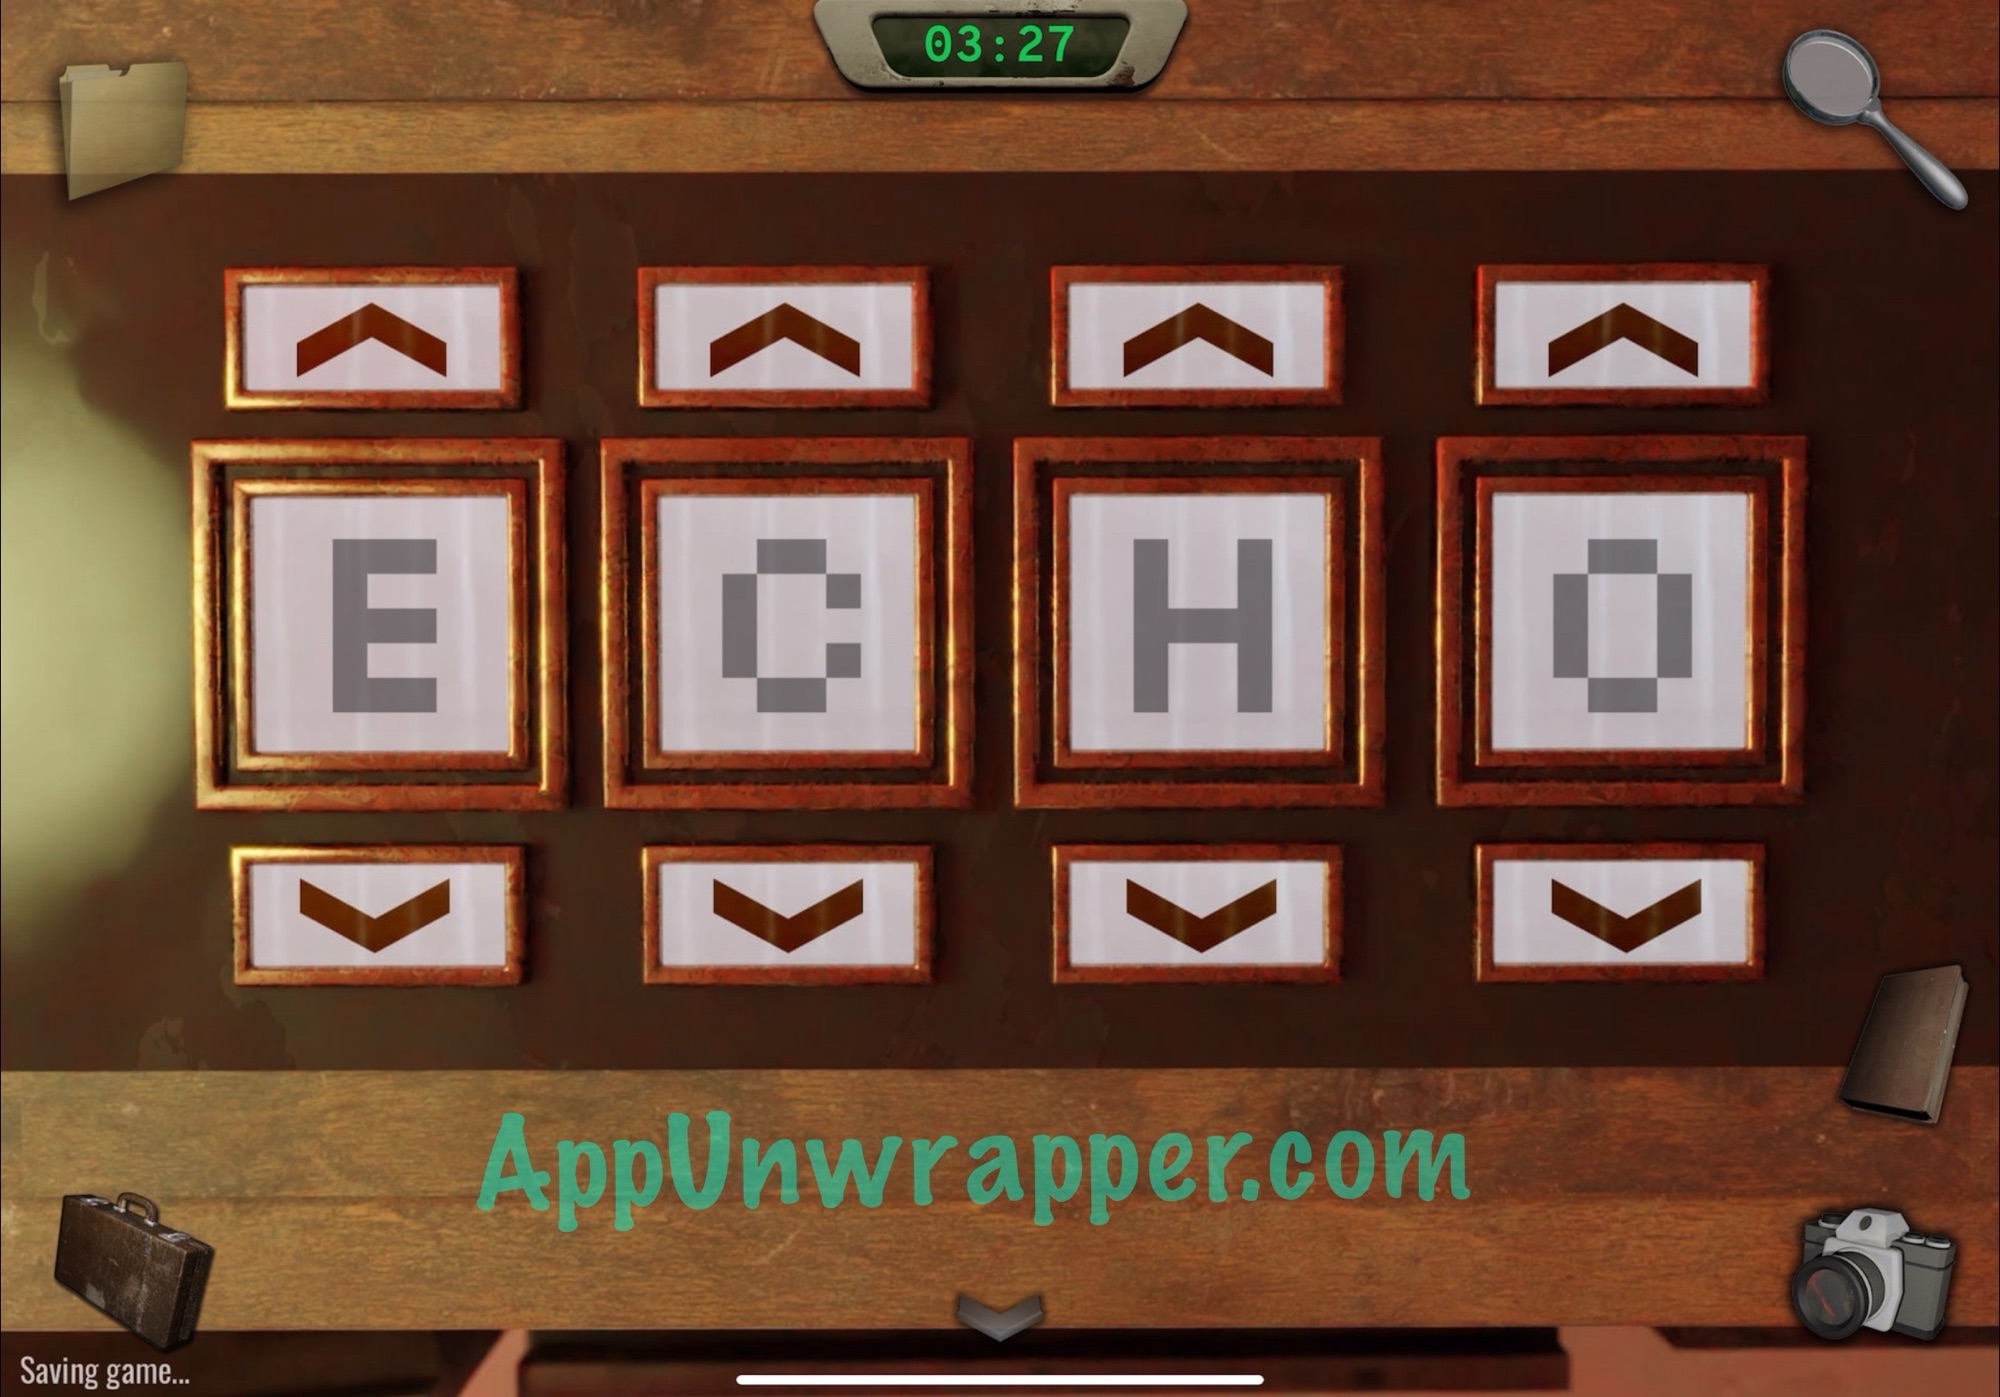
3. Leave the room and go up the stairs to the right. Look at the globe to see a clue that says THE CAPITAL IS IMPORTANT. Then turn on the projector to see flags for four different countries: England, China, Hungary, Oman. All that matters are the capital letters because of the clue we just saw. Put them together and you get ECHO.


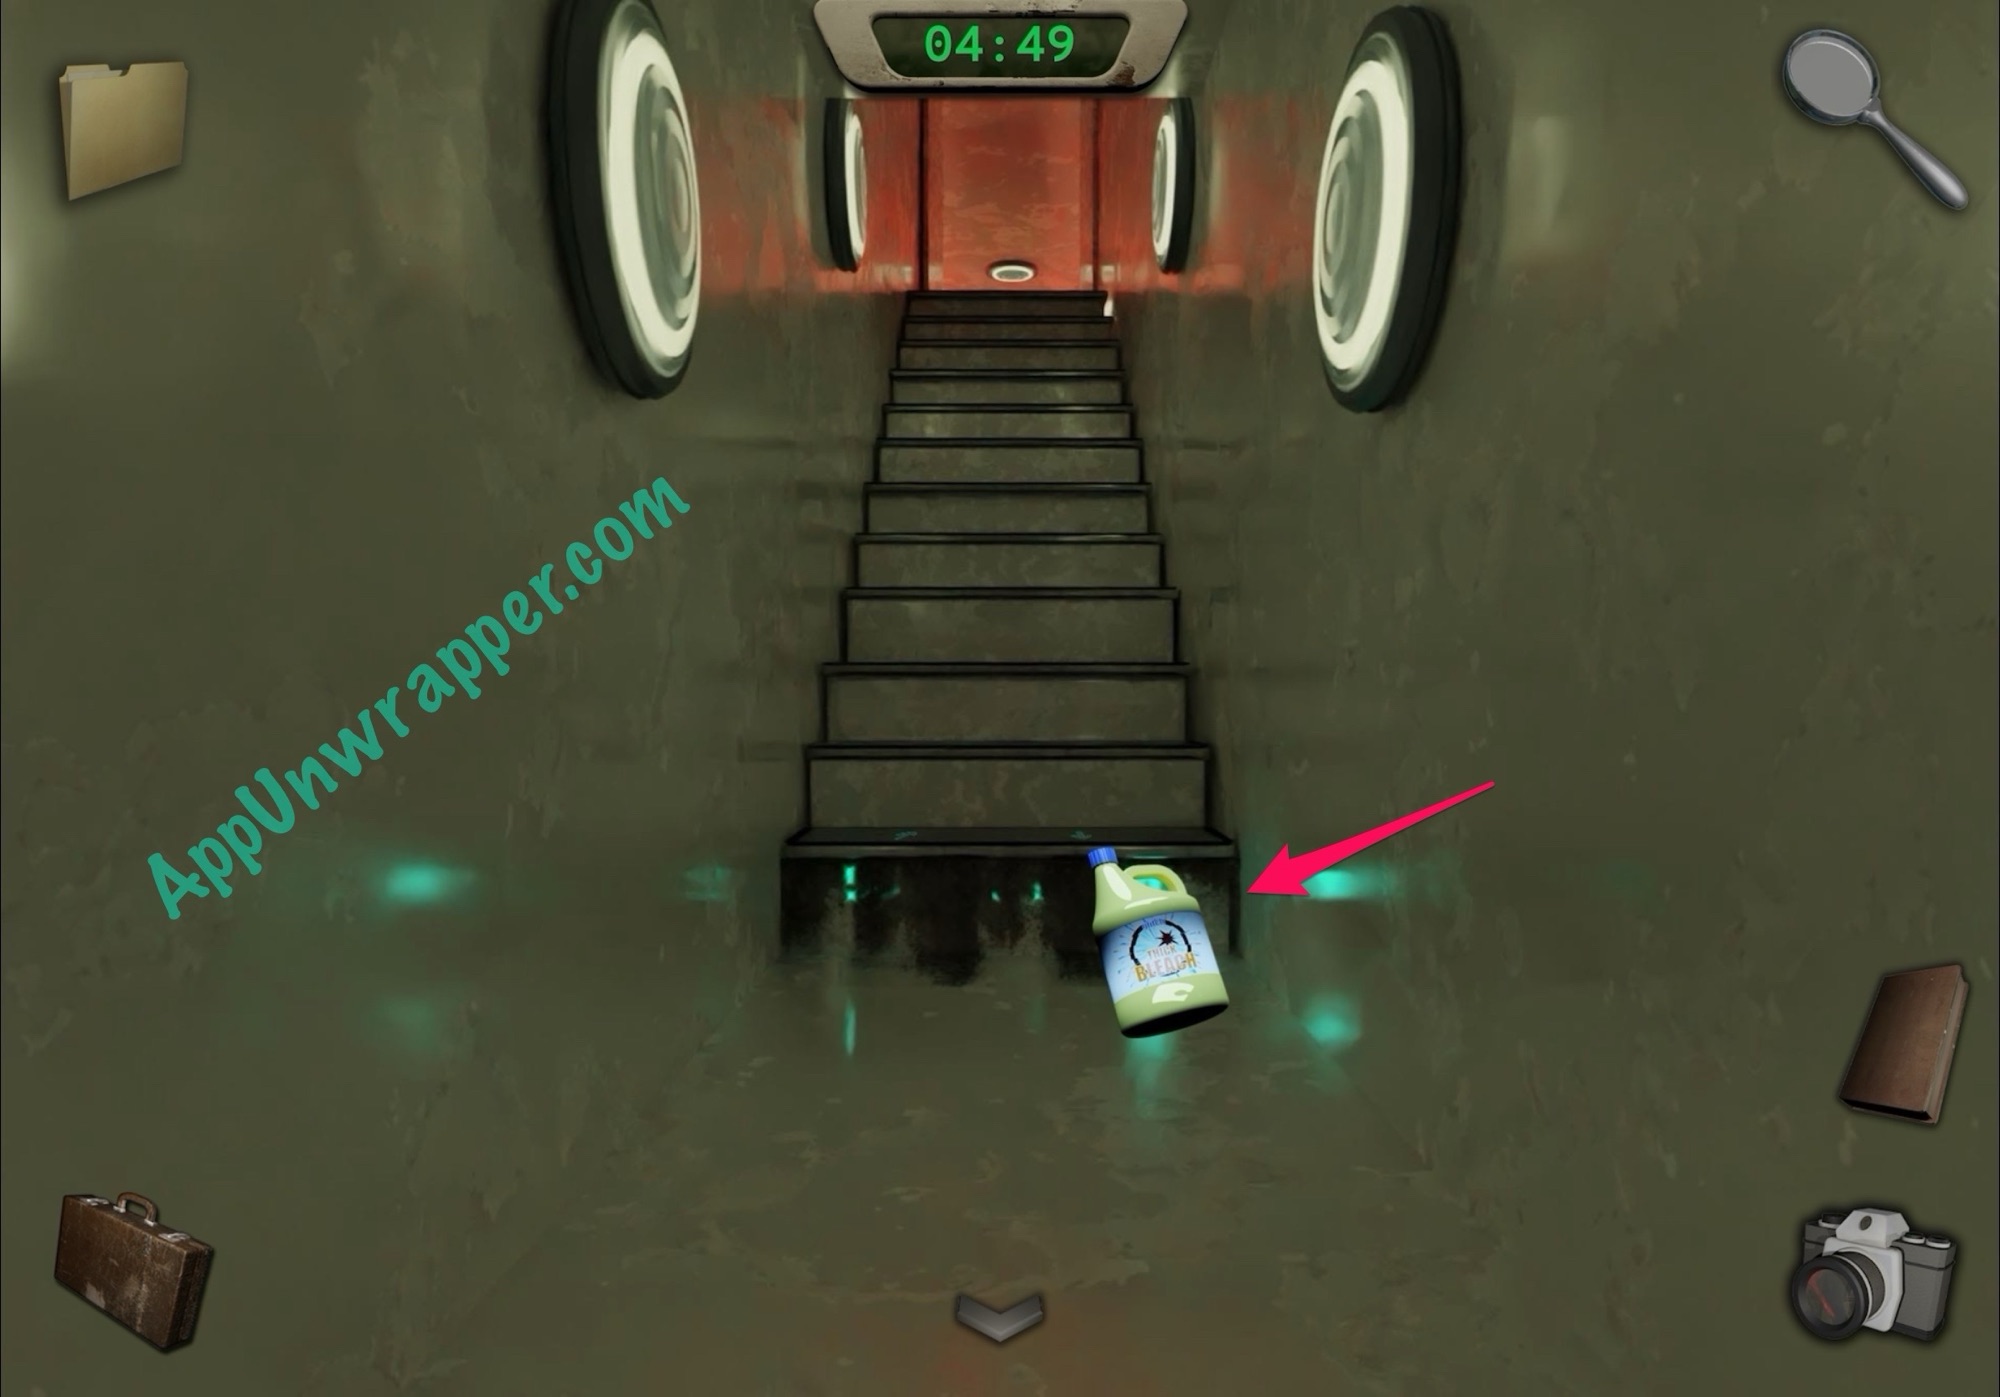
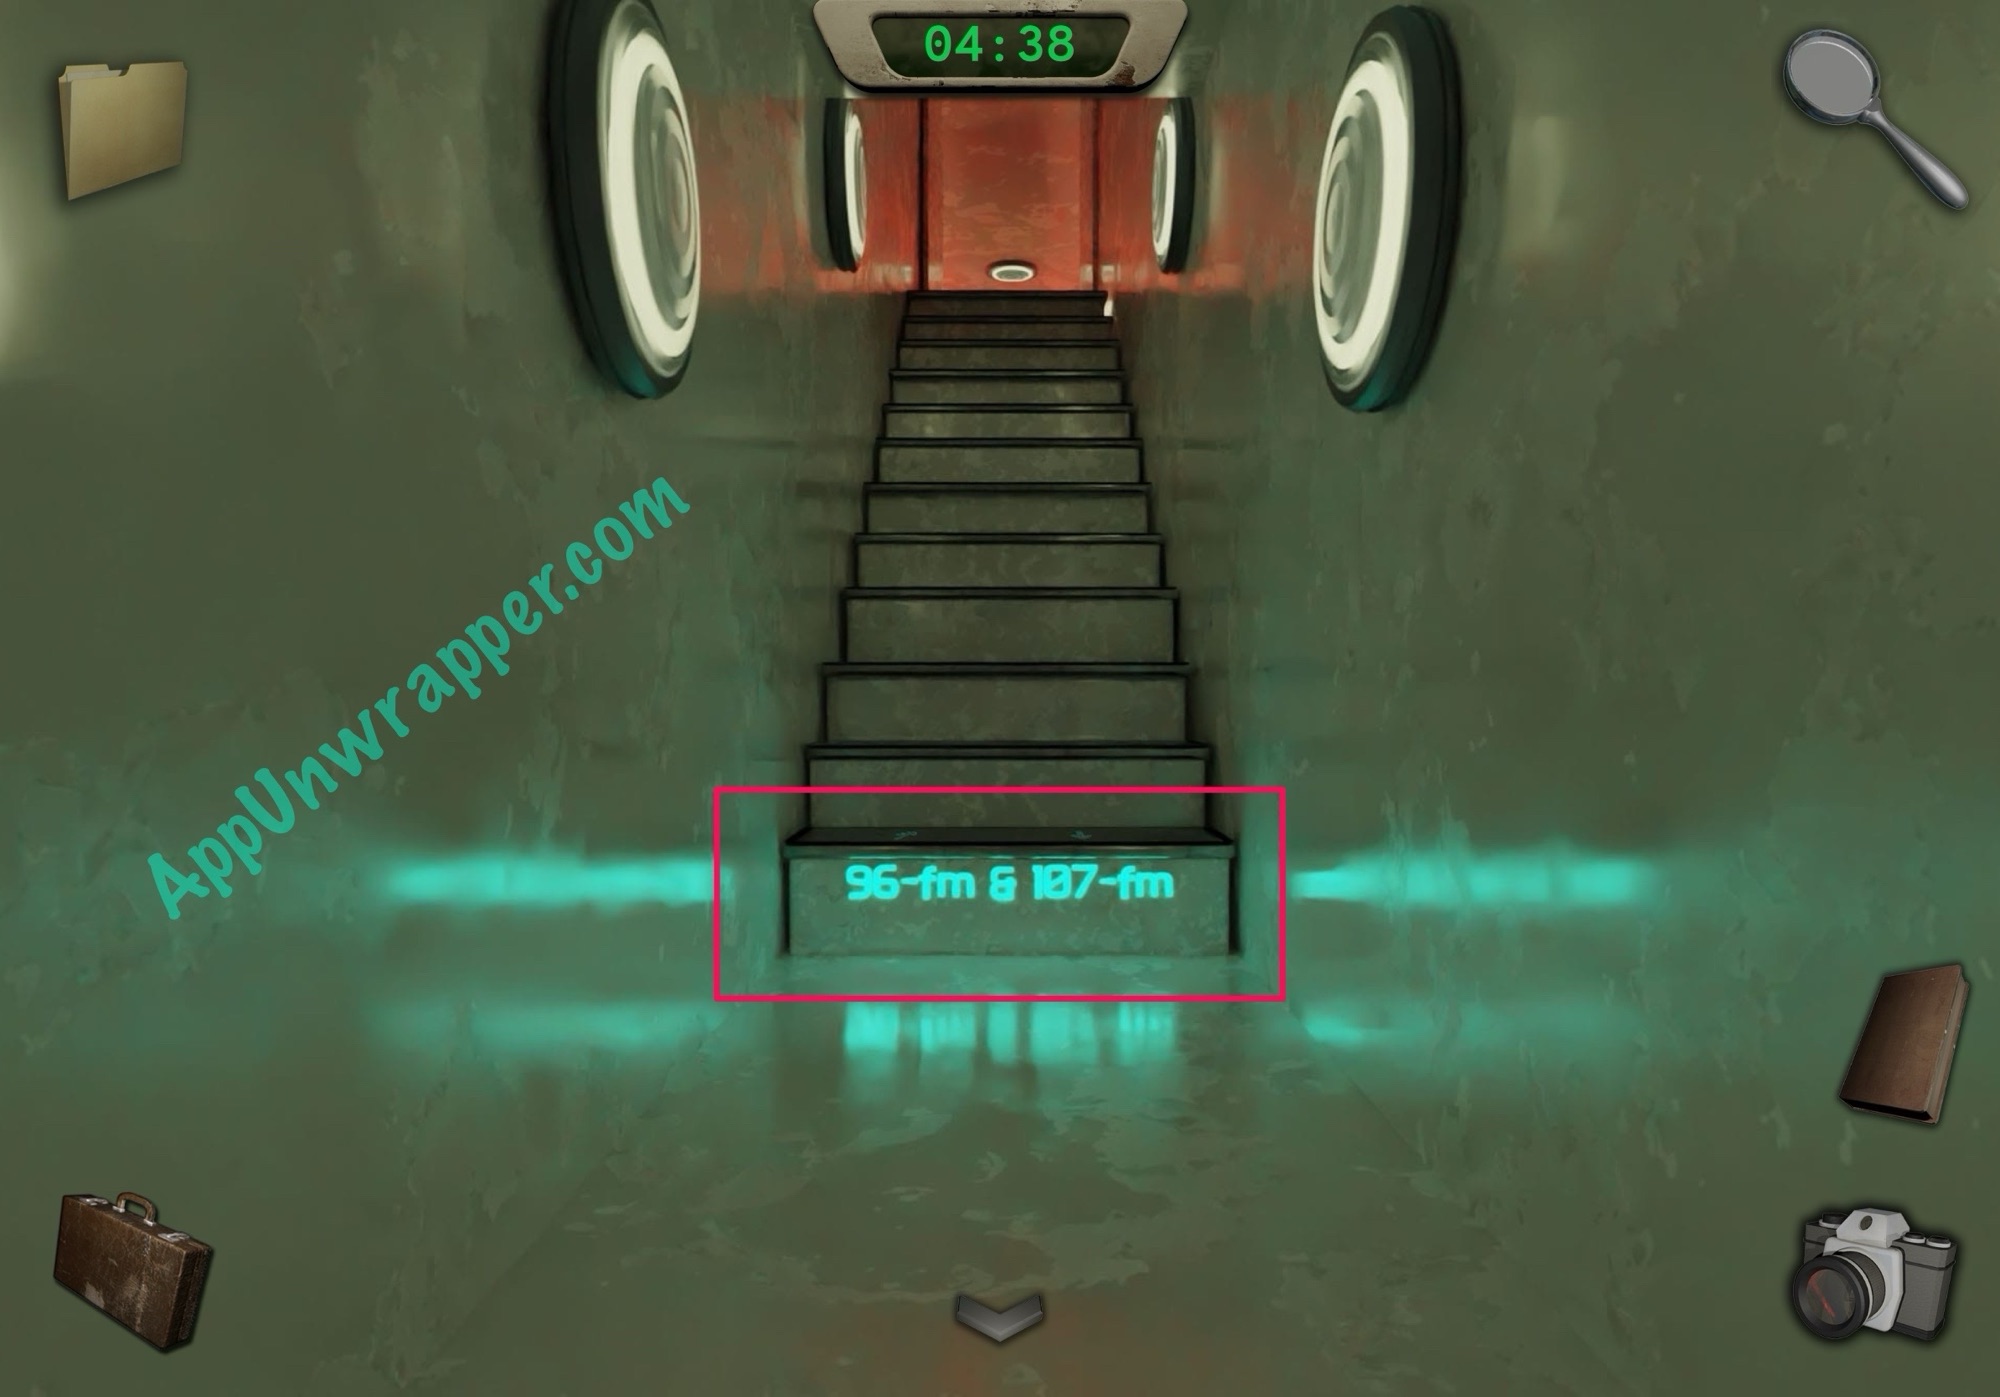
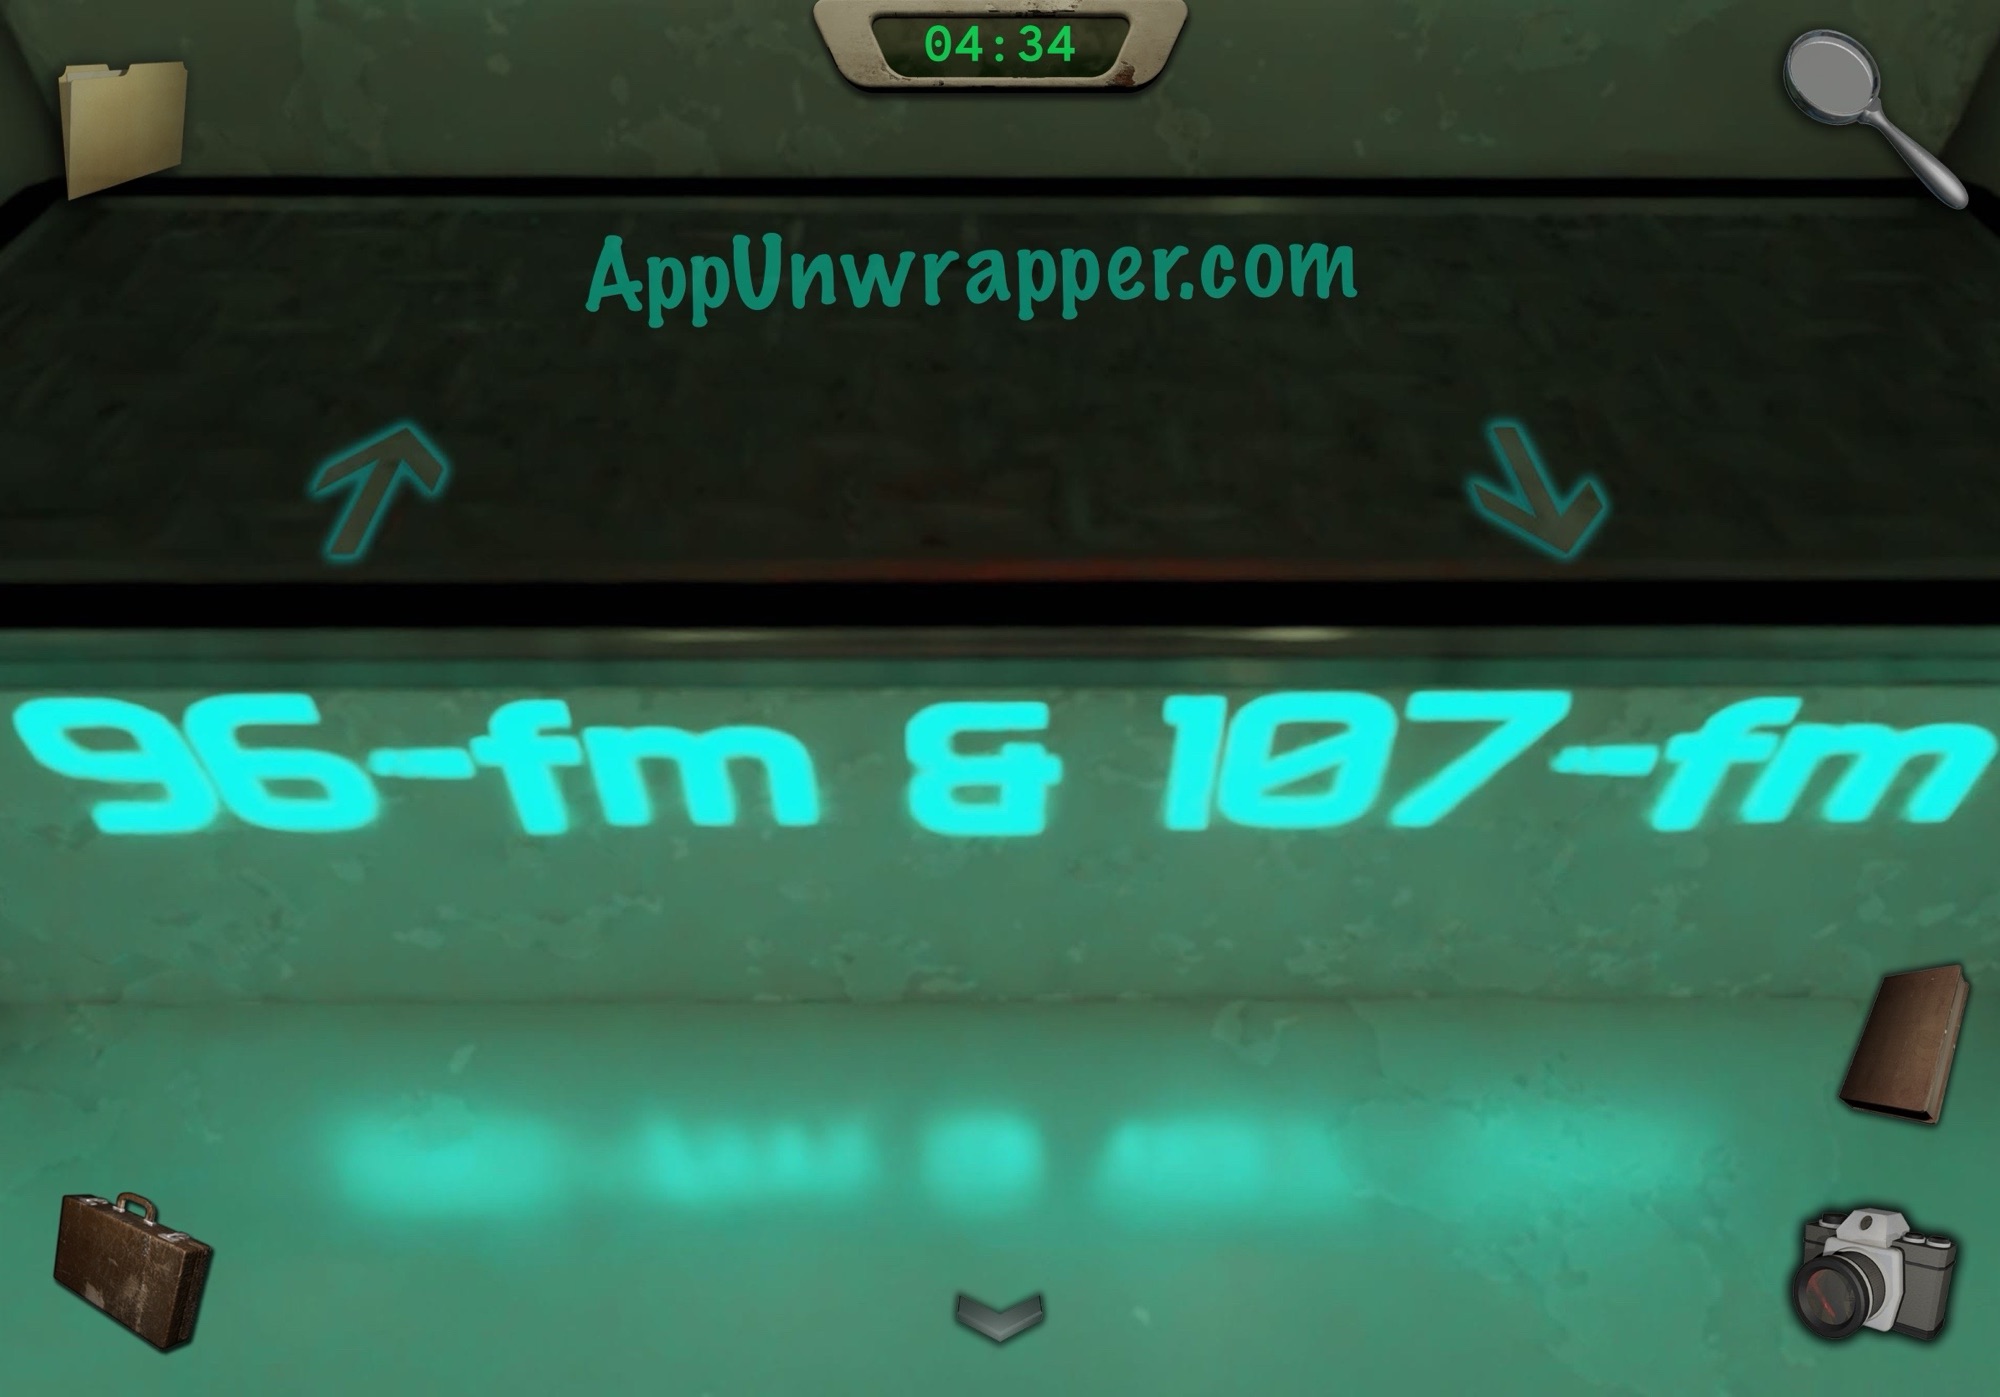
4. Go back down the stairs and through the door that had the lasers. Notice some dirt on the bottom step. Use the bleach to clean it off and take a photo of the clue.
5. Continue up the stairs. Press either of the buttons and grab the key. You won’t be able to take the other. Tap on the locked box to the right and enter the word ECHO, the capital letters from the slides in the projector. Take a photo of the clue inside.
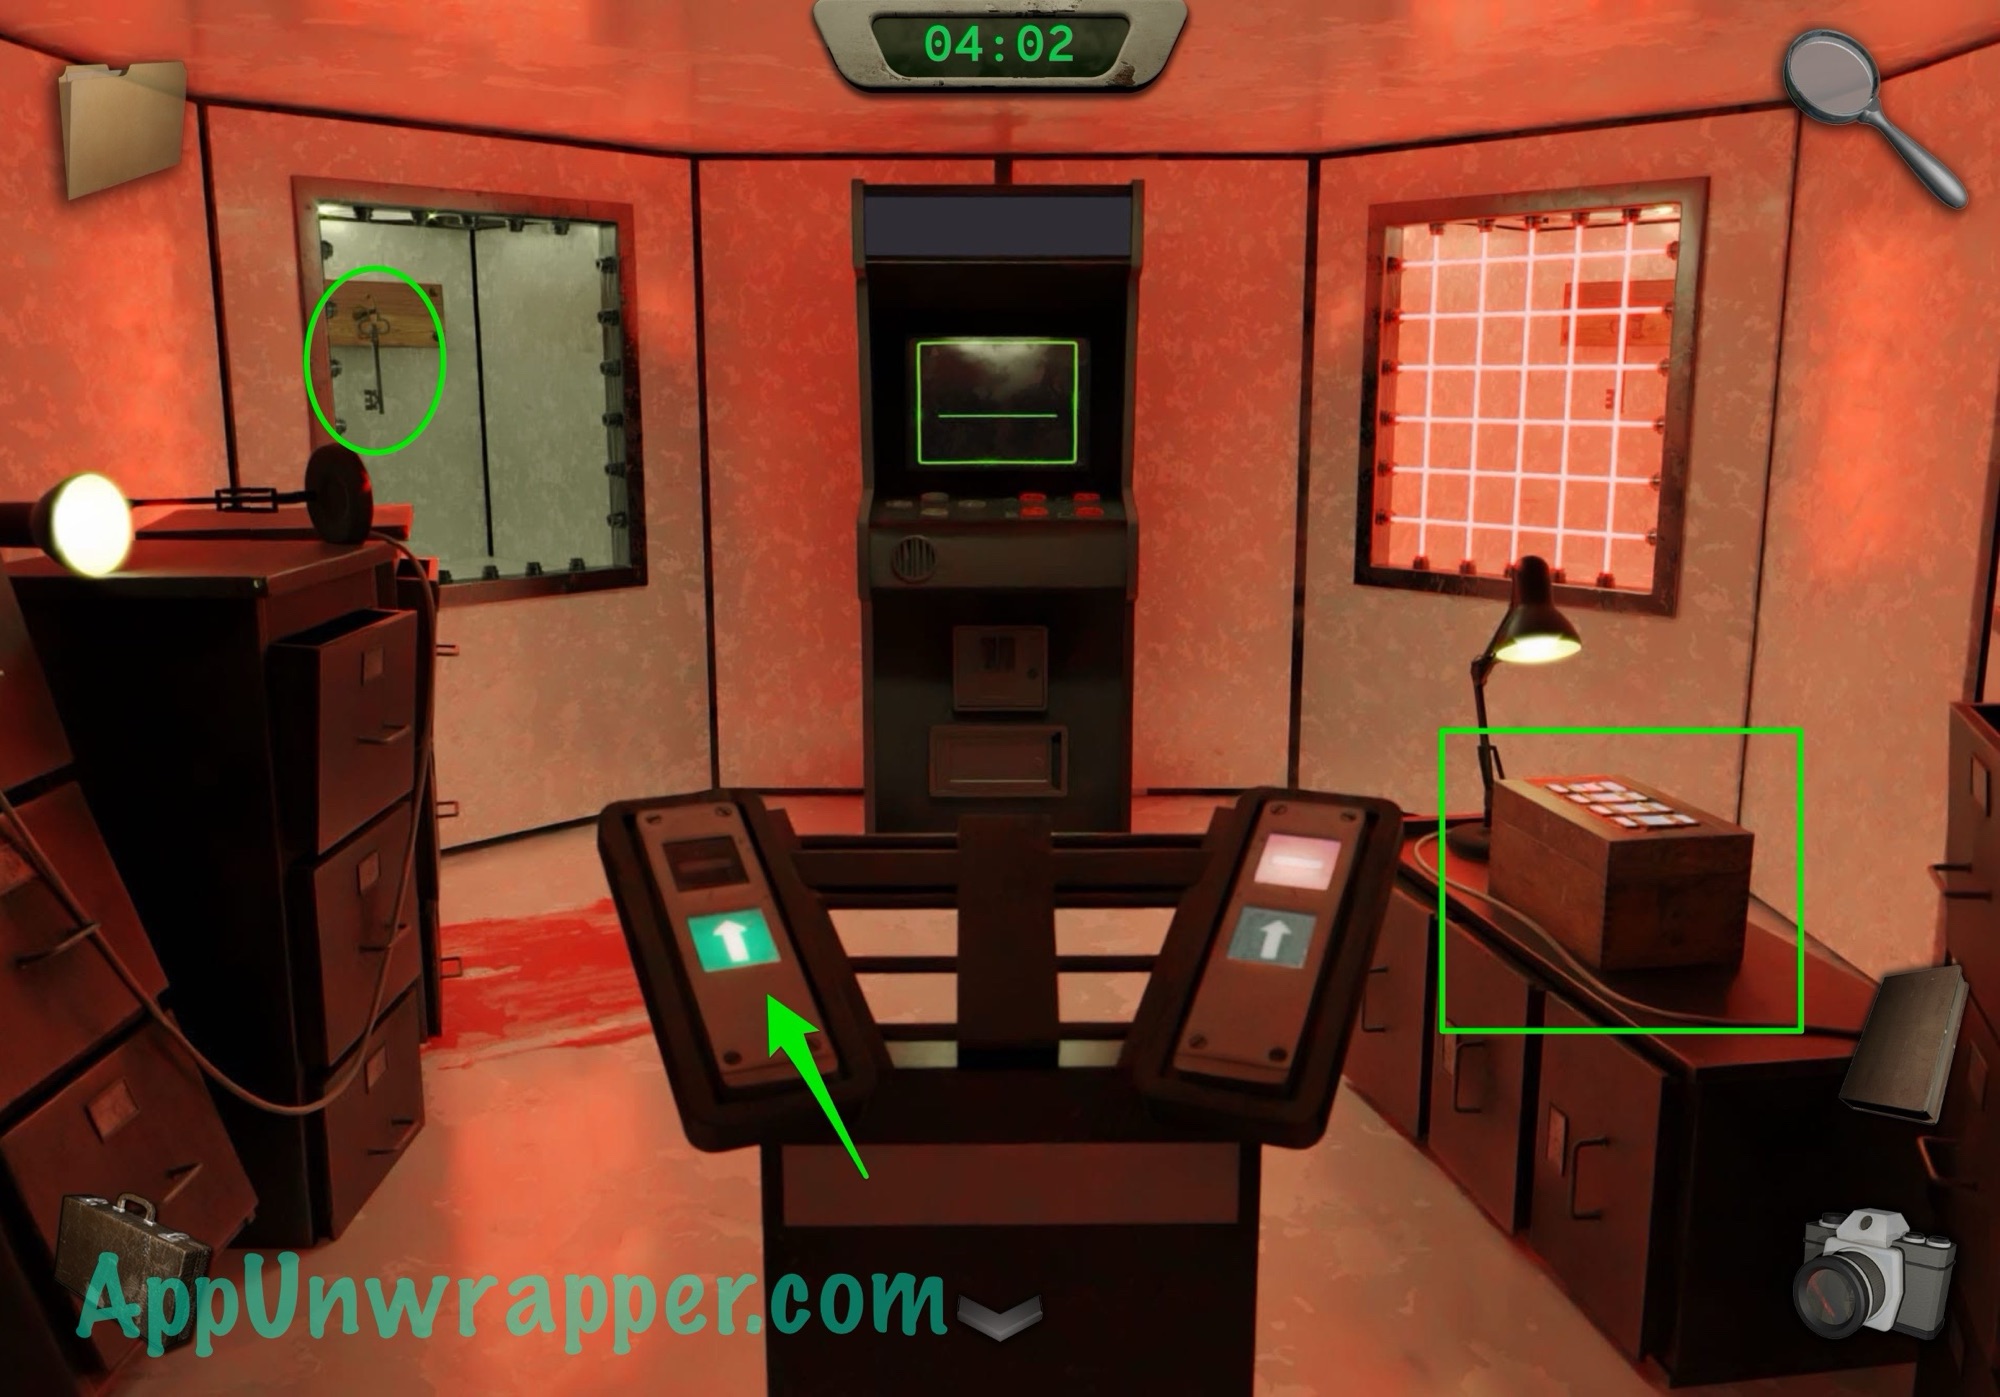
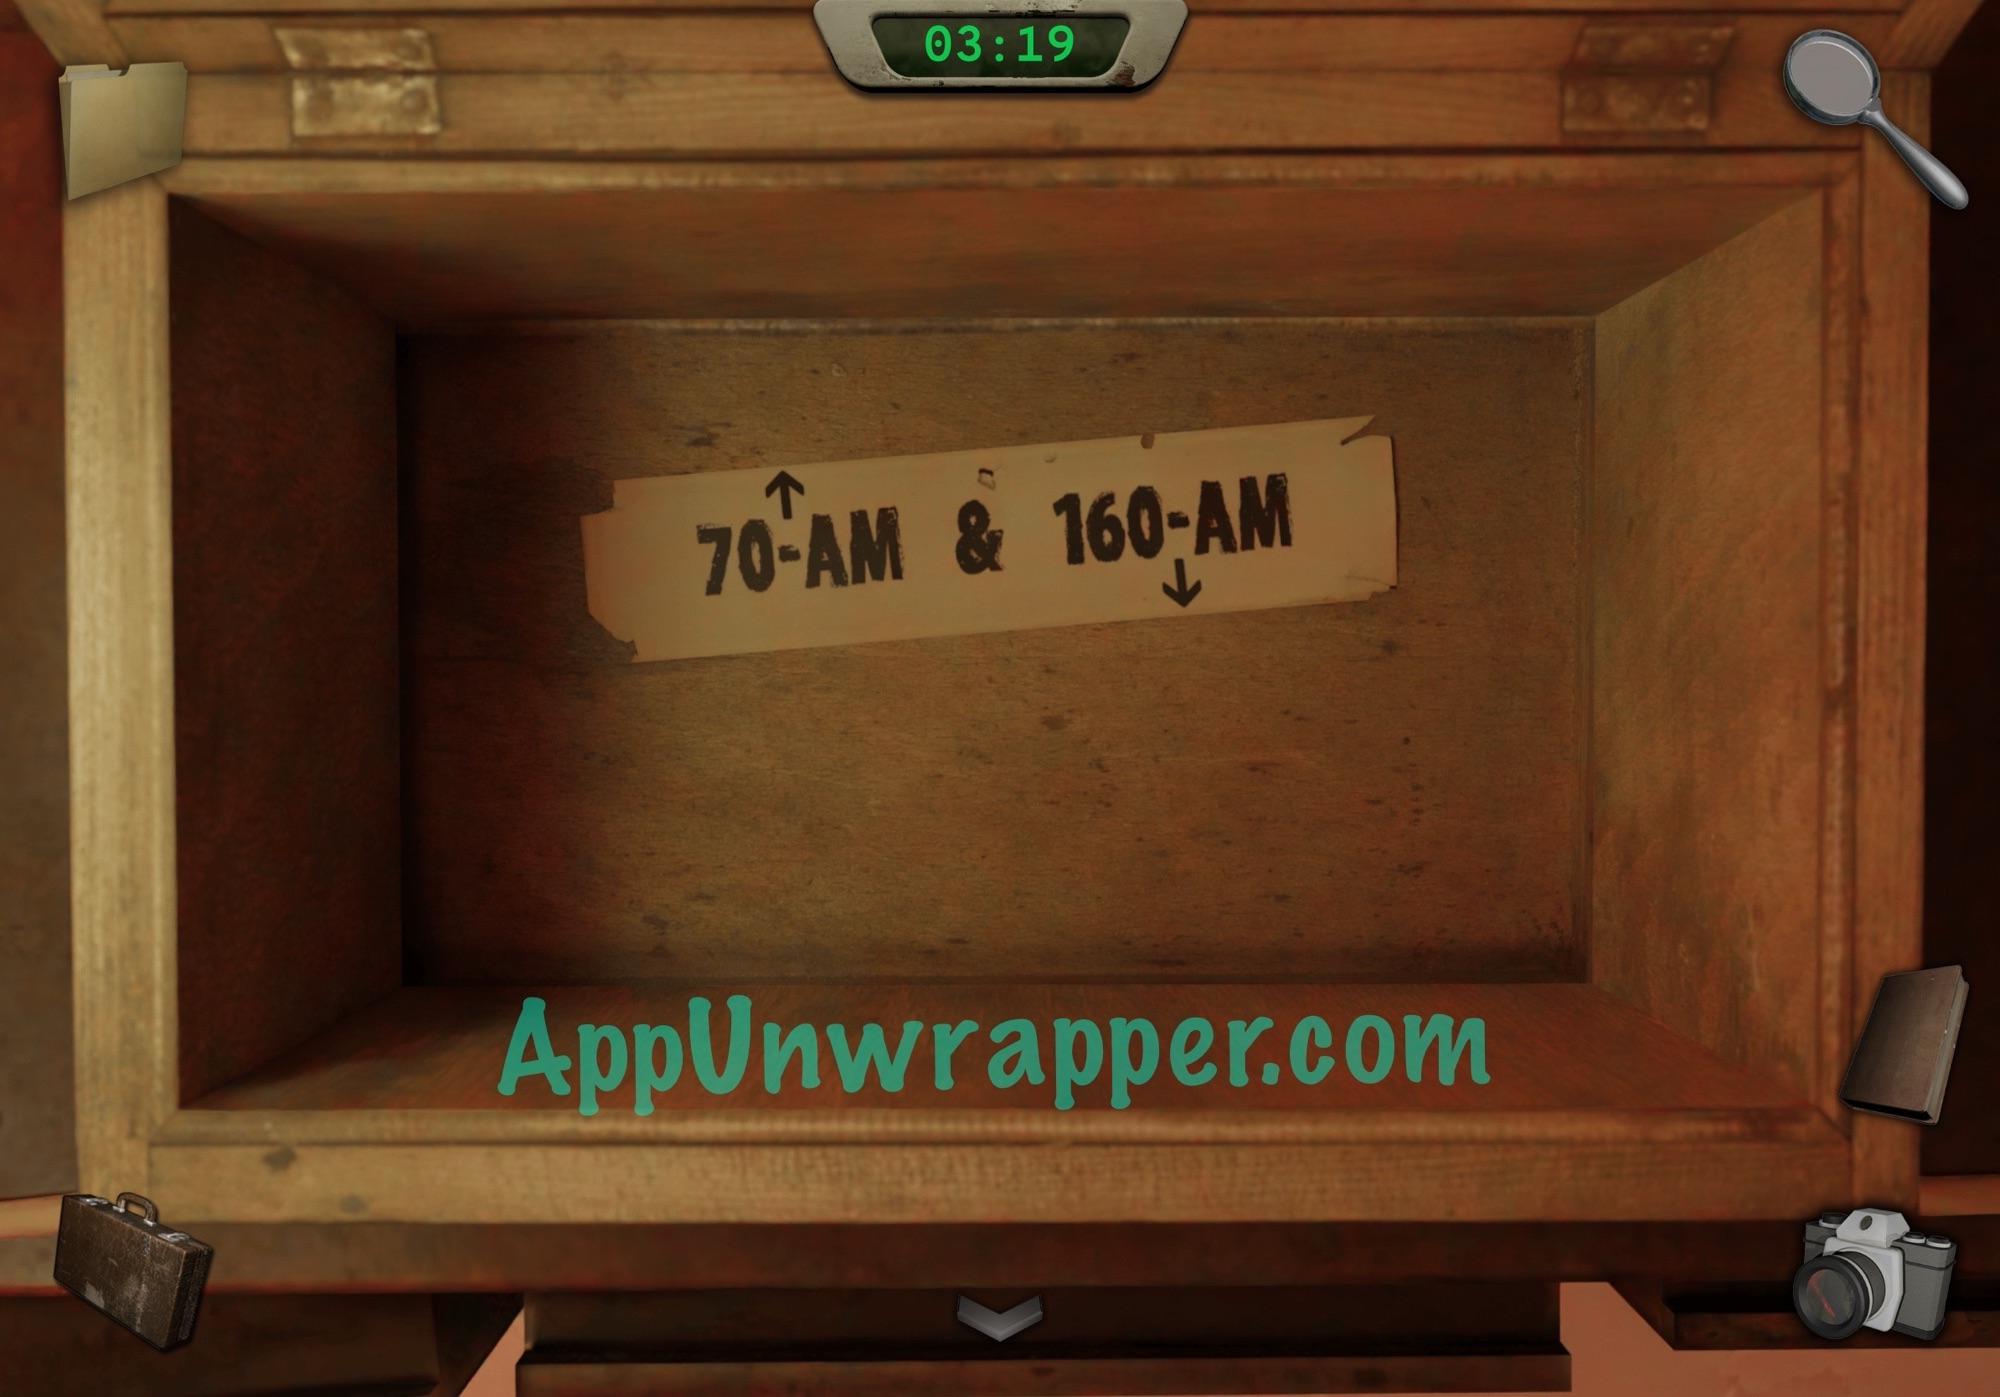
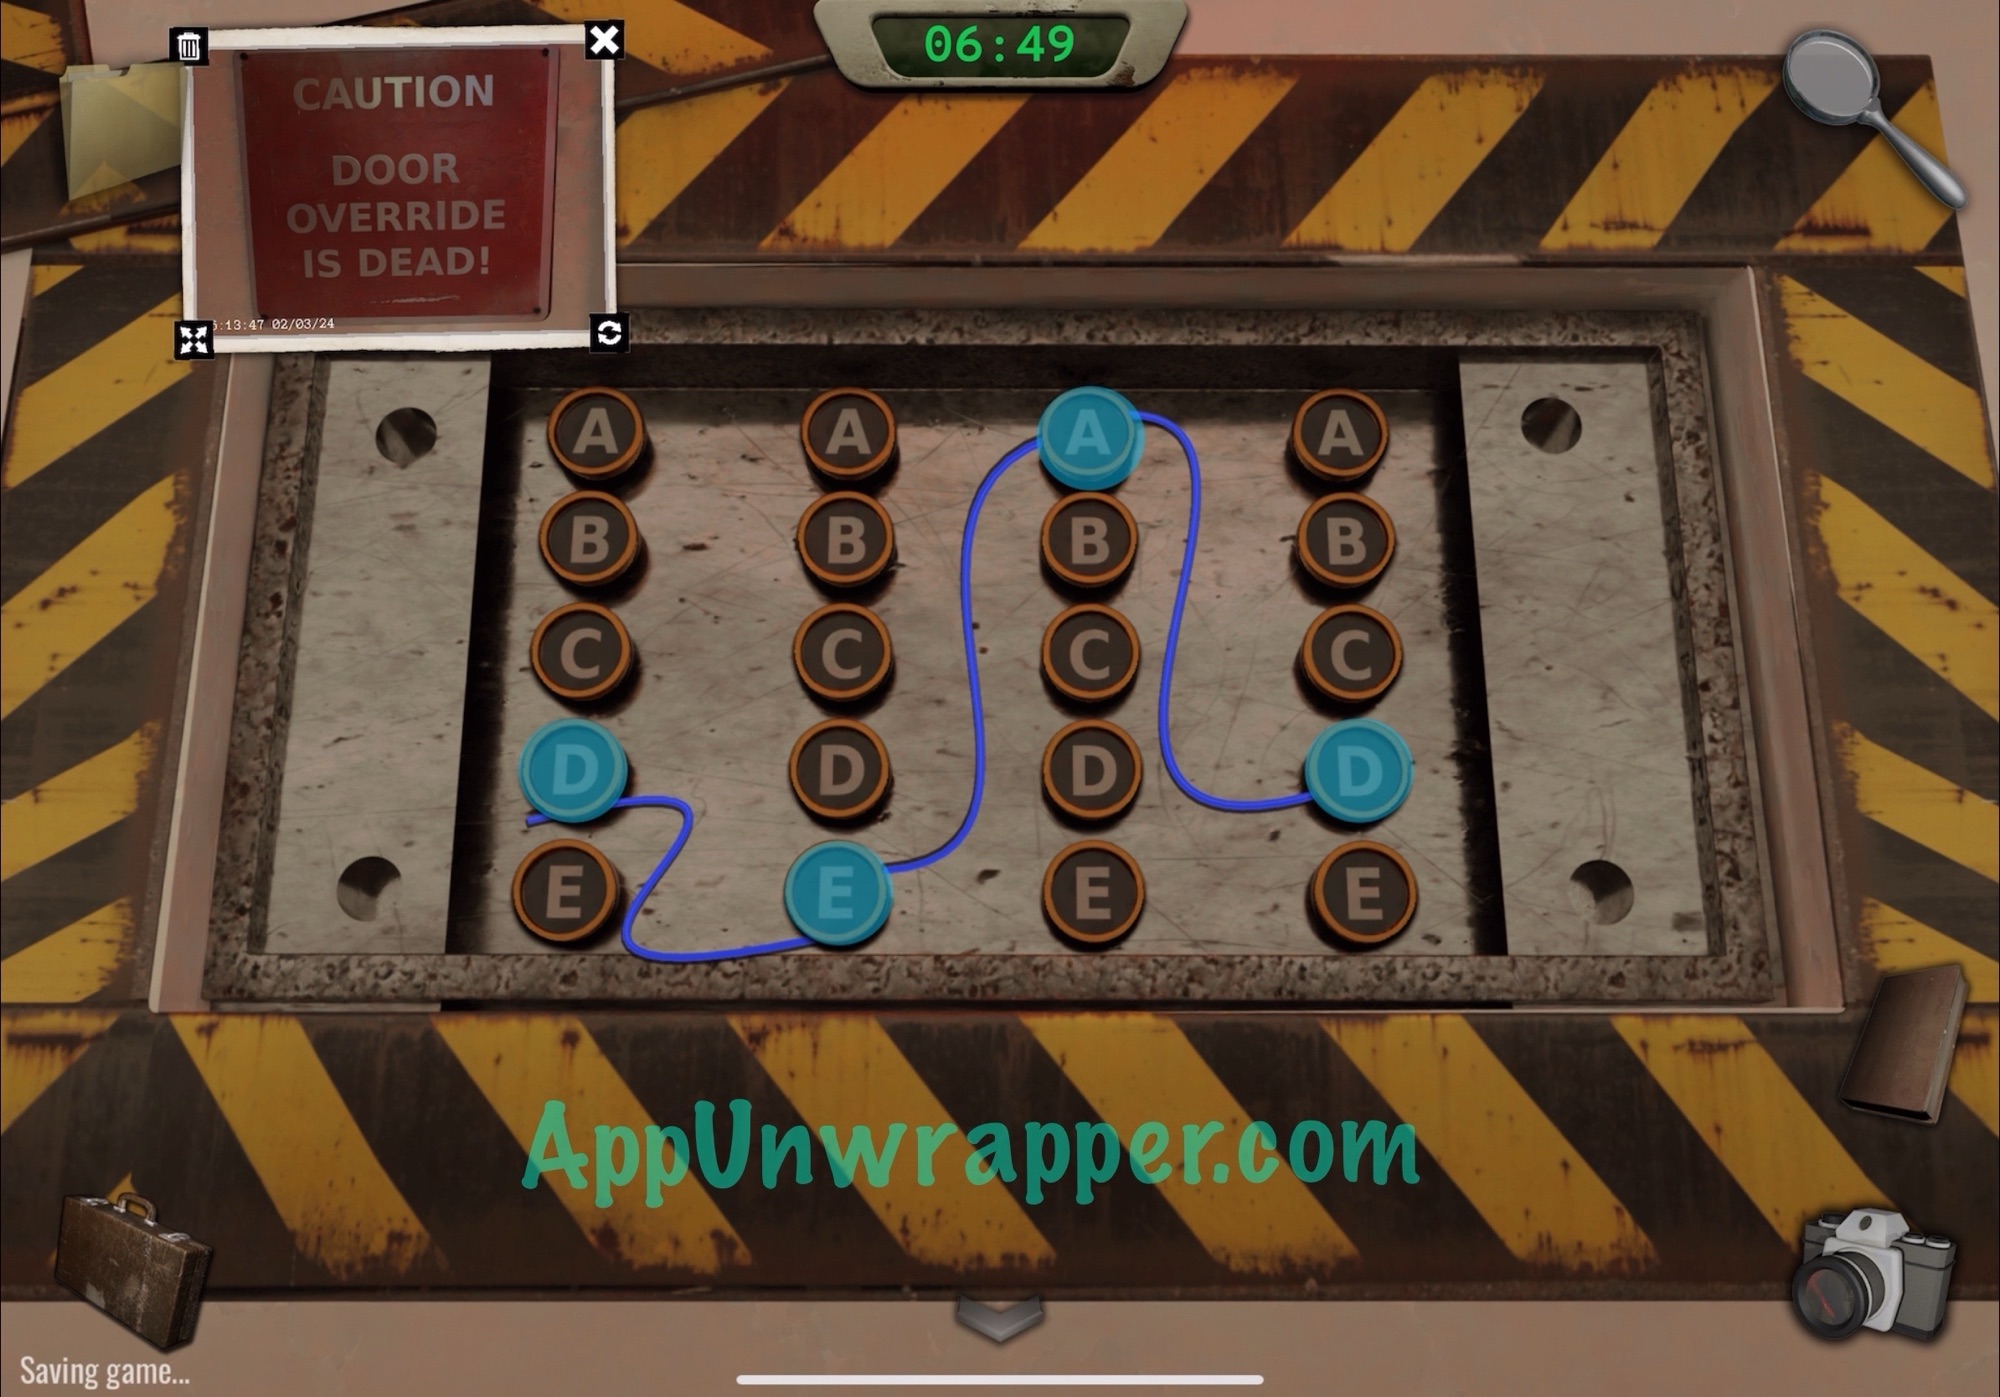
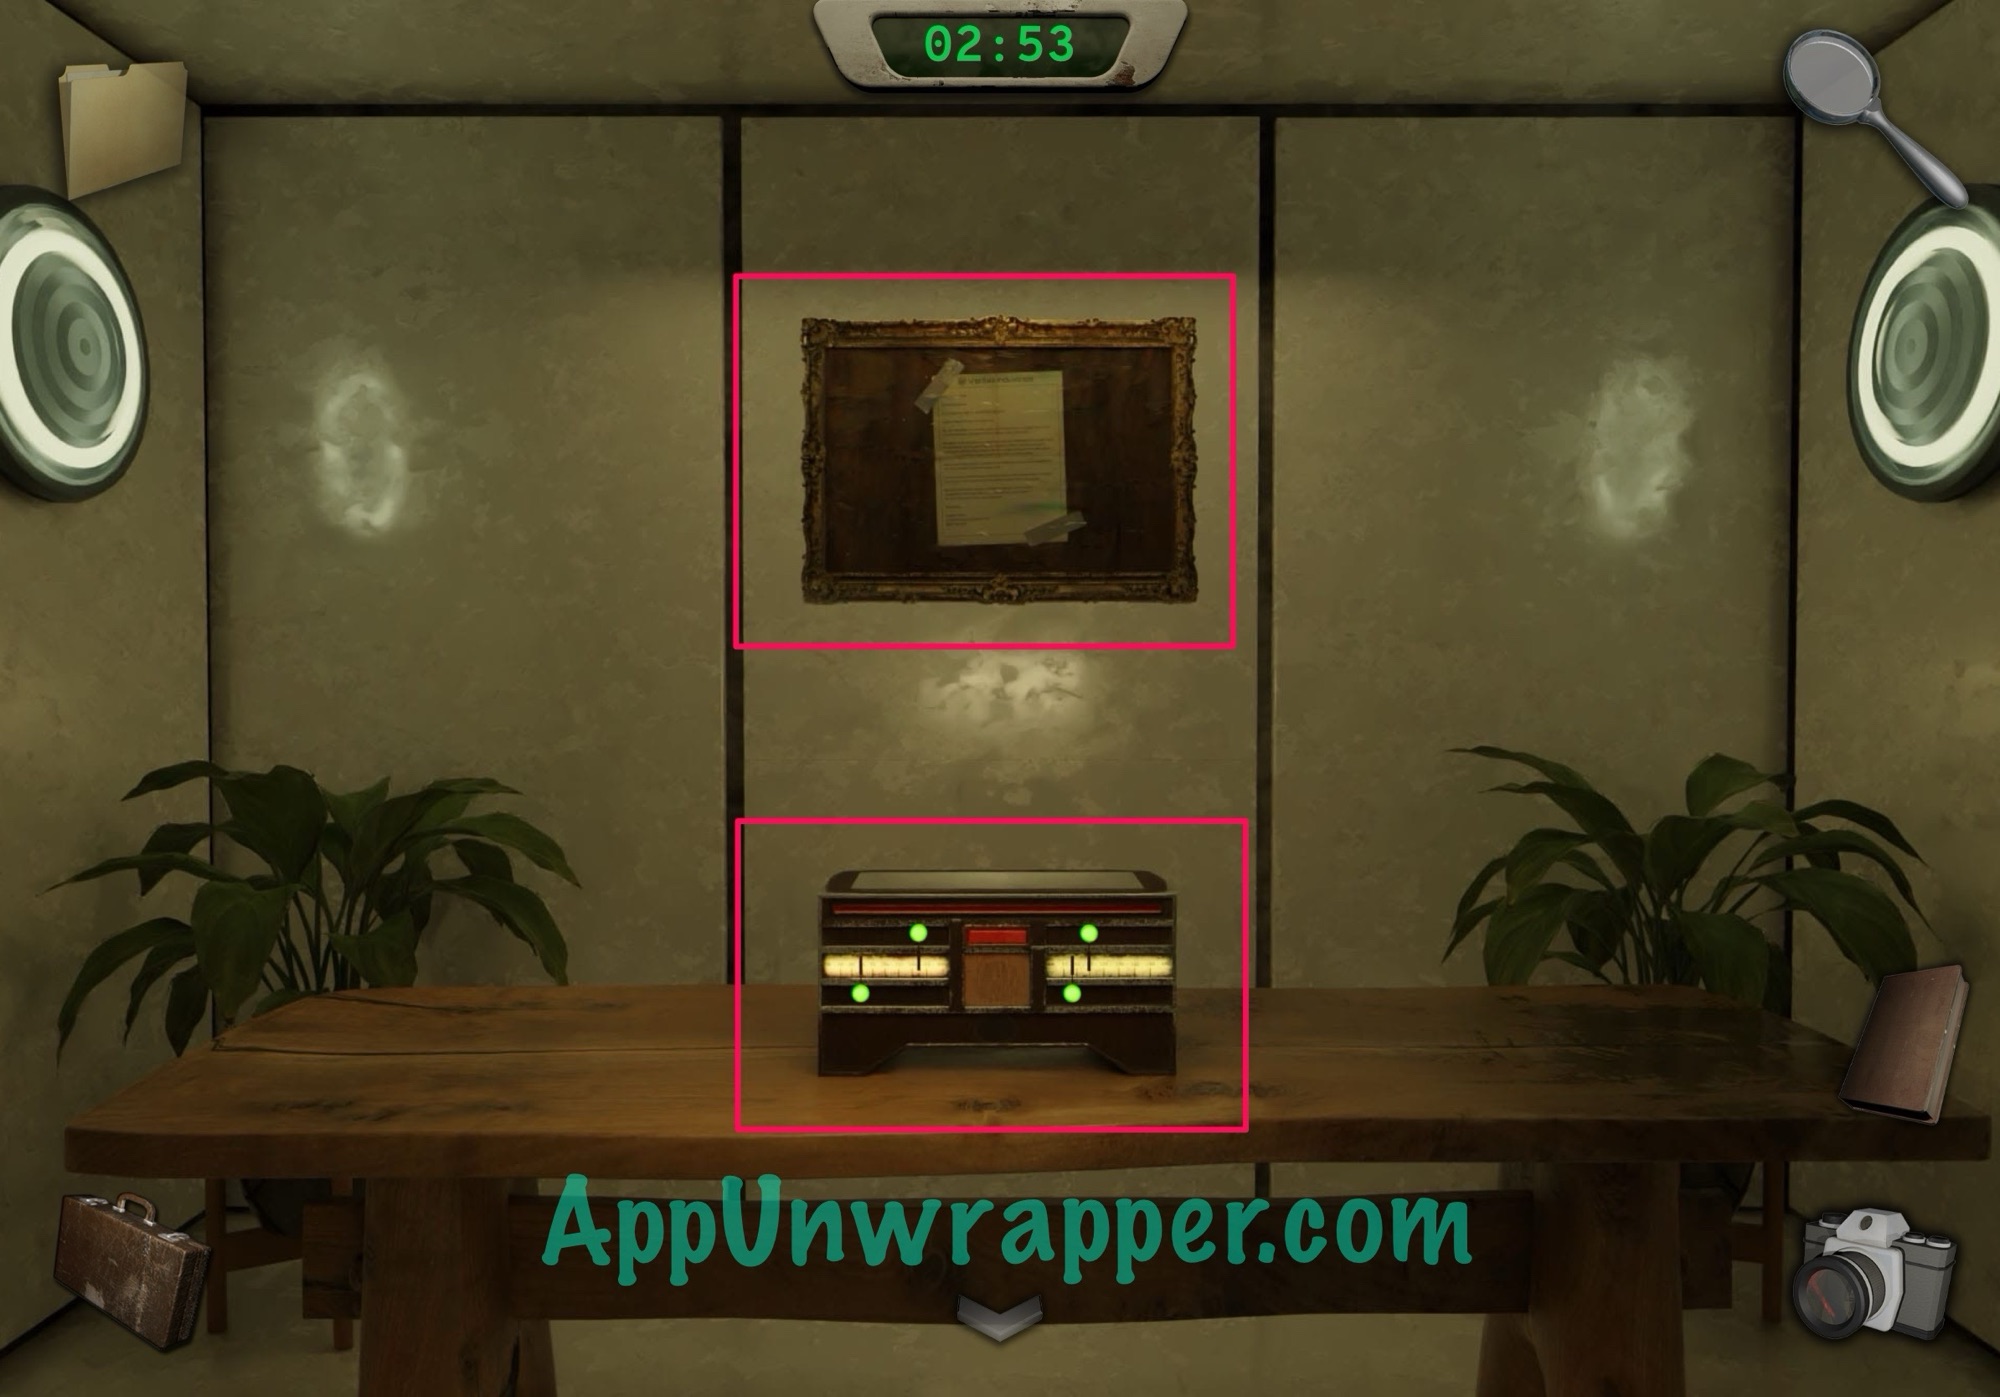
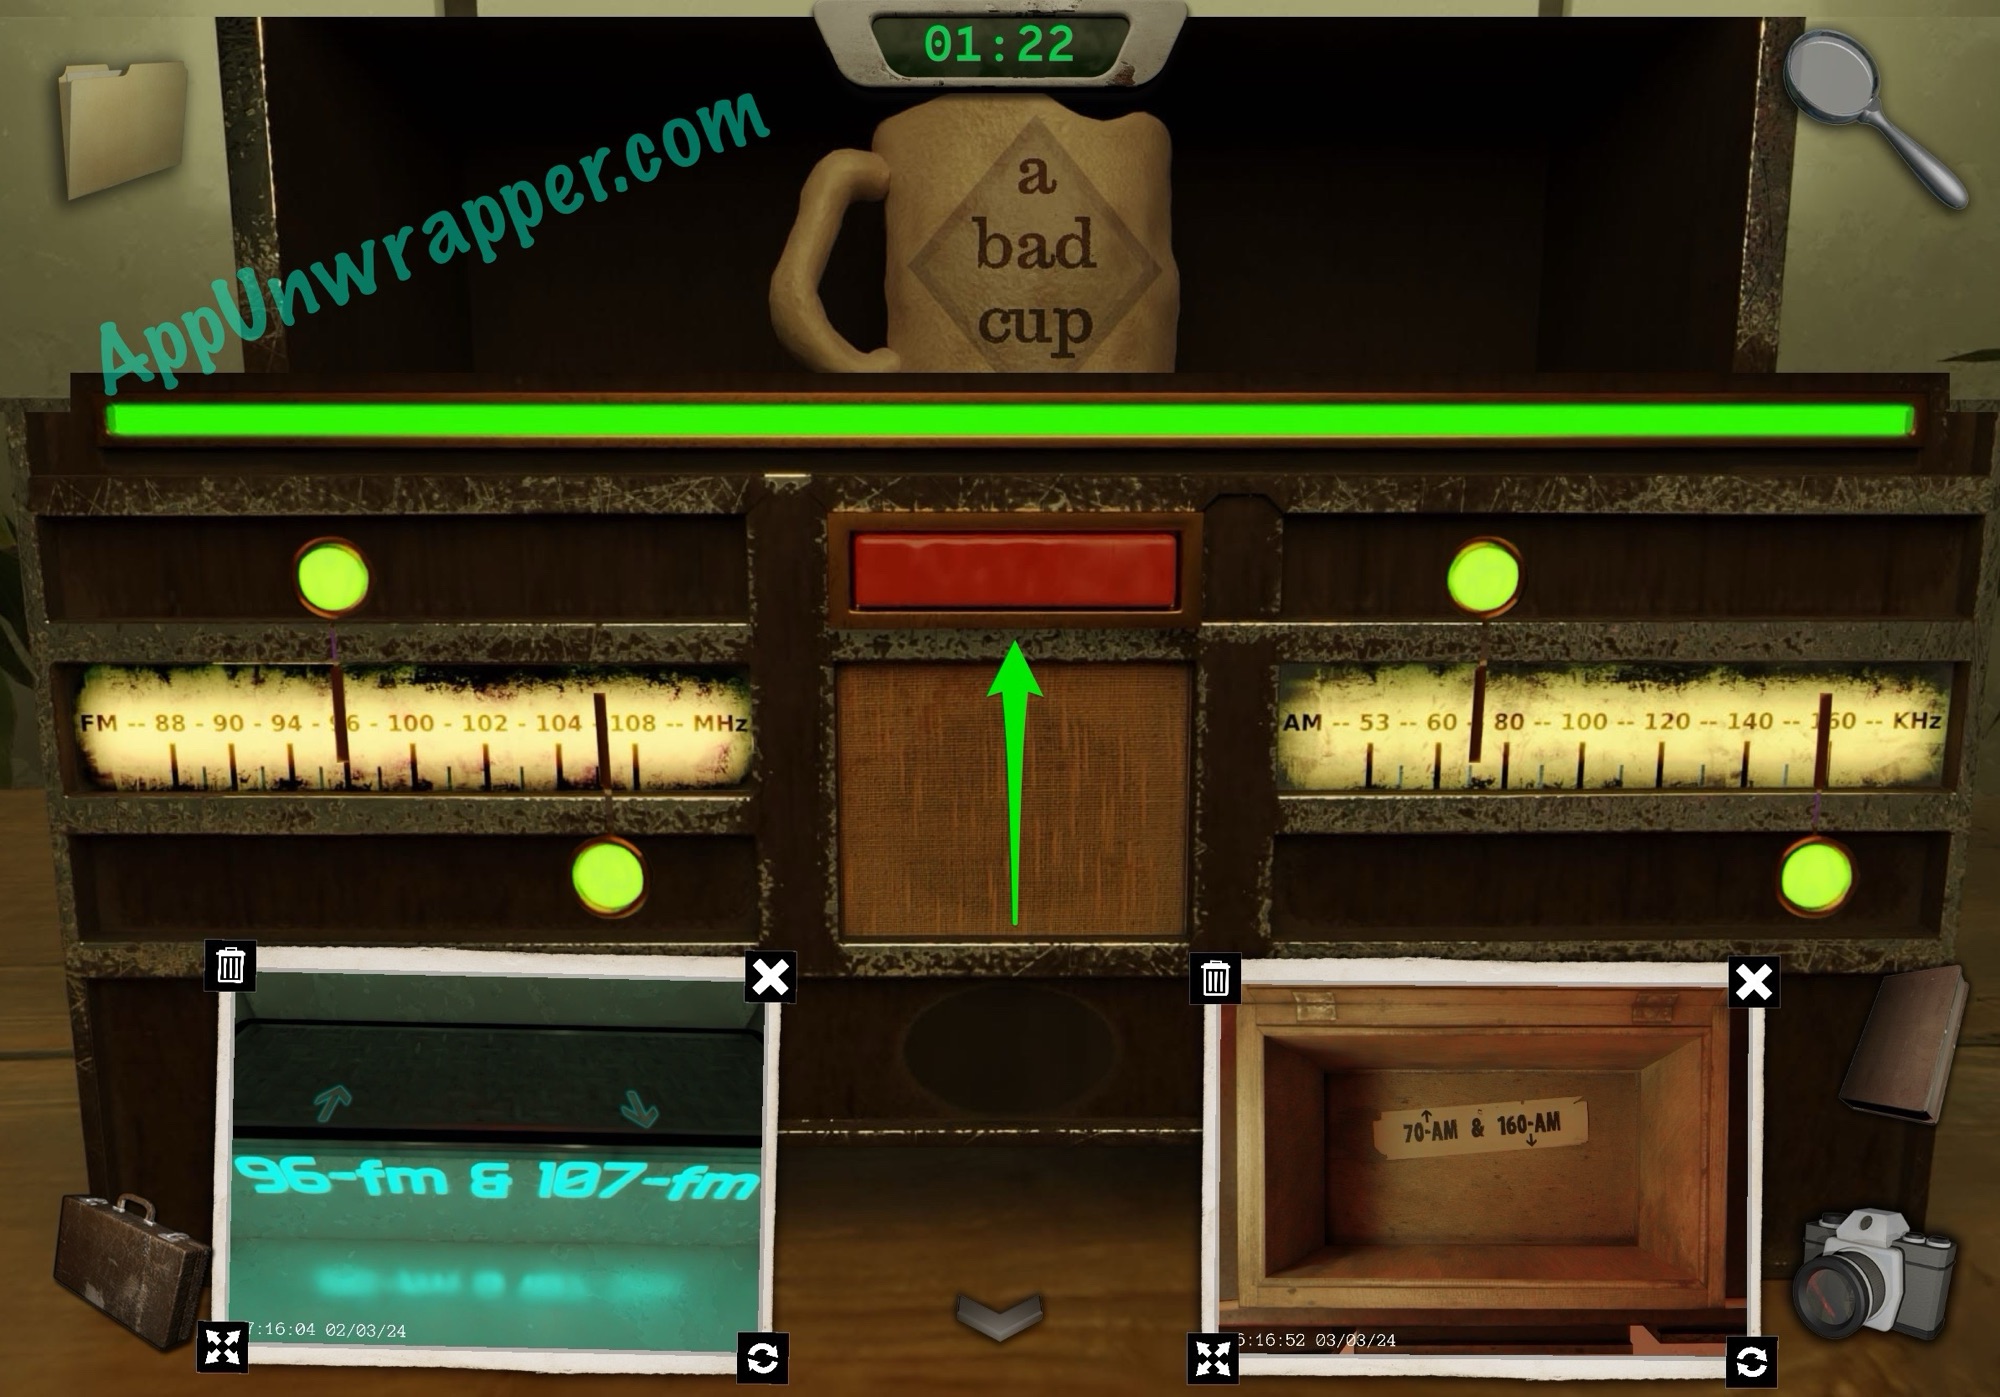
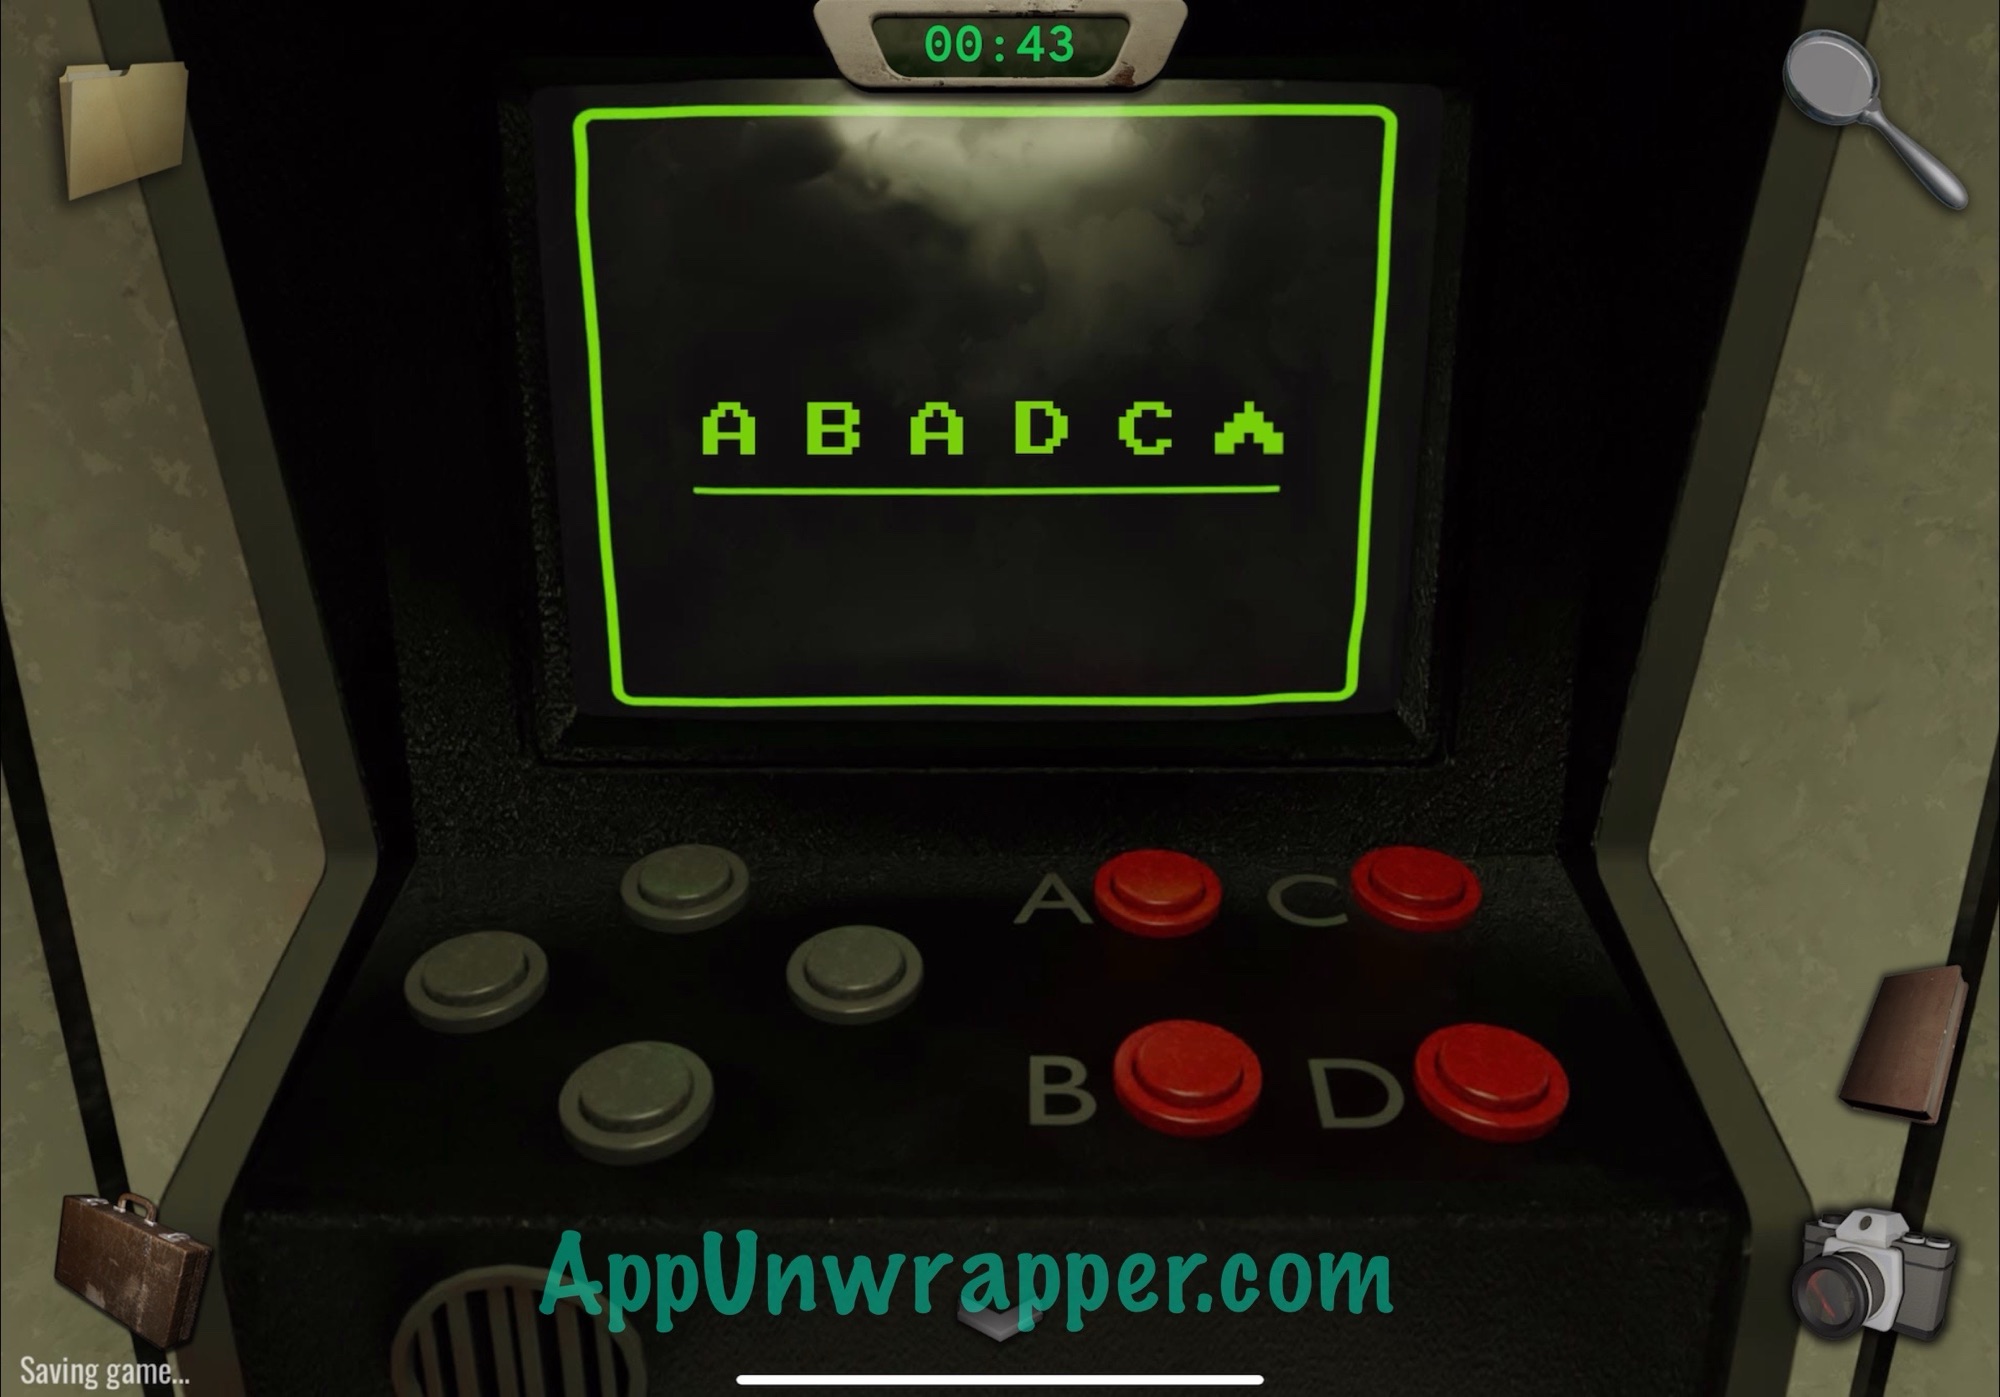
6. Go back downstairs and through the left door. Look at the framed note. It’s just story stuff, not part of any puzzle. Then tap on the radio and take out the two photos you took of the clues from the stairs and the box. Change the stations to 96 fm on the top left, 107 fm on the bottom left, then 70 AM on the top right and and 260 AM on the bottom right. Press the red button and a panel will open up, revealing a mug that says A BAD CUP on it. Take a photo.
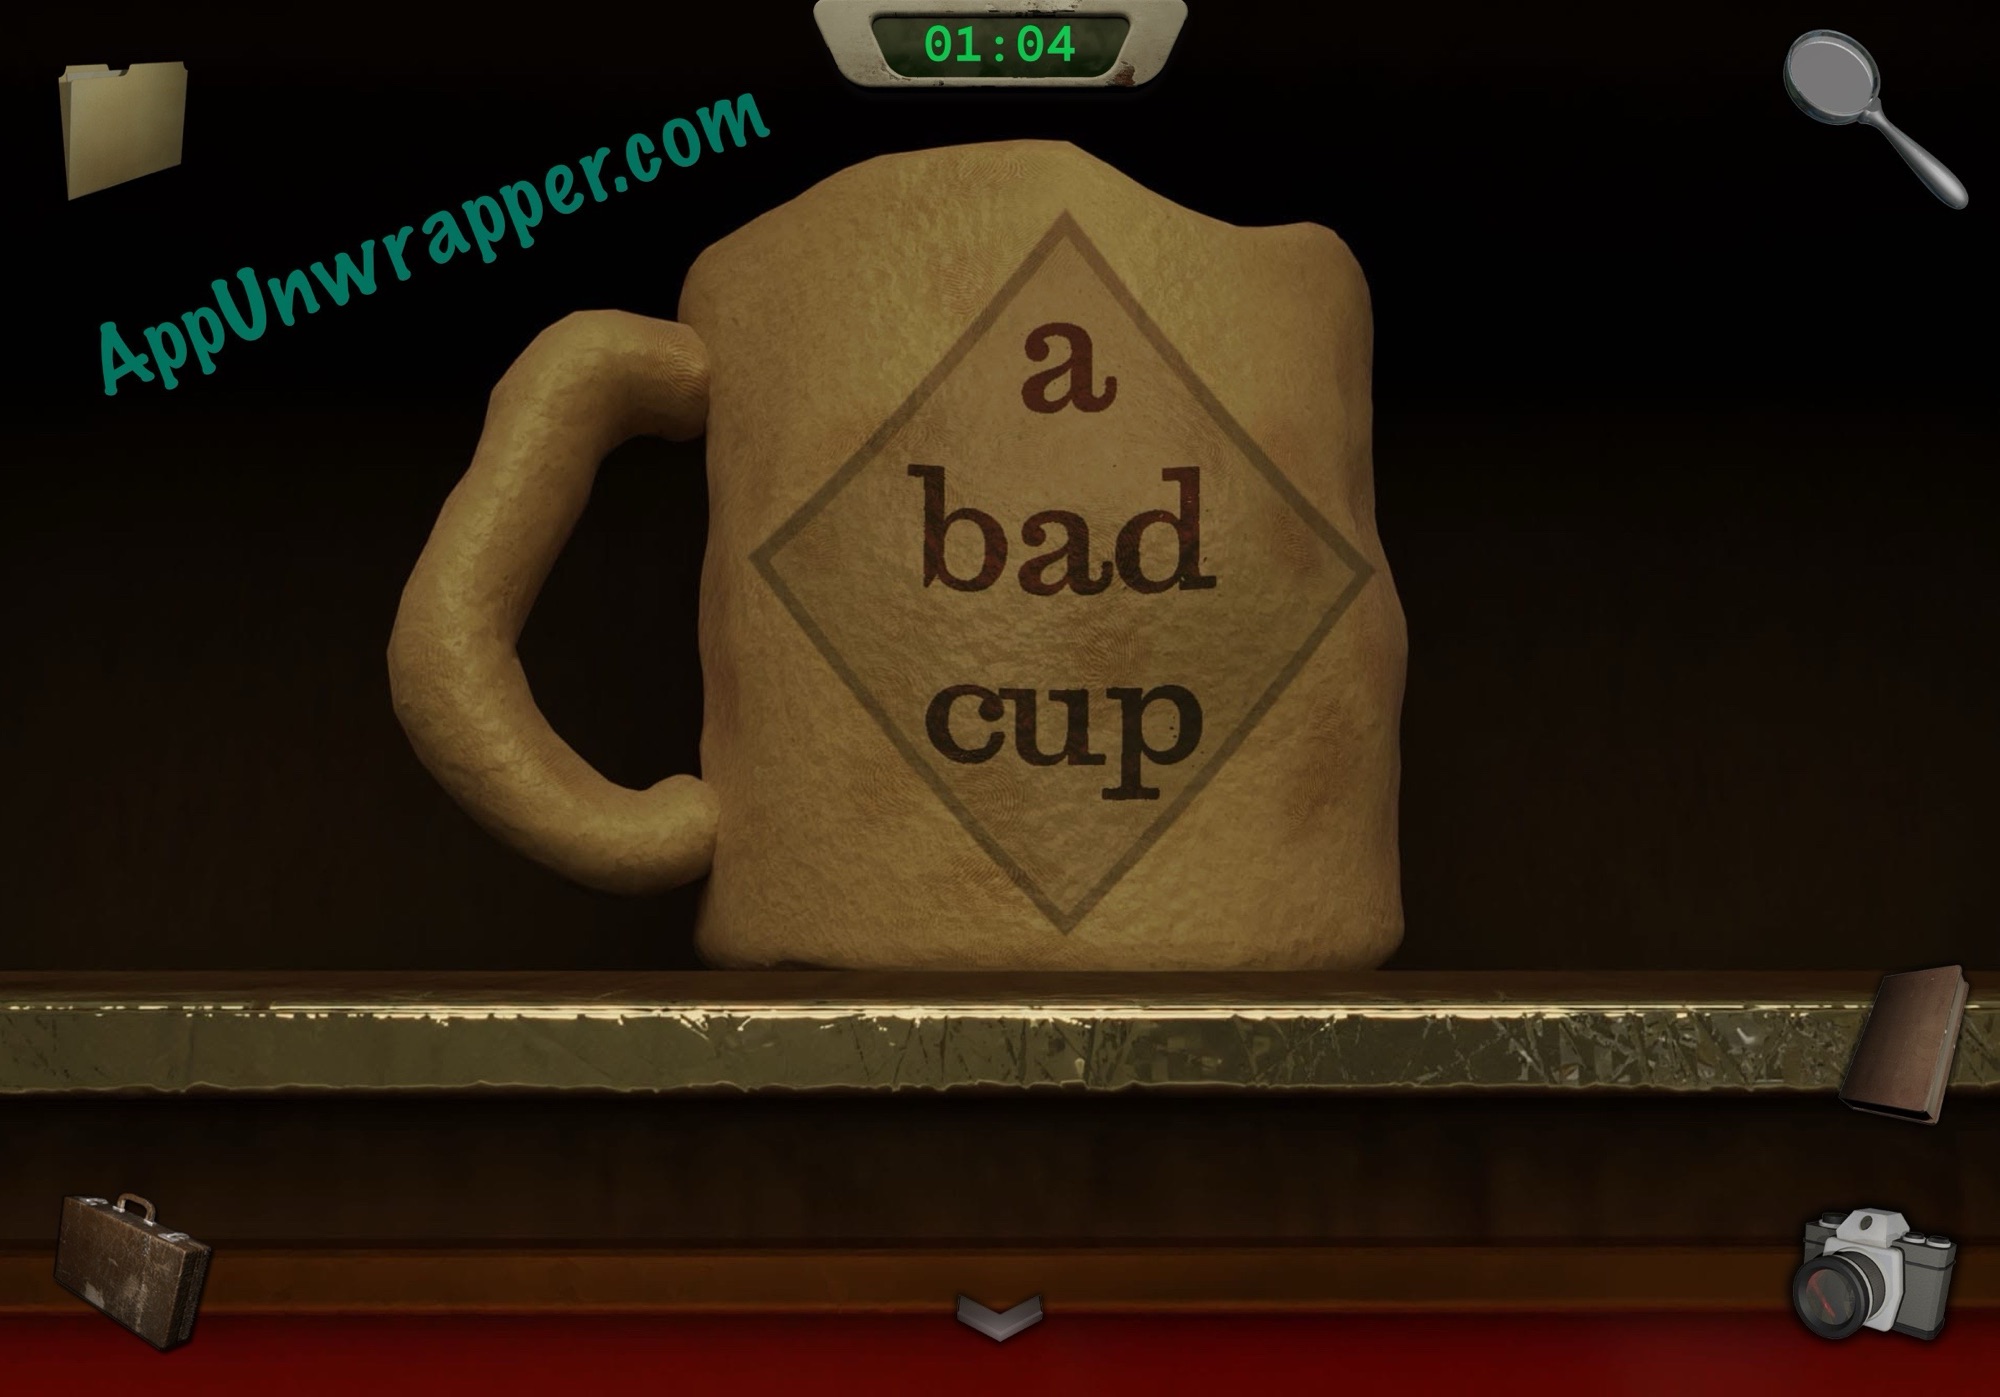
7. Go back upstairs and tap on the arcade machine. Use the clue from the mug and press these buttons: A B A D C and then UP. Take a photo of the clue on the screen.

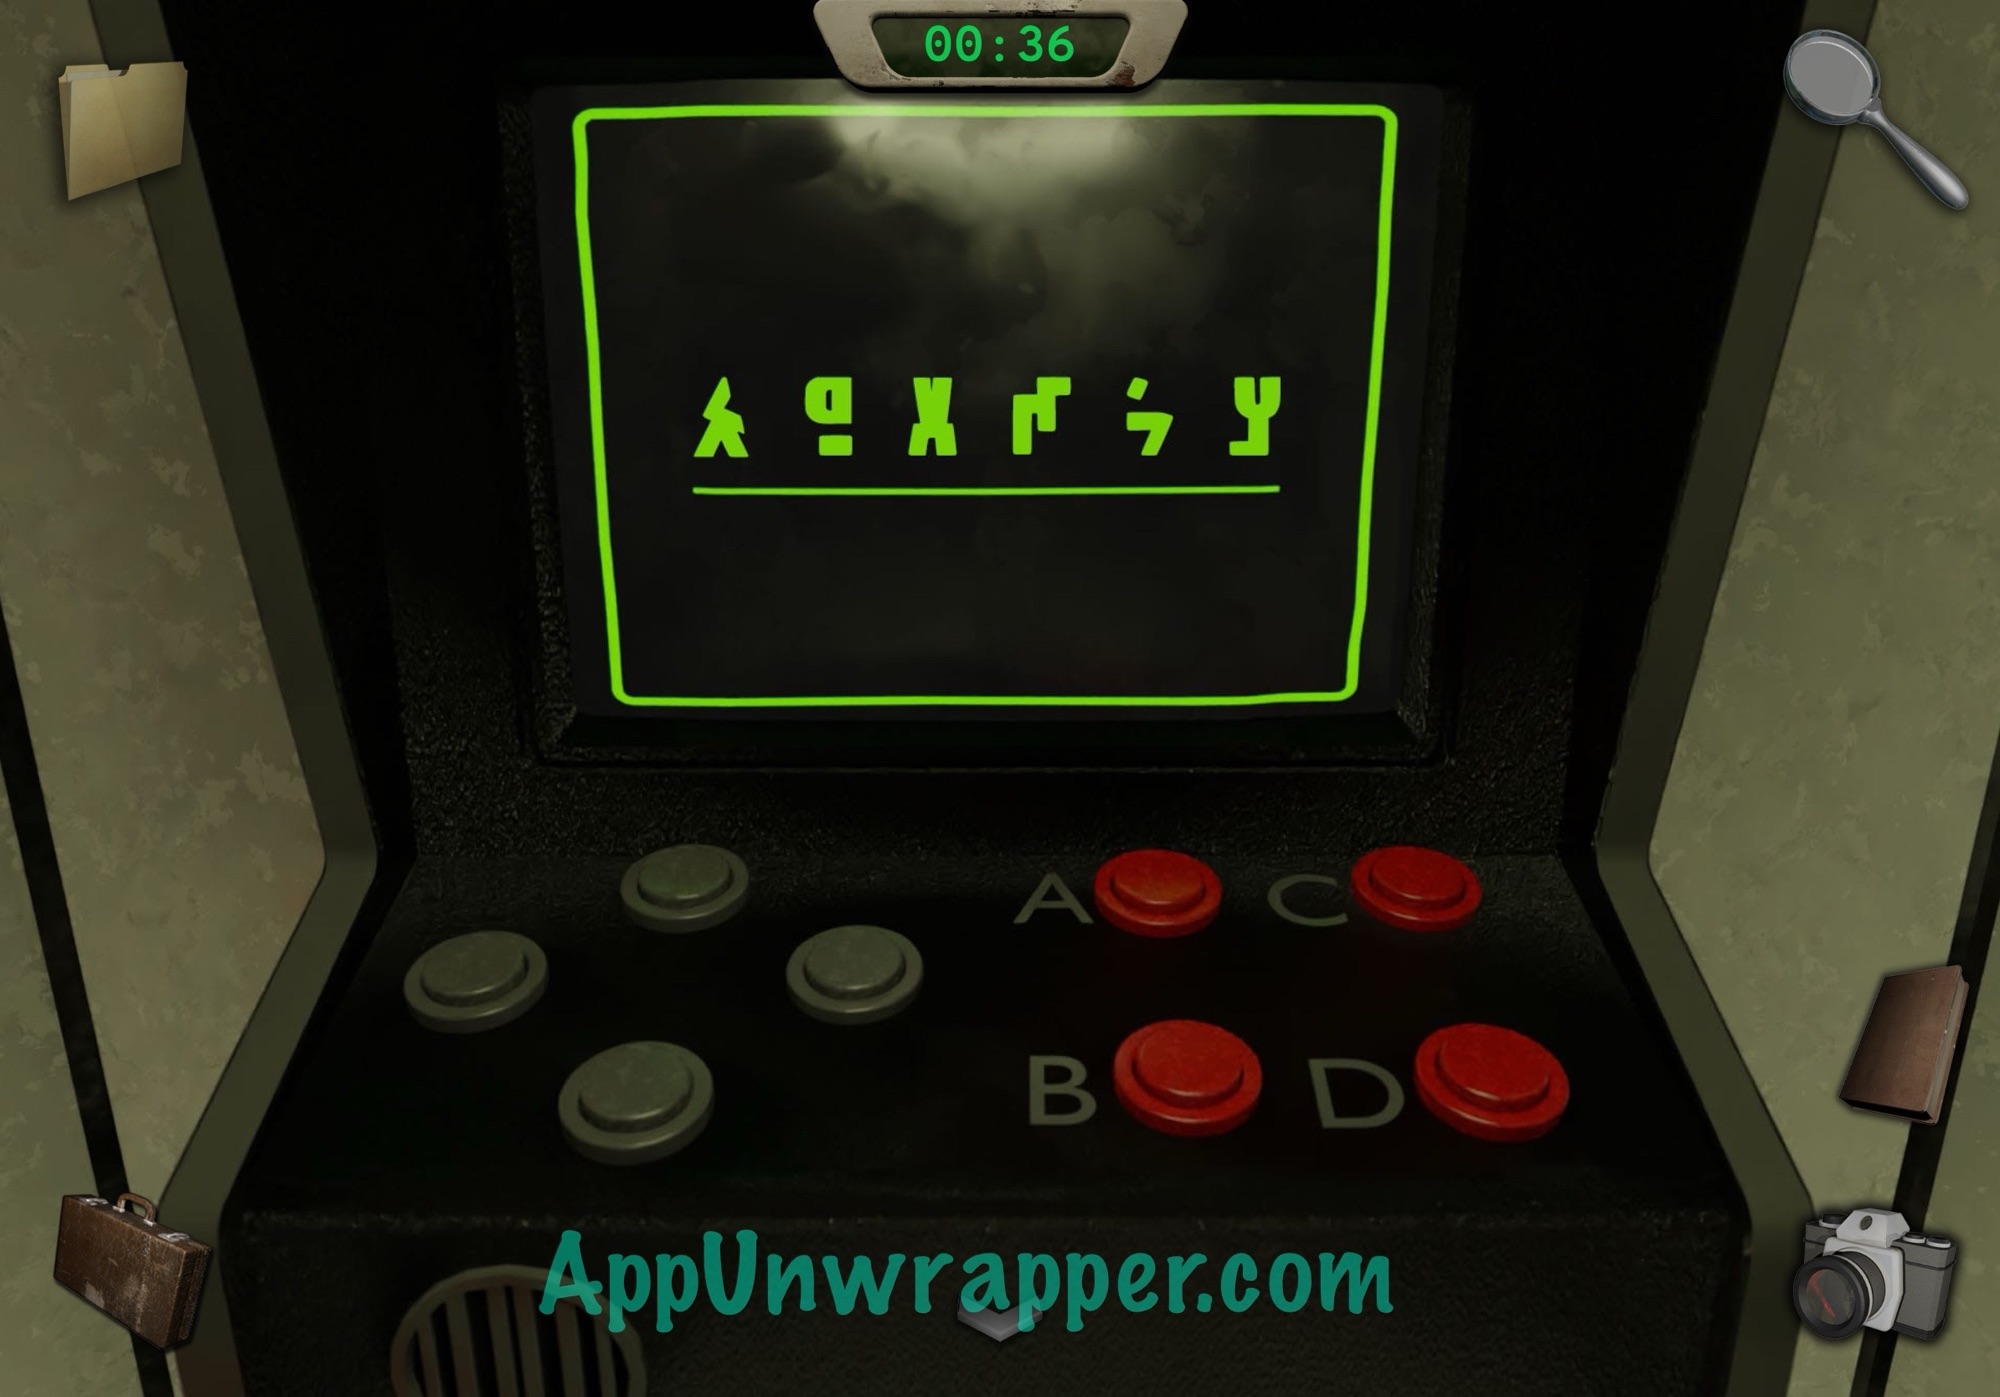
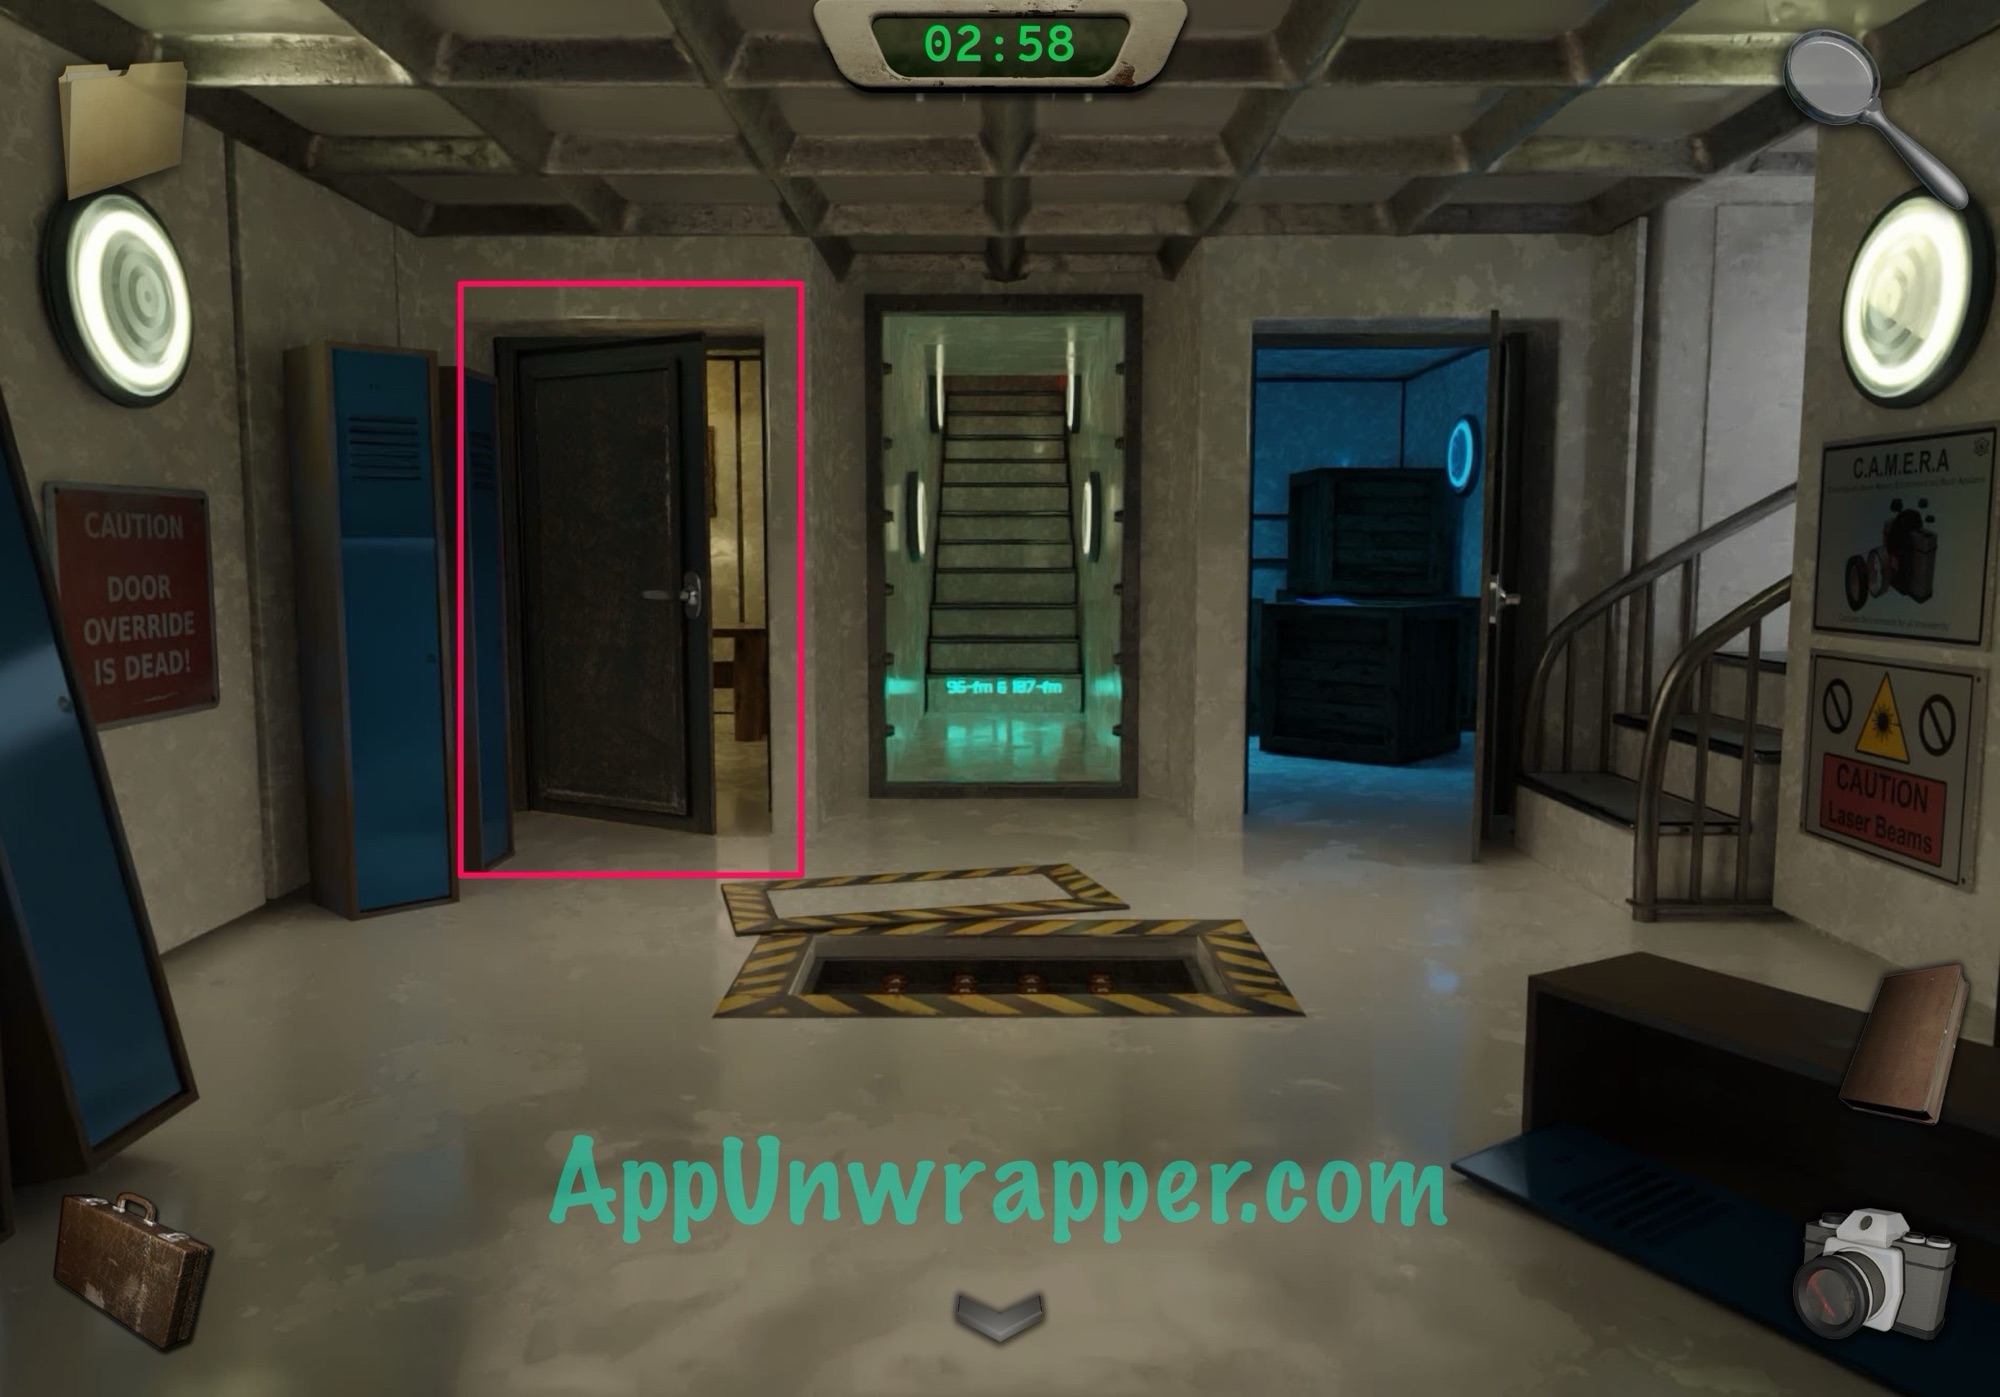
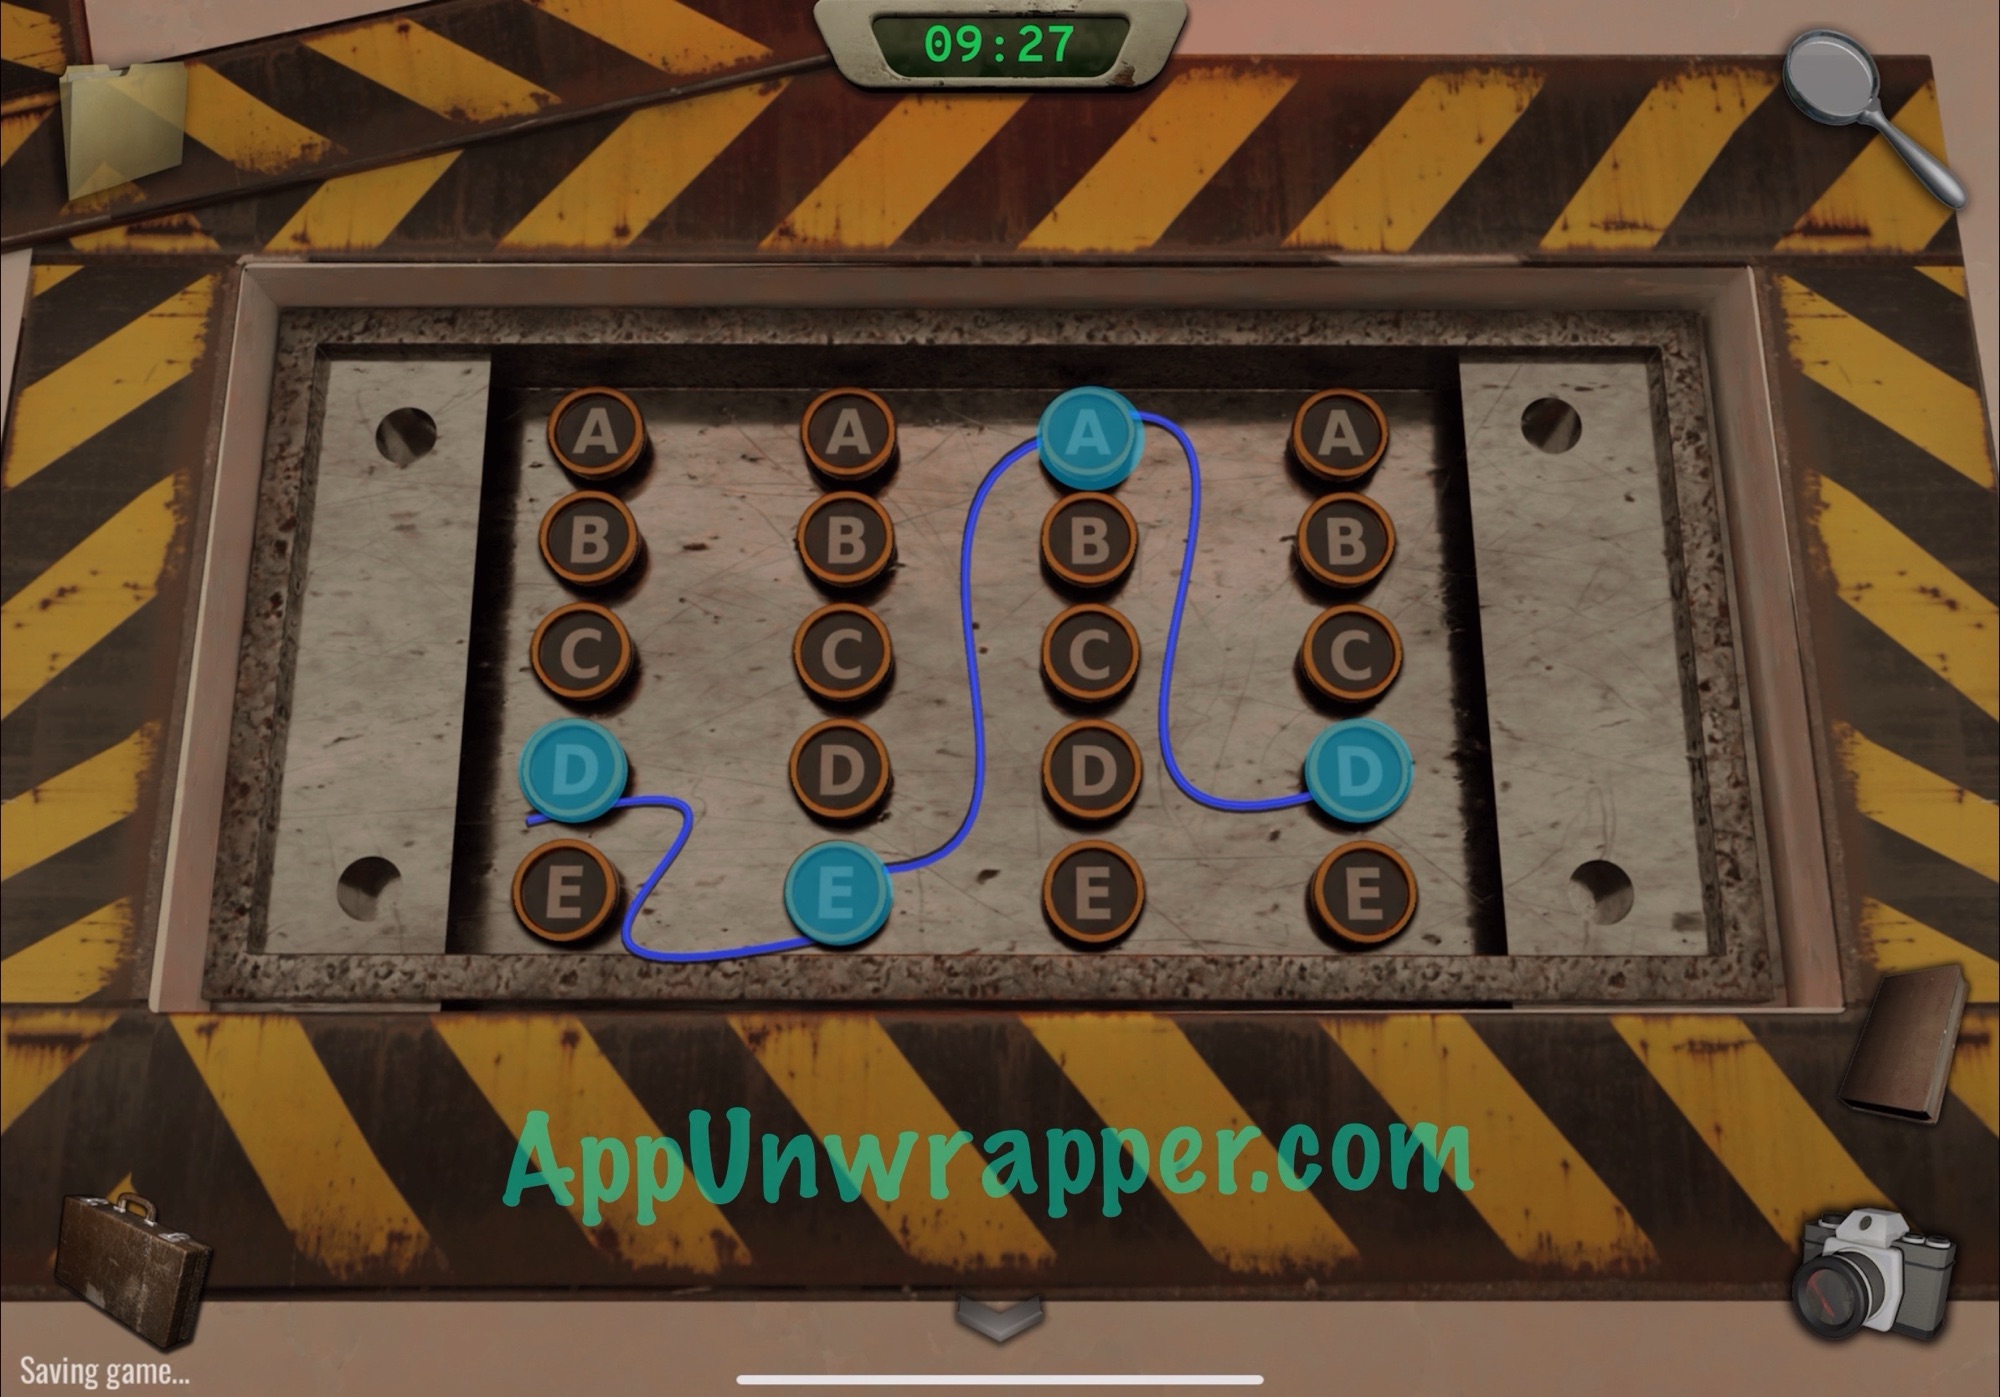
8. Go back down and up the stairs to the right. Tap on the door there and take out the photo you just took. Press the buttons in the same order to unlock the door. Go through.

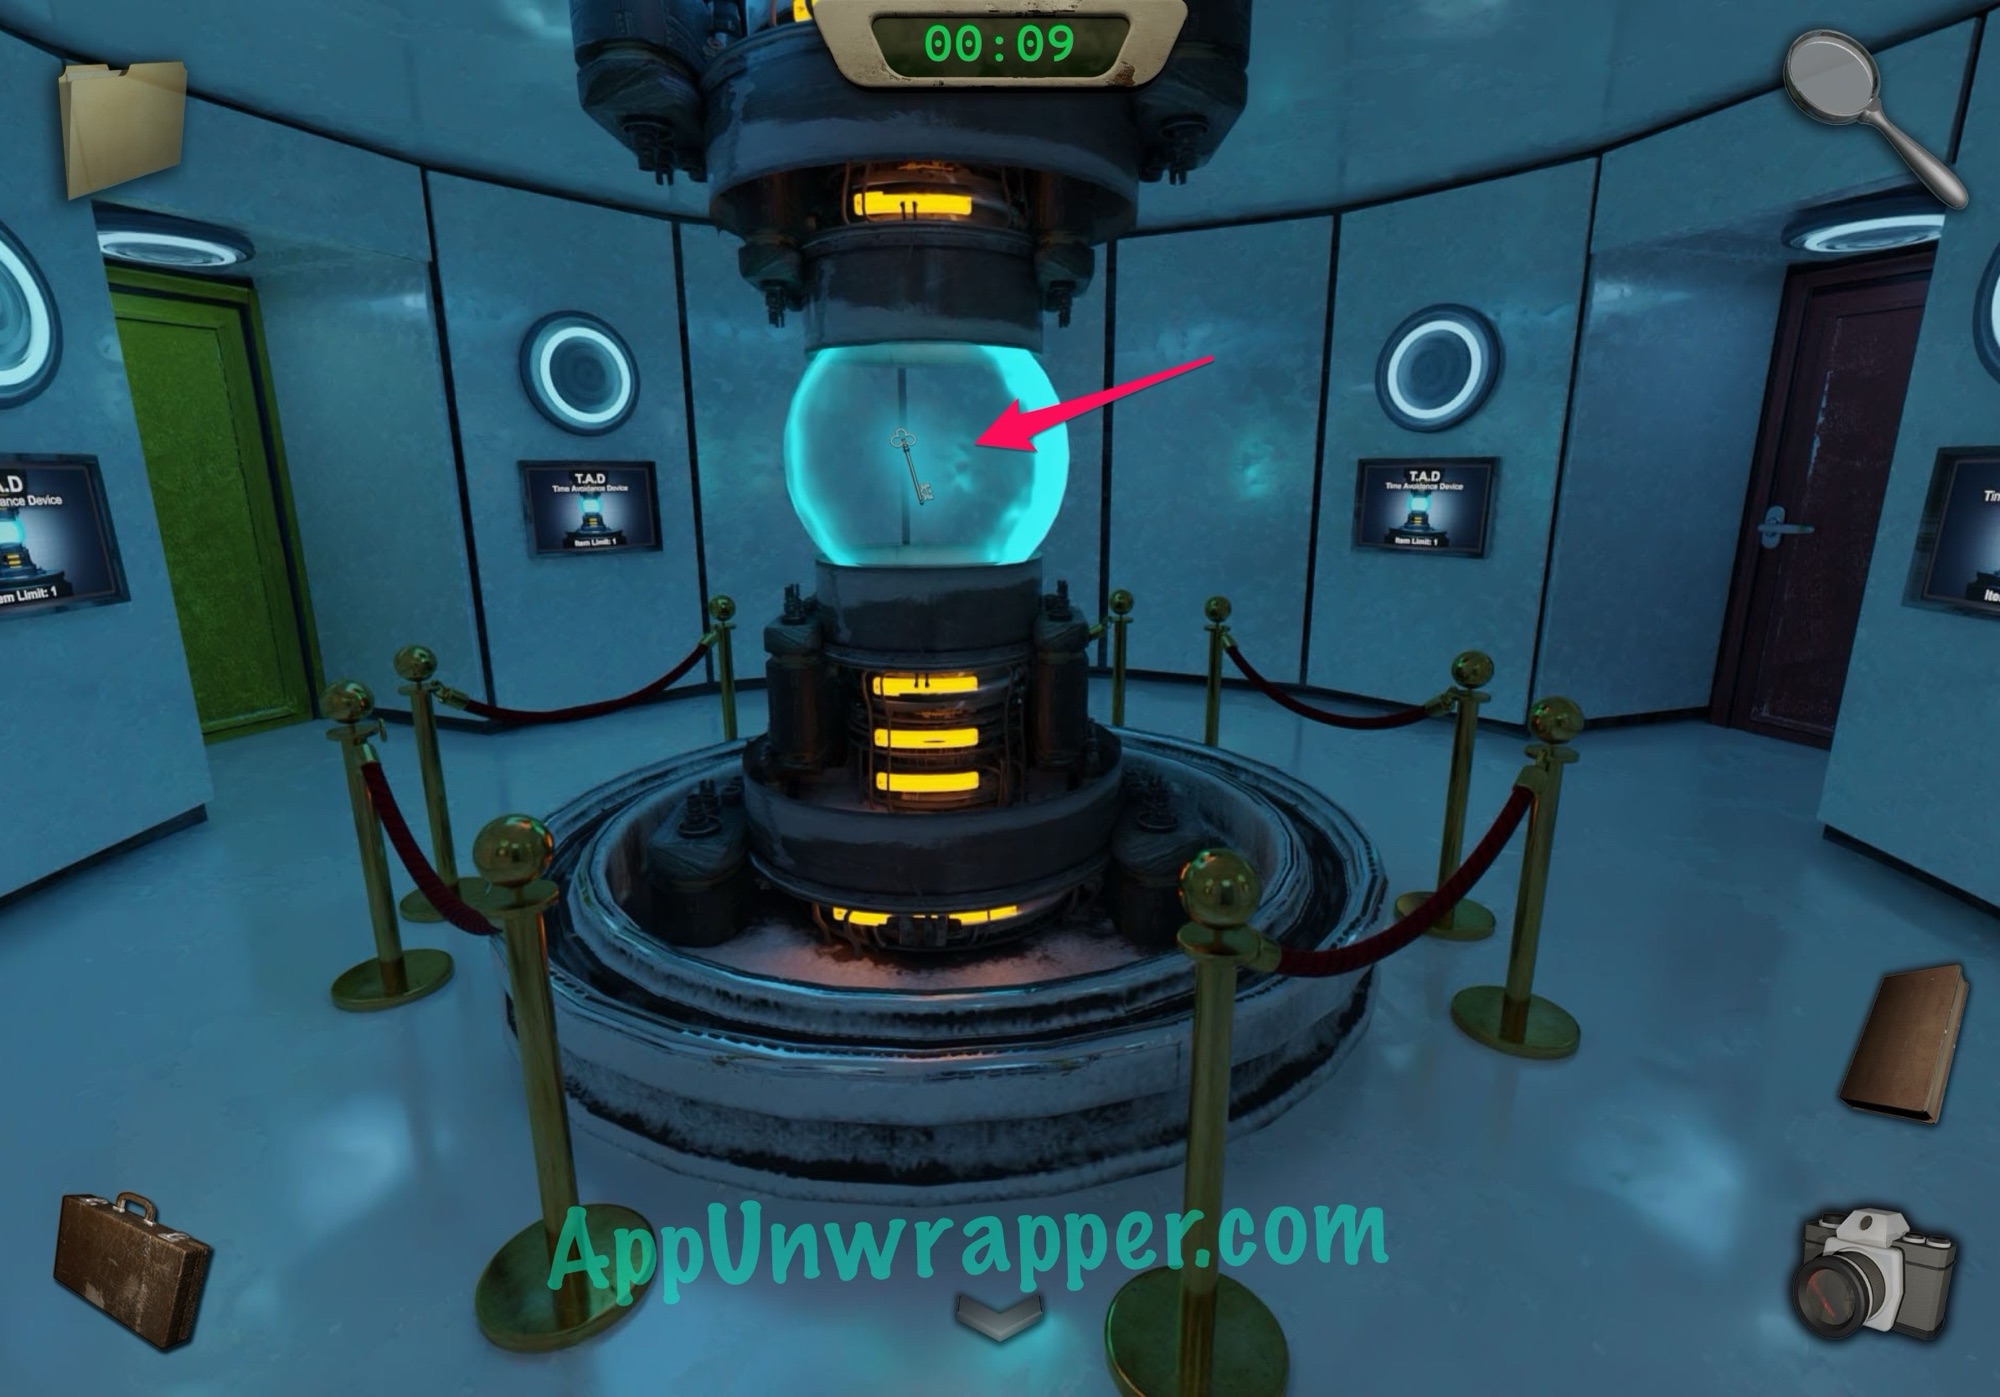
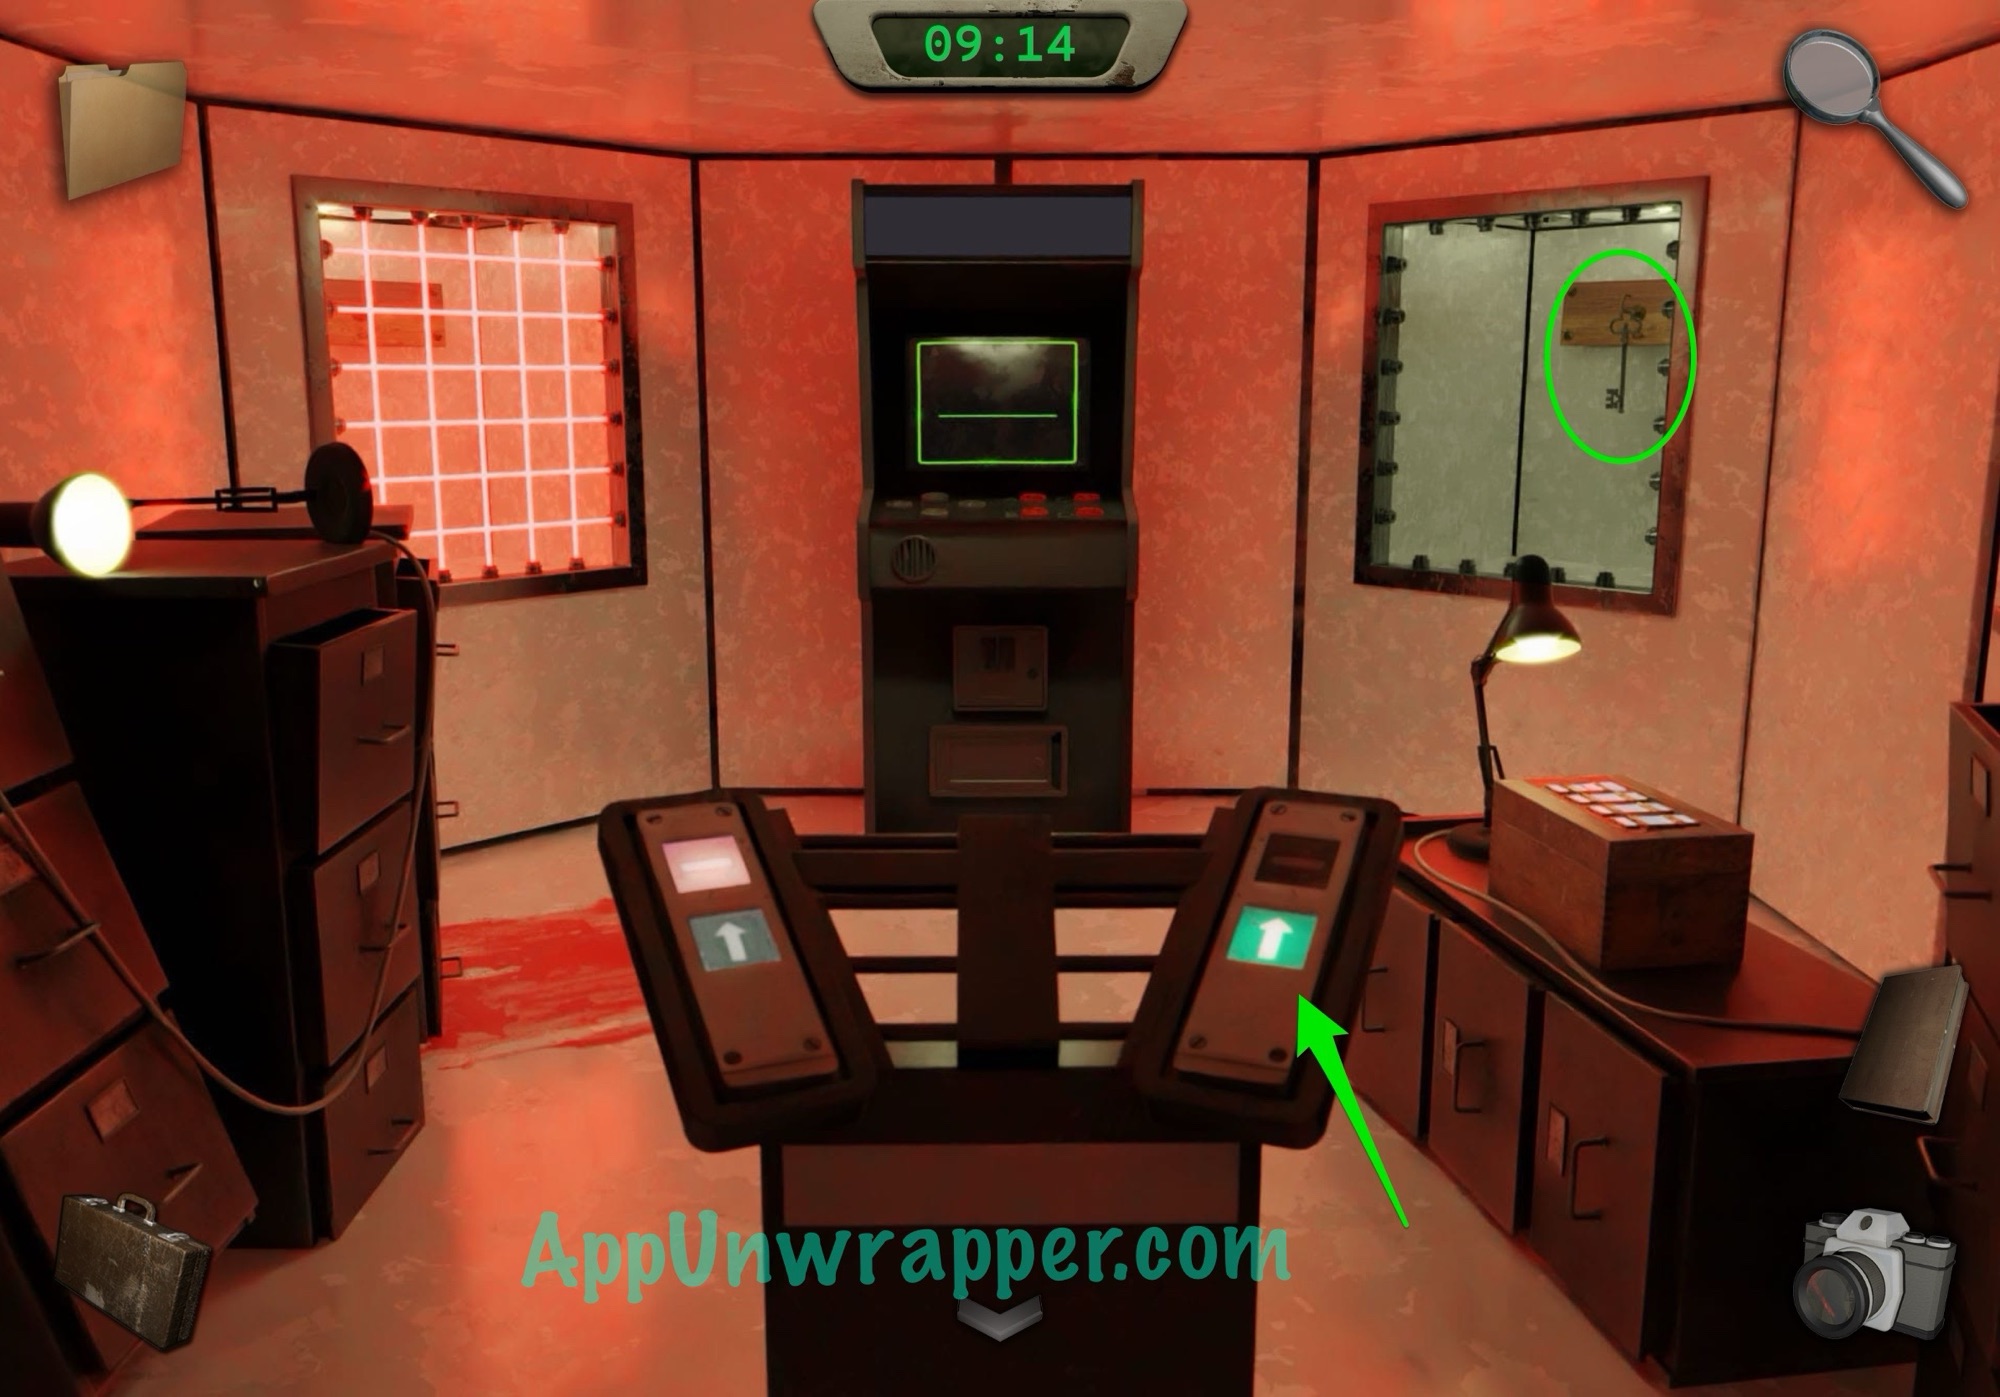
9. Here you have the Time Avoidance Device (T.A.D.), which allows you to store one item through a time loop. This will allow us to get both keys. So place the key you have in the TAD. Then either wait for the time loop to reset or go back to the first room and touch the exposed wires in the light to die and restart.
10. So now we start back at the beginning with two differences — you still have all your photos and that key is in the TAD. Use the photo you took to unlock the left door again. Open the DOOR OVERRIDE and set it to DEAD again to turn off the lasers. Head up the stairs and press the button to turn off the lasers on the right and grab the key.
11. Now we just have to get to the TAD again for the key we left there. Go back down and up the stairs to the right and take out the photo with the clue to open the door to the TAD again. Grab the key and go back down the stairs.

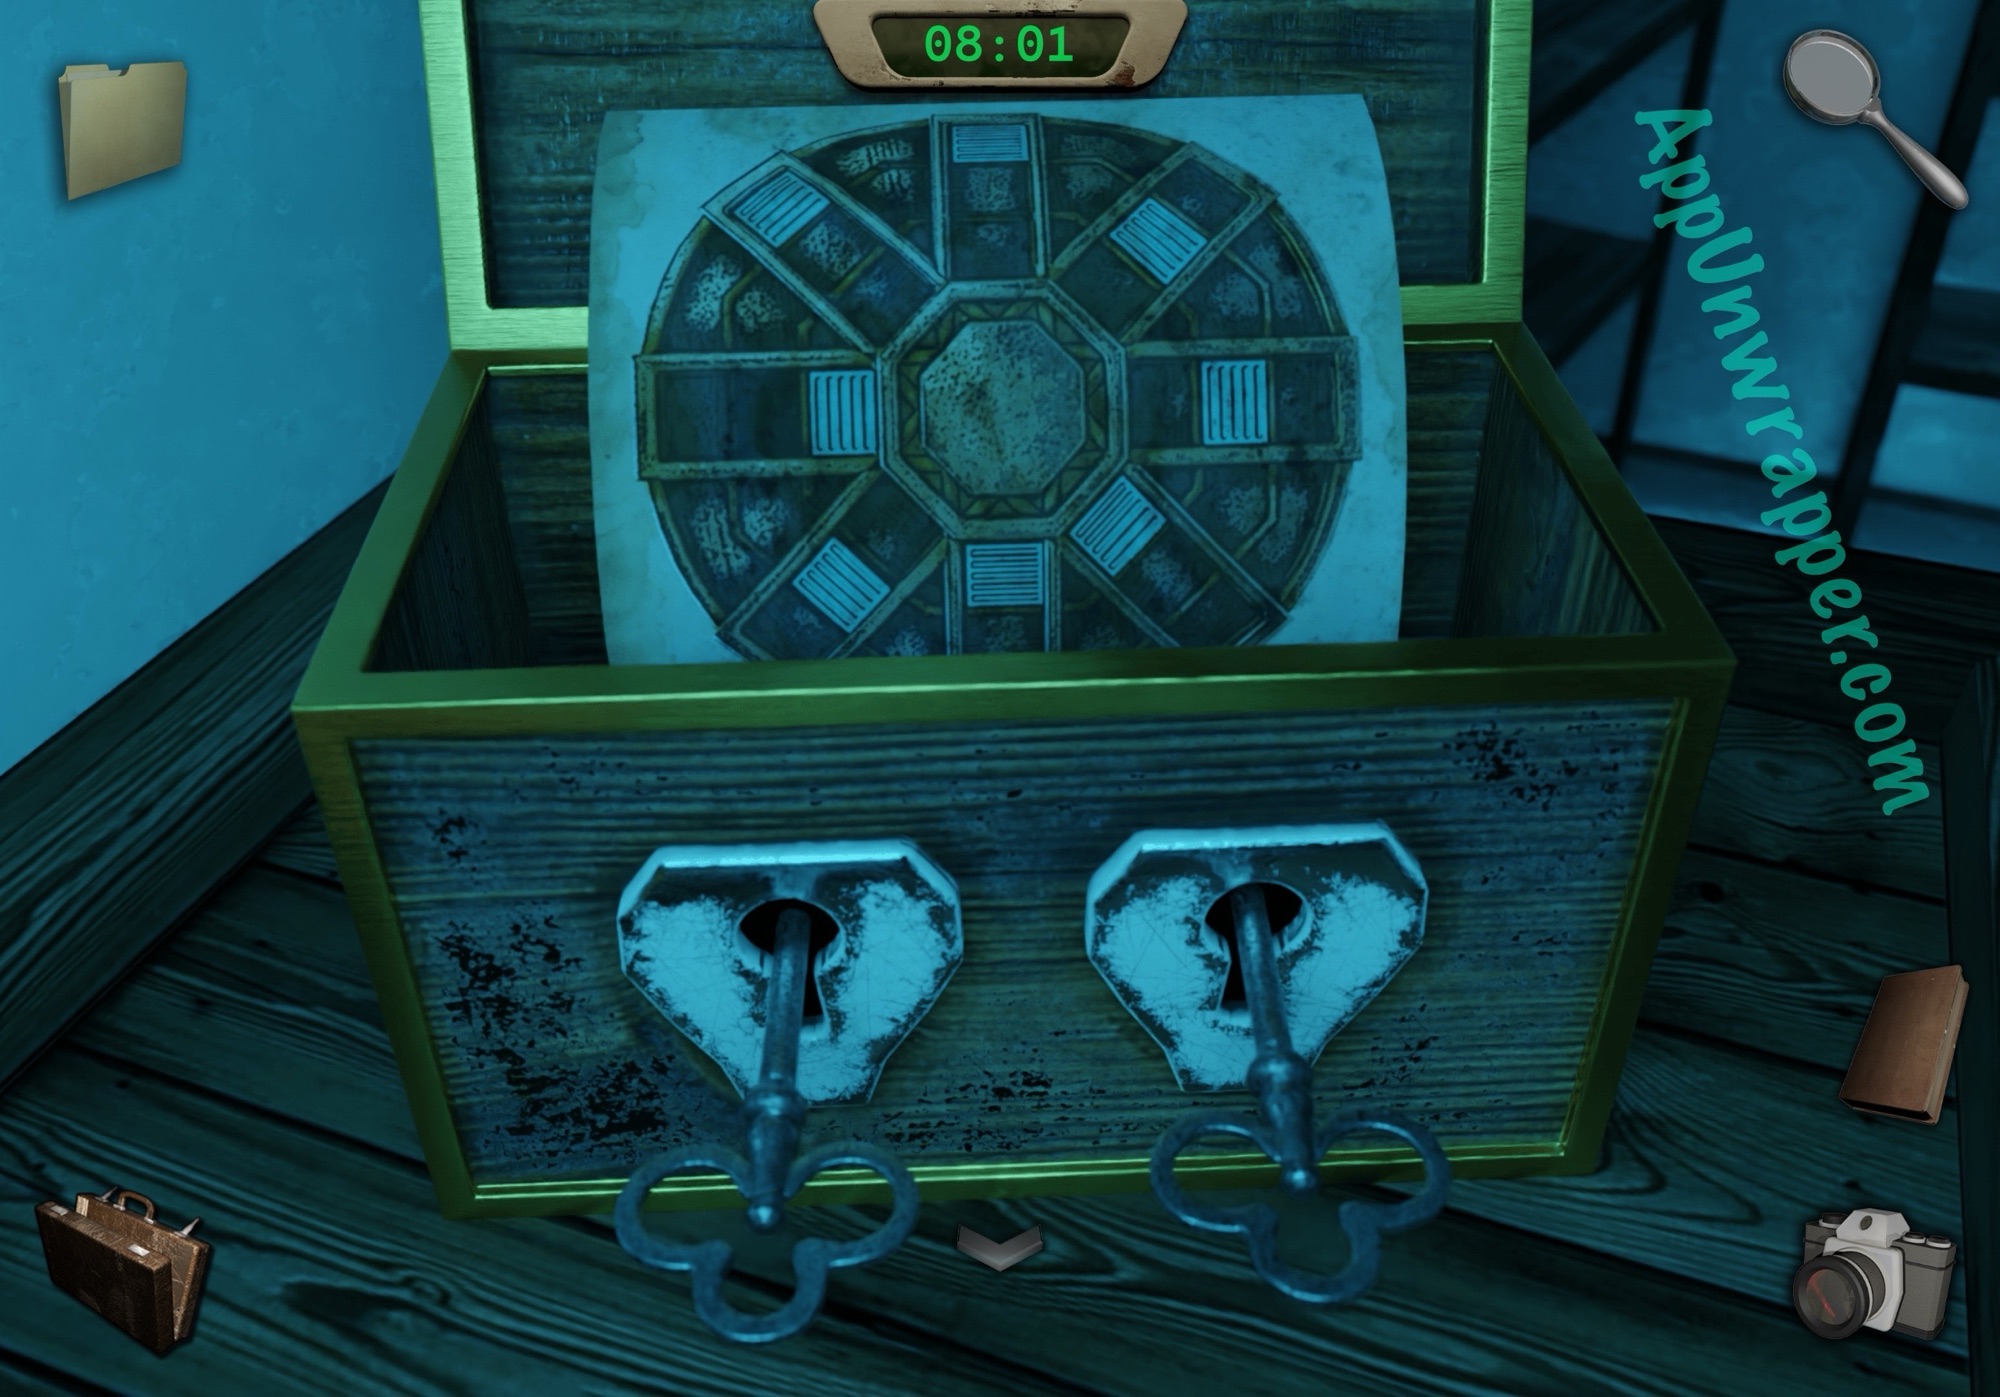
12. Enter the room where you found the bleach and insert both keys into the locked box. Take a photo of the clue inside.
13. Go back all the way to the start and use that clue to unlock the right door. Go through to complete the first chapter. If you die or the timer runs out after this point, just use that photo to open the same door and skip all of chapter 1.
And that’s the end of Chapter 1! Click here to continue to Chapter 2 or choose a chapter below.
Prologue + Chapter 1 | Chapter 2 | Chapter 3 + Epilogue