Aurora Hills: Chapter 1
By: NovaSoft Interactive


Aurora Hills: Chapter 1 is a first-person point-and-click adventure from the makers of Meridian 157. It has you investigating a whole bunch of missing person cases in the town of Aurora Hills. It can be tricky at times, so this walkthrough should help if you get stuck. Feel free to ask for extra help in the comments section.
Walkthrough:
You can watch my video for all of Chapter 1 or continue to my step-by-step guide below.
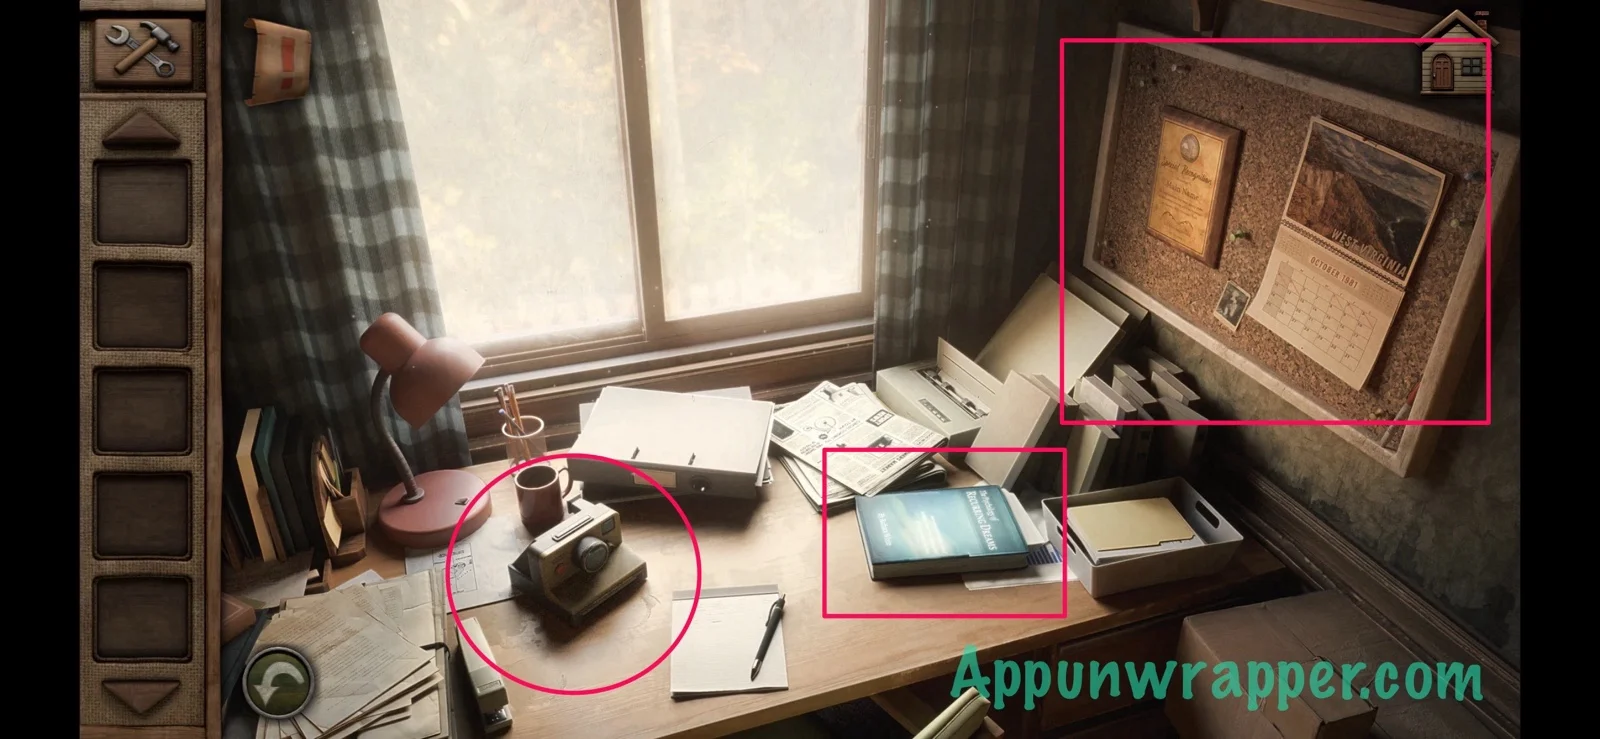
1. Let’s get ready for work. Tap on the desk and grab the camera. You can also look at the book, the calendar, and the plaque on the wall.
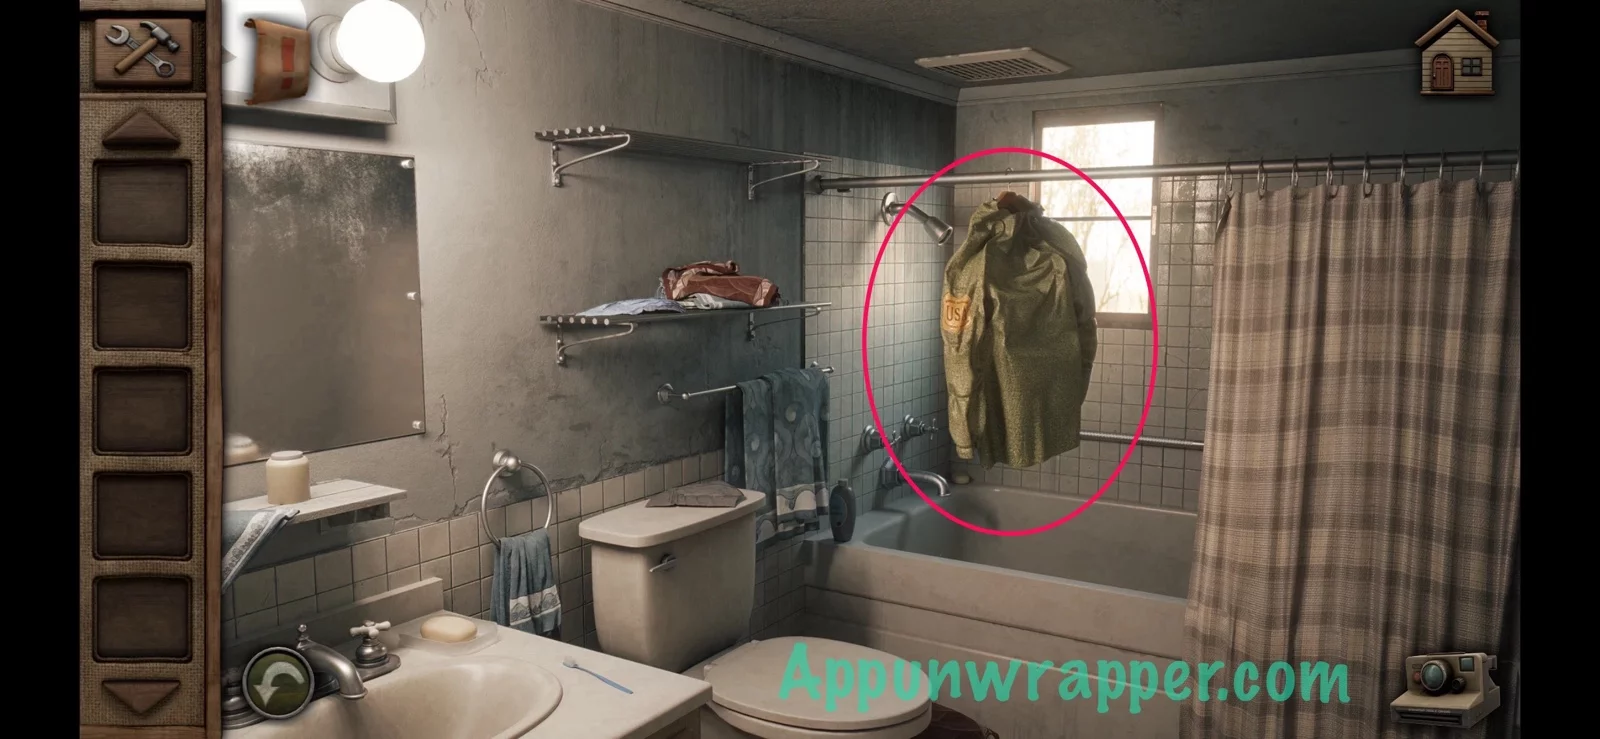
2. Go back and head out the door. Enter the bathroom and grab your park ranger uniform.
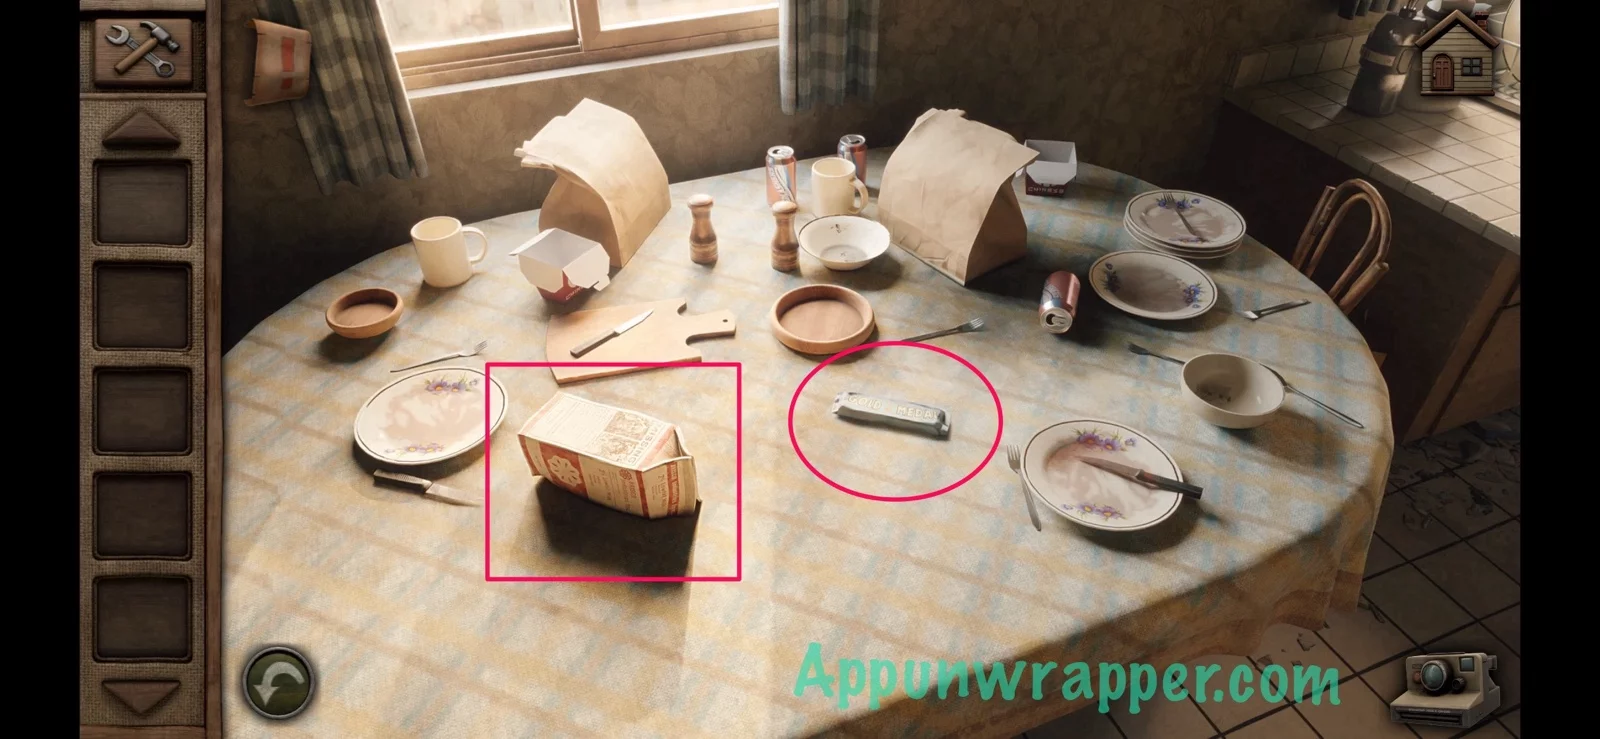
3. Leave the bathroom and head down the stairs. Go to the kitchen and grab the energy bar from the table. Also, look at the milk carton.
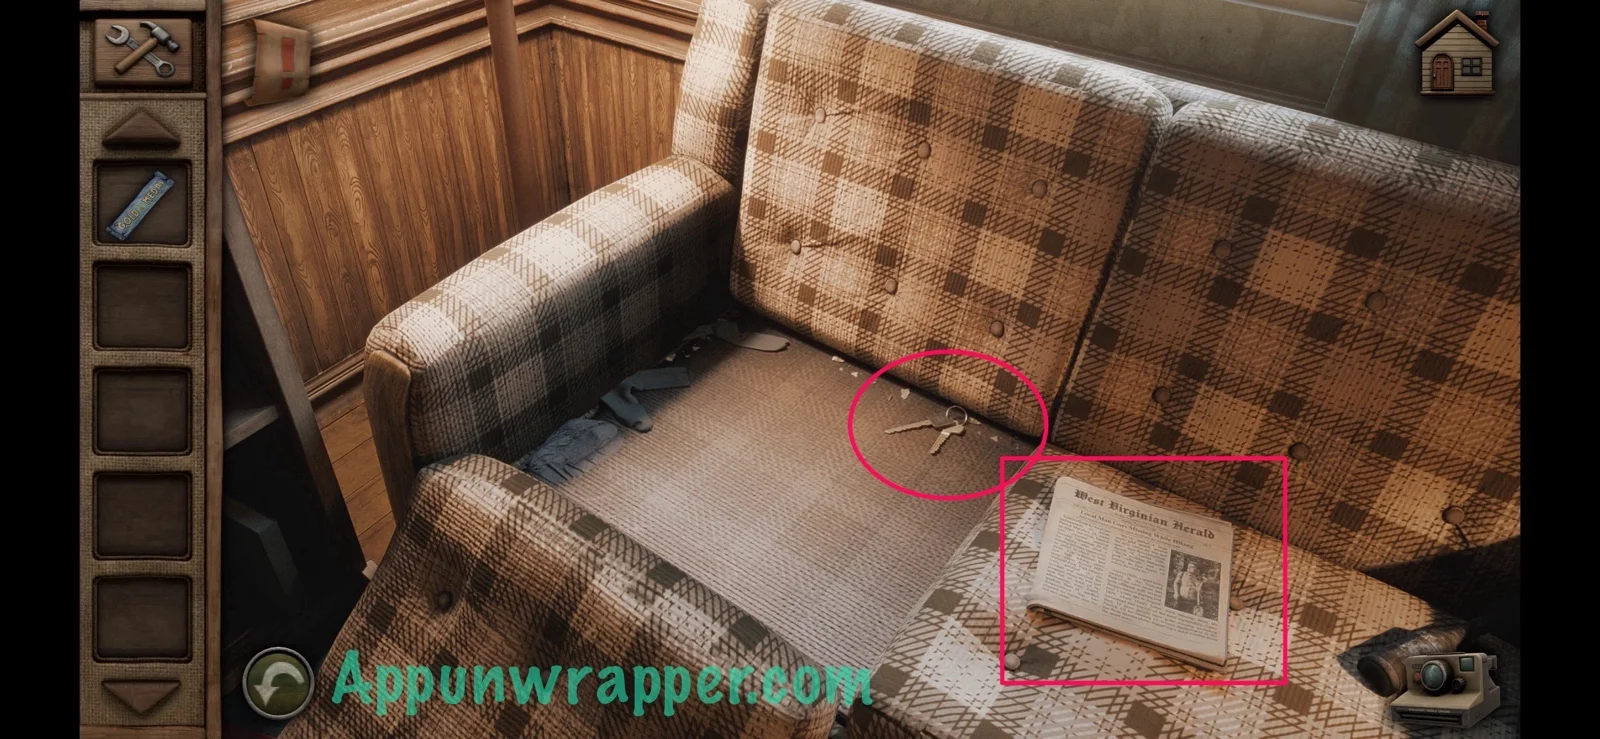
4. Go back and enter the living room. Look at the couch and lift up the cushion to get the car keys. Also, read the newspaper.
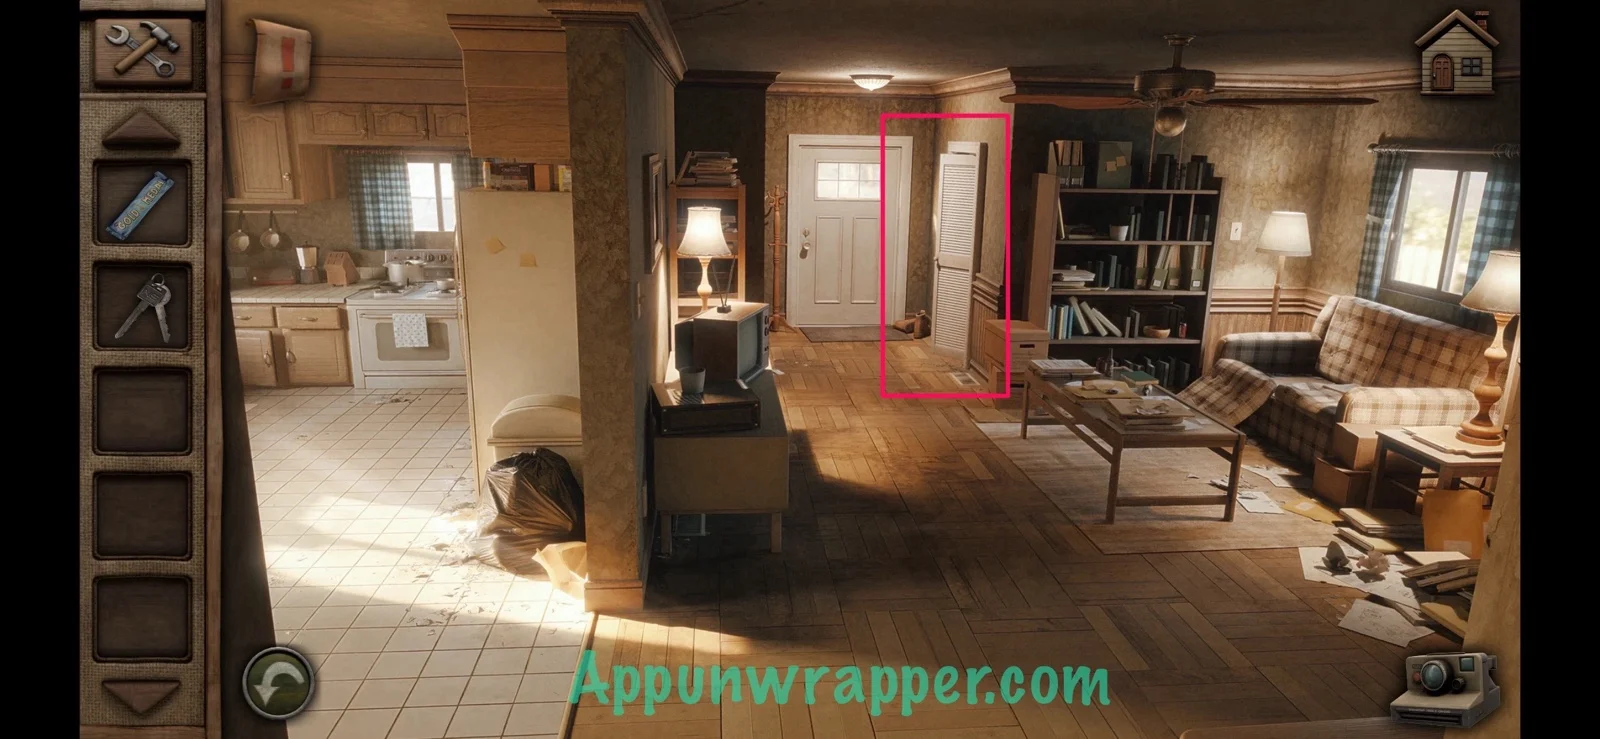
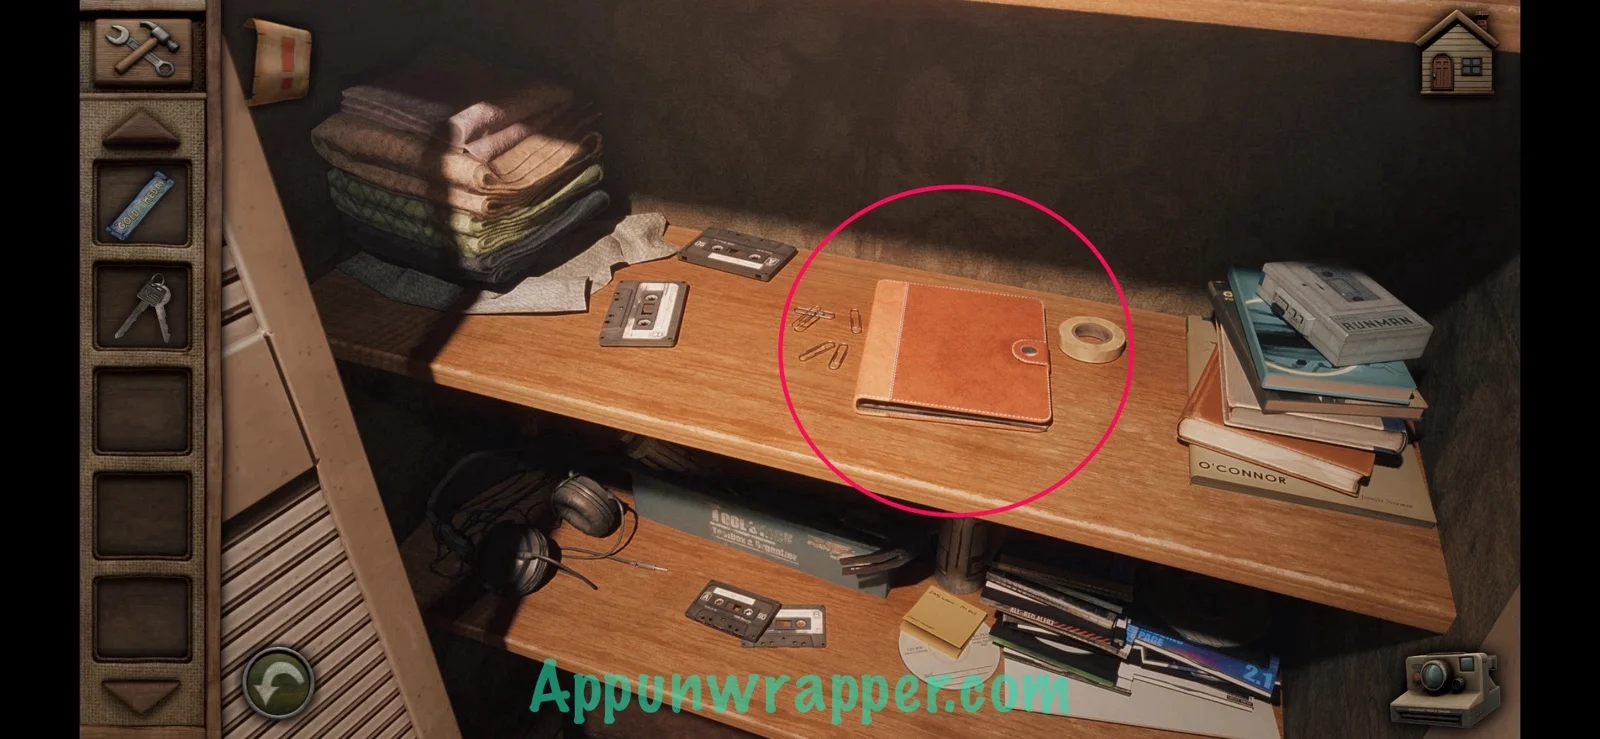
5. Go back and head to the closet near the front door. Open it and take the photo album from inside. Now you can take photos!
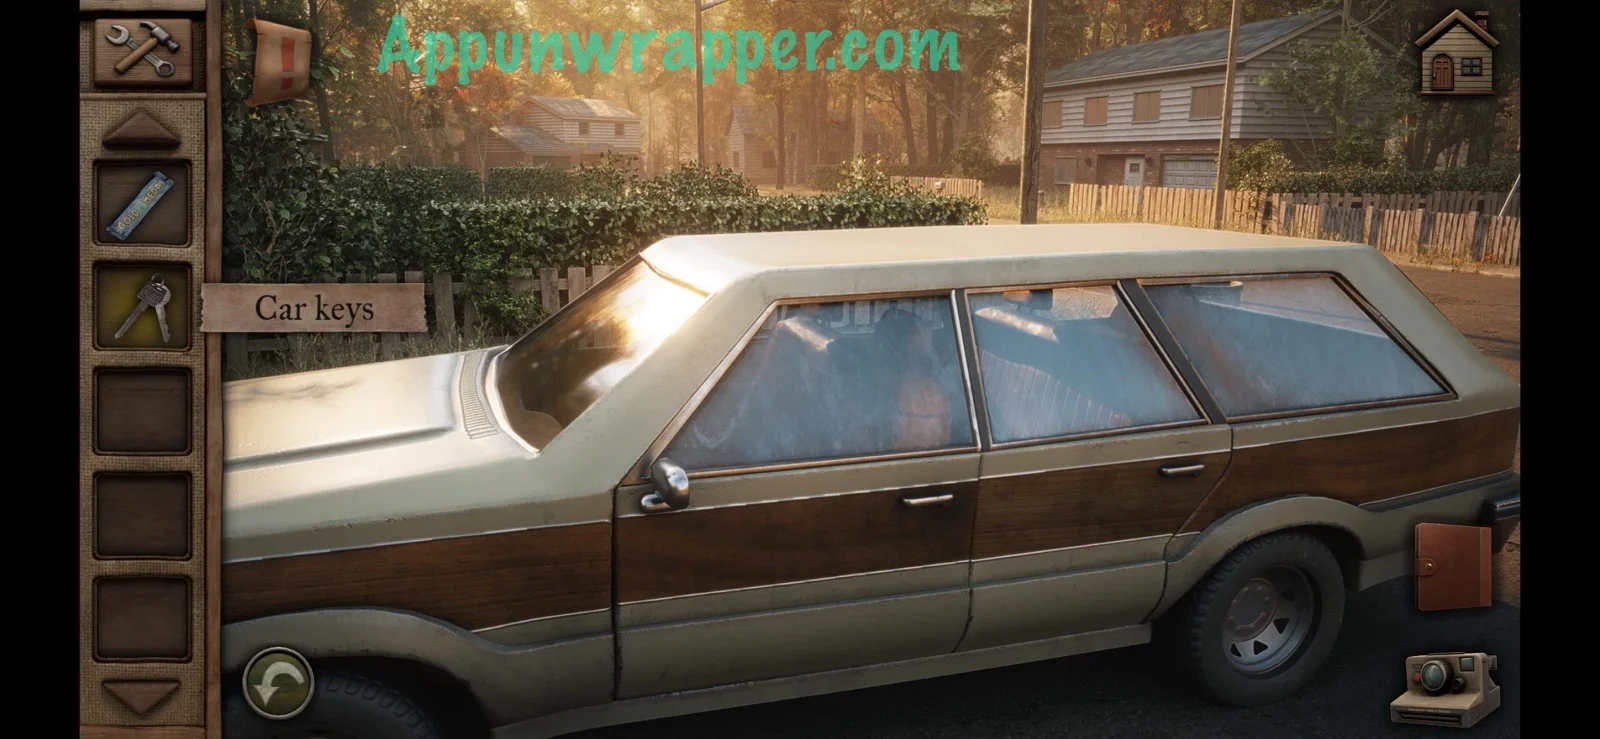
6. Leave via the front door and go to the car. Use the car keys to unlock it and get inside for another cutscene.
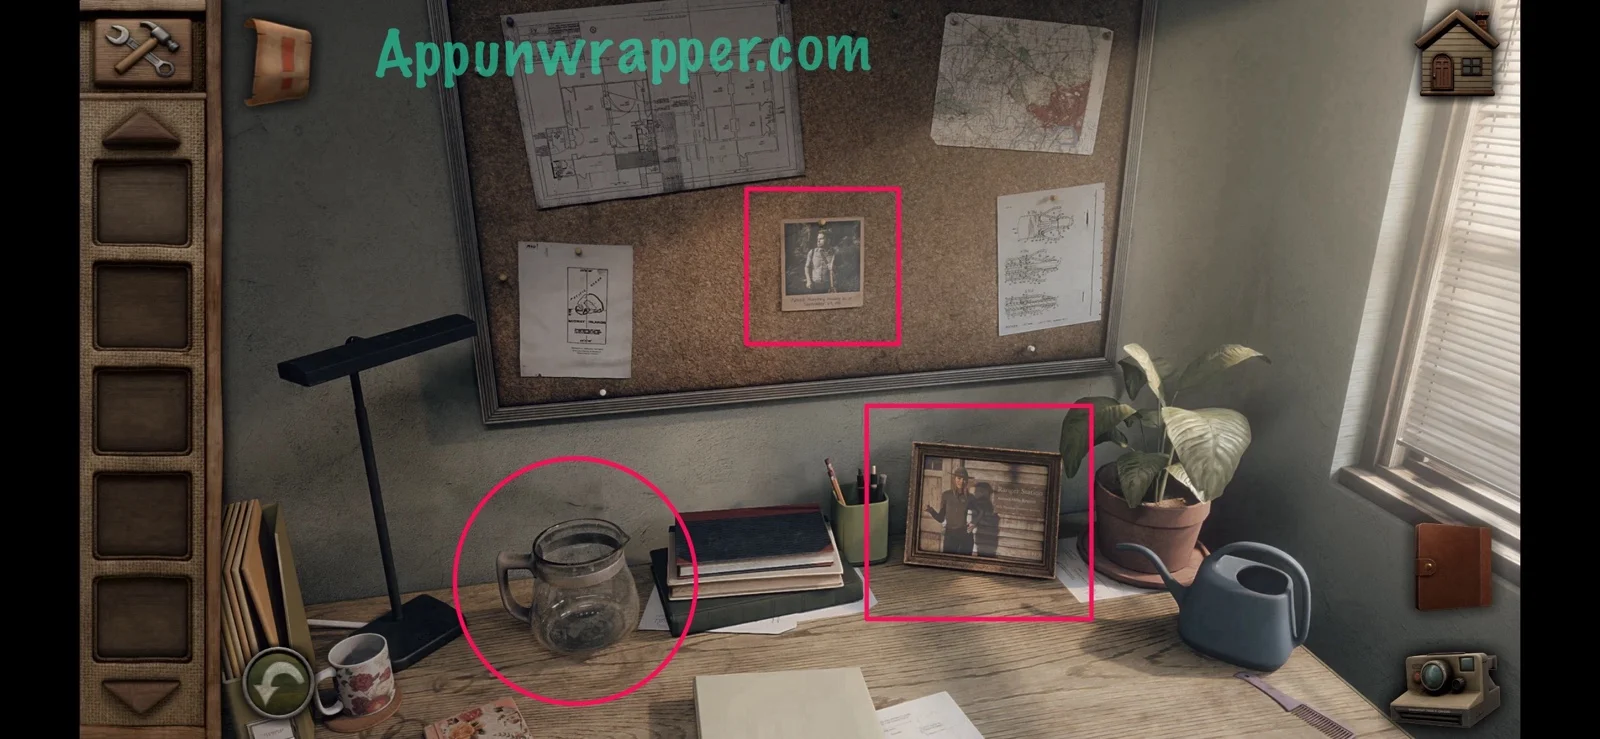
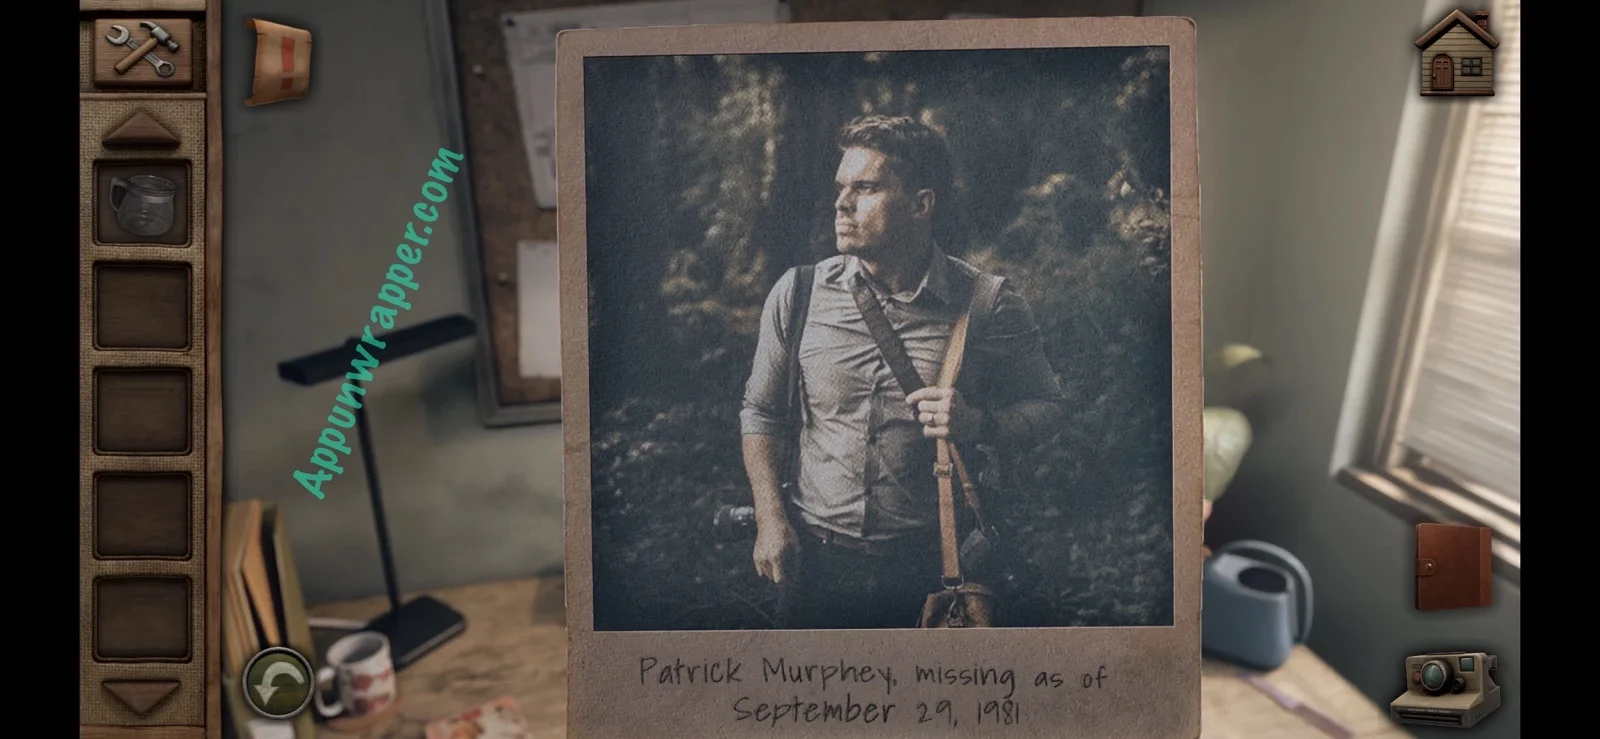
7. We’re in the parking lot. Enter the ranger station. Open the door on the left and head into the office. Grab the coffee pot and notice the framed photo of Jen. Also, take a photo of the picture of Patrick Murphey.

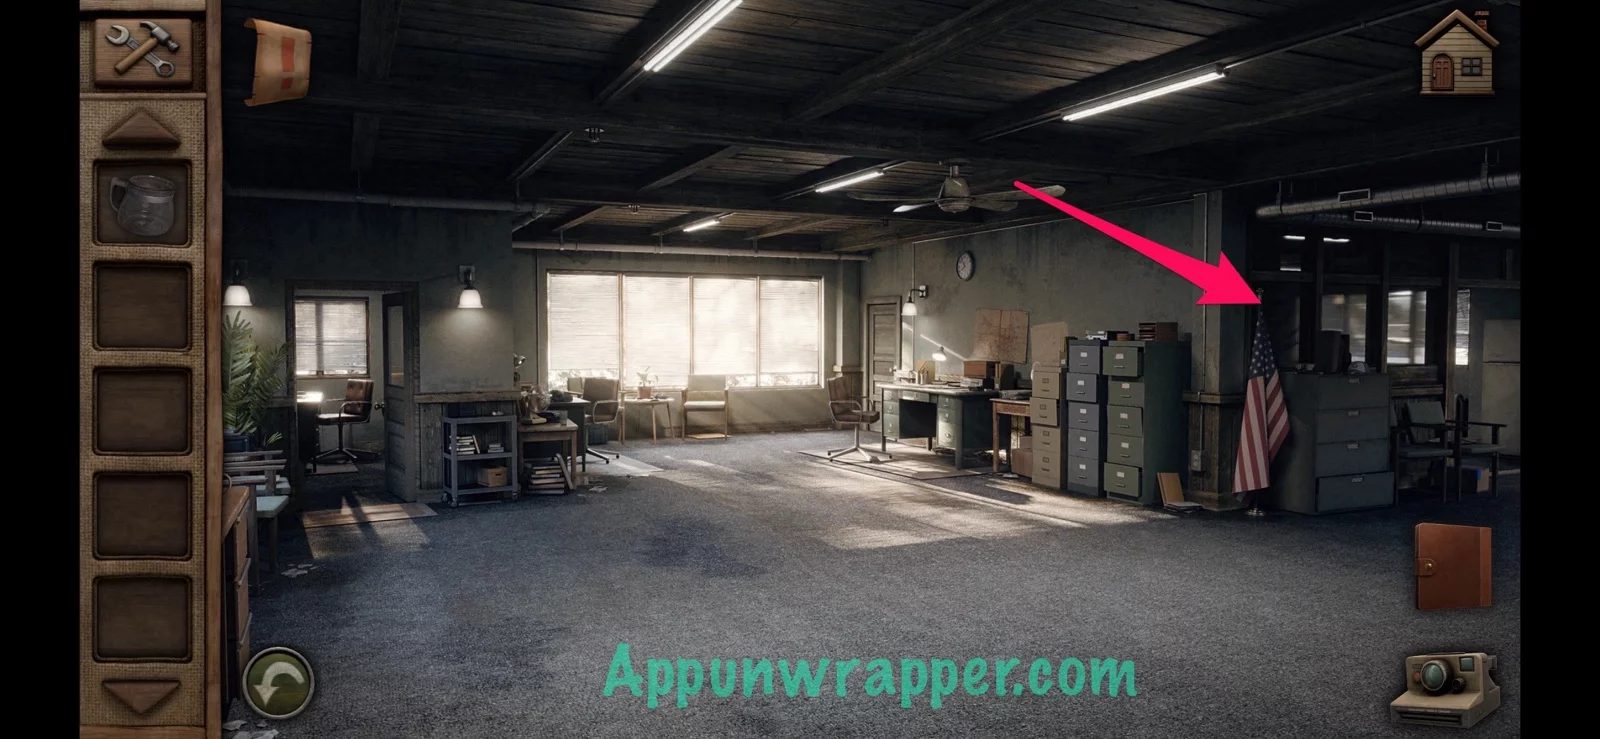
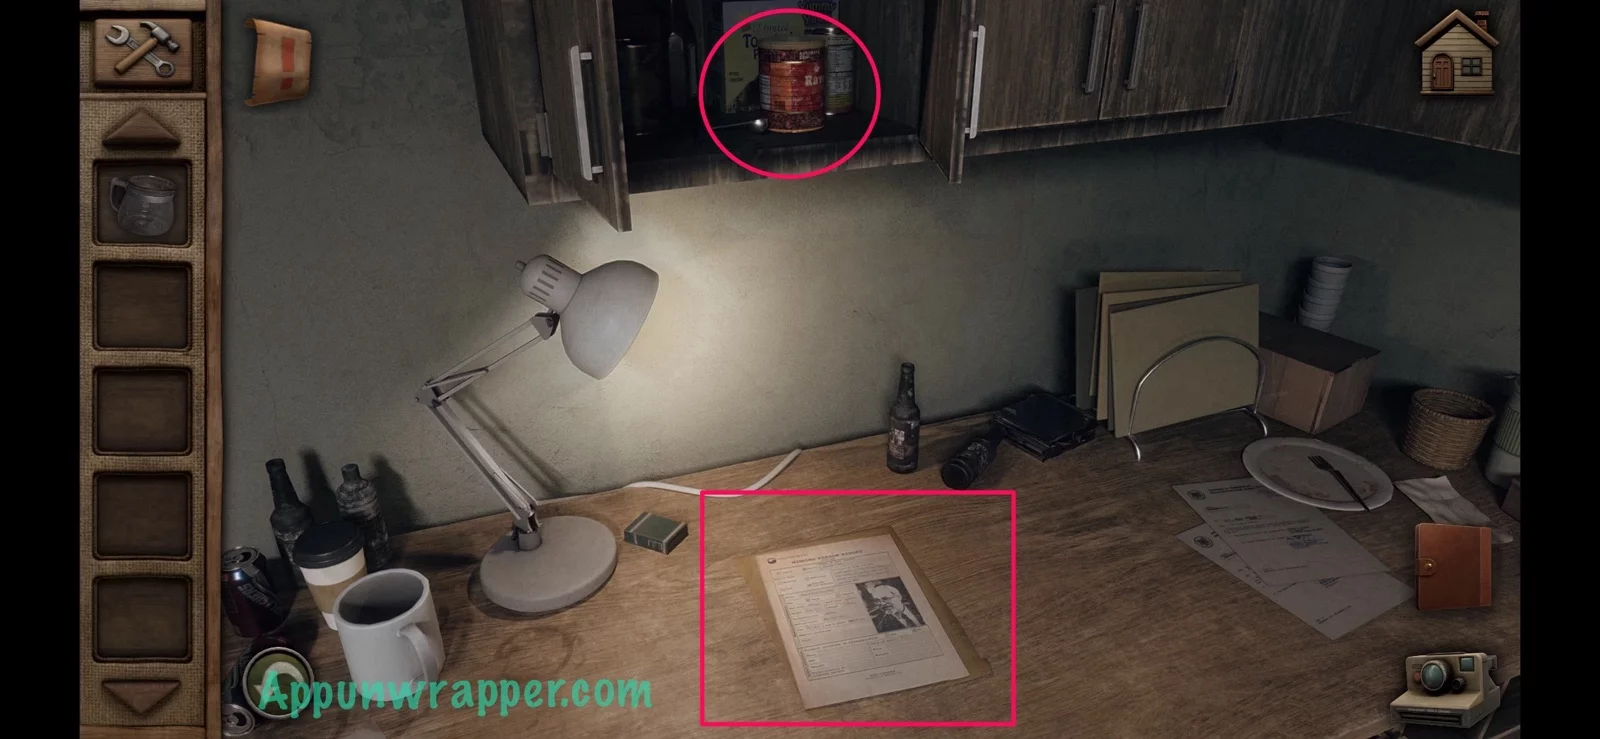
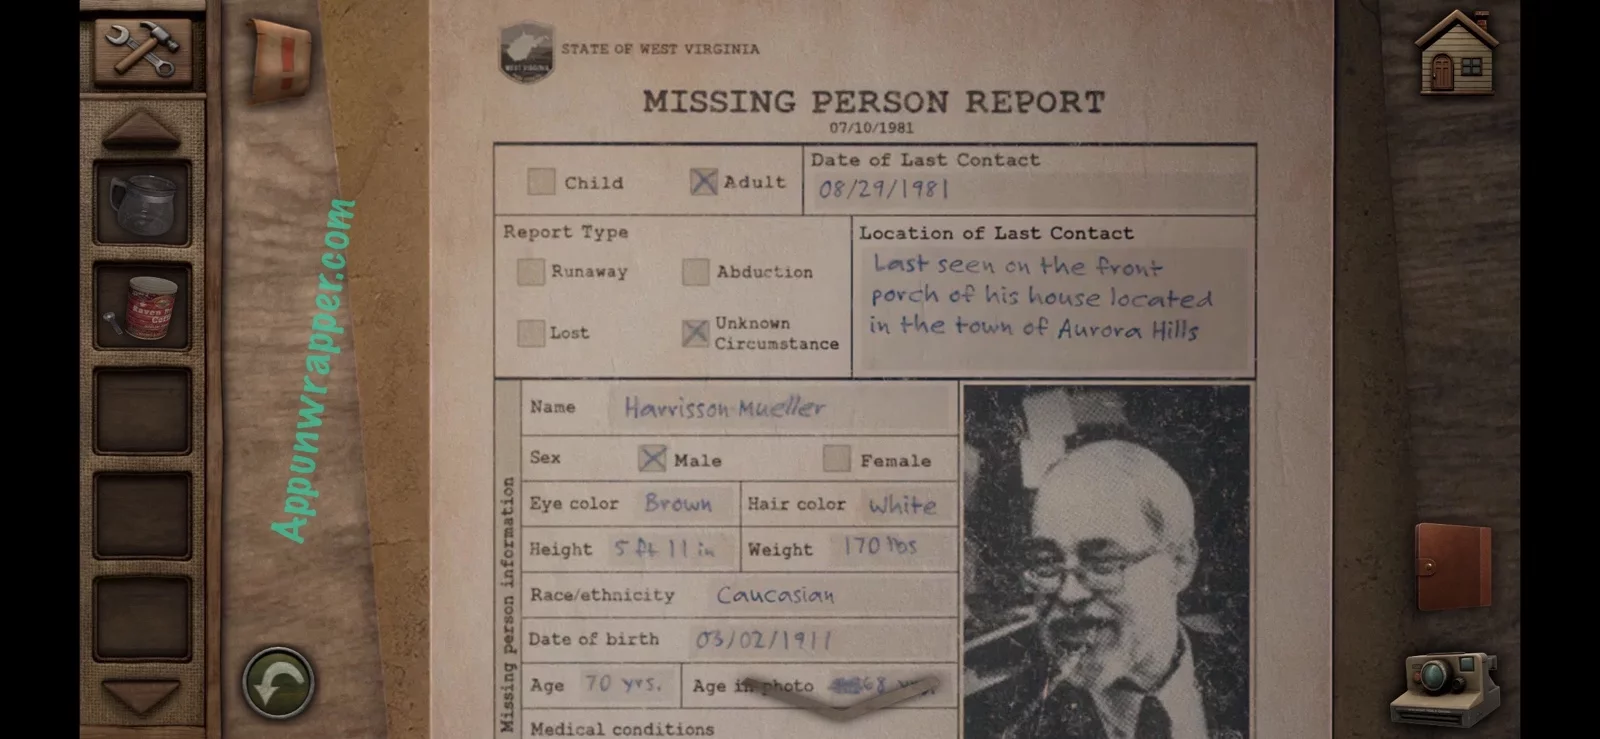
8. Leave the room and zoom back out. Head to the area on the right. Continue through to the next room. Go to the desk on the left and grab the coffee from the cabinet. Also, take a photo of the missing person report of Harrison Mueller.
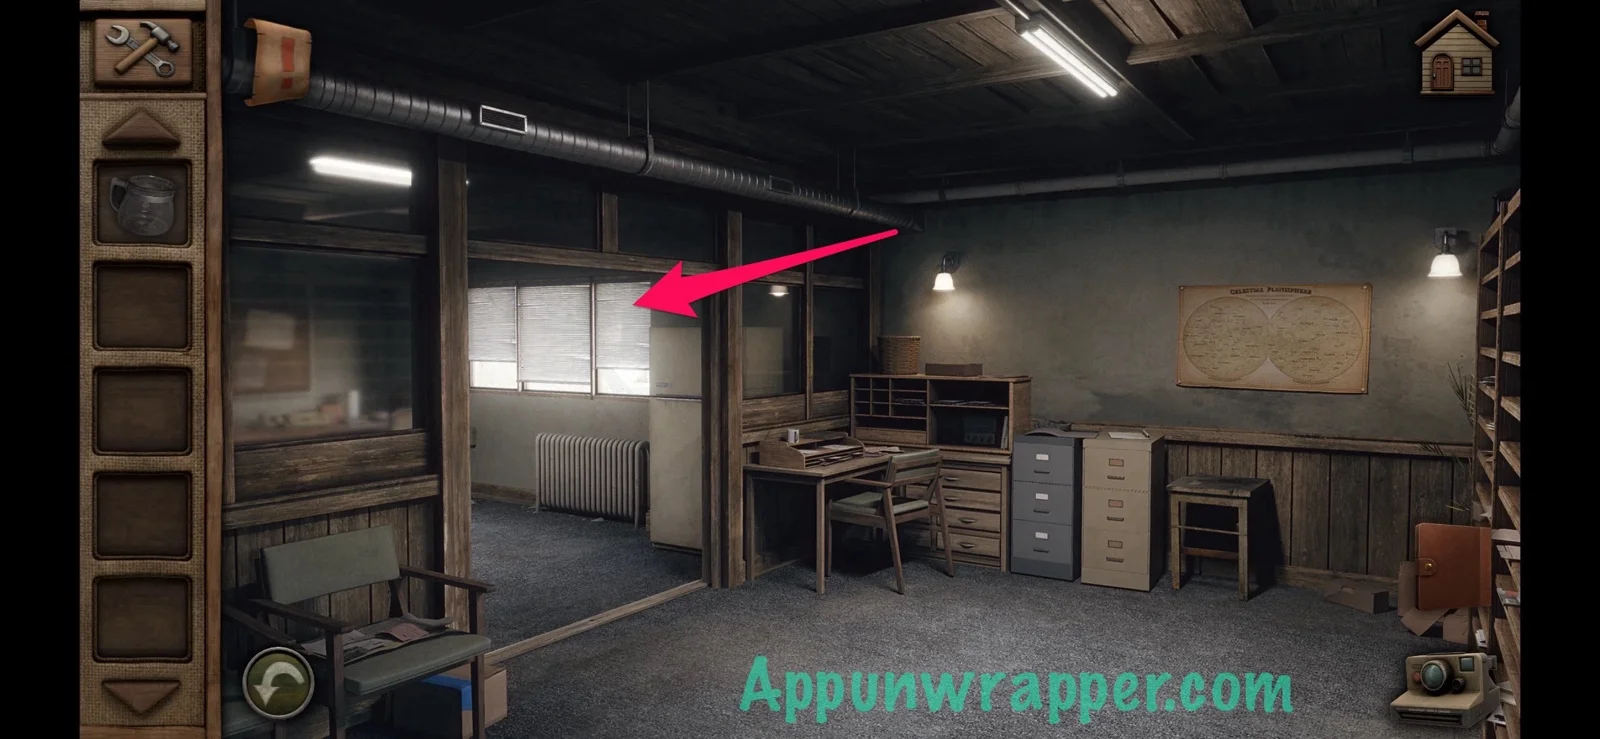
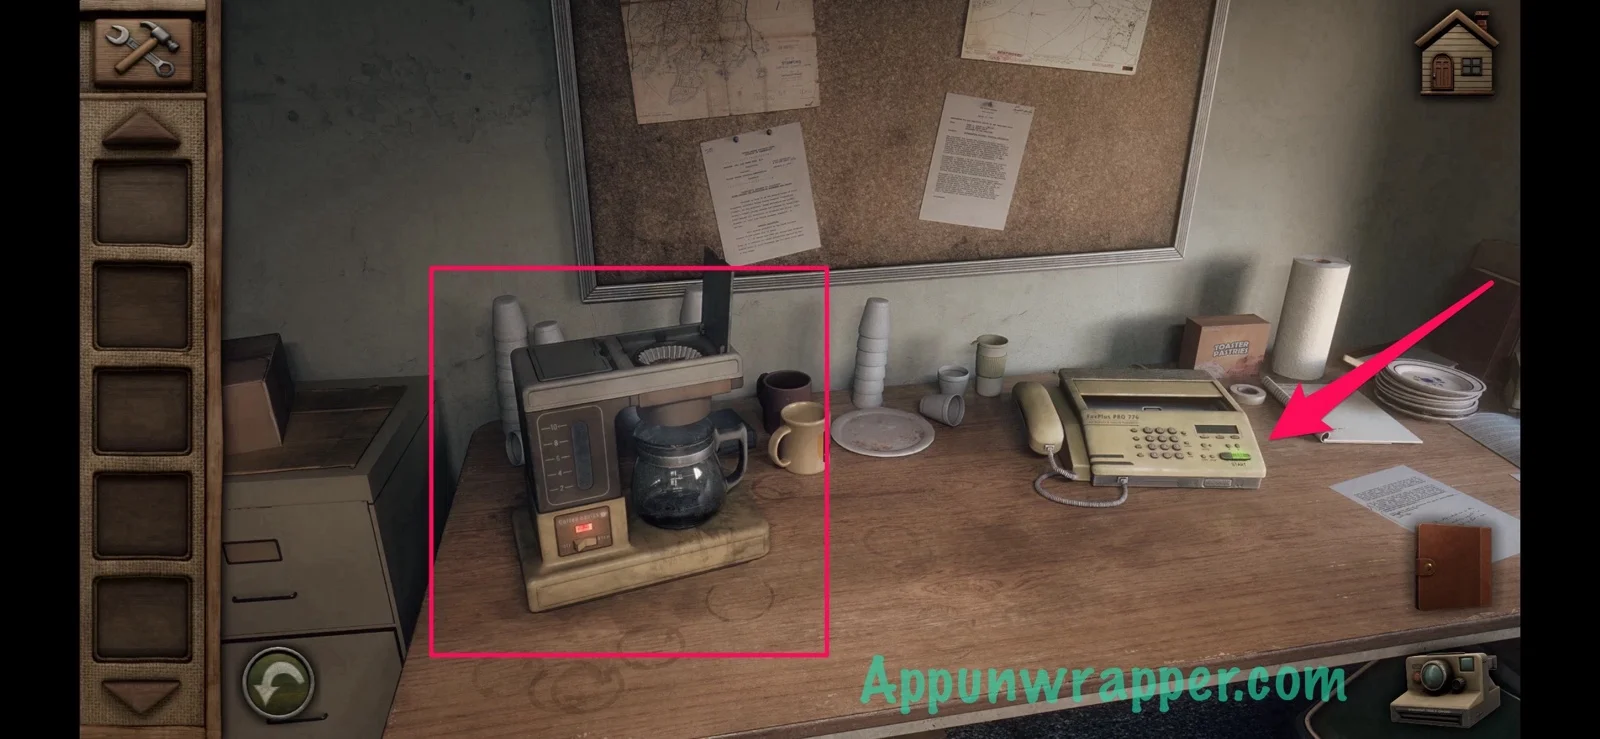
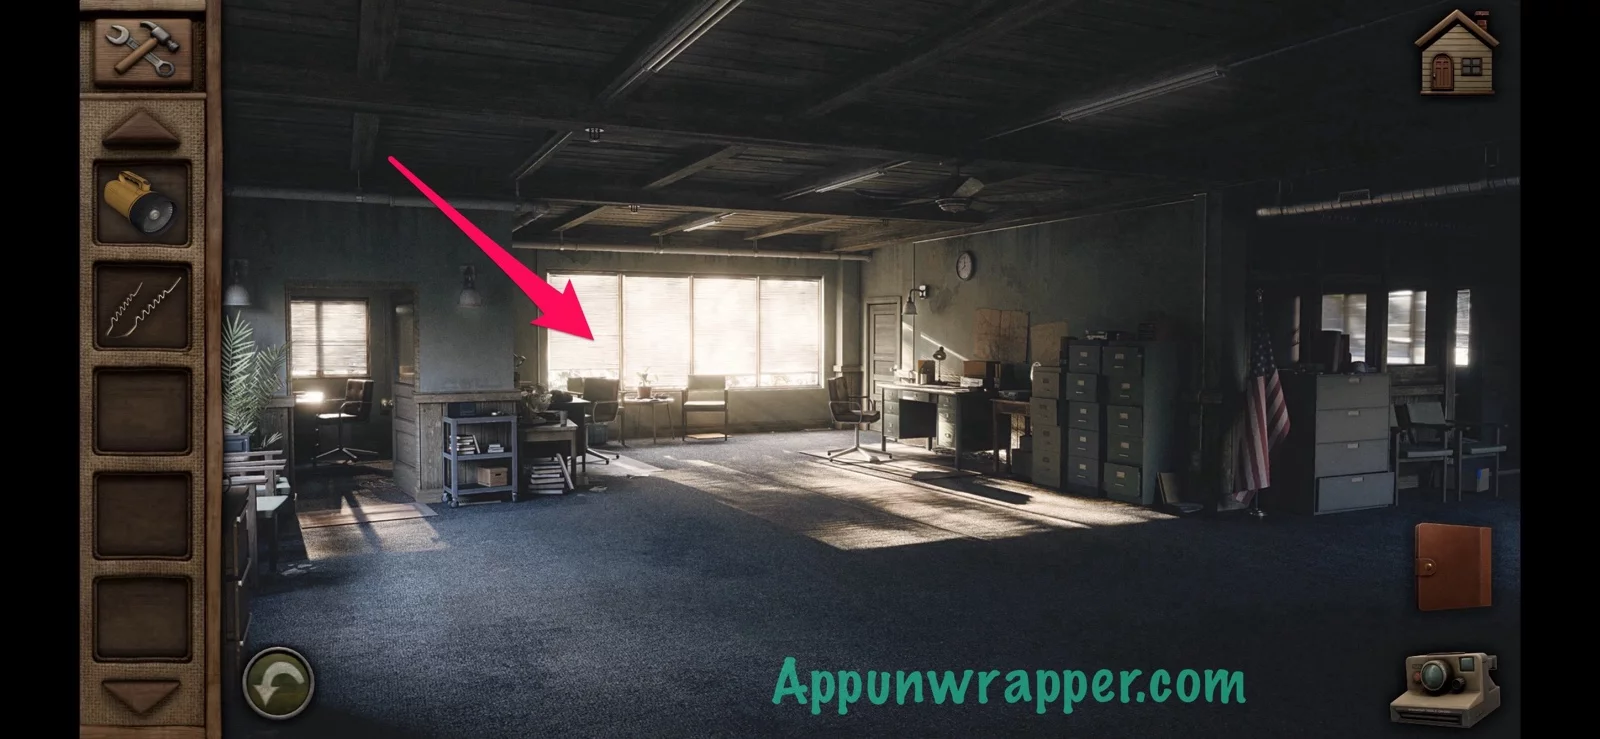
9. Go back and then to the desk on the right. Tap on the coffee maker and place the coffee pot down. Add the coffee and press the button to turn it on. You’ll get a fax at the same time. Press the button on the fax machine and the fuse will blow.
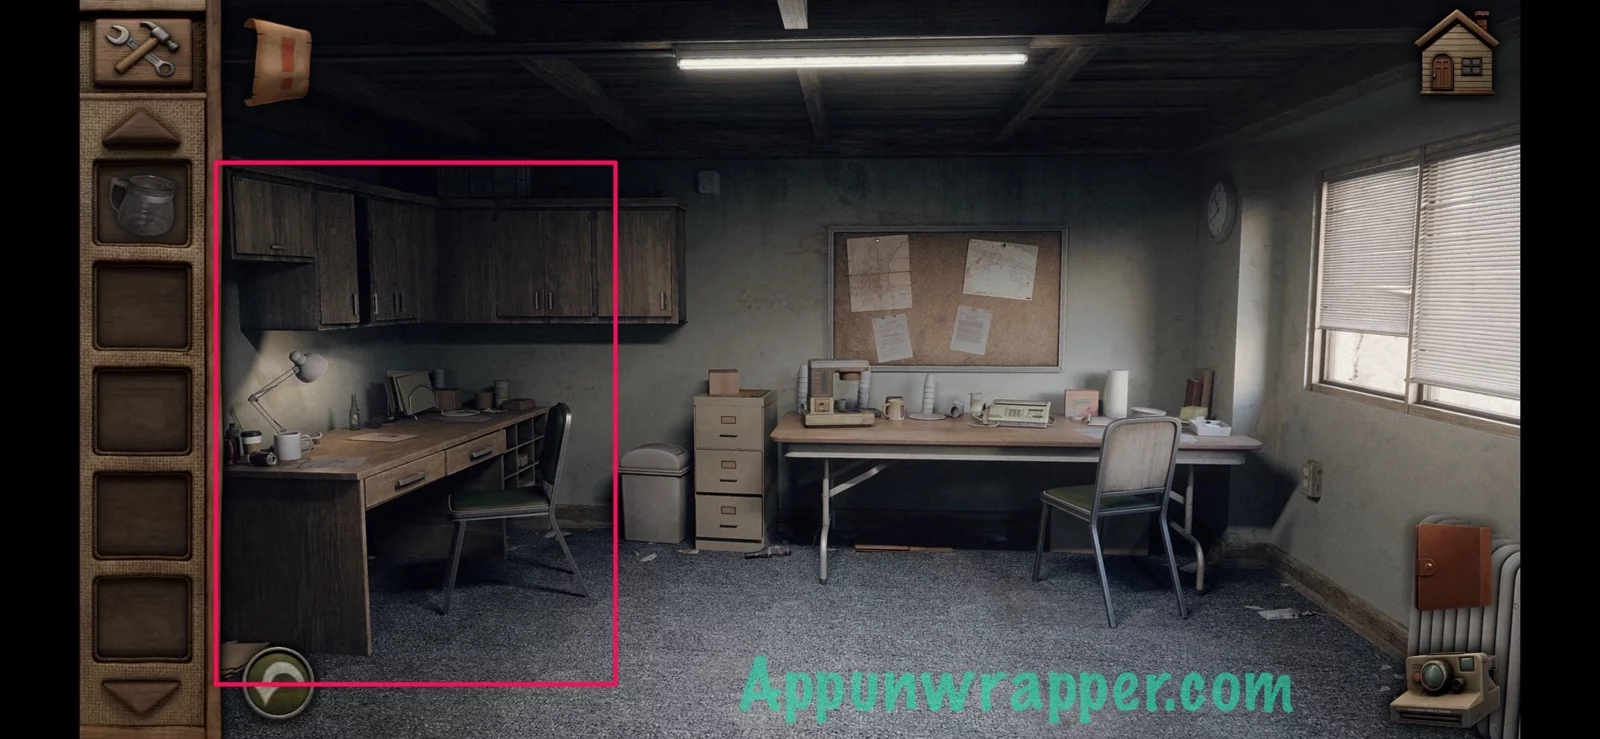
10. Go back to the room before this one and notice the glowing poster on the wall. Take a photo of it.
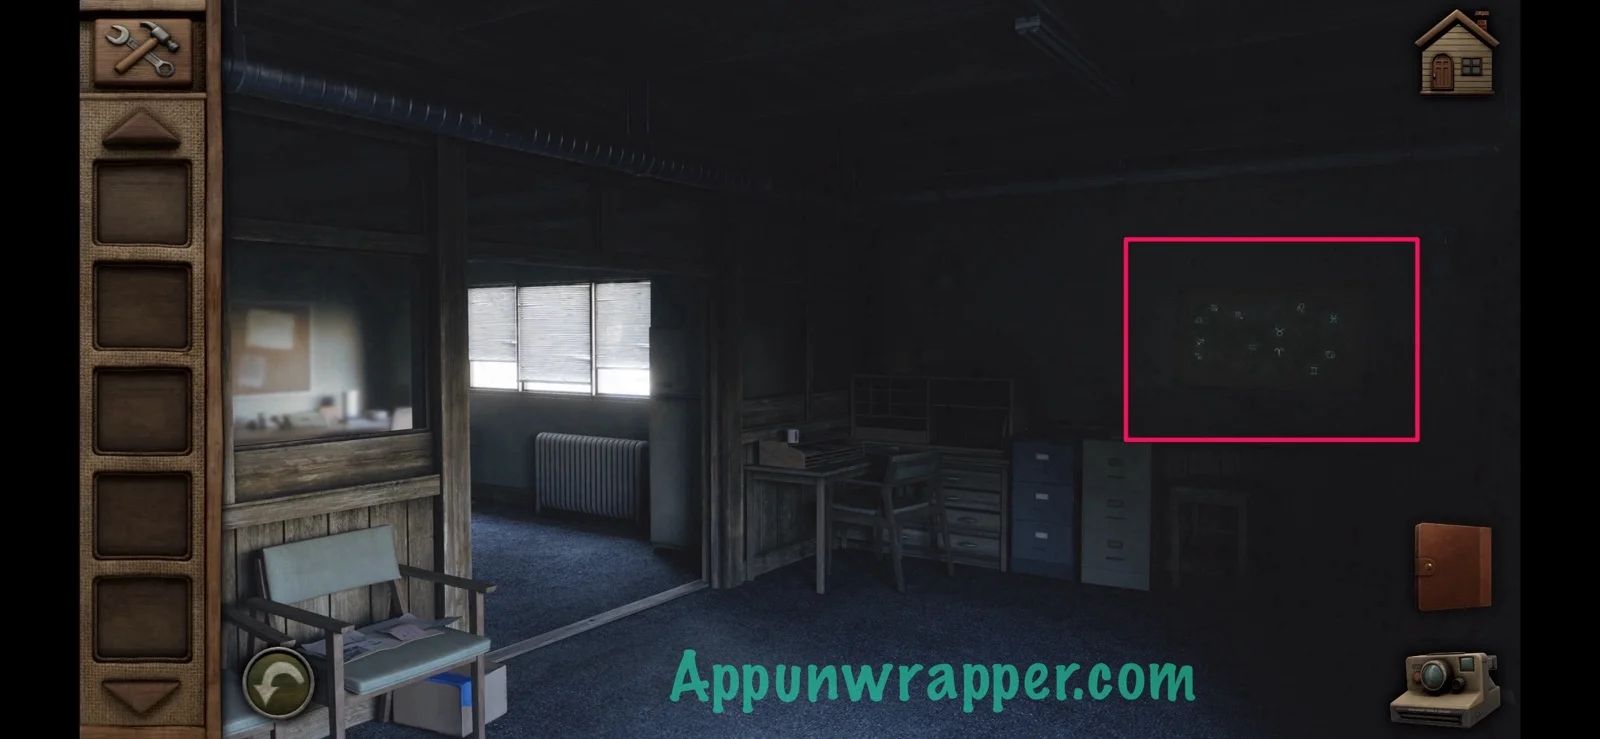
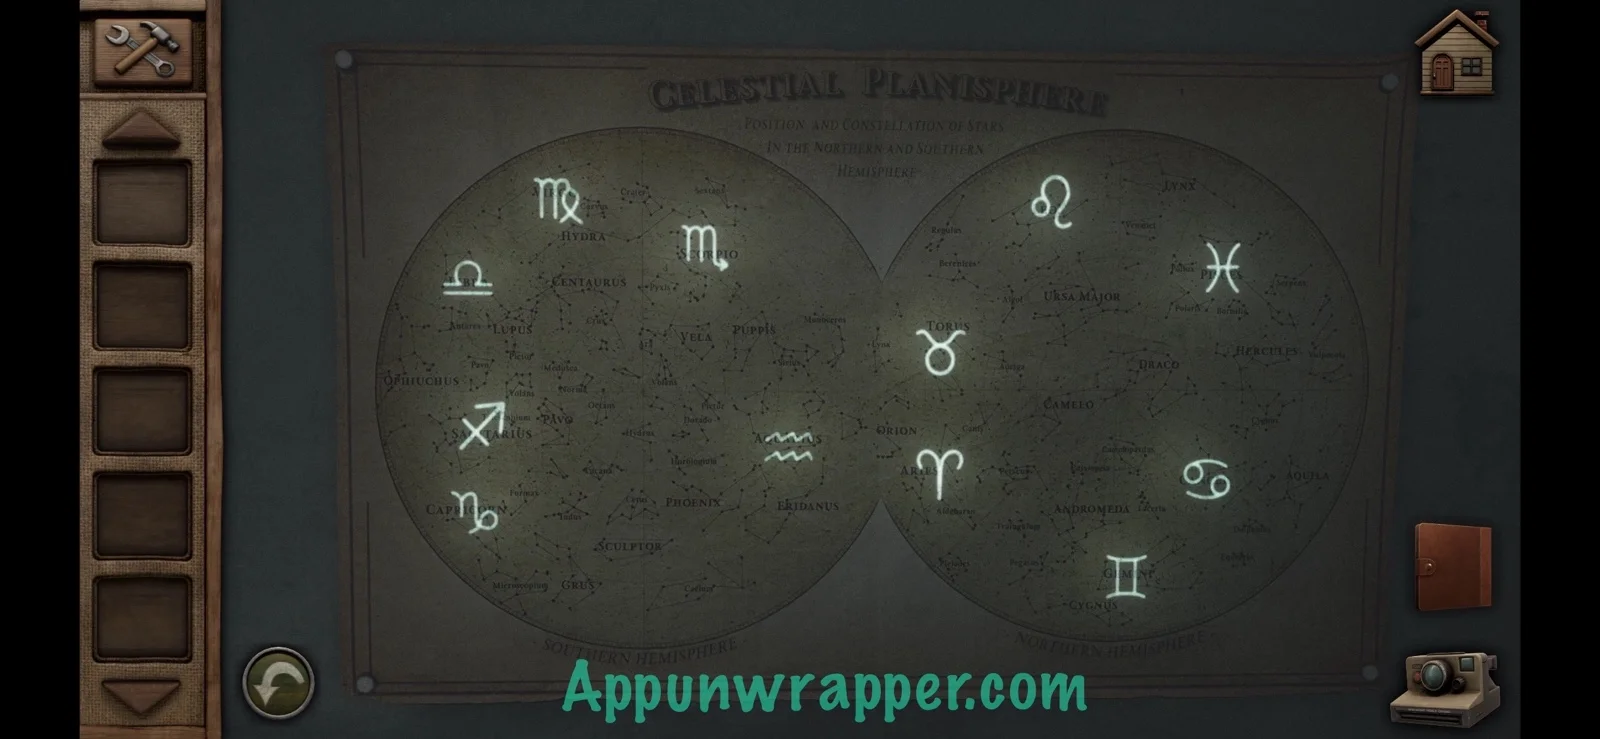
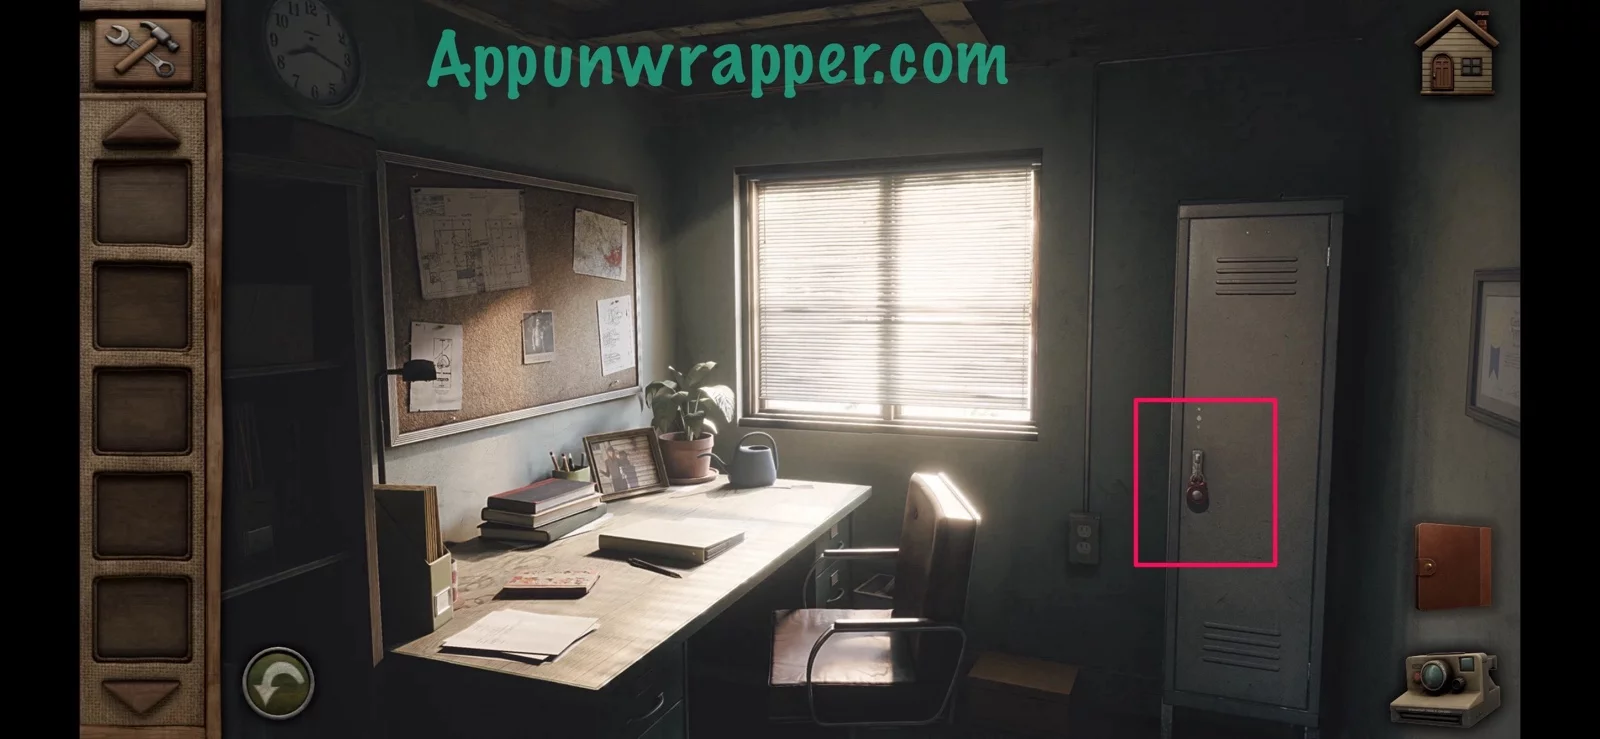
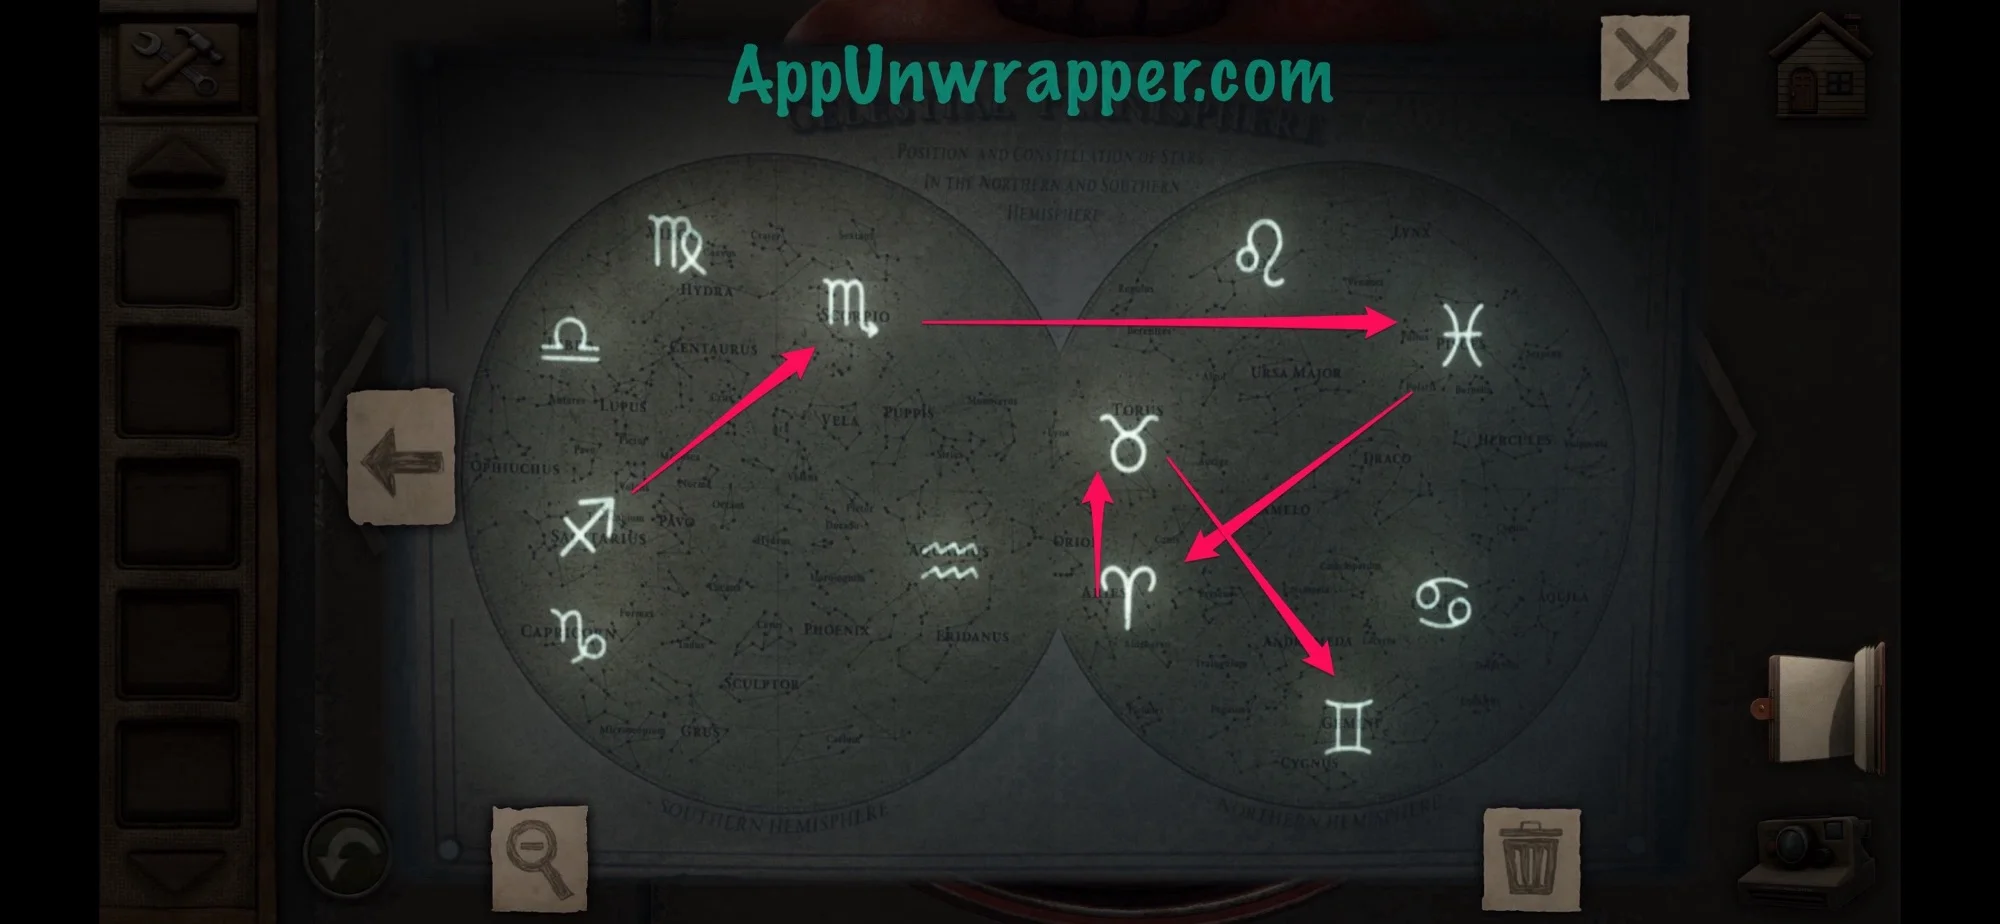
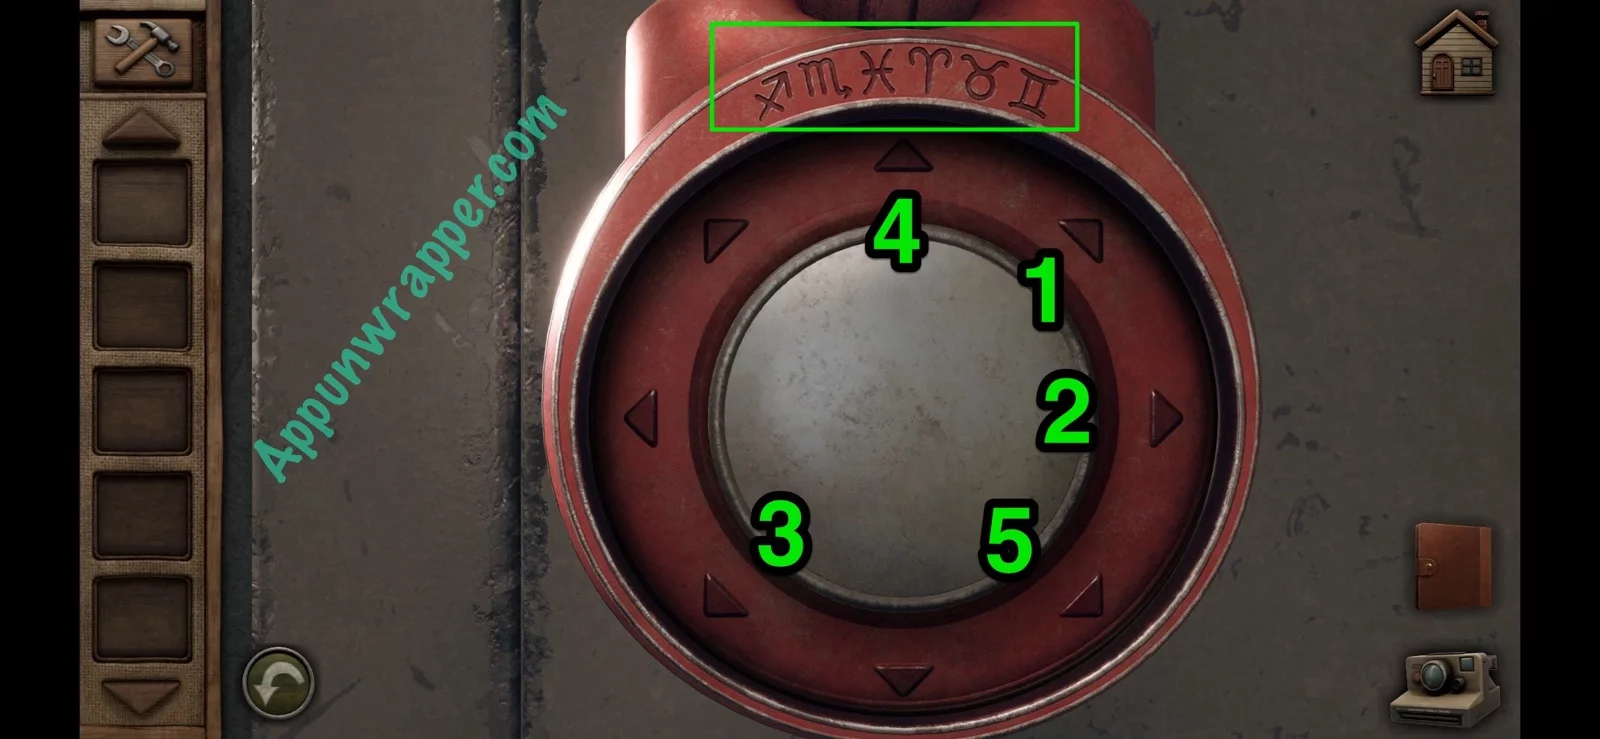
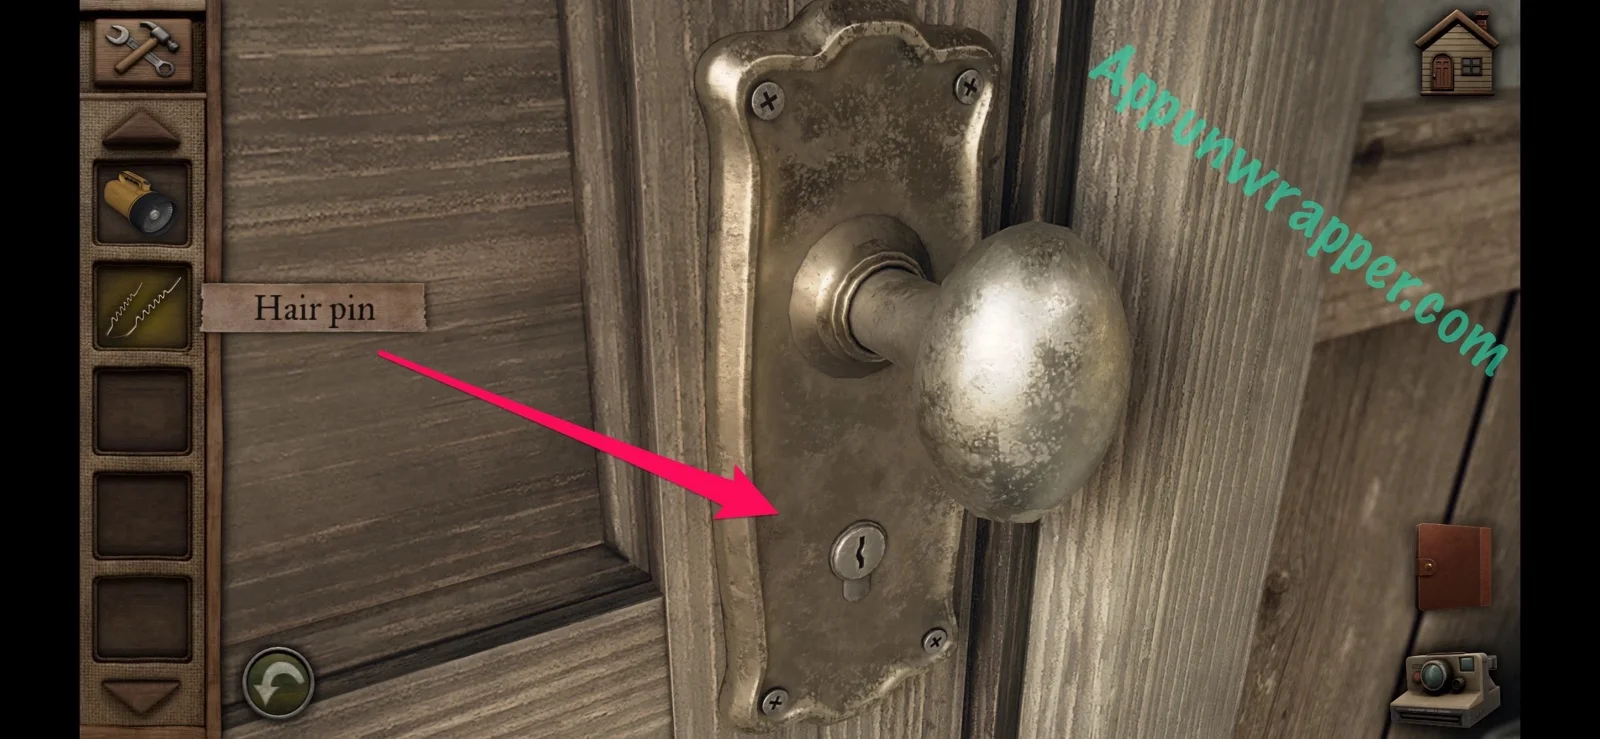
11. Go back to the small office. There’s a locker in there with a red padlock on it. Notice the horoscope signs at the top. We saw the same ones on the glowing poster. Basically, find the first one on the poster and then note the direction you go in to get to the next symbol. Keep doing this until you have all the directions. Then move the middle piece of the lock in those directions. You can follow my directions on the image below if you’re still stuck.
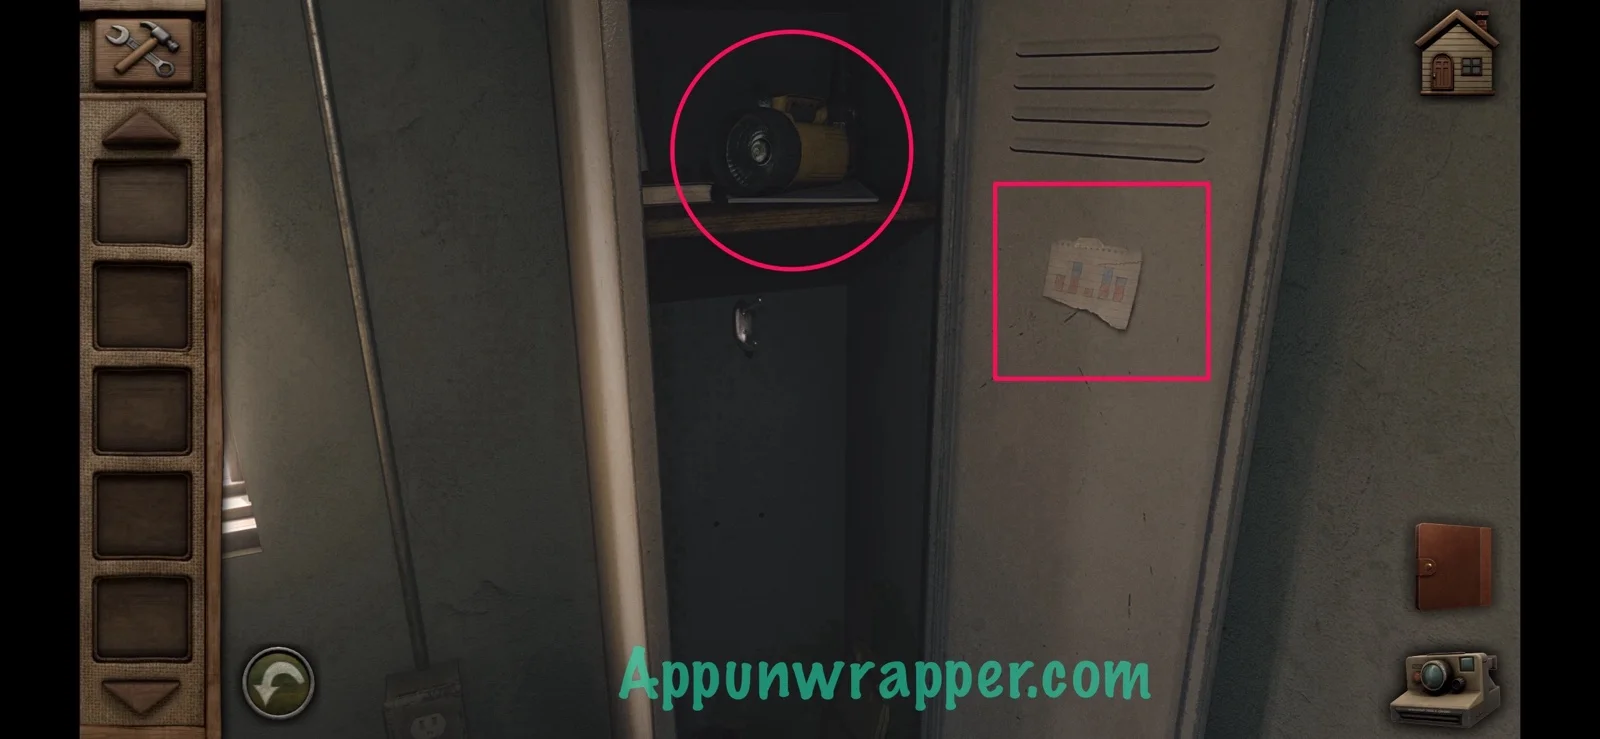
12. Take the flashlight from inside the locker. Also, look at the drawing and take a photo of it. Don’t forget to also take the hair pin.
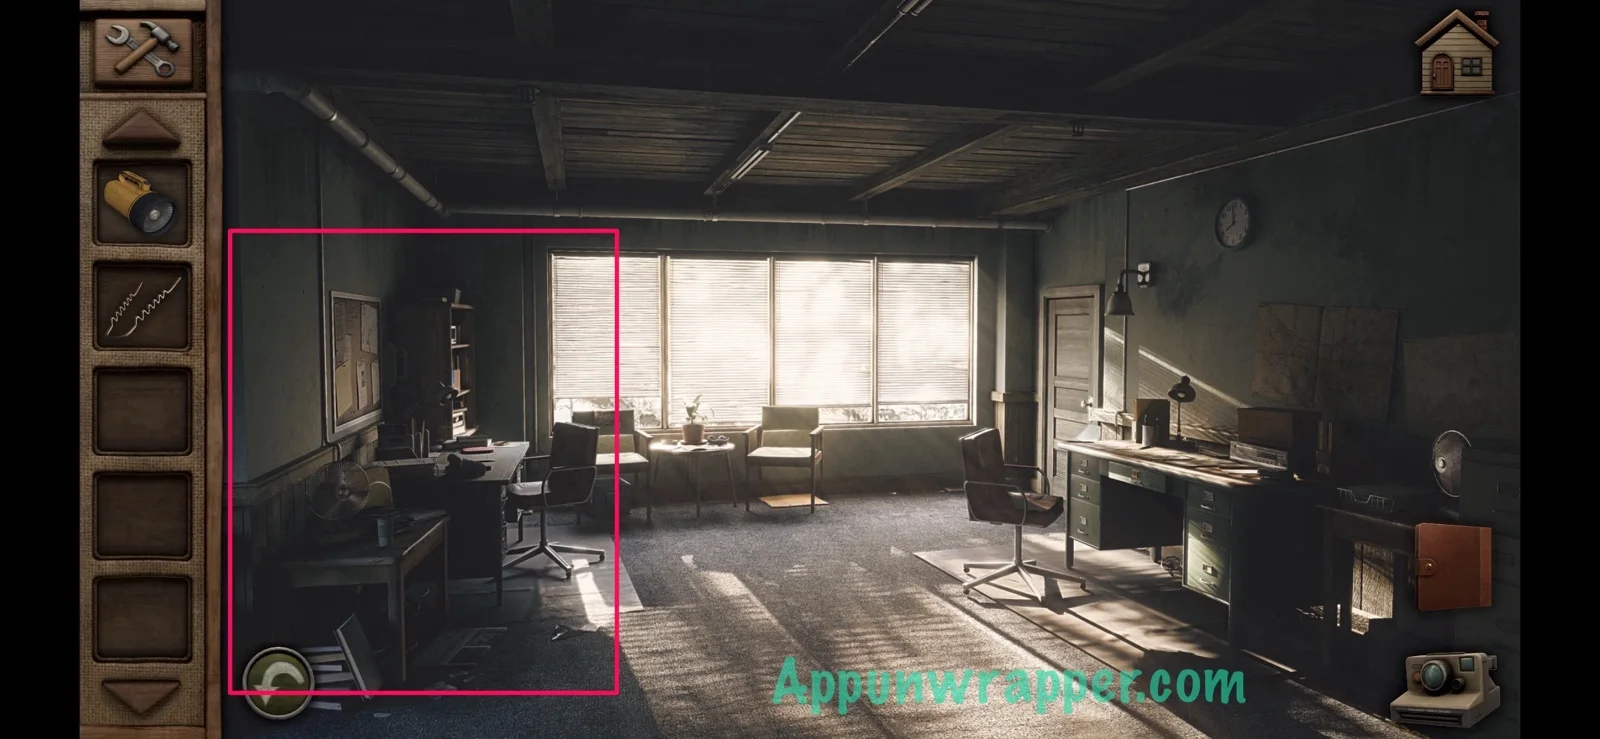
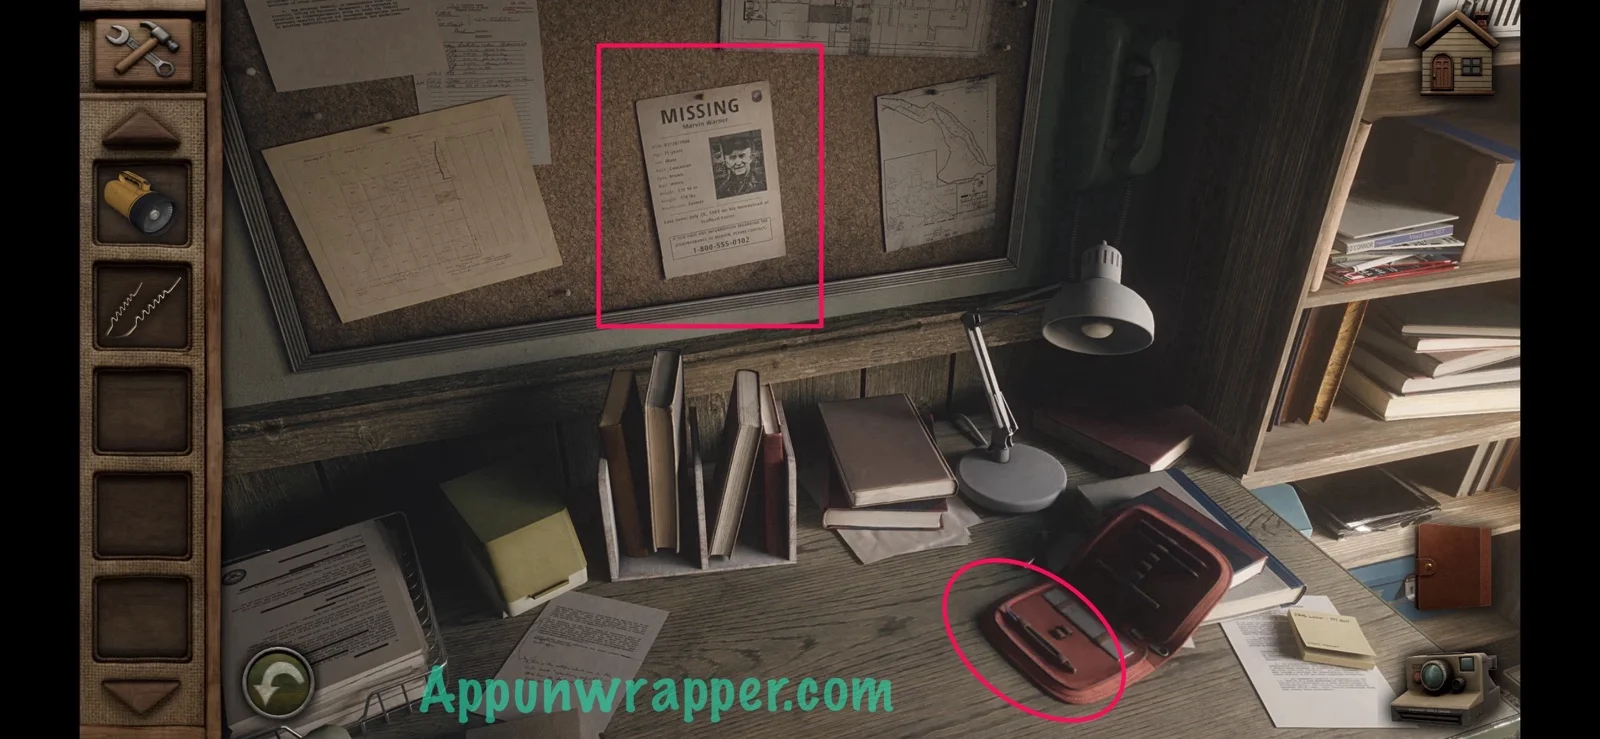
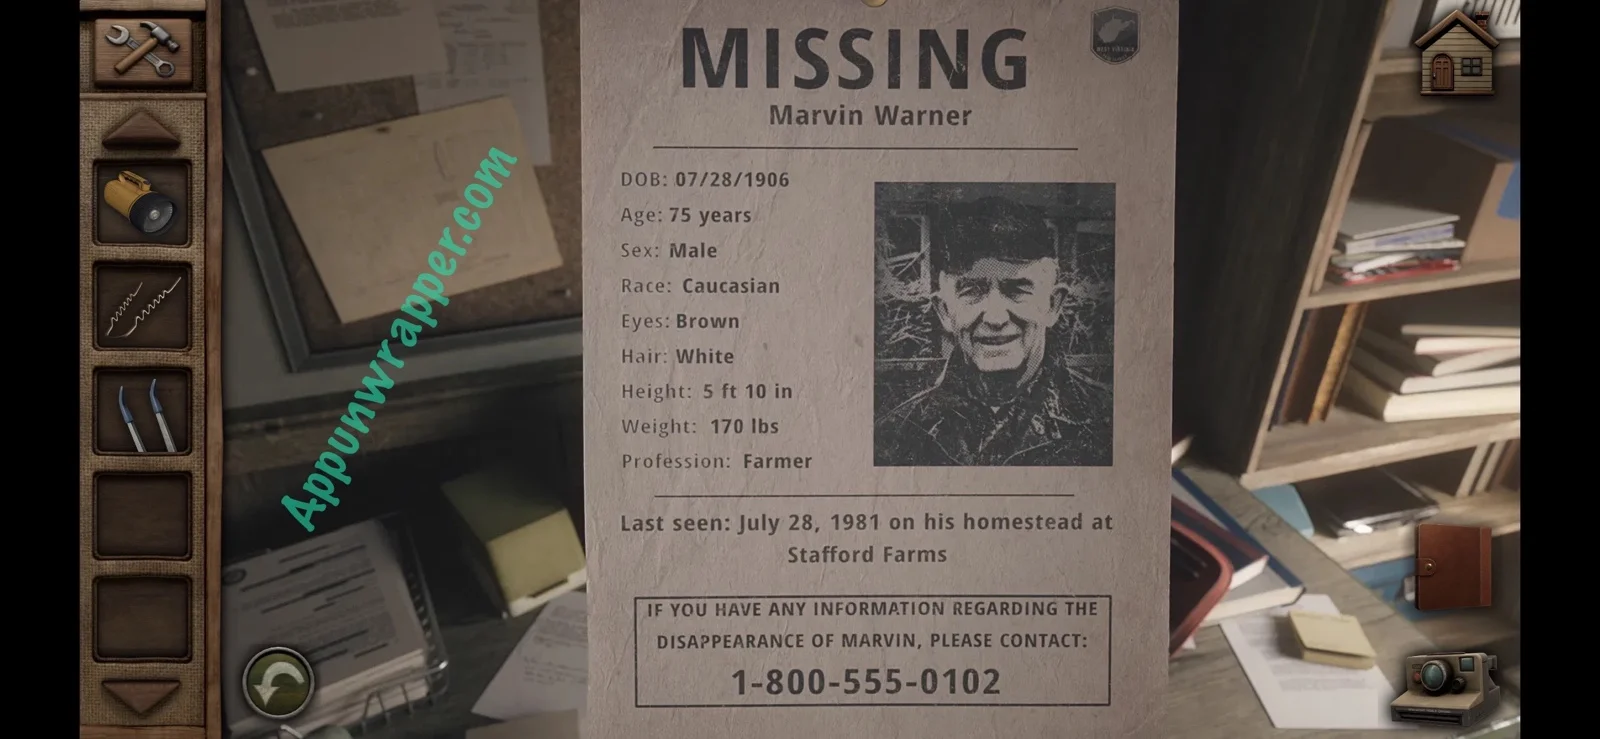
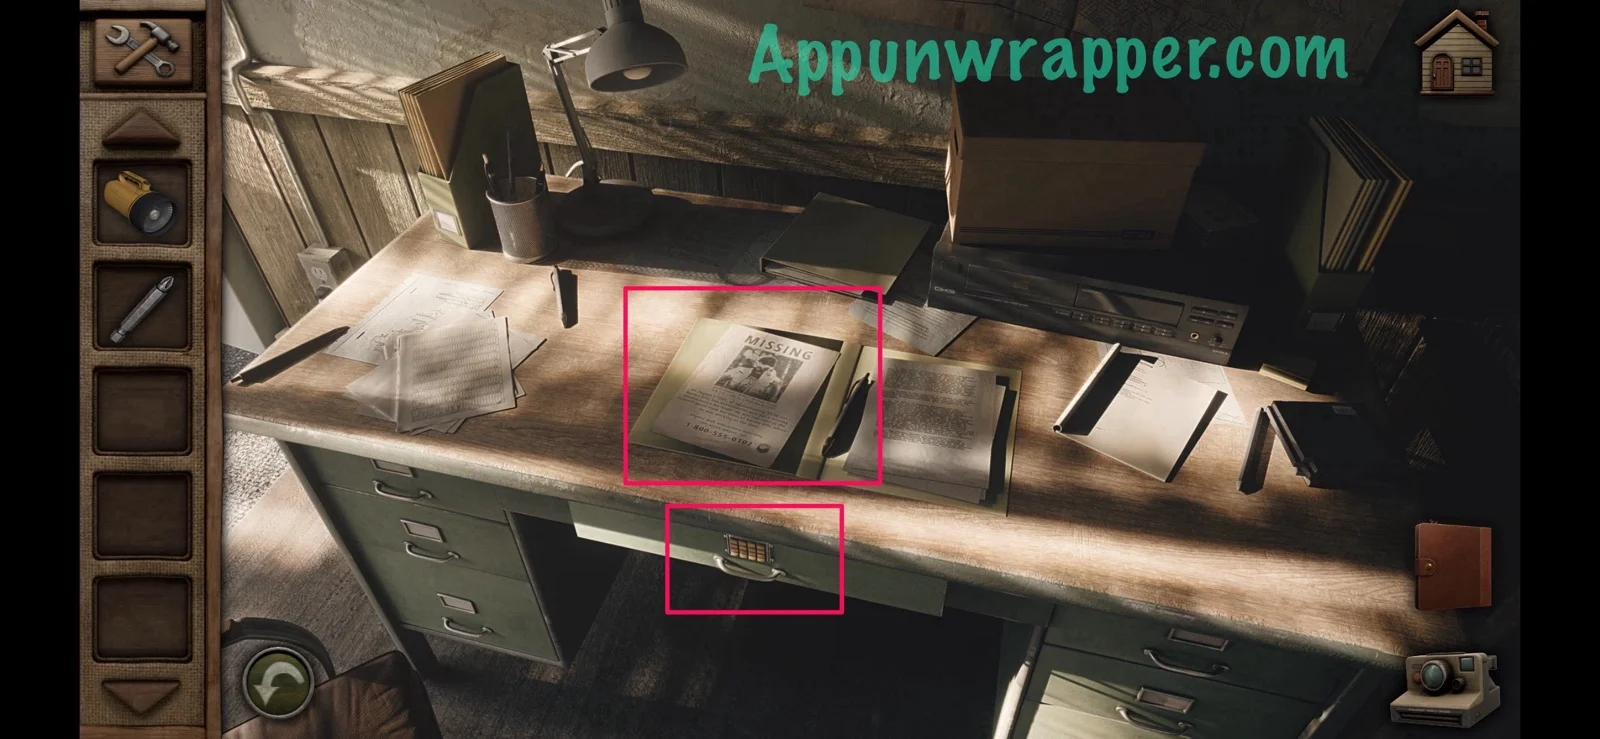
13. Go back to the main area and head towards the windows. Inspect the desk to the left and get the tweezers from the pouch. Also, take a photo of the missing person notice for Marvin Warner.
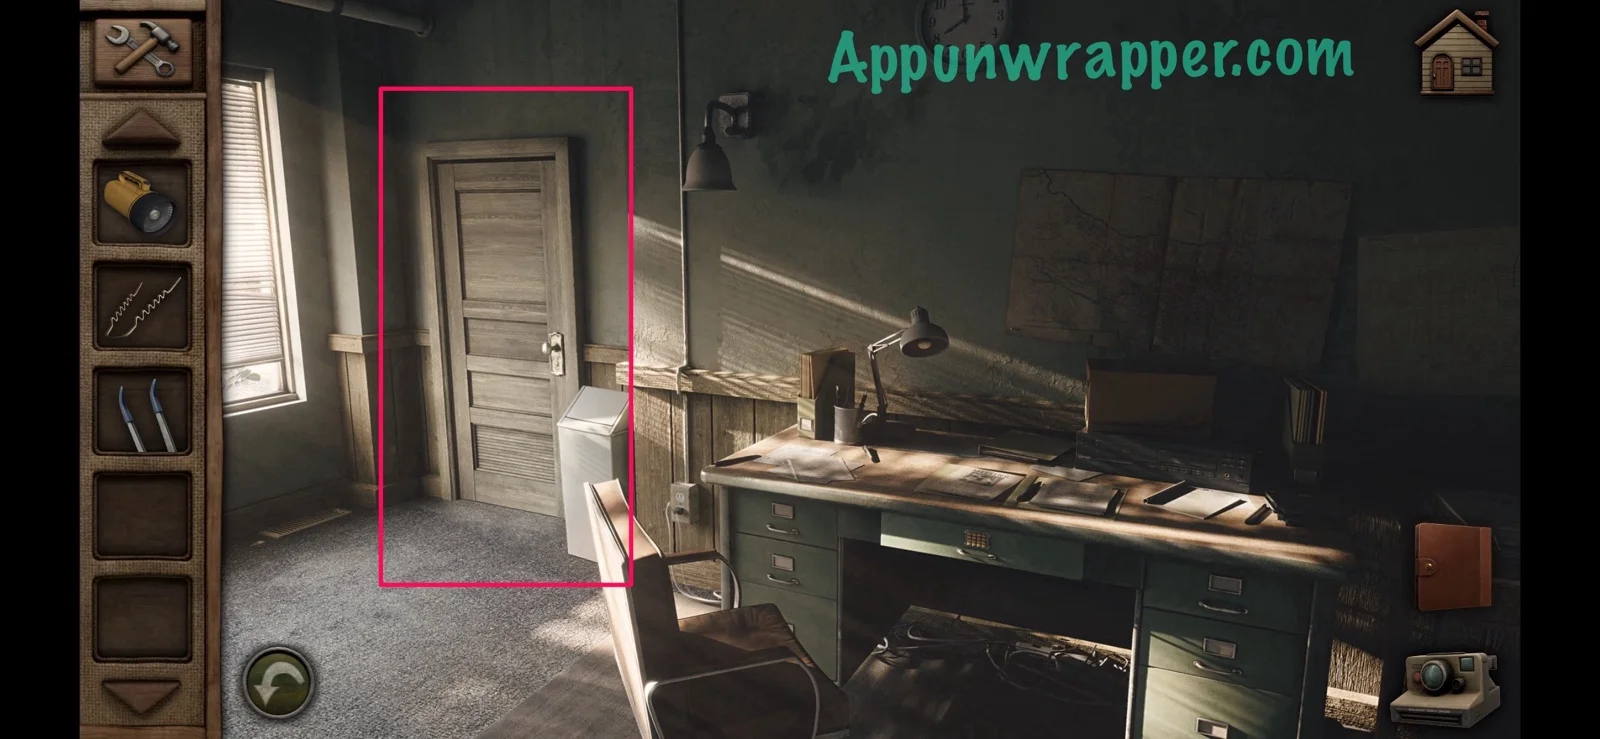
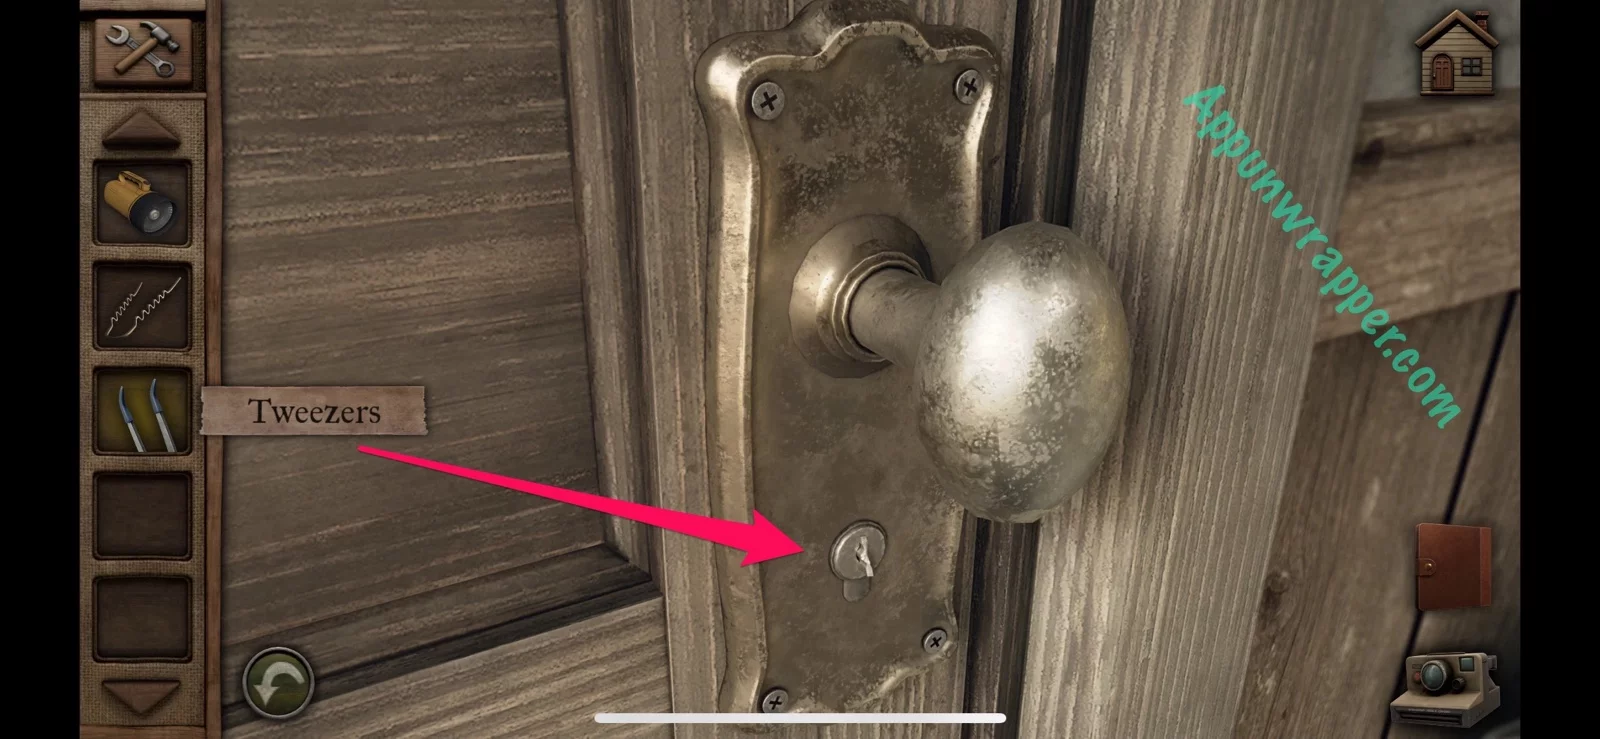
14. Zoom back out and inspect the desk to the right. Before going to the desk, look at the door to the left. There’s a piece of a key stuck in the keyhole, so use the tweezers to remove it.
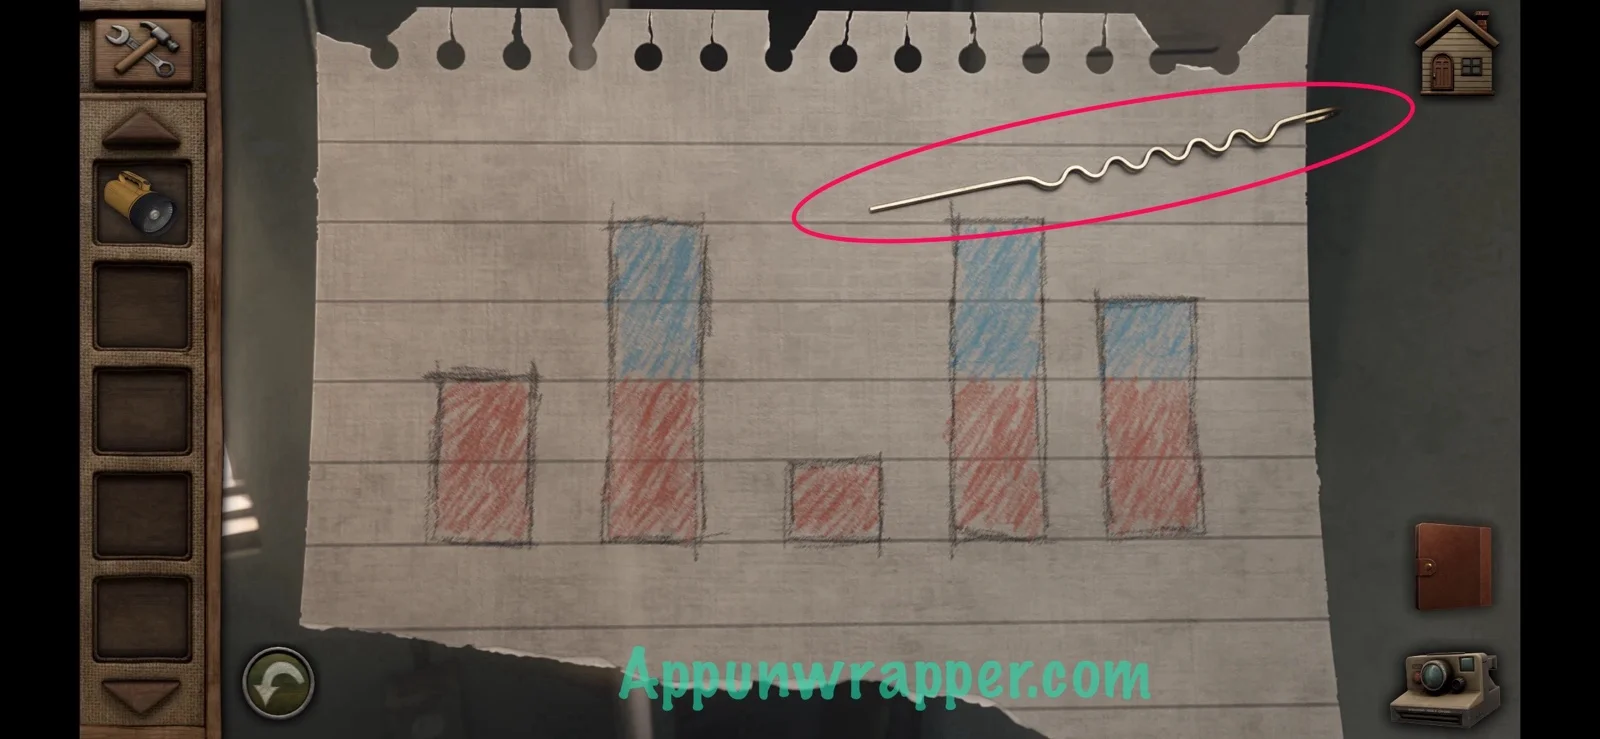
15. Next, use the hair pin as a lockpick. Take out the photo of the drawing from the locker to figure out how to solve it.
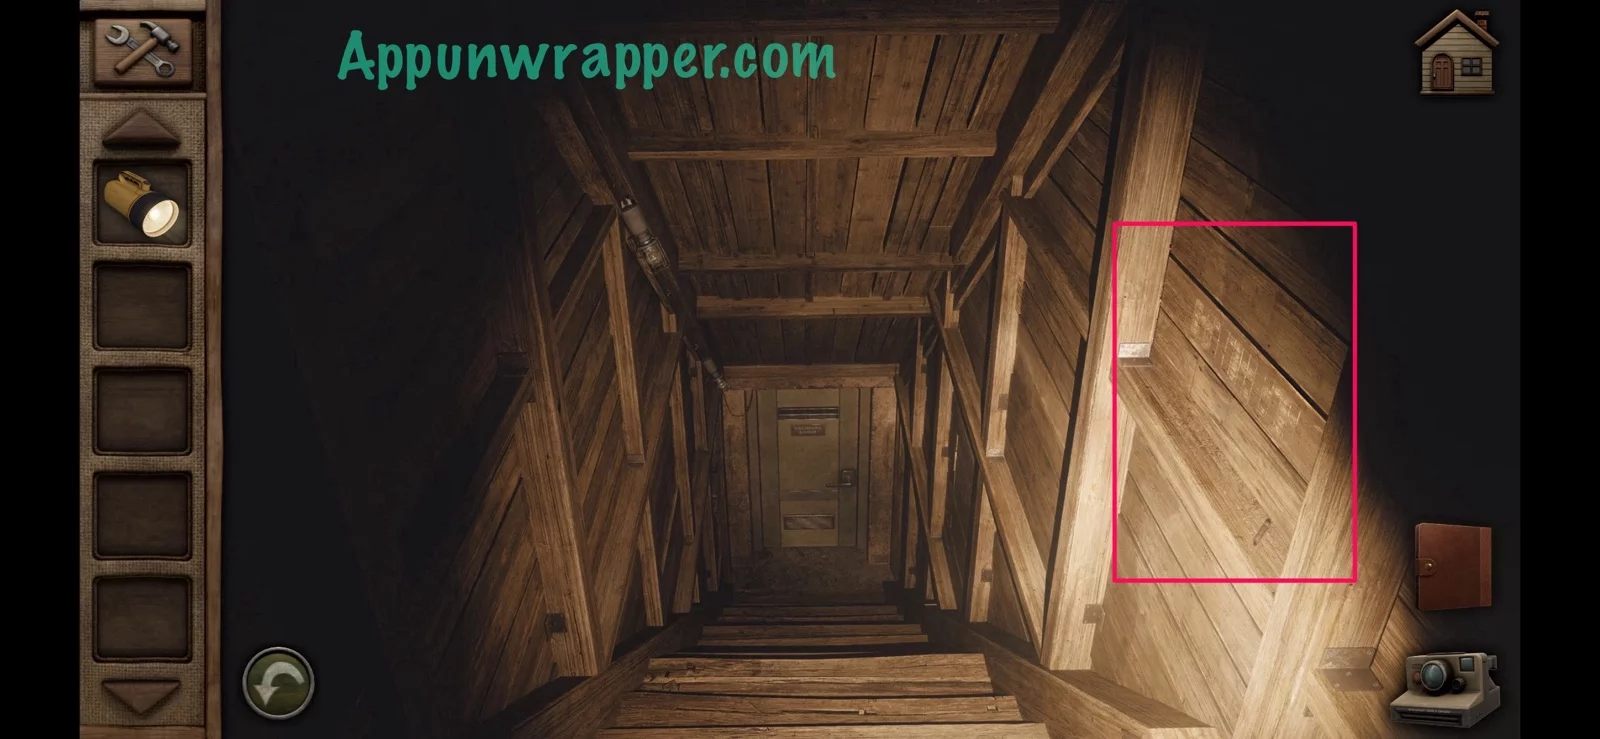
16. Go through and you’ll automatically use the flashlight. Head downstairs and then look to the right for a clue etched into the wall and also a screwdriver bit. Make sure to take a photo of the clue.
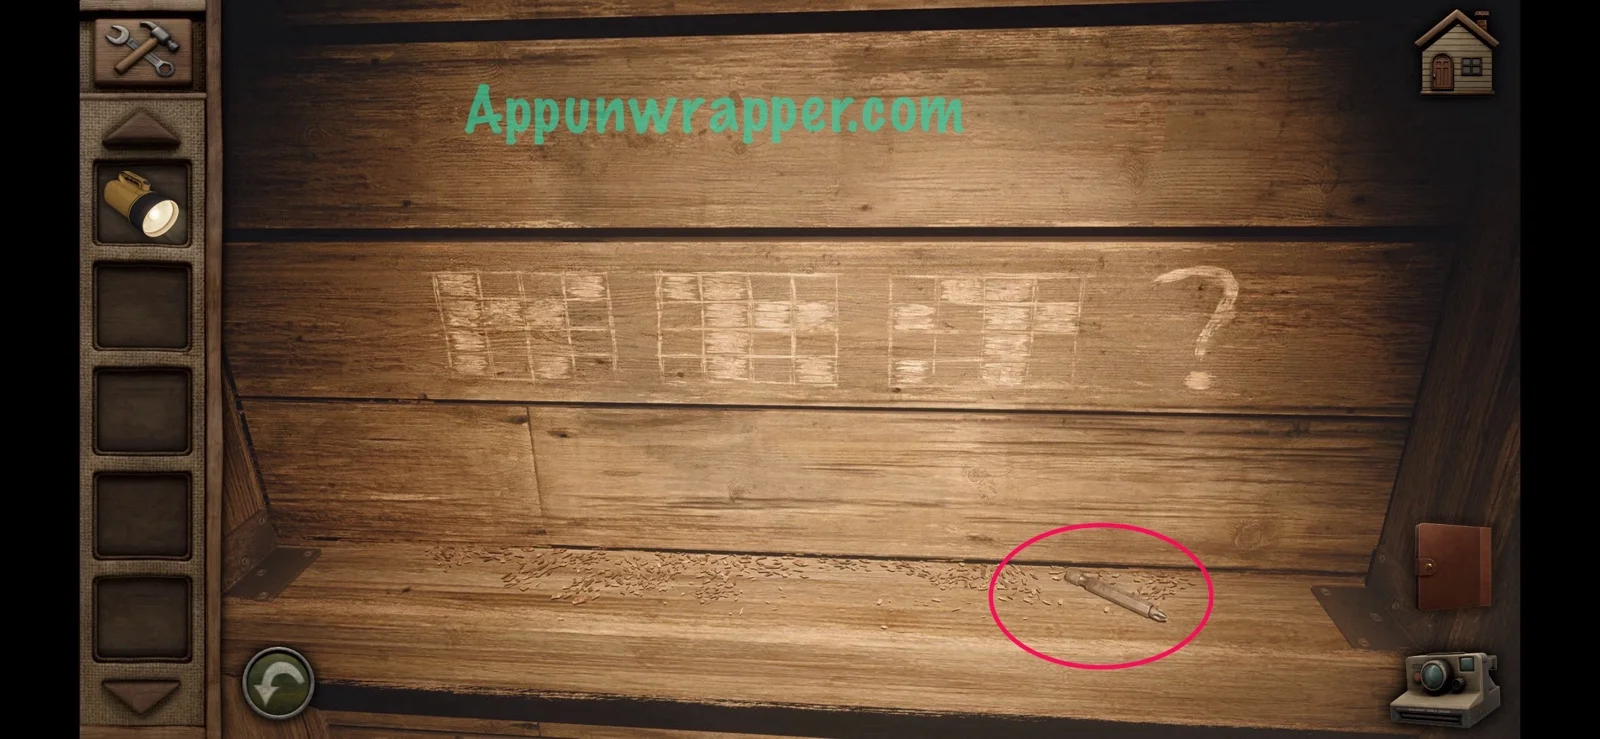
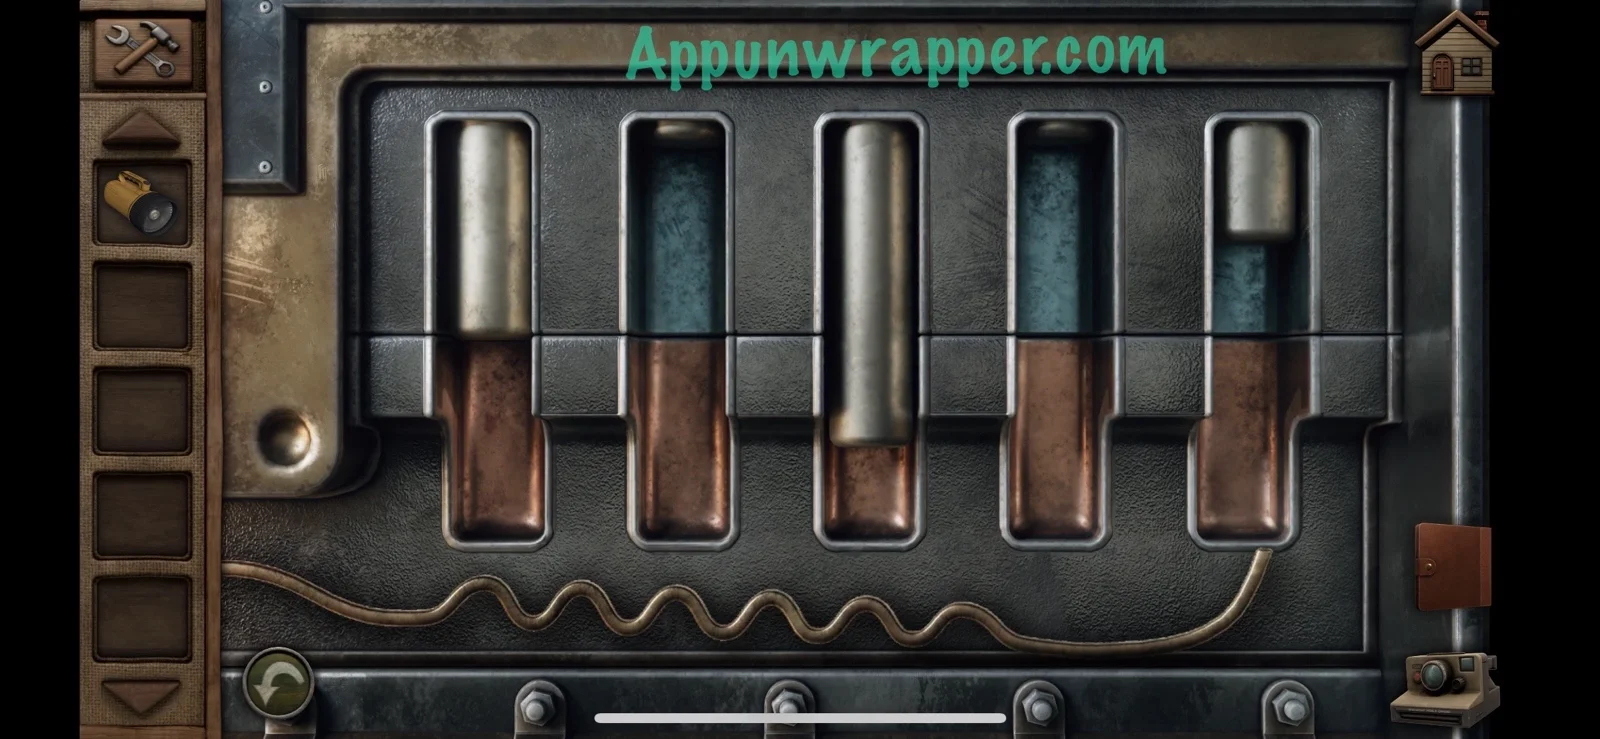
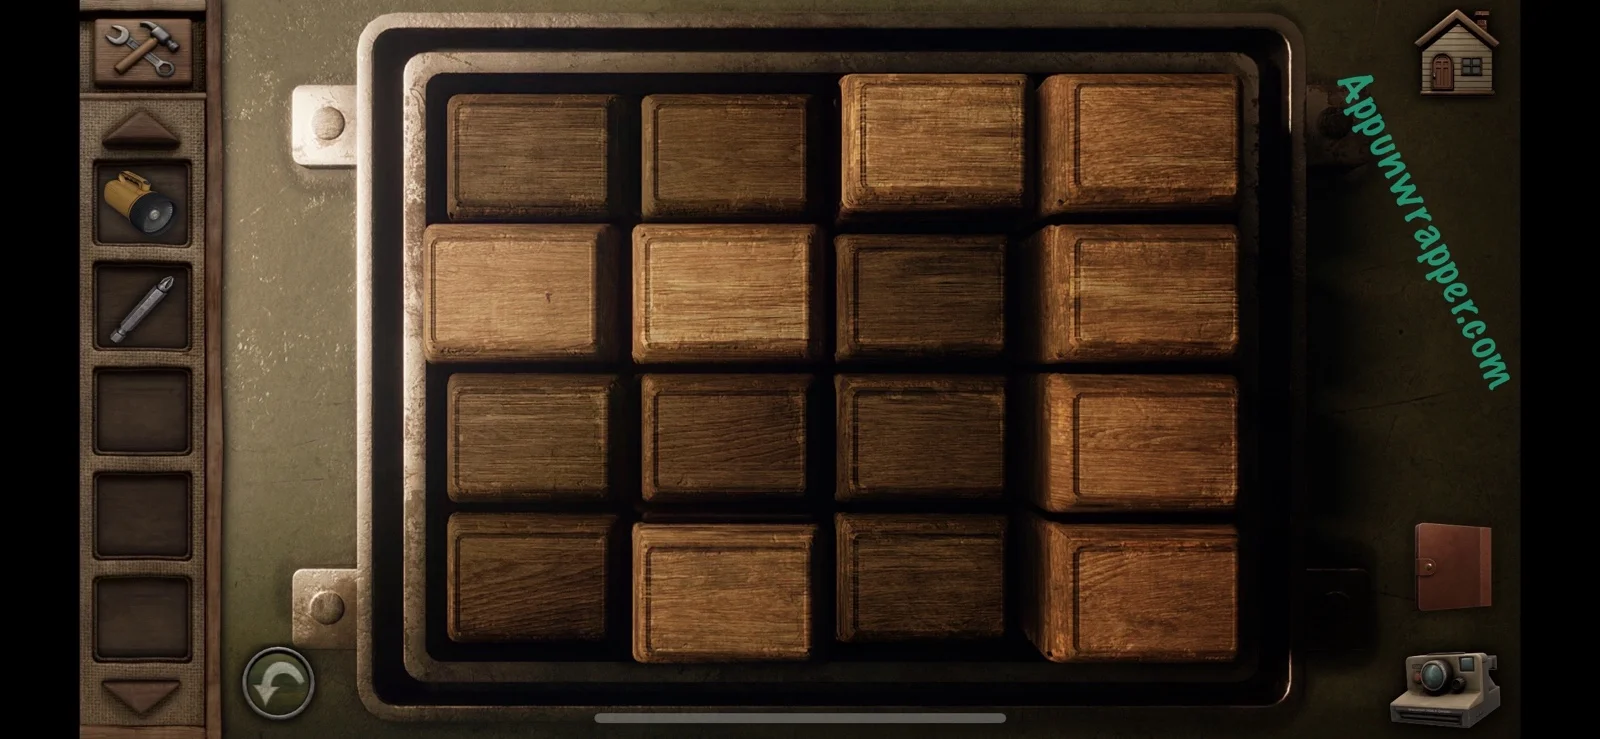
17. Go back upstairs and finally look at the desk to the right of the basement door. Take a photo of the missing person flyer for Qadir Samra. Also, inspect the locked drawer to see some wooden buttons. Use the clue from the basement wall to solve it. Basically, each grid in the etching shows you how it changes from one to the next and you can then guess what the next one should look like. Or just copy my solution below.

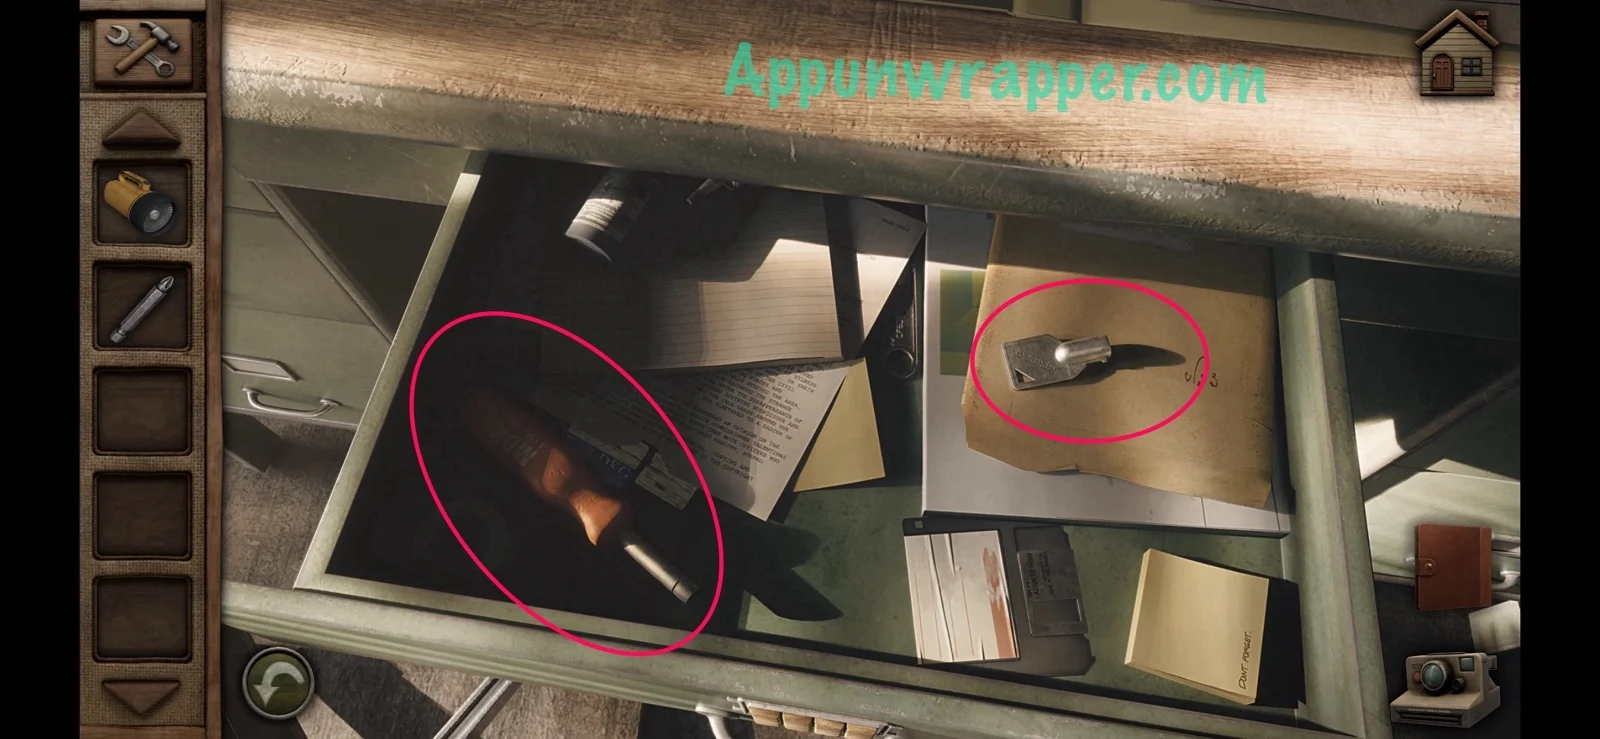
18. Take the tubular key and the screwdriver handle from inside the drawer.
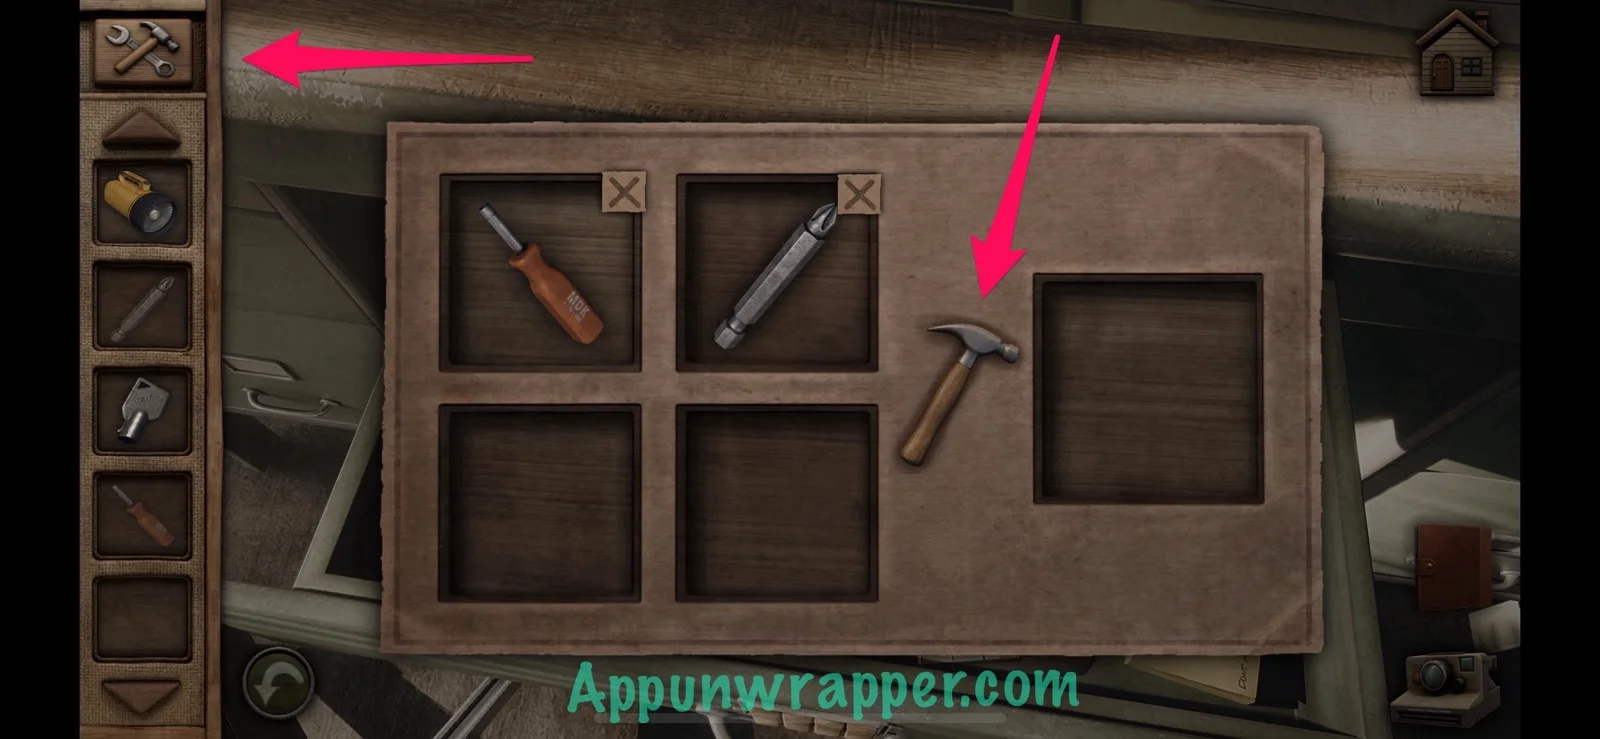
19. Use the combination tool to combine the screwdriver handle with the screwdriver bit. Now you have a screwdriver!
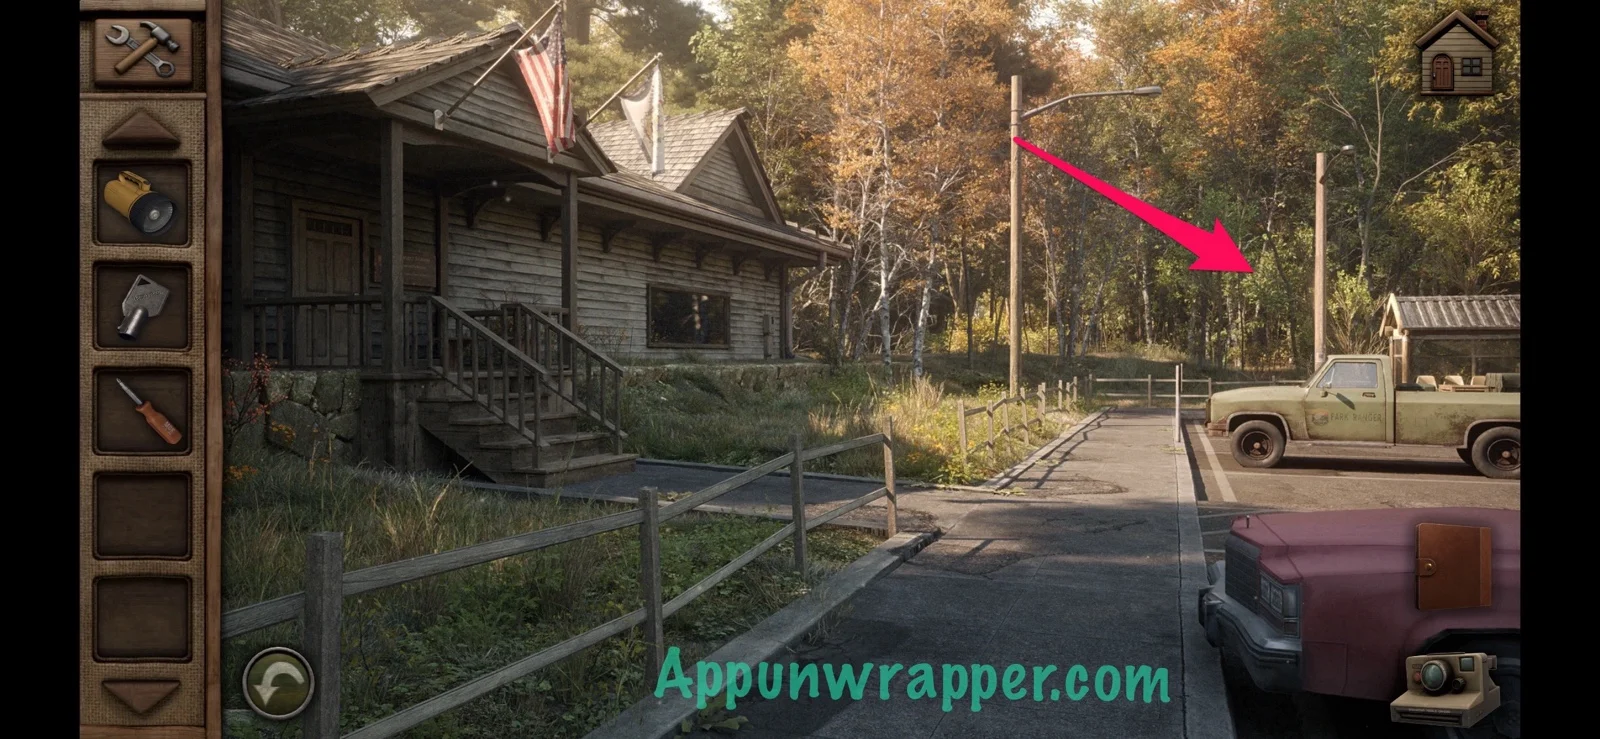
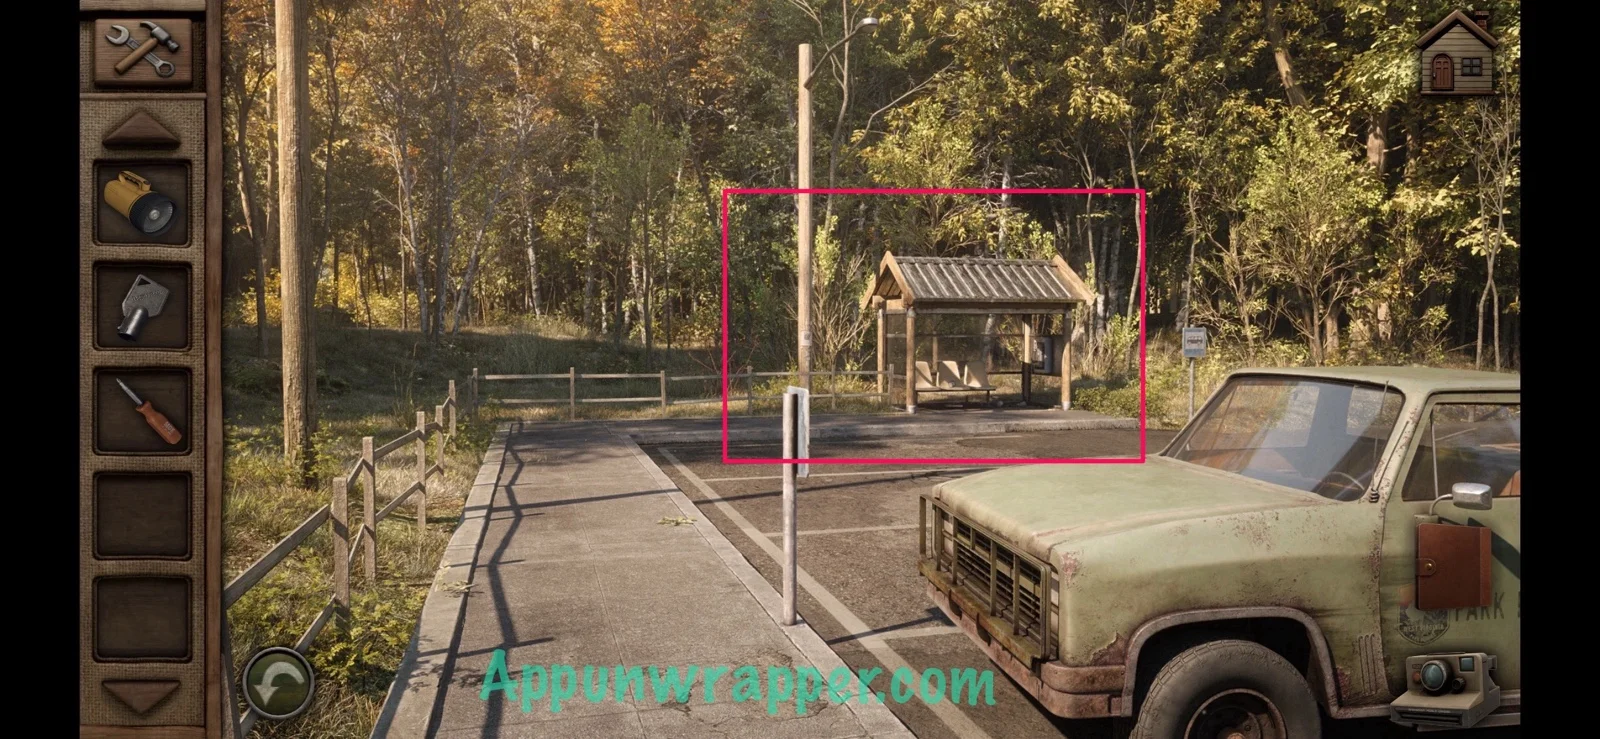
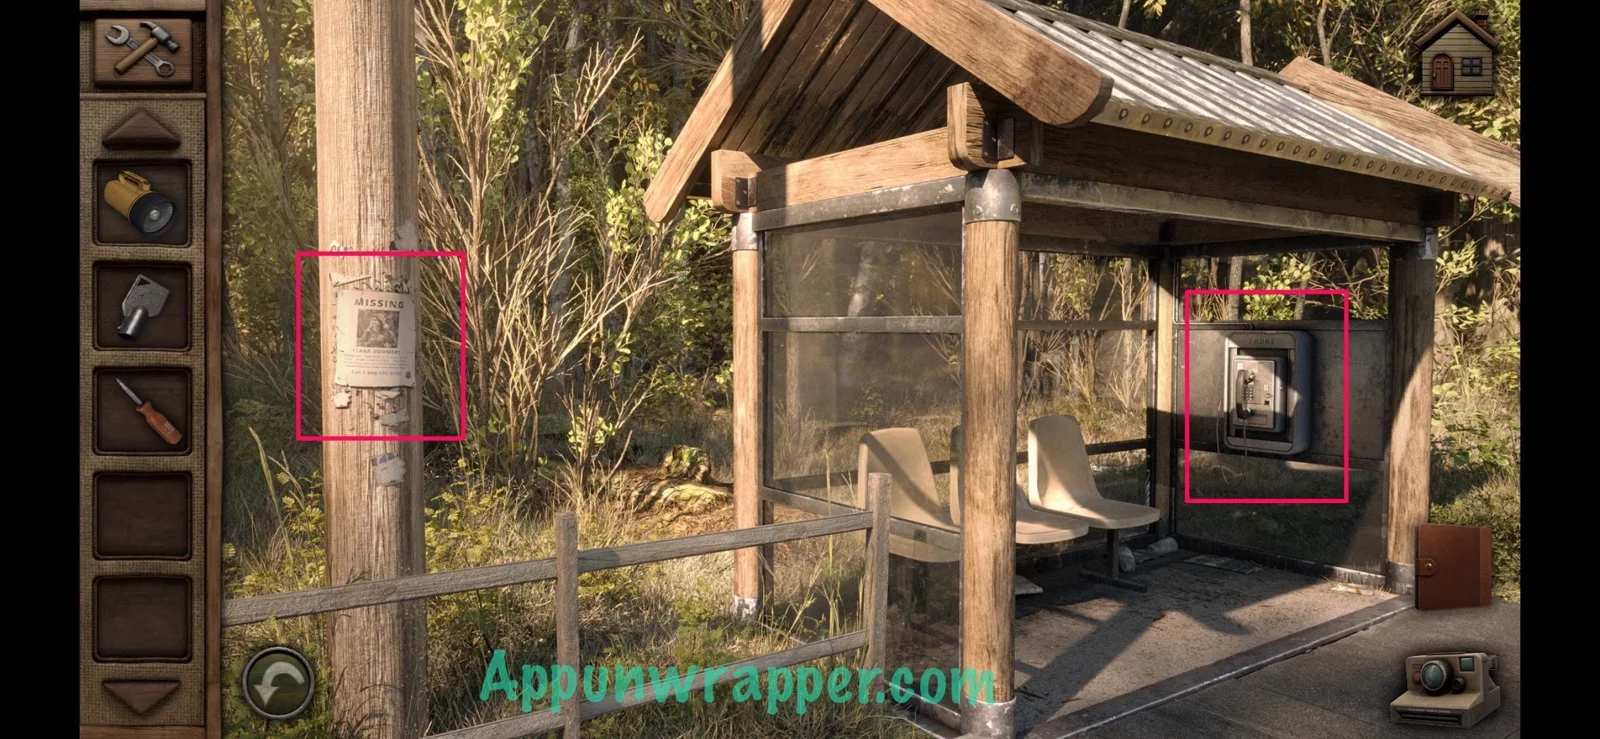
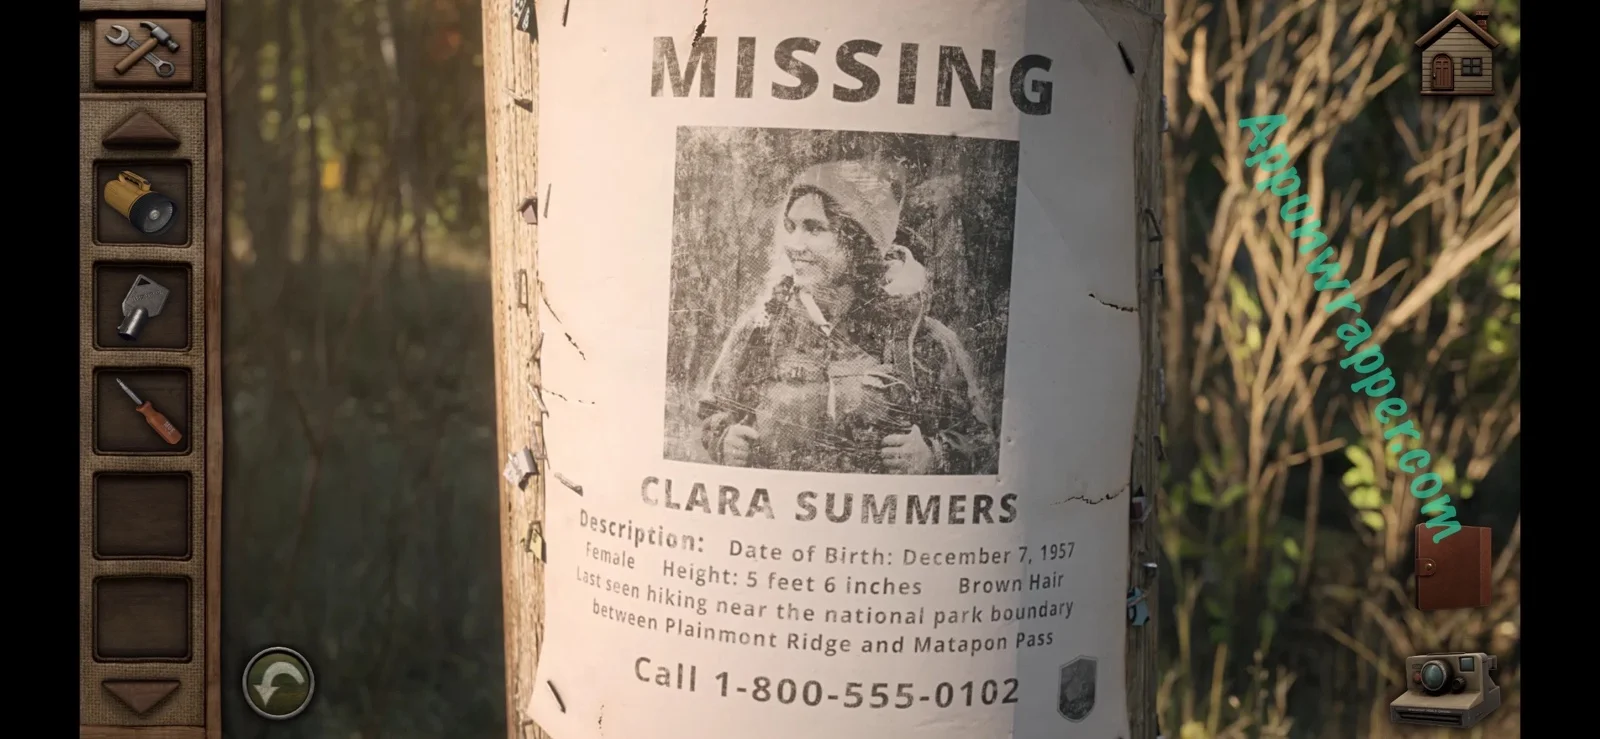
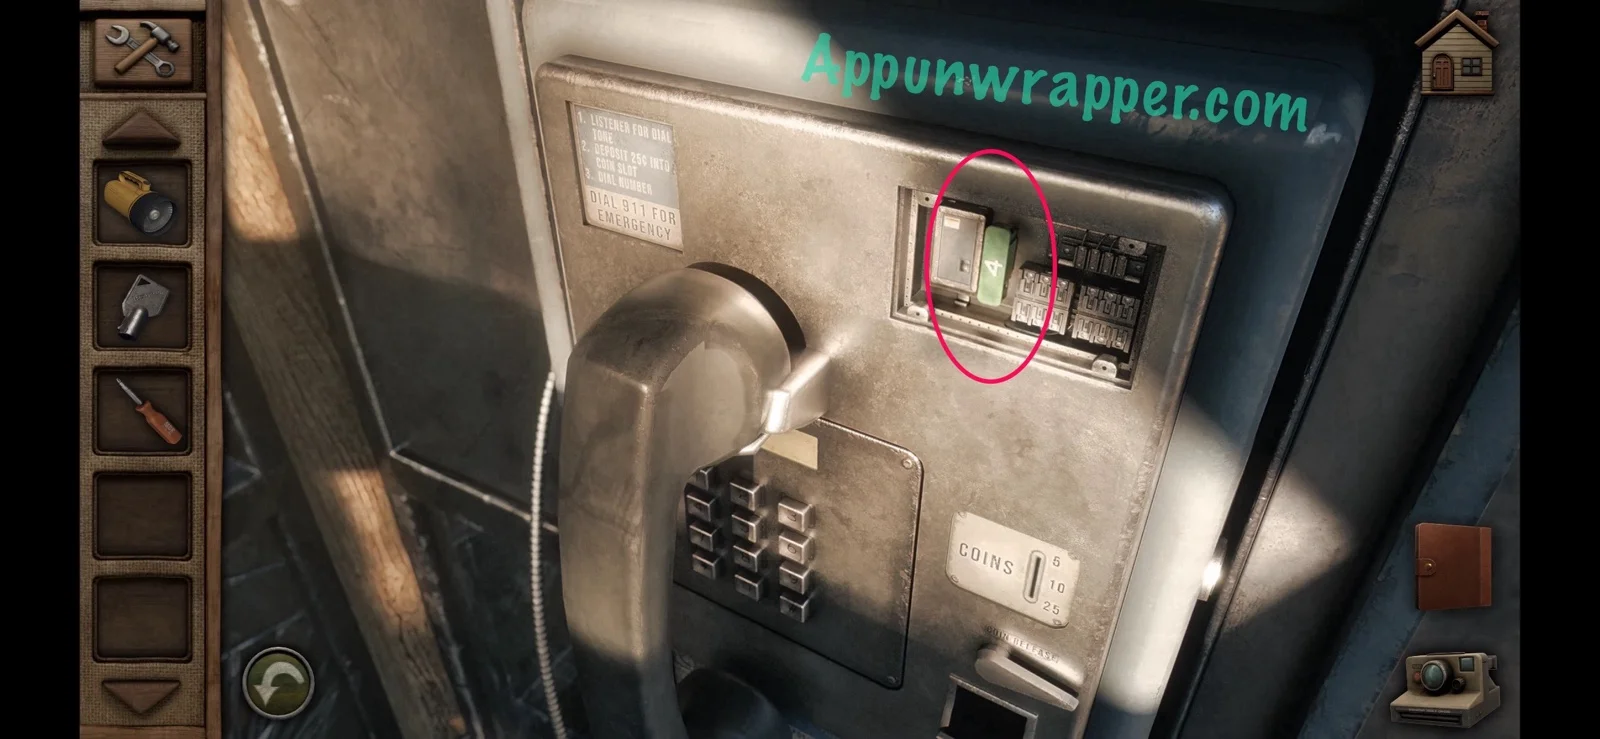
20. Leave the ranger station. Head towards the bus stop and take a photo of the missing person flyer of Clara Summers on the telephone pole. Then look at the payphone and use the screwdriver to remove the panel. Grab the fuse from inside.

Click on the little numbers below to continue to the next page of the walkthrough or click here.
From the first few moments I’m getting a Twin Peaks vibe. Will check this out!