Adventure Escape Mysteries – Hidden Ruins
By: Haiku Games


In this Haiku Classic Game, join steadfast Professor Burns, rich daddy’s girl Rachel, and tech whiz Peter as they explore the hidden ruins of the Kunari civilization. This is a complete step-by-step walkthrough guide with hints, tips, tricks, answers and solutions for Chapter 5 of the iOS and Android adventure game, Adventure Escape Mysteries – Hidden Ruins by Haiku Games. Feel free to ask for extra help in the comments section.
Looking for my Dark Ruins walkthrough?
Walkthrough:
Chapter 1 | Chapter 2 | Chapter 3 | Chapter 4 | Chapter 5 | Chapter 6 | Chapter 7 | Chapter 8
Chapter 5:
You can watch my video for Chapter 5 here or continue below for my step-by-step guide:
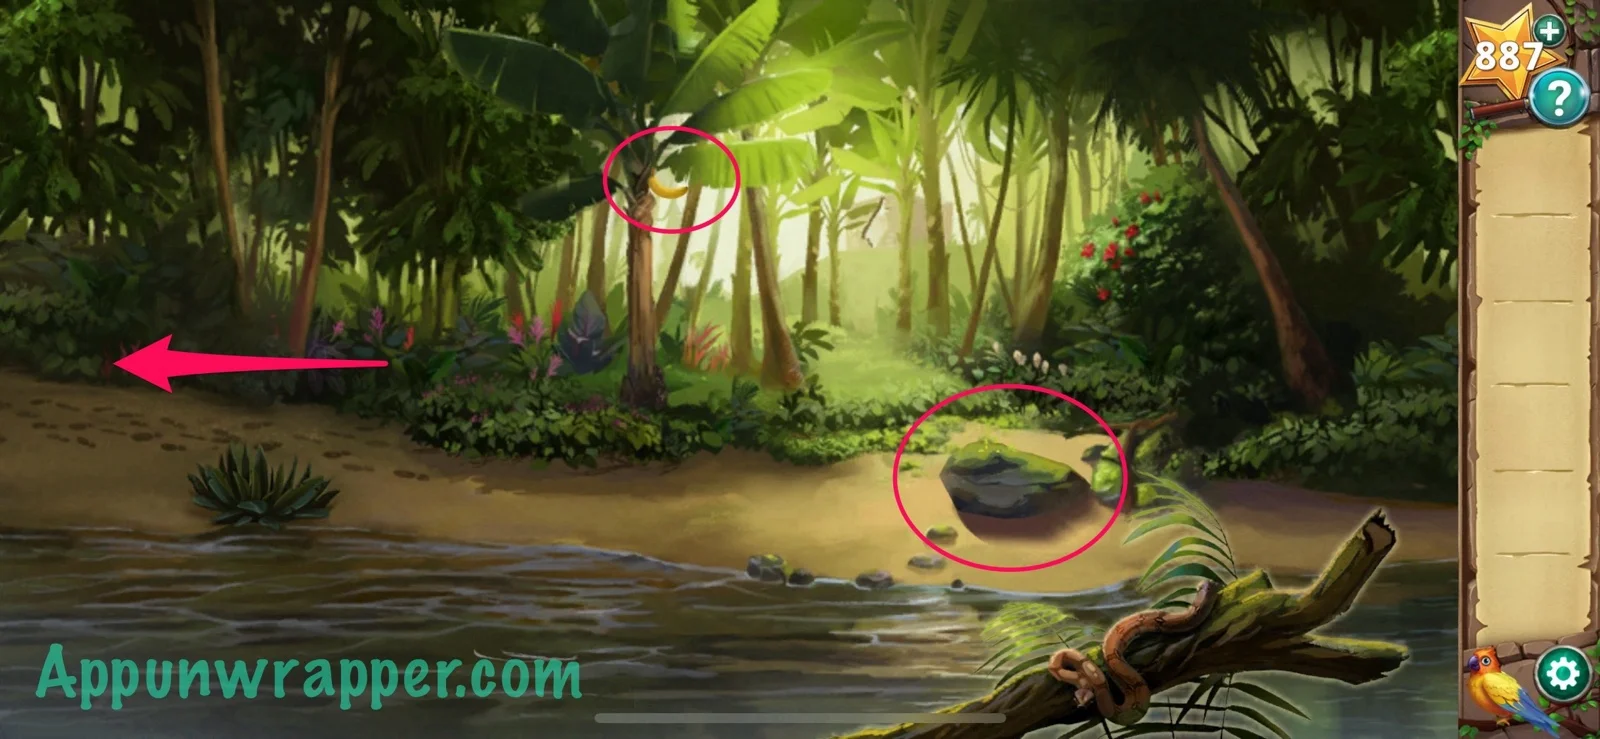
1. Grab the banana from the tree and the heavy rock from the ground. Then follow the footprints to the left.
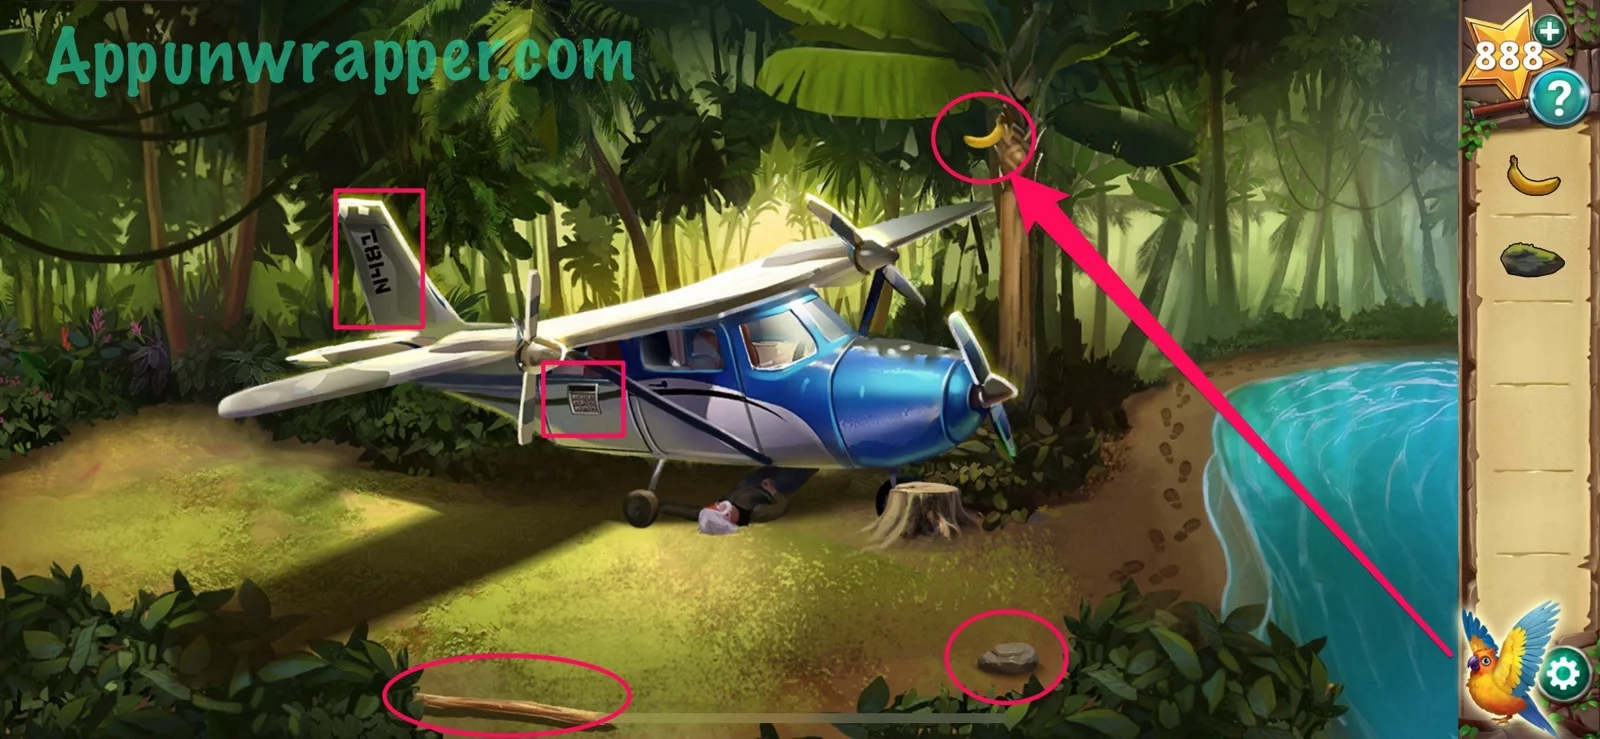
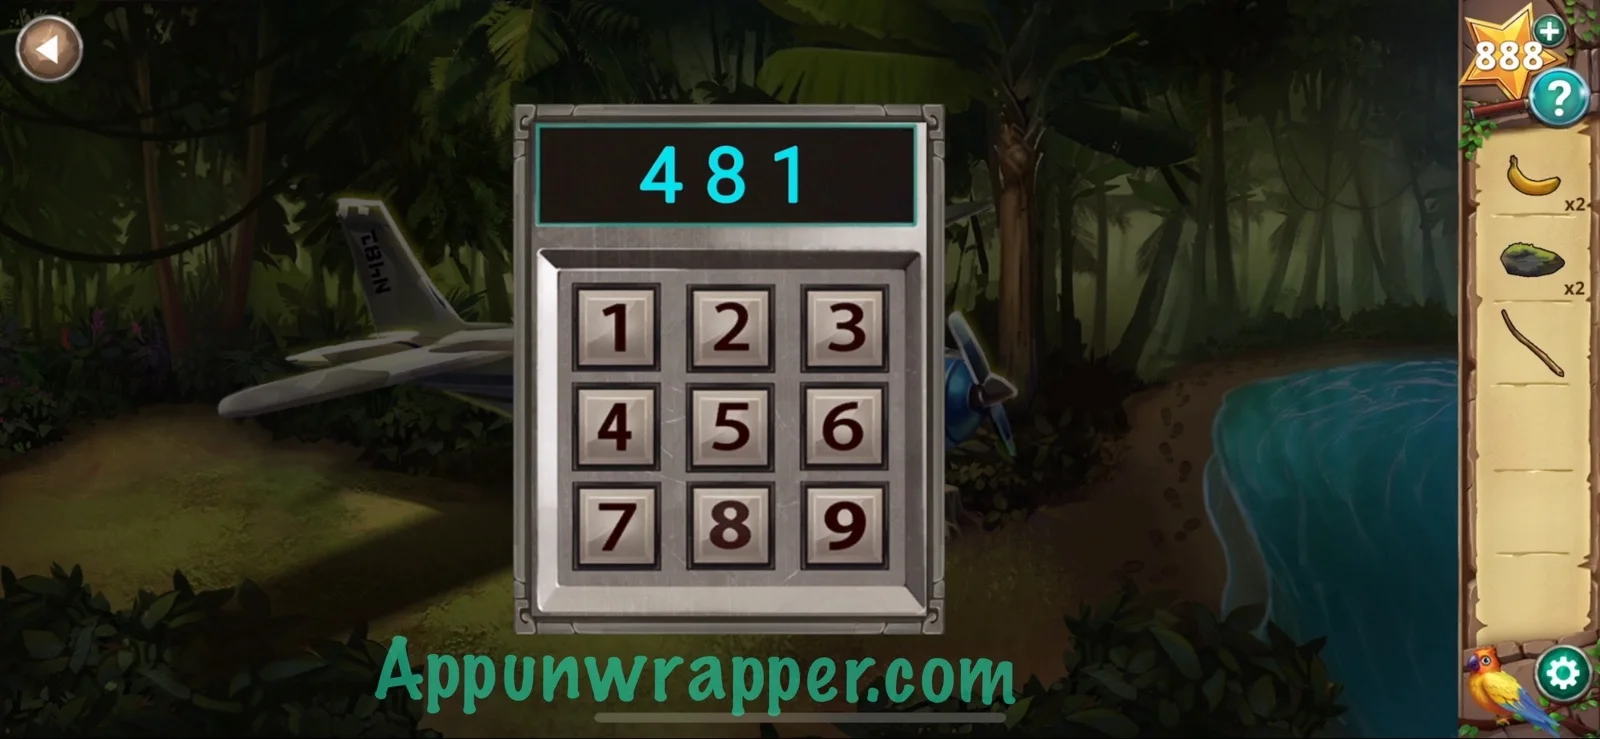
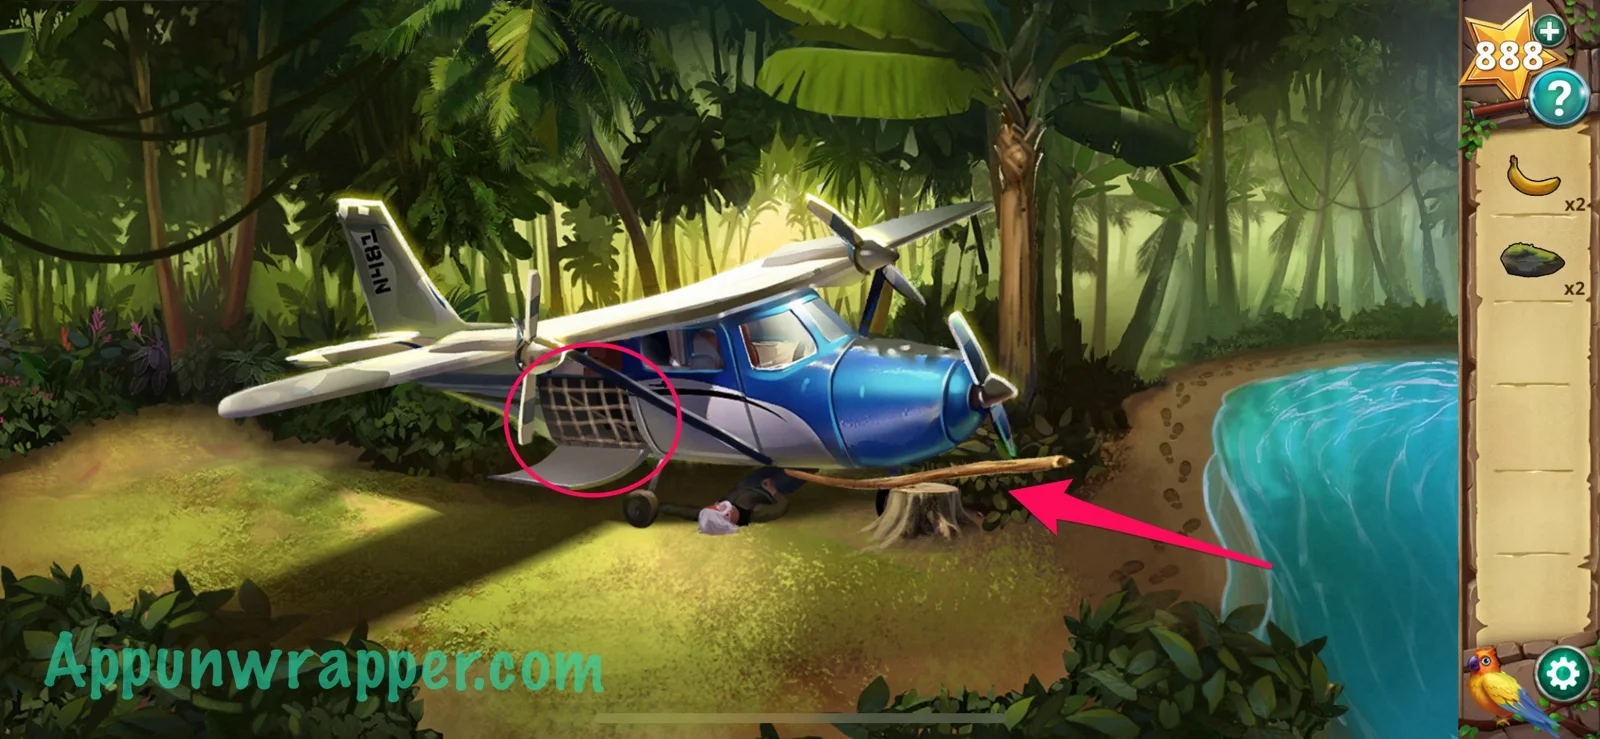
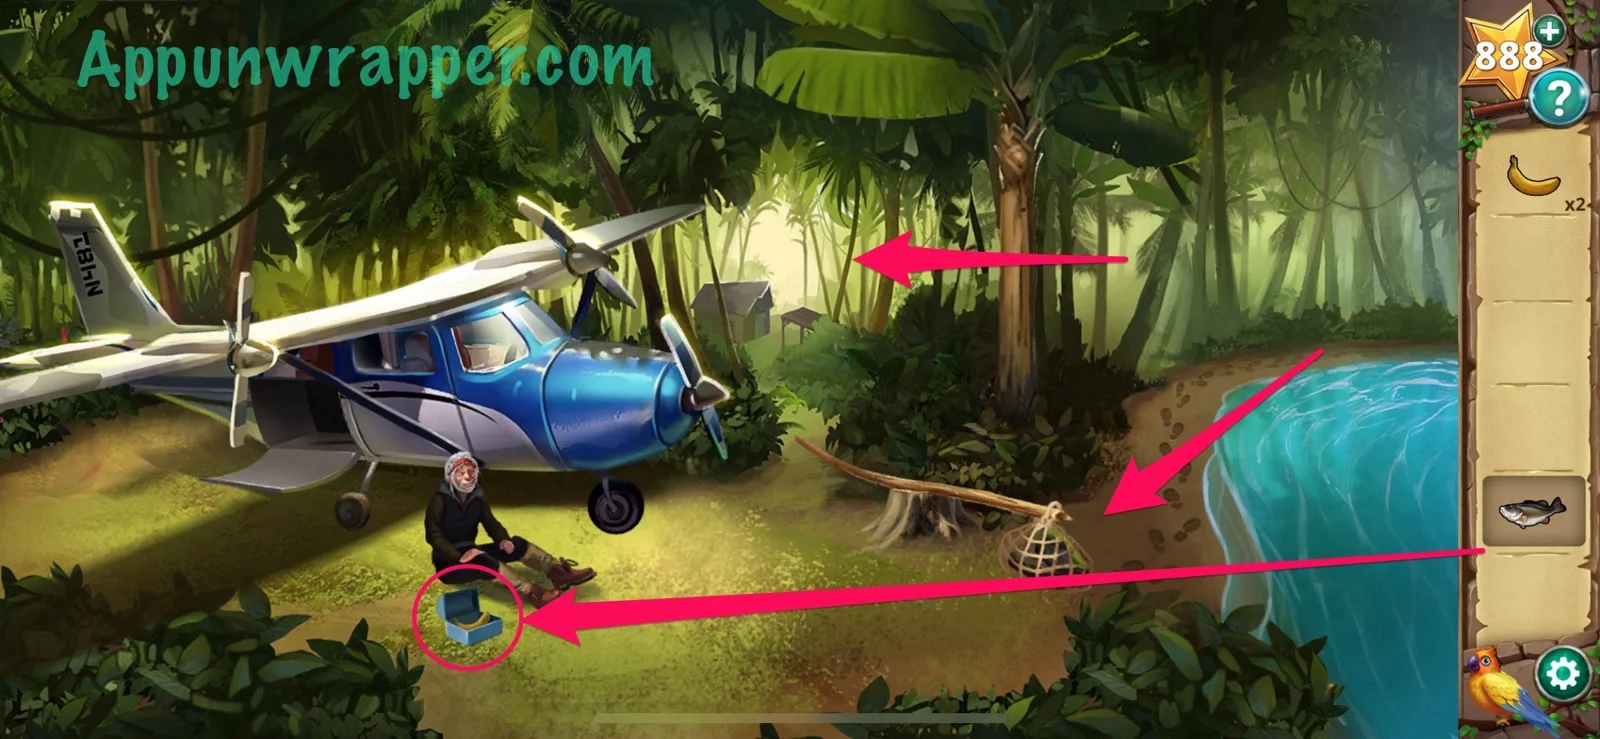
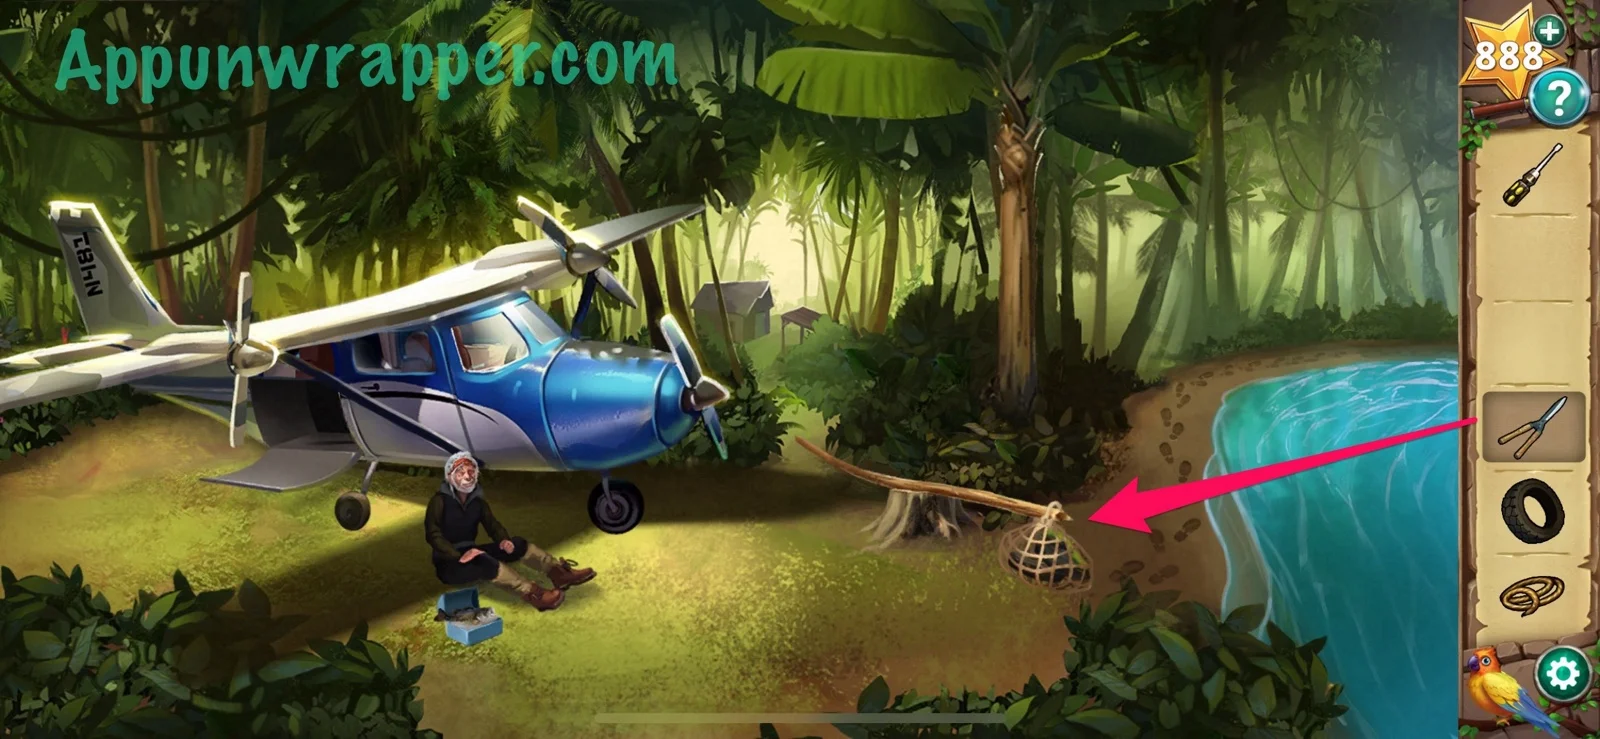
2. There’s a man stuck under a plane! We have to help him. First, use Bert to get another banana here. Pick up the heavy rock and the fallen tree branch. Also, notice the number on the plane’s tail — N481. Tap on the keypad on the plane and enter 481 to open the cargo bay.
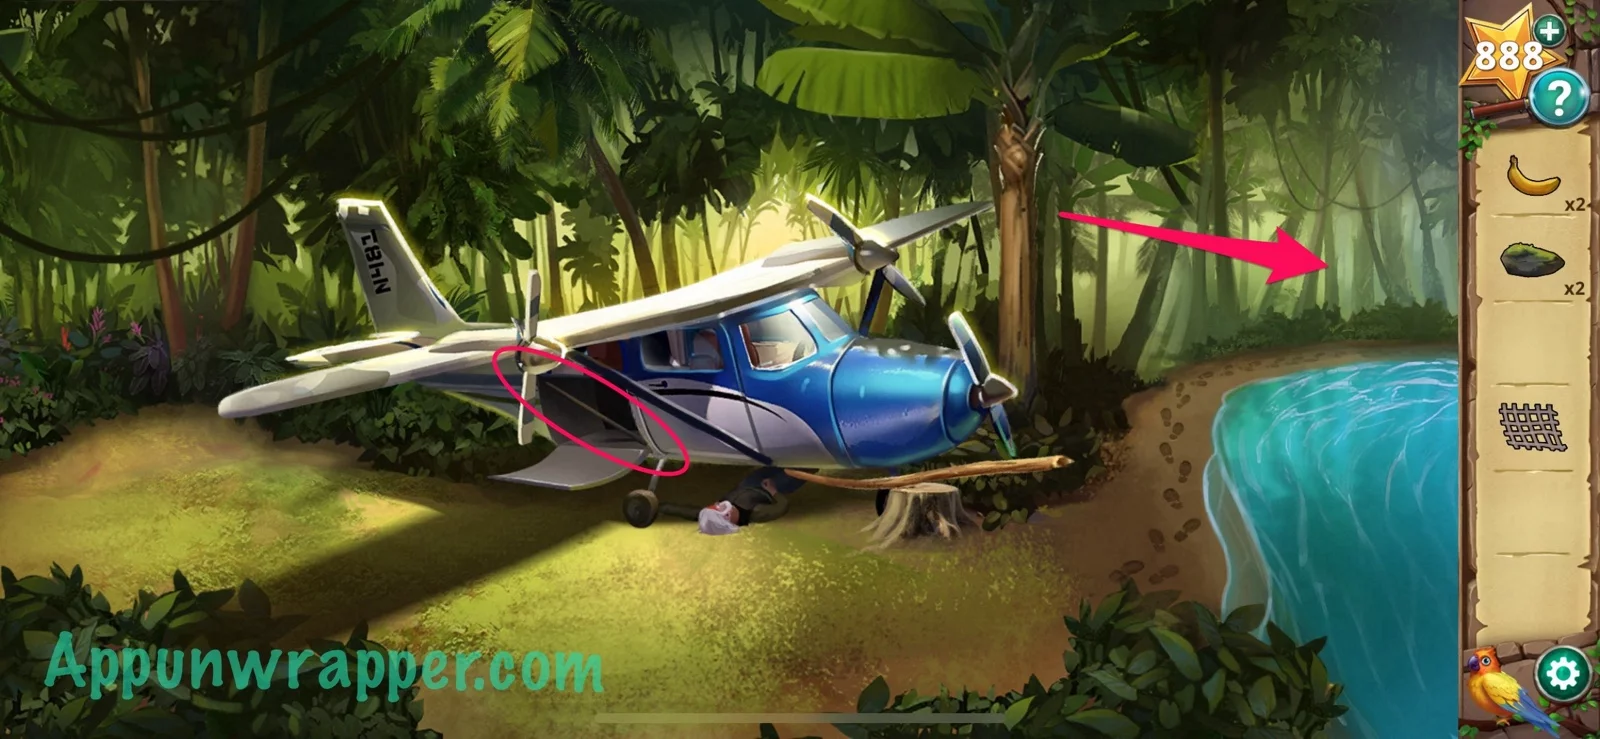
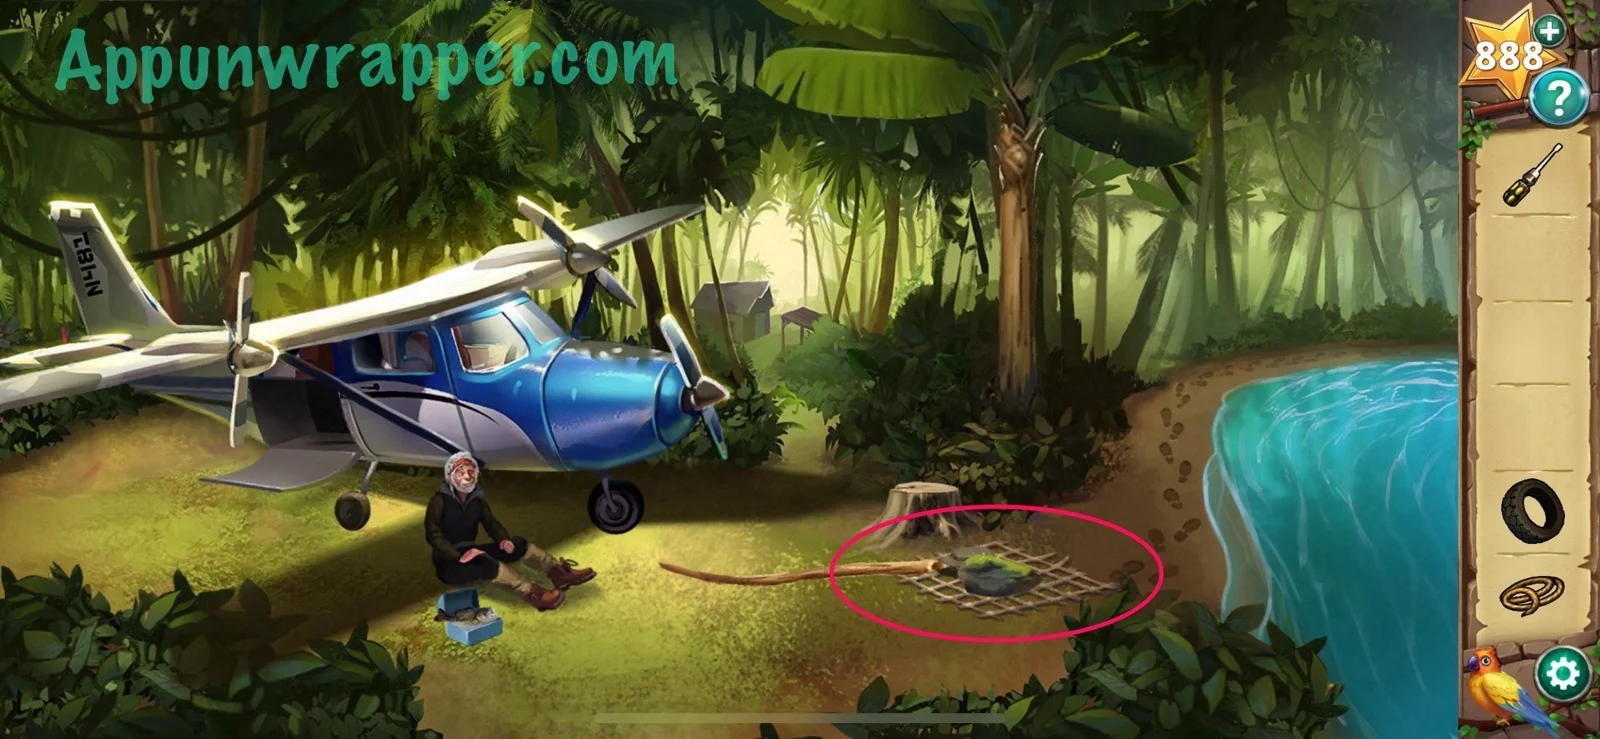
3. Get the cargo net and fishing rod from the cargo bay. Then place the fallen tree branch on the tree stump. Then go right to where we started.
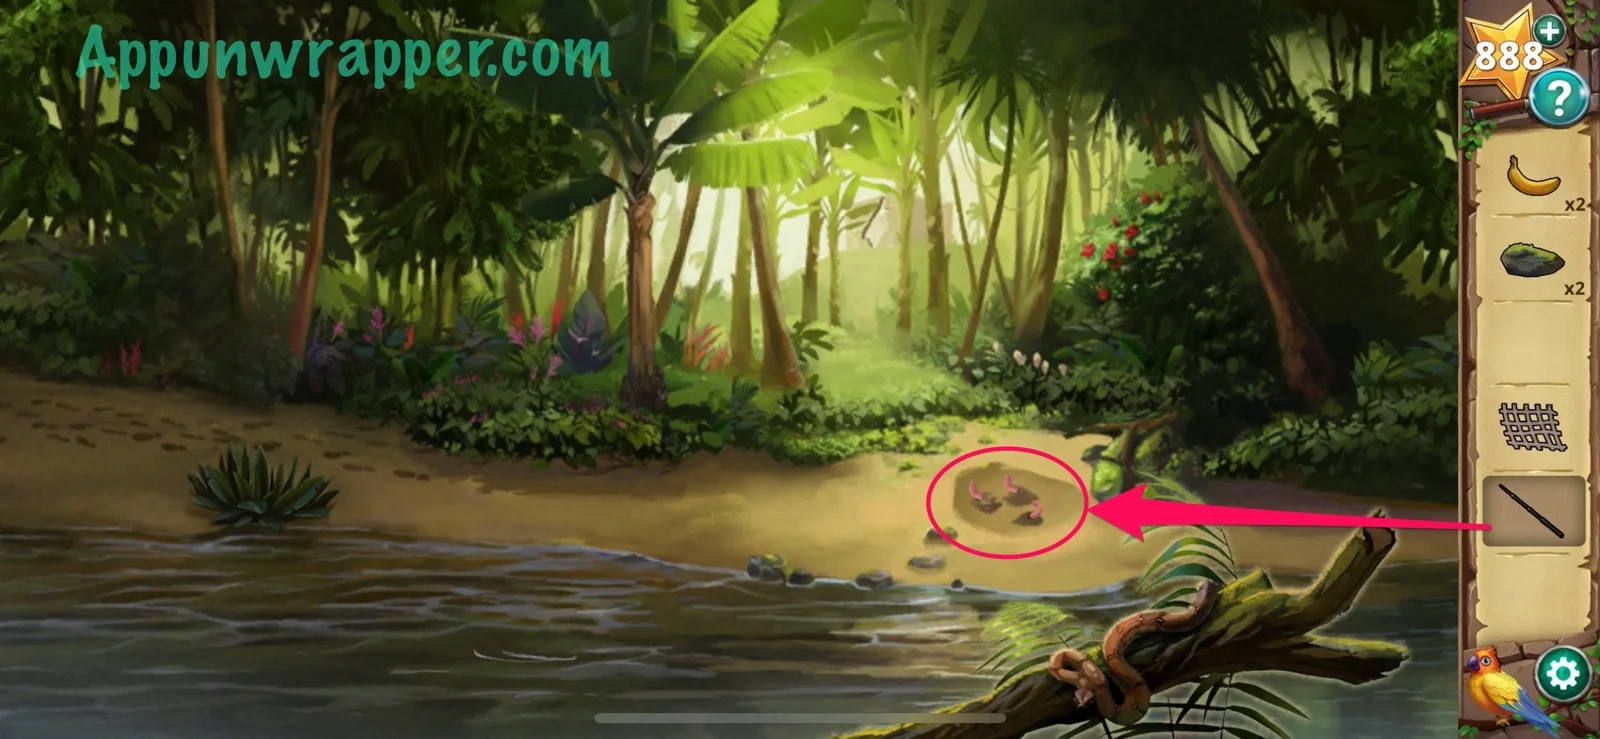
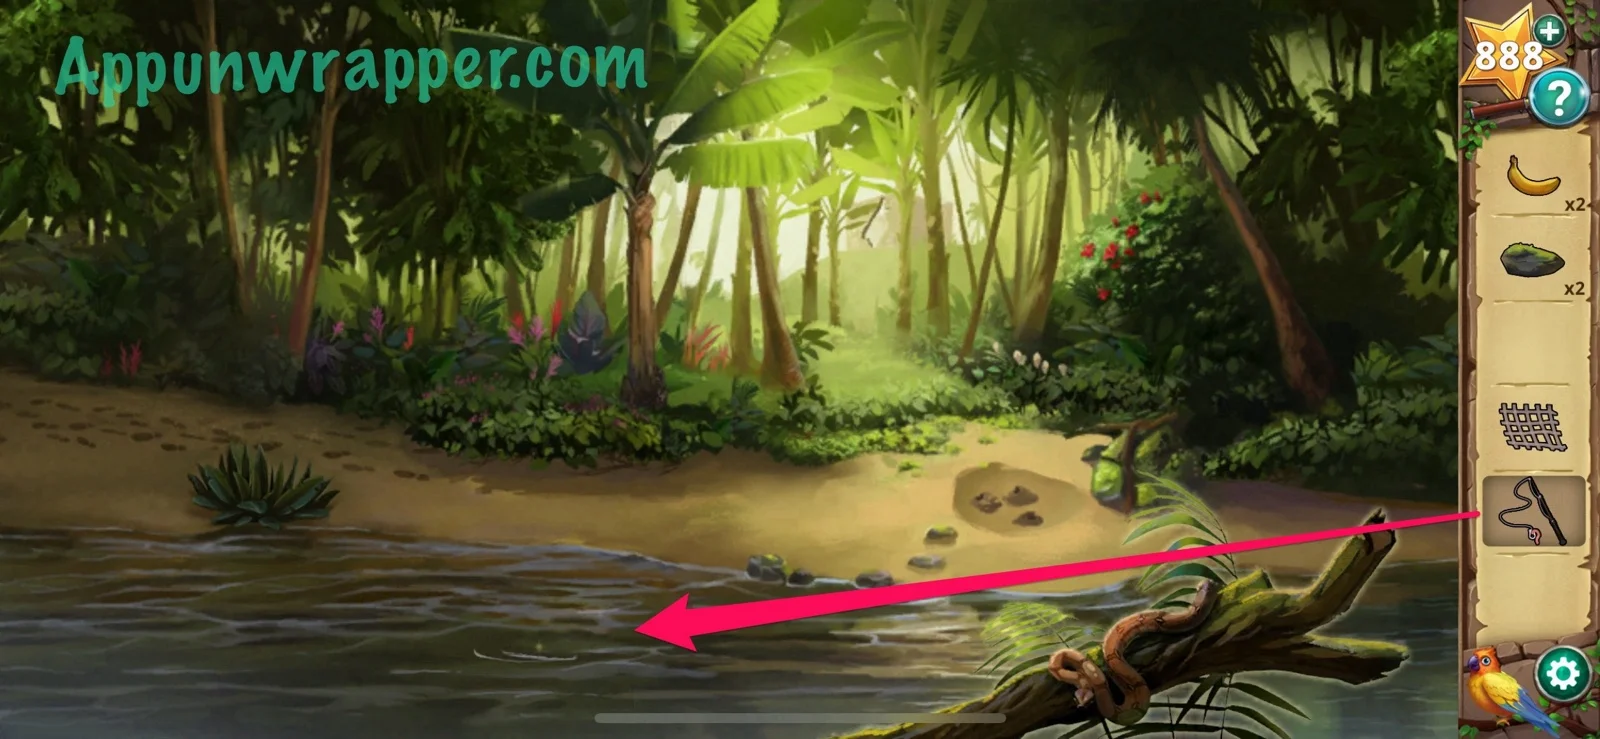
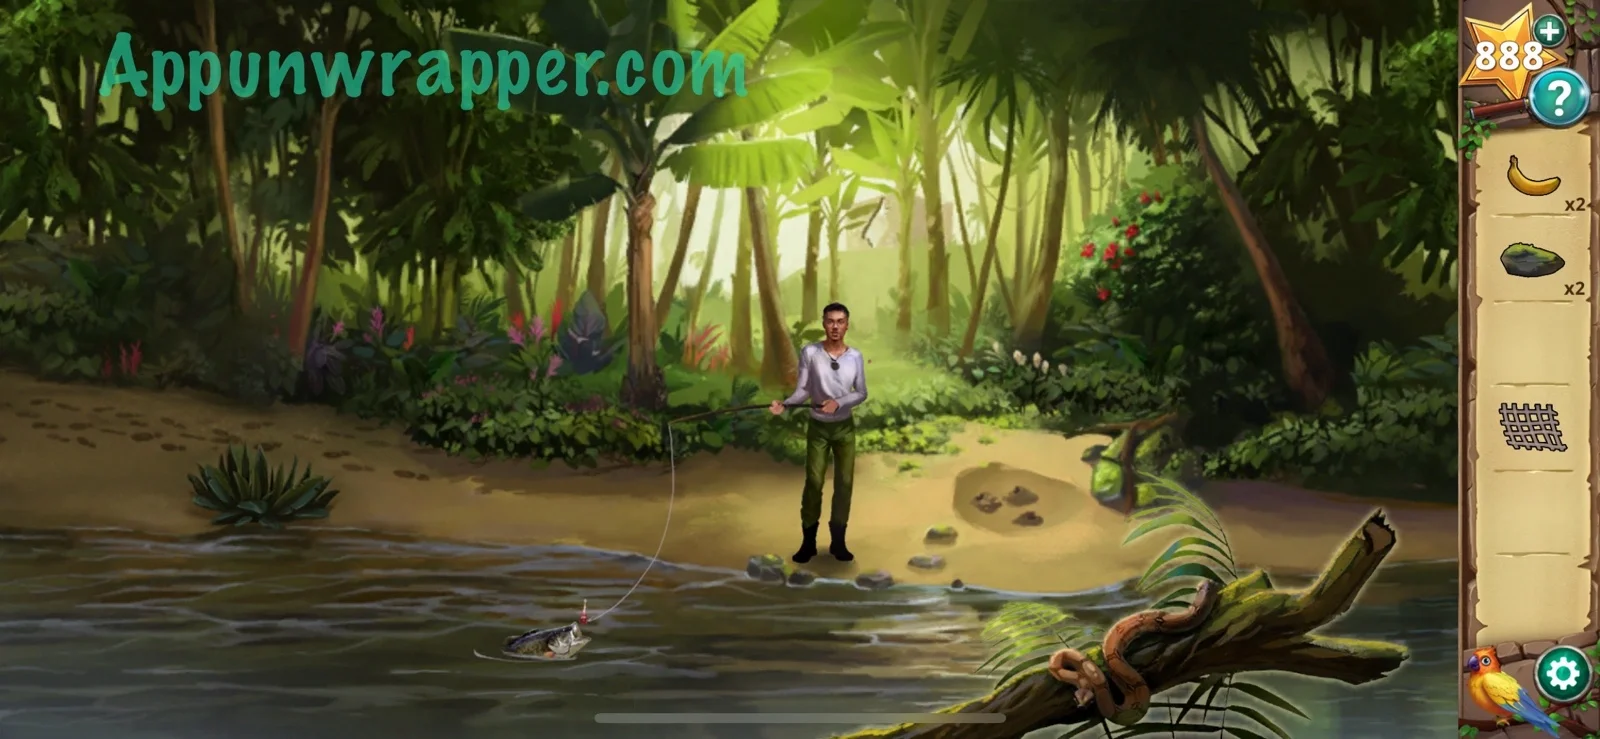
4. Use the fishing rod with the worms that were under the rock. Then use the fishing rod with the sparkling spot in the water to get a tasty fish.
5. Go back to the plane. Place the net on the fallen tree branch and add the two rocks to free the guy trapped under the plane. Open his lunch box to see a banana. Give him the fish in exchange for it. Then go through the trees to the buildings.
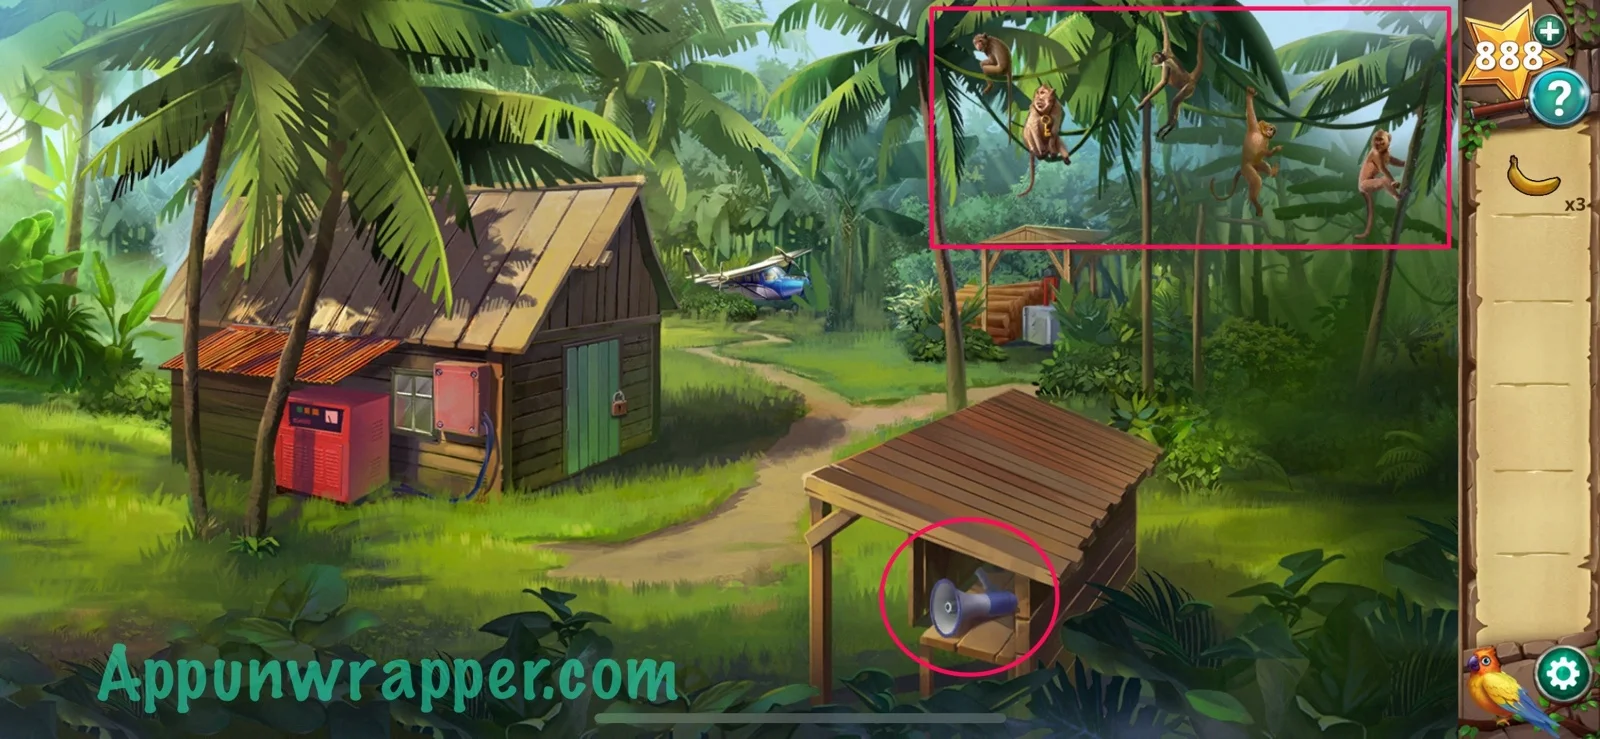
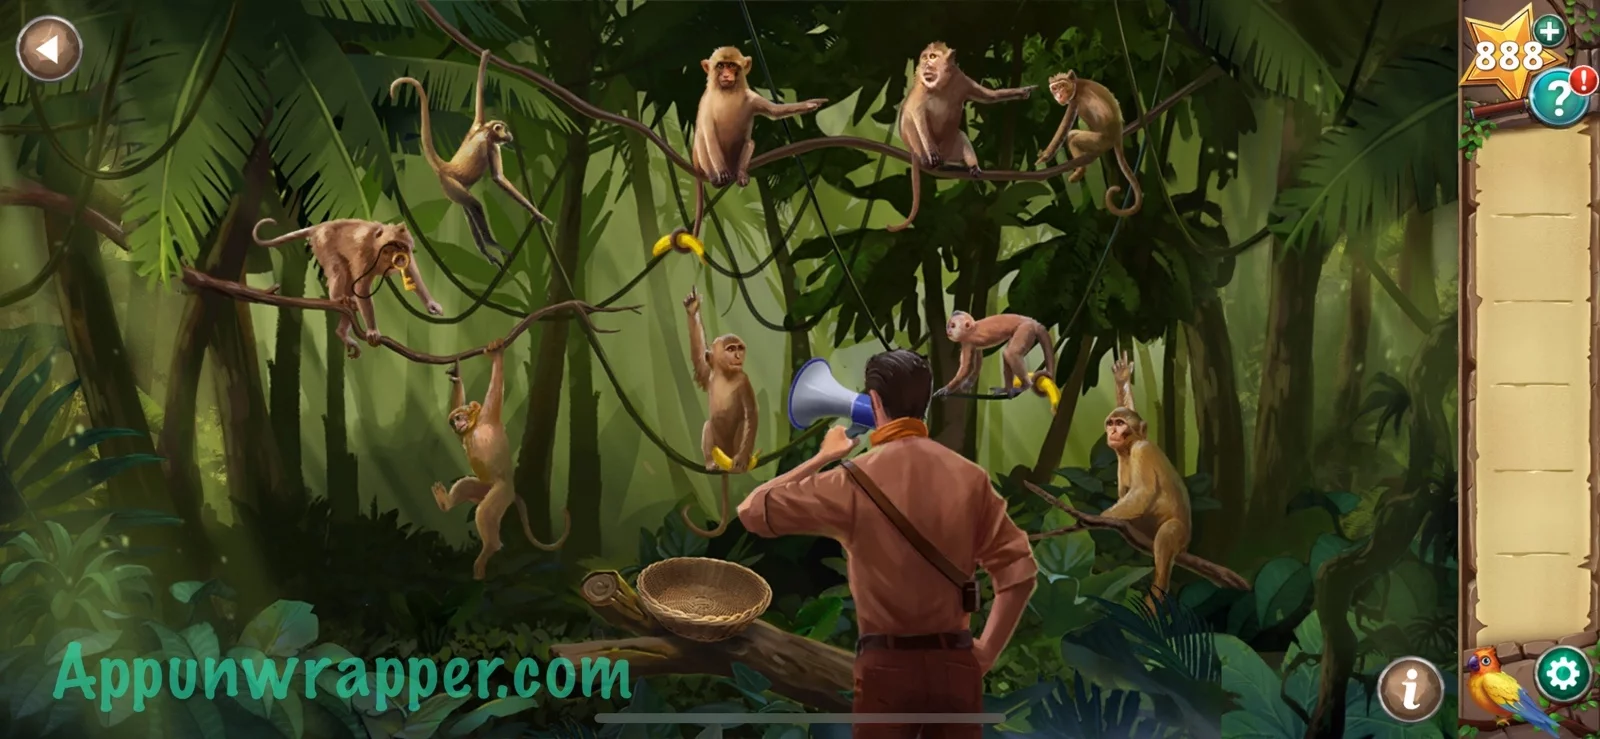
6. Pick up the bullhorn. Tap on the monkeys to start the monkey puzzle. Place the three bananas in the basket and the bullhorn next to the basket.
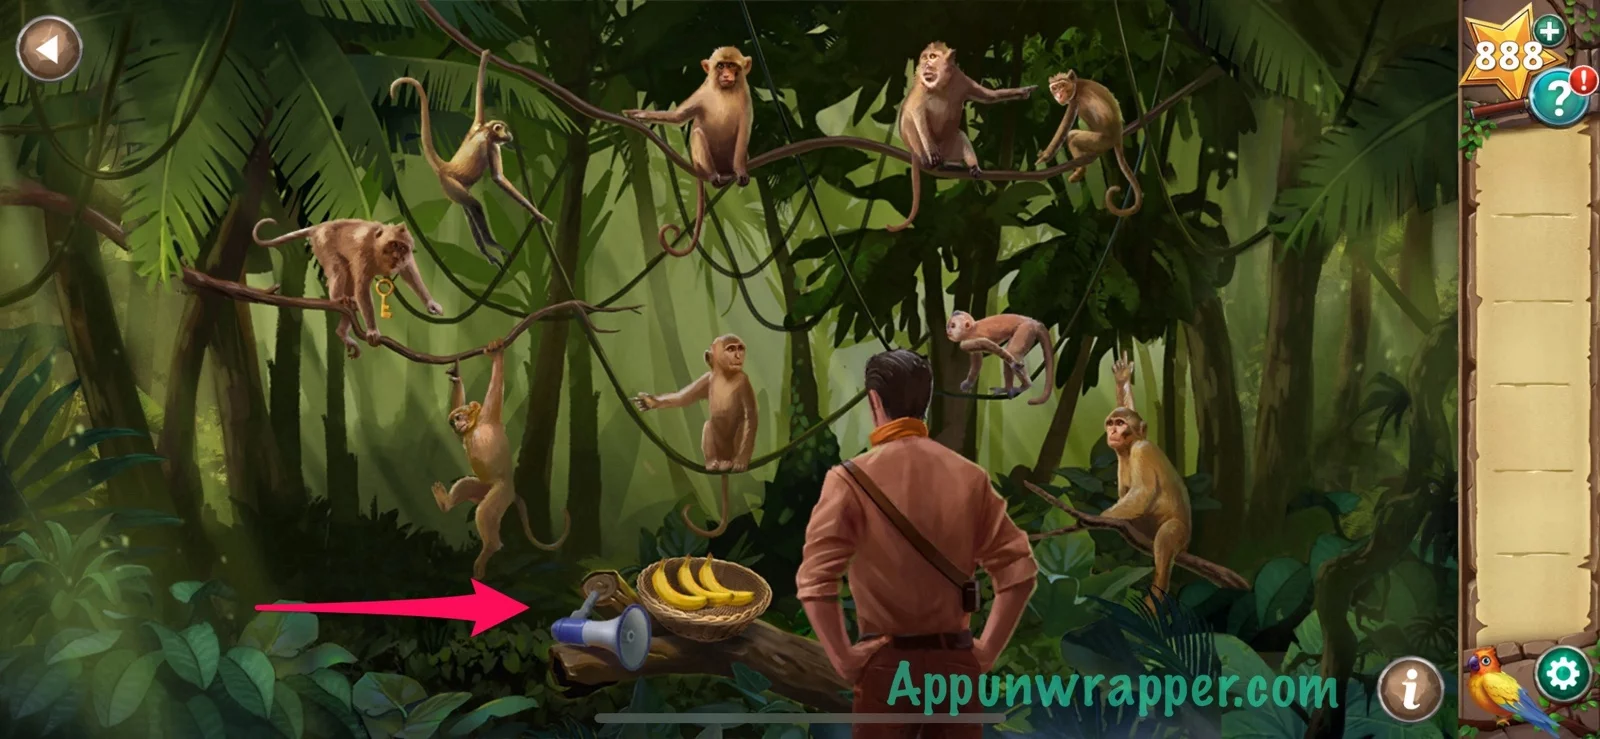
7. When you give a banana to a monkey, the monkey changes the direction it’s pointing a hand. You need to give the correct monkeys the bananas so that when the bullhorn is blown and the key gets passed around, it will end up in your basket. It should look like the photo below. Blow the bullhorn and you’ll automatically get the key.
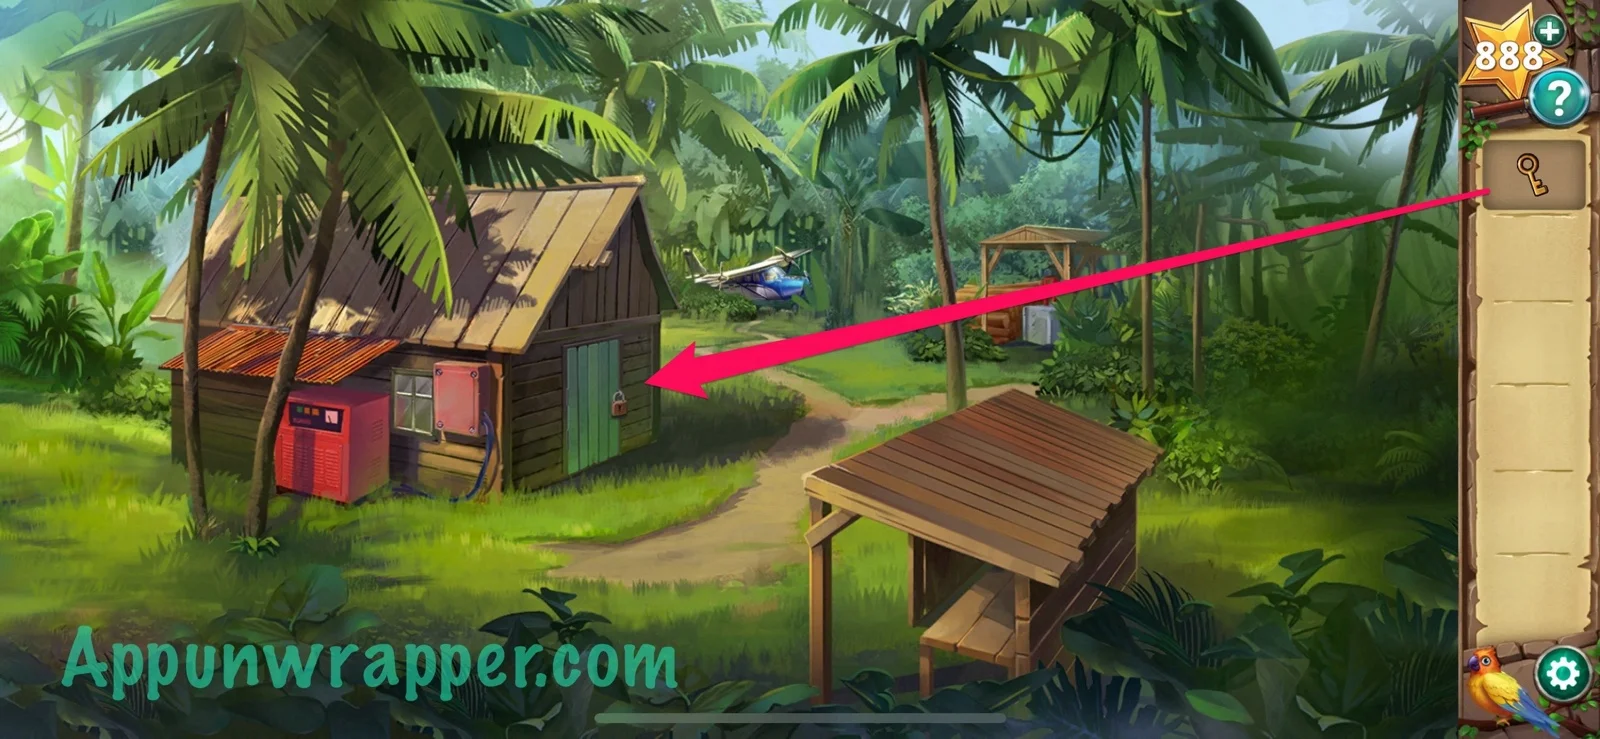
8. Use the rusty key to unlock the shed. Go inside.
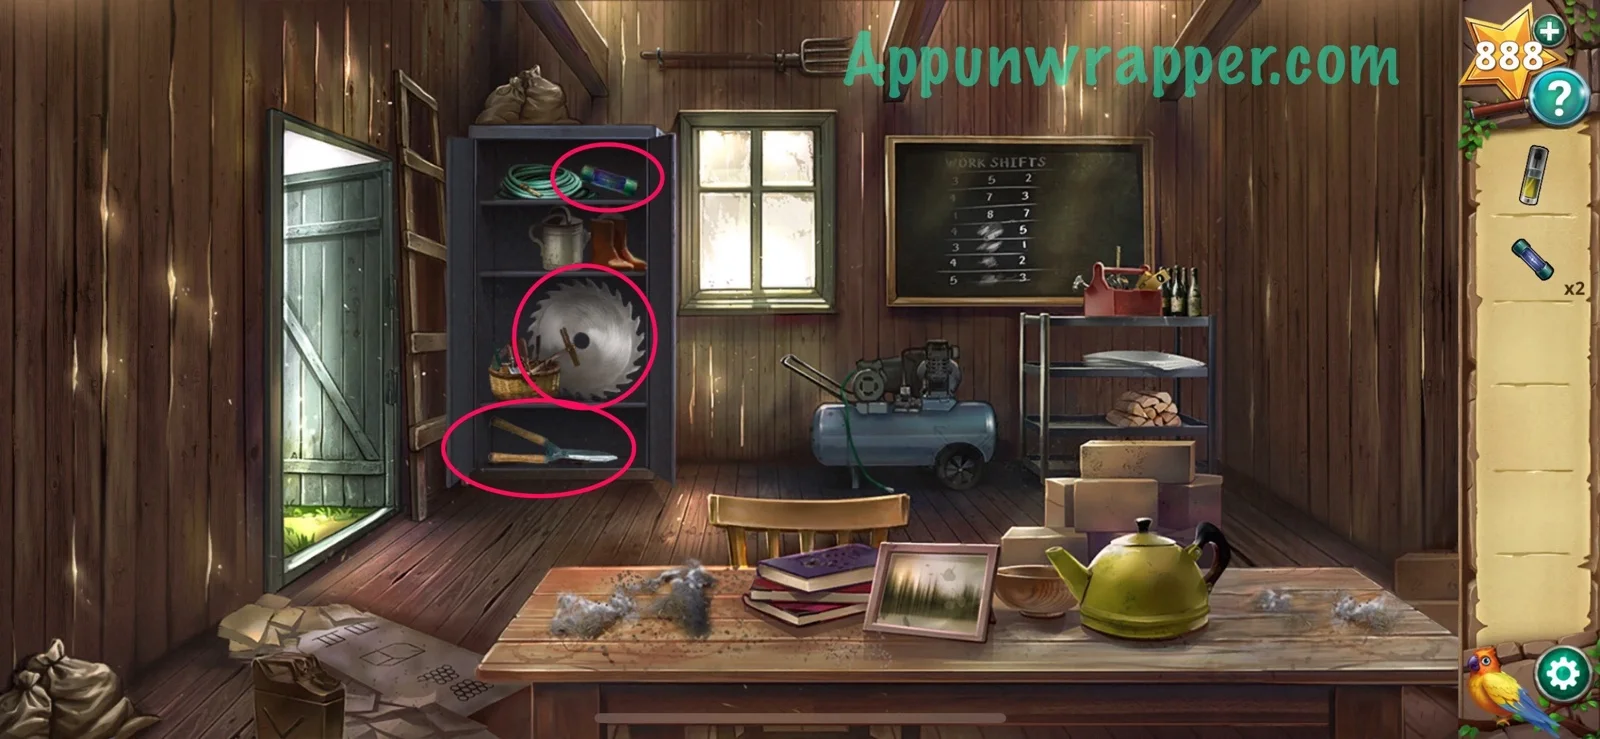
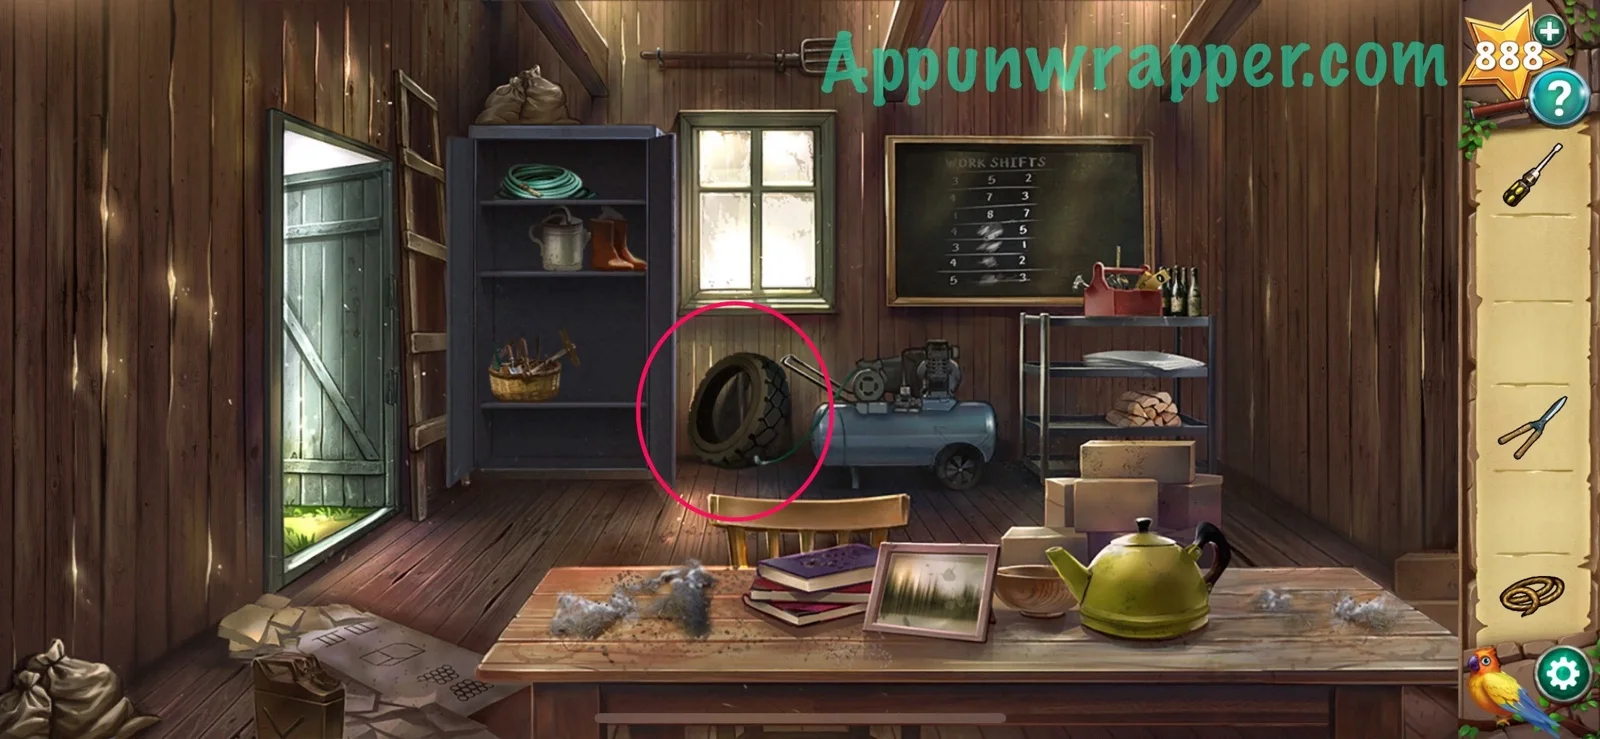
9. Pick up the oil spray and two fuses. Look at the blackboard and the diagrams on the floor. There’s also a padlock on the closet.
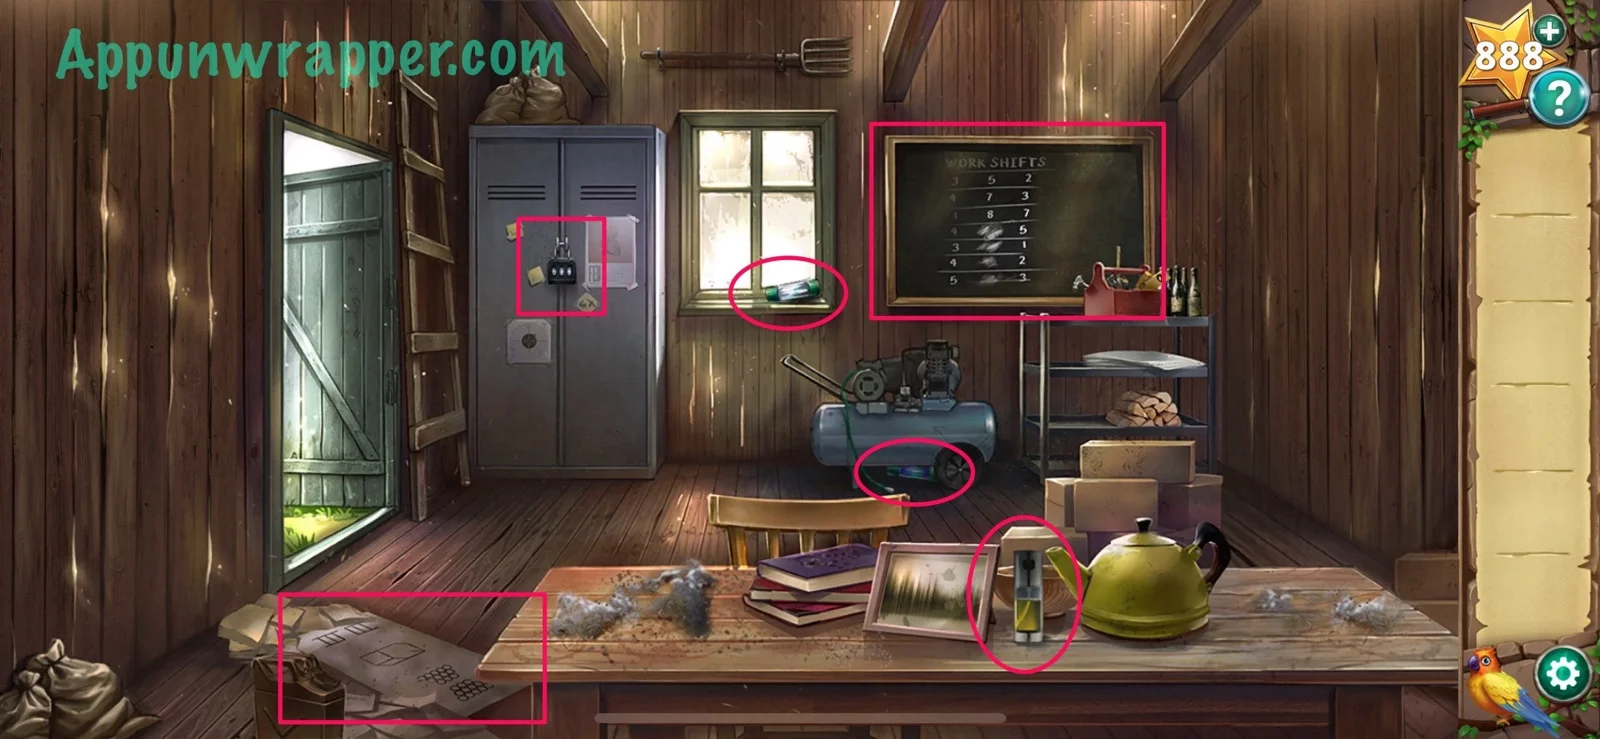
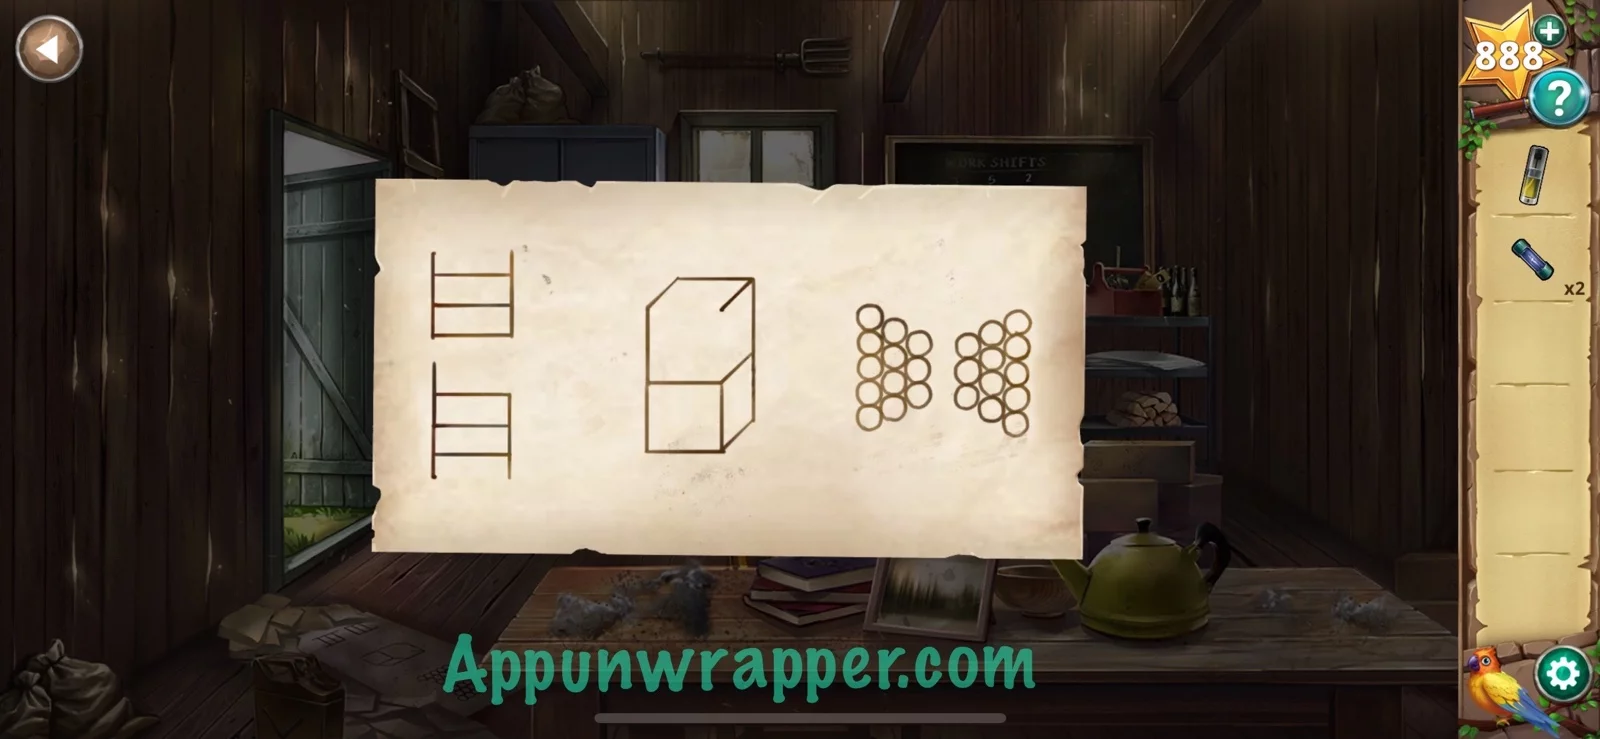
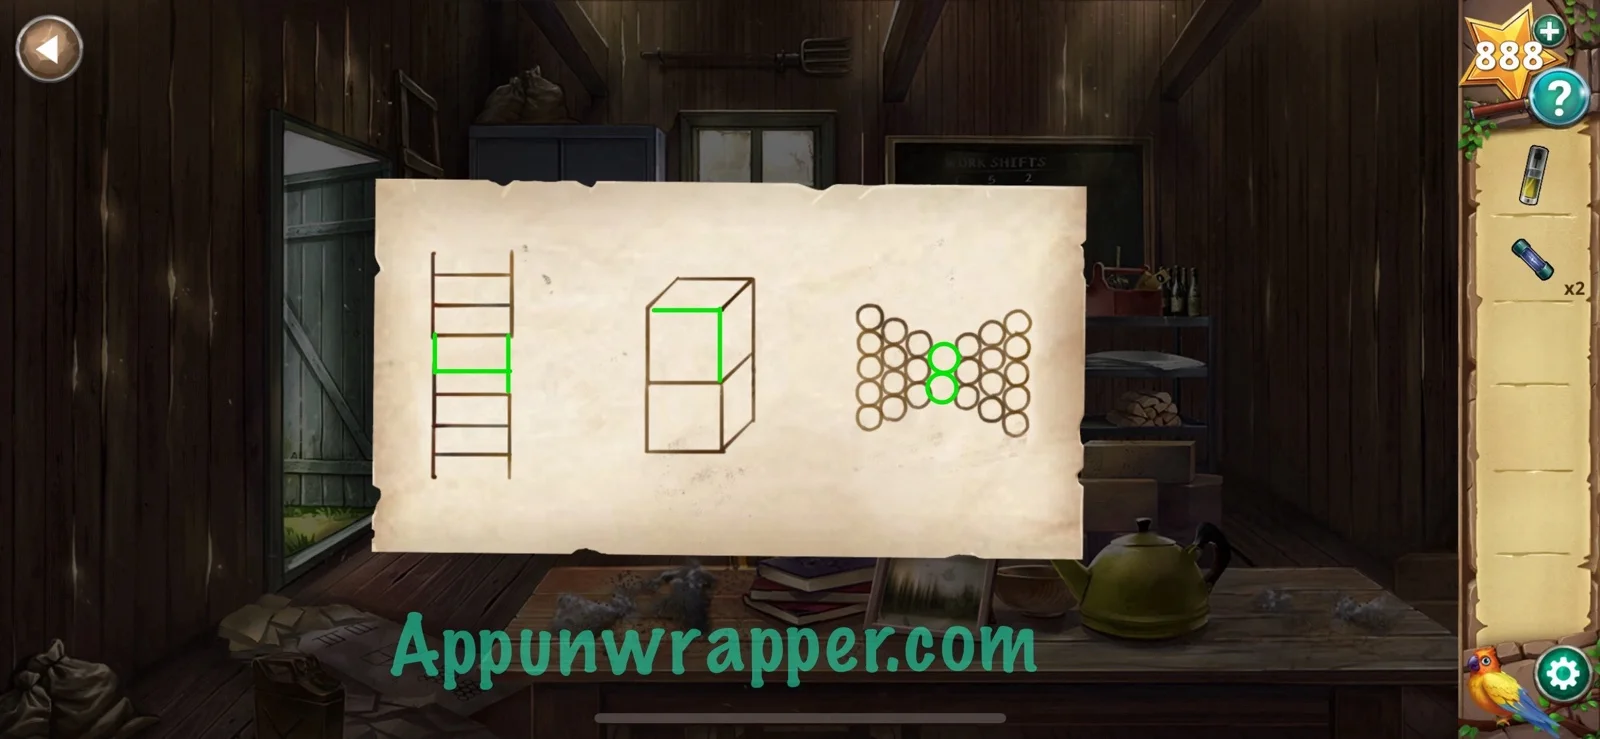
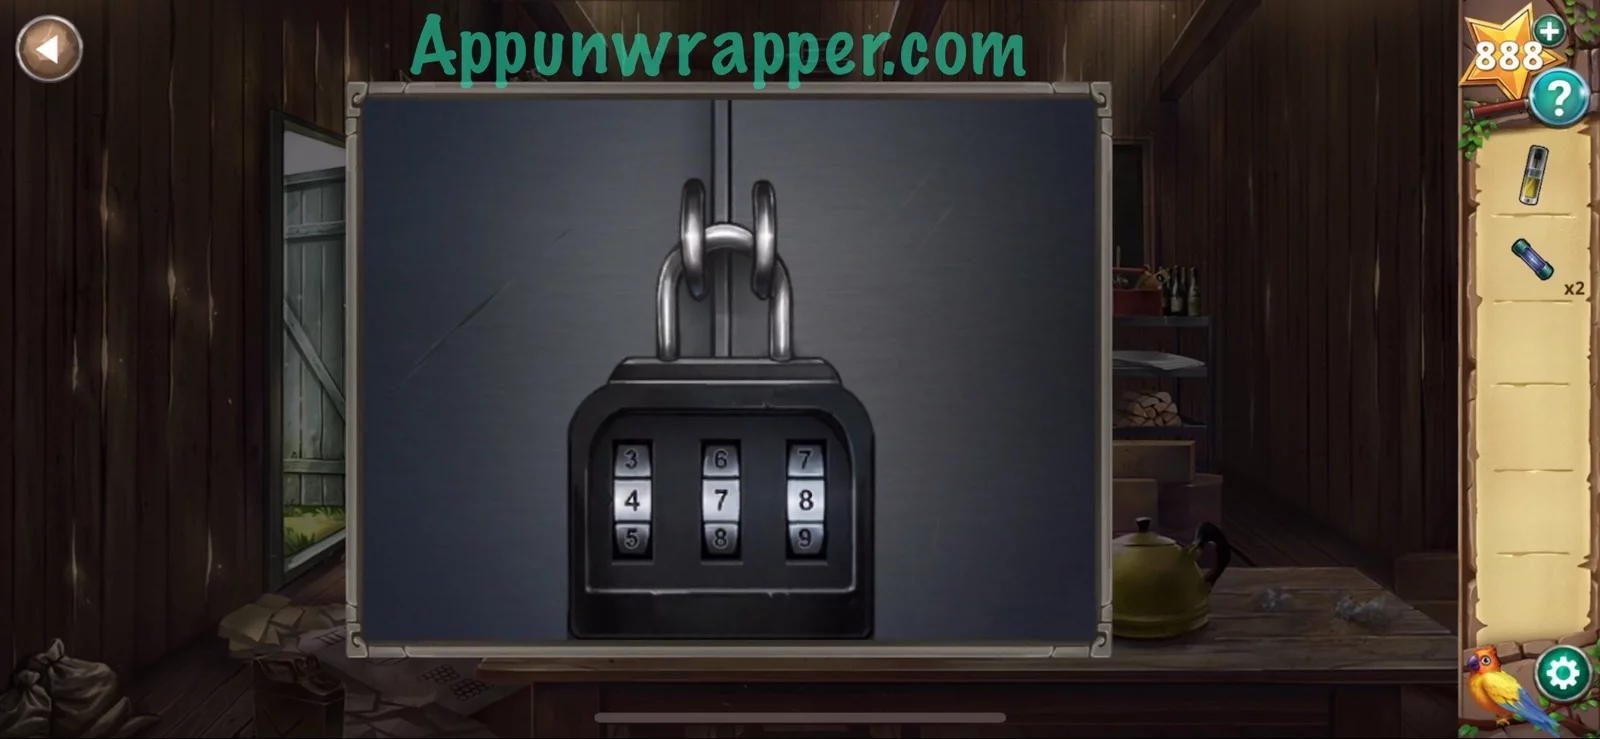
10. You need to figure out the code for the closet lock based on the diagrams on the floor. This is a tricky one. Fill in the lines that are missing and then see what they look like. You get 478. Use that number to unlock the closet. Take the saw blade, fuse and shears from inside.
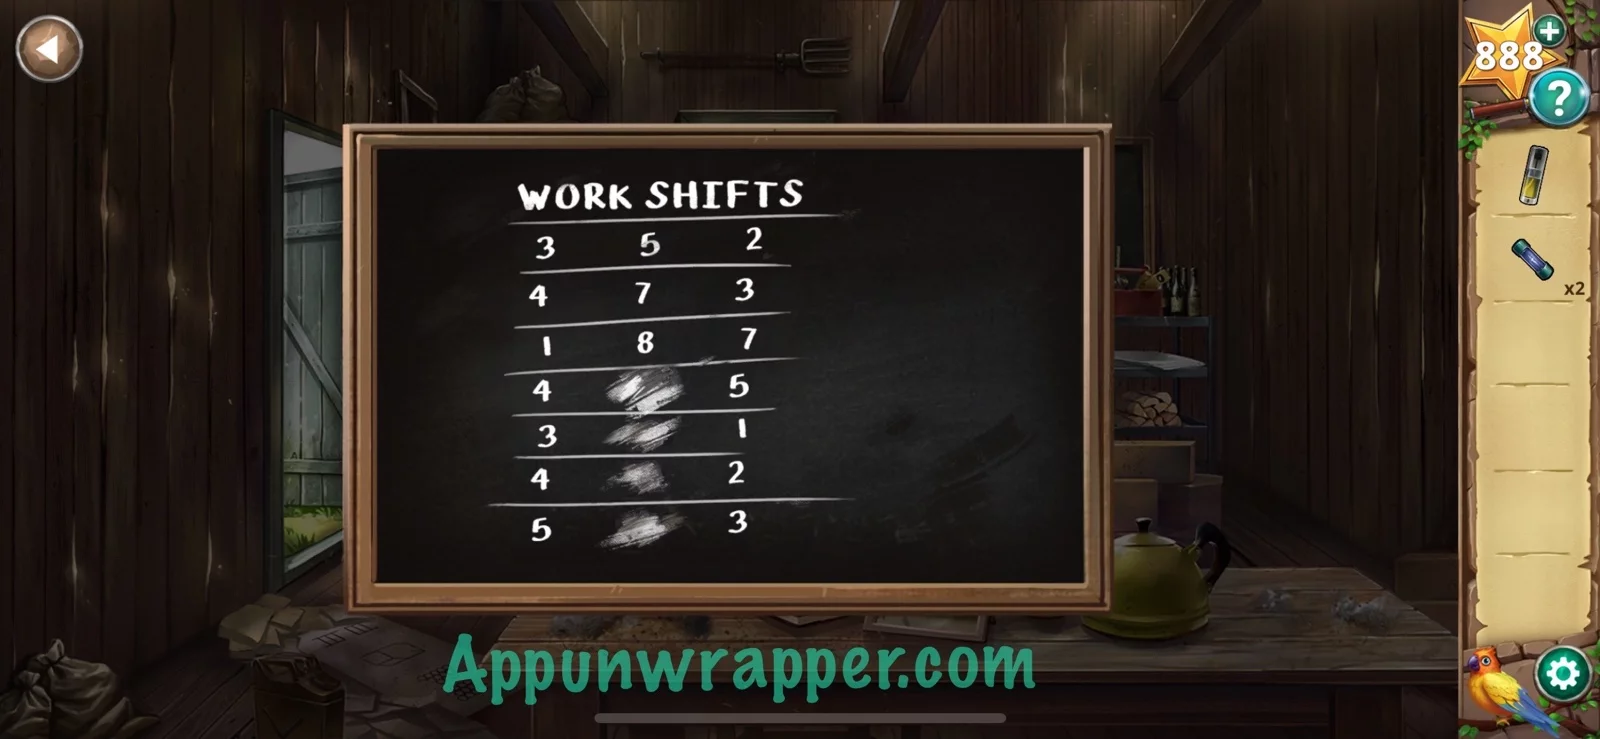
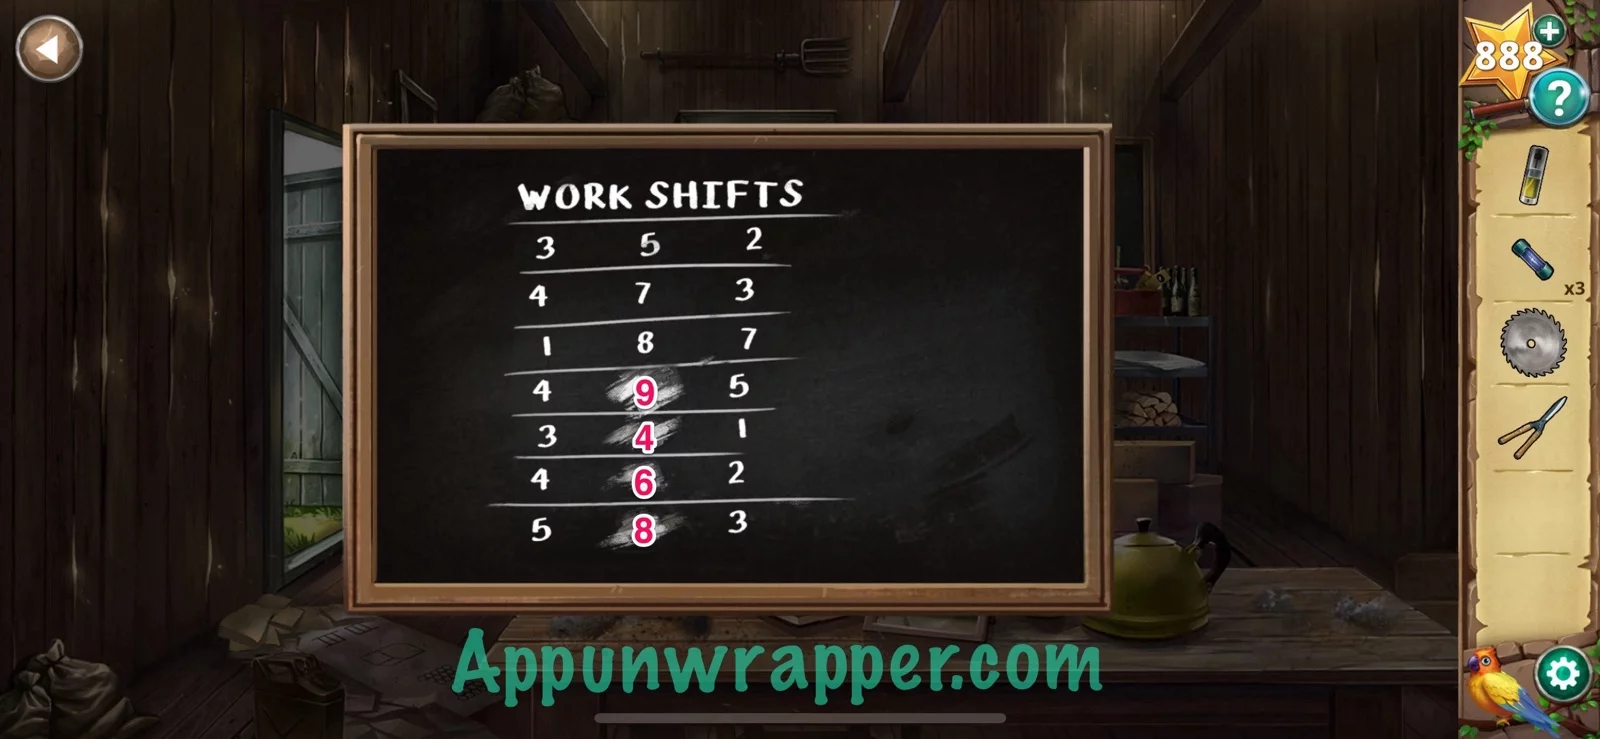
11. Look at the blackboard and find the pattern in the numbers. It goes like this: add up the first number and third number to get the second number. So:
3 + 2 = 5
4 + 3 = 7
1 + 7 = 8
4 + 5 = 9
3 + 1 = 4
4 + 2 = 6
5 + 3 = 8
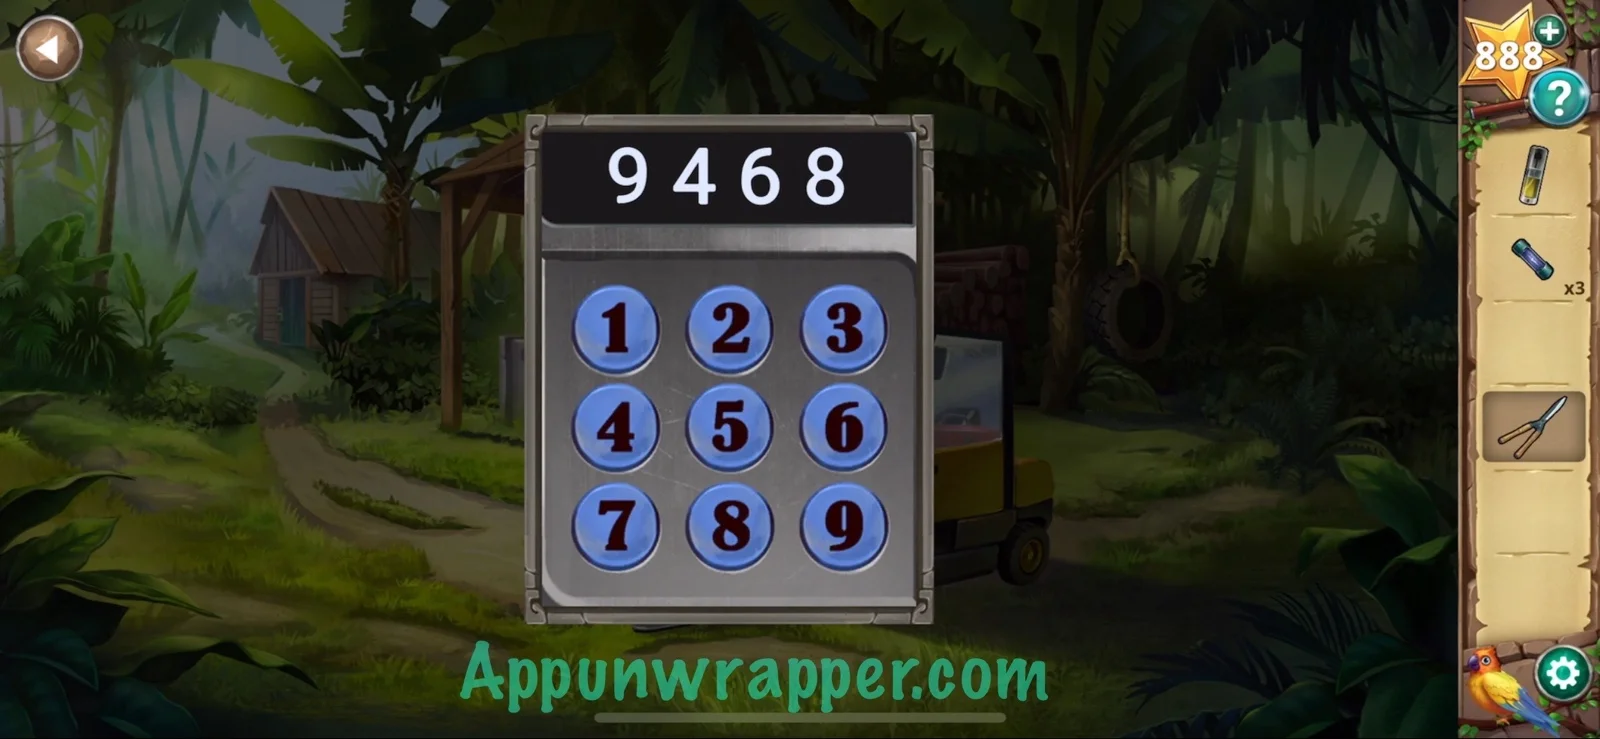
Take the last four of those numbers and you get 9468. Remember that because we’re going to use it soon.
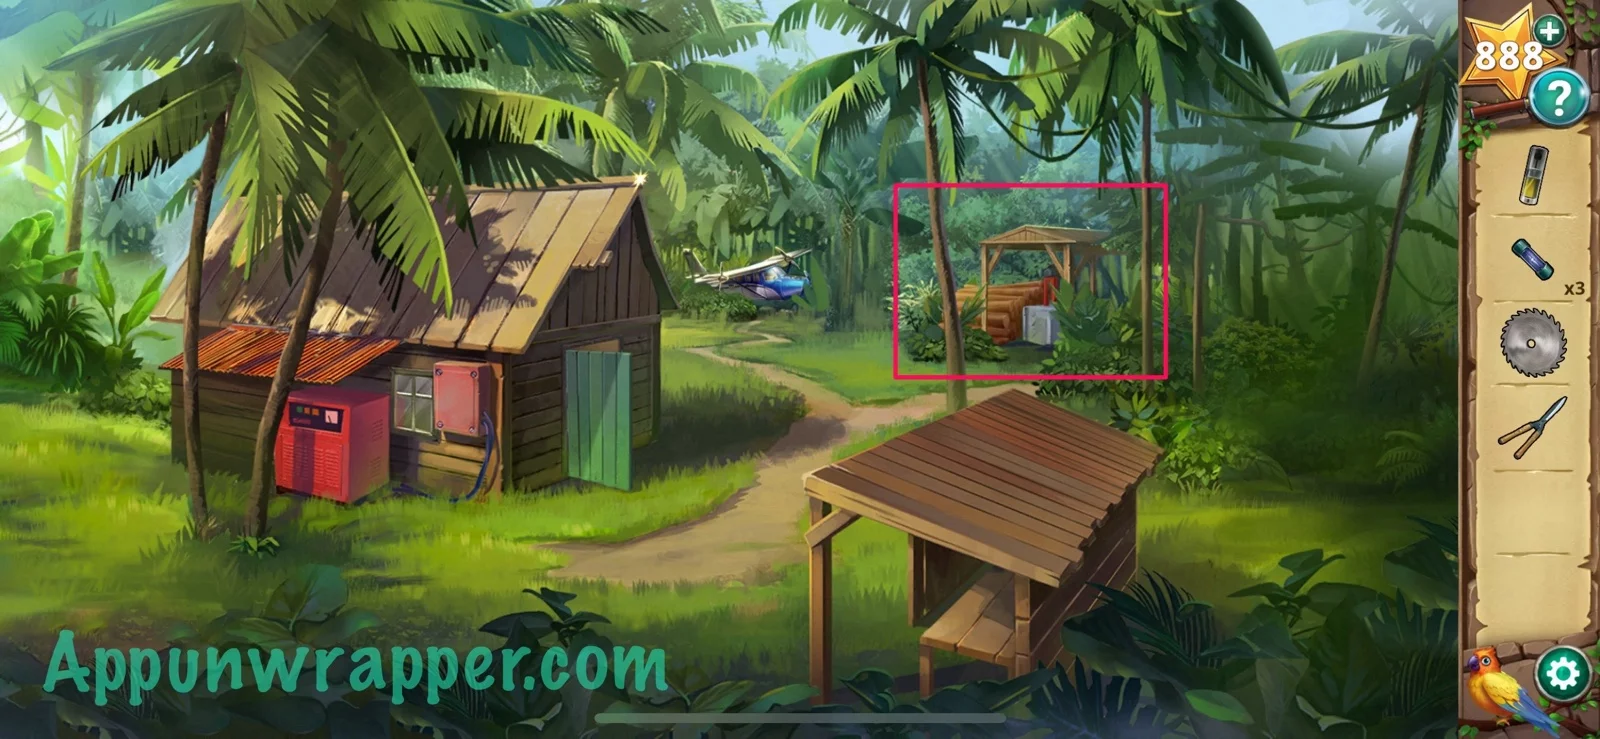
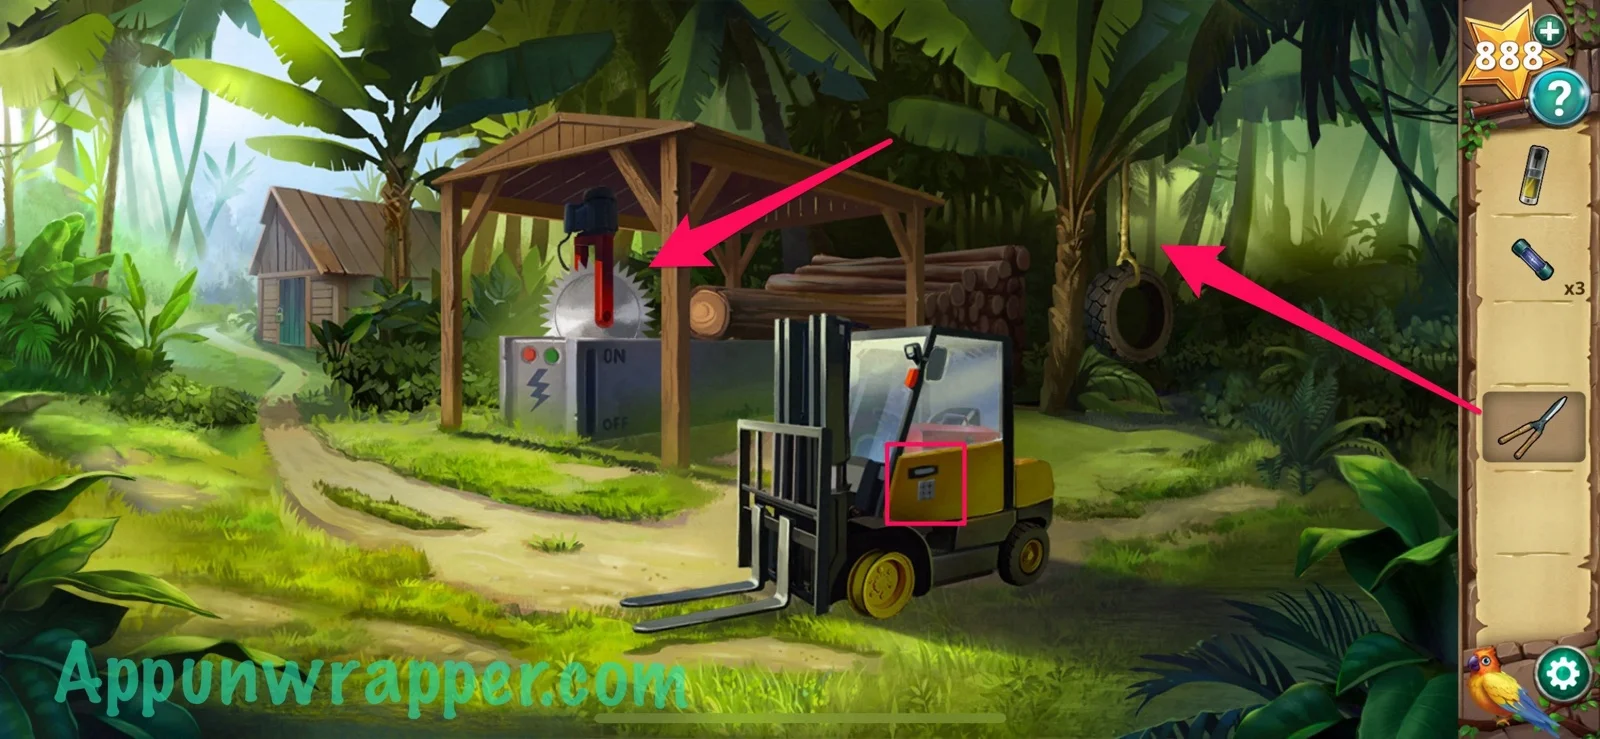
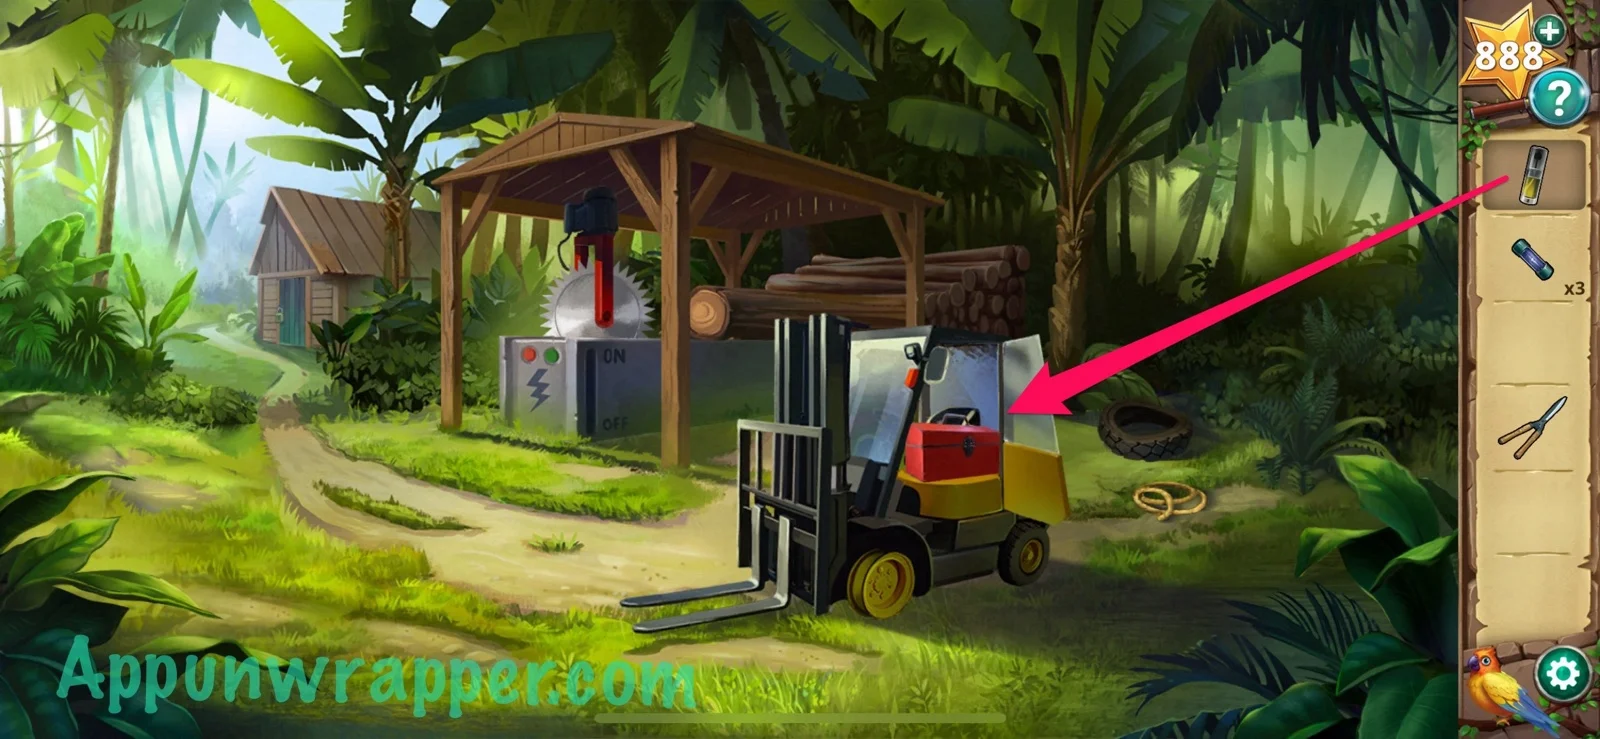
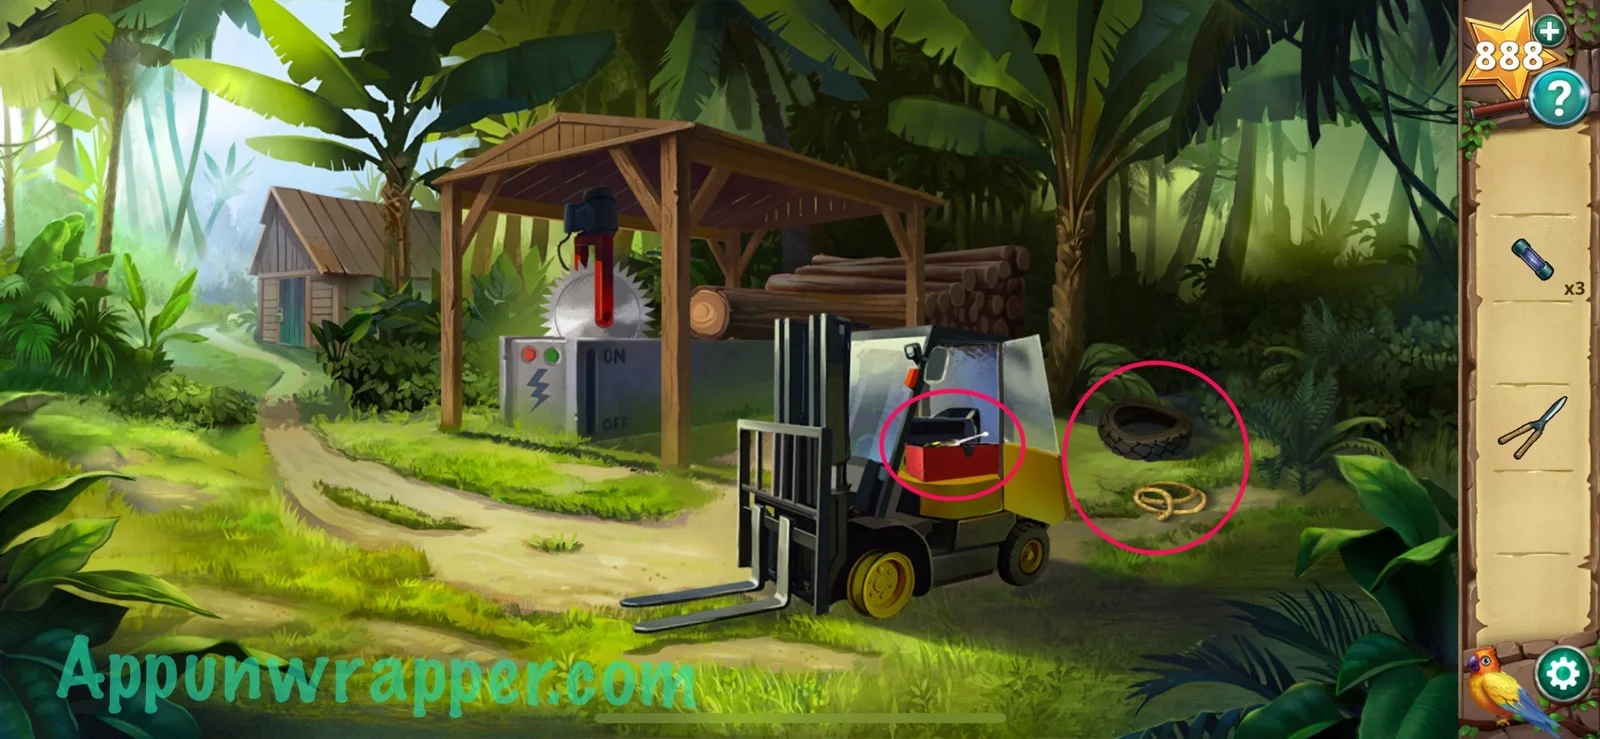
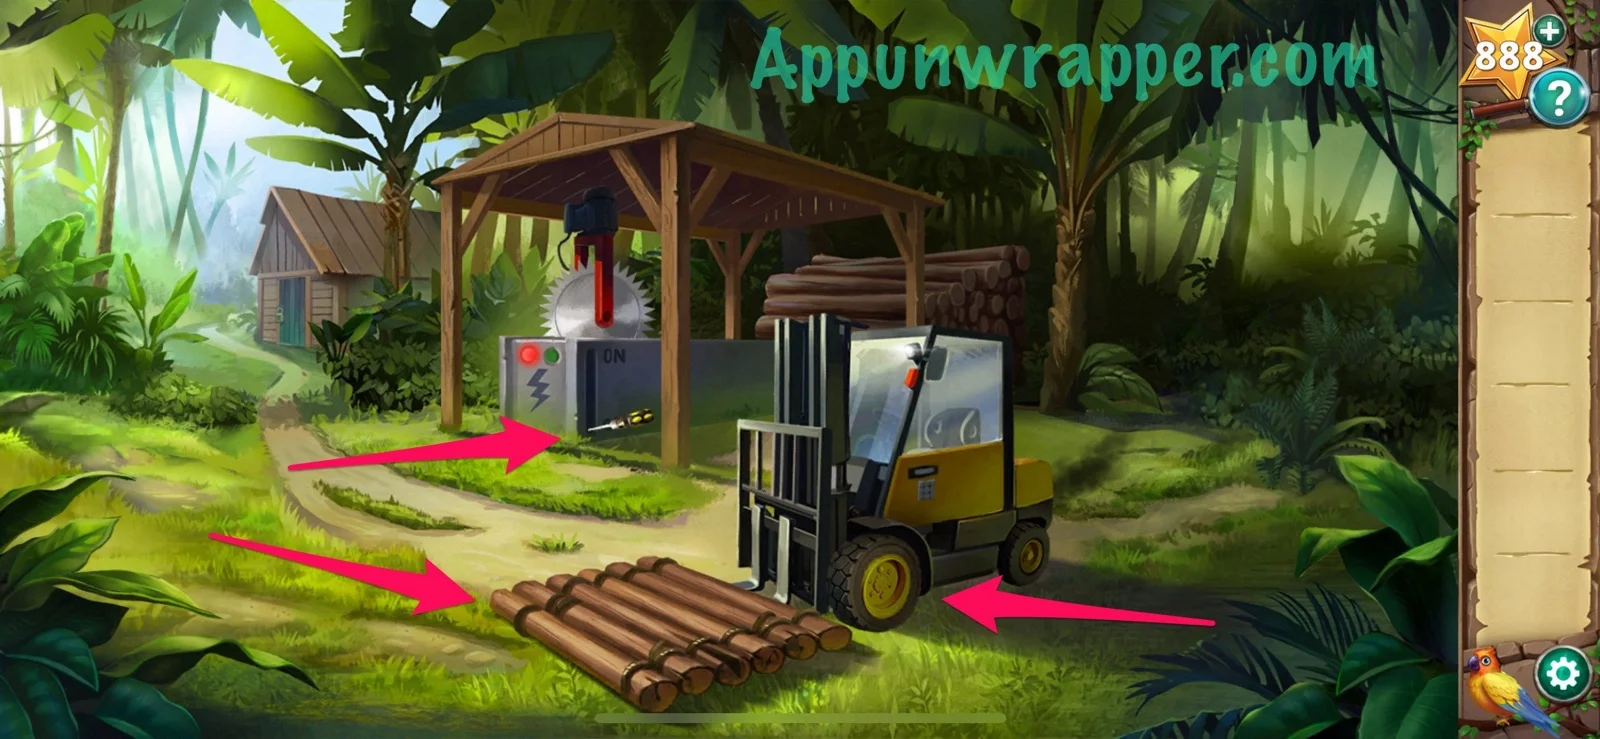
12. Leave and head towards the logger. Place the blade on the machine. Use the code you got from the blackboard (9468) to unlock the the forklift. Use the shears to cut the rope holding the tire swing, then pick up the tire and rope. Use the oil spray to open the toolbox and get the screwdriver.
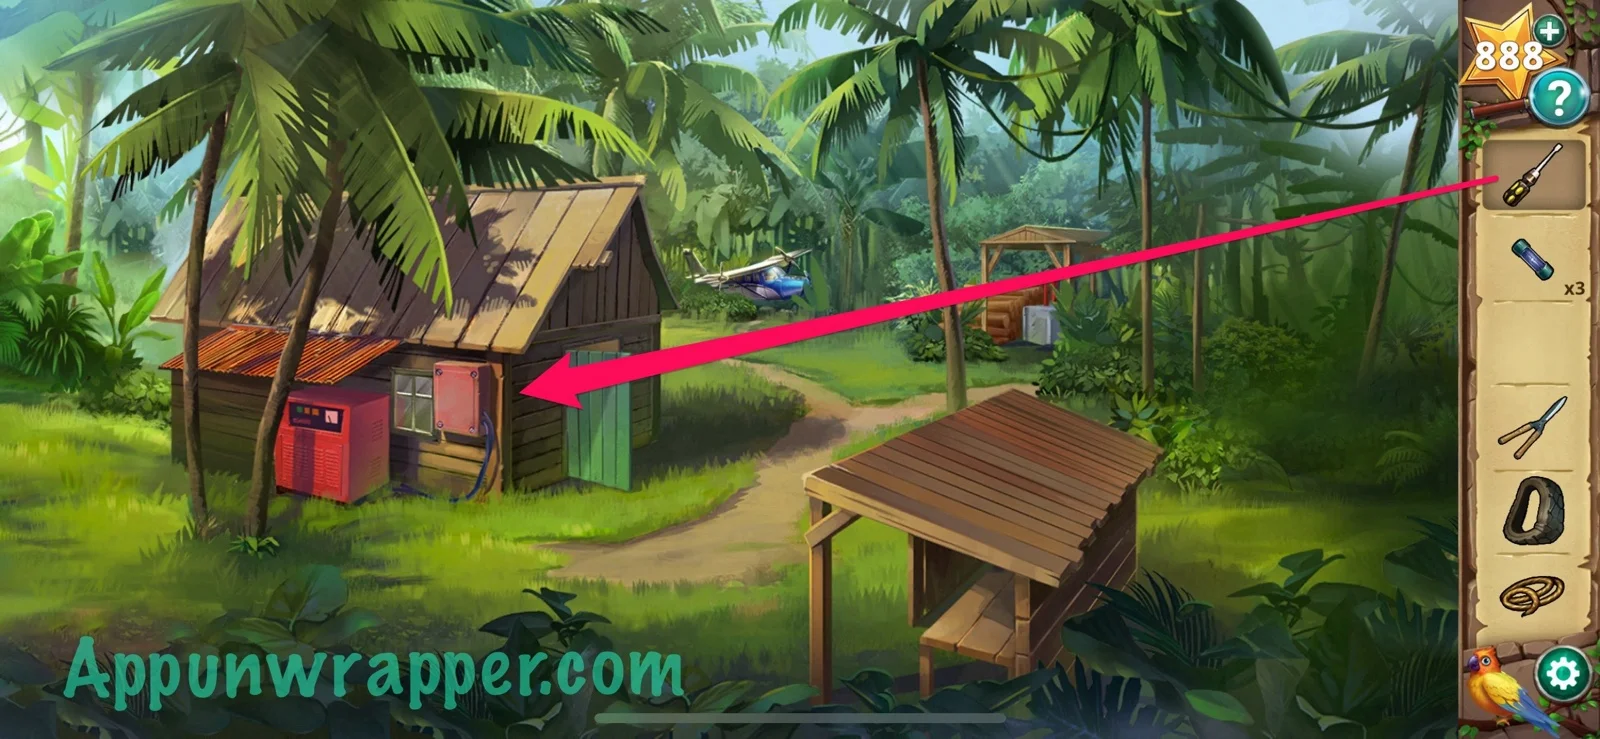
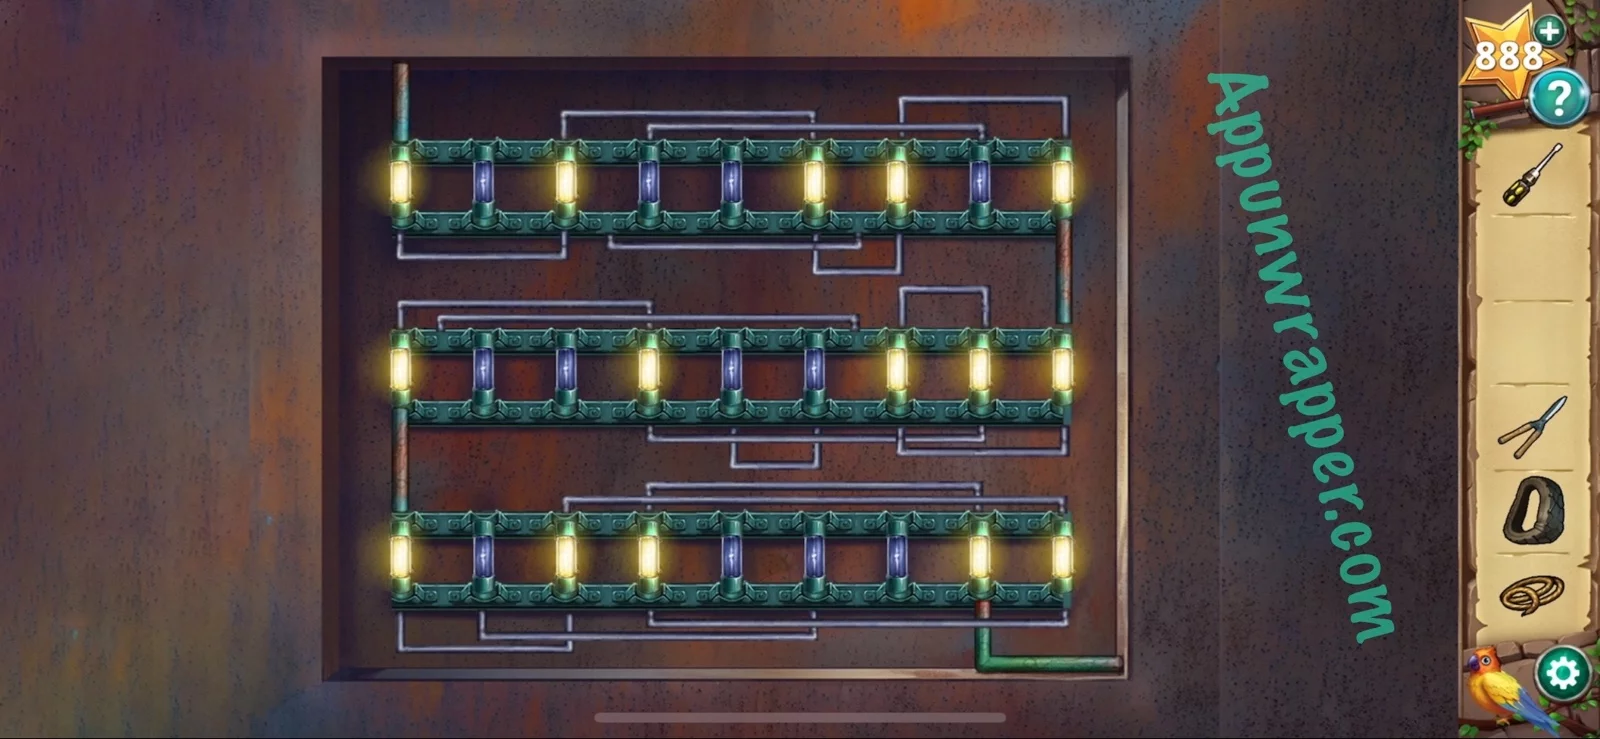
13. Go back a screen and use the screwdriver to open the fuse box. Place all three fuses in the box and then move the brackets to the correct spots to get electricity flowing from the top row to the bottom. It should look like the photo below. The generator should be working now.
14. Go back into the shed and inflate the tire. Then pick it back up.
15. Go back to the plane and use the shears to cut the net and get the net as another rope.
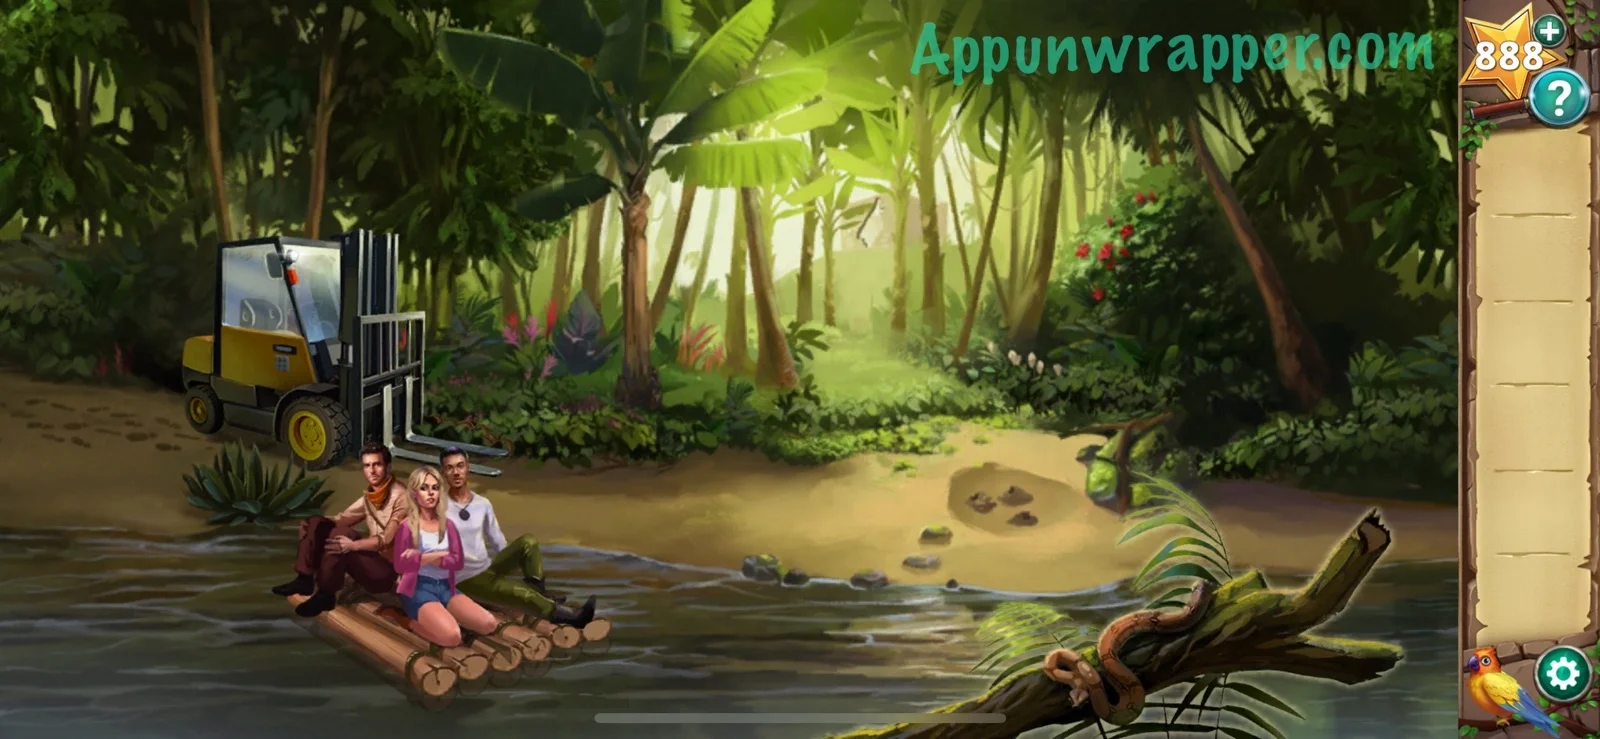
16. Go back to the forklift. Use the screwdriver as a lever to turn on the logger and cut all the wood. Use the ropes to tie them together into a raft, and place the tire on the forklift so you can take it to the river. And that’s the end of Chapter 4!
And that’s the end of Chapter 5! Click here to continue to Chapter 6 or choose a chapter below.
Chapter 1 | Chapter 2 | Chapter 3 | Chapter 4 | Chapter 5 | Chapter 6 | Chapter 7 | Chapter 8