Adventure Escape Mysteries – Hidden Ruins
By: Haiku Games


In this Haiku Classic Game, join steadfast Professor Burns, rich daddy’s girl Rachel, and tech whiz Peter as they explore the hidden ruins of the Kunari civilization. This is a complete step-by-step walkthrough guide with hints, tips, tricks, answers and solutions for Chapter 7 of the iOS and Android adventure game, Adventure Escape Mysteries – Hidden Ruins by Haiku Games. Feel free to ask for extra help in the comments section.
Looking for my Dark Ruins walkthrough?
Walkthrough:
Chapter 1 | Chapter 2 | Chapter 3 | Chapter 4 | Chapter 5 | Chapter 6 | Chapter 7 | Chapter 8
Chapter 7:
You can watch my video for Chapter 7 here or continue below for my step-by-step guide:
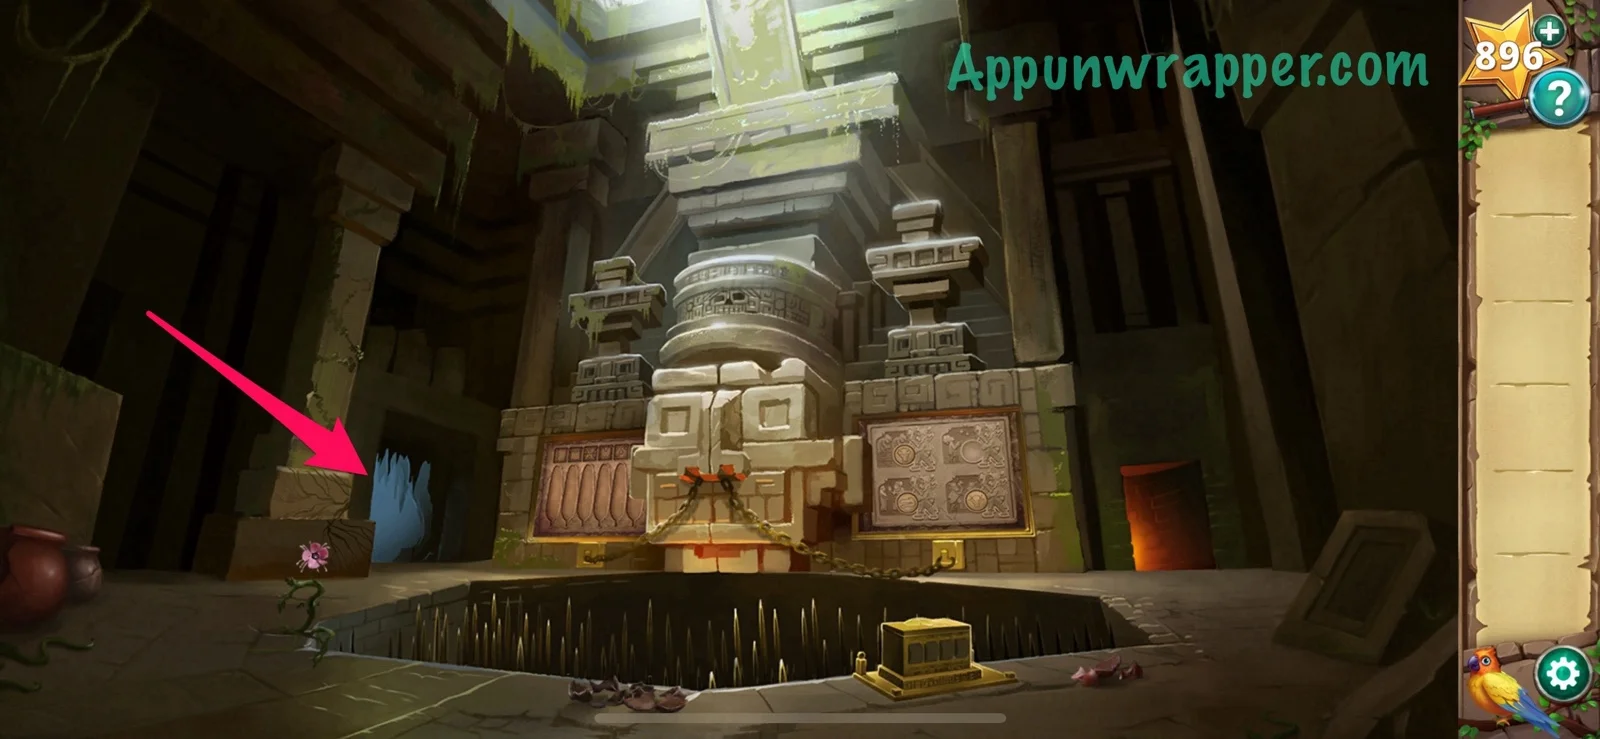
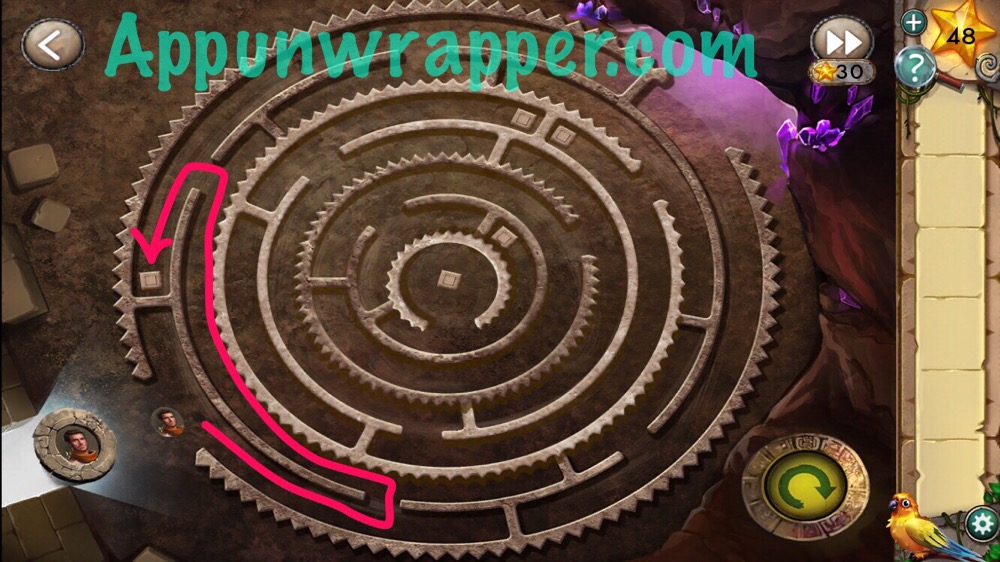
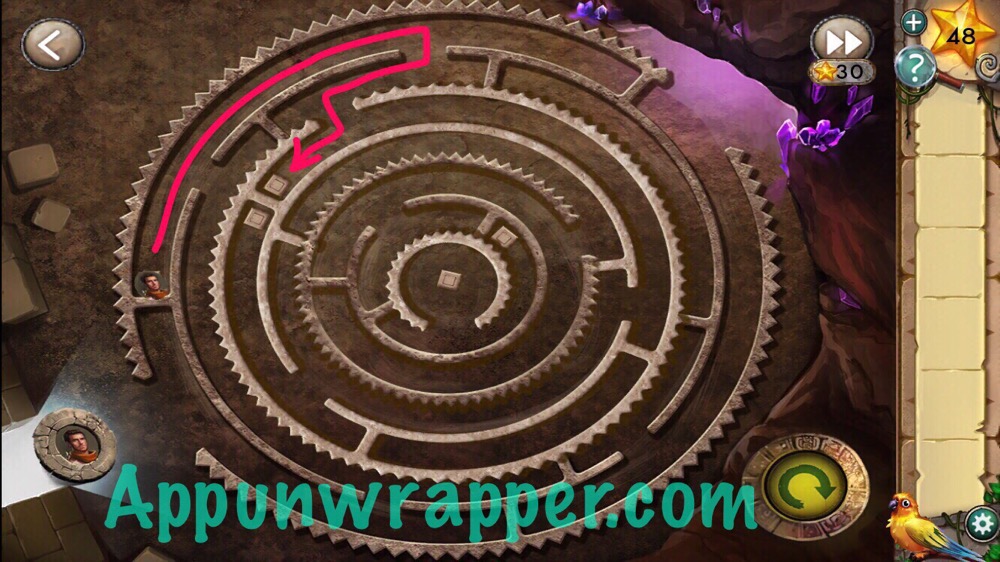
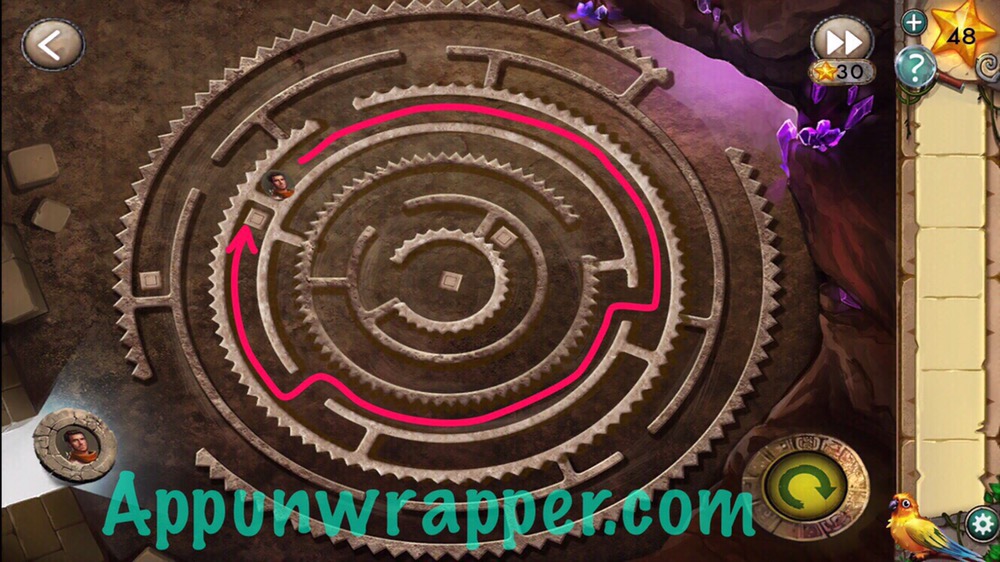
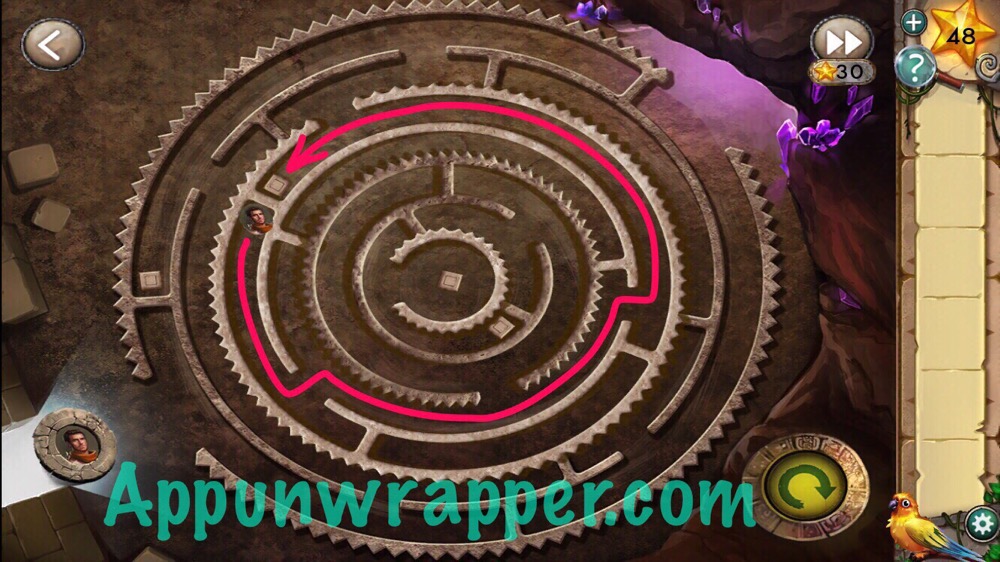
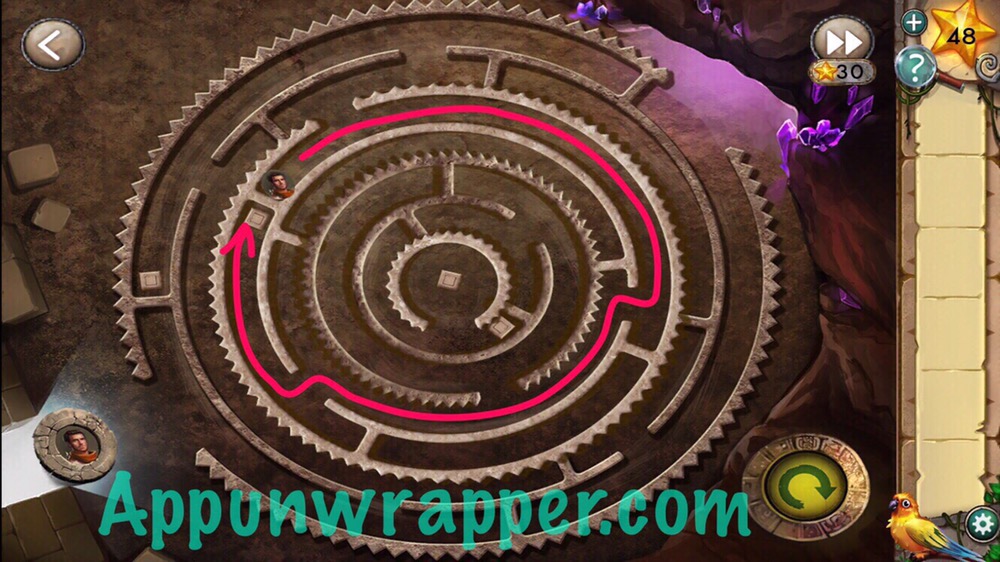
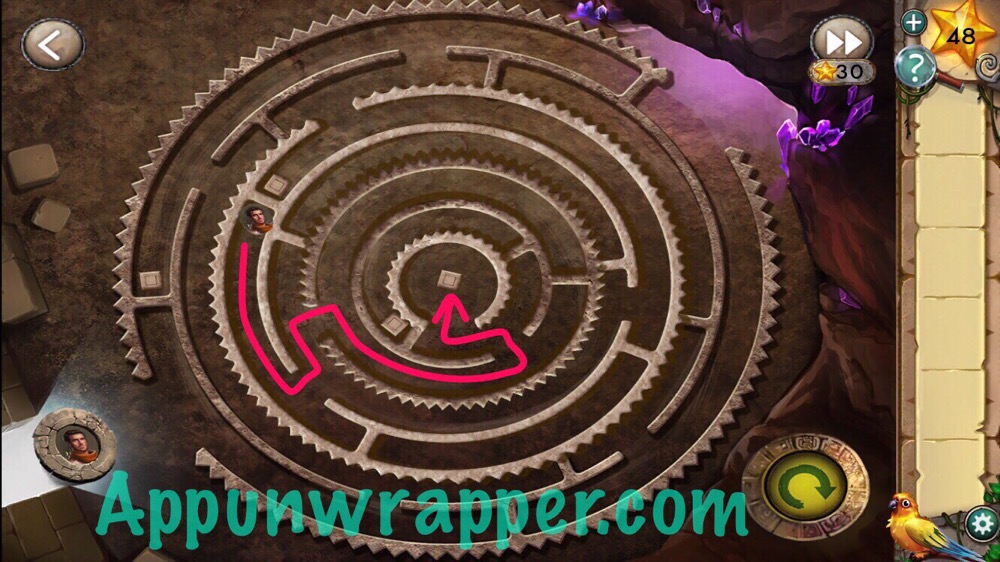
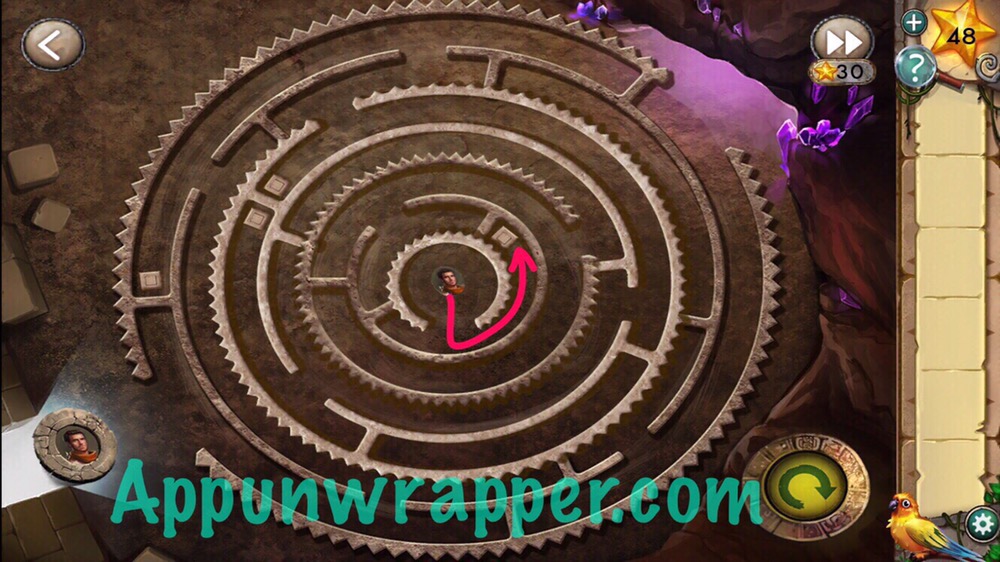
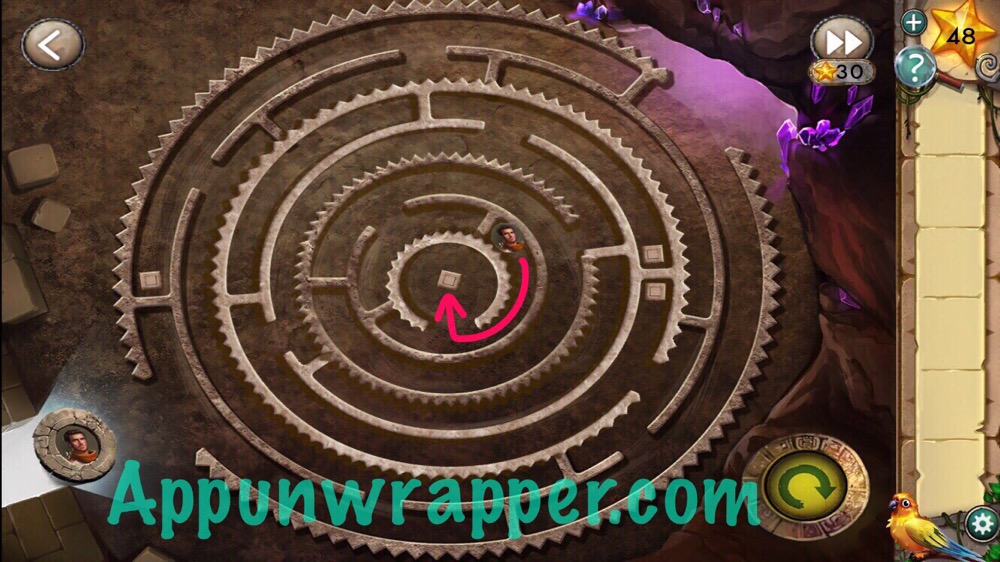
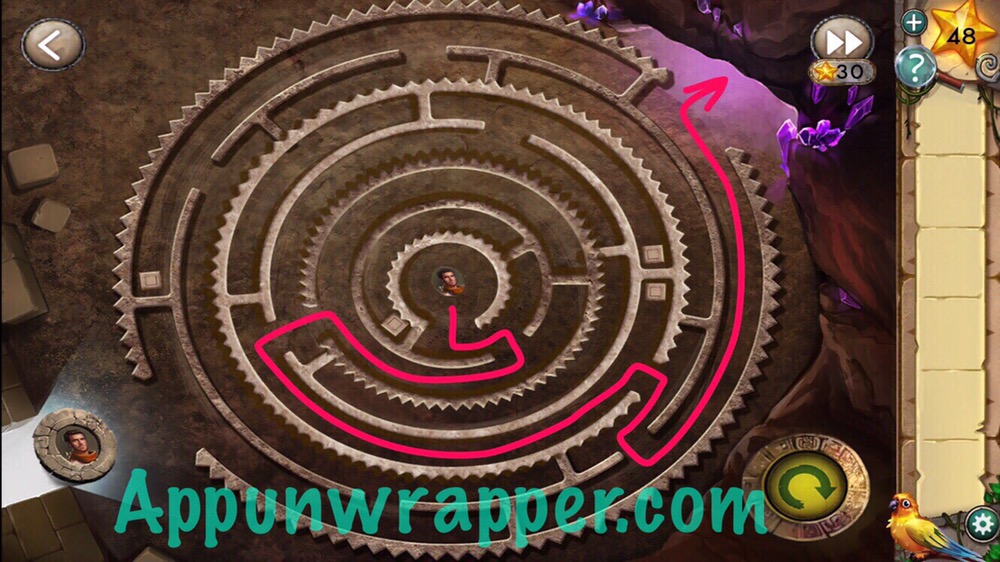
1. There’s a lot going on in here. You can smash the three pots to get some extra stars. Tap the blue doorway to the left and solve the maze puzzle. The square switches cause part of the maze to rotate. You can copy the path below if you need help.
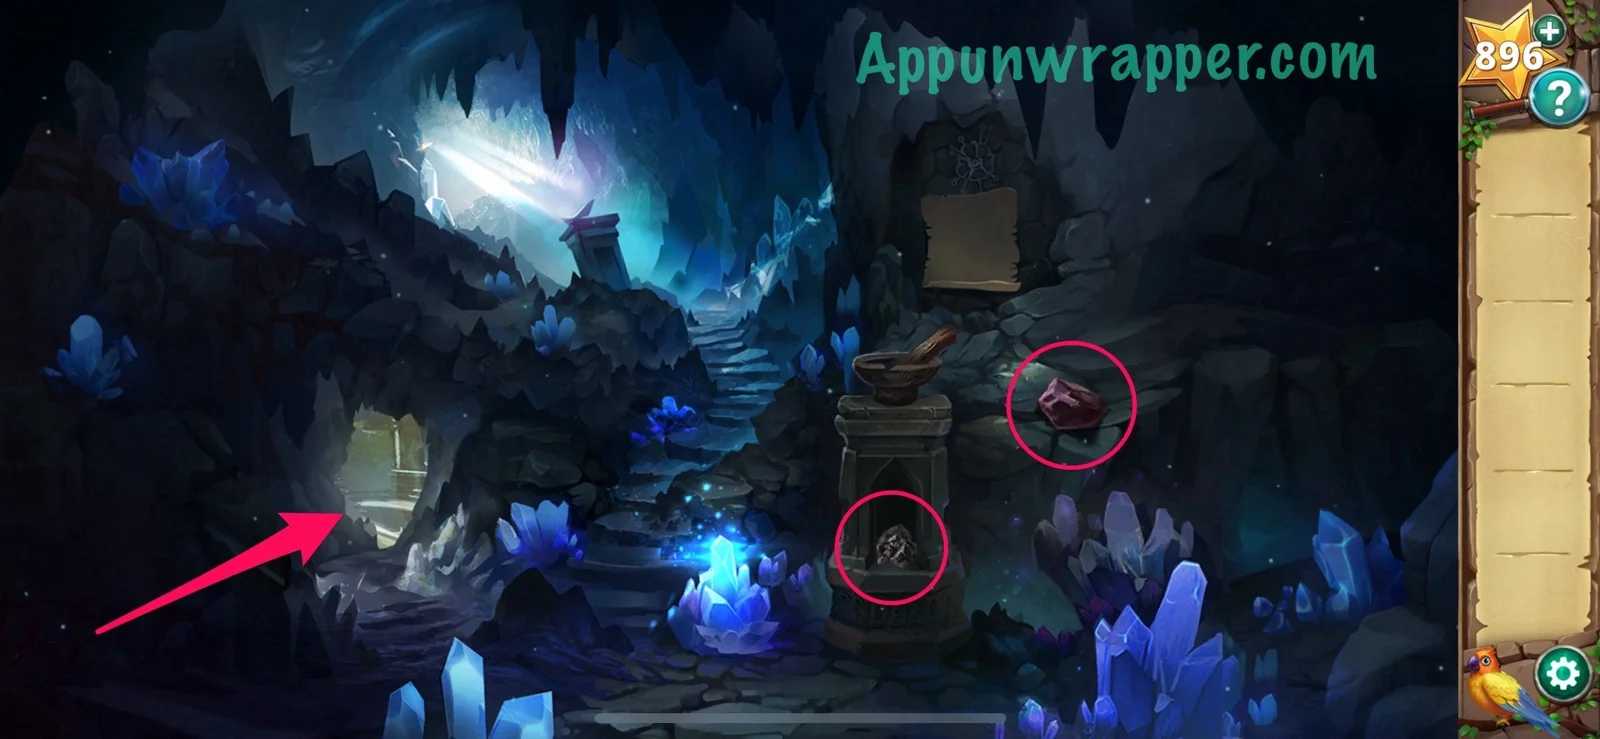
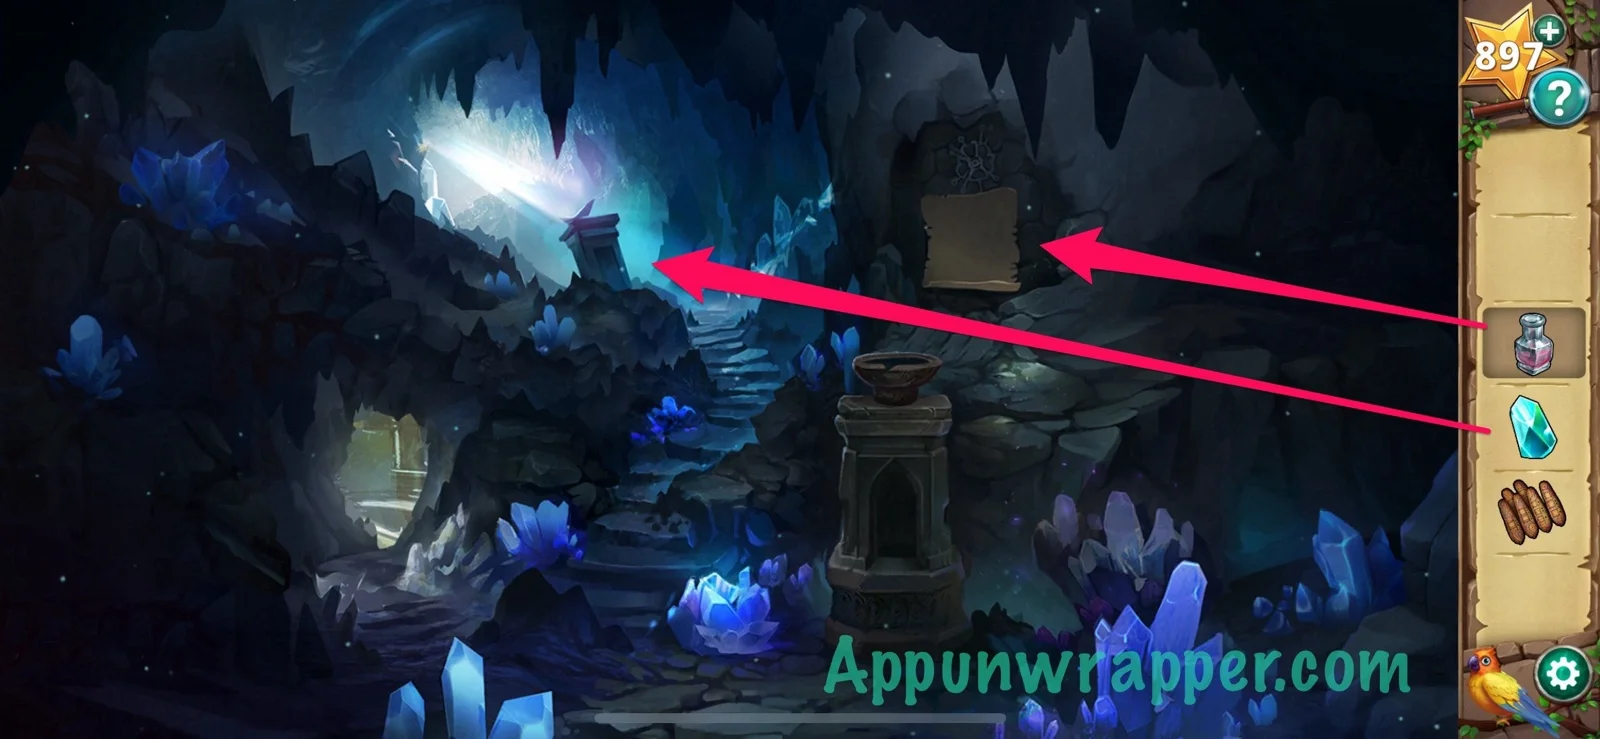
2. You’re now in some crystal caverns. Take the ore and the chunk of obsidian and then leave the room.
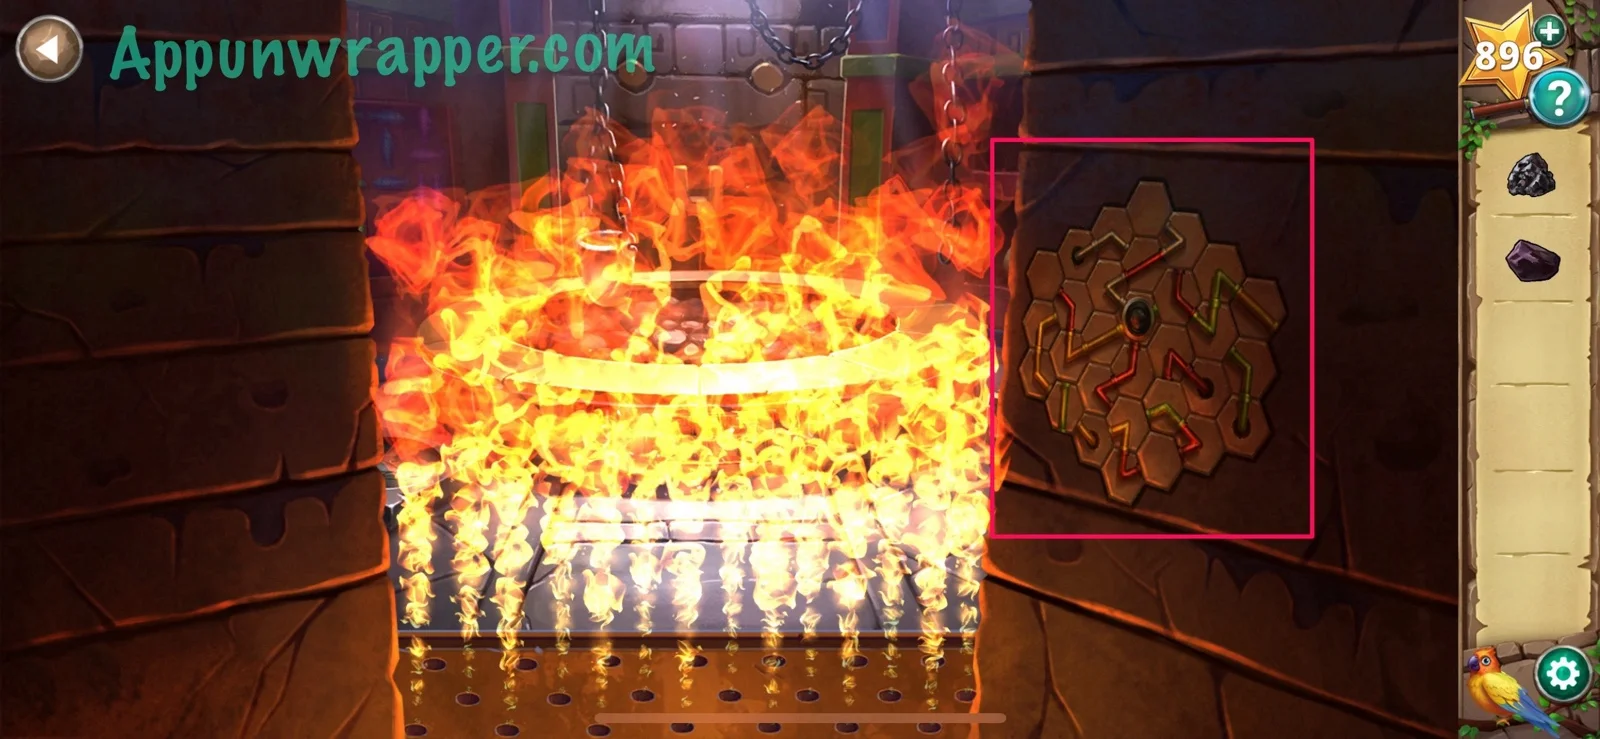
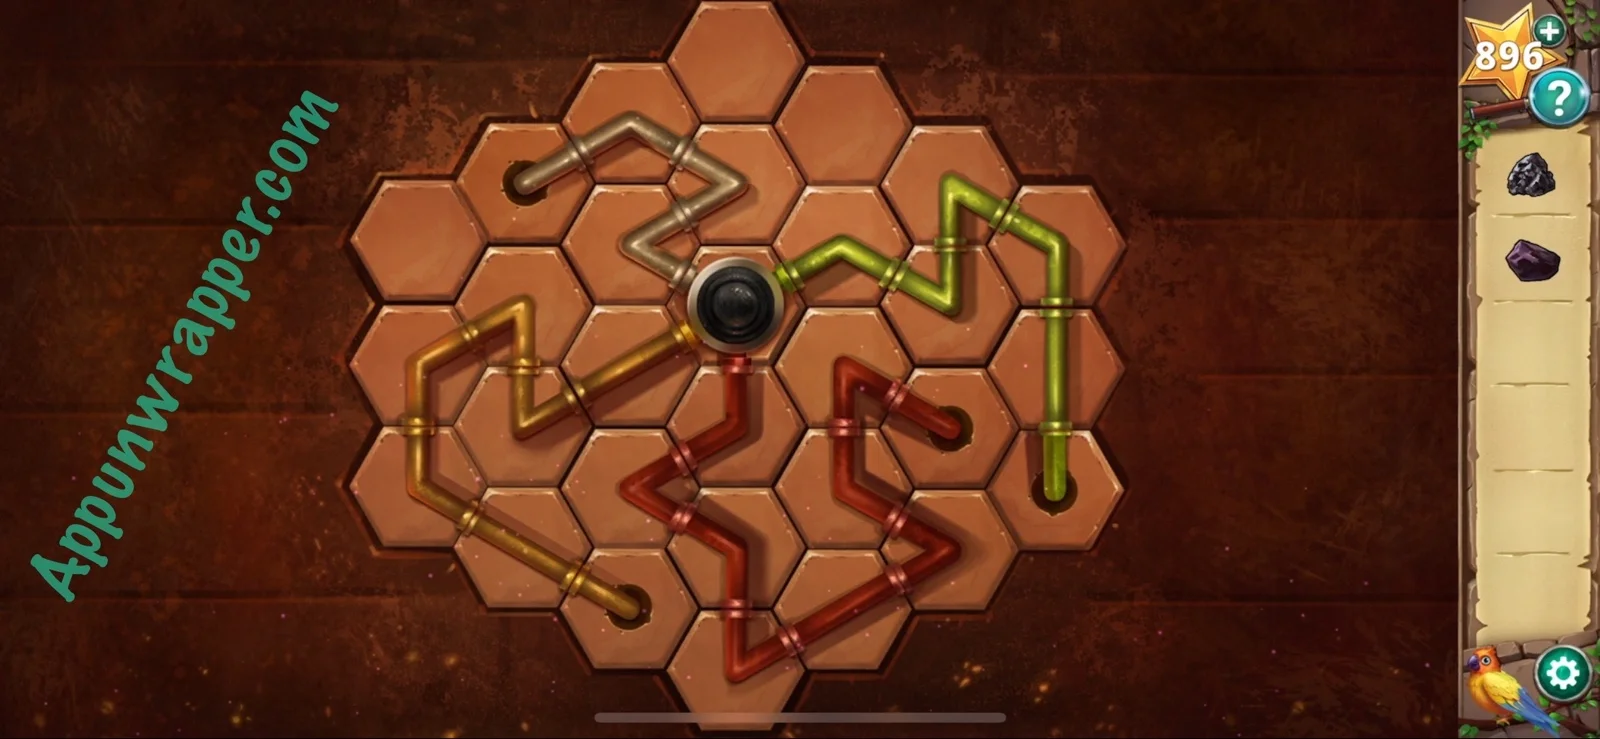
3. Head through the right doorway. Solve the pipes puzzle on the right. You want all the pipes to form complete paths.
4. Use the grinding stone to sharpen the obsidian and place the ore in the crucible. Look at the fish on the wall. We’ll need that in a second.
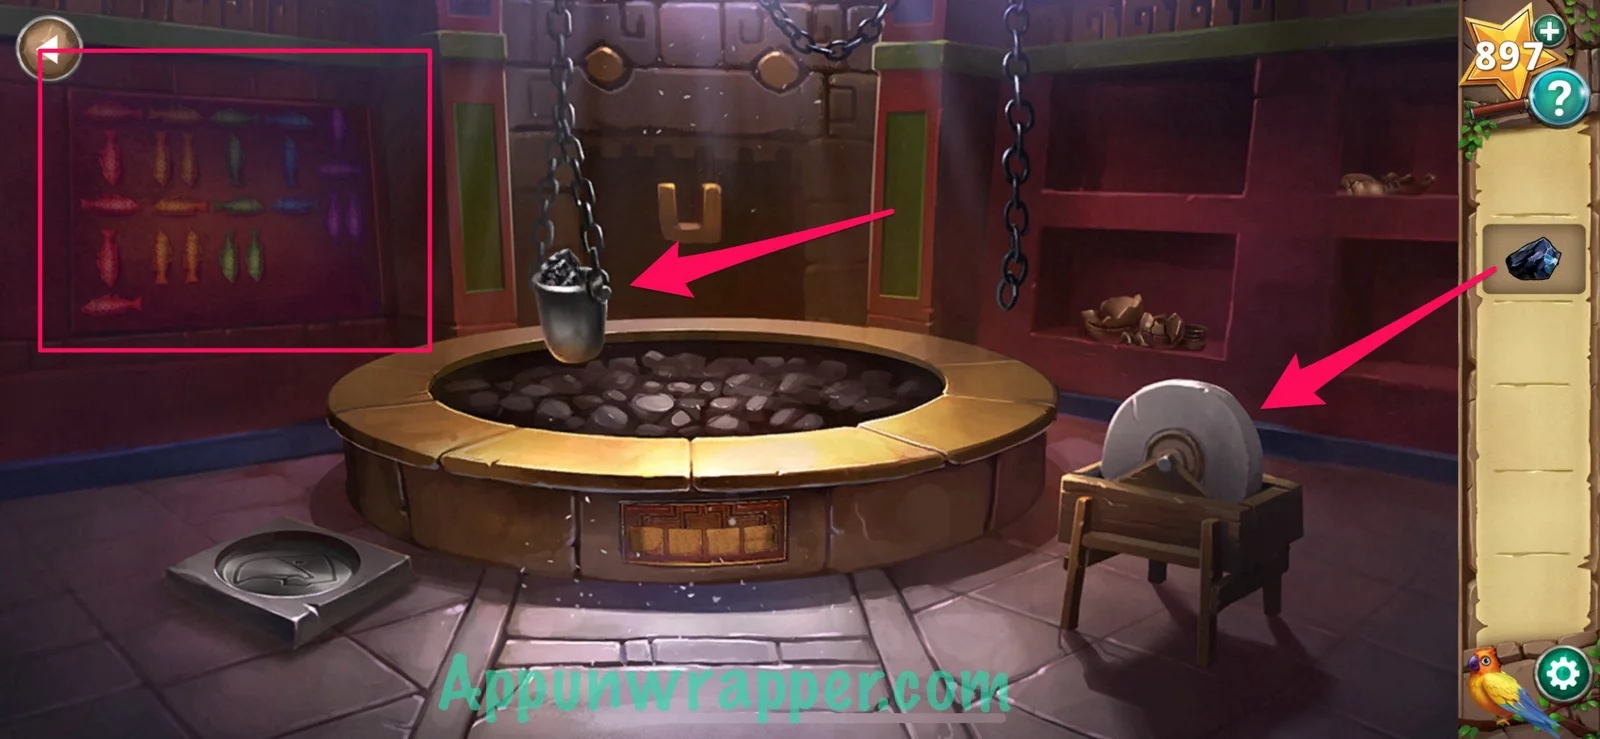
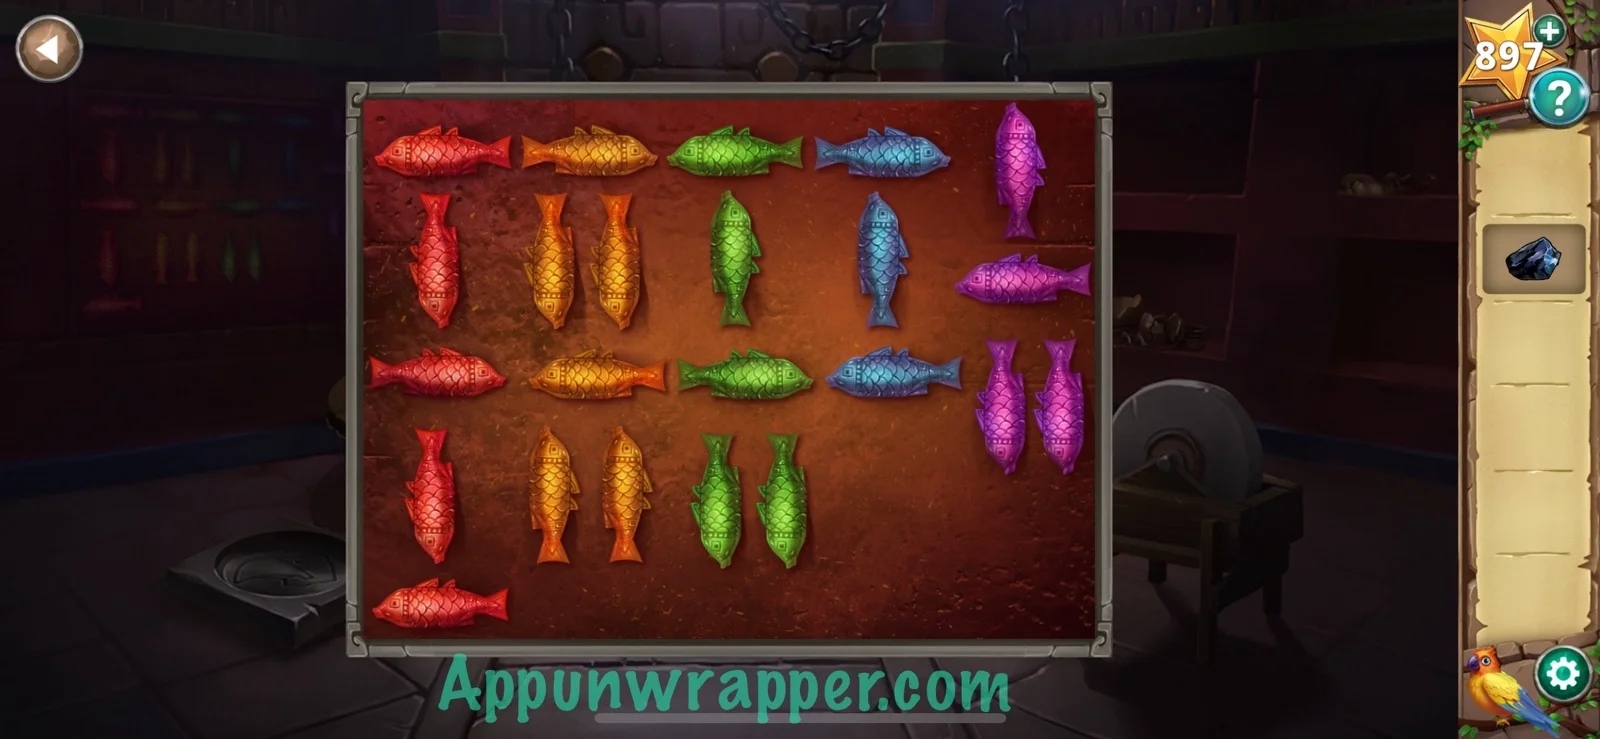
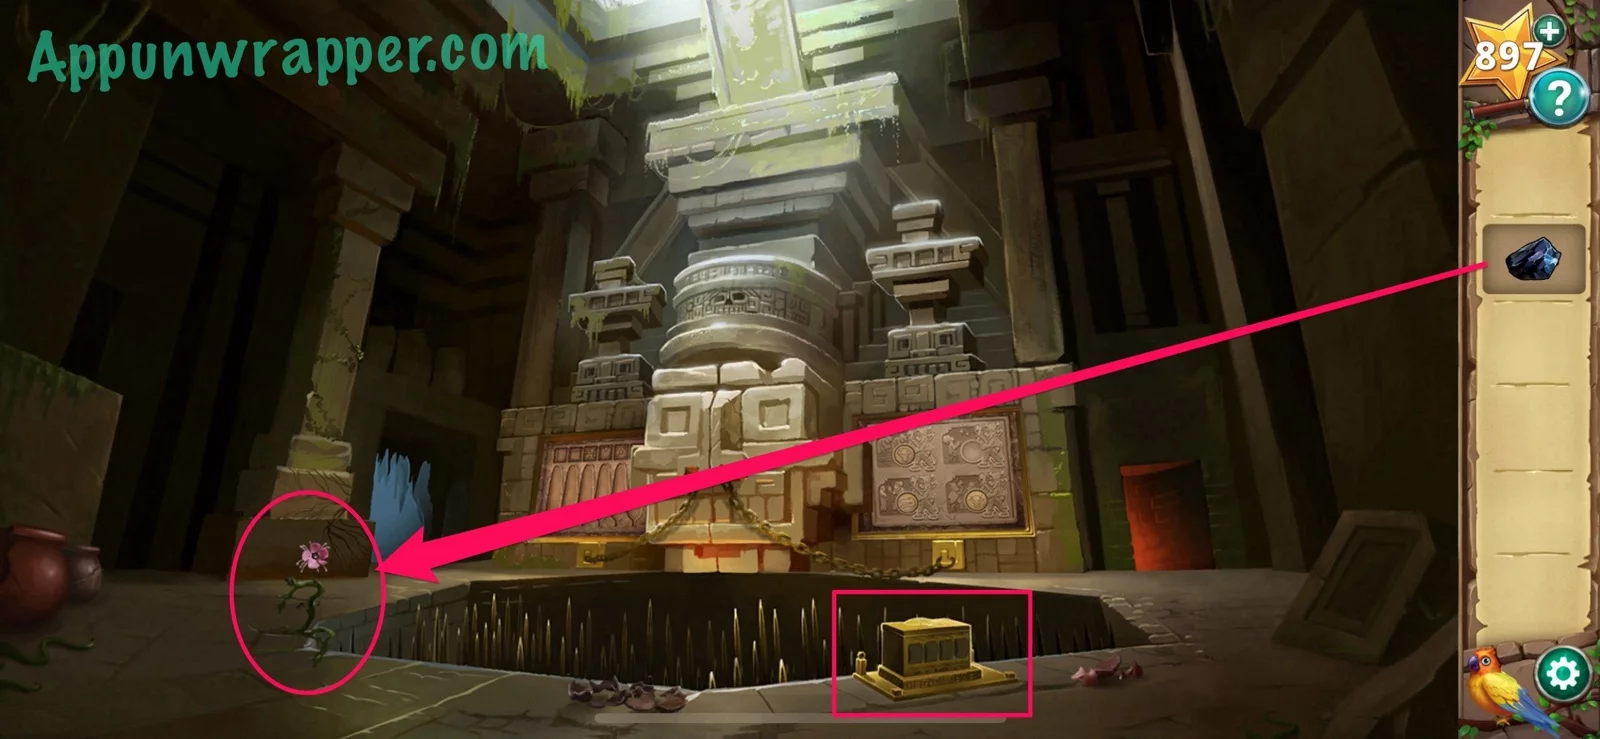
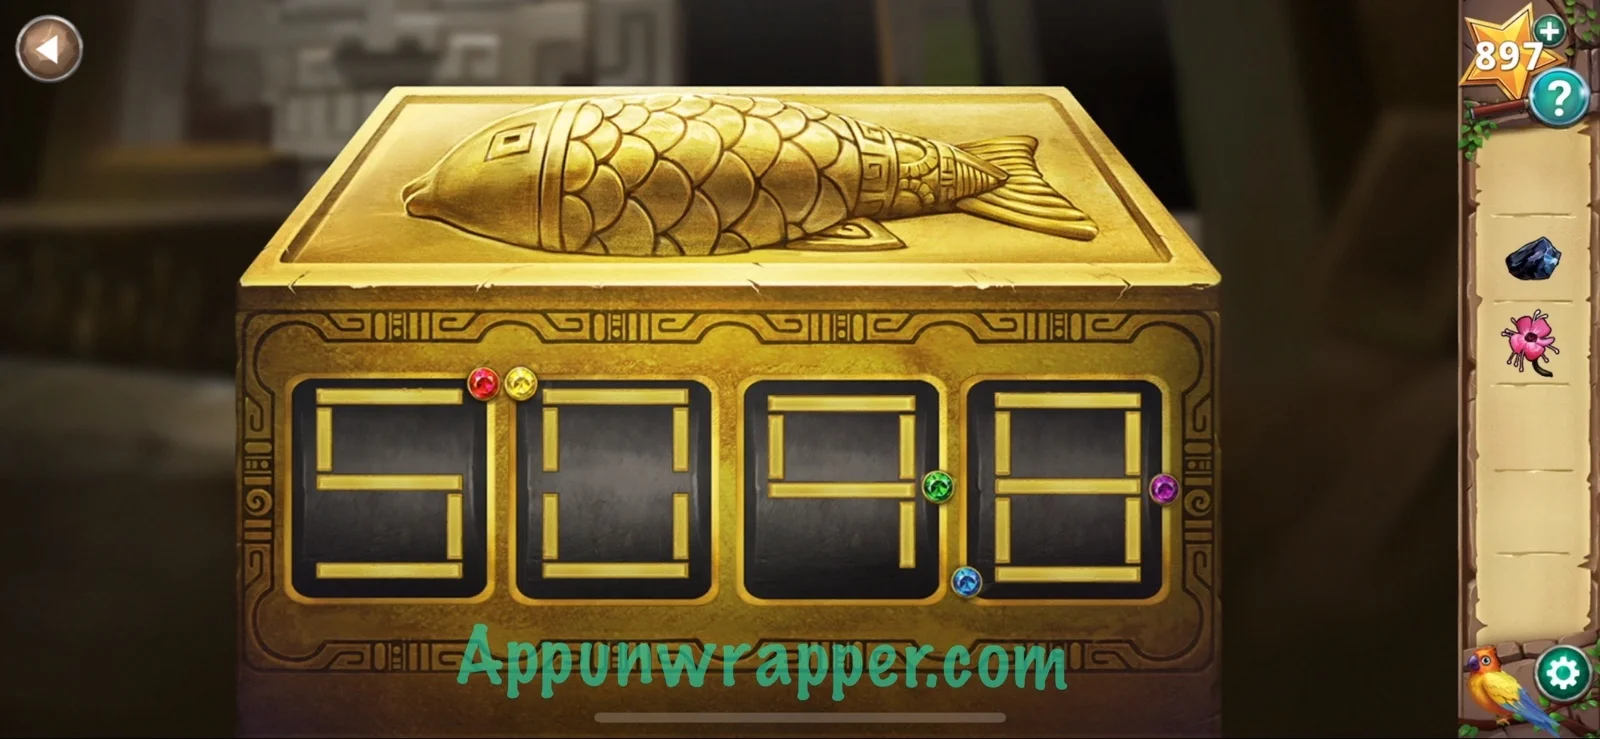
5. Go back to the main room. Use the obsidian to cut the flower. Tap on the combination lock to the lower right. So the way you get the numbers is to look at the gemstones on the lock. The first one is red and in the upper right corner. Look at the red fish on the wall and draw a line based on the directions they’re facing, starting at the top and making your way down the wall. So with red, you get left, down, right, down, left — or 5. So red is 5. Do the same with yellow and you get 0. Green gets you 9. And last, blue together with purple gets you 8. Put them together and you get 5098. Enter that into the combination lock. Take the stone quills from inside.
6. Go back to the crystal caverns and use the sharpened obsidian to get a crystal. Also, use the flower with the mortar and pestle to get some flower dye.

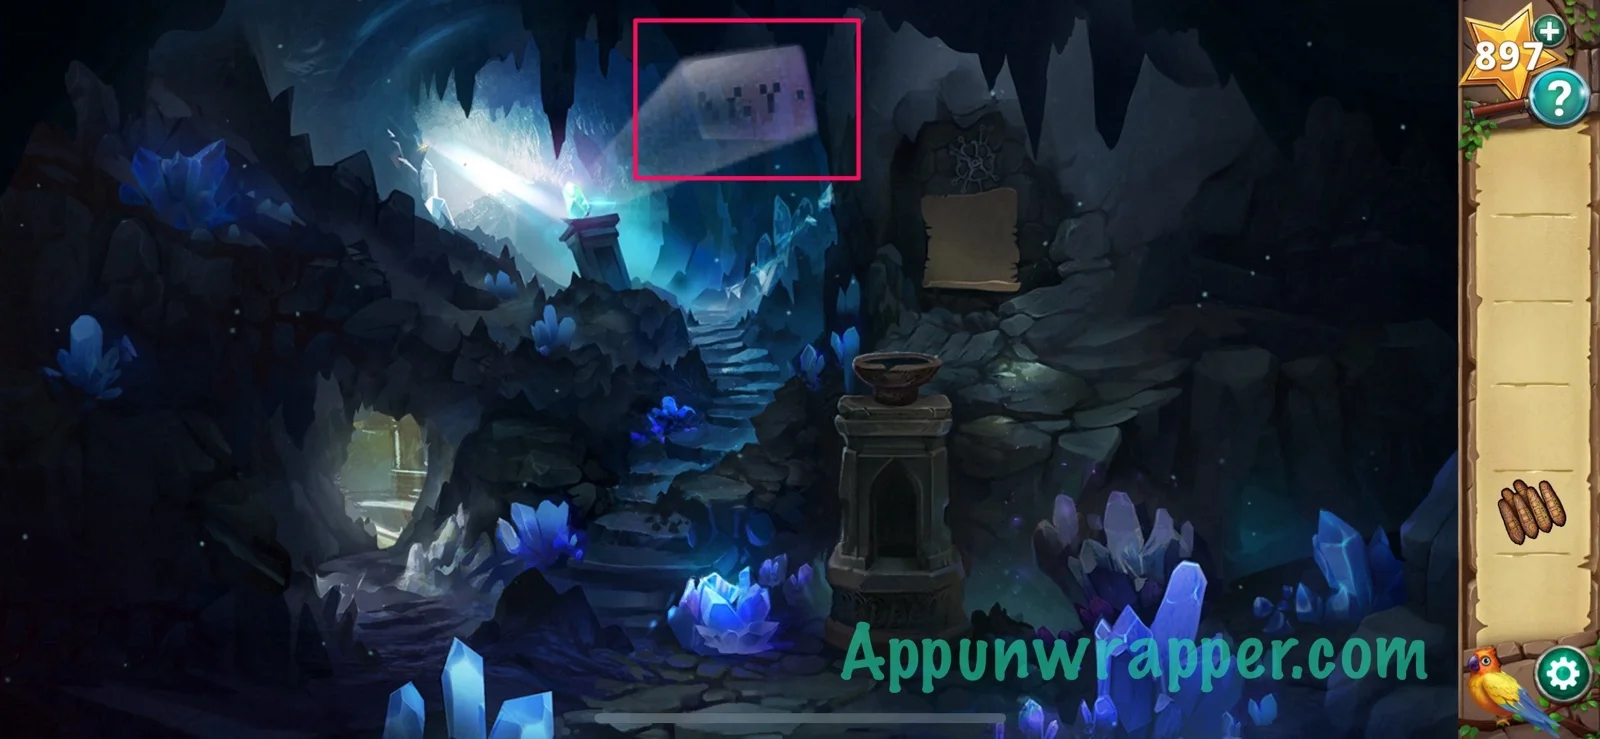
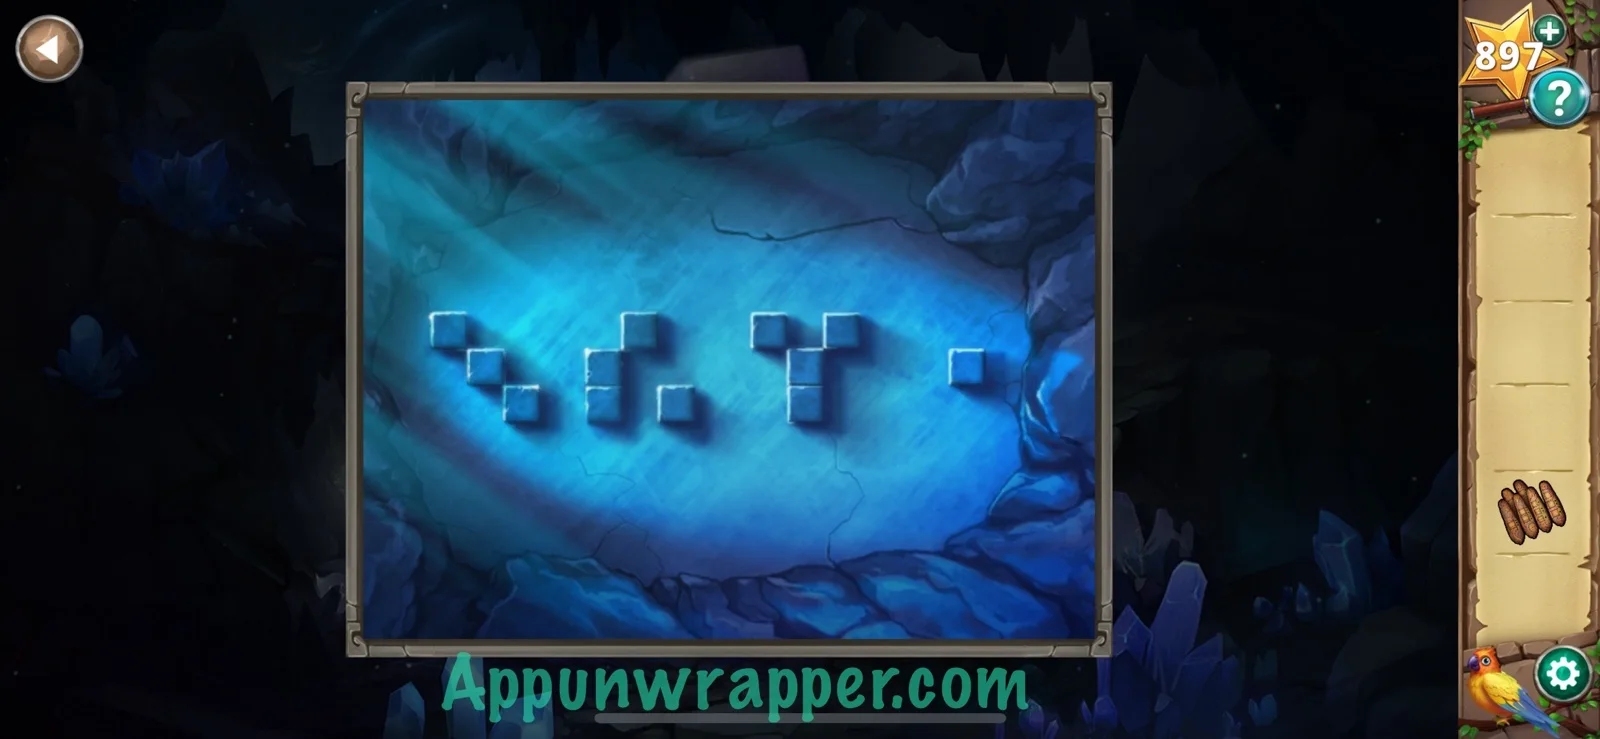
7. Add the flower dye to the parchment to get a clue for the stone quill puzzle. Place the crystal on the pedestal to get a clue for the puzzle in the smelting room.

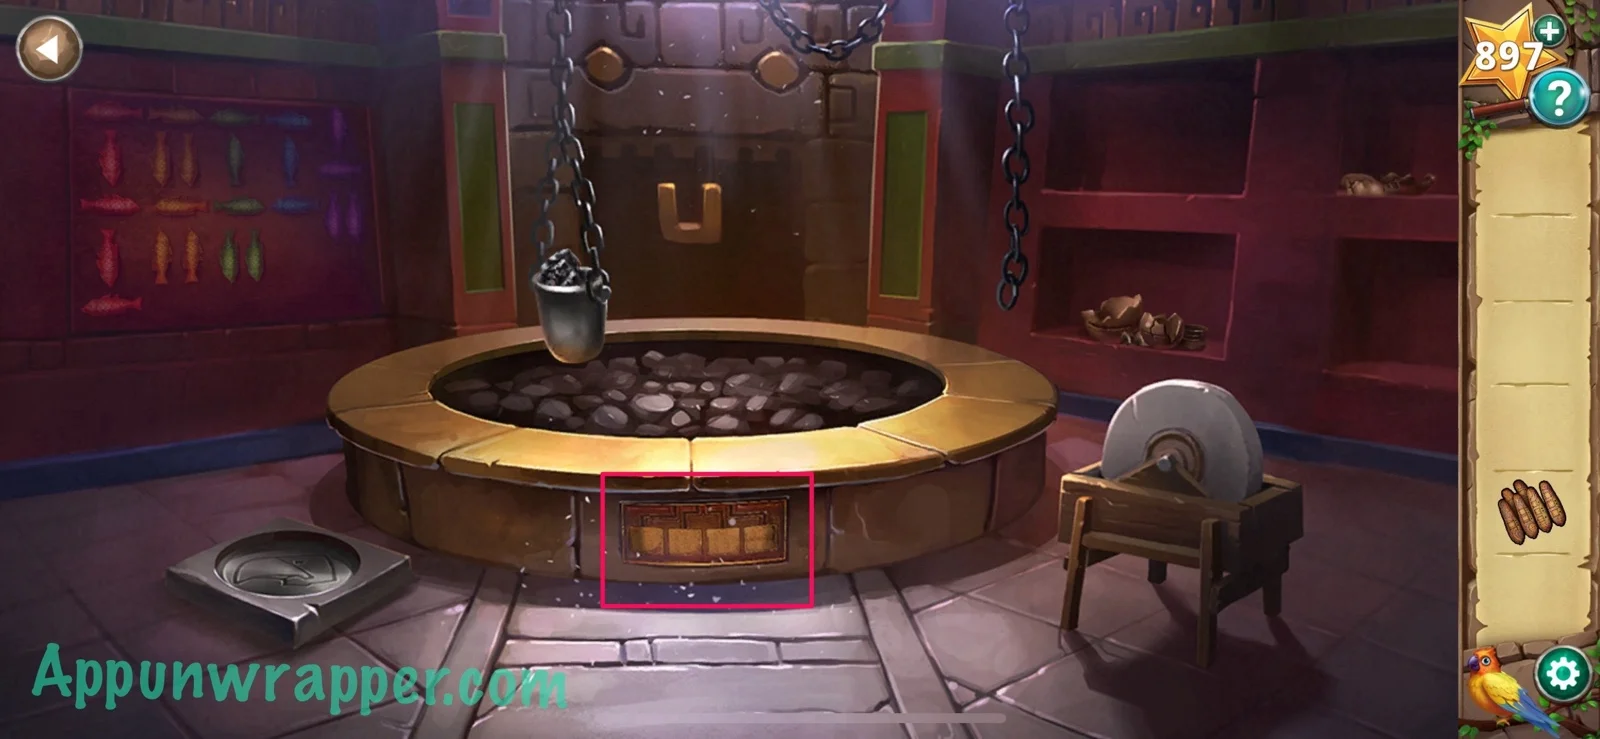
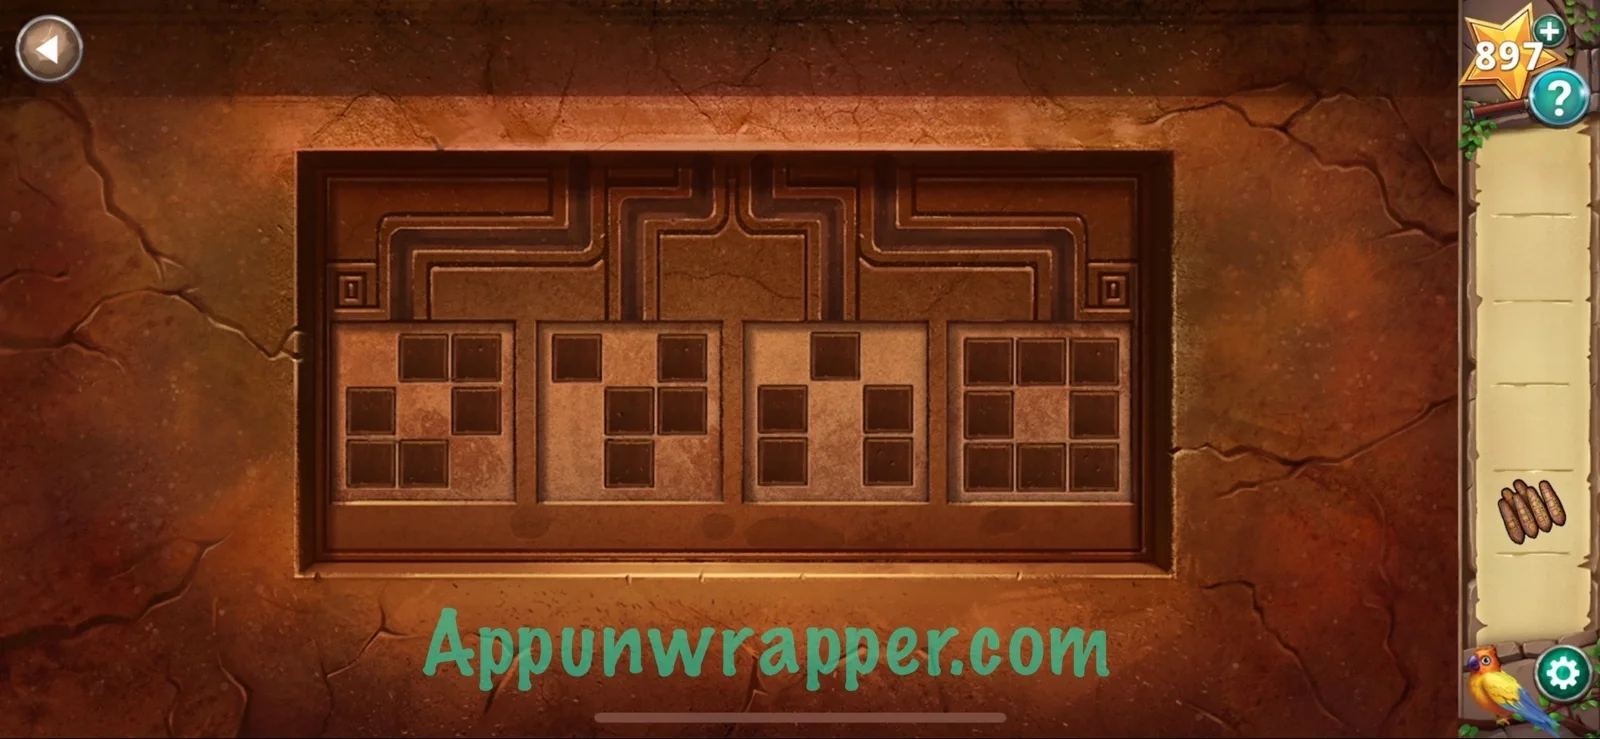
8. Go back to the smelting room and use the crystal clue to solve the puzzle at the bottom. You have to actually look at the negative space for this! The solution is below if you need help.
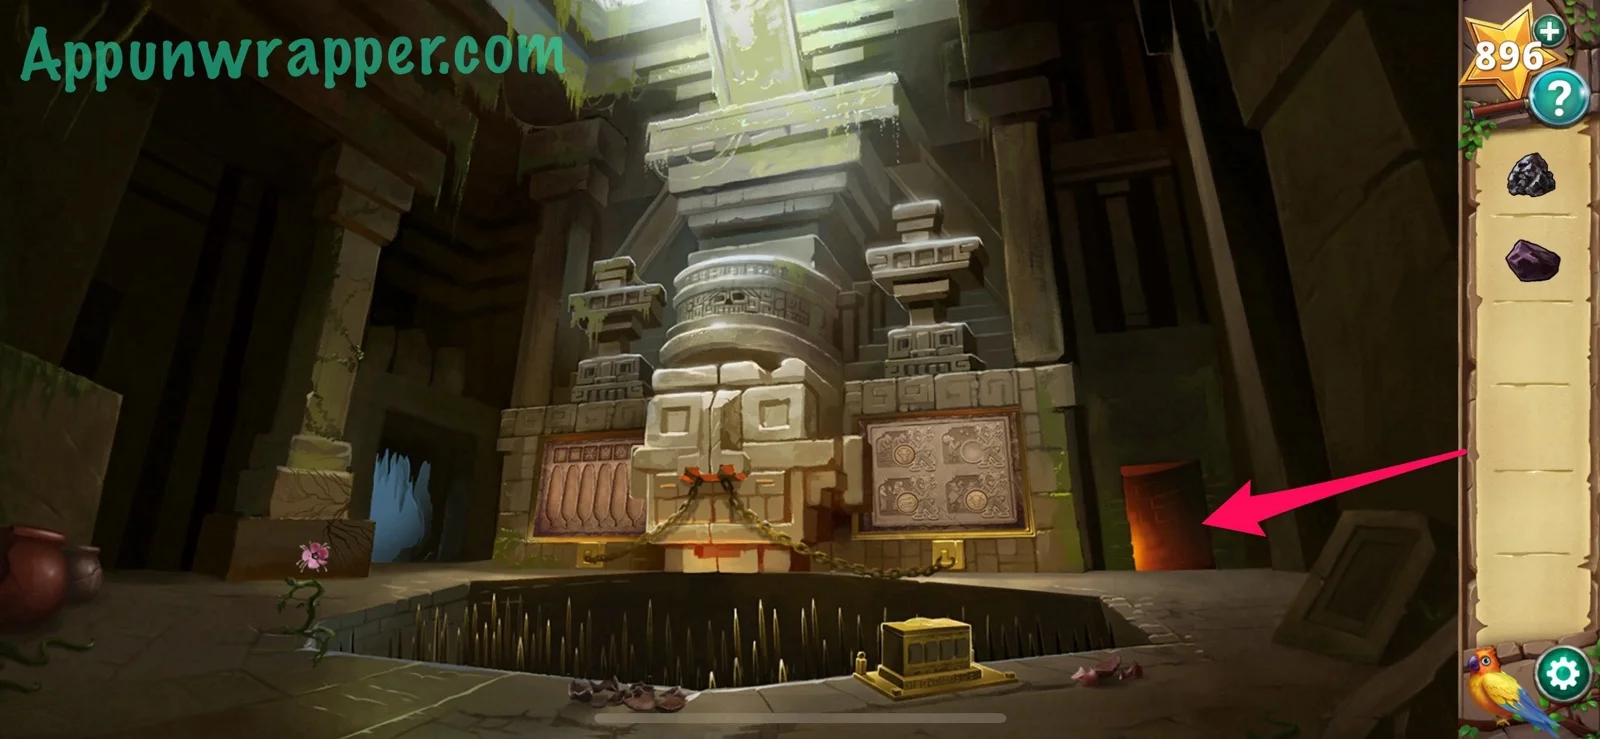
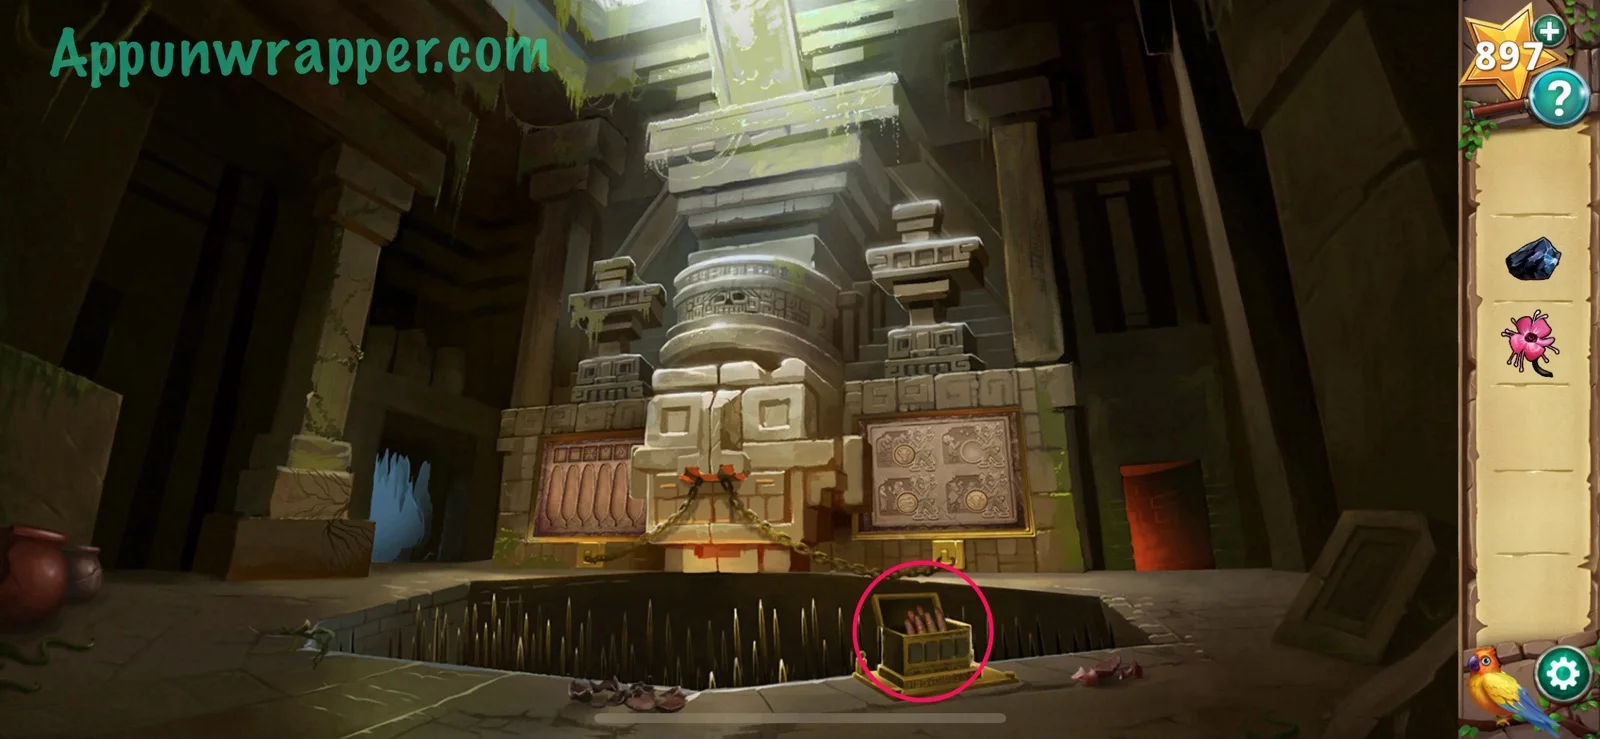
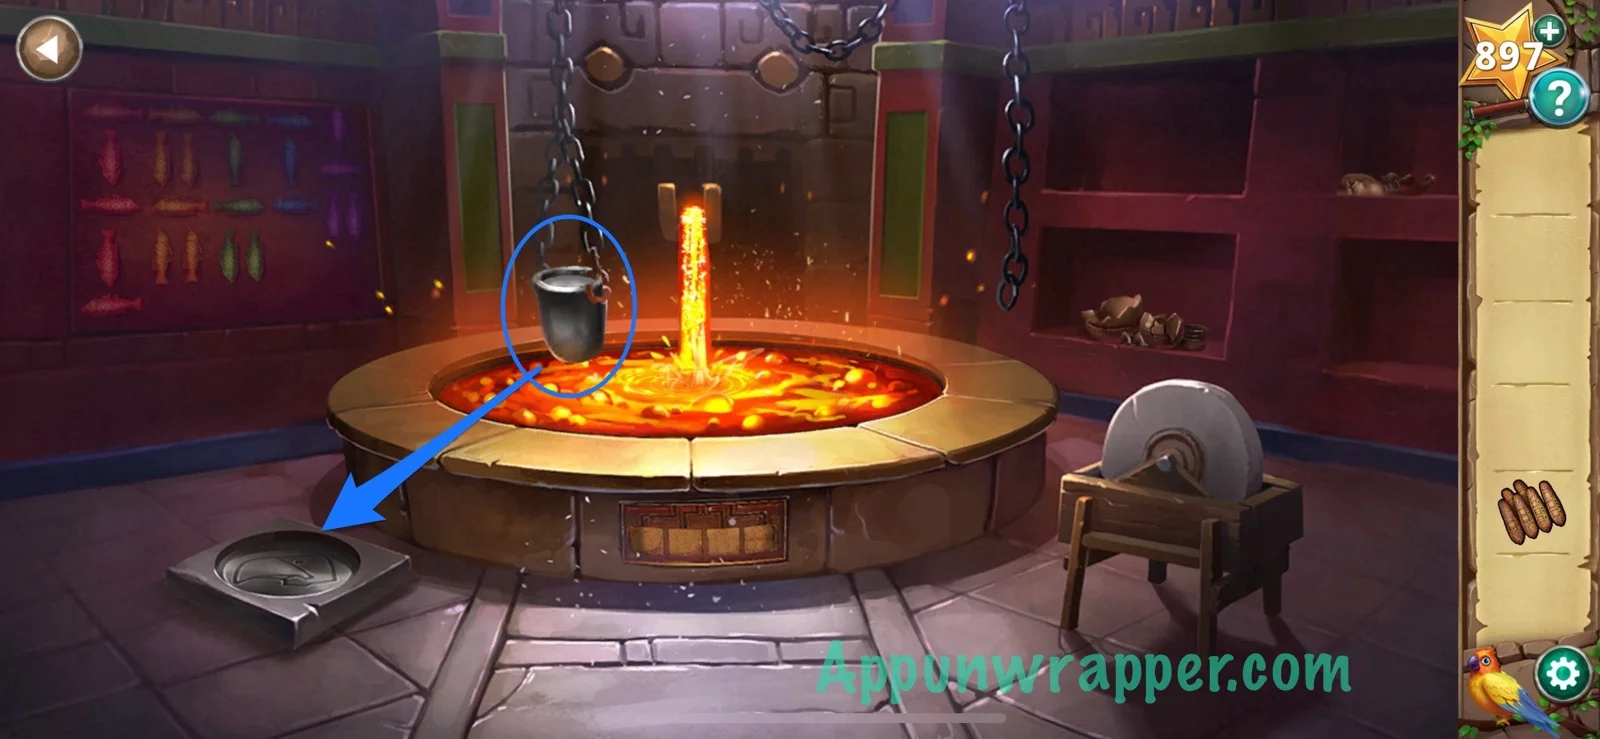
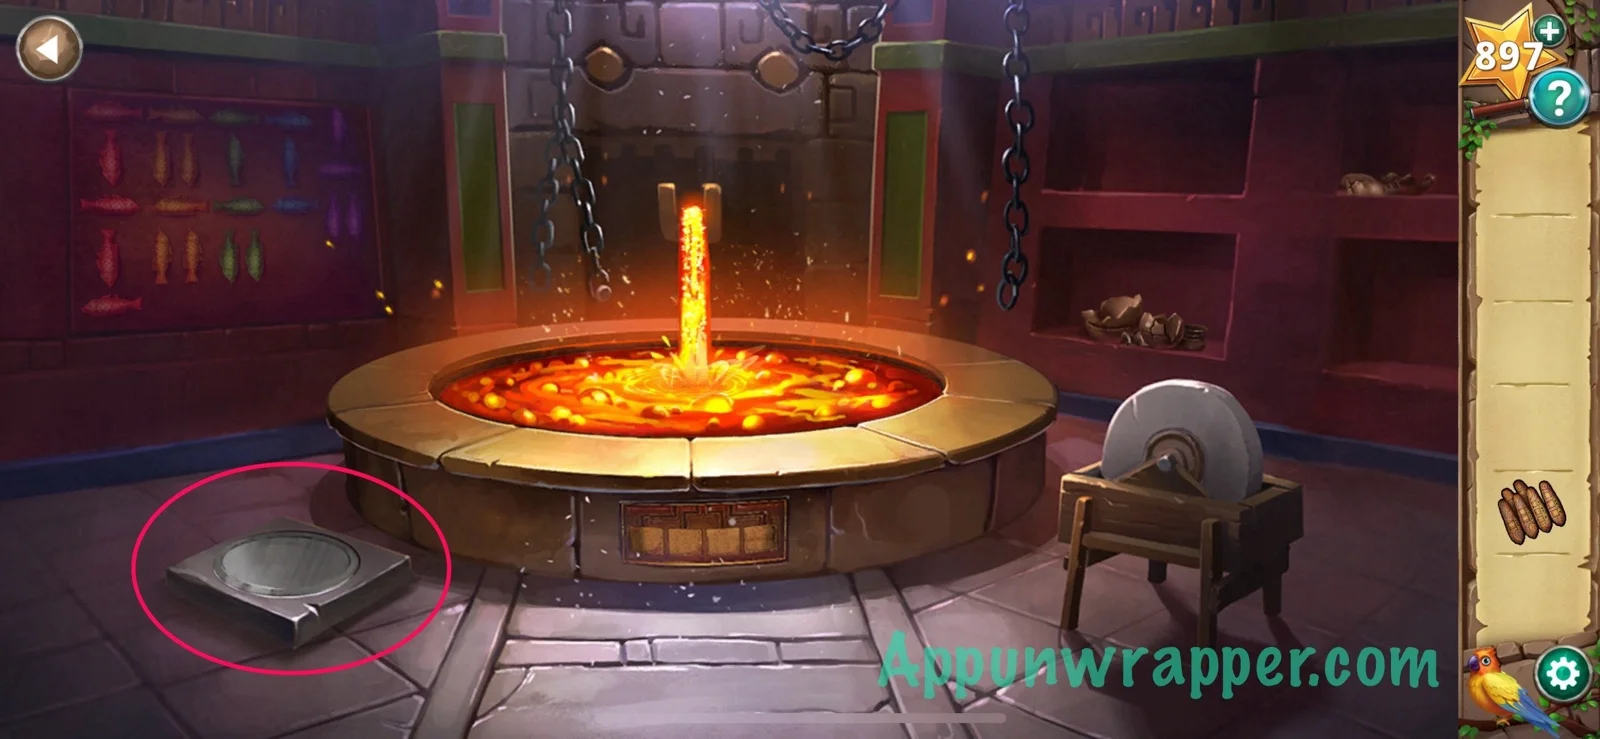
9. Take the melted ore and pour it into the mold on the floor. Take the shield.
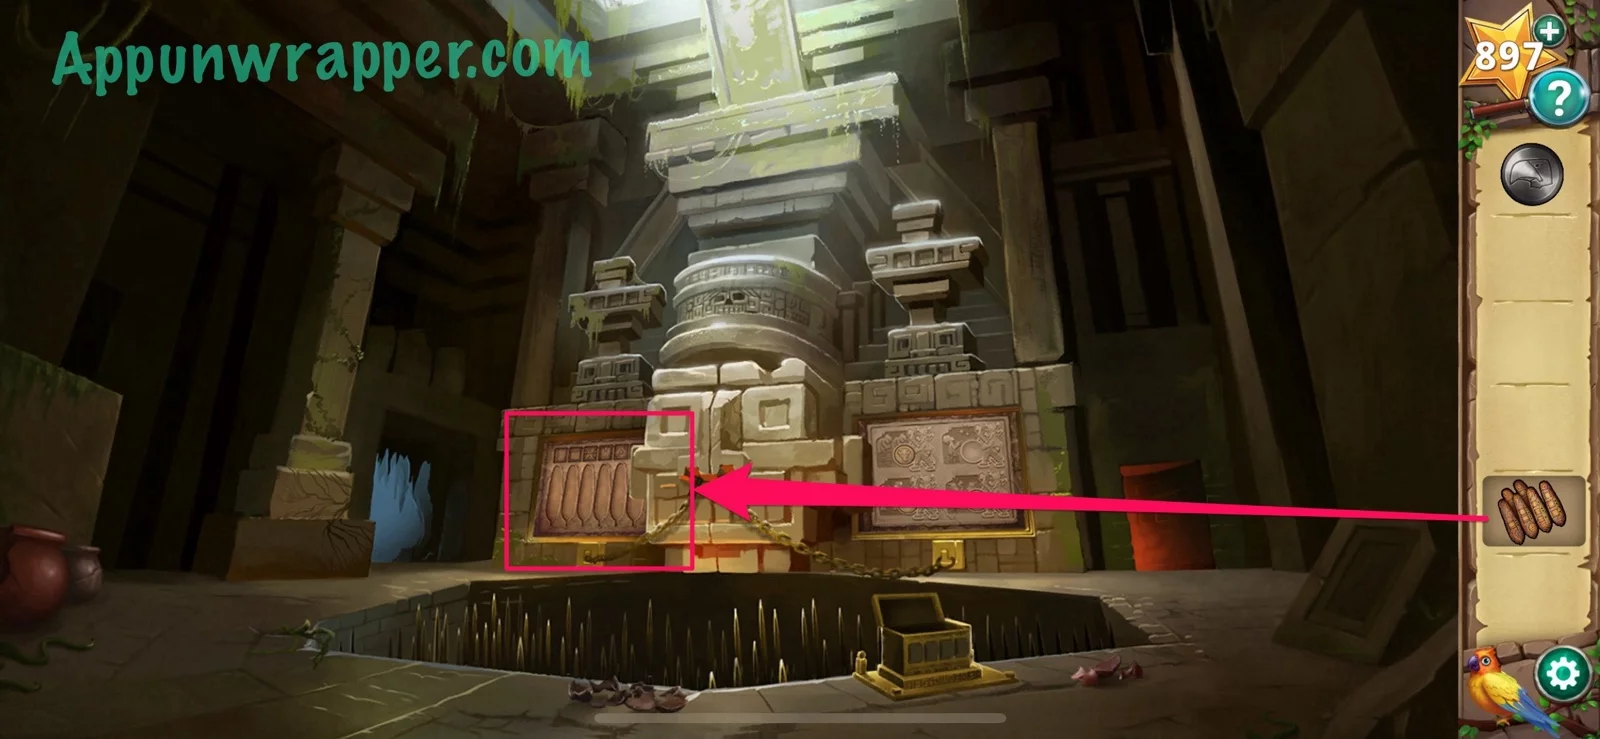
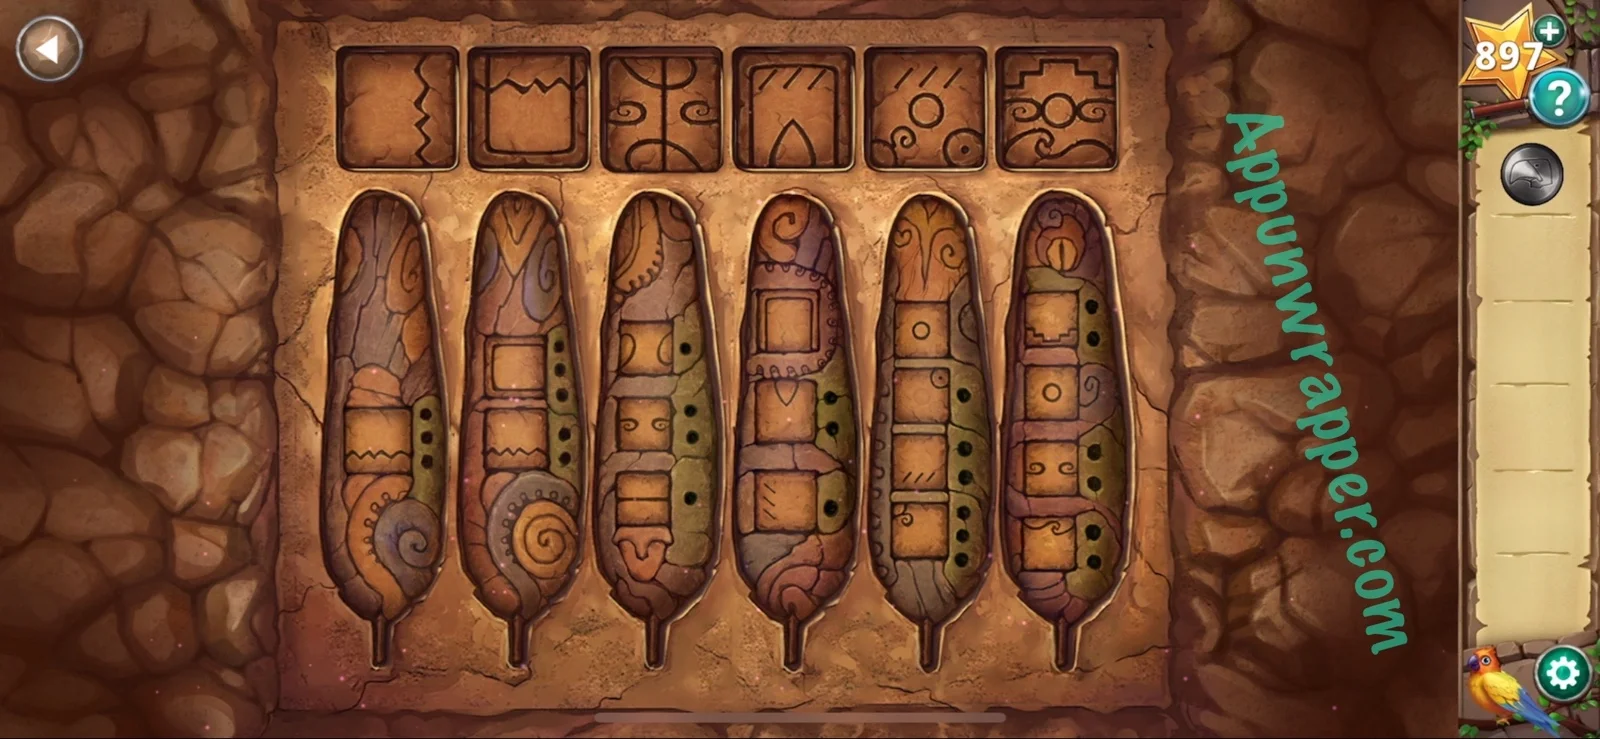
10. Go back and add the stone quills to the puzzle to the left. You need to figure out which patterns at the top to choose. The parchment tells you that 1 dot means one turn clockwise, 2 dots is two turns clockwise, and 3 dots is three turns clockwise. It’s a bit of a convoluted puzzle, but you can copy the solution below if you’re stuck.
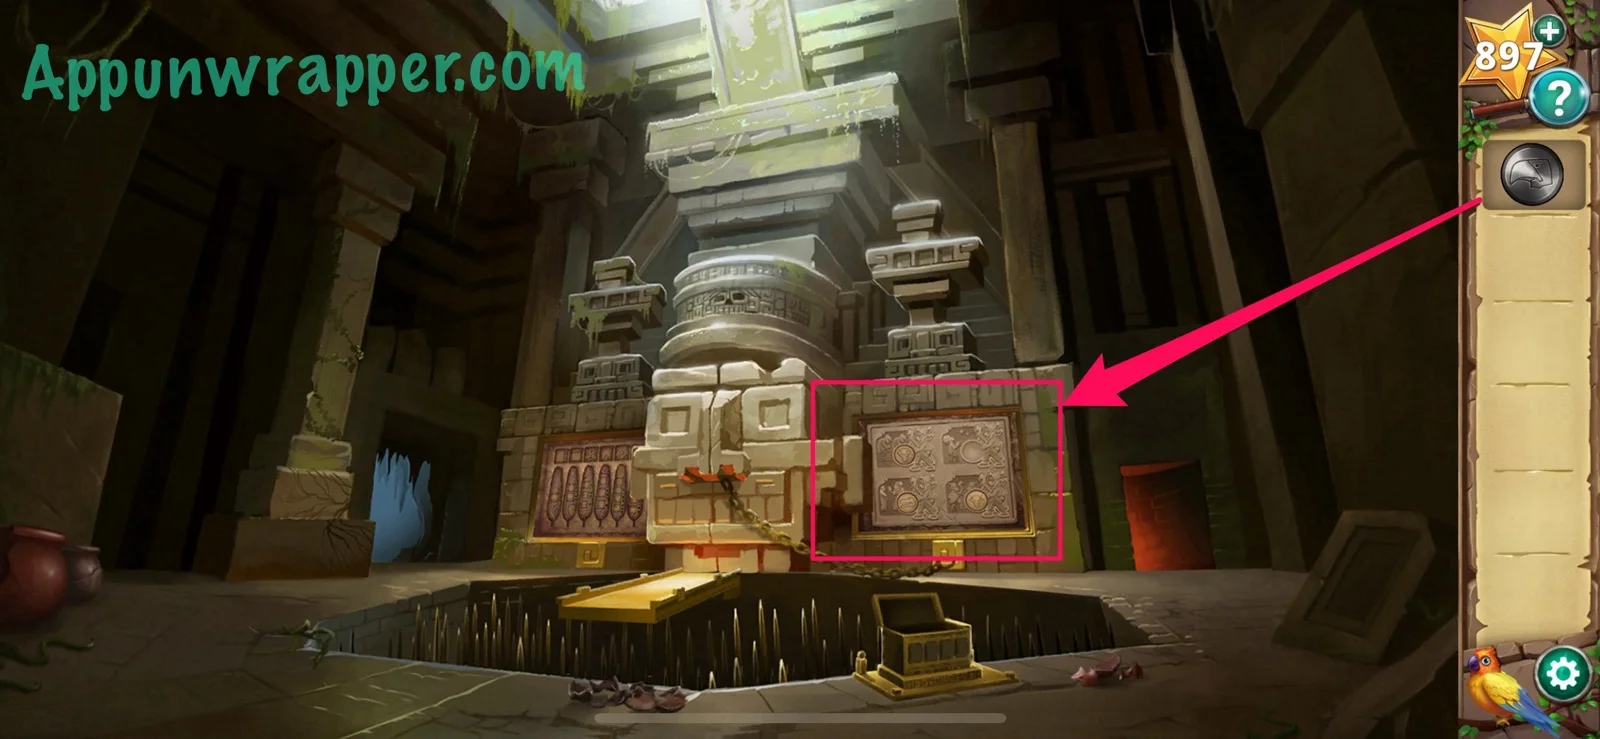
11. Place the shield with the other shields on the puzzle to the right. Tap on each image to see this text:
“The Kumari farmers worked in the fields.” — so this gets the Ox shield.
“They believed the cunning river beasts were descended from the gods.” — so this gets the Crocodile shield.
“The Kumari were known as sly traders.” — so this gets the Snake shield.
“The Kumari often fought from higher ground.” – so this gets the Hawk shield.
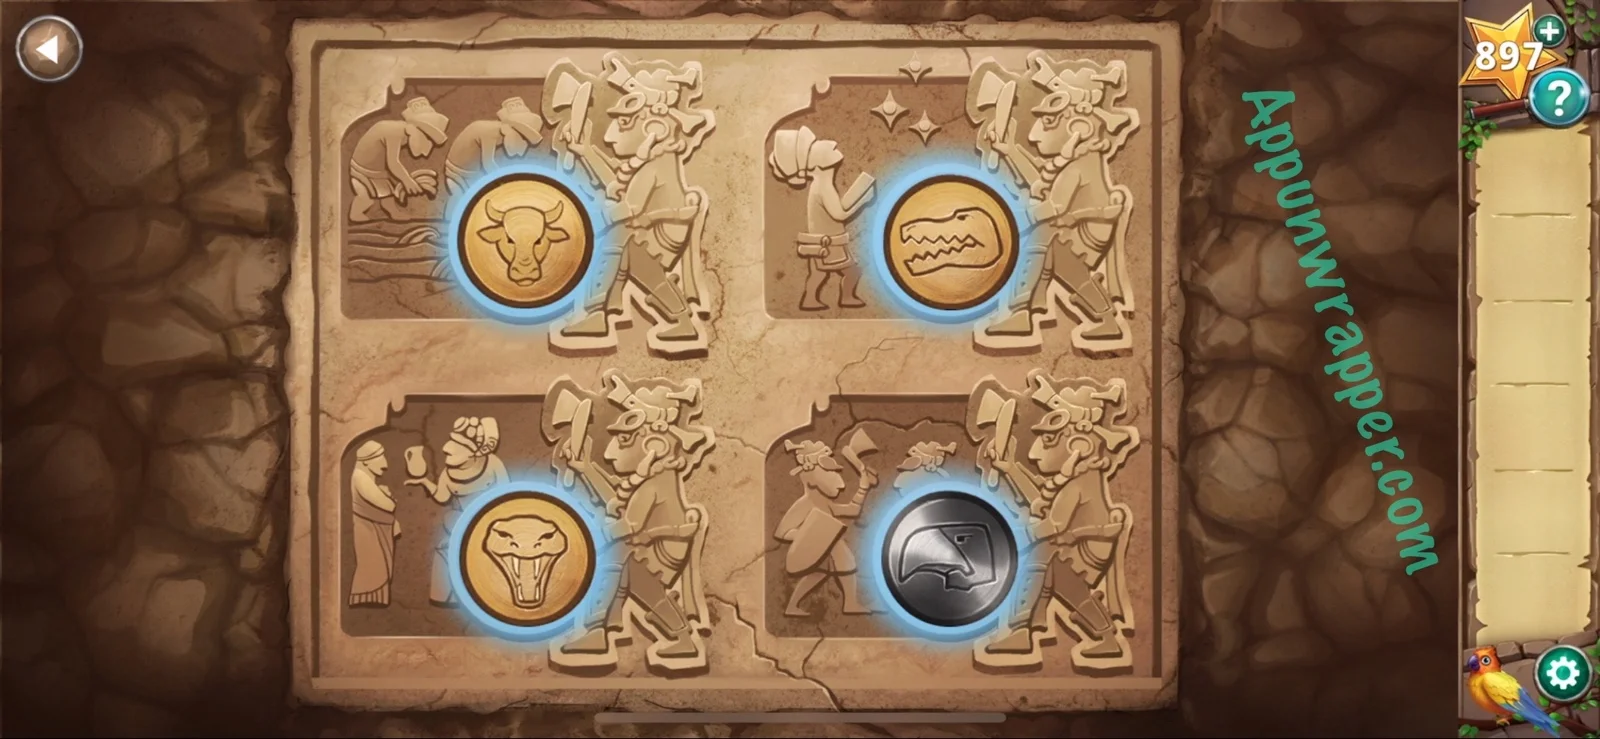
12. Go through the door to complete Chapter 7!
And that’s the end of Chapter 7! Click here to continue to Chapter 8 or choose a chapter below.
Chapter 1 | Chapter 2 | Chapter 3 | Chapter 4 | Chapter 5 | Chapter 6 | Chapter 7 | Chapter 8
The coloured fish, green: if you start in the middle and follow the direction of the fish, you go up – left, or two down. You can’t go two down from the right middle starting point. And you can’t choose to continue from up left. And you can’t choose to ignore the direction. So there is no number 9 unless the rules are different.
Same with blue and purple, it does not work if you start from the gem and follow the fish direction.
You always start the fish from the top. The gem is showing you where to start drawing. If you get out pen and paper, it’s easier to see.
Cannot get the feather puzzle to work, despite using the solution you posted.
Any thoughts?
Still having troubles? Or did you figure it out? I had to really pay attention to each drawings’ details.
I also can’t get the feather puzzle to work. I paid really close attention the details in the drawings. I managed to work out the shield puzzle before attempting the feather puzzle – I wonder if this is the reason it doesn’t work?
I managed to sort this by restarting the chapter and doing the feather puzzle before the shield one 😊