Kitty Q – A Quantum Adventure
By: Philipp Stollenmayer / Kamibox
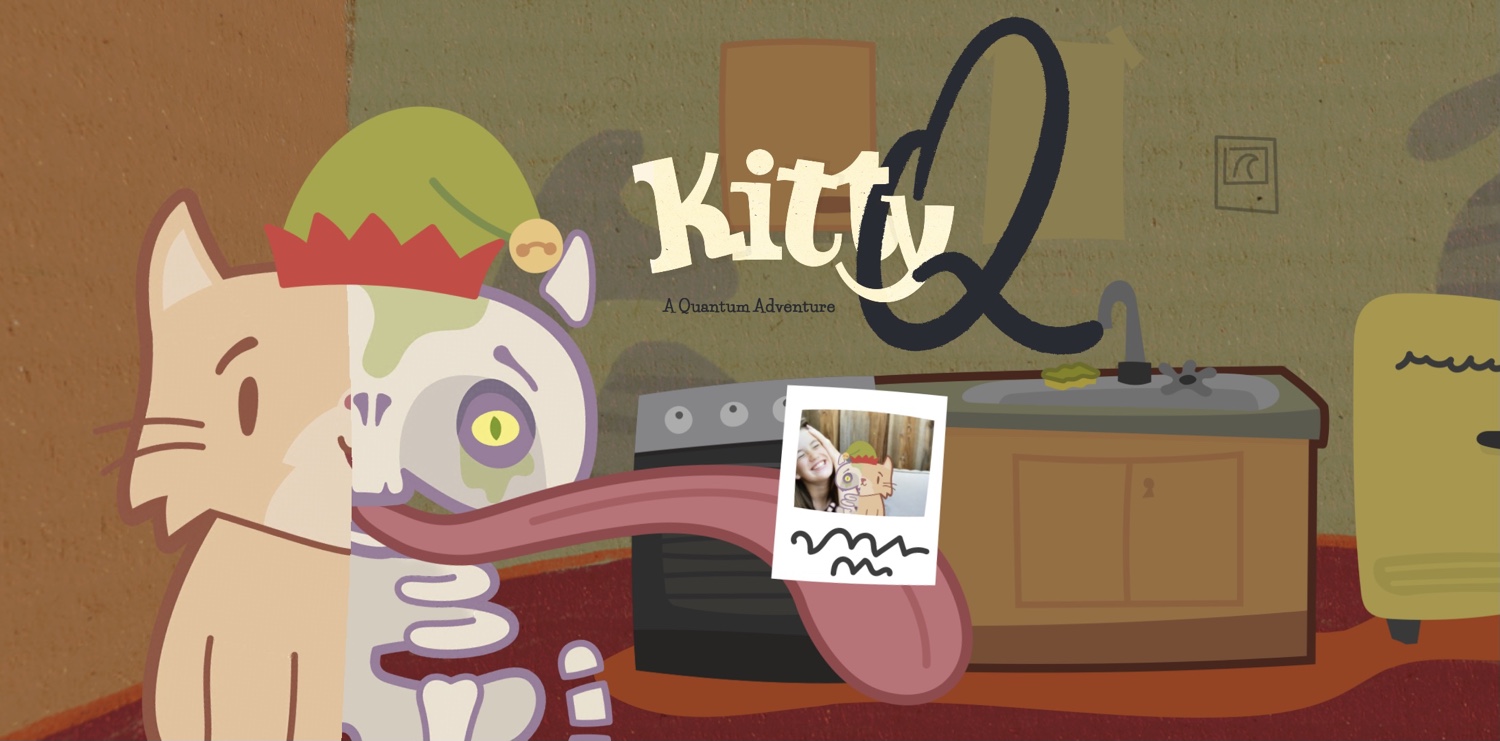

Kitty Q is a new room escape game from Philipp Stollenmayer, in which you work with Anna, Erwin Schr╬ô├╢┬ú╬ô├▓├│dinger’s granddaughter, to help the cat that’s both alive and dead to escape the quantum realm. The game has built-in hints, but if you get stuck, this walkthrough guide should help. Feel free to ask for extra help in the comments section.
Walkthrough:
You can watch my video for the full game here or continue below for my step-by-step guide:
1. Someone rang the doorbell! Pull the door open and then pick up the phone to answer the text. Tap the hand emoji to say hi. Then you can choose either the silhouette or box emoji.
2. Anna introduces herself as Erwin Schr╬ô├╢┬ú╬ô├▓├│dinger’s granddaughter. She asks you to open the box. So pull the lid open and reveal the half-dead half-alive cat. Pet it and Anna will ask what you see. Answer her. Keep chatting with her. Either agree to name the cat Kitty Q or choose your own name.
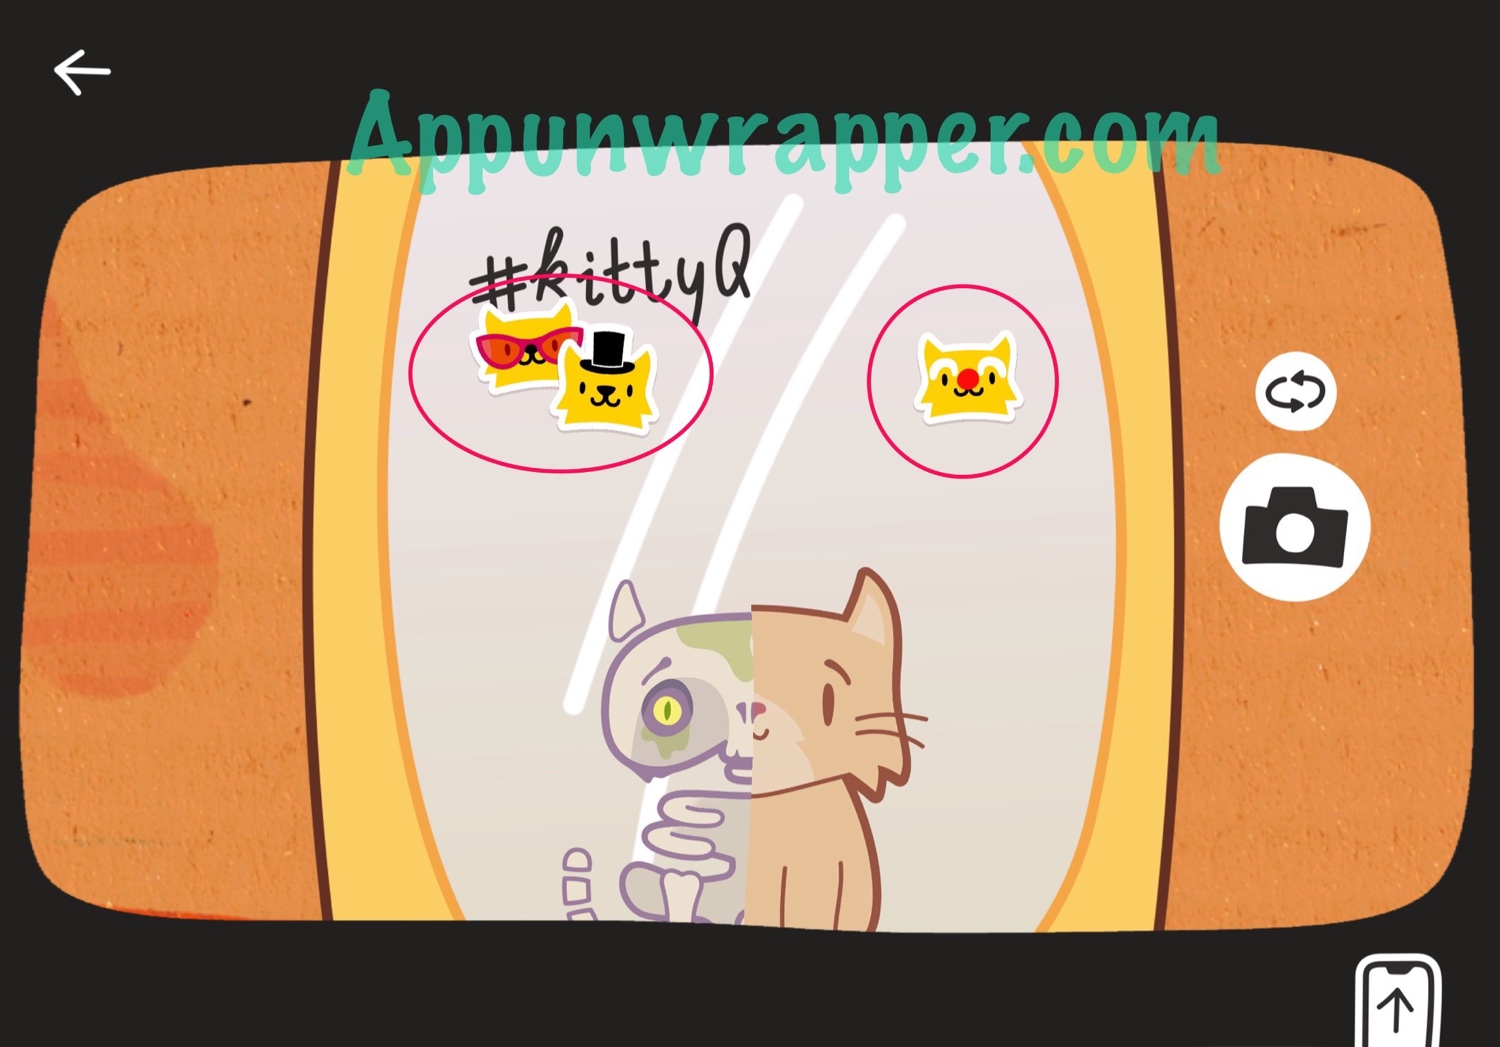
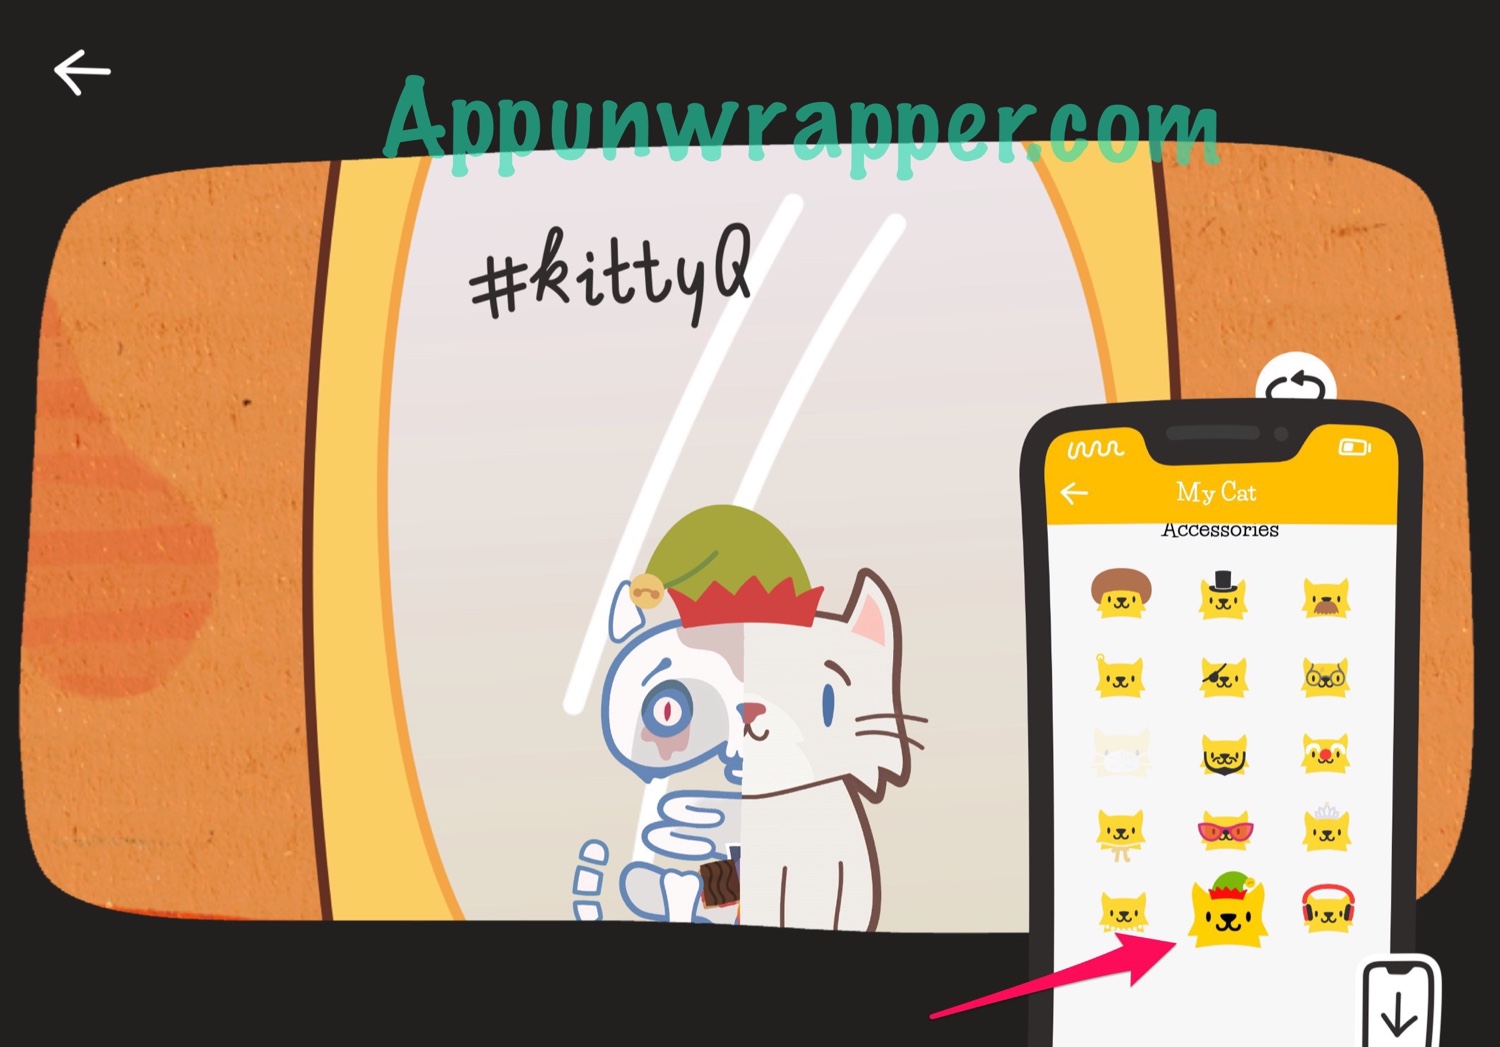
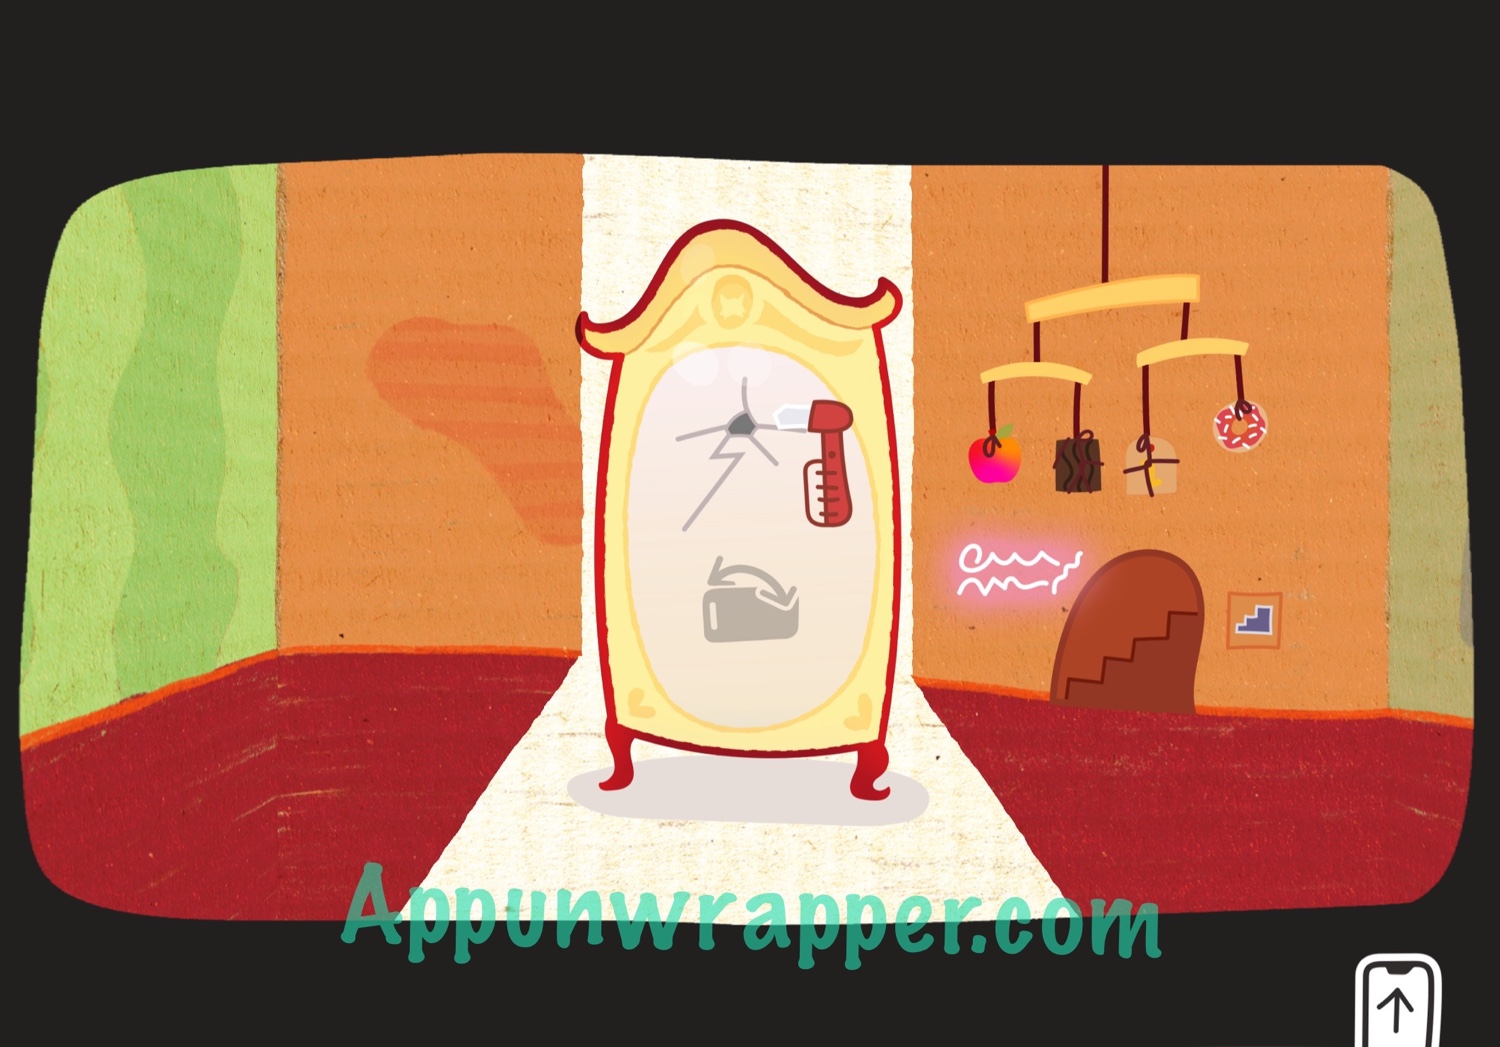
3. Minimize the phone and start to look around your environment. Tap the mirror to zoom in on it and grab the three stickers/accessories. Then go back.
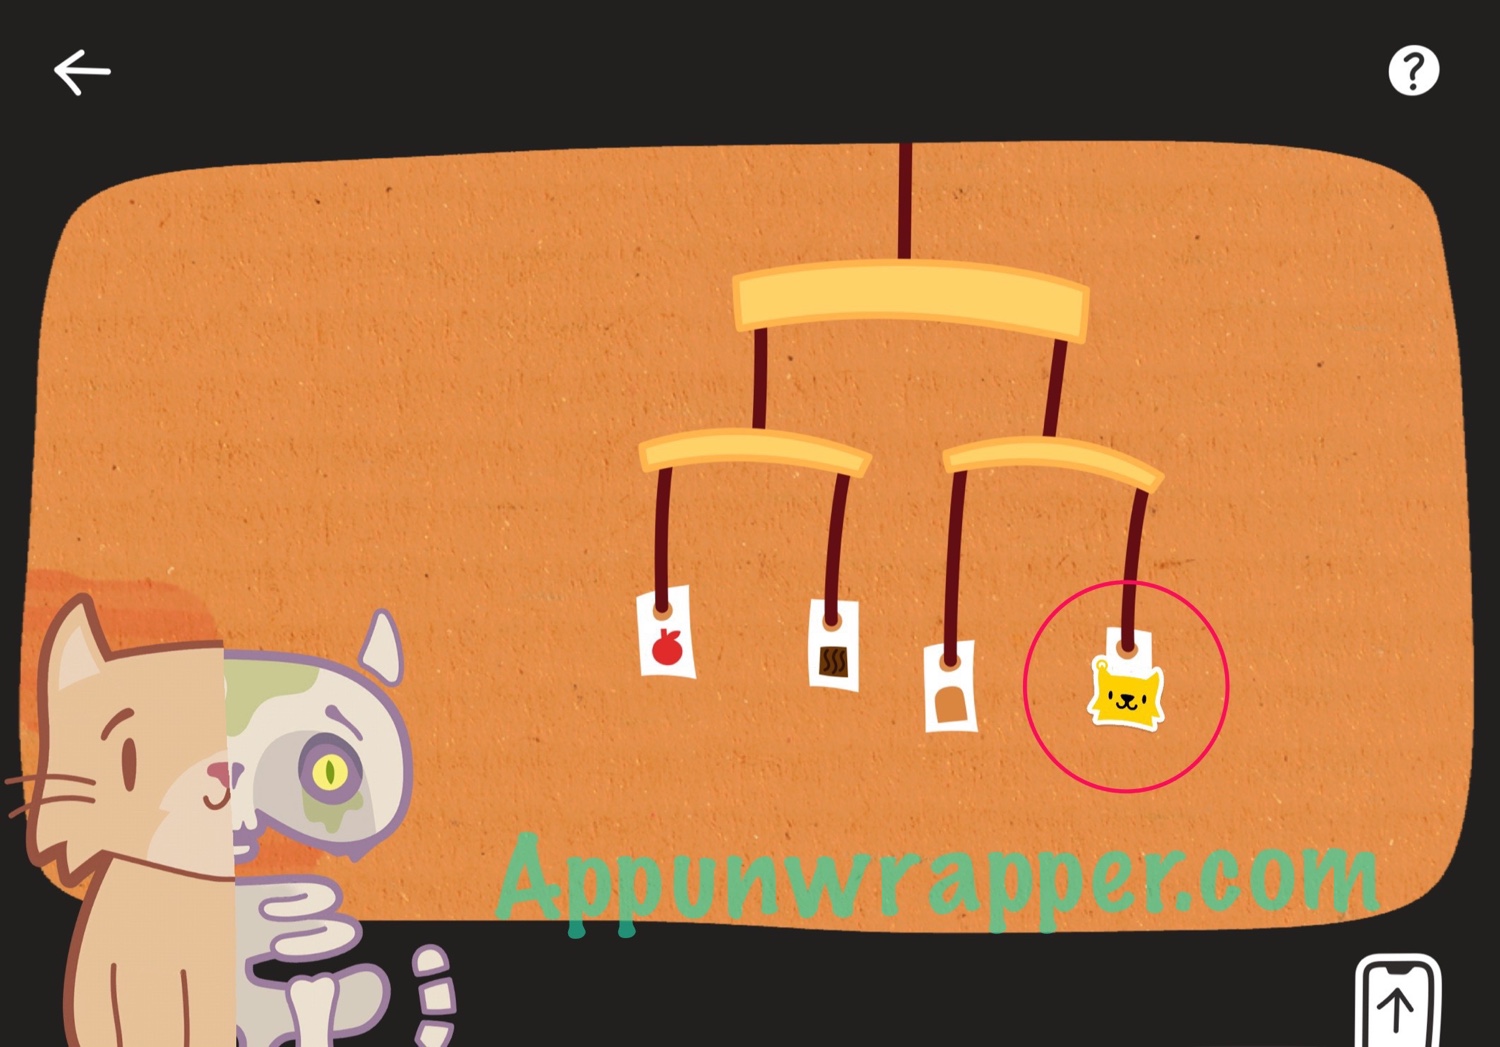
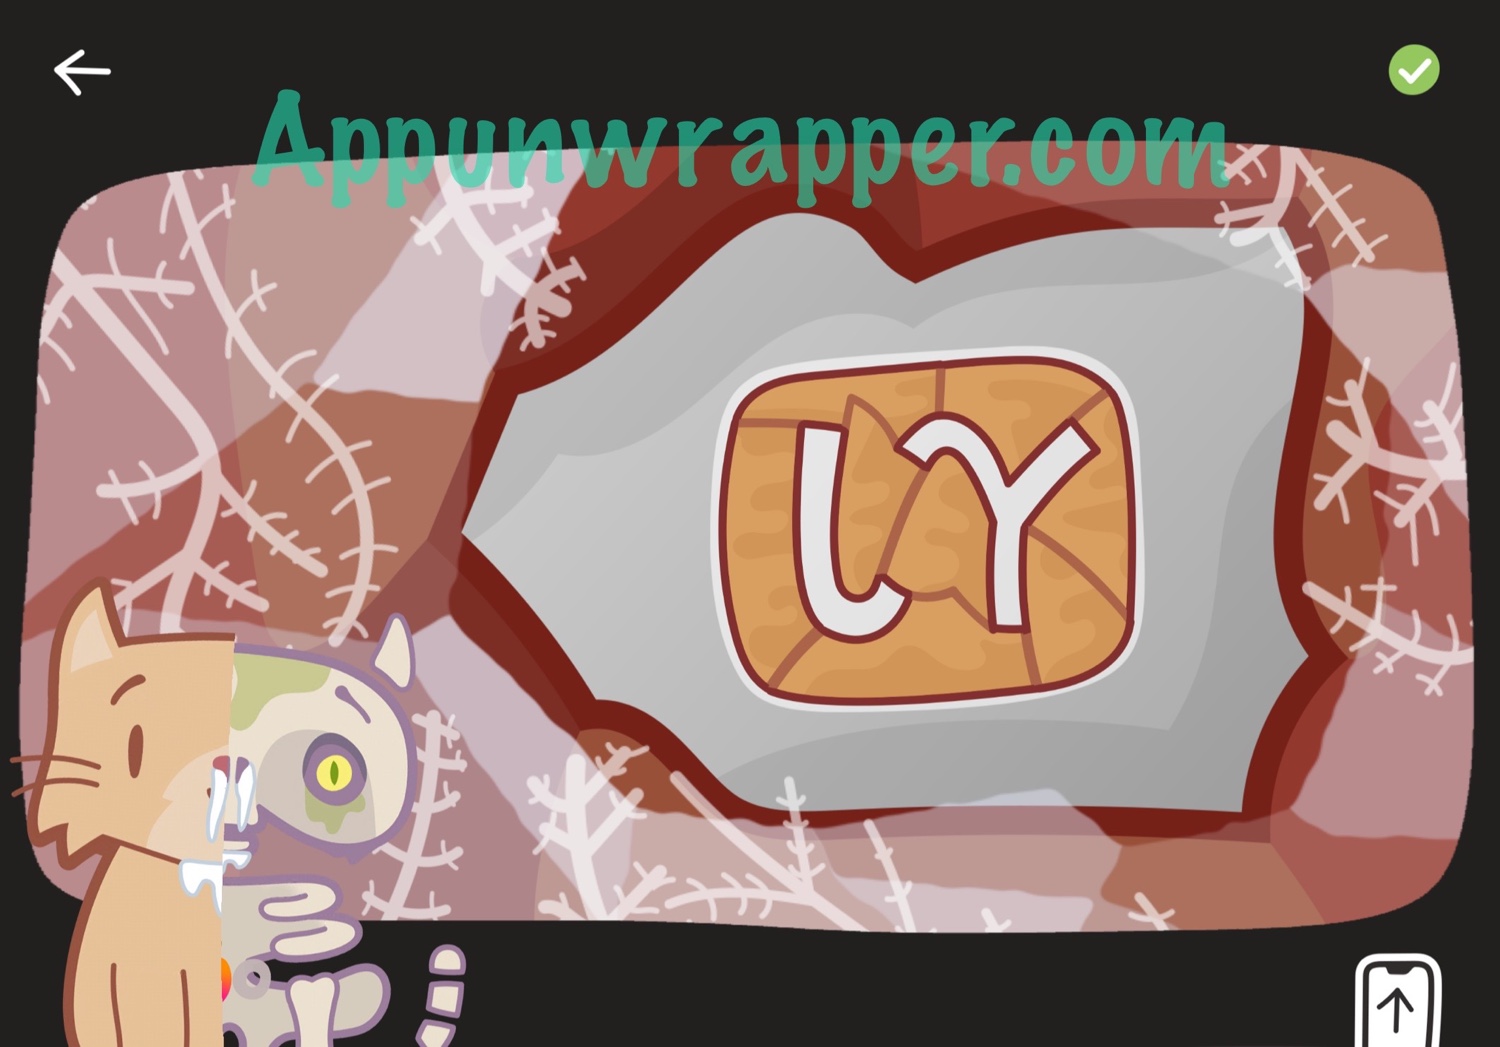
4. Tap on the mobile and grab another sticker.
5. Go back and tap on the doorway. Grab another sticker. Then go back.

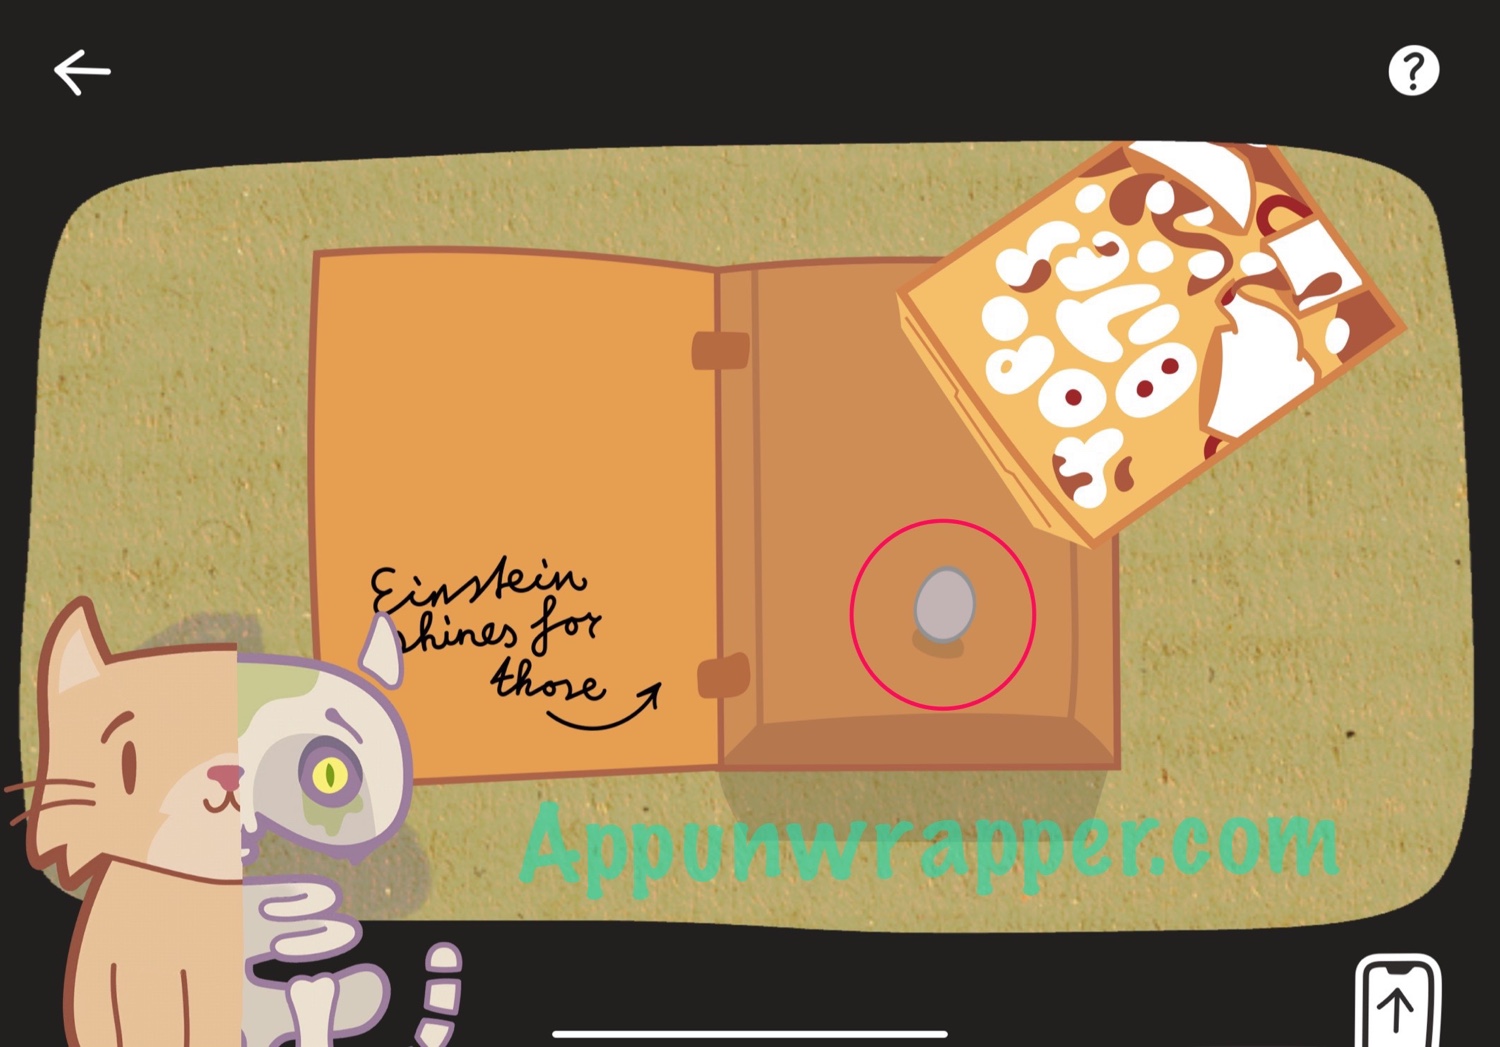
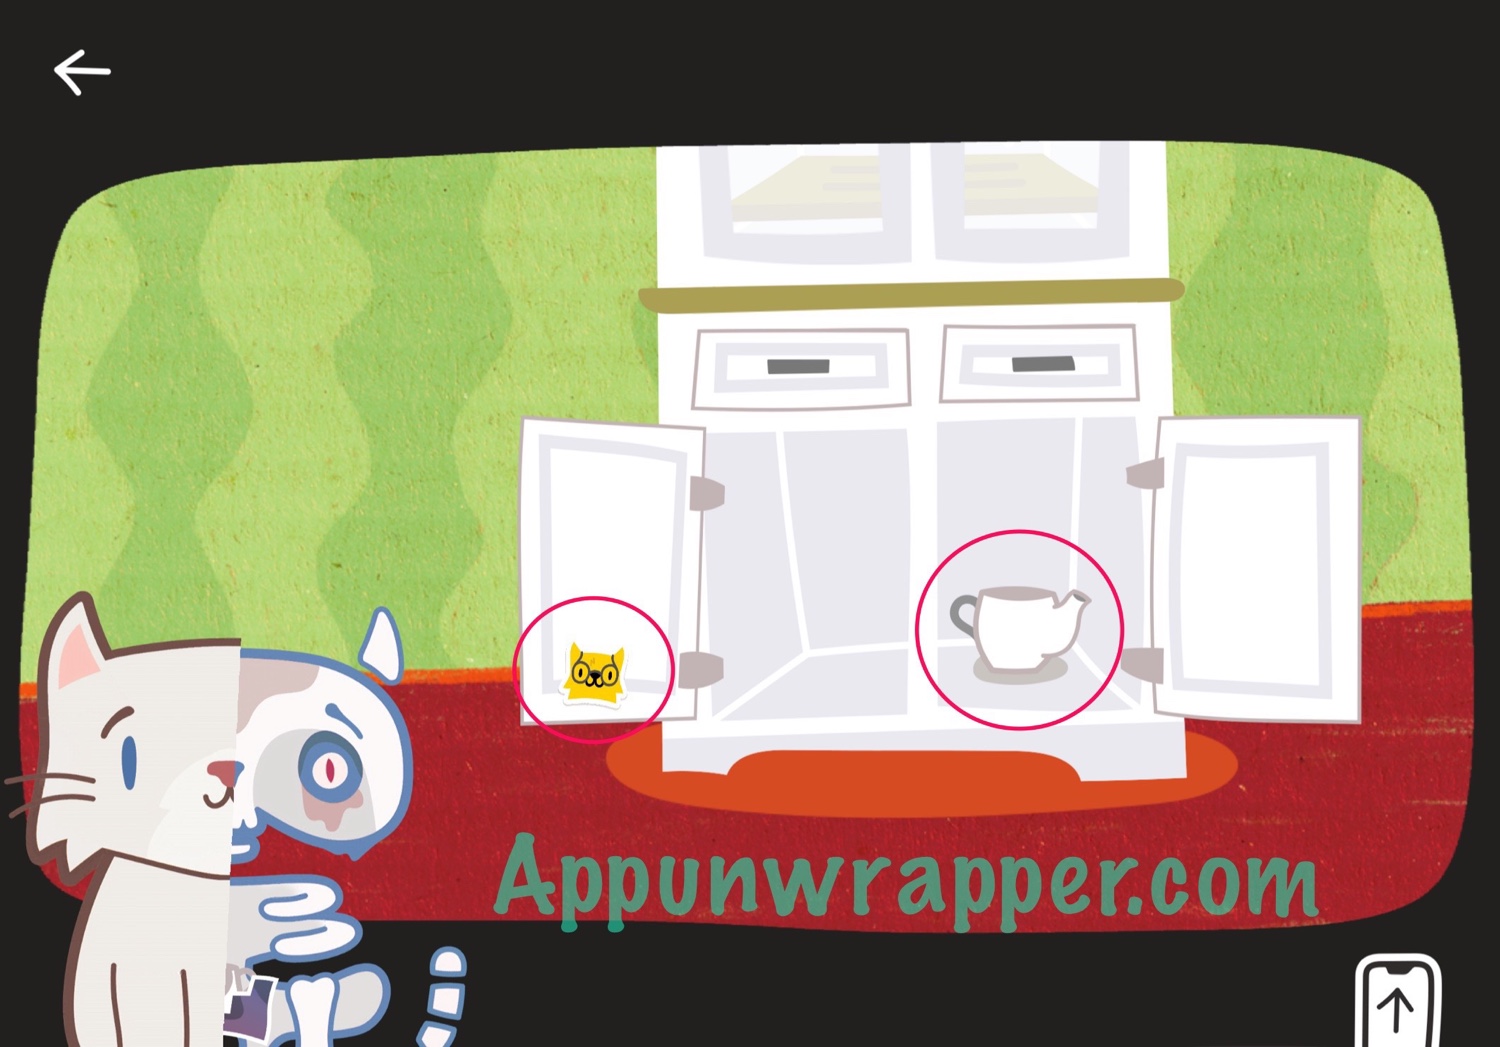
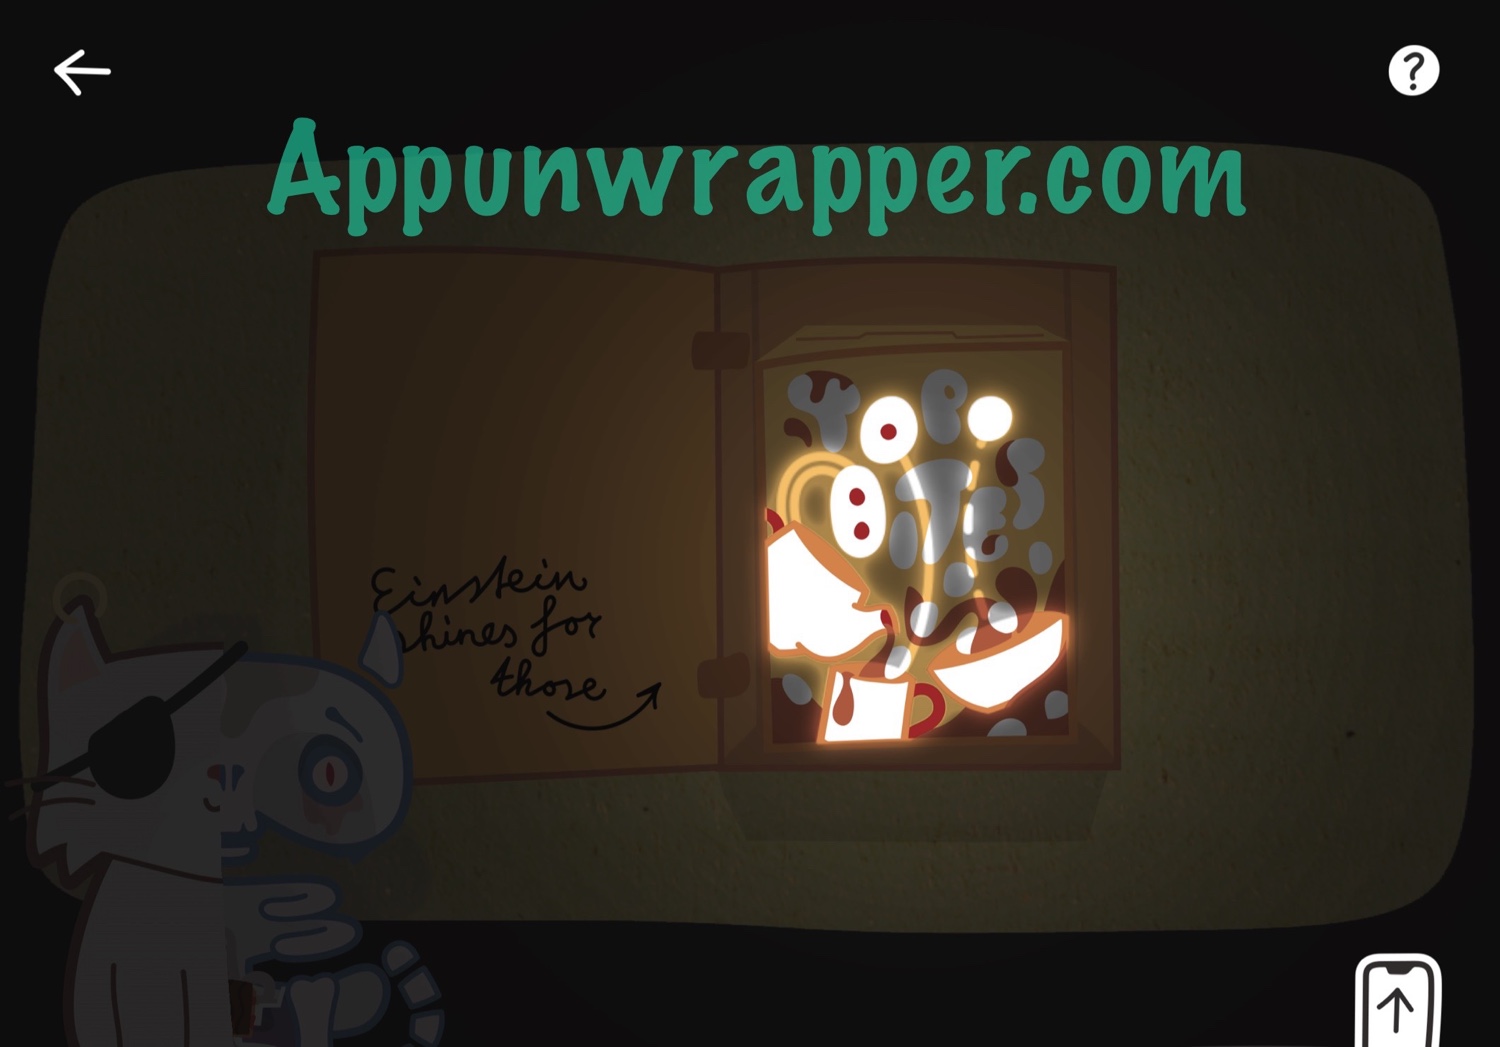
6. Swipe to turn right. We’re in the kitchen and there’s a lot to do here. First, open the cabinet and shake the box of Top Bites cereal to get a round clay object. Take it. Kitty Q will eat it, but you can rub her tummy to access your inventory. Also, notice the clue: “Einstein shines for those.”
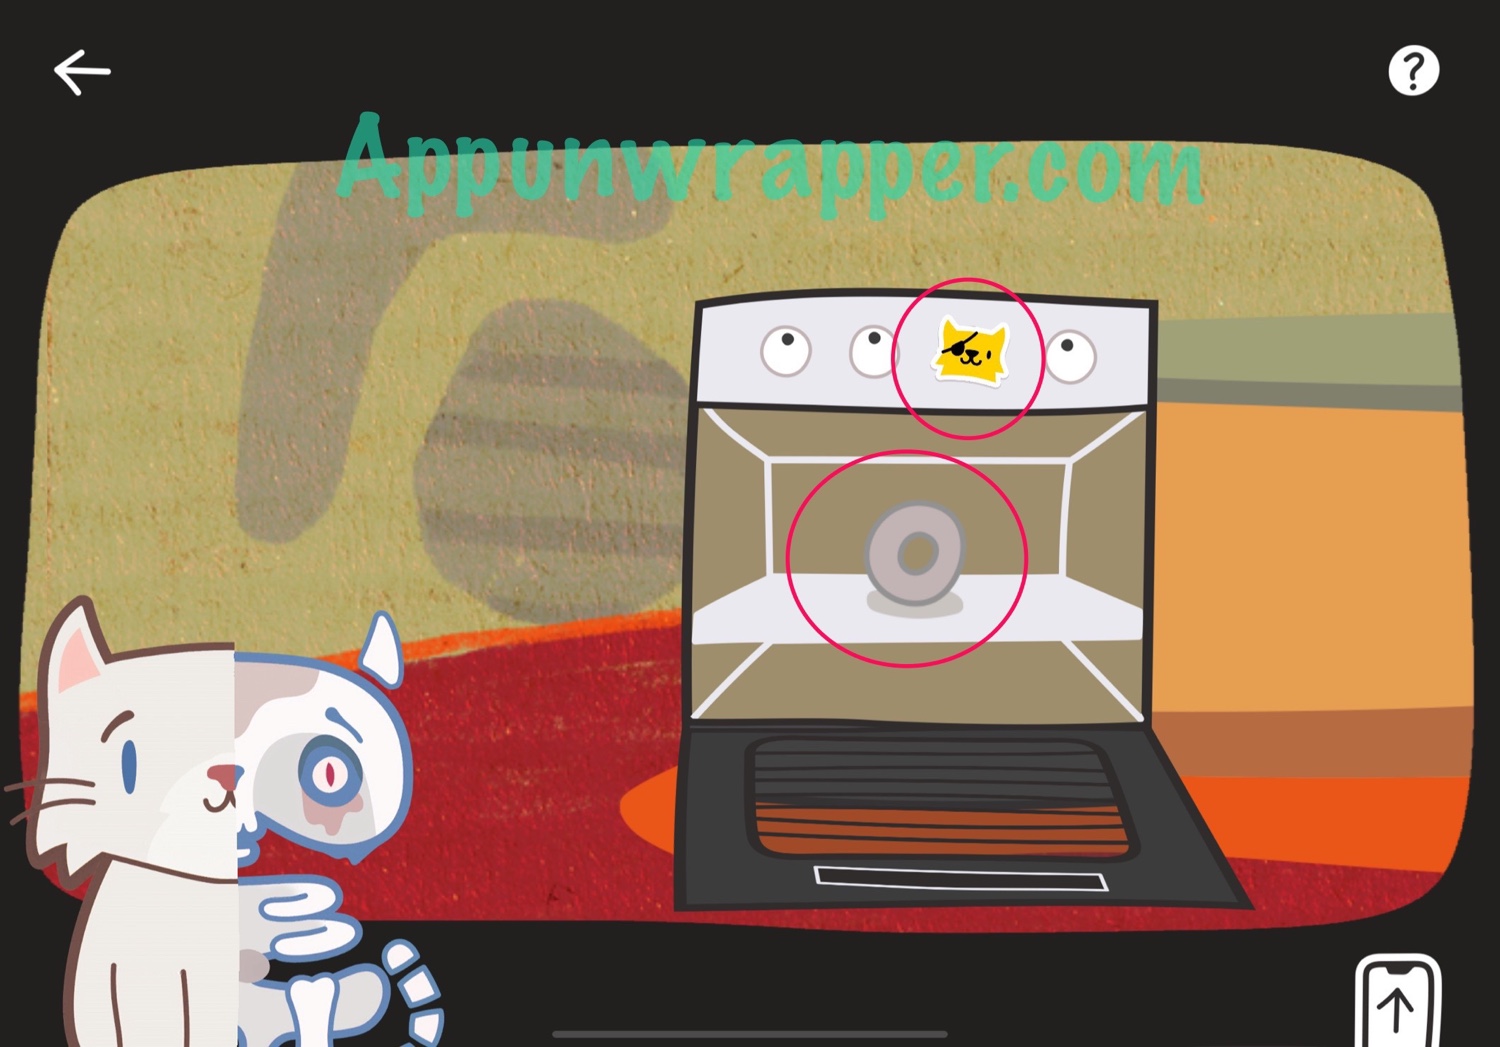
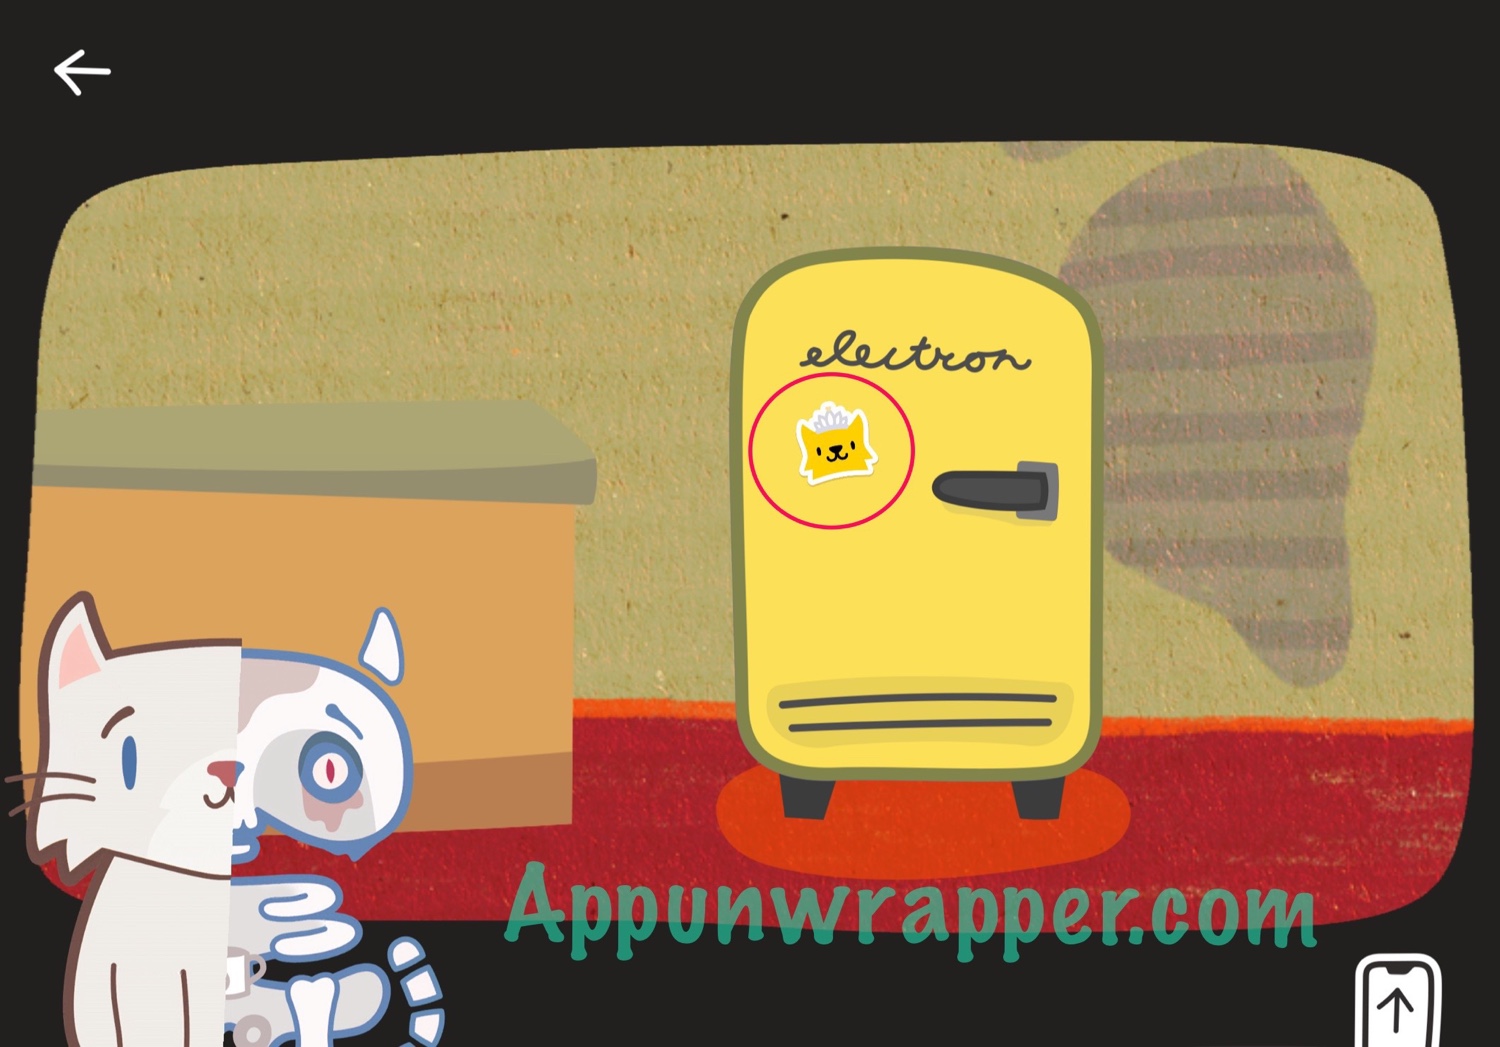
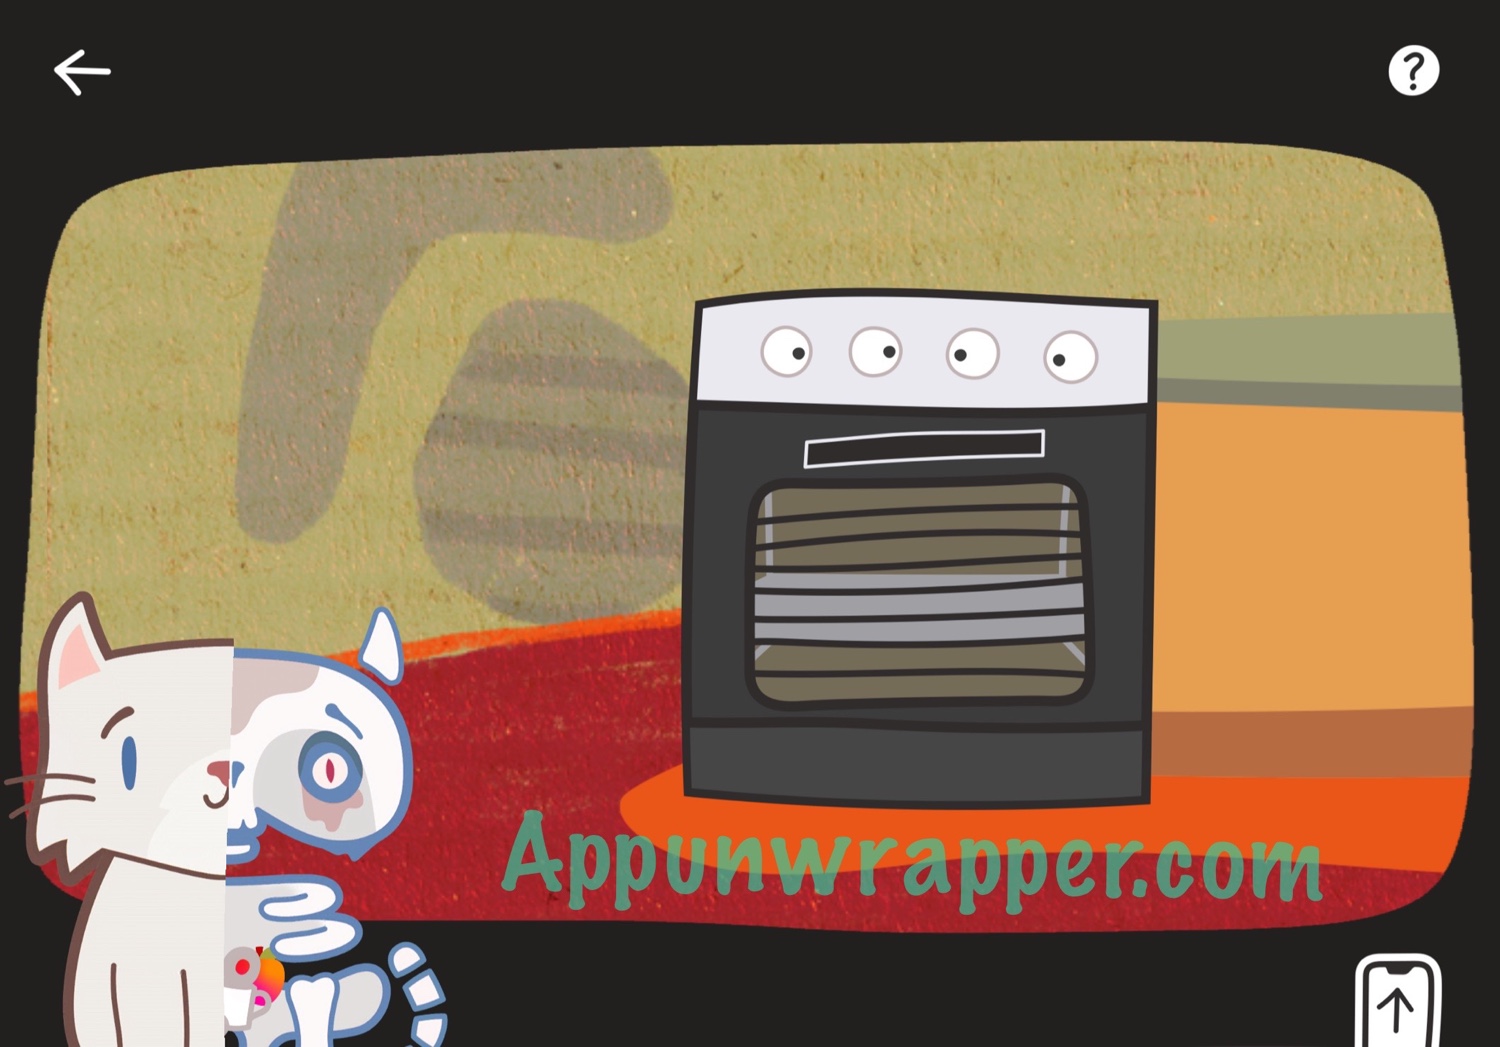
7. Tap on the oven and grab another sticker. Also, open the oven and take the clay donut.
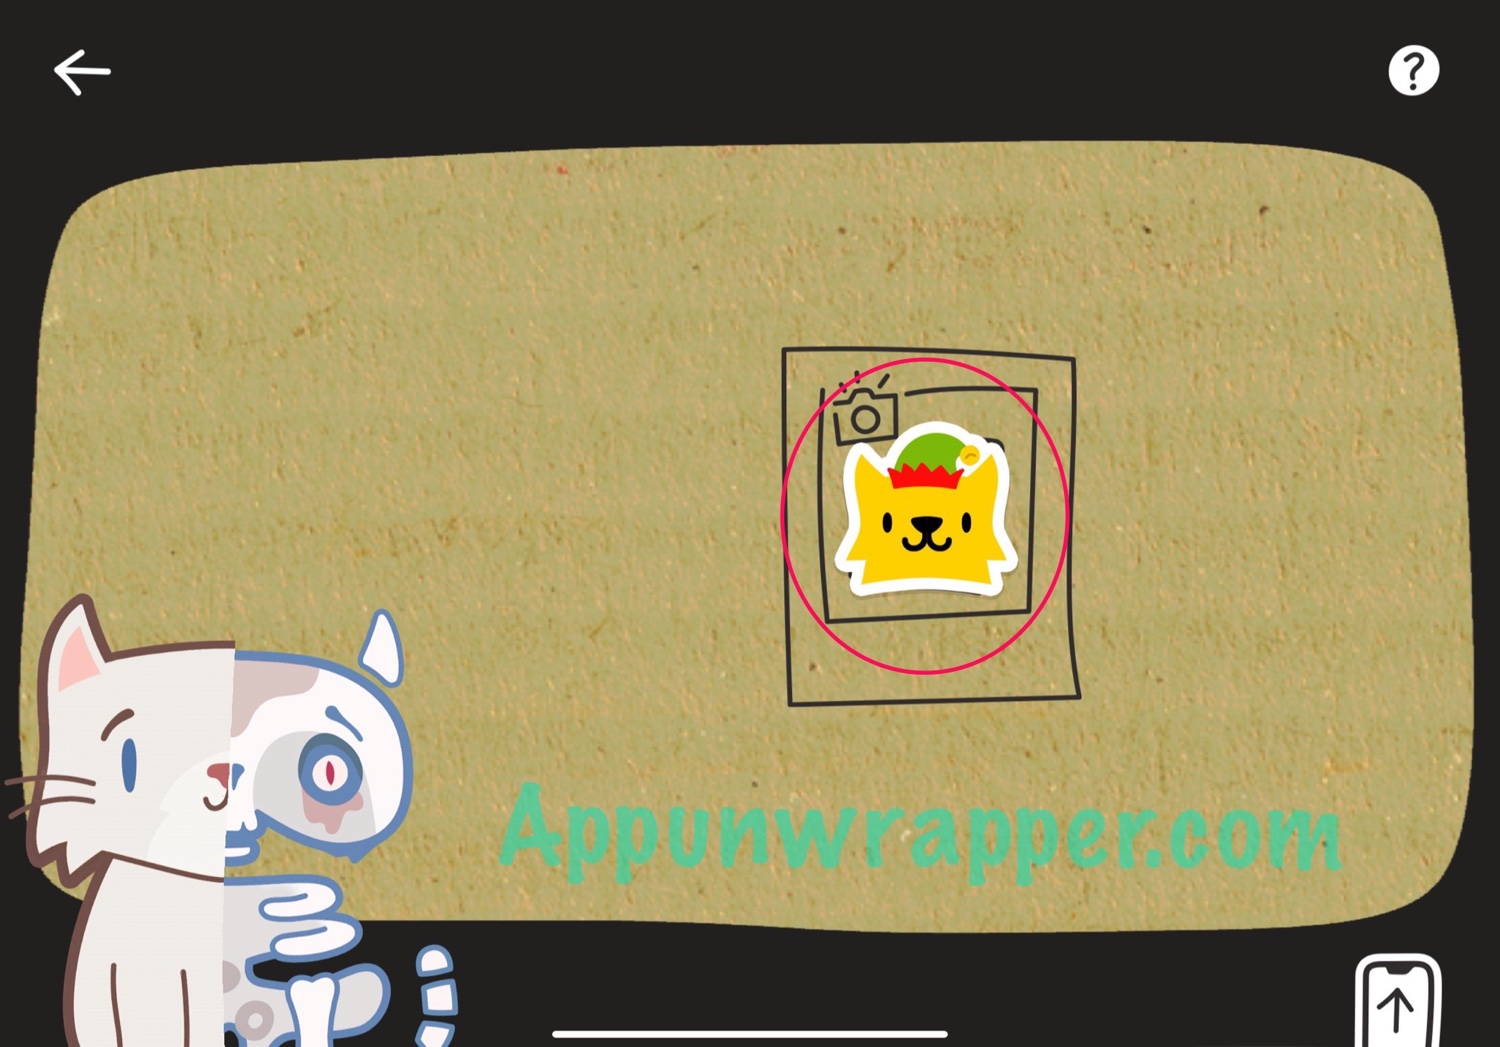
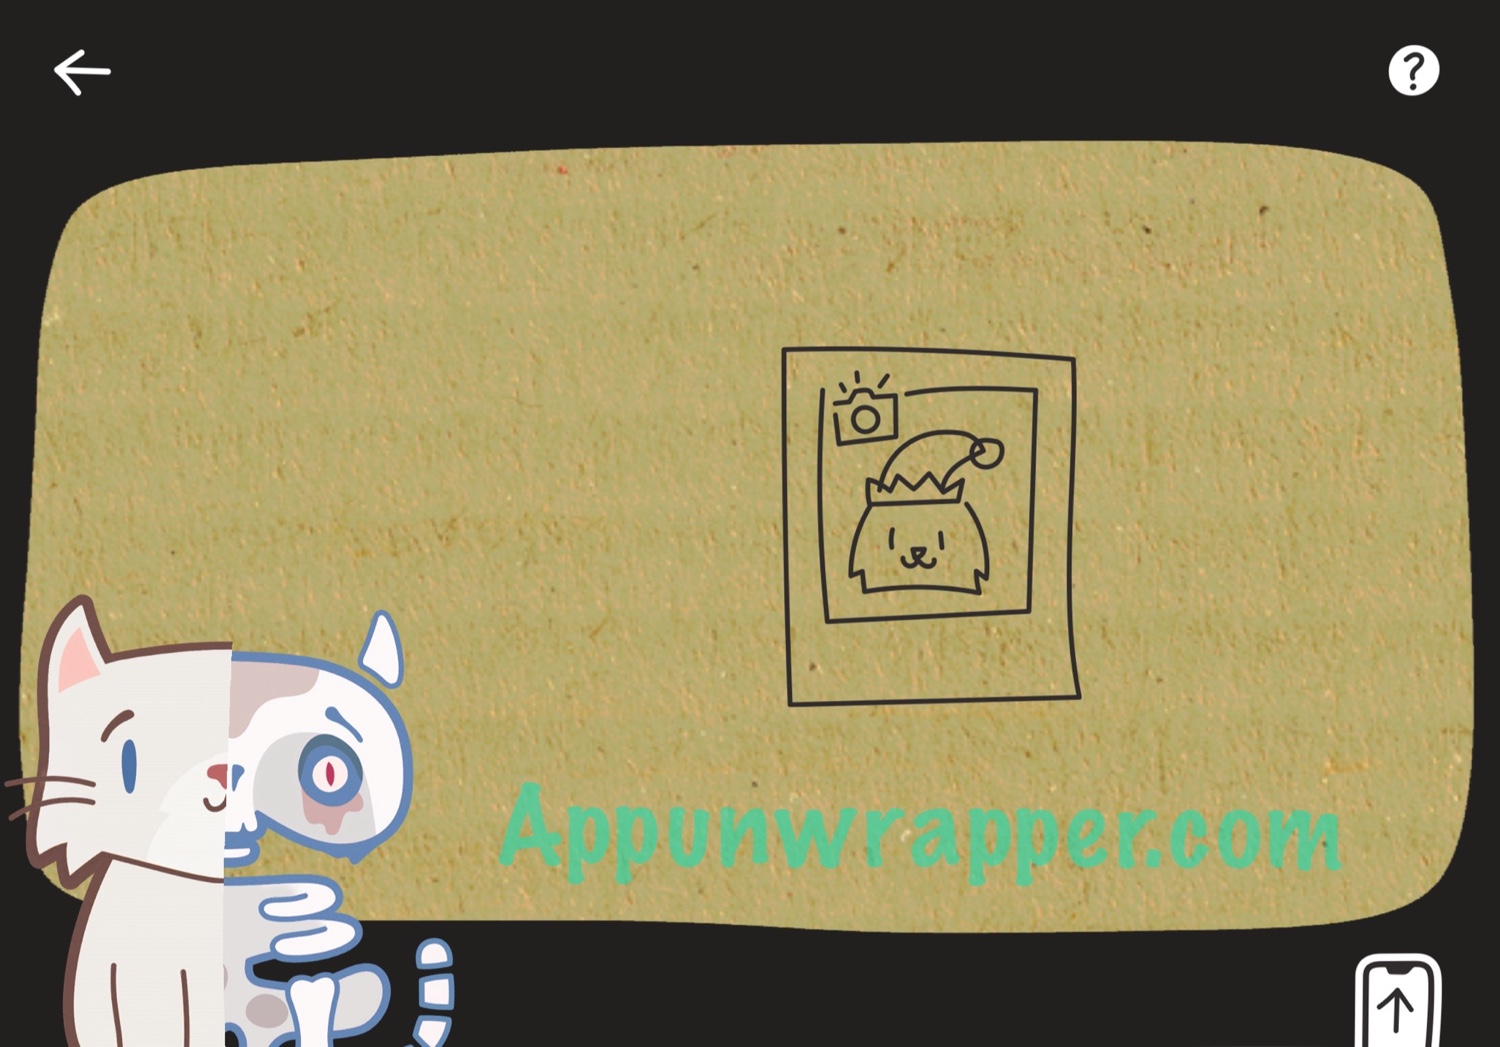
8. Go back. Grab the sticker from the wall and notice the clue that looks like a photograph of the cat wearing the elf hat. Also, notice there’s a poster missing.
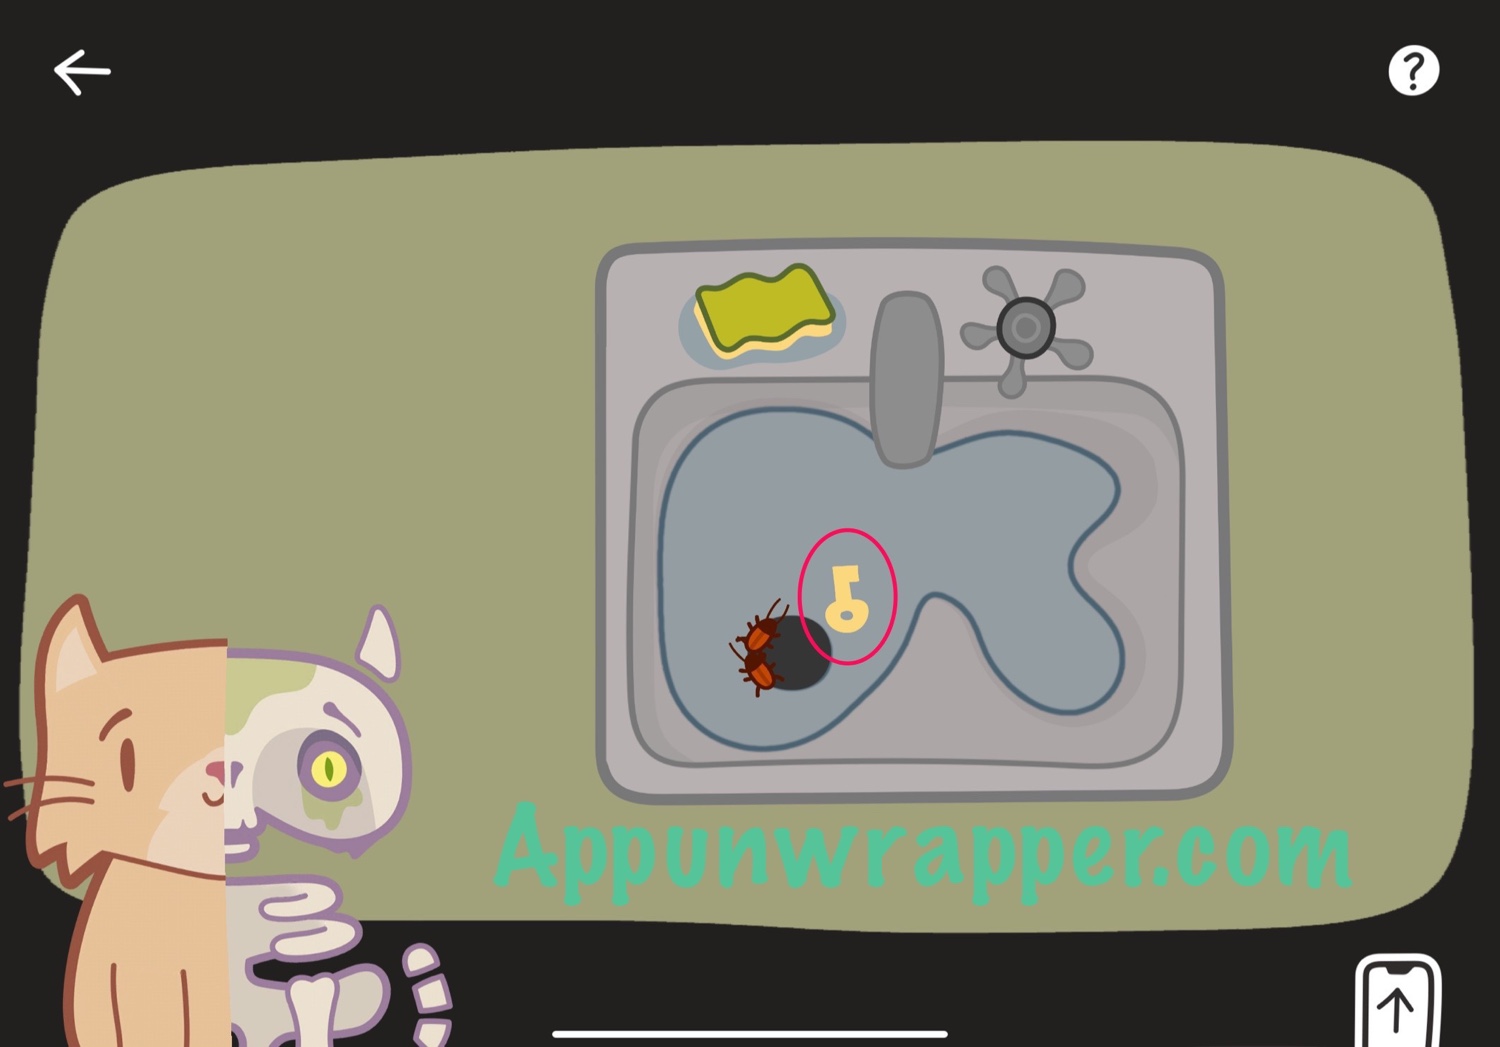
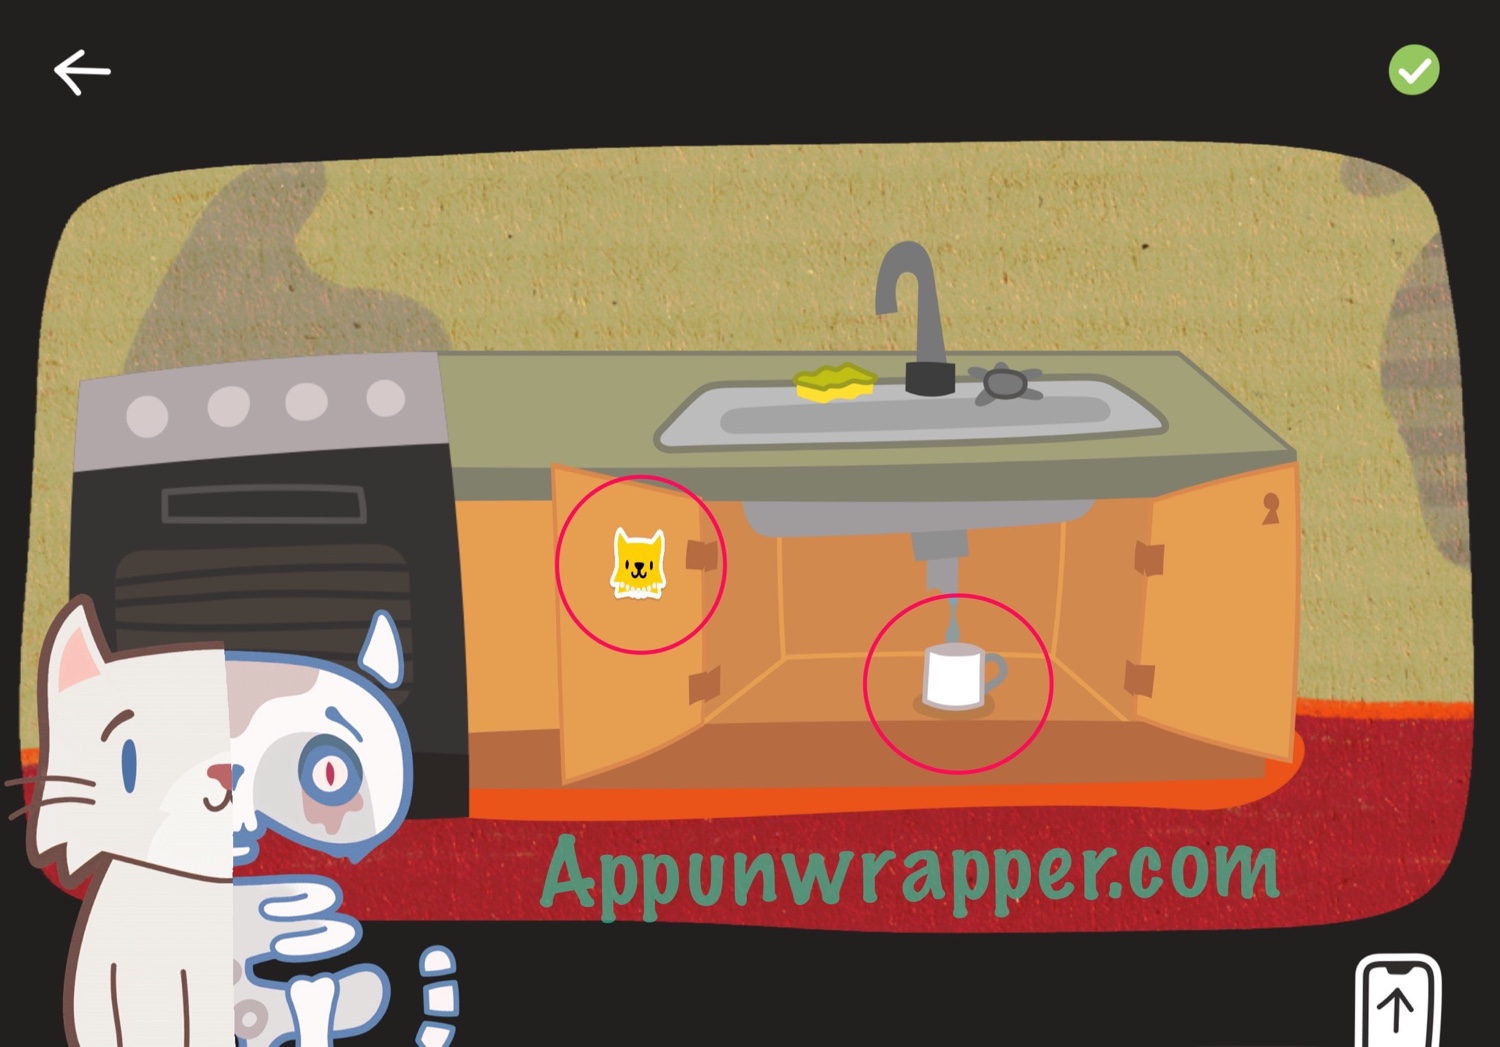
9. Tap on the sink. Turn the handle to fill the sink with water. You can use the sponge to remove water. Using the two, try to get the two roaches circling the drain so they’ll open it. Then take the key.
10. Use the key to unlock the cabinet under the sink. Take the mug and the sticker from inside.
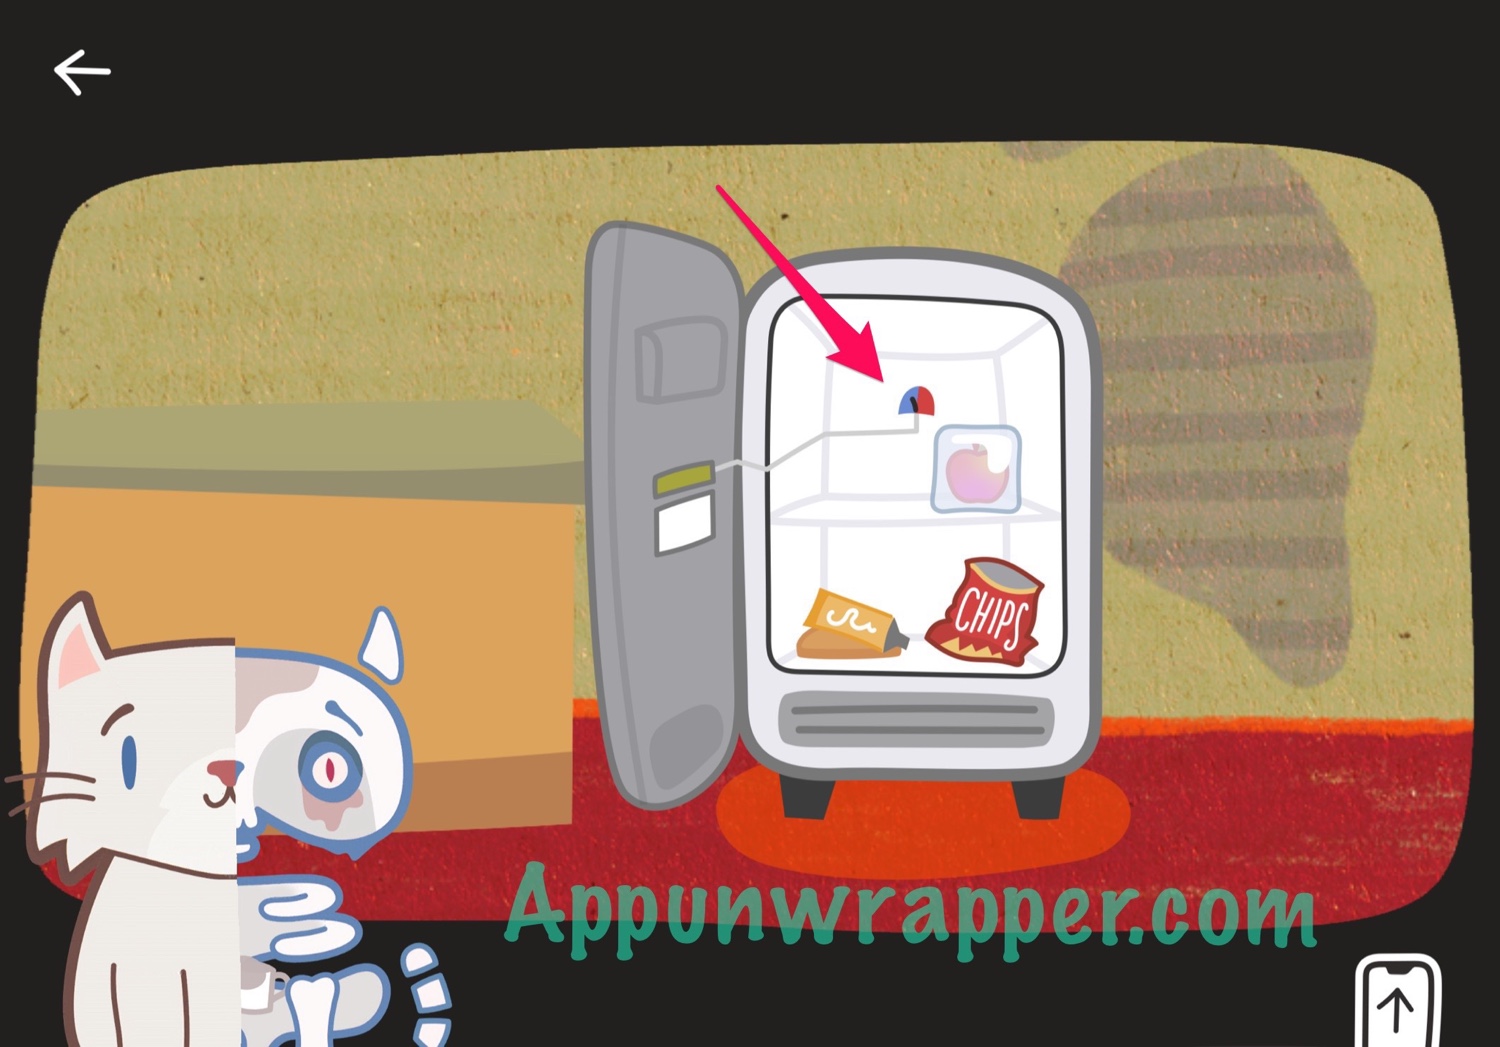
11. Go back. Tap on the fridge and take the sticker. Then open the fridge. Notice the apple is frozen. Look at the temperature gauge to see how to make the fridge warmer.
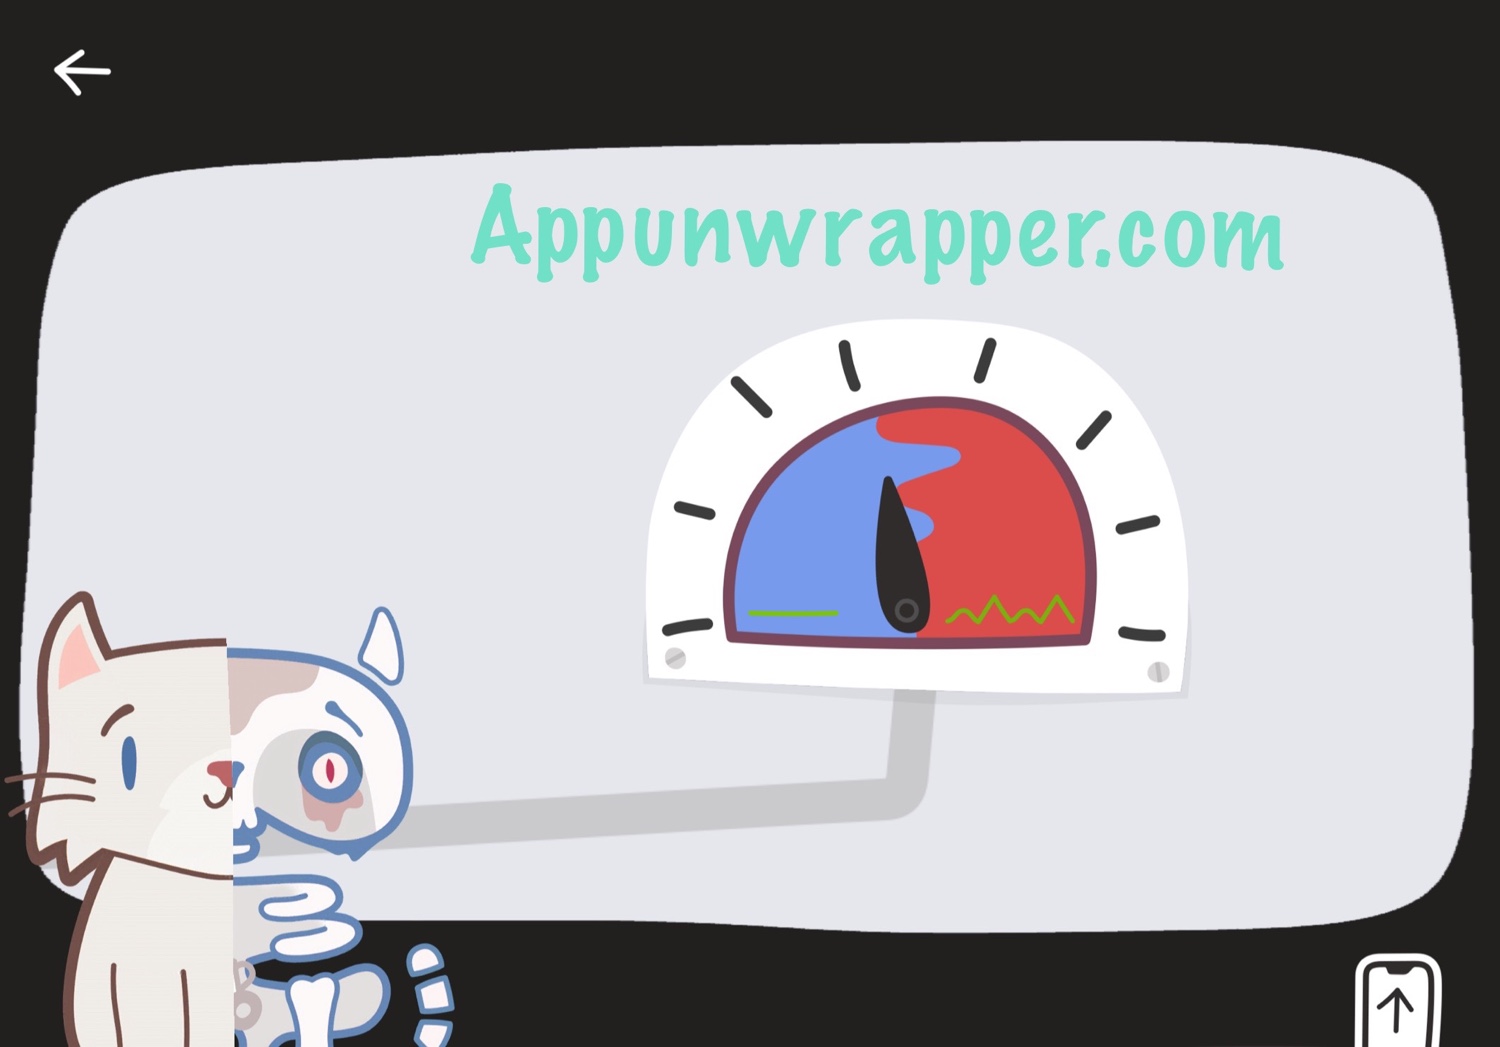
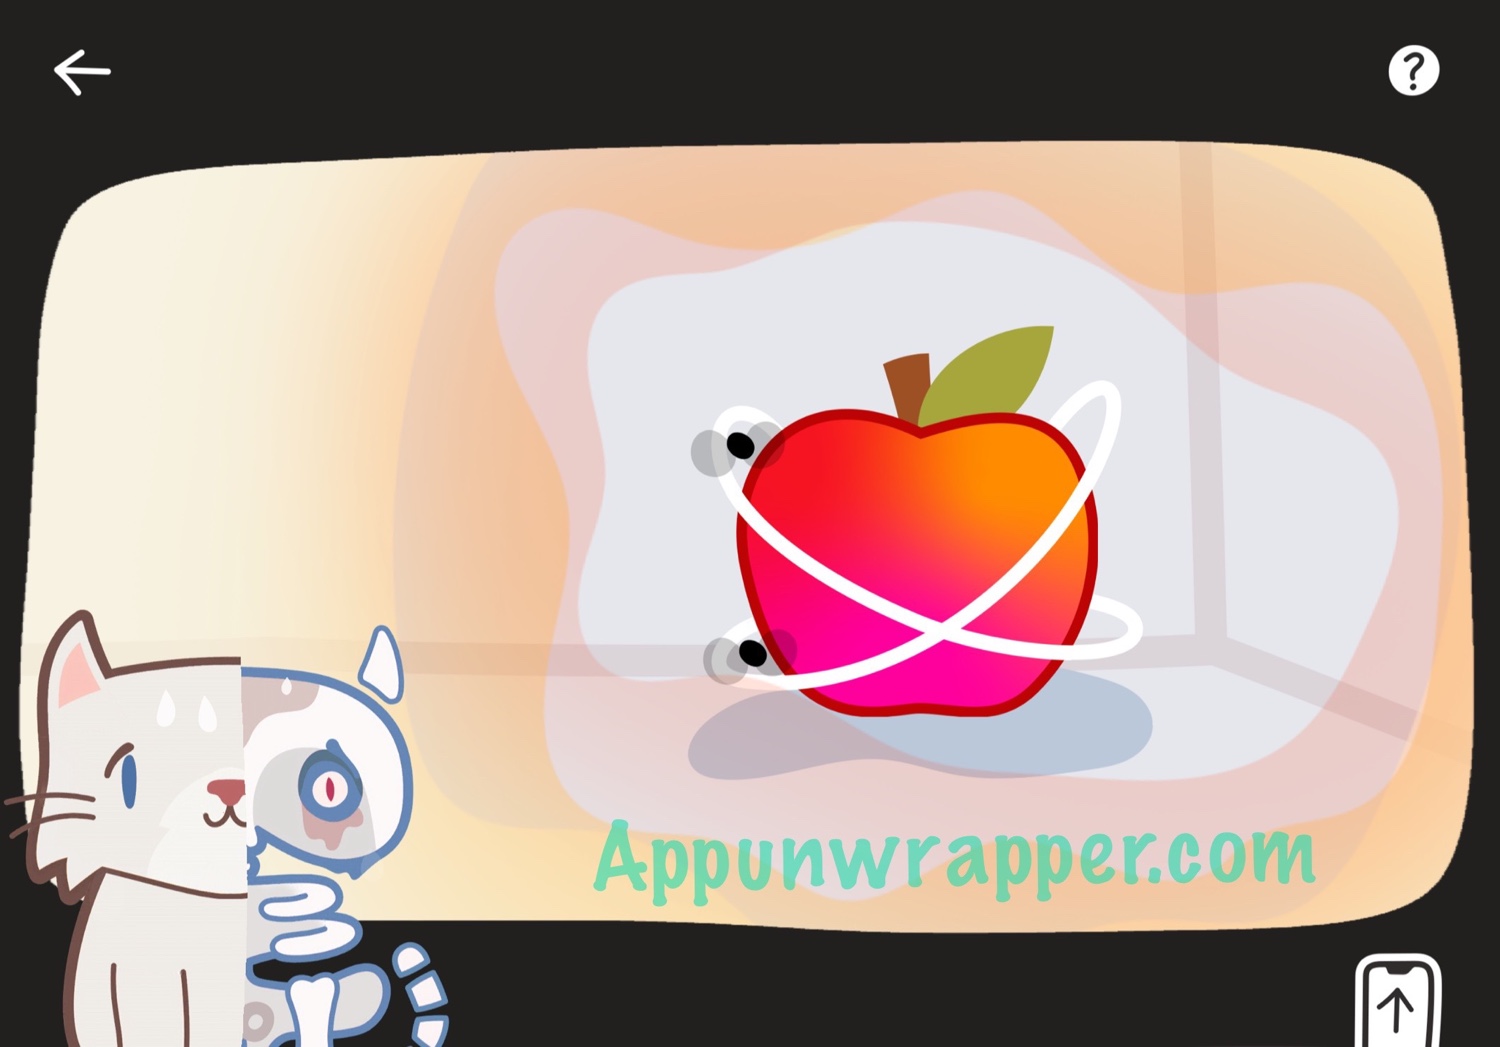
12. Tap on the door and adjust the radio waves to make the same shape that looks like cat ears. If you got it right, Kitty Q will start sweating. The apple should be defrosted now, but there are flies buzzing around it.
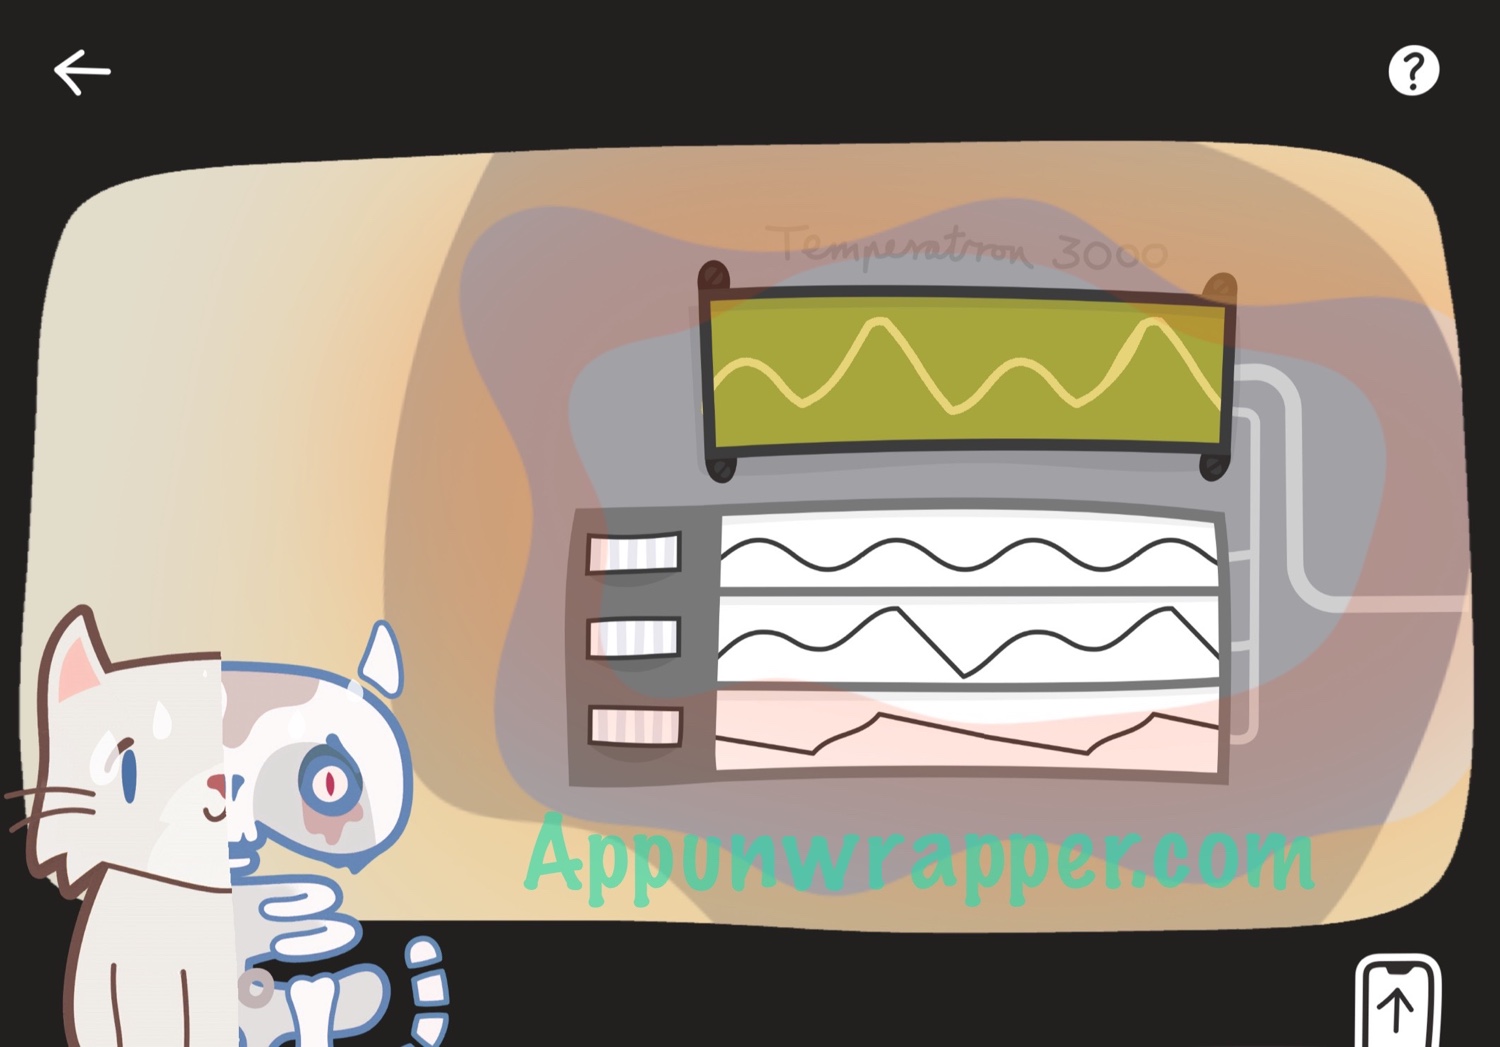
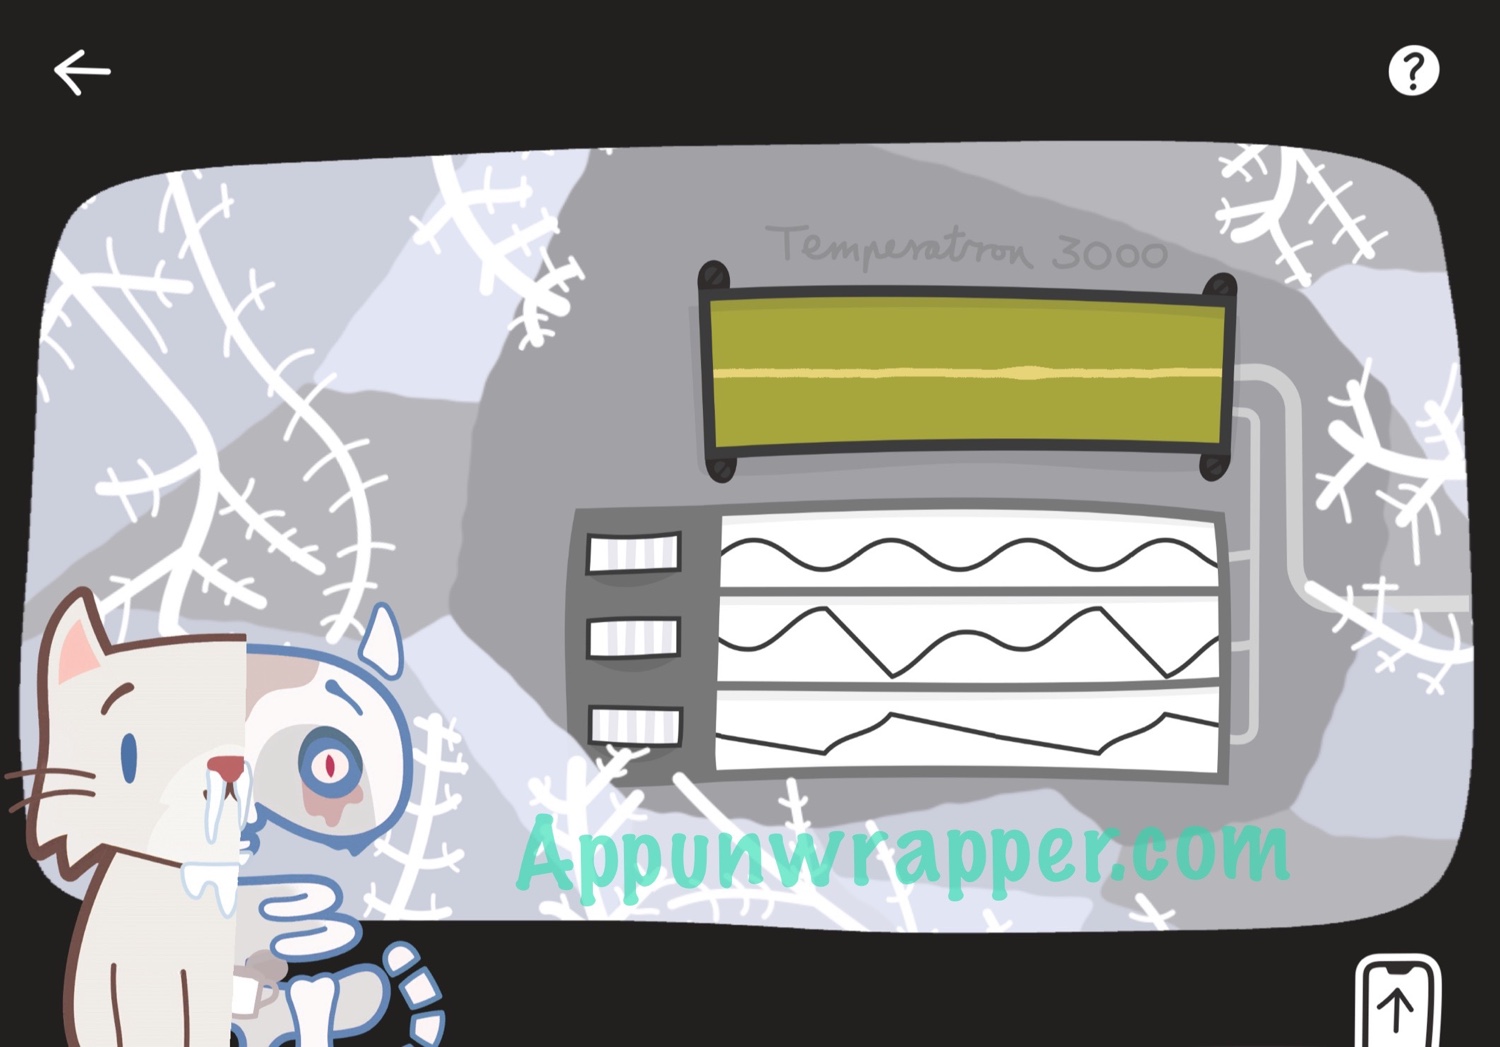
13. Go back to the door and change the temperature again. This time, make a straight line so the freezer will get cold again. Now the flies faint. Take the apple.
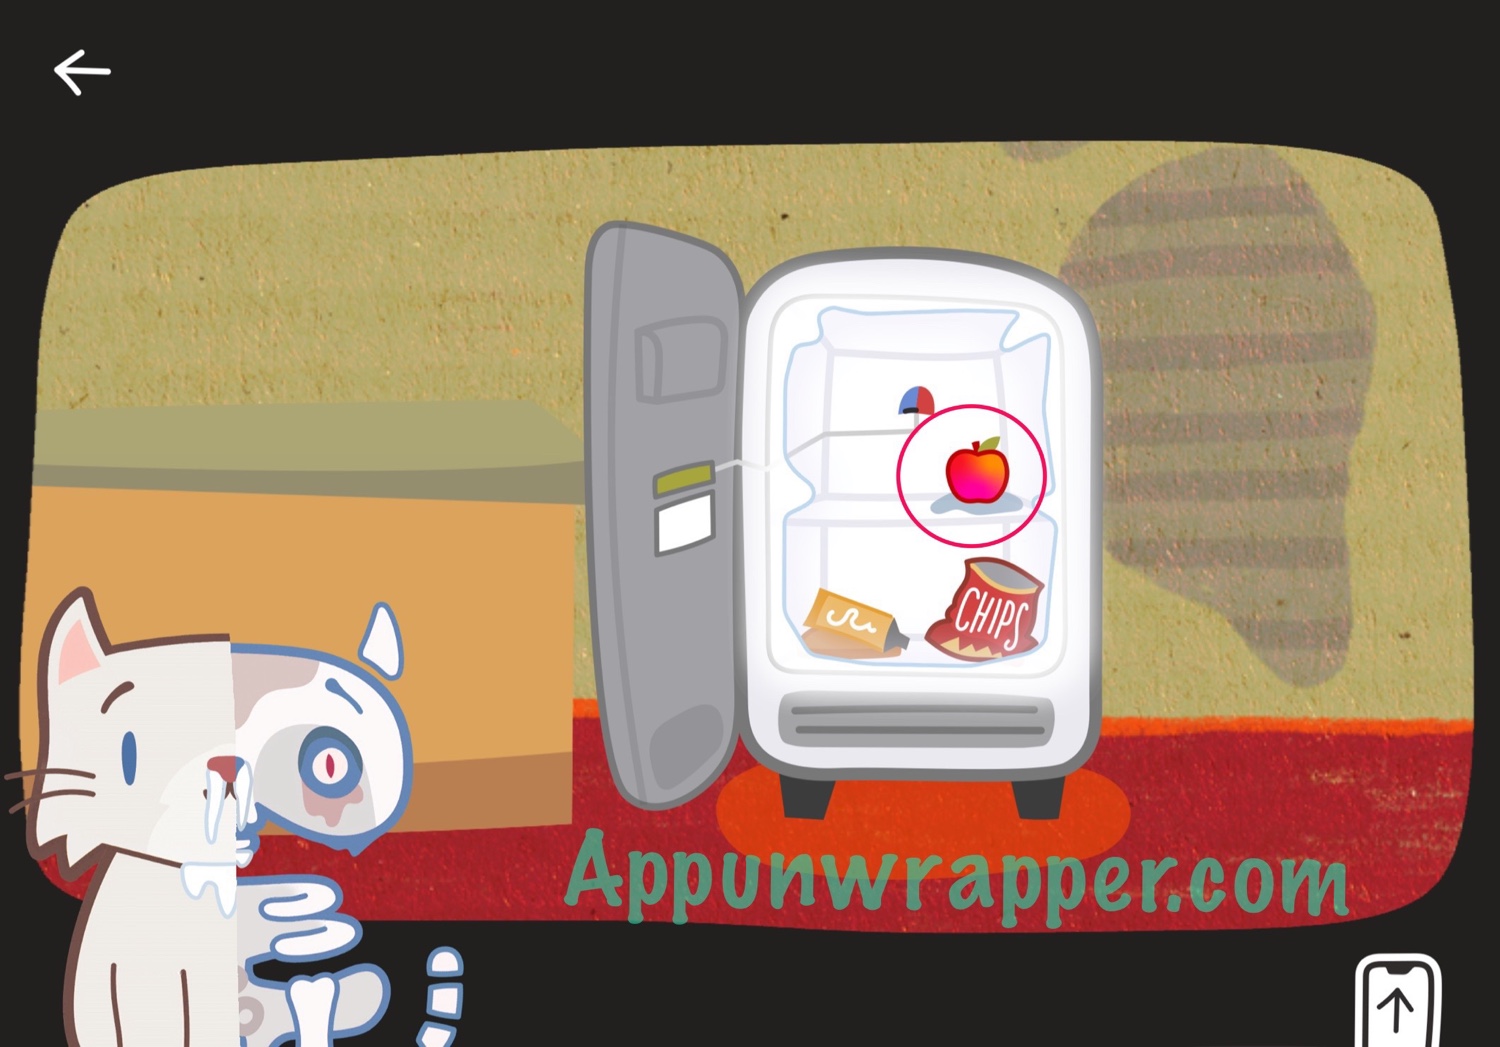
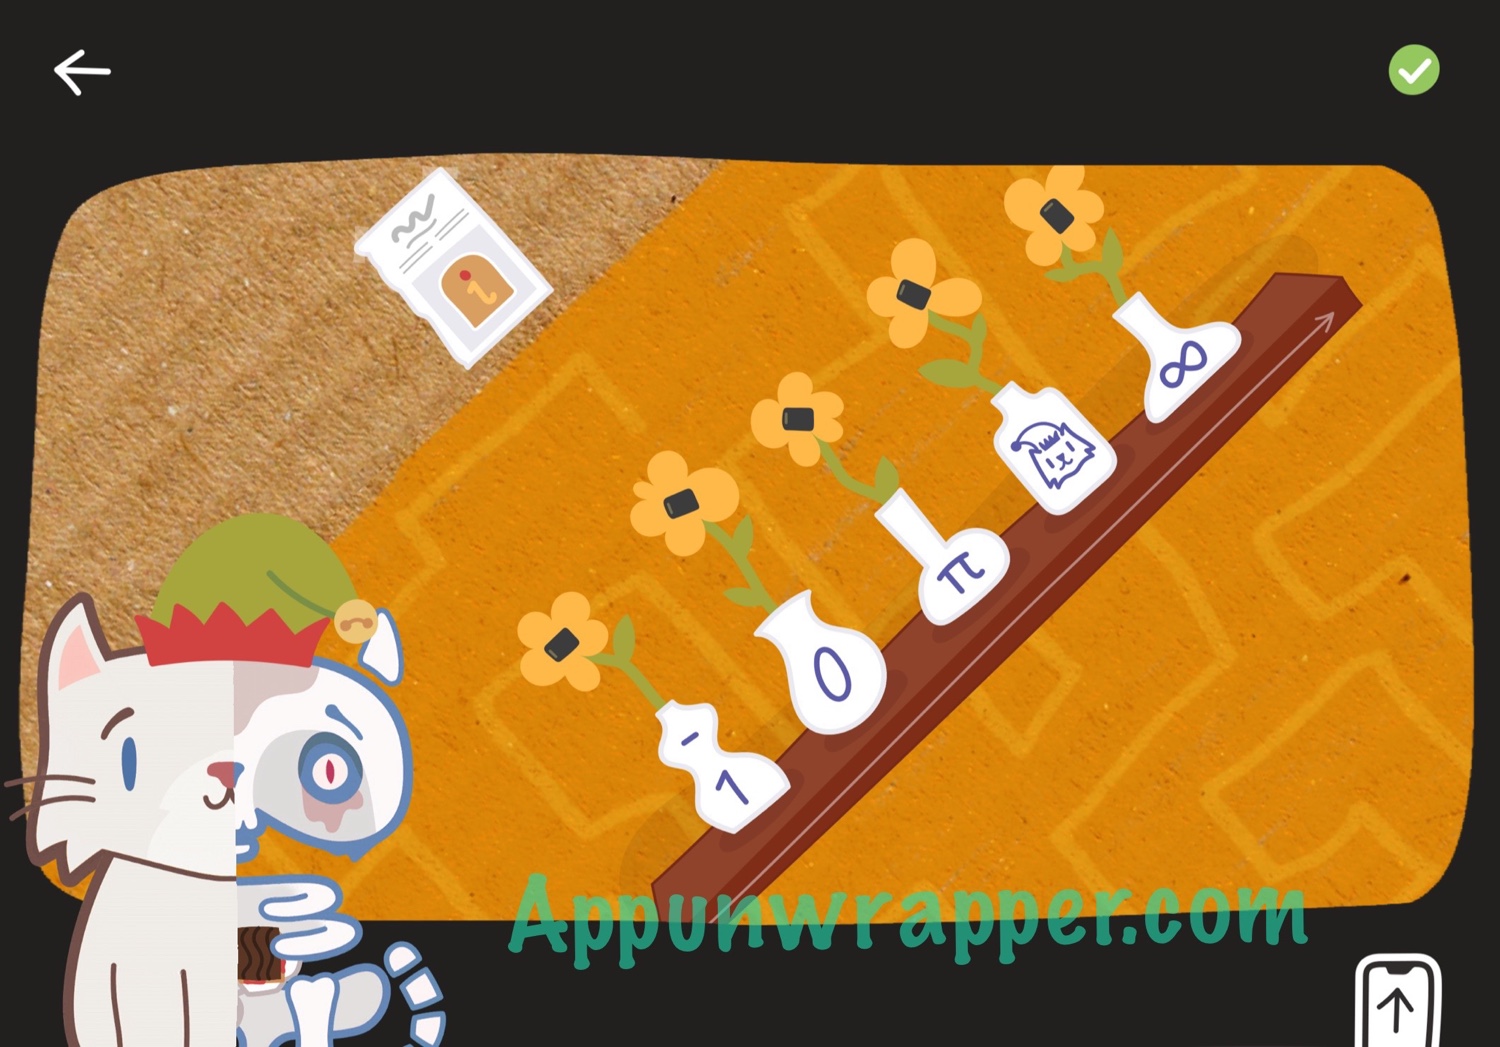
14. Now go examine the bag of chips. Move the pieces around so they form two symbols. Ignore the toast and ketchup/mustard for now. Leave the fridge.
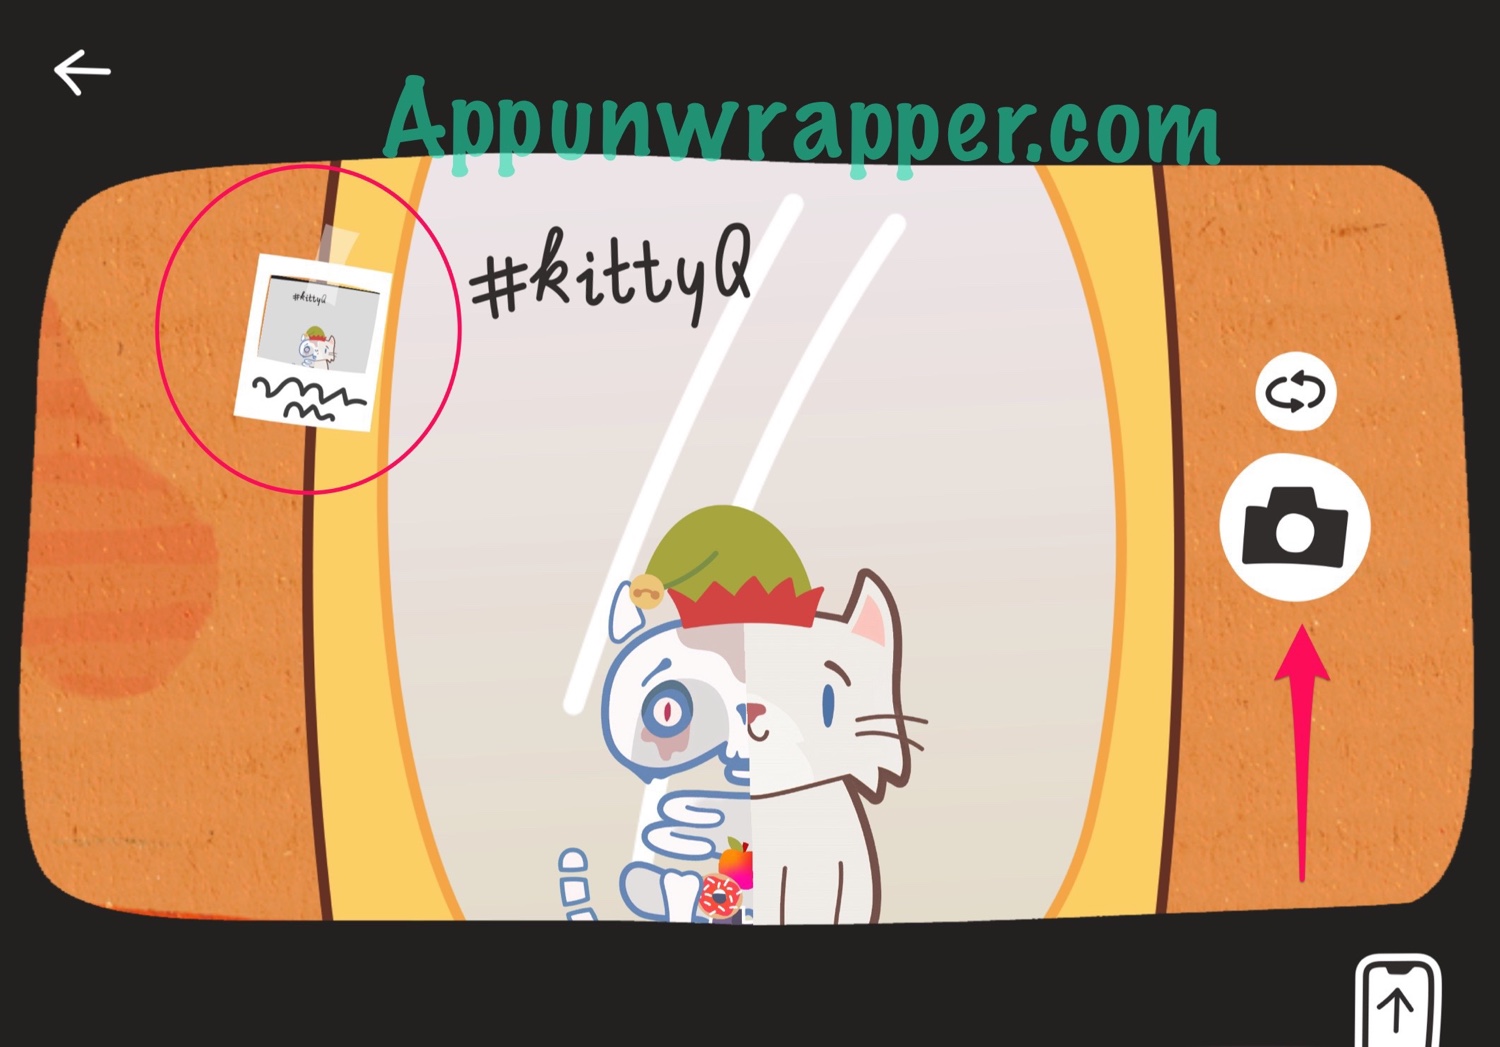
15. Go back to the mirror. Remember the clue we saw on the wall with the elf hat? Put on the elf hat and then look in the mirror. Take a photo of your reflection. Then grab the photo.
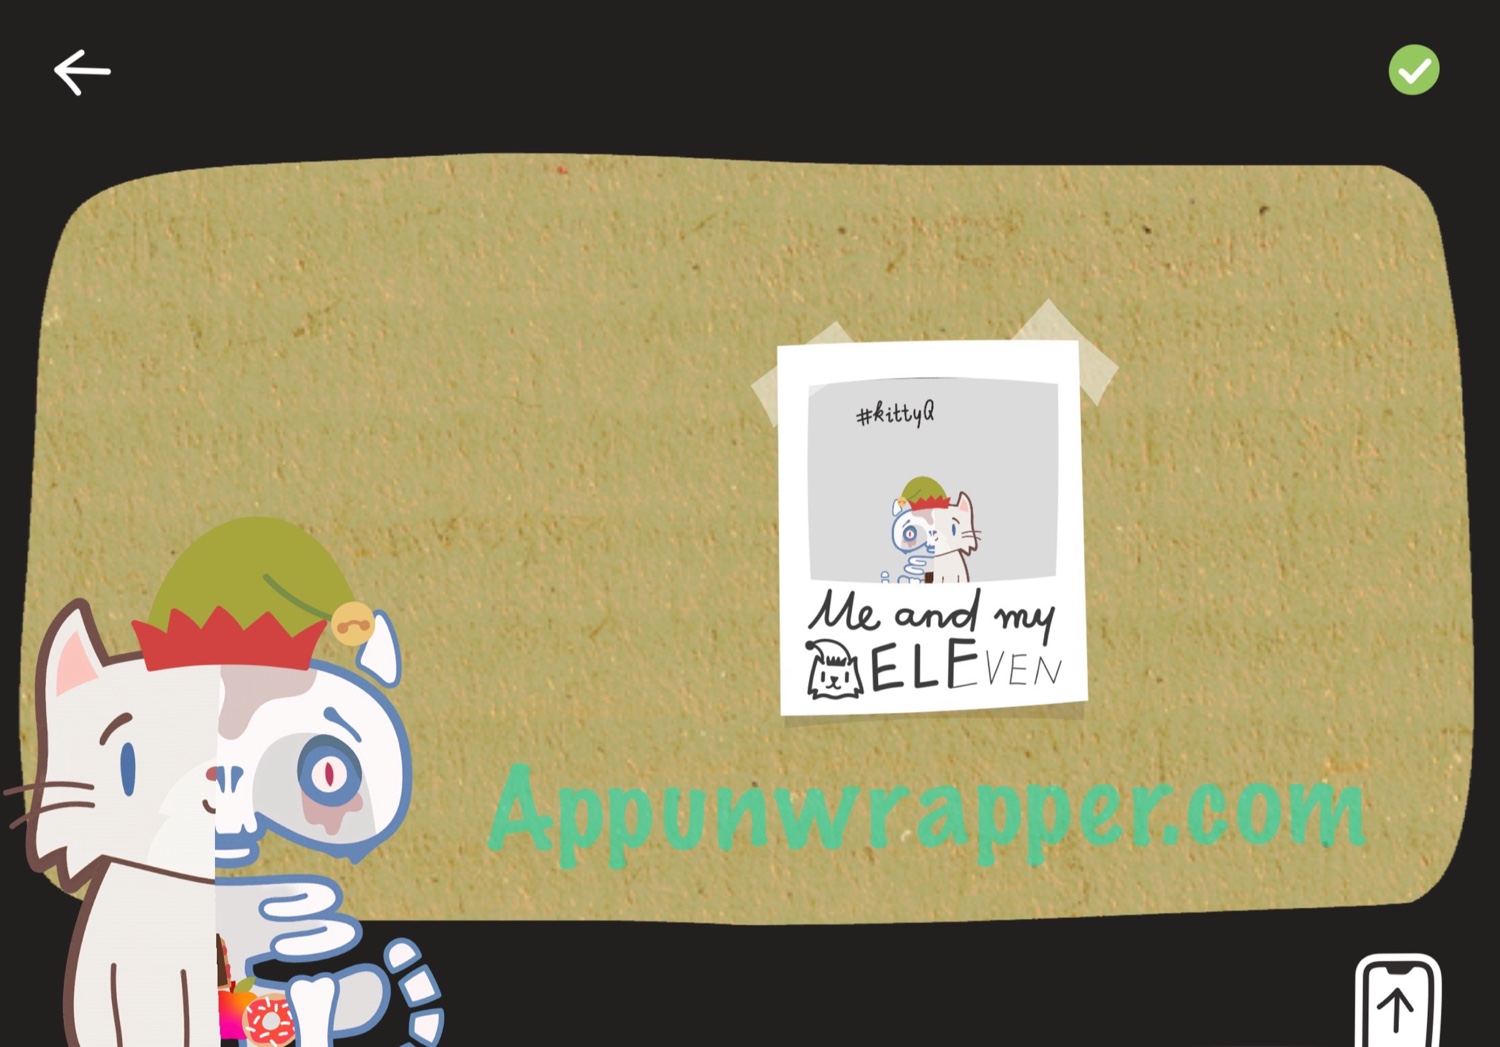
16. Go back to the kitchen. Place the photo on the wall to get a clue. It says: “Me and my ELEVEN.”
17. Turn right to see the waving lucky cat. tap on the jars. Grab the sticker from the rightmost bottle.
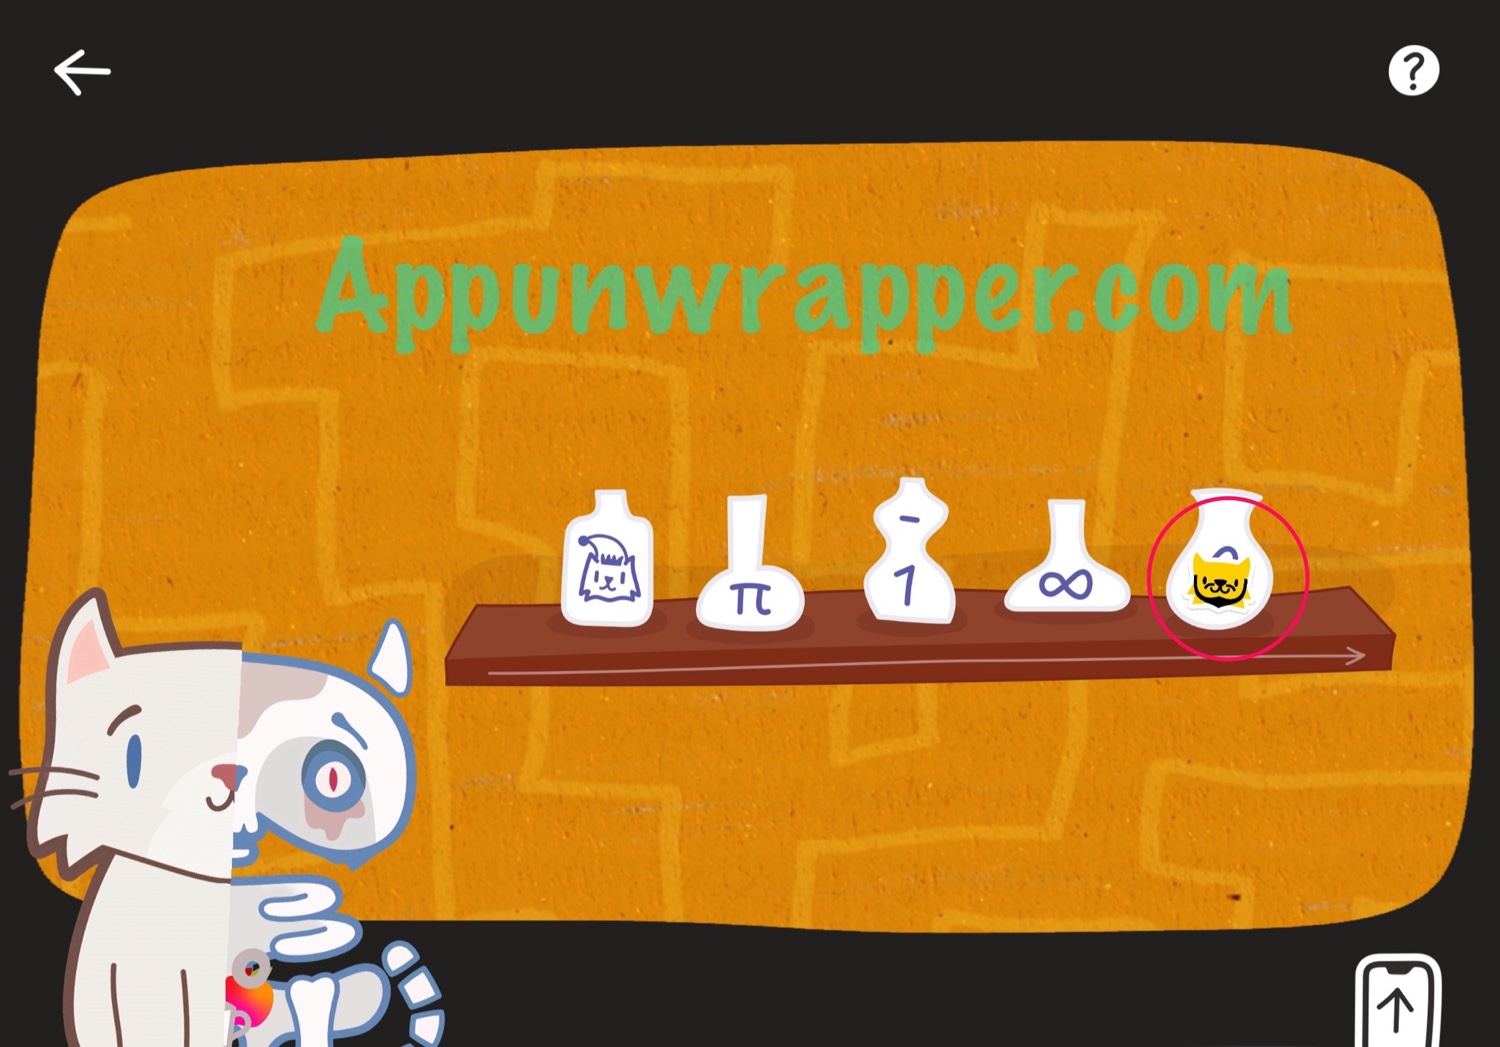
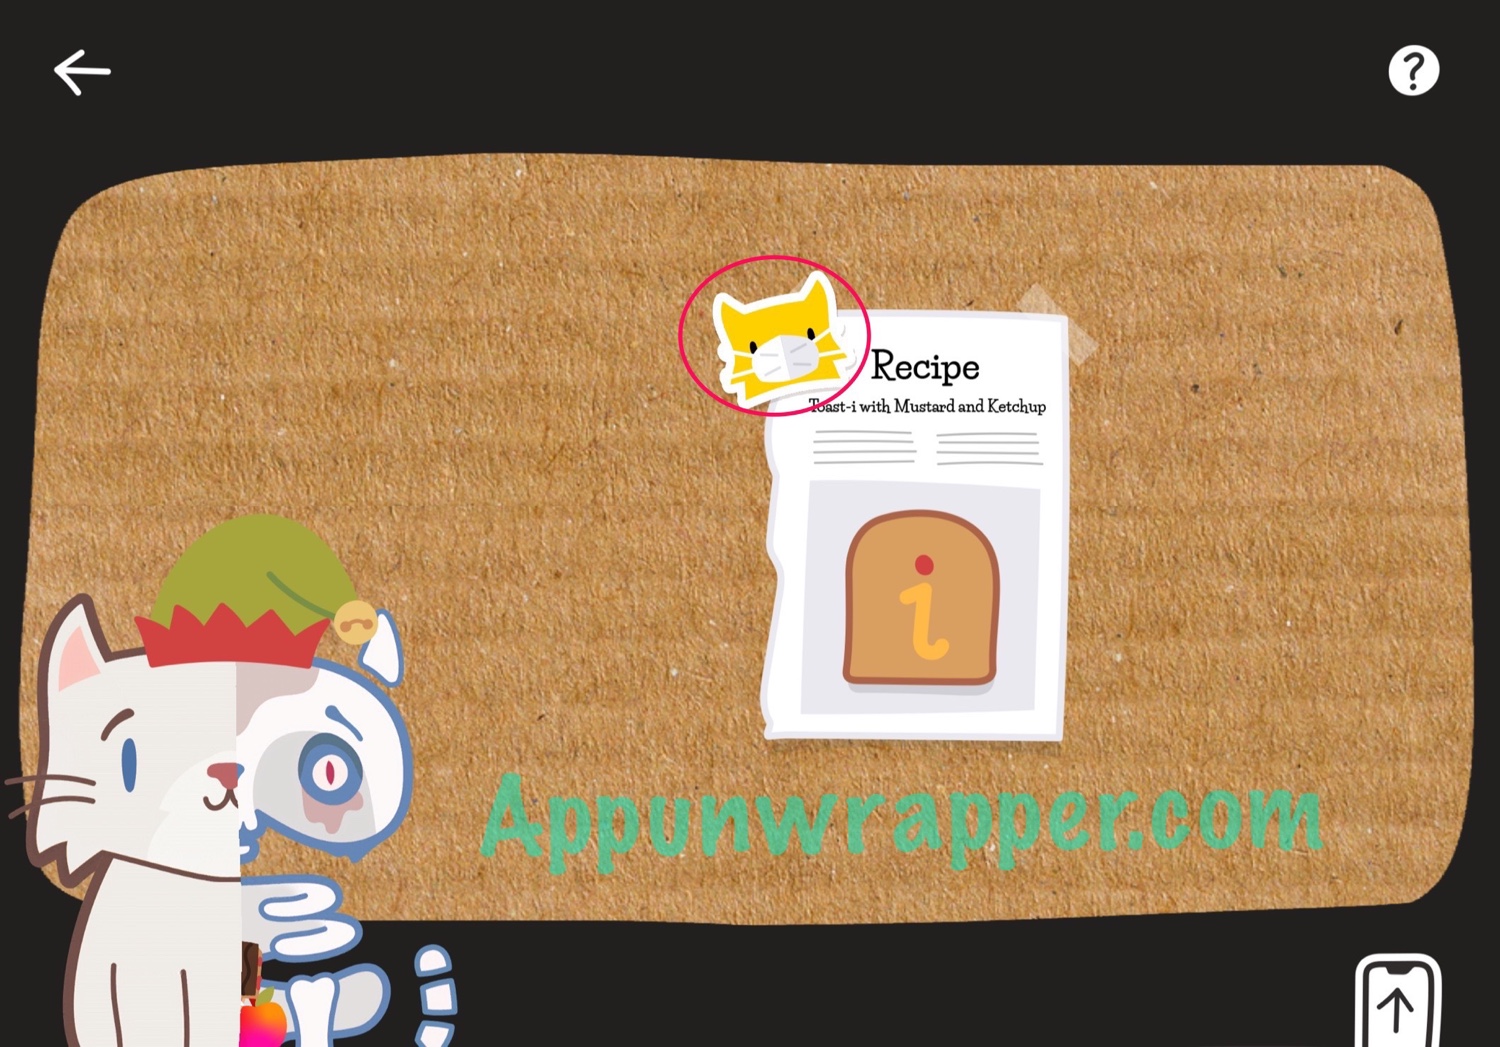
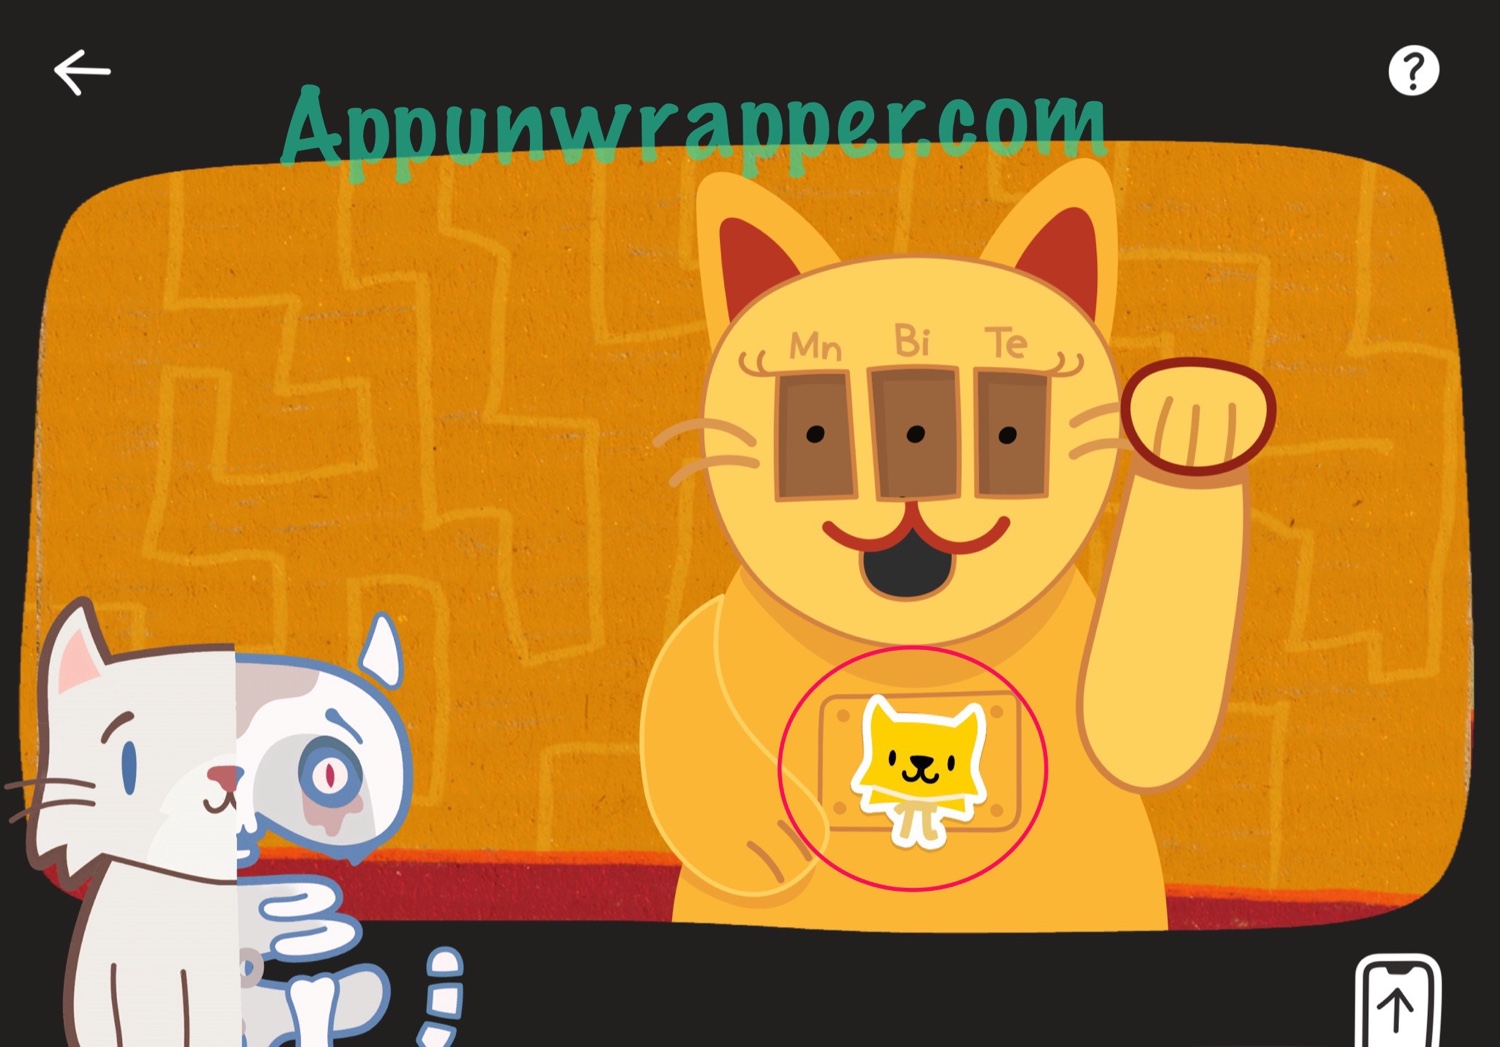
18. From the photo, we know that the cat with the elf hat represents the number 11. The arrow tells you to organize them in ascending order. So it goes -1, 0, pi (3.14), 11, infinity. Flowers will sprout and you can now rotate the screen to access a recipe above them. Grab the sticker and memorize the pattern to make a Toast-i with Mustard and Ketchup.
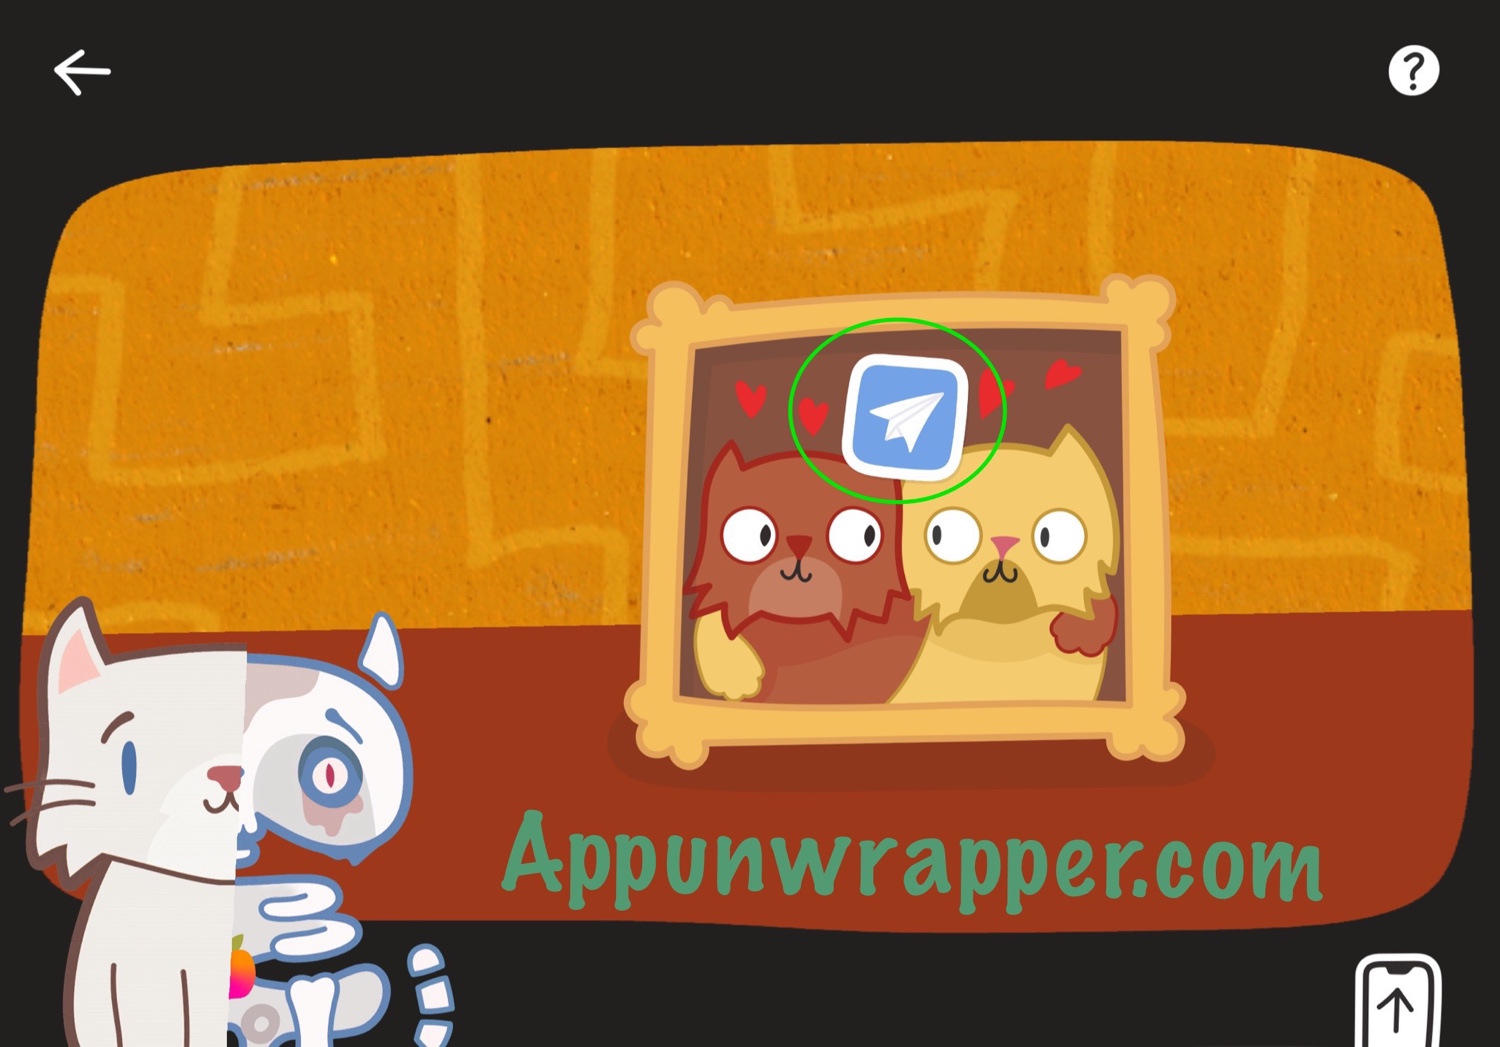
19. Zoom back out. Tap on the framed photo. If you tap it a few times, Anna asks why they don’t look interested in each other. Notice their eyes look familiar.
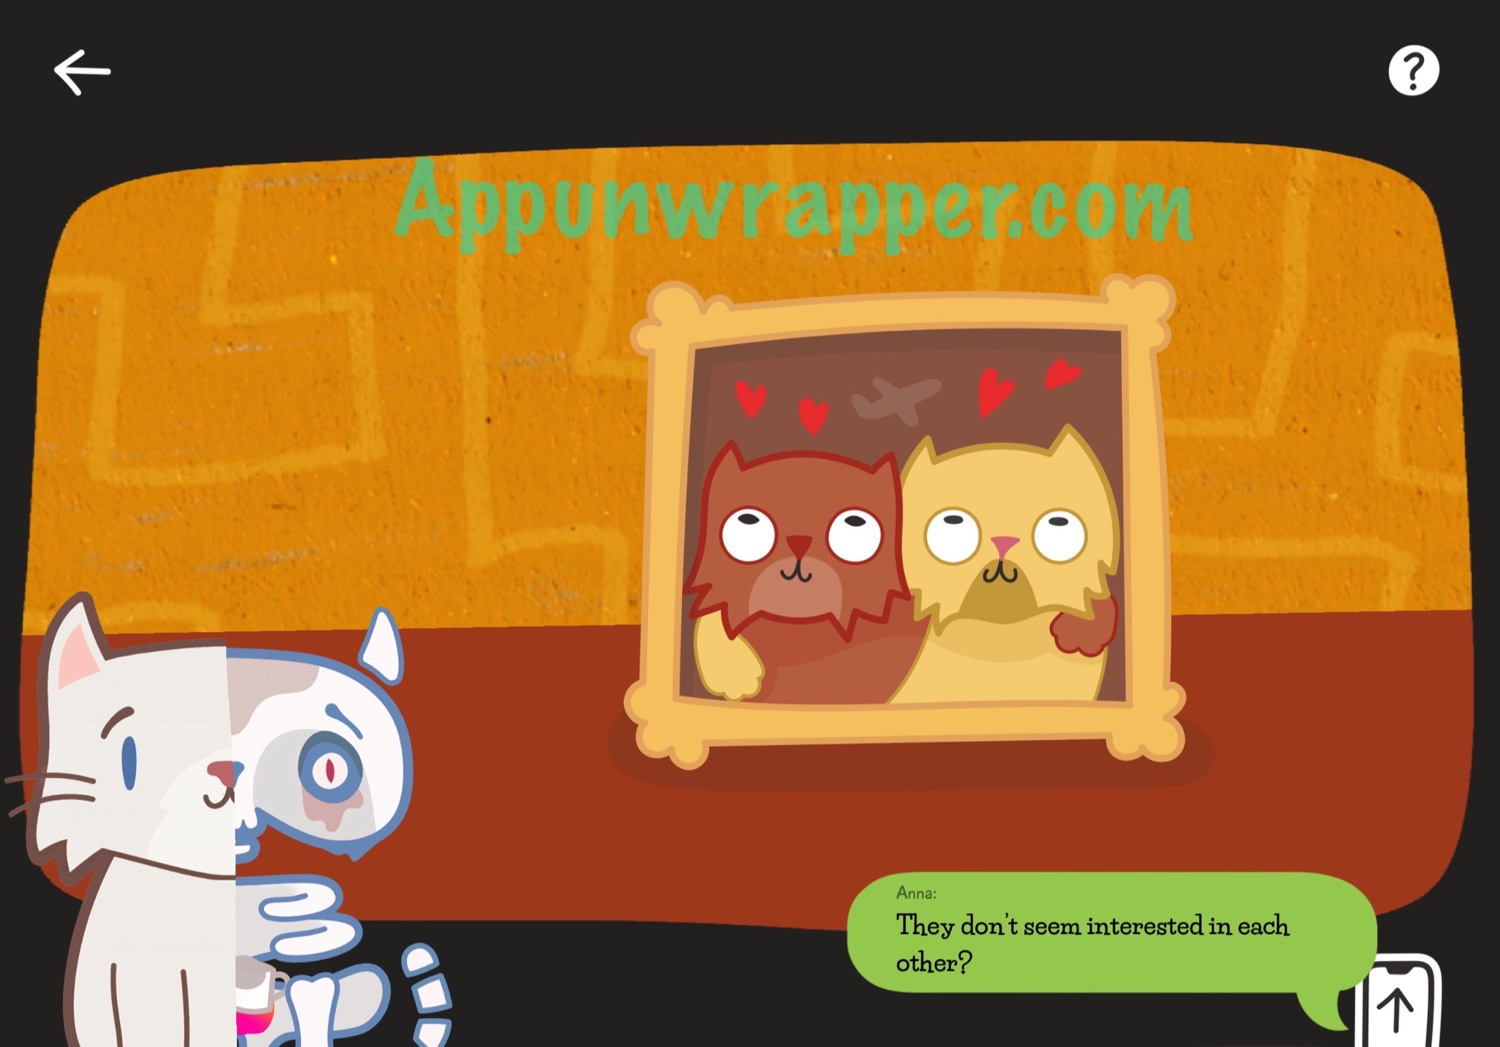
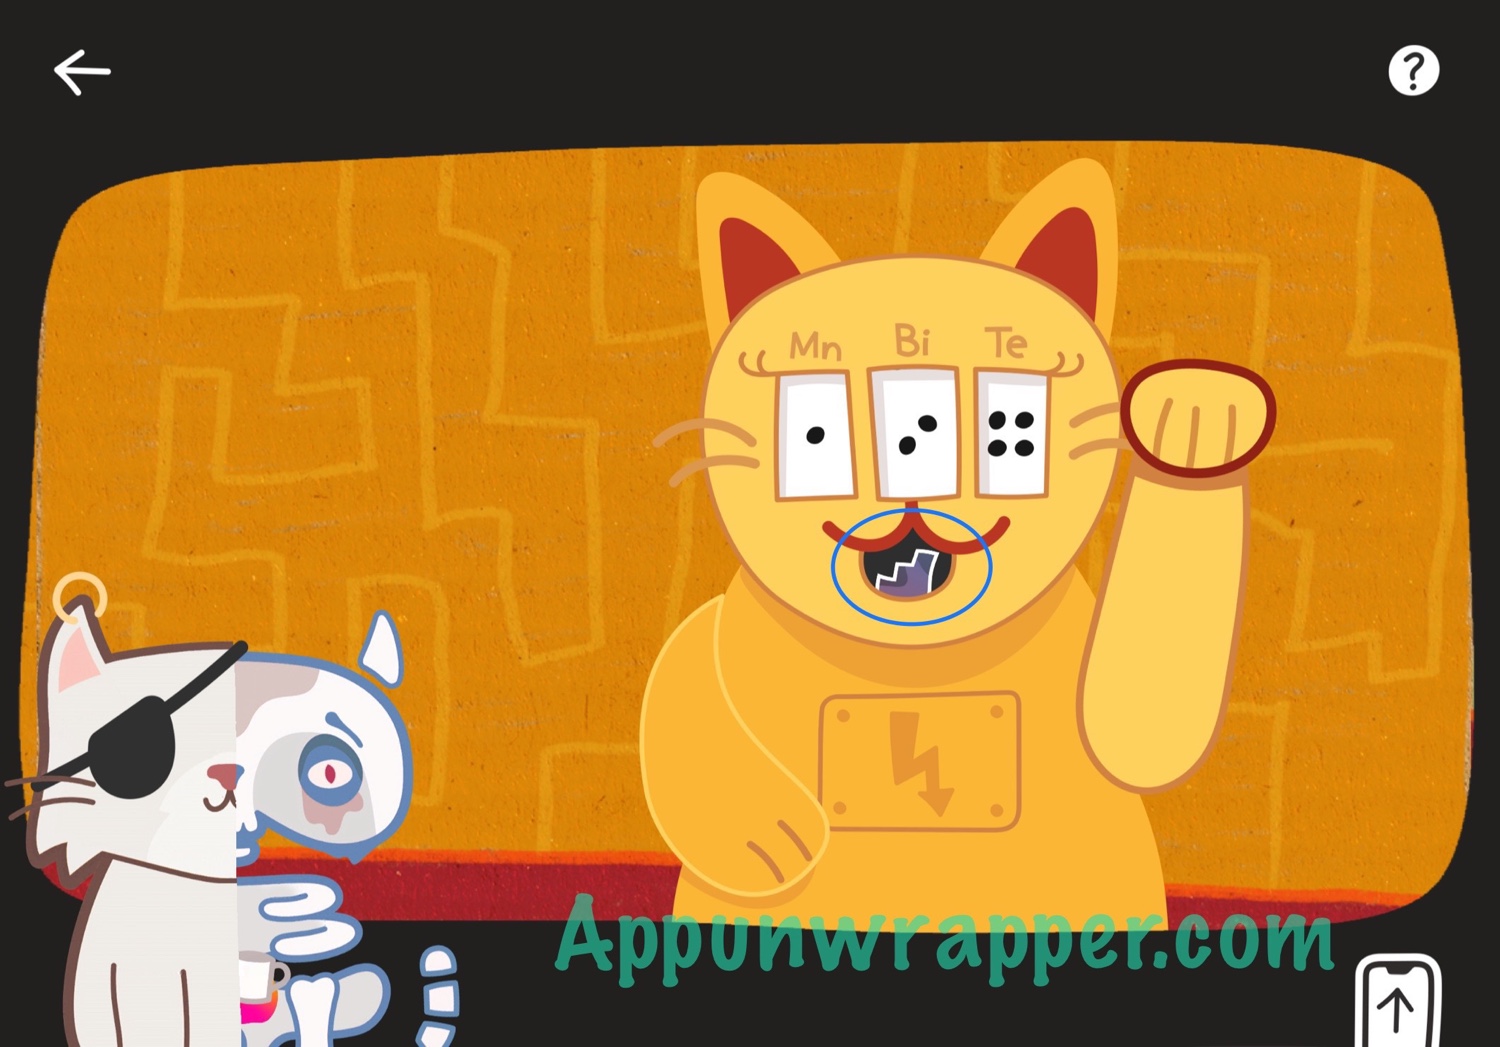
20. Go back to the oven and turn the knobs so the first two point right and the last two point left. Then look at the photo again and the two cats will be looking at each other. Take the airplane sticker to add an app to your phone.
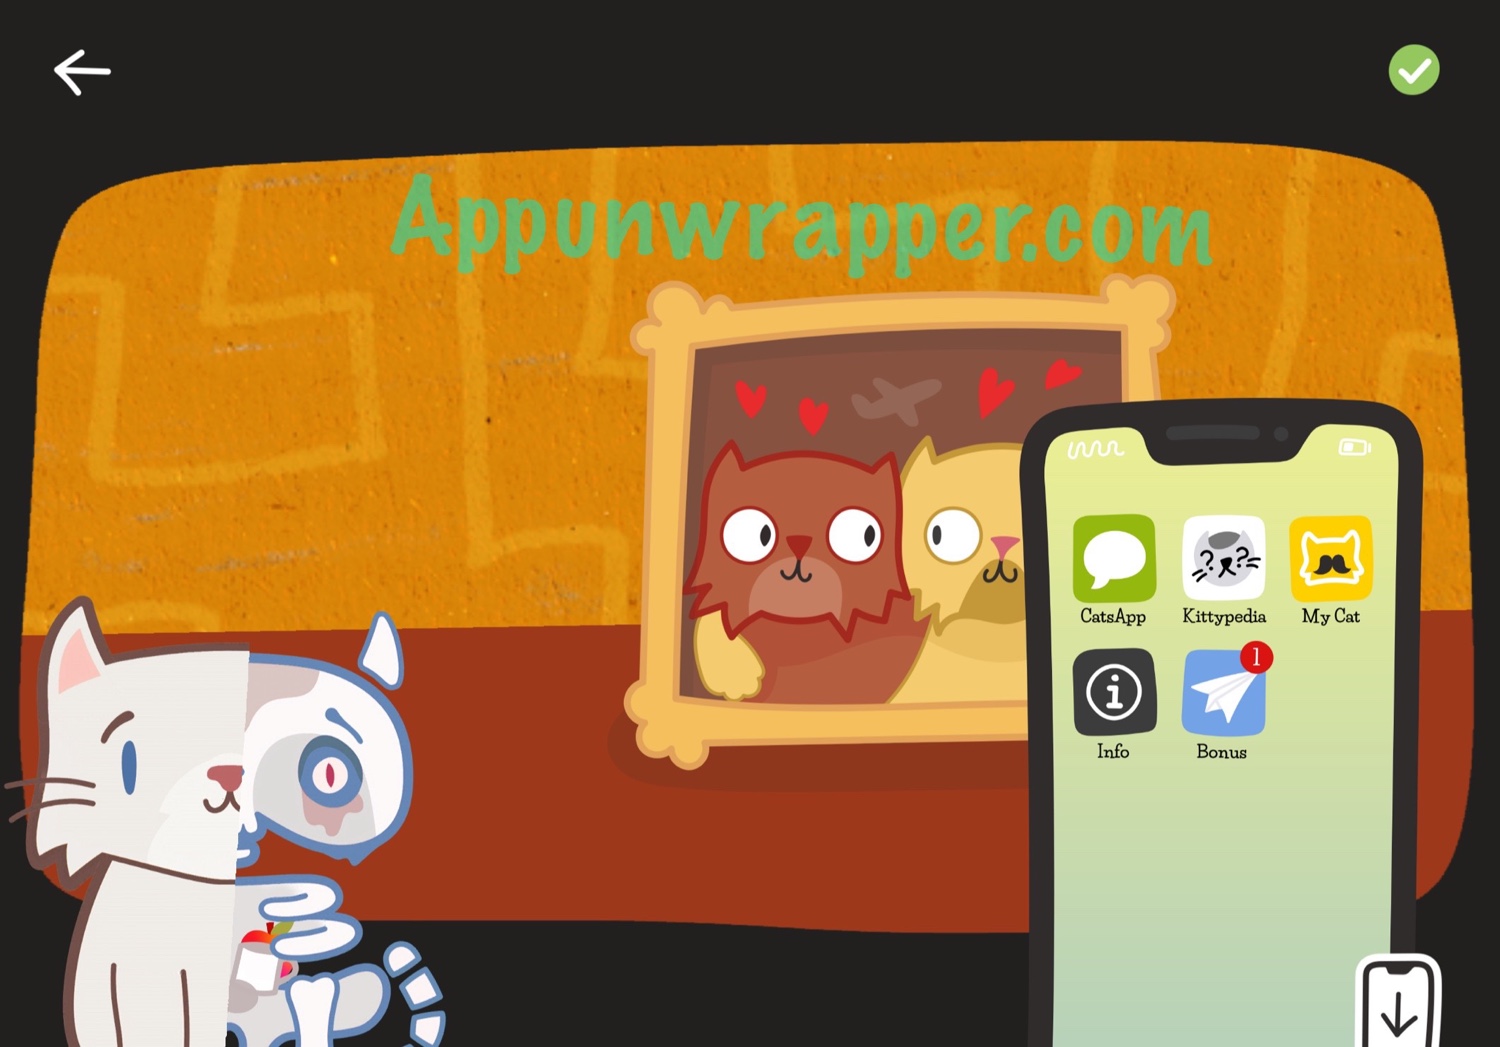
21. Open the app on your phone to access a bonus. There’s a short video you can watch. If you ask a question, they’ll answer it on their YouTube channel.
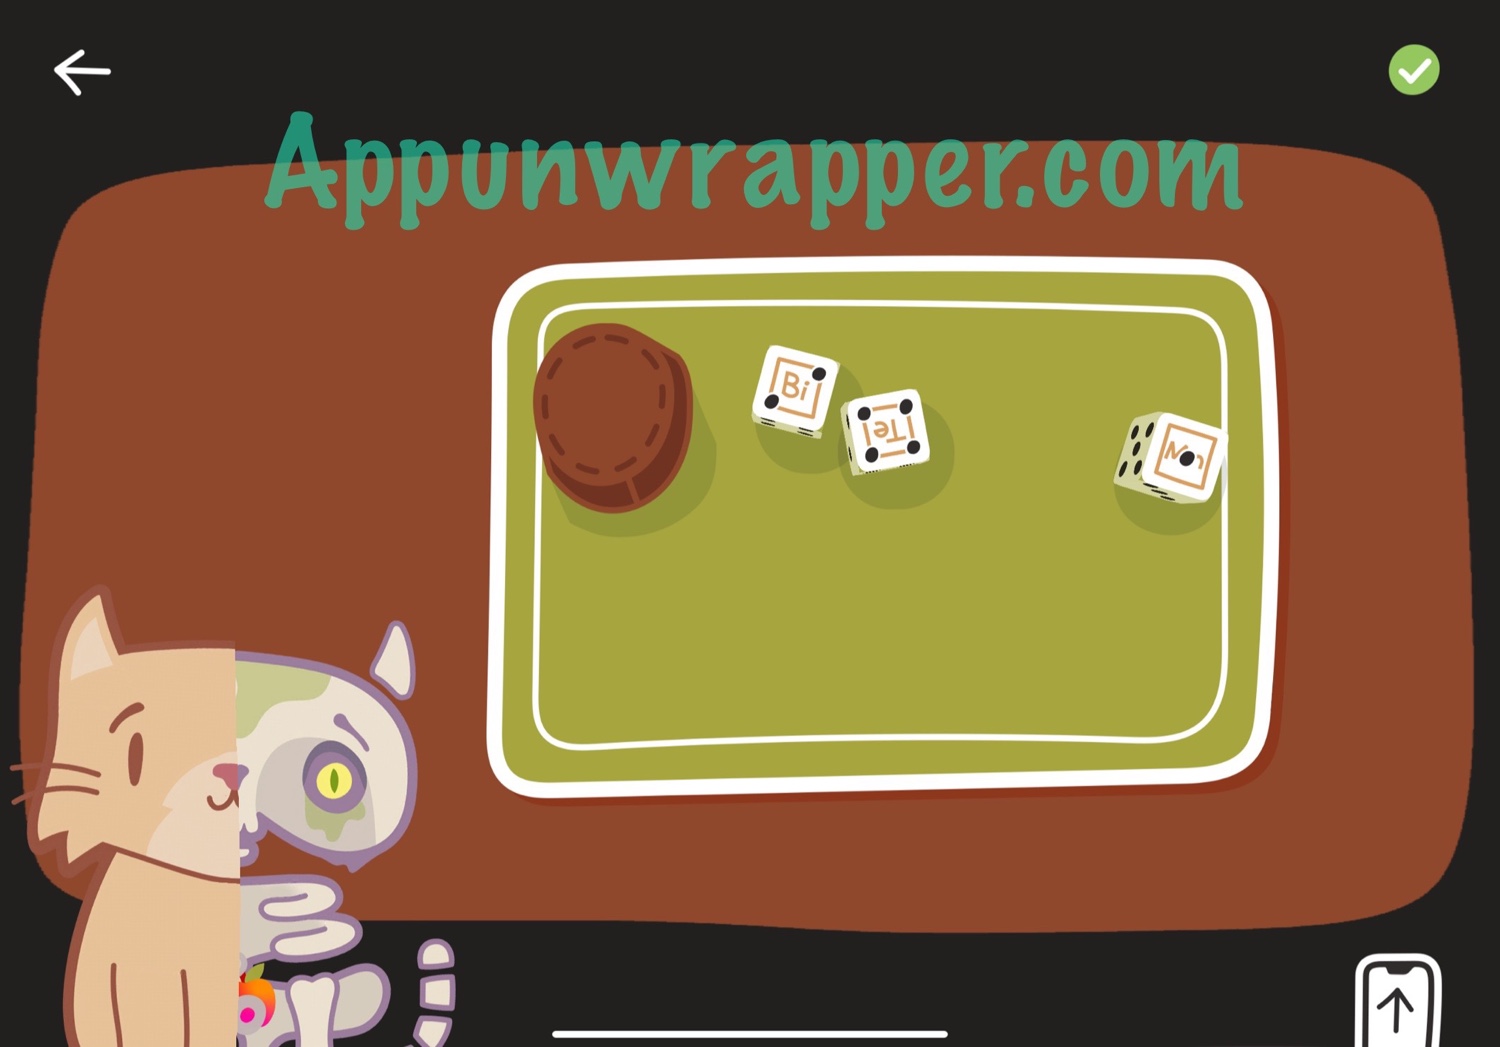
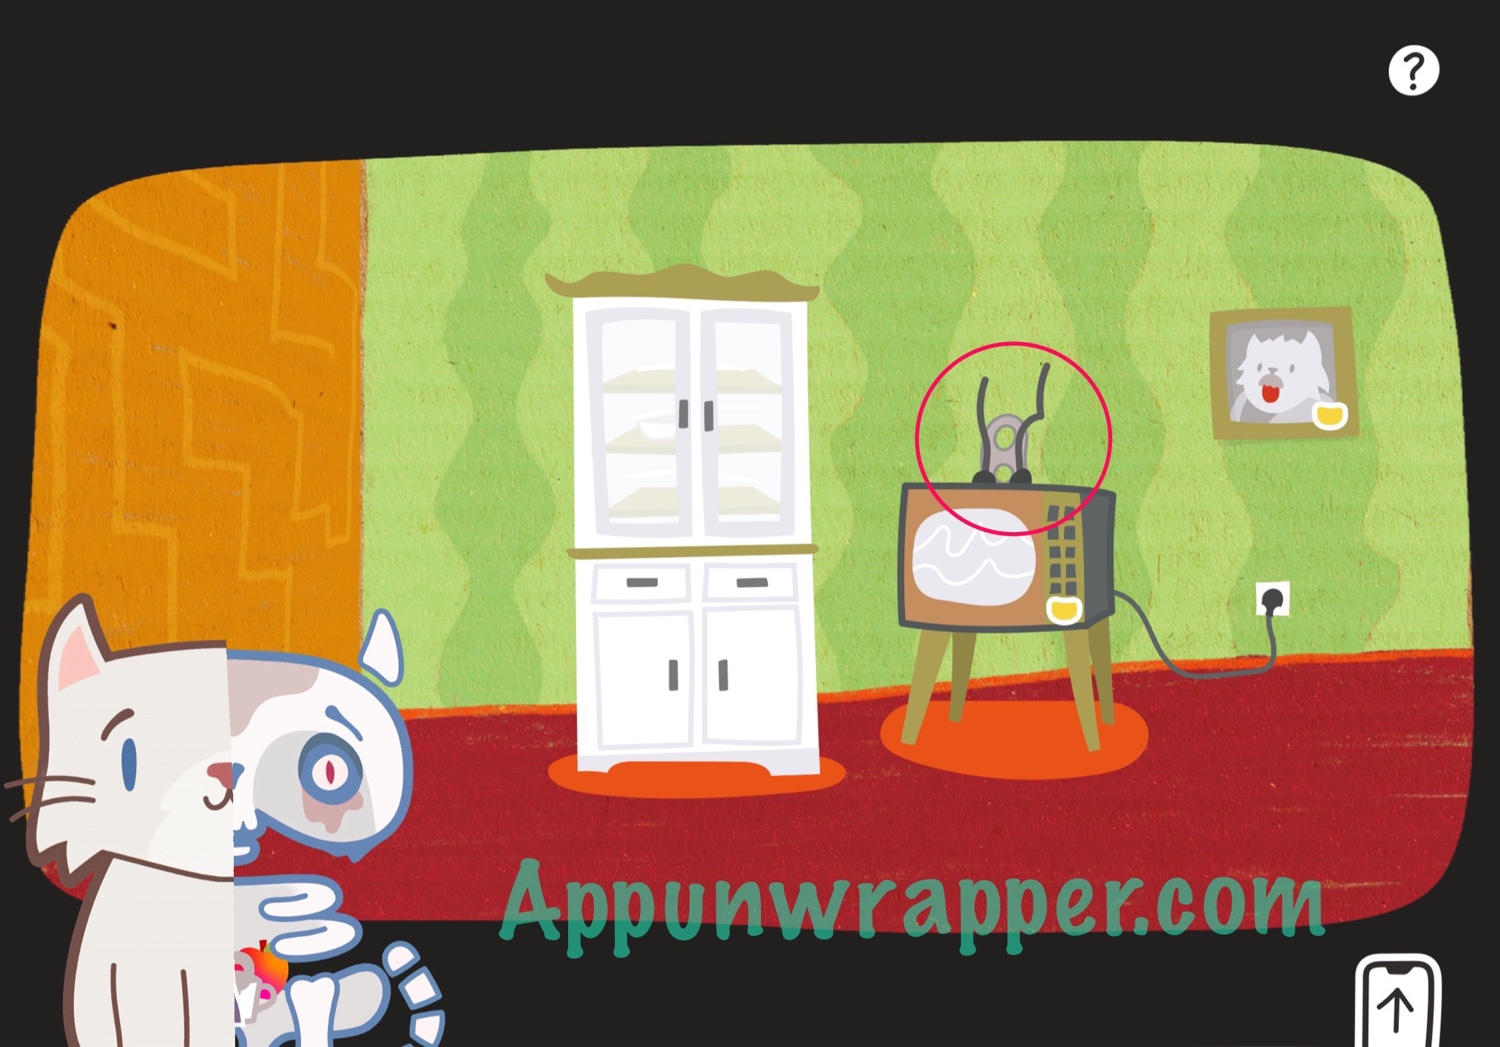
22. Tap on the dice on the table. Tilt your device to roll each of them over to the side with some letters. Once one lands on the side you need, it won’t roll anymore, so you can just focus on one at a time. Notice that the dice landed on 1, 2, and 4. Pay attention to the letters on each.
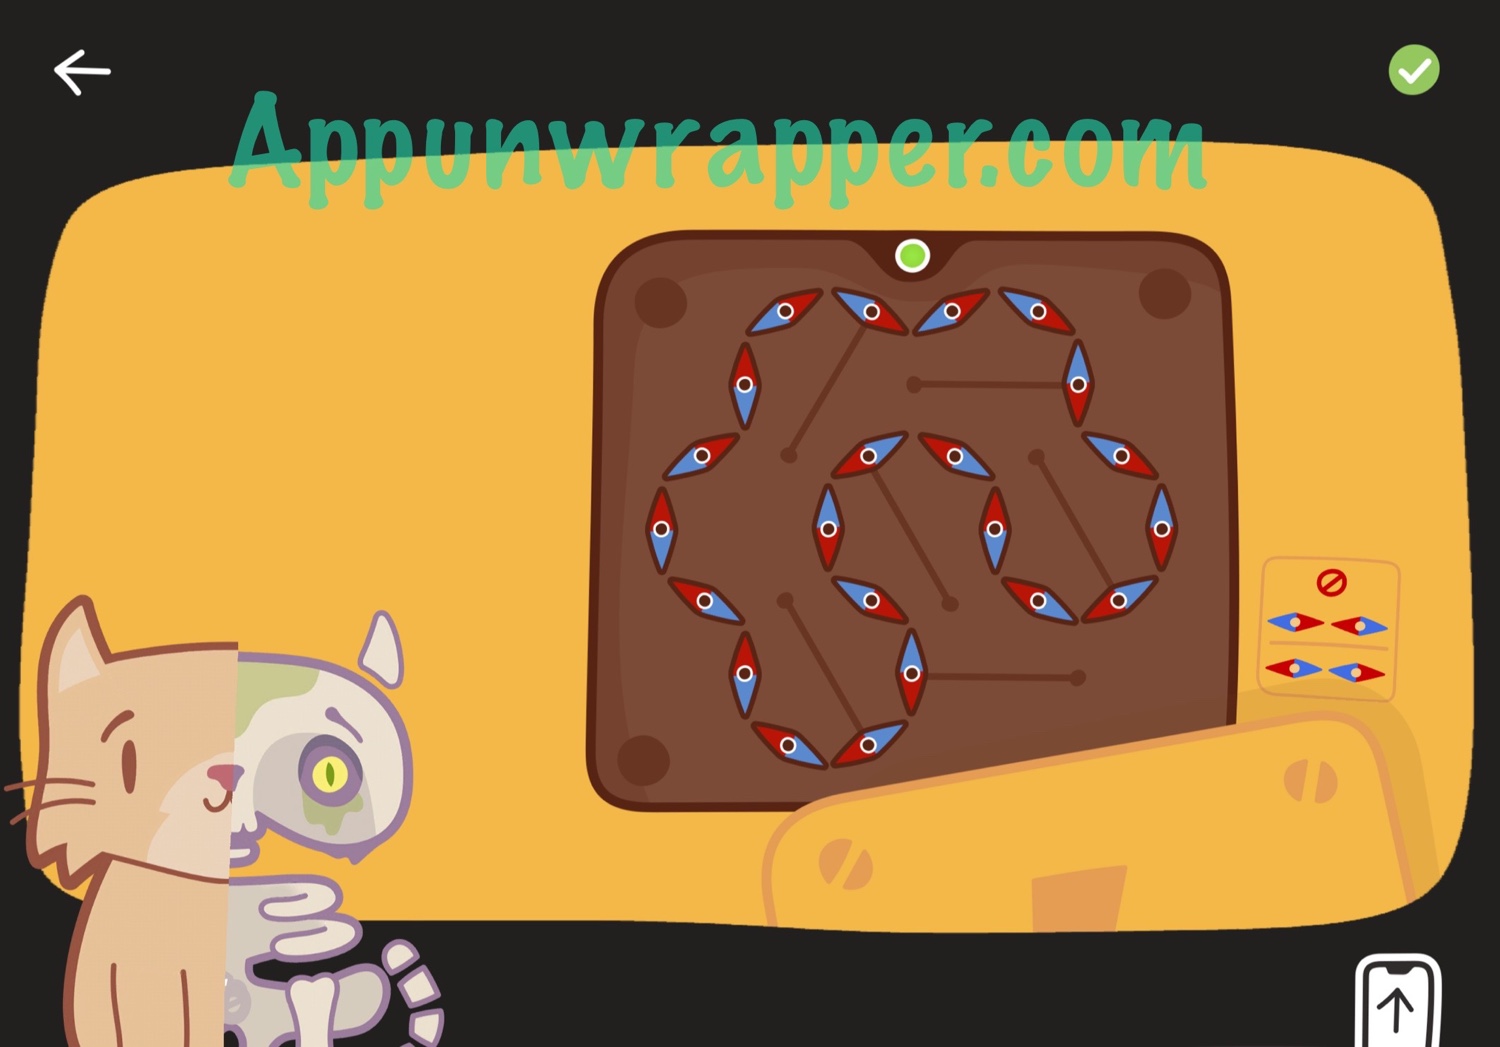
23. Go back and tap on the waving cat. Grab the sticker. Then open up the panel and solve the magnet puzzle inside. You need to move and rotate the magnets so same colors never touch, because opposites attract and likes repel. Once all the magnets stop jittering, the electricity will turn on.
24. Now, look at the waving cat again. It’s a slot machine! Pull its arm down to get the slots spinning. Then stop them at 1, 2, 4 as shown on the dice. Take the stair-shaped piece from its mouth.
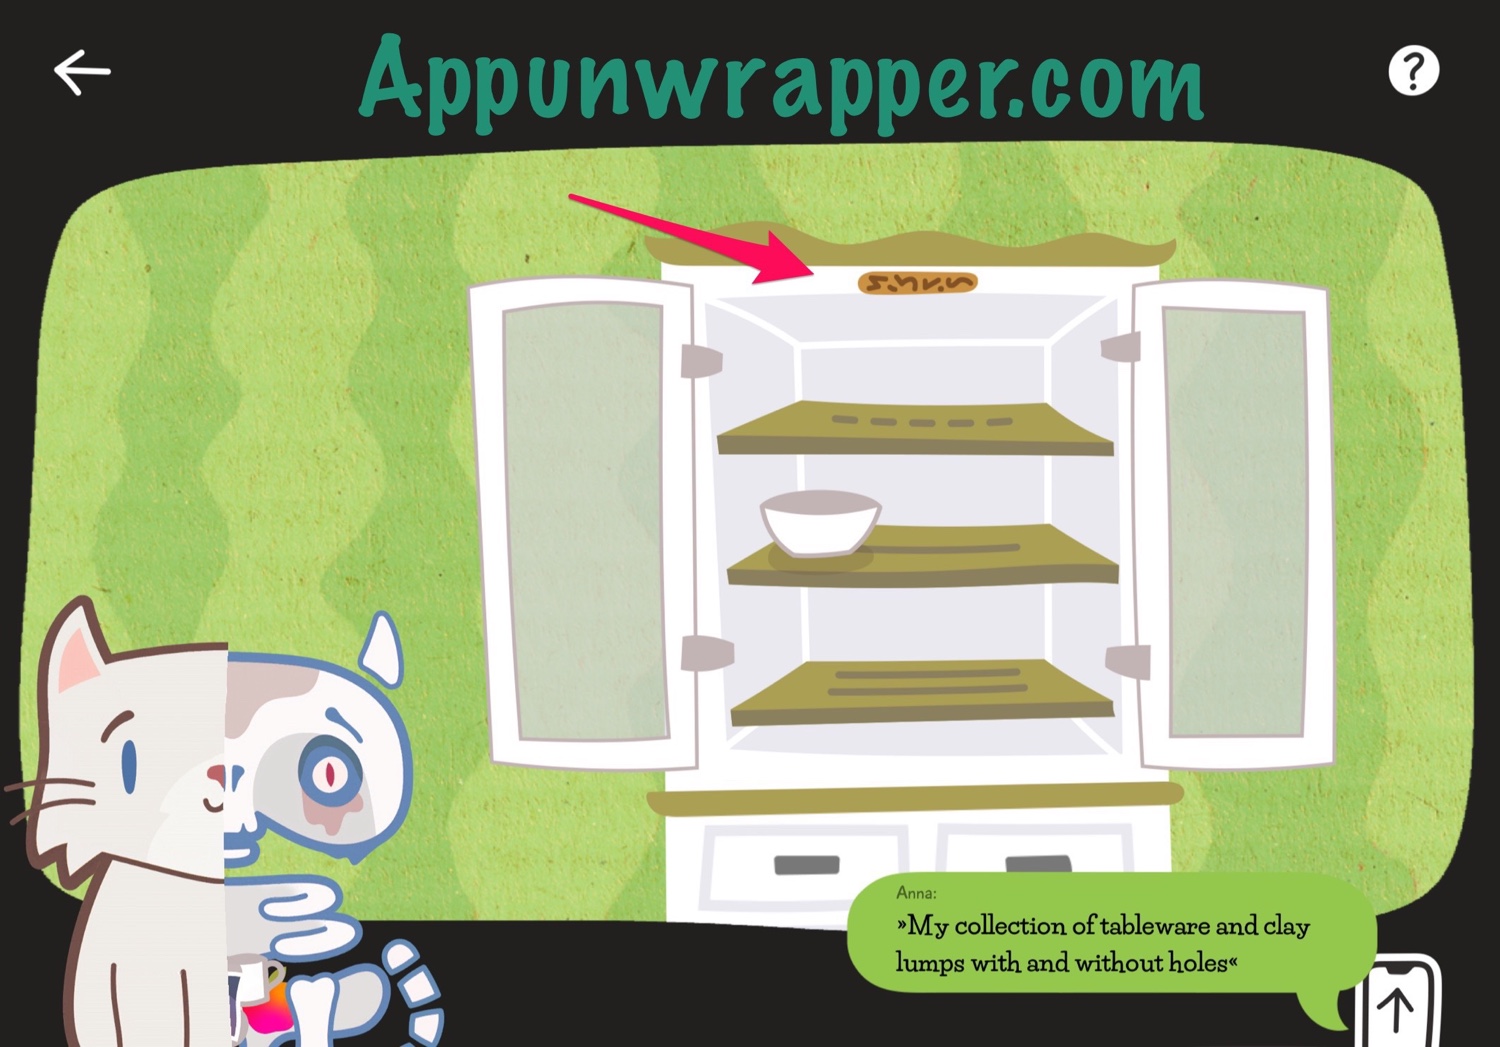
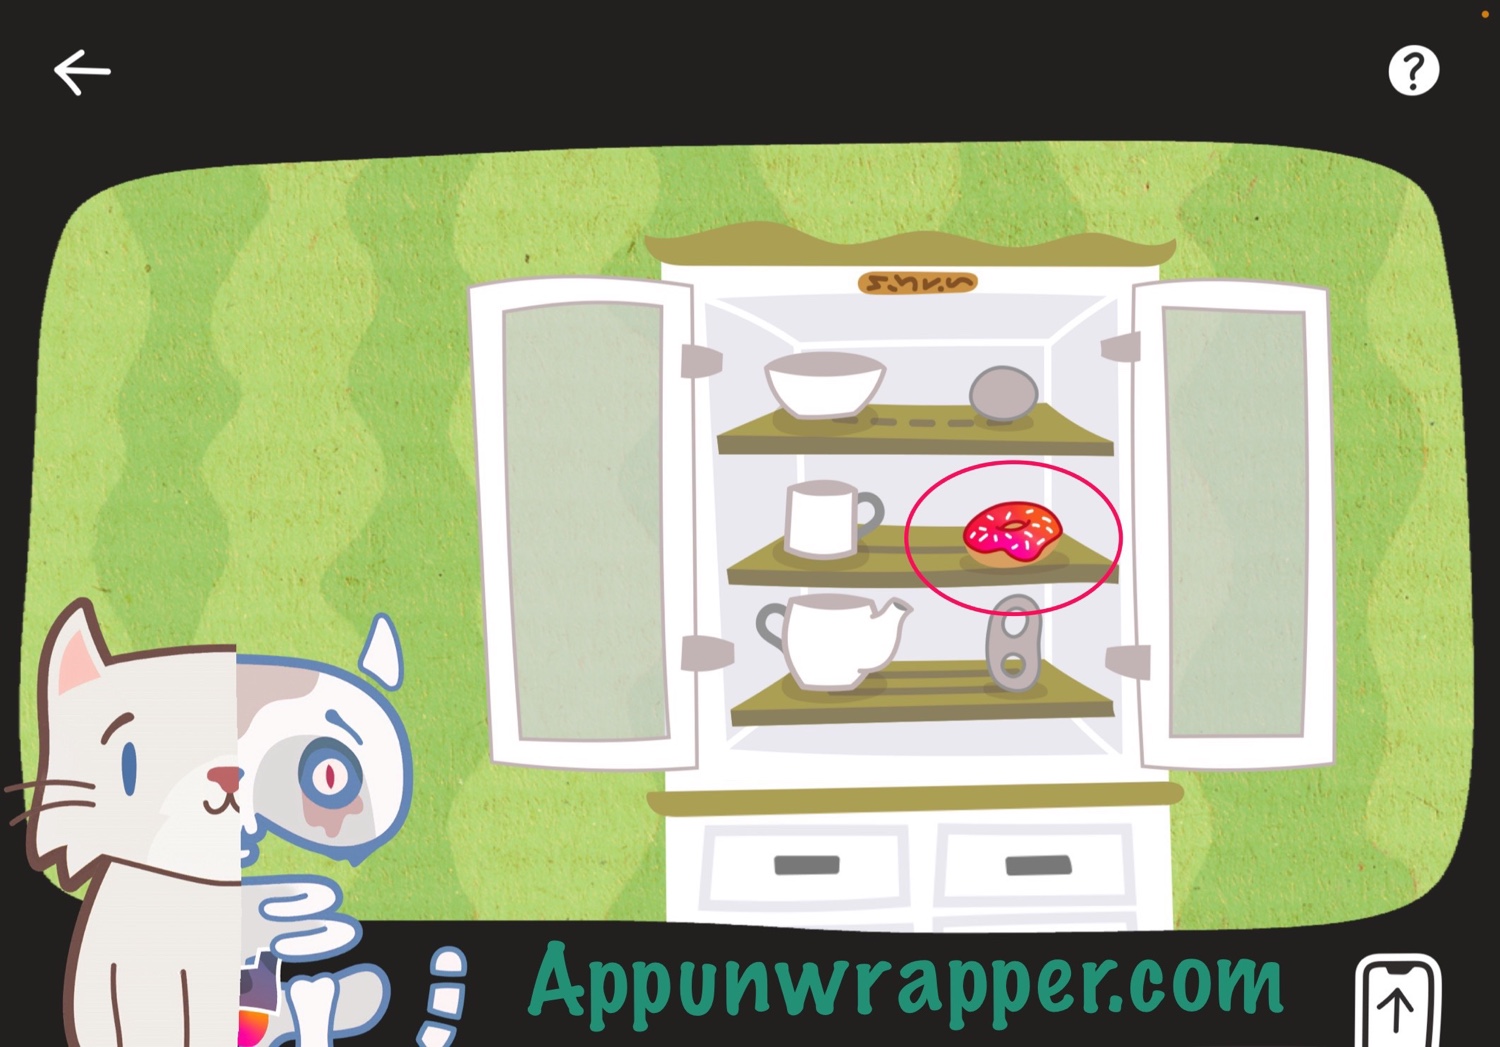
25. Zoom out and turn to the right again. Open the glass cabinets and notice the bowl. Tap on the plaque at the top. It says: “My collection of tableware and clay lumps with and without holes.” Open the cabinets at the bottom and take the sticker and the teapot.
26. Go back. Take the clay piece above the TV. Then tap on the TV. Take the sticker. Then change the channel to the two symbols you saw in the chips bag.
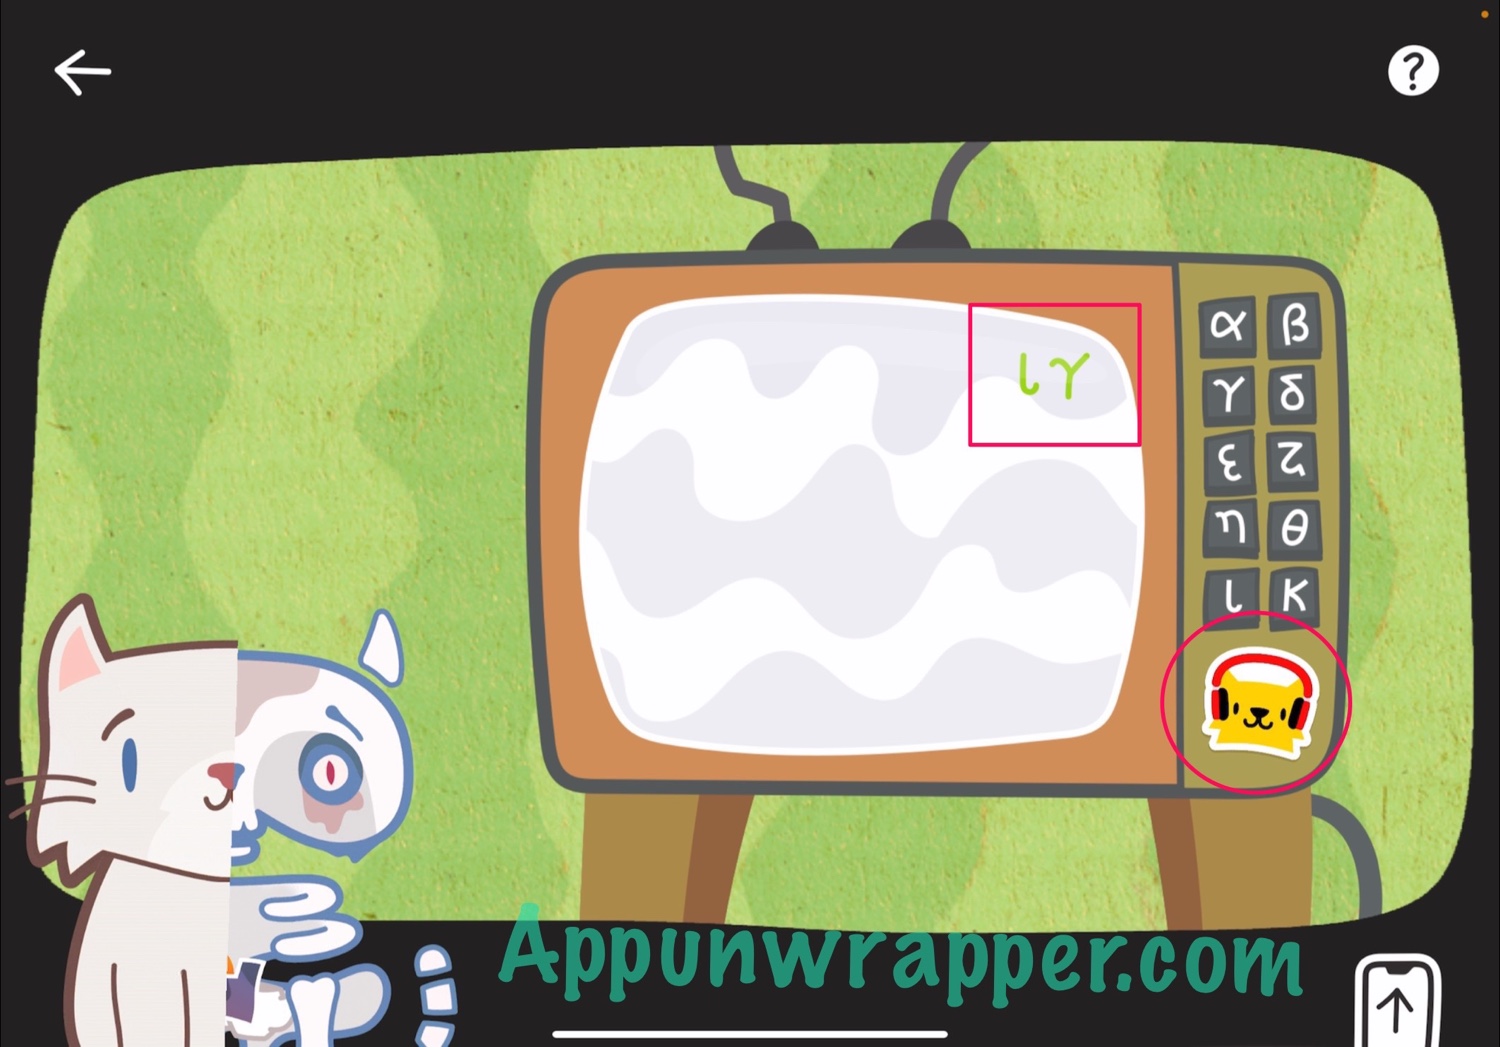
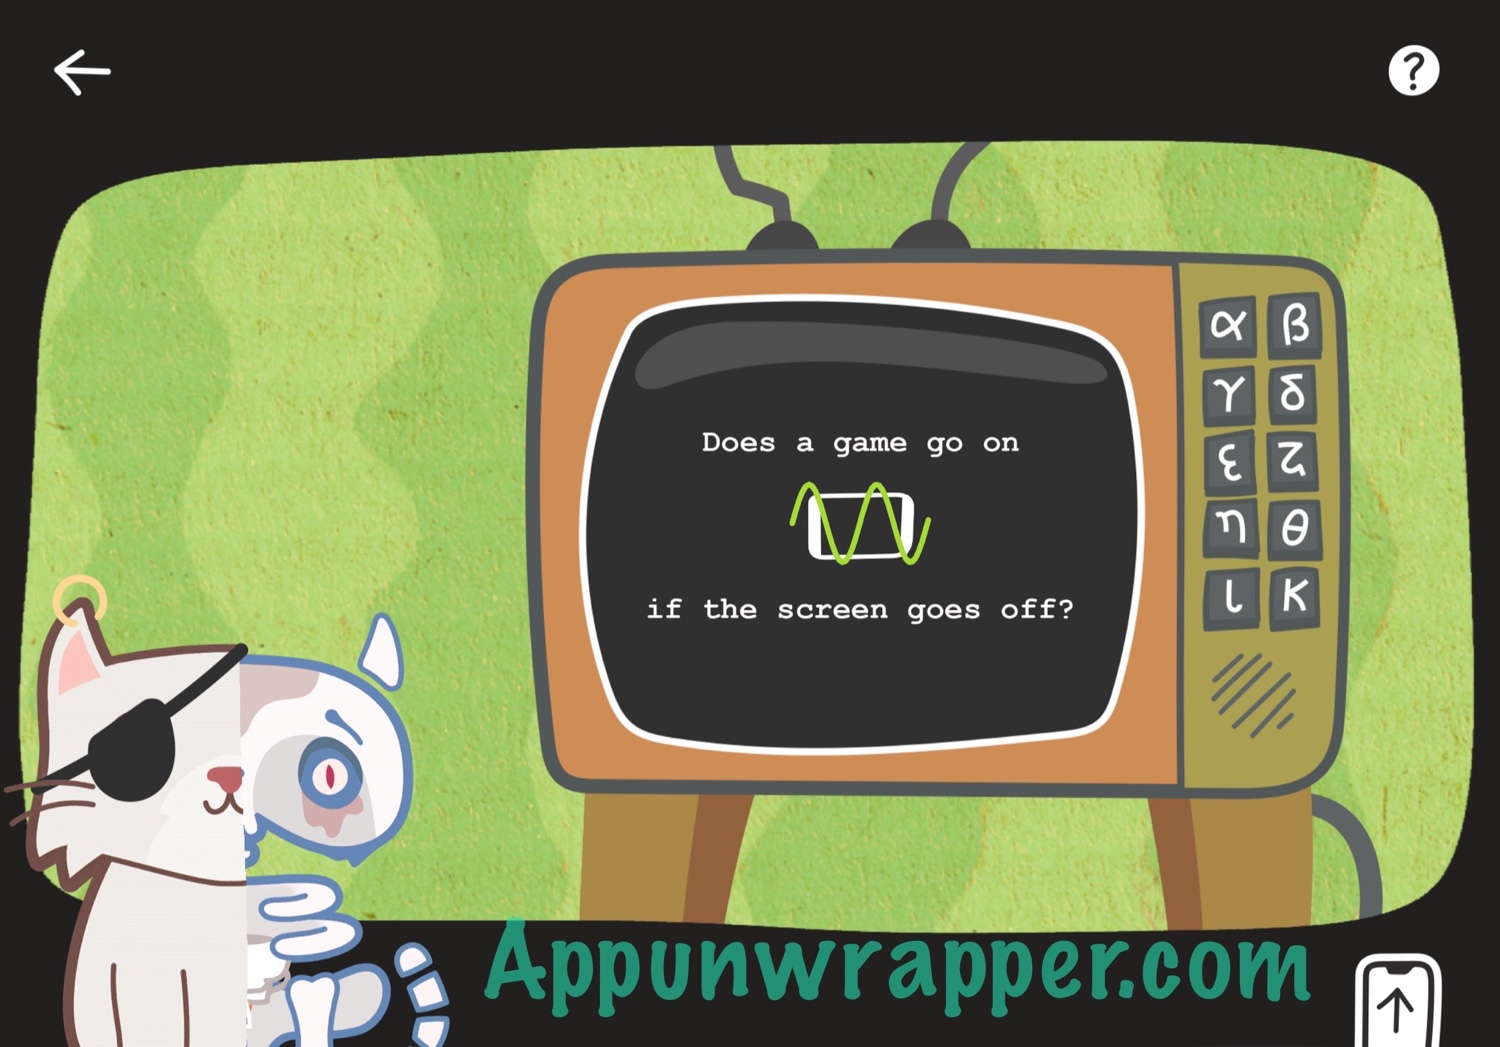
27. Now there’s a ball bouncing around the screen. To get it to go where you need it, pay attention to the symbols at the bottom of the screen. Press the buttons to rotate the bumpers so the symbols match the rotation at the bottom.
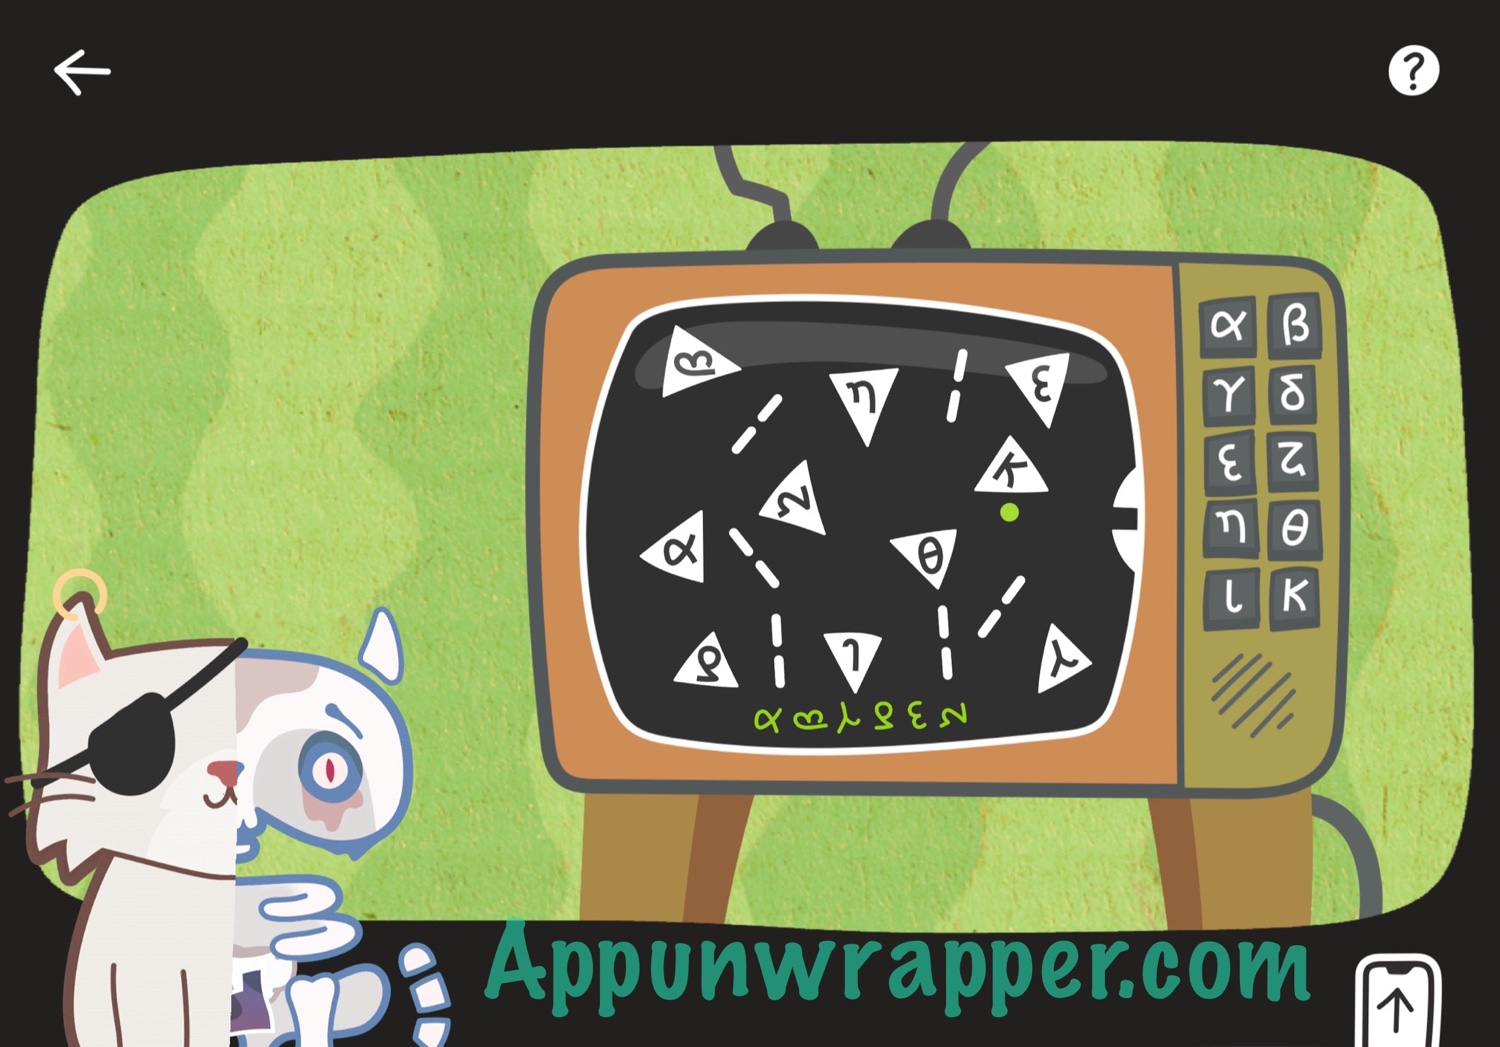
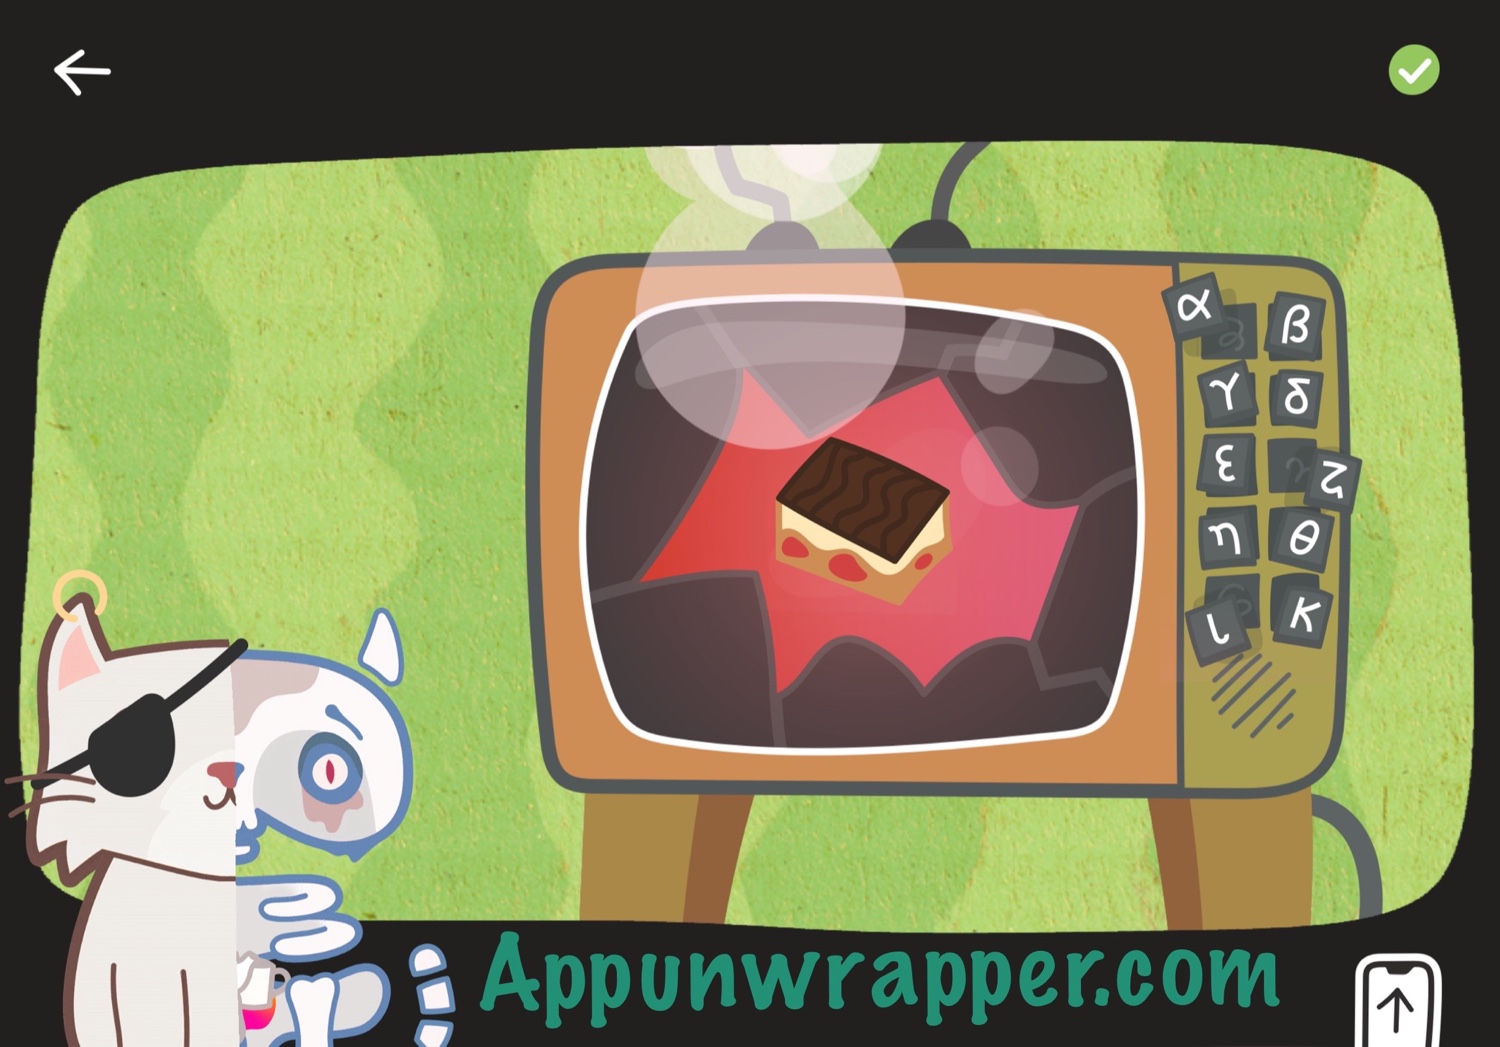
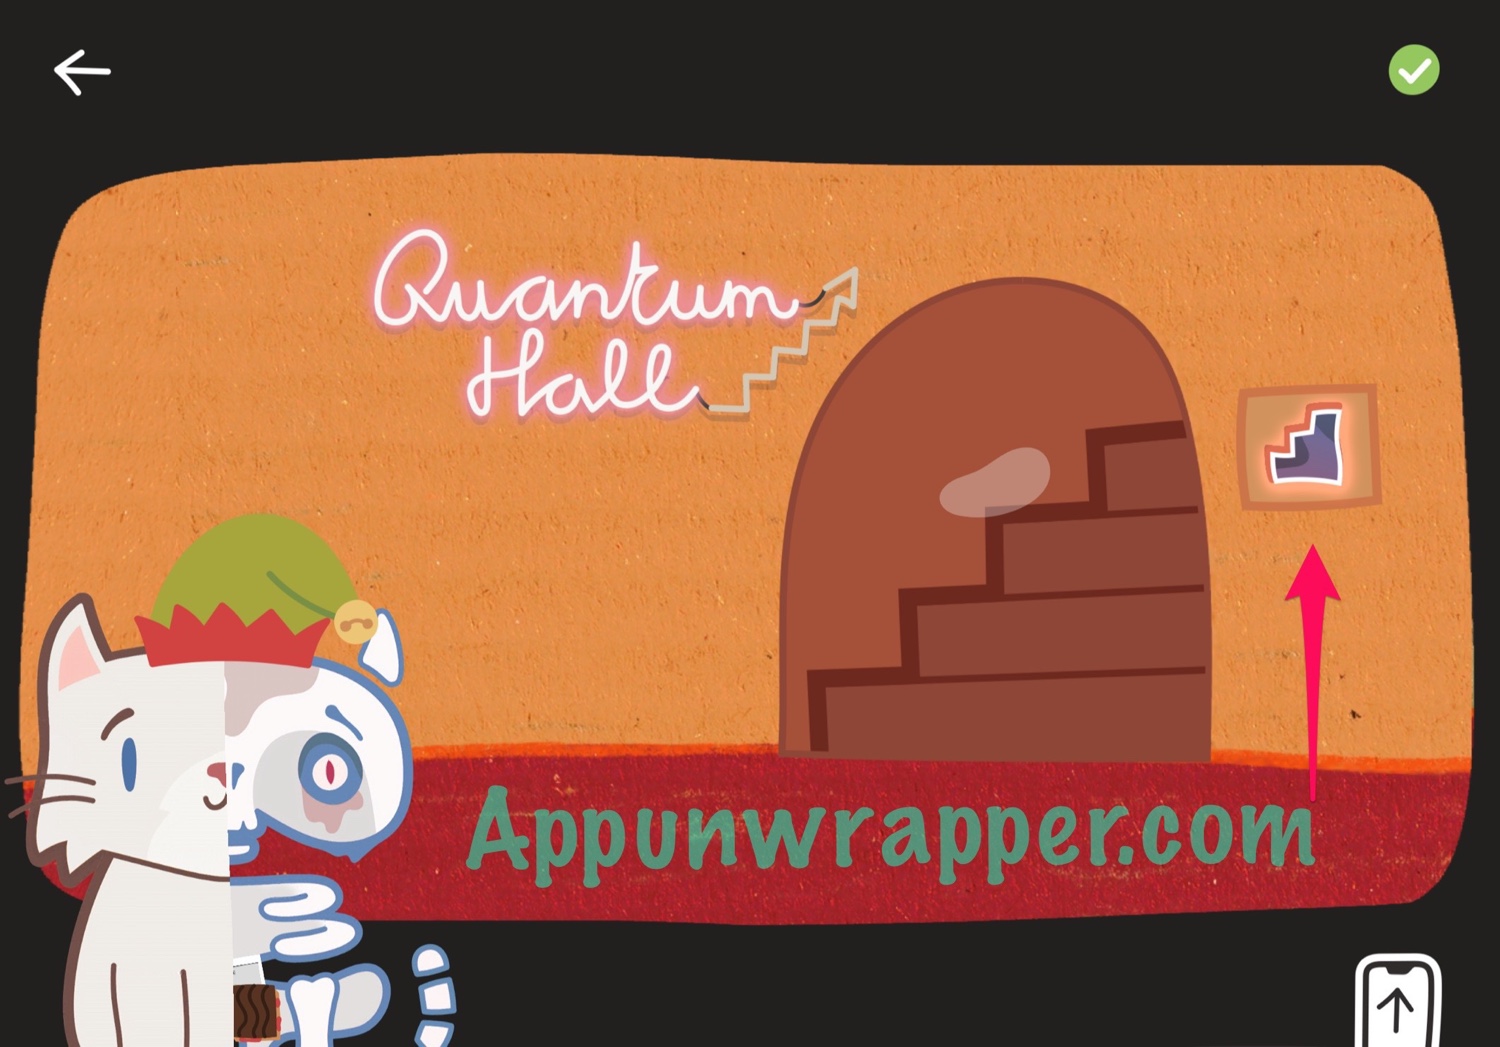
28. When the ball goes through the hole, it will say: “Does the game go on if the screen goes off?” So turn off your device’s screen, then turn it back on to see what happens. The TV broke! Take the piece of cake
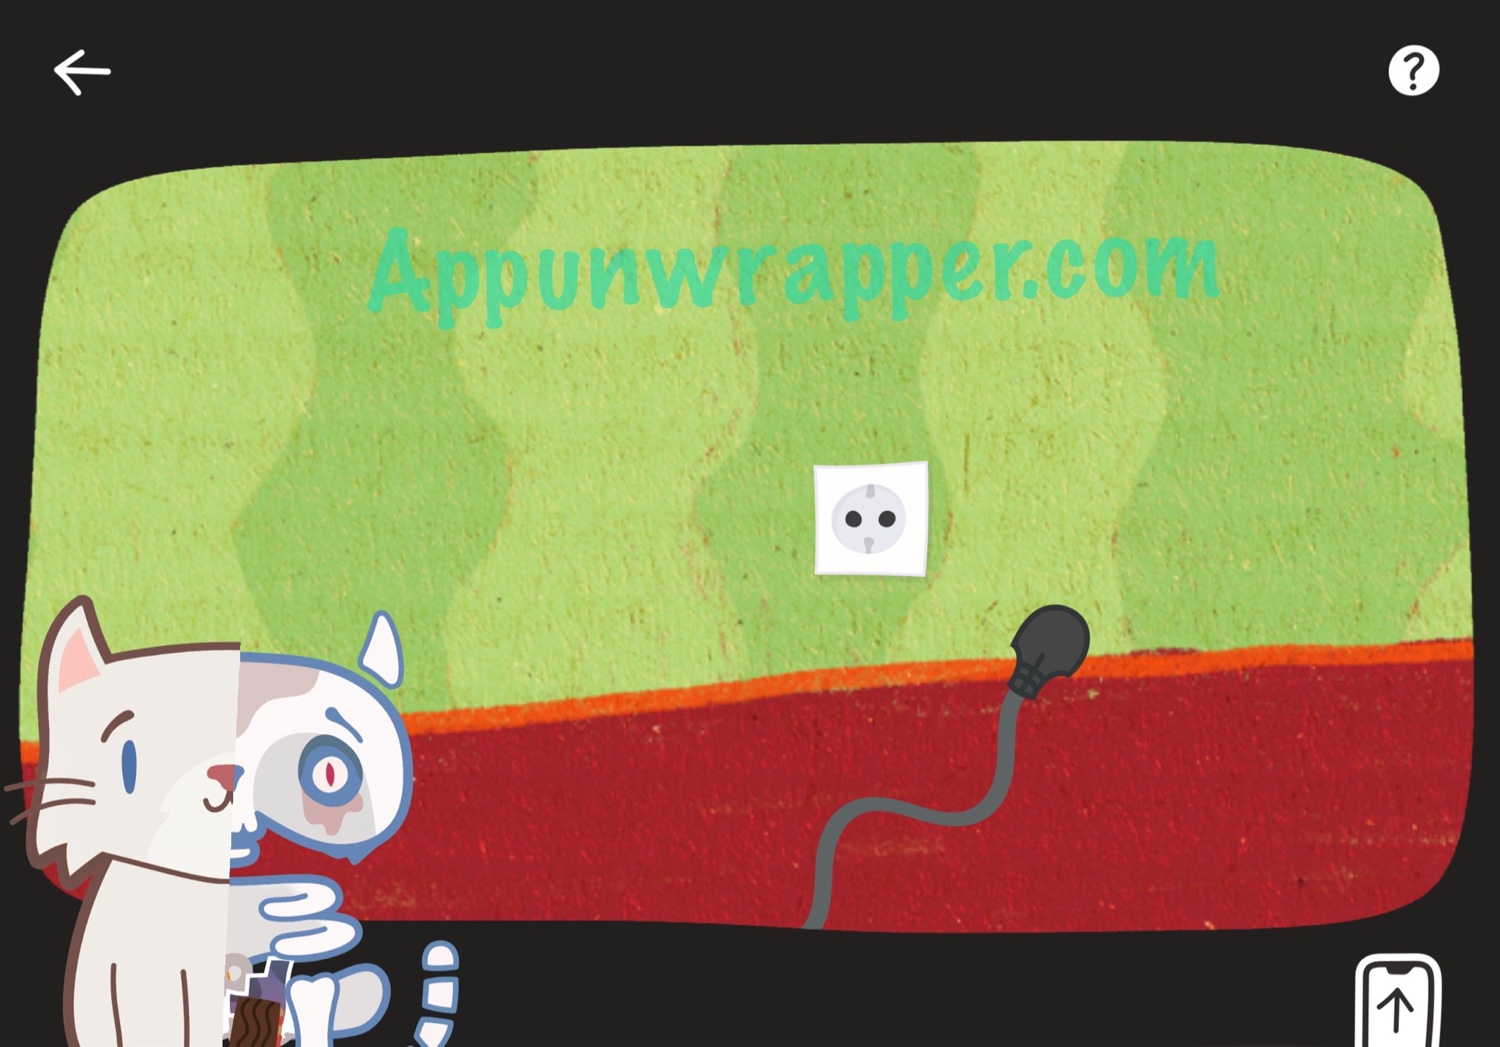
29. Now, zoom back out and tap on the portrait on the wall. Grab the sticker. Then pull on the tongue. It’s a cable! Zoom out and unplug the TV, then plug in the tongue. Einstein’s eyes will light up!

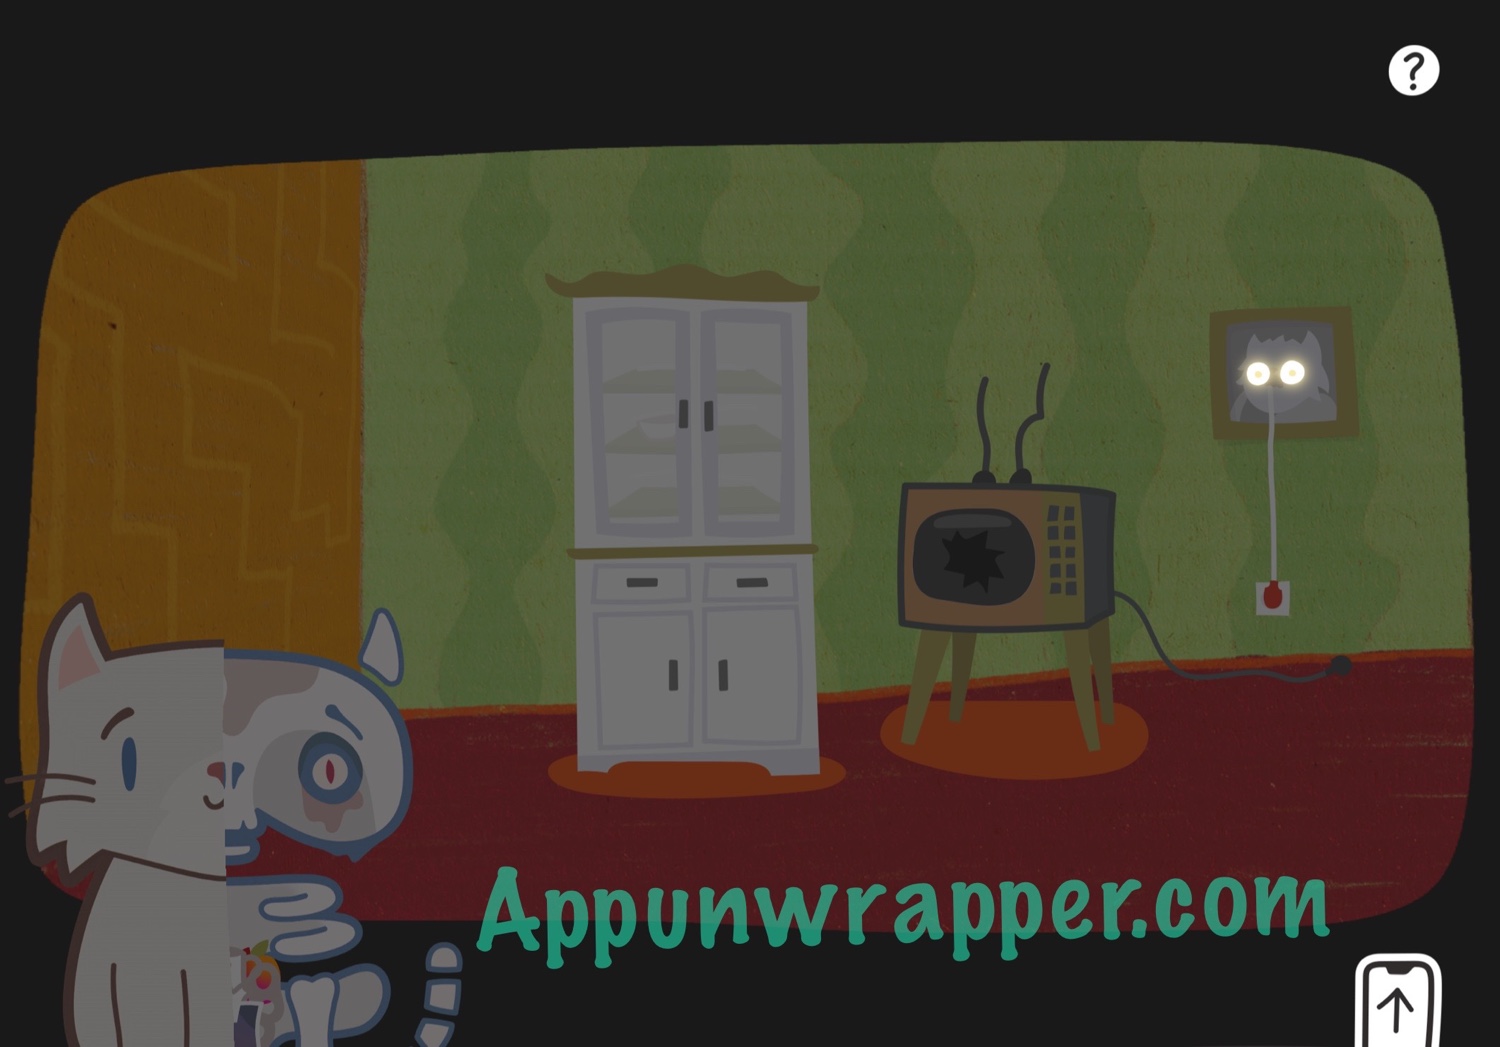
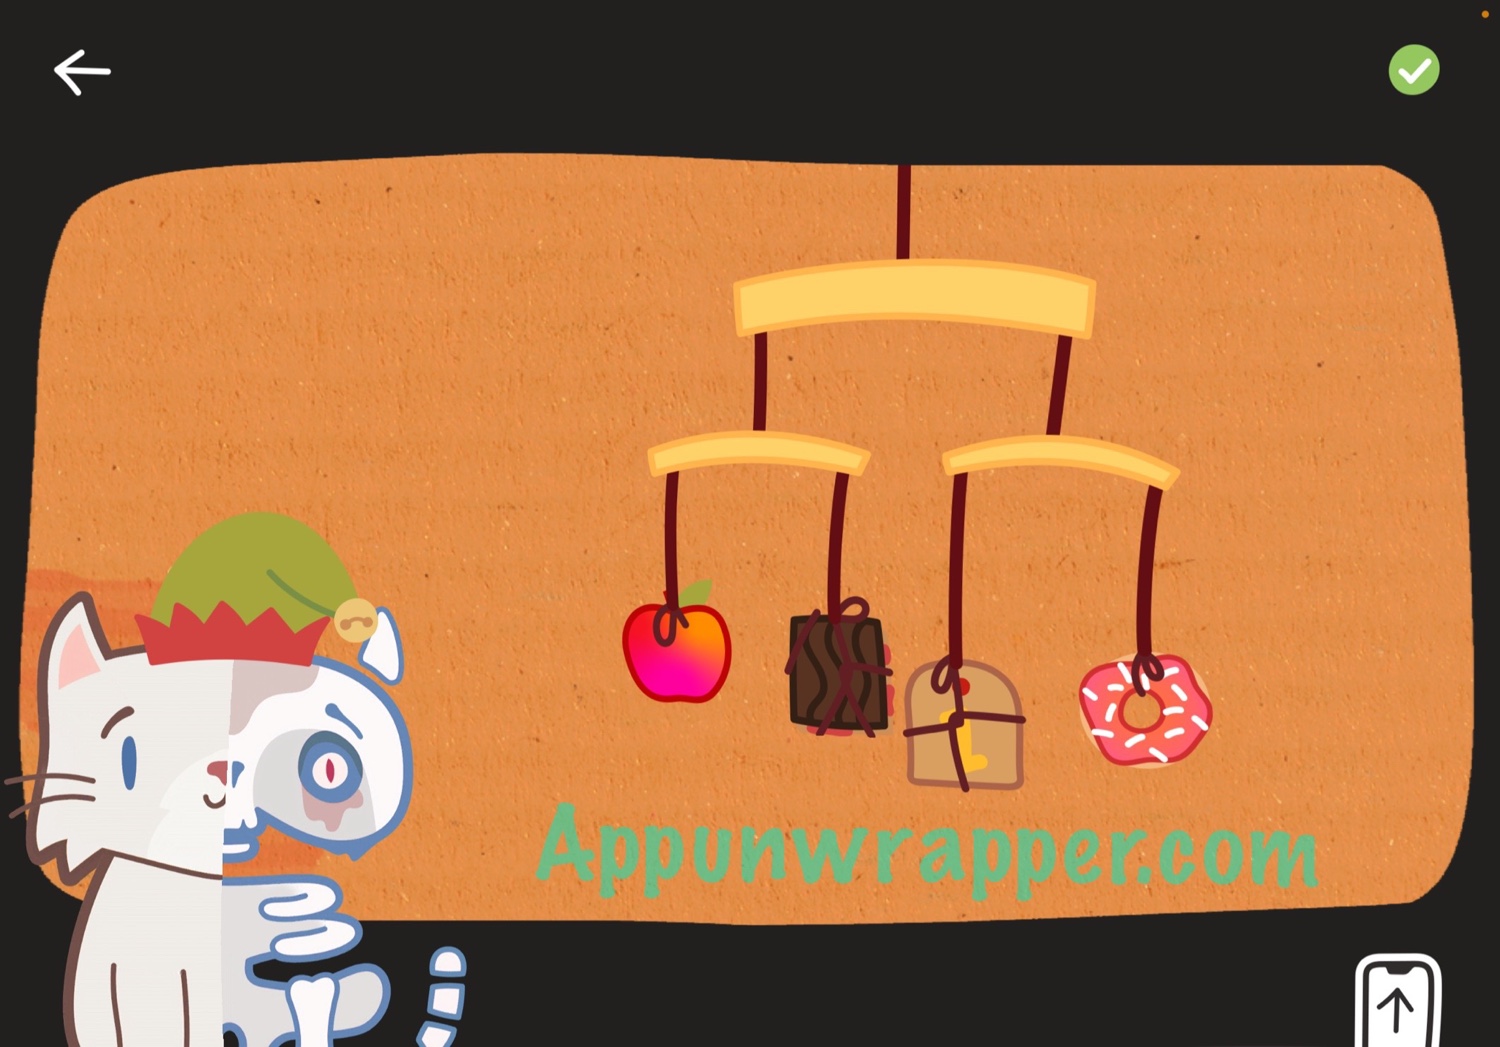
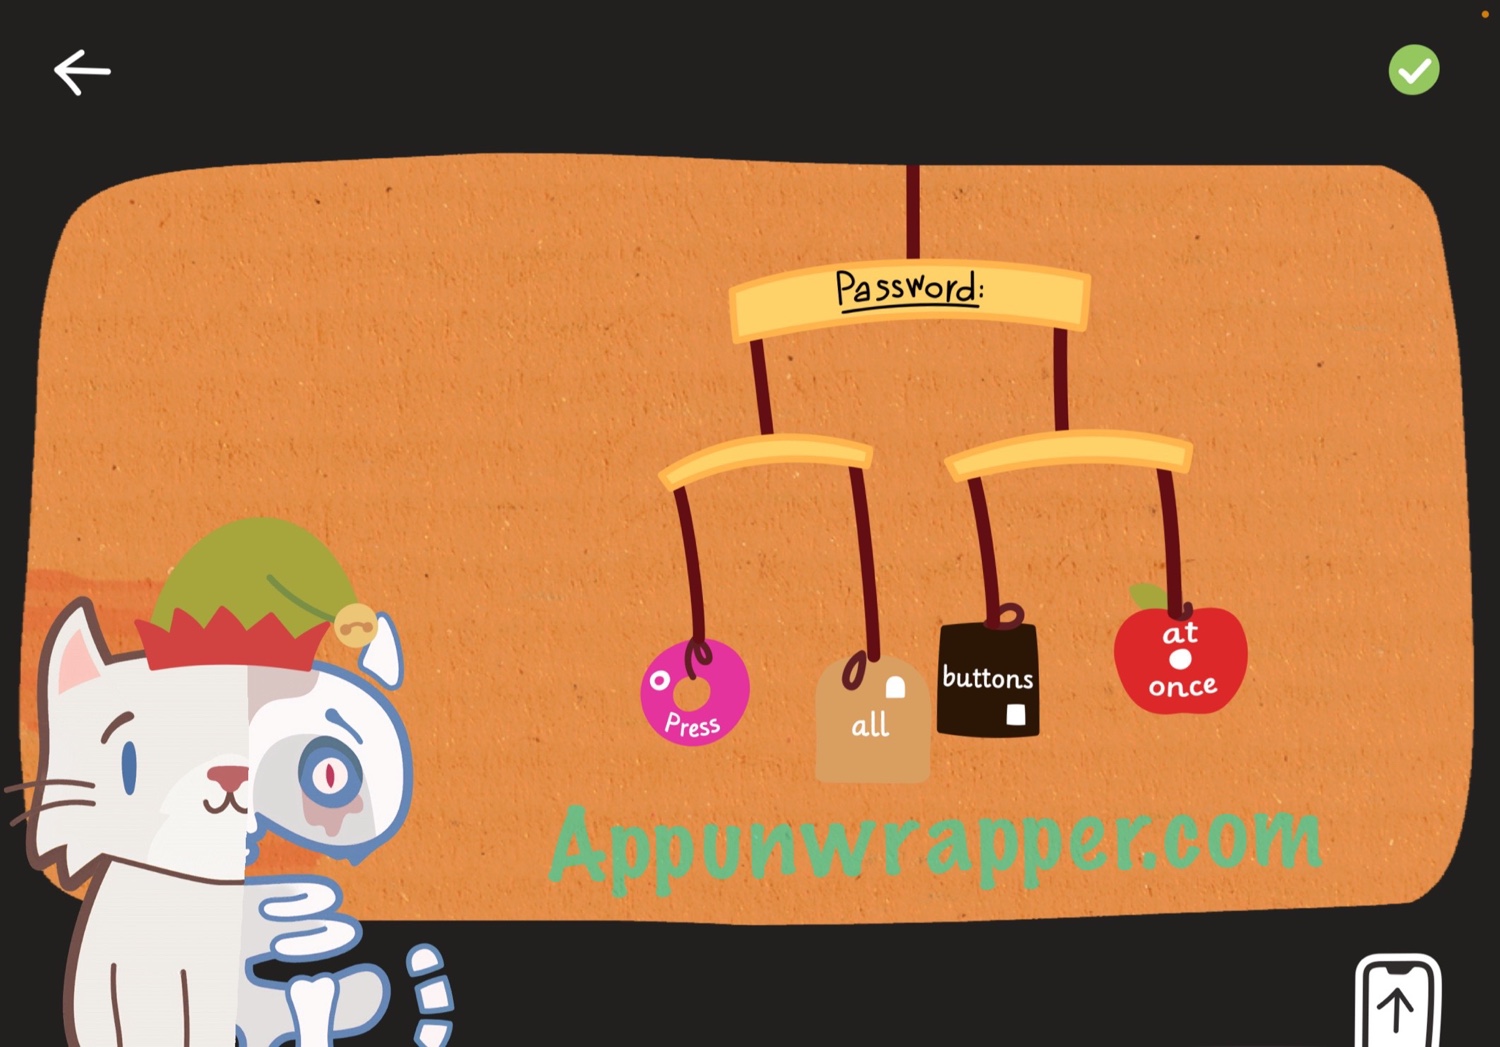
30. Turn to the opposite wall and open the cabinet that’s glowing. Take a screenshot of the glowing ceramics and lines.
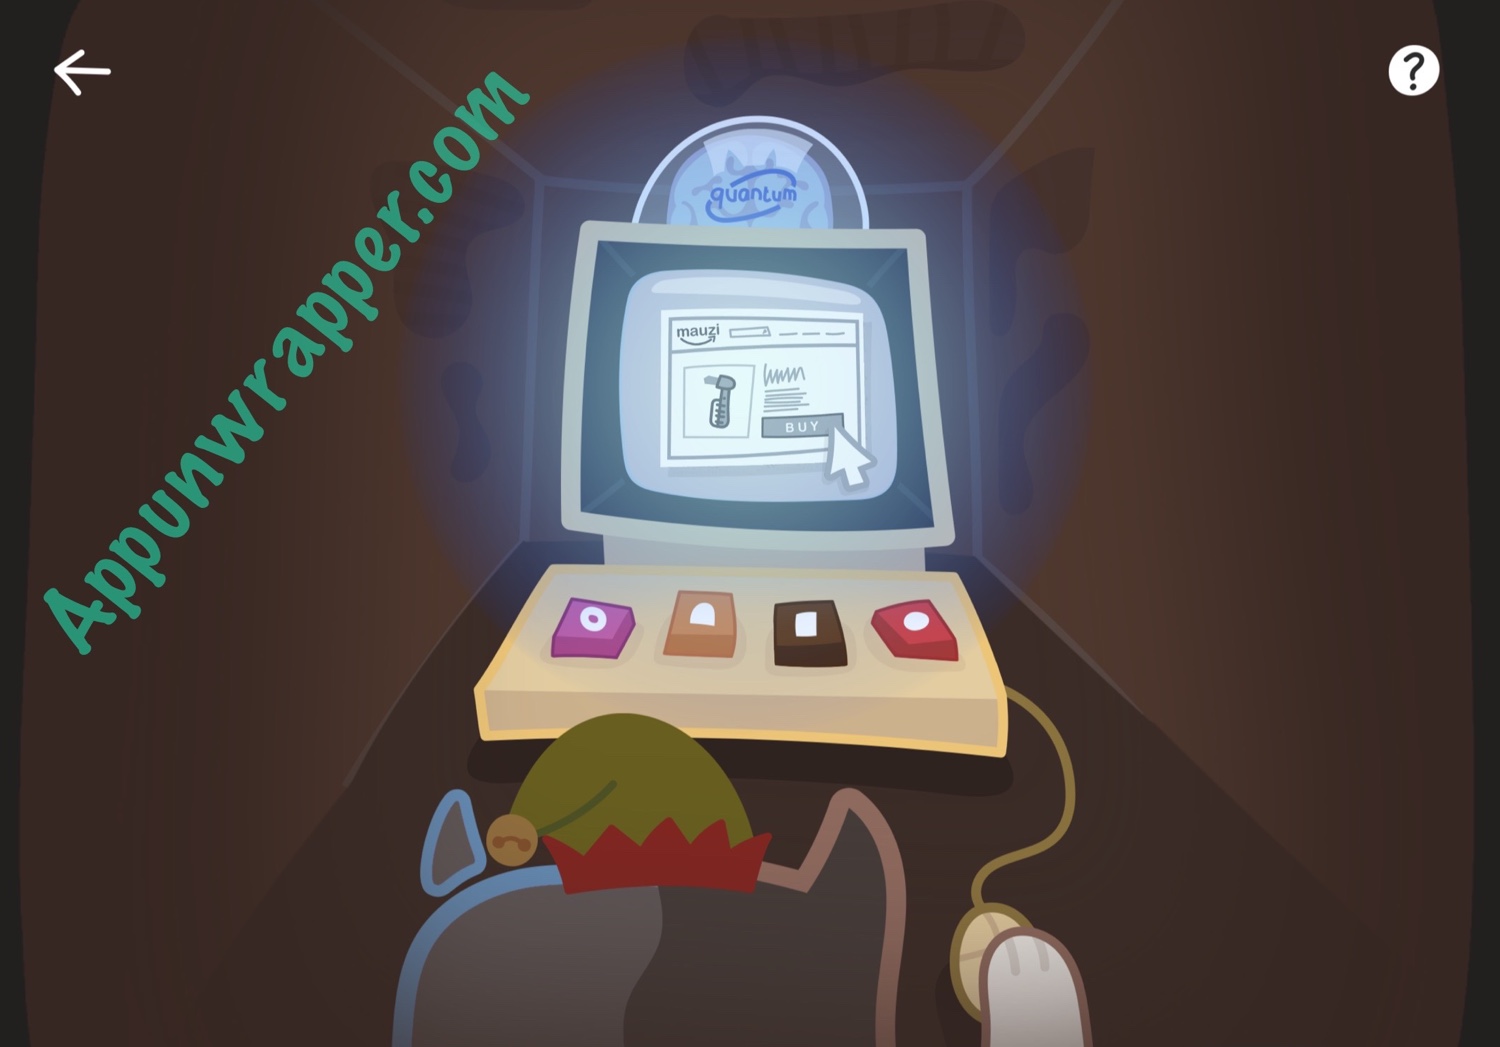
31. Unplug the tongue again so we can see better. Then open the cabinet with the bowl inside. Place the objects down the same way you saw on the lit-up cereal box. The donut-shaped object will turn into an actual donut! Grab it.

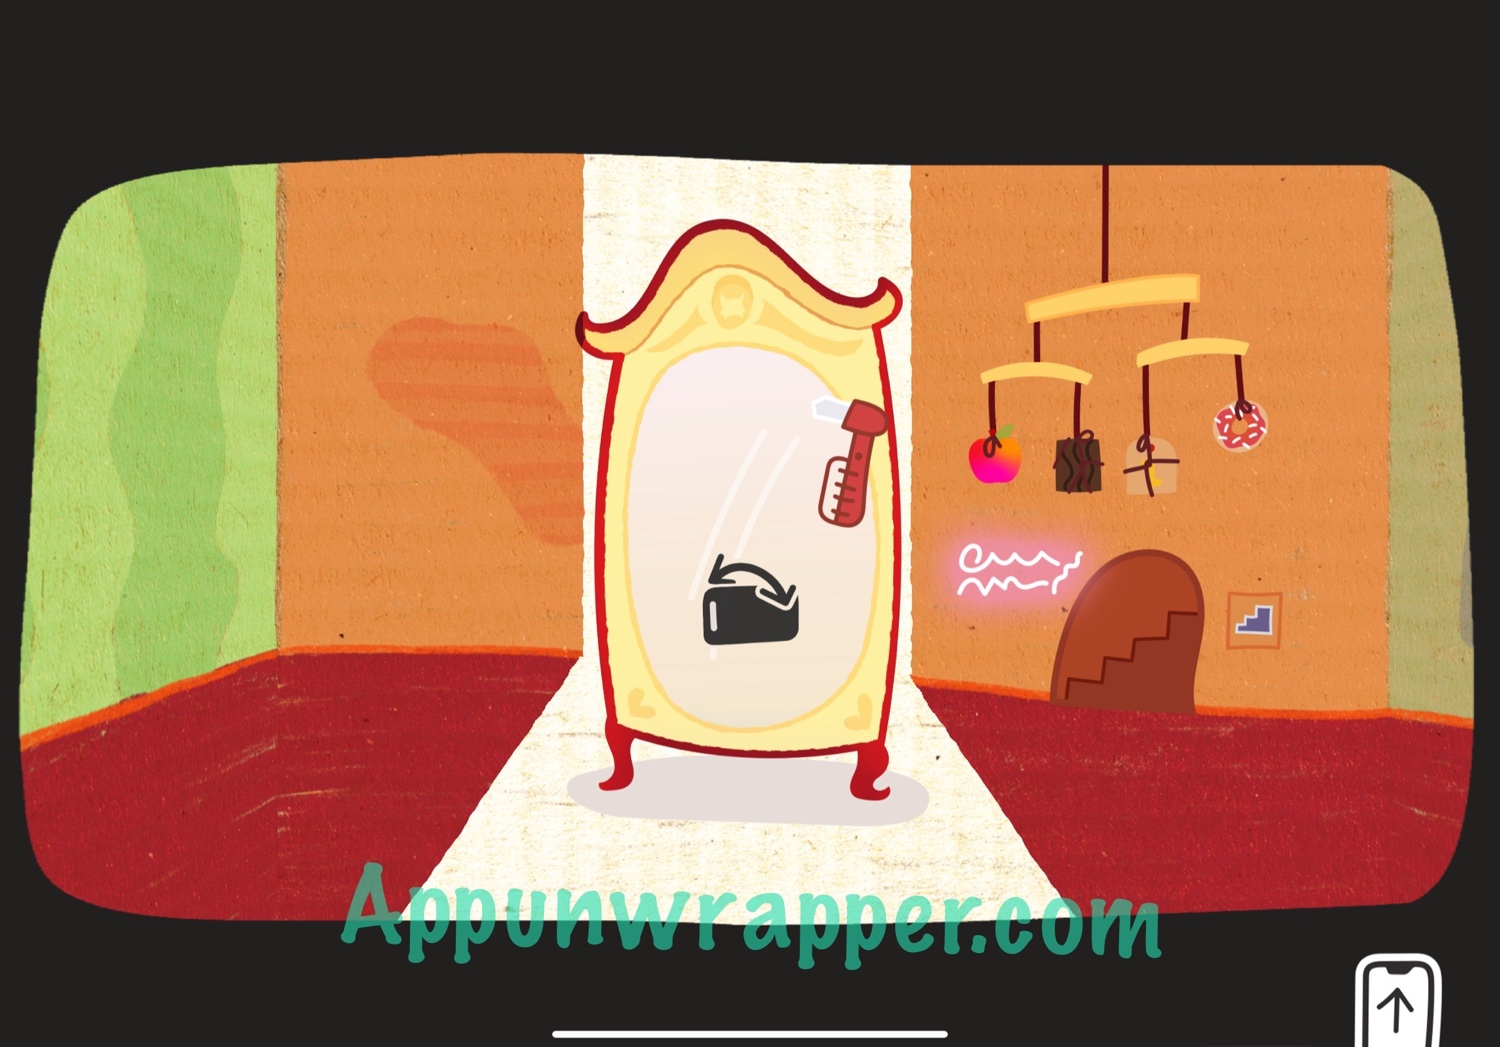
32. Zoom back out and place the stair piece in the slot to the right of the doorway. You can now go up the stairs to the Quantum Hall. We need a password, though, so we’ll come back later.
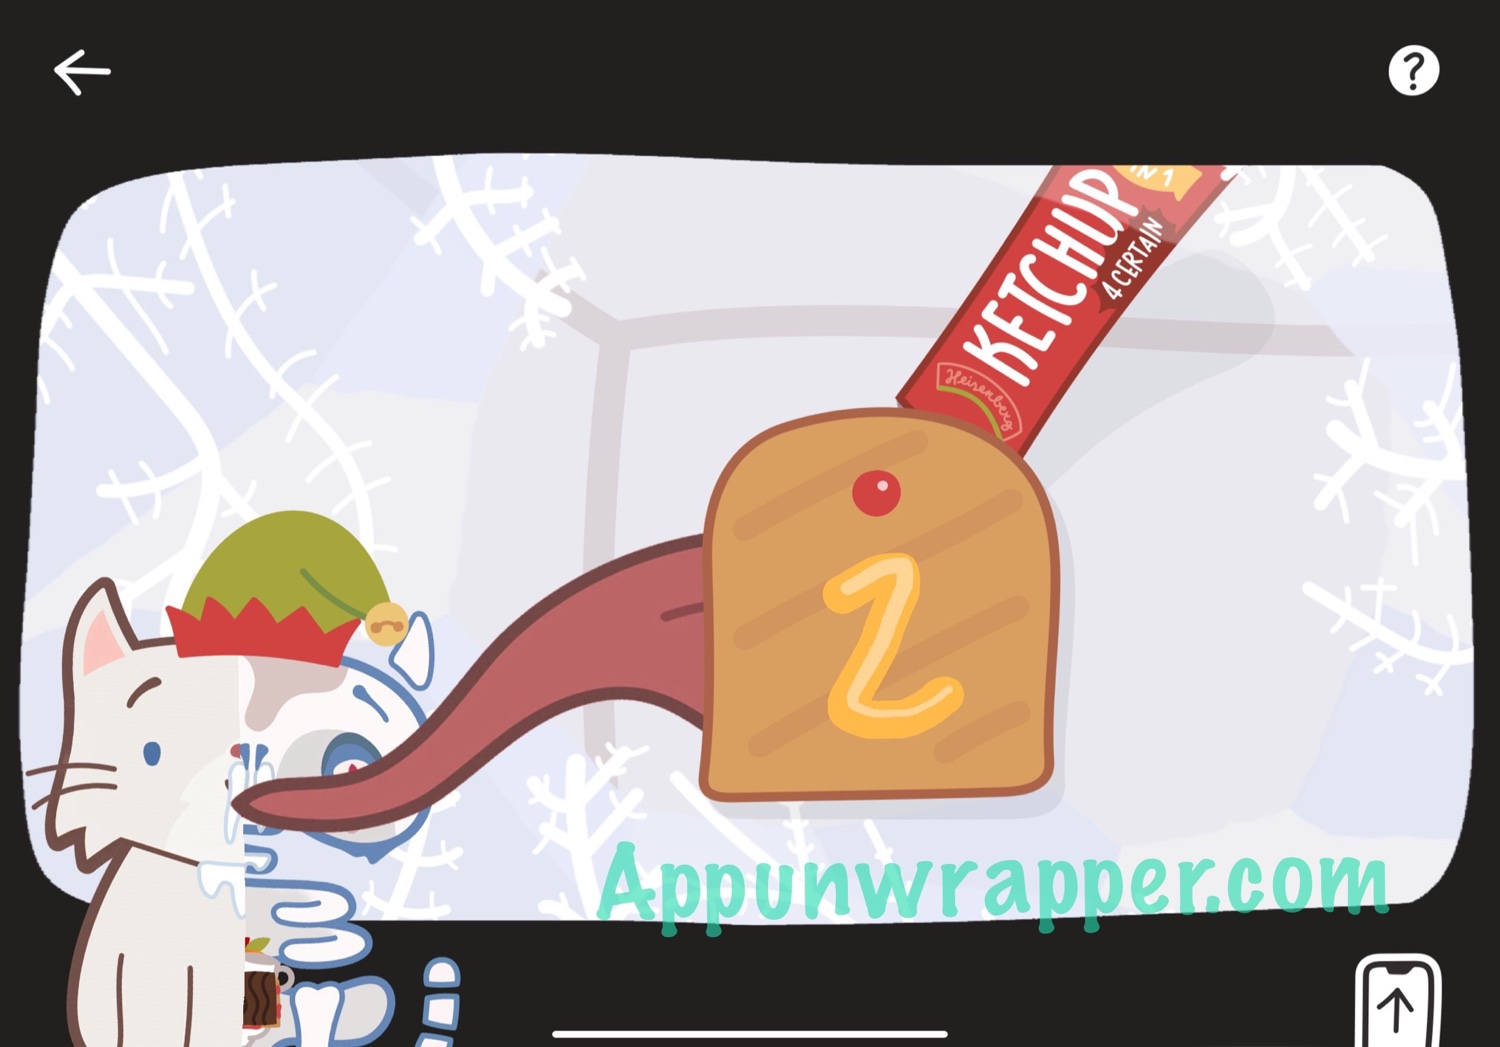
33. Go back to the fridge and use the mustard and ketchup to draw the “i” on the toast. You can swipe on the mustard to change it to ketchup.
34. Now we have four different food items. Go back to the mirror and zoom in on the mobile. Place the apple, cake, toast and donut on the mobile. Then it will turn around and show you that the password is to press all the buttons at once.
35. Zoom out and go up the stairs to the Quantum Hall. Press all four buttons at once. Use the mouse on the screen to close all the pop-up ads. Then purchase the item on the screen.
36. Go back downstairs. Pick up the tool that’s delivered and then rotate your device a bit to use it to hammer at the mirror and break it.
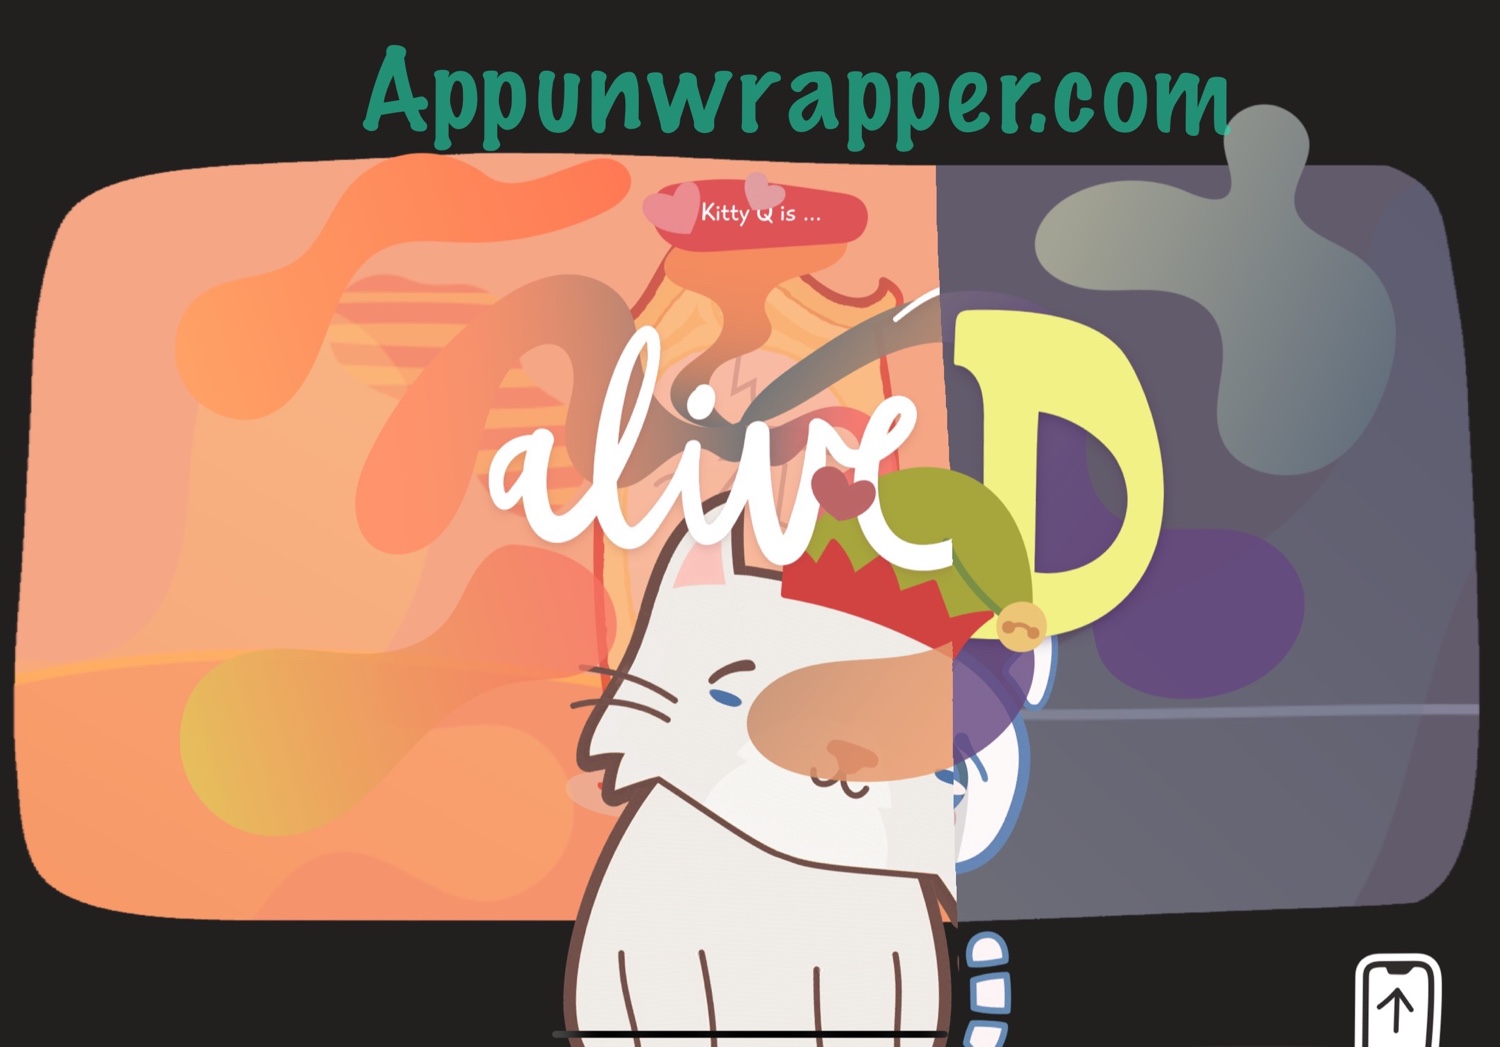
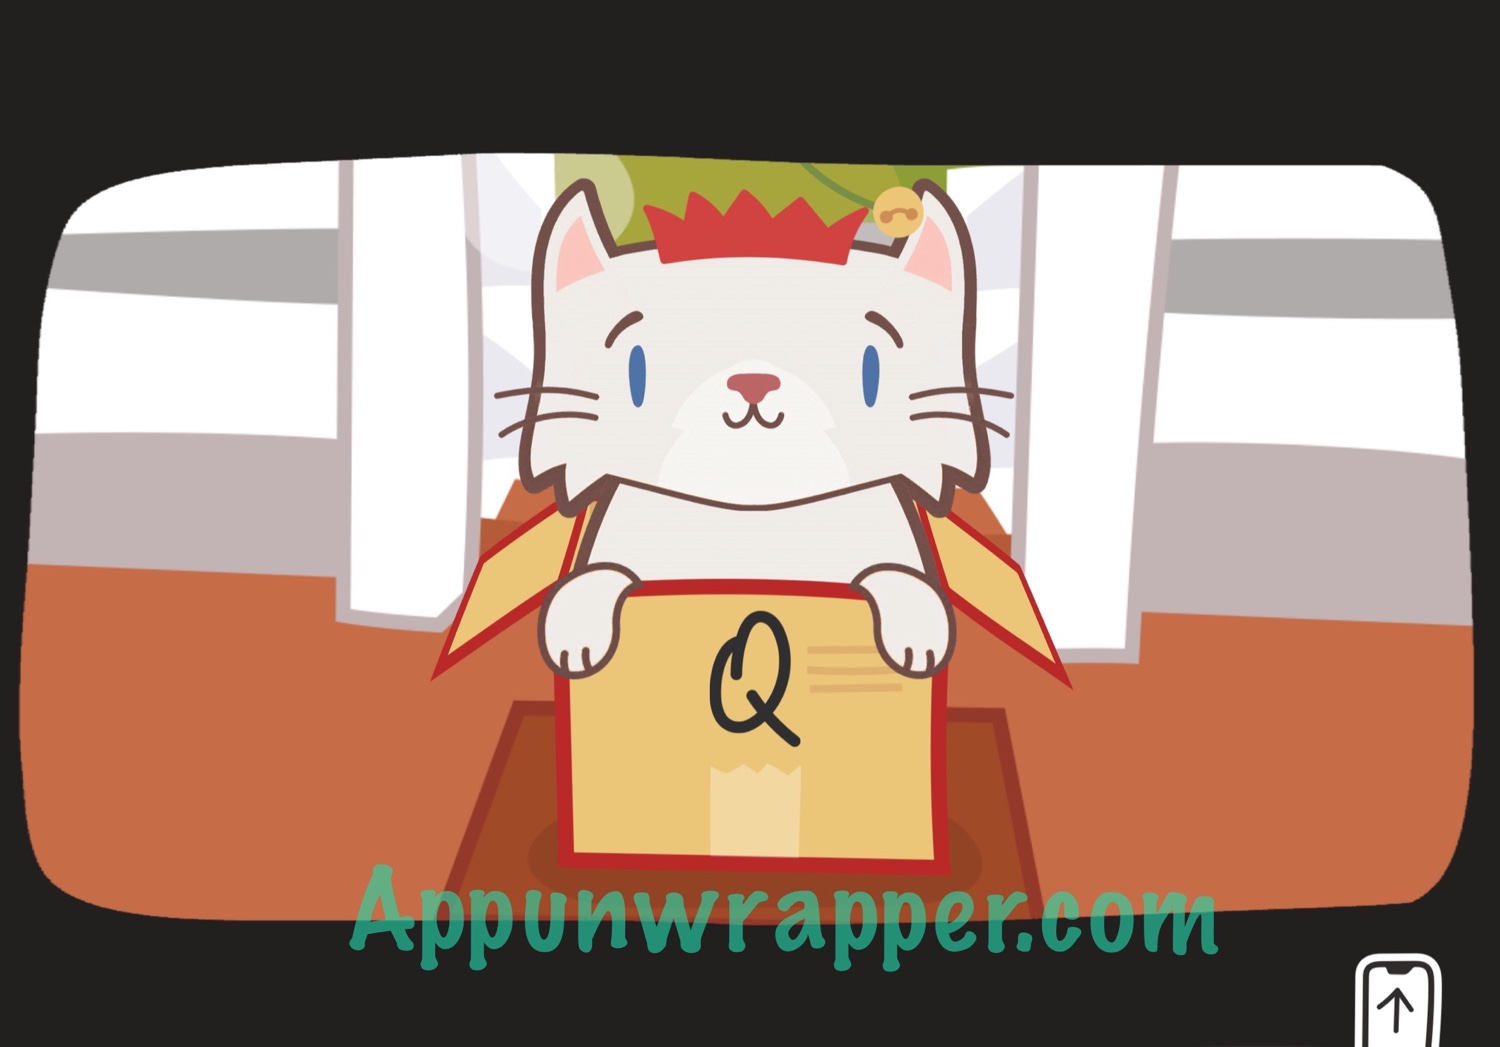
37. Now you get to choose whether Kitty Q is alive or dead. Drag one side of the screen to the other to choose. I wanted her to be alive. You then get delivered a new box with Kitty Q as alive or dead, whichever you chose, and can take a photo of her.
And that’s the end! Congratulations! Make sure to read through the Kittypedia to learn more.

I didn’t get the Kittypedia entry for ‘Randomness’, anyone else?
ThereΓÇÖs a step I missed that could be it. If you change the lucky catΓÇÖs eyes to 3 3 3, you get a poster.
ME TOO!!
I also can’t seem to get the randomness entry even though I completed the game… I tried changing the cars eyes to 3, 3, 3 but it didn’t do anything for me….
Okay so it doesnt matter if you pick alive or dead Kitty Q is cute either way. The walkthrough was very helpful and I wish I knew about this game sooner.