Adventure Escape: Framed for Murder (A Mystery Room and Crime Solving Detective Story!)
By: Haiku Games
This is a complete step-by-step walkthrough guide with hints, tips, tricks, solutions and answers for the iOS and Android adventure game Adventure Escape: Framed for Murder (A Mystery Room and Crime Solving Detective Story!) by Haiku Games. Feel free to ask for extra help in the comments section.
Looking for FRAMED by Loveshack?
Walkthrough:
Chapter 1 | Chapter 2 | Chapter 3 | Chapter 4 | Chapter 5
Chapter 5:
You can watch my video for Chapter 5 here or continue below for my step-by-step guide:
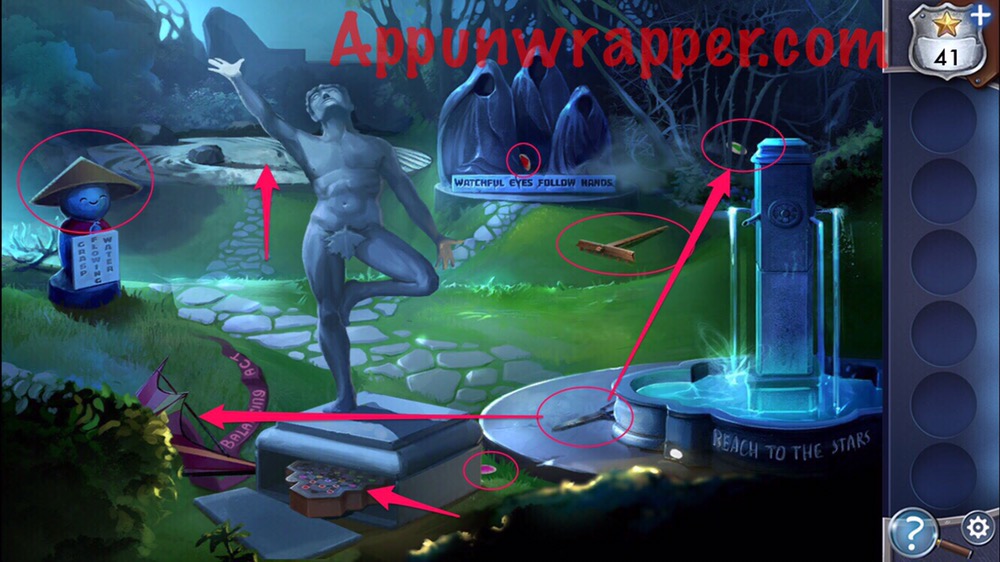
1. Head to the garden. Pick up the rake, shears, the hat from the statue to the left, and the pink and red puzzle pieces. Use the shears to access the green puzzle piece. Also, notice the four clues around the garden:
WATCHFUL EYES FOLLOW HANDS.
BALANCING ACT.
REACH TO THE STARS.
GRASP FLOWING WATER.
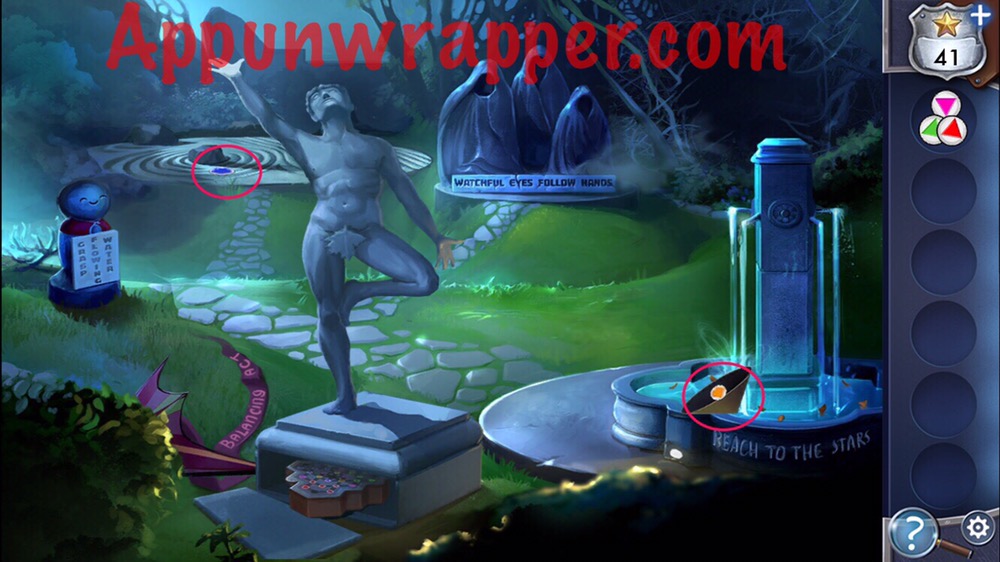
Arrange the statue based on those clues. It should look like the photo below. The bottom of the statue will open up, revealing a puzzle. Use the rake in the zen garden to find the purple puzzle piece. Use the shears on the kite to get the kite frame. If you use it on the fountain, it disappears. But you can use the hat to collect a yellow puzzle piece from the fountain.
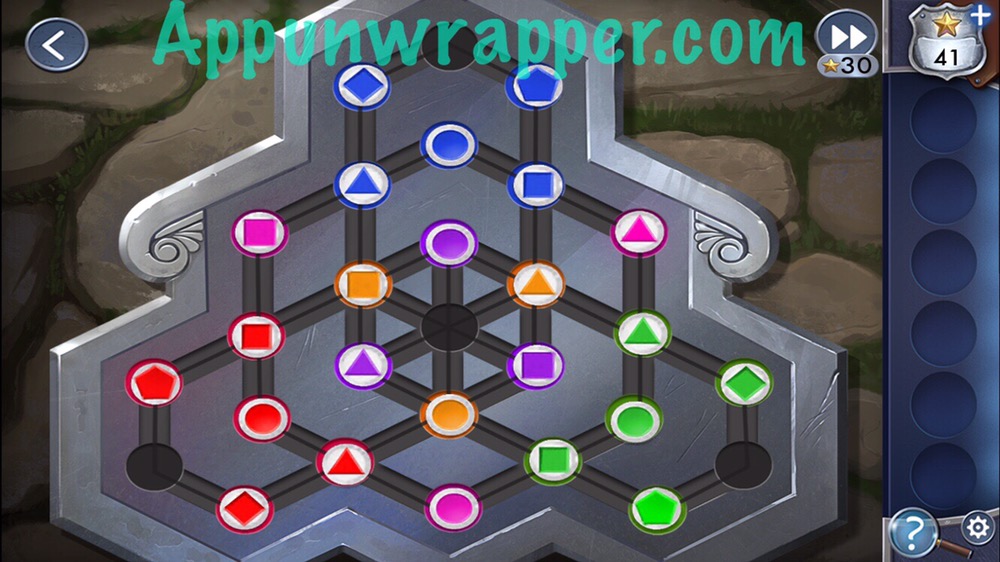
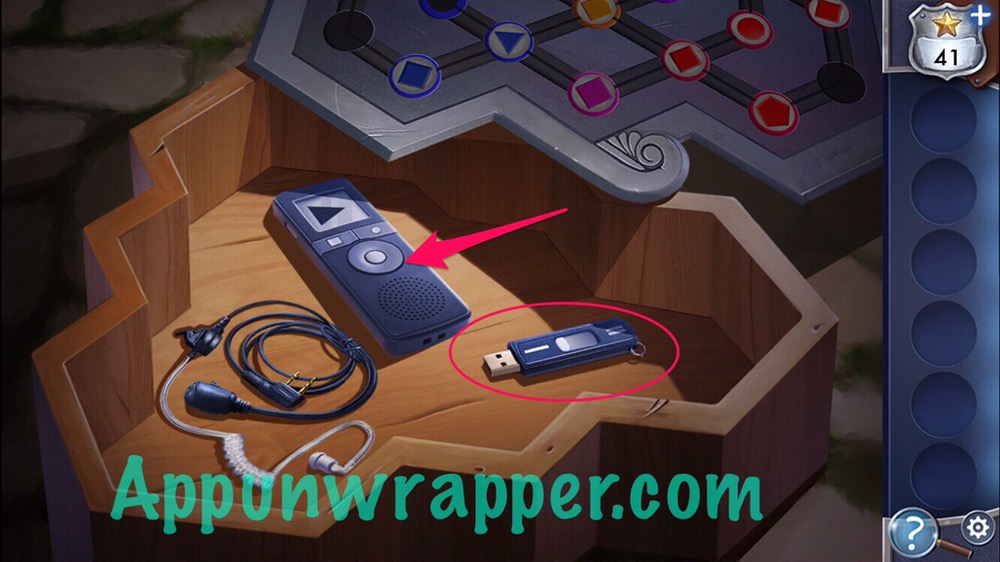
2. Let’s solve Caesar’s Box! Add the five pieces to it. You need to move all the pieces to the correct places. The colors and shapes must match. It should look like the photo below. I believe each starting position is different, but you can watch my video below for extra help. Then it’ll open up. Listen to the recording and take the USB stick.
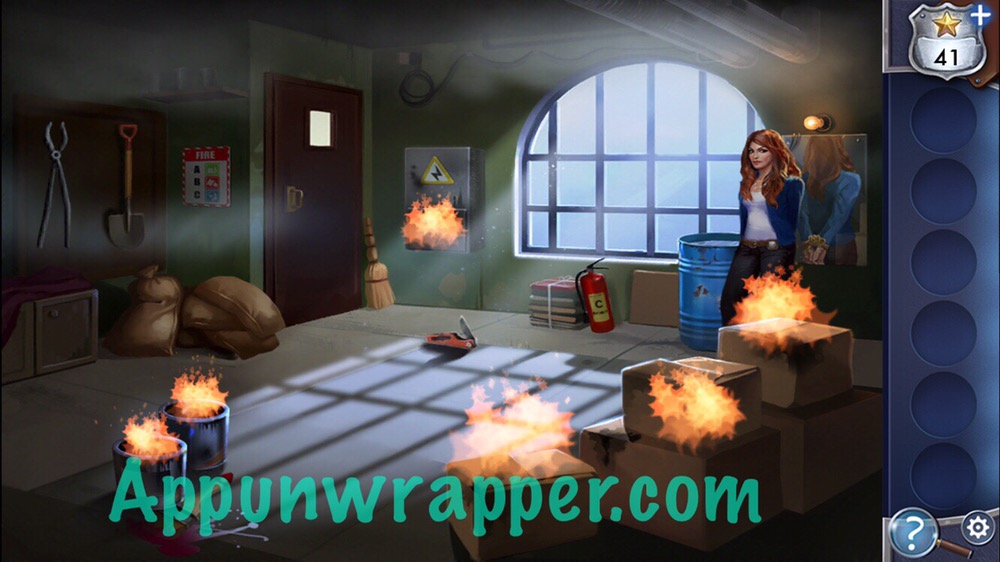
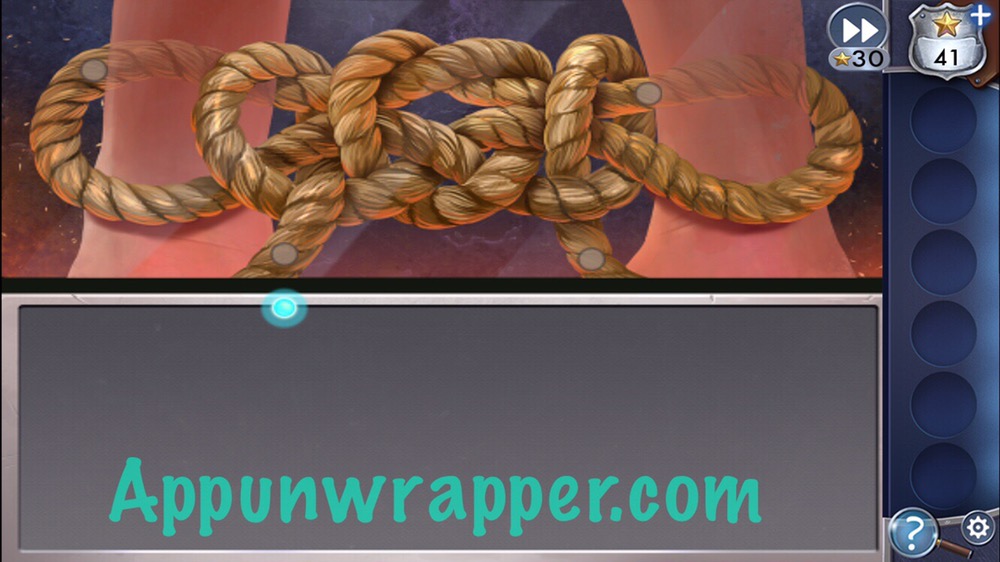
3. Looks like Kate has been kidnapped! She’s tied up in a burning room. Tap on the mirror and she’ll walk over to it. Now you have to untie the ropes by tracing them in the mirror in what might be one of the most annoying puzzles ever. I recommend going very slowly and taking advantage of the checkpoints. This puzzle is torture. You can watch my video below for extra help.
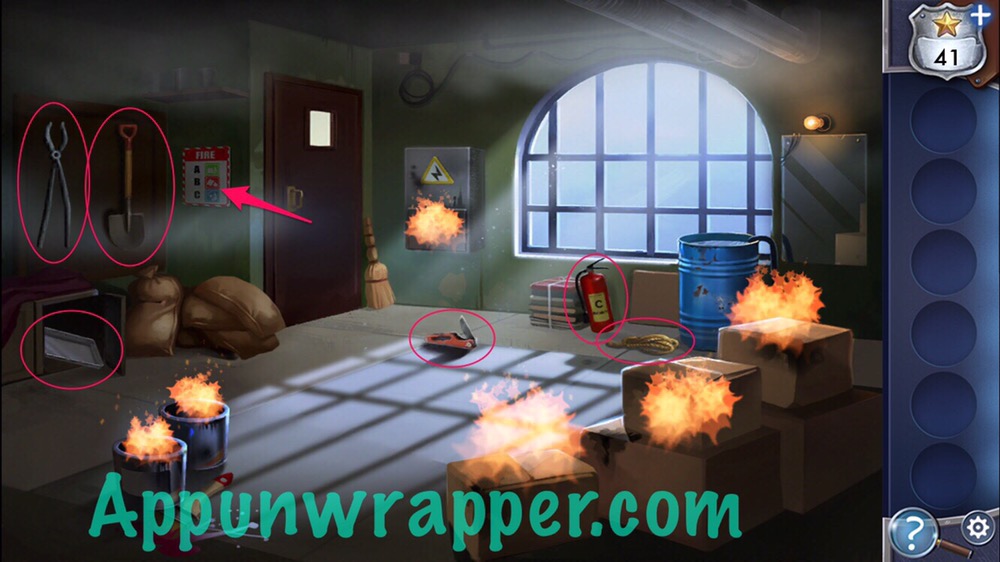
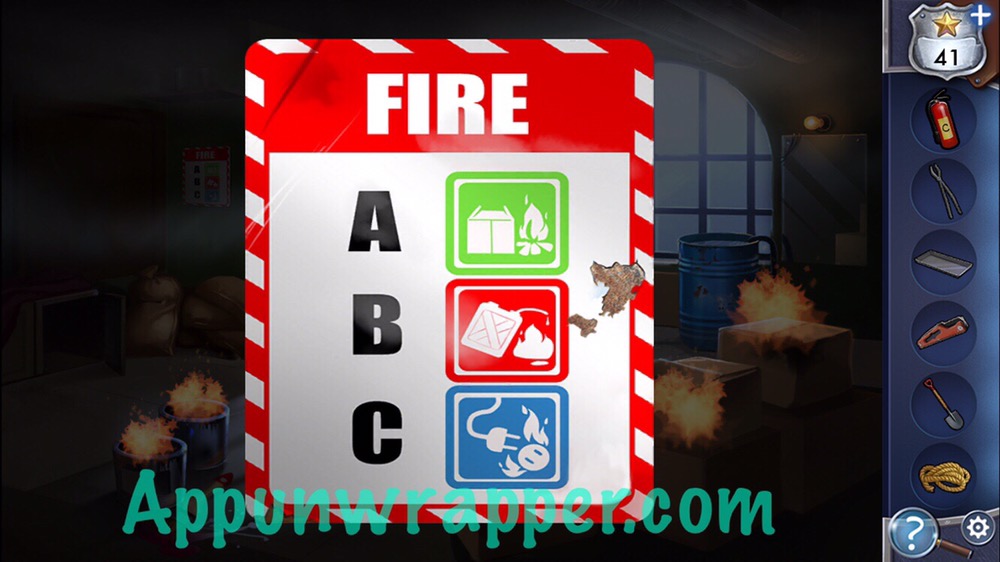
4. Now that you’re free, time to put out the fire. Pick up the multi-tool, tongs, fire extinguisher, shovel, rope, and baking sheet. Also, look at the poster about fire.
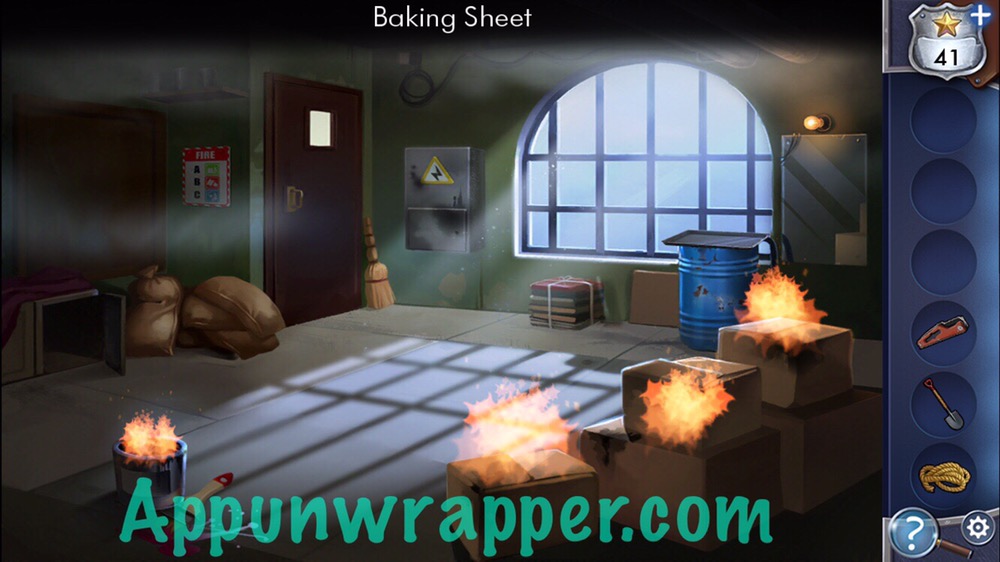
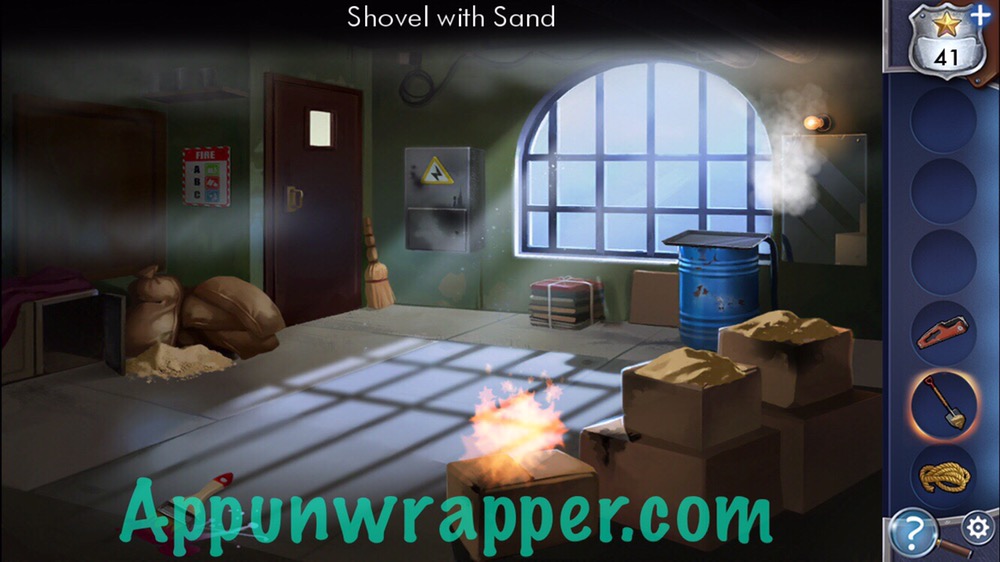
5. Use the fire extinguisher to put out the flames on the fuse box. Then, use the tongs to grab each paint can and drag it to the water. Then, place the baking sheet over it to put out the flames. For the boxes, use the multi-tool to cut open a sack of sand. Then, use the shovel to pick up some sand and shovel it onto the boxes. Do the same for each. Then leave through the door.
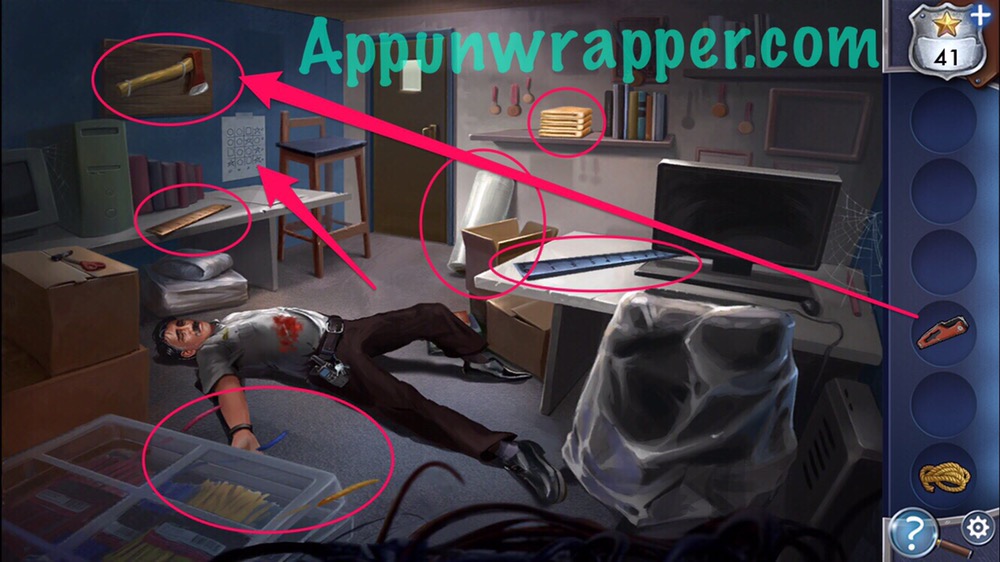
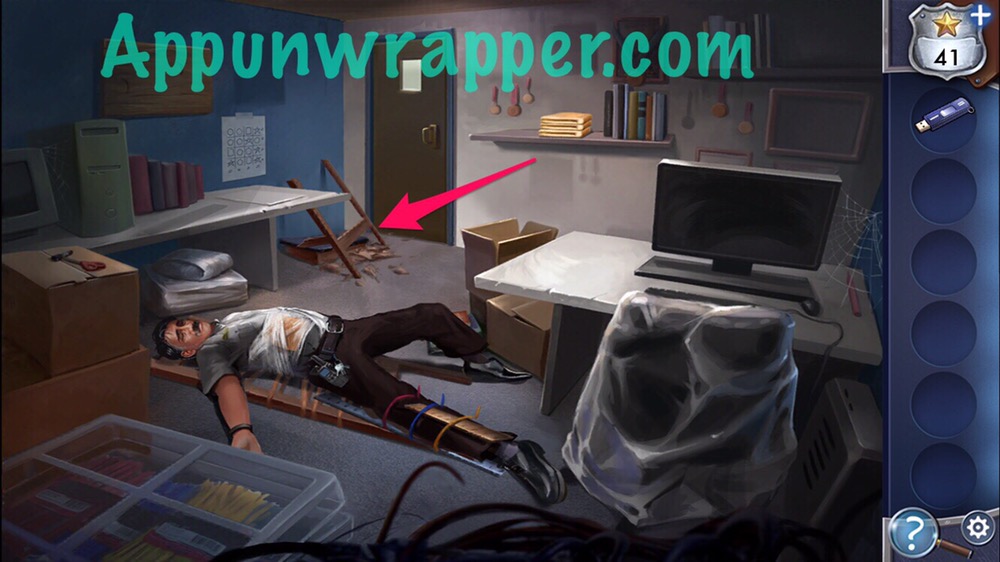
6. We need to help Bill! Pick up the two rulers, cable ties, cloth, and plastic wrap. Use the multi-tool to get the axe. Also, look at the note on the wall.
7. Use the cloth to clean the wound. Then wrap plastic wrap around him. His leg is broken, so use the rulers and cable ties as a makeshift splint. And last, use the axe on the stool in the corner. Then tie the rope to it to make a stretcher.
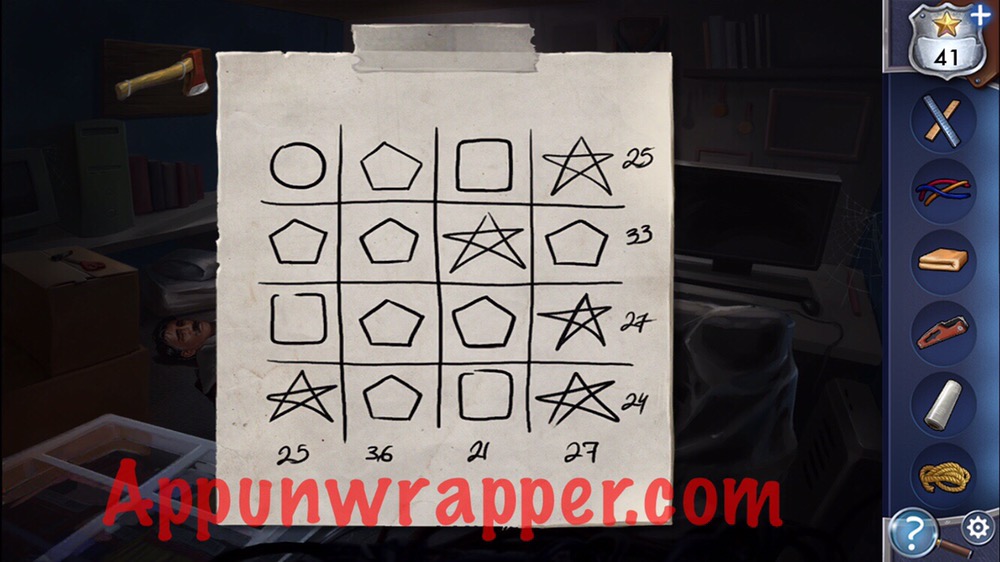
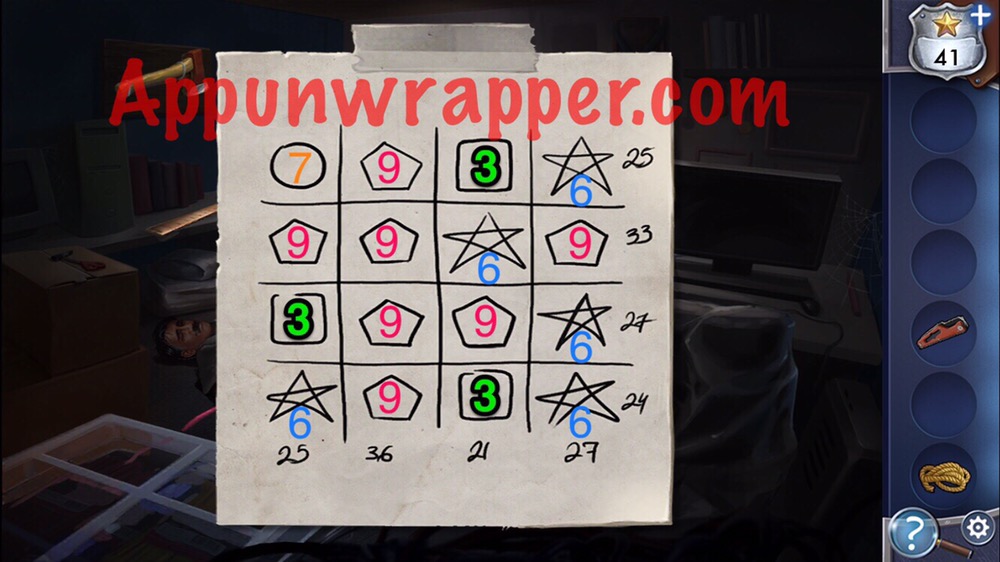
8. Now we can look at the USB stick on the computer. The clue for the password is the poster with the shapes on it. The hint is to add the circle, square, pentagon, and the circle again to get the number. So let’s figure out what number each shape represents. The easiest one to figure out is the pentagon because there’s a row of just four of them. 36/4 = 9. So the Pentagon is 9. Then there’s a row with three pentagons and one star, adding up to 33. 3×9 = 27. So that means the star is 6. Now you have a couple of rows with just a square left. 9+6+6+x = 24. 21+3=24. So the square is 3. So now we just have the circle left. x+9+3+6=25. 25-18=7. So the circle is 7. So back to the equation given on the PC. Circle + square + pentagon + circle = password. 7+3+9+7=26. So enter 26 into the keypad and press ENTER.
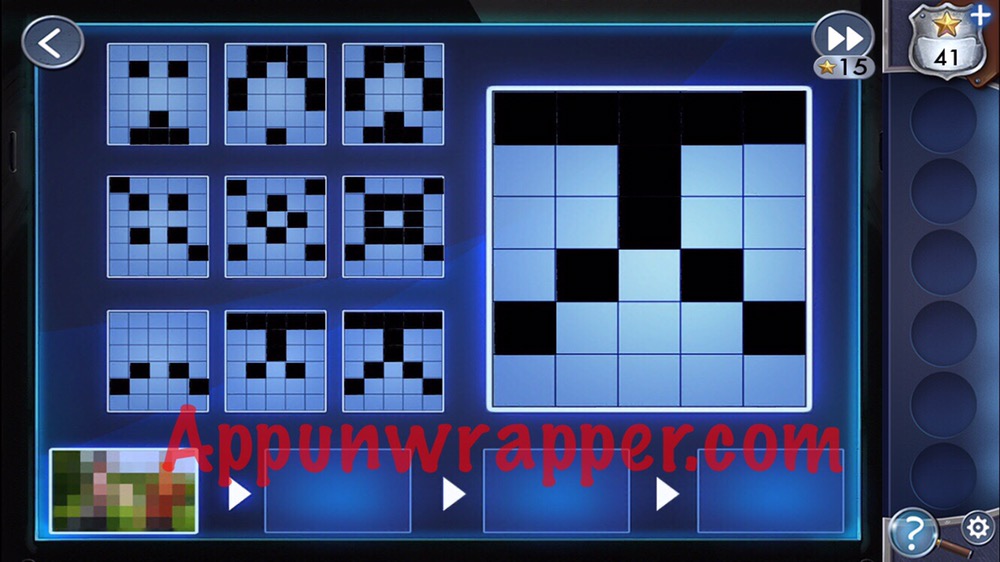
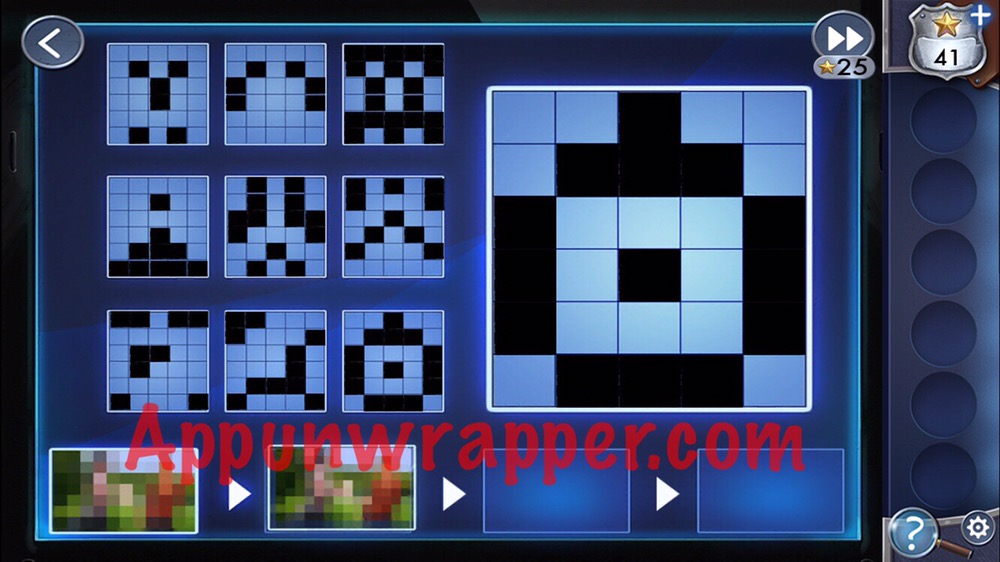
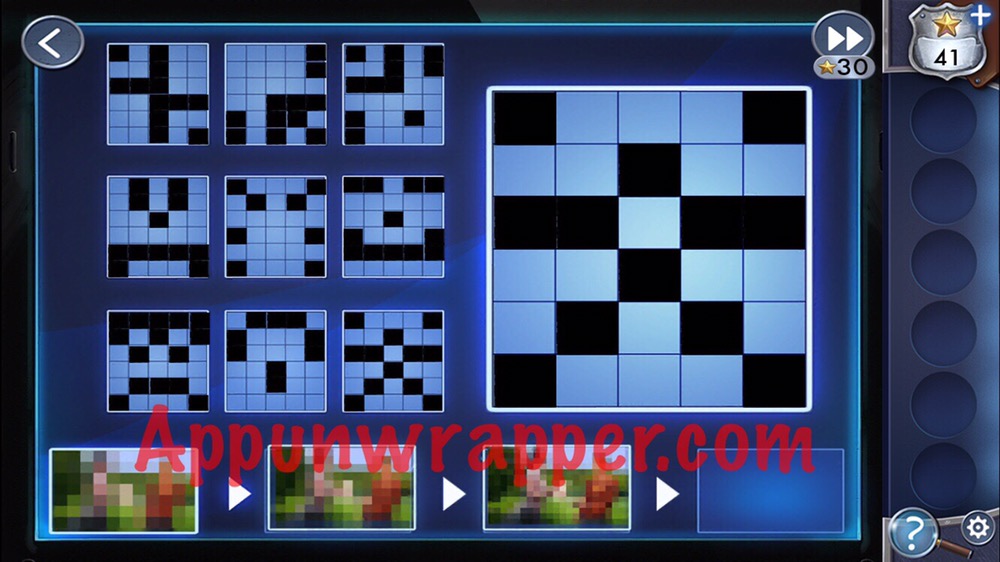
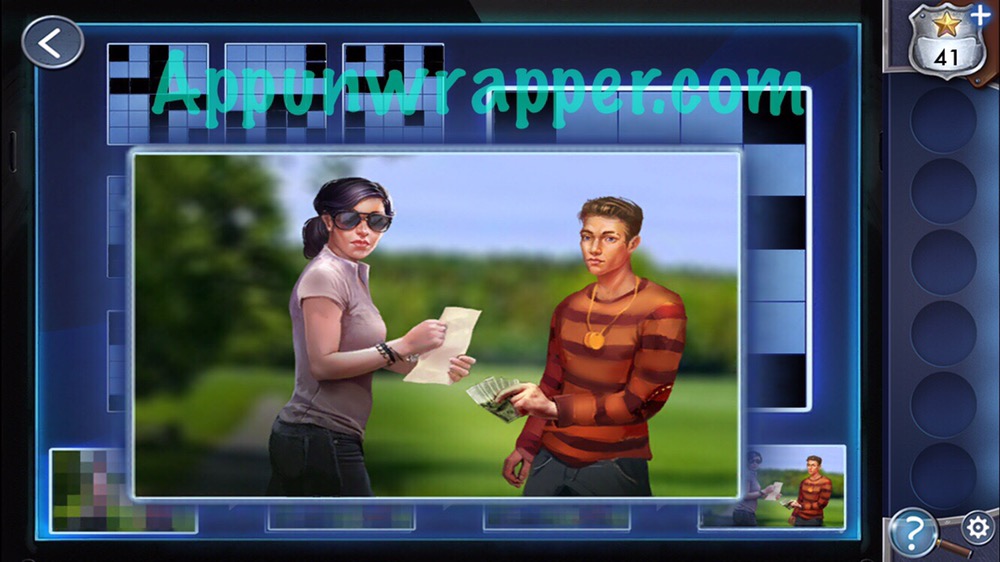
9. Now we have to solve what looks like a picross puzzle of some sort. You need to look at the pattern in the first two rows and then fill in the third one on the third row based on that pattern. You’ll have to do this for three different patterns. The first is easy. Just combine the first two images. The second one asks you to invert the colors. The third one asks you to directly combine the two — this means that any squares that overlap get negated. The easiest way to do that one is to copy the first image exactly, and then go over it with the second image. Now the image will clear up and you can see who was tipping off the gang!
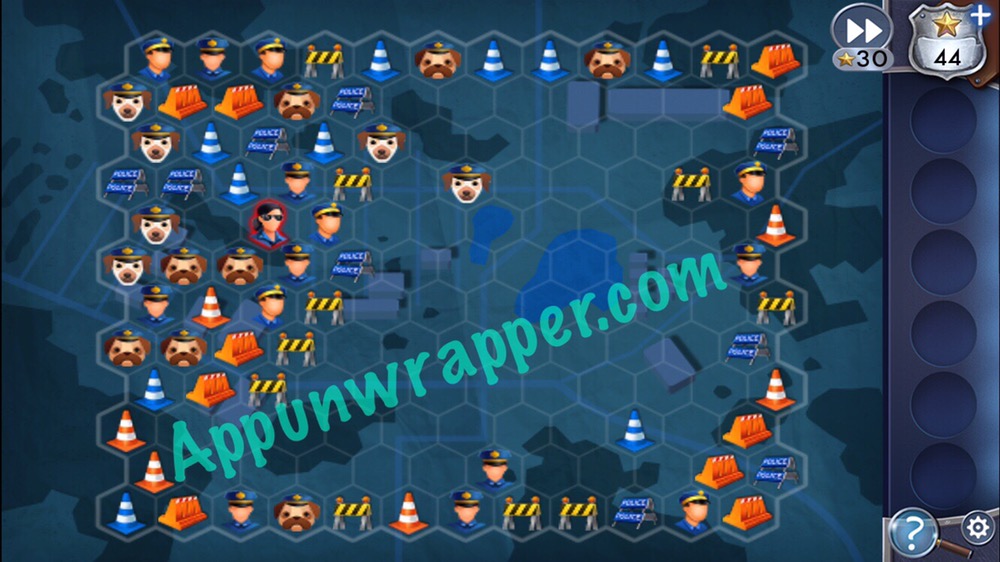
10. Now we have another mini game. Tap to place a barrier Carla can’t cross. If Carla makes it to the edge of the grid, you’ve failed to capture her. Completely surround Carla so she can’t escape. First, focus on keeping her from getting off the board. Then, close up the boarders and fill in an area around her until she has nowhere to move. Each time you play will be different, so you’re on your own for this.
Watch the ending and complete the game! Congratulations! Make sure to check out the other Adventure Escape games if you haven’t yet.





Tip: use a (real) mirror for the rope puzzle. easy as cake if you concentrate on the mirror 🙂
I cried when I pass the first point in the rope puzzle ‘) its freakin hard
Haha yeah that puzzle is evil.
Yeah, I almost deleted the game when I got to the rope puzzle at first. I powered through and got it done, though.
Making the perimeter on mine was a lot easier than yours looks. There were a couple of barriers already near her, so I fenced her in pretty fast. I used maybe 10 barriers to finish the game. Guess I got lucky.
That knot puzzle is the worst mini game/puzzle I’ve faced!
The poster doesn’t really explain how to put the fire out, I just guessed around
Rope puzzle is the worst please put use a knife to cut the rope off but the puzzle is so freaking annoying and it makes you wanna scream please take it off
If I had enough starts I would pass it and yes I got the free starts already but I still donΓÇÖt have enough to pass it. If yΓÇÖall have enough starts pass the puzzle.