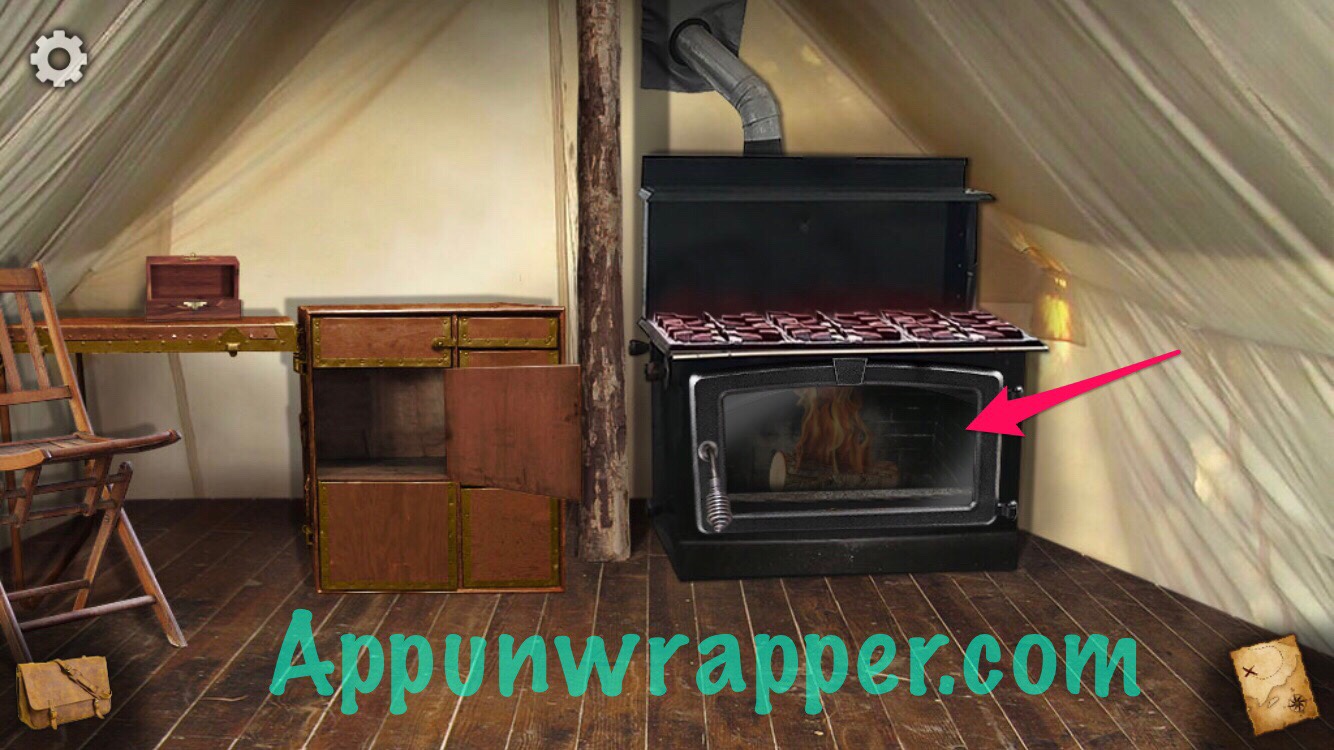
16. Place the wooden log in the oven. Use the matches to turn on the oven.
17. Go back to Scene 6. Place the dynamite on the rocks to the right and use the matches to light it. The dynamite will explode and you can go through to Scene 12.

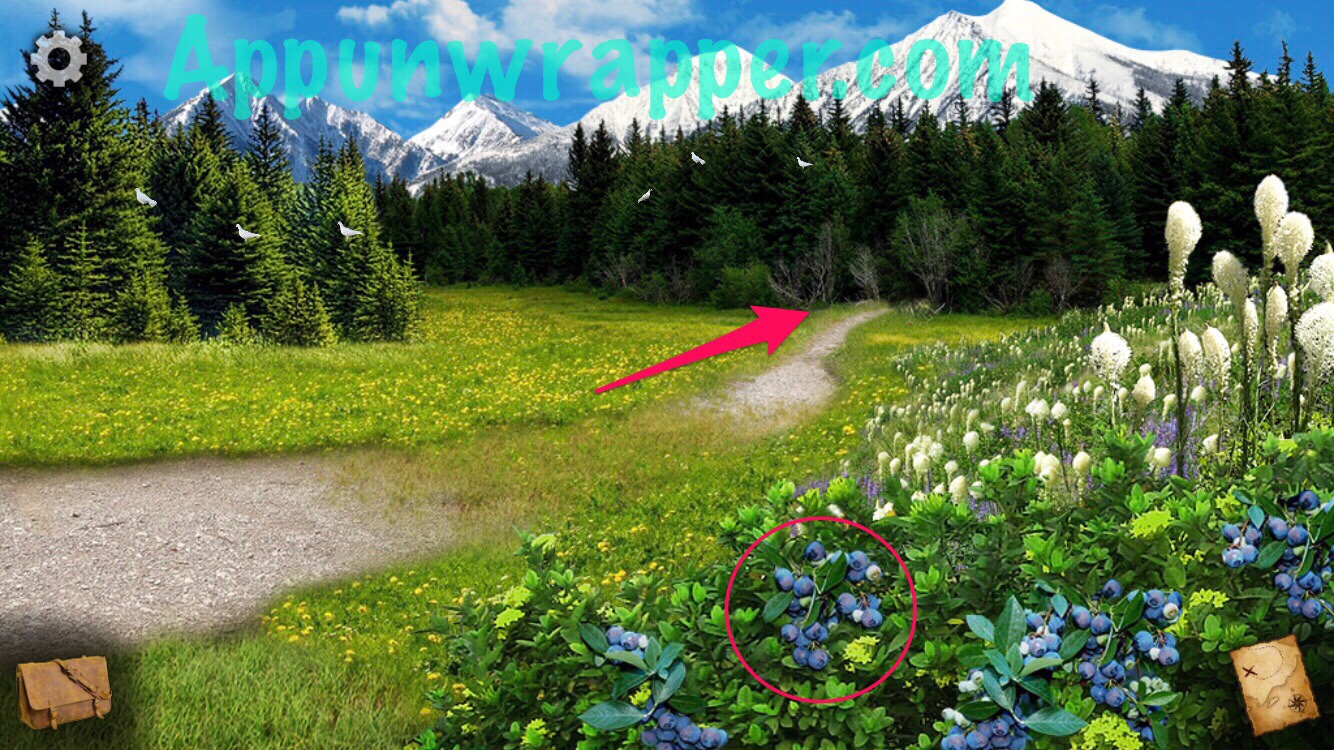
18. You’ll see Bigfoot heading down a path into a forest! Pick some huckleberries and then follow him down the path to Scene 13.
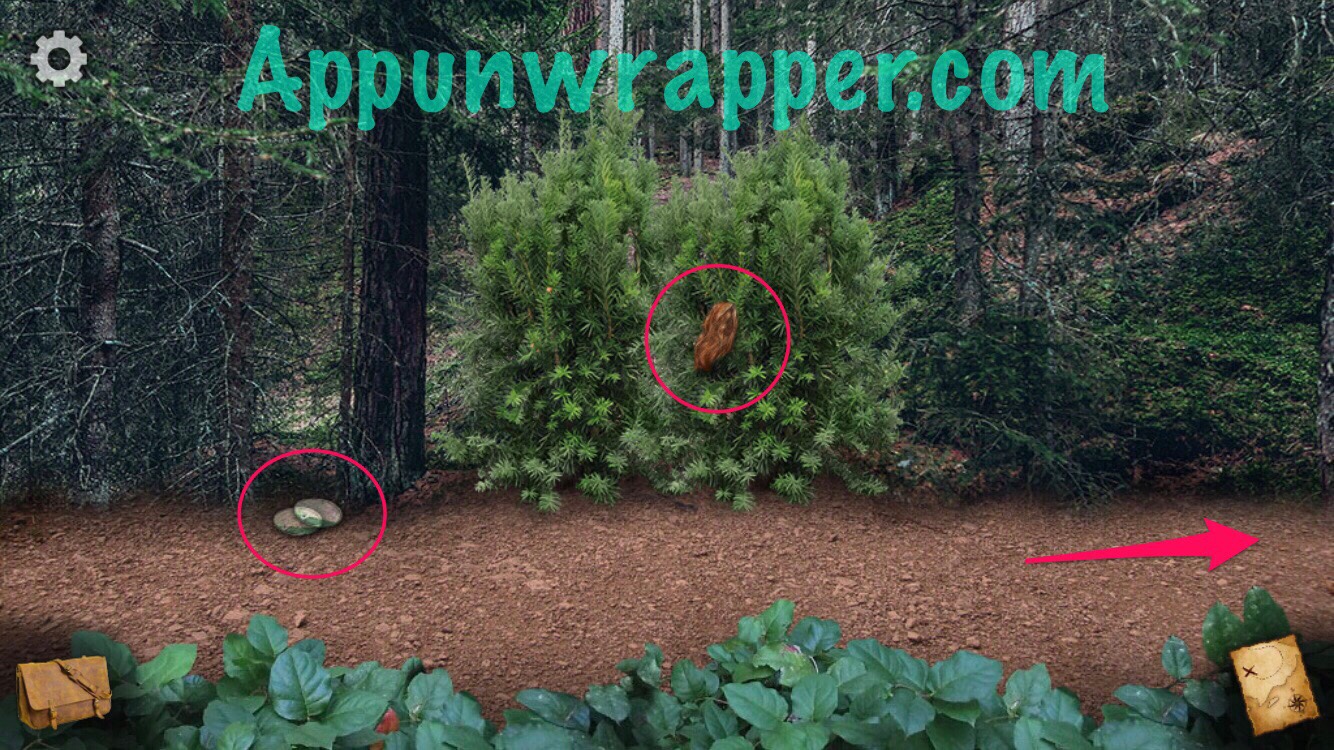
19. Pick up the glass lenses and the tuft of fur. Head right to Scene 14.
20. We can’t cross yet, so go back to Scene 8. Use the bow on the boulder across the gap. Use the matches to light an arrow. Then, pull the arrow back and shoot the rock. Now you can cross to Scene 18!


21. Take the middle path to Scene 22 and continue straight ahead to Scene 23.
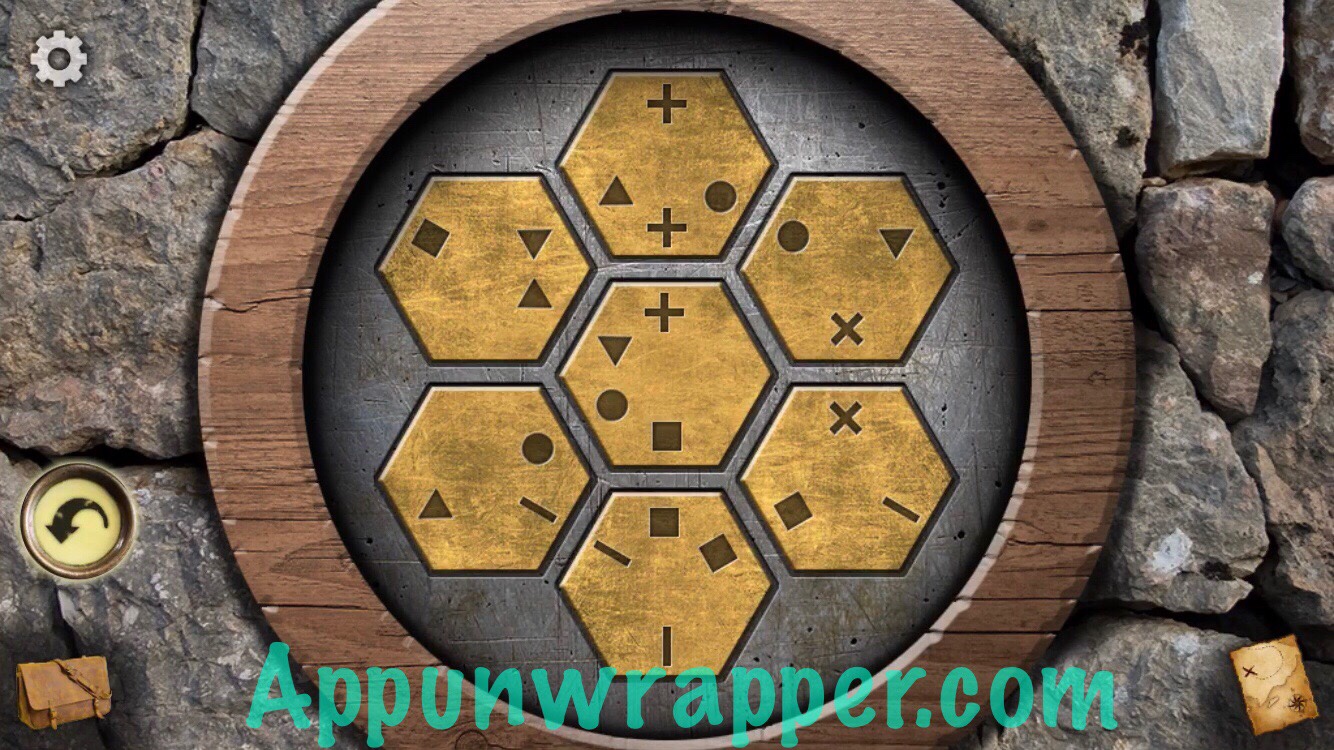
22. Head inside to Scene 24. Pick up the axe. There’s a puzzle on the wall with different shapes on hexagon tiles. Swap the tiles around so the shapes match up.

23. We need a clue for the next puzzle, so just ignore it for now. Go back to Scene 23 and then up the stairs to Scene 25. Place the two glass lenses on the binoculars. Look through them and adjust the view to see a clue. You’ll automatically take a photo of it.

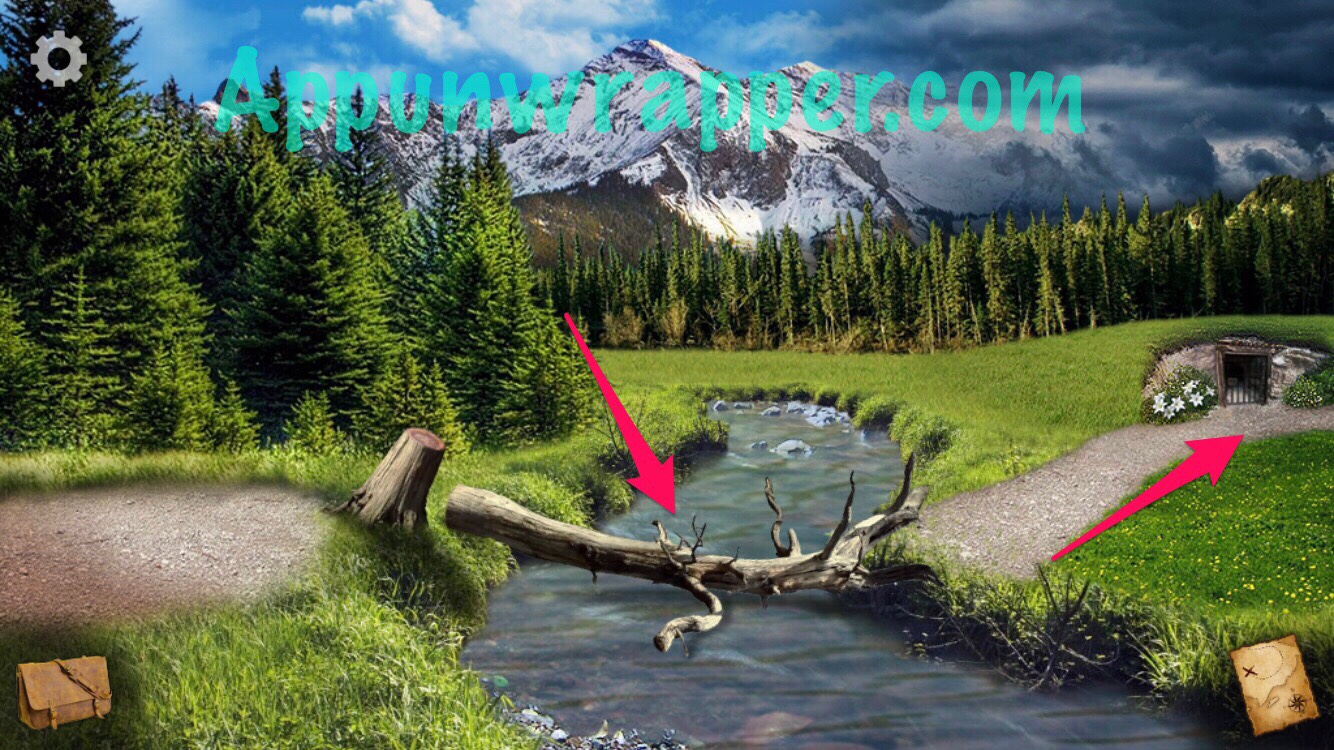
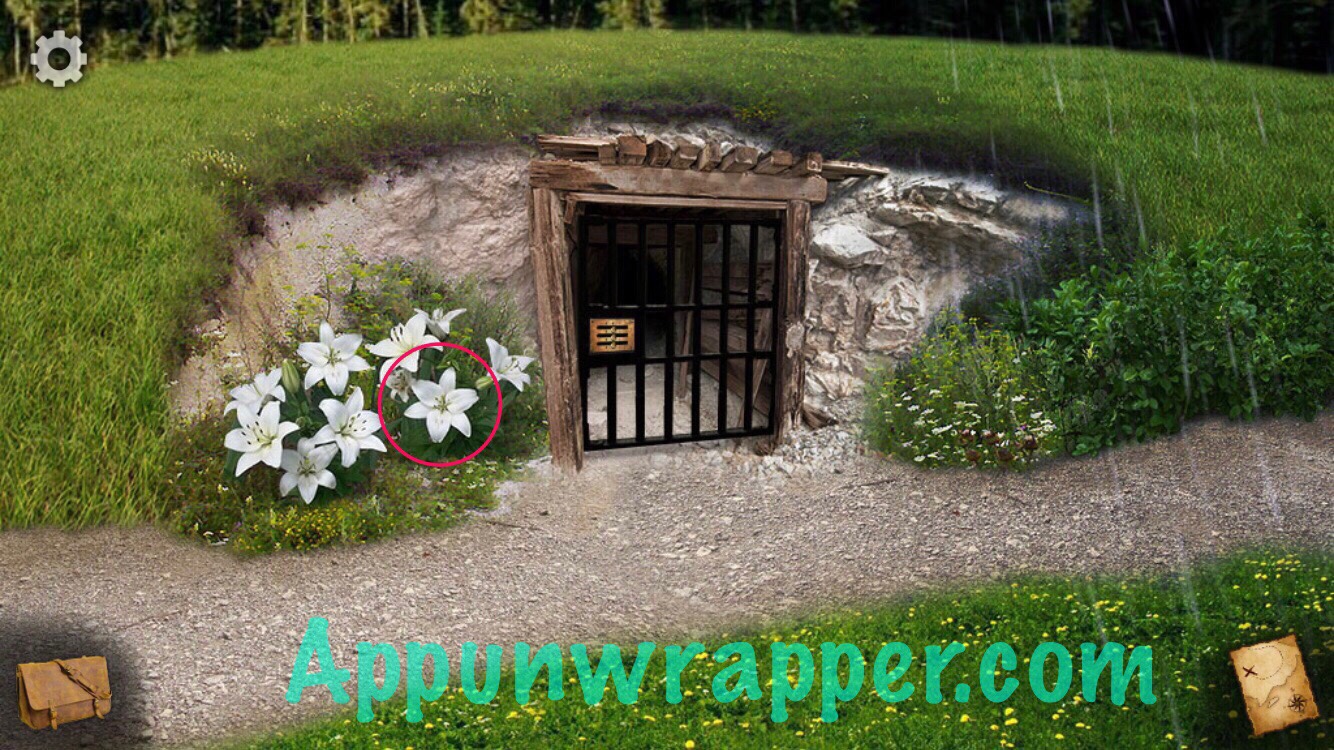
24. Go back to Scene 14. Use the axe to chop down the tree so you can cross to Scene 15. Pick a lily flower.
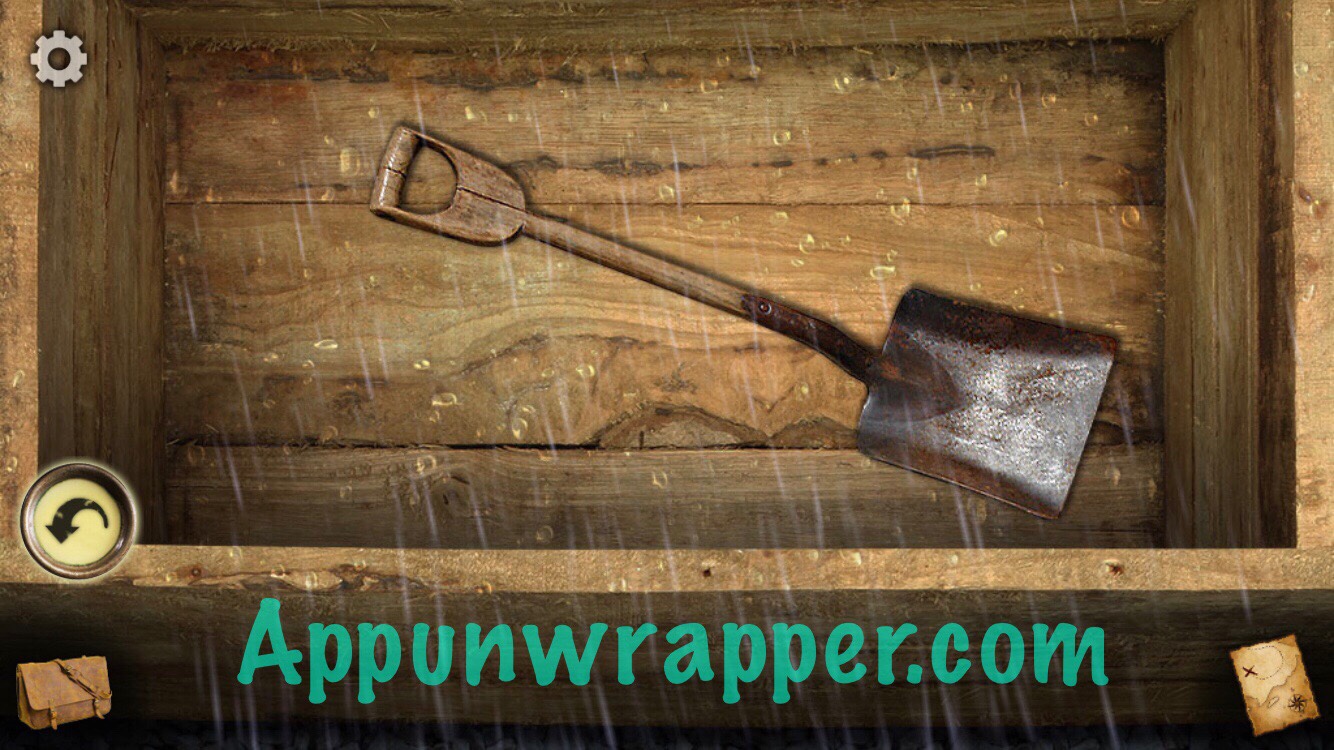
25. We need a clue for the gate lock, so ignore it for now and continue right to Scene 16. Solve the mosaic puzzle on the bench. Take the shovel from inside.

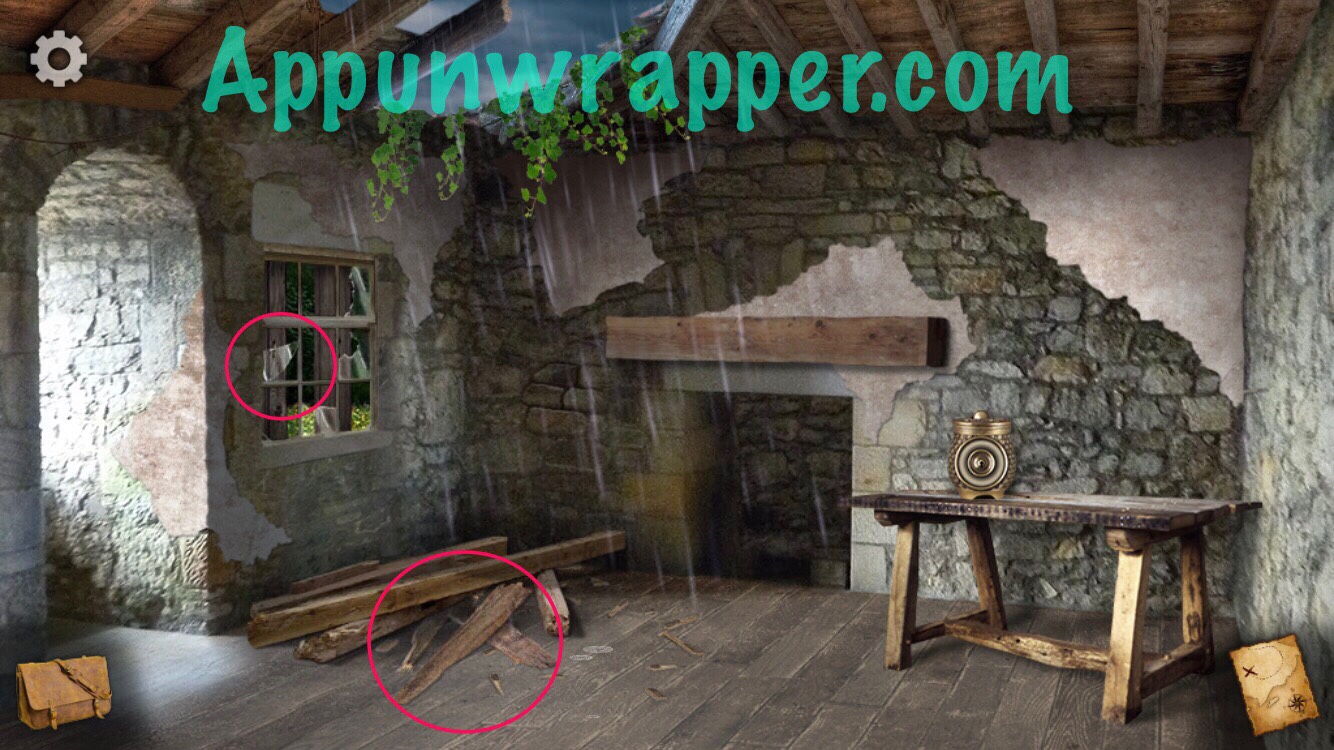
26. Open the door and go through to Scene 17. Pick up the pieces of wood and broken glass. We’ll come back later for the locked box.
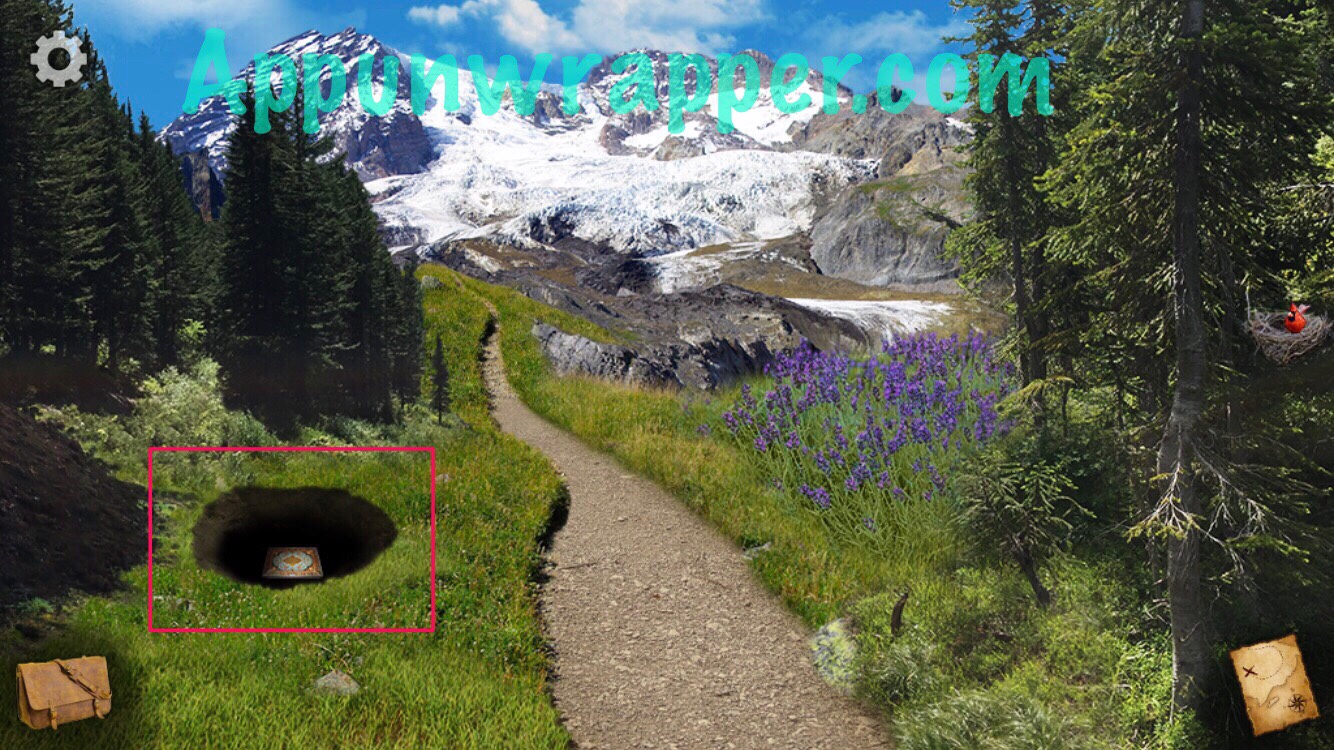
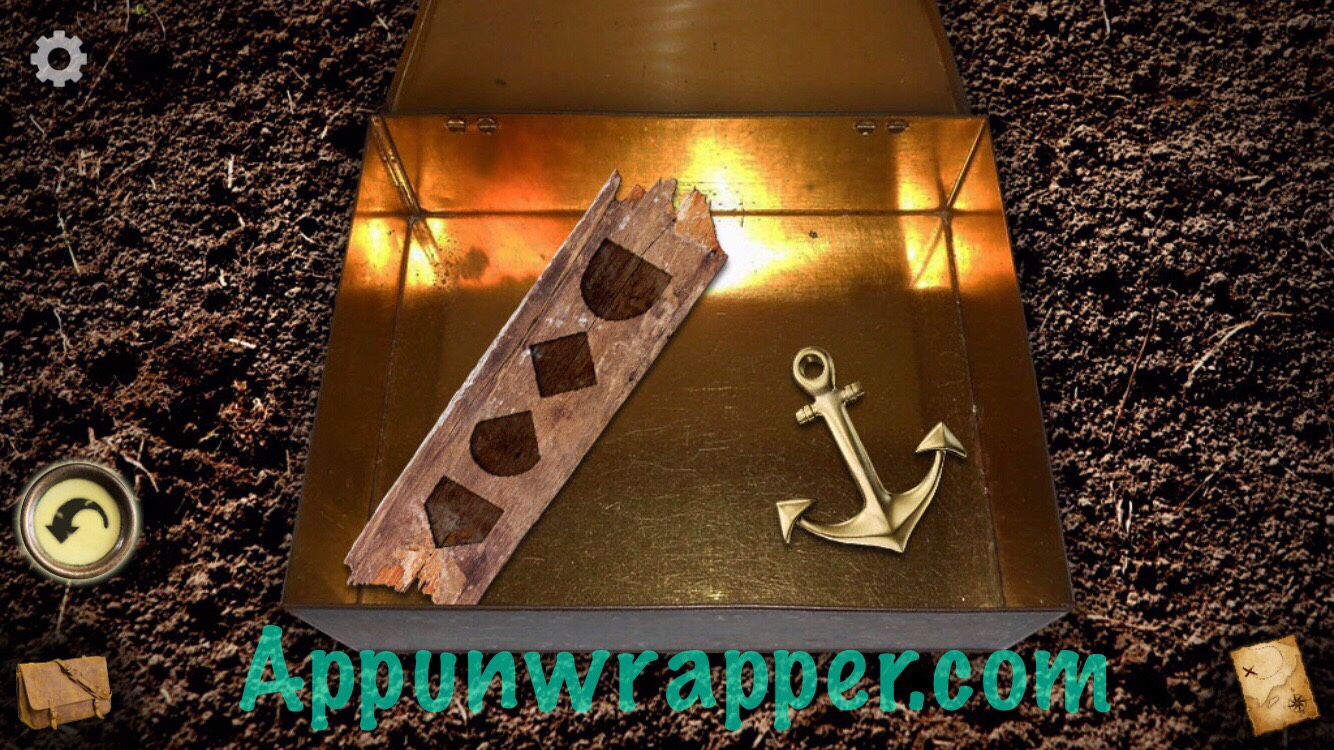
27. Go back to Scene 7. Use the shovel to dig up the mound of dirt until you find a small box. Open it and take the board with carvings and small gold anchor. Take a look at the board with carvings. It has a clue on it!

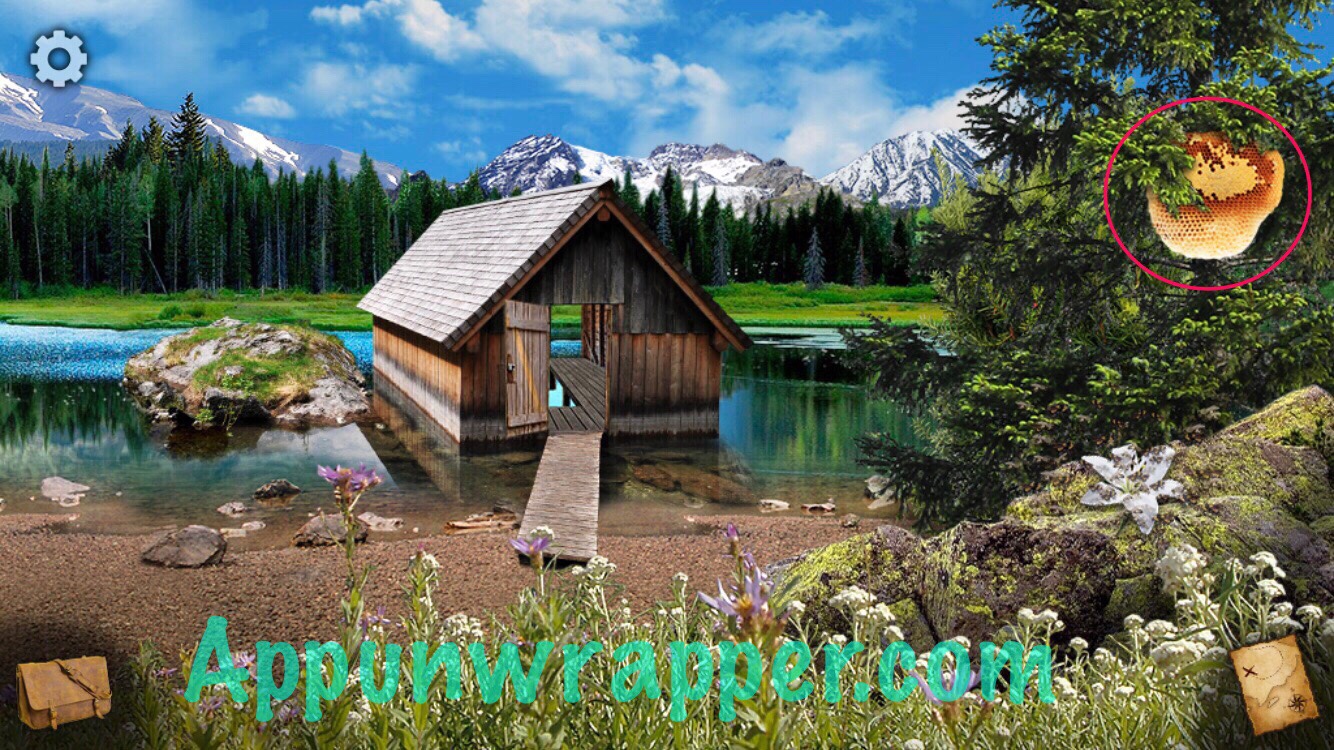
28. Go back to Scene 4. Use the lily flower on the bees to get them away from the honeycomb. Take a piece of the honeycomb.
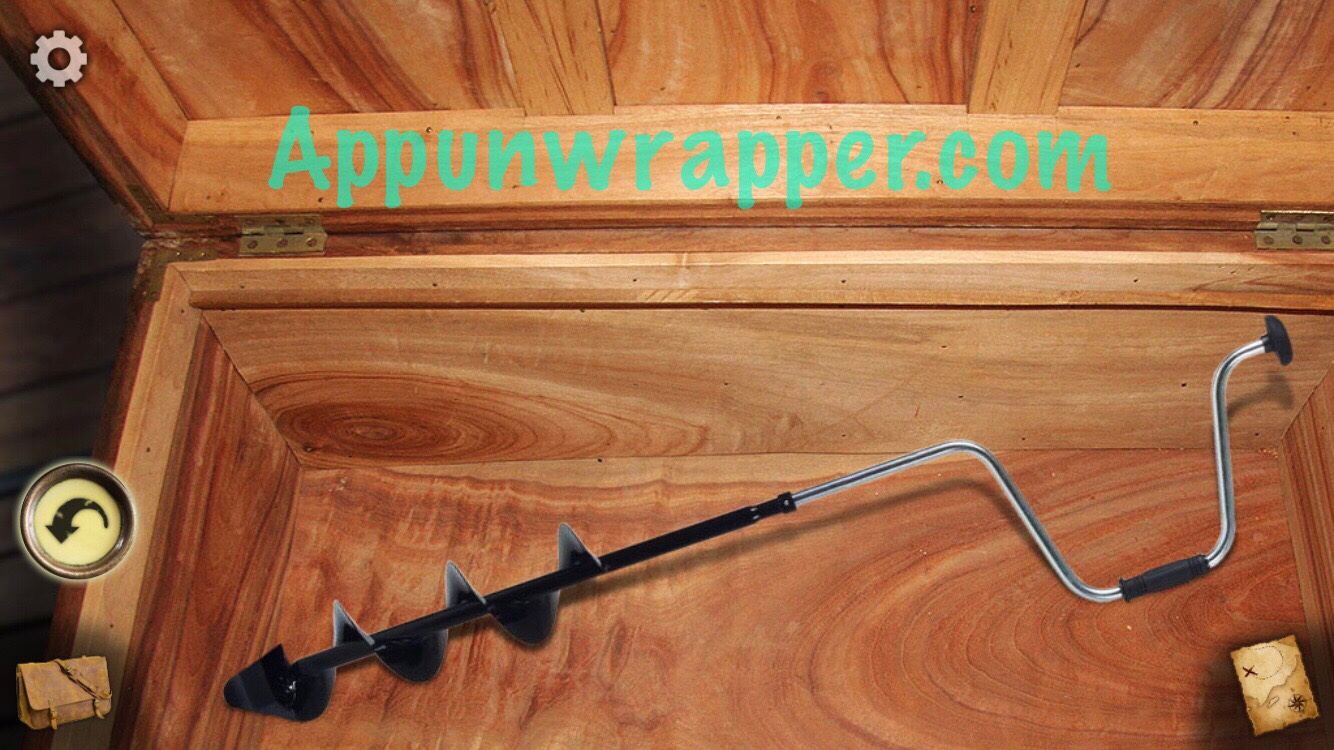
29. Go inside to Scene 5. Rotate the discs on the chest so there’s an opening for the small gold anchor. Insert it to unlock the chest. Take the ice drill from inside.

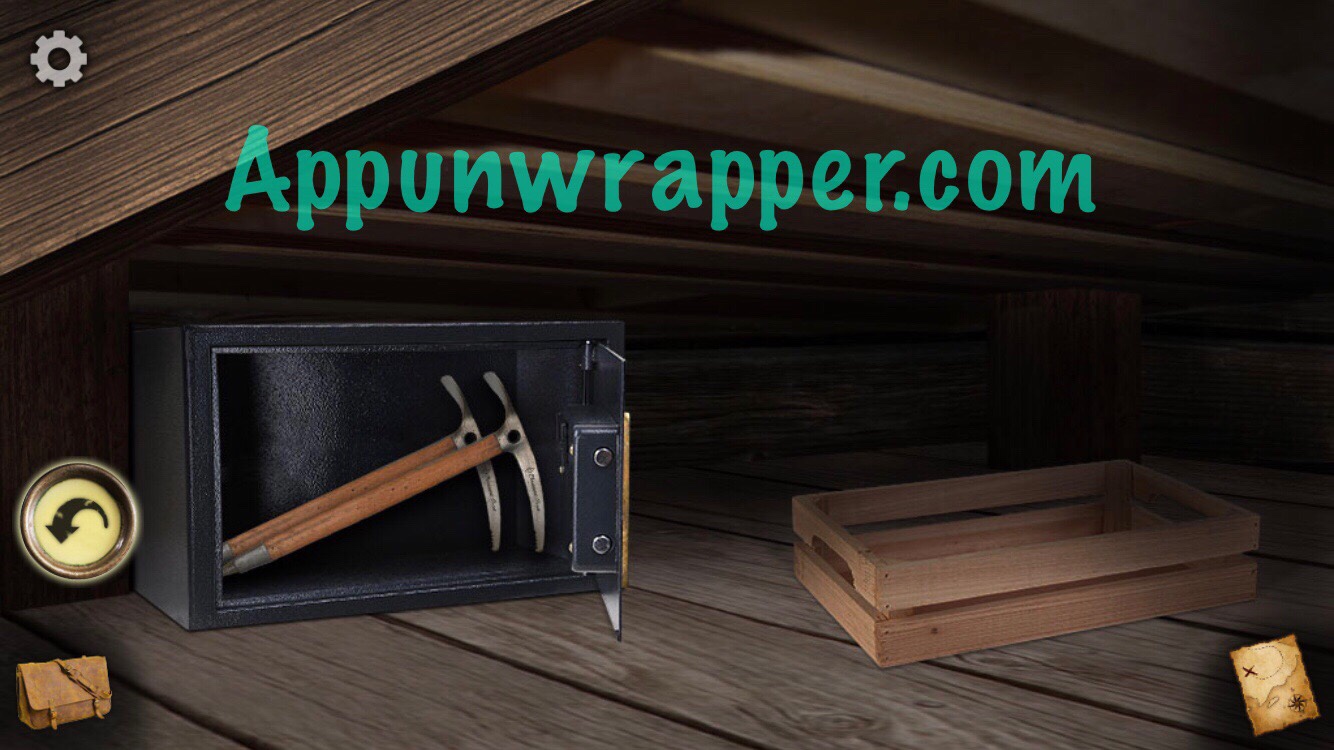
30. Go back to Scene 10. Use the clue from the board with carvings to unlock the safe under the bed. Take the ice axes from inside.
Click on the little numbers below to continue to the next page of the walkthrough or click here.


Awesome! Thank you!!
Finished this in a day. Very simple and not worth the money to be honest.
You can only finish this in one day if you use this walkthrough. Otherwise it would take at least two weeks…
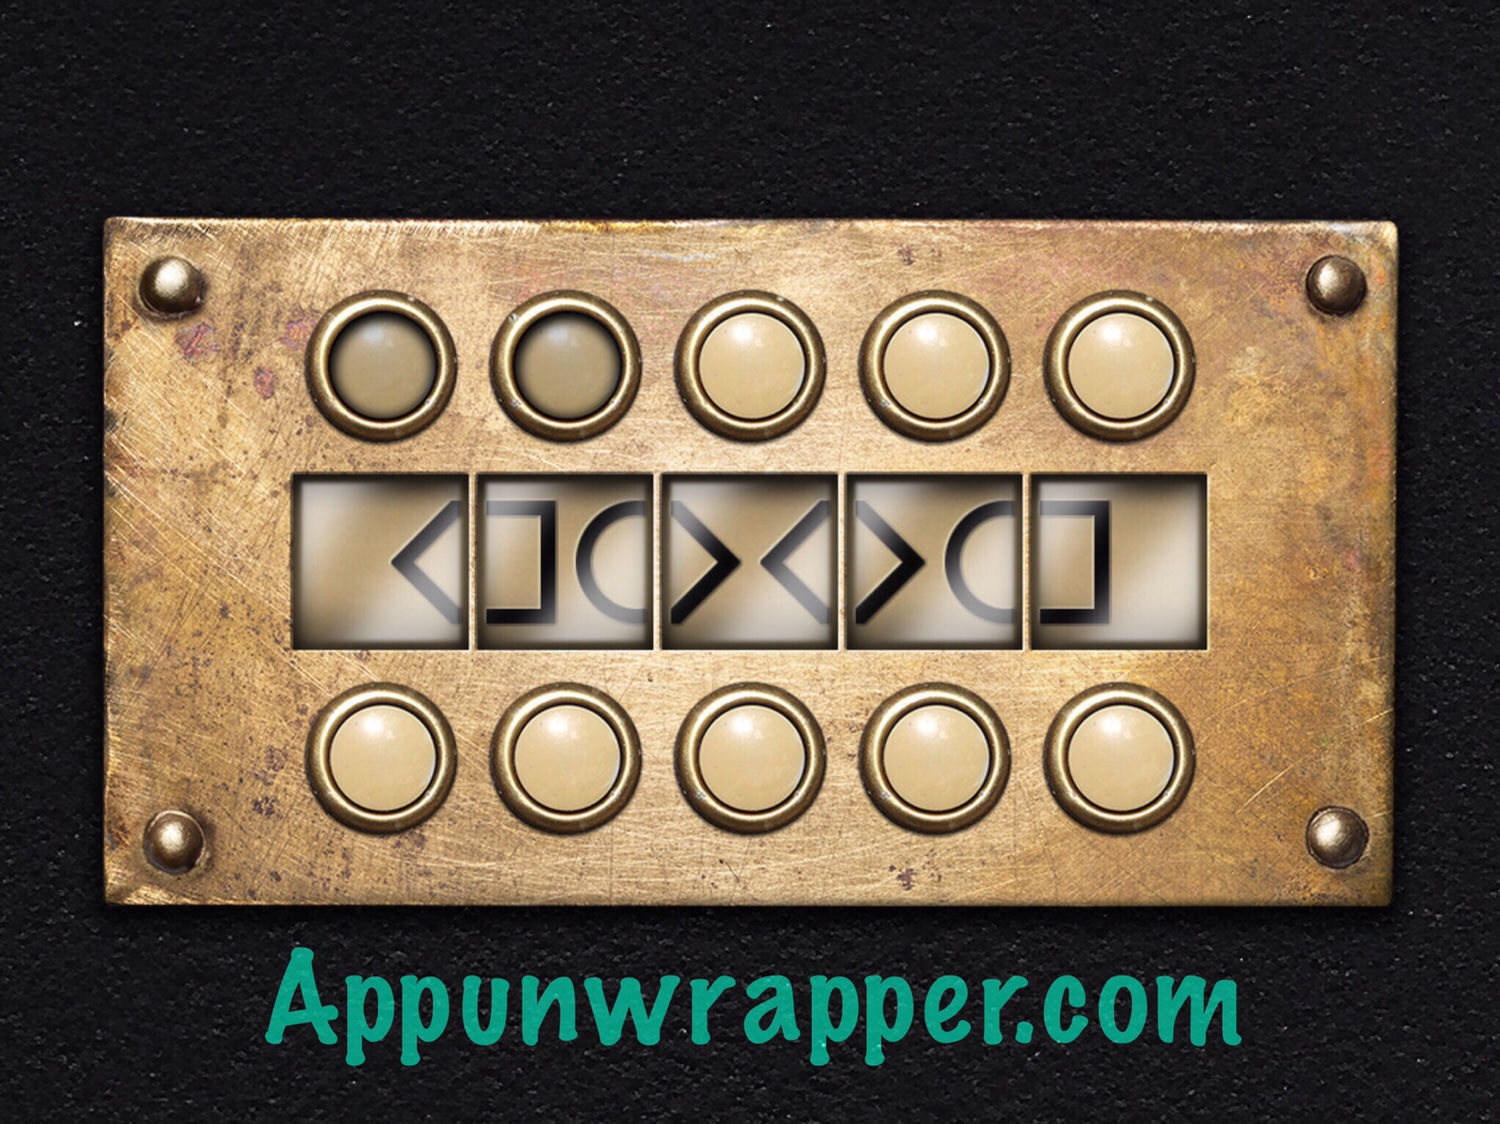
Step36, open the gate by moving handle to left so the vertical goes up. Insert ΓÇ£long support beamΓÇ¥ found in the mine. Then move handle right so horizontals open. Step through to next scene.
What say you
The walkthrough ends at step 43. Do you have the rest of the game walkthrough?
Hi have you found the rest of the walkthrough,I can’t
The walkthrough stops at step 43. Where is the rest?
Hiyah, Step 41, I assumed it meant line up the image so the outer ring has 4 stripes and 2 stripes each over 1 stripe.
WhereΓÇÖs the rest of the walkthrough?
Did anyone find the rest of the Walkthrough?
Did you find where the rest is?
use rope in scene 42
Cena 24 como resolver?
Cena 24 como resolver
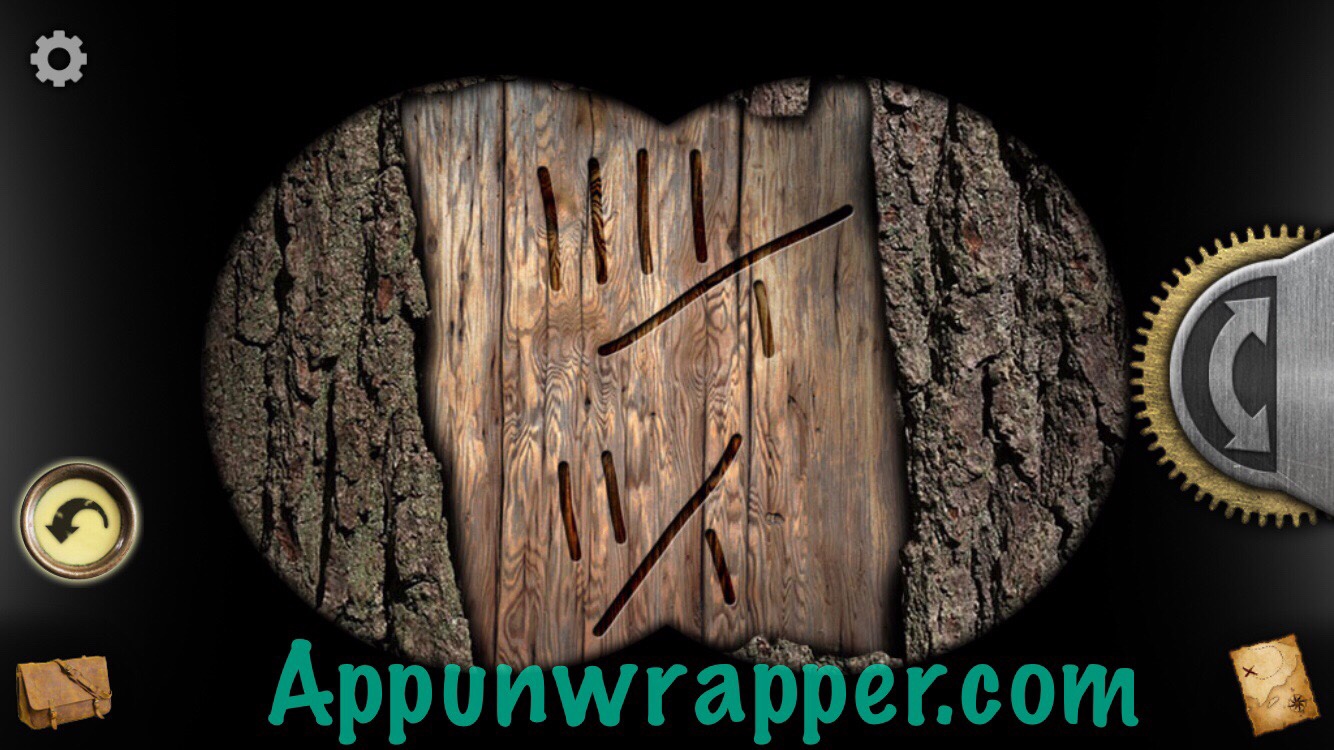
Step 41 on page three says that there is a picture below to show the solution for the door problem. However, there is no picture. How do you solve the IIII/I and II/I puzzle? The camera picture clue on the game is no help at all.
Should be fixed now. Sorry about that!
.
Thank you so much for all your time and effort in presenting this website. It is amazing :).