Adventure Escape Mysteries – Legend of the Sacred Stones
By: Haiku Games


Haiku Games is back with a new Adventure Escape game, called Legend of the Sacred Stones. You play as Aila, who needs to take control of the elements and learn the truth about her past as she battles towering Stone Gods. This walkthrough guide should help you if you get stuck on any of the puzzles in Chapter 7. Feel free to ask for extra help in the comments section.
See all my other Adventure Escape guides here.
Walkthrough:
Chapter 1 | Chapter 2 | Chapter 3 | Chapter 4 | Chapter 5 | Chapter 6 | Chapter 7 | Chapter 8
Chapter 7:
You can watch my video for Chapter 7 or continue below for my step-by-step guide.
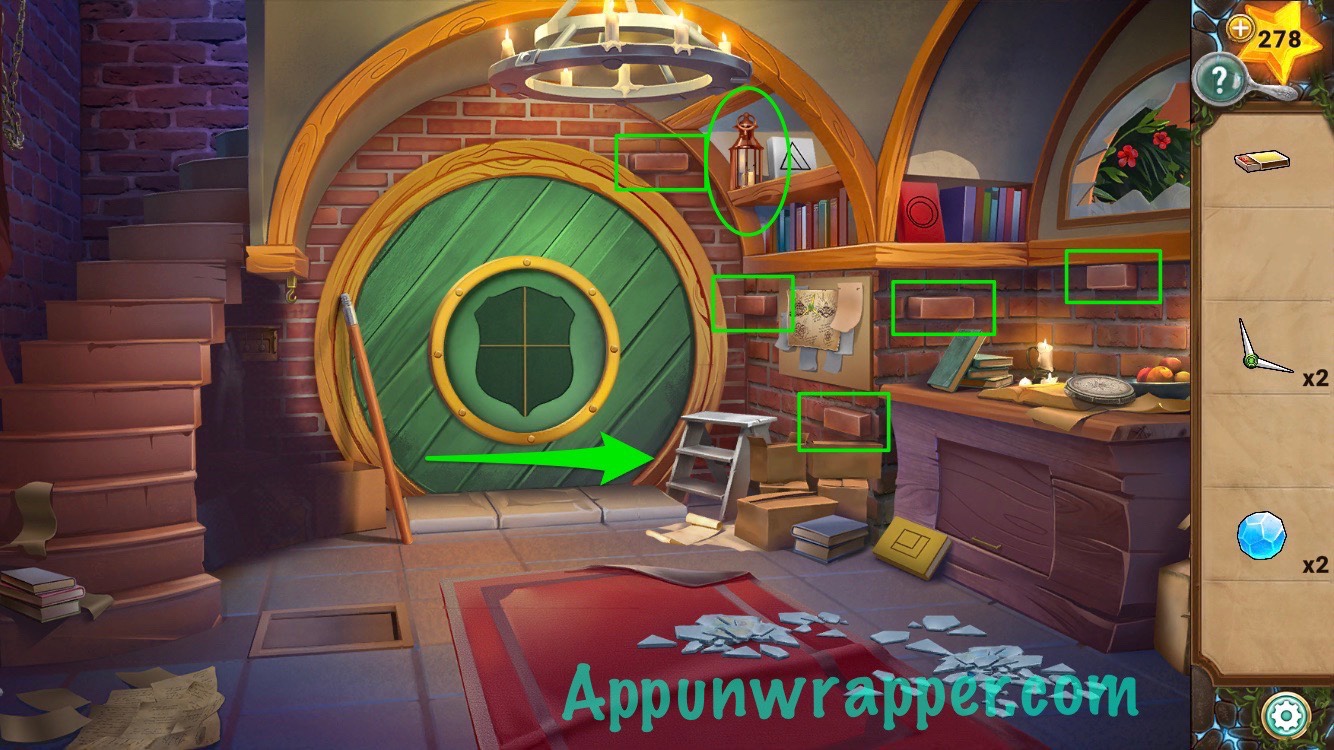
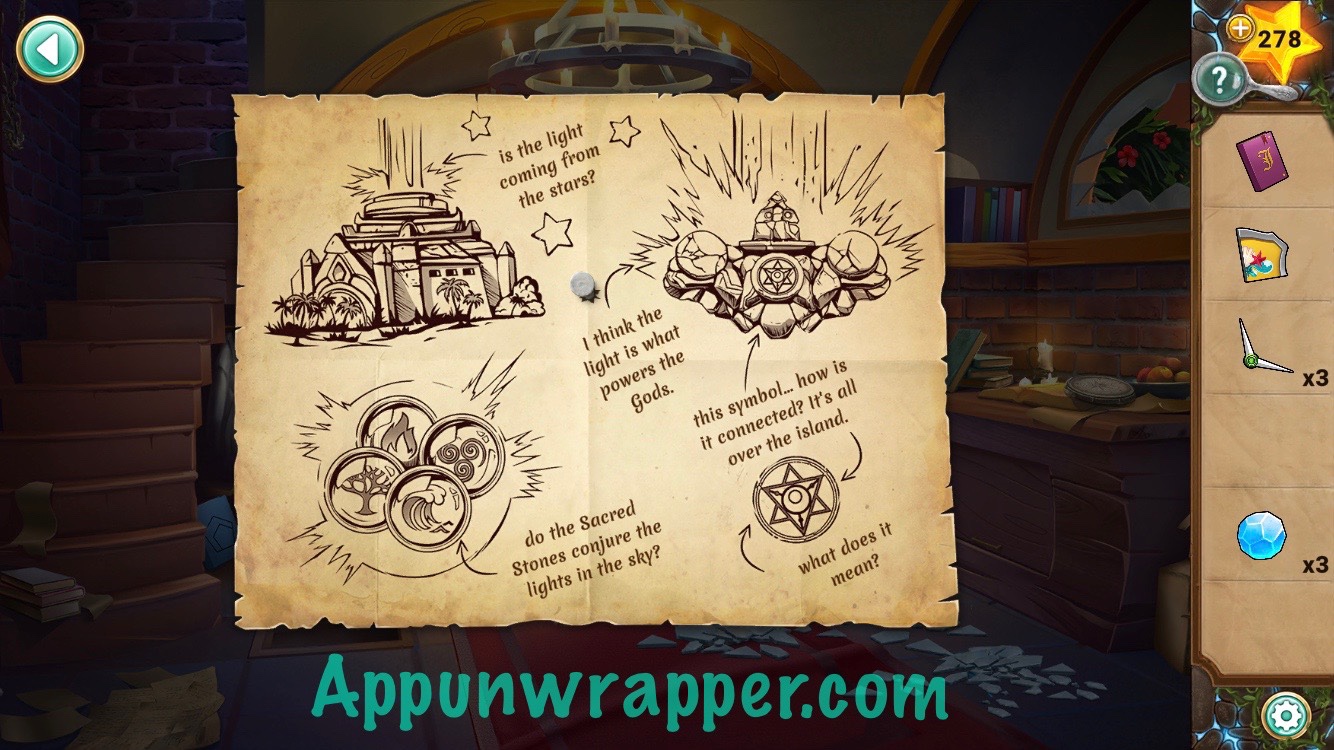
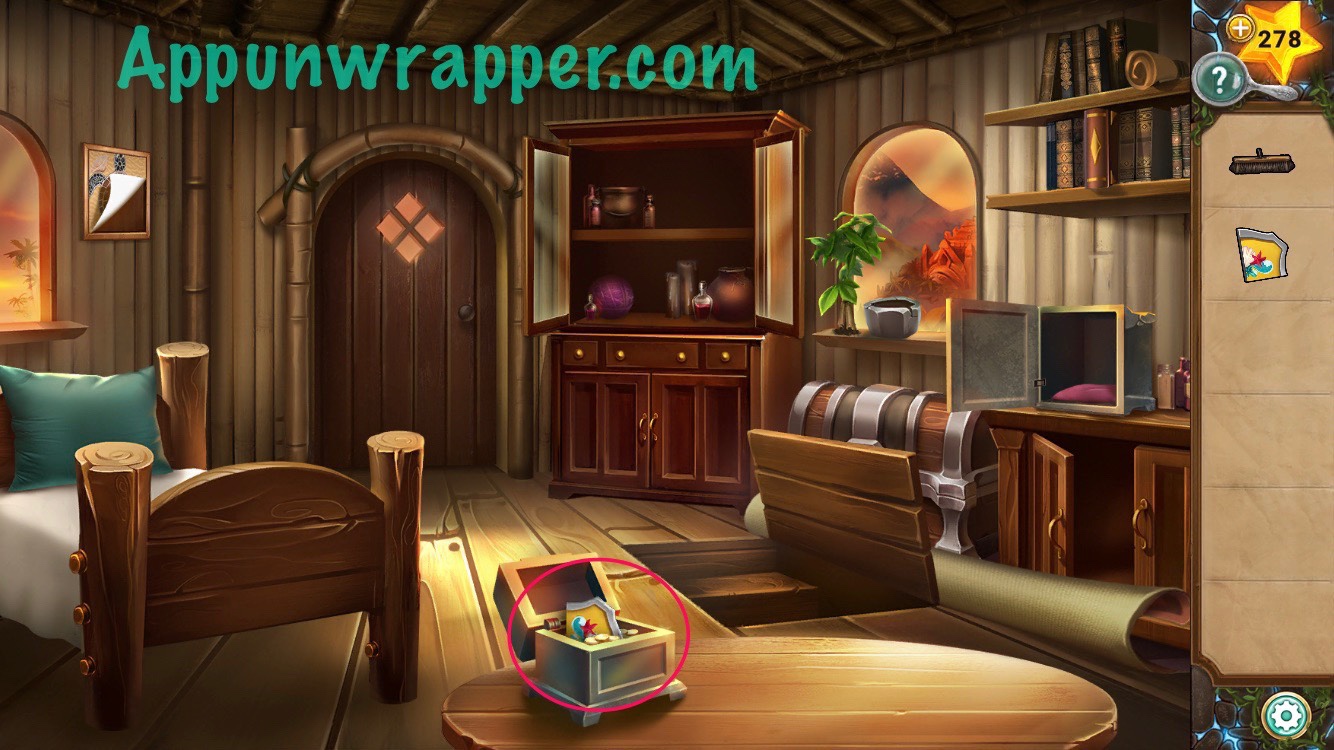
1. You wake up back at home, but the locket’s missing! Selma asks you to fetch her journal from the cellar. Pick up the step stool, compass hand, matches and pry bar. Also, lift up the rug to reveal a lock mechanism. And last, open the book on the shelf and grab the compass hand from inside.
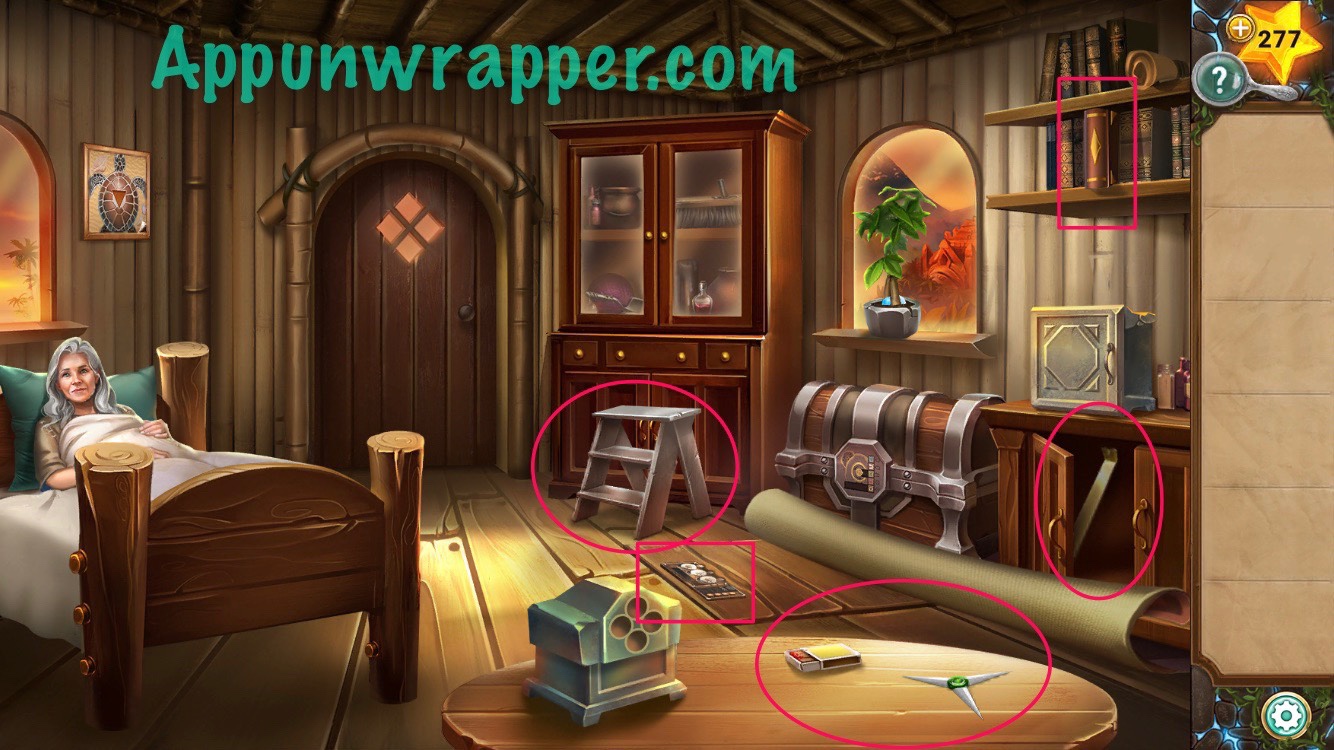
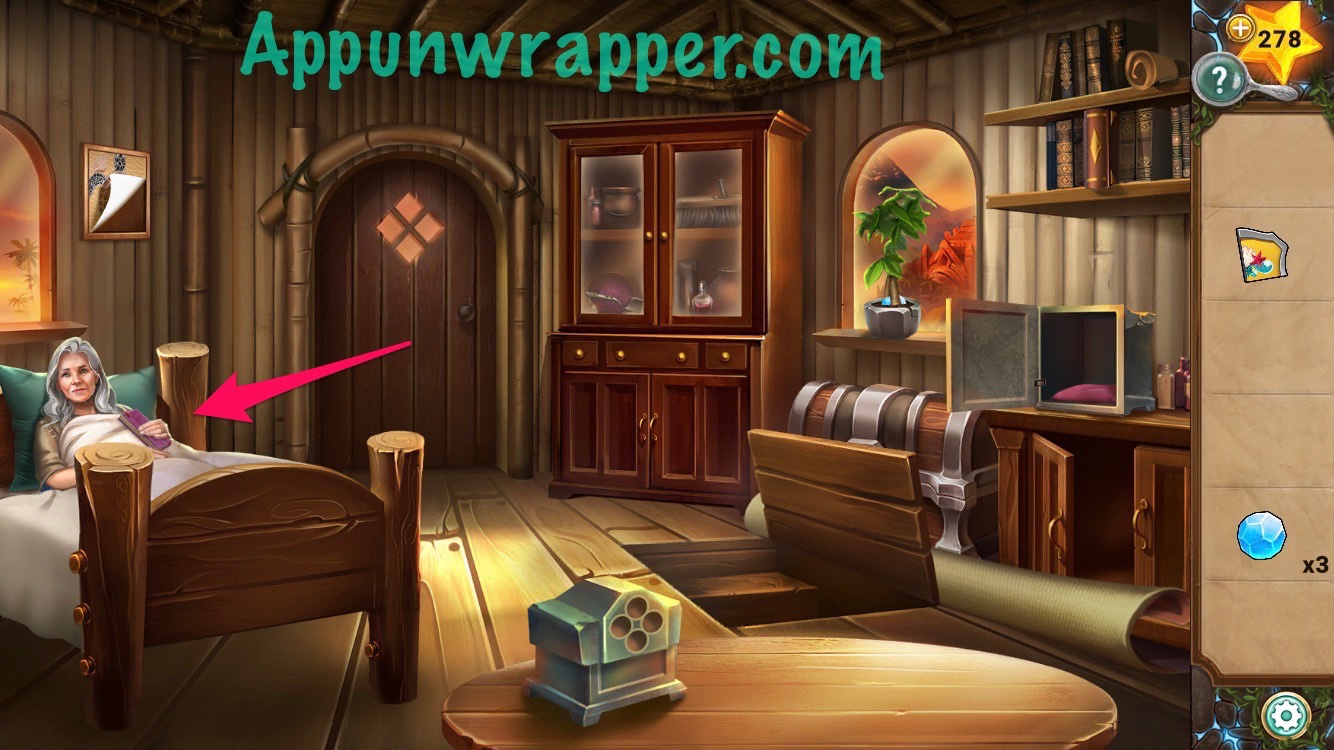
2. Use the pry bar to open the box on the dresser. Then take the tweezers and gemstone from inside.
3. Use the tweezers to lift up the paper on the painting and get another gemstone.

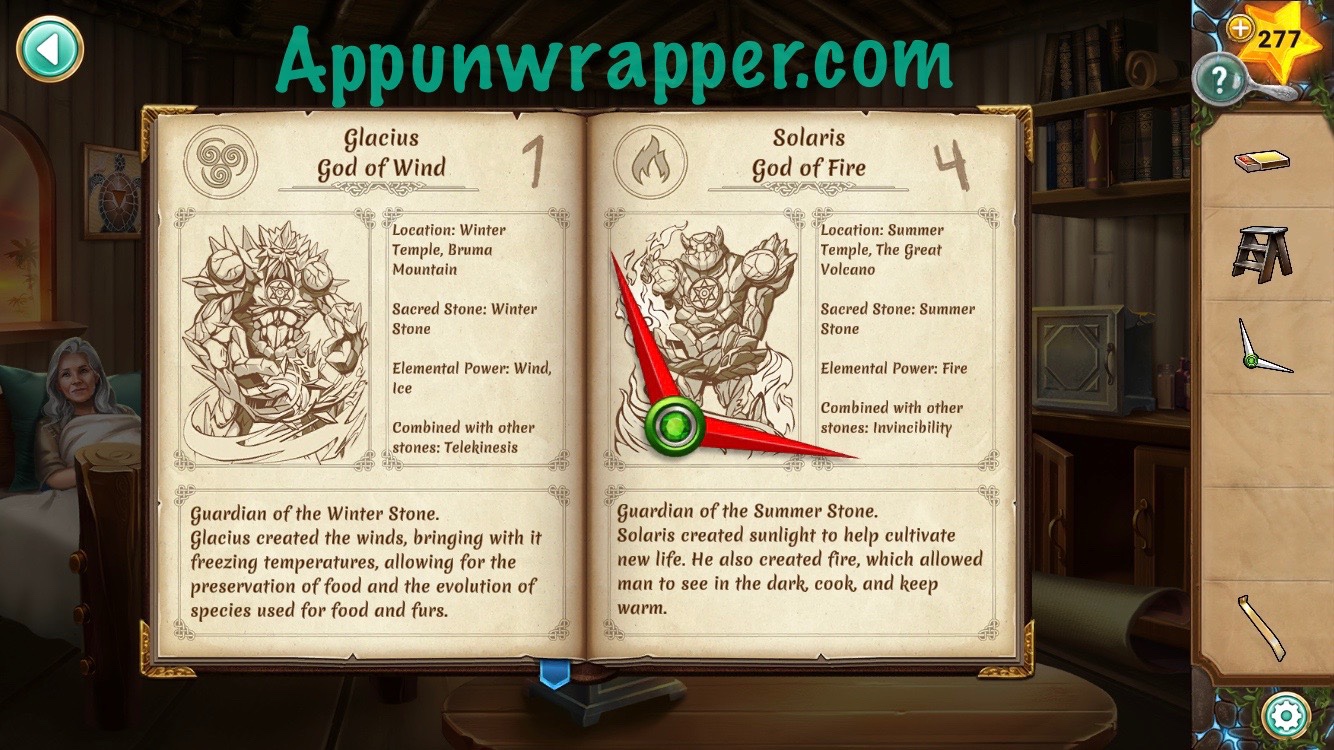
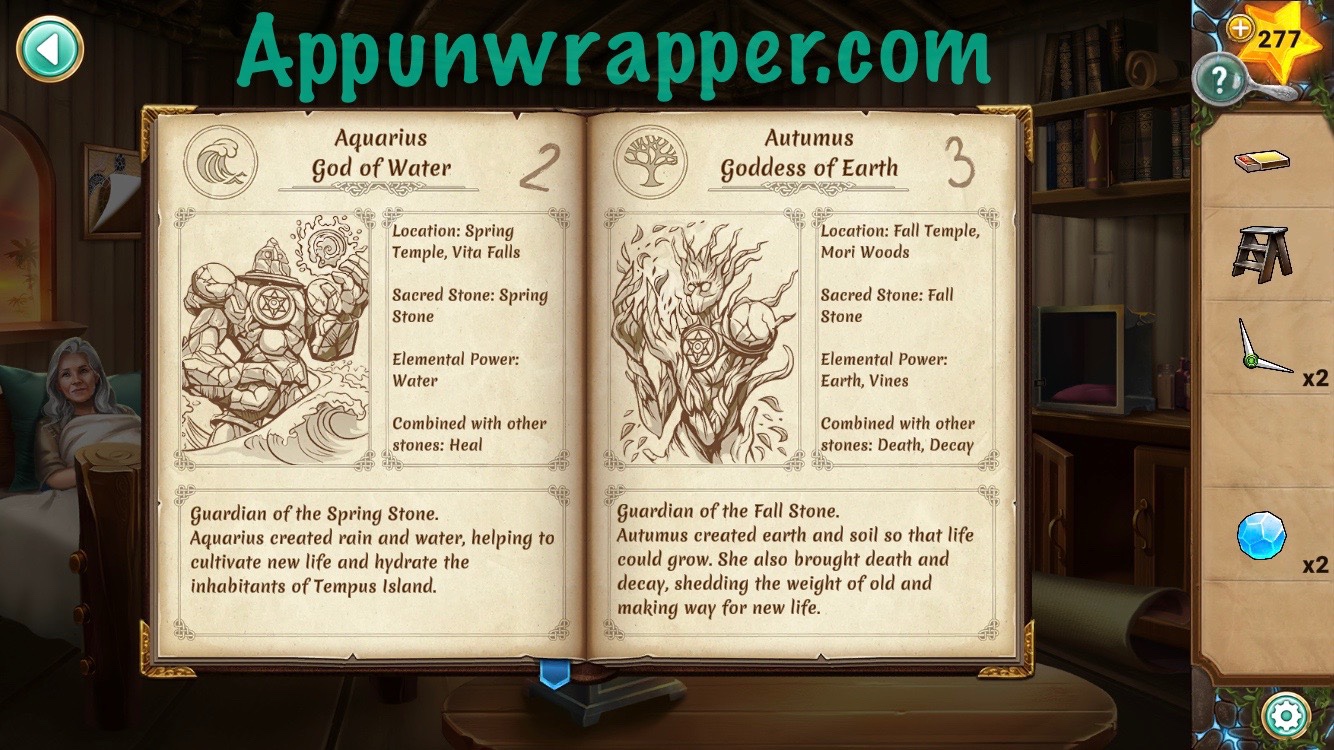
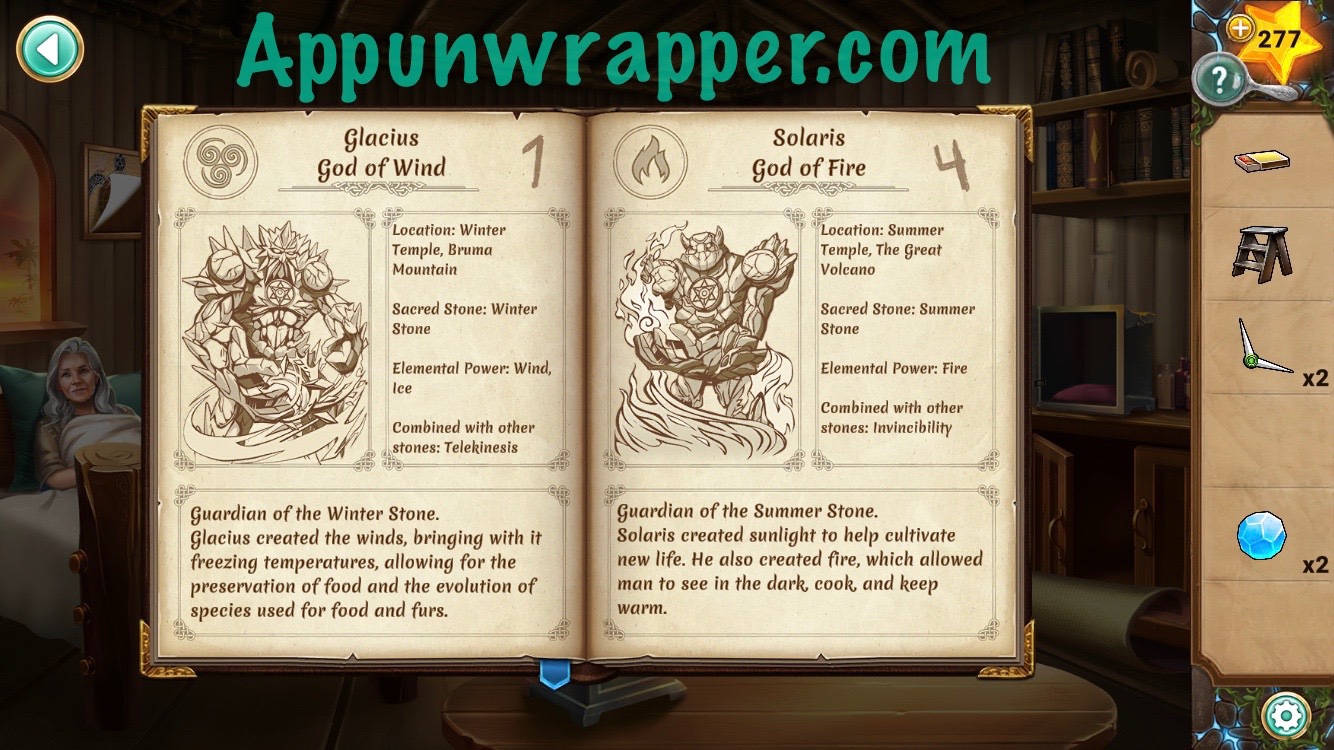
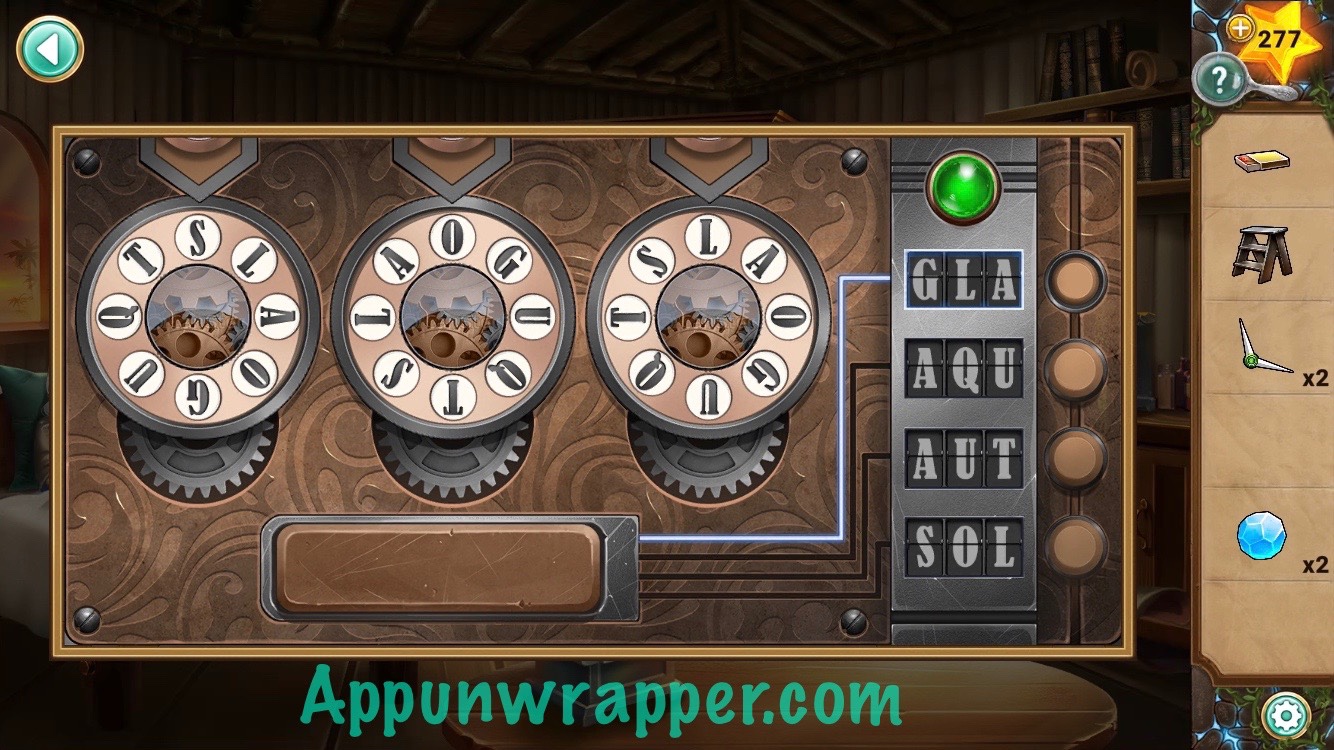
4. If you talk to Aila’s mother, she tells you that the passcode for the cellar door should be in one of Arthur’s books. There’s only one book you have access to, and that’s the one where you found the compass hand. Notice each of the pages is numbered 1 – 4. So organize them in order and then take the first three letters of each god’s name. That’s the solution to the puzzle!
1 = GLA(cius)
2 = AQU(arius)
3 = AUT(umus)
4 = SOL(aris)
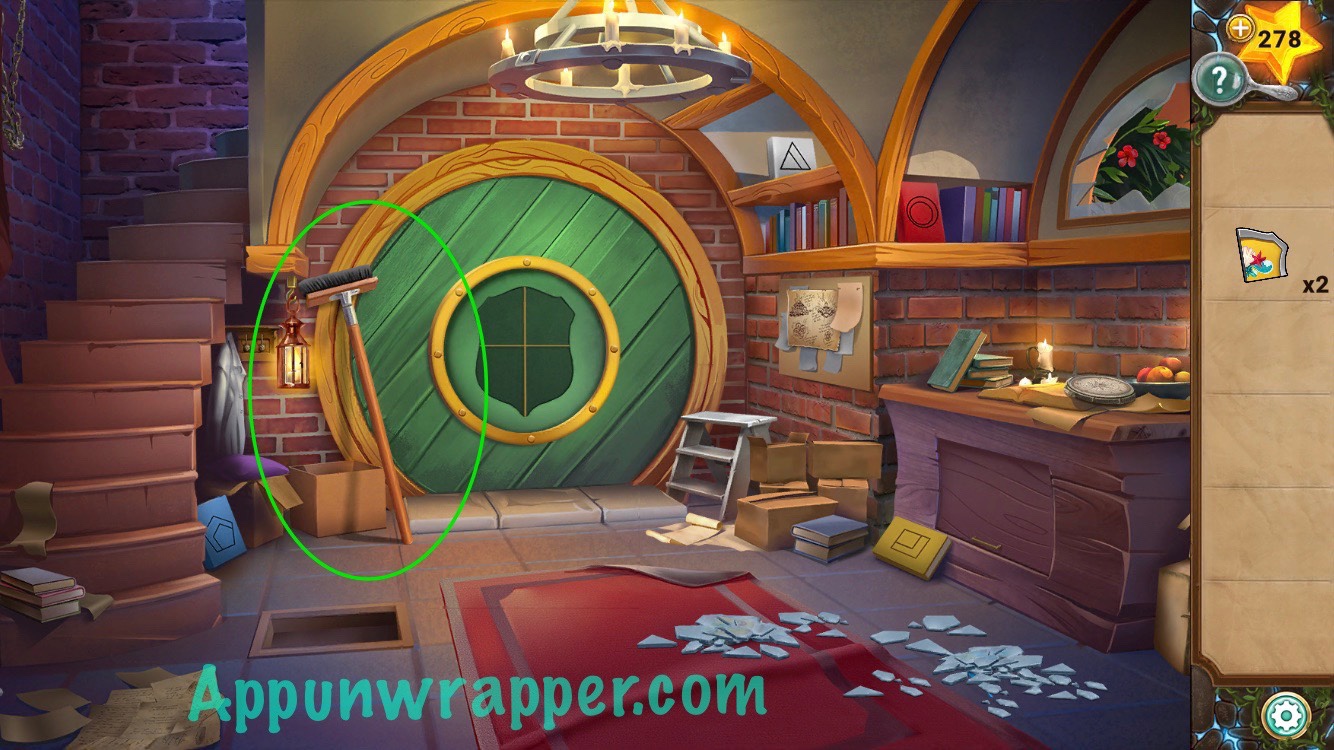
5. Head down into the cellar.

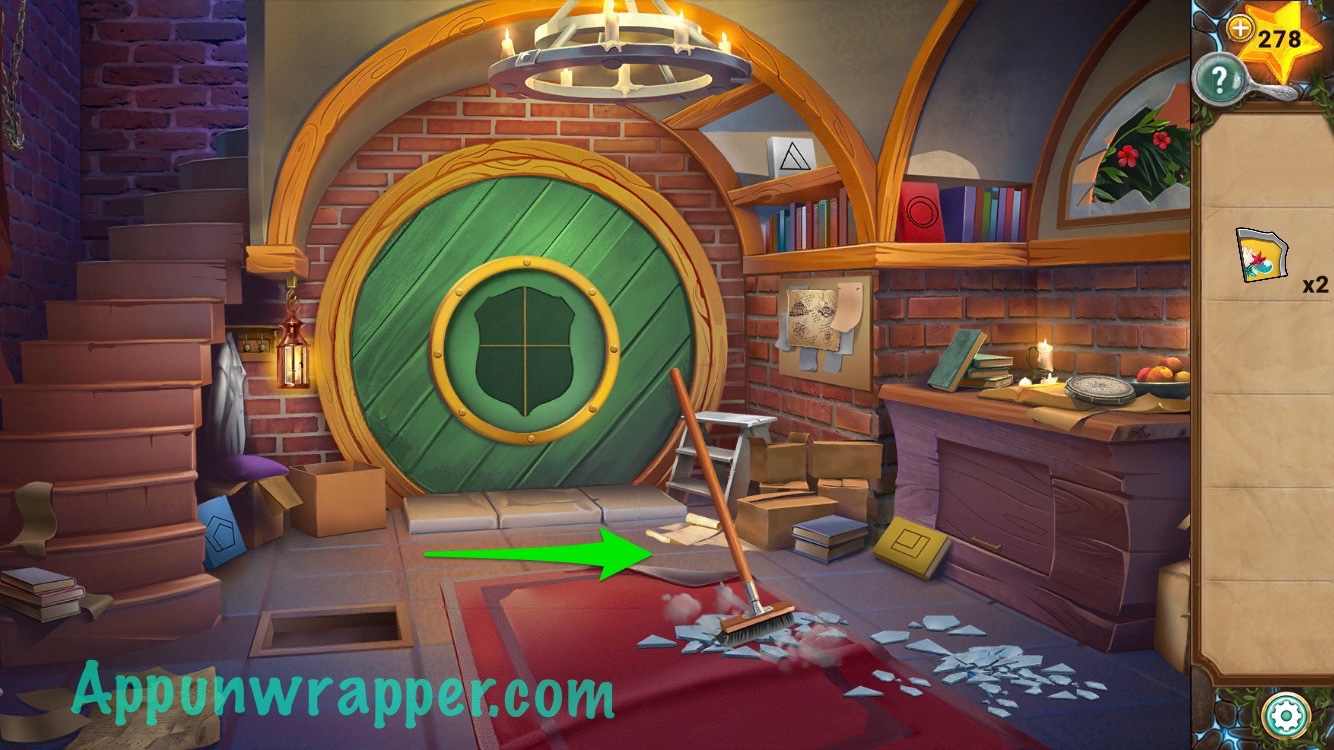
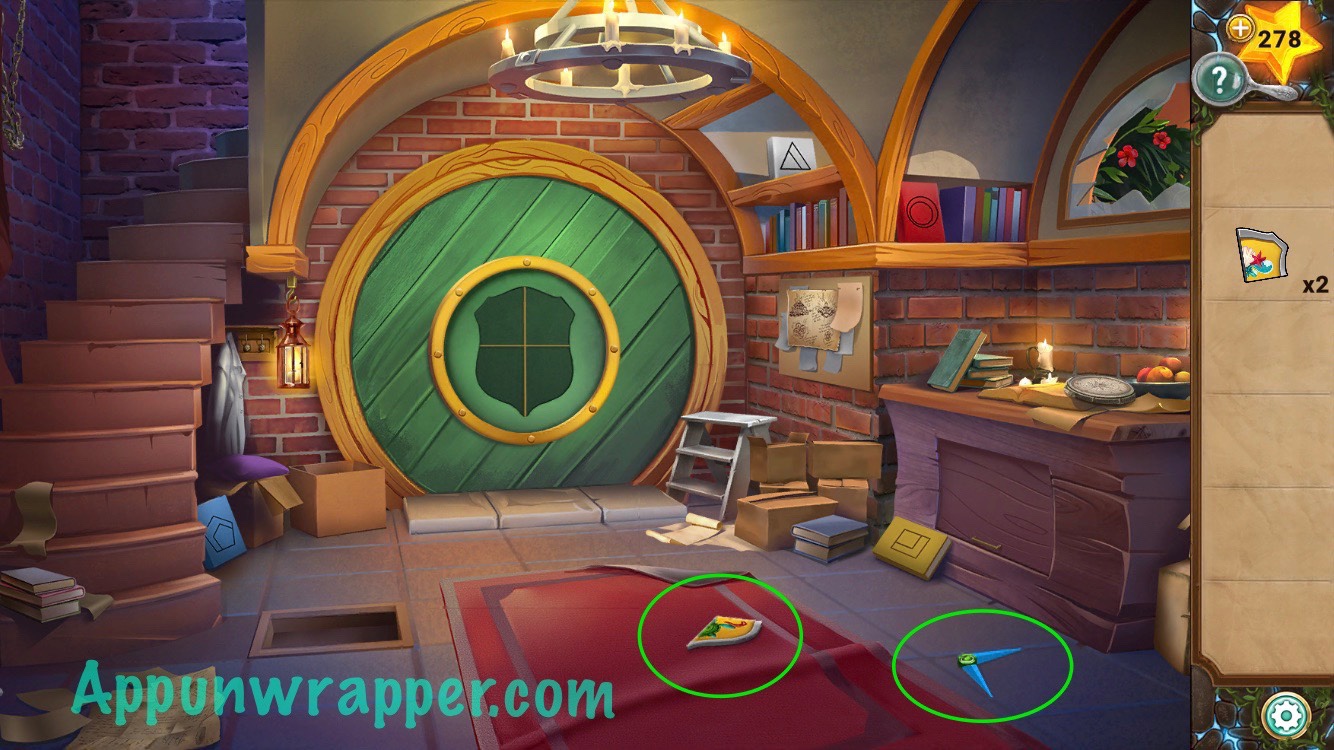
6. Place the step stool down so you can reach the lantern. Push in all the bricks that are sicking out.
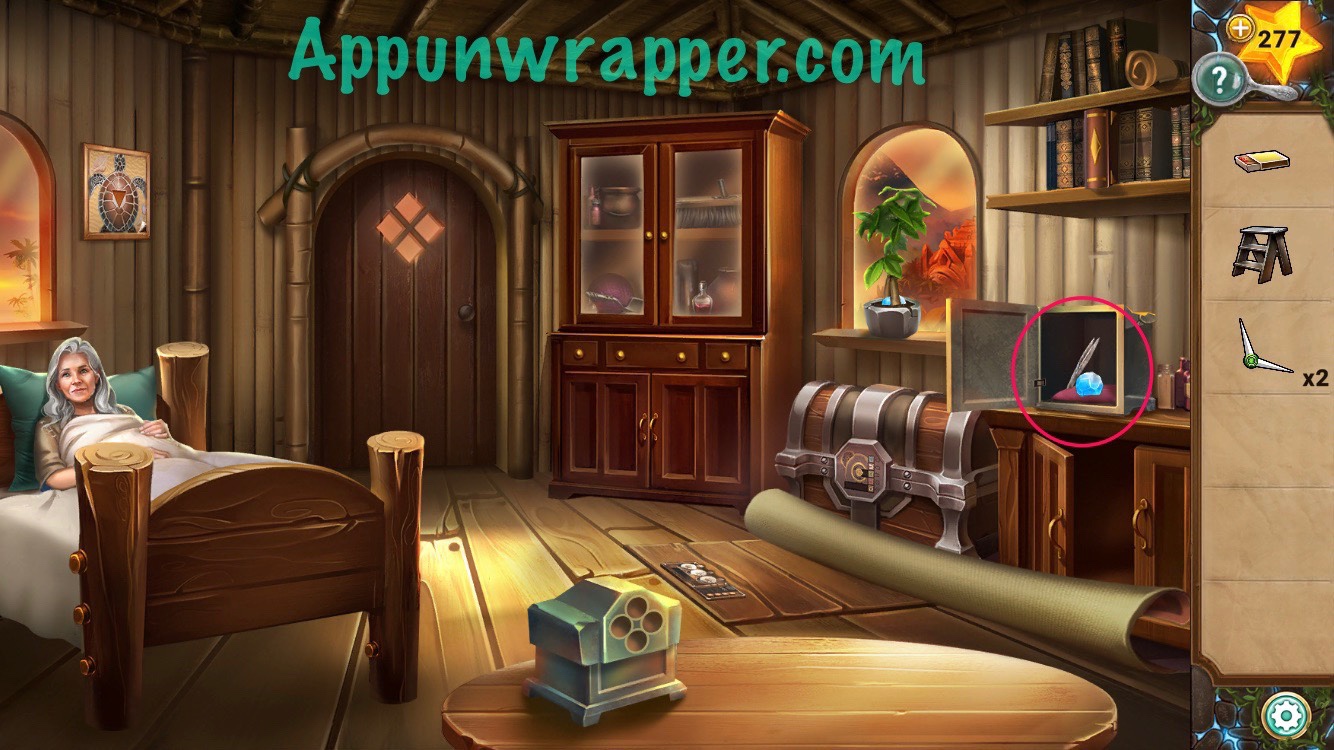
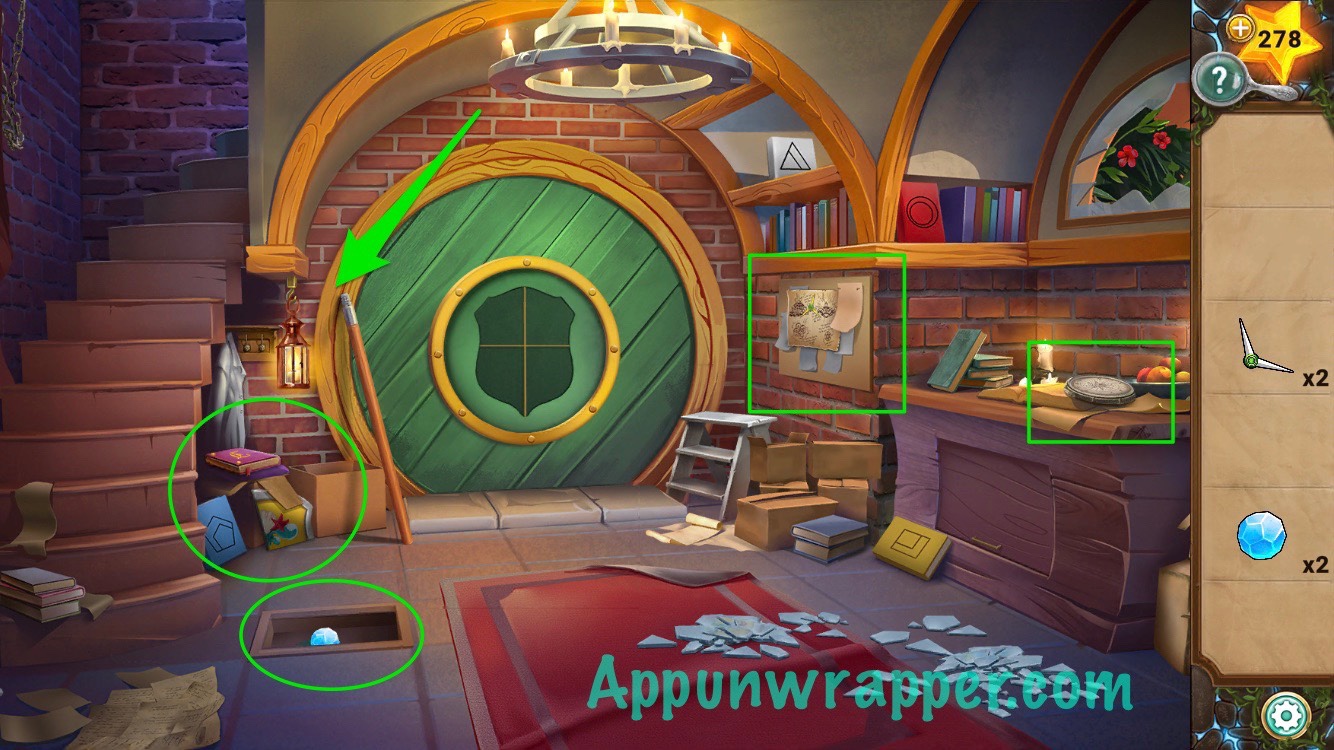
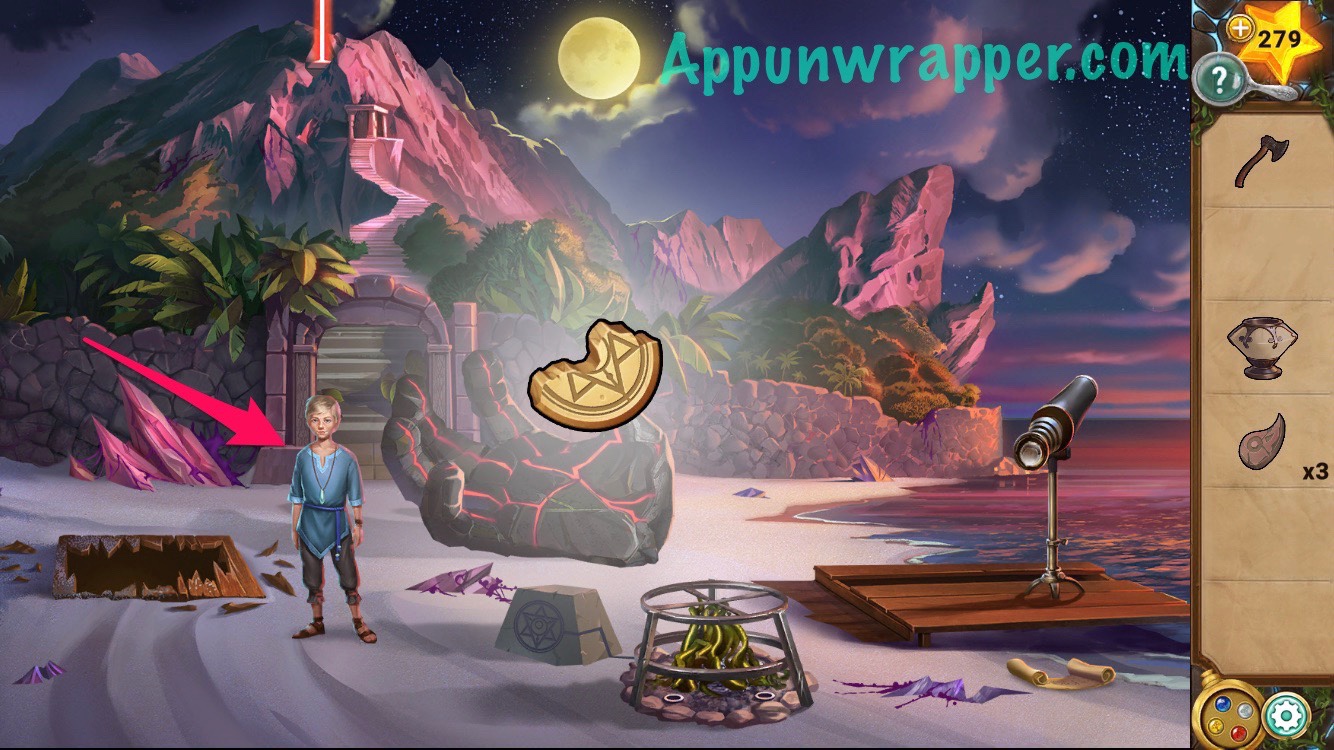
7. Get the gemstone from the trap door in the floor. Also, place the lantern on the hook and use the matches to light it. Grab the journal and family crest. Also, look at the page pinned to the wall. Take the compass arm from it. There’s also a compass on the table. Add the three compass arms to it. We’re still missing some.


8. Go back upstairs and give the journal to Selma. She tells Aila the story about how she came to them and how she was a blessing, not a curse. She then takes her last breaths. Three hours later, Arthur gives Aila the cabinet key.
9. Use the key to open the cabinet and then take the brush and trowel from inside.

10. Use the trowel to remove the plant from the planter and then grab the gemstone.
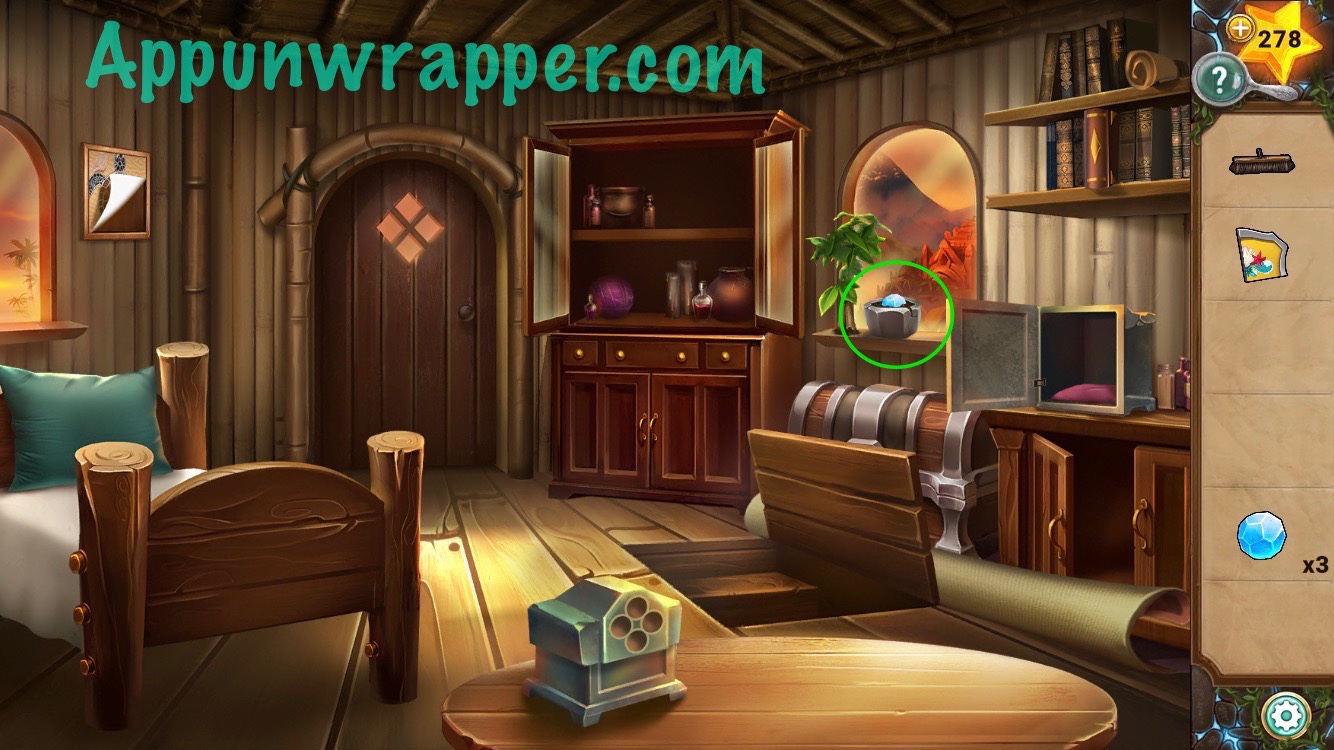
11. Now you should have all four gemstones. Place them in the slots on the box on the table and then take the family crest.
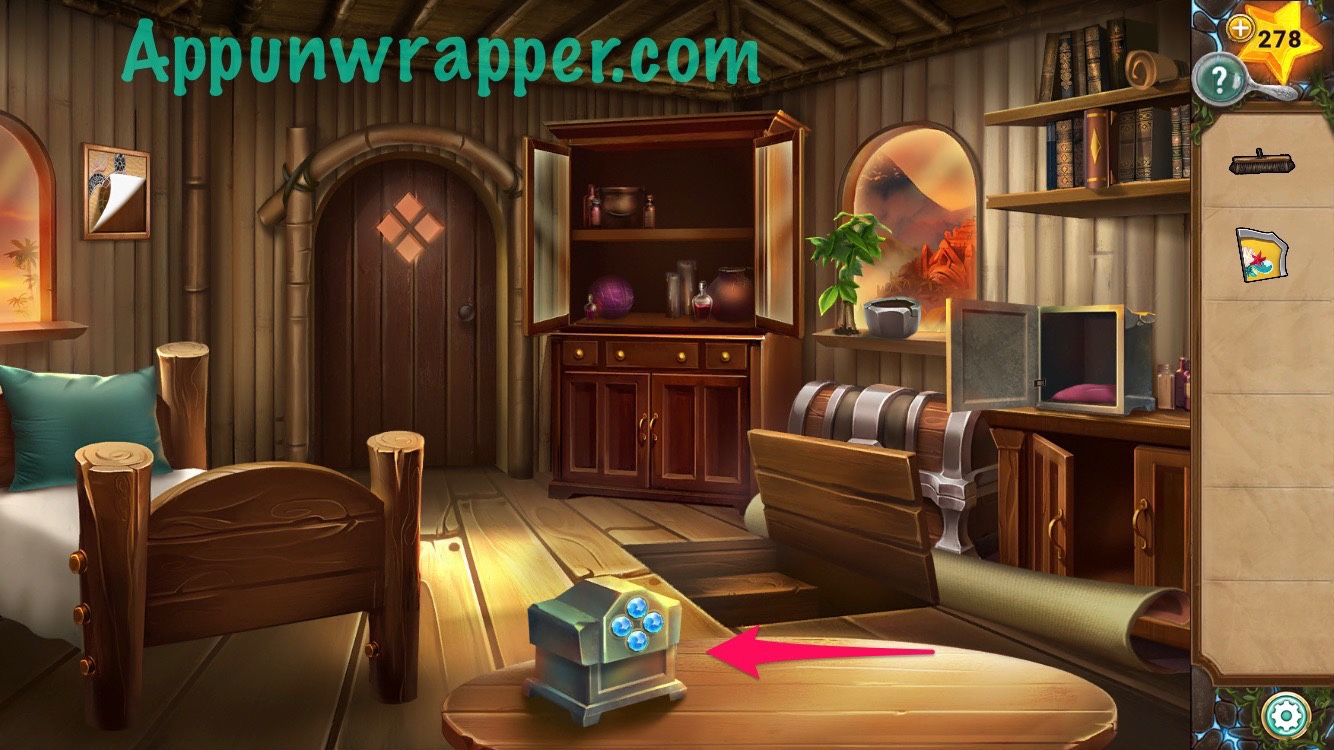
12. Go back downstairs and add the brush to the broom. Then use it to sweep up the broken glass. Pick up the family crest and compass hand.
13. Place the compass hand with the rest to unlock a panel nearby.
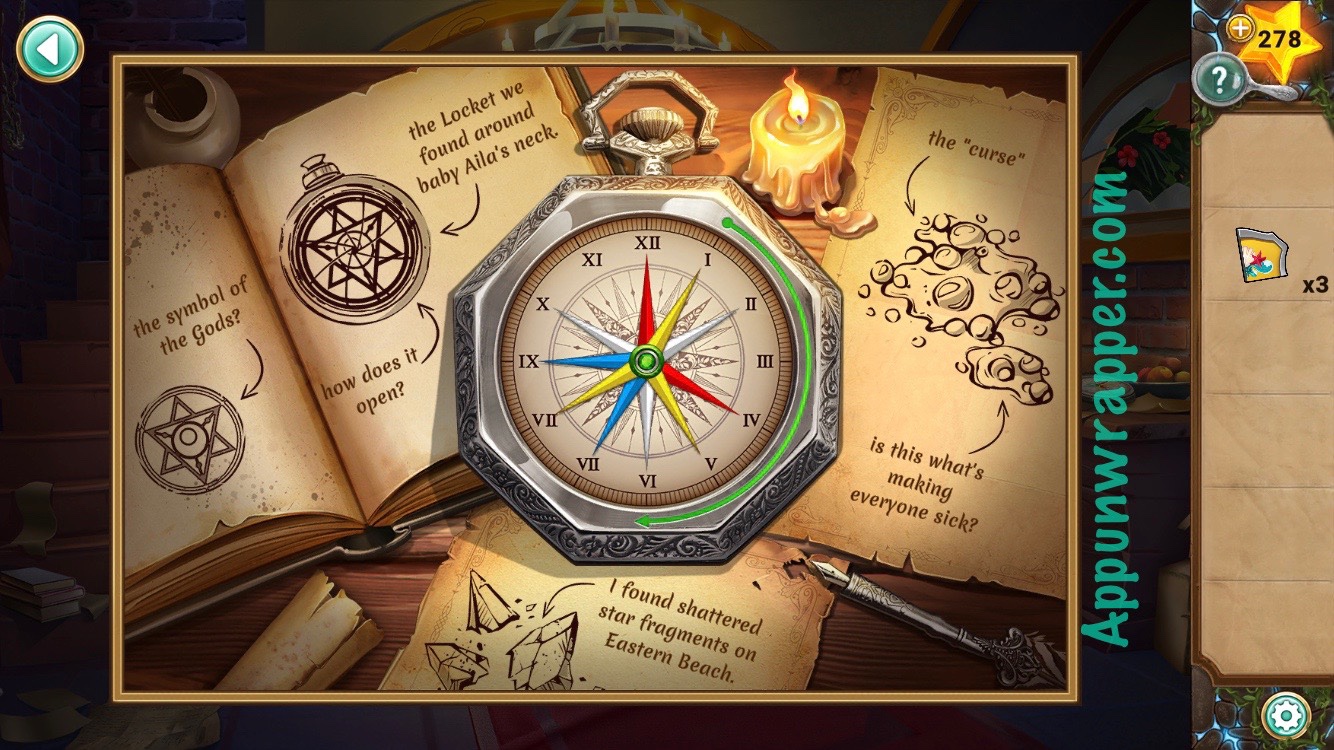
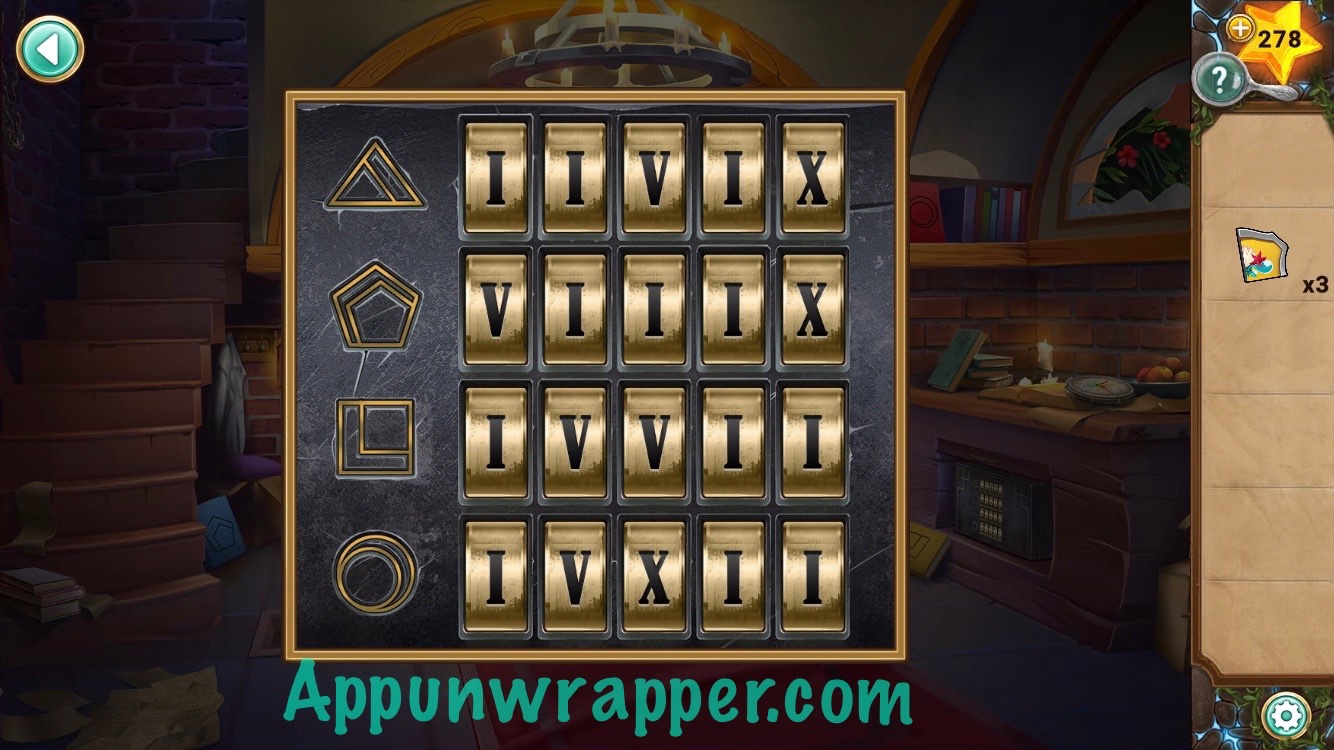
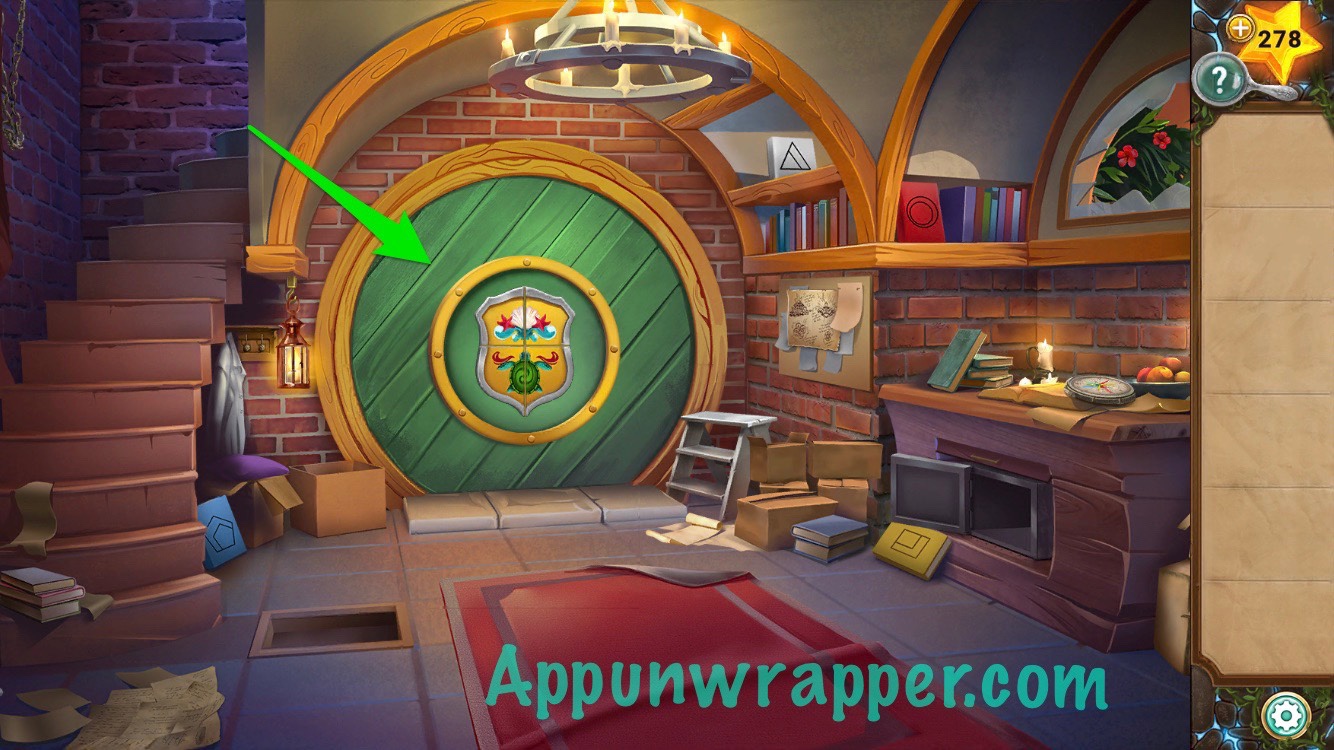
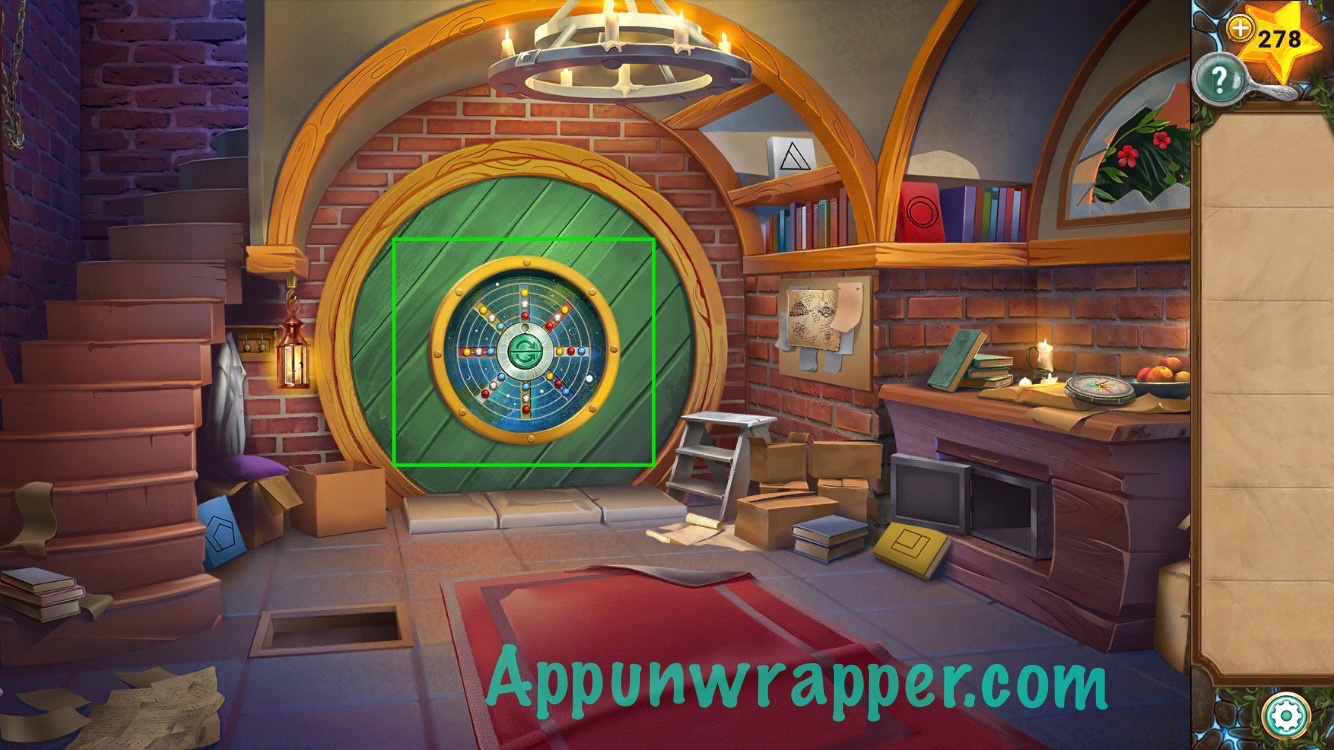
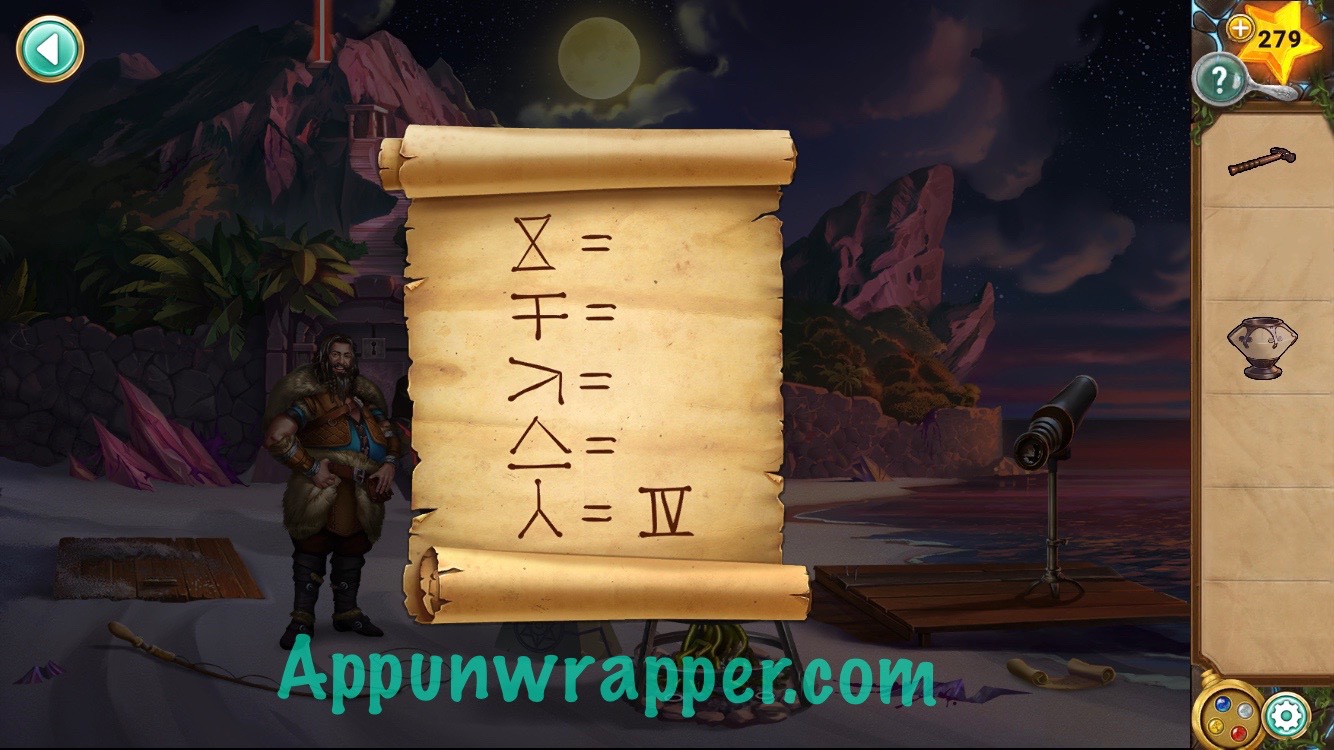
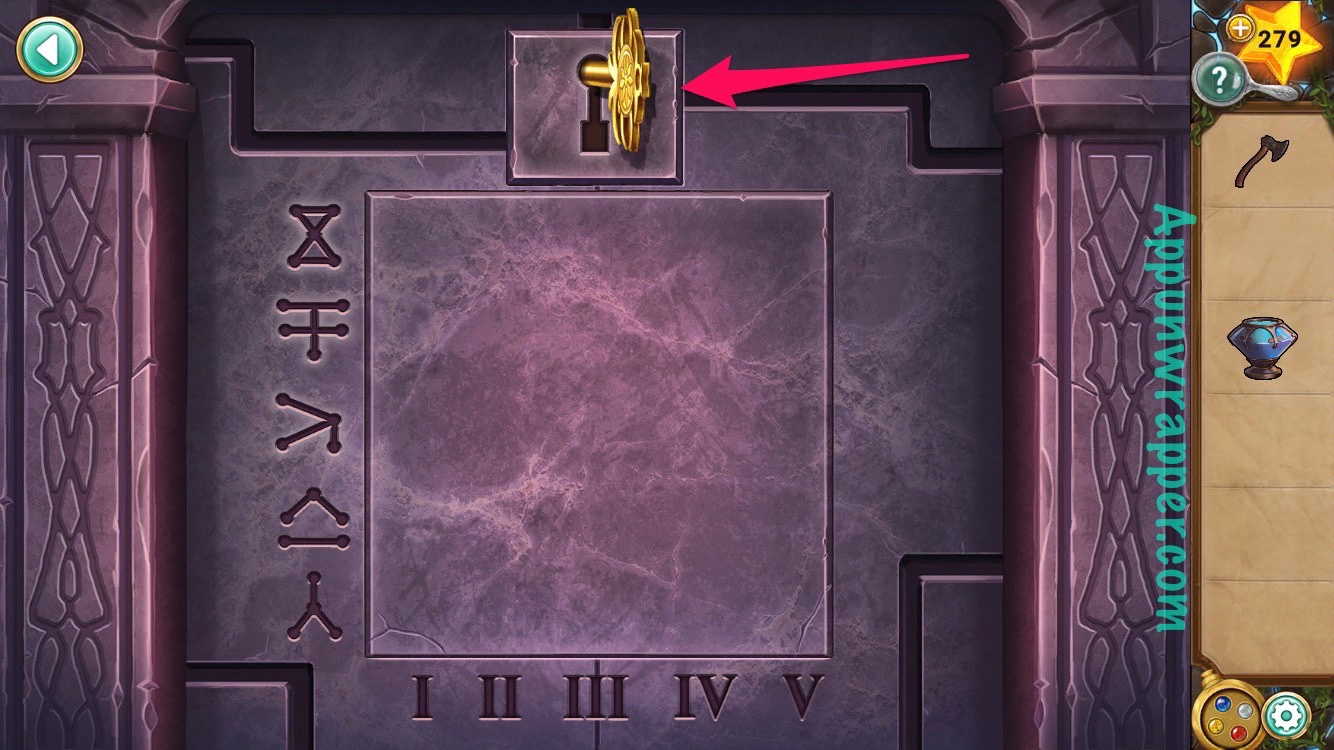
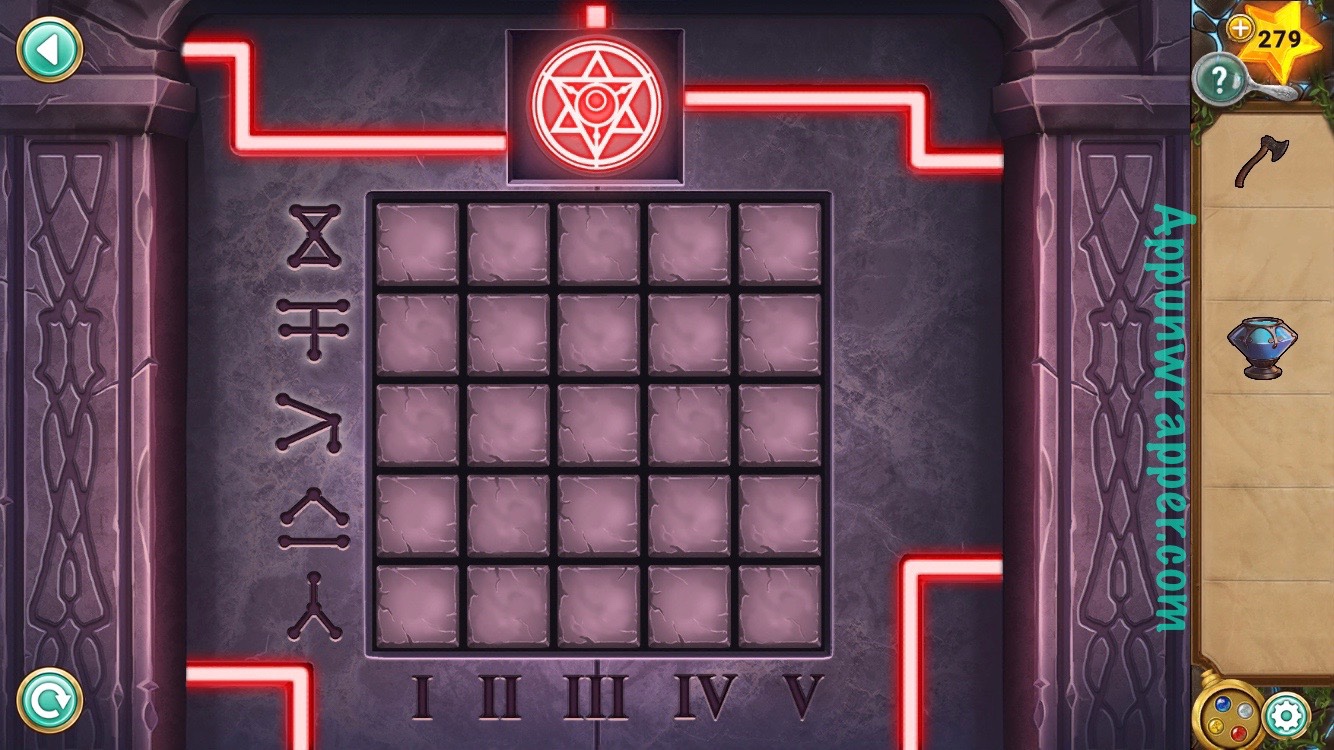
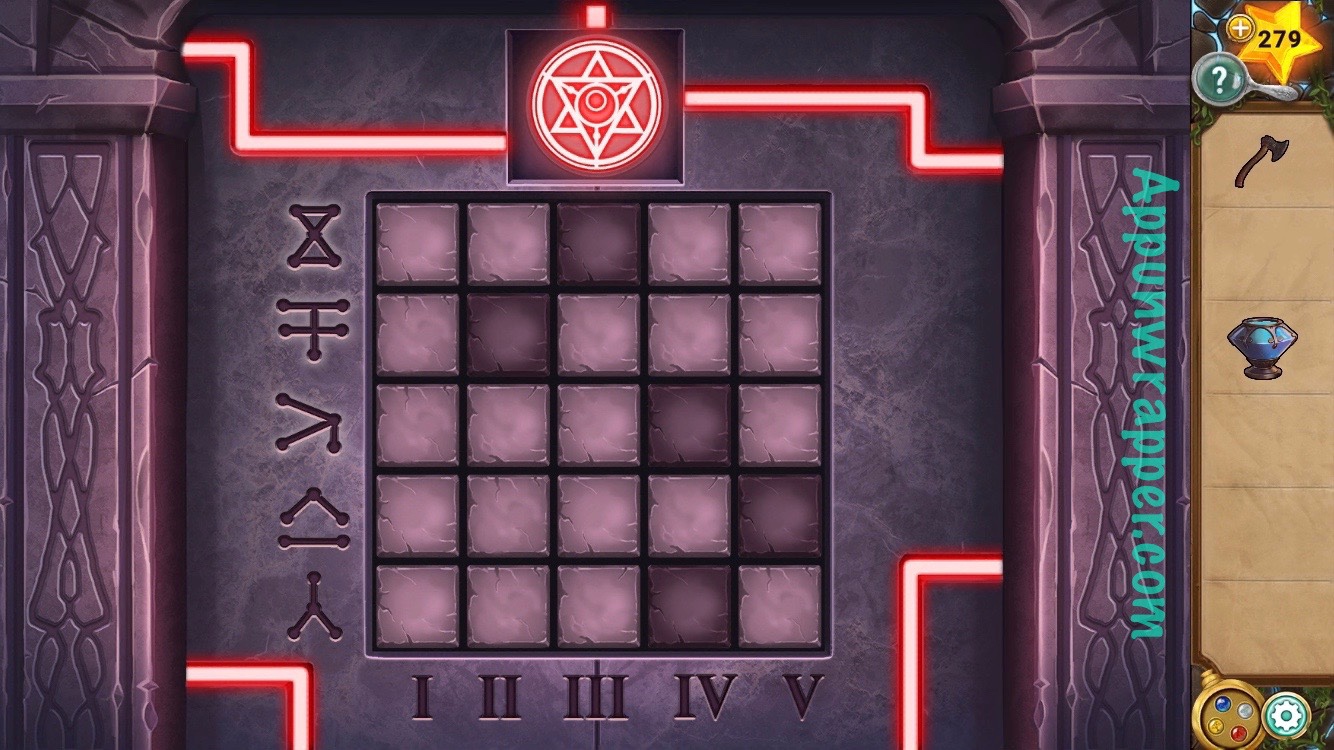
14. Now, notice the four books around the room that have covers that match the symbols on the combination lock.
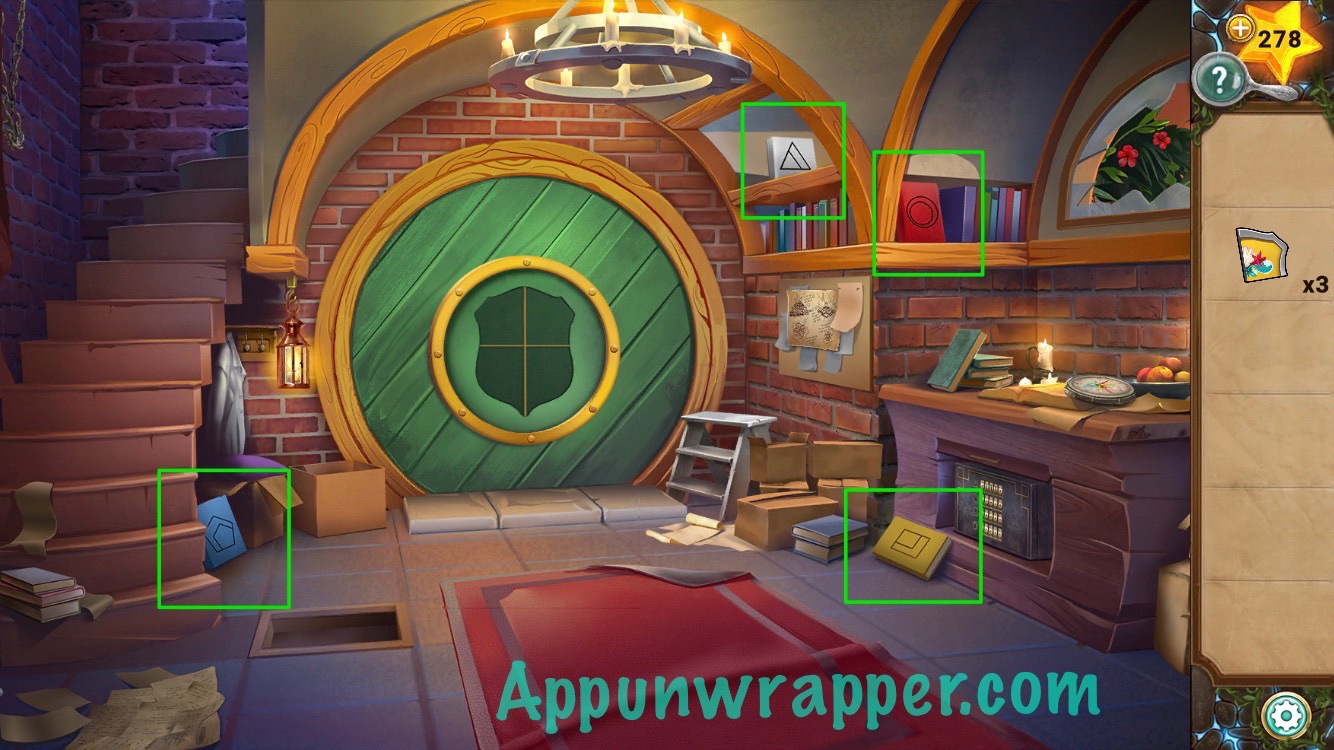
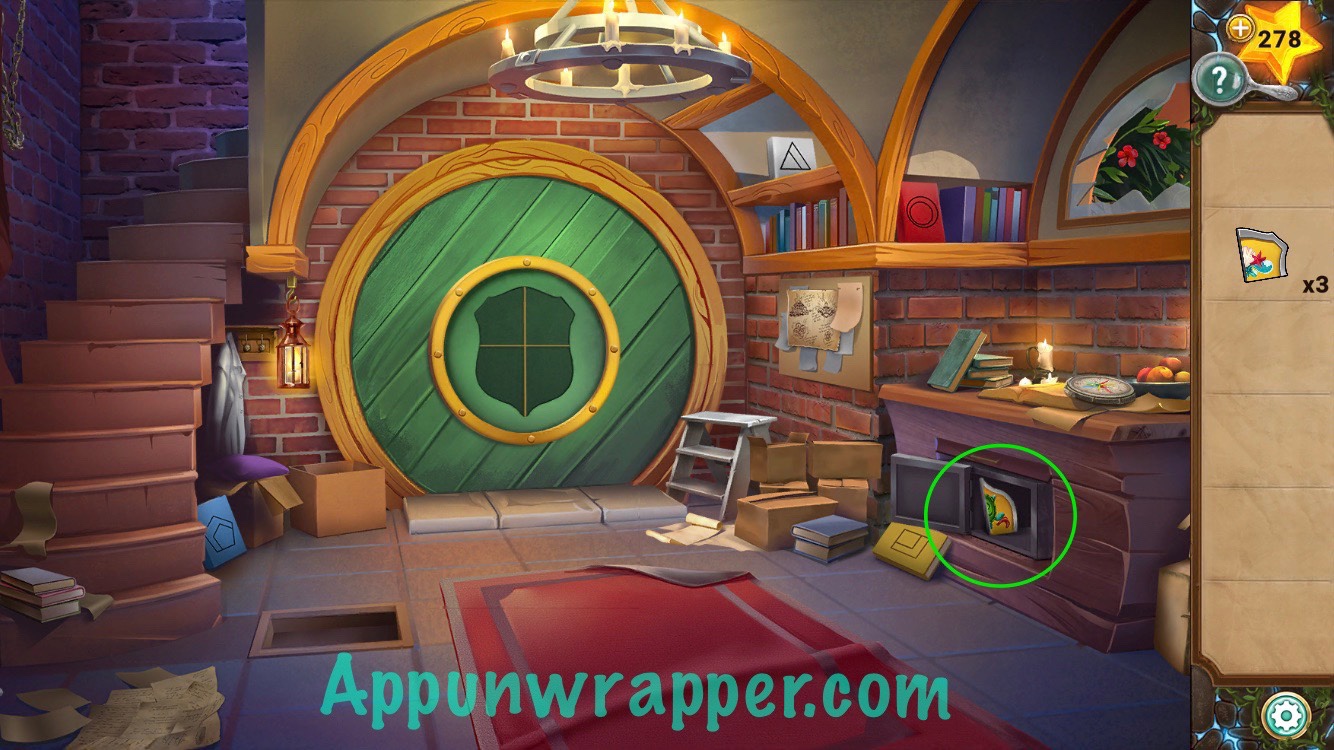
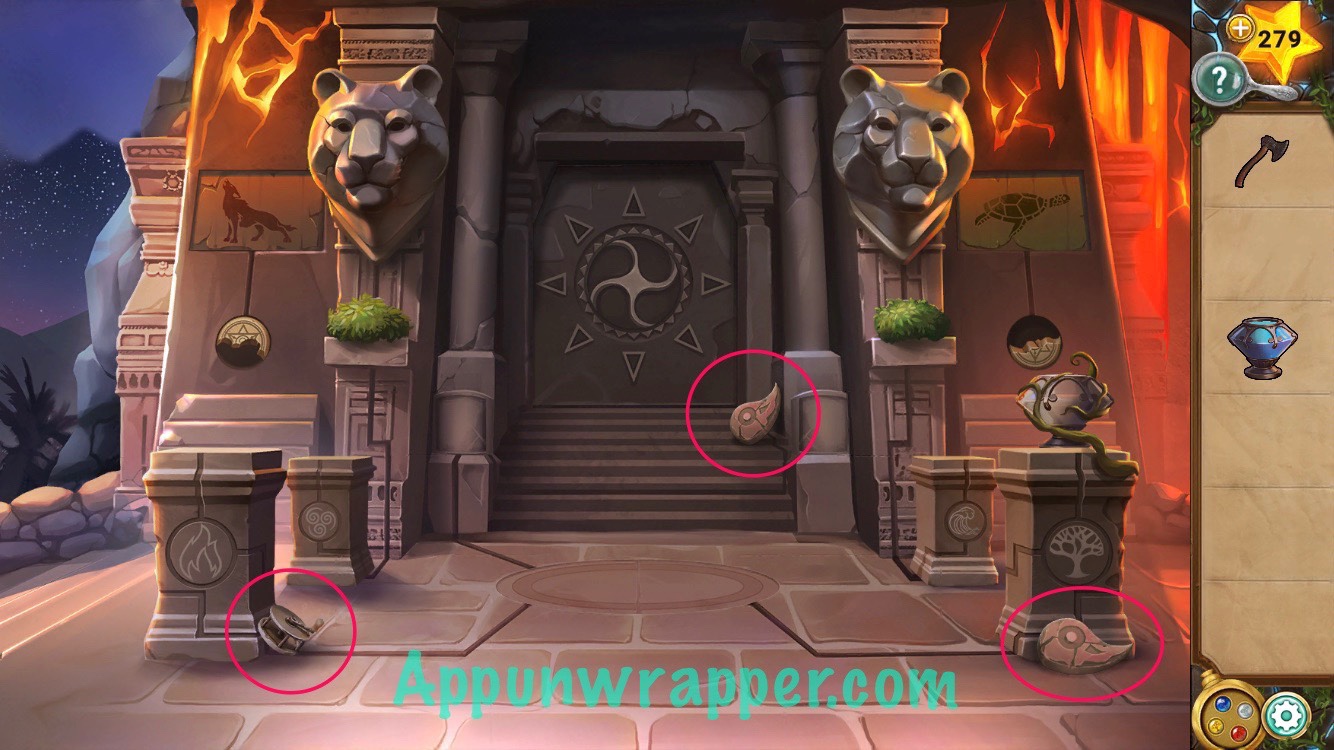
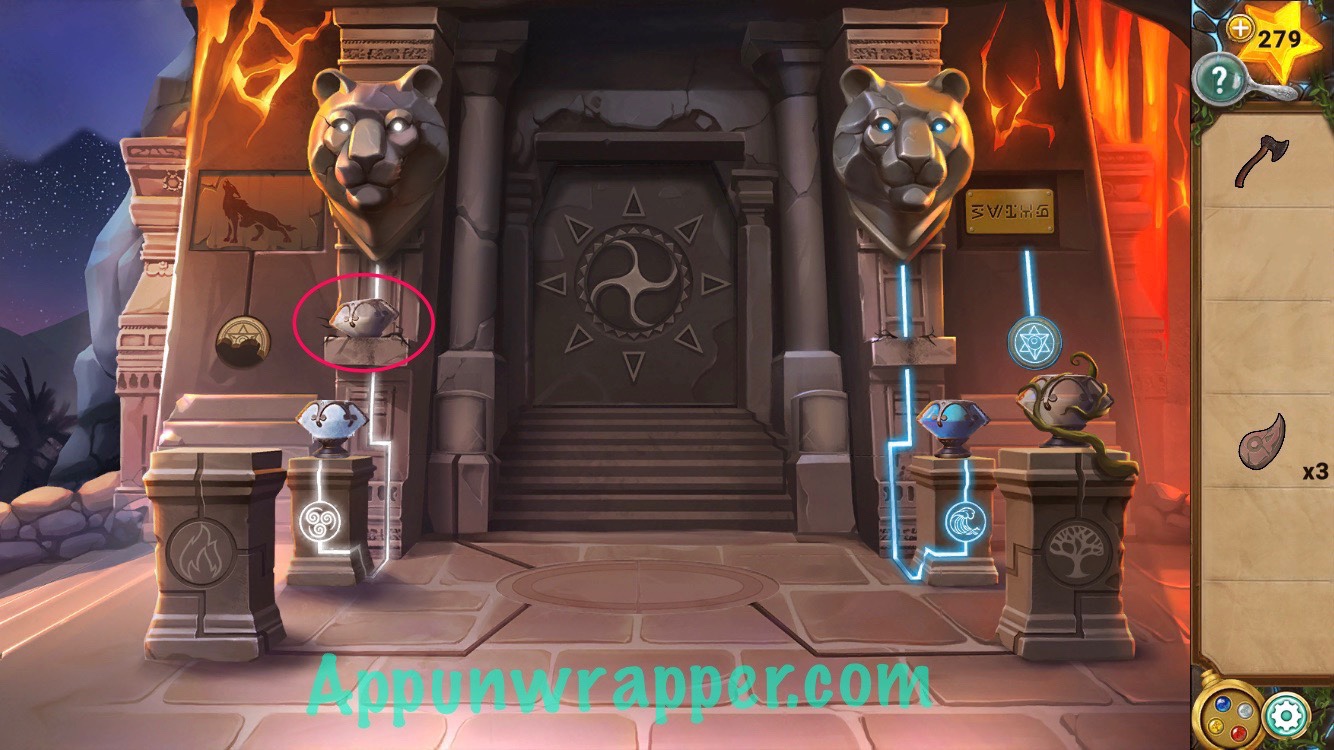
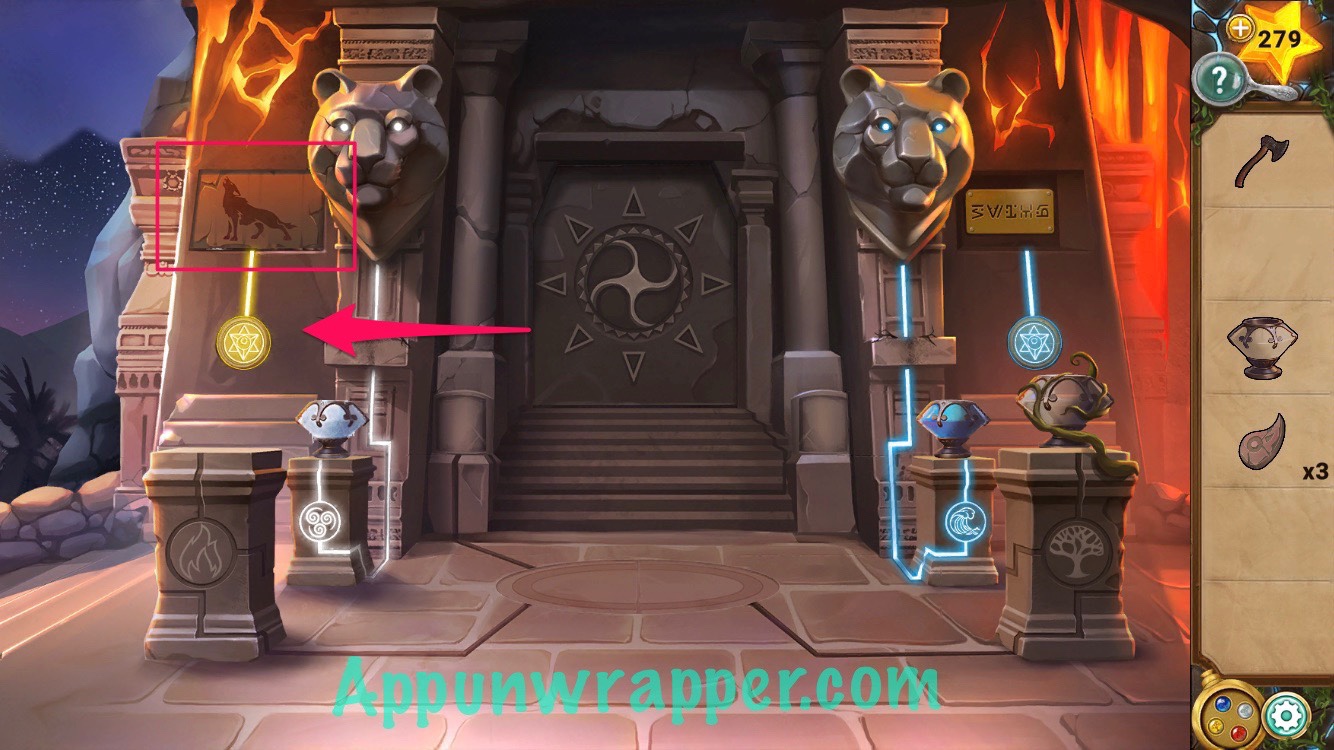
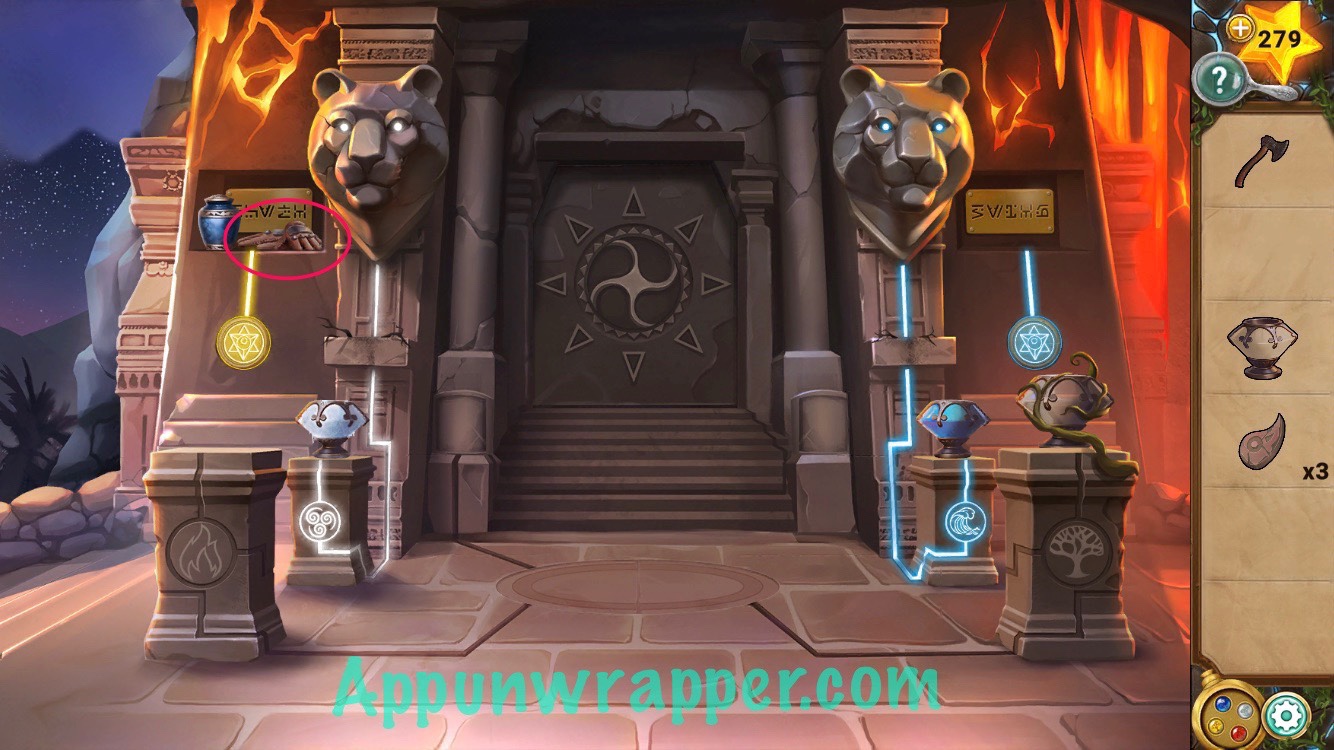
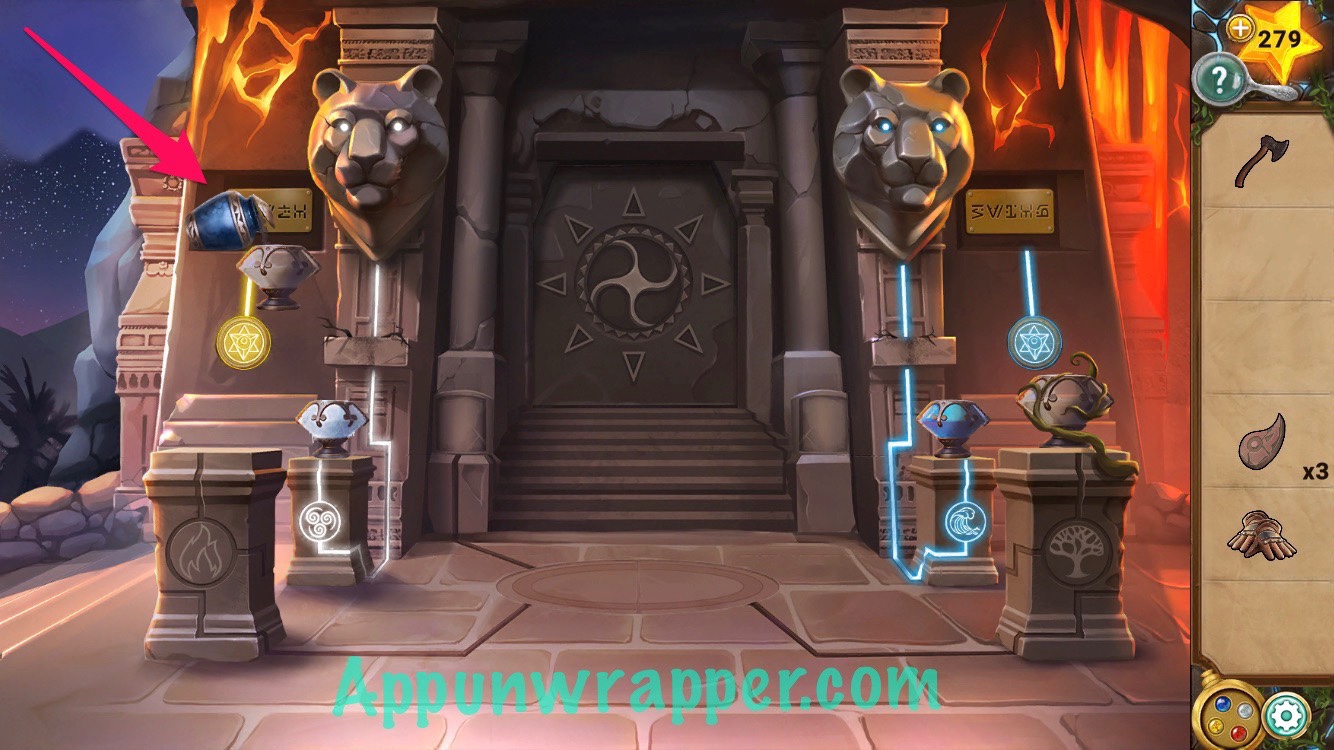
15. Now use the compass clue together with the books to figure out the Roman numerals to enter for each shape. The green arrow on the compass tells you to start at 1 (I) and make your way around to 12 (XII). Look at the color of the number at I and then find the book of that color. Then add I next to that symbol on the lock. Continue doing so until all the numbers have been used and it looks like the image below. Then take the family crest from inside.
16. Add all the family crest pieces to the door and reveal the planets puzzle.
17. Now to solve the planets puzzle. You need to move all the marbles to the same colors background. Then continue through.
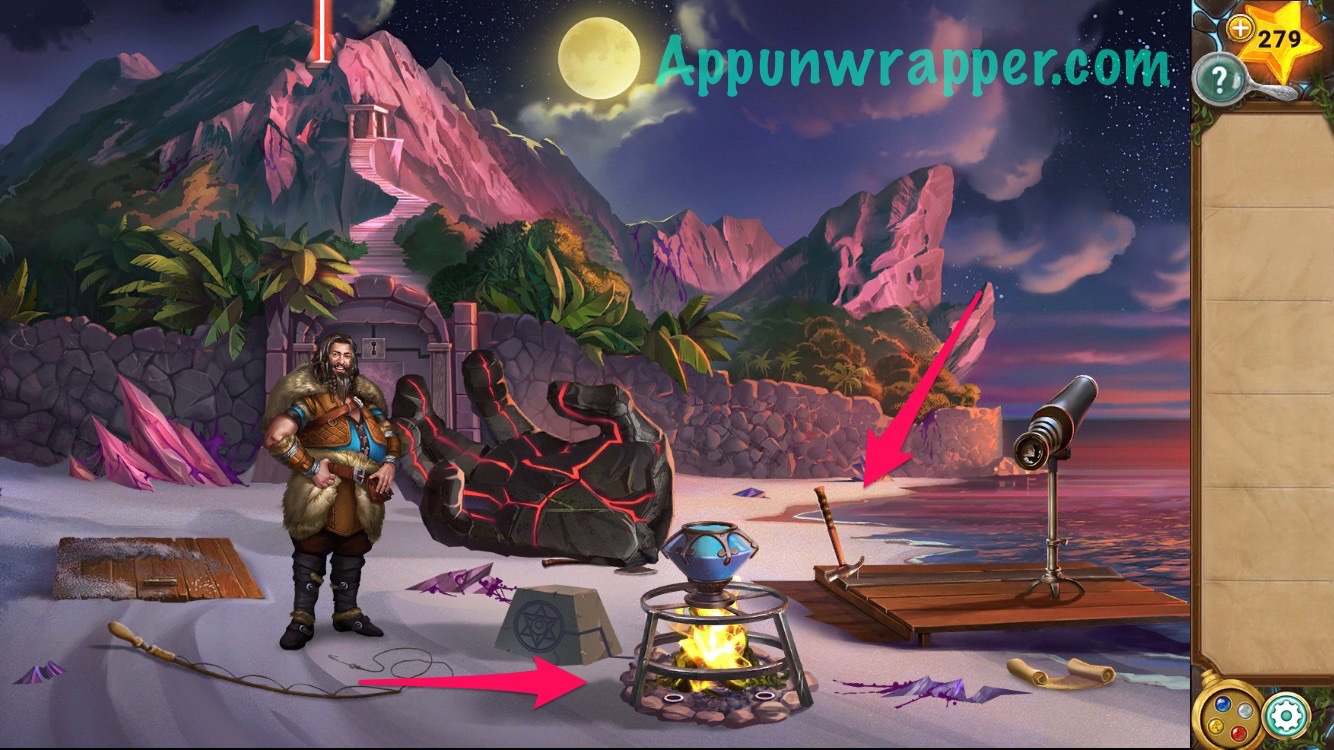
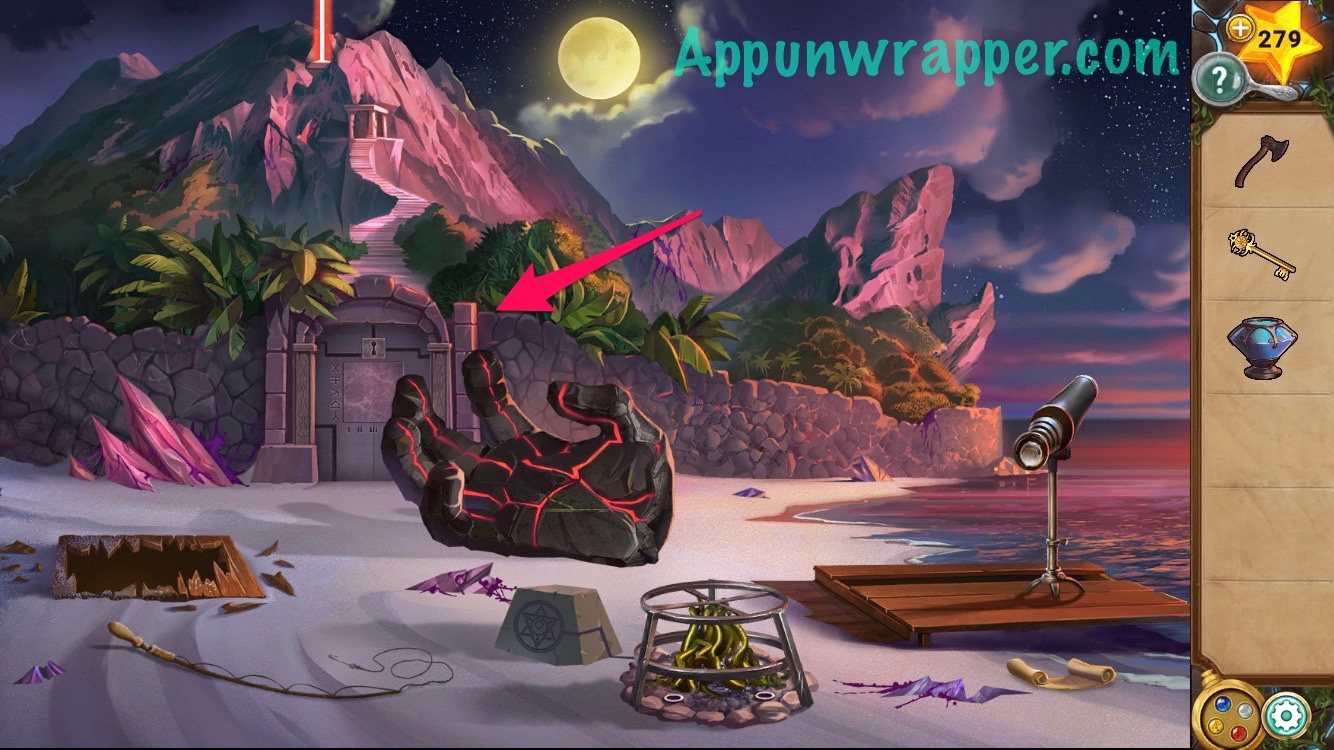
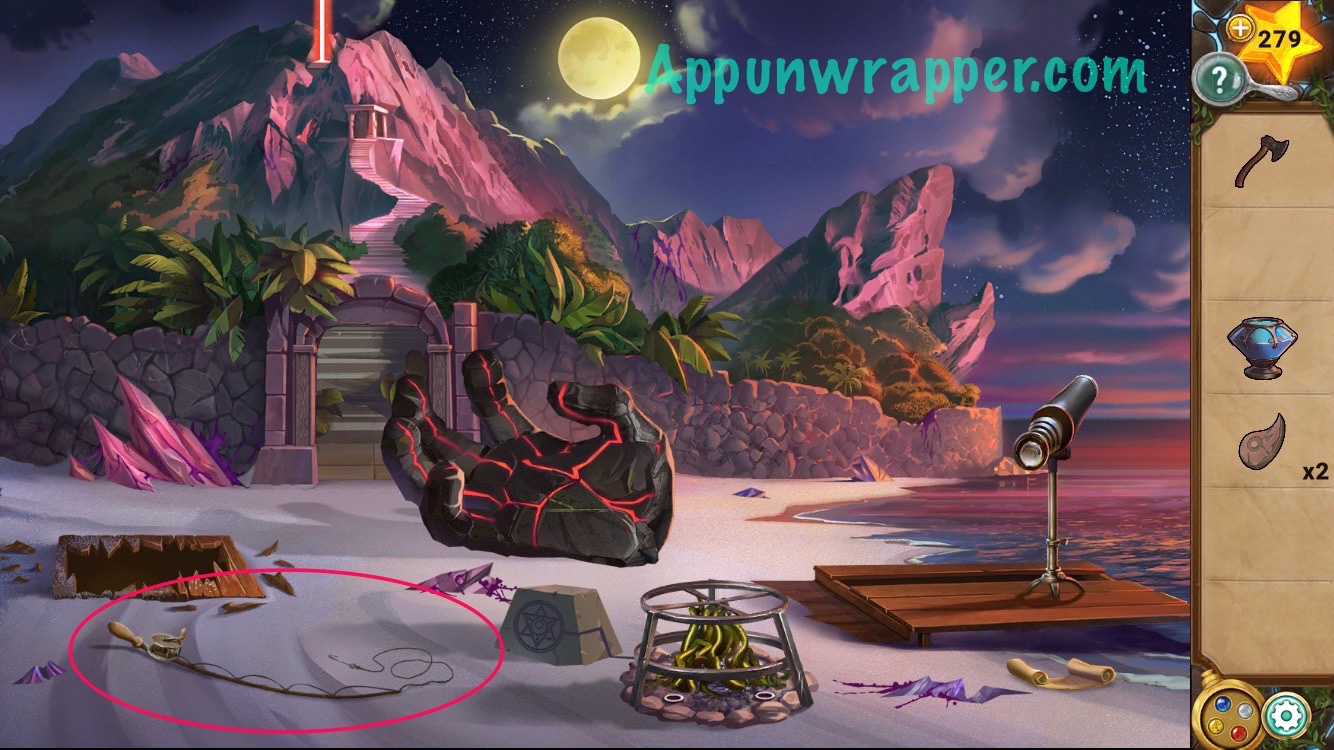
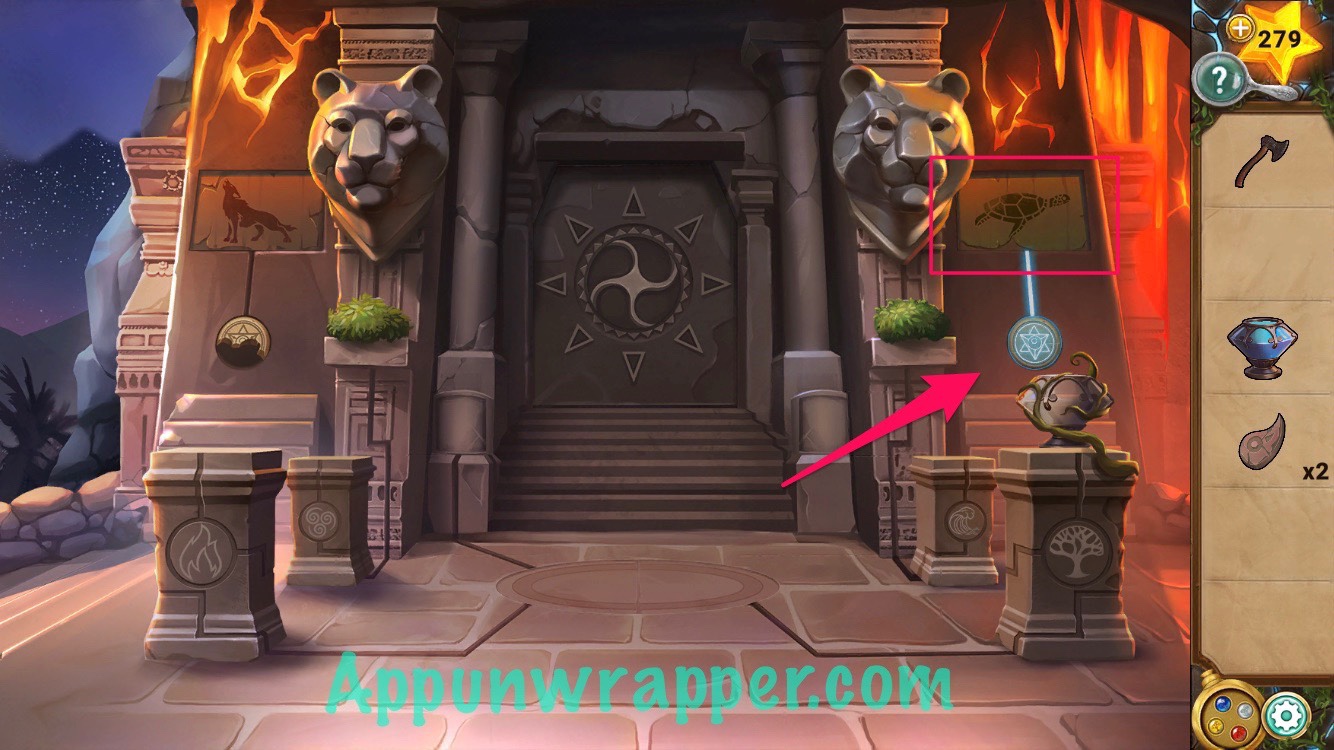
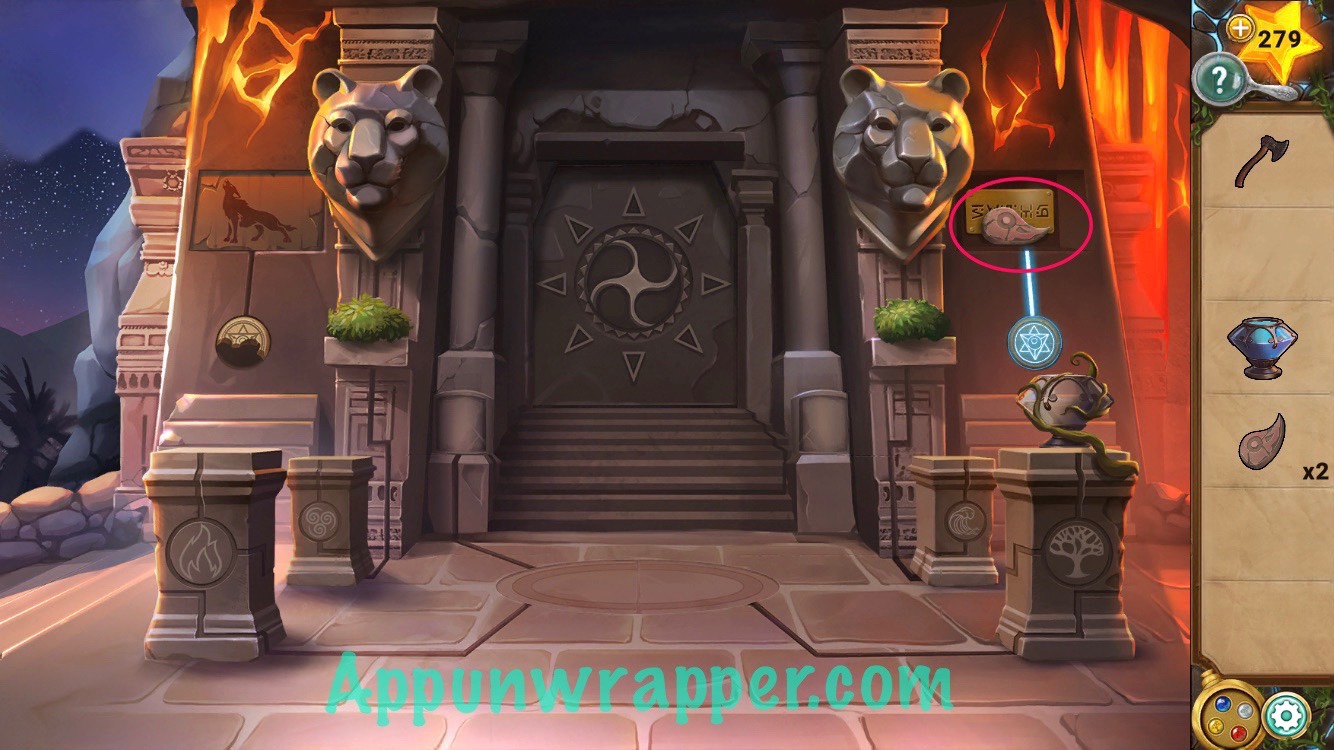
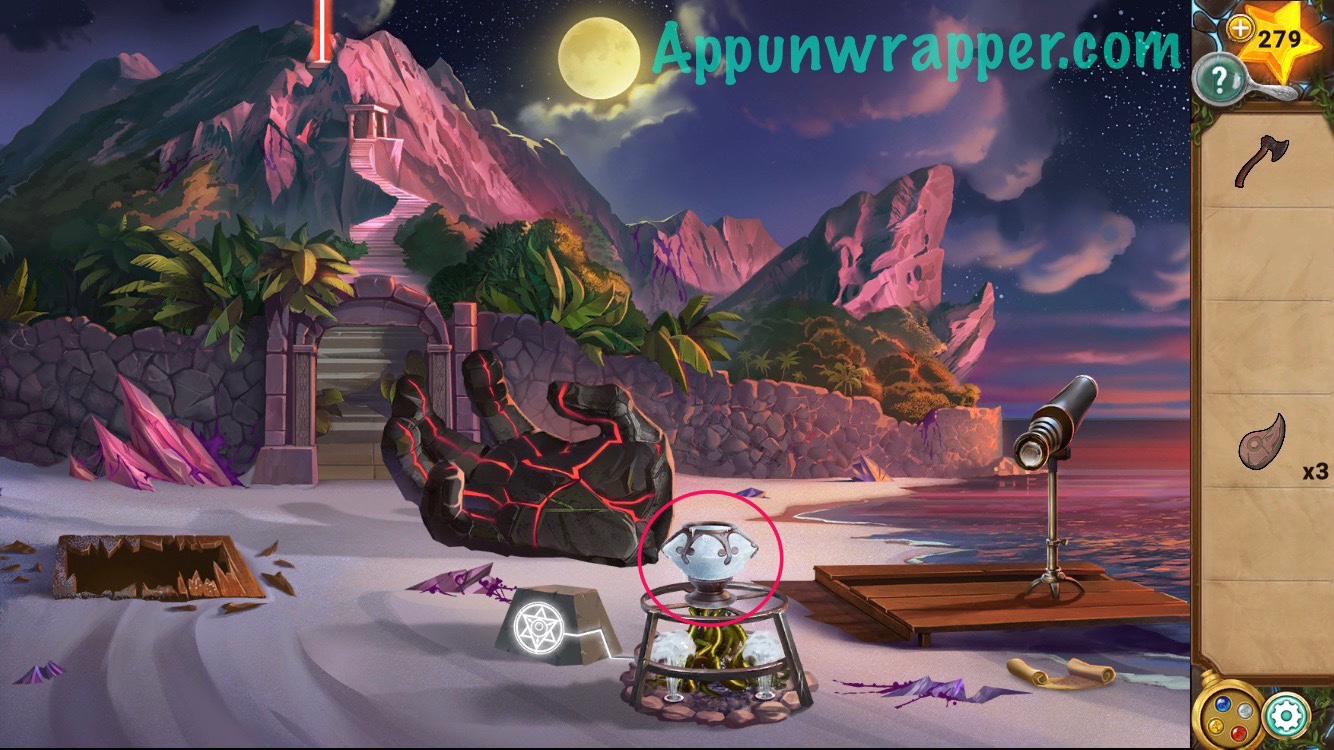
18. You meet Siegfried again, who found your locket! He returns it to you and the red beam of light gives you power over fire. Use the earth stone on the star emblem to grow some vines. Also, pick up the hammer and crystal bowl and look at the scroll on the ground.
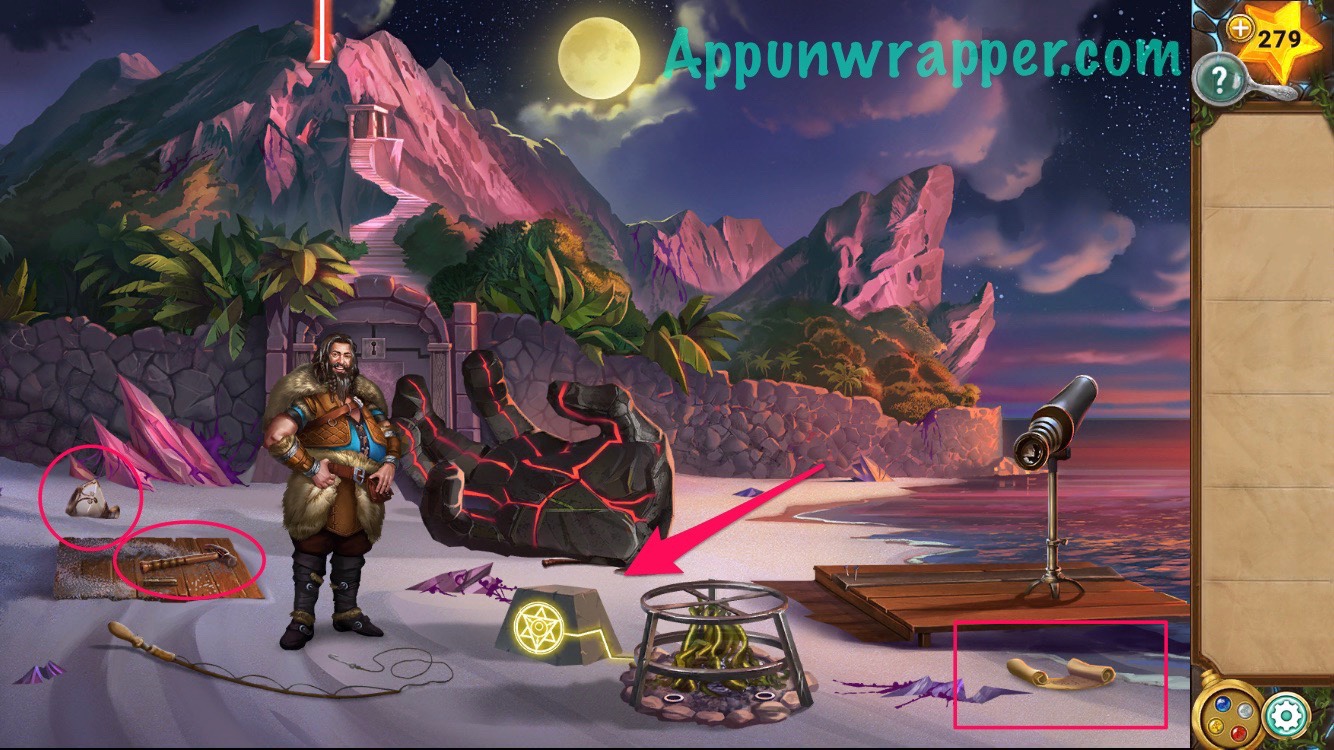
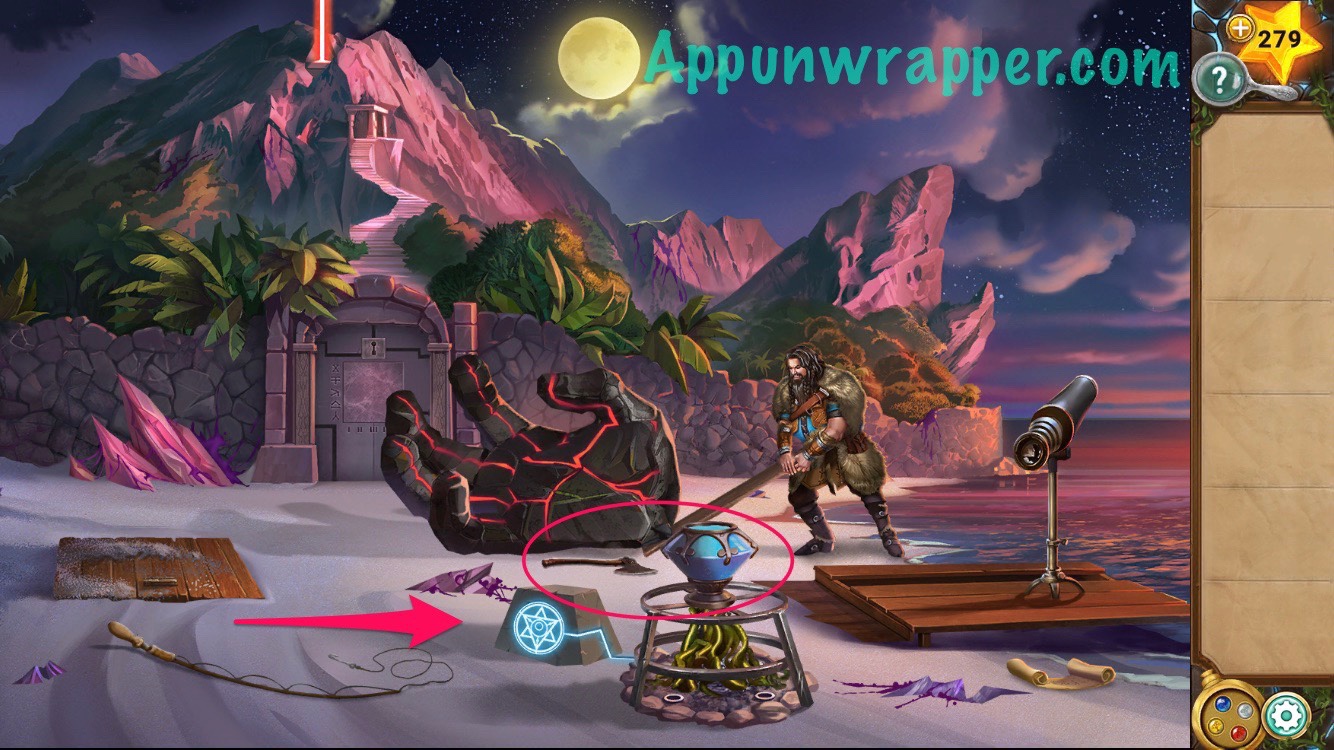
19. Use the fire stone on the star emblem to light the vines on fire. Fill the crystal crystal bowl with water from the ocean and then place it on top. Also, use the hammer to remove the wooden plank.
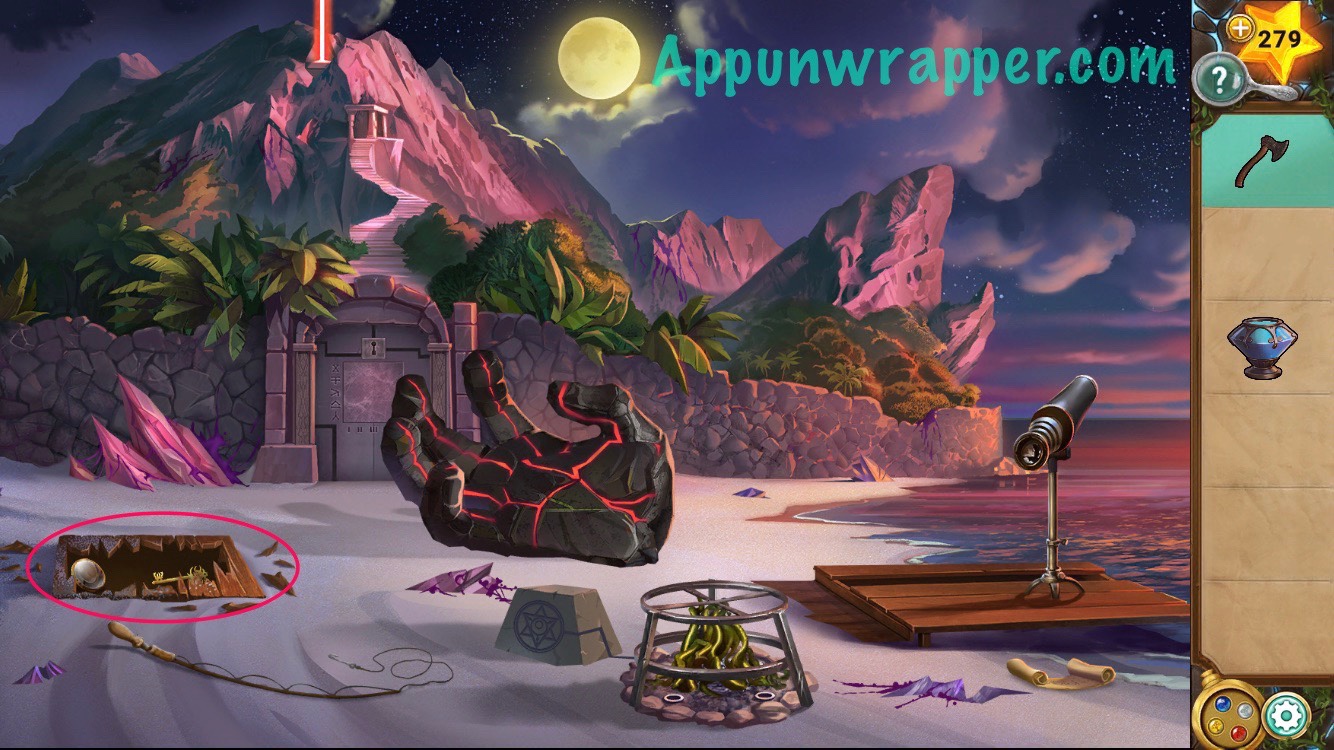
20. Use the wooden plank to lift up the giant hand. It’s too heavy, so ask Siegfried to help. Then grab the axe. Also, use the water stone on the star emblem to put out the fire. Then take the crystal water bowl back.
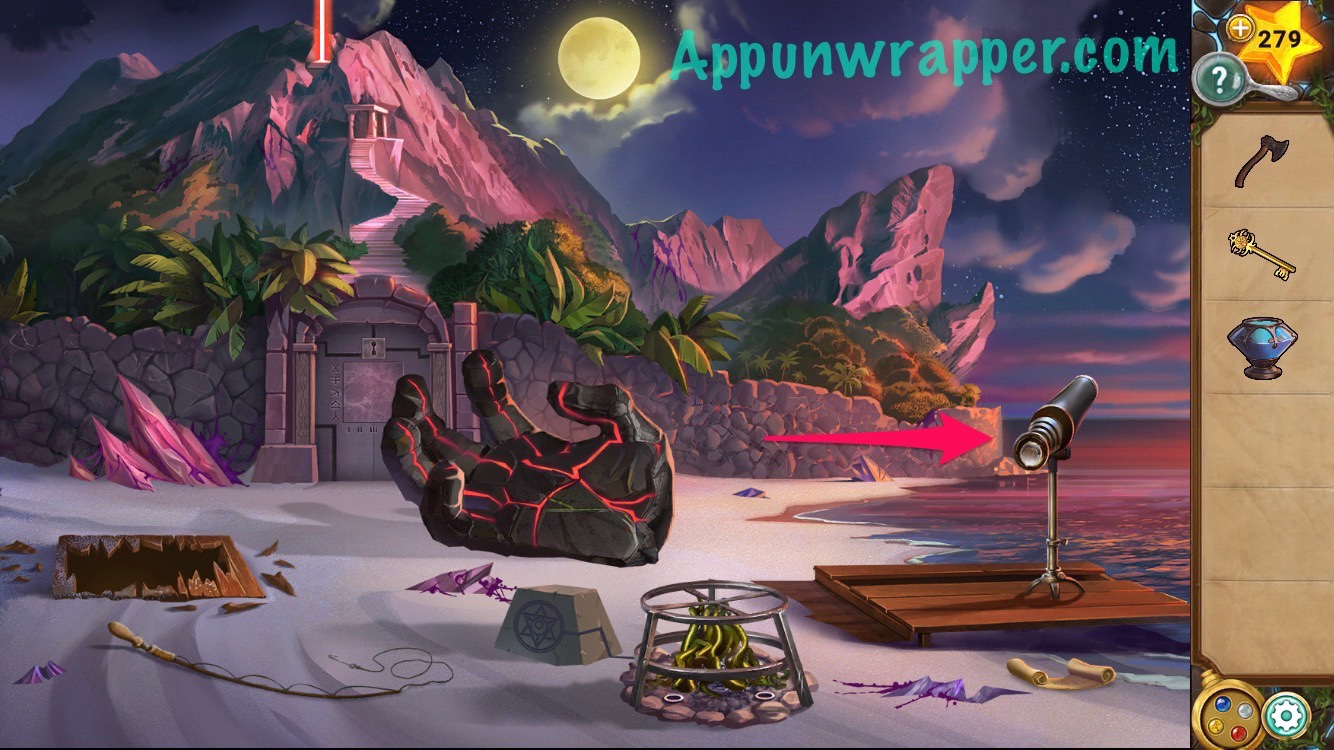
21. Use the axe on the wooden trap door to the left and then take the lens and sun key.
22. Replace the lens on the telescope and then look through.
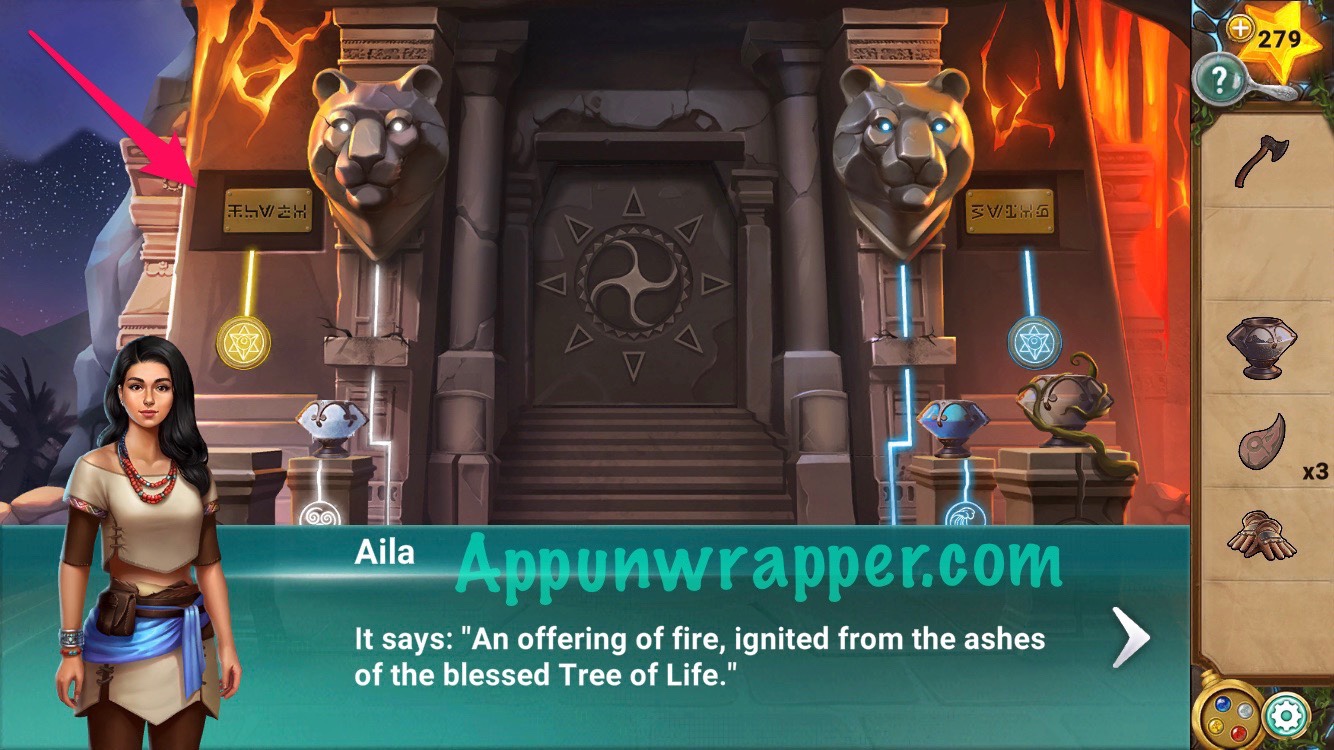
23. Now, move the colored circles around until the stars are in focus.
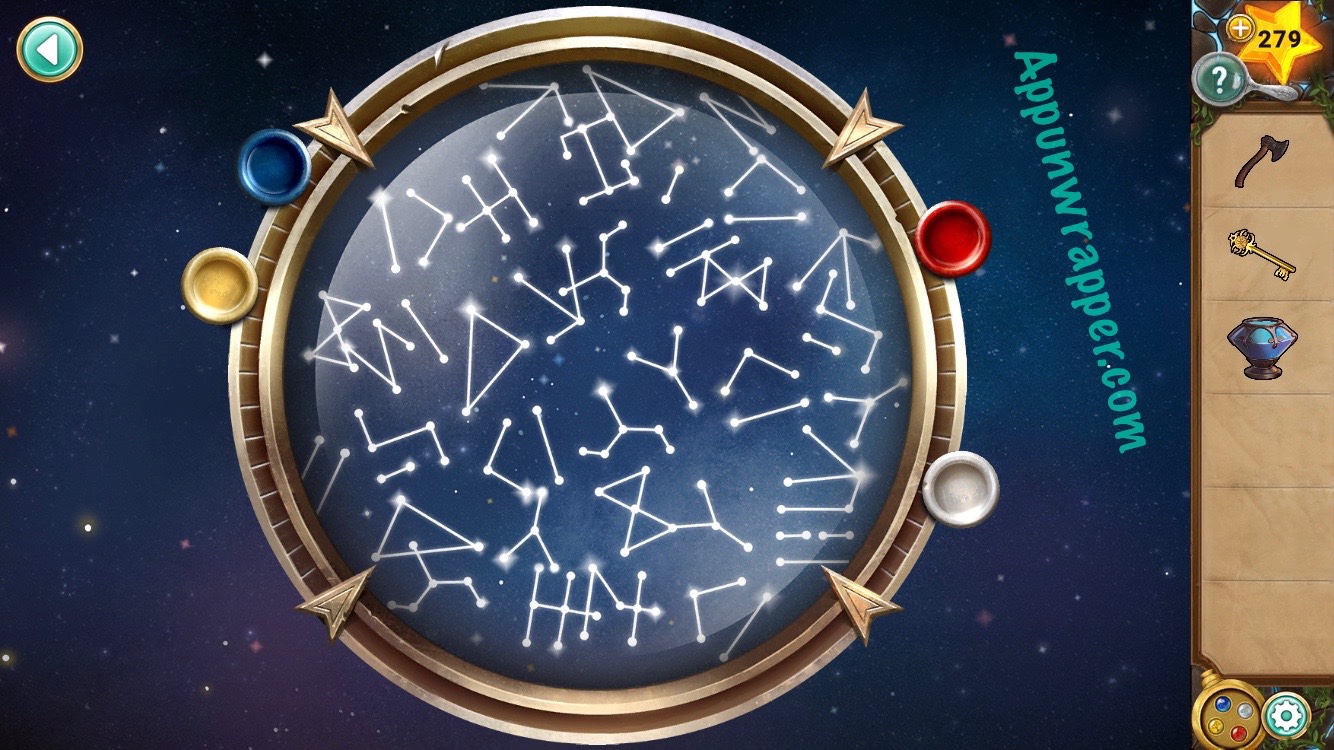
24. Tap on the door towards the back and use the sun key on the lock. It will reveal a star emblem. Use the fire stone on it to make buttons appear.
25. We know that the bottom symbol is IV based on the scroll we found. So press that button. We still need to figure out the other four. Basically, just count how many times you find each of those constellations in the telescope. That’s the answer. It goes 3, 2, 4, 5, 4. Then go through.
26. Now we’re at the temple entrance. Pick up the fishing reel and two summer pendants.
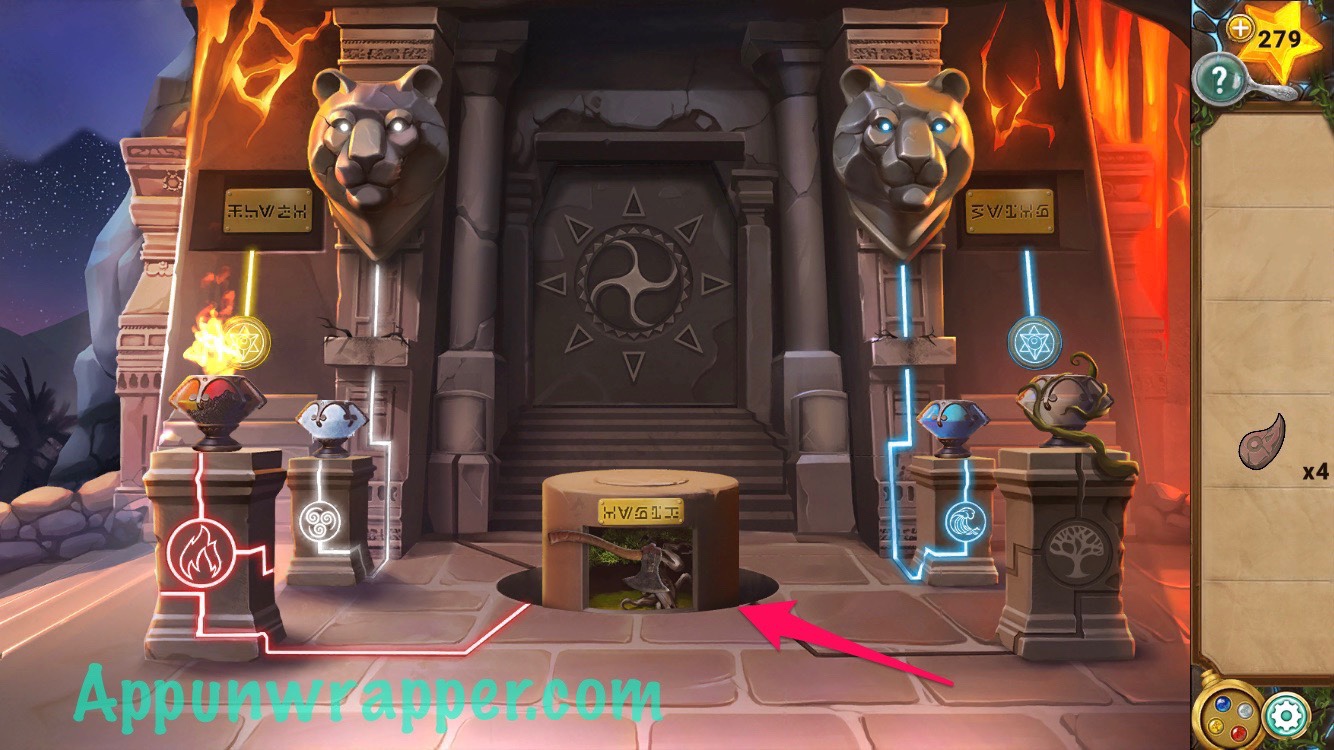
27. Go back down and add the fishing reel to the fishing rod. Now you have a working fishing rod.
28. Use the rod to fish up a stone slab.

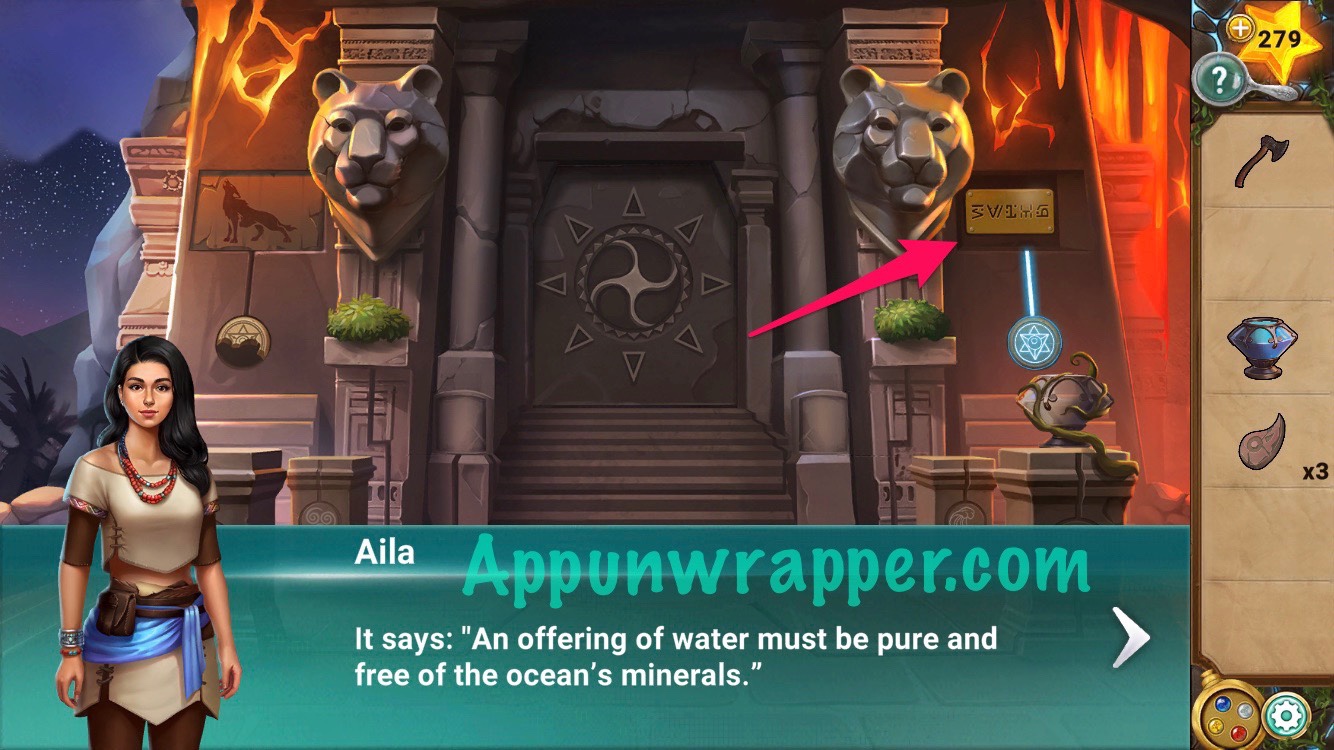
29. Go back up the stairs and place the stone slab with the other half to make a working star emblem. Notice the turtle image above it. So use the water stone on the star emblem. Then take the summer pendant and notice the writing that says, “An offering of water must be pure and free of the ocean’s minerals.”
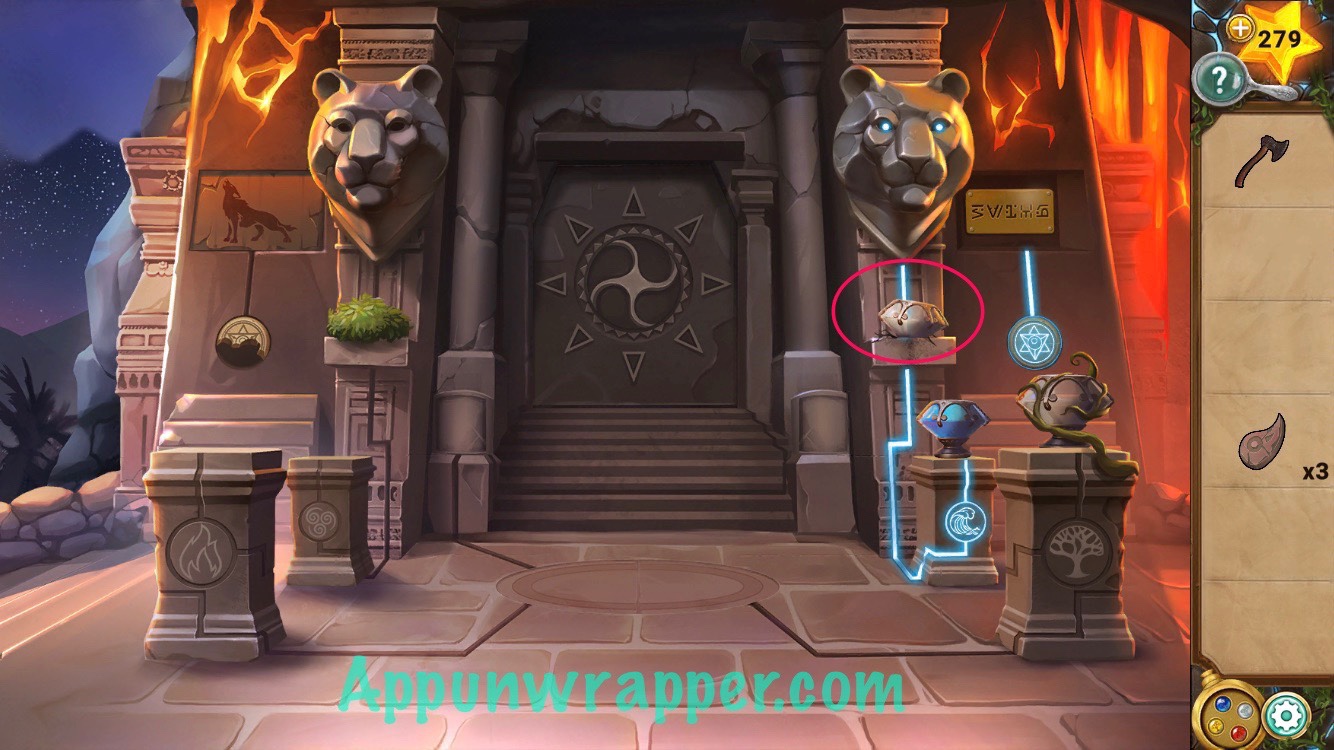
30. We already boiled and purified the water, so place the water bowl on the water pedestal. Then take the new crystal bowl that’s revealed.
31. Go back down and do the same thing with the bowl as before — fill it up with water, place it on the stove, heat it up to purify it. Butt then add one last step — use the wind stone to freeze it. Now you have an ice bowl!
32. Go back upstairs and place the ice bowl on the wind pedestal. Then take the new crystal bowl.
32. Go back downstairs. Ollie is standing there. Talk to him and he’ll give you the other stone slab.
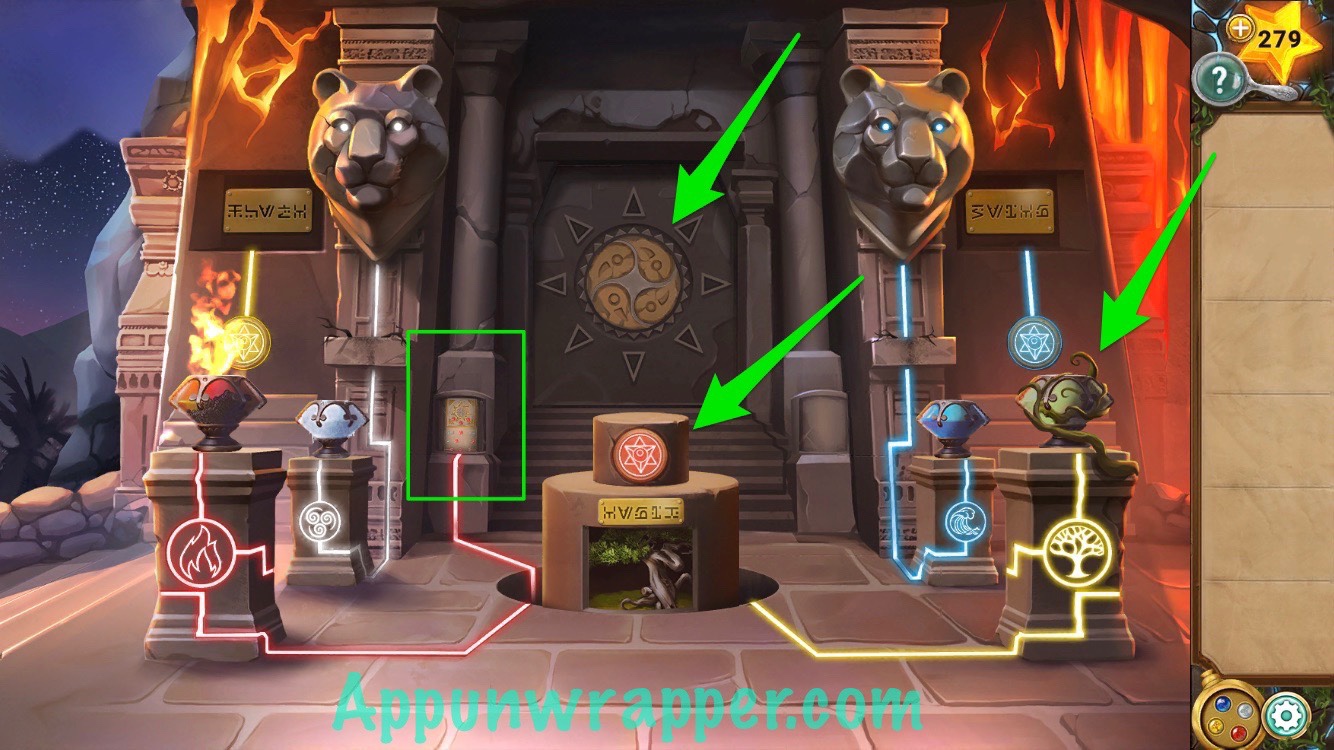
33. Go back upstairs and place the stone slab in the slot to fix the left star emblem. Notice the wolf image. Use the earth stone on the star to unlock that panel. Take the gloves from inside and use the crystal bowl to collect the ashes from the urn.
34. Notice the engraving: “An offering of fire, ignited from the ashes of the blessed Tree of Life.”
35. Go back down and place the bowl of ashes on the stove. Use the fire stone to light it on fire and then use the gloves to pick up the fire bowl.

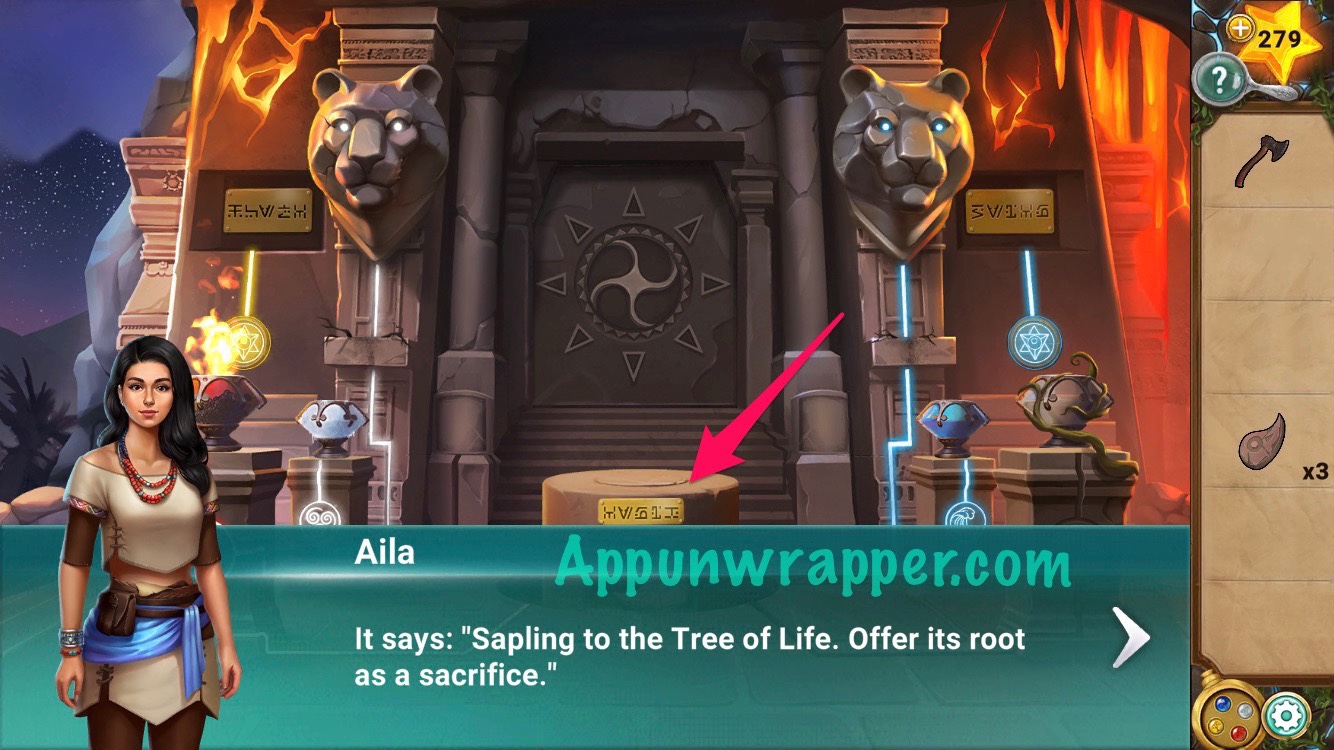
36. Go back upstairs and place the fire bowl on the fire pedestal. Something rises from the ground. Read the inscription: “Sapling to the Tree of Life. Offer its root as a sacrifice.” Then grab the summer pendant.
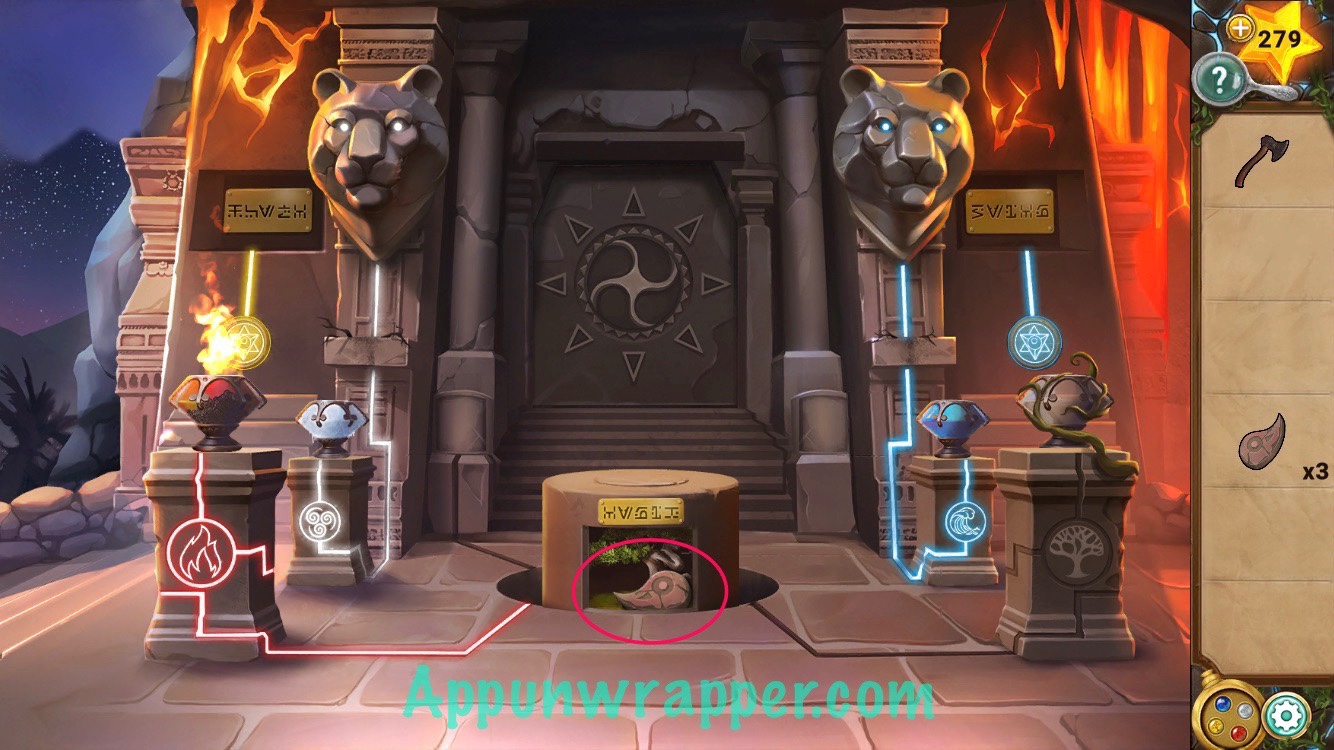
37. Use the axe to cut off one of the sapling’s roots.
38. Place the four summer pendants on the the door. Place the sapling root in the fourth bowl that’s sitting on the earth pedestal. This will activate a new star emblem. Use the fire stone on the star to reveal another pillar puzzle.
39. The seventh pillar puzzle is a light reflection puzzle. There’s two puzzles to solve. They’re not too difficult.

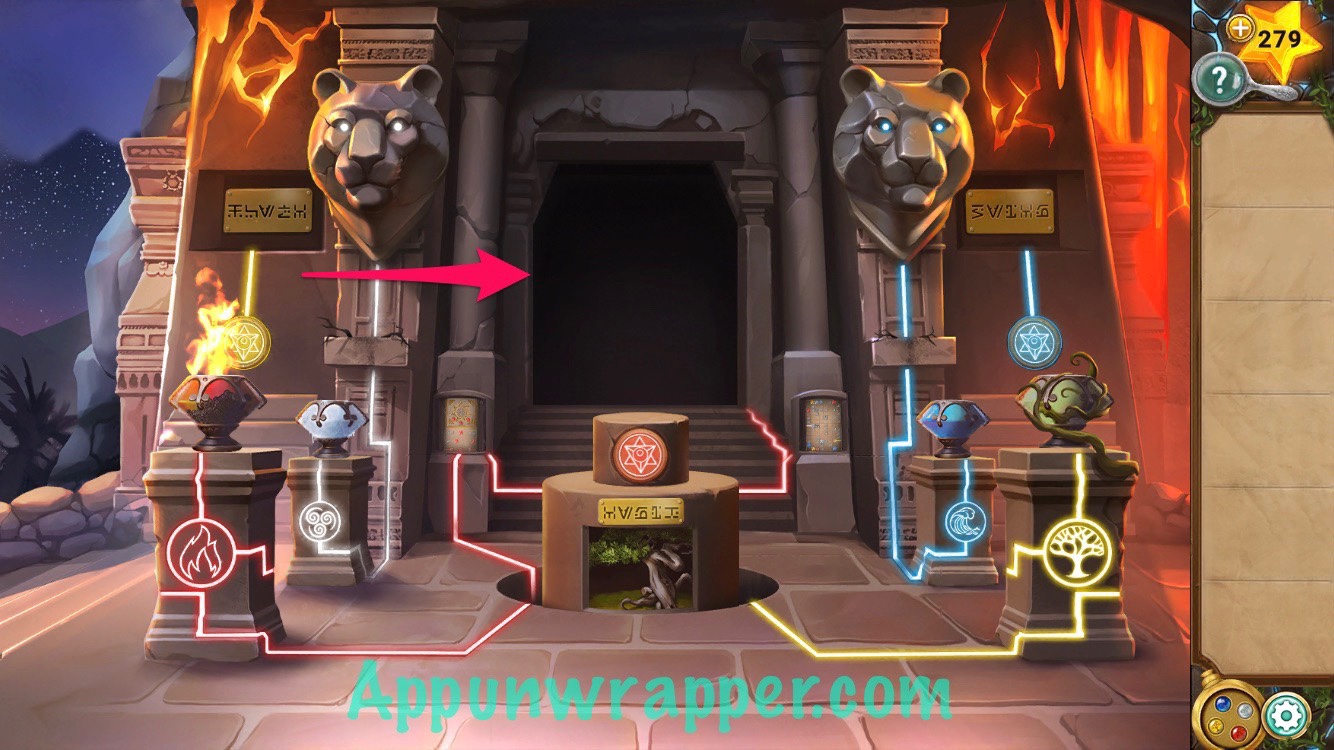
40. Now work on the eighth pillar puzzle.
41. Arthur appears to wish you luck. After he leaves, head inside to complete the chapter.
And that’s the end of Chapter 7! Click here to continue to Chapter 8 or choose a chapter below.
Chapter 1 | Chapter 2 | Chapter 3 | Chapter 4 | Chapter 5 | Chapter 6 | Chapter 7 | Chapter 8

Look in the book on the shelf. Pages are numbered- use the first three letters of the Gods names on the page.
1- GLA
2- AQU
3- AUT
4- SOL
Did that, it die Not accept but buzzes red
Me too!!
Buzzer stays red and won’t open the lock.
Keep going. Once they’ve all been entered, it’ll turn green. I got stuck here too
Push the pop out brick in the basement and the tile will reveal a gem
And use the hands on the compass to open the lock
Ive been stuck on the compass a full day now, ive been entering the numerals clockwise and it still wont unlock
Ok so the code to unlock the puzzle is
Row1, white book: I I V I X
Row2, blue book: V I I I X
Row3, yellow book: I V V I I
Row4, red book: I V X I I
Enter them in numerical order
The last one you need to do from where the arrow start not at 12 but 1..
Keep going clockwise, but start with roman numeral I
Use the colored books to know which line and hands to use together.
What about passing beam puzzle?
IΓÇÖm on the second beam puzzle, blue and gold, but there are no beams of light. Did I miss a step?
Me too. Something mus be wrong.
Anche a me non appaiono…. eppure risulta tutto fatto correttamente
Hi
I have no light beams either, done the 1st 3 red ones??? Help
Me not either could you figure it out??thanks
Successo anche a me…
Same.
This has been extremely helpful as I’m very new to this type of game. Thank you.
Okay, so I finish chapter 7 and shut down tablet to do chapter 8 today and am absolutely gutted I have to redo the whole of chapter 7 again?????
How do you restart a chapter after you’ve gotten a little ways in? I’m in chapter and accidentally restarted the level and now I’m now getting the first stone chard
Não estou entendendo como você conseguiu a sequência de algarismos romanos de cada livro para abrir a fechadura. Mesmo deslocando os ponteiros da bússola no sentido horário, não consigo achar a sequência correta? Pode me ajudar? Obrigado.
help! i solved the planet marble puzzle which opened the green door in basement, but it won’t let me through to meet Siegfried.
What do I do?
Help, In chapter 7…solved the planet marble puzzle in the basement. Door opened but I can’t get through to see Siegfried….