Adventure Escape Mysteries – Sweet Dreams
By: Haiku Games

Haiku Games is back with a new Adventure Escape game, this time about a 5-year-old boy’s dreams. You play as Revi, a Dream Manager who has to help young Arlo conquer his fears about starting school. This walkthrough guide should help you if you get stuck on any of the puzzles in Chapter 6 of Sweet Dreams. Feel free to ask for extra help in the comments section.
See all my other Adventure Escape guides here.
Walkthrough:
Chapter 1 | Chapter 2 | Chapter 3 | Chapter 4 | Chapter 5 | Chapter 6 | Chapter 7
Chapter 6:
You can watch my video for Chapter 6 or continue below for my step-by-step guide:
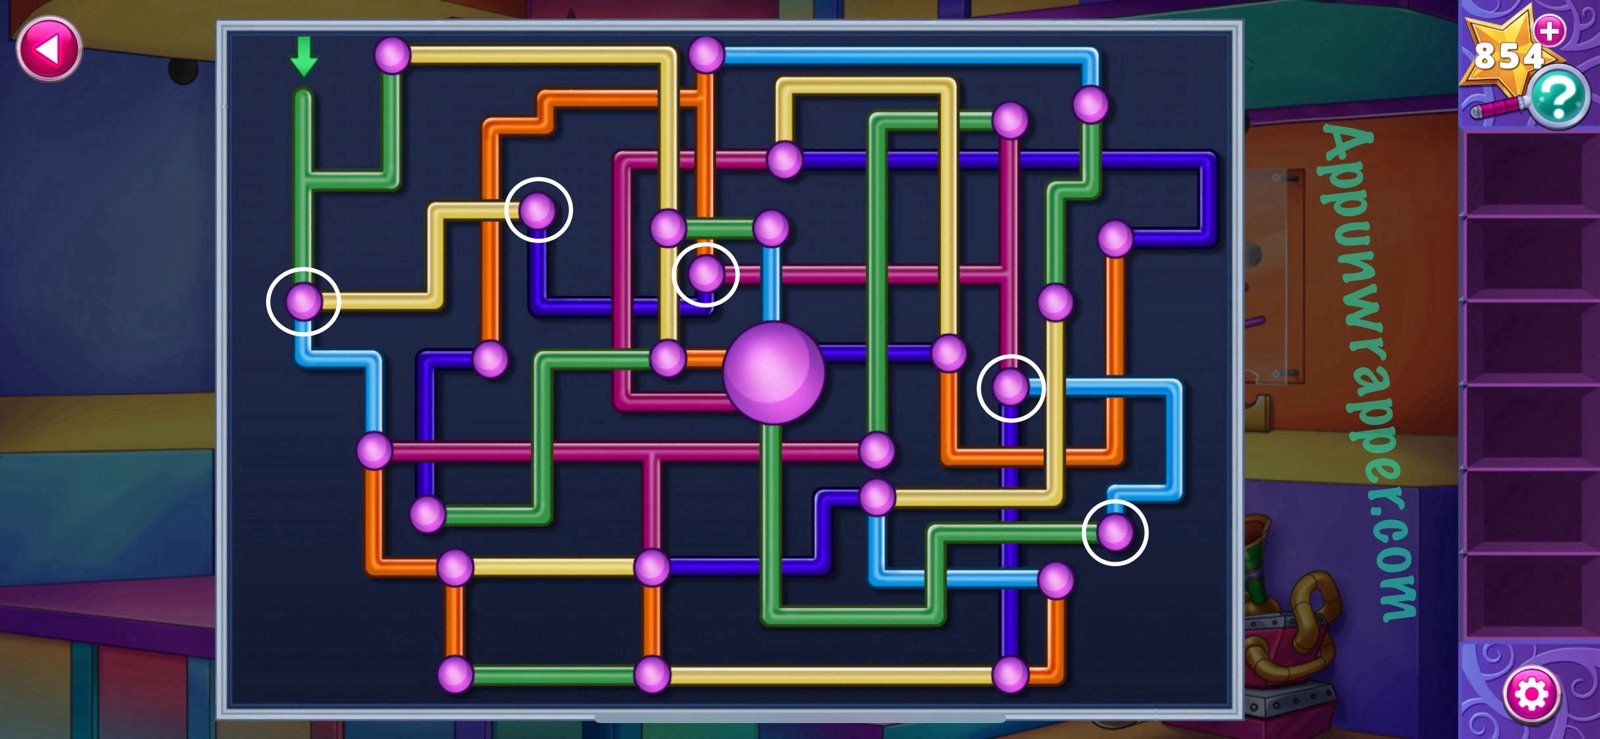
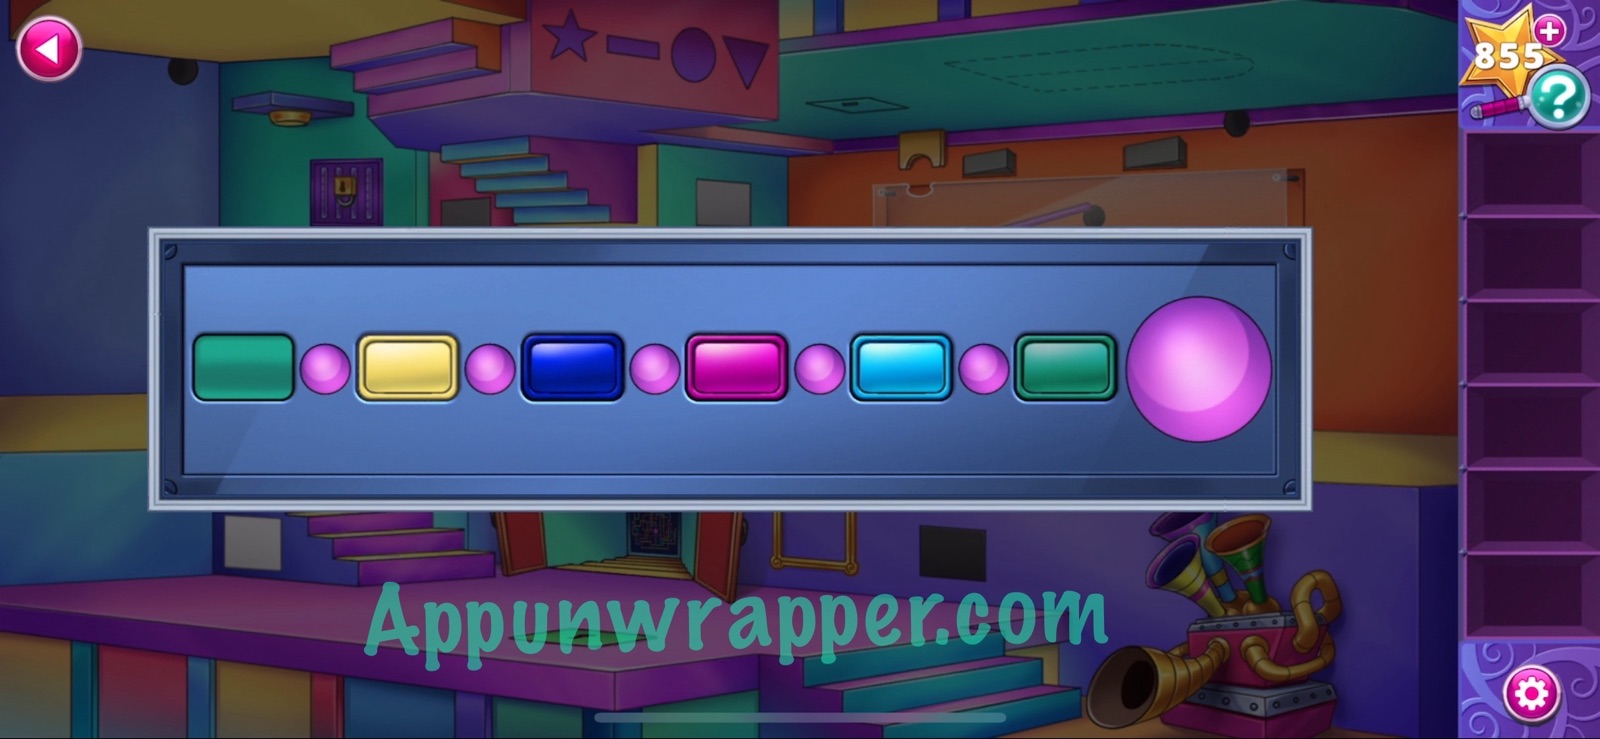
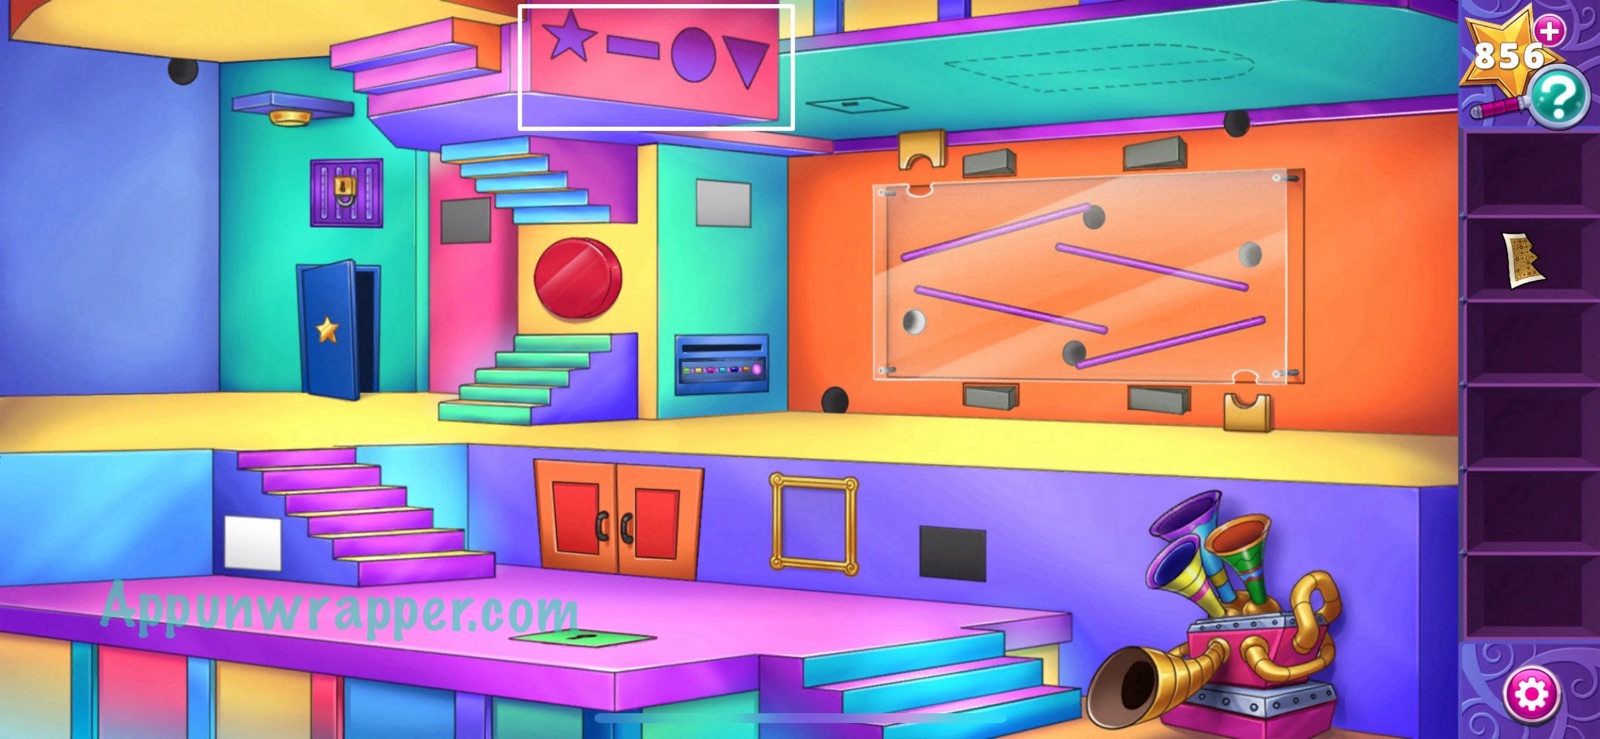
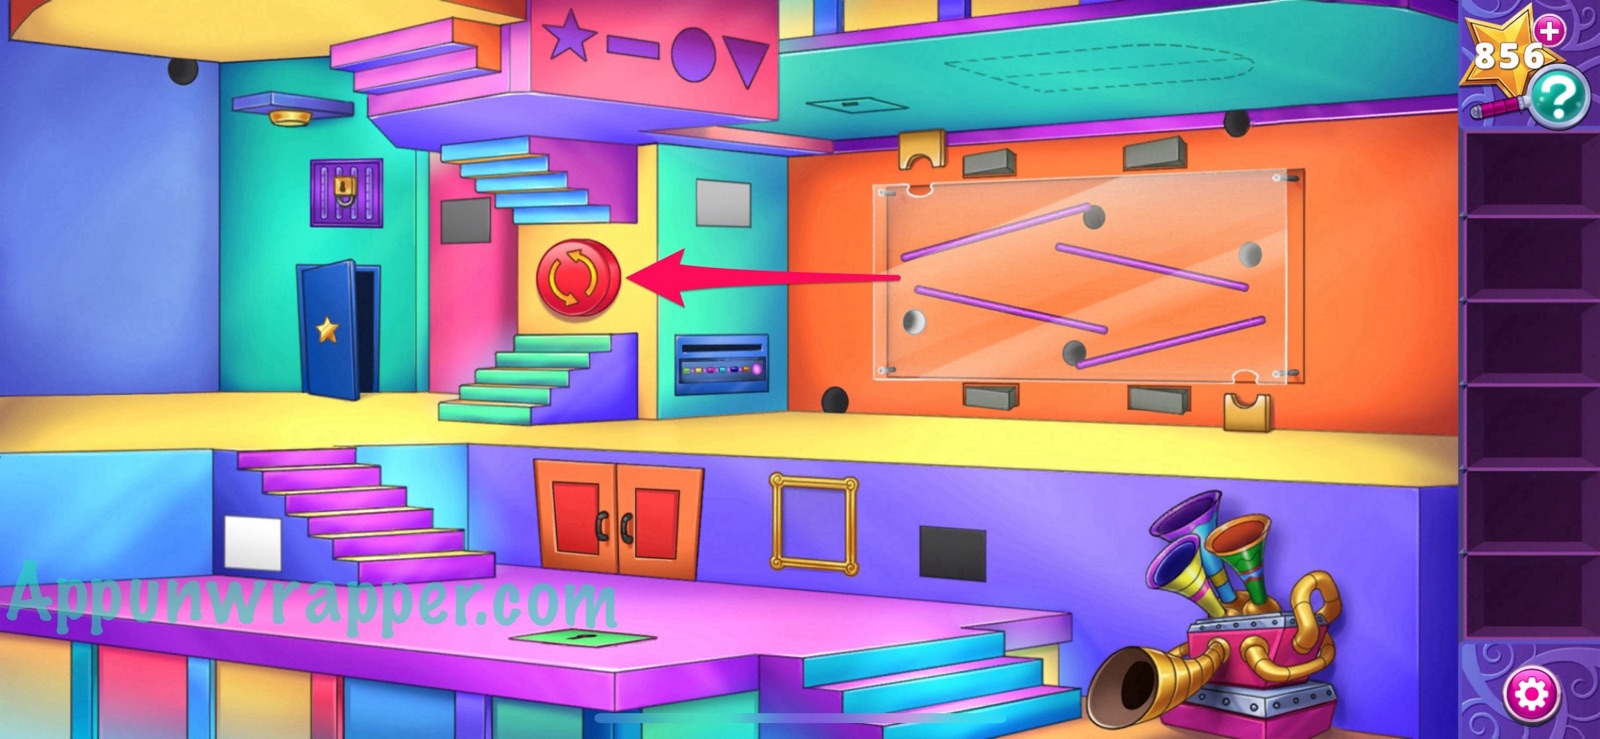
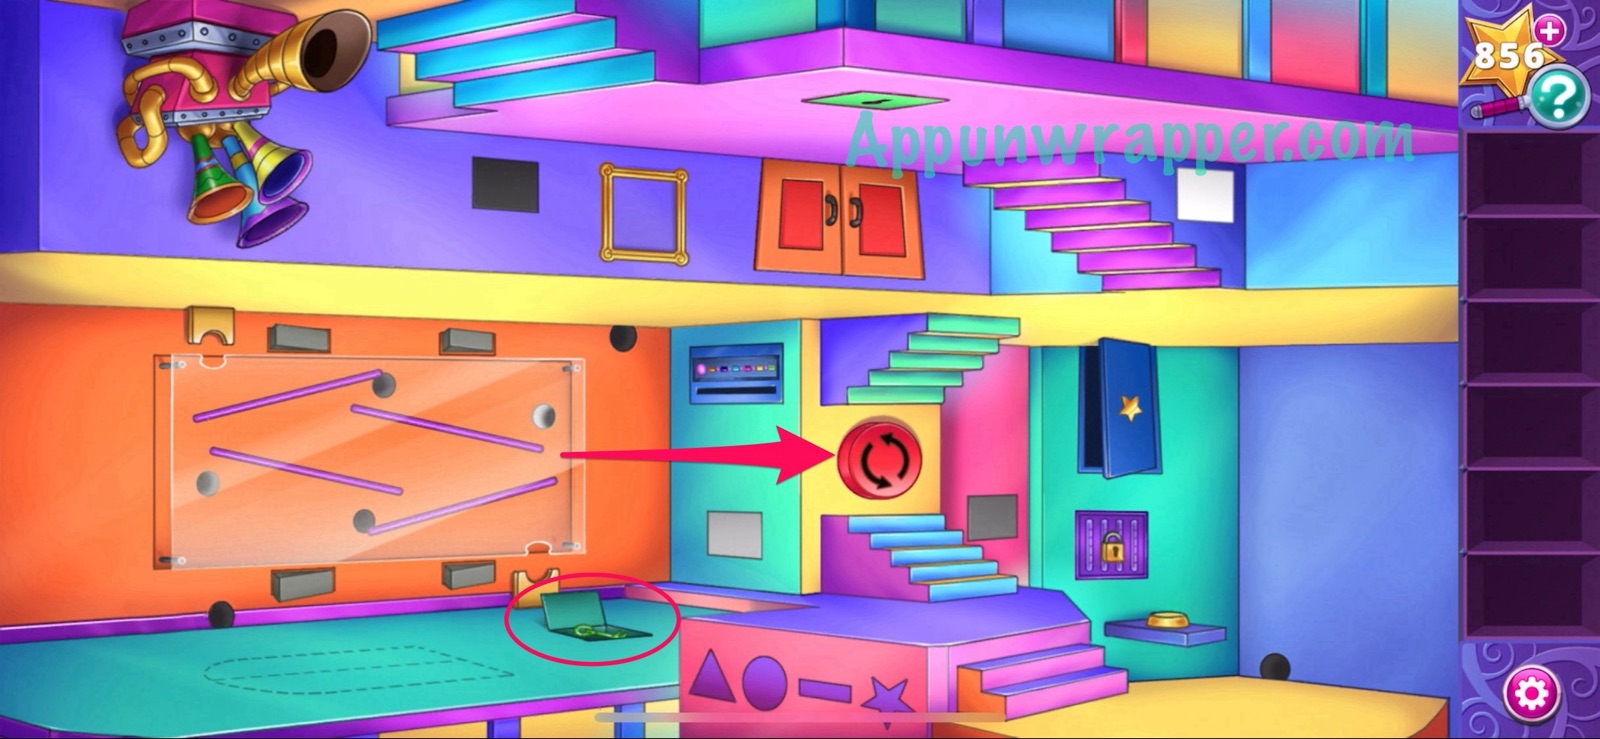
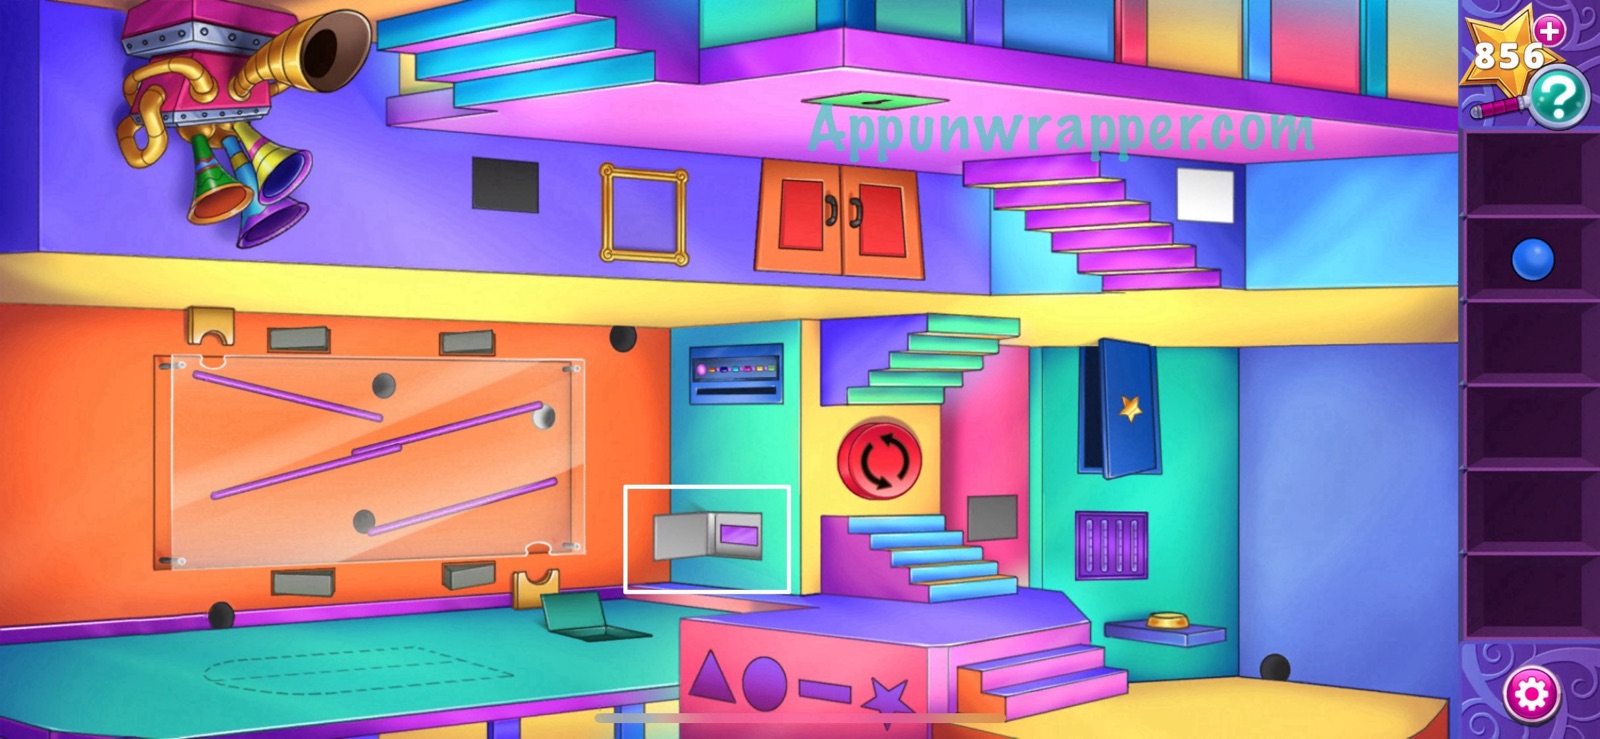
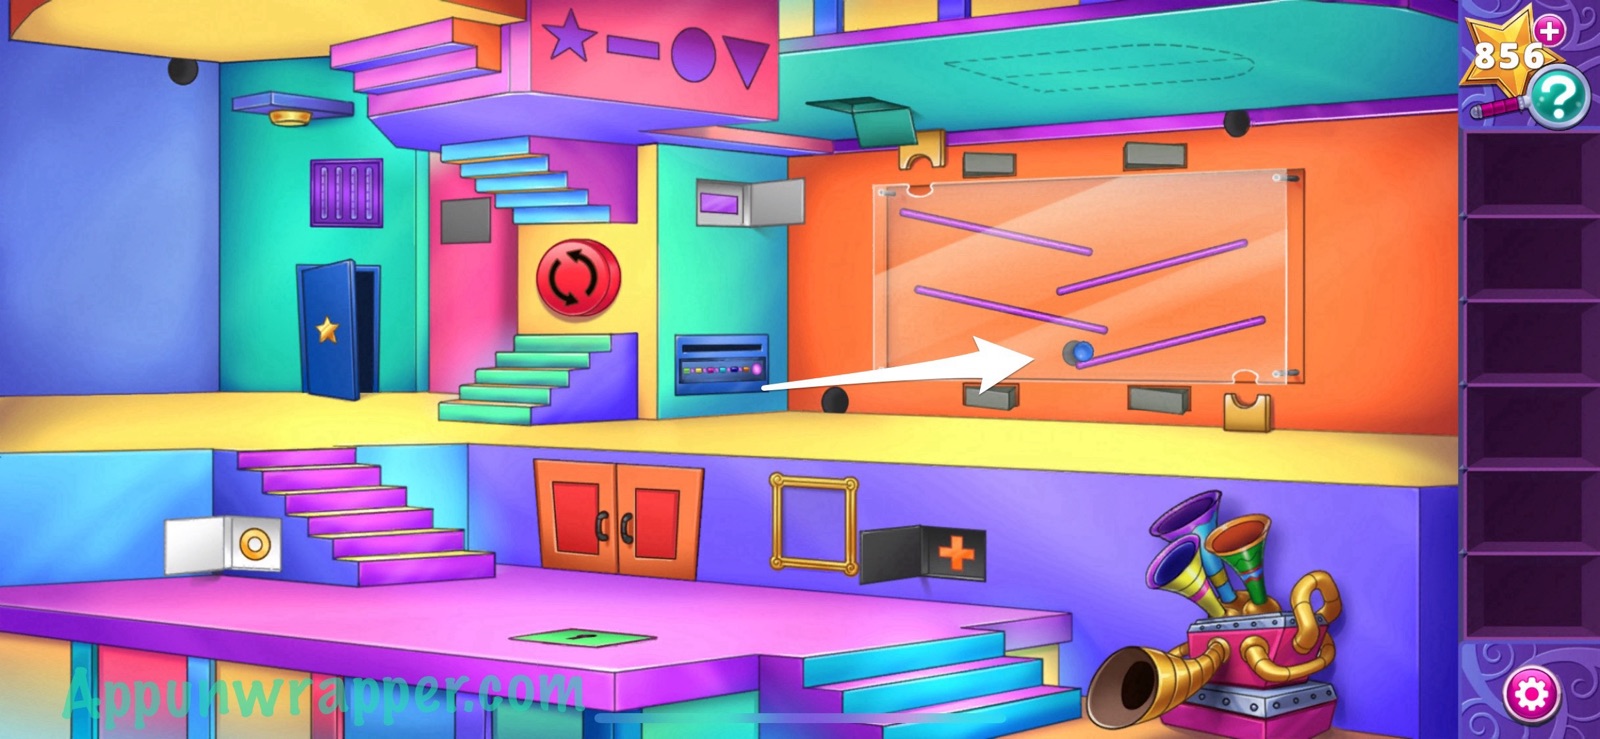
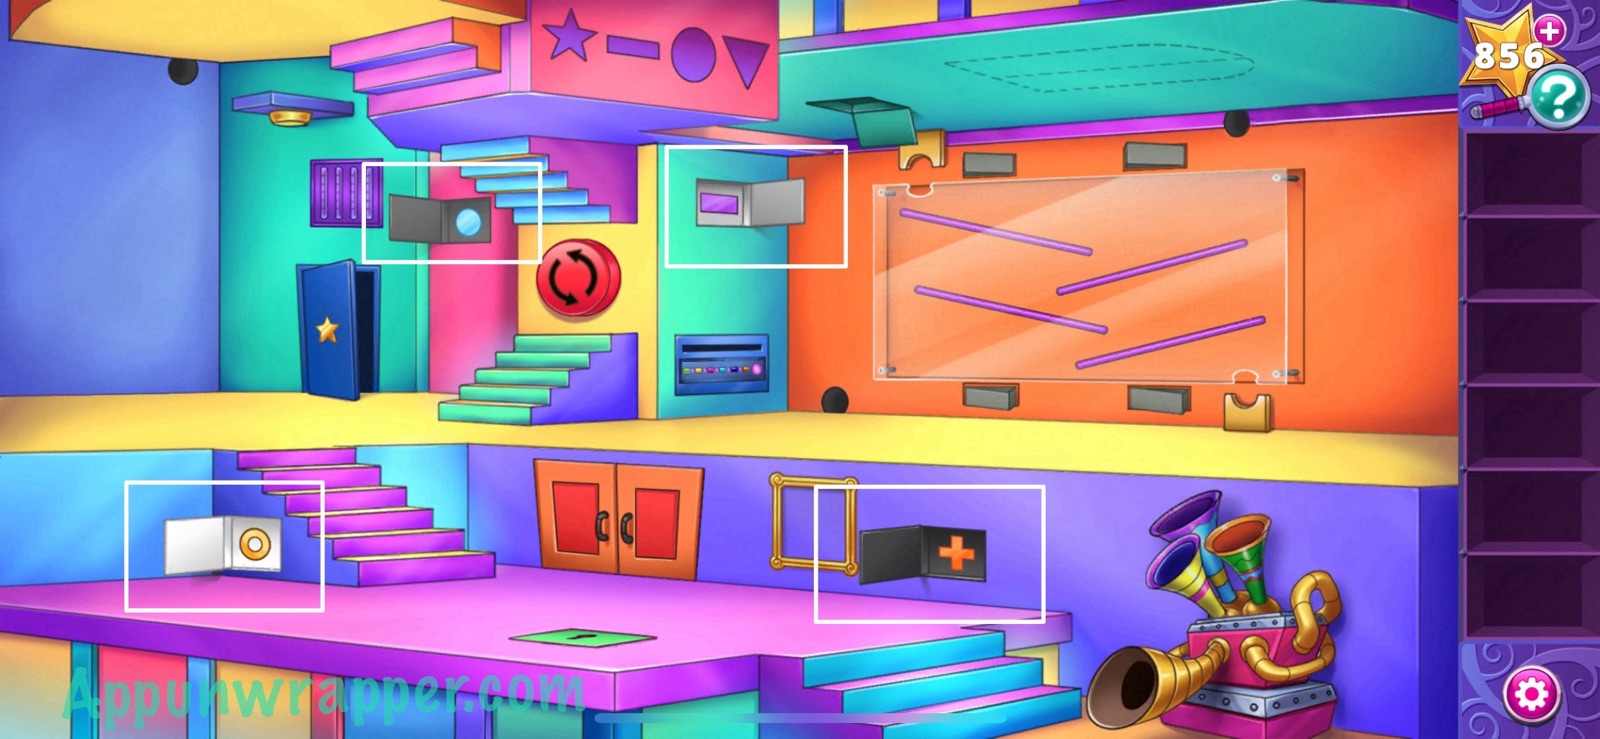
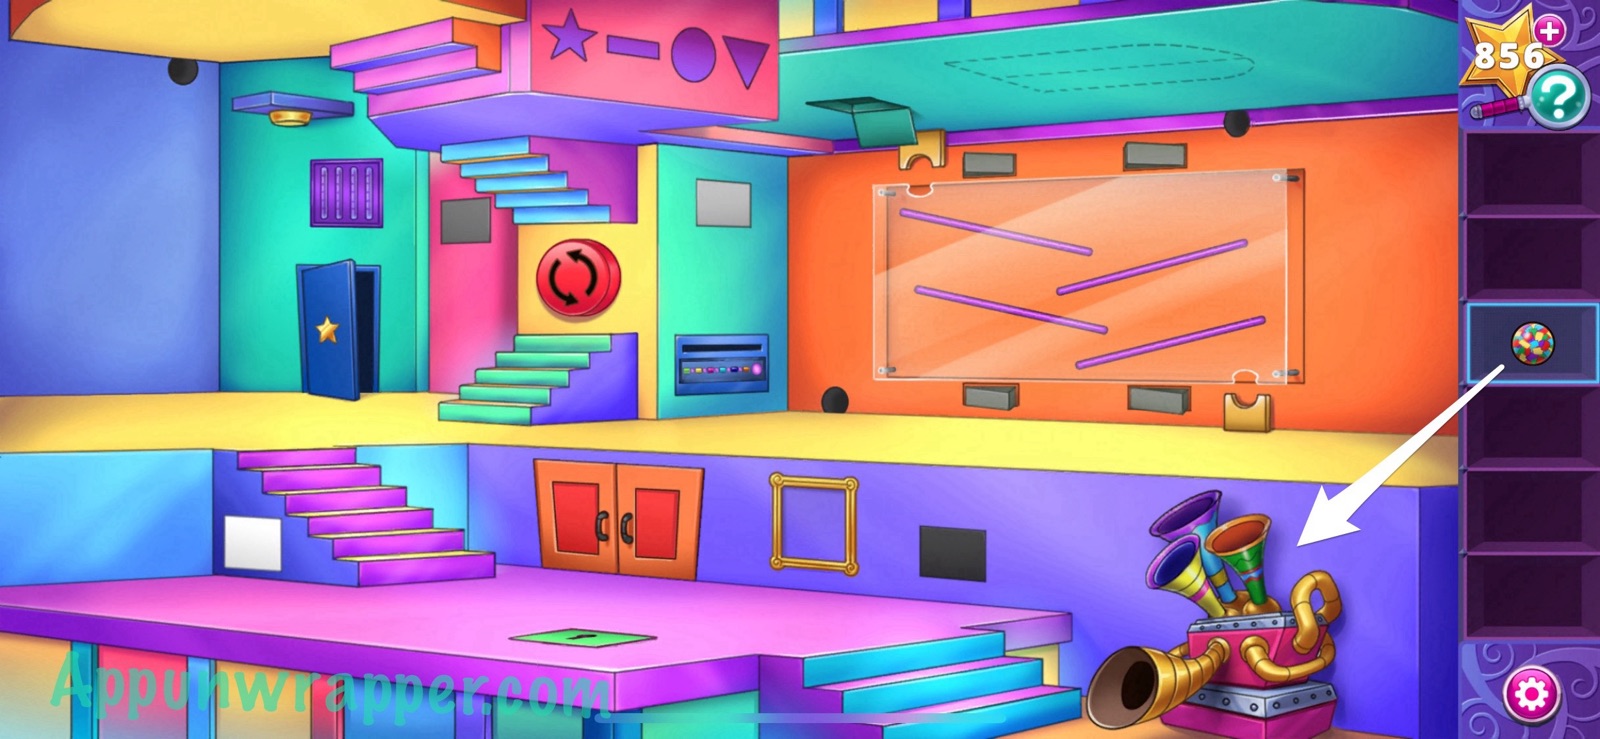
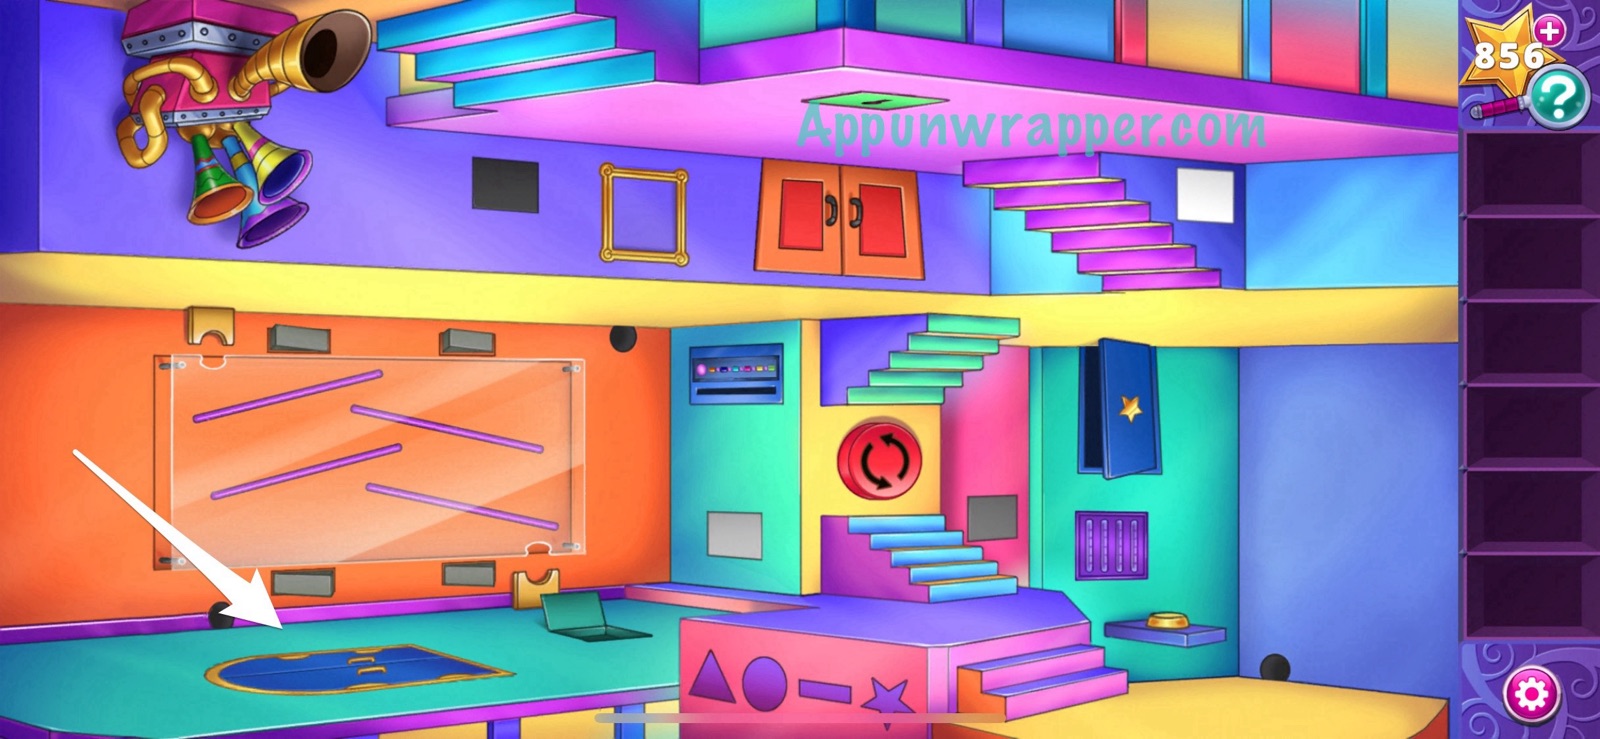
1. We’re in a new dream and everything is topsy-turvy! First, open the little doors and look through to see a clue with different colored pipes. You need to start at the green arrow and follow them to the big pink circle in the middle, noting down the colors you pass. You need to pass exactly 5 nodes. I circled the nodes for you. Then tap on the printer above it and change the colors to match the ones you passed. You end up with: Green, Yellow, Dark Blue, Pink, Light Blue, Green. Then you’ll get a star picture.

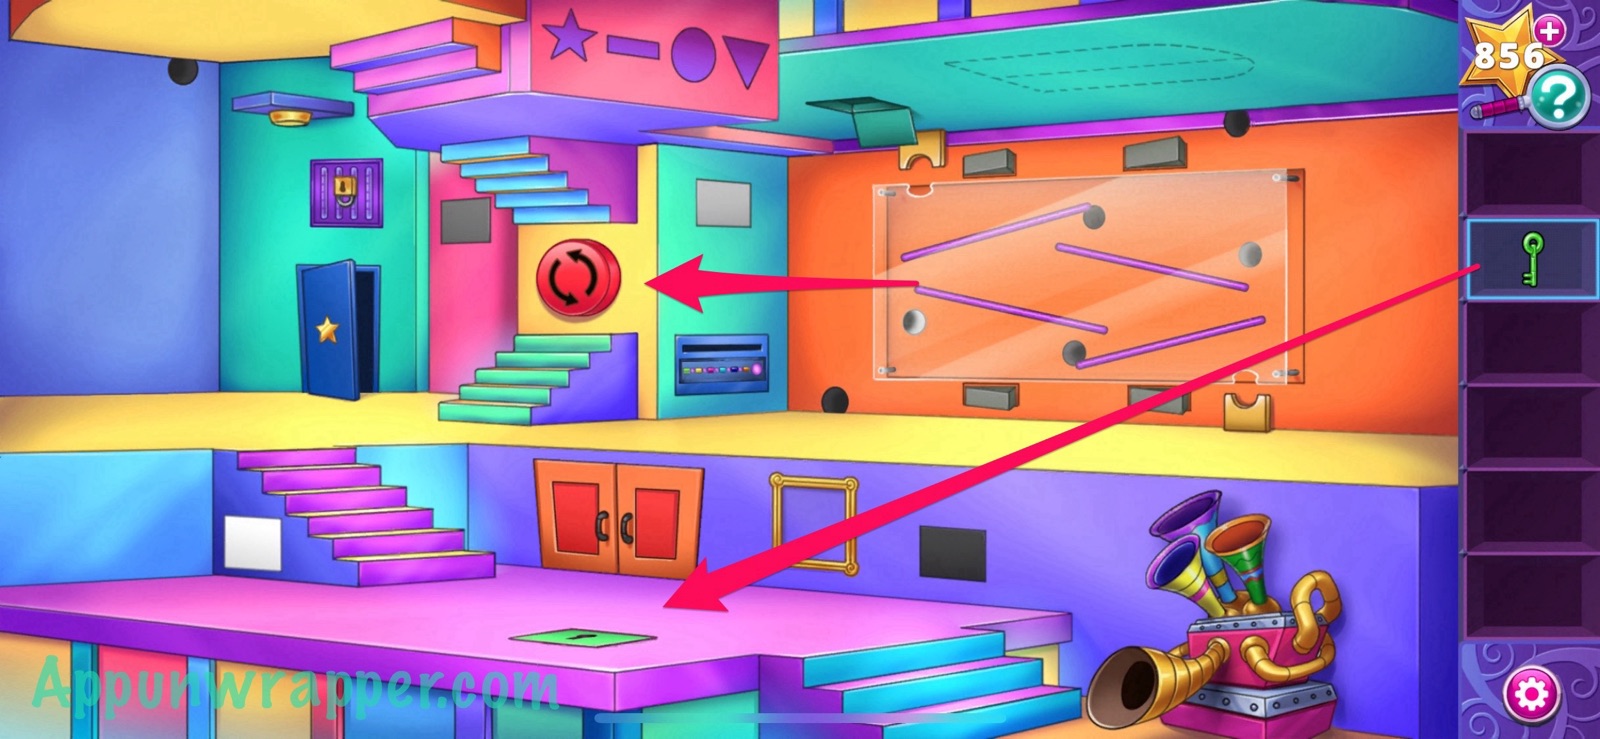
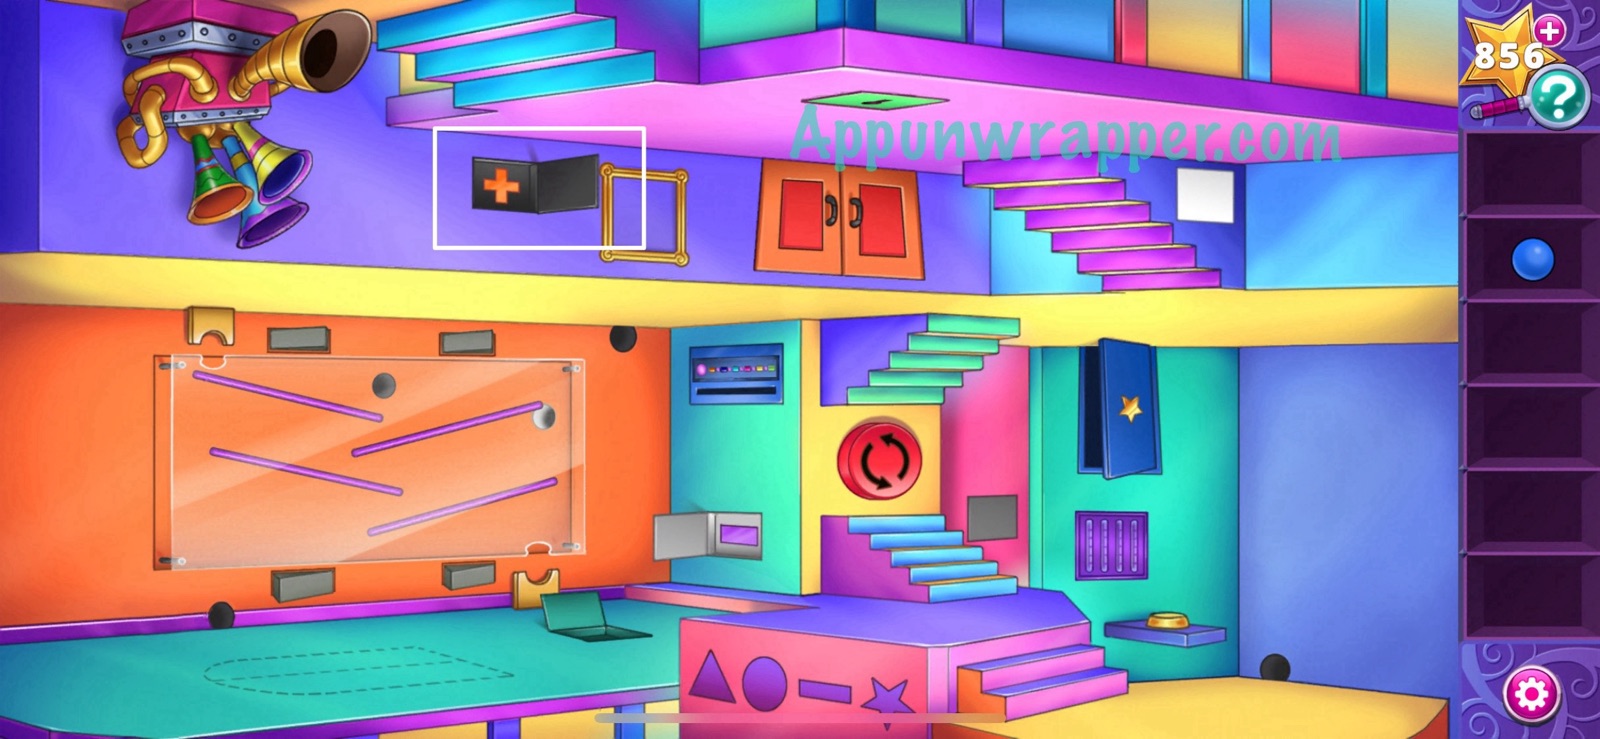
2. Put the star picture in the picture frame to get a star key.
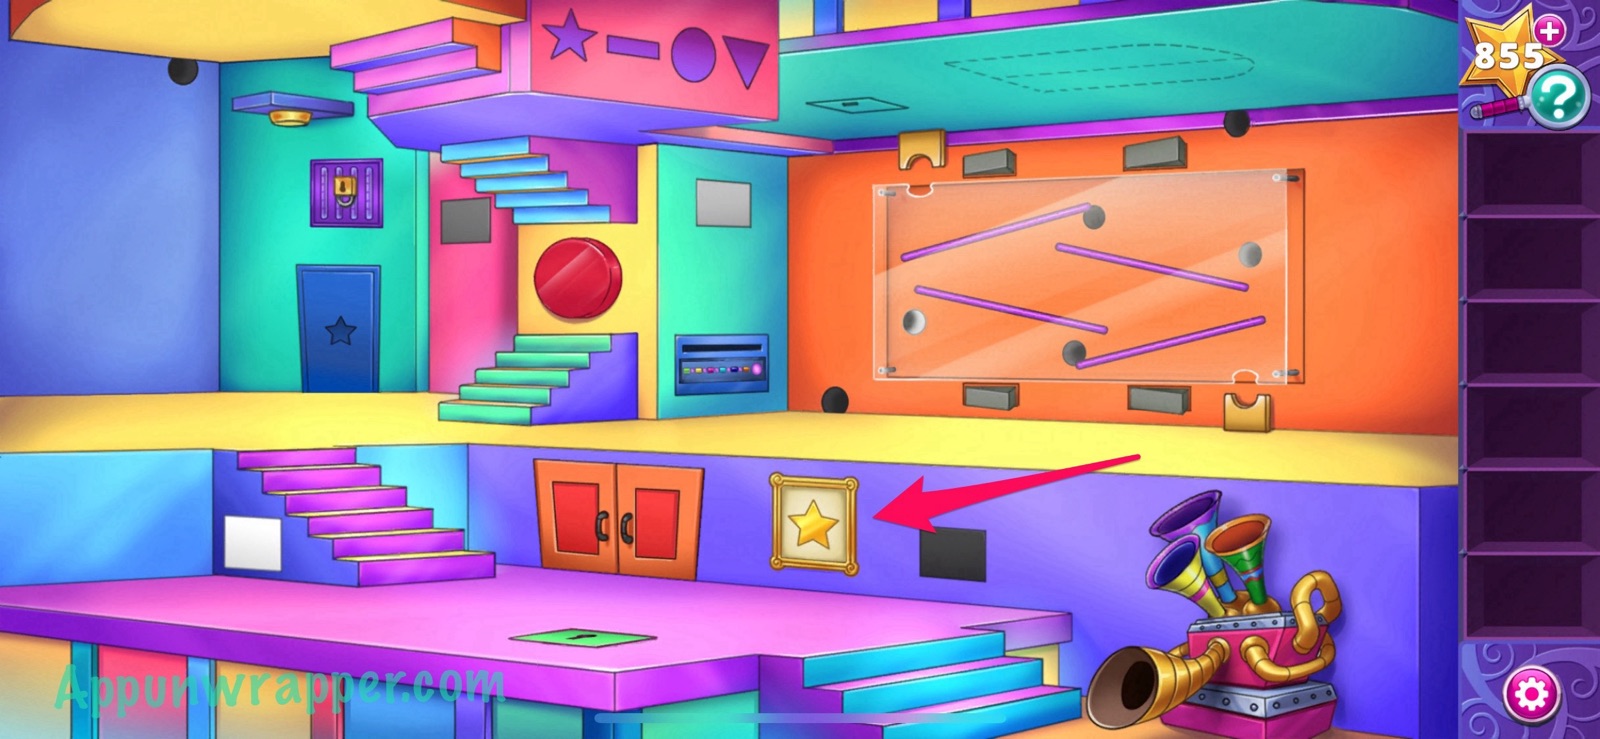
3. Place the star key in the star-shaped slot and go through the door.

4. Now let’s solve the Square Room puzzle. Follow the directions on the wall to create a path through the arrow grid. Every arrow will be visited exactly once. To start, press the lit arrow in the top left corner. That arrow points left, which, according to the directions, means that you should go right. The second arrow you select should be the arrow to the right of the first arrow. Basically, everything is the opposite of what it should be. You can watch my video if you need help.
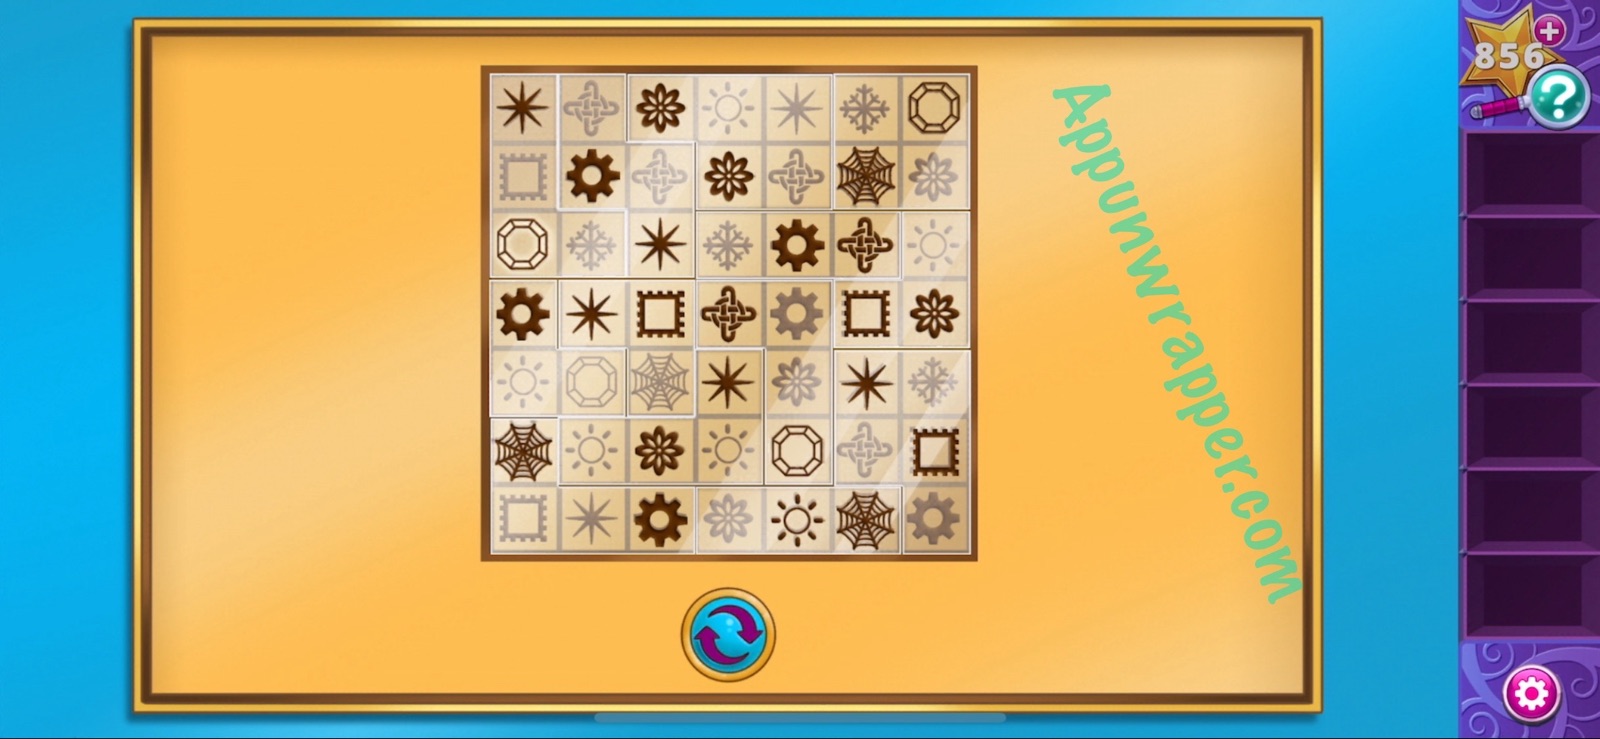
5. For the next puzzle, use the four designs in the corners to fill in the design in the center. Use the star to orient yourself. It should look like this in the end.

6. With this next puzzle, pay attention to the patterns at the top. You basically have to press the squares so they follow that pattern, over and over. Again, you can follow my video if you need help.
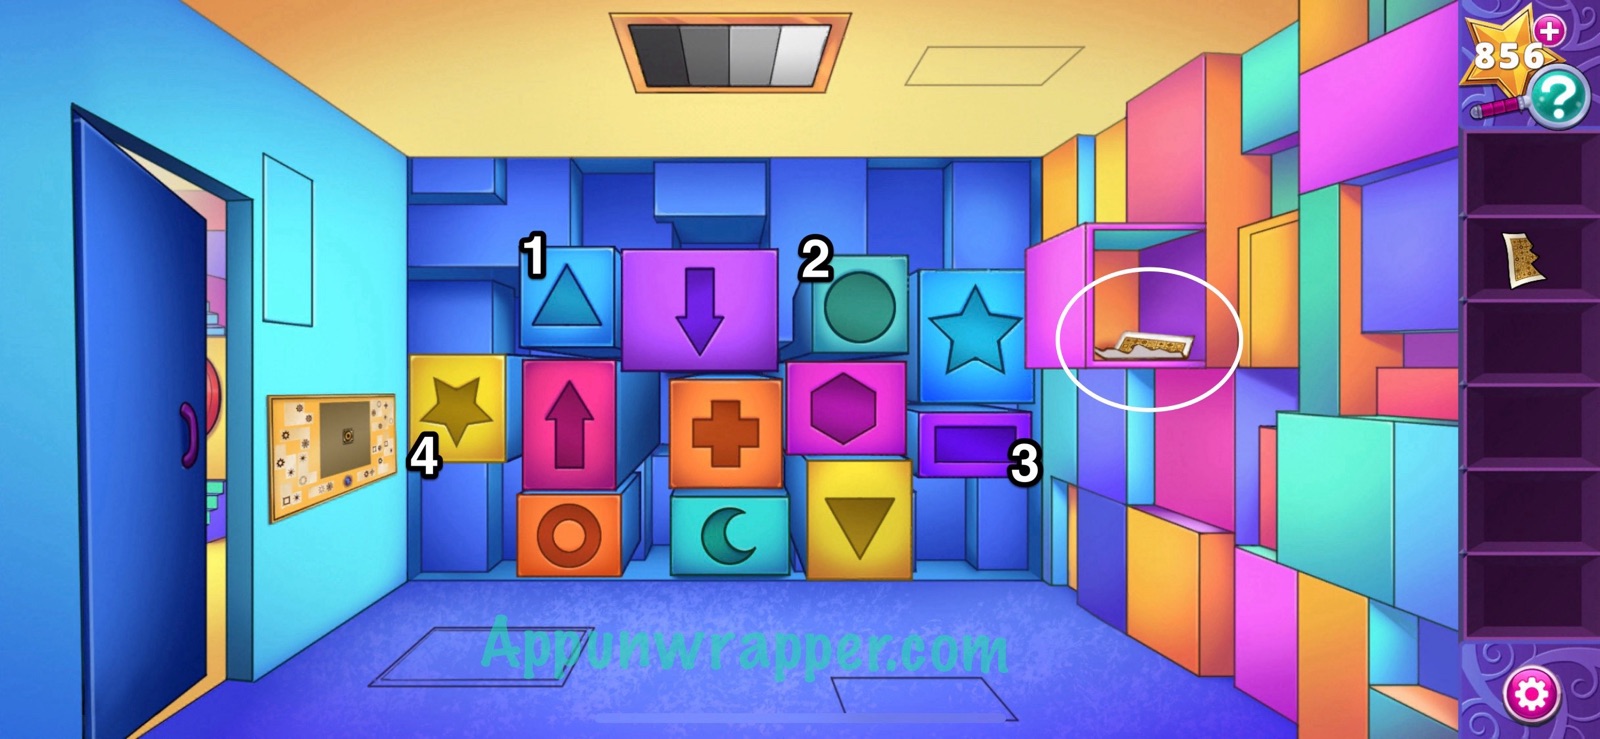
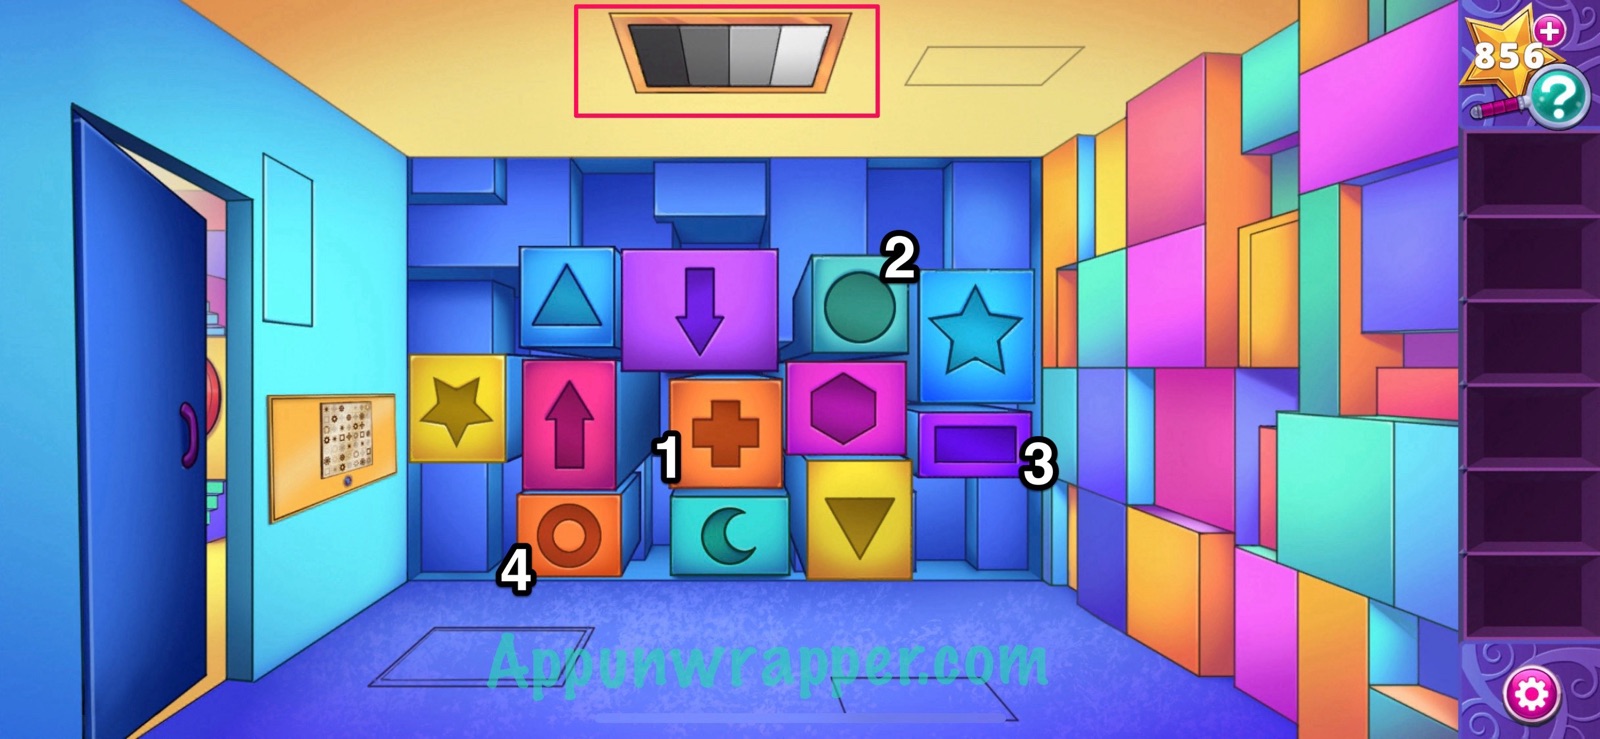
7. Grab the torn puzzle board picture and notice the puzzle on the left wall. There’s also a gradient on the ceiling that’s a clue.

8. Go outside and notice the clue that resembles the blocks in the square room. Note them down, but upside-down because that’s not really a ceiling but an upside-down floor. Themn go back into the room and press the blocks in that order — Triangle, Circle, Dash, Star. Make sure the star and triangle are the right orientation. Then take the other torn puzzle board picture.
9. Leave the room and place the puzzle board picture in the photo frame to get an actual puzzle board. Then go back into the room and place the puzzle board on the puzzle to the left.
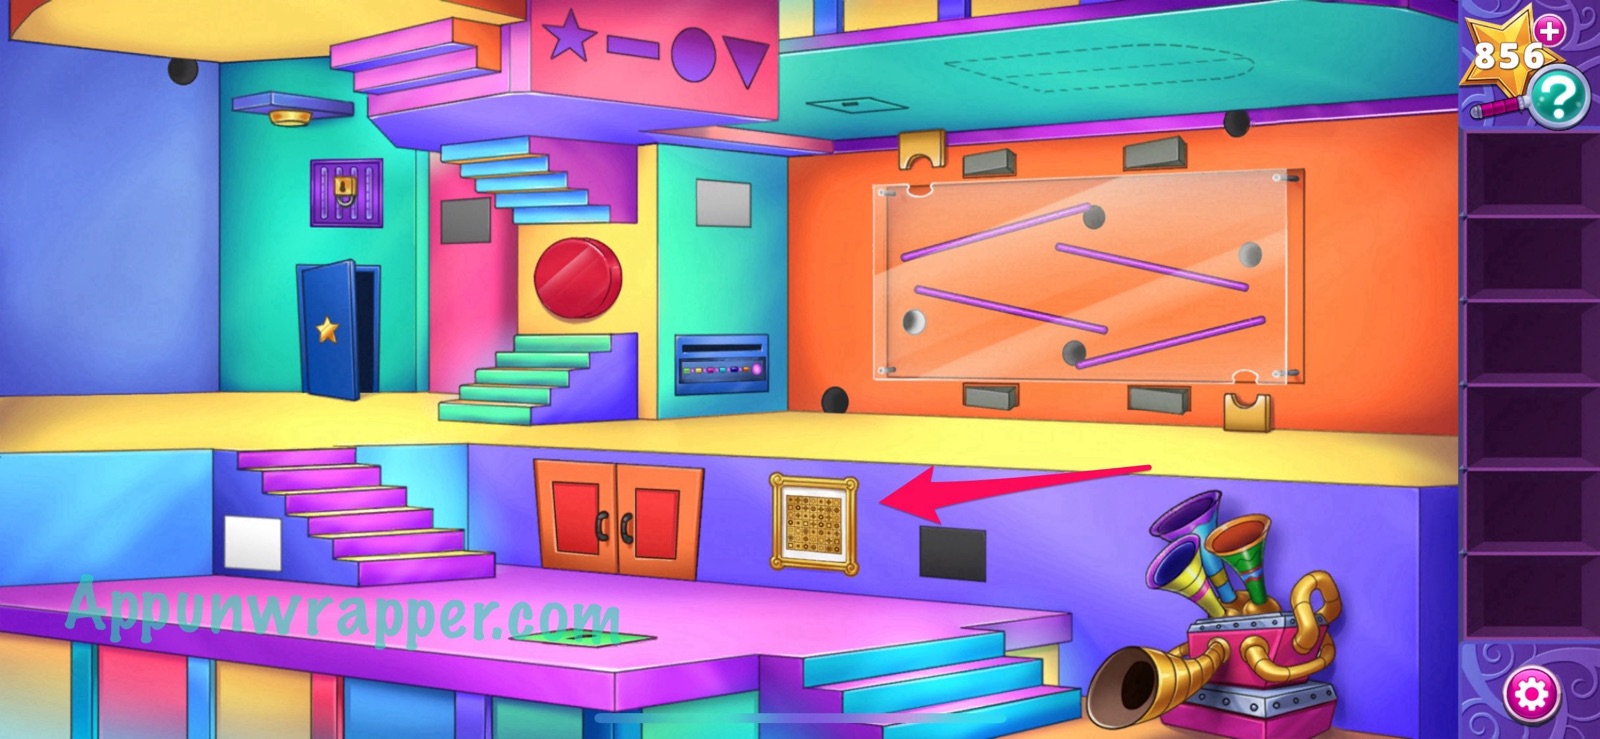
10. Now let’s solve the Gold Panel Puzzle! We did something like this in an earlier chapter. Place all the pieces on the board so that the symbols on the pieces cover their matching symbols on the board. The board can be rotated 90 degrees at a time. This one is much trickier than the last one. I’ll try to take you through it in screenshots.
For the starting orientation, nothing fits, so before placing anything down, rotate it once. Then place everything like so:
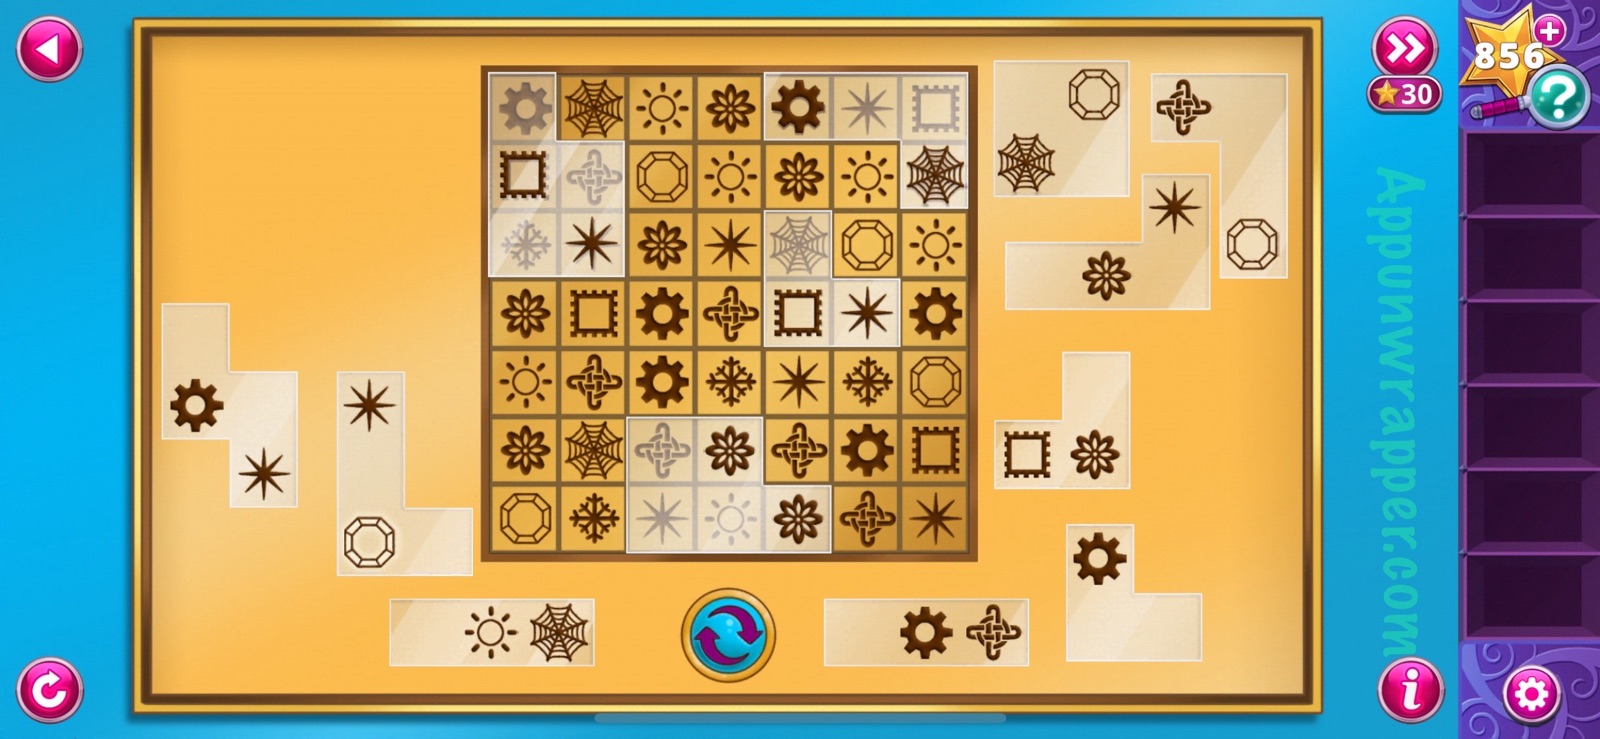
Then rotate it twice so it looks like this:

Then place the rest of the pieces so it looks like this:
And here it is in video form:
11. Leave the room to see what all that shaking was. The big red button is blinking, so press it to flip the room upside-down!
12. Open the little cubby to get a green key. Then turn the room upside-down again.
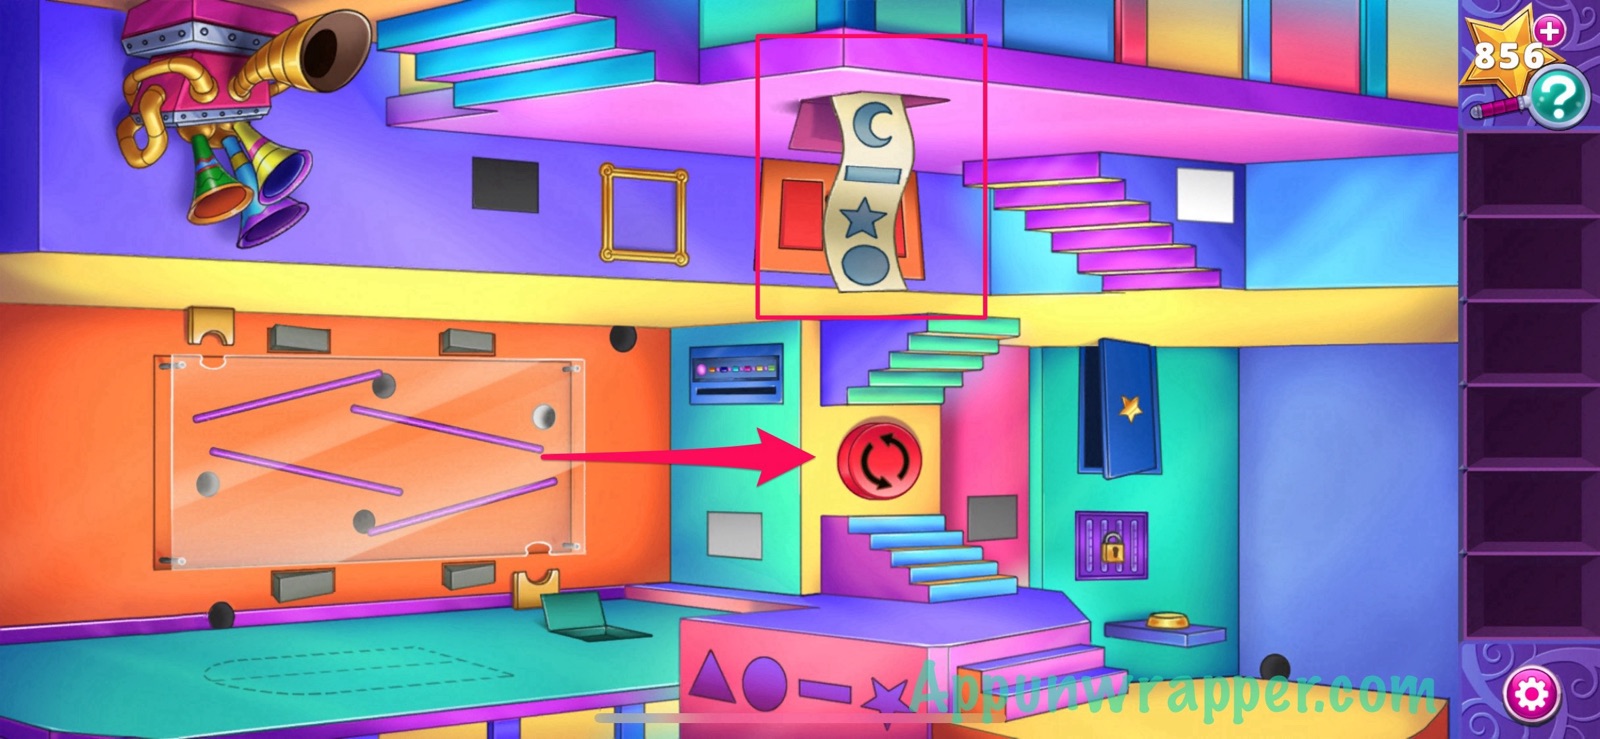
13. Use the green key to open the green cubby. It seems like there’s nothing down there, but if you flip the room upside-down again, a banner drops out with more shapes! Flip it over again.
14. Go through the door and press the blocks in that order: Moon, Dash, Star, Circle. Then take the glass ball.

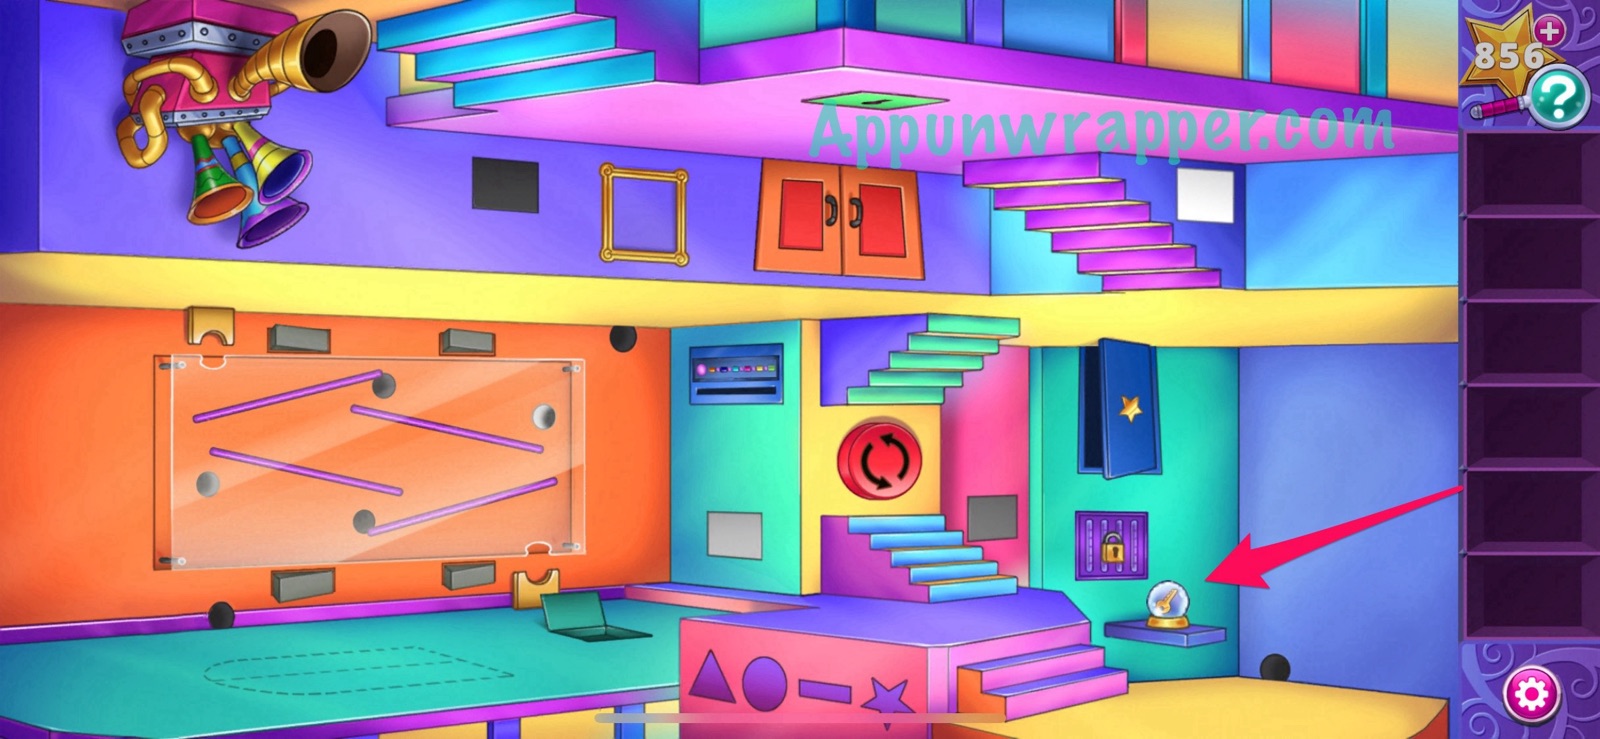
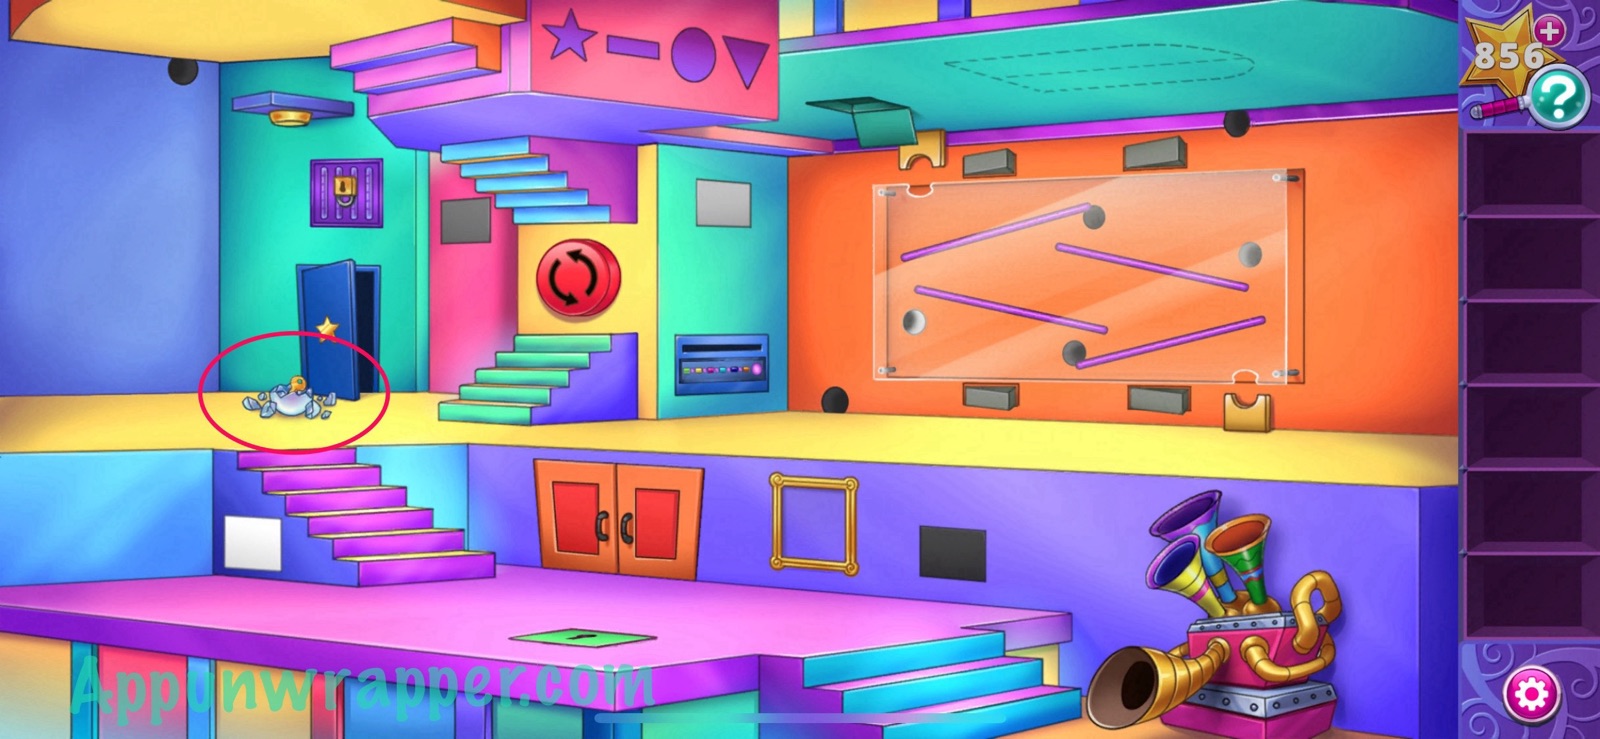
15. Go back outside. Flip the room again and place the glass ball on the pedestal. Then flip the room again and take the gold key from the broken glass.
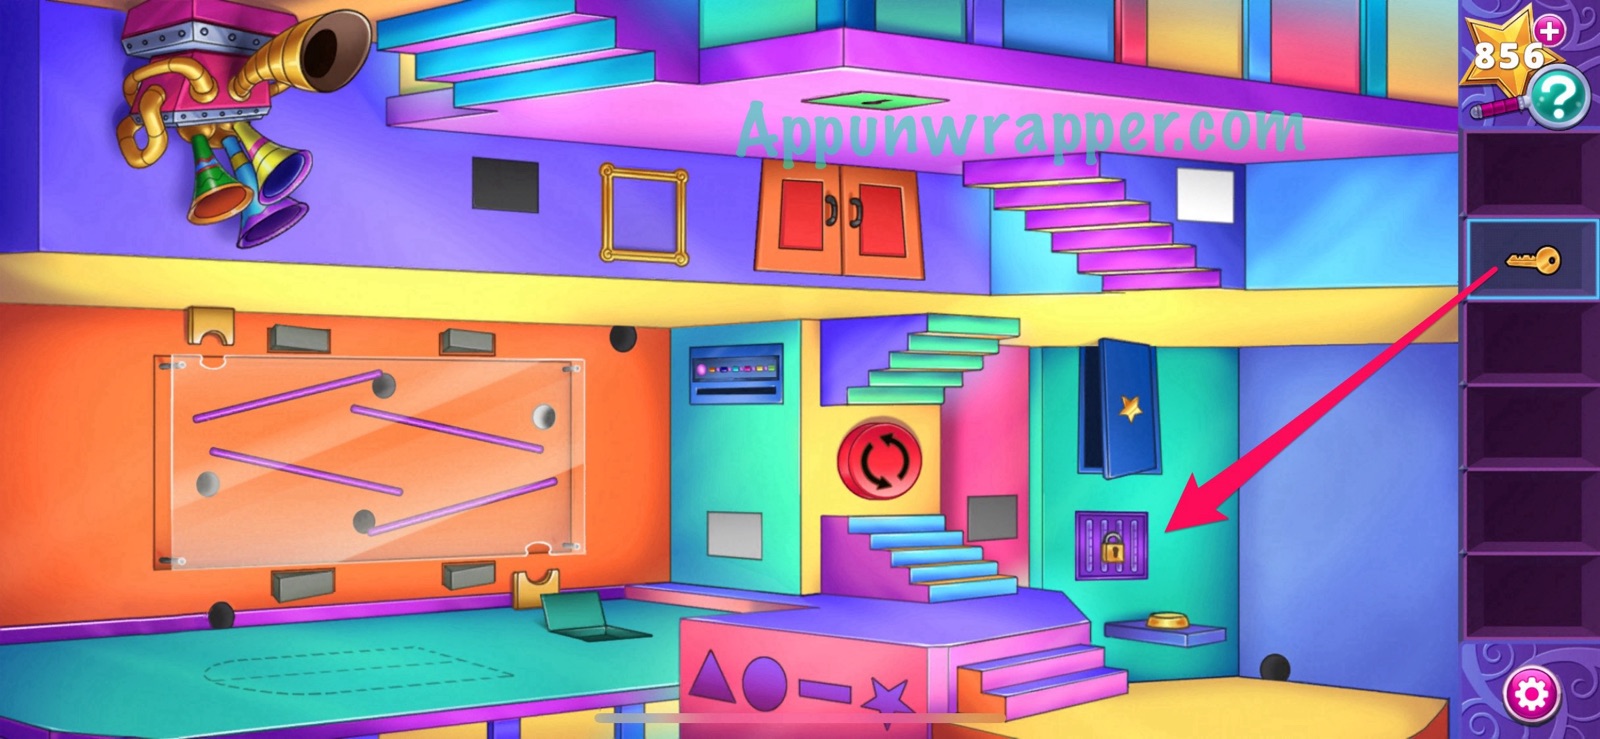
16. Flip the room again. Use the gold key to unlock the padlock and access another puzzle.
17. We can’t solve the puzzle yet, but notice the shapes to the left of it. That’s a clue for the blocks inside the square room. Notice the borders around each shape. There’s 1 around the ring, 2 around one of the stars, 3 around the other star, and 4 around the moon.
18. Flip the room again and head inside the square room. Press the shapes in that order — Ring, Star, Star, Moon — and then take the two planks. Notice the panels popping out from the walls.
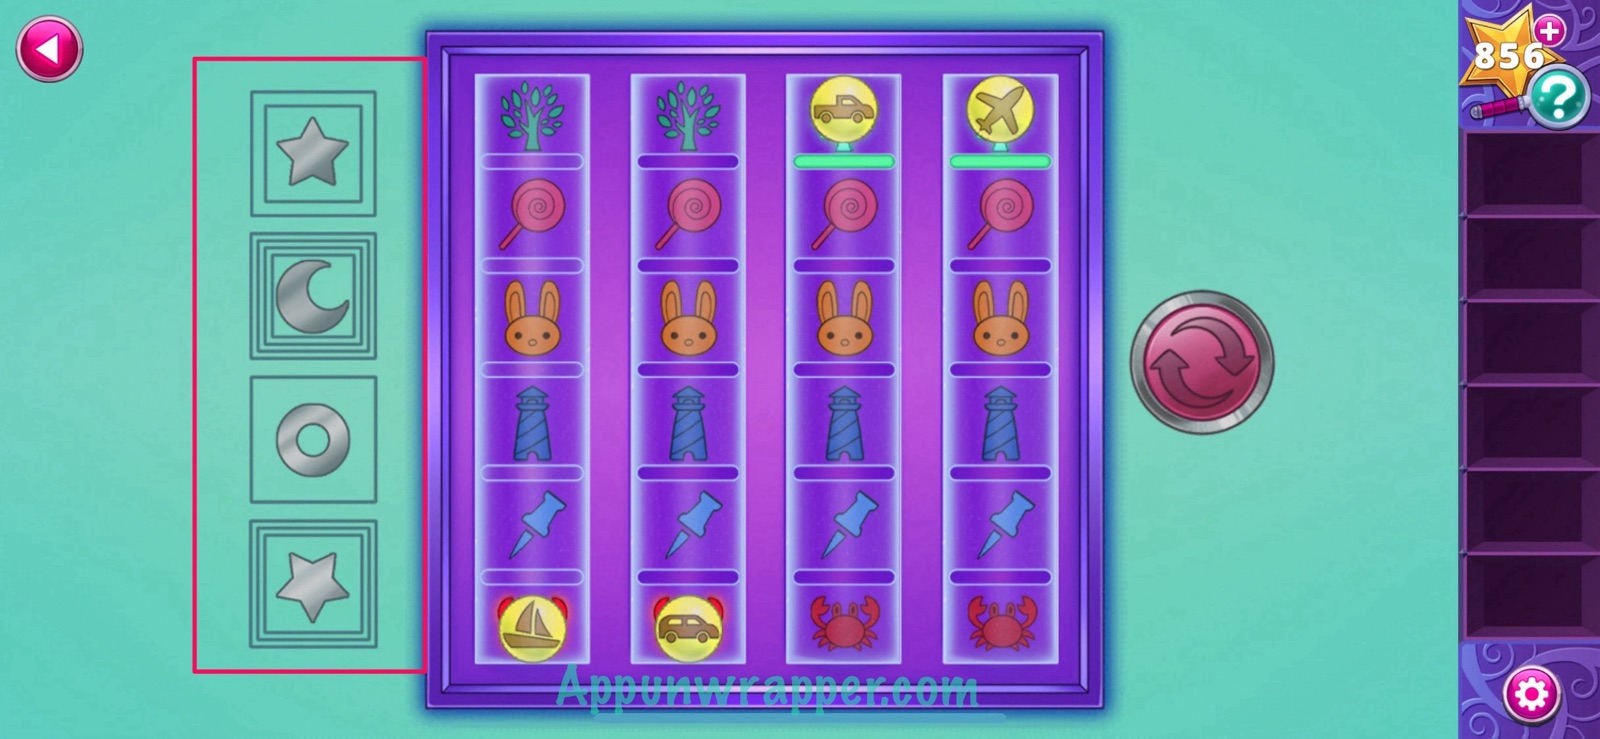
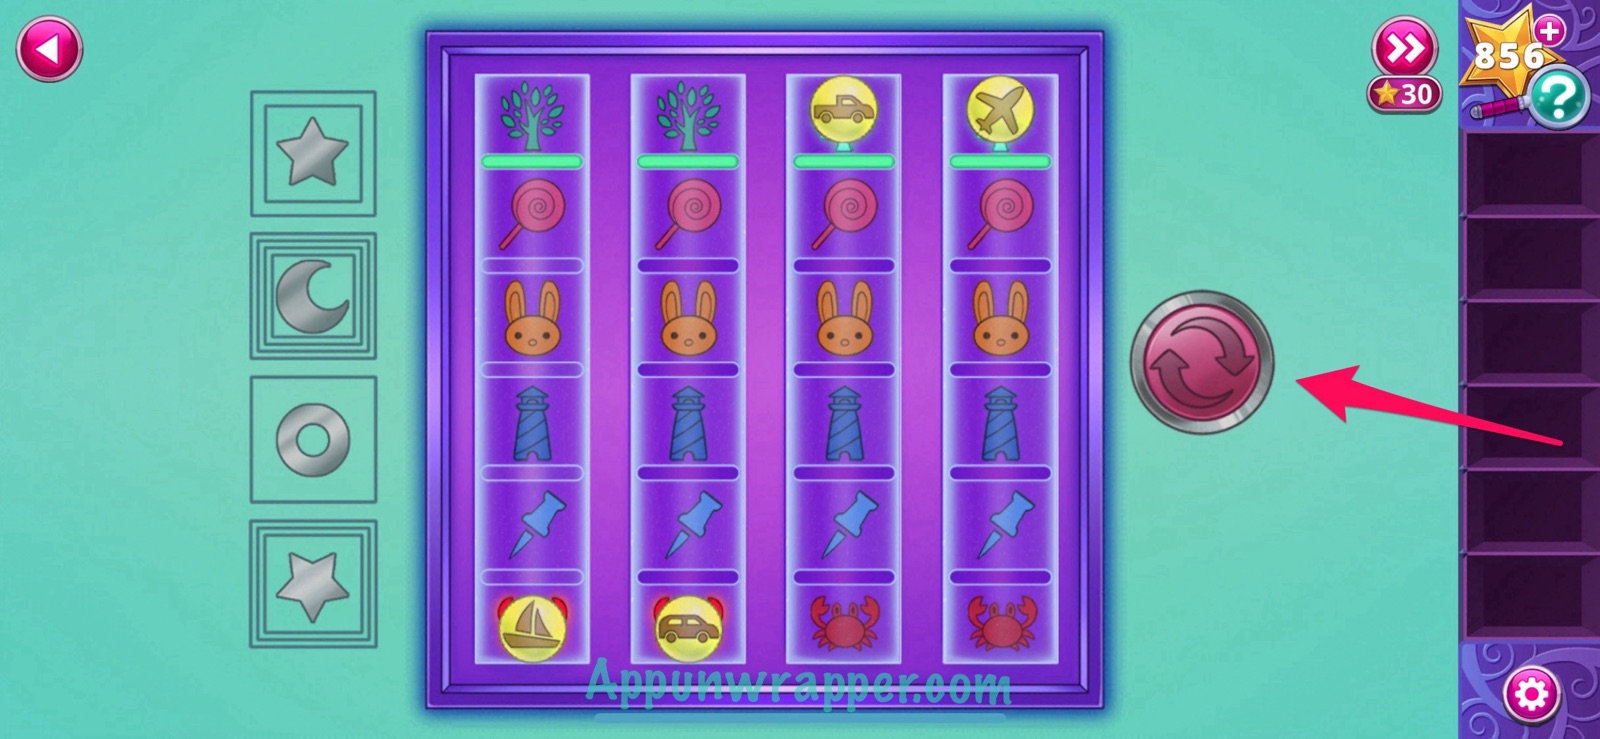
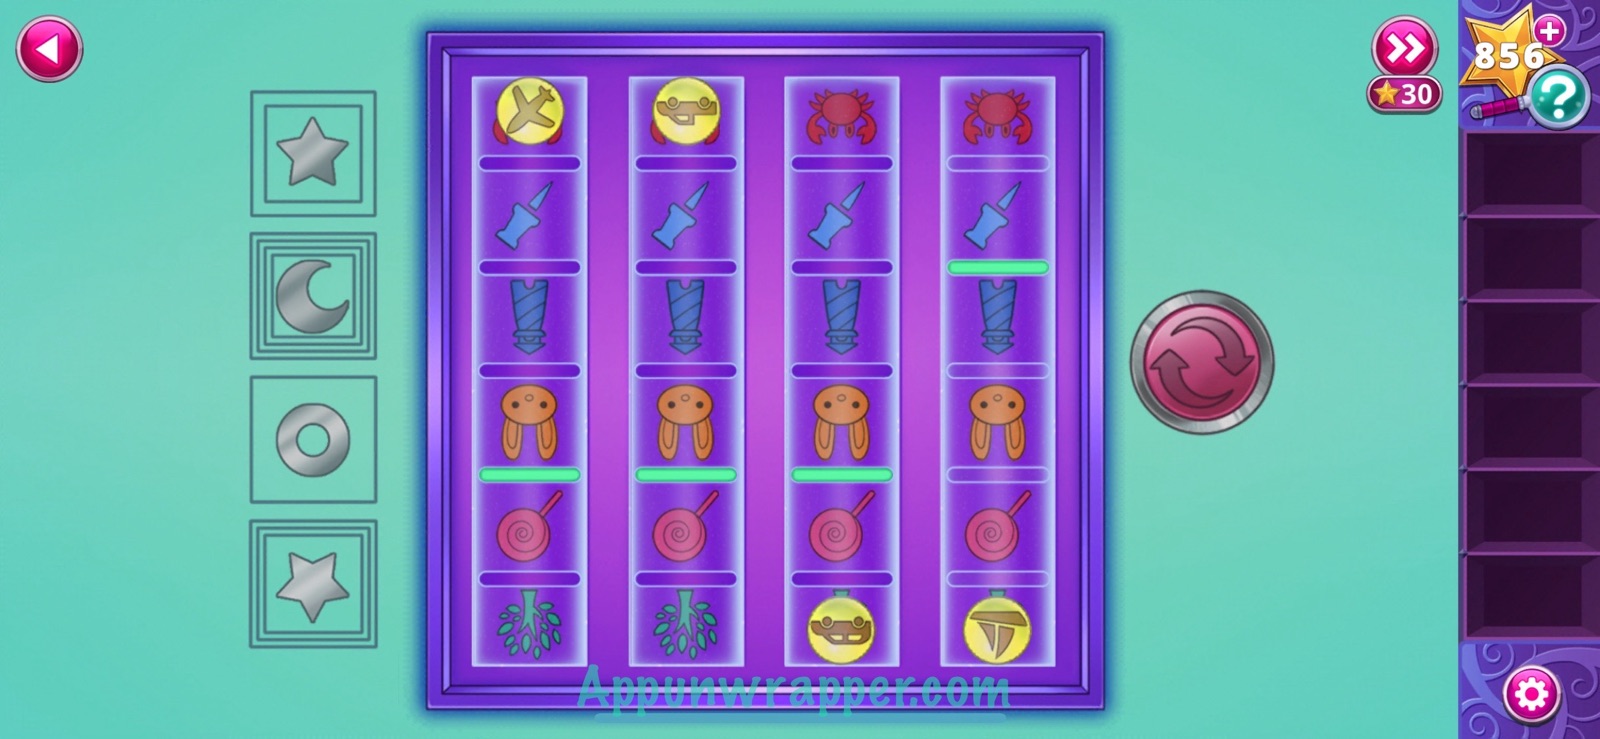
19. Go back out and flip the room again. Go to the purple puzzle and place the two planks down. Now we have four and can solve the puzzle. You basically need to arrange it so that the balls land on the images so that they match the panels from the small room. So you want the boat to land on the lighthouse, the mini van to land on the lollipop, the truck to land on the rabbit, and the airplane to land on the crab.
So first, this is how they start. Press the button to flip them over.
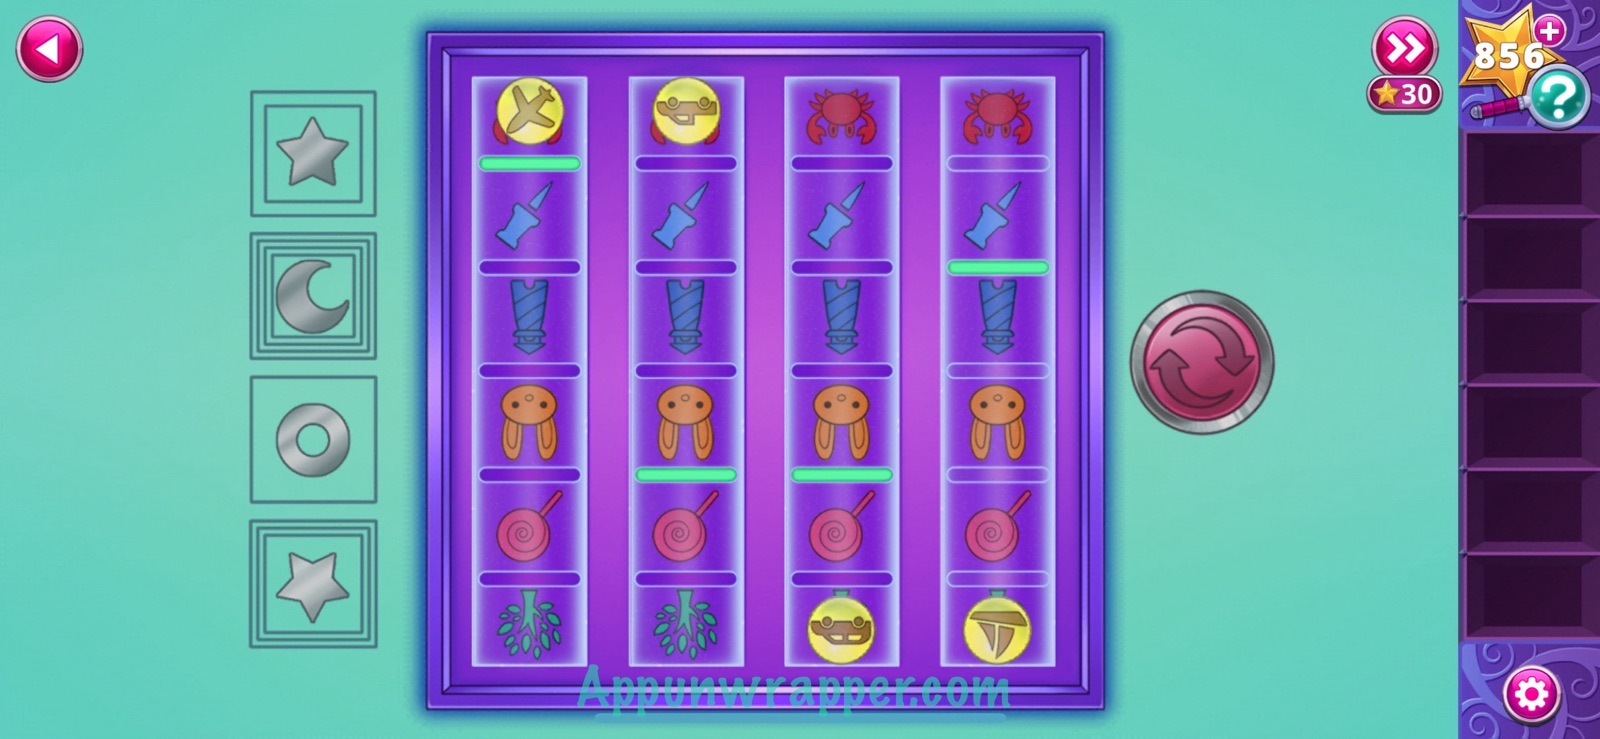
Then move them into these positions:
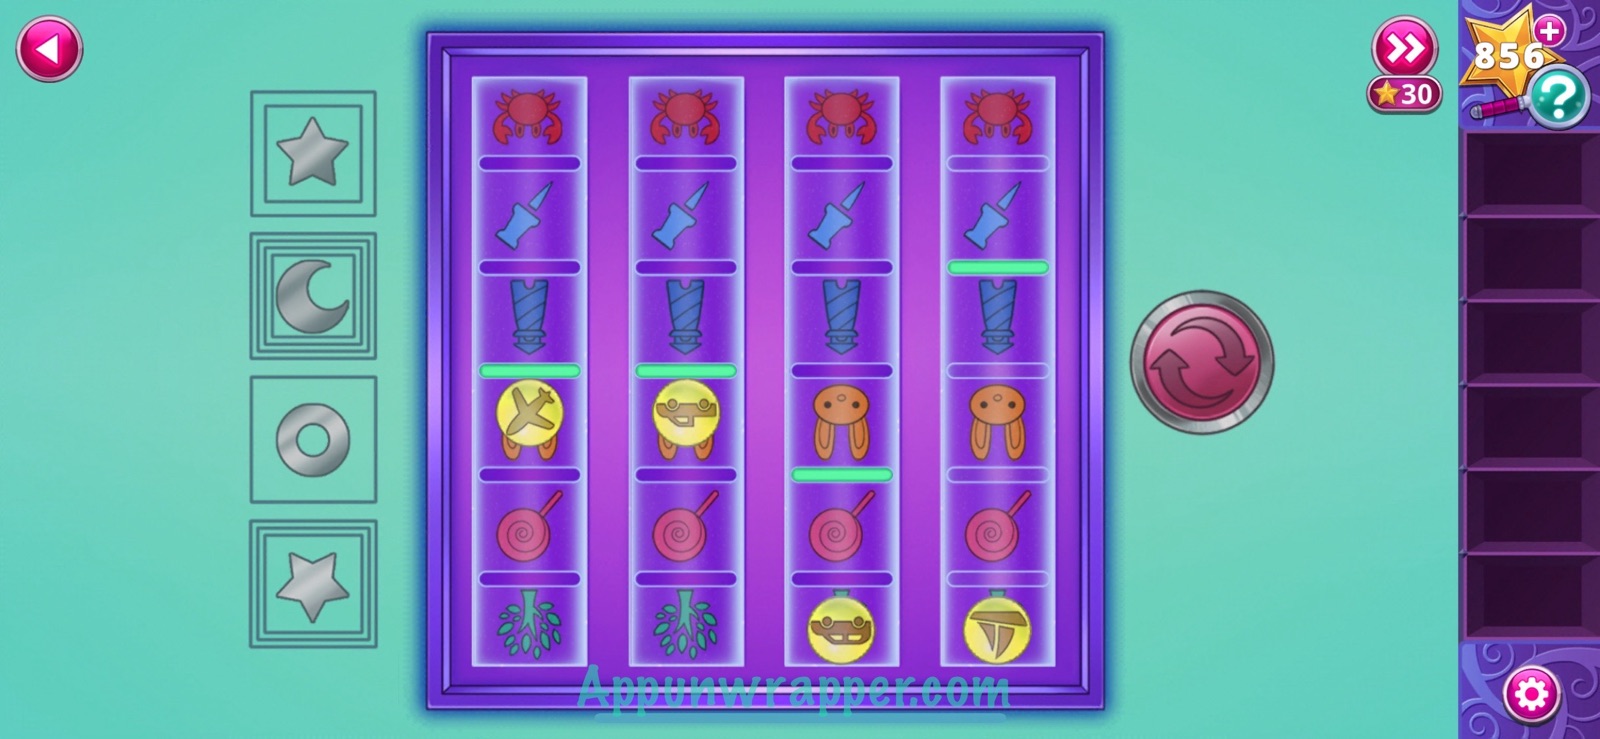
And now like this:
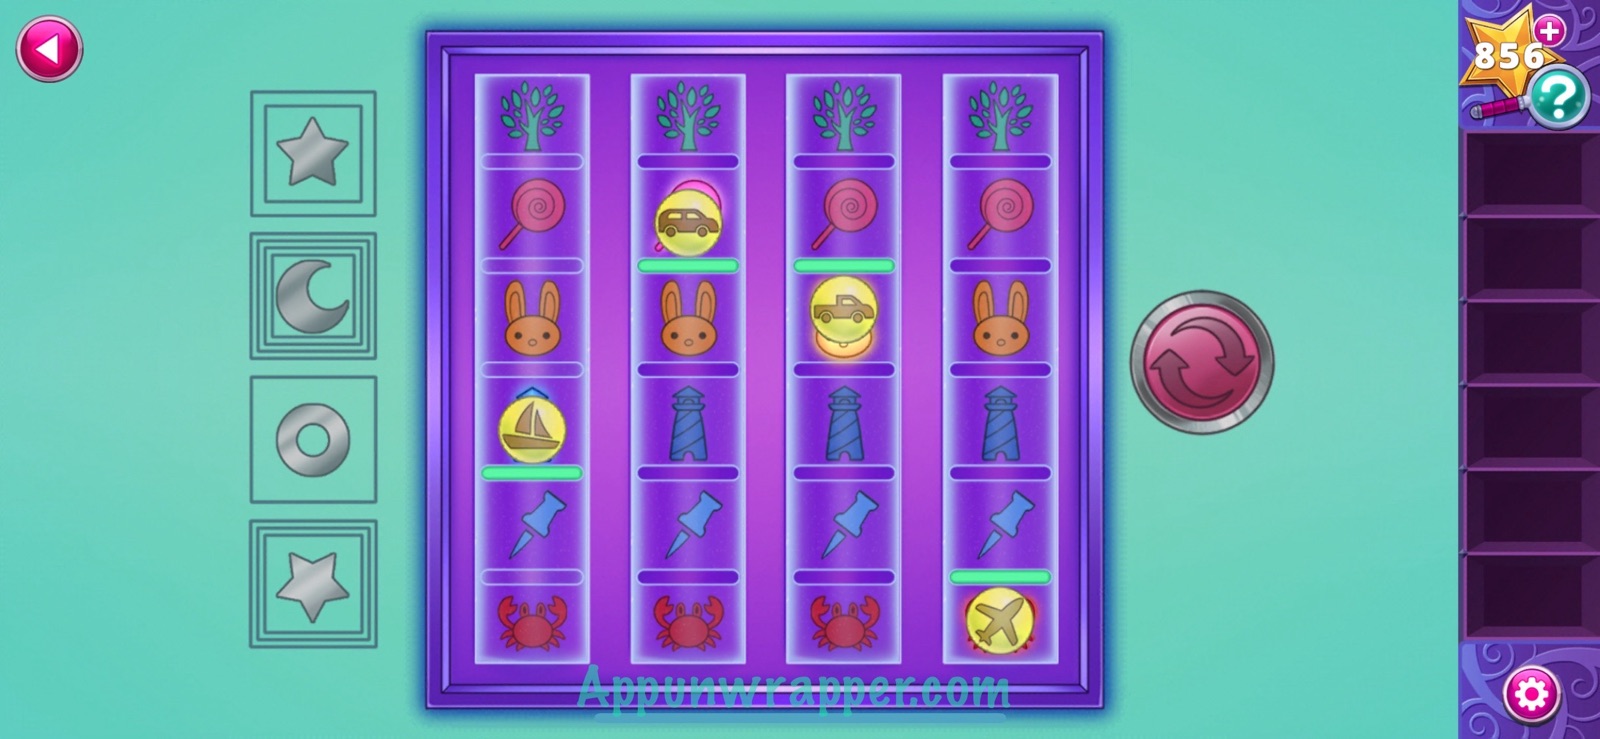
Then like this:
And now flip it over to get all the balls to land where you need them:
You can also watch my video for it:
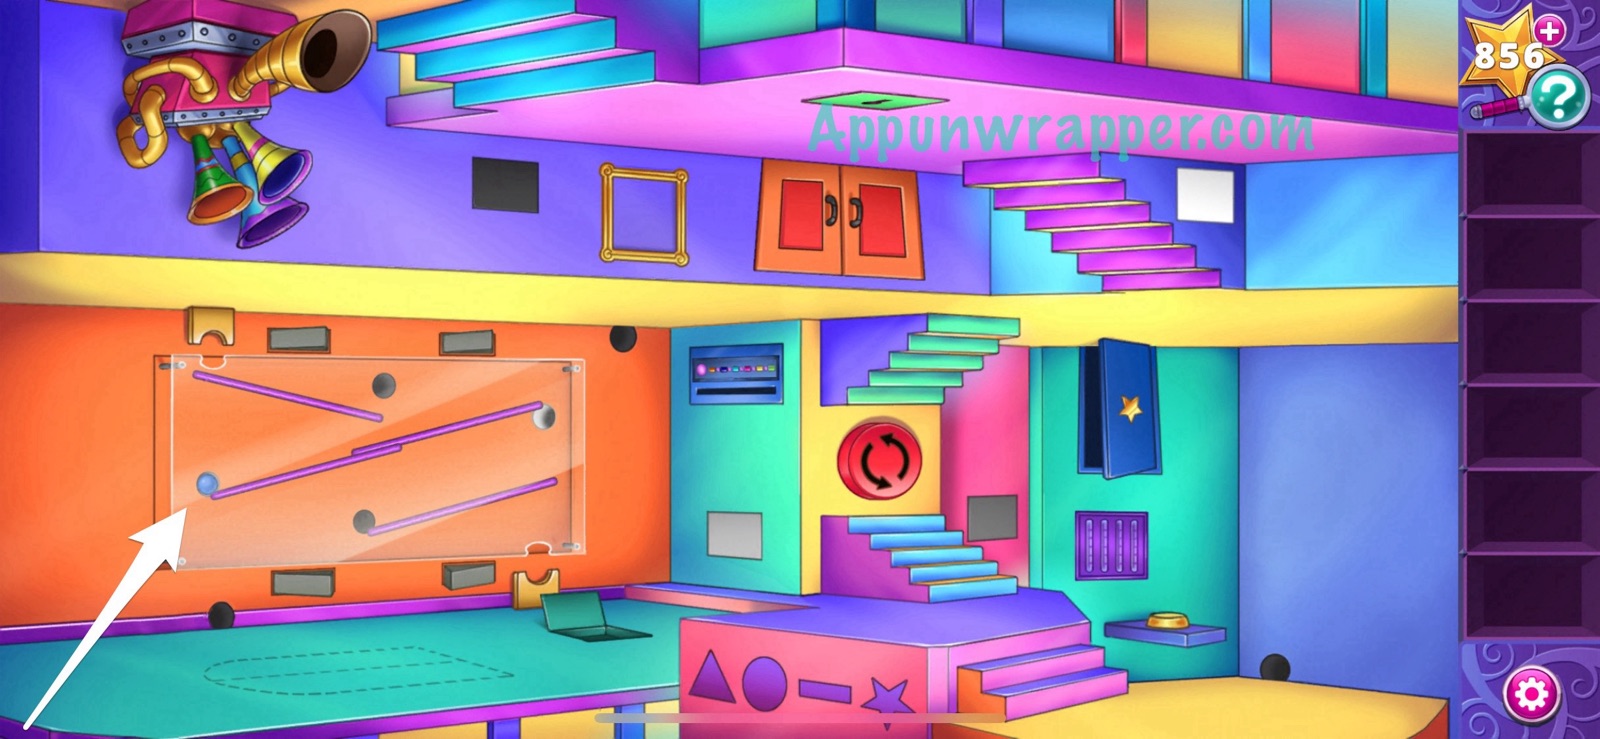
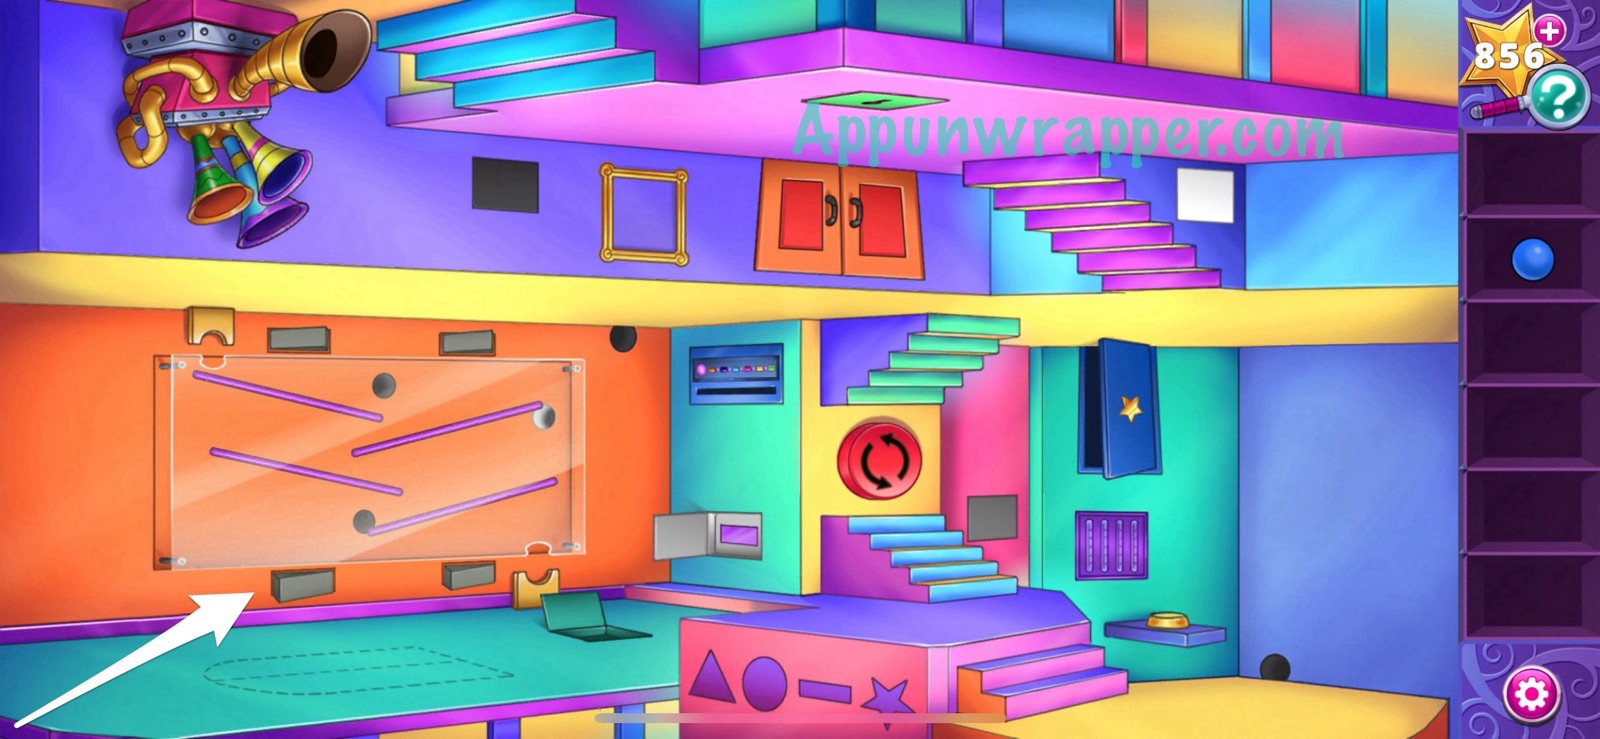
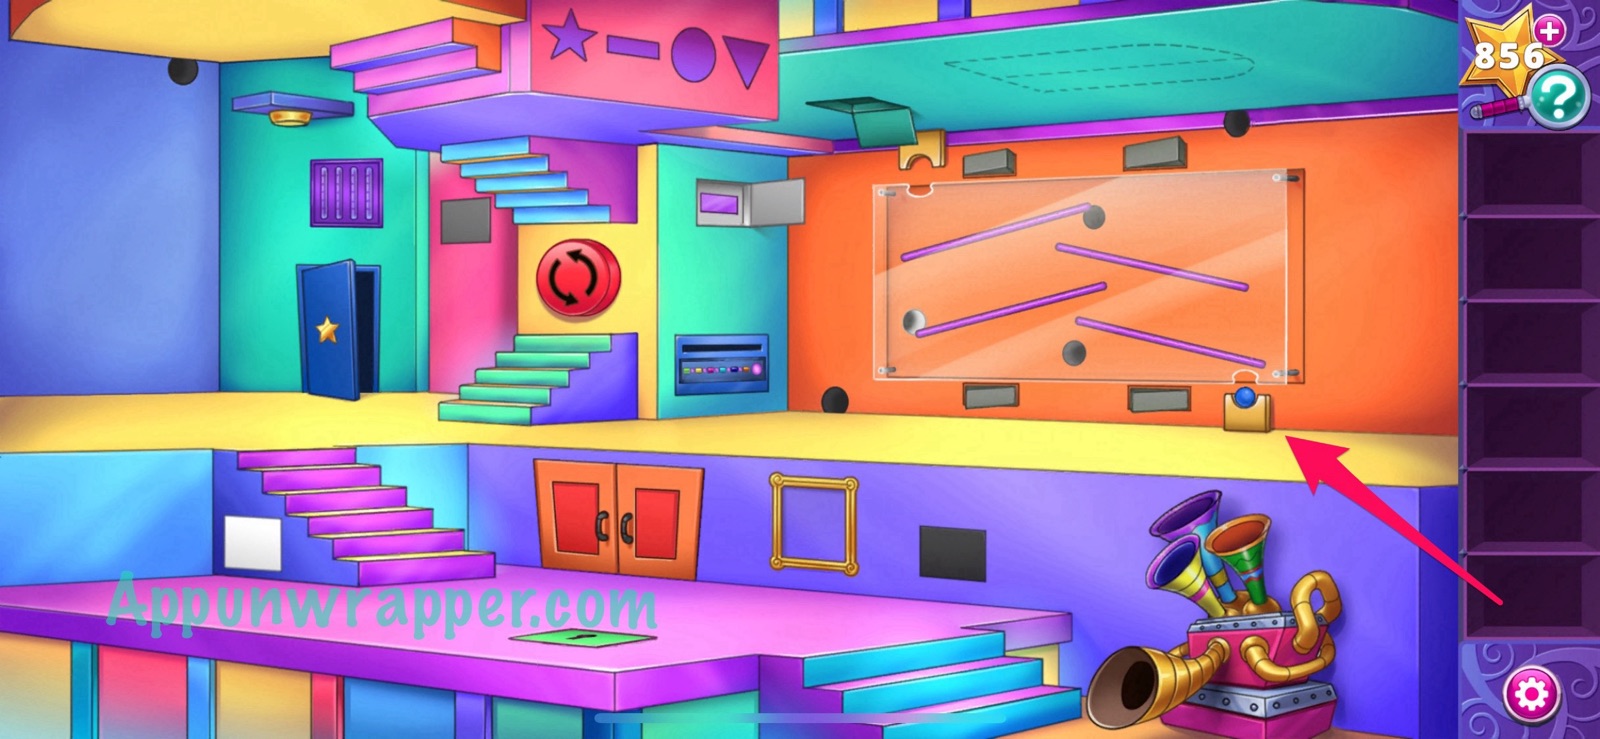
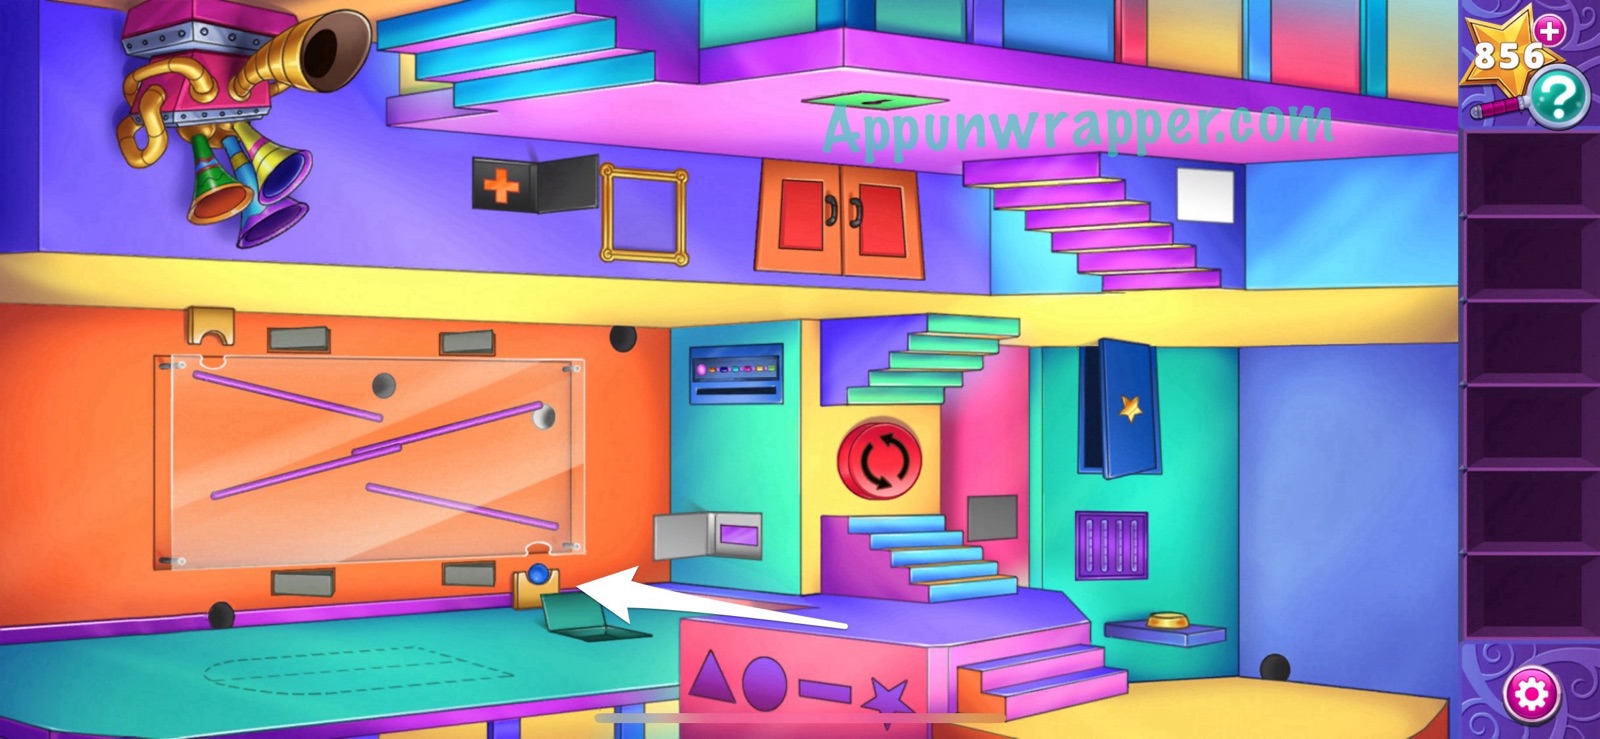
20. Now we have a small ball. Notice the ramps behind the glass. There are two buttons that you can reach now and two buttons that you can reach if you flip the room. We need to get the ball to go through each hole separately. So let’s start with one of them.
First, press the gray switches the move the ramps like this:

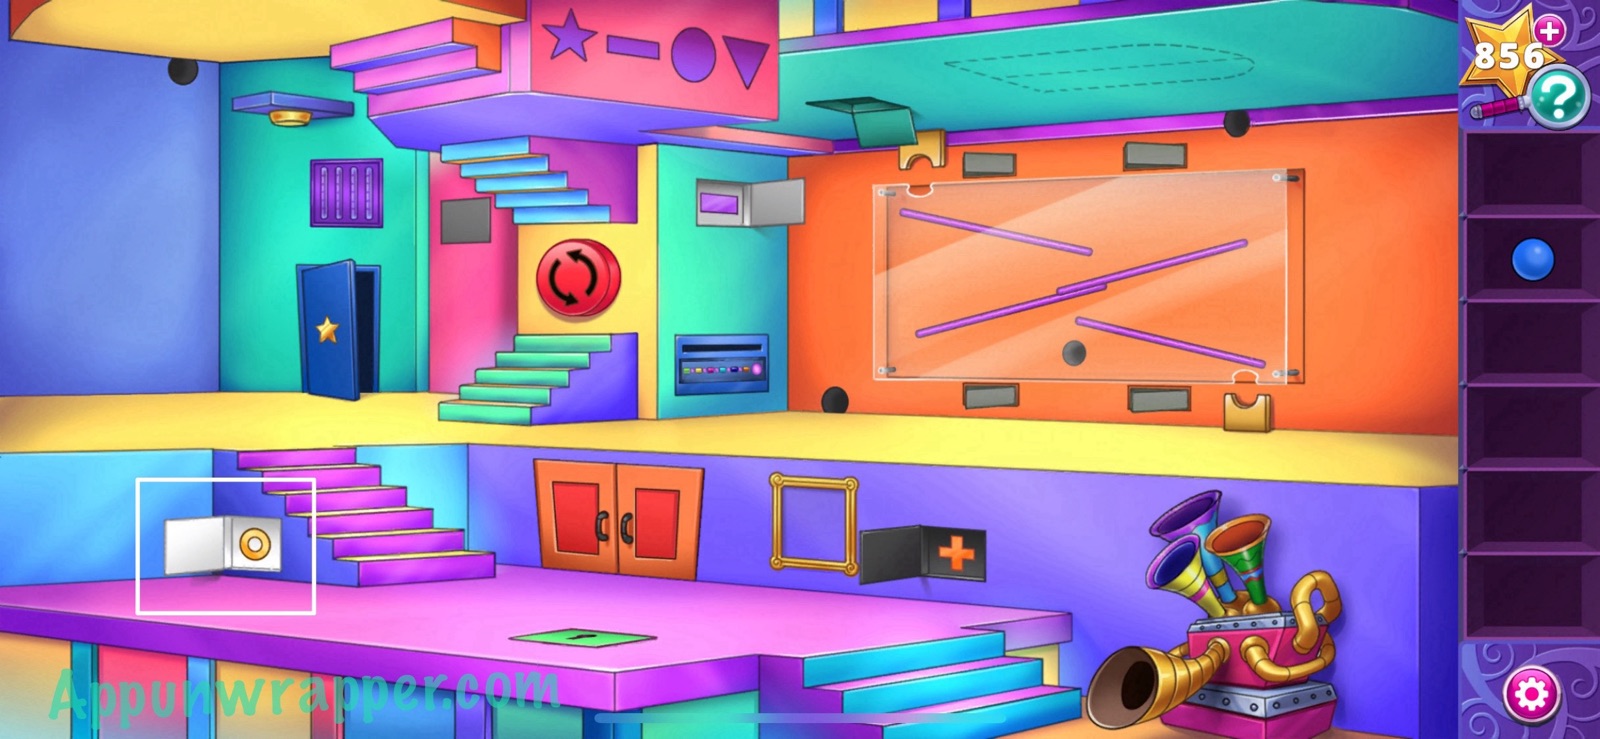
Then flip the room and press the gray switches so the ramps look like this. Place the ball the yellow slot.

Flip the room again and watch the ball go through the hole, opening a little cubby with an image in it.
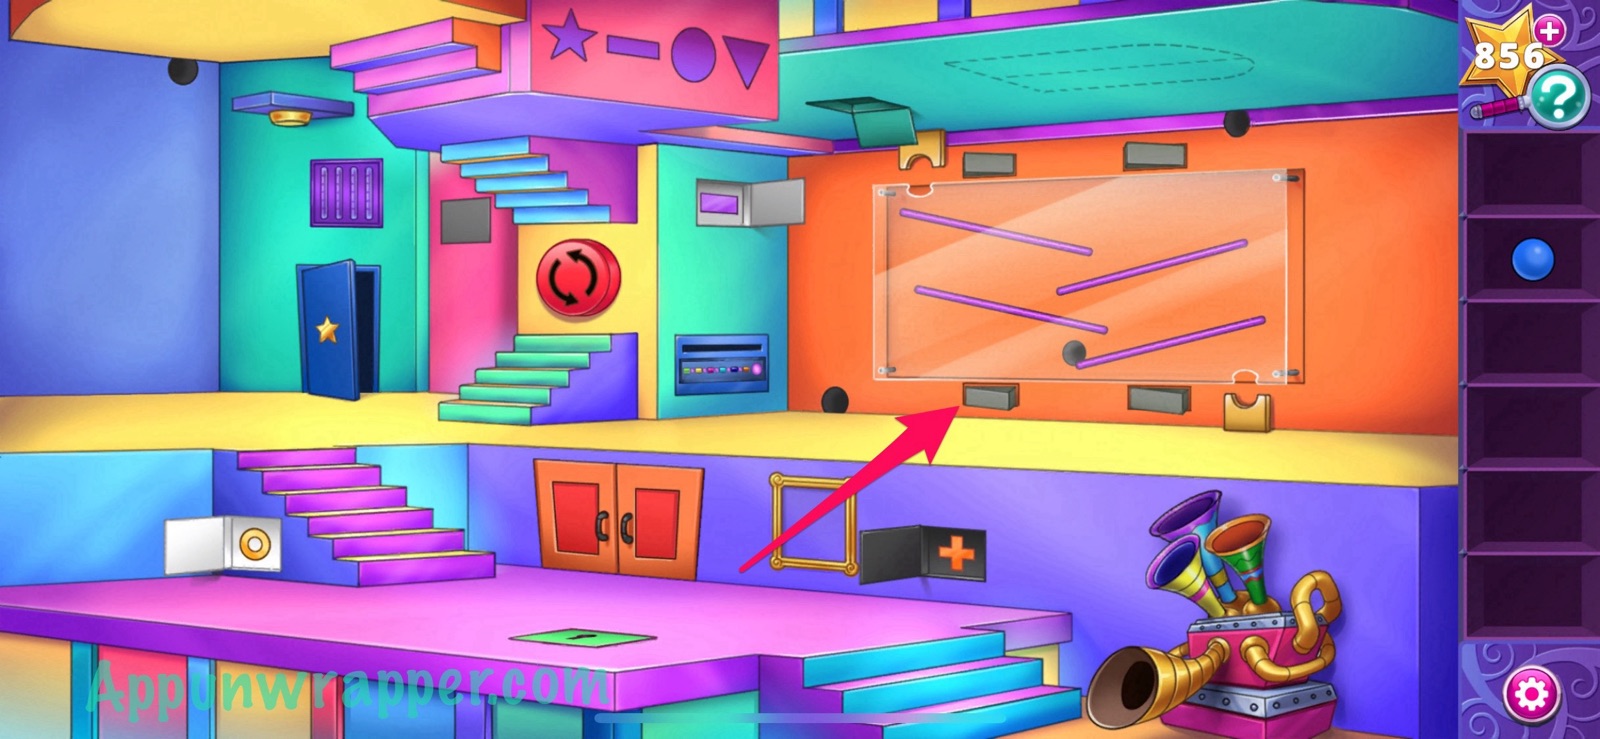
21. Now let’s work on the next hole. Press the switches so the ramps look like this:
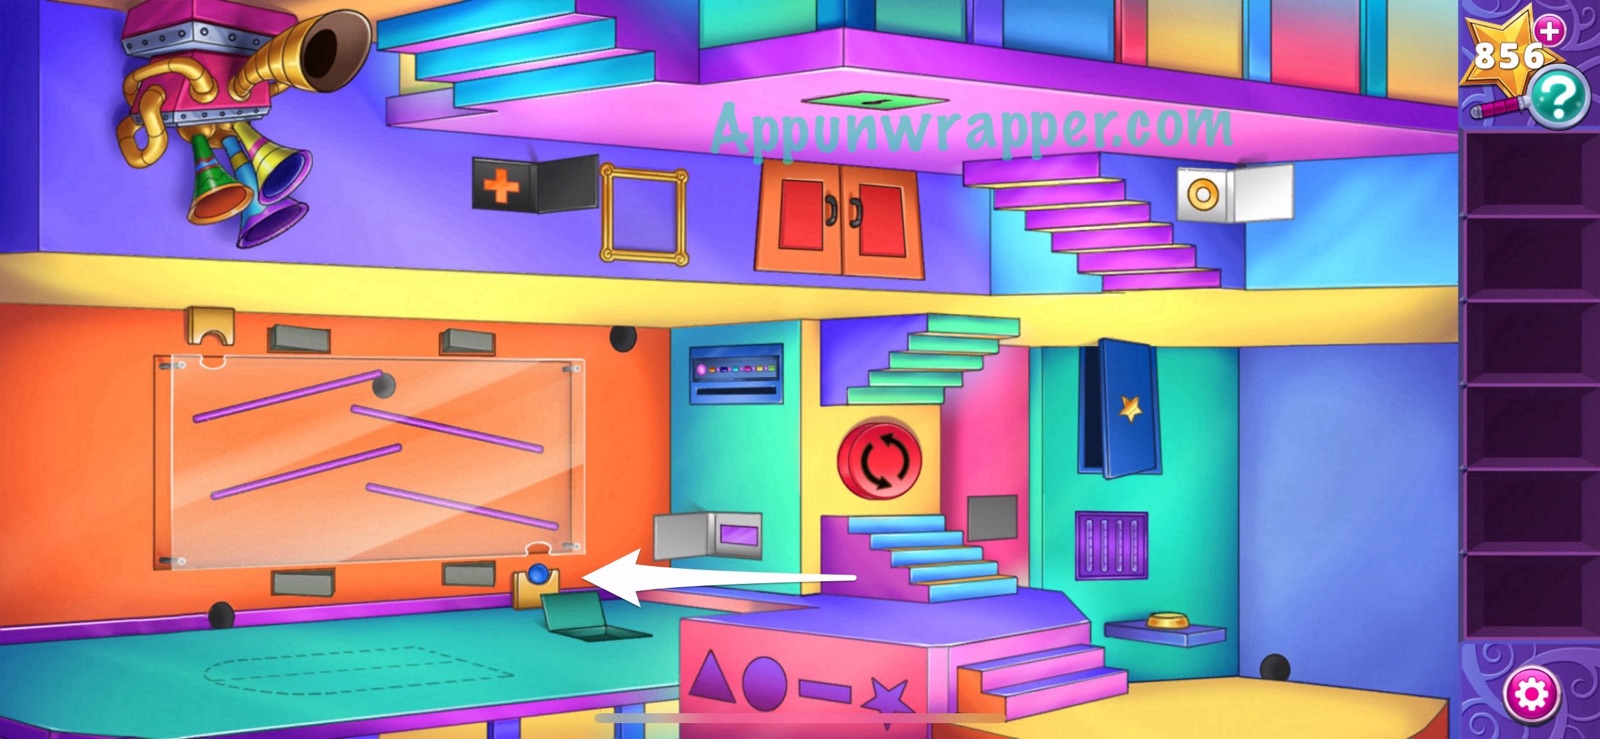
Then flip the room and place the ball the yellow slot.
Flip the room again and watch the ball go through a different hole, opening another little cubby with an image in it.

22. Now let’s work on the next hole. Press the switches so the ramps look like this and place the ball in the yellow slot.
Flip the room again and watch the ball go through a different hole, opening another little cubby with an image in it.

23. Now let’s work on the last hole. Press the switches so the ramps look like this:
Then flip the room and place the ball the yellow slot.
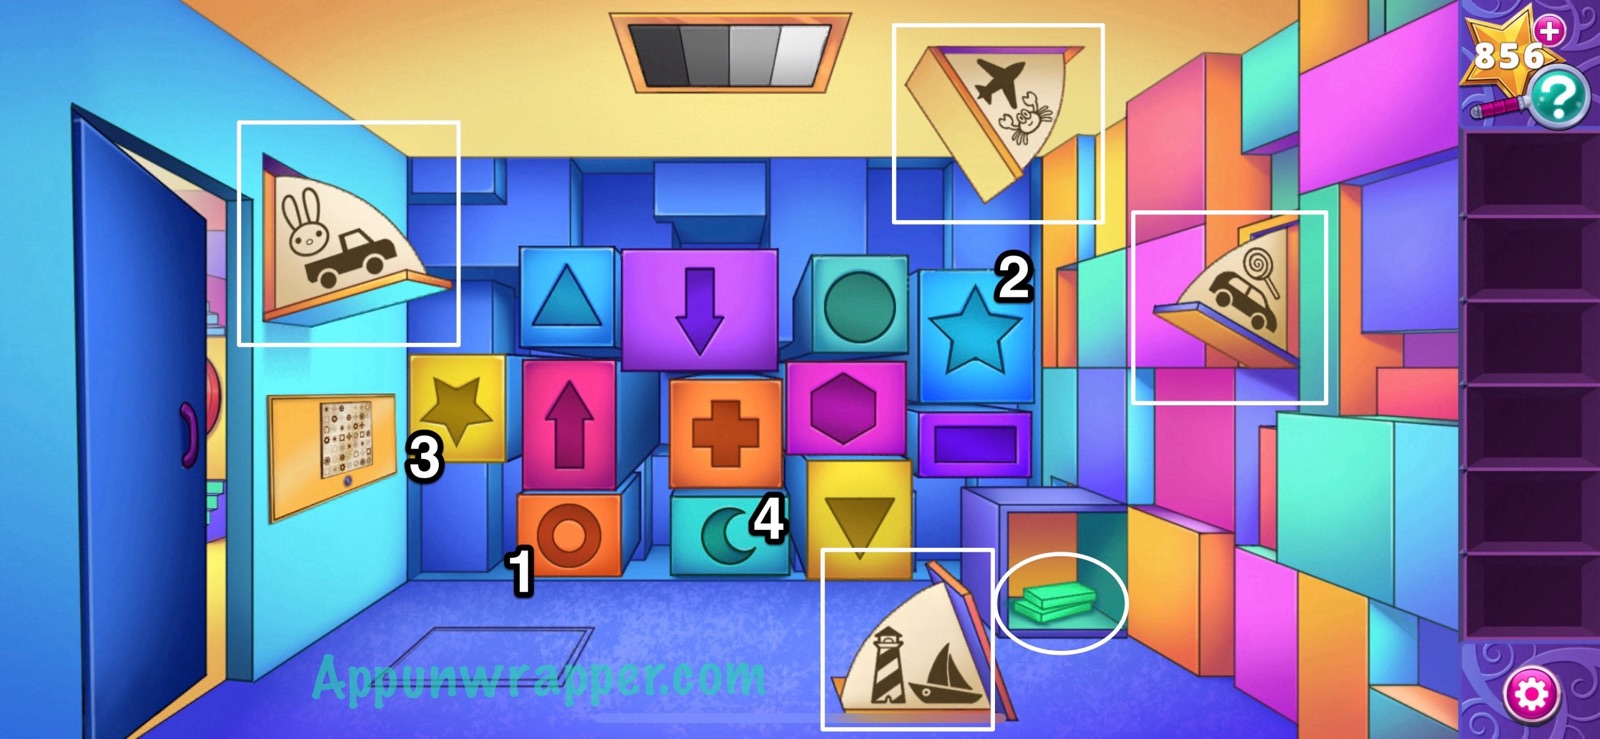
Flip the room again and watch the ball go through the last hole, opening the last little cubby with an image in it. Now we have all four images! I highlighted them for you.
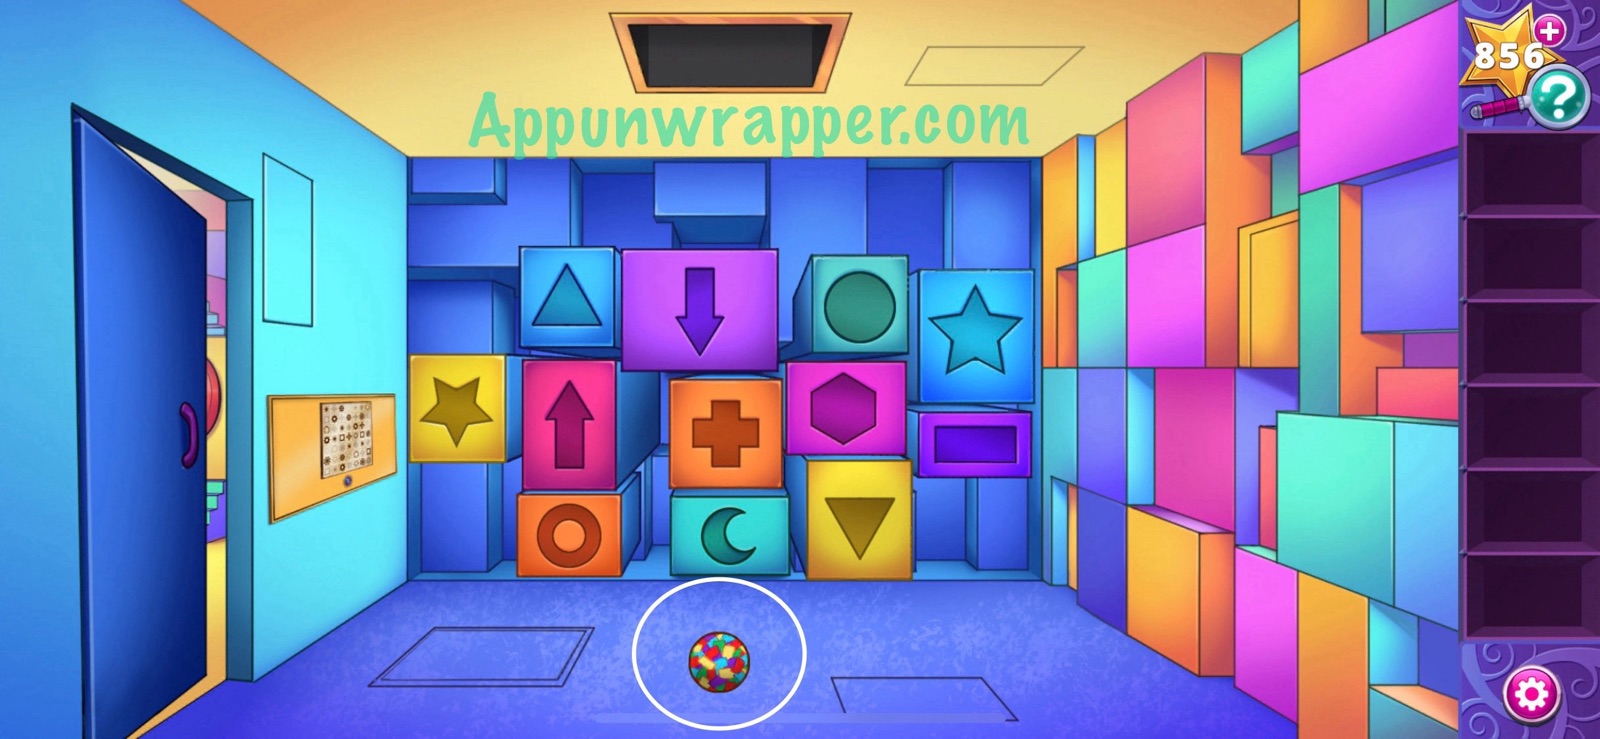
24. Go back into the small square room. Remember the gradient on the ceiling? It goes from black to white. So it’s showing you the order to put the four shapes. It goes: Plus Sign, Circle, Dash, Ring. Press those shapes. Then take the paper mache ball.
25. Leave the room and place the paper mache ball in the confetti machine. Tap it to shoot out the confetti. You’ll then get some door picture pieces.
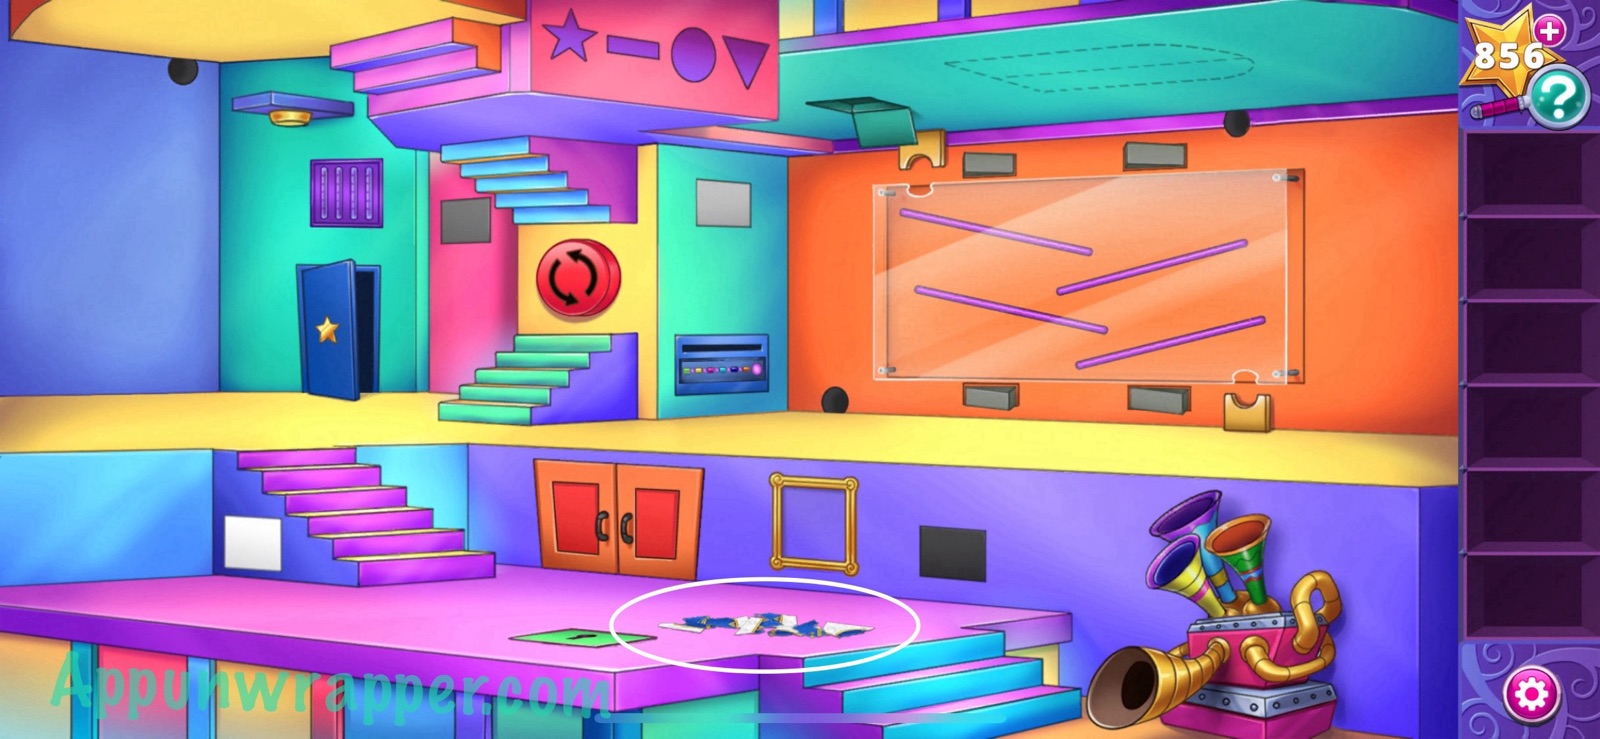
26. Examine the door picture pieces and piece them together like a puzzle. It should look like this in the end:
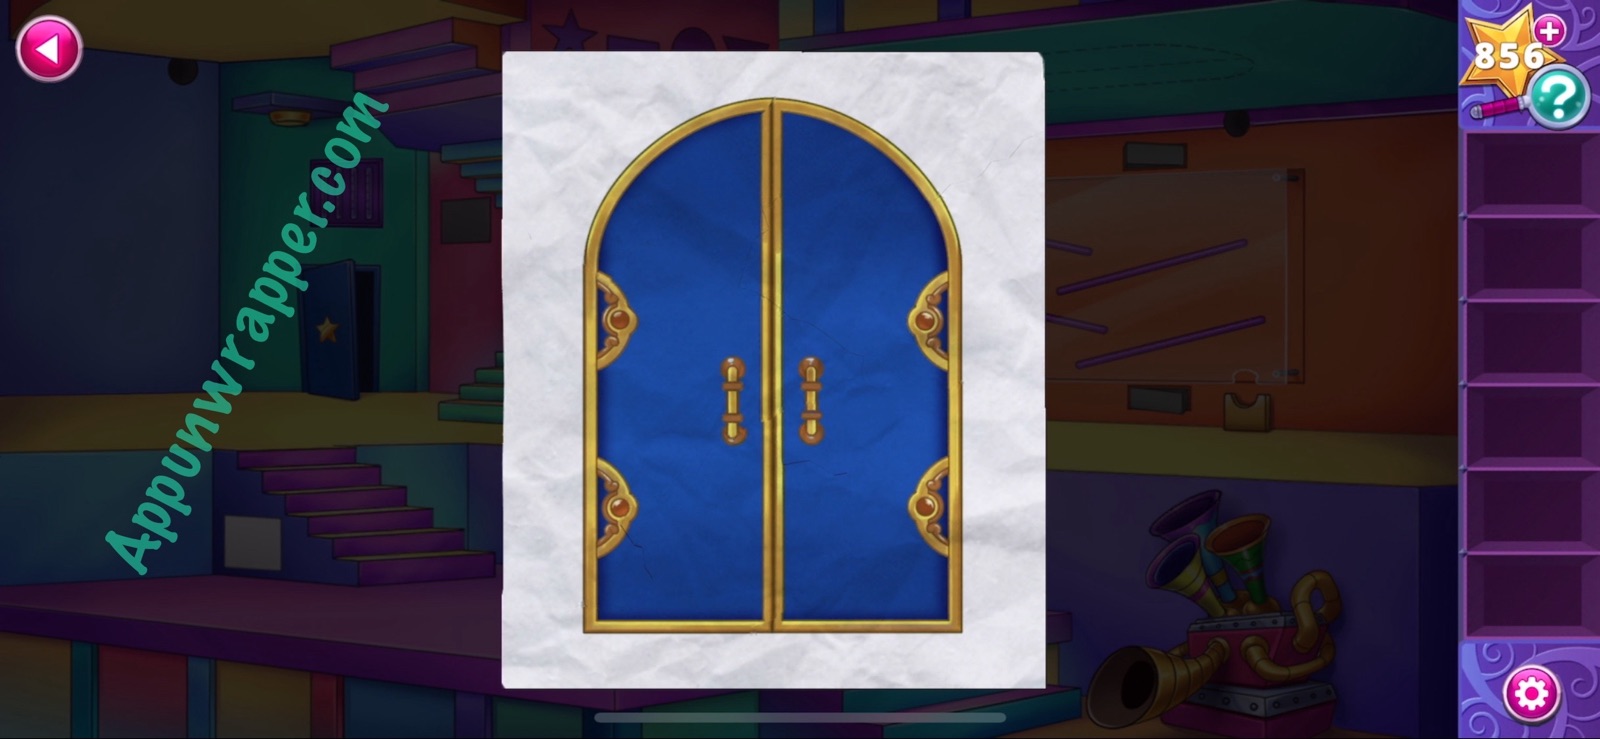
27. Place the door picture in the picture frame to get a door.
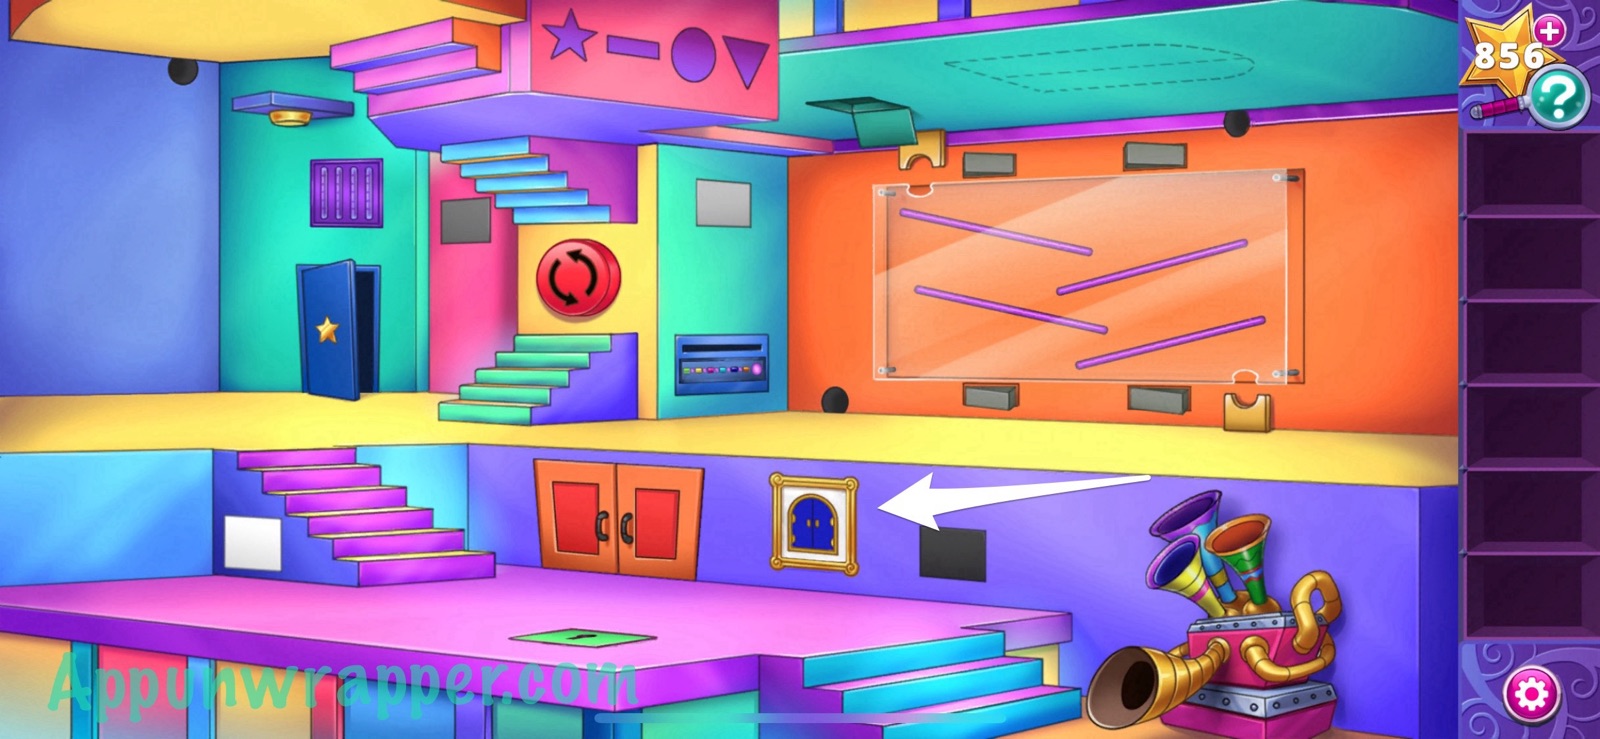
28. Flip the room upside-down and place the door on the floor. Then go through.
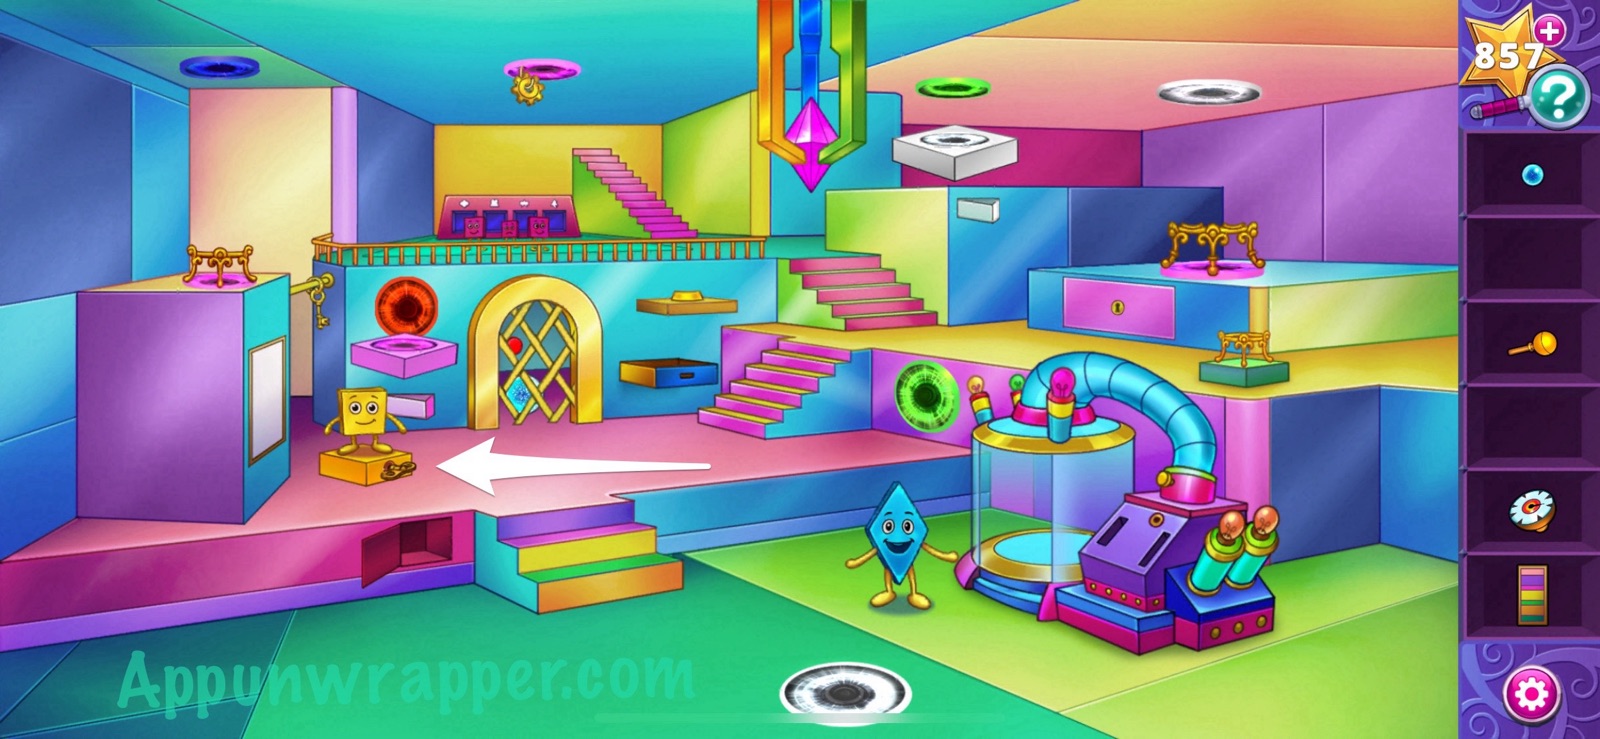
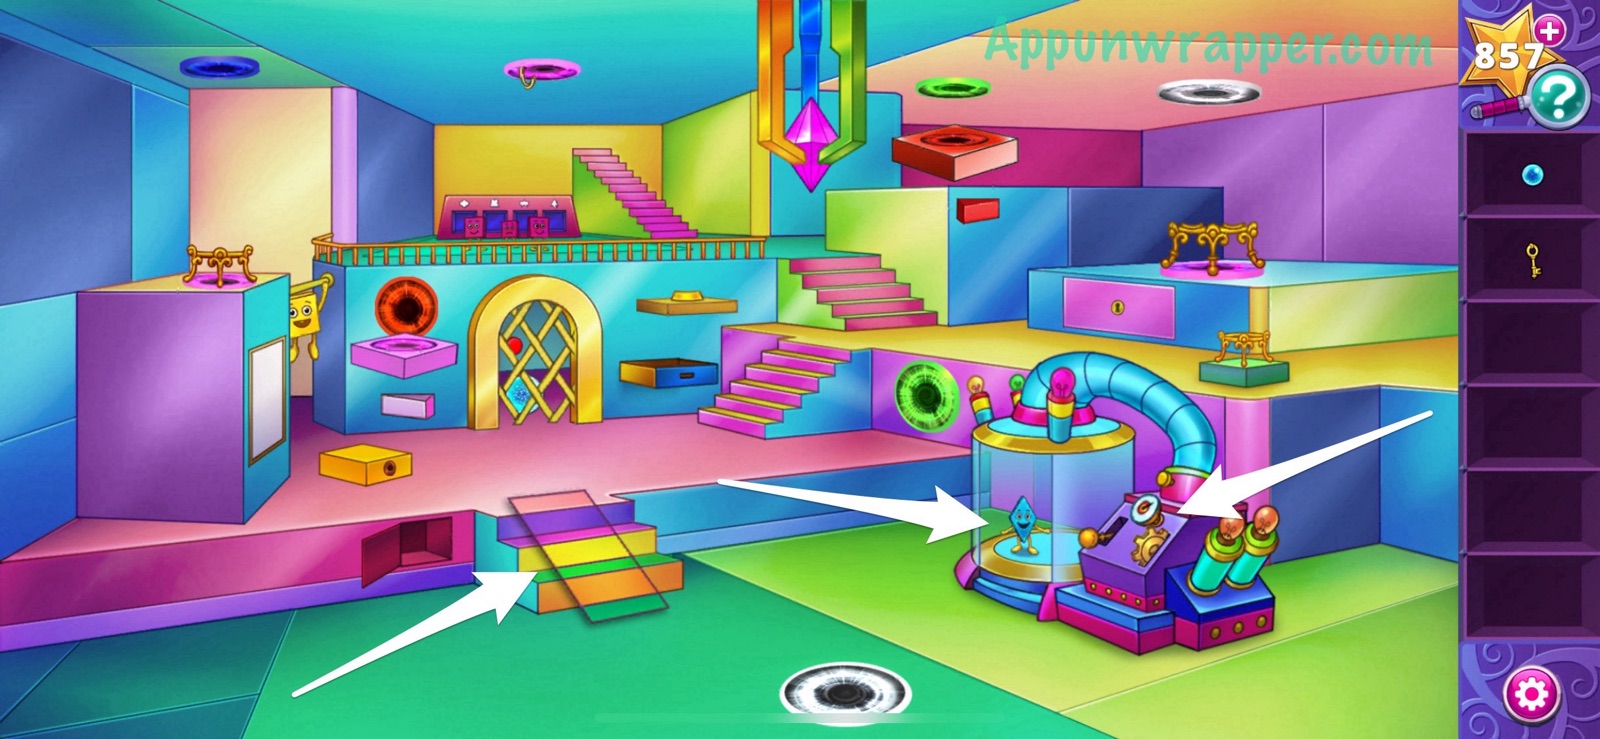
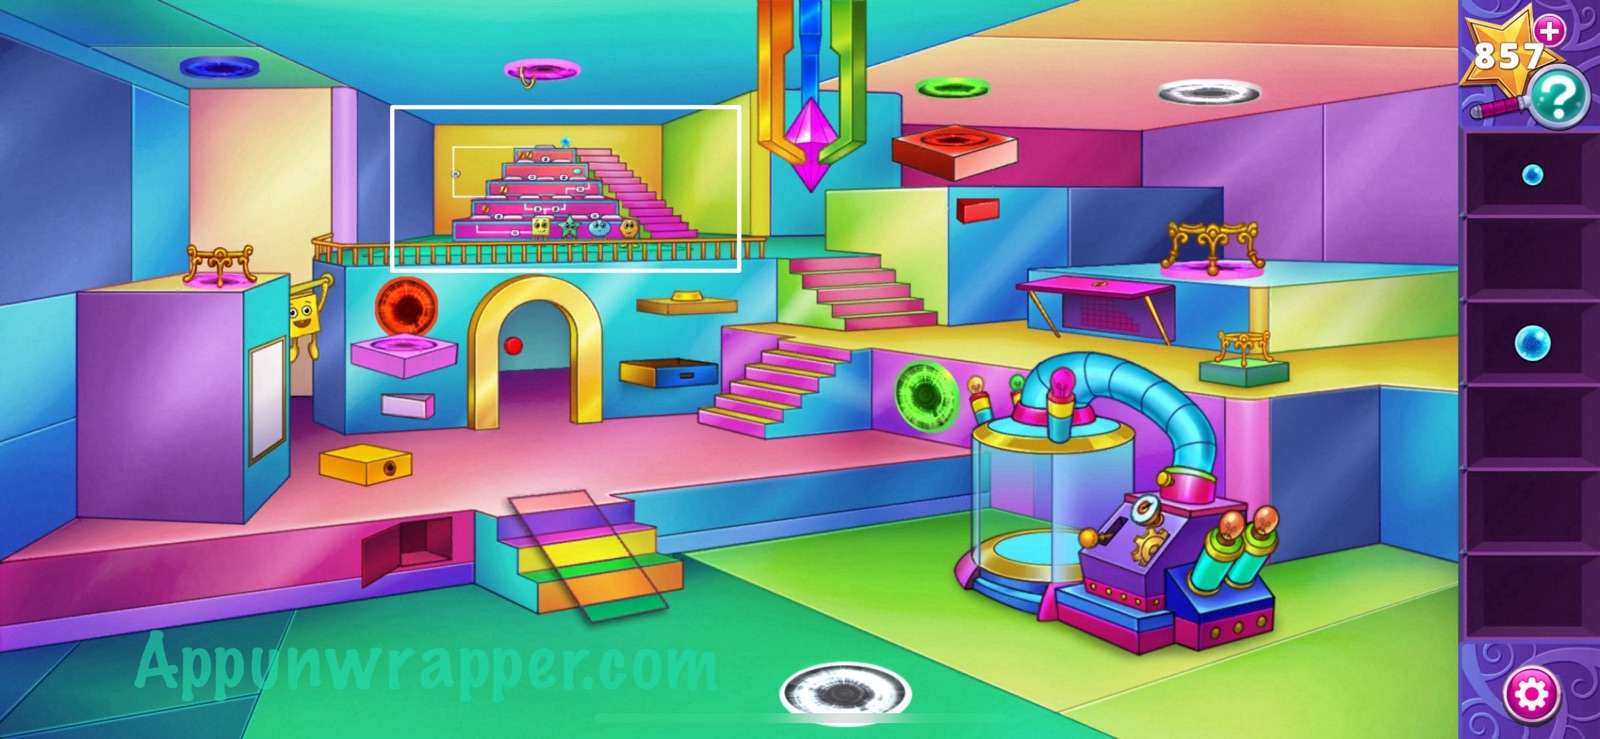
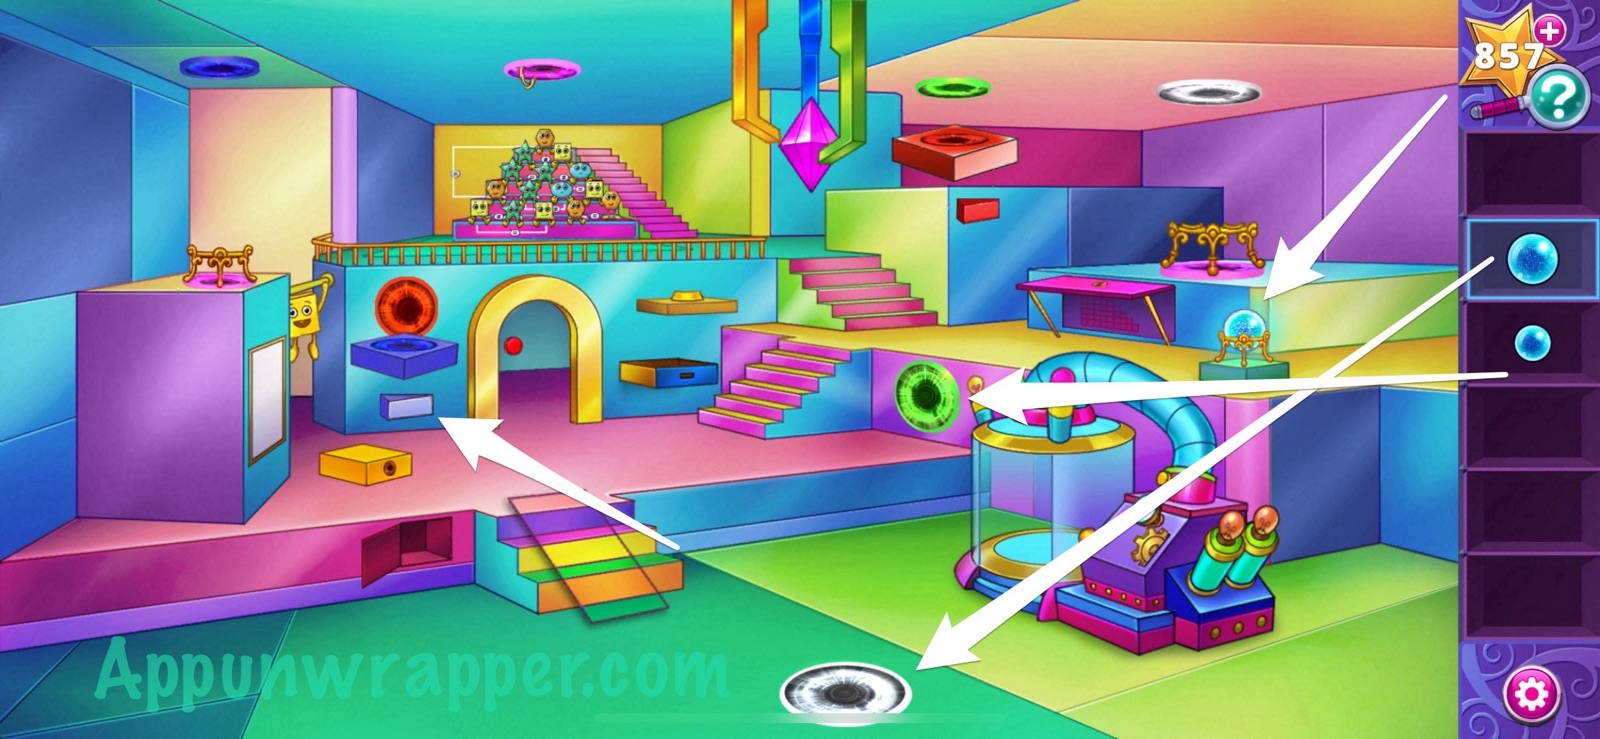
29. Now we’re in a whole new area. The weird creatures here tell us to use the portals to place all four crystal balls on their pedestals. First, grab the painting, turn key, small crystal ball and lever. Also, talk to both shapes.

30. Look under the diamond guy’s hat to get a gauge.

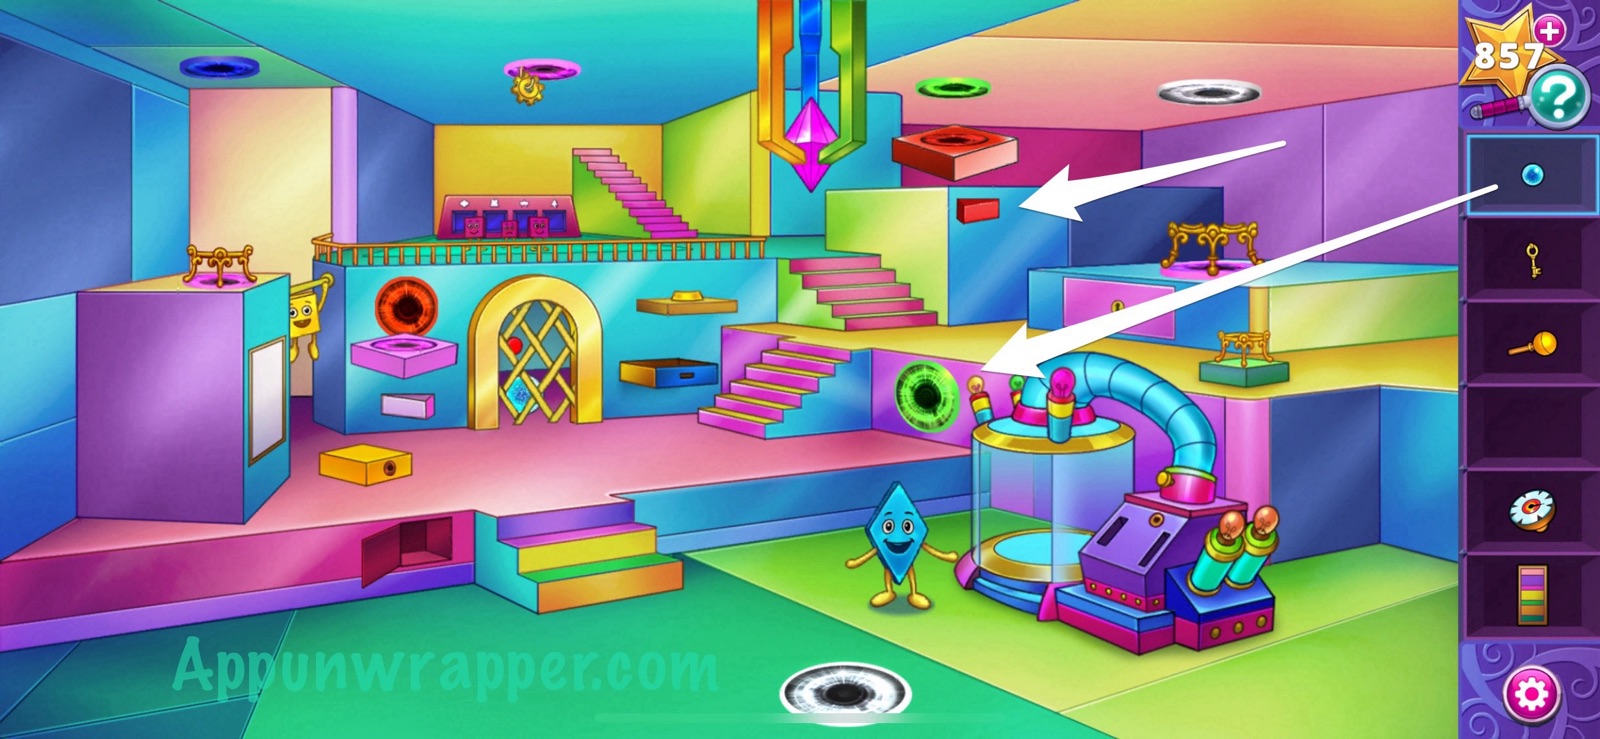
31. Put the turn key in the spring box to help the little square guy get up to the pole. He’ll give you a small key in exchange.
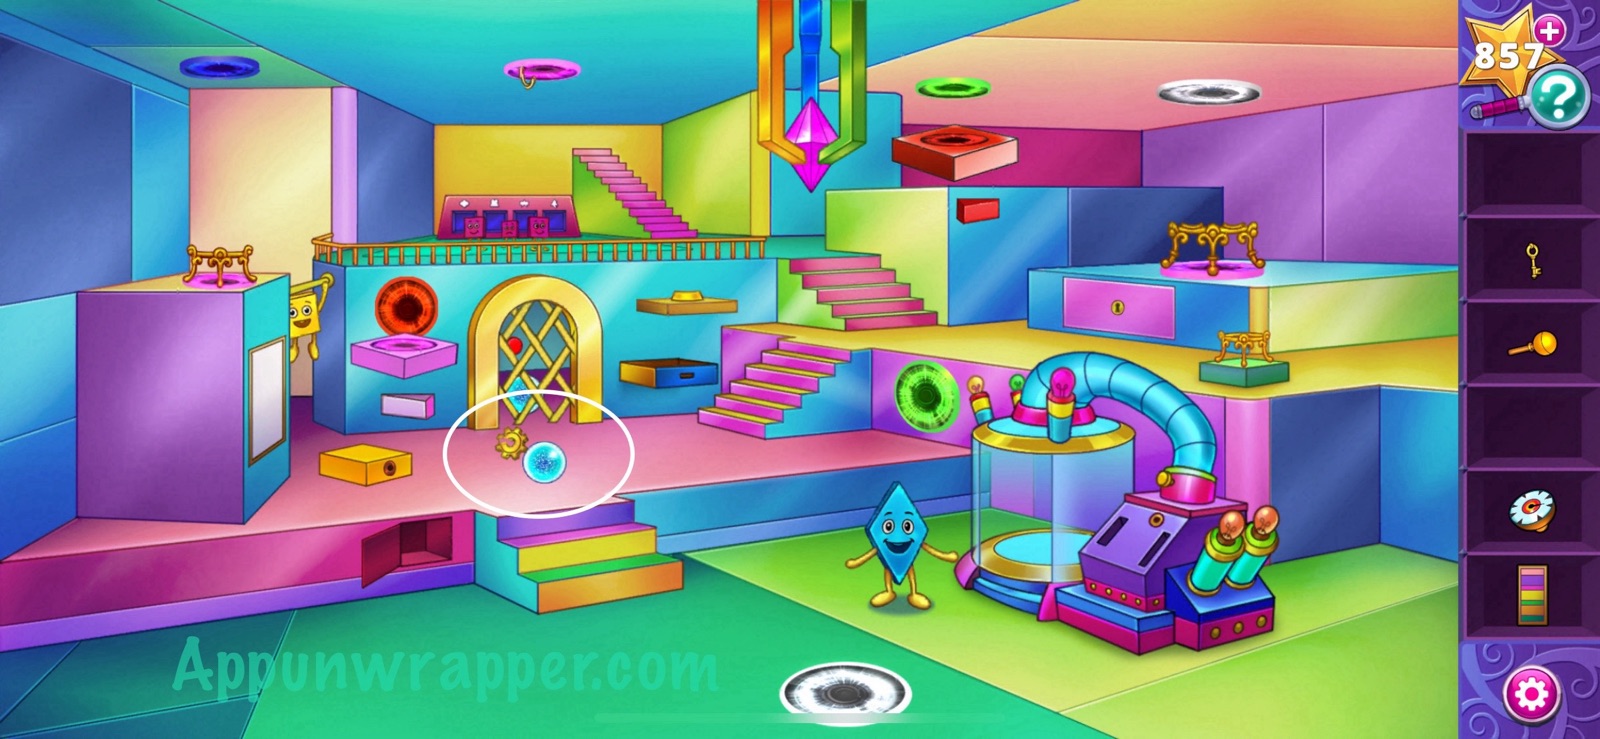
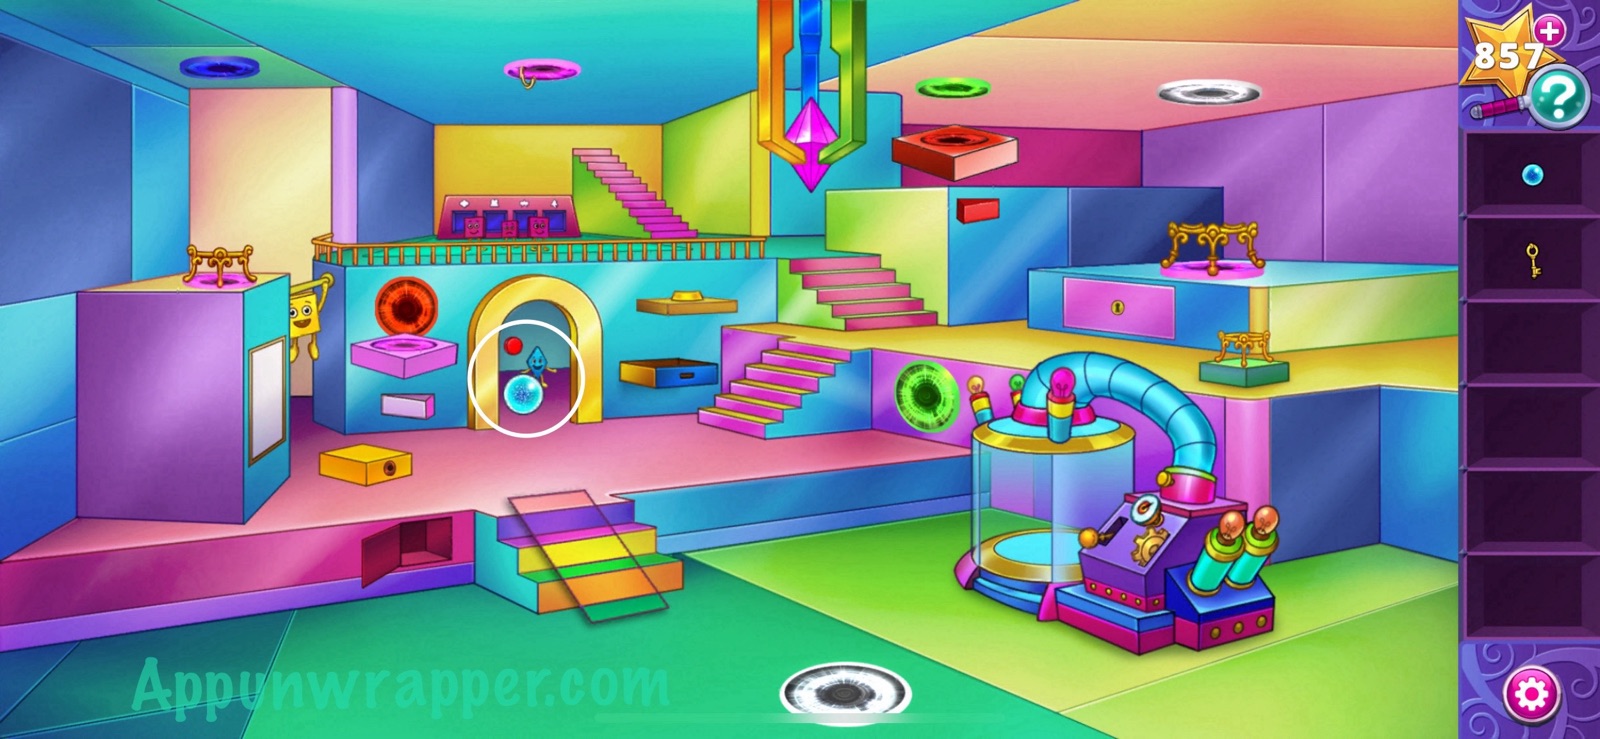
32. Press the white switch to turn the square with the white portal on it red. Then drop the small crystal ball through the green portal and watch it jump through different portals before knocking the gear off from the ceiling.
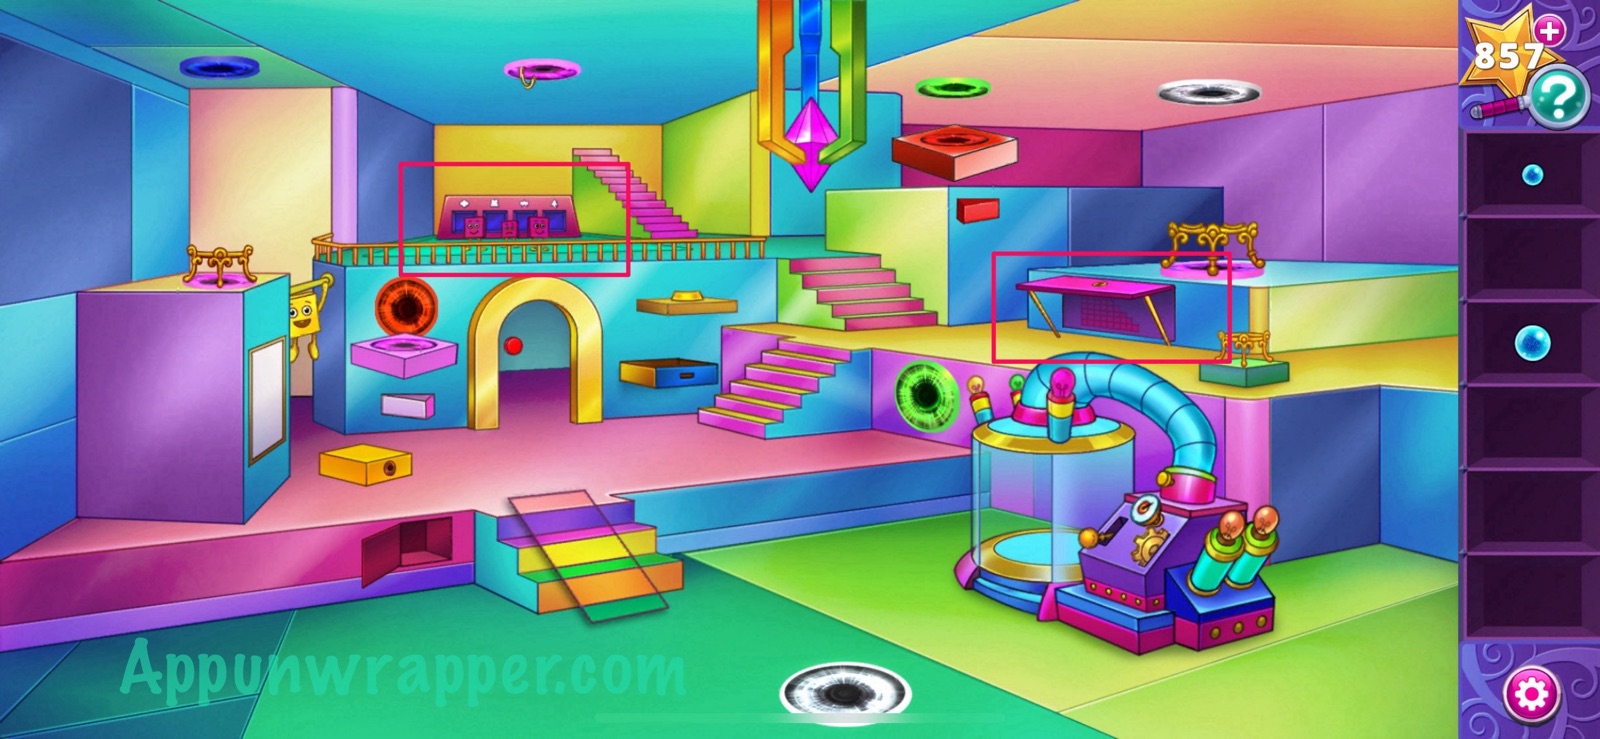
33. Place the lever, gear and gauge in the shrinking machine so the diamond guy can shrink. Then tap on him to ask him to go and press the red button inside the cell. Make sure to place the painting on the stairs first so he can use it as a ramp. Then take the medium crystal ball.
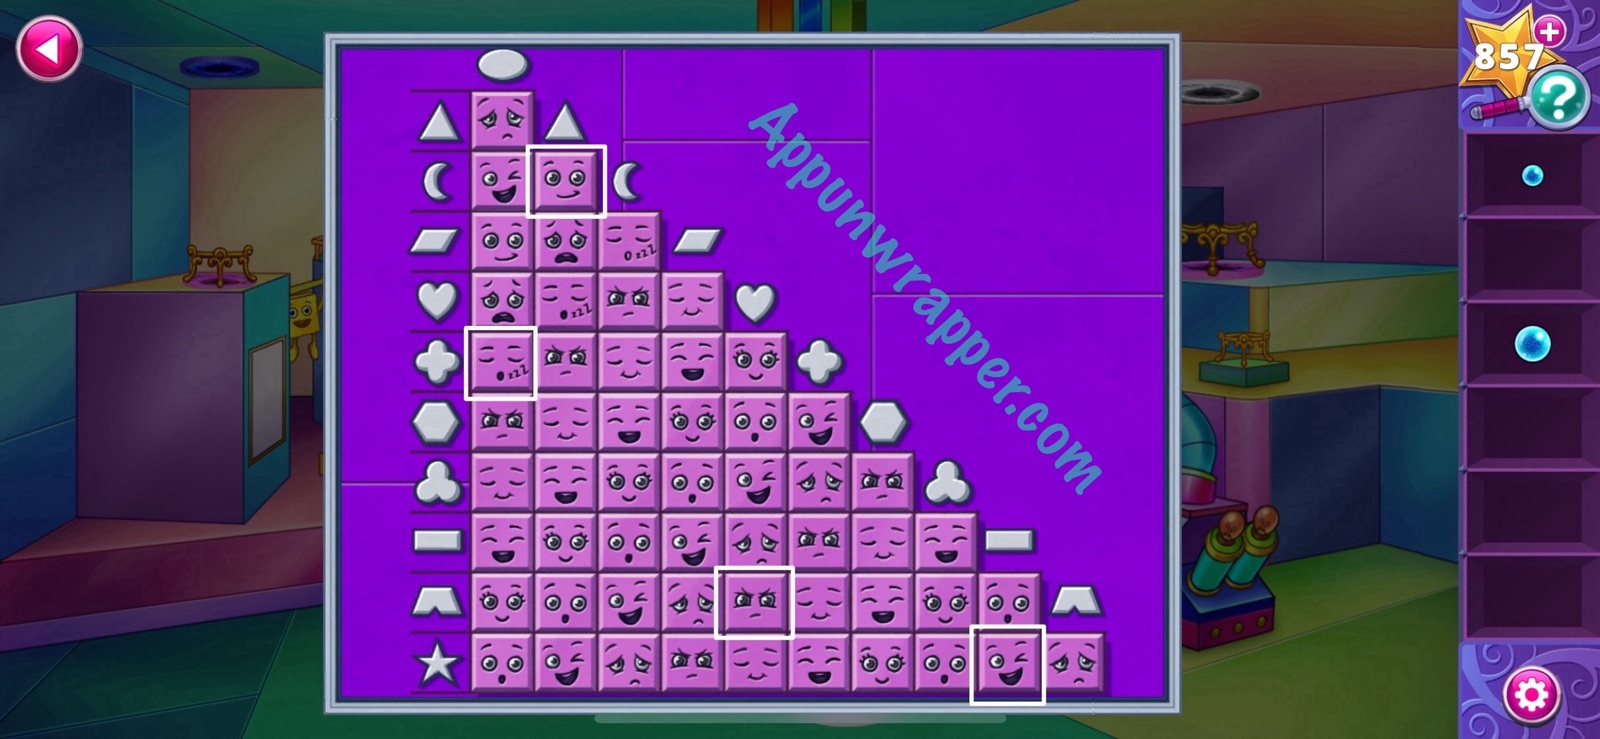
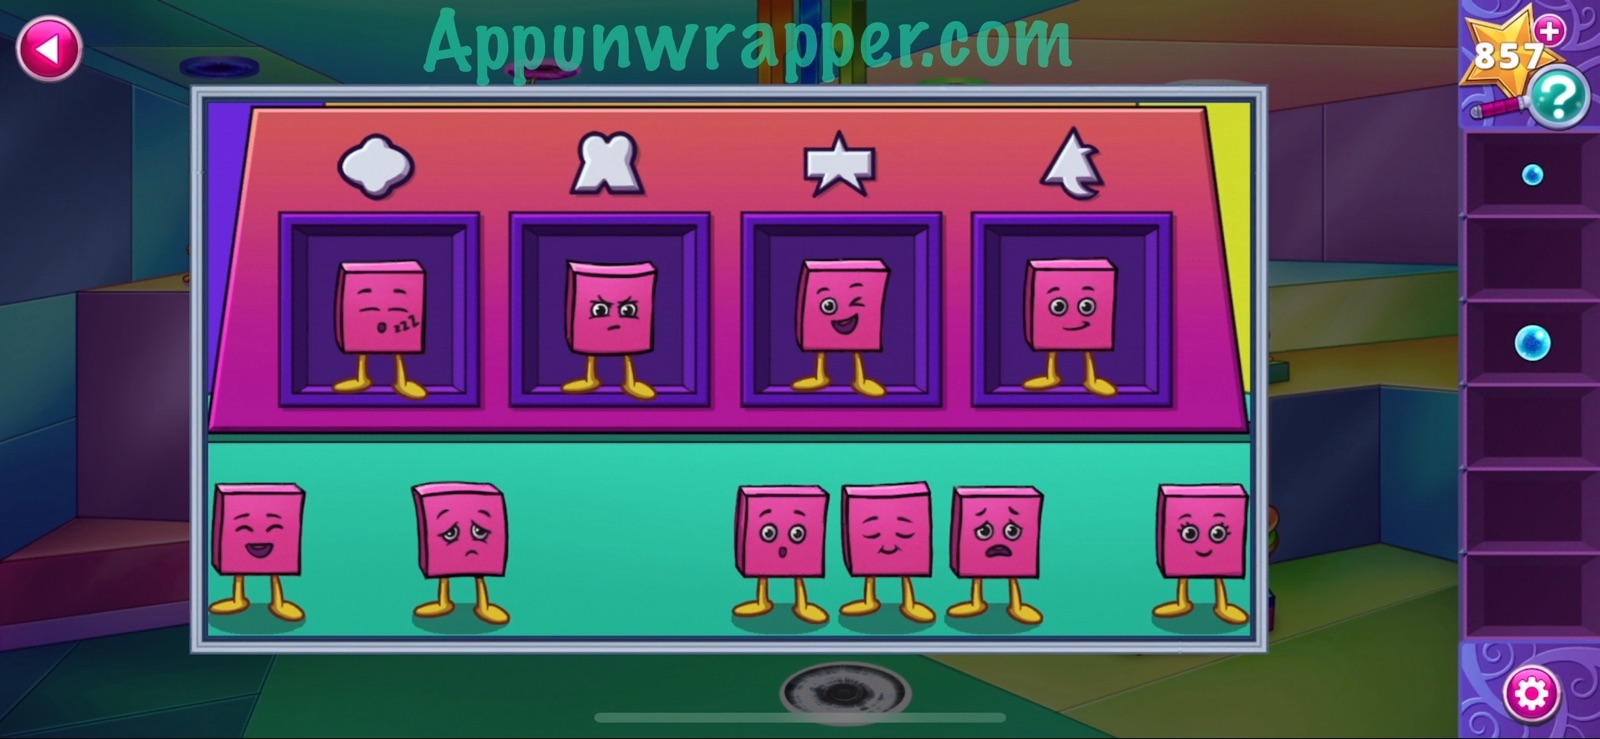
34. Use the key to unlock the locked cabinet and then look inside for a clue. Then use that clue to solve the puzzle on the upper platform. Basically, look at the puzzle and note the shape above each purple square. You need to figure out which simple shapes combine to make each complex shape. Then use that to figure out which square creature should go in each box. So the first complex shape is made up of an oval and plus sign. The next is a heart and what looks kind of like shorts? Next is a star and a dash. And last is a moon and triangle. I’ve highlighted them for you on the chart. Now just drag those square creatures into the purple boxes.
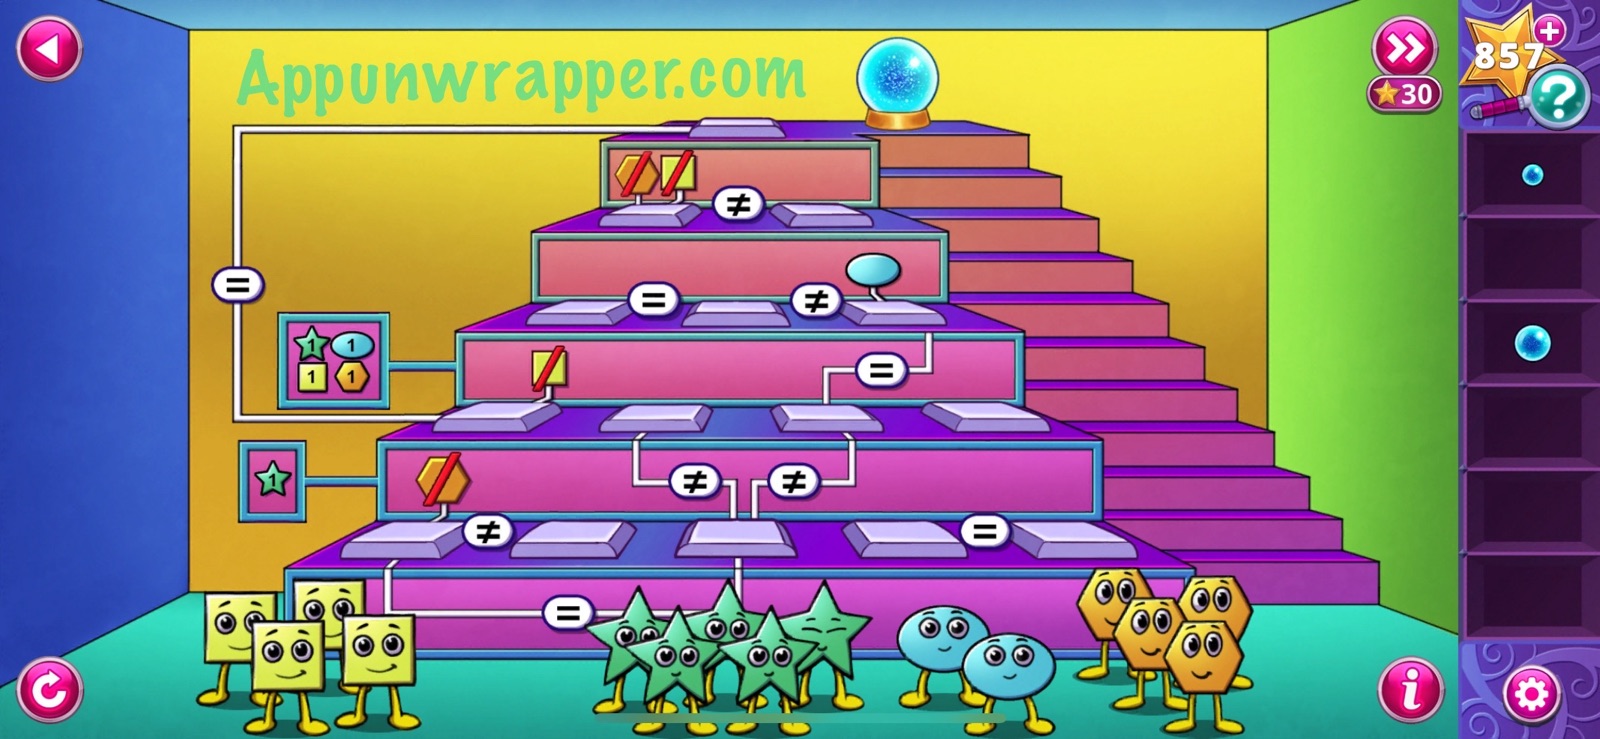
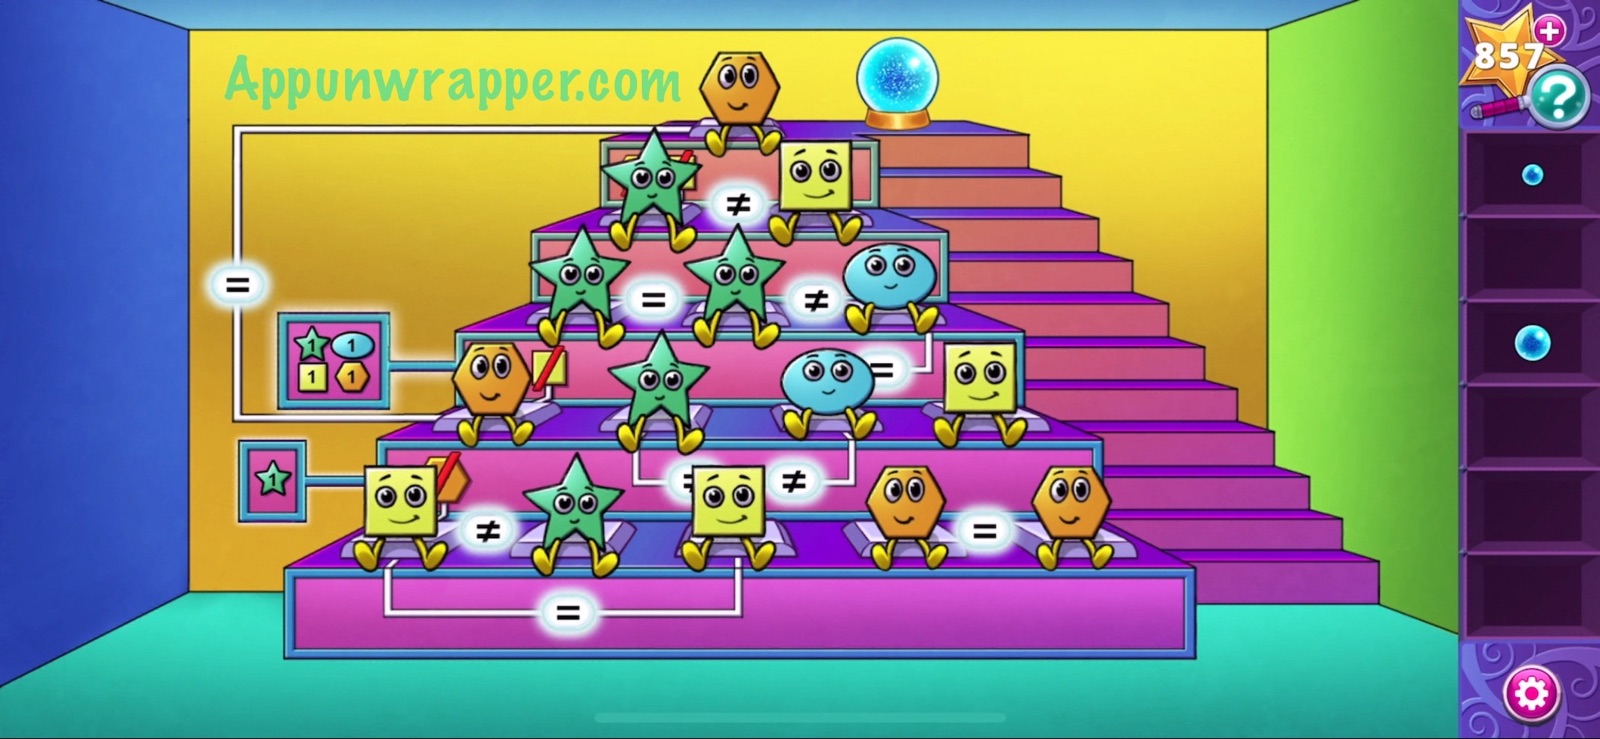
35. A whole pyramid rises up from the floor! Take a look at it. Follow all the rules to figure out where to place all the shapes. You can follow my solution if you’re stuck. You’ll then get the large crystal ball in return.
36. Now we have all three crystal balls and just need to place them on their stands. The small one is easy — just place it on the stand. For the large one, drop it through the white portal. And for the medium one, press the pink switch to change the pink portal to purple. Then drop the medium crystal ball through the green portal. Now all three crystal balls should be in place. The exit crystal will drop into Arlo’s arms. Watch the cutscene to complete the chapter.
And that’s the end of Chapter 6! Click here to continue to Chapter 7 or choose a chapter below.
Chapter 1 | Chapter 2 | Chapter 3 | Chapter 4 | Chapter 5 | Chapter 6 | Chapter 7

I can solve the arrow puzzle it keeps freezing 😞