Adventure Escape Mysteries – Sweet Dreams
By: Haiku Games

Haiku Games is back with a new Adventure Escape game, this time about a 5-year-old boy’s dreams. You play as Revi, a Dream Manager who has to help young Arlo conquer his fears about starting school. This walkthrough guide should help you if you get stuck on any of the puzzles in Chapter 3 of Sweet Dreams. Feel free to ask for extra help in the comments section.
See all my other Adventure Escape guides here.
Walkthrough:
Chapter 1 | Chapter 2 | Chapter 3 | Chapter 4 | Chapter 5 | Chapter 6 | Chapter 7
Chapter 3:
You can watch my video for Chapter 3 or continue below for my step-by-step guide:
1. Shoku returns and sees Revi and Arlo falling through the sky. He heads out to rescue them. We have to help Arlo get to the door in the clouds or he’ll remain stuck in his dreams! We’re on the beach now. Grab the shovel and fire sign. Grab a stick from the rocks and another that was holding up the sign. There’s another inside the sand castle and another in the fence. Open the windows on the house and take the kettle and oven mitt.
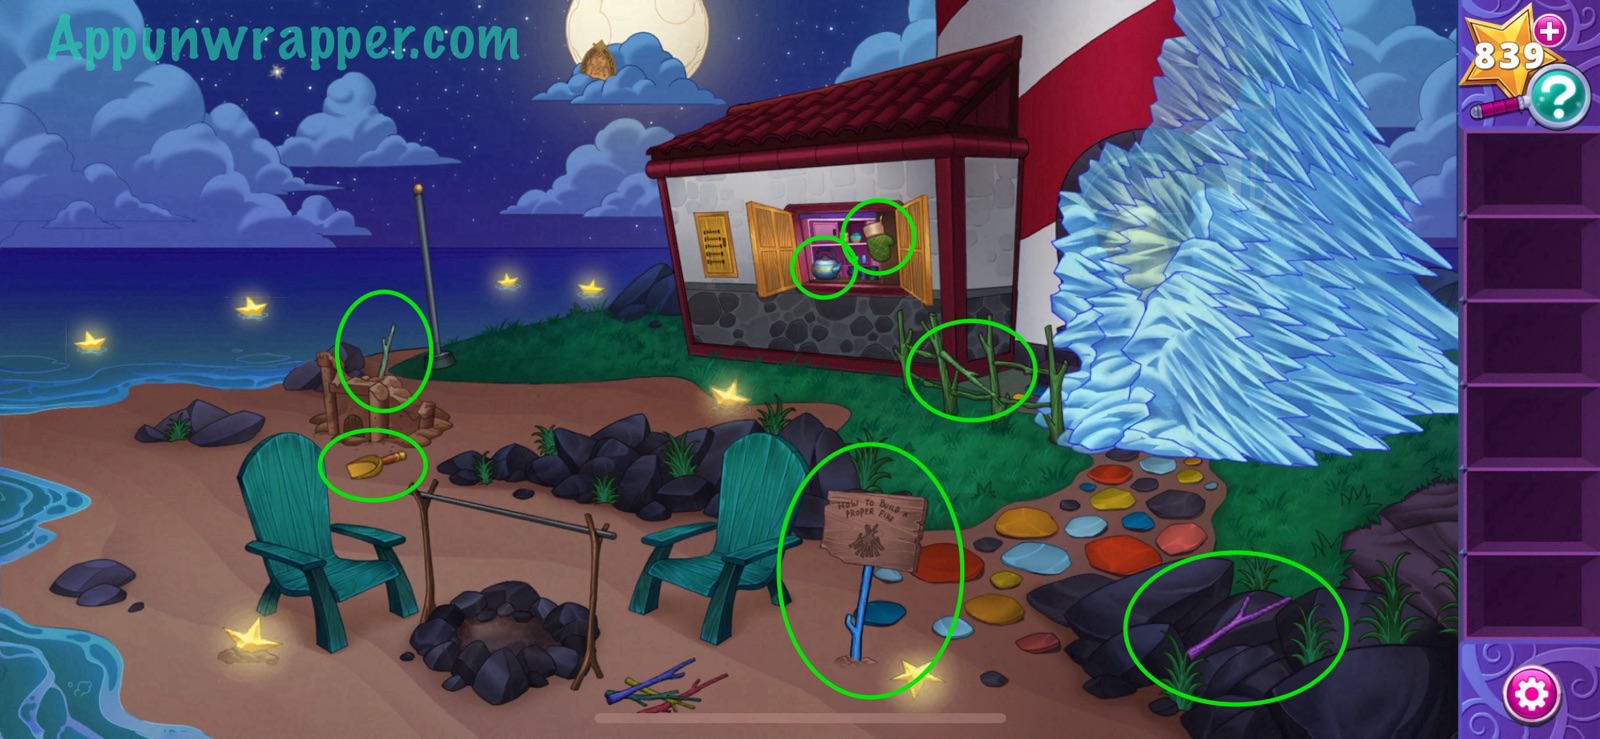
2. Use the shovel to dig up some of the stars. Then use the oven mitt to pick them up.
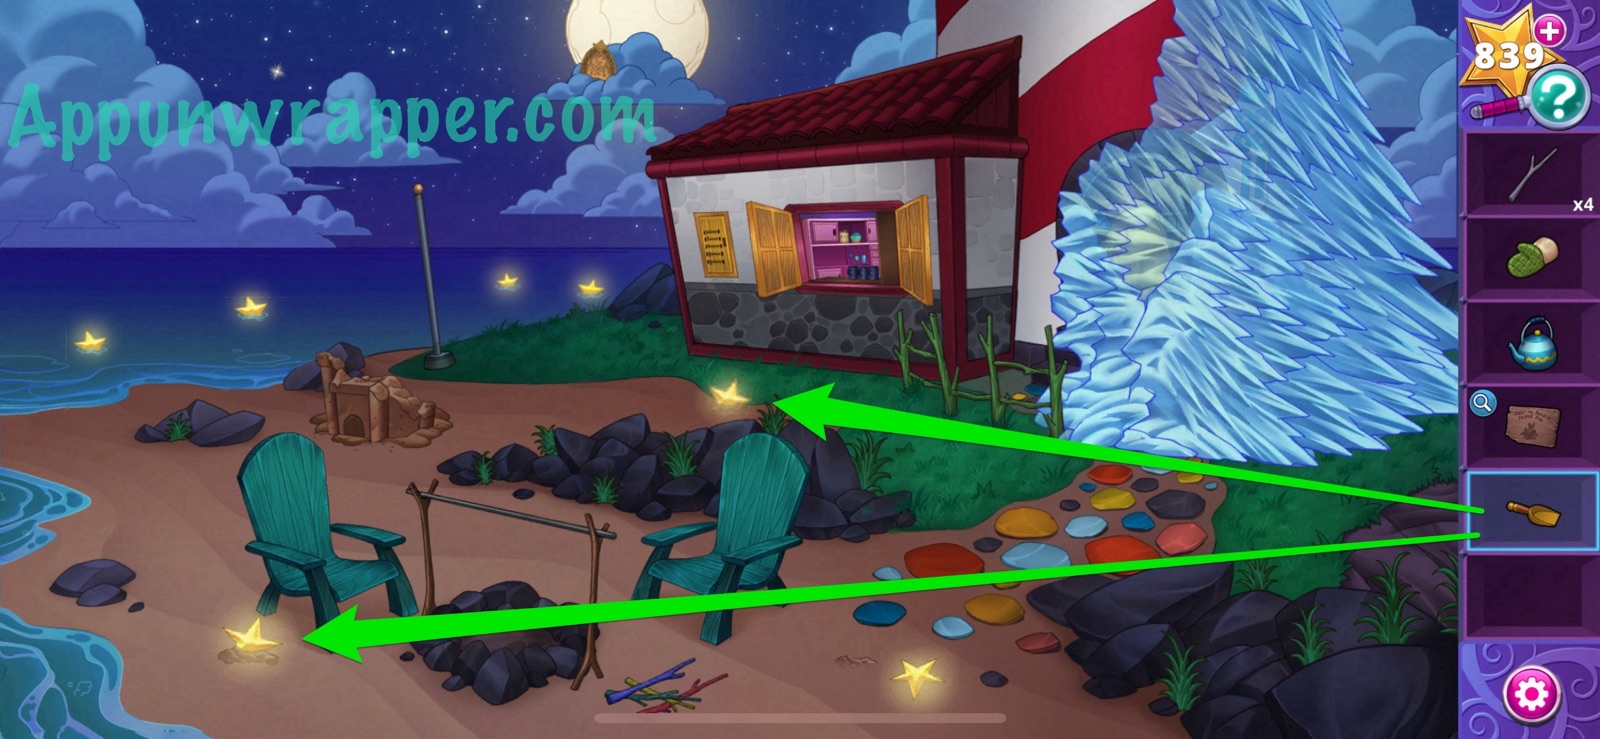
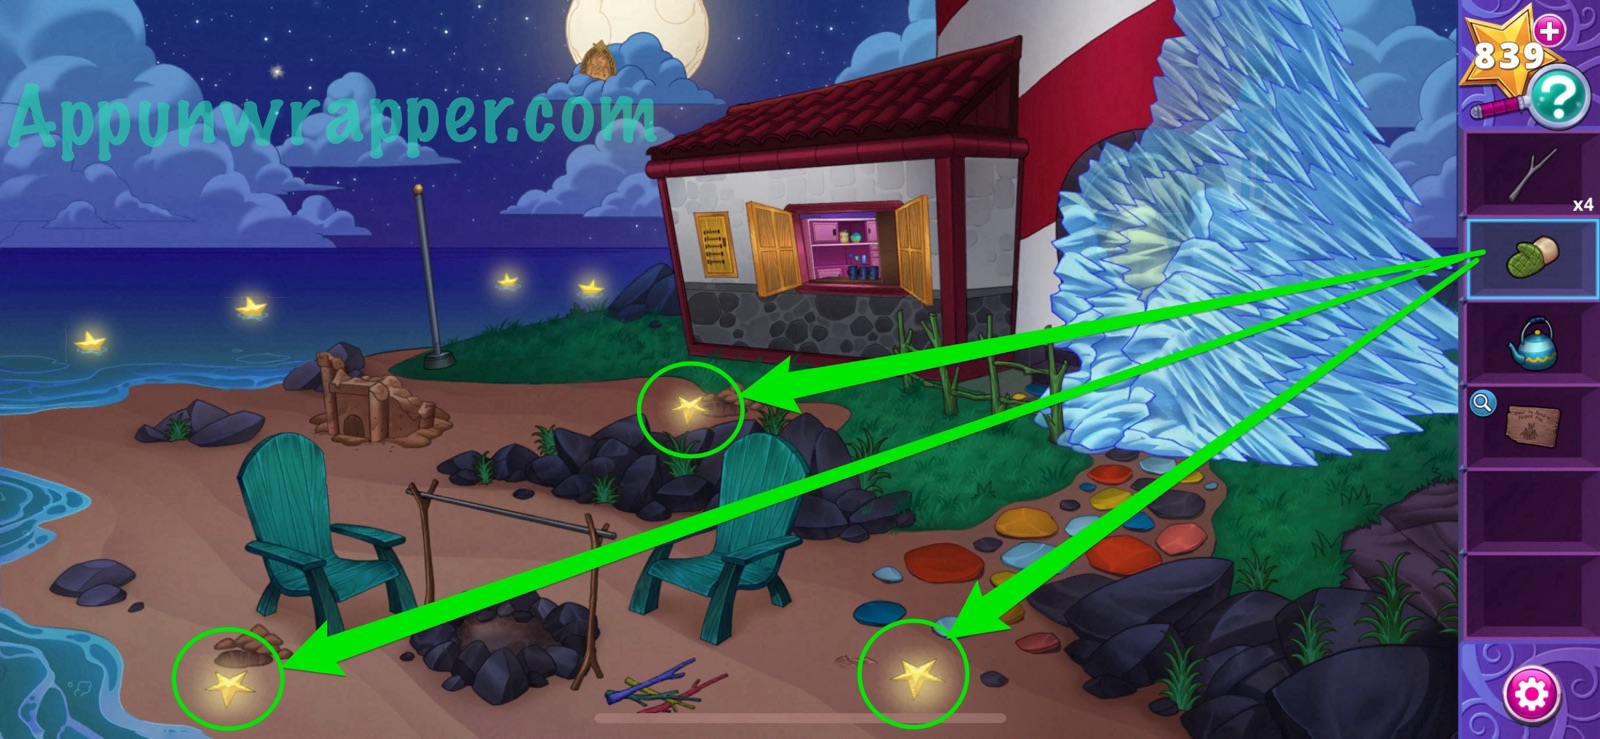
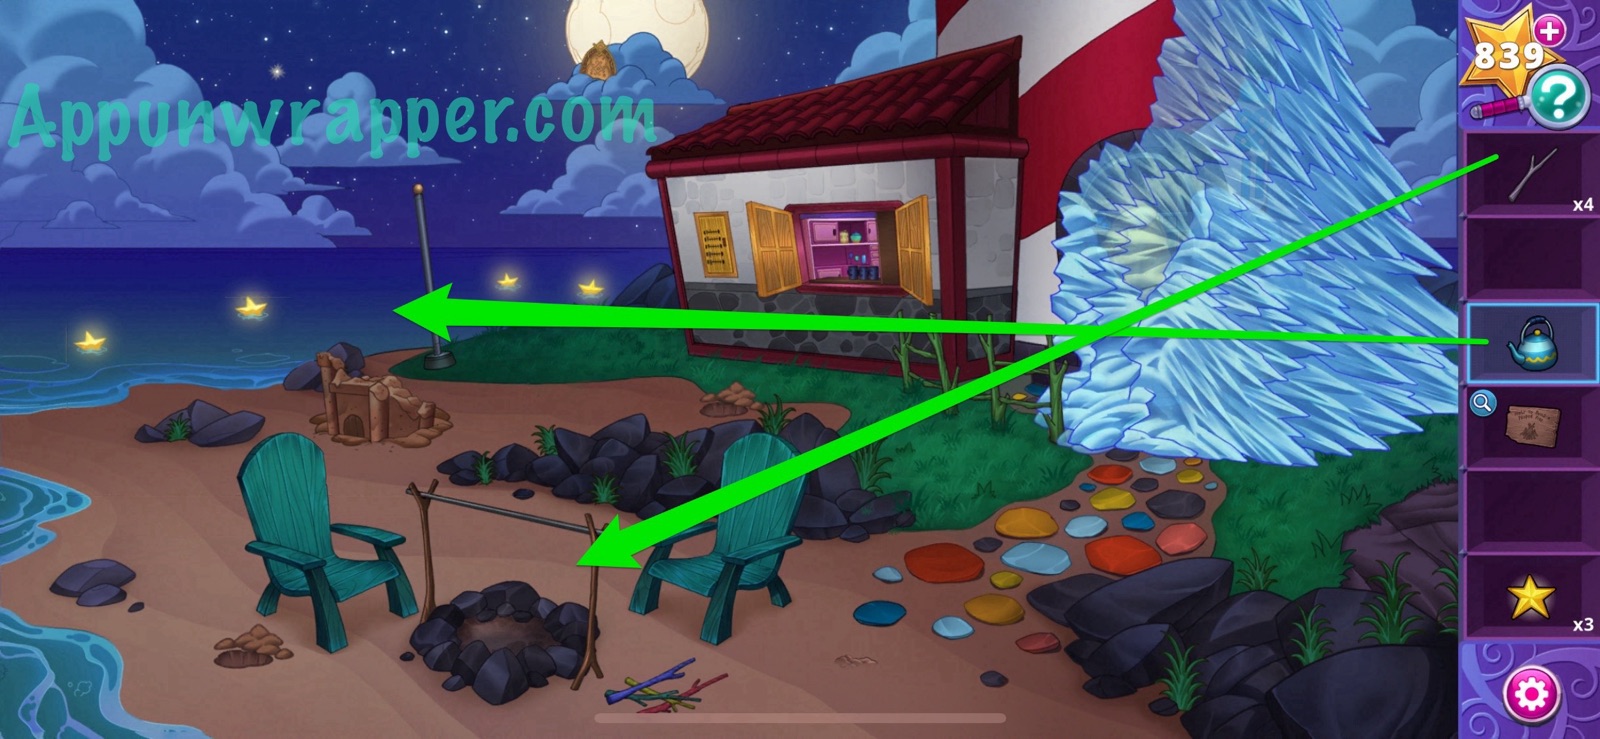
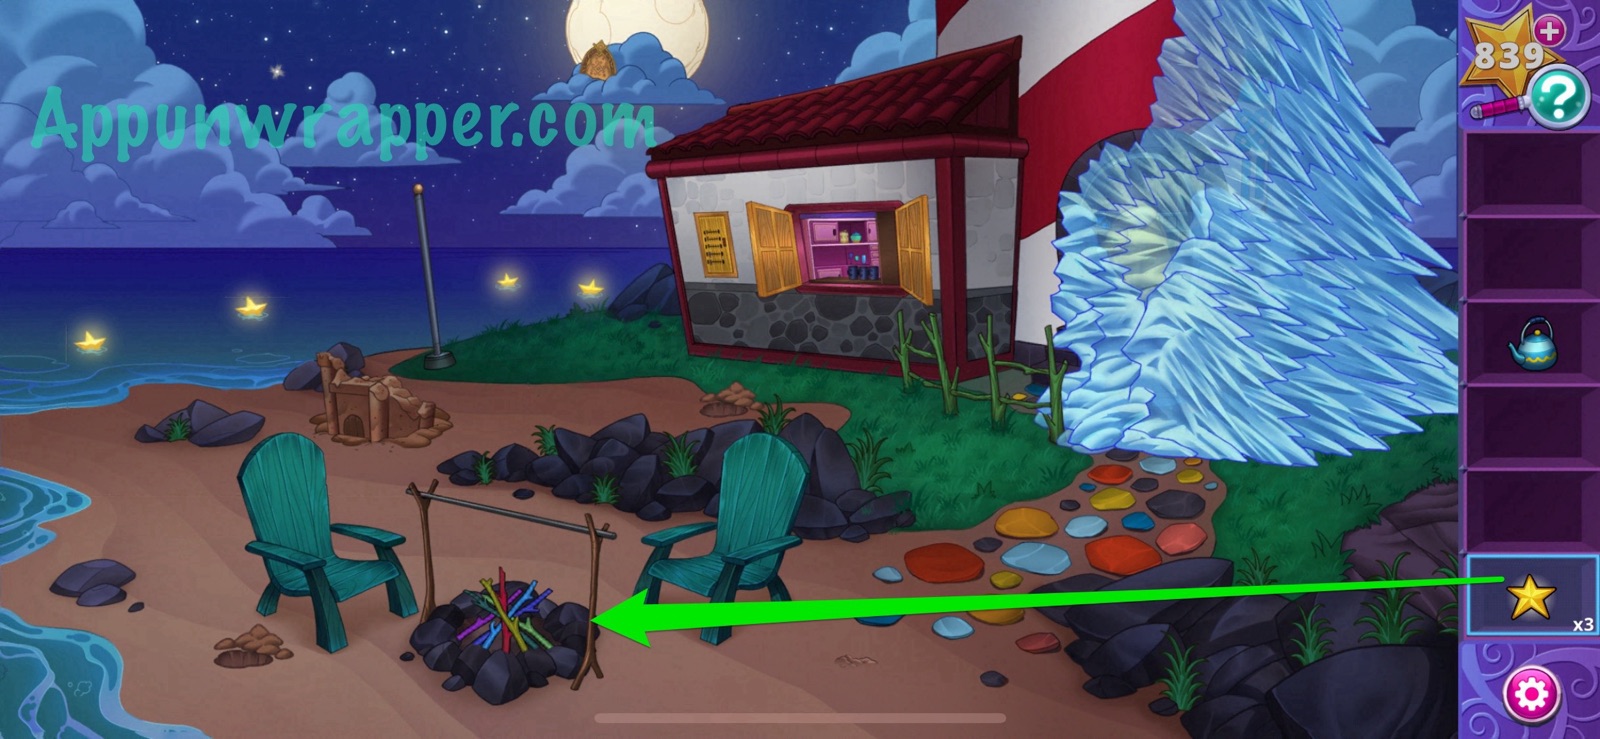
3. Fill the kettle with water from the sea. Then place all the sticks down by the fire pit.
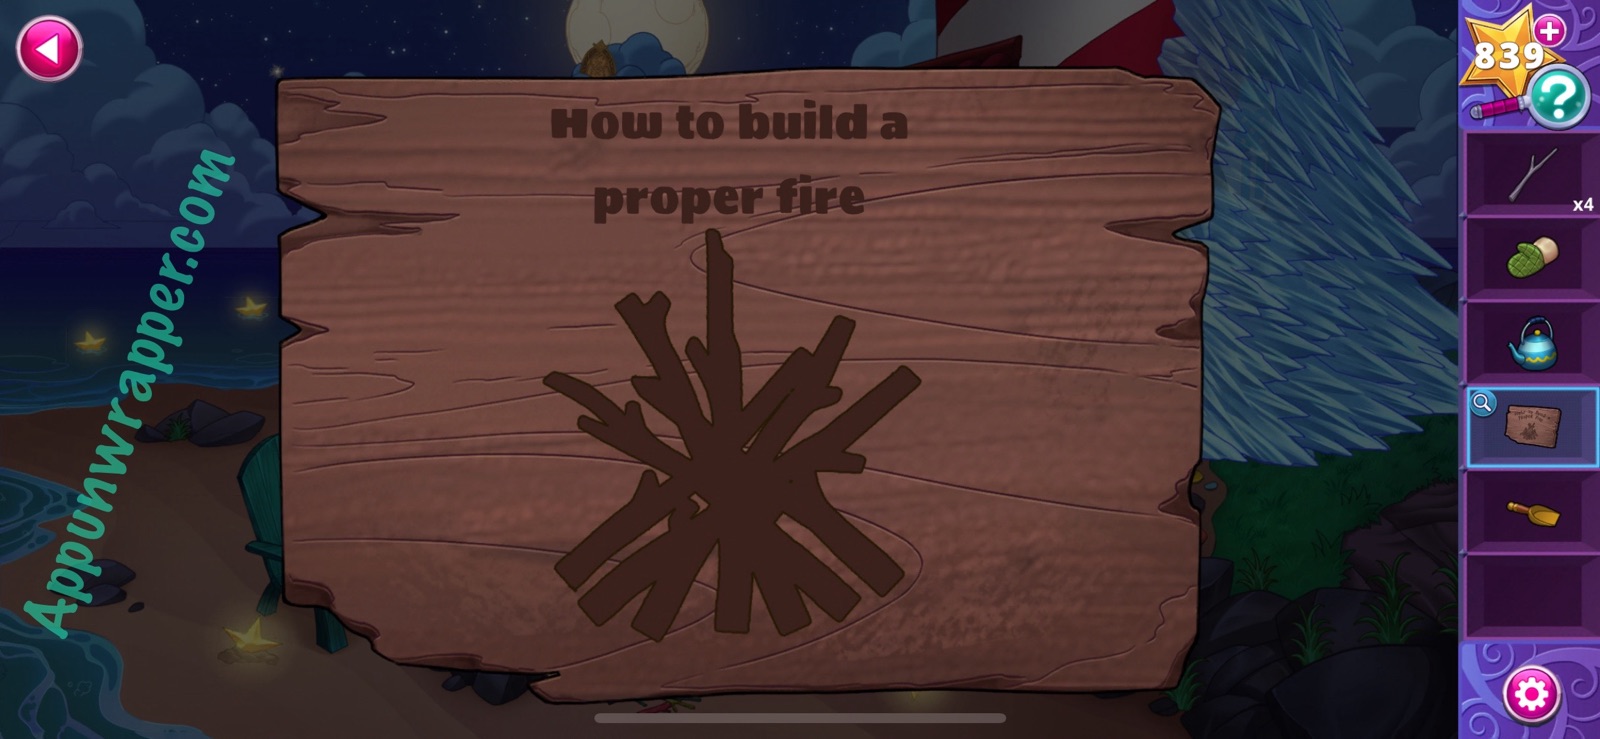
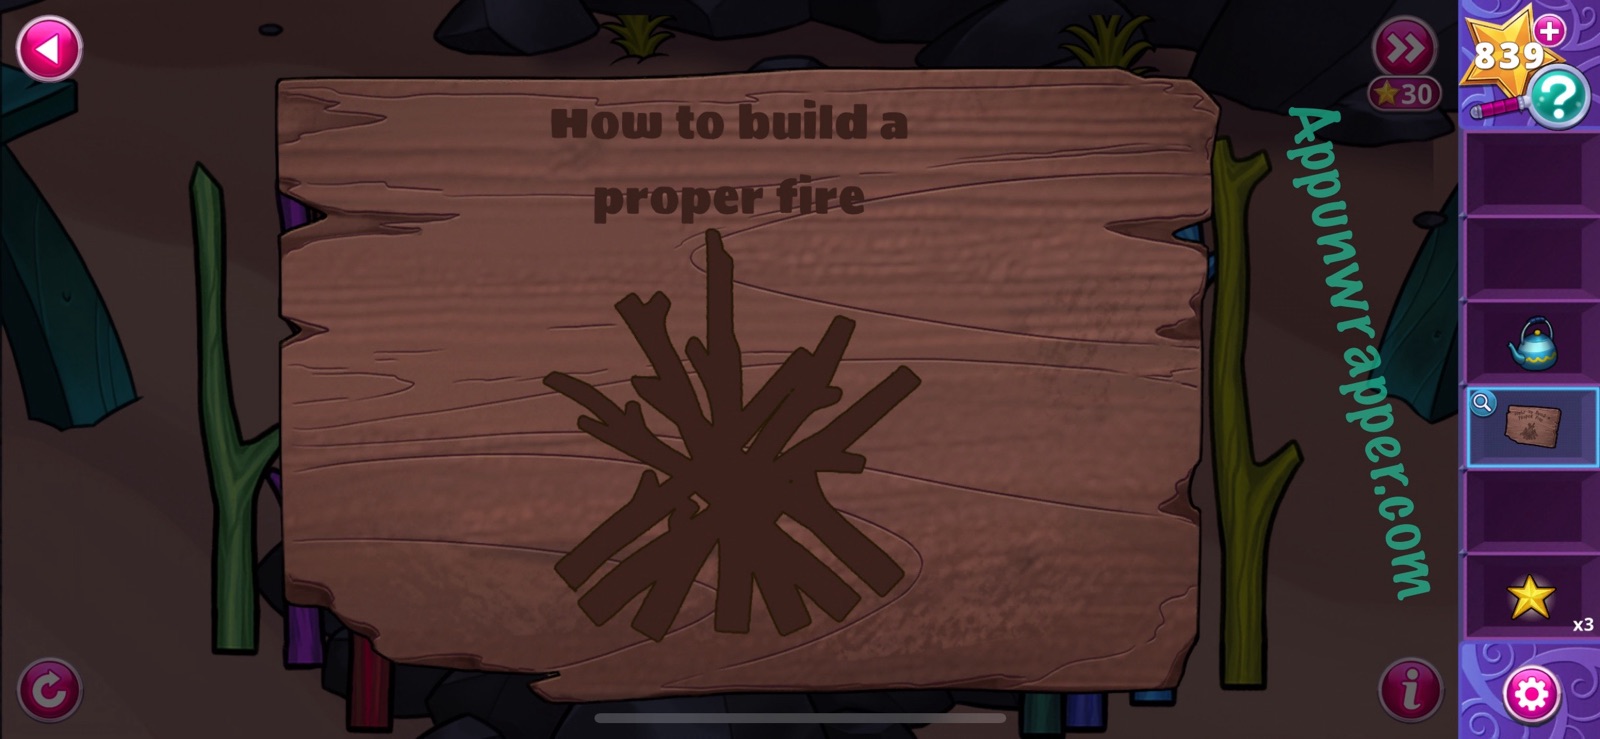
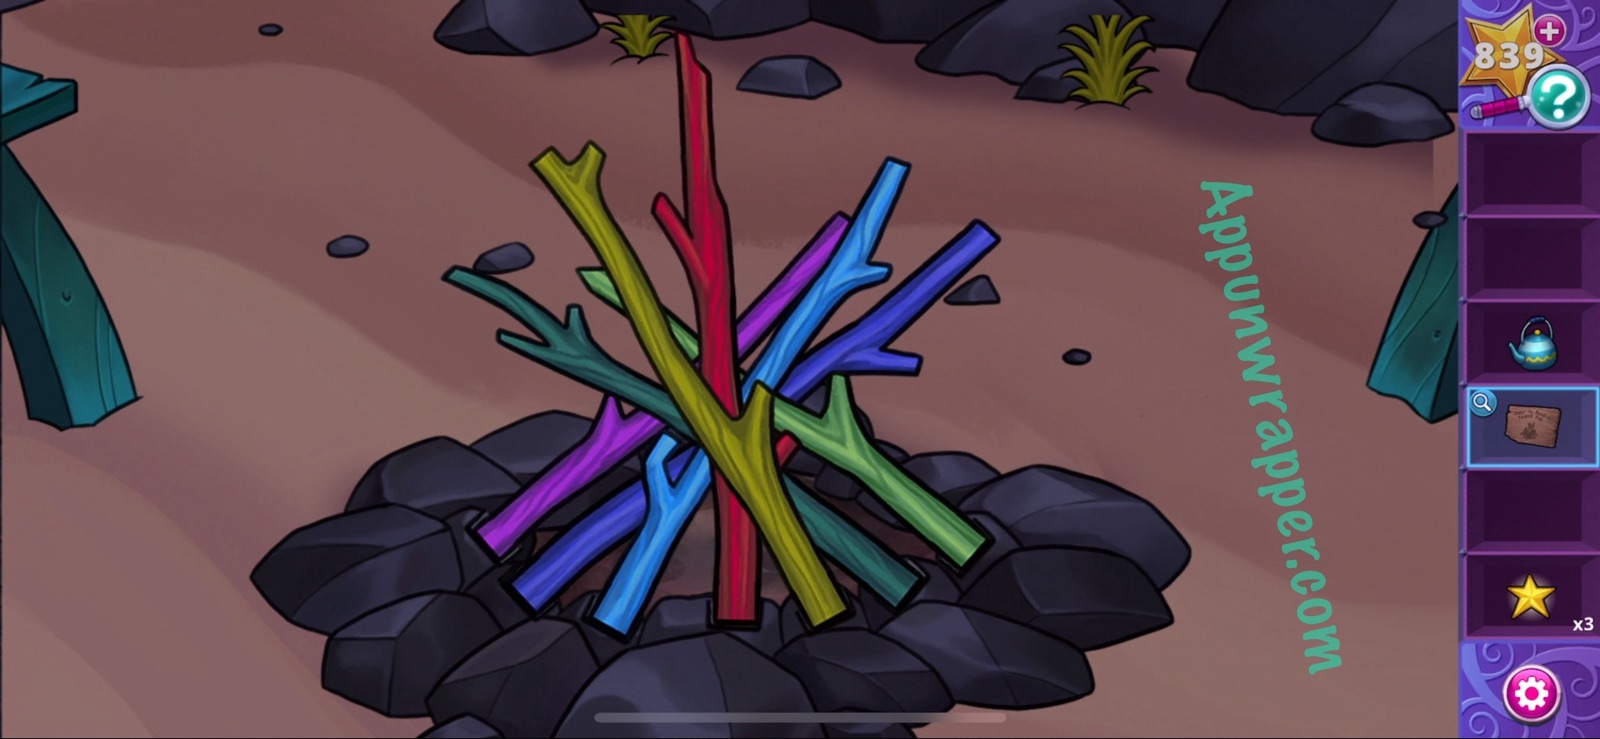
4. Look at the fire sign in your bag. Then create the same shape using the sticks. It should look like the image below.
5. Use the three stars to light the fire. Then place the full kettle over it to heat it up. Now we have hot water!
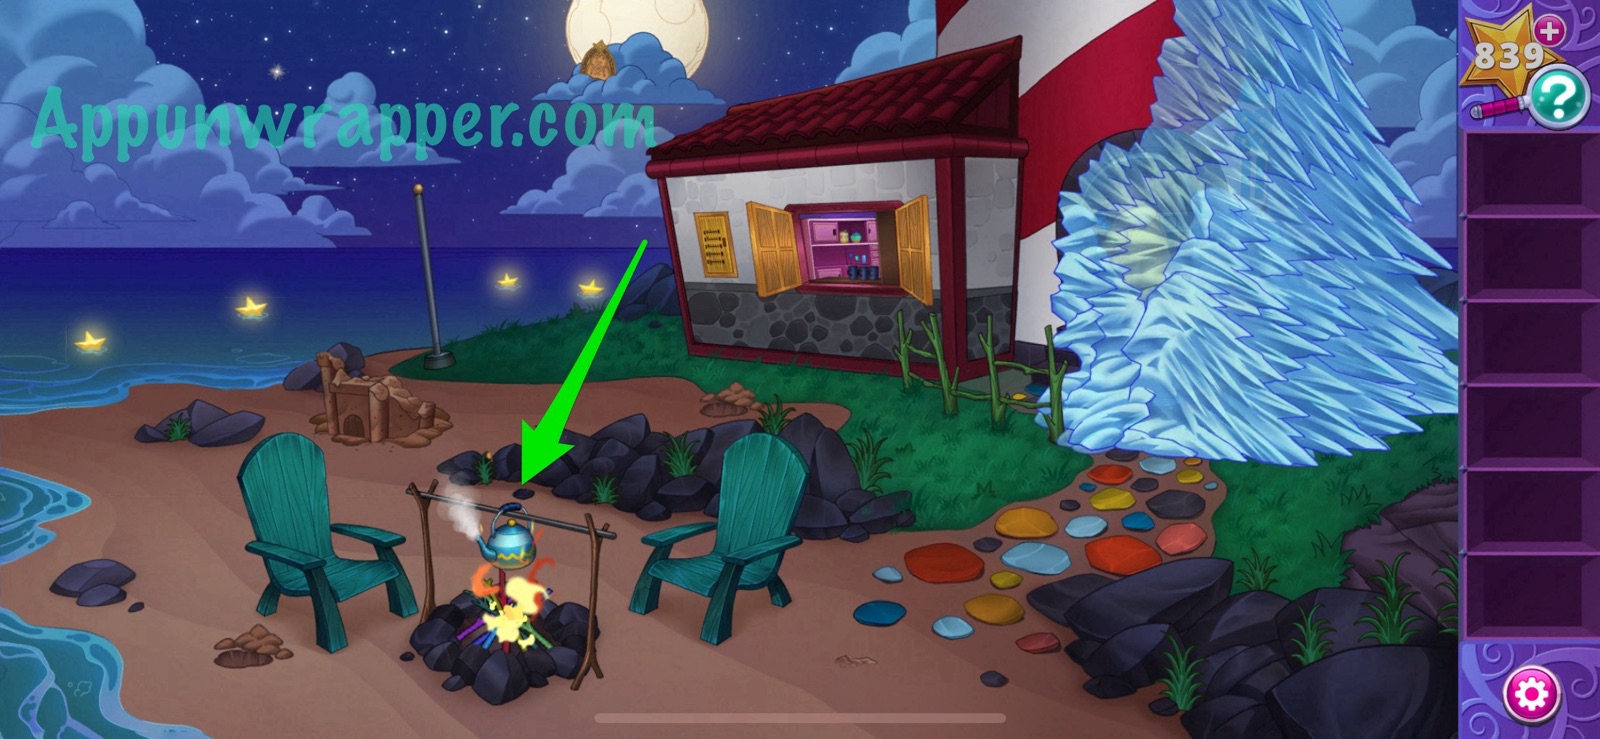
6. Pour the hot water on the ice.
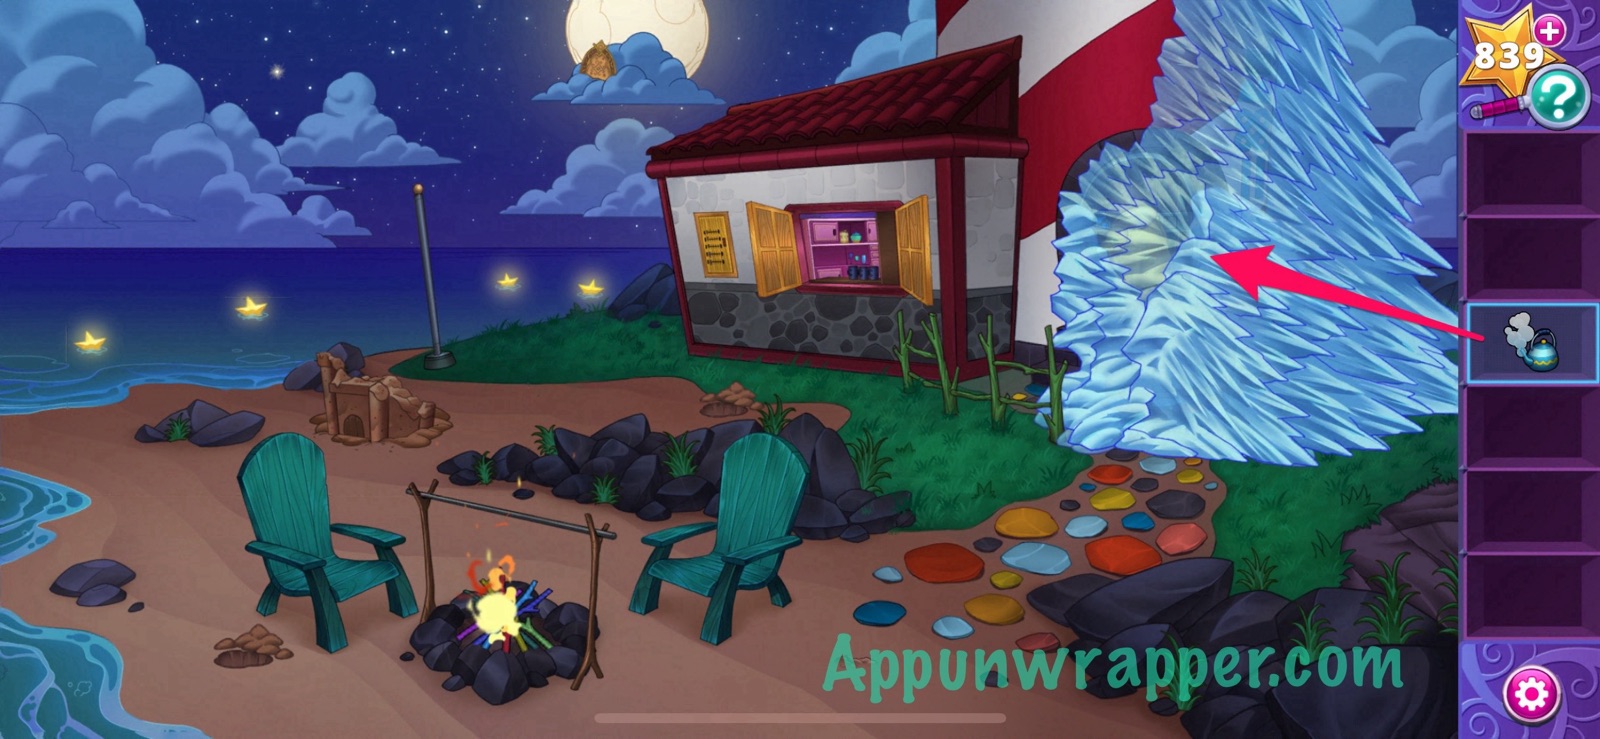
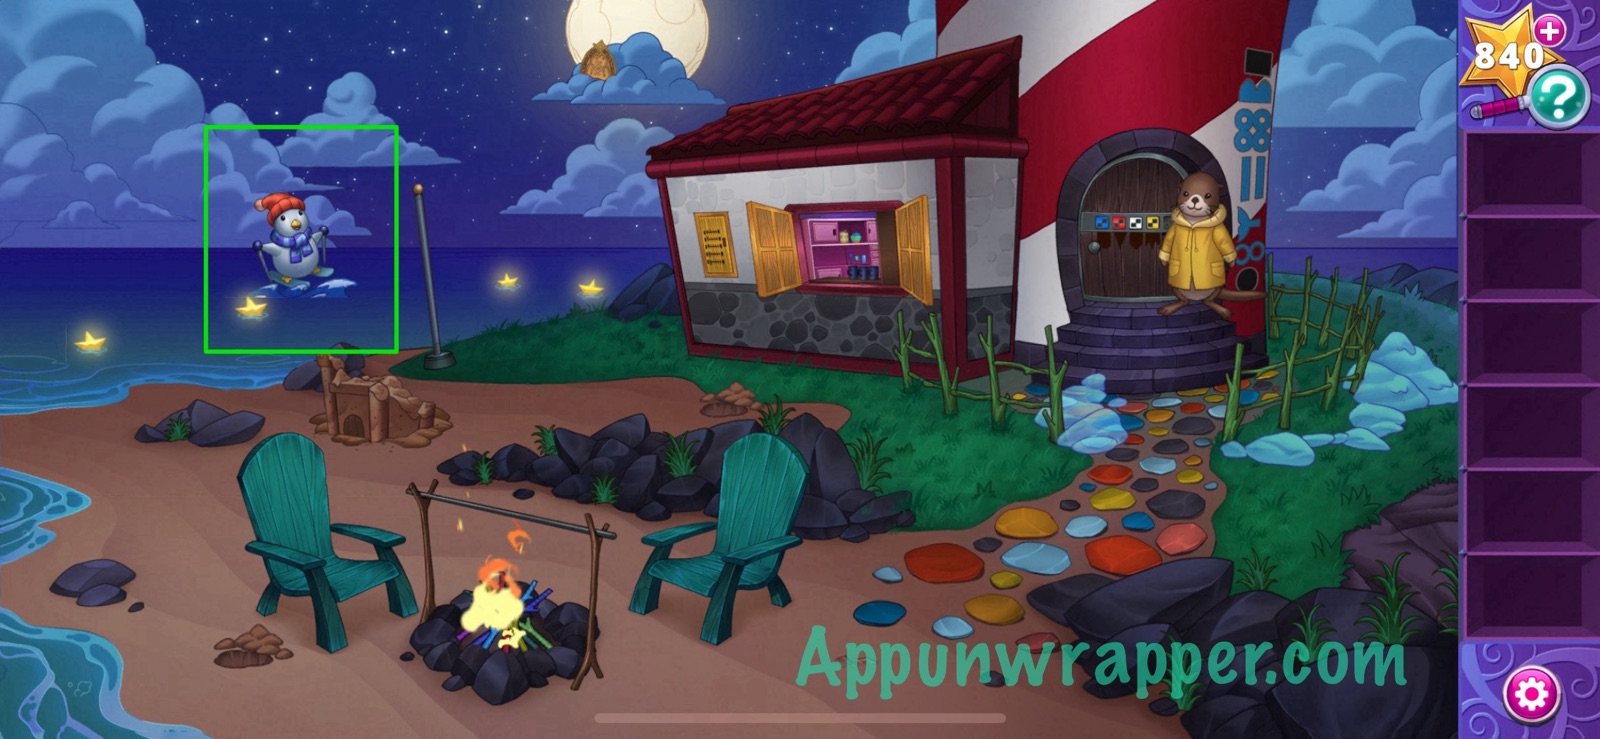
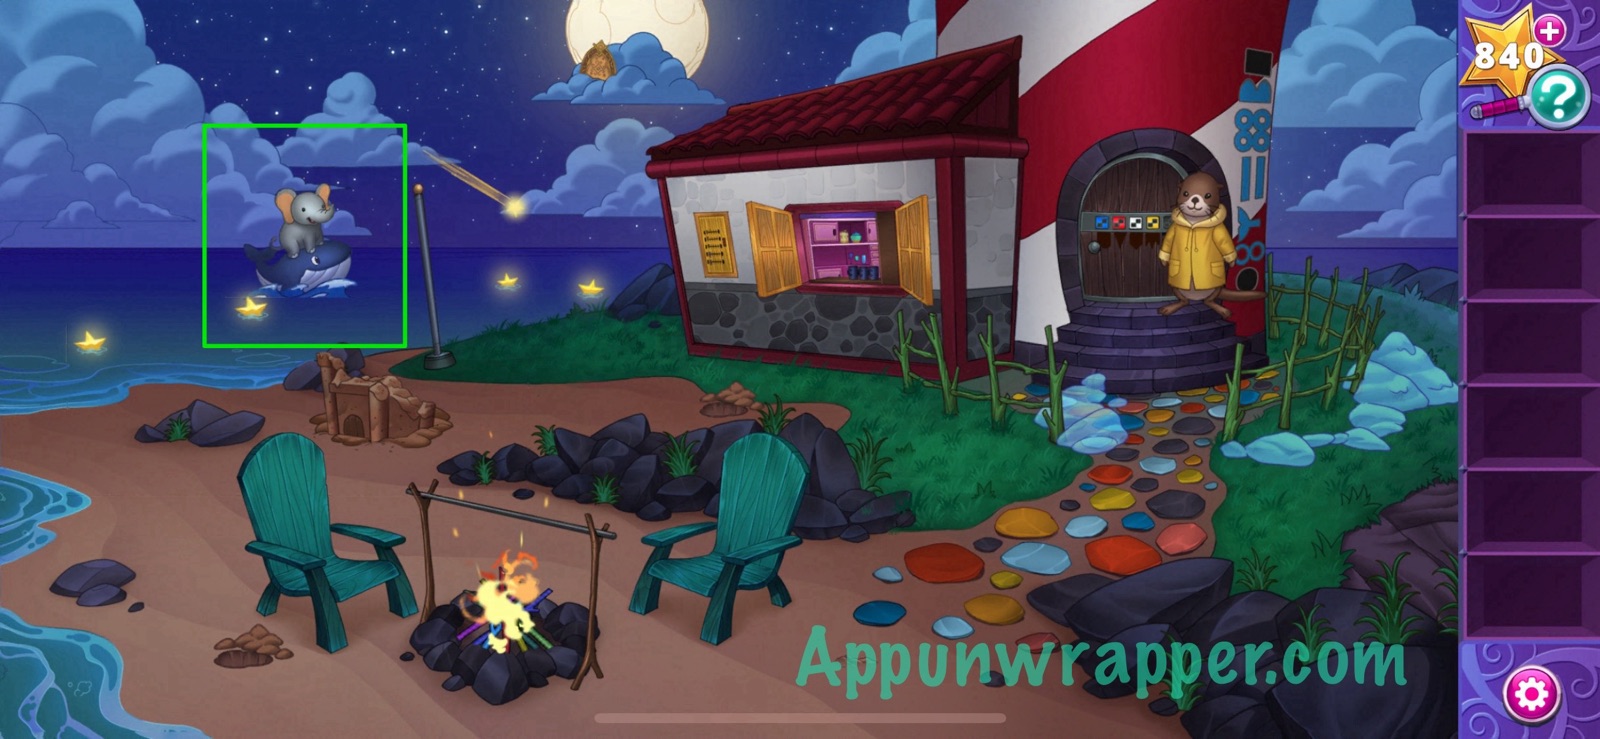
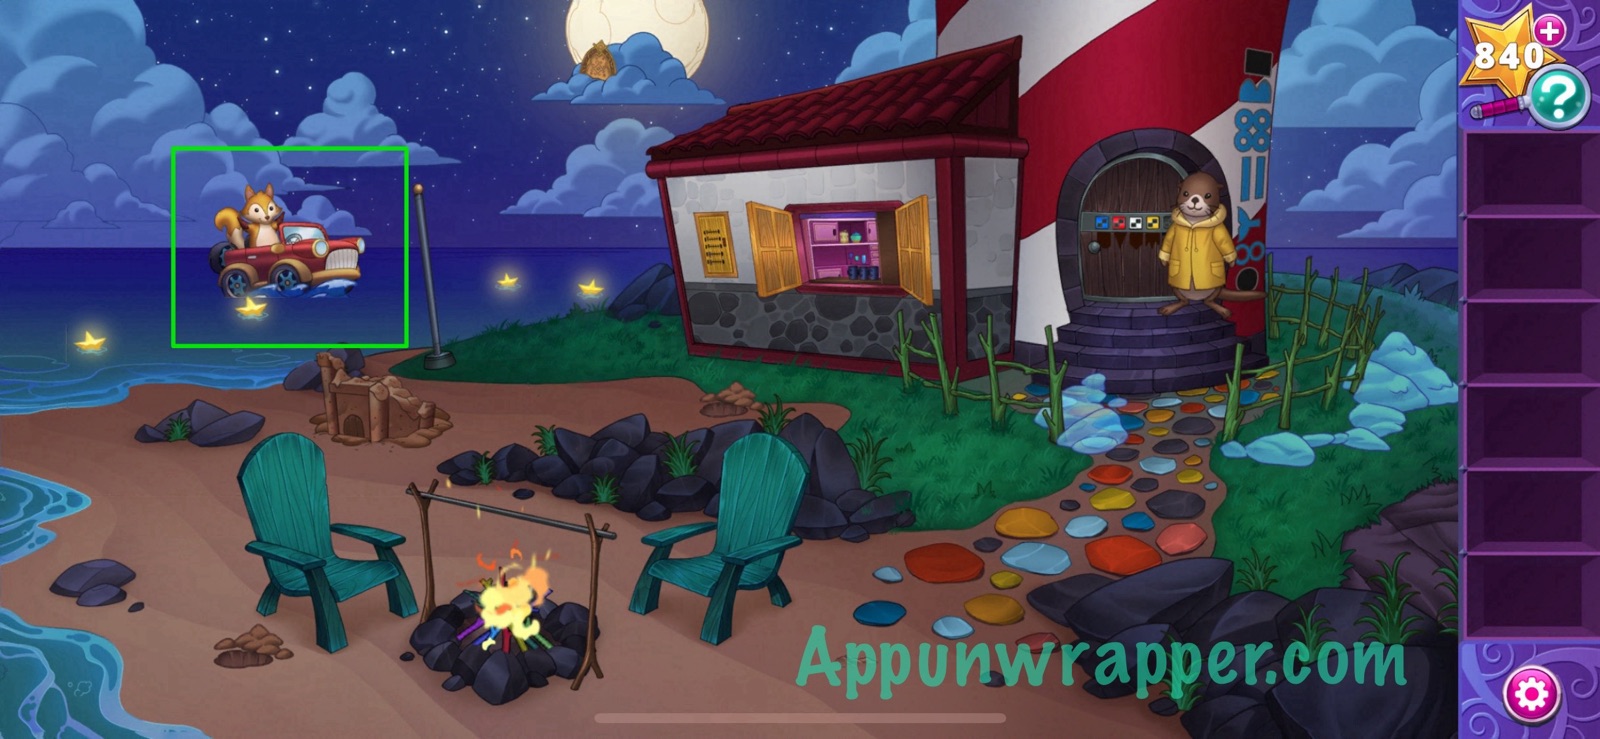
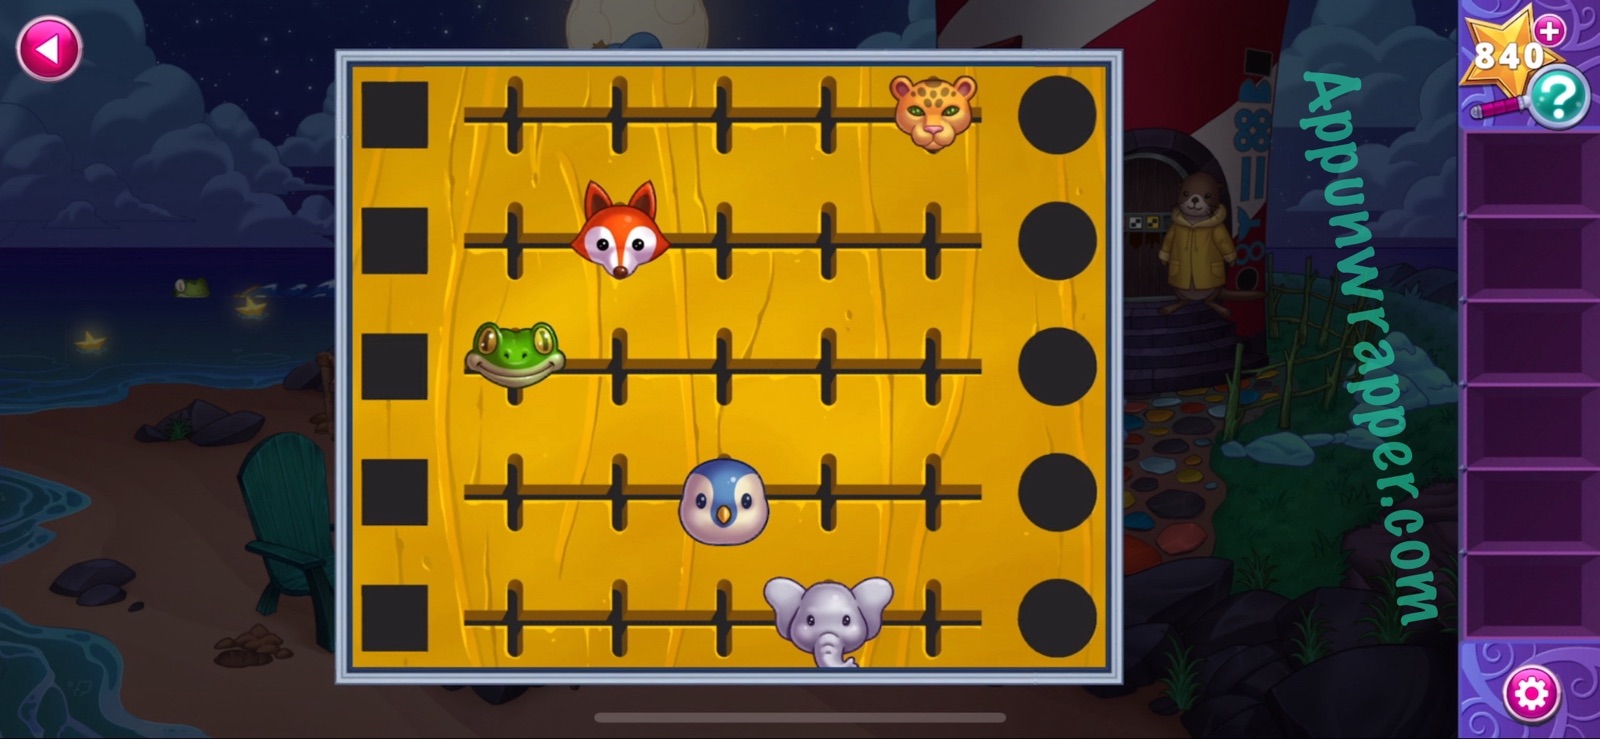
7. There’s an otter inside! The lighthouse door is locked and the otter forgot the code. Notice a few things here. There’s animals jumping out of the water, an animal puzzle next to the window, and some symbols to the right of the lighthouse door. They’re all related, so let’s work on it. Pay attention to all the animals jumping out of the water. There’s a cheetah on a bike, a penguin on skis, an elephant on a whale, a frog on a camel, and a fox in a car. The symbols on the lighthouse represent the mode of transportation. The top one is a camel, then car, skis, whale, and bike. Notice there’s a black square at the top and a black circle at the bottom. The puzzle by the window also has squares along one side and circles along the other. The symbols by the door are basically telling you how close to the square or circle an animal should be. So the order goes:
Square
Camel = Frog
Car = Fox
Skis = Penguin
Whale = Elephant
Bike = Cheetah
Circle
So now just arrange them like that for the puzzle. You can copy my solution below if you still need help.


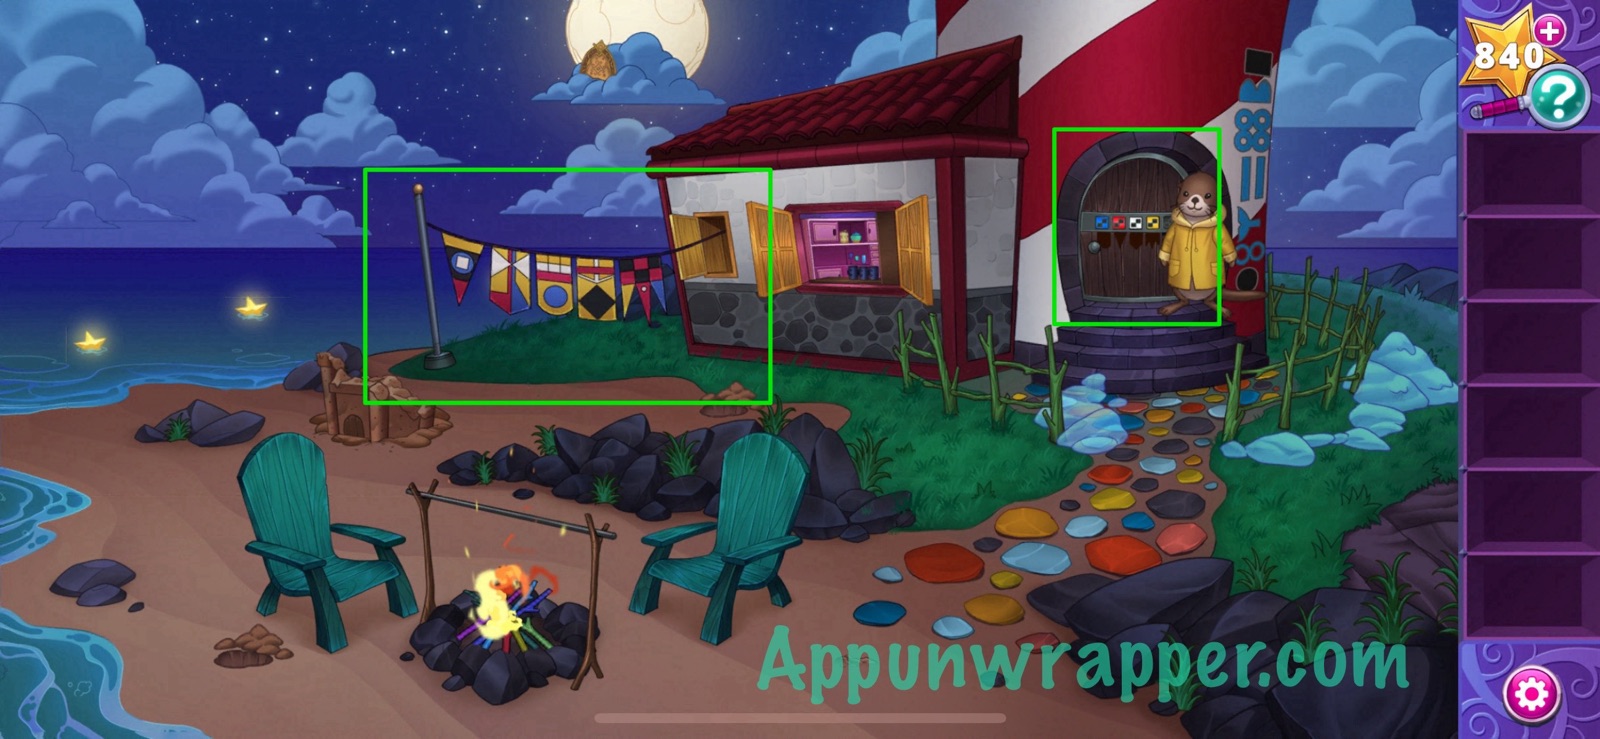
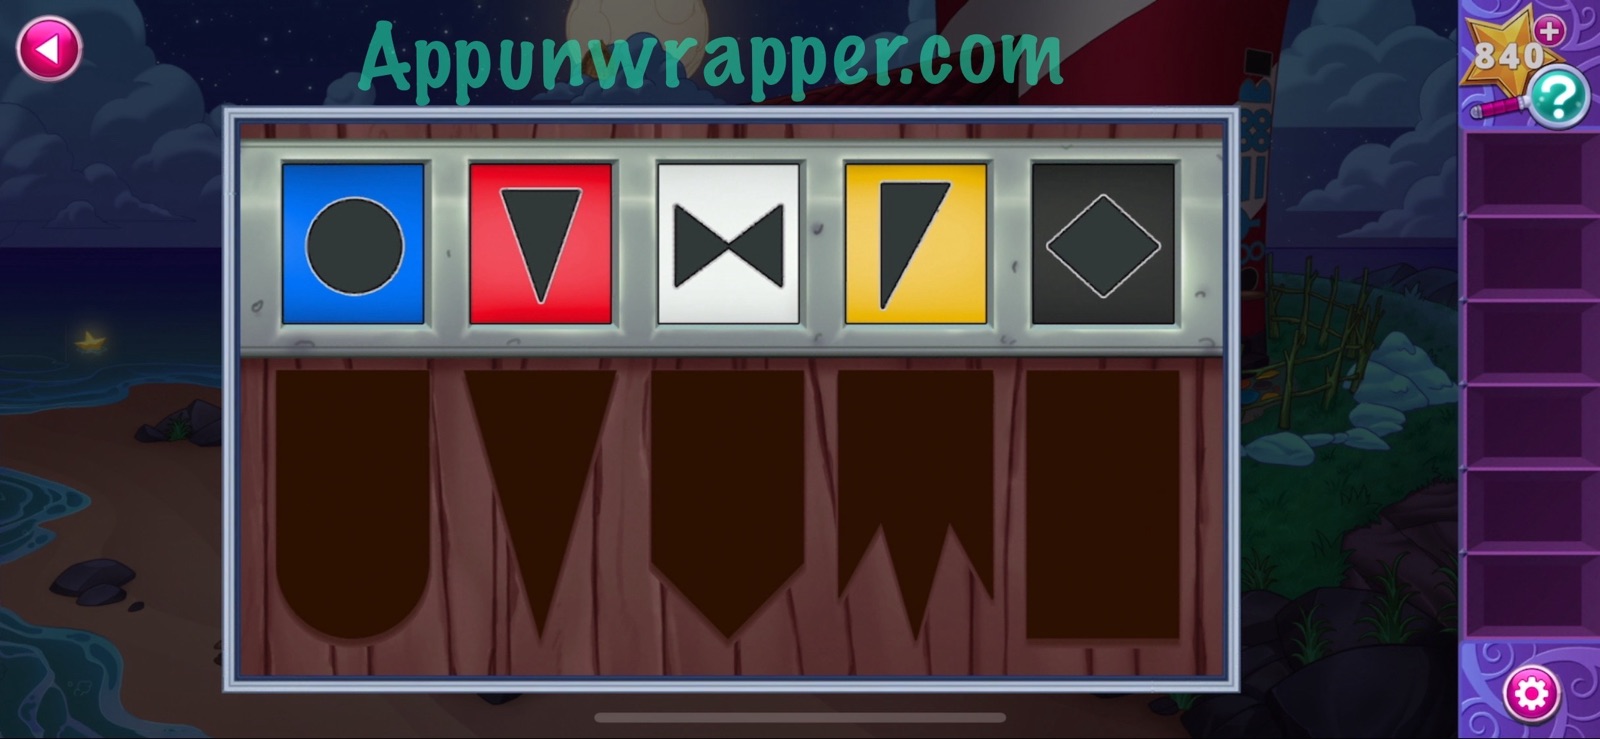
8. Now we can see some flags, which should help us solve the door puzzle. For each of the flags, look at which color the door is asking for. Then find the shape on that flag that’s that color and that’s the answer. You can also copy my solution below. Then head inside the lighthouse
9. Now we’re underwater? Talk to the octopus named Olive. She says her friend is missing! Tap on the cracked wall to find her friend the starfish. They’ll give you a pearl as thanks. Also, touch the sea urchin to get one of his spines. And grab the flag off the swimming fish. Then head up the stairs.
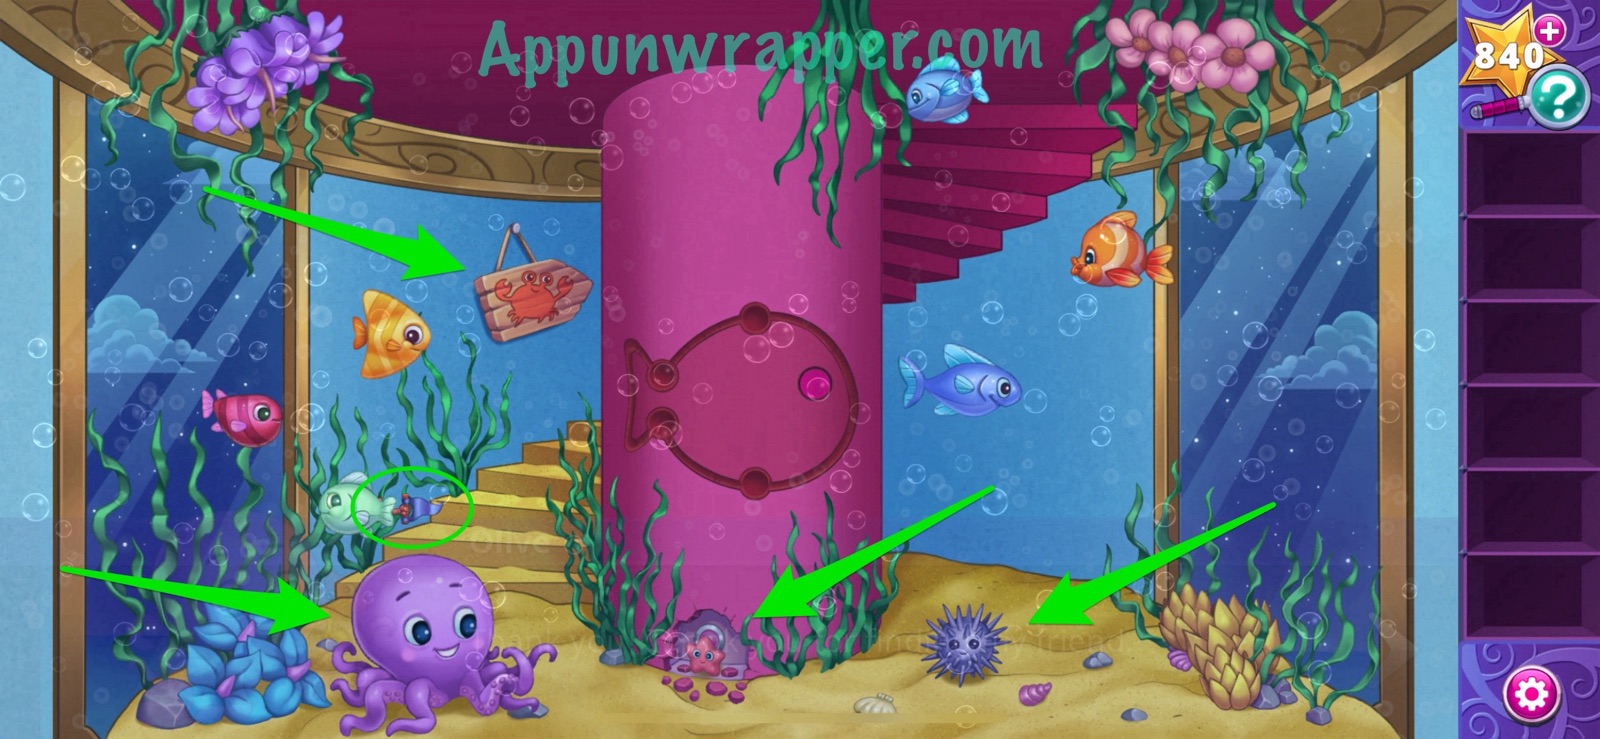
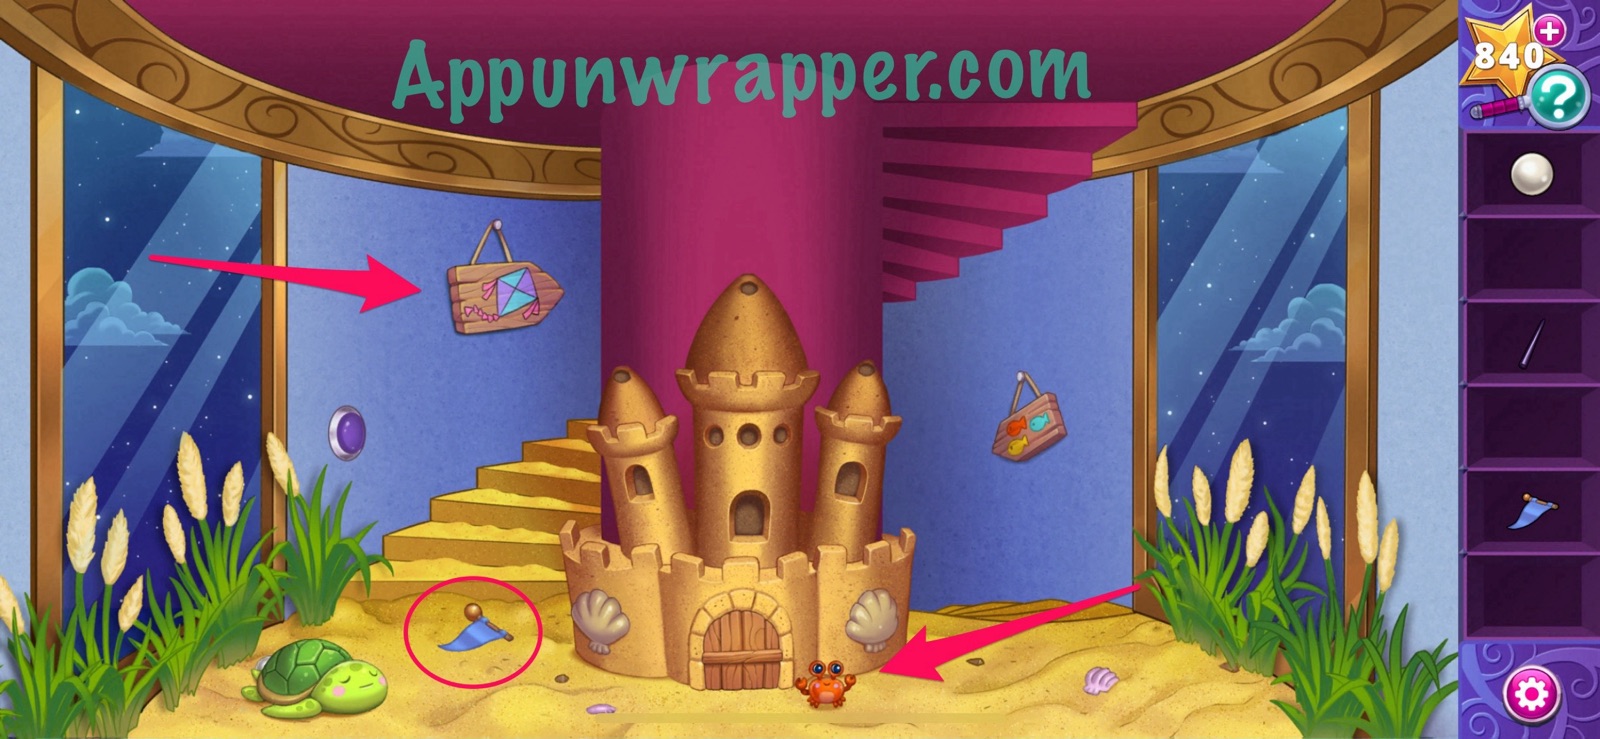
10. Pick up another flag here. Also, talk to the crab and learn that you can open the sand castle door by placing three flags on top of it. Then head up the stairs.
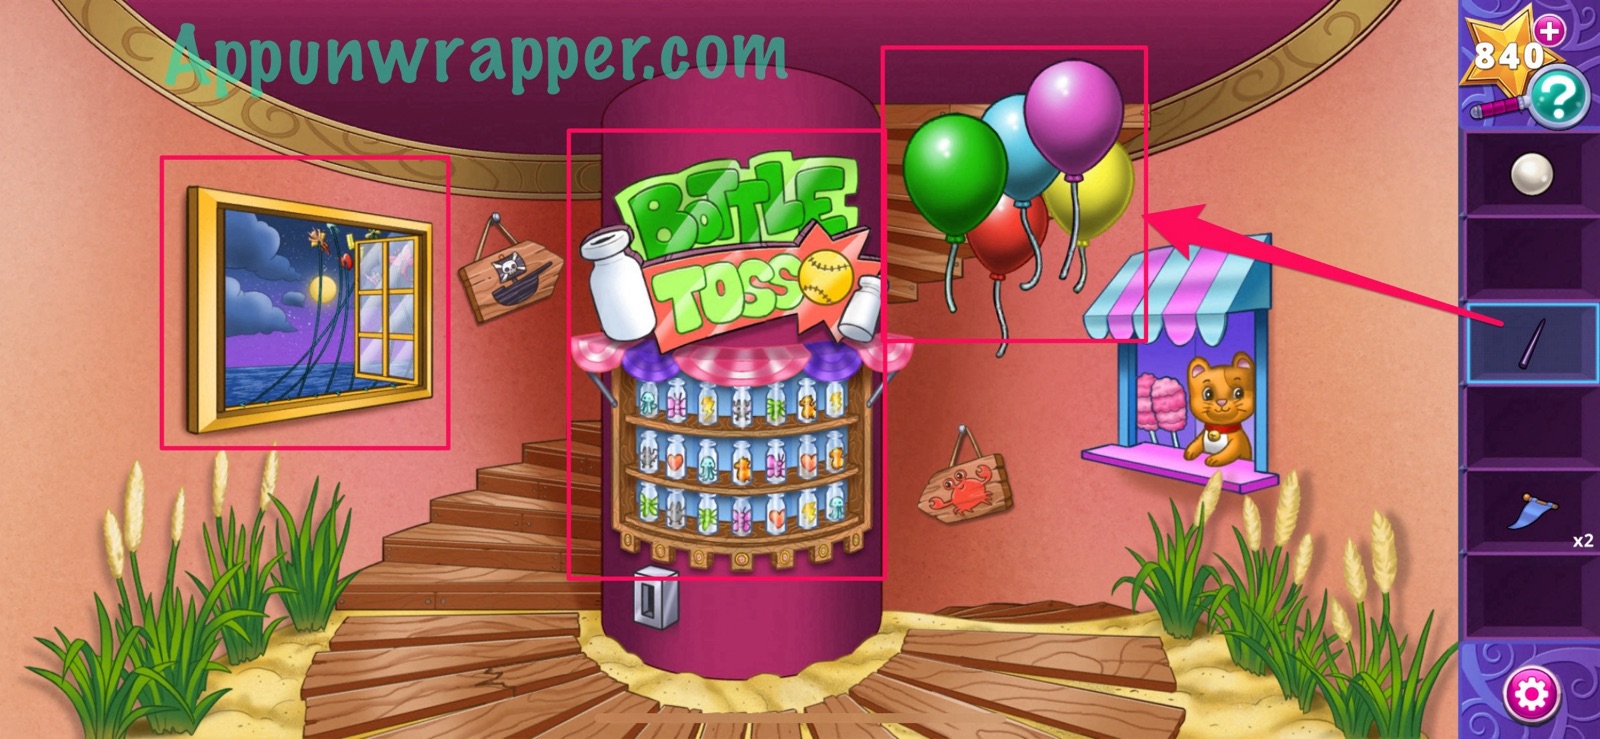
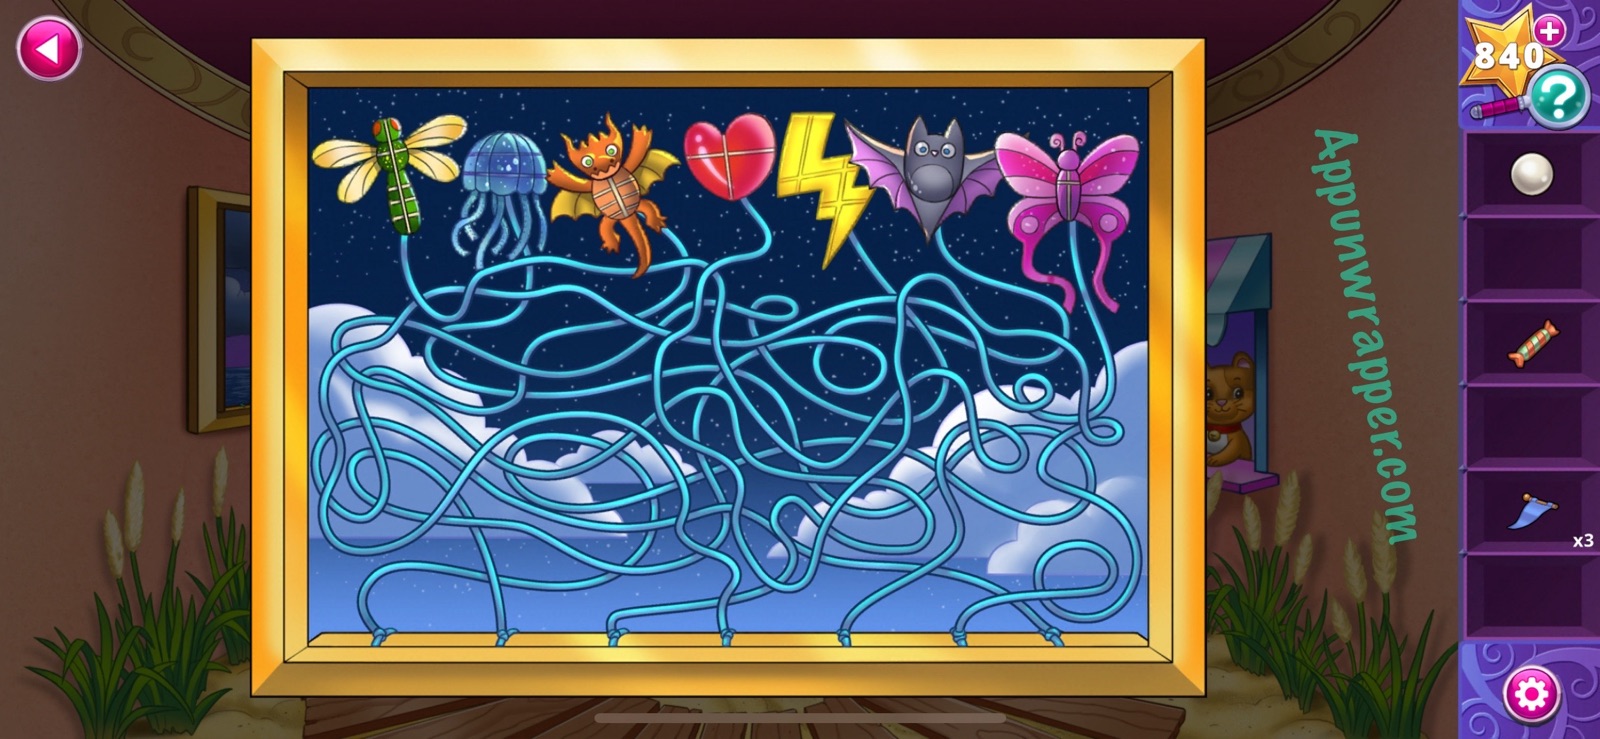
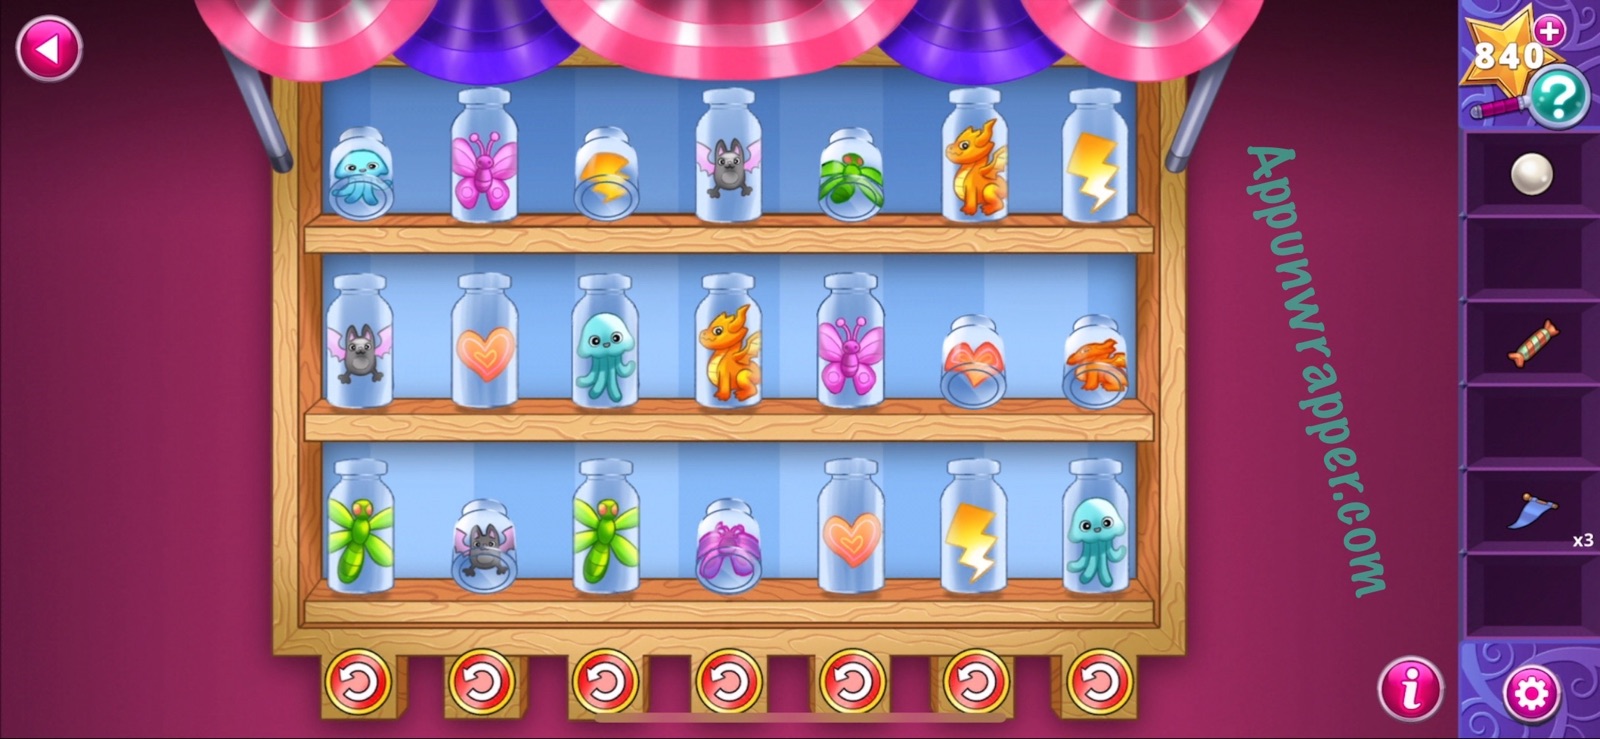
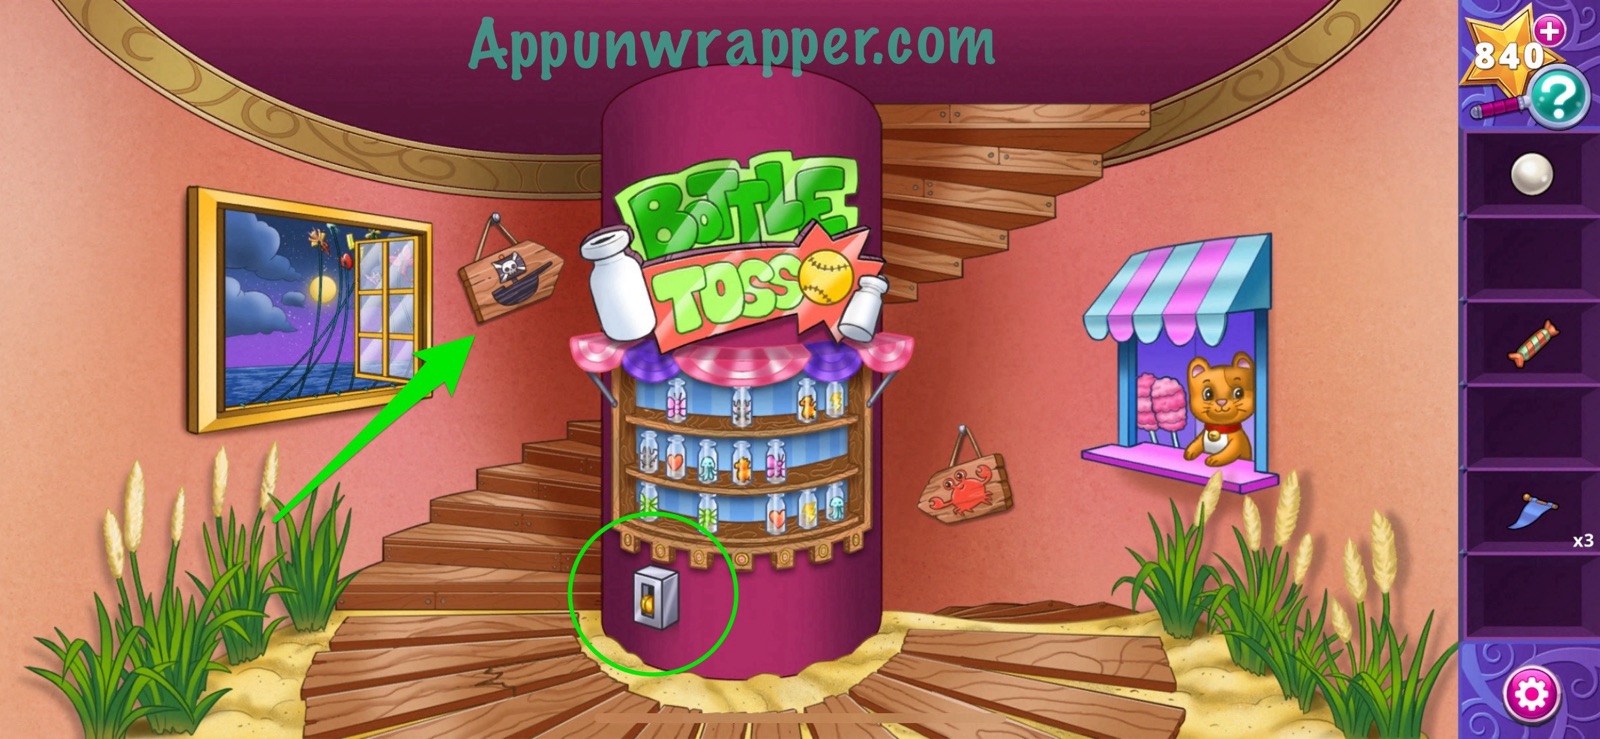
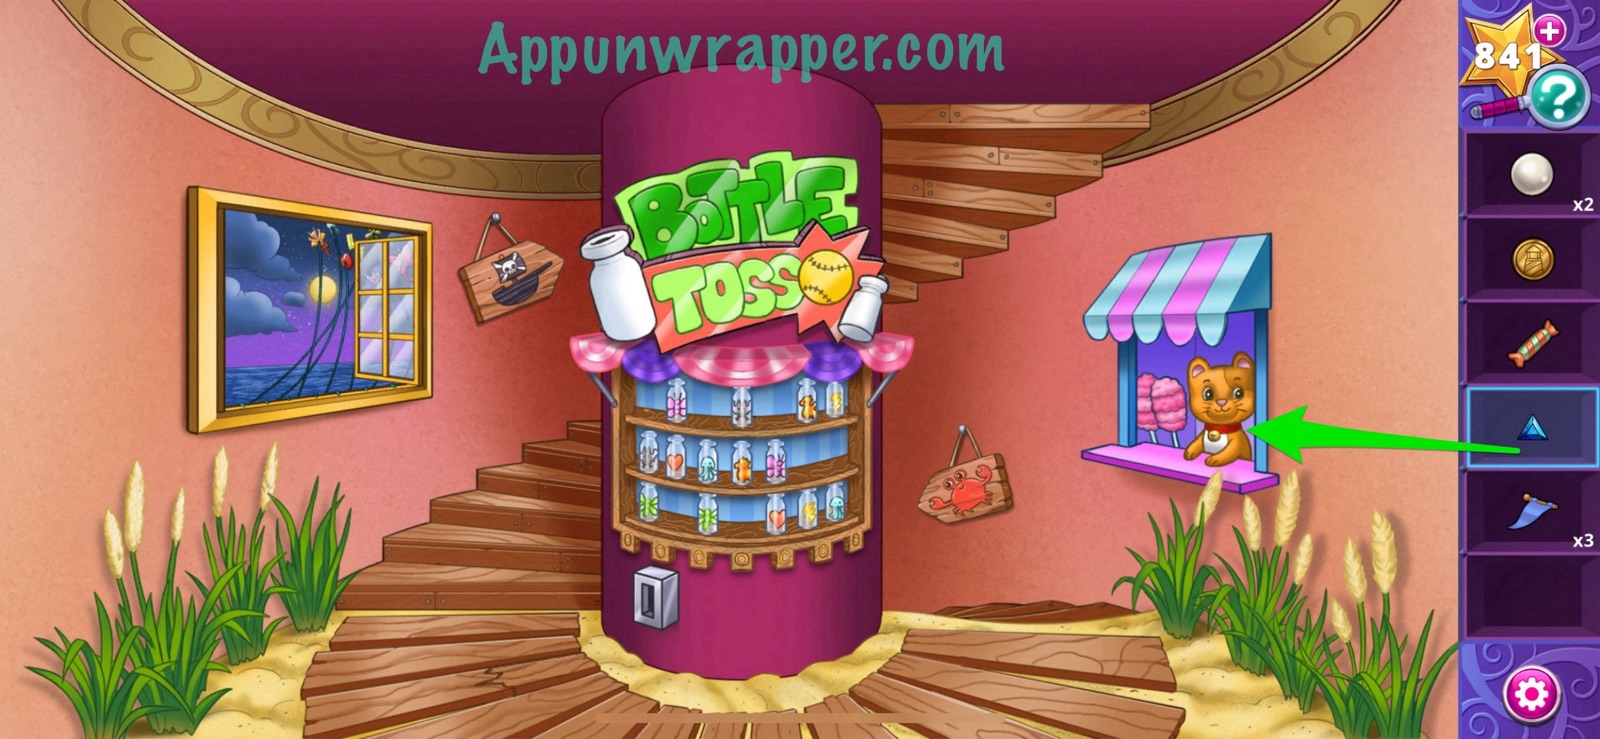
11. Use the urchin’s spine to pop all the balloons and get another flag and a party cracker. Also, talk to the cat named Catherine. She wants something blue and sparkly in exchange for cotton candy. Open the window and look at all the kites outside. Those are a clue for the Bottle Toss game. You need to follow the strings for each kite so you know which bottle to knock down in each column. It goes: Jellyfish, Bat, Thunderbolt, Butterfly, Dragonfly, Heart, Dragon. So knock down those bottles in the bottle toss game.
12. Grab the doubloon and then head upstairs.
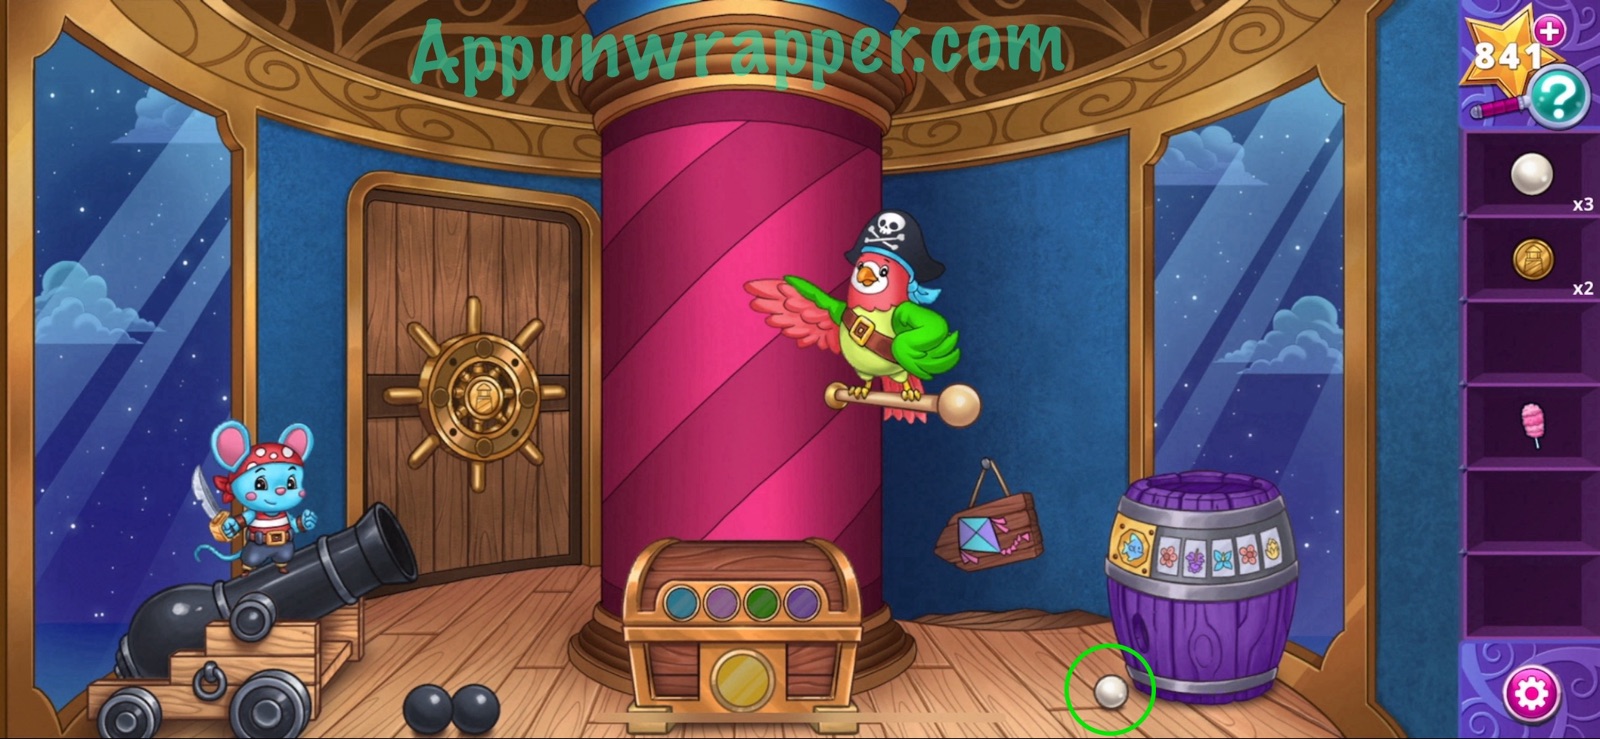
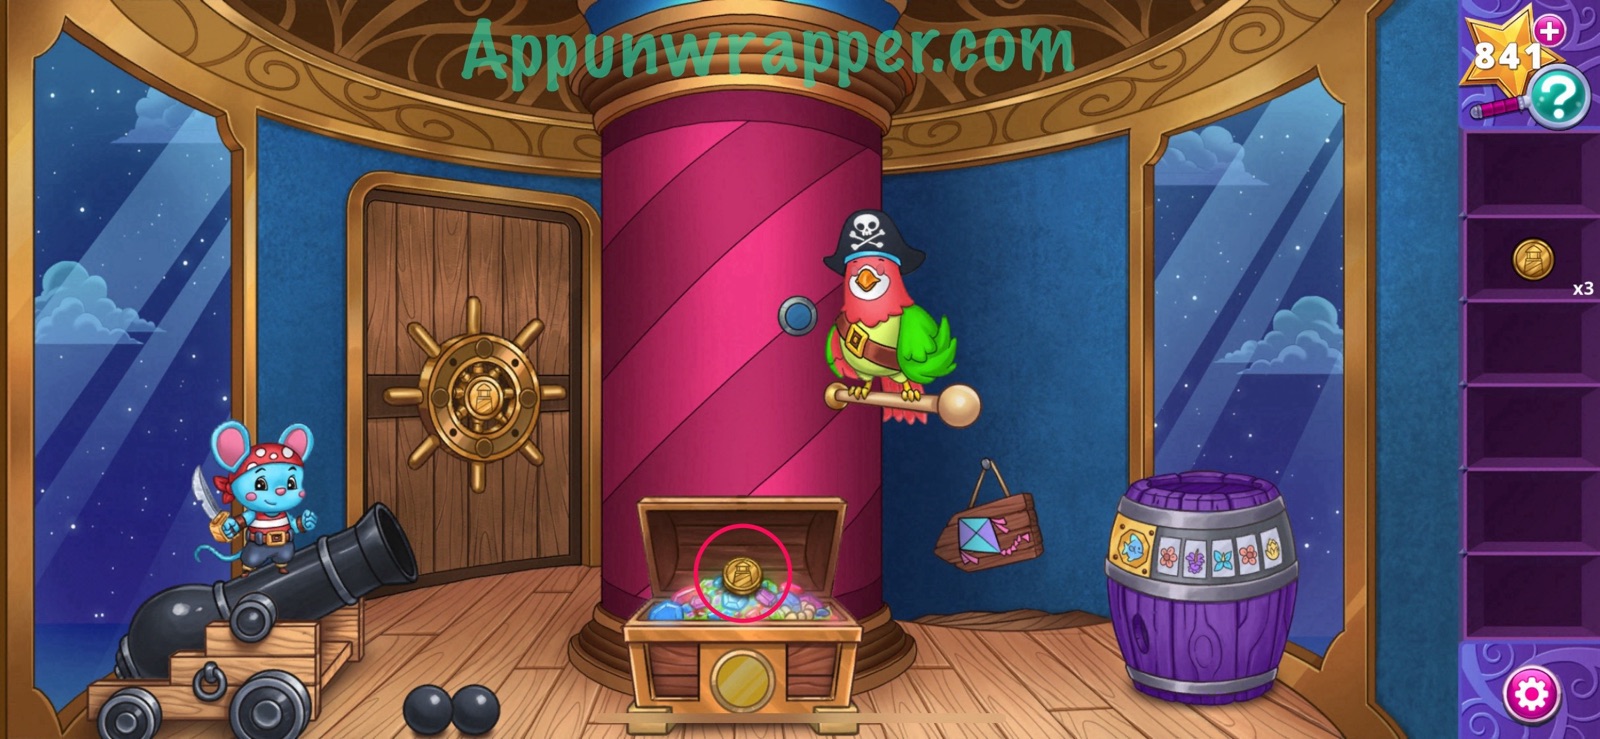
13. Talk to the parrot. He wants something sweet before he’ll help you. Pick up the blue gemstone. Also, tip the cannon three times to get another pearl. And last, look at the barrel to the right. Get a good look at the fish. We’ve seen it before!

14. Go back down one floor and give Catherine the blue gemstone in exchange for some cotton candy.
15. Go back down one floor and place the three flags on the sandcastle. Then head inside to help the baby crab get to his mama.
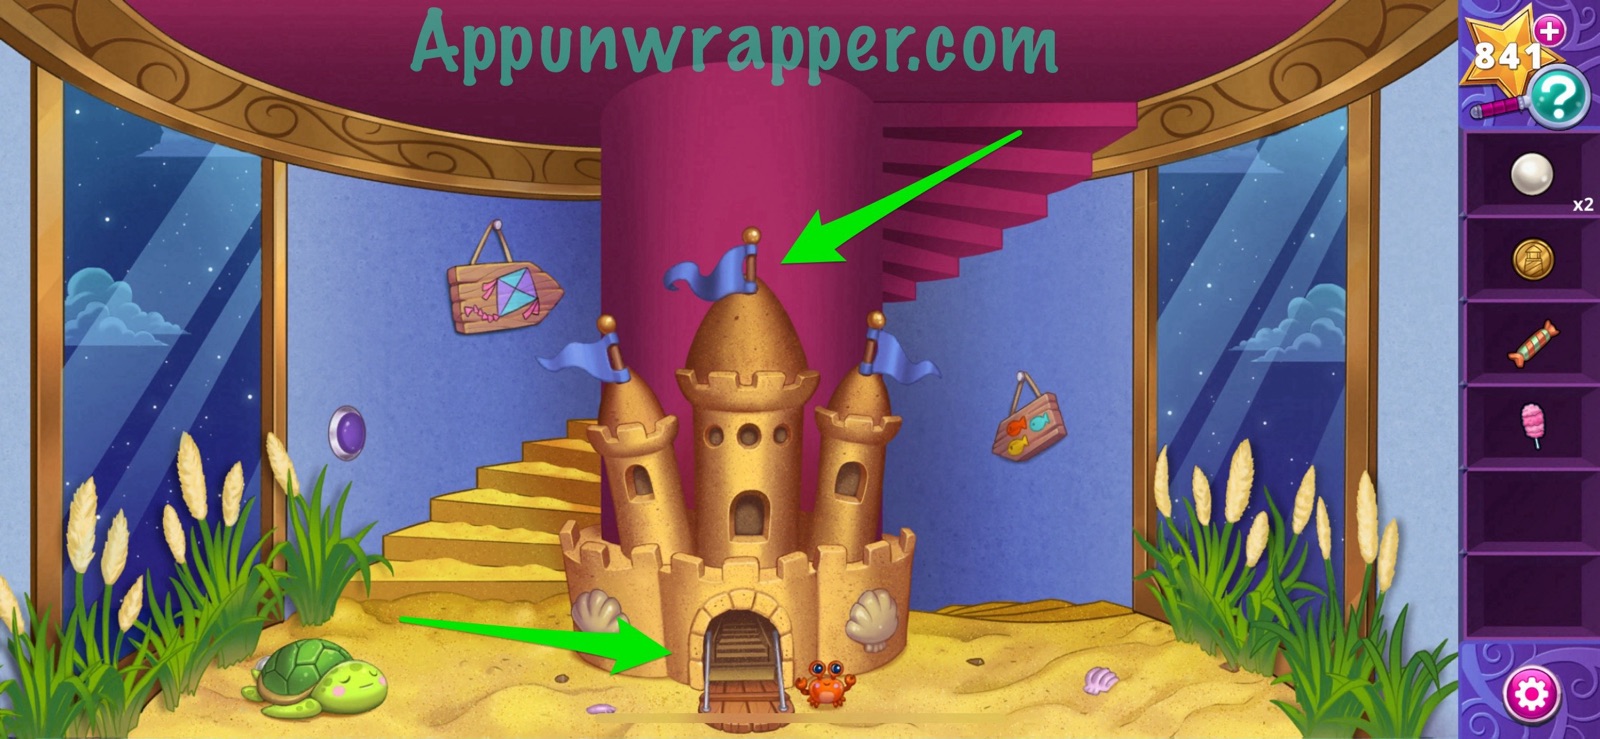
16. Let’s solve the Sandcastle puzzle. Guide the baby crab to his mama by crawling through all of the shells. Select a shell next to the crab to enter it. The crab will exit from the matching shell. Visit all shells in the right order so that the baby crab ends up next to its mama. Then mama crab will give you a doubloon.

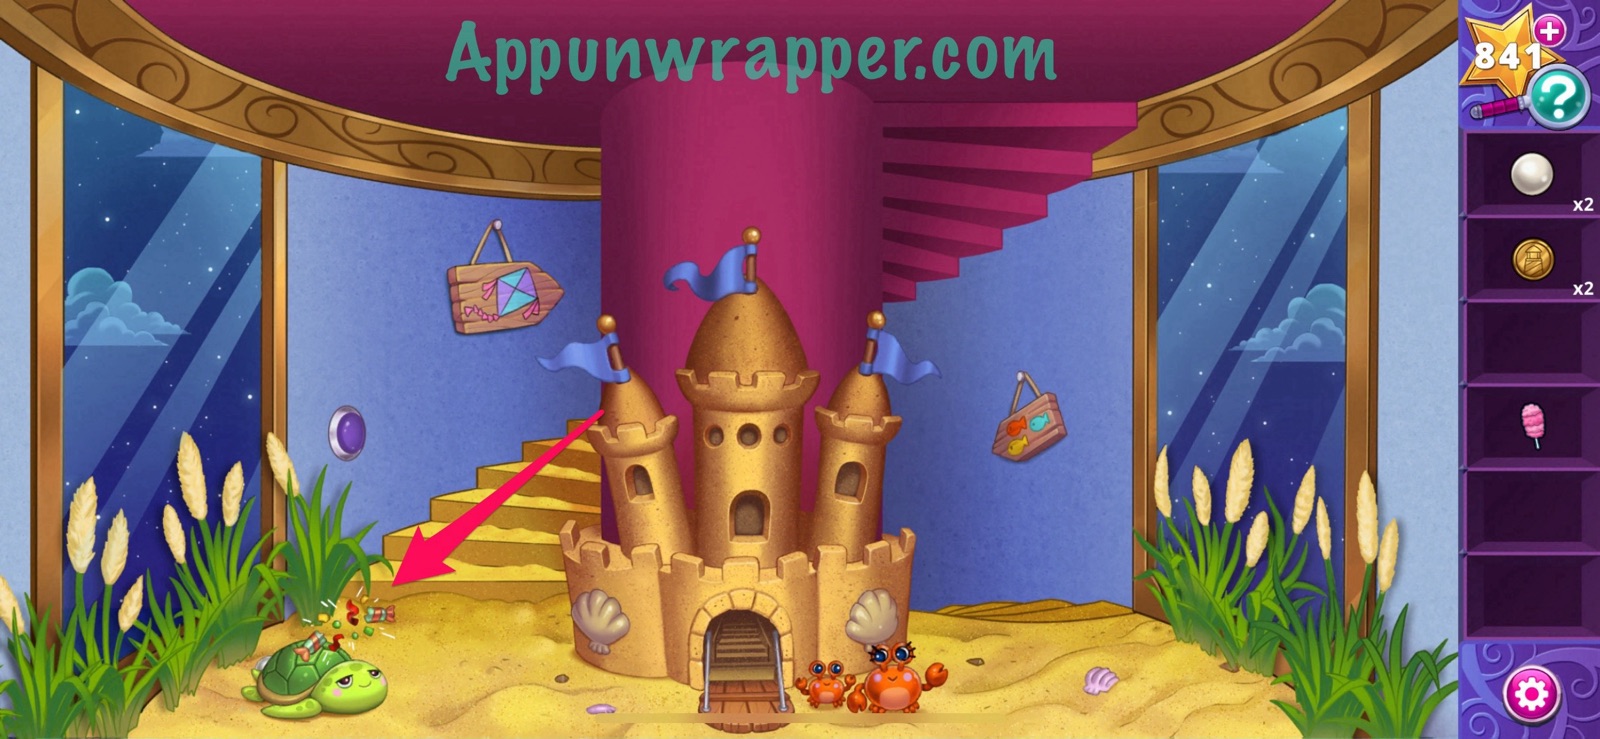
17. While here, use the party cracker to wake the turtle and get another pearl.

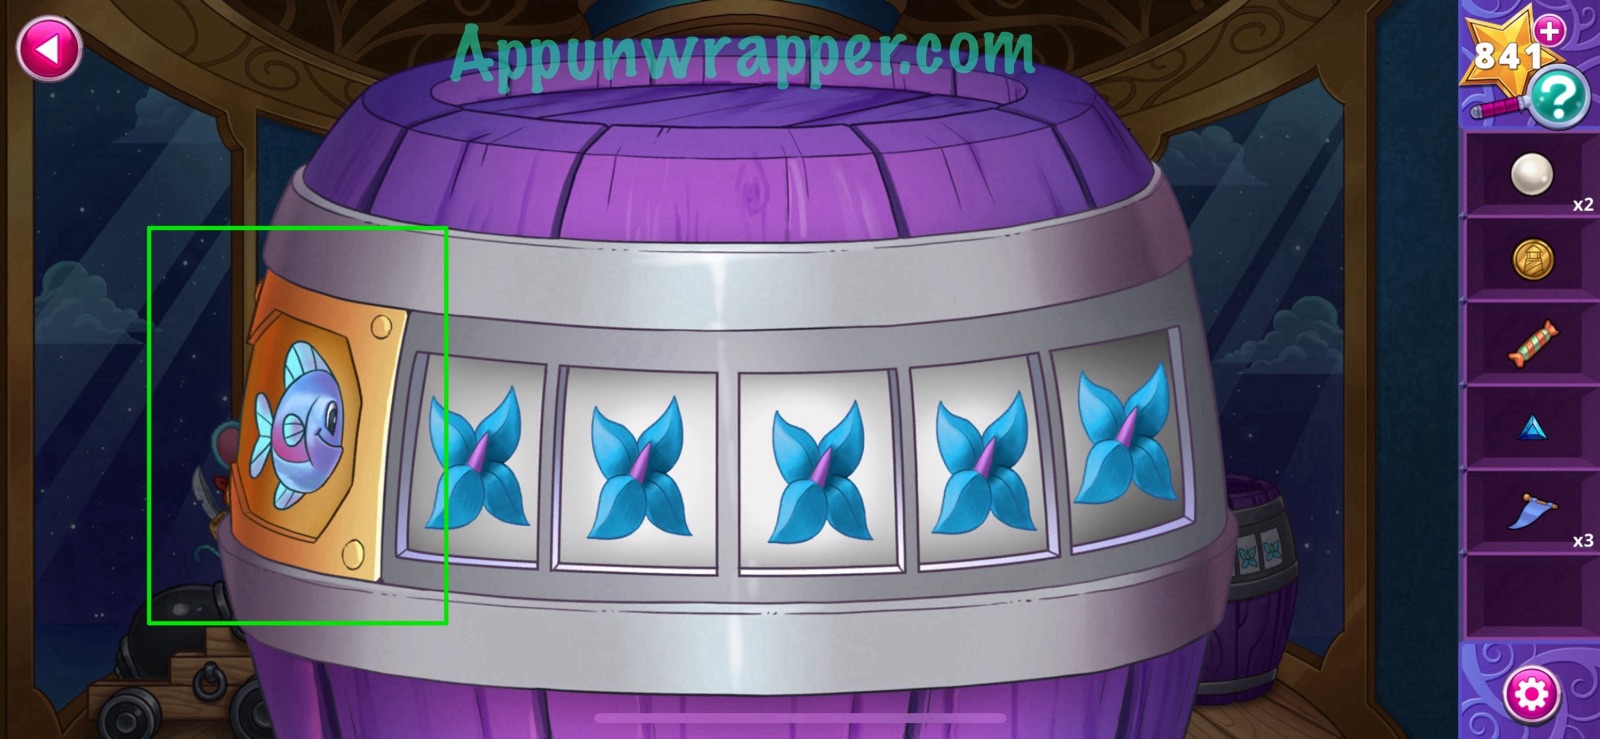
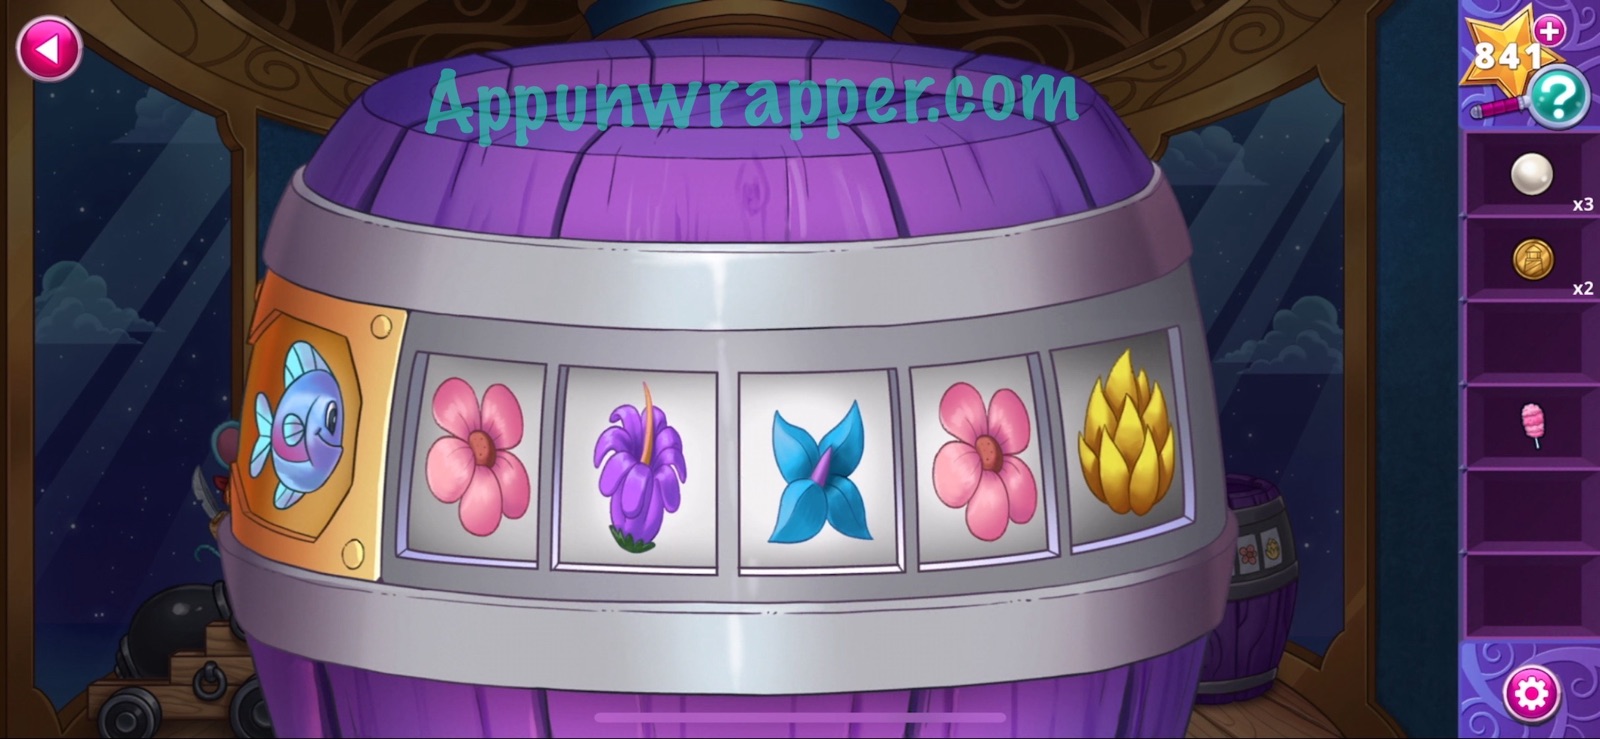
18. Head back down one floor. Find the fish we saw on the barrel on the top floor. Notice it swims to different flowers. Wait for it to settle in the middle of the room and then follow it around to see which flowers it swims to. I numbered them before for you.
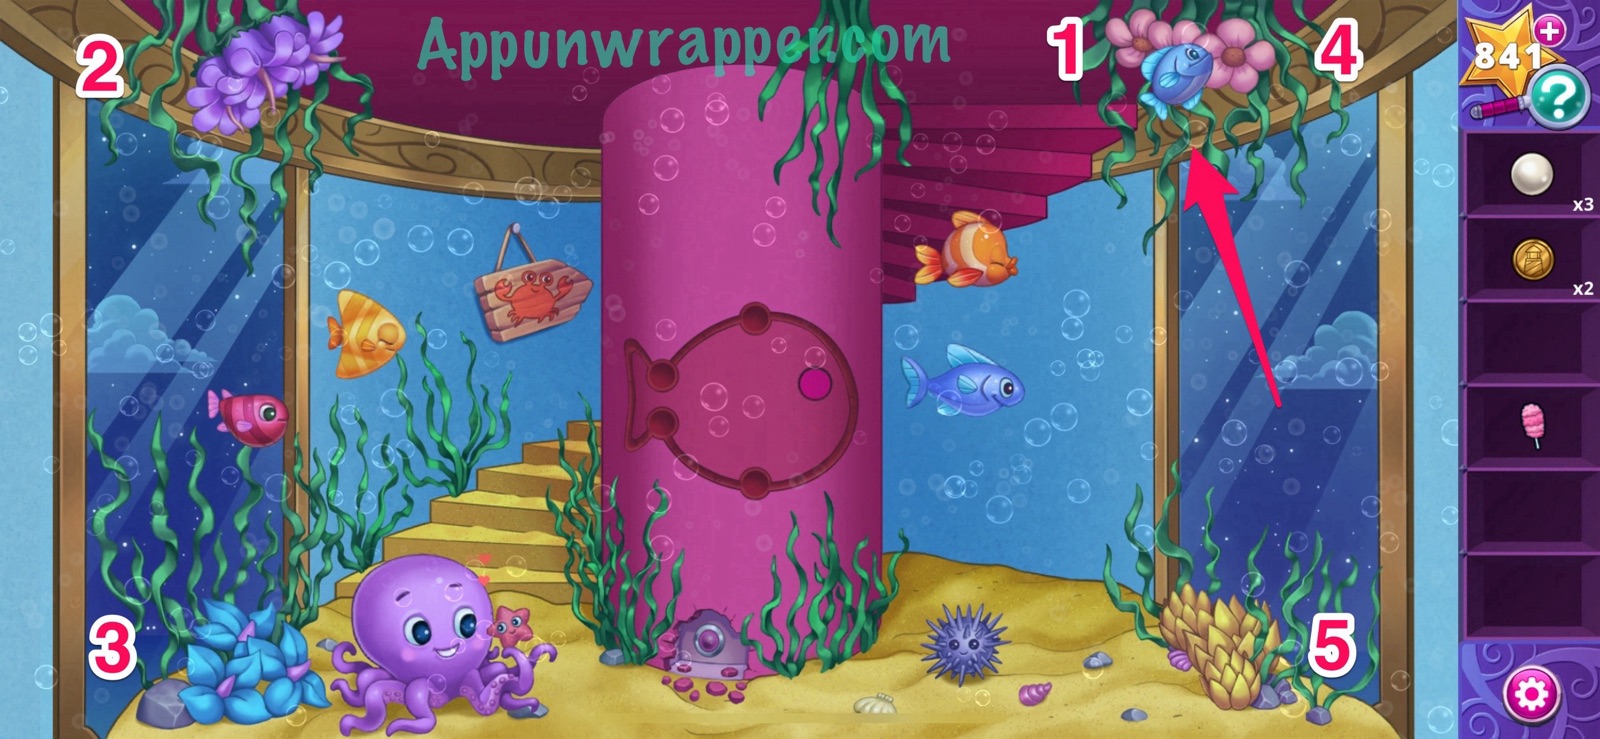
19. Go back to the top floor. Solve the barrel puzzle using the information you got from the fish. Then you’ll get another pearl.
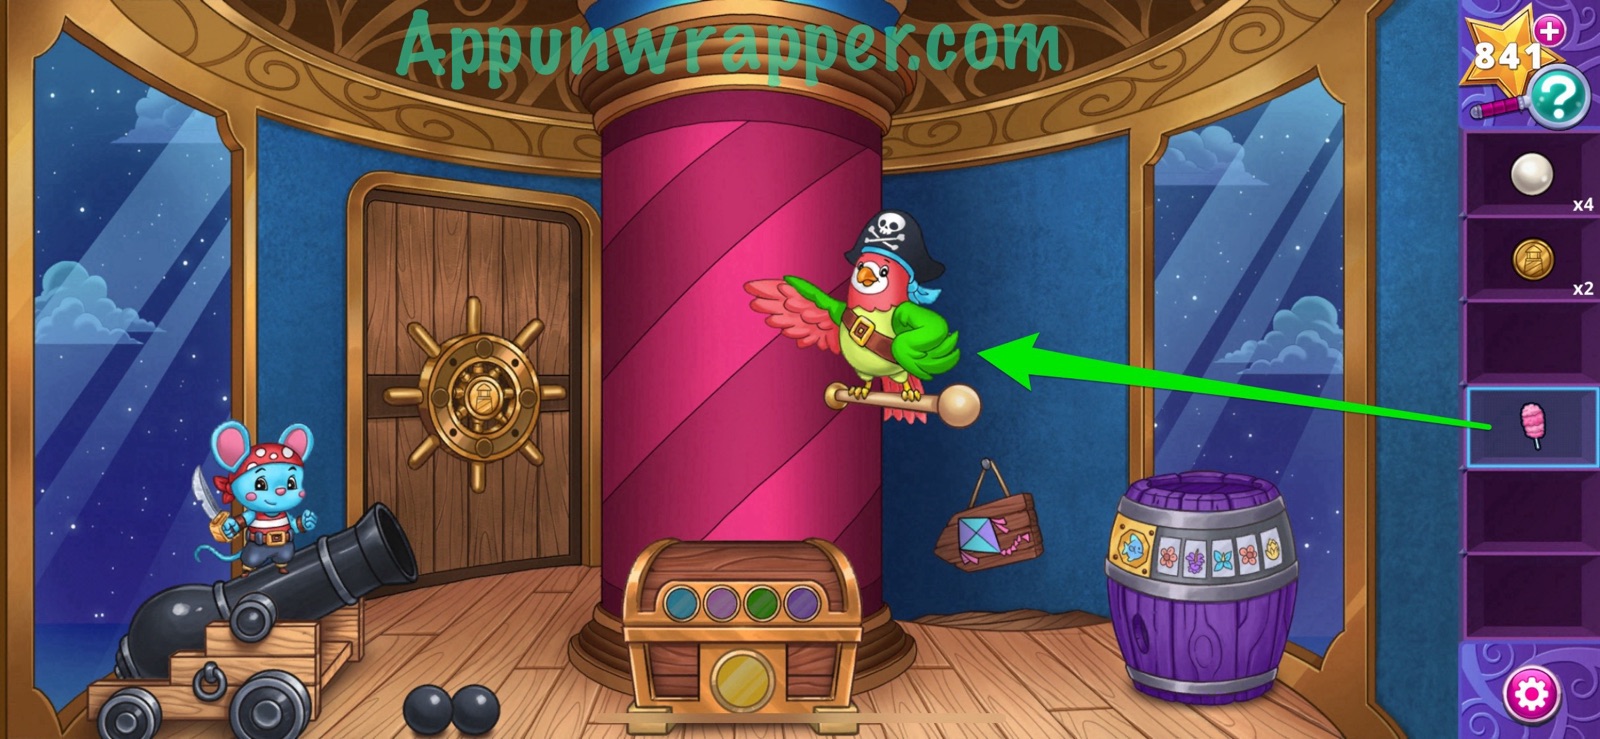
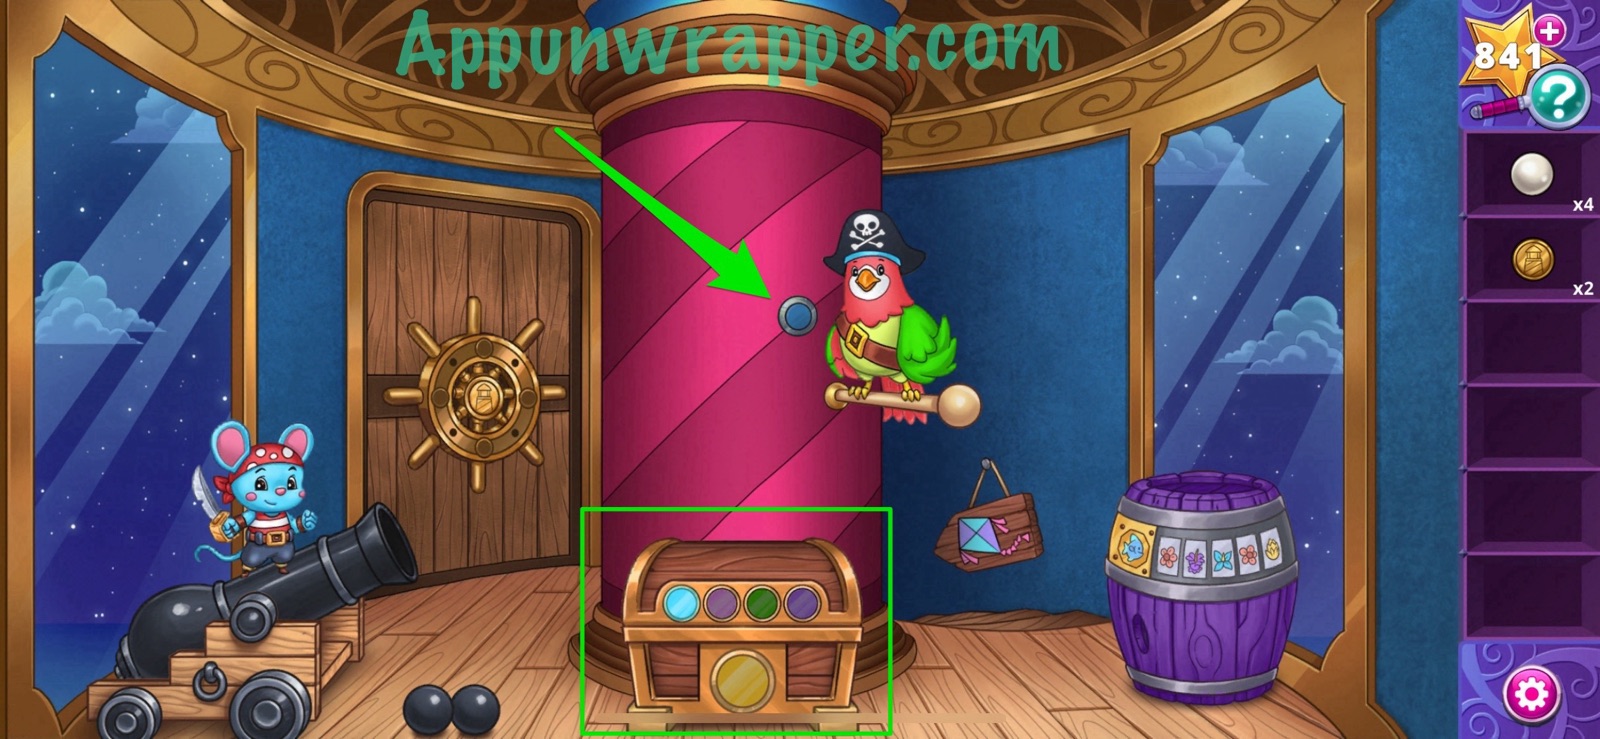
20. Give the cotton candy to the pirate parrot. He’ll move his wing, revealing a blue button. Press it to light up the blue light on the treasure chest. So we need to press all those buttons around the lighthouse.
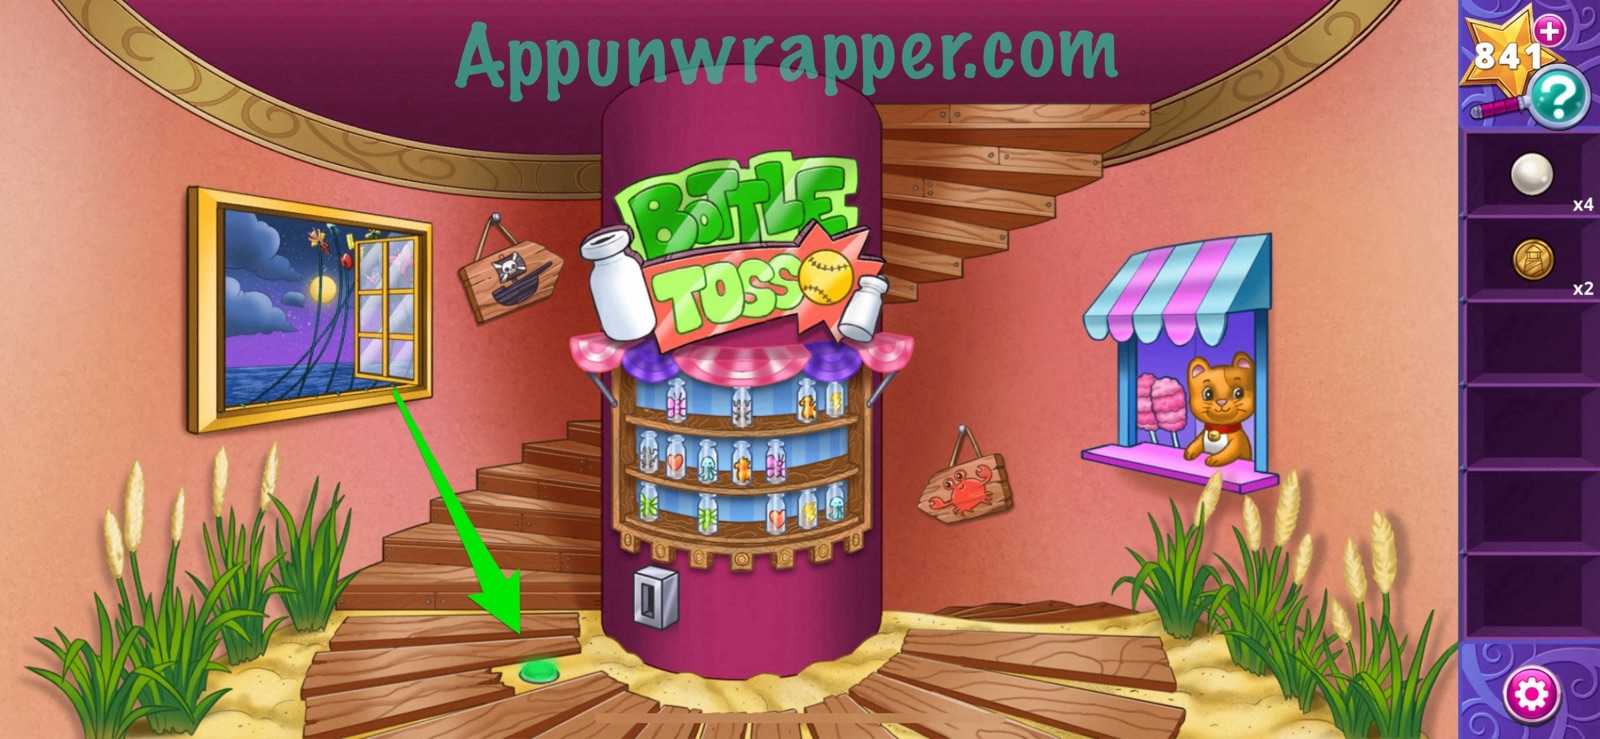
21. Go down one floor and notice the cracked floor plank. Remove it and press the flashing green button.
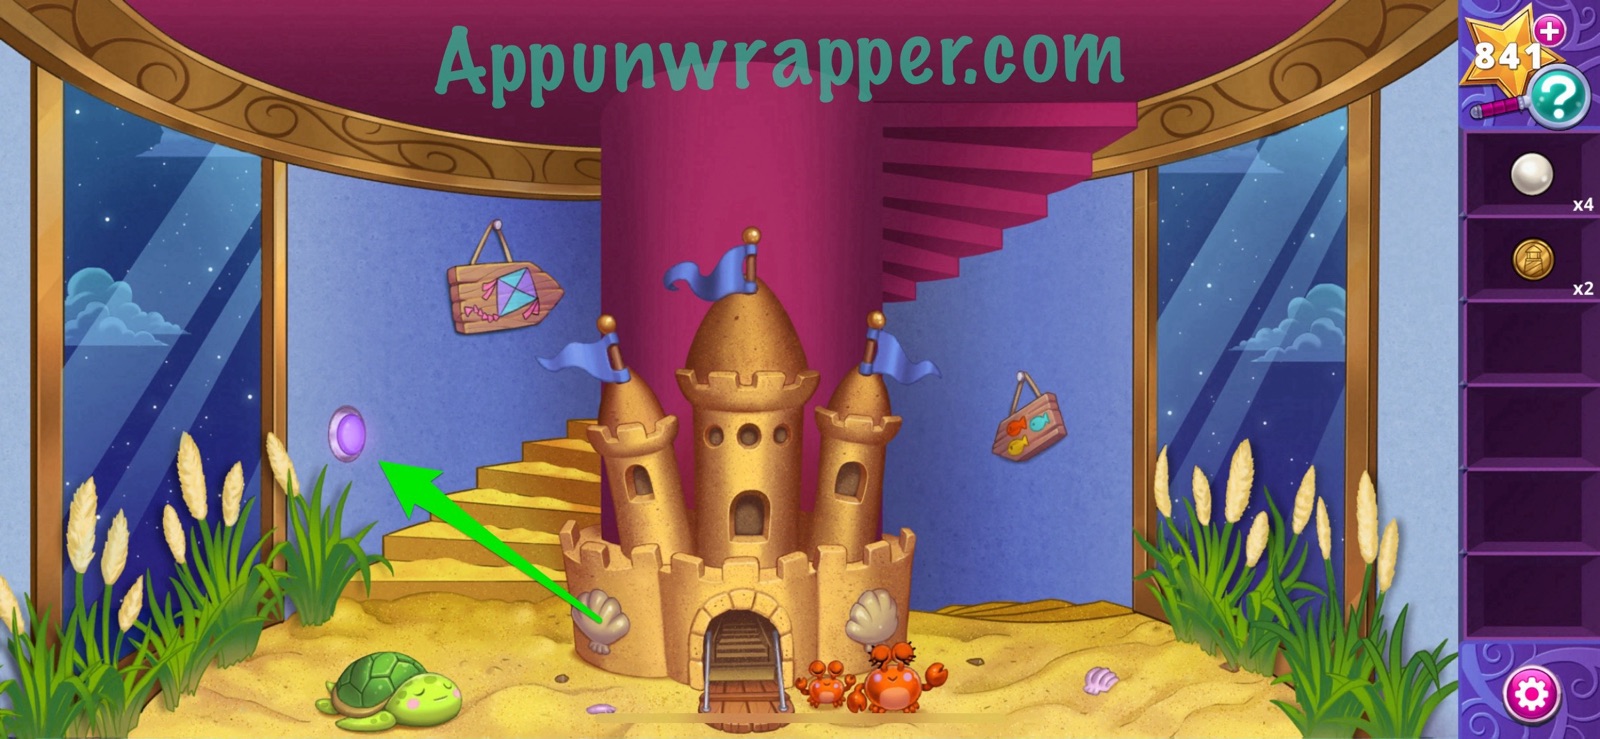
22. Go down another floor and press the flashing purple button.
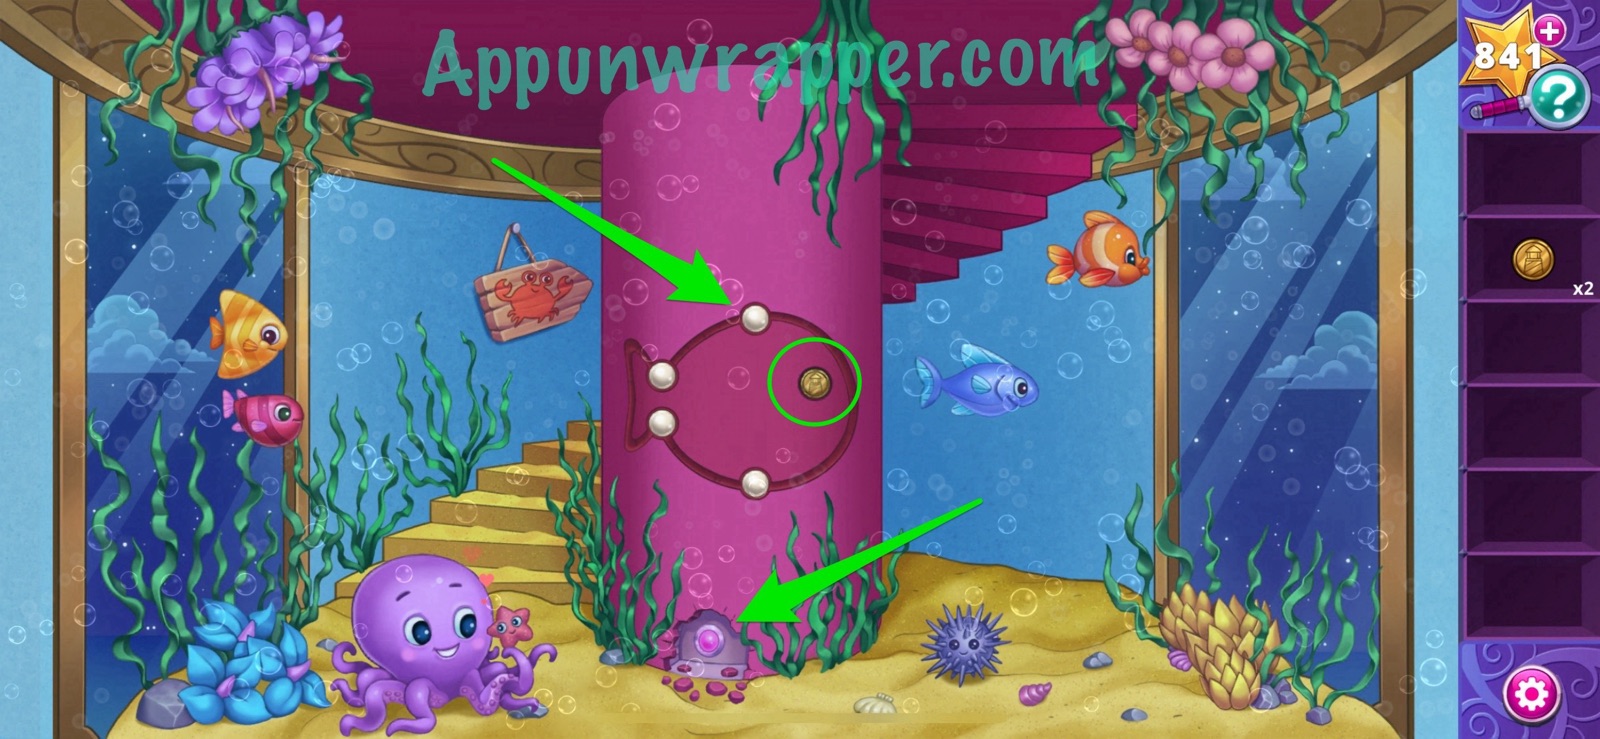
23. And last, go down to the bottom floor and press the flashing pink button. Also, place the four pearls in the slots on the column and take the doubloon.
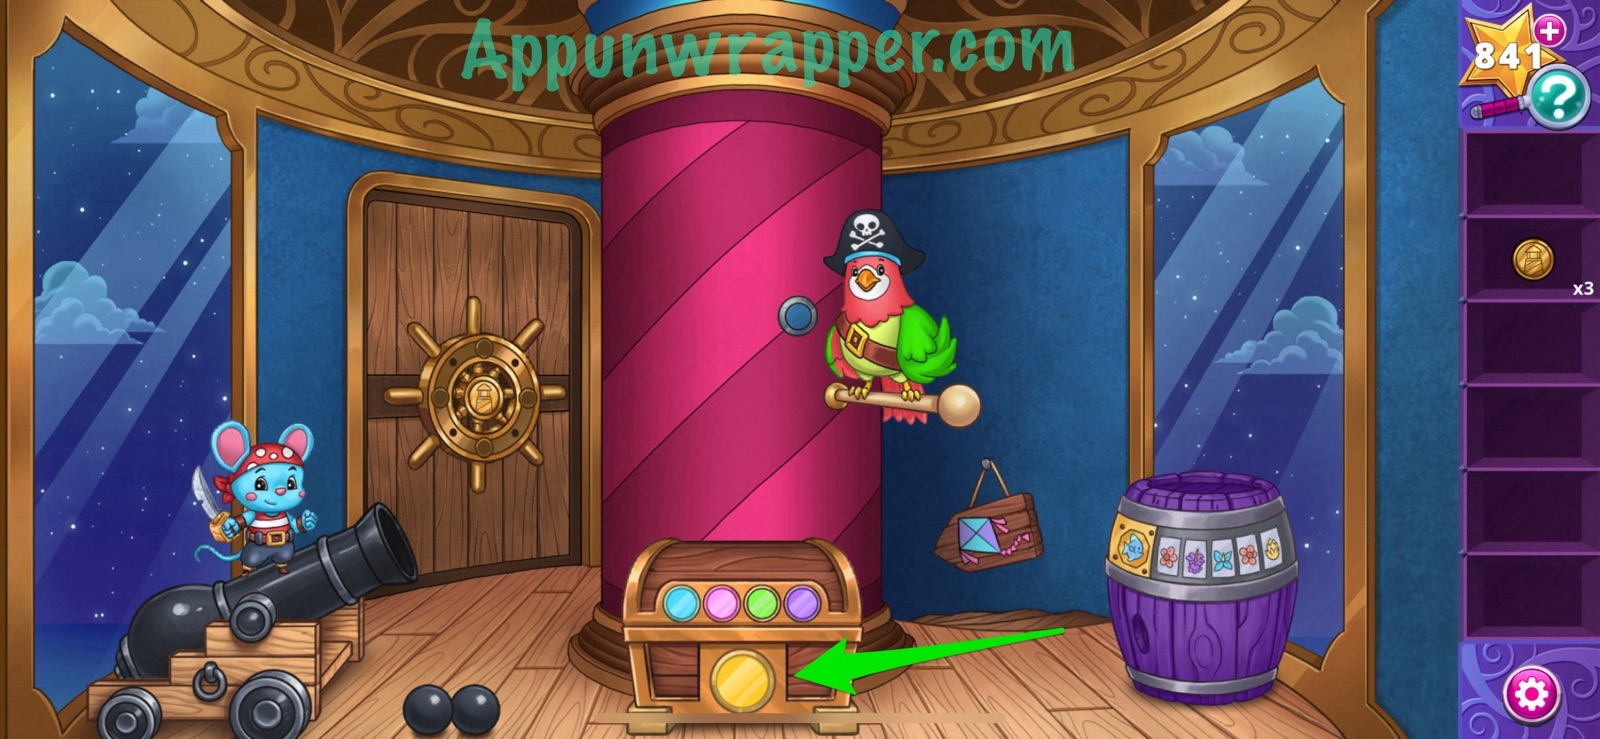
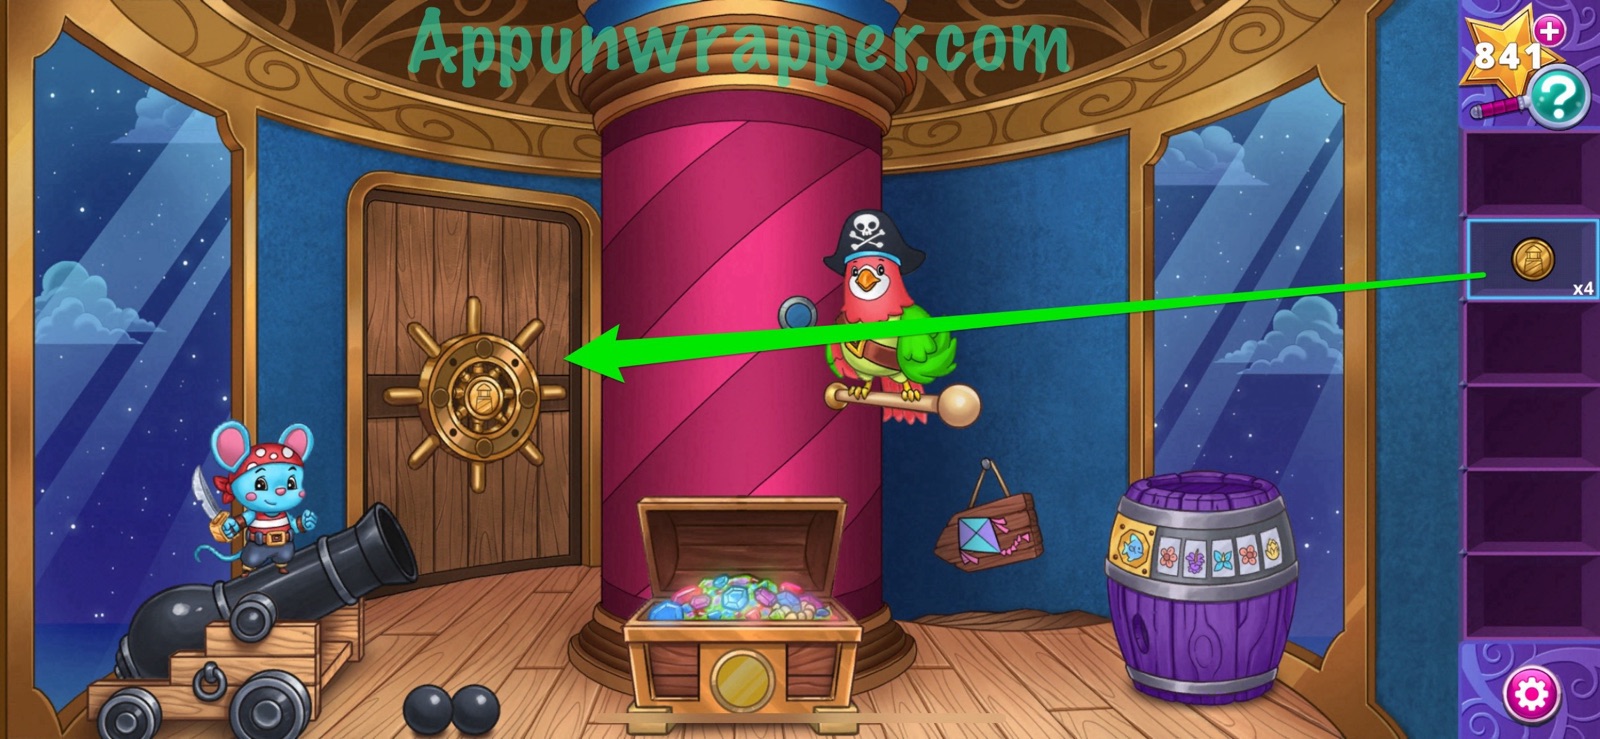
24. Go back up to the top floor. Now the yellow light on the treasure chest is blinking. Press it to open the chest and get the fourth doubloon.
25. Place all four doubloons in the wheel on the door. Then go through.
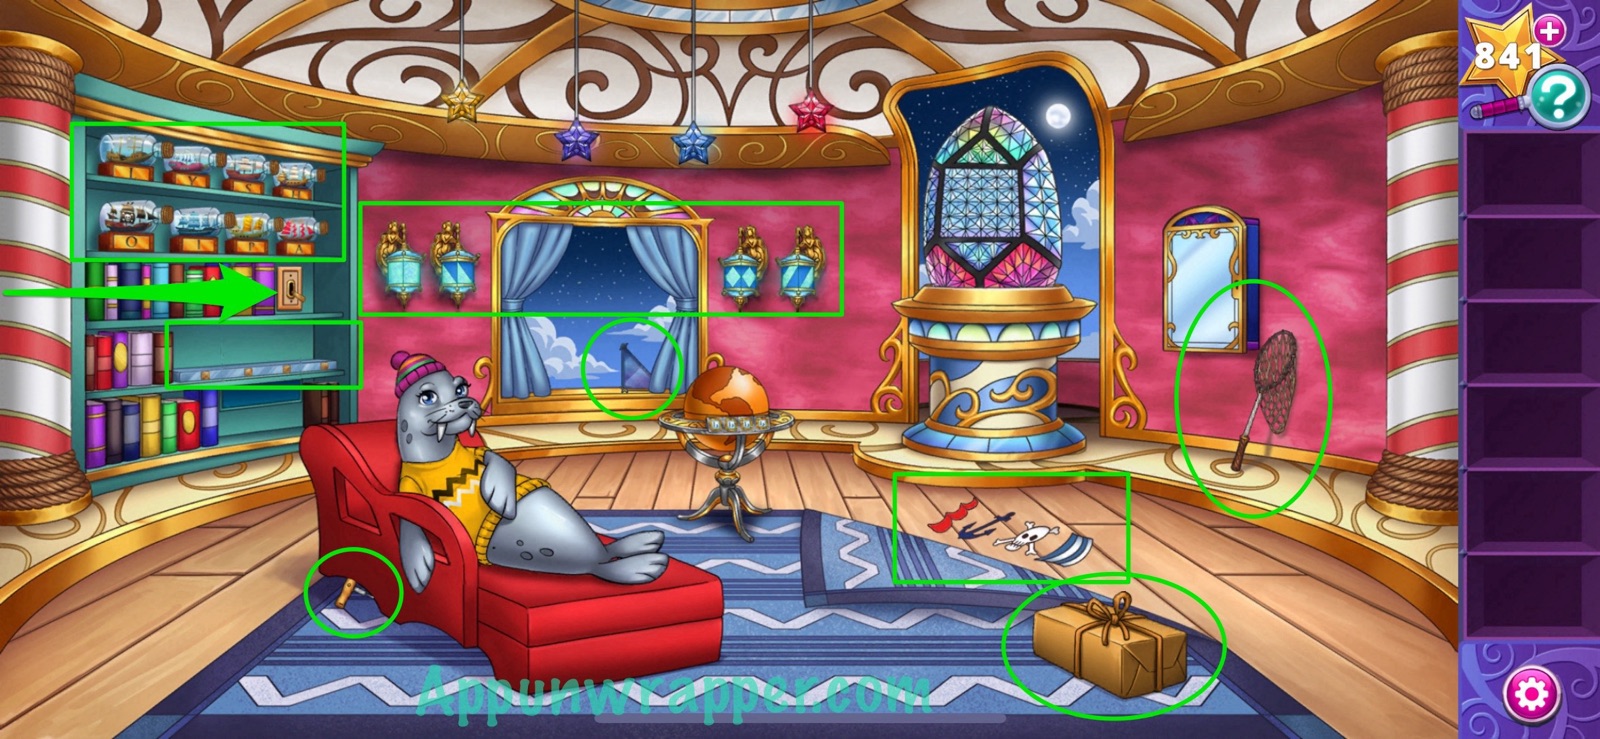
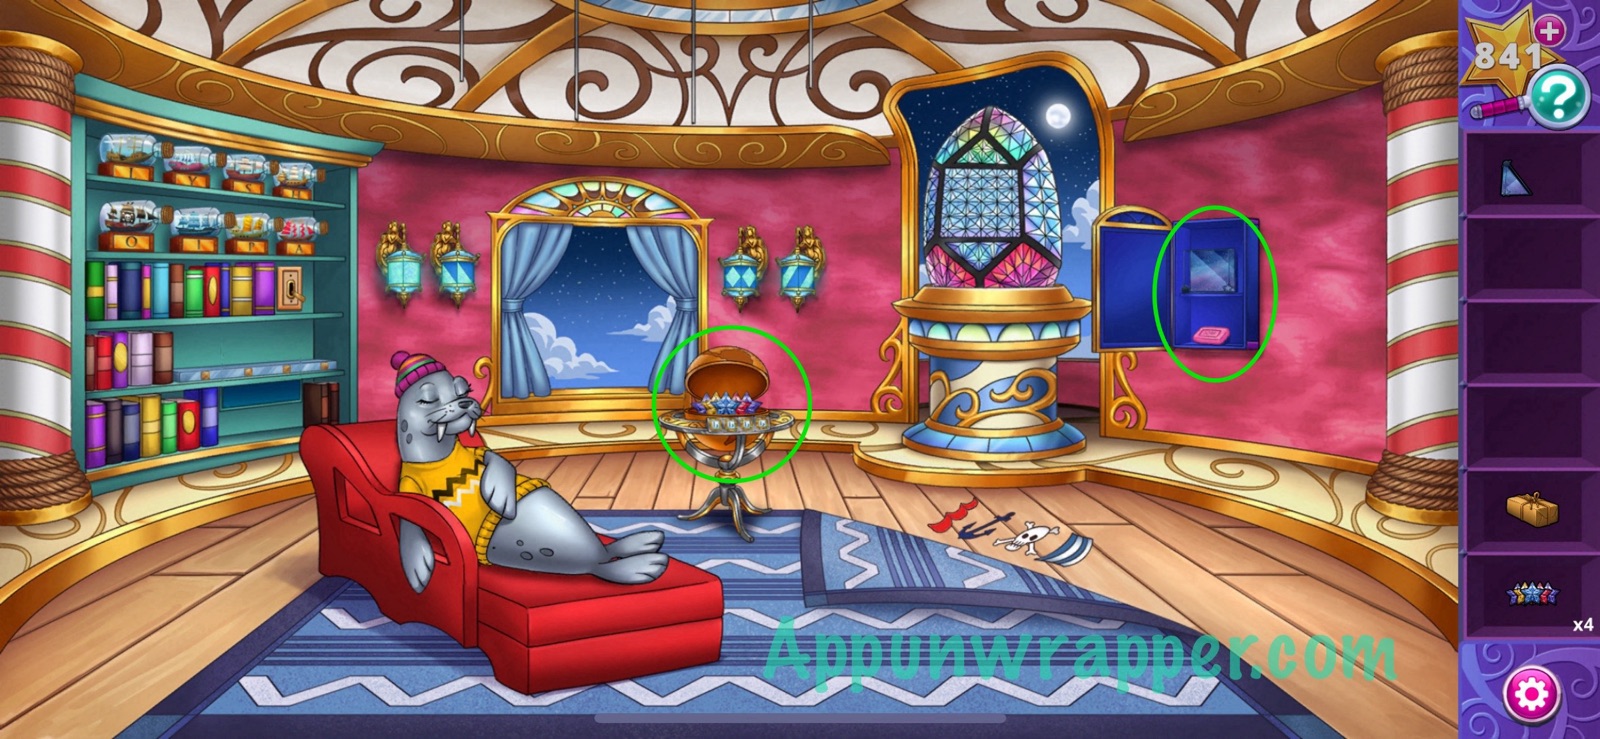
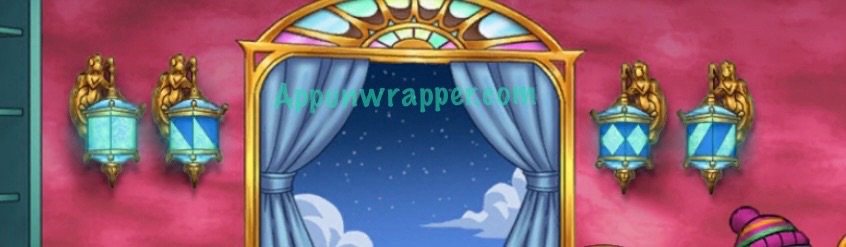
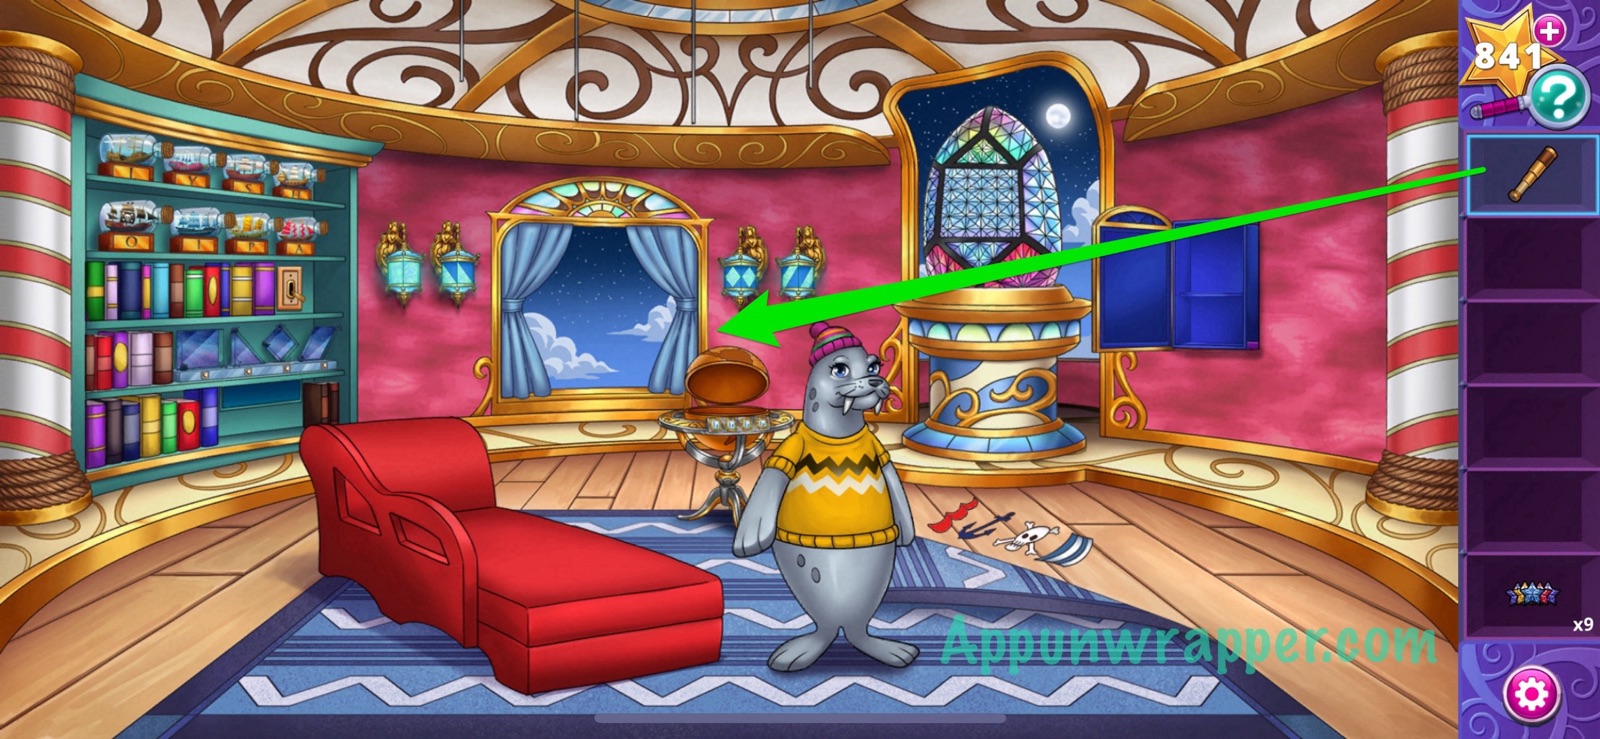
26. There’s a sleeping sea lion named Lottie in this room. We wake her up and learn she’s stuck in the chair. We have to help her out! Grab the package, corkscrew, butterfly net and sculpture. Lift the corner of the rug to see a clue. Also, flip the switch on the bookshelf to turn on the lanterns by the window. Also, notice the ships in bottles on the shelves and another shelf that’s empty.
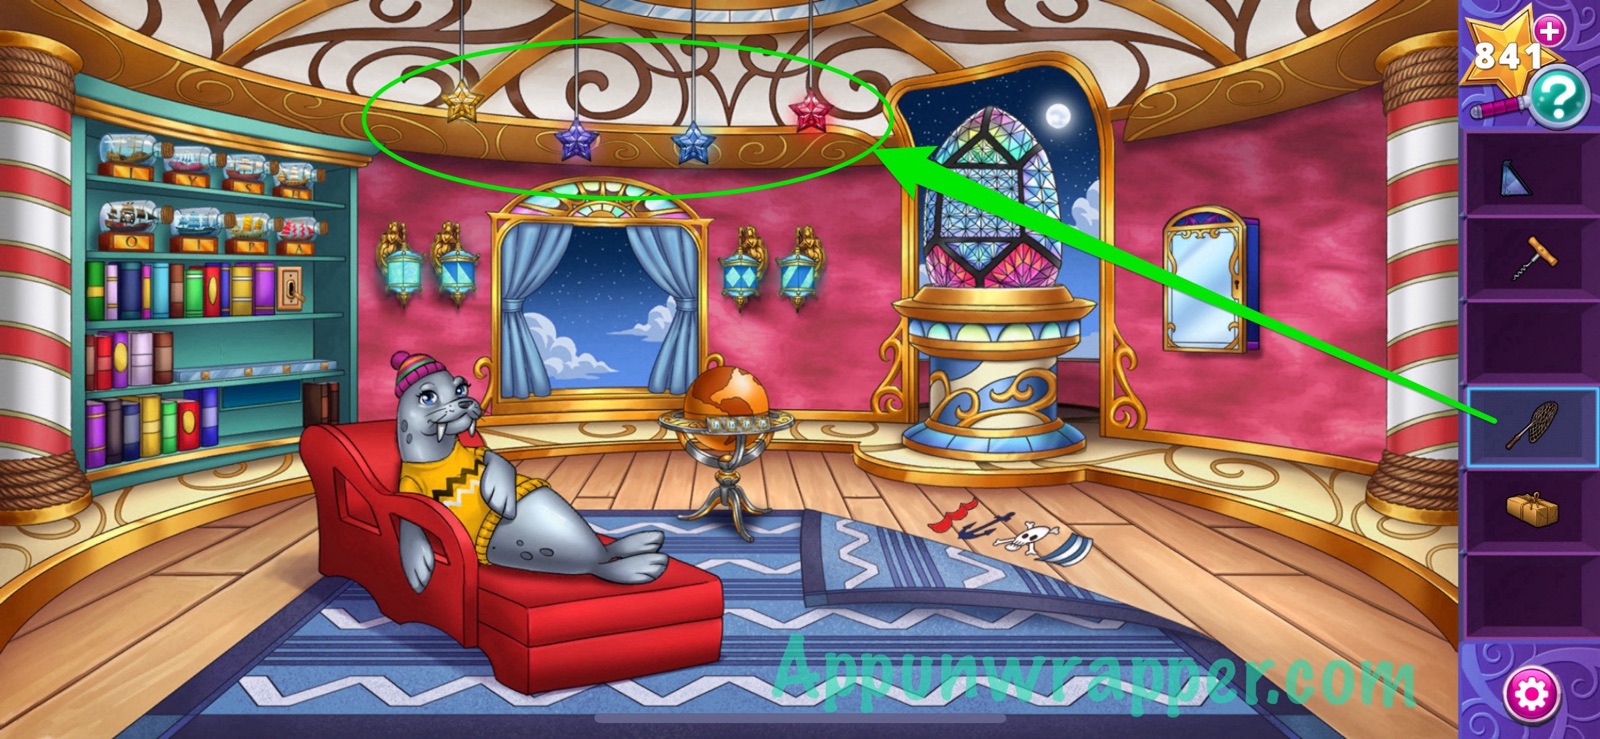
27. Use the butterfly net to grab the four hanging star jewels.
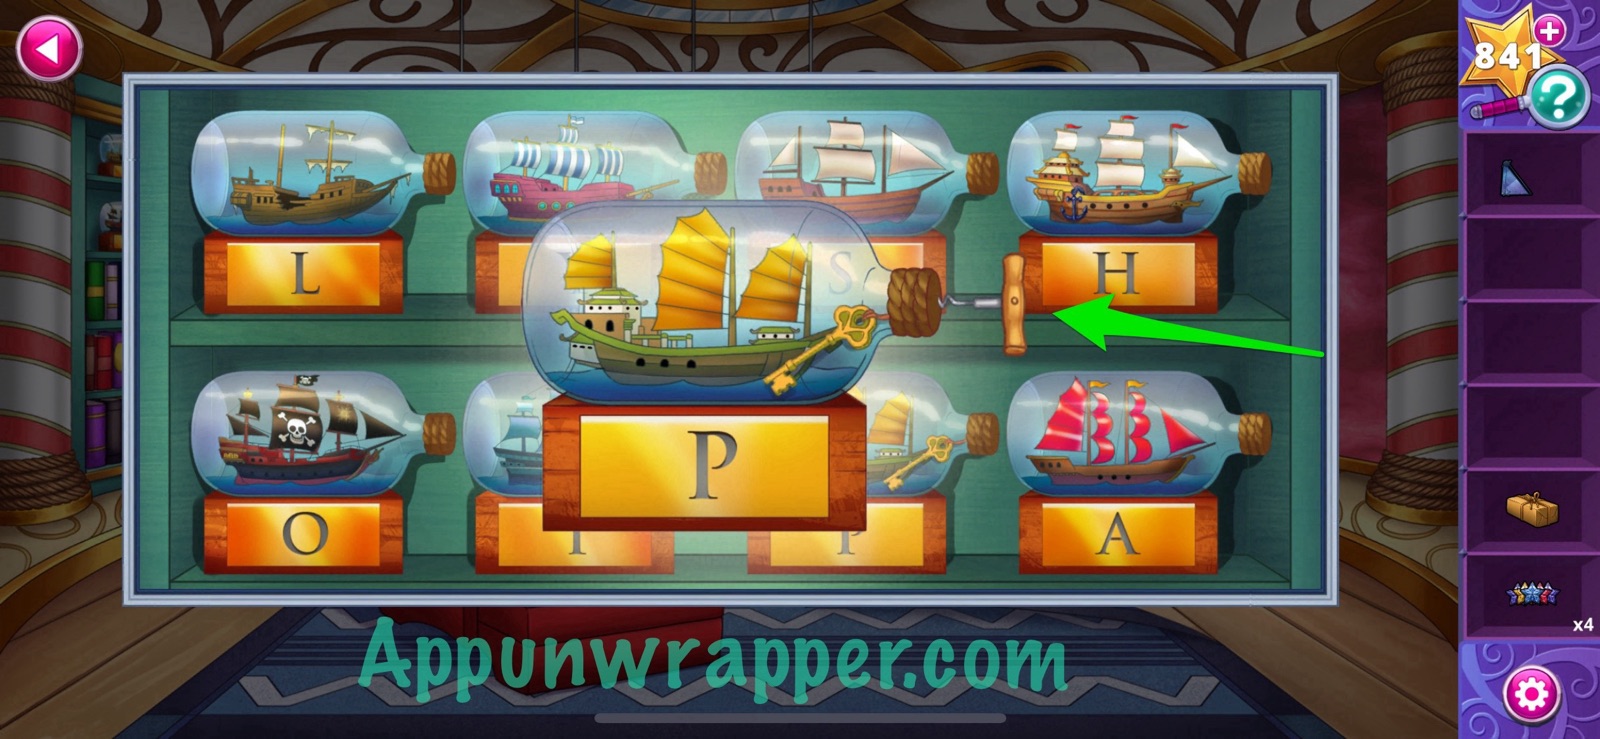
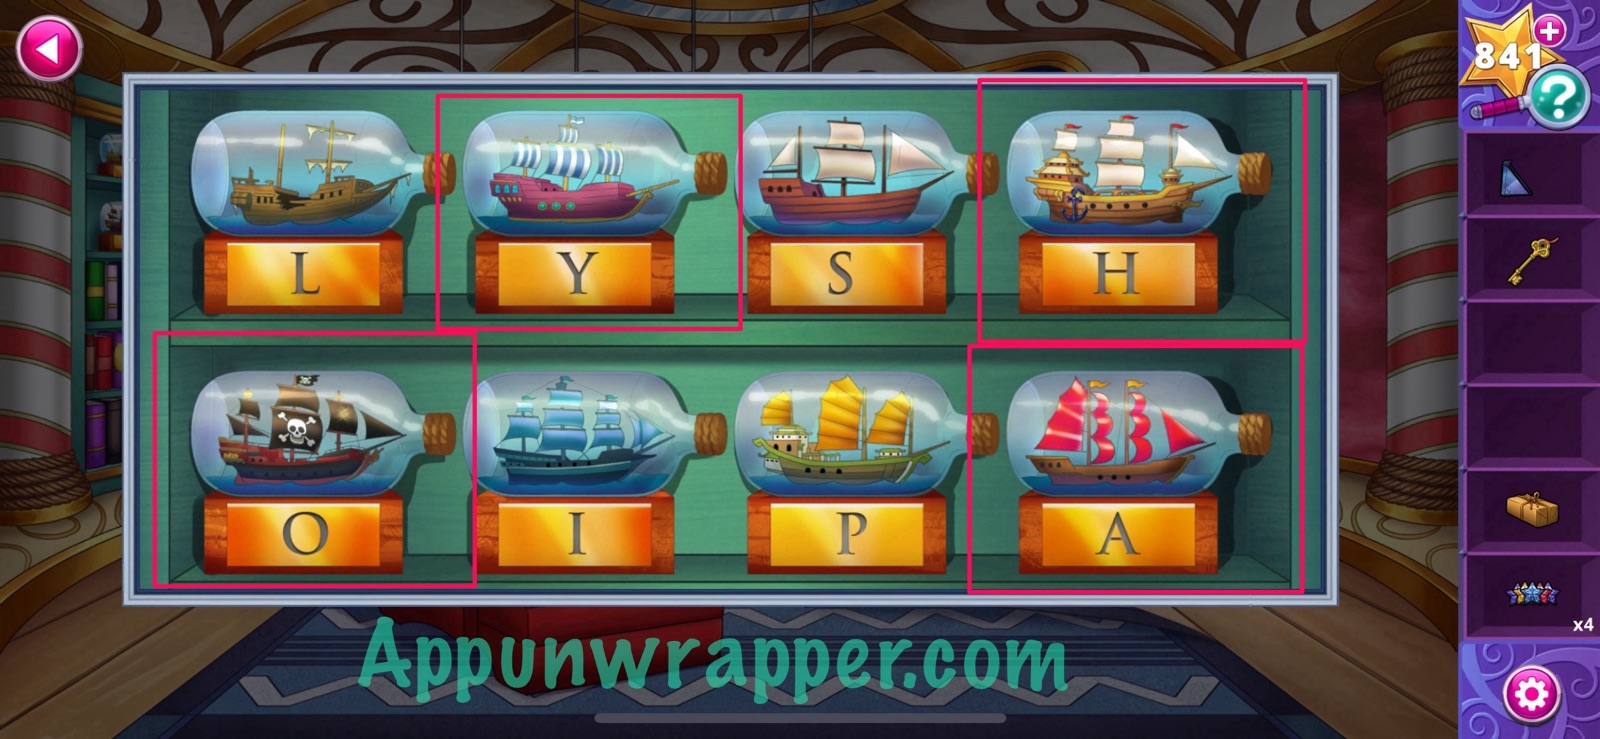
28. Look at the clue under the rug again. Find those same symbols on the ships in the bottles and note down the letters you get. First is a red sail, so A. Then a black anchor, so H. Then a white skull, so O. And last, a blue-and-white striped sail, so Y. You end up with AHOY. While here, use the corkscrew to get the key out of the P bottle.
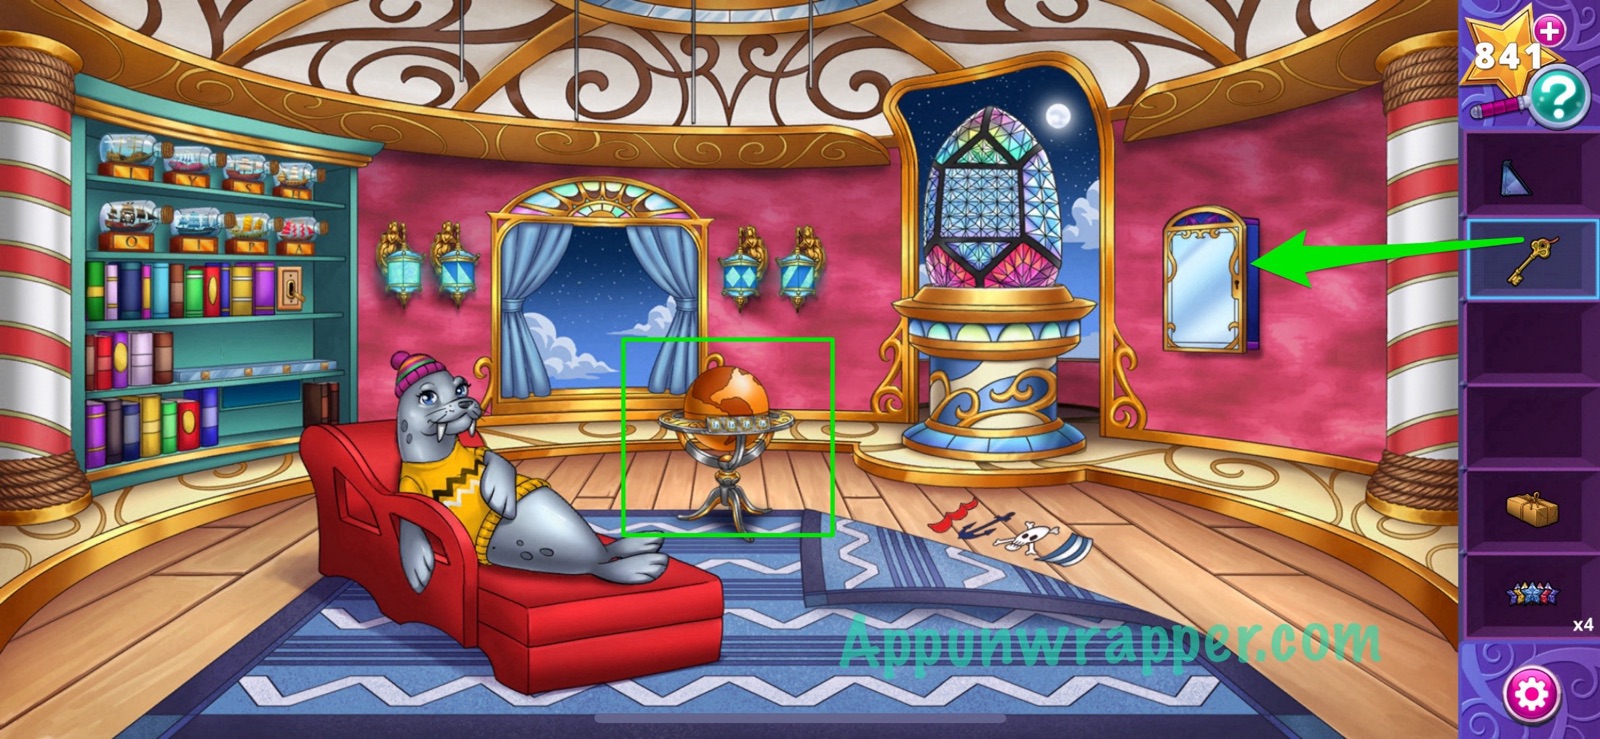
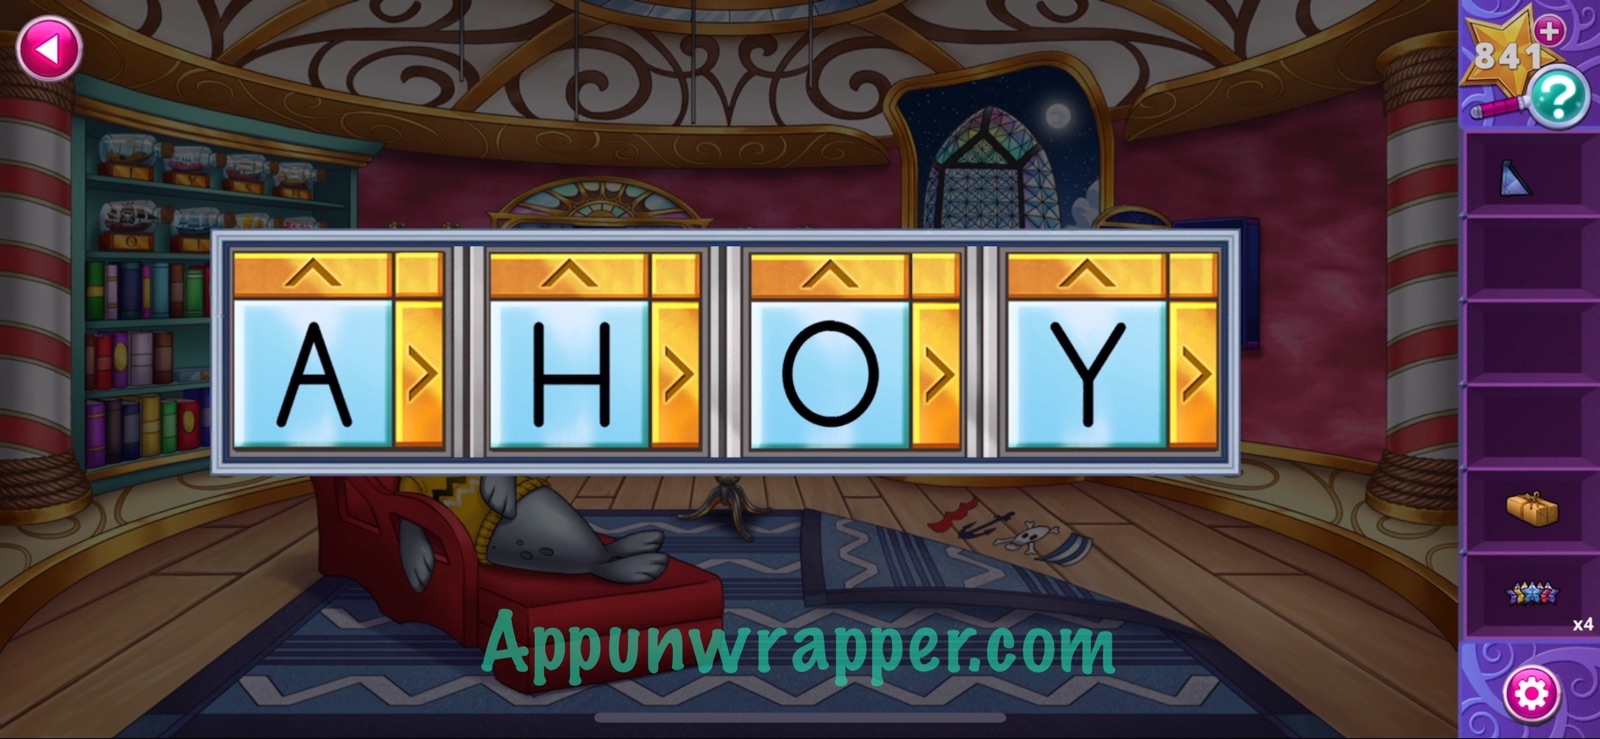
29. Use the key to unlock the mirror and take the sculpture and soap from inside. Tap on the globe. Cycle through the letter halves to spell out AHOY. Then take the star jewels from inside.
30. Use the soap to help Lottie free her flipper.
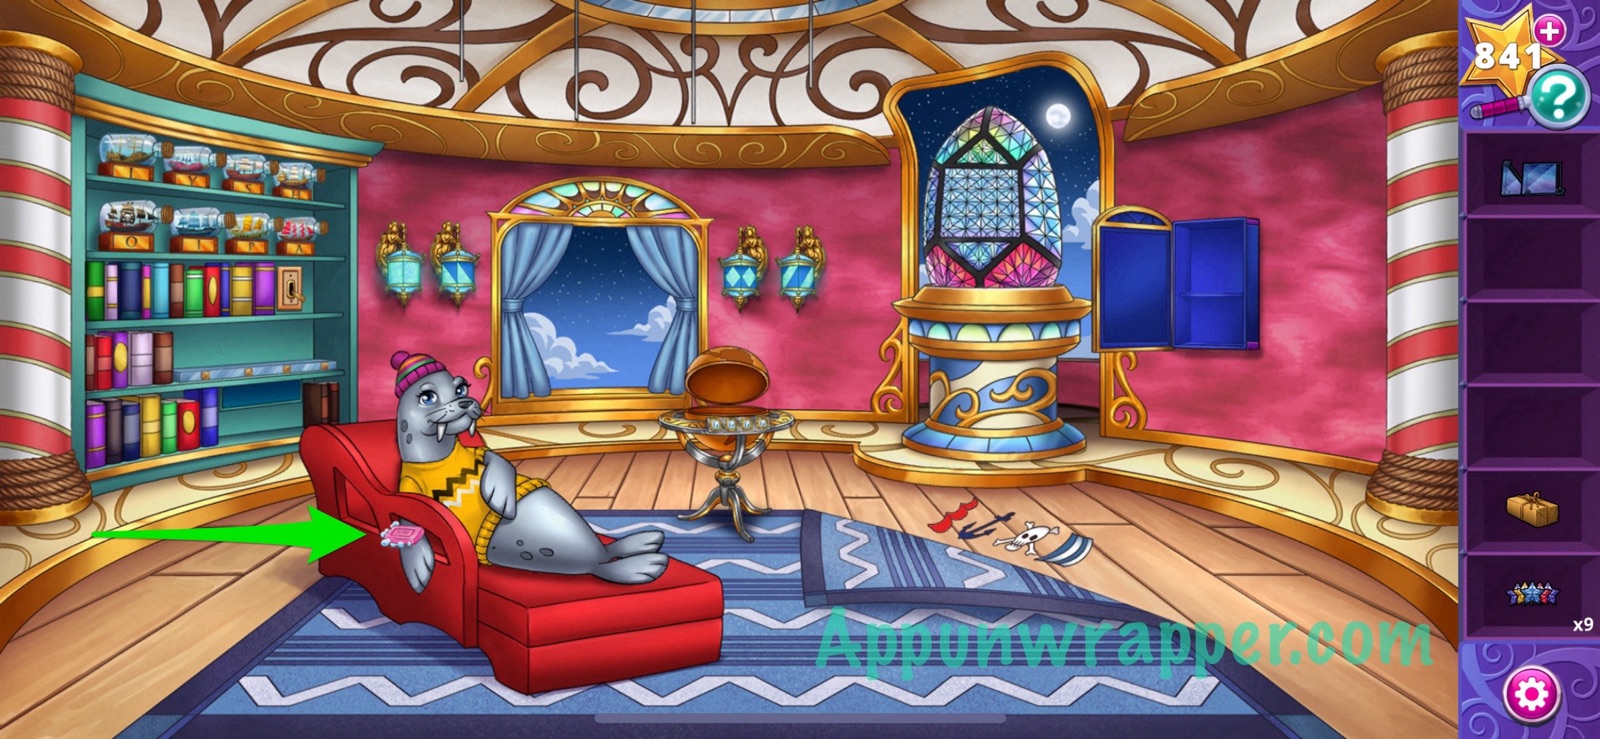
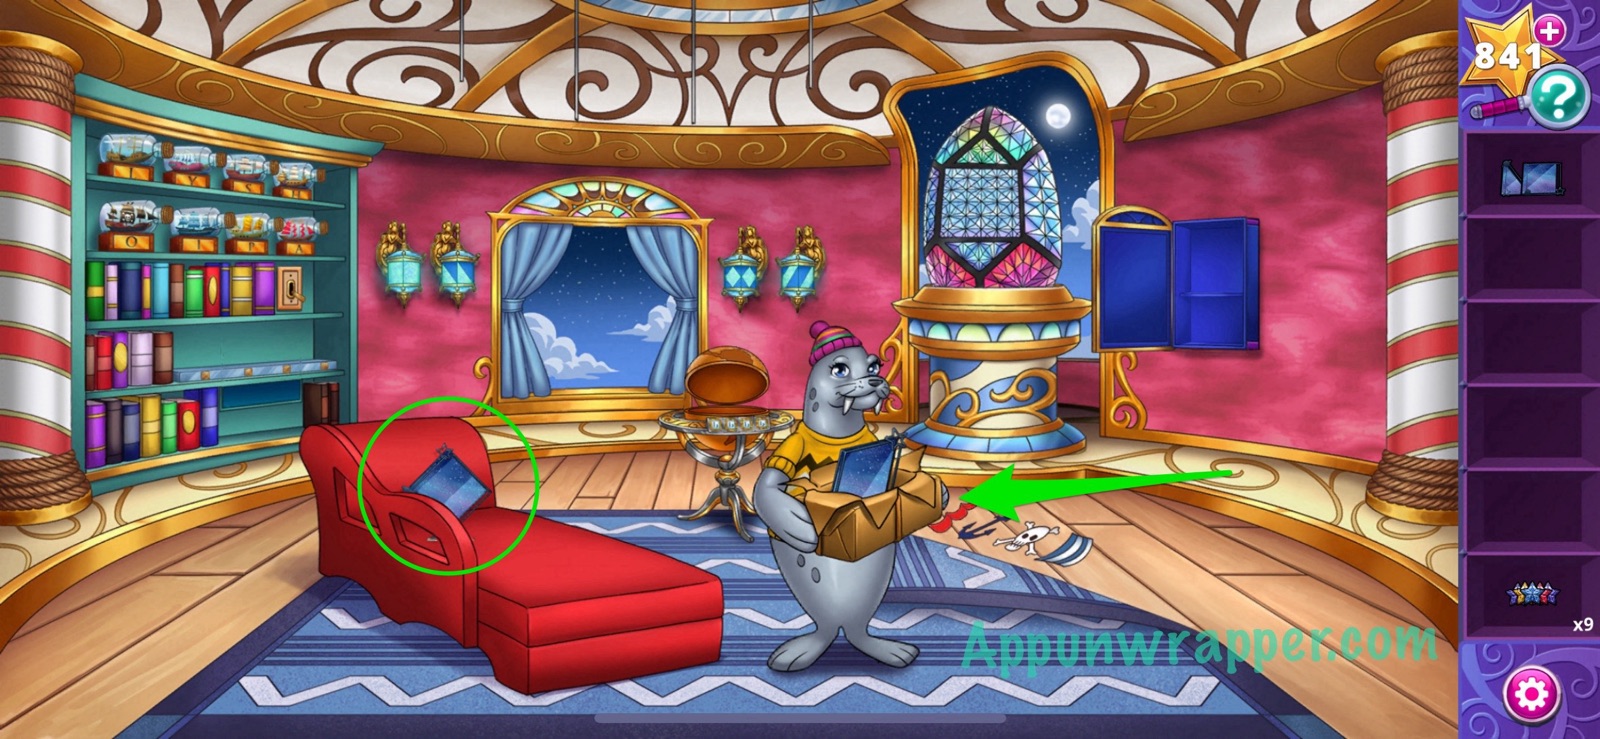
31. Grab the sculpture from the chair Lottie was sitting in. Then give her the package so she can open it for you with her tusks. Now we have all 4 sculptures.
32. Place all the sculptures on the empty shelf. Then use the clue from the lanterns to figure out the order. It goes: Square, Triangle, Diamond, Rhombus. The panels below open up and Lottie gives you a spyglass.
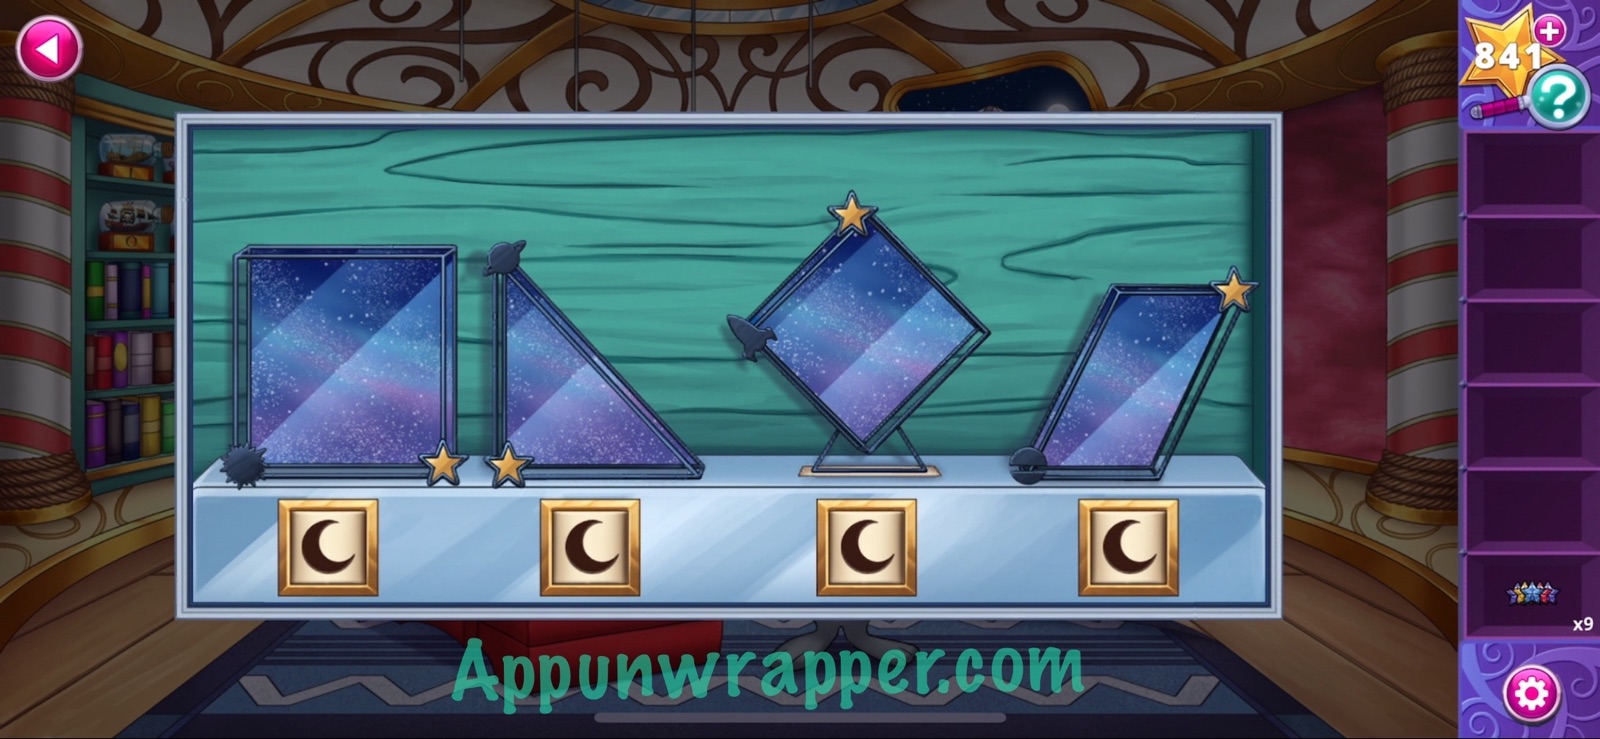
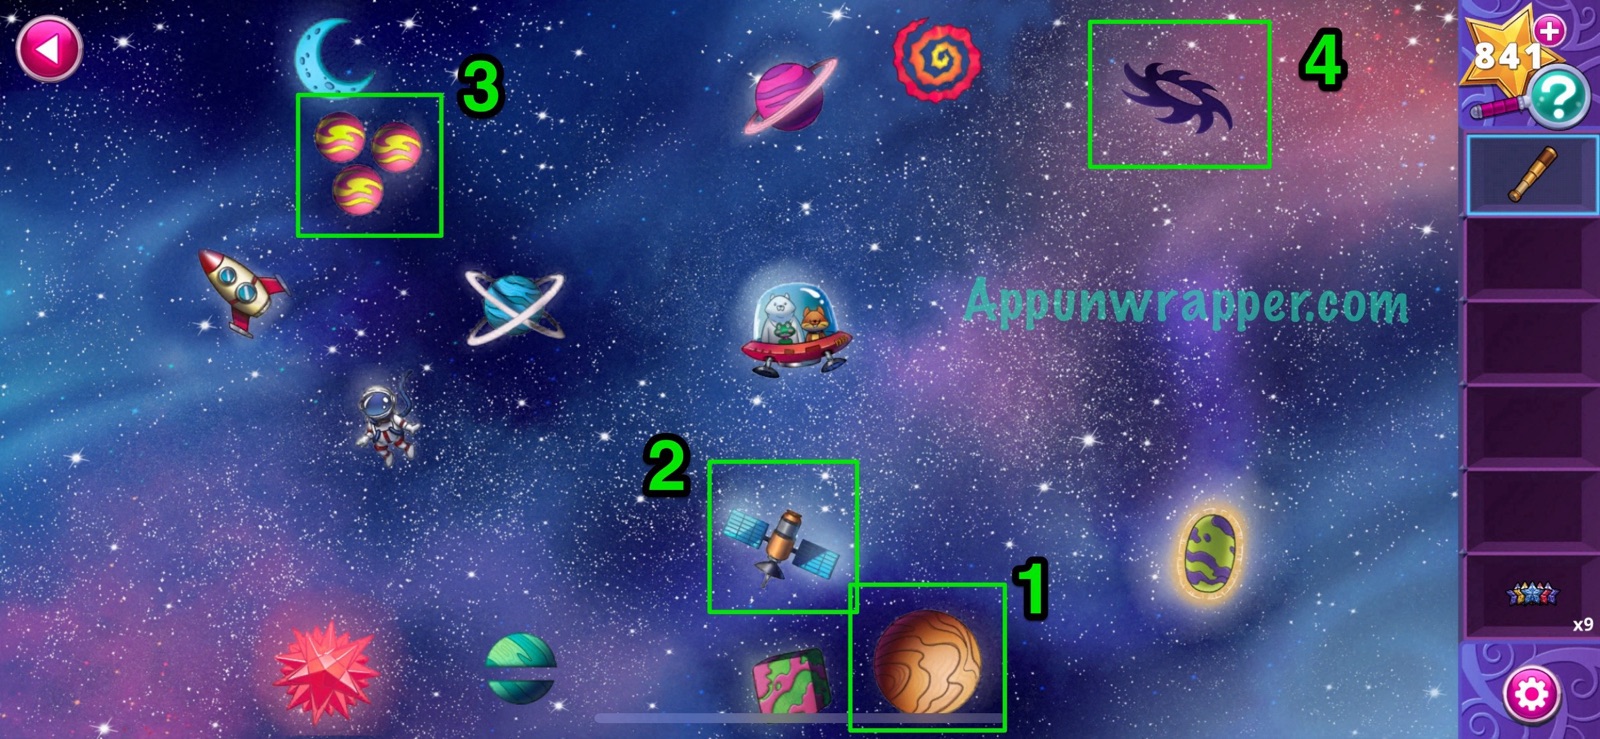
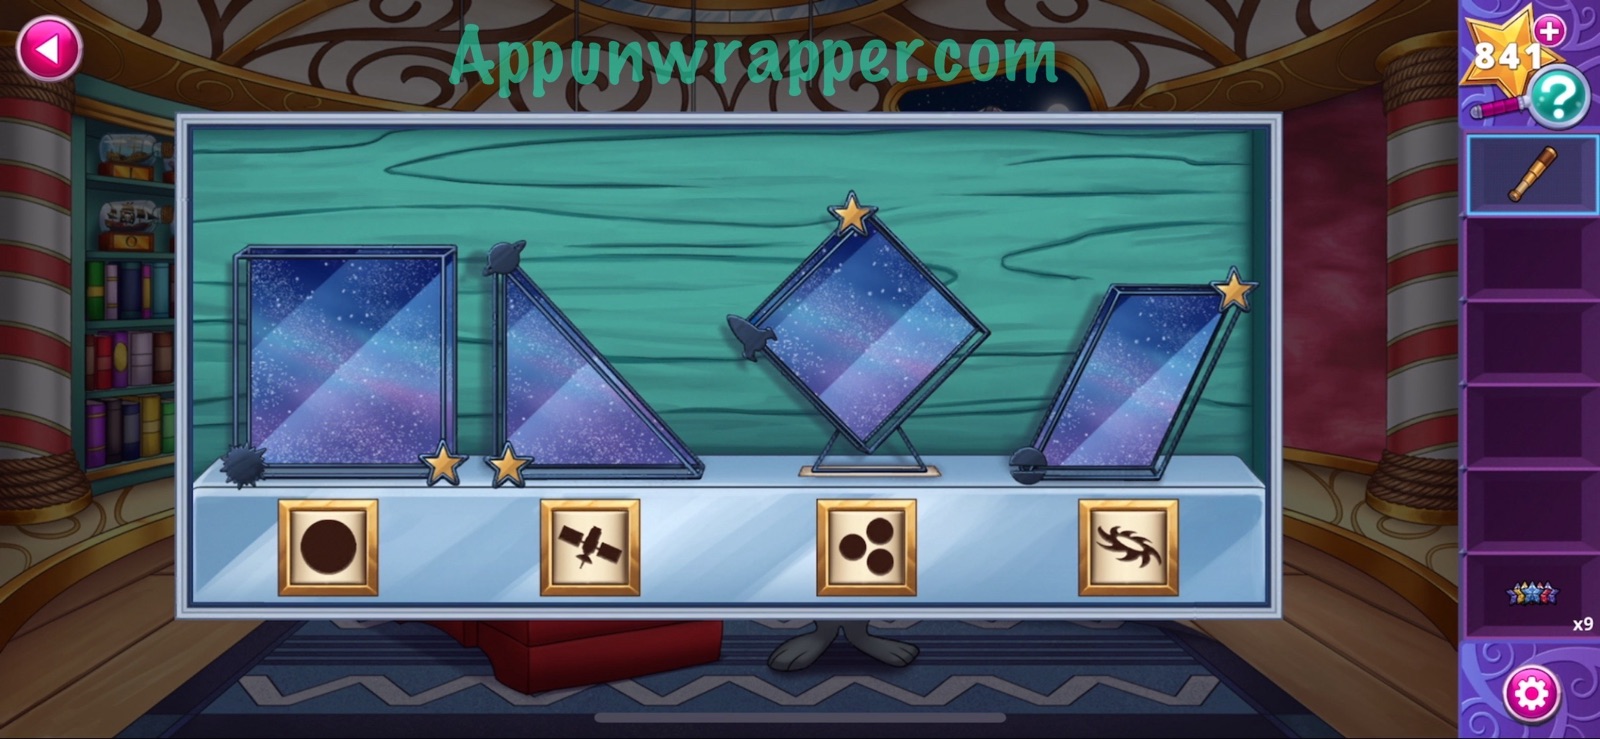
33. Use the spyglass to see outside the window. Use the sculptures to figure out what you’re looking for. There’s a shape on one corner of each and a star on another. You need to locate the object where the star would be. I circled them for you. Change the shapes under the sculptures to match those.
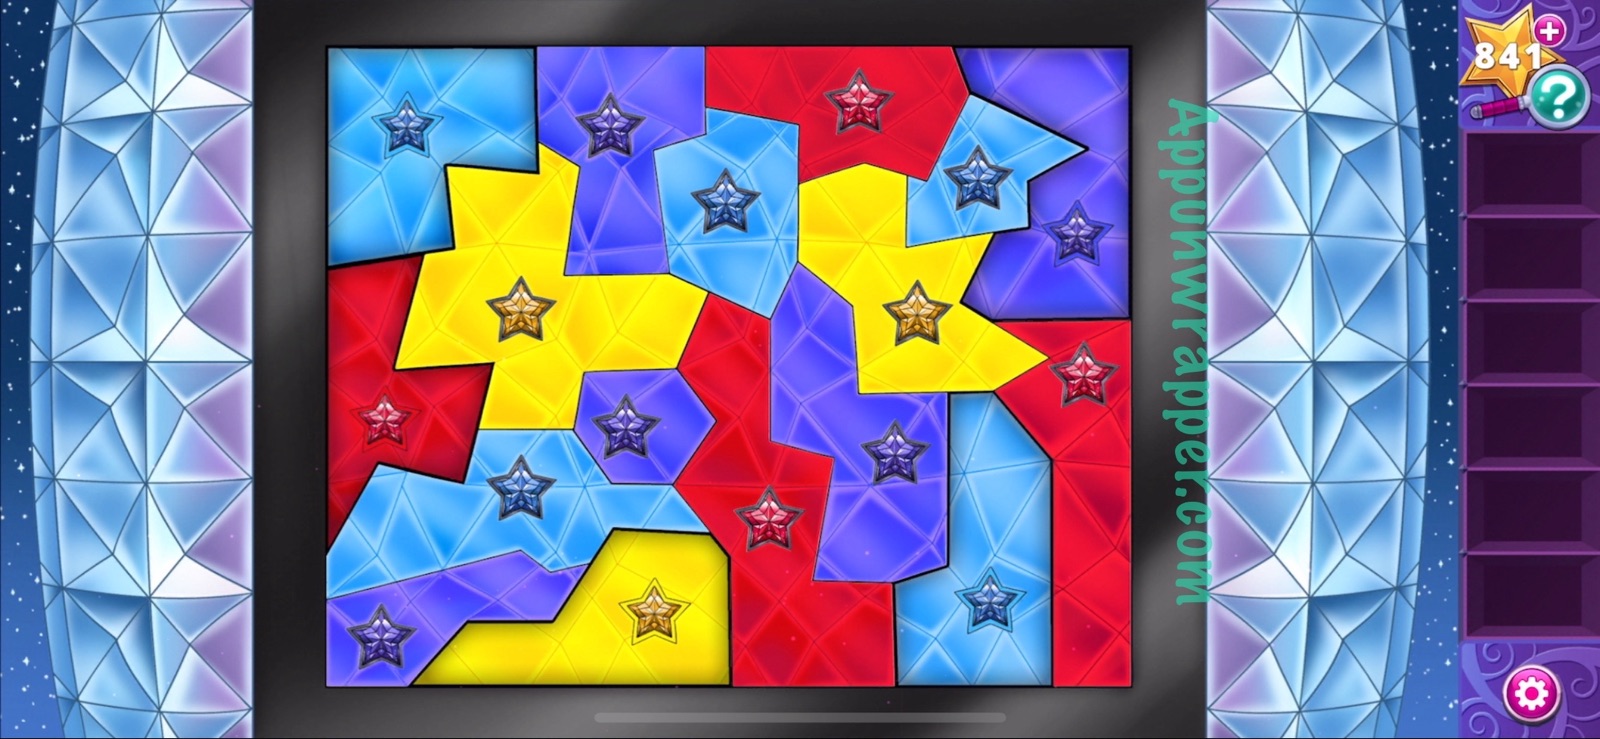
34. Take the last of the stars. You should now have 12. Tap on the giant glass lantern and add all 12 stars to it.
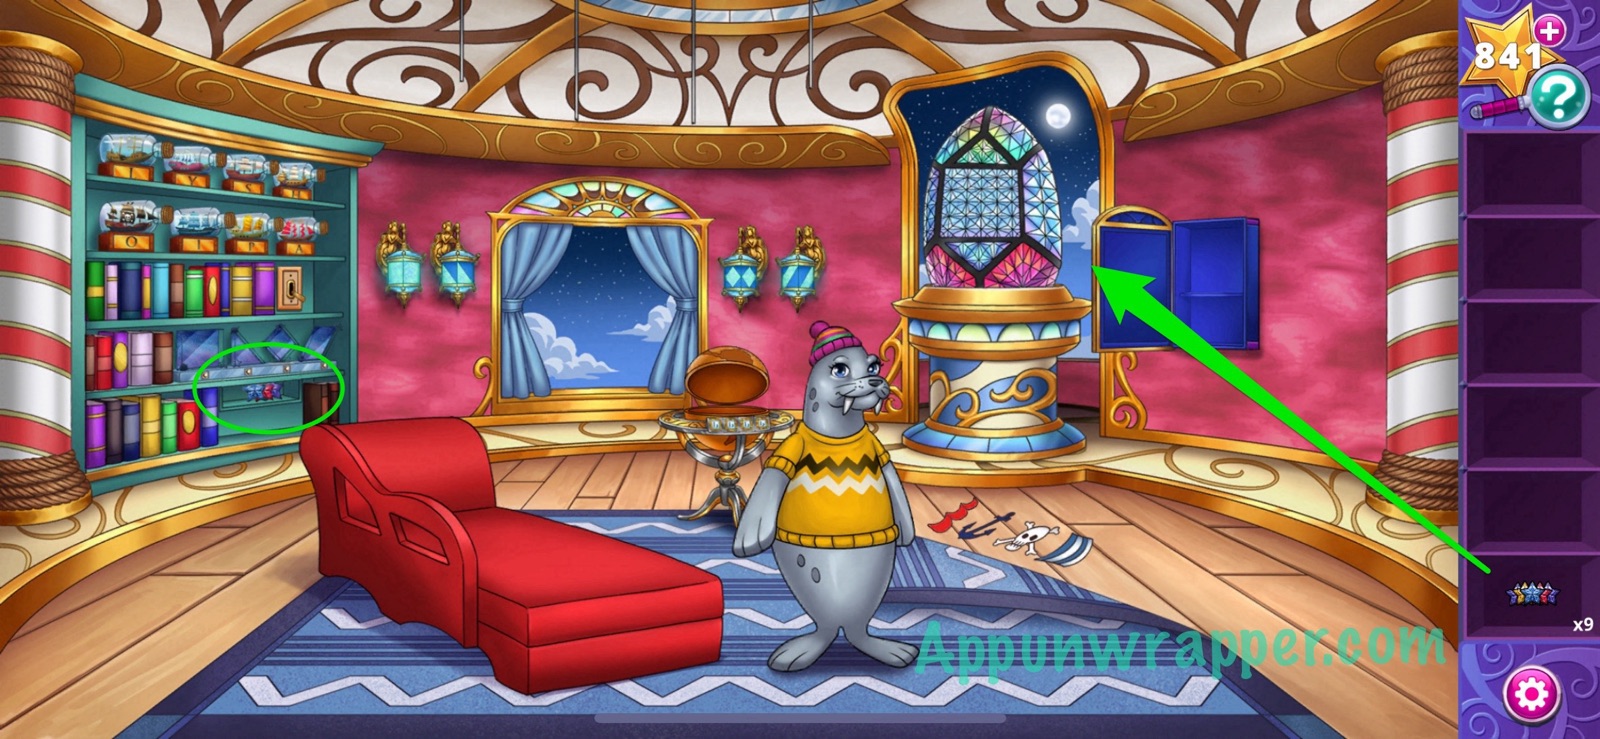
35. Now let’s solve the Lantern Puzzle. Place the 12 stars so that no two touching sections are the same color. To place a star, select it and then select an empty section. You can copy my solution if you’re stuck. Then watch the cutscene and complete the chapter.
And that’s the end of Chapter 3! Click here to continue to Chapter 4 or choose a chapter below.
Chapter 1 | Chapter 2 | Chapter 3 | Chapter 4 | Chapter 5 | Chapter 6 | Chapter 7
The flags / door puzzle solution makes no sense at all.
I think you just didn’t understand it (no judgment here, as I, too, have to sometimes use a walkthrough!) I was stumped at first but then realized I was thinking about it wrong and that the shapes were clues to the colored shapes WITHIN each flag that you were supposed to select. It was actually a very clever and logical game!
Agree with Laurel. It made perfect sense!
i cant find the flag that supposed to be in the first floor, is there other place where it could be?
Behind the octopus… which is hard to see.
For the sculpture shapes that open the door– how do you know how far away from the initial shape to go? Like for me, the first one would be the split planet, or the cube. The second would be the little spaceship with the critters in it.
Yeah it wasn’t the best puzzle. To be honest, I adjusted a couple of times until I got it. But I’m not sure there’s a better explanation?