Adventure Escape Mysteries – Sweet Dreams
By: Haiku Games


Haiku Games is back with a new Adventure Escape game, this time about a 5-year-old boy’s dreams. You play as Revi, a Dream Manager who has to help young Arlo conquer his fears about starting school. This walkthrough guide should help you if you get stuck on any of the puzzles in Chapter 5 of Sweet Dreams. Feel free to ask for extra help in the comments section.
See all my other Adventure Escape guides here.
Walkthrough:
Chapter 1 | Chapter 2 | Chapter 3 | Chapter 4 | Chapter 5 | Chapter 6 | Chapter 7
Chapter 5:
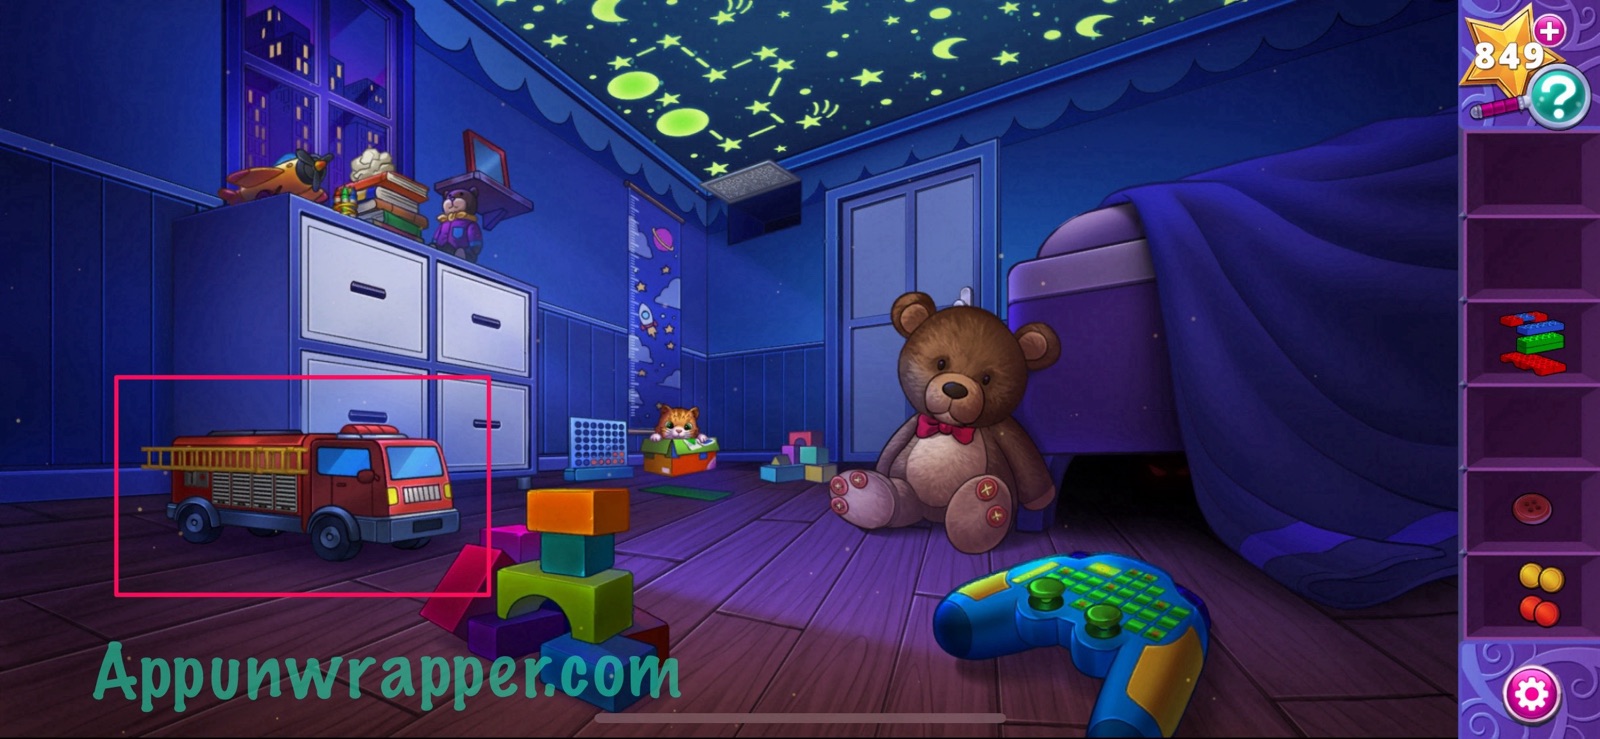
You can watch my video for Chapter 5 or continue below for my step-by-step guide:
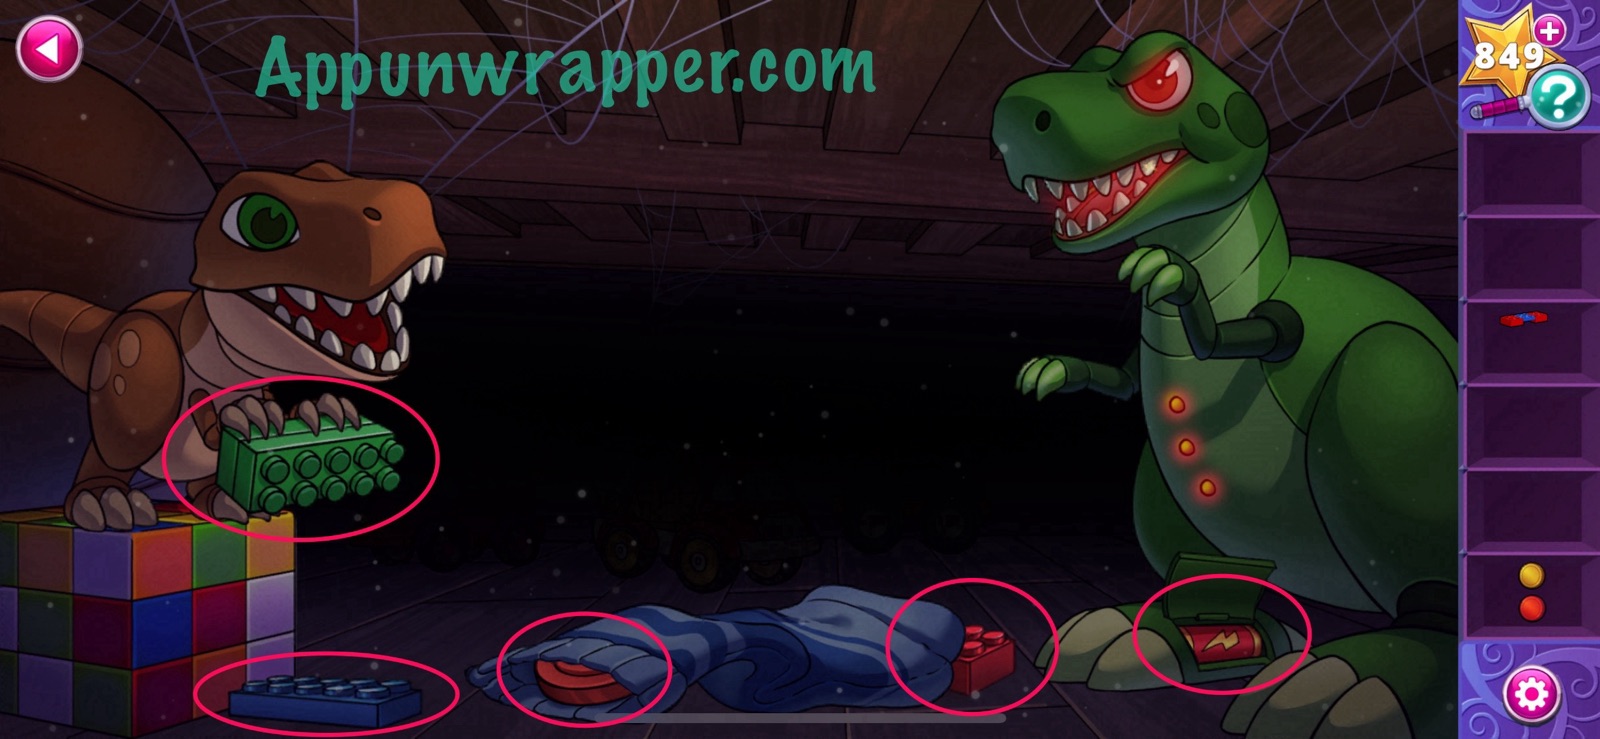
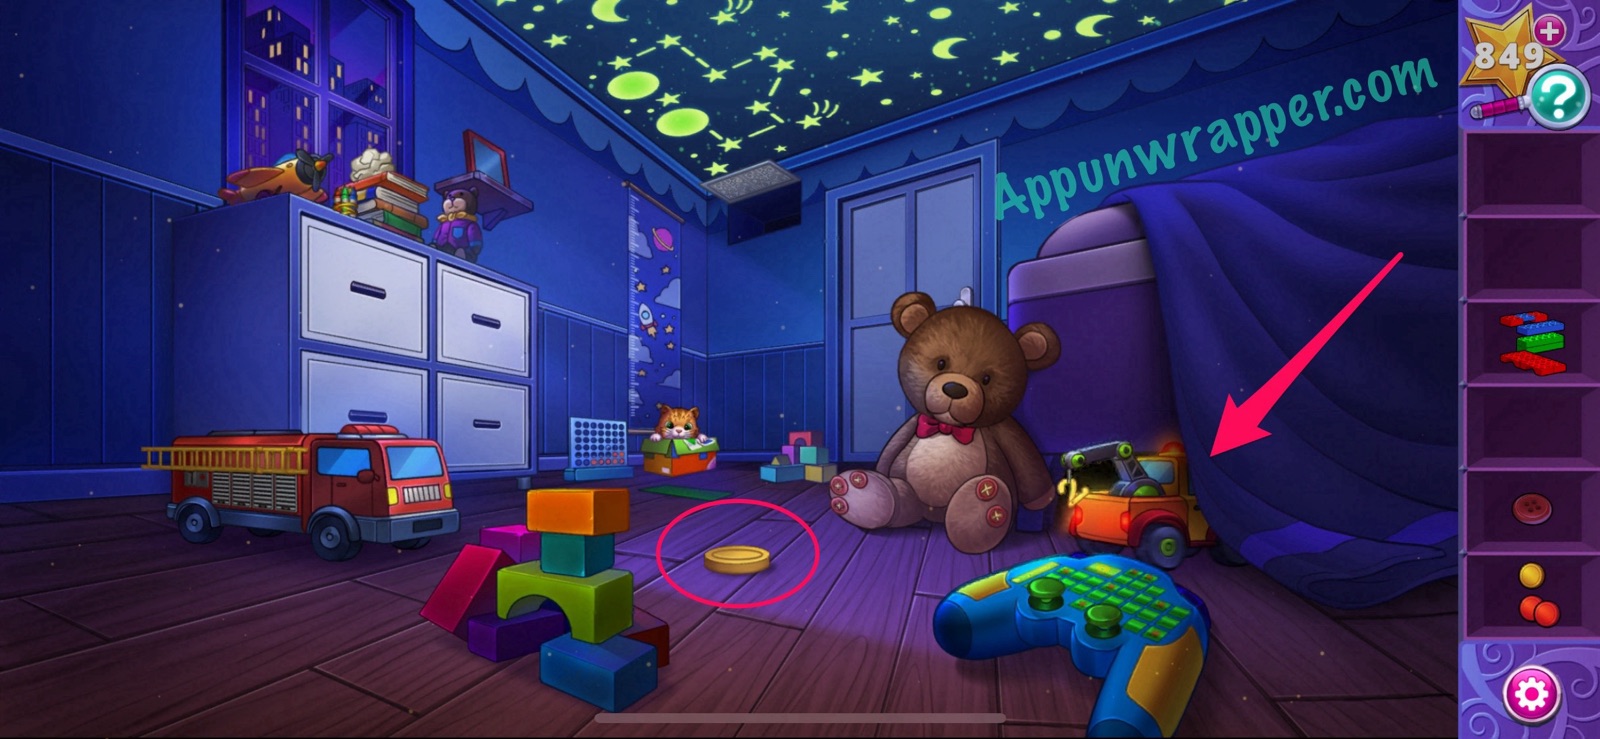
1. Were in another dream! This time, it’s Arlo’s room but we’re tiny! First, grab the construction block and the two game discs. Also, take a look at the growth chart on the wall. Then look under the bed for another game disc and three more construction blocks. While here, take the battery from the dinosaur’s foot.
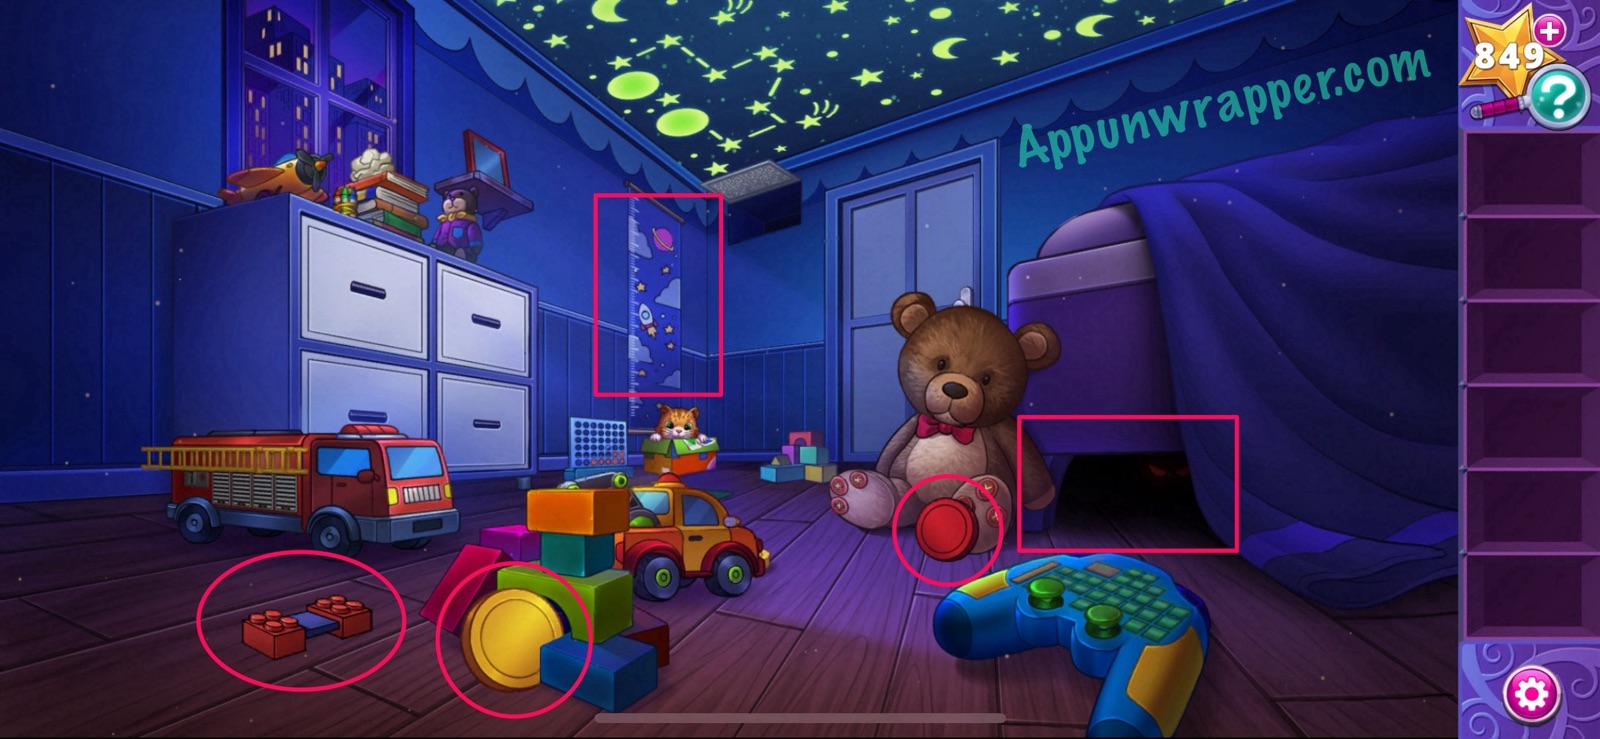
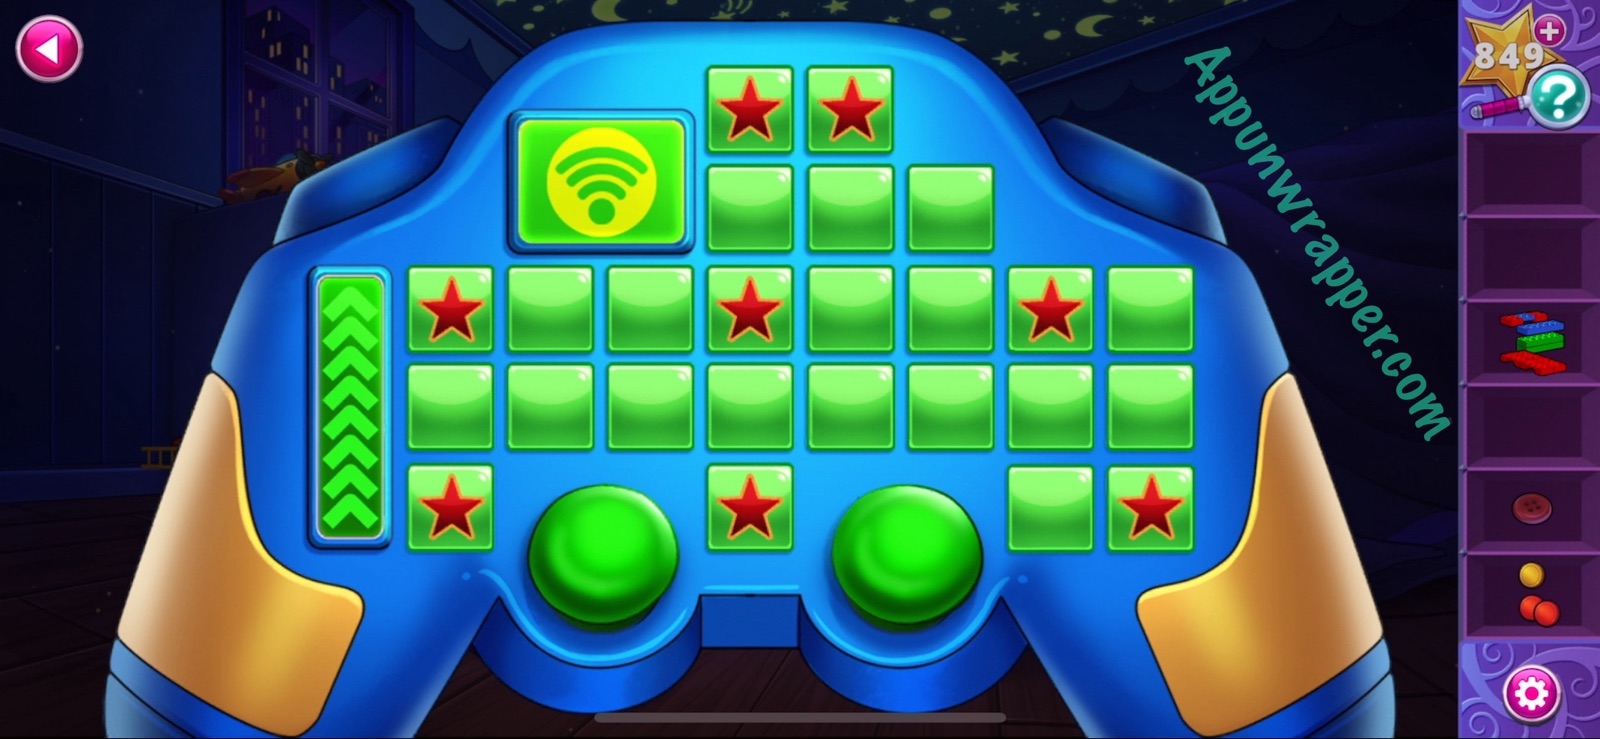
2. Go back and place the battery in the controller. While here, look at the clue on the ceiling made of glow-in-the-dark stars. Also, take the button from the teddy bear’s foot.
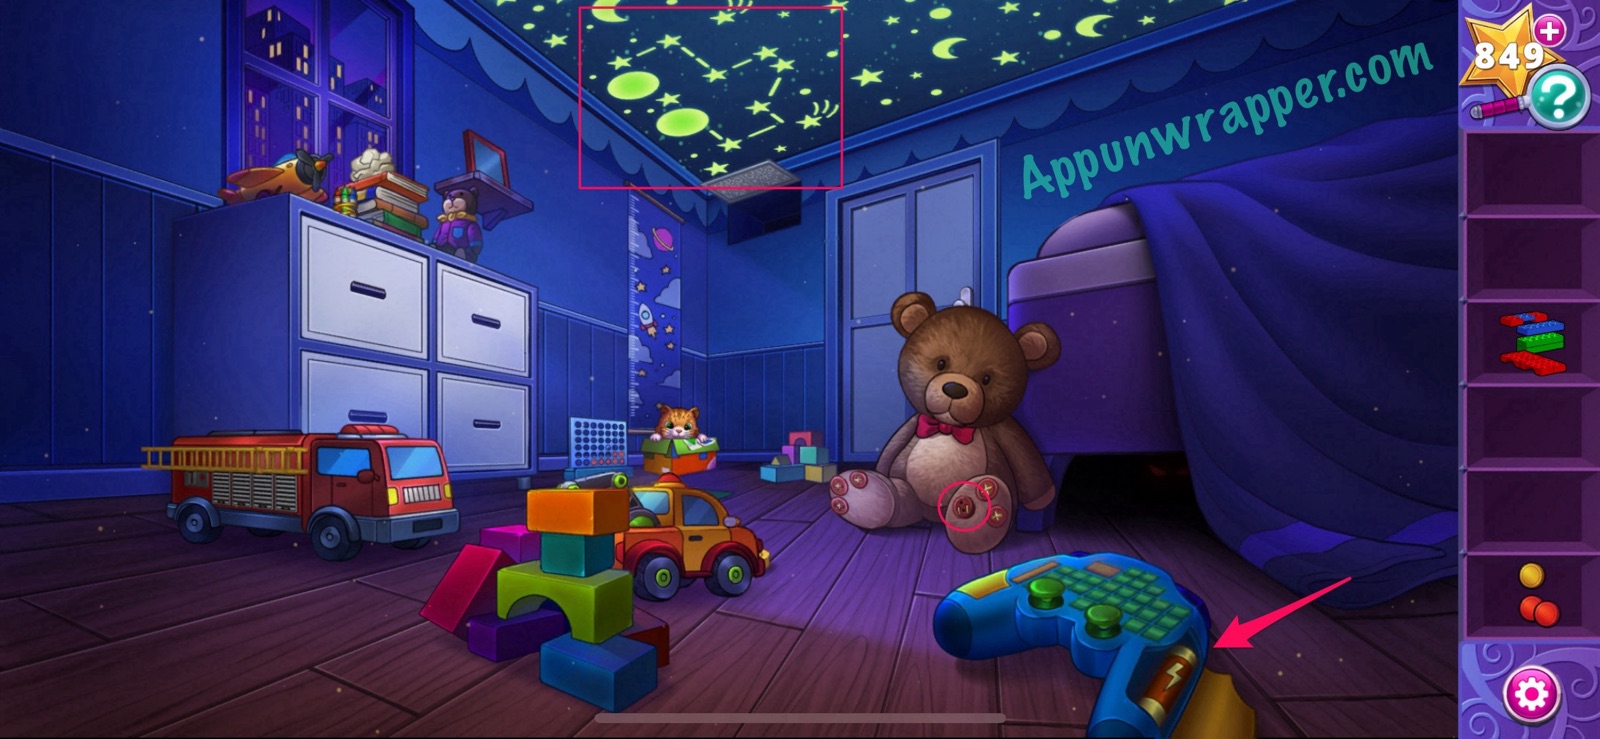
3. Tap on the controller and let’s solve the puzzle to unlock it. Copy the pattern from the ceiling.
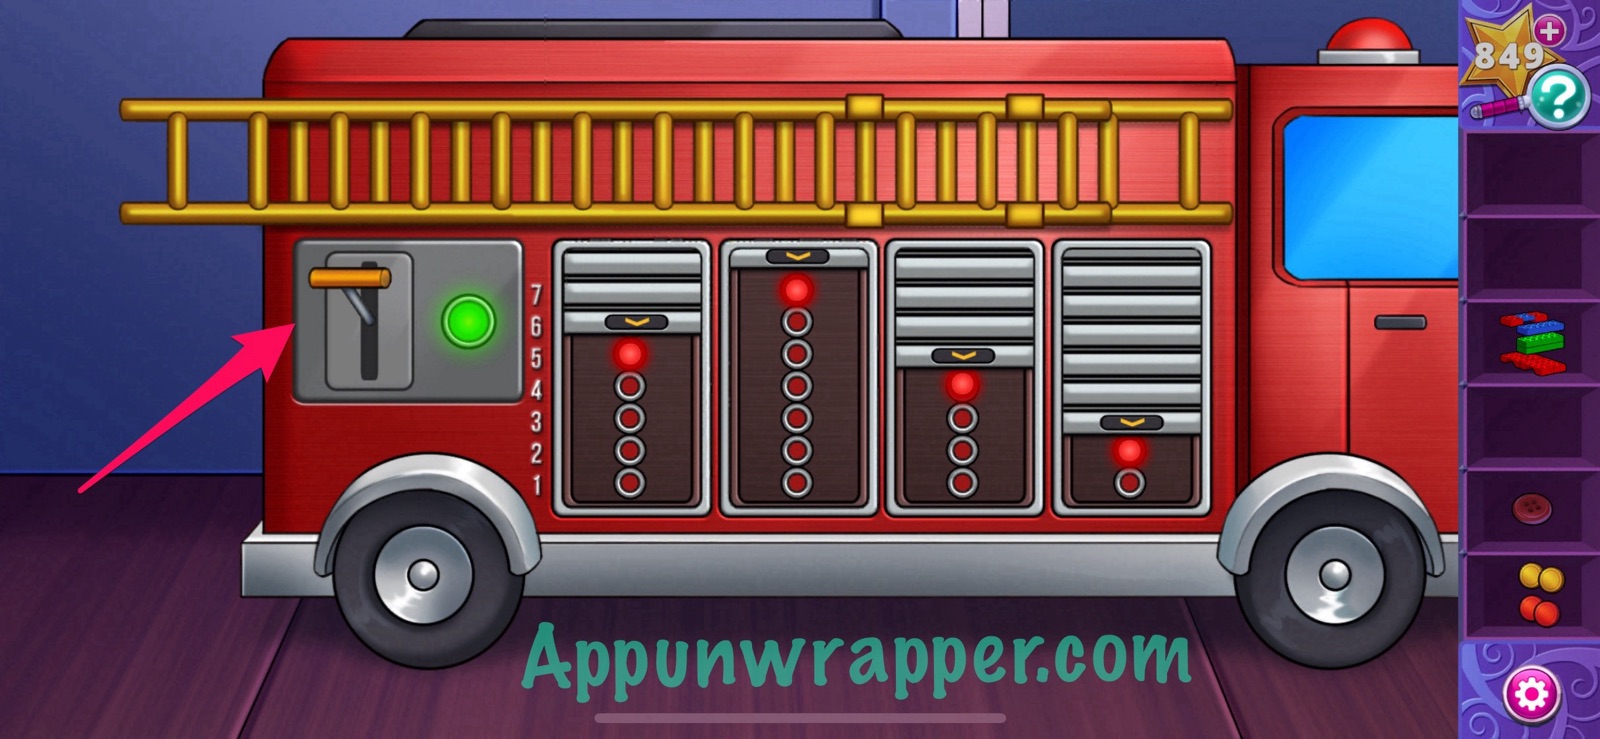
4. Now you’ll automatically move the pickup truck to the bed to light it up under there. Pick up the game disc and then look under the bed. You’ll see four trucks with the numbers 5742 on them.
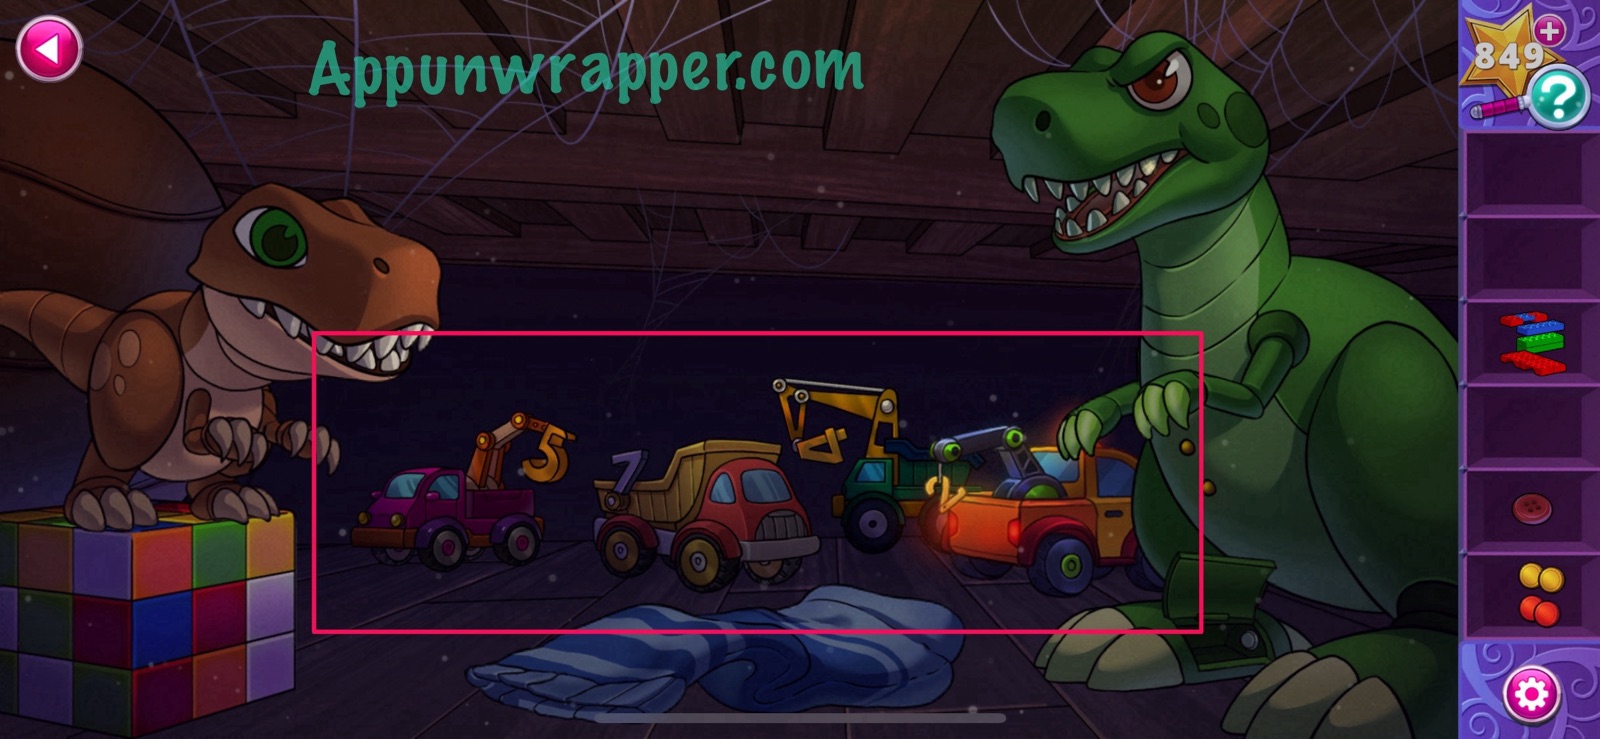
5. Tap on the fire truck and pull up the shutters until the lights are on the numbers 5742. Pull the lever. Then everyone will climb up the ladder to the plane.
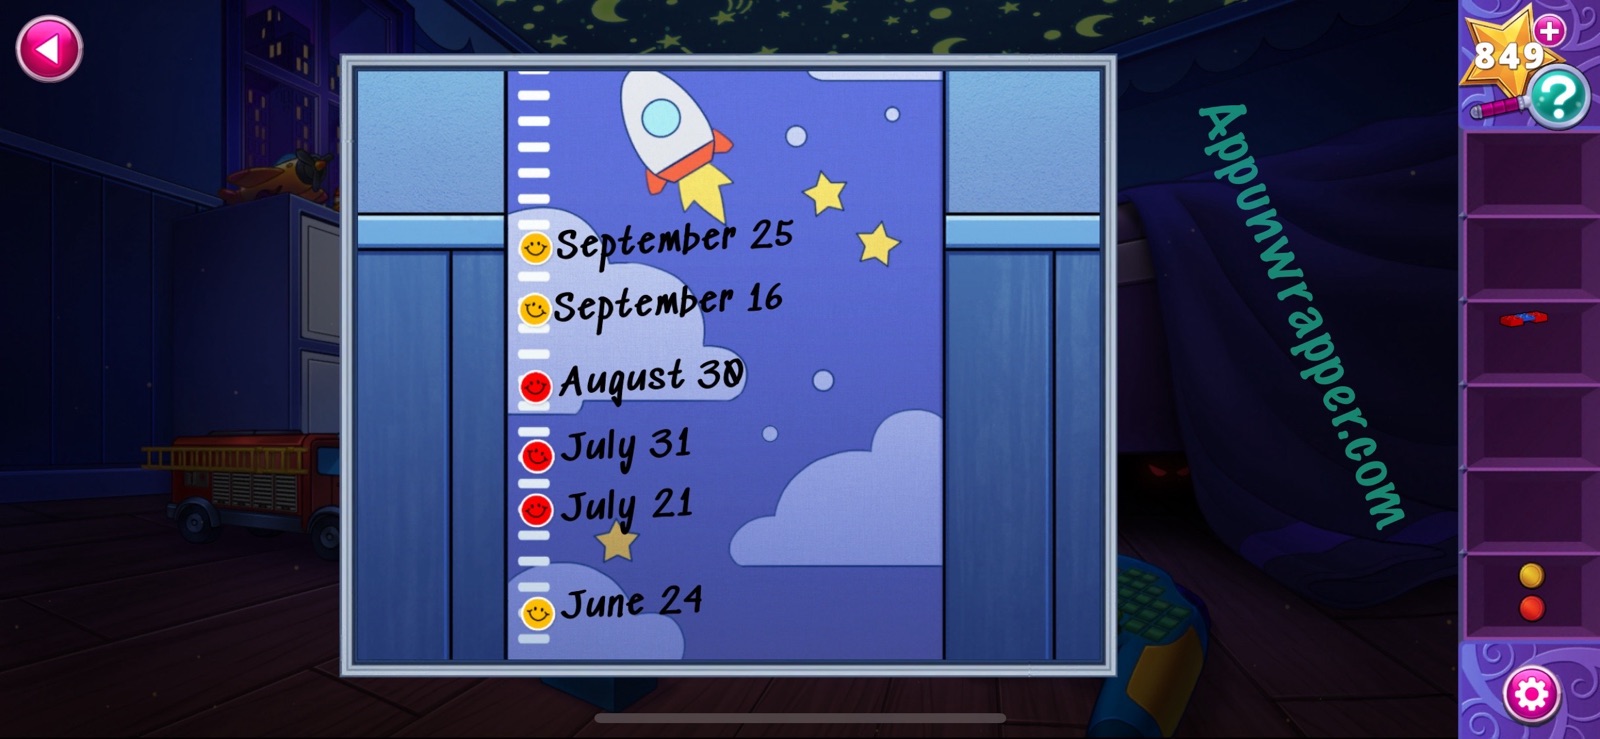
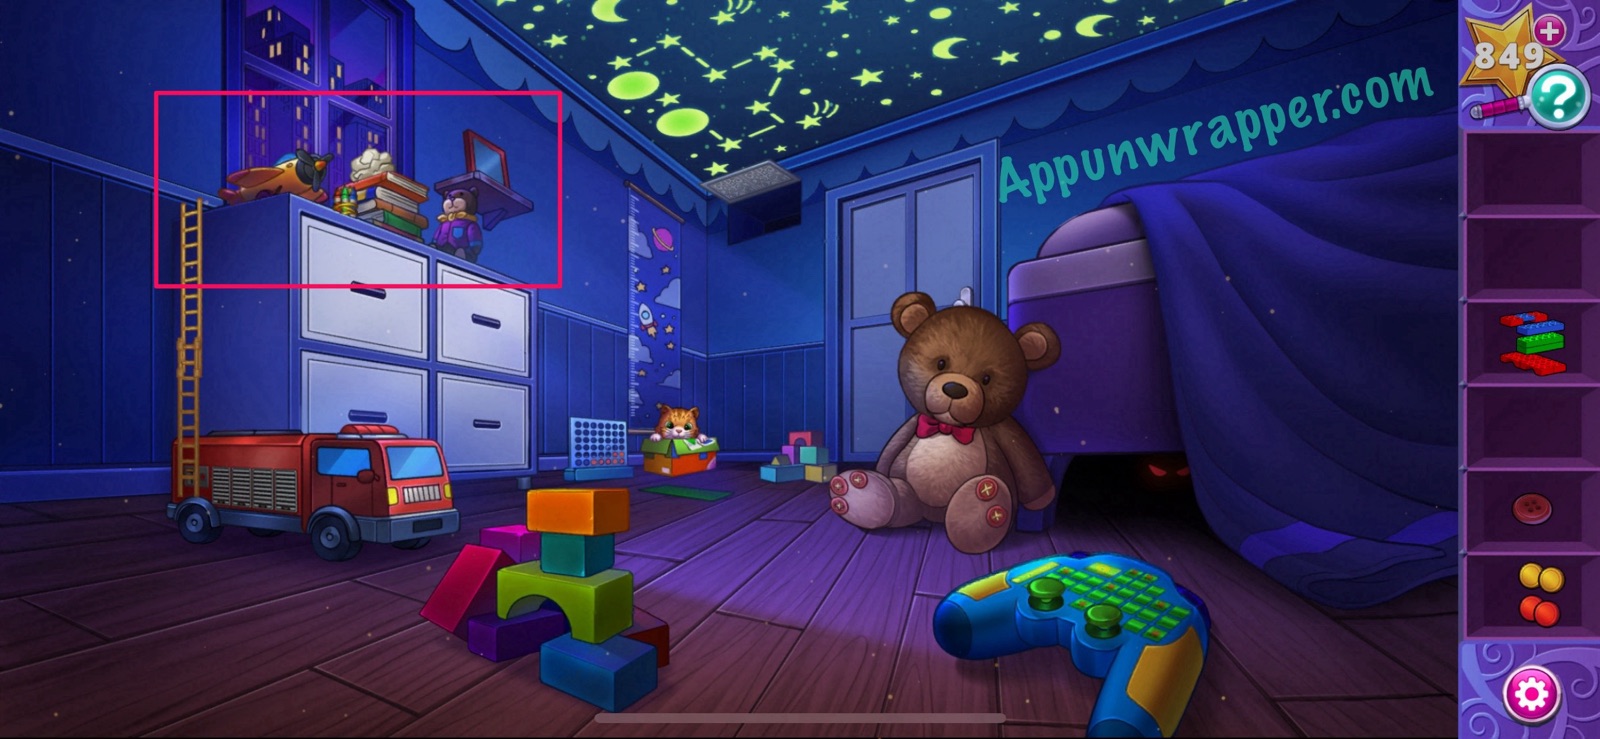
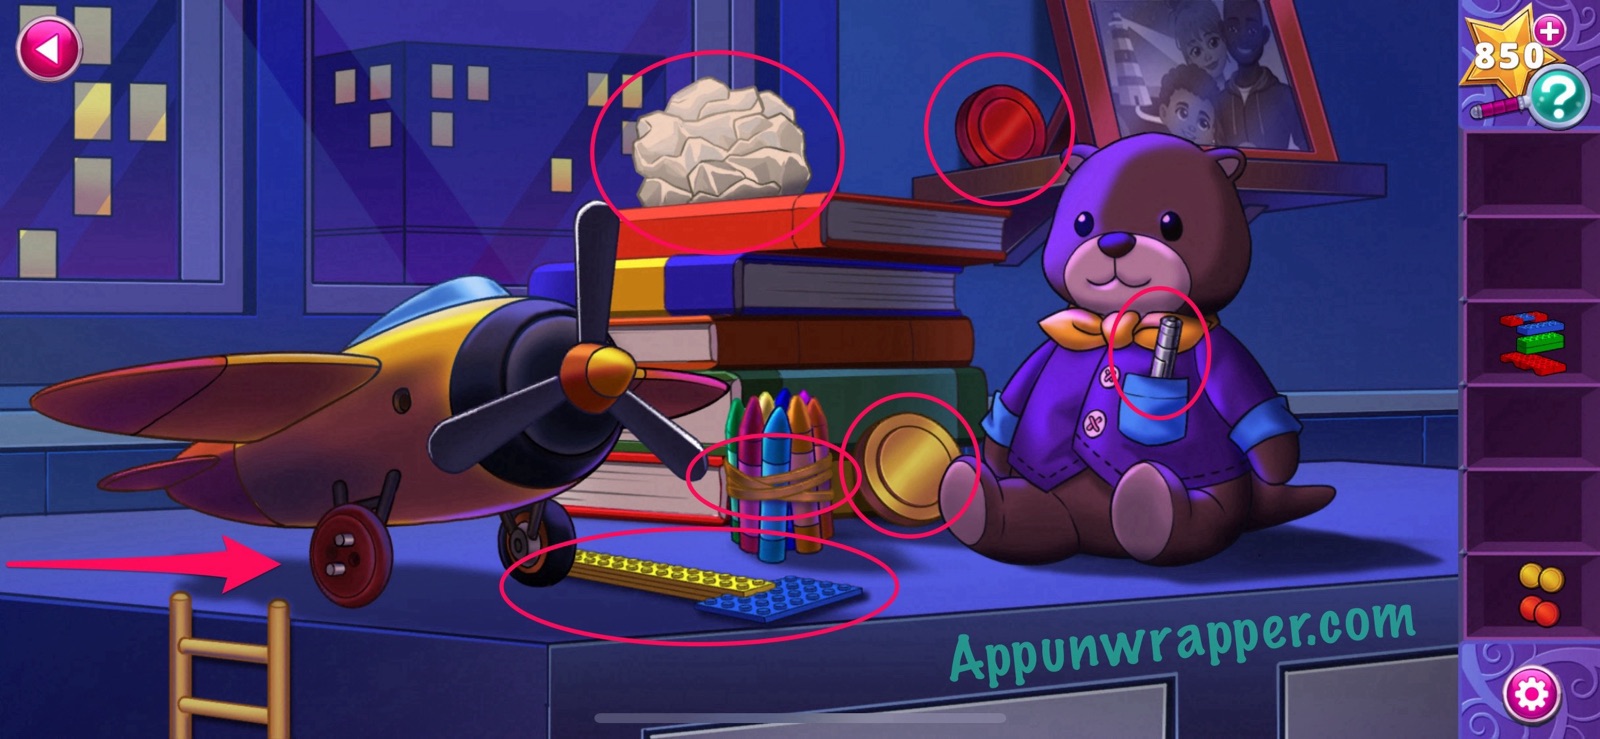
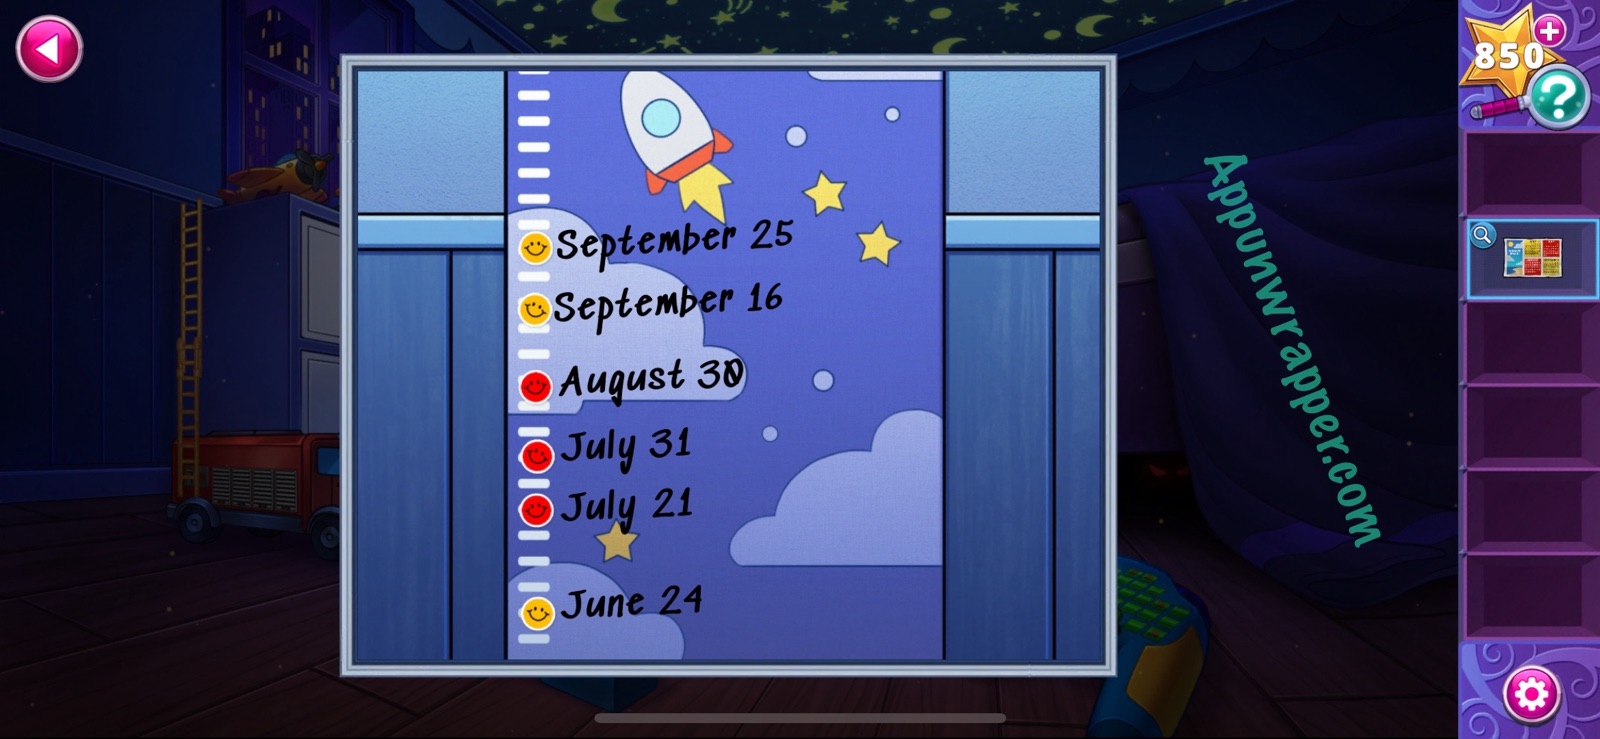
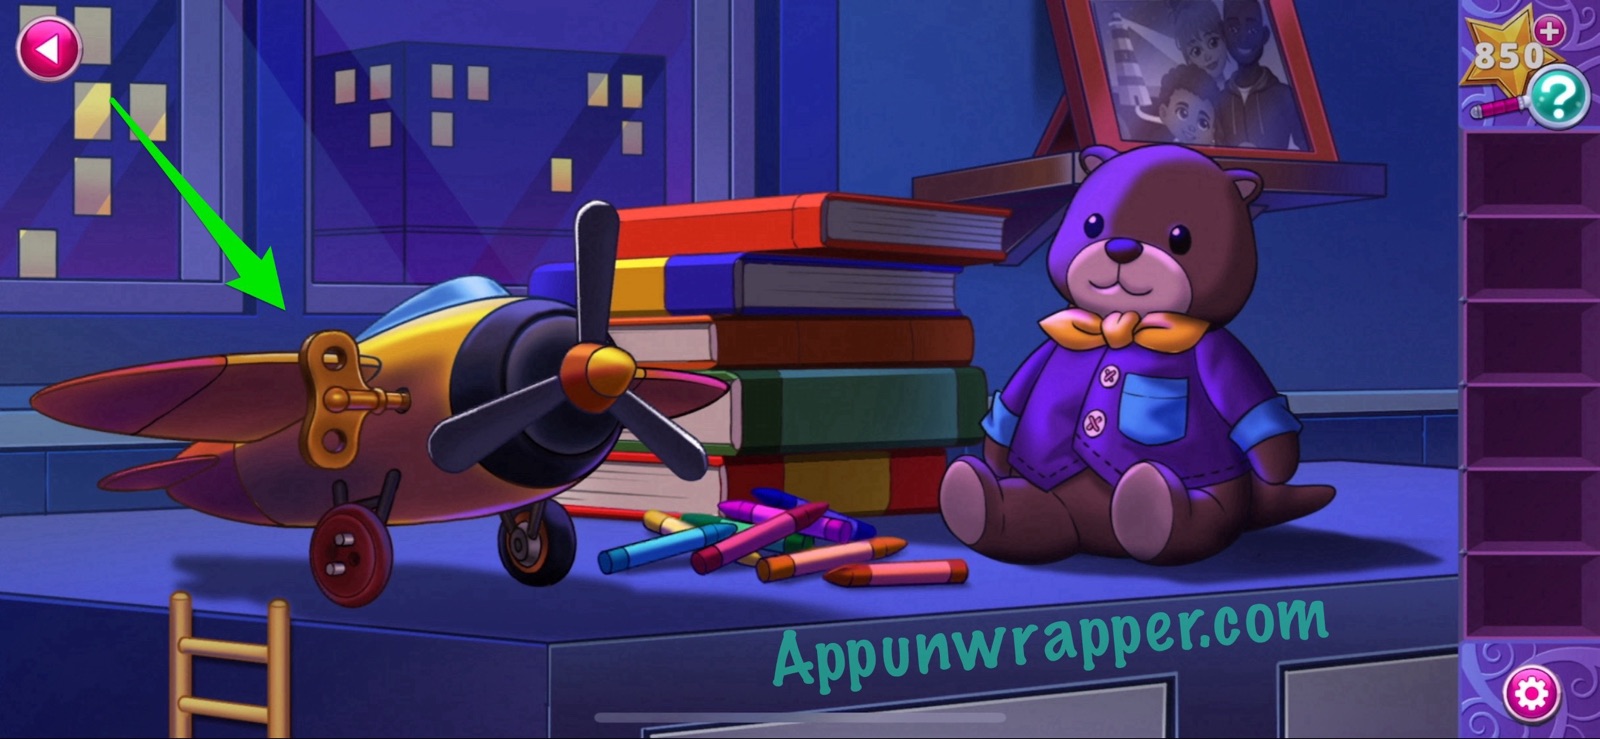
6. Tap on the plane to look at it. The plane needs both a wind-up key and also a wheel. Use the button as a wheel. Then grab the two game discs, the construction blocks, rubber band, laser pointer and calendar. Look at the calendar for a clue.
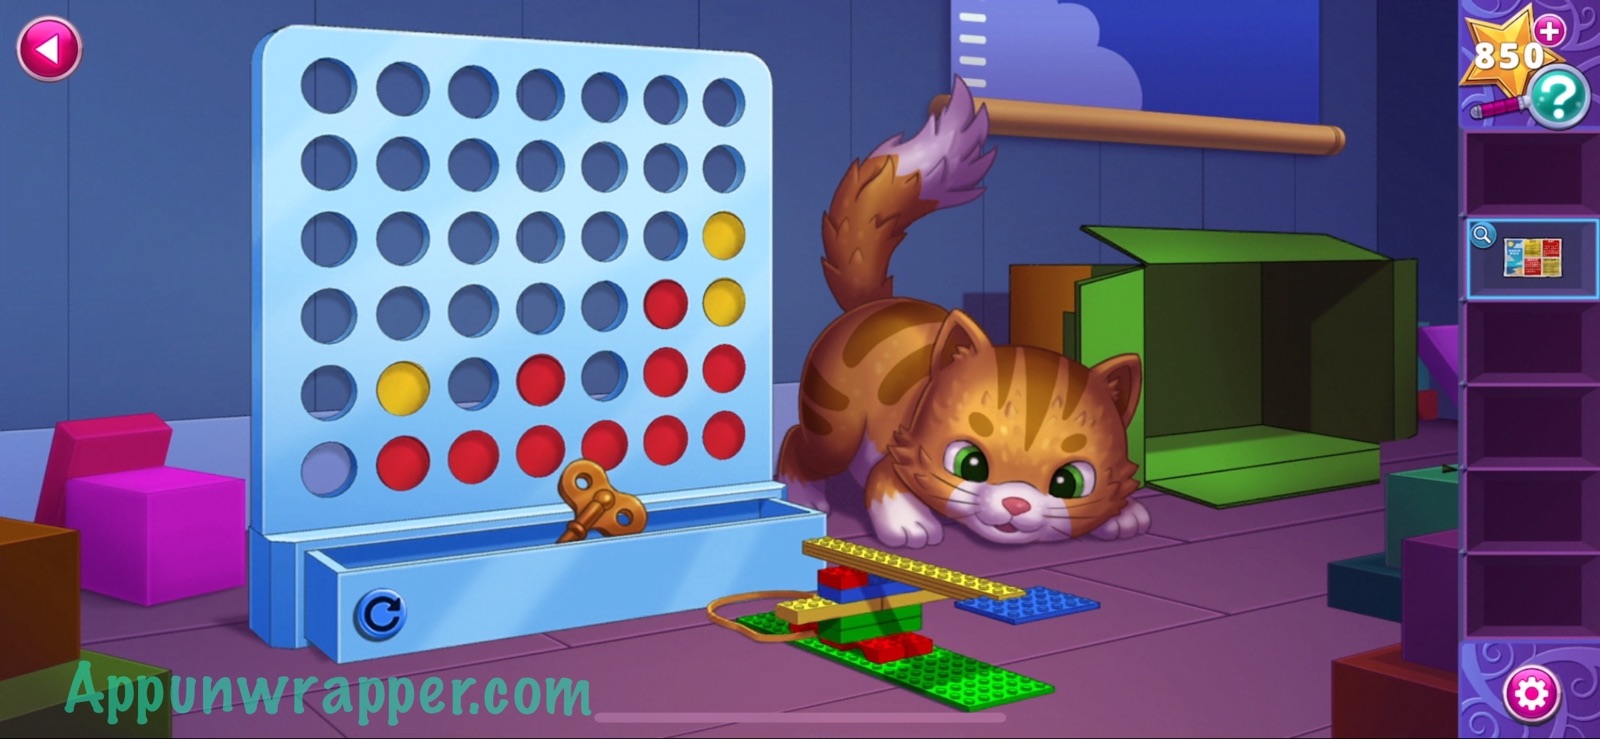
7. Go back down and tap on the cat and Connect Four game in the back of the room.
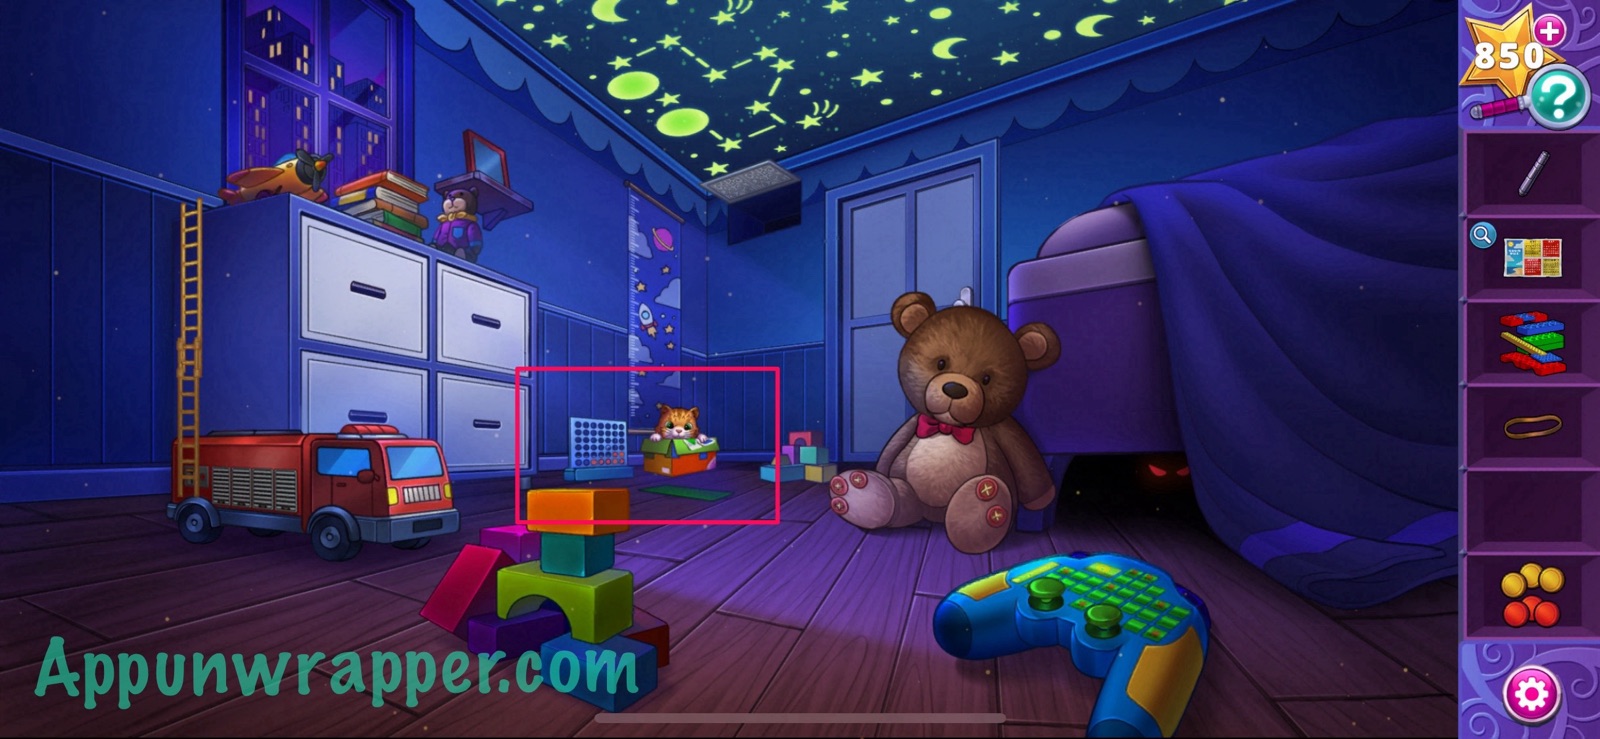
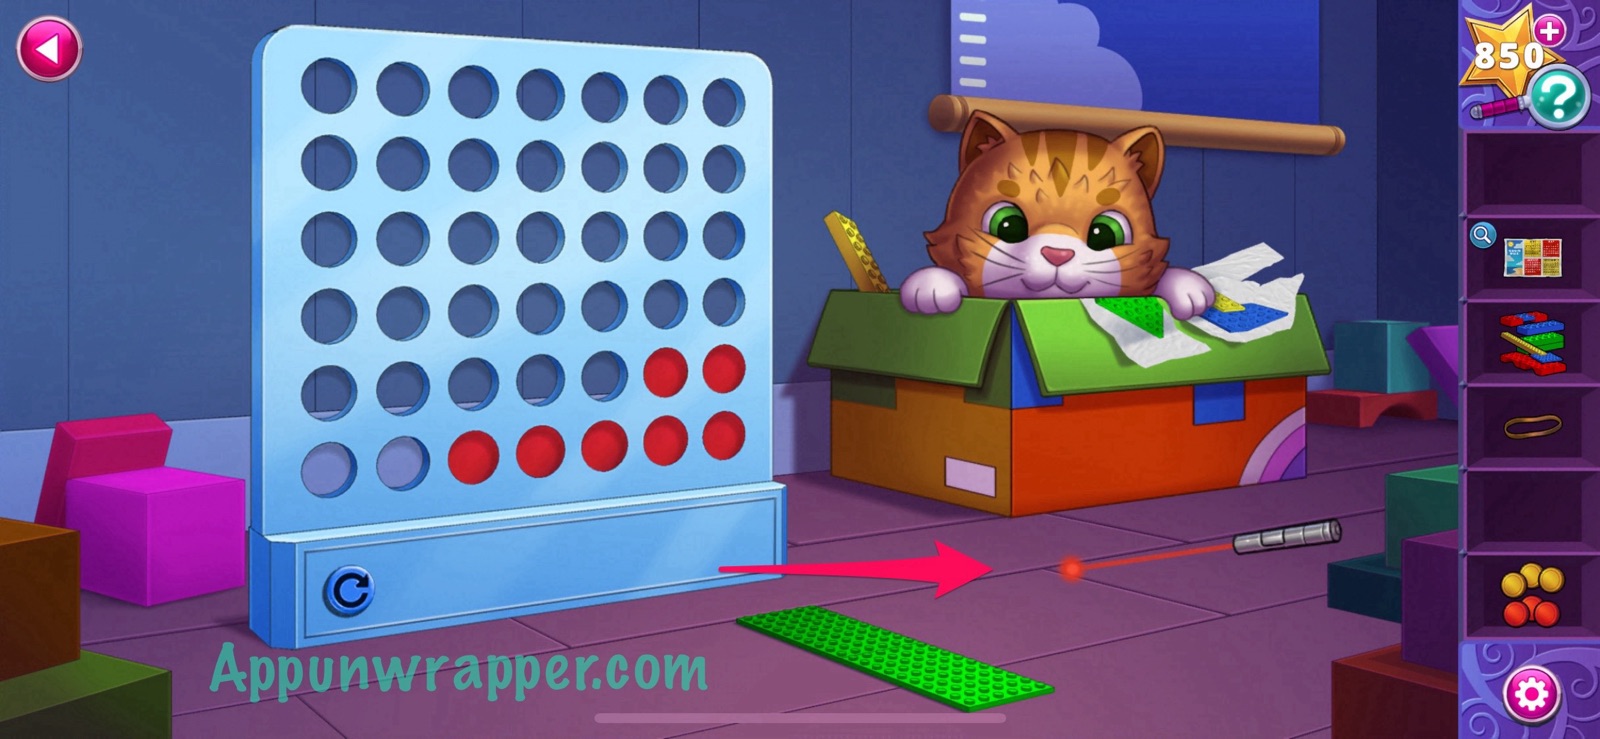
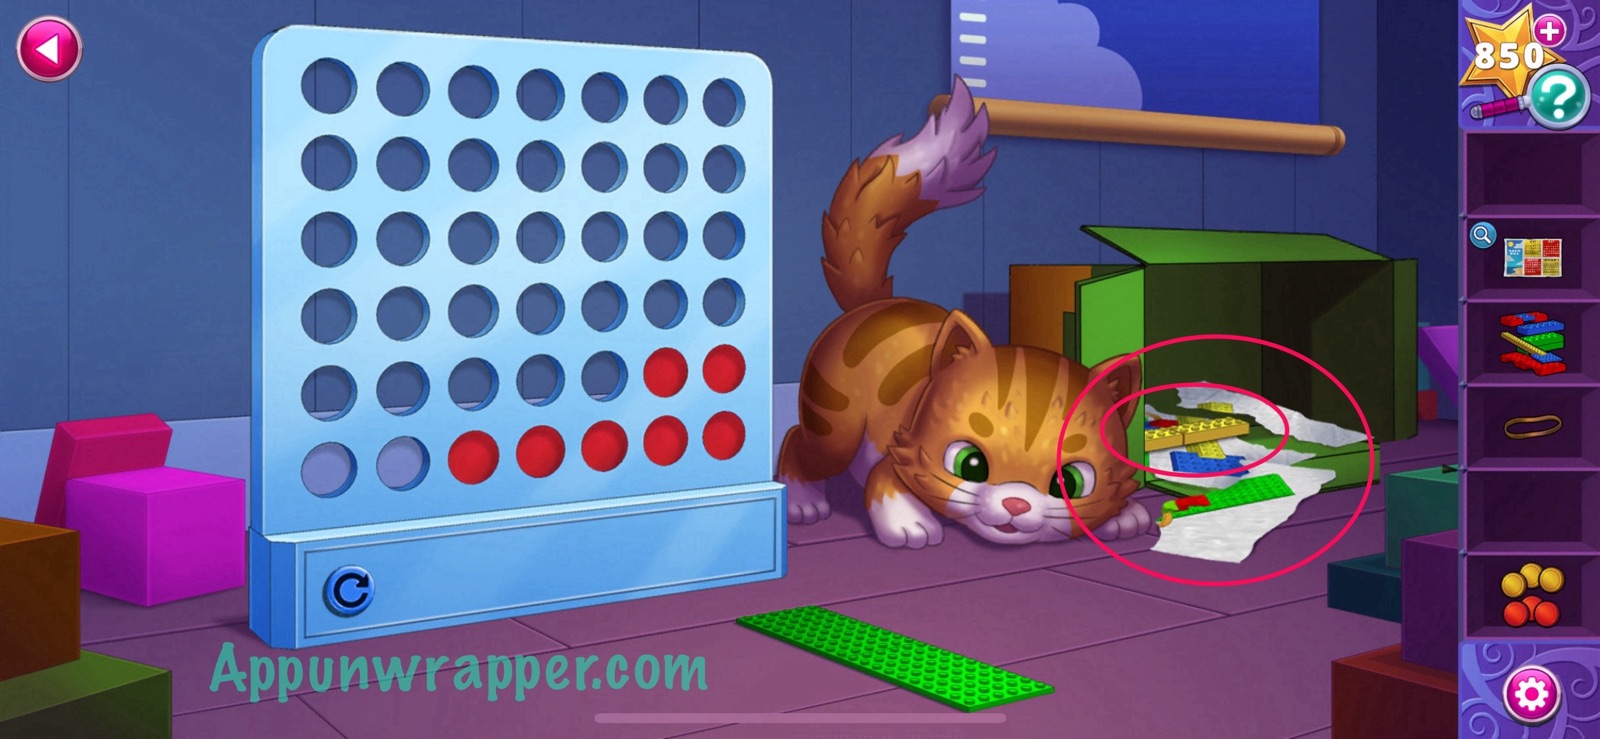
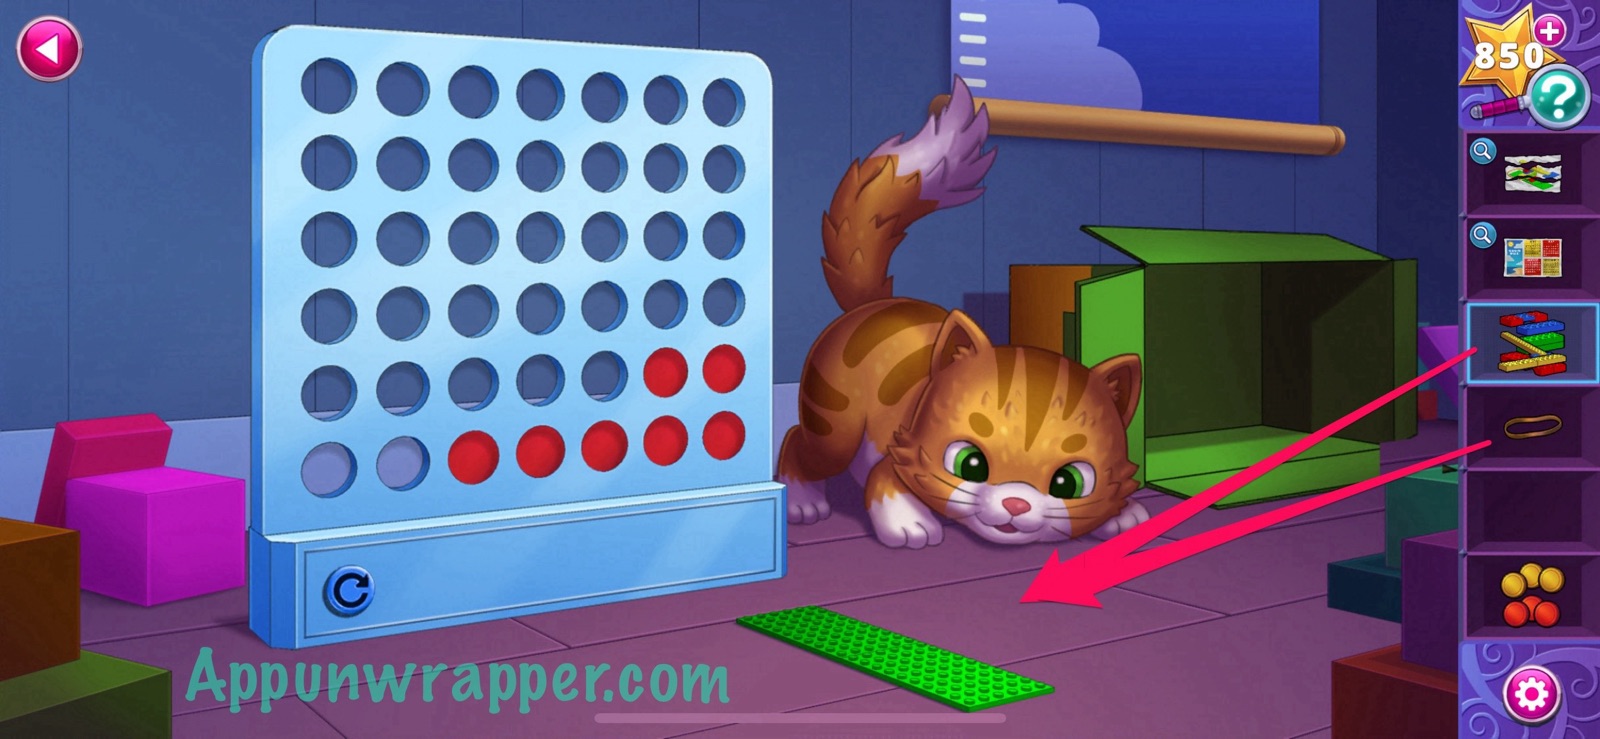
8. We need to get into the box to get the instructions and more construction blocks, but the cat is in the way. Use the laser pointer to distract her and then grab the instruction sheet and construction blocks.
9. Place all the blocks down and also the rubber band and then look at the instructions to see what we’re going to build.
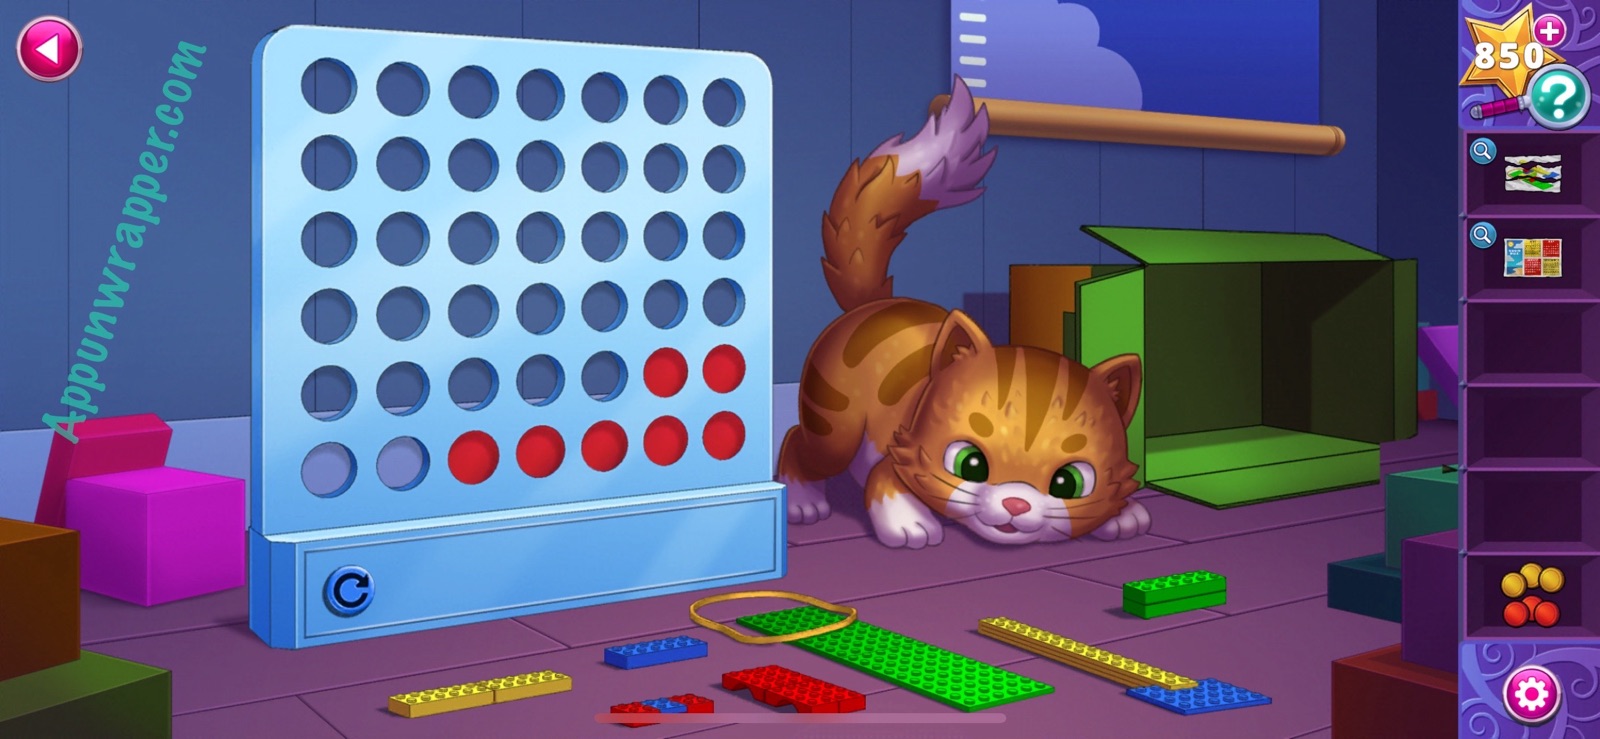
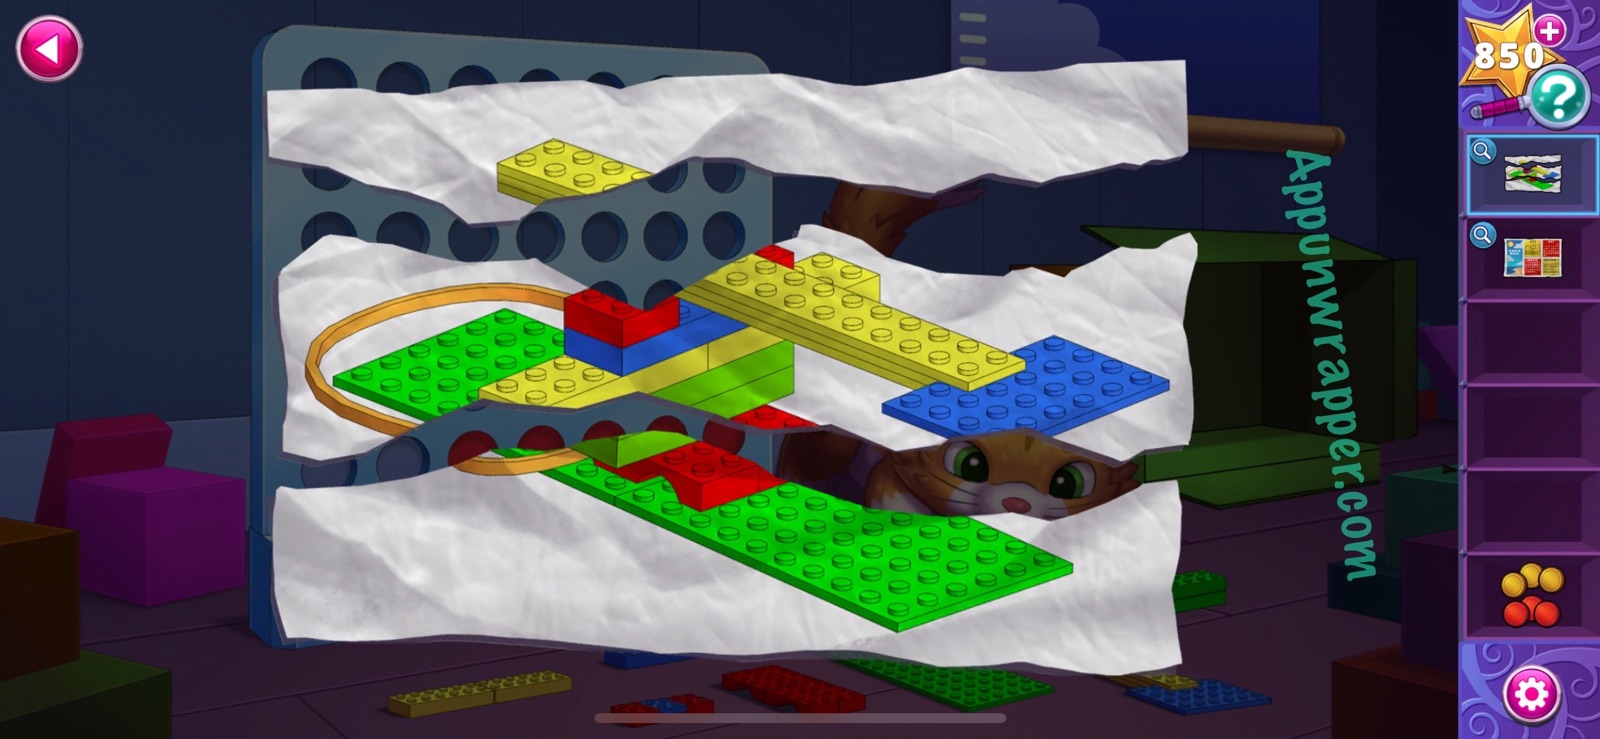
10. Now select each of the pieces to place them in the right order. I numbered them for you. Then place all the discs by the catapult so we can launch them into the game.

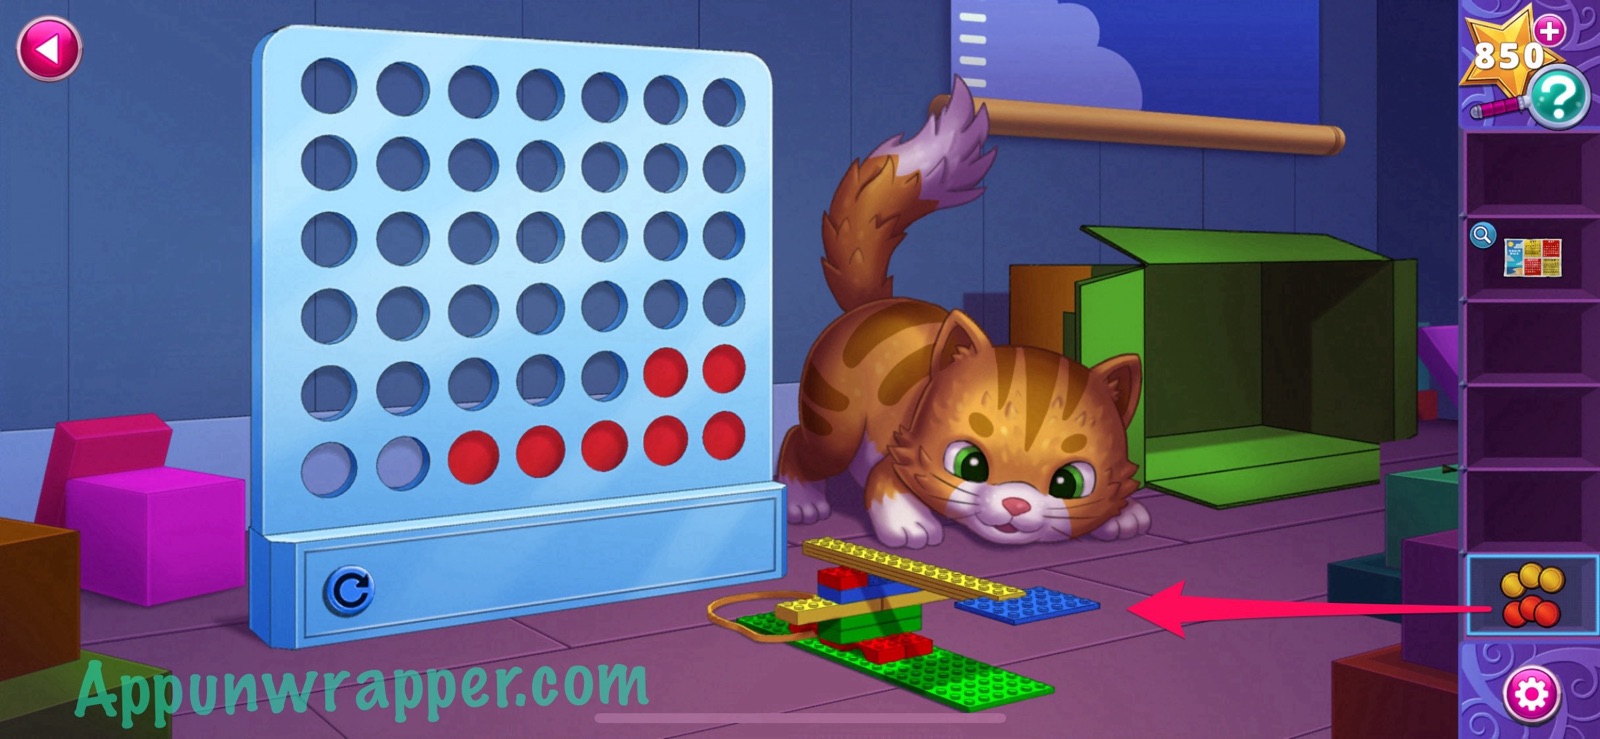
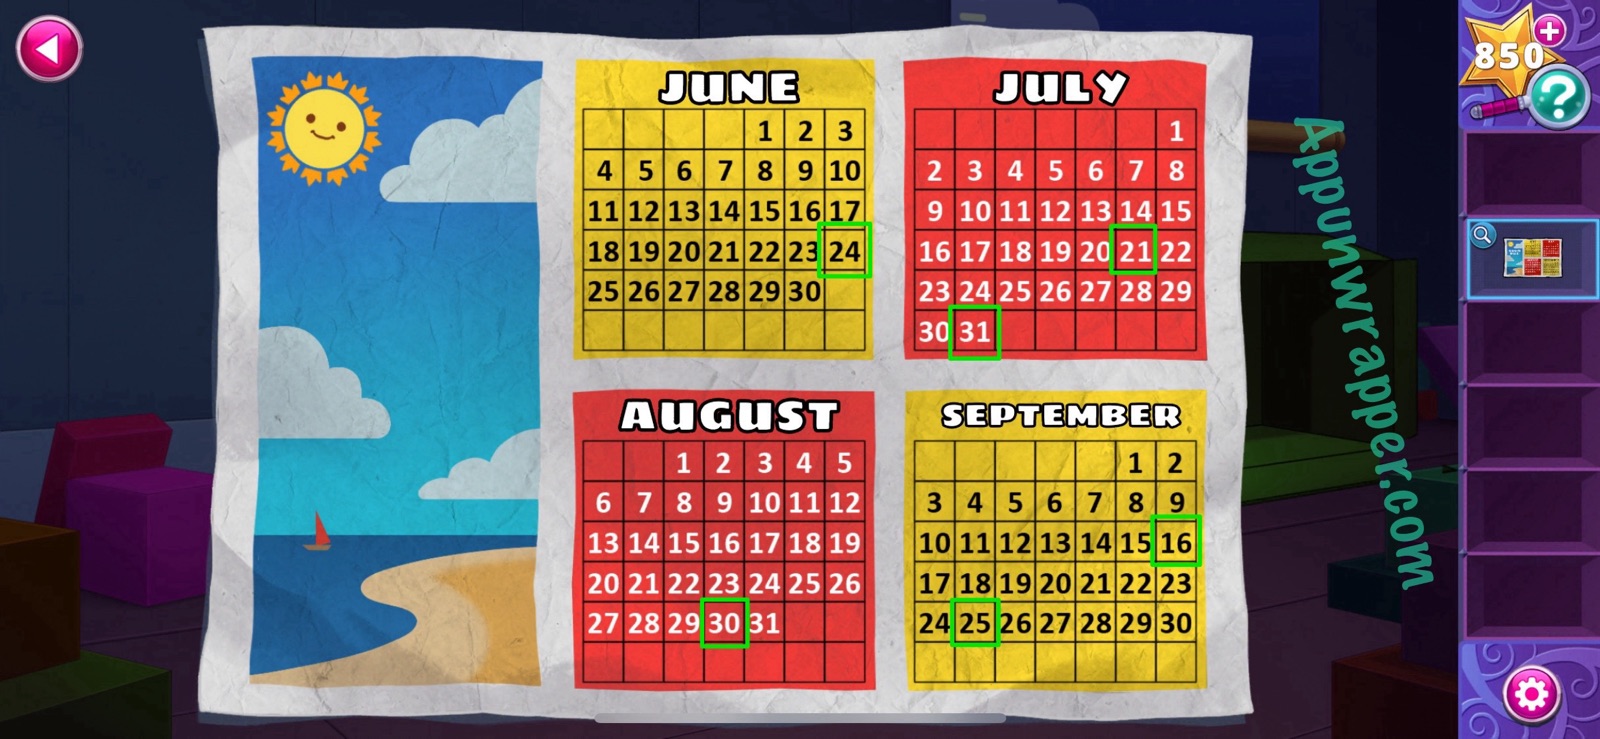
11. Now, we need to use the growth chart together with the calendar to figure out where to send each disc. I’ve highlighted the dates on the calendar for you. Notice the game has six rows and the calendar months each have six rows. You need to make sure the locations of those six dates end up in the same spots in the game. In the end, it should look like the photo below. To simplify it, drop a red disc in the 2nd column, then a yellow in the 2nd column, a red in the 4th column, a red in the 6th column, and then two yellows in the 7th column. Then you’ll get the wind-up key.
12. Climb back up to the plane and use the wind-up key to get it working. You’ll then fly into the vent.
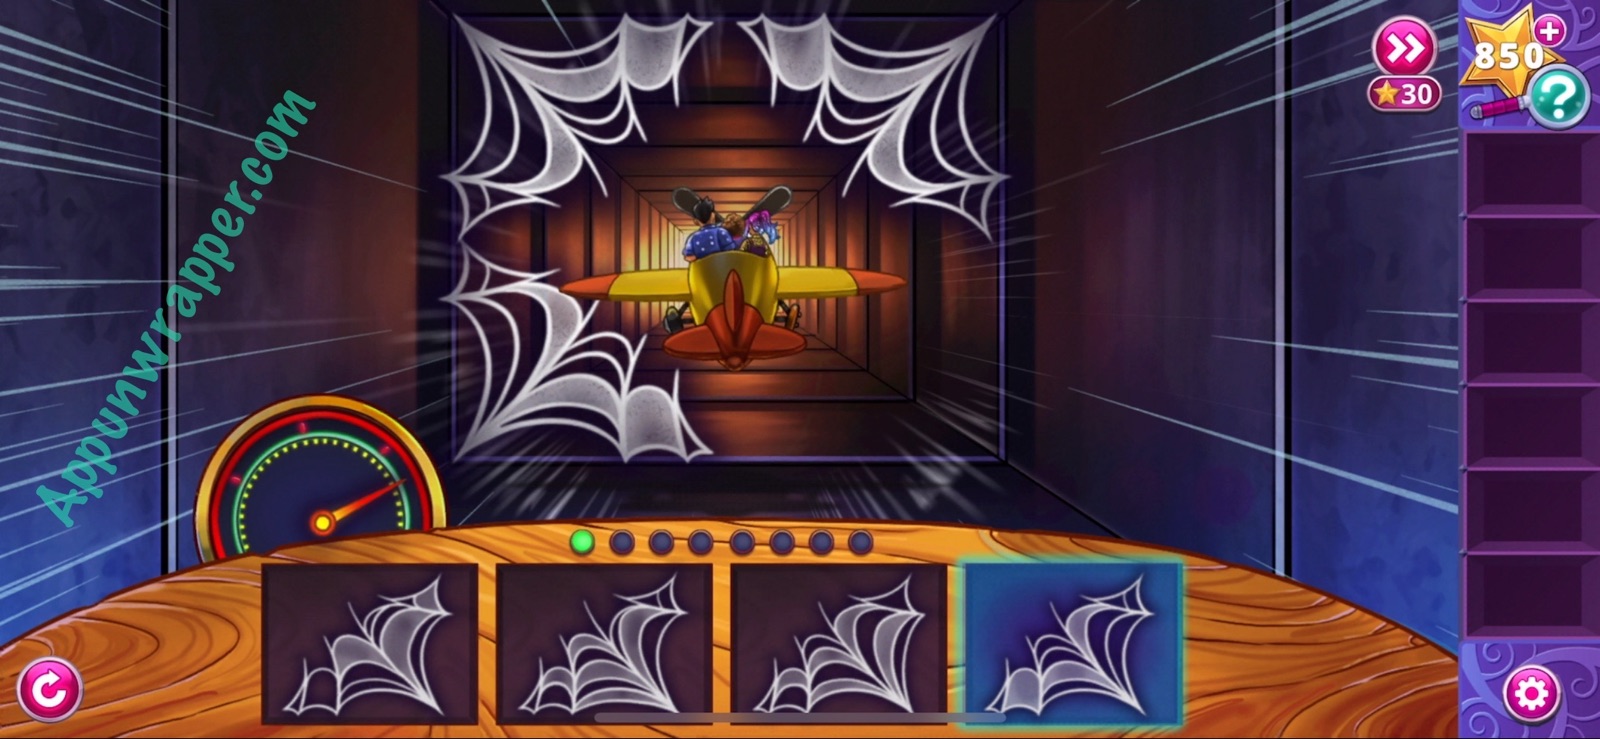
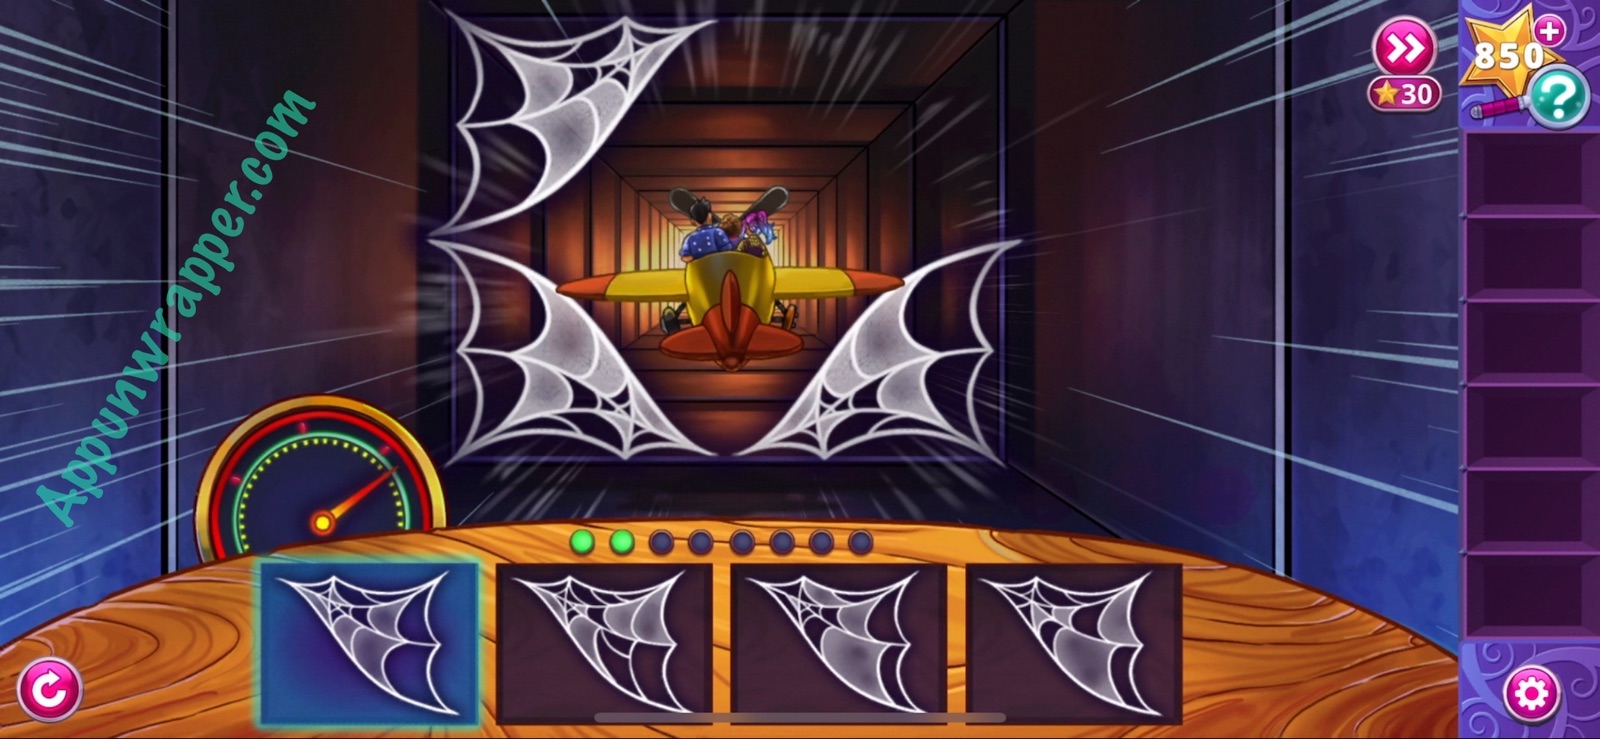
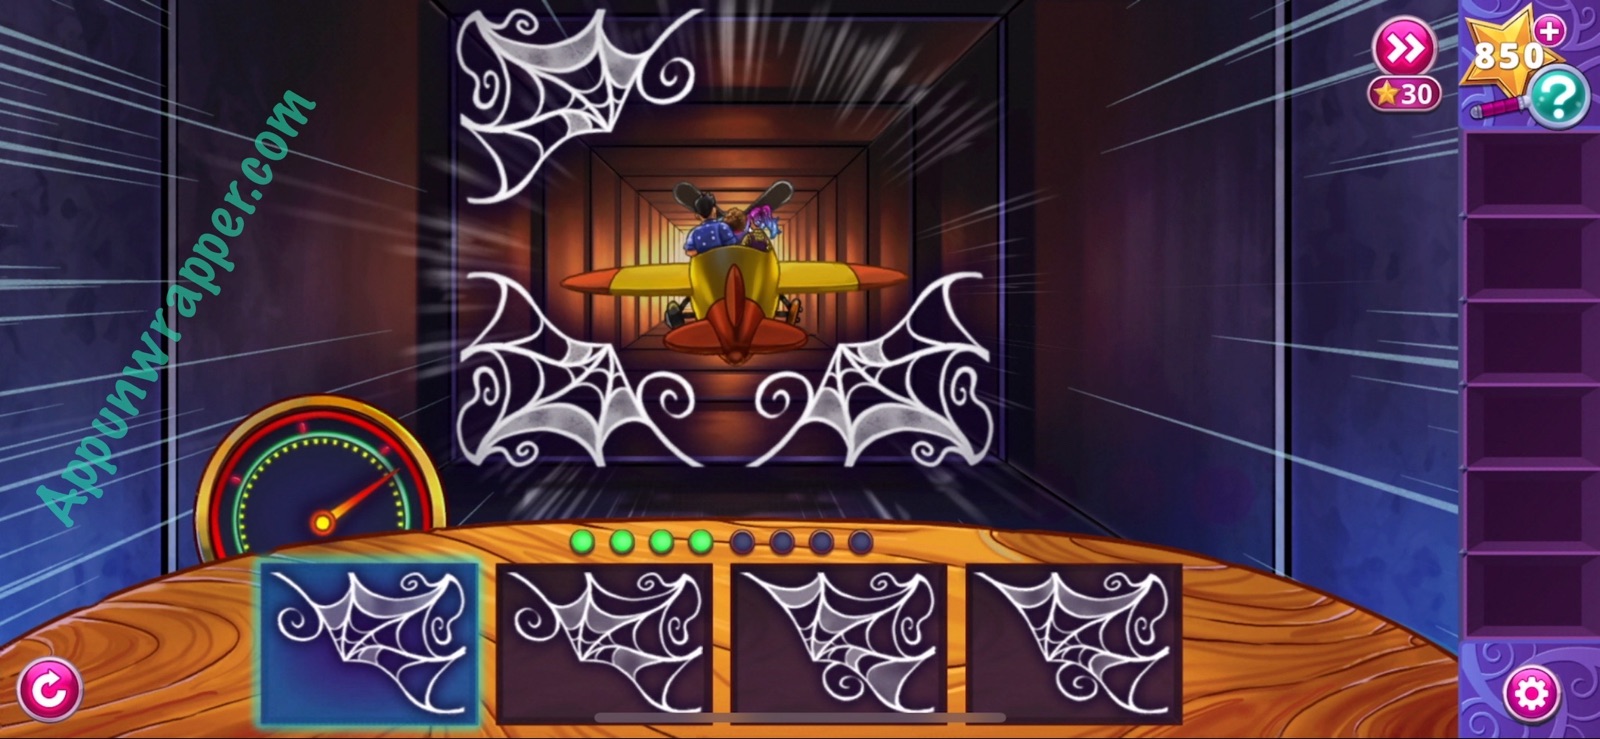
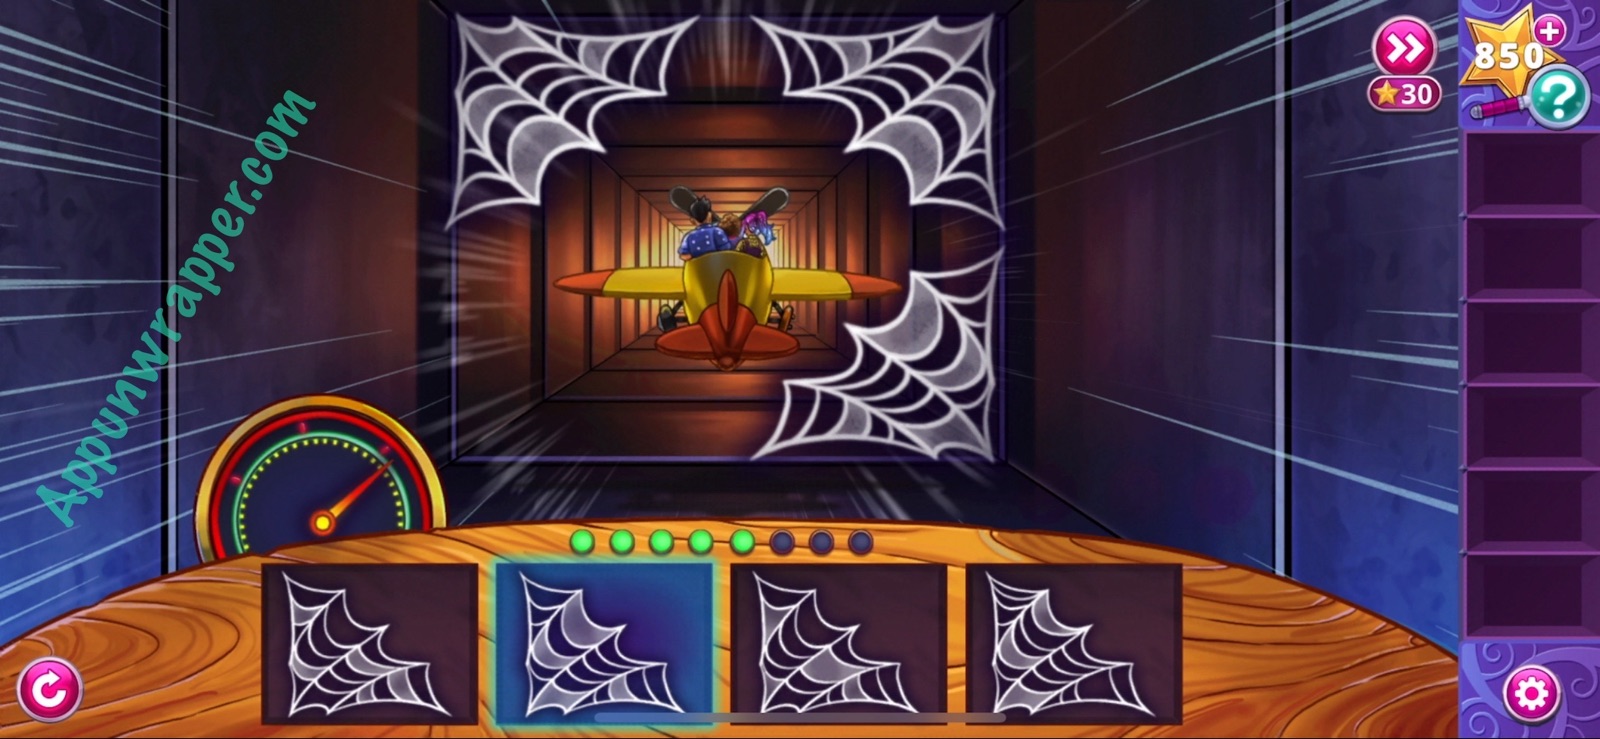
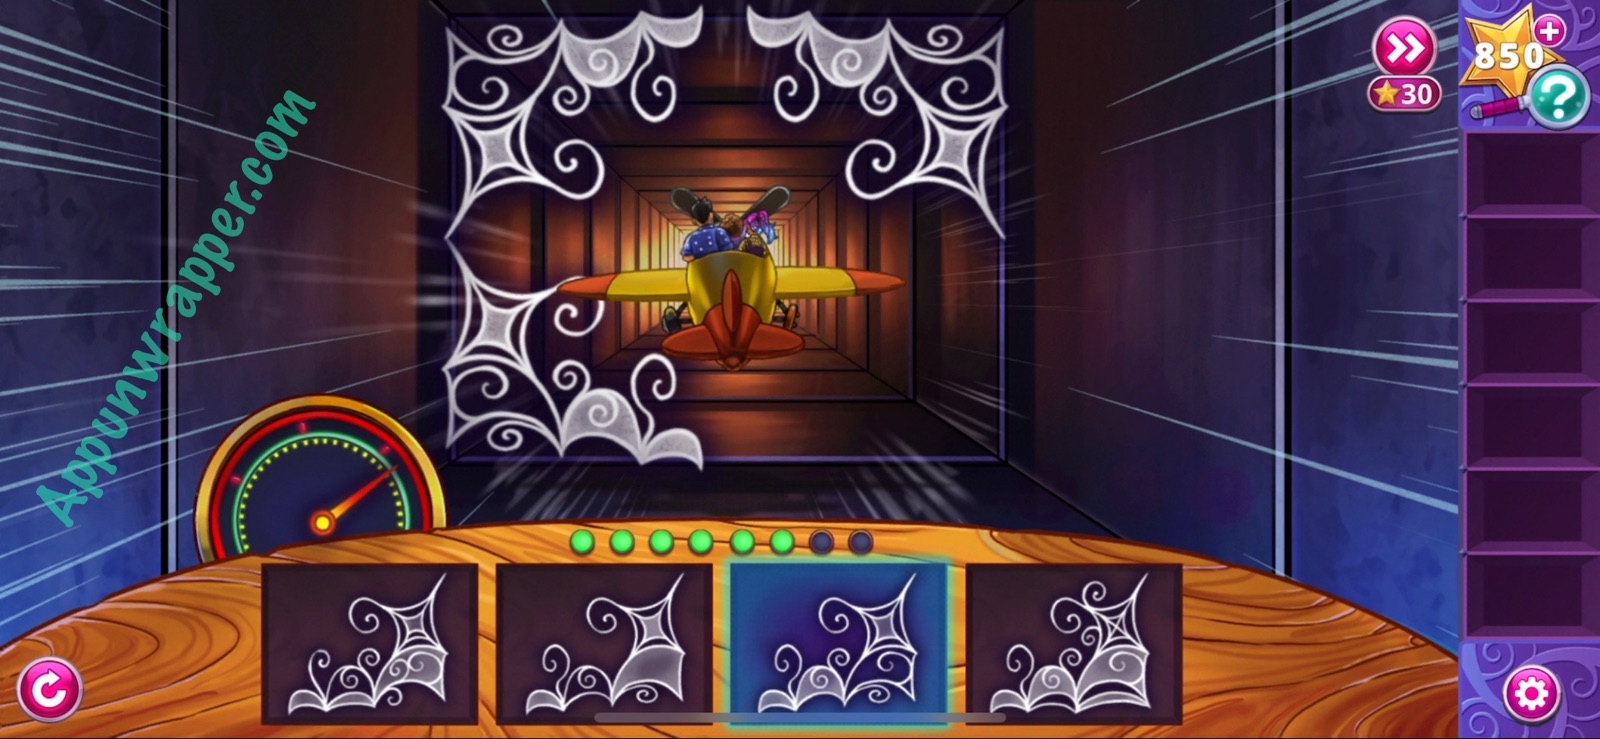
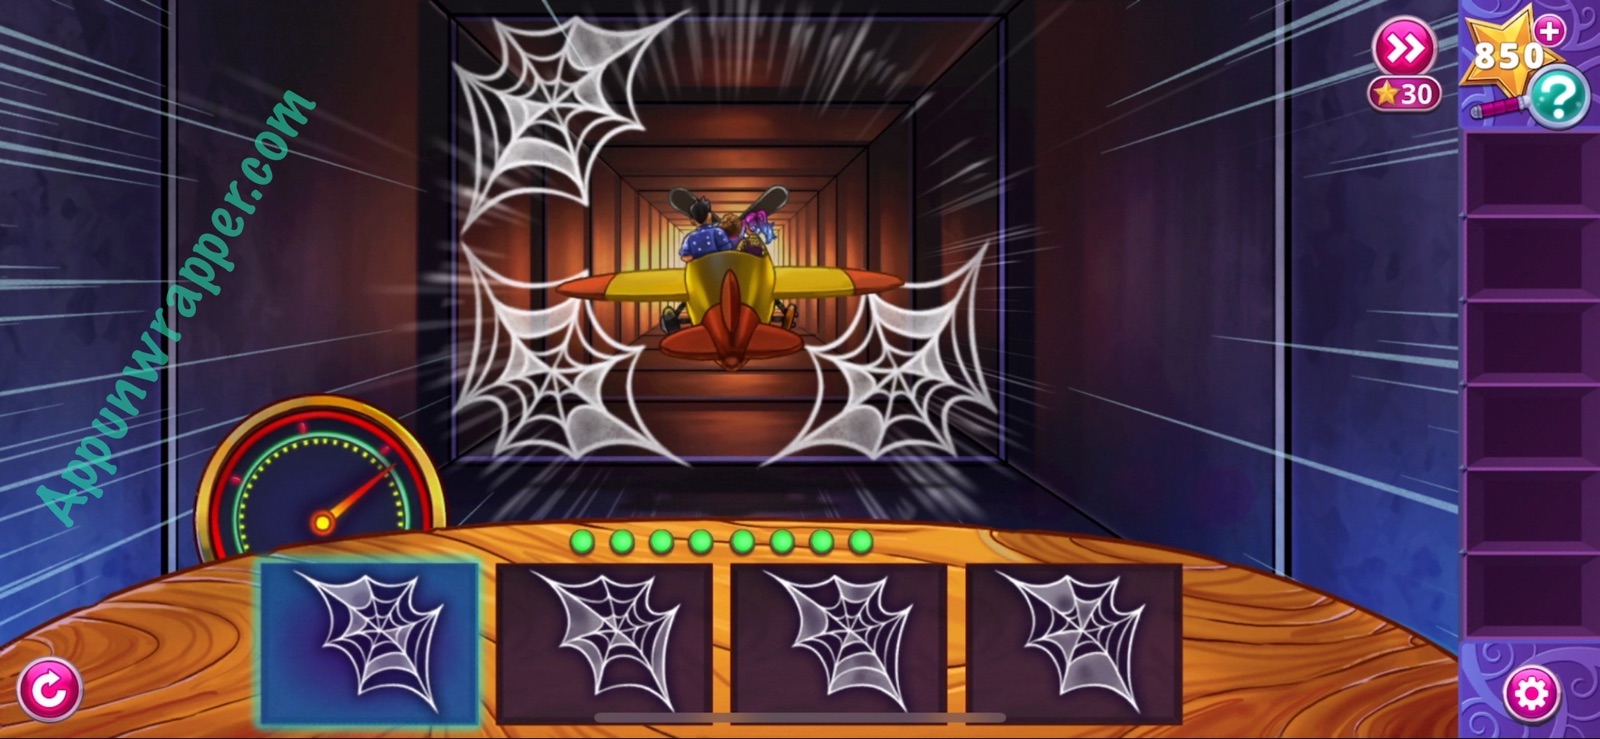
13. Now we have to complete the Airplane Vents puzzle. Select the missing piece of the symmetrical pattern to steer the plane away from the spiderwebs. Solve eight spiderweb patterns before the time runs out to win. Unfortunately, this one seem to be randomized, so the best I can do is give you a few of the solutions and if you see them there they can help you. But the timer is pretty long, so just stay calm and think each one through before choosing.


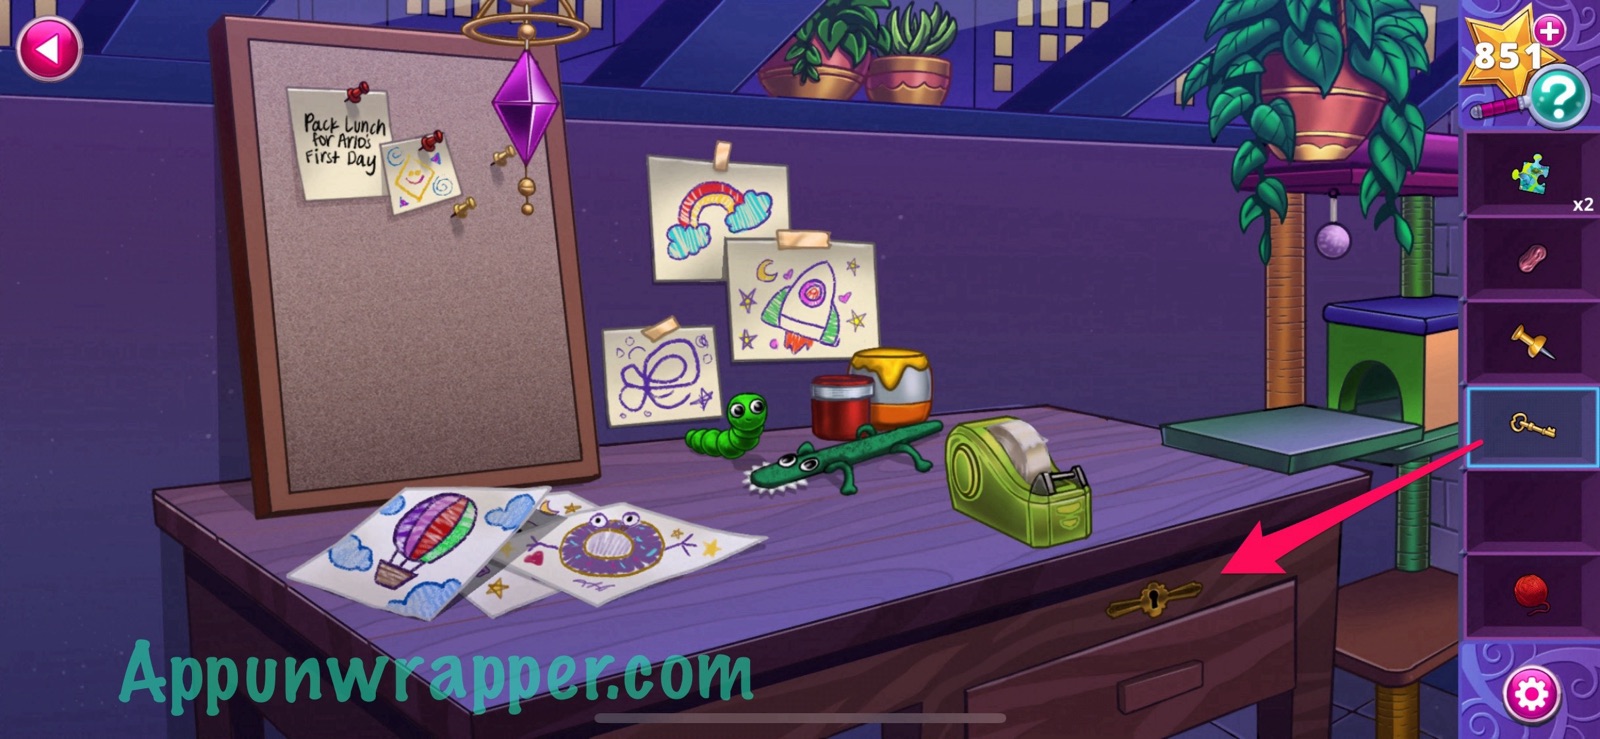
14. Pick up the two puzzle pieces and the gum from the bottom of the shoe. Then tap on the cat tree to create a bridge to the desk. Then use it to get to the desk.
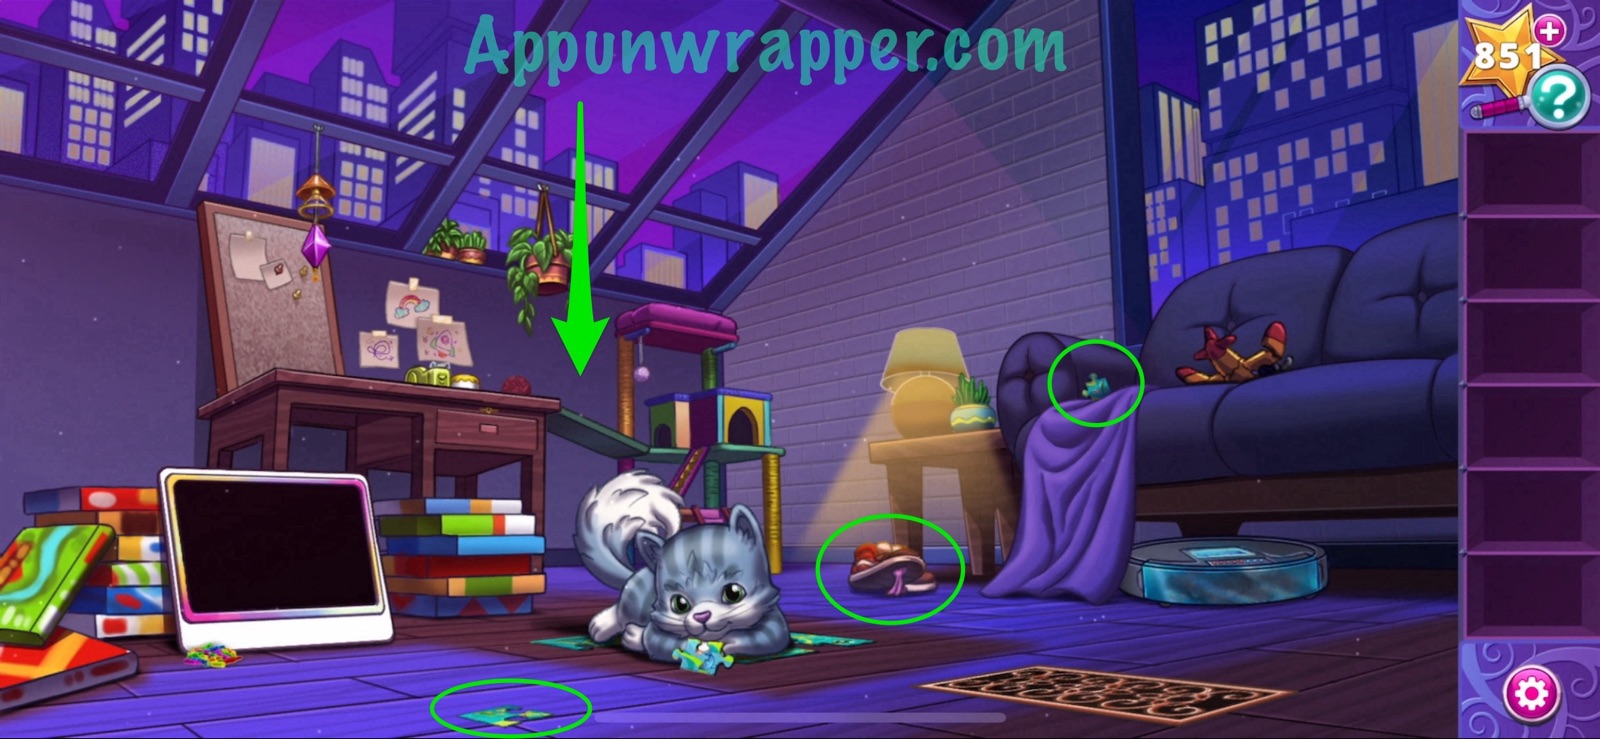
15. Pick up the yarn ball, thumbtack, tape and pipe cleaner.
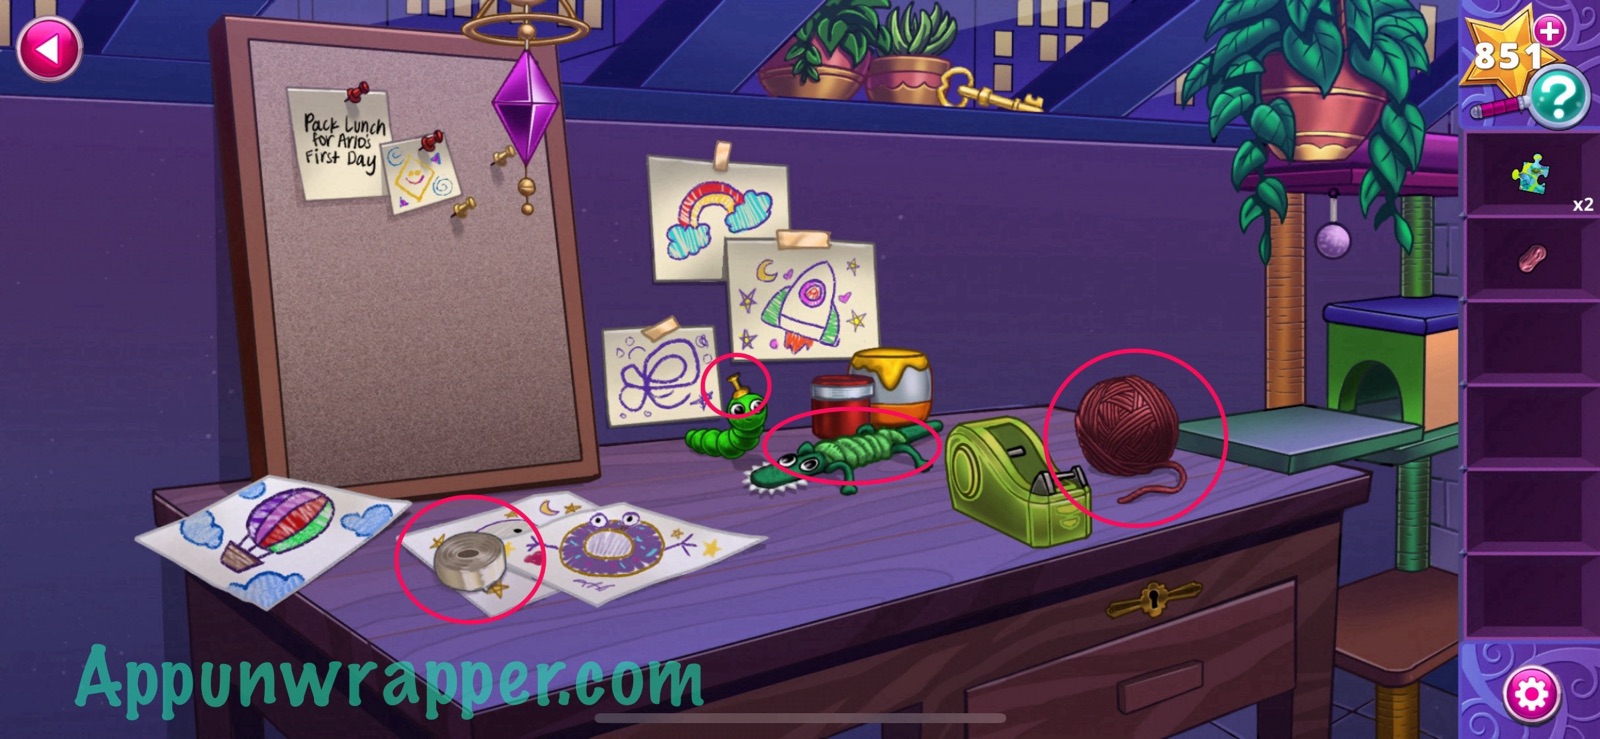
16. Put the tape in the tape dispenser and use the pipe cleaner to reach the gold key.
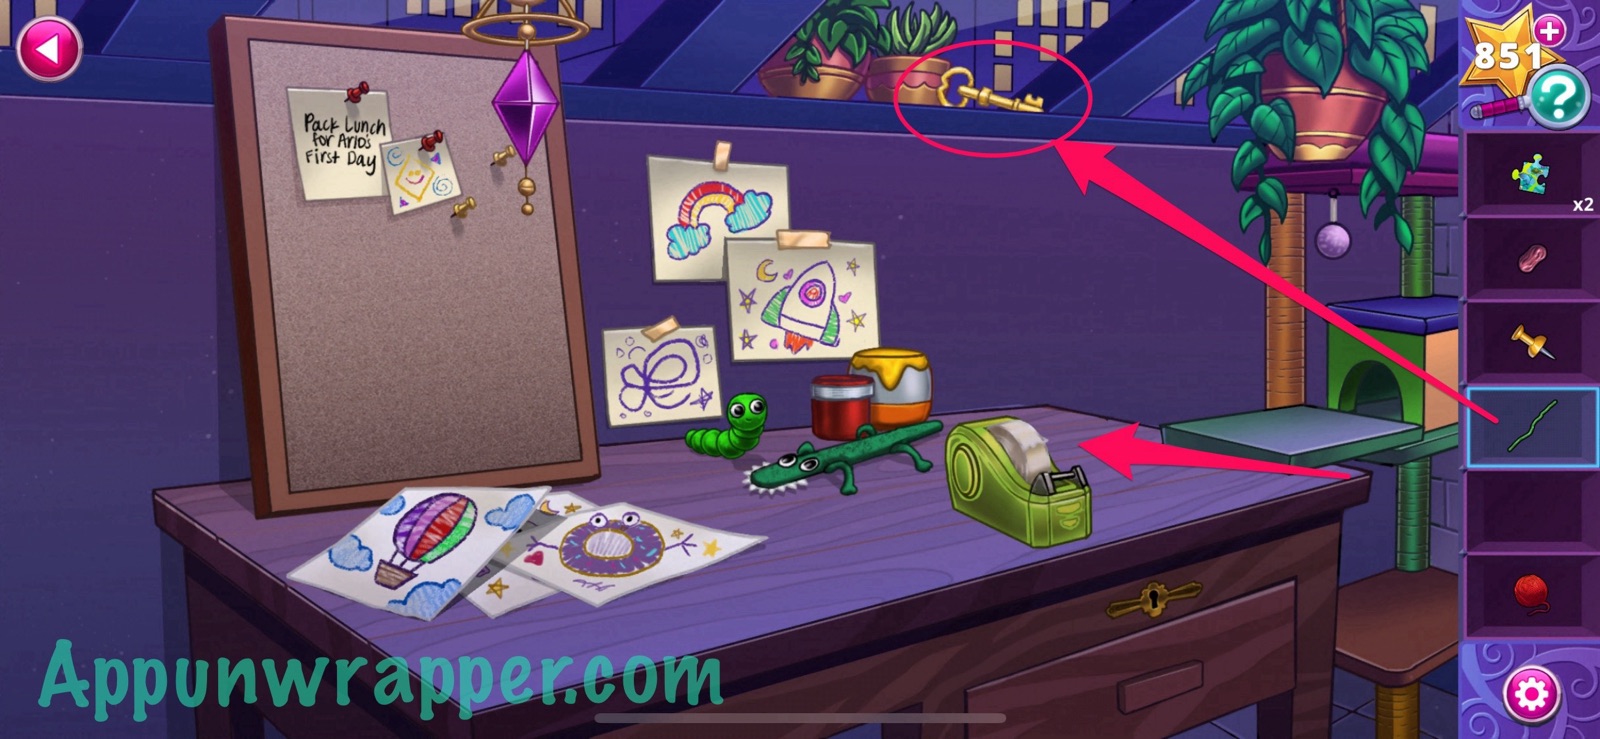
17. Use the key to unlock the drawer and then climb down the tape into the drawer.

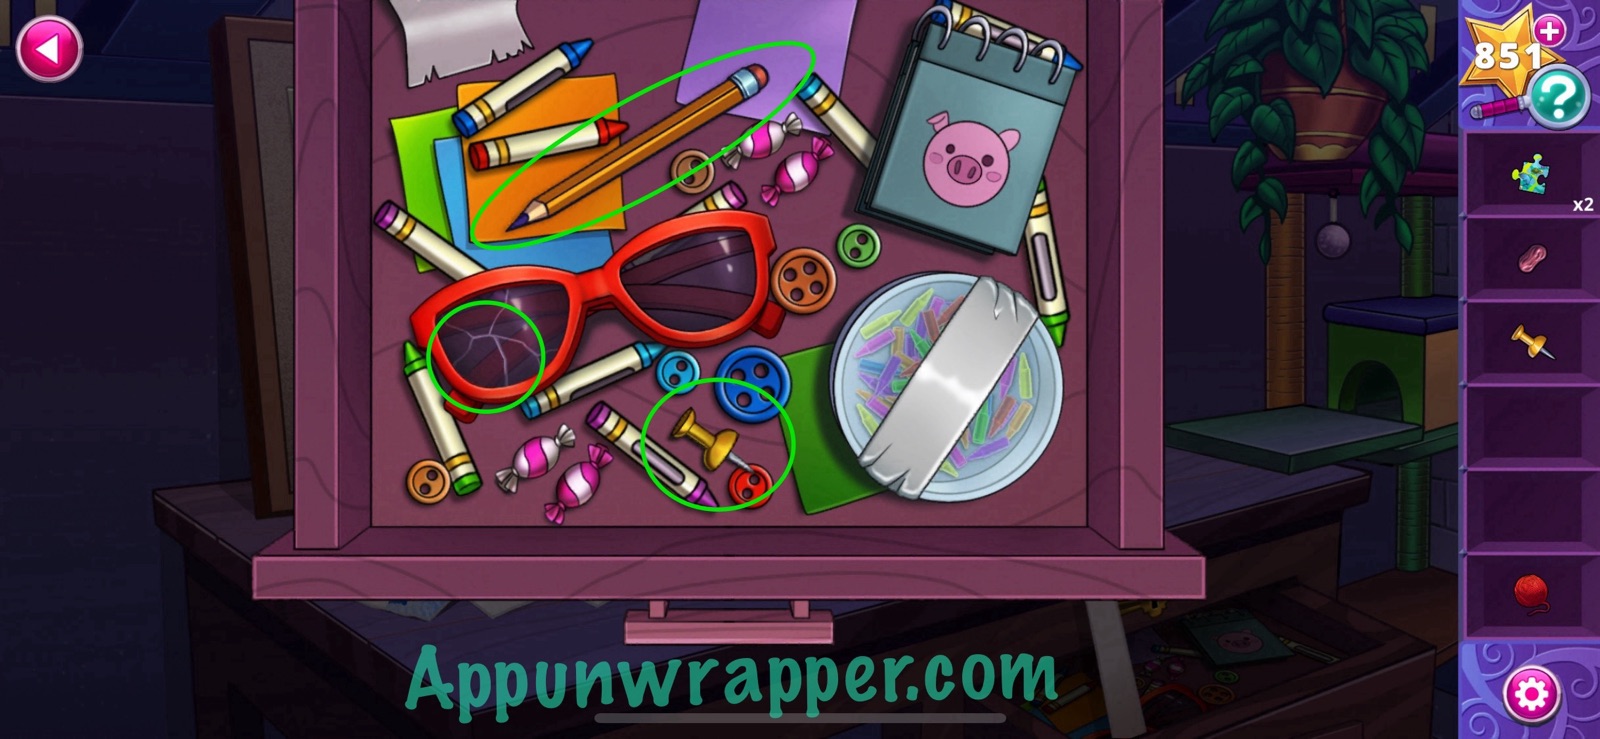
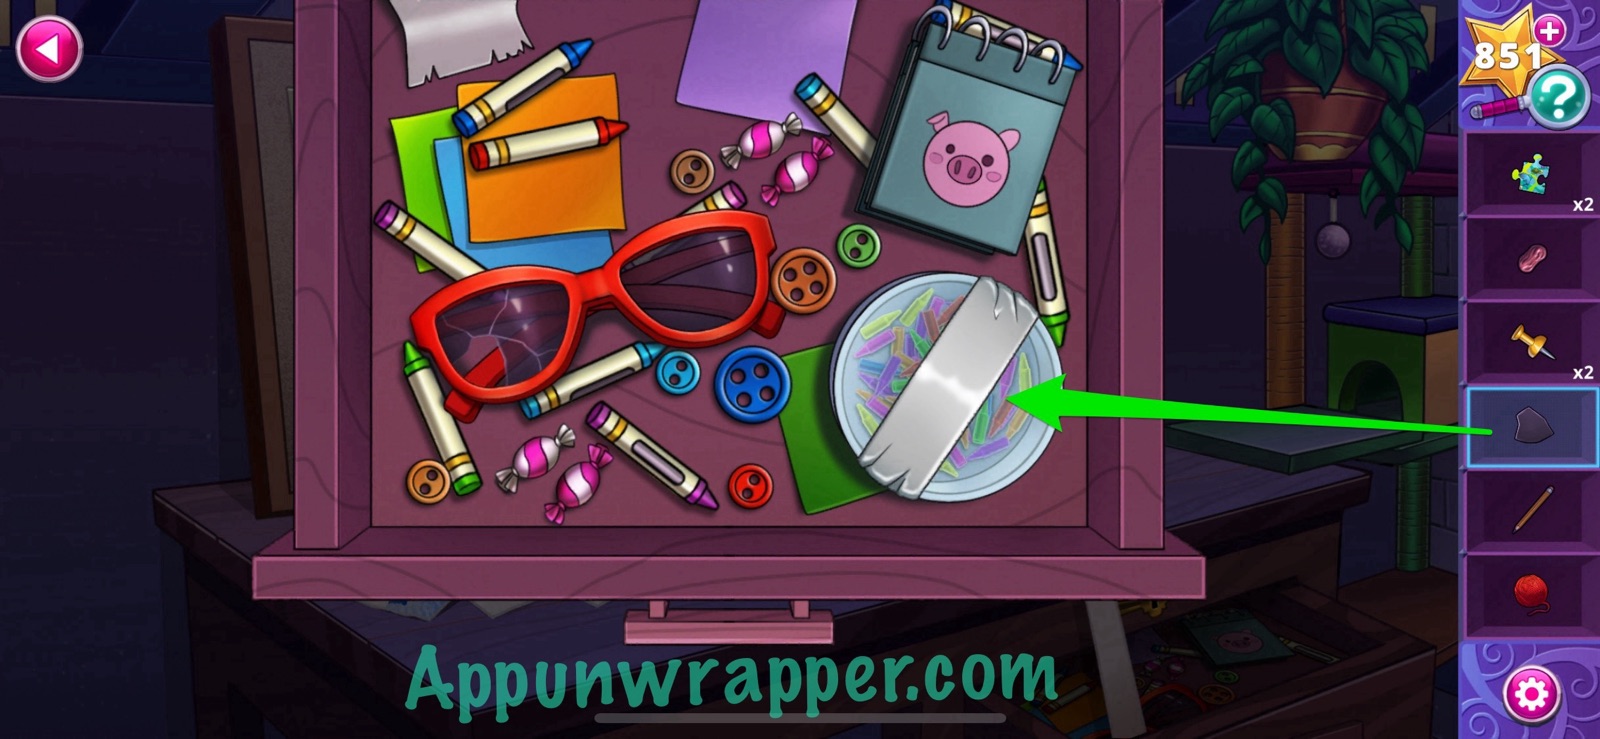
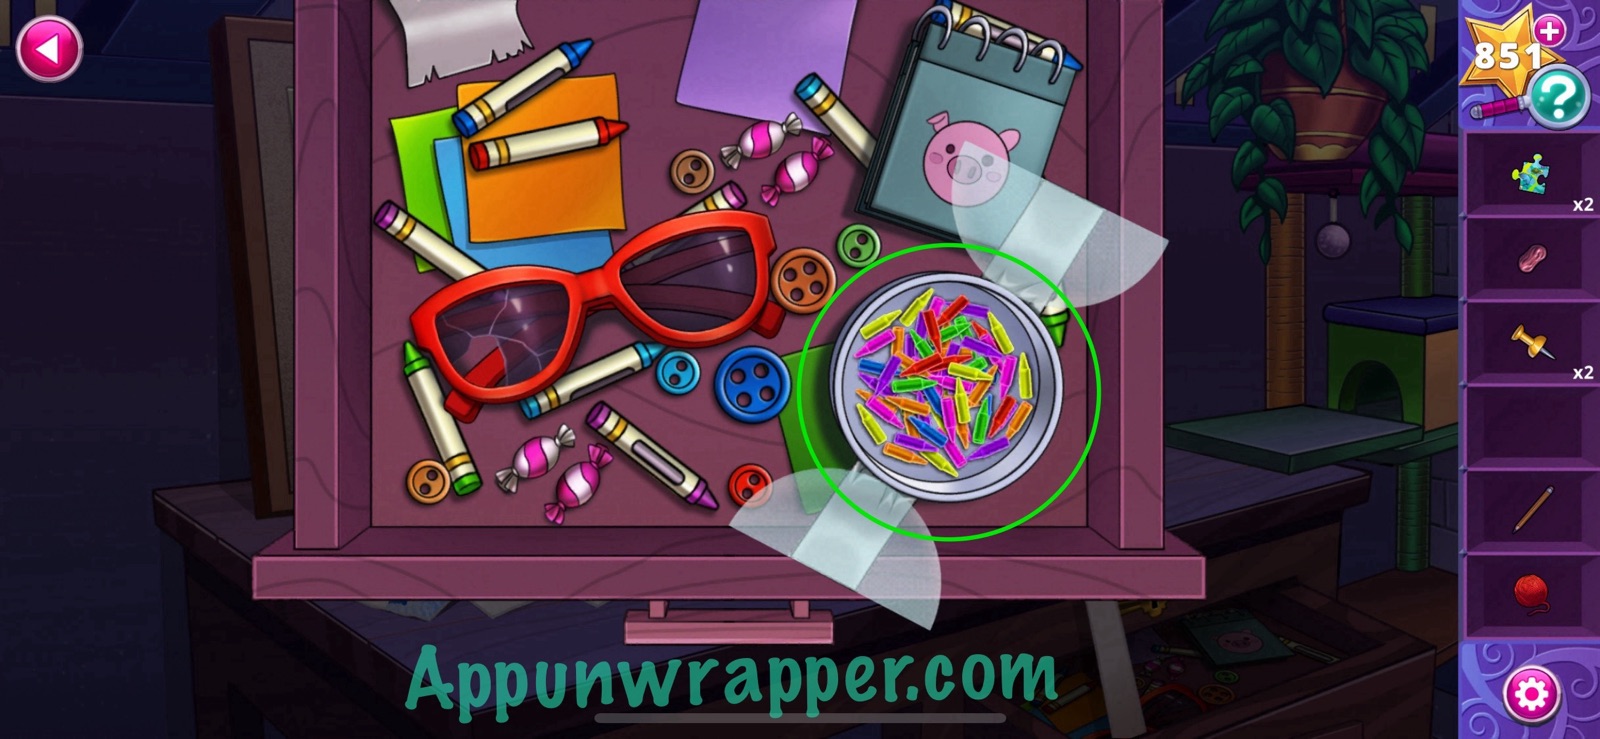
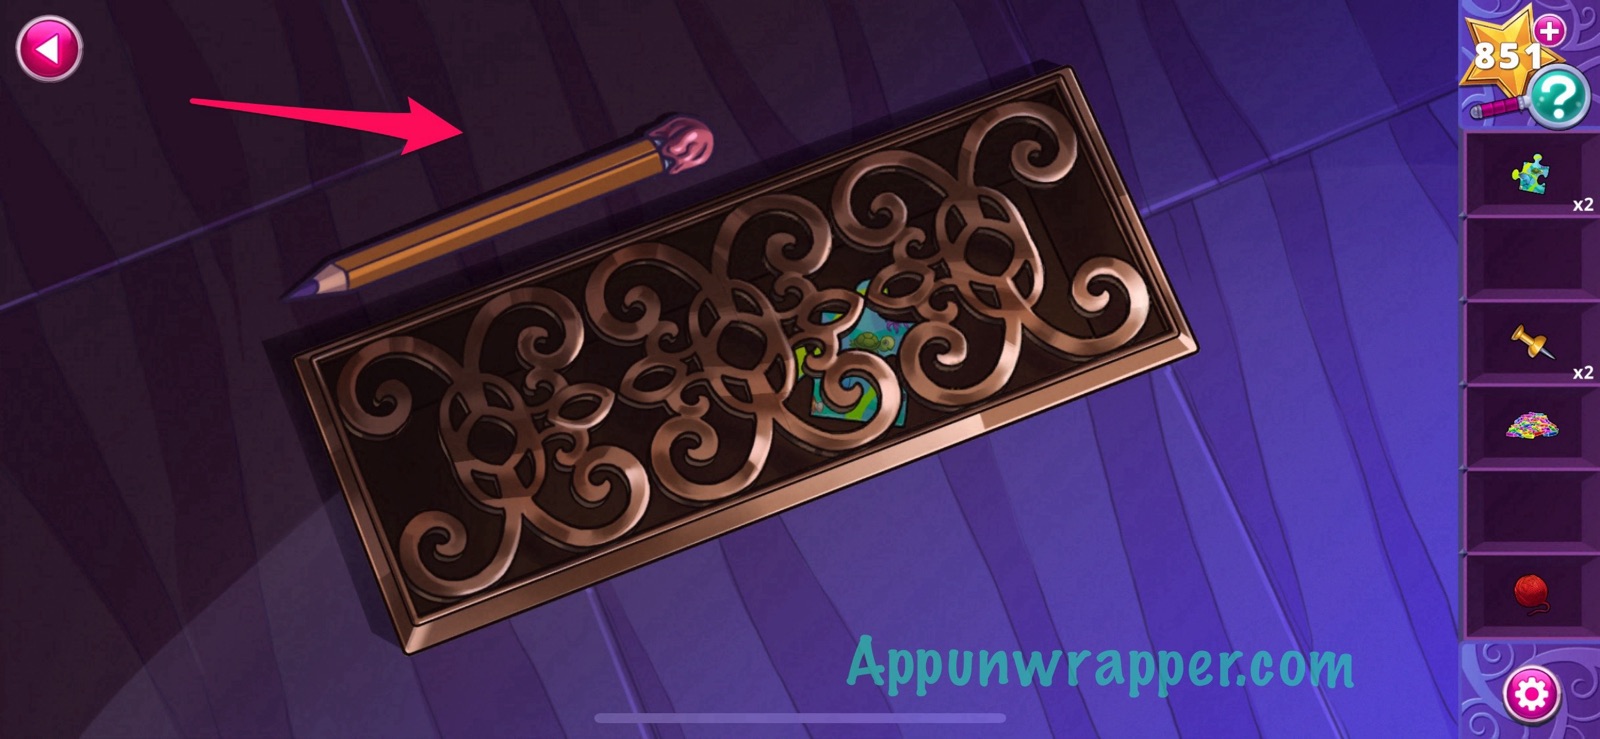
18. Grab the pencil, thumbtack and broken lens. Then use the broken lens to cut open the tape holding the container of light pegs. Grab the light pegs.
19. Go back down and look at the air vent on the floor. Place the pencil down and then attach the gum to it and use it to get the puzzle piece out.

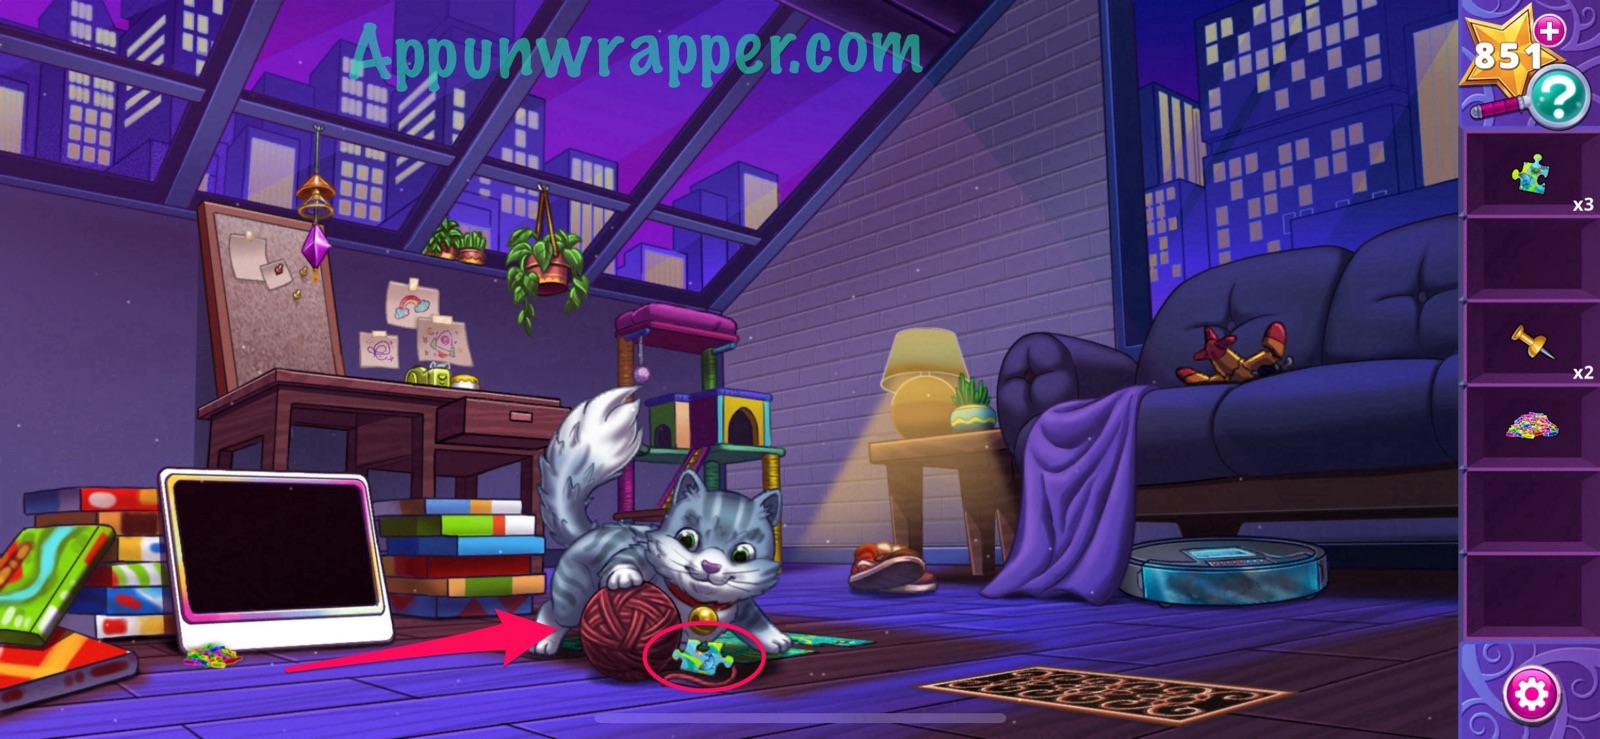
20. Go back and use the yarn to get Smoky the cat off the puzzle. Then you’ll automatically get another puzzle piece.
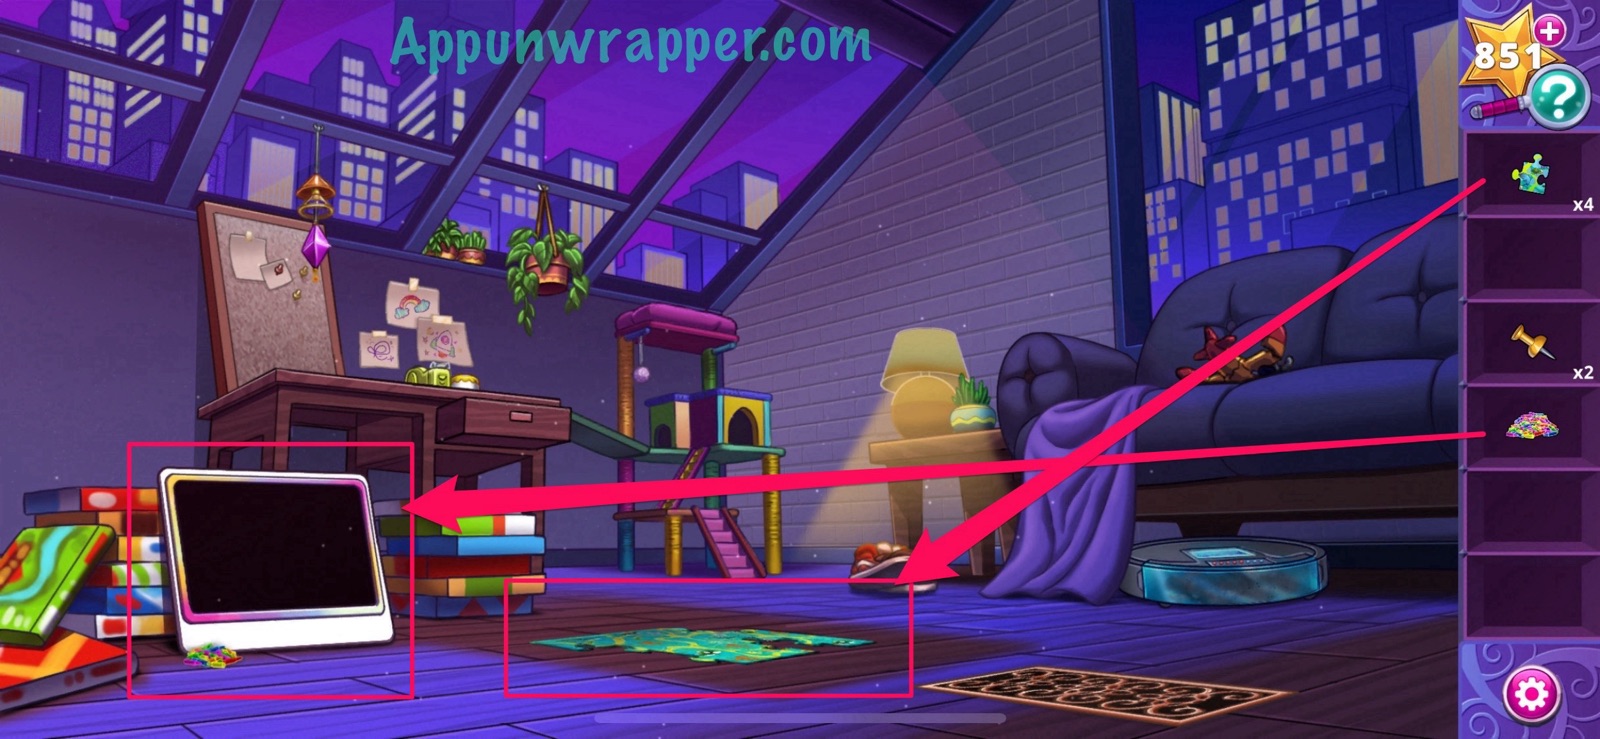
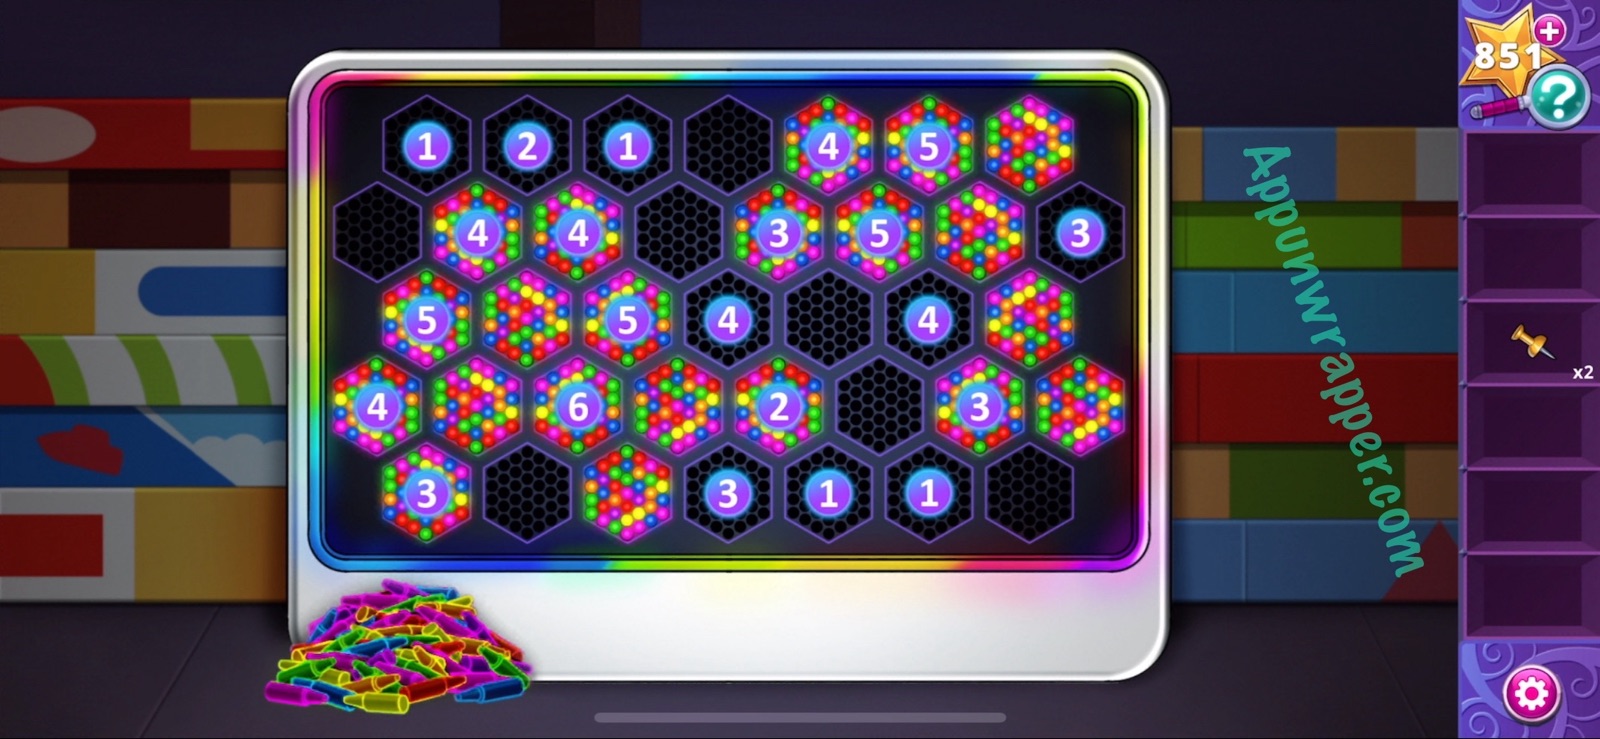
21. Tap on the puzzle and add all four puzzle pieces to it. We now have a clue but it’s not enough. So tap on the Lite Brite game and place the light pegs down.
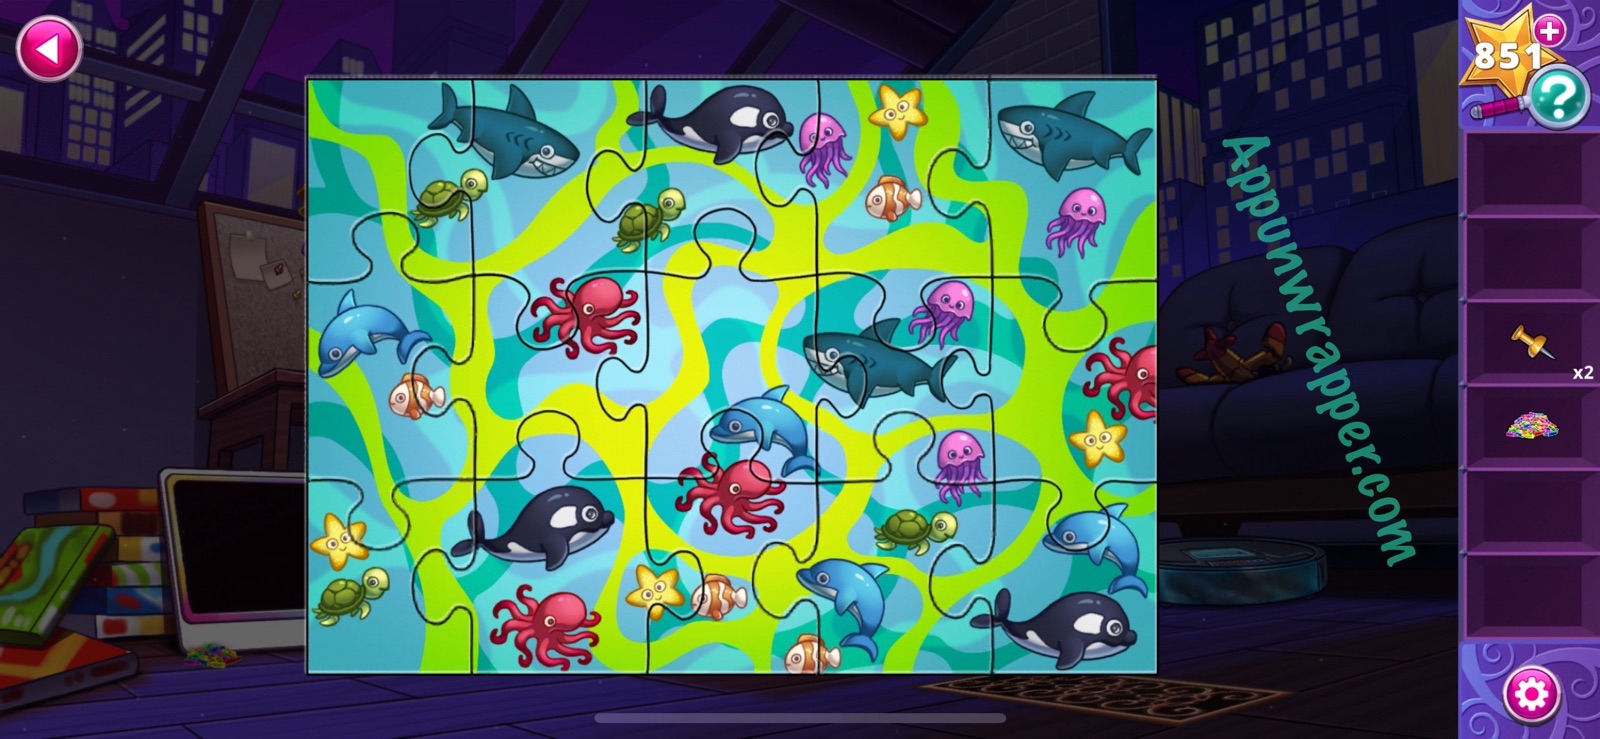
22. Now let’s solve the Light Peg puzzle! Correctly fill in the spaces to create a picture. The numbers indicate how many hexes need to be filled in (on and around the hex with the number). When you’re sure a hex should be empty, you can tap it twice to add a red “X.” You end up with an image of a turtle and a dolphin.
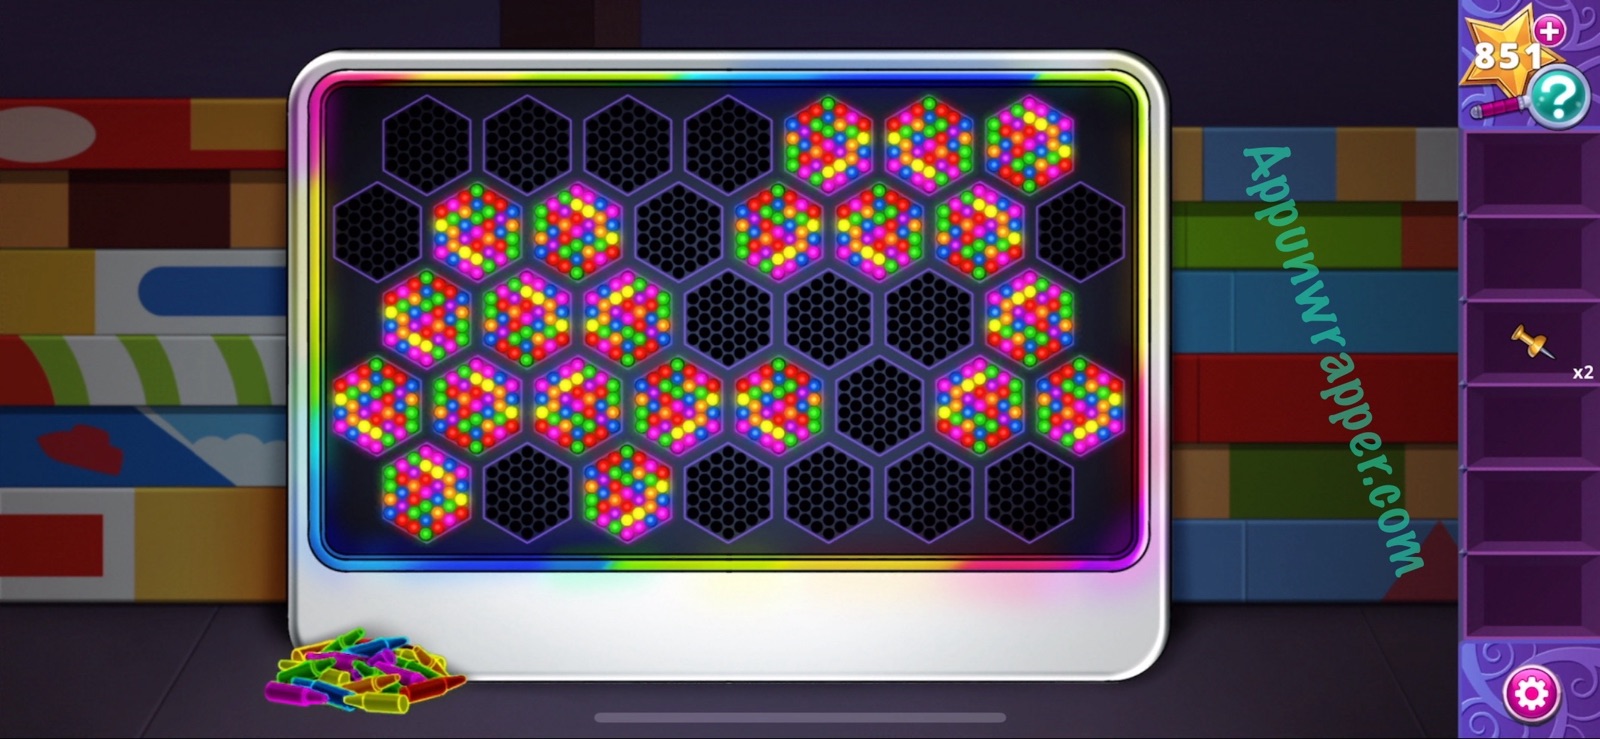
23. Now, look at the puzzle again and circle all the turtles and dolphins you see.
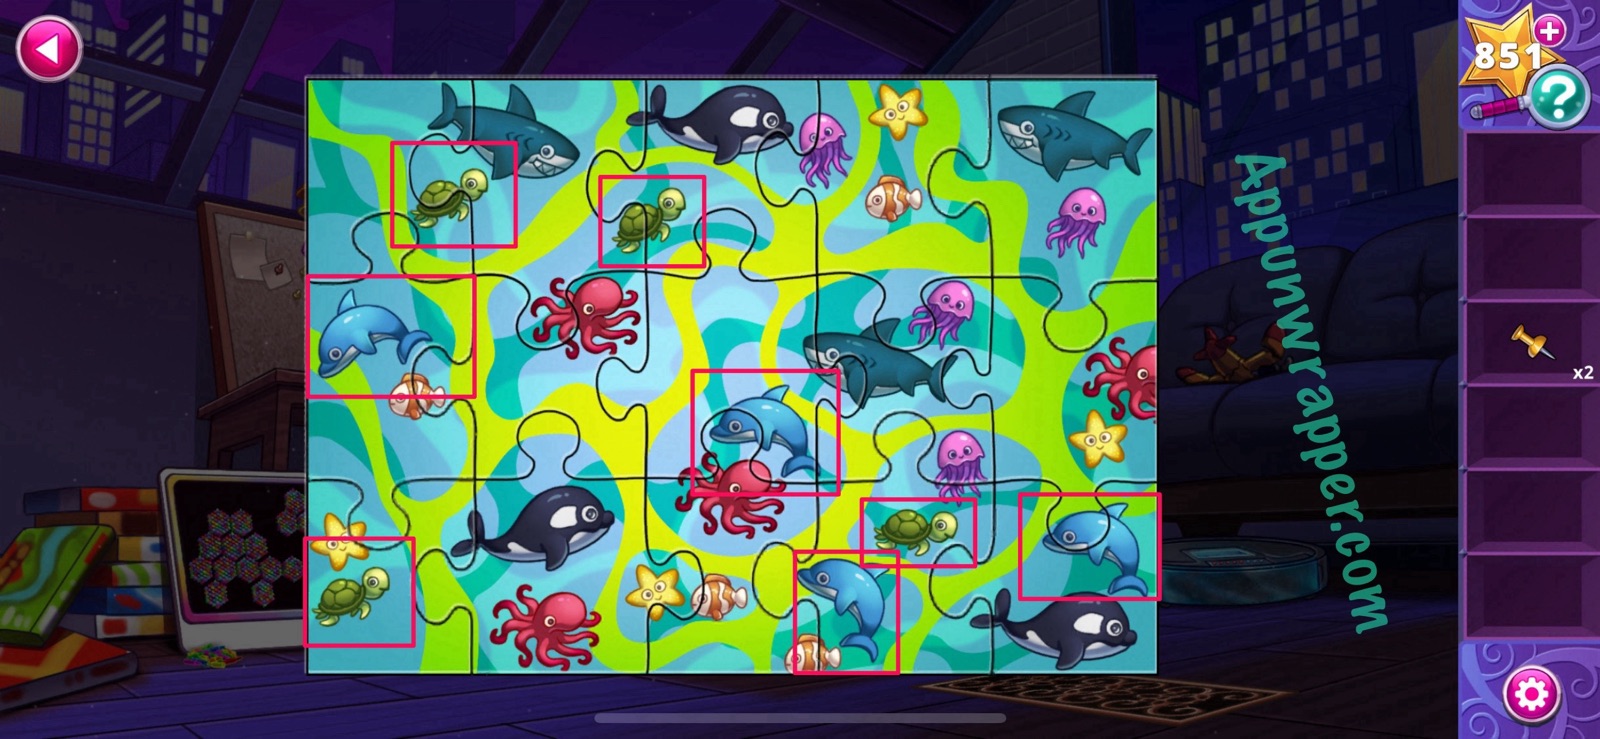
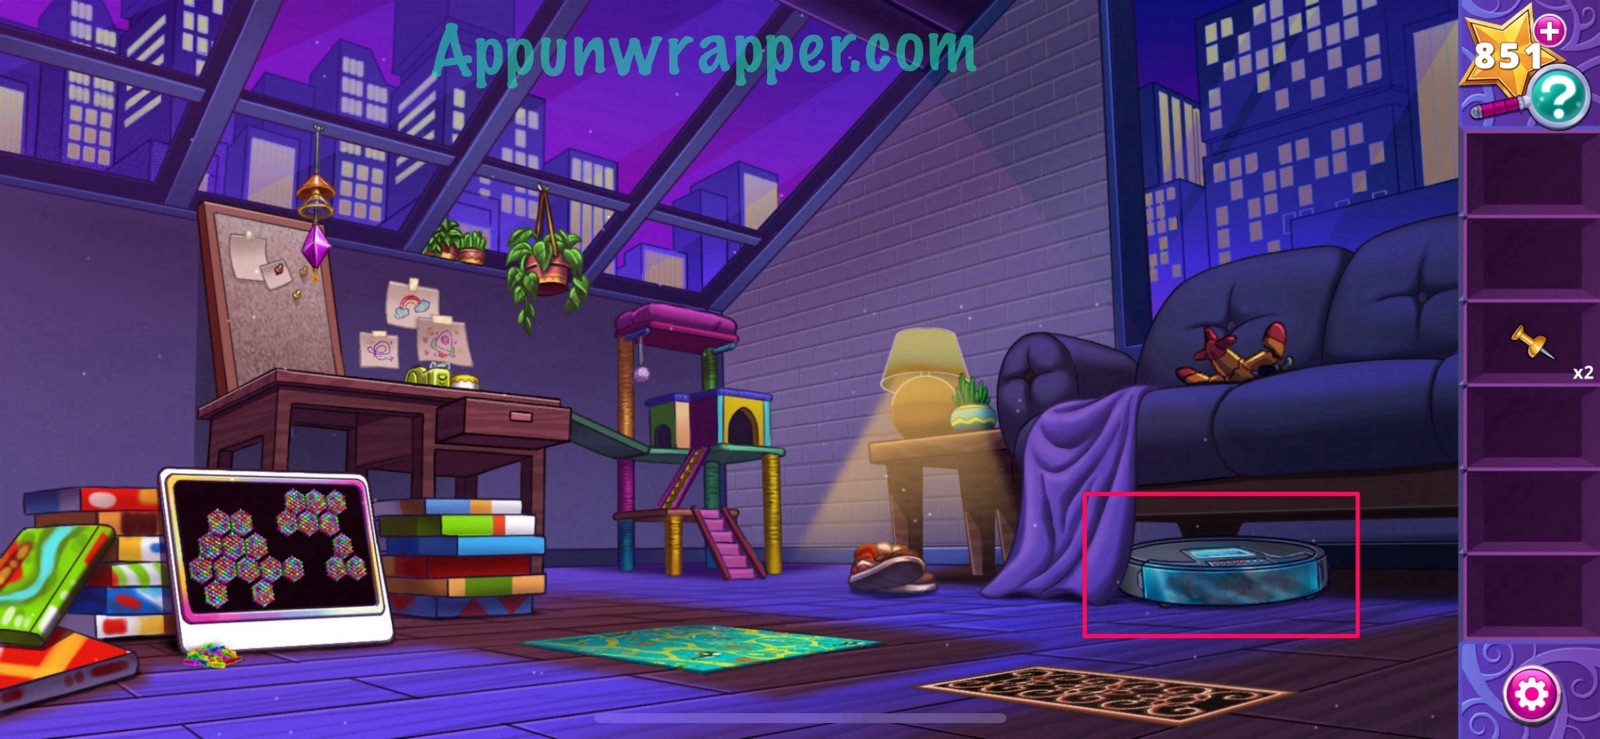
24. Now, tap on the Roomba. Basically, just select all the sections where you saw a turtle or dolphin on the puzzle. Then you’ll automatically get the thumbtack.

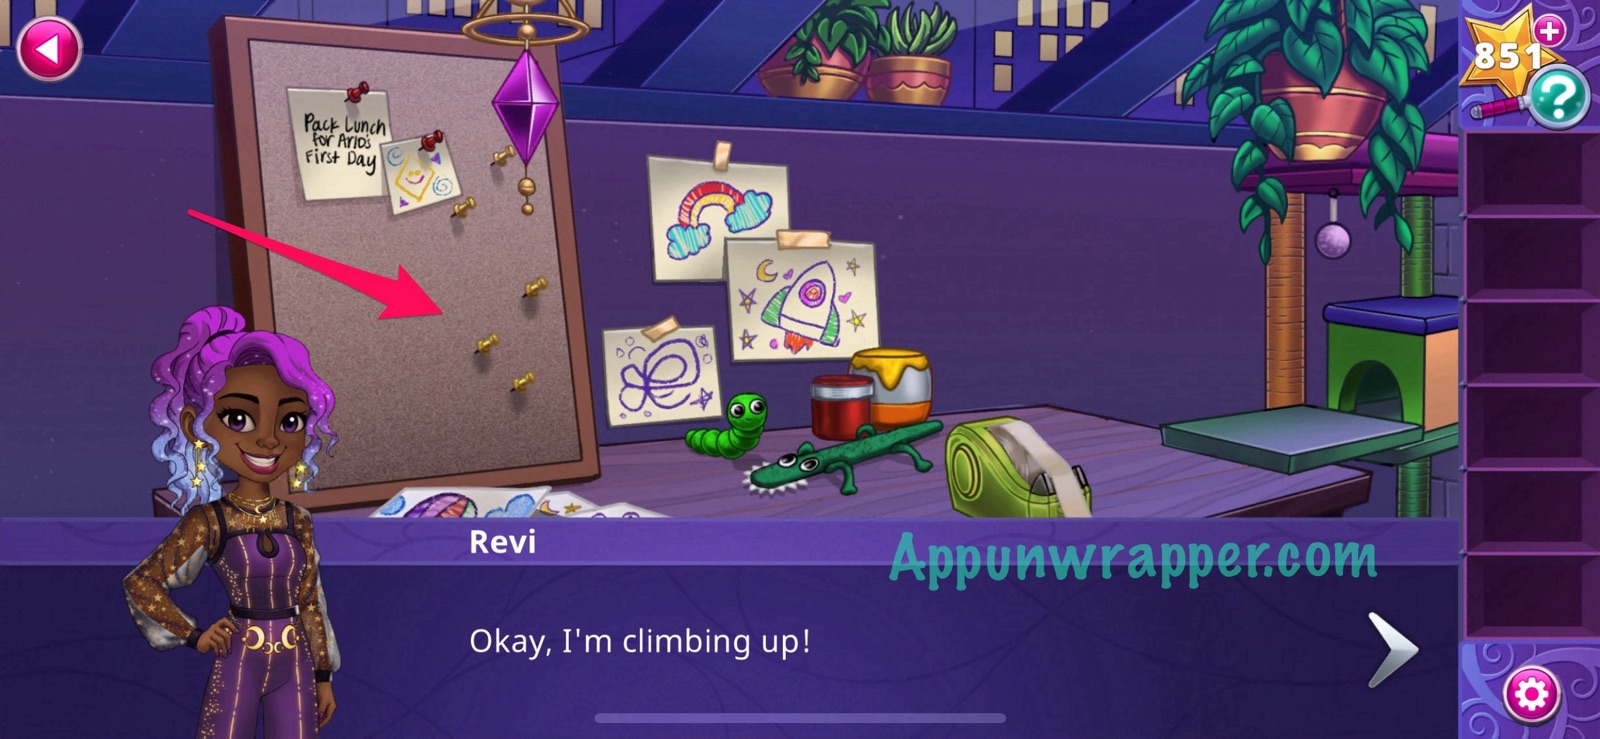
25. Go back to the desk and place the three thumbtacks on the bulletin board. Revi will climb up to get the exit crystal. Touch it to leave the dream and complete the chapter.
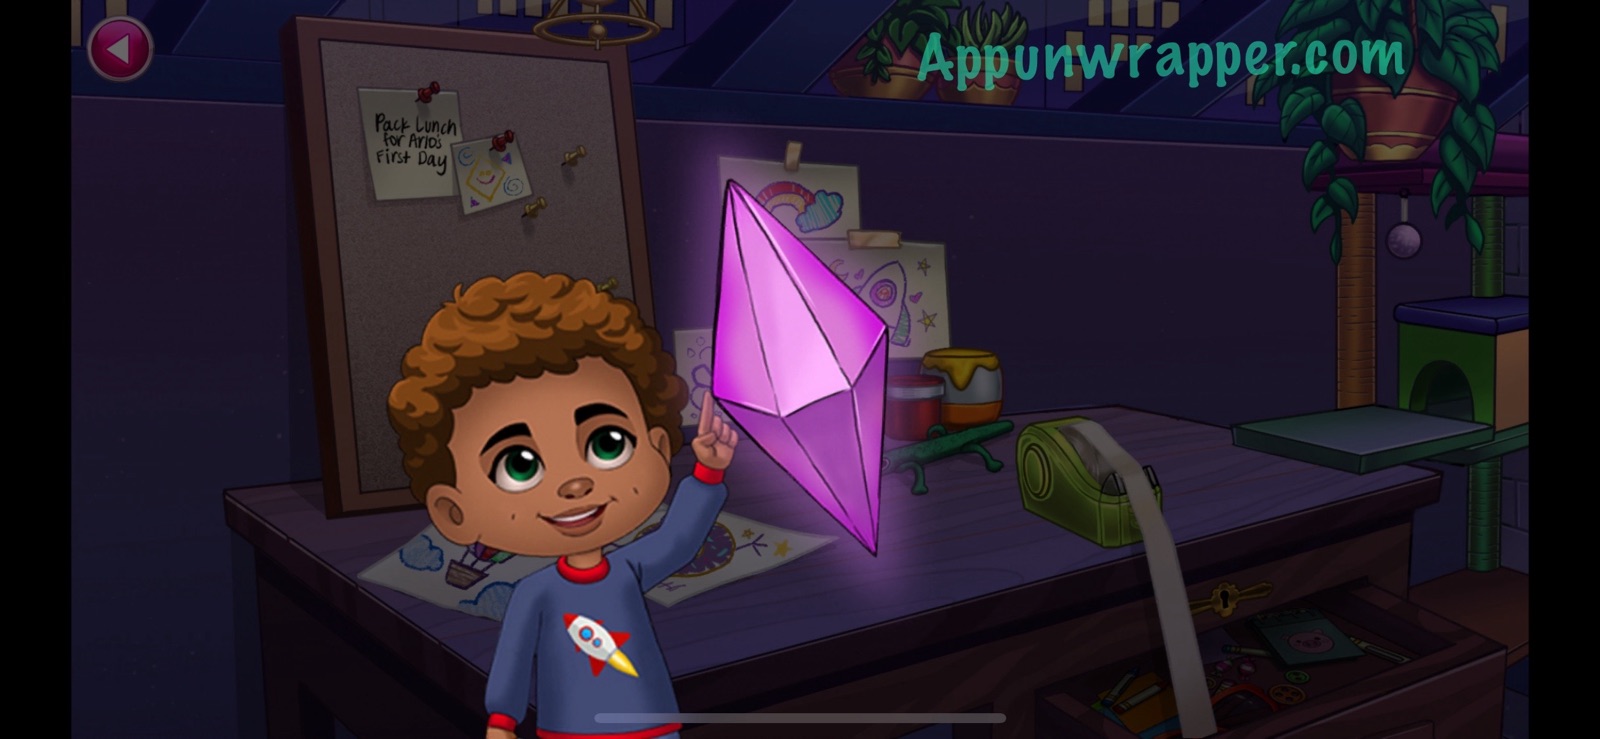
And that’s the end of Chapter 5! Click here to continue to Chapter 6 or choose a chapter below.
Chapter 1 | Chapter 2 | Chapter 3 | Chapter 4 | Chapter 5 | Chapter 6 | Chapter 7