Adventure Escape Mysteries – Lost Ruins: Revenge on Atlantis
By: Haiku Games

Haiku Games is back with a new Adventure Escape game, called Lost Ruins: Revenge on Atlantis . When Professor Burns gets possessed by an ancient desert artifact, he sets out to destroy the underwater city of Atlantis. You need to stop him before Atlantis is lost forever. This walkthrough guide should help you if you get stuck on any of the puzzles in Chapter 2. Feel free to ask for extra help in the comments section.
See all my other Adventure Escape guides here.
Walkthrough:
Chapter 1 | Chapter 2 | Chapter 3 | Chapter 4 | Chapter 5 | Chapter 6 | Chapter 7 | Chapter 8
Chapter 2:
You can watch my video for Chapter 2 or continue below for my step-by-step guide.
1. Xochi and Peter got thrown down into a pit and Peter’s injured. Pick up Professor Burns’ journal and look through it. Then head through the door and inside the sort of temple.
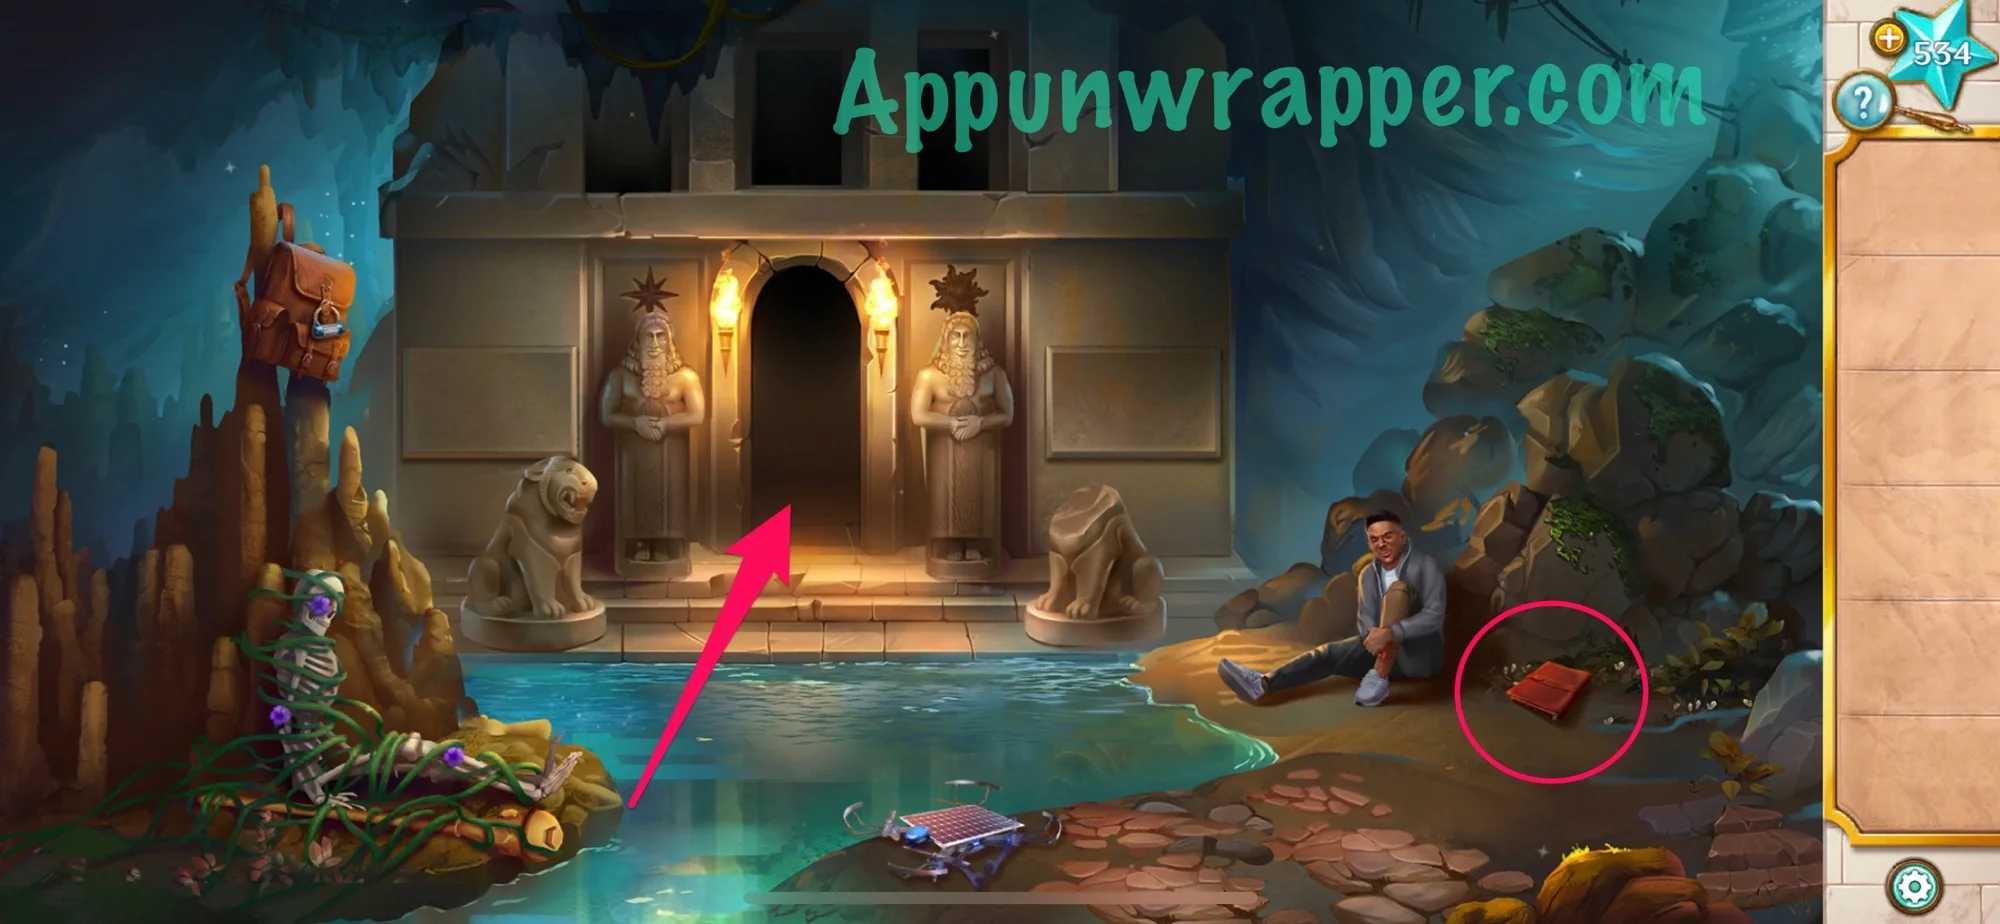

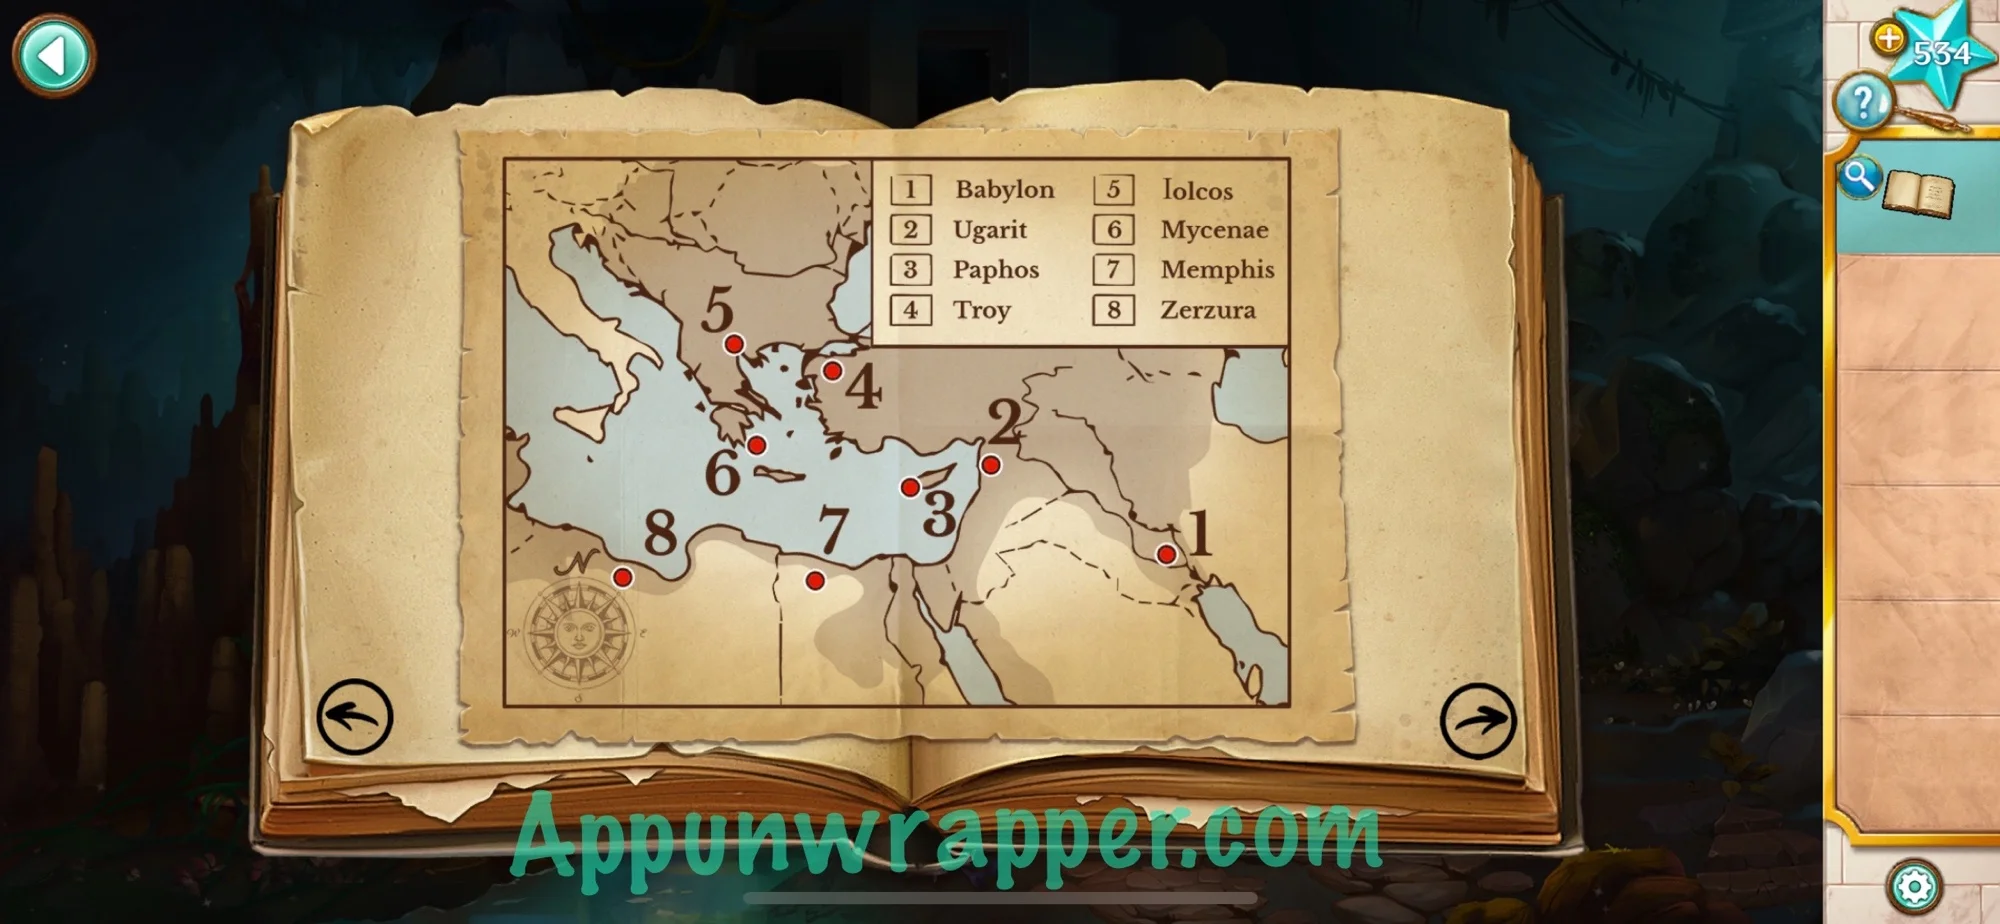
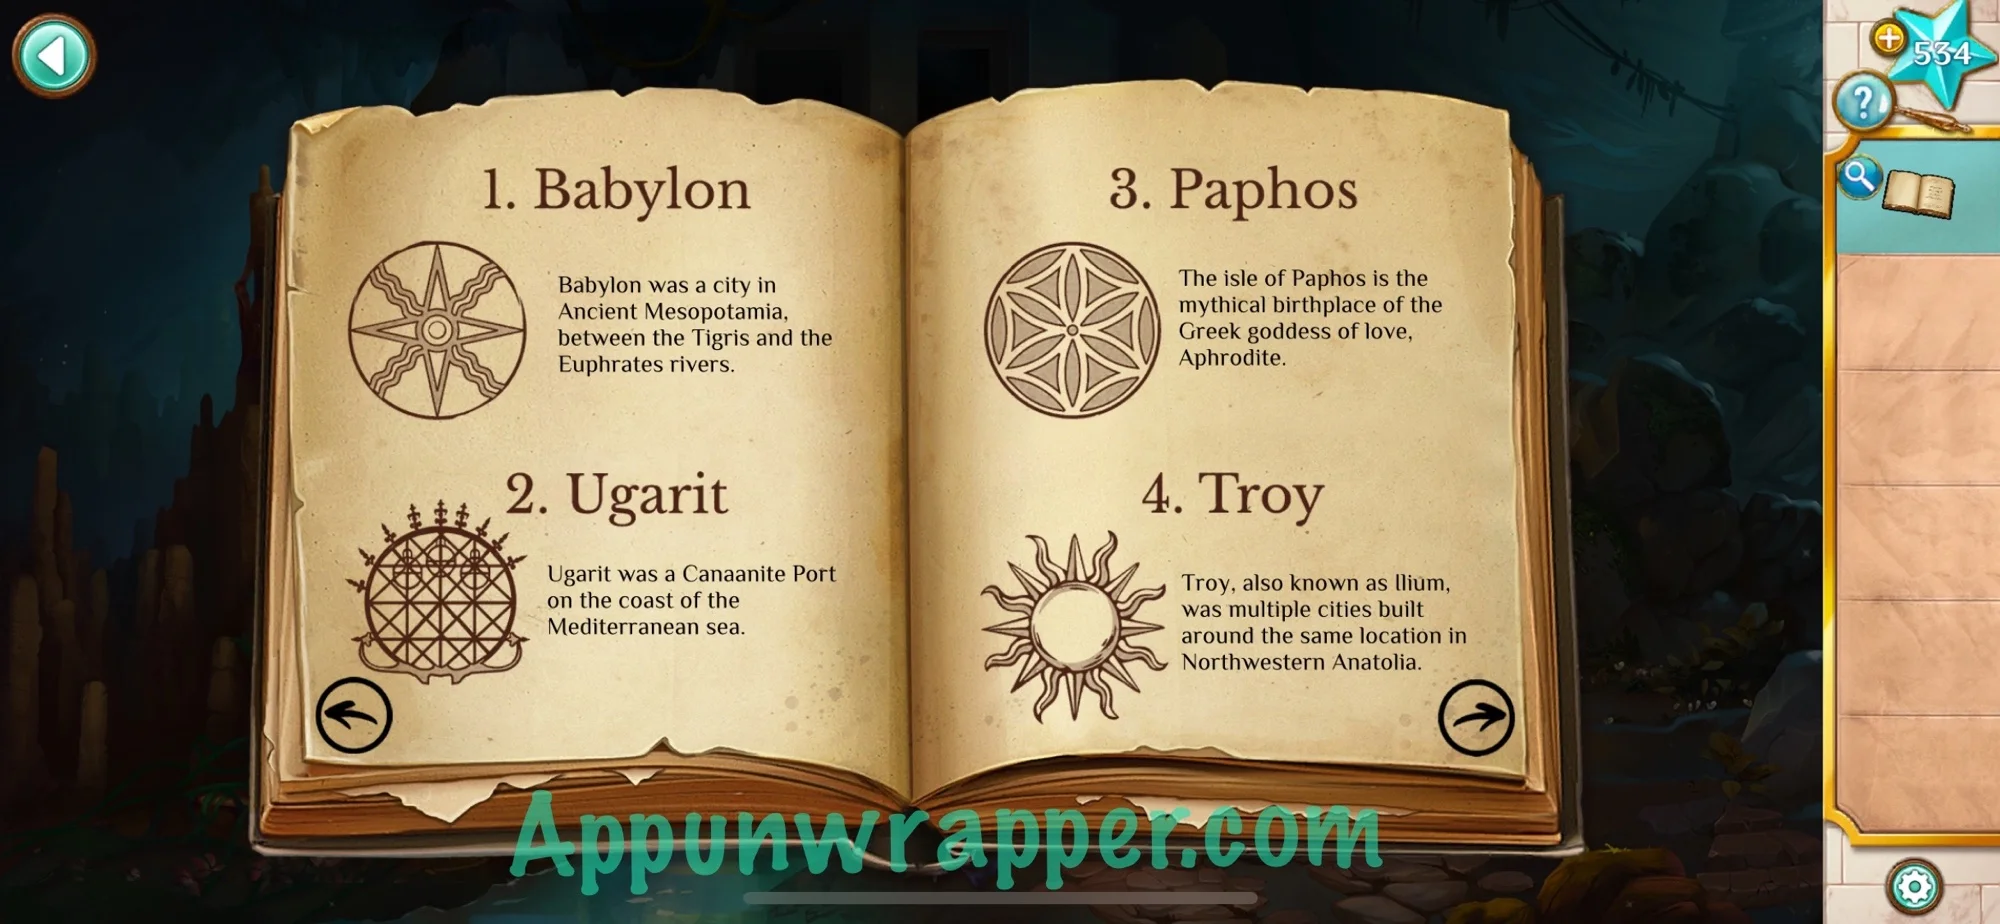
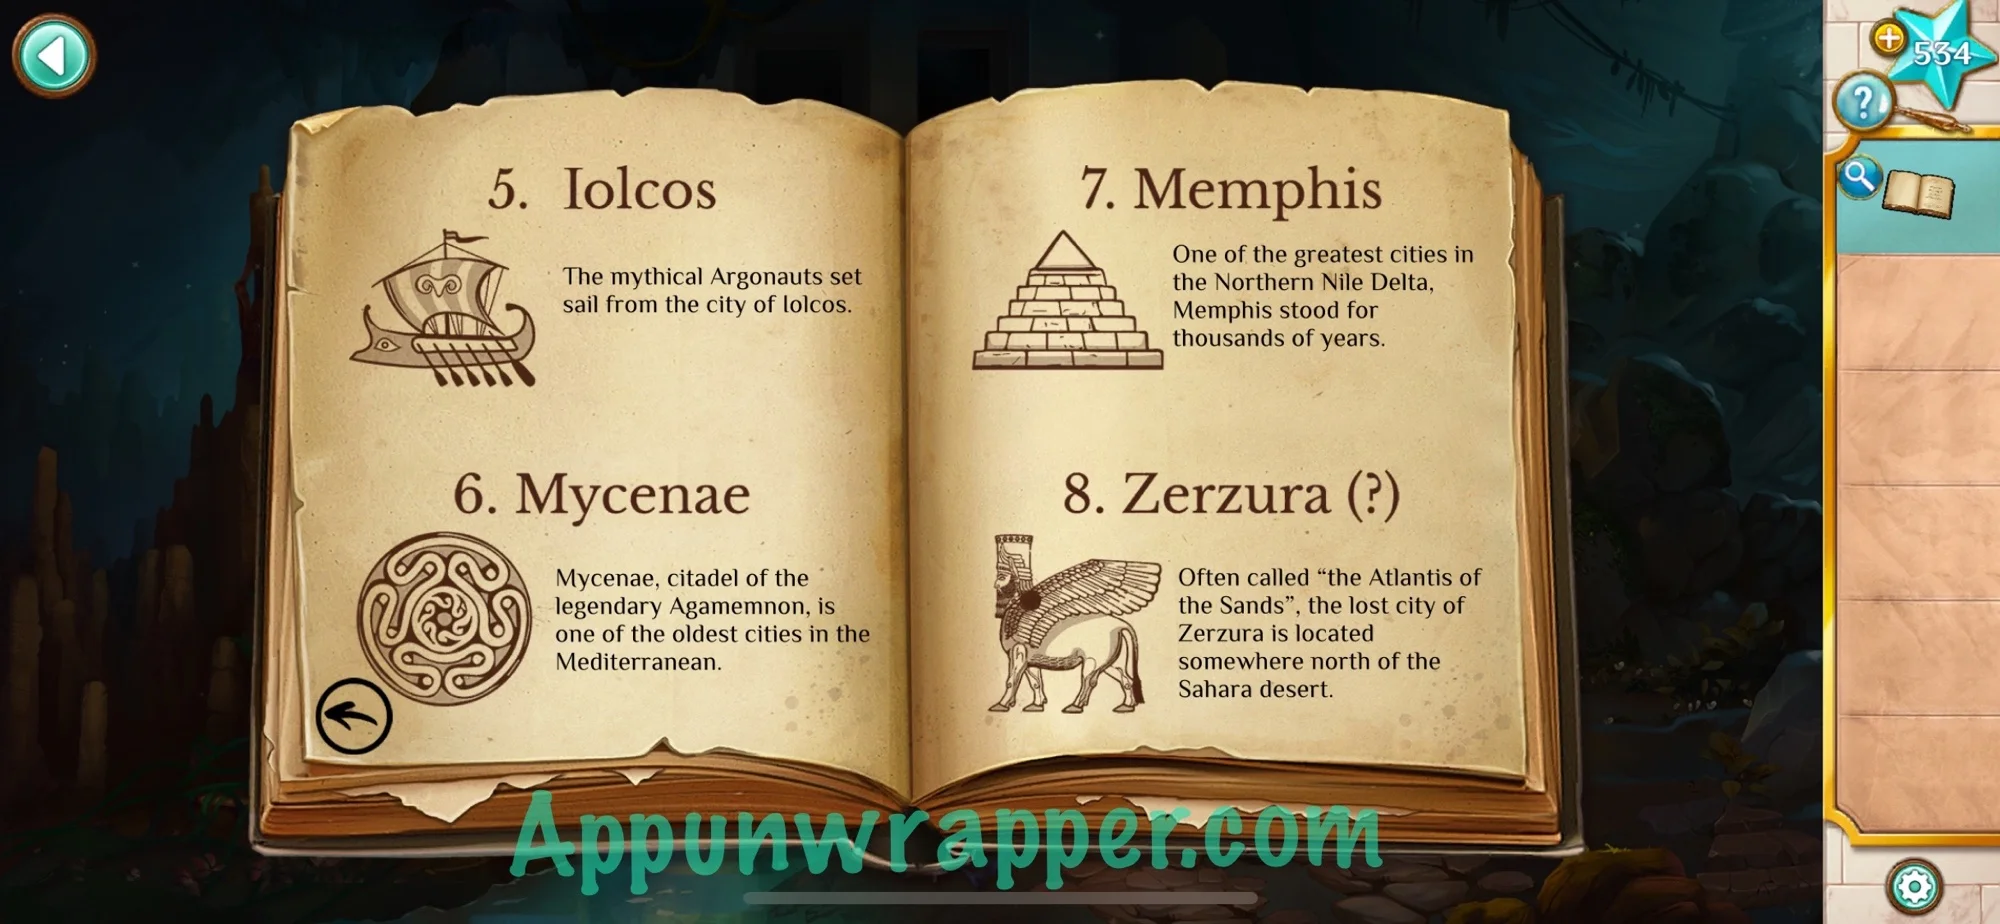
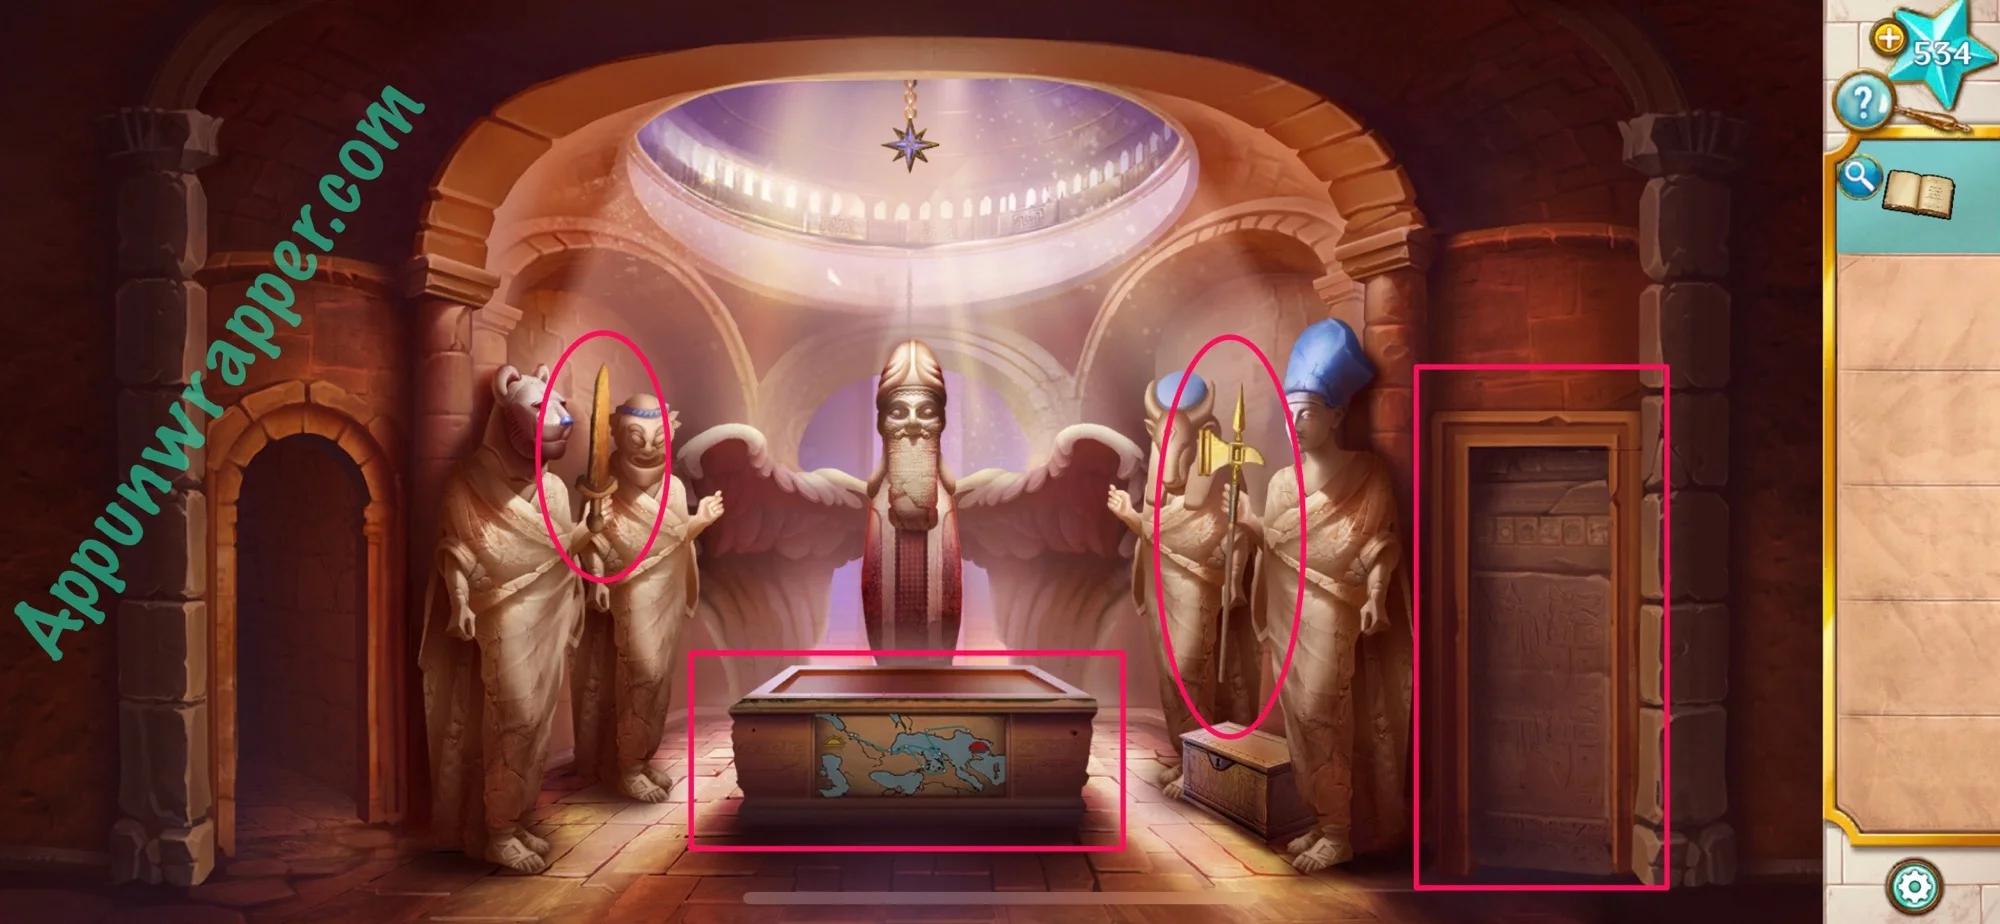
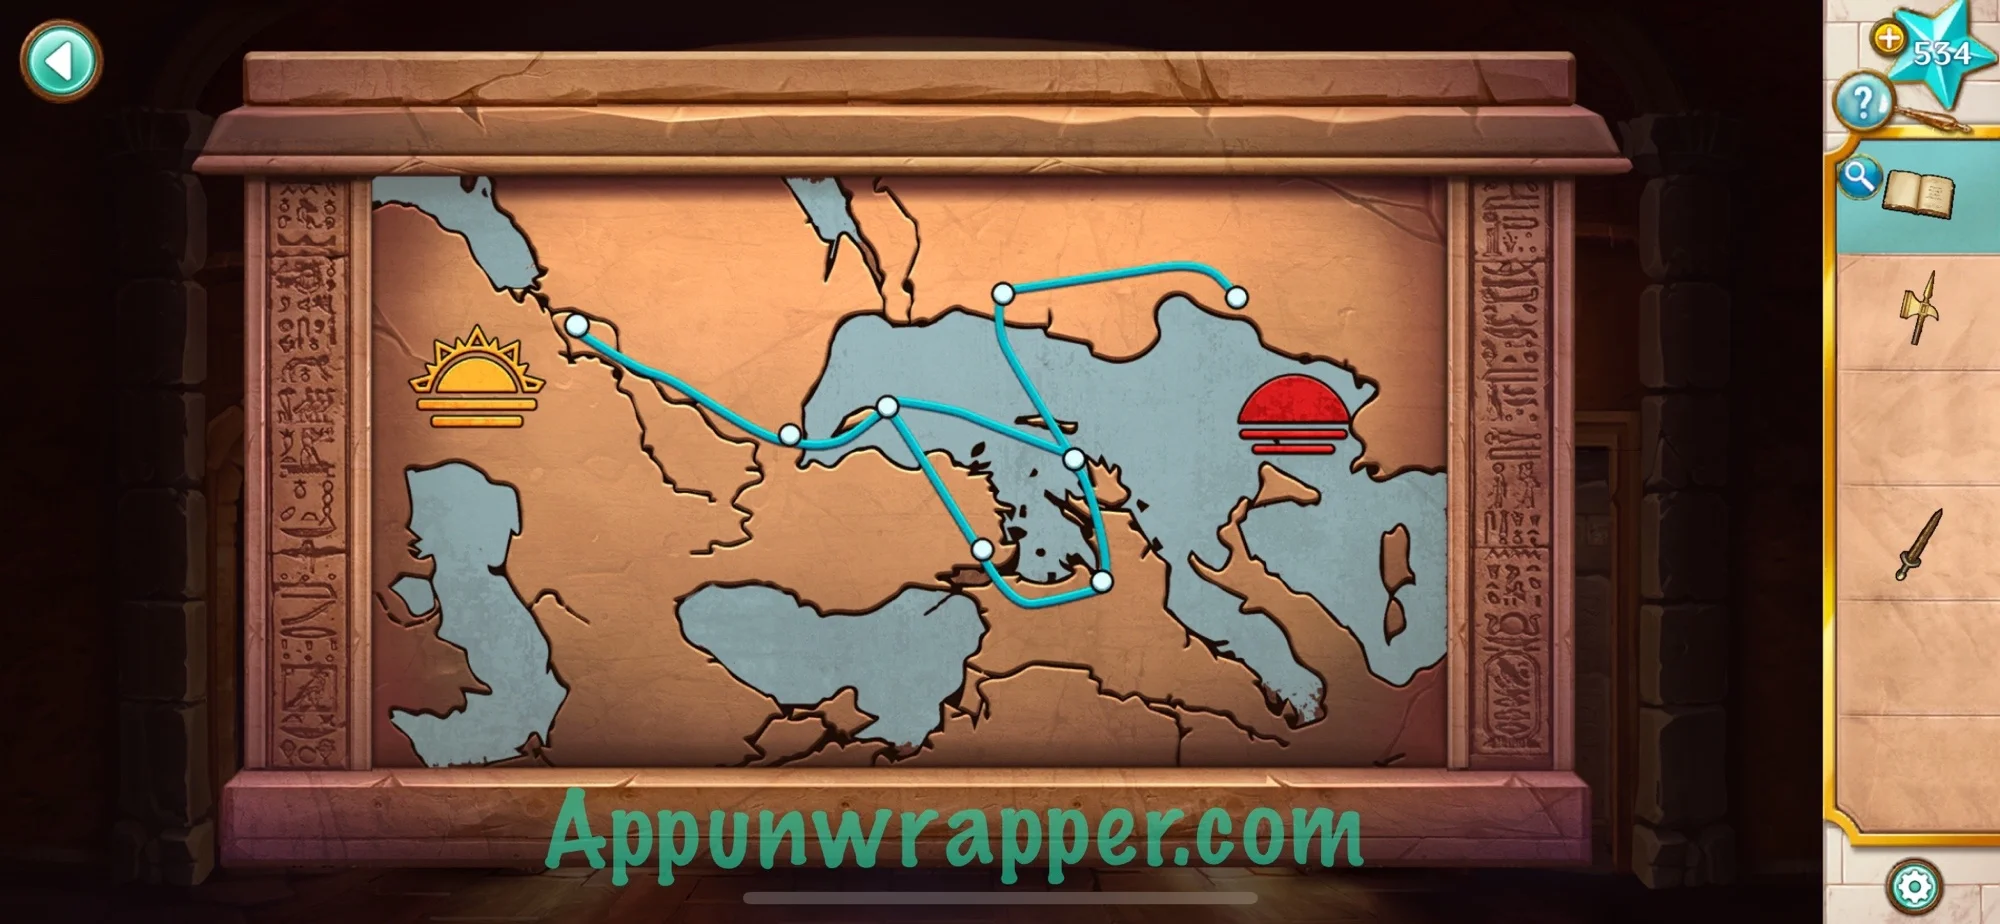
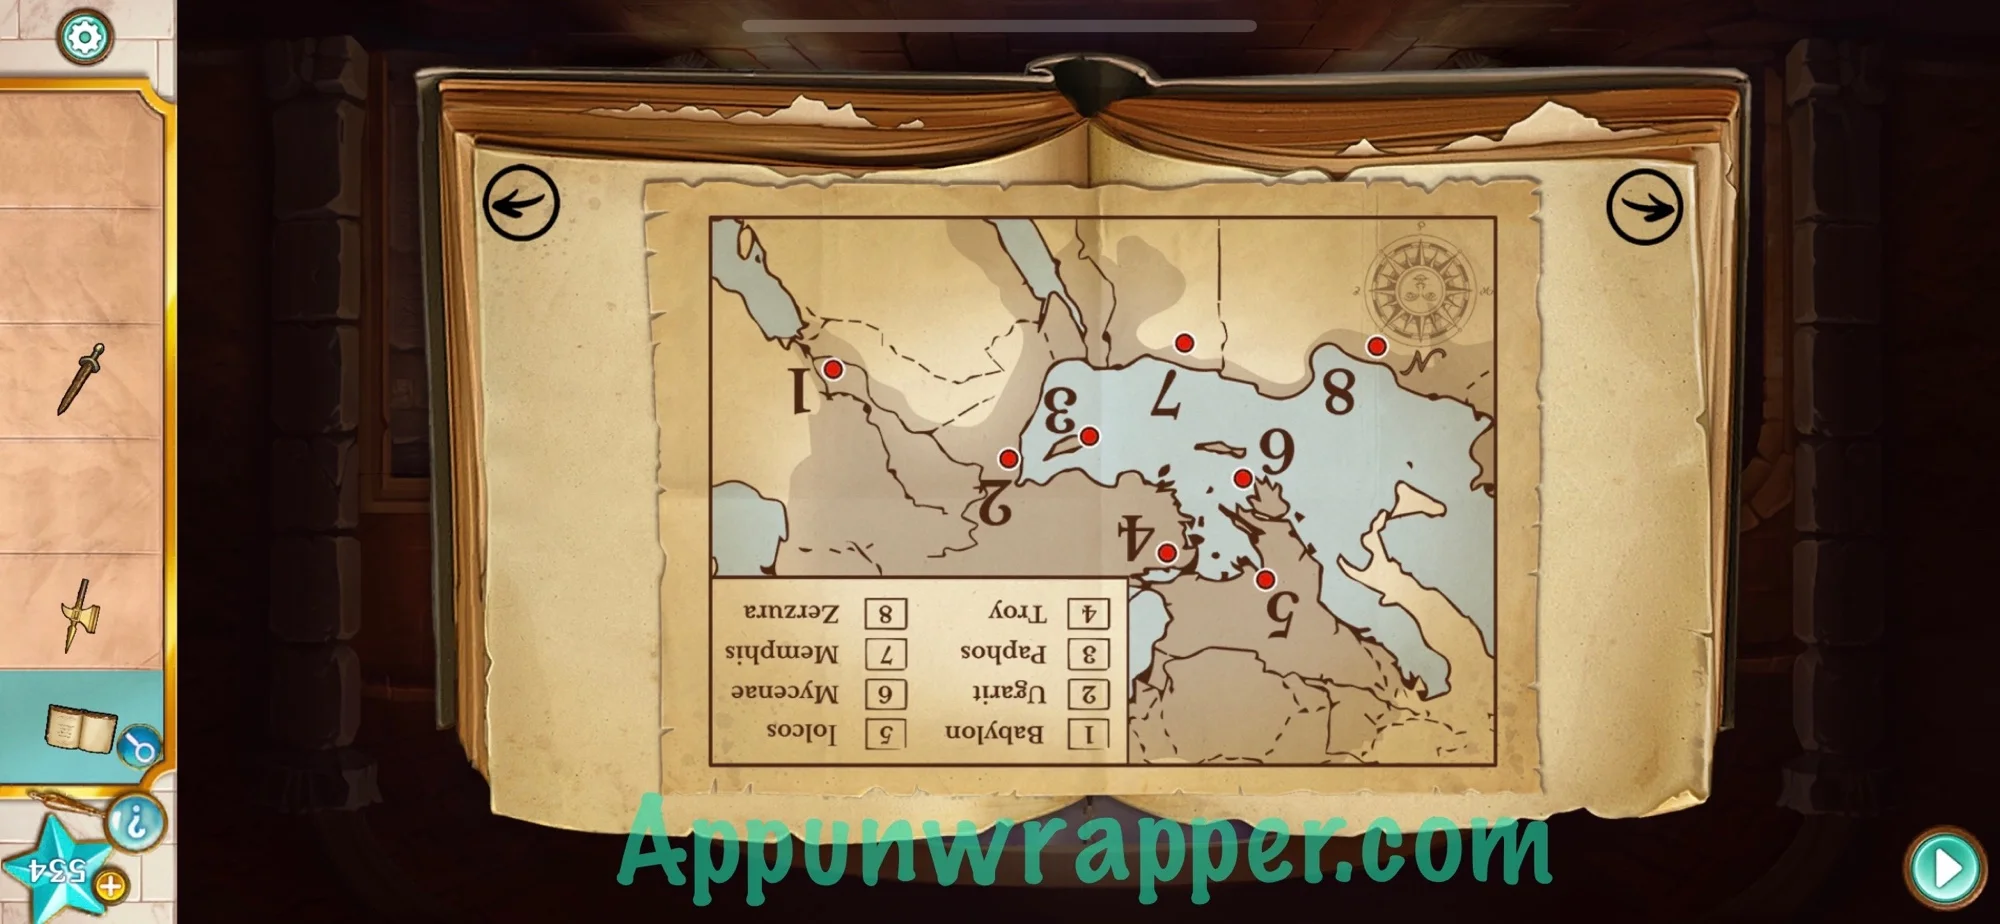
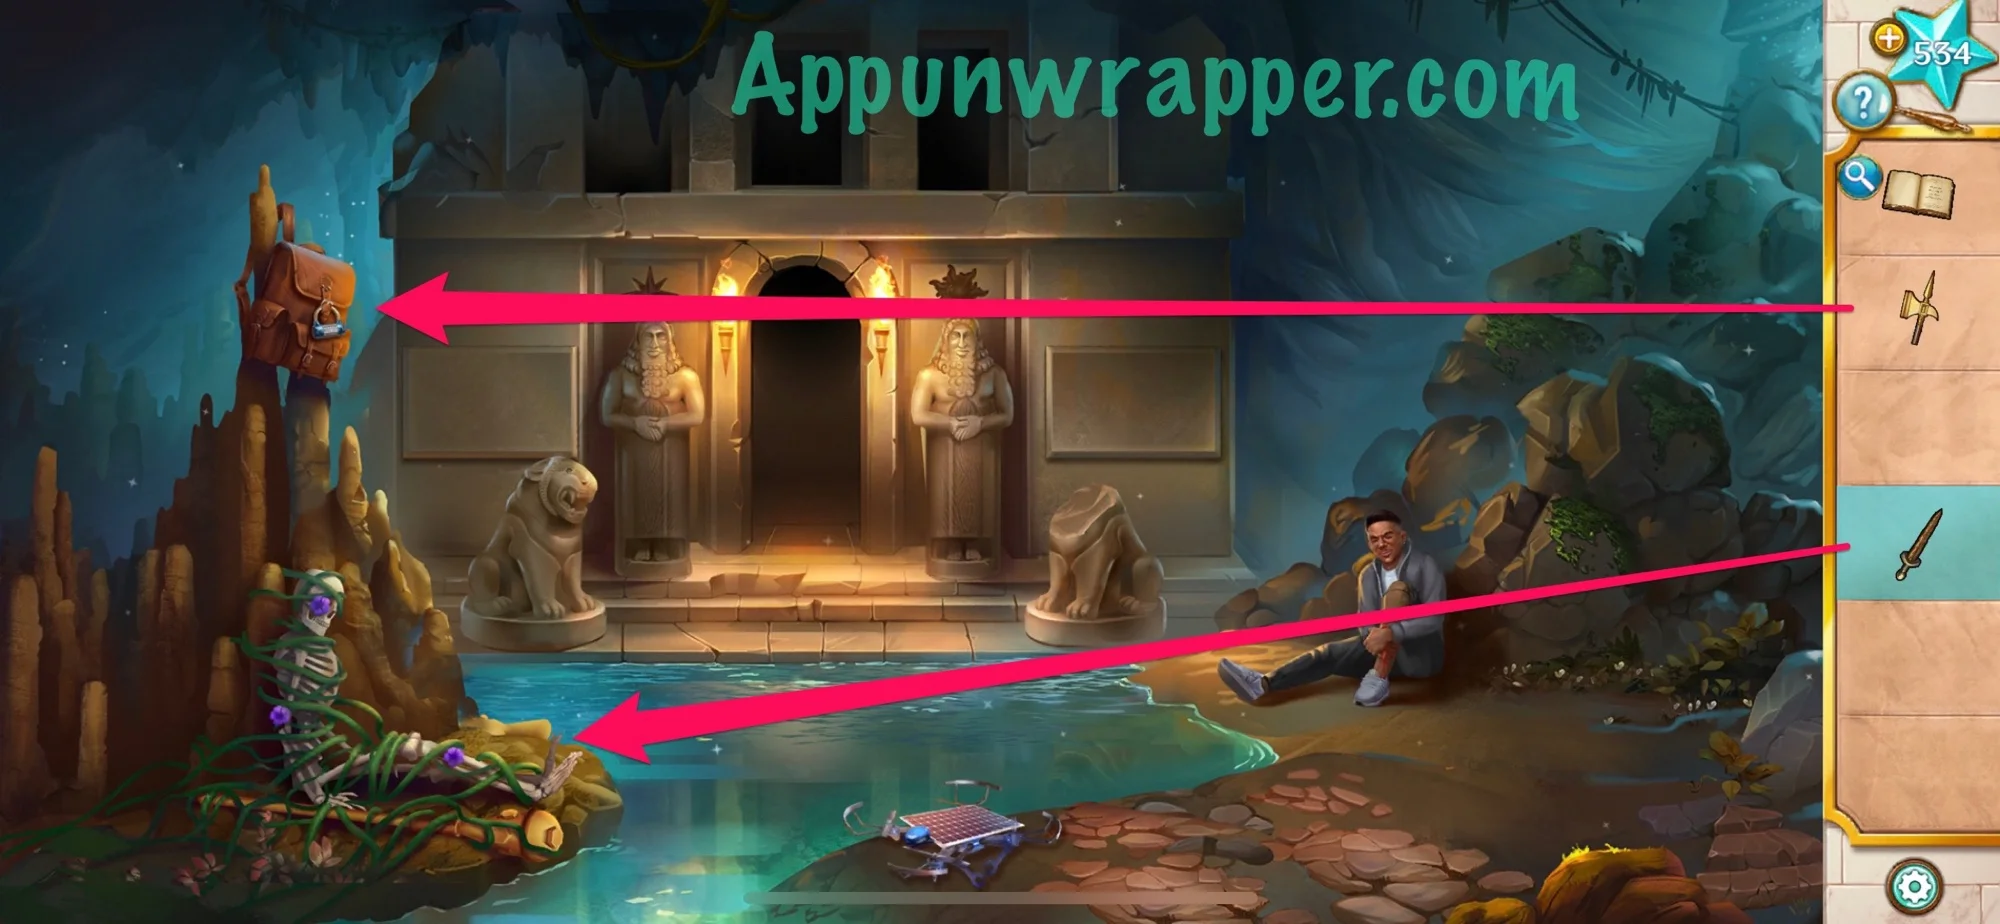
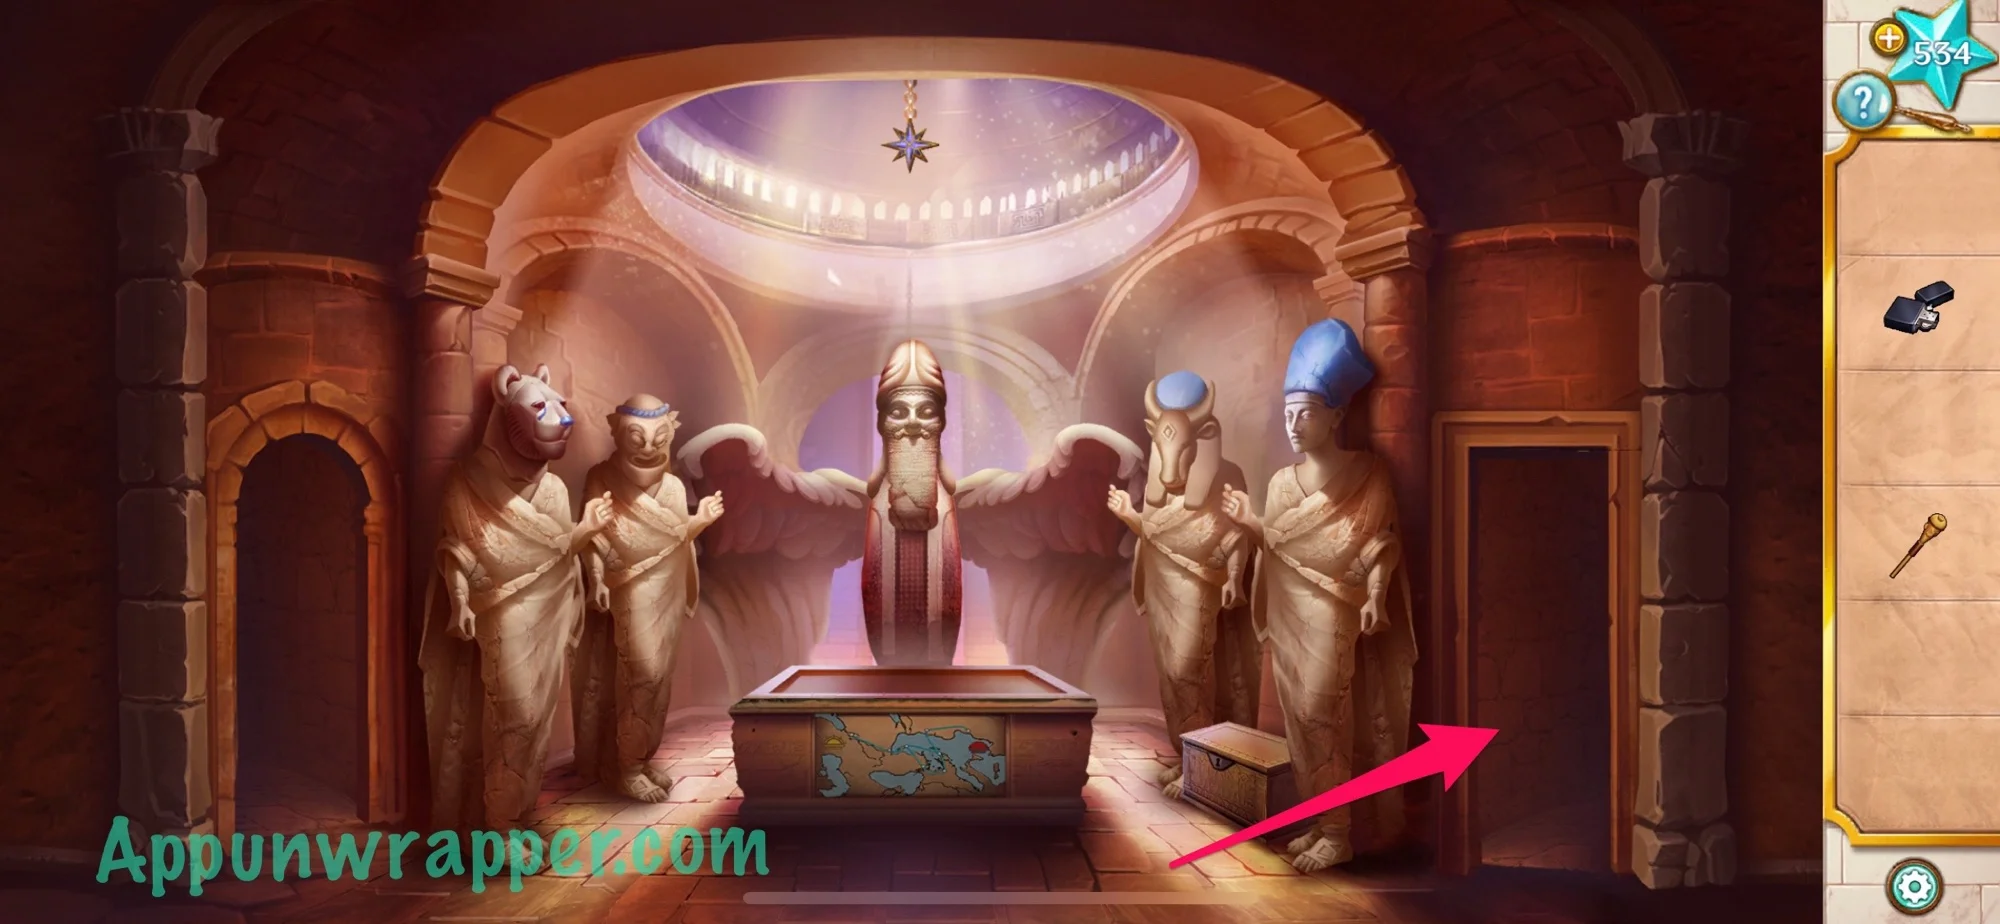
2. Take the sword and warhammer from the statues’ hands. Look at the map below them. And then look at the lock on the door. It says, FOLLOW THE SHORTEST PATH TO ZERZURA. Use the the journal to identify each location on the map. Then figure out the shortest path. For some reason, the map in the journal and the map in the room are rotated 180 degrees. I’ve rotated the image of the map in the book so they match up. Now you should be able to find the shortest path. It’s 1 Babylon to 2 Ugarit to 3 Paphos to 6 Mycenae to 7 Memphis to 8 Zerzura. Find the images for each of those places in the journal and then enter them into the combination lock. We can’t go through the door yet because we need to help Peter.

3. Head back out. Use the sword to cut through the vines on the skeleton. Also, use the warhammer to reach the bag. Grab the the beekeeper staff. We need to figure out the passcode for the combination lock on the bag.

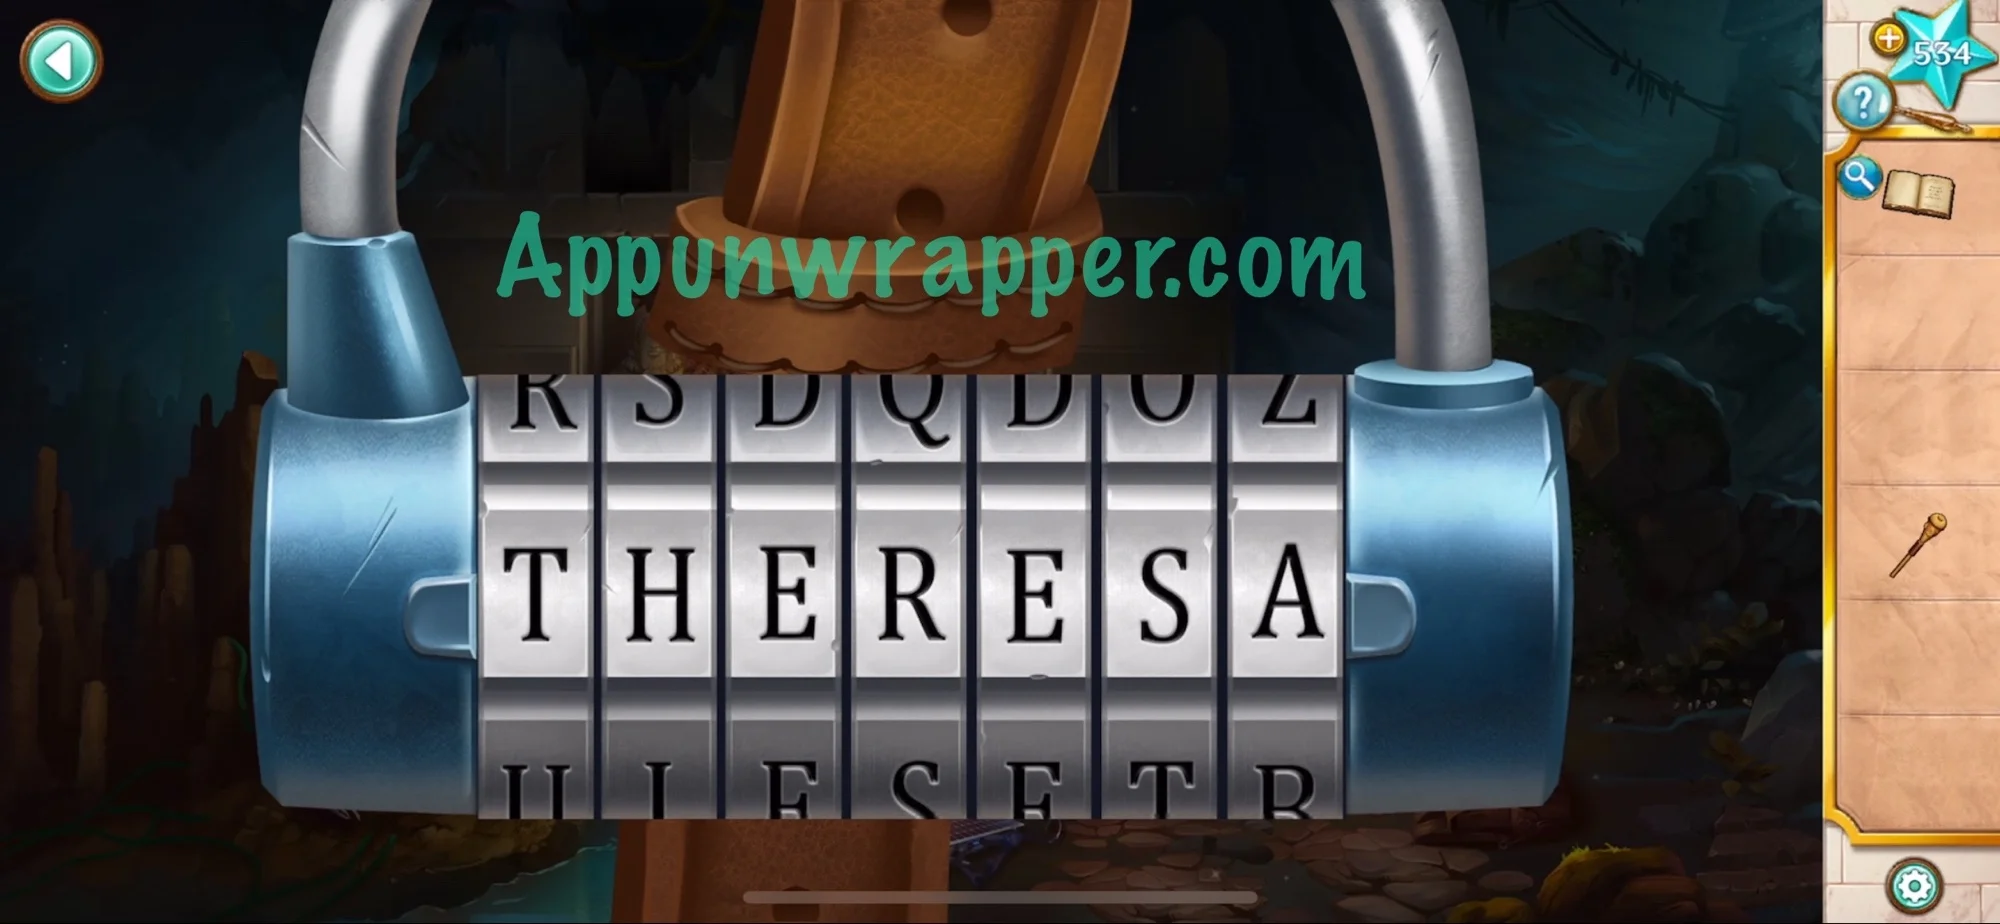
4. The passcode is in Mr. Burns’ journal. His dead wife’s name was Theresa. Enter THERESA unlock it. Then grab the med kit and lighter that fall out.
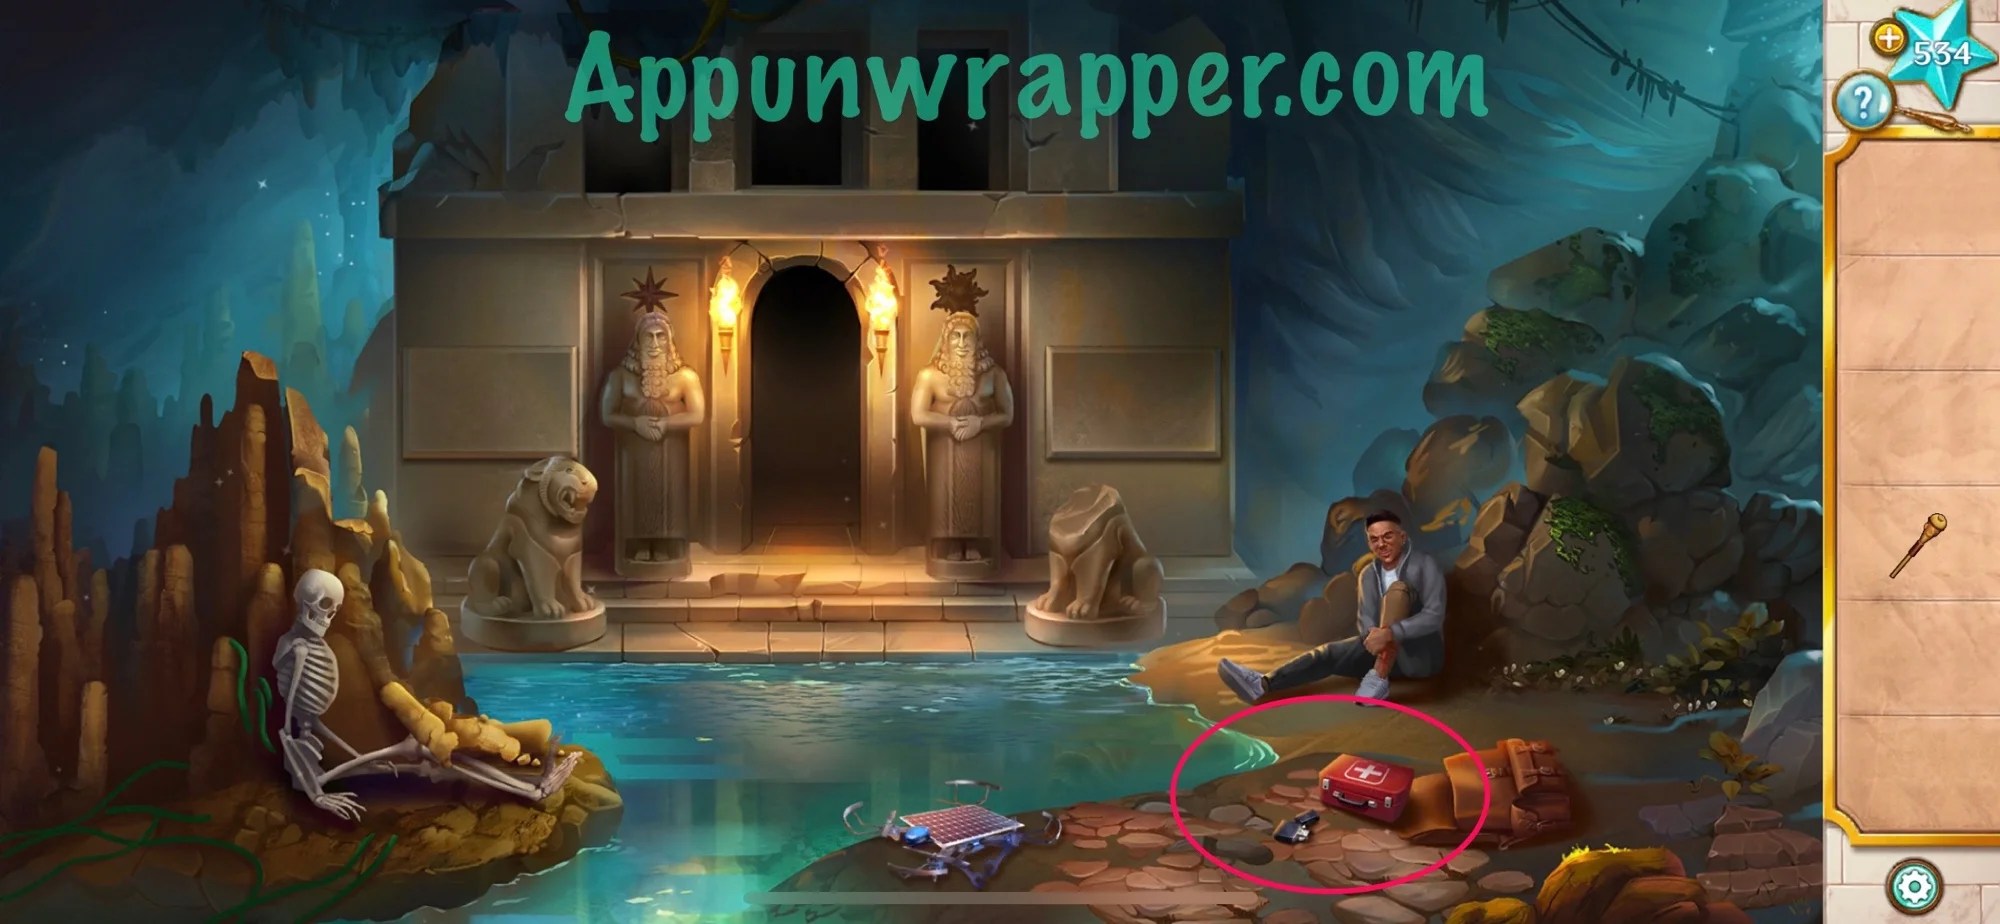
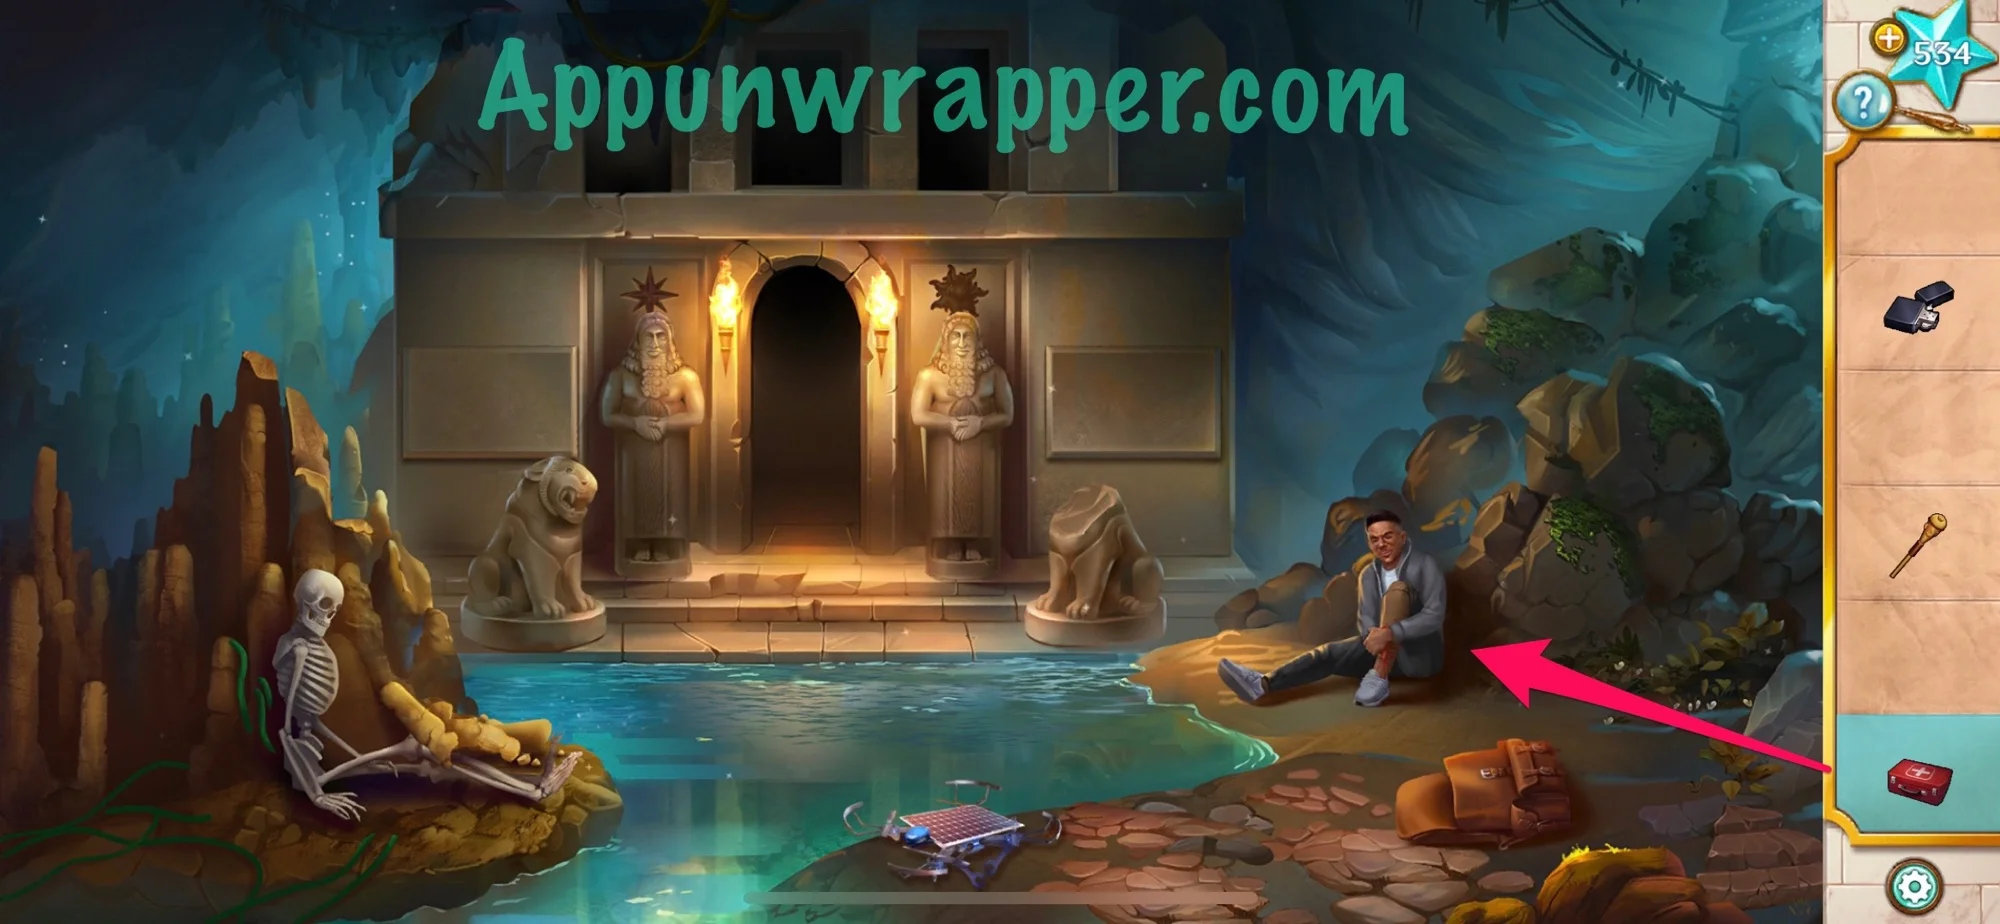
5. Use the med kit on Peter and then he’ll get up to look at the drone. We need to find some oil for it.
6. Head back inside and through the newly opened door. There’s a ton of gold coins!
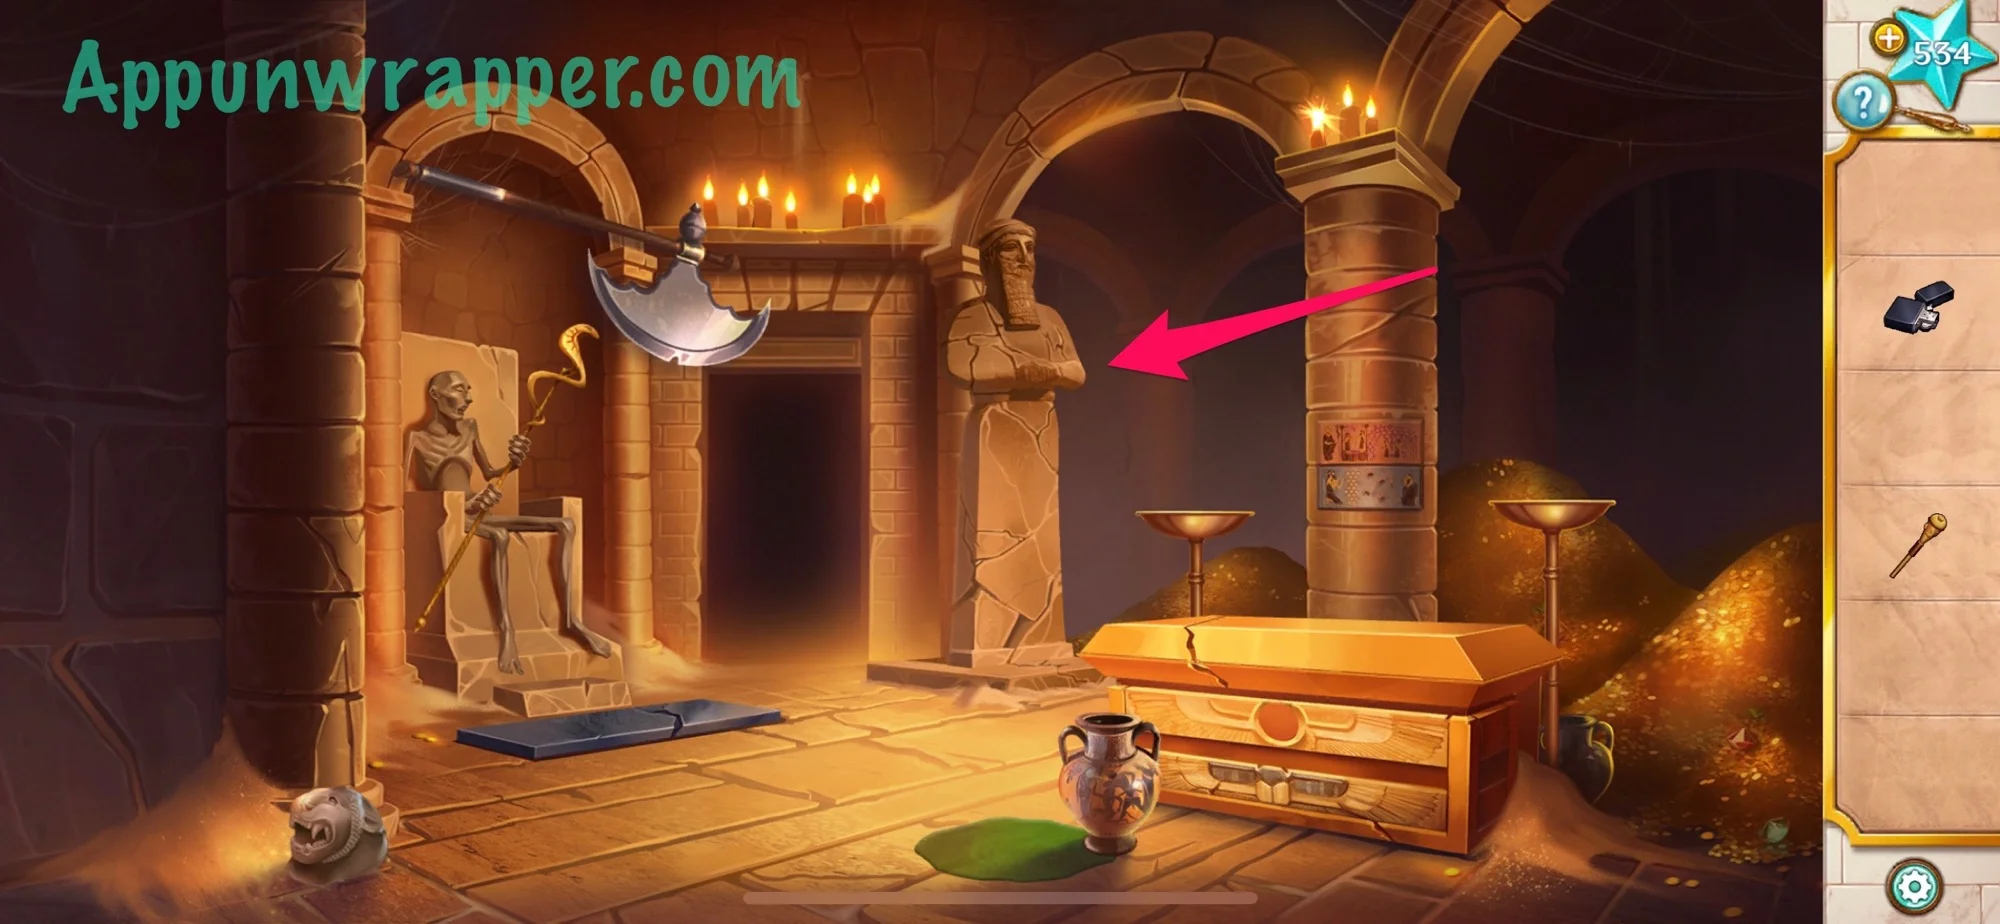
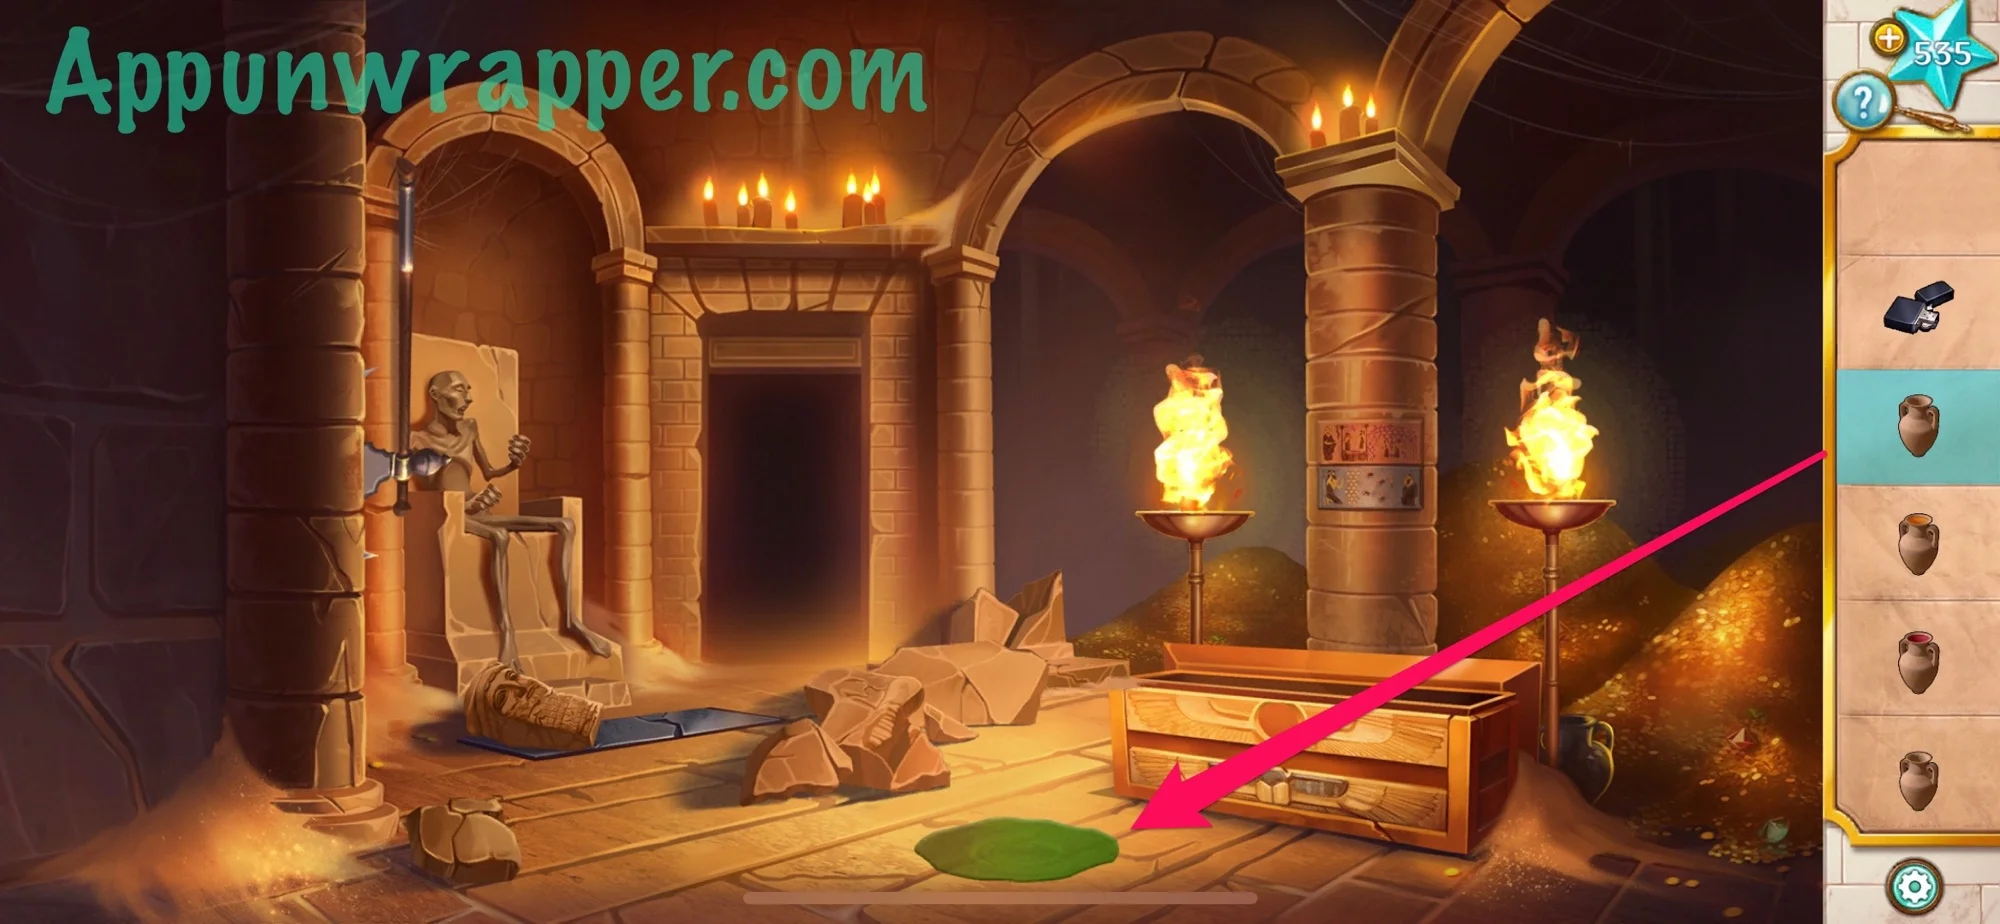
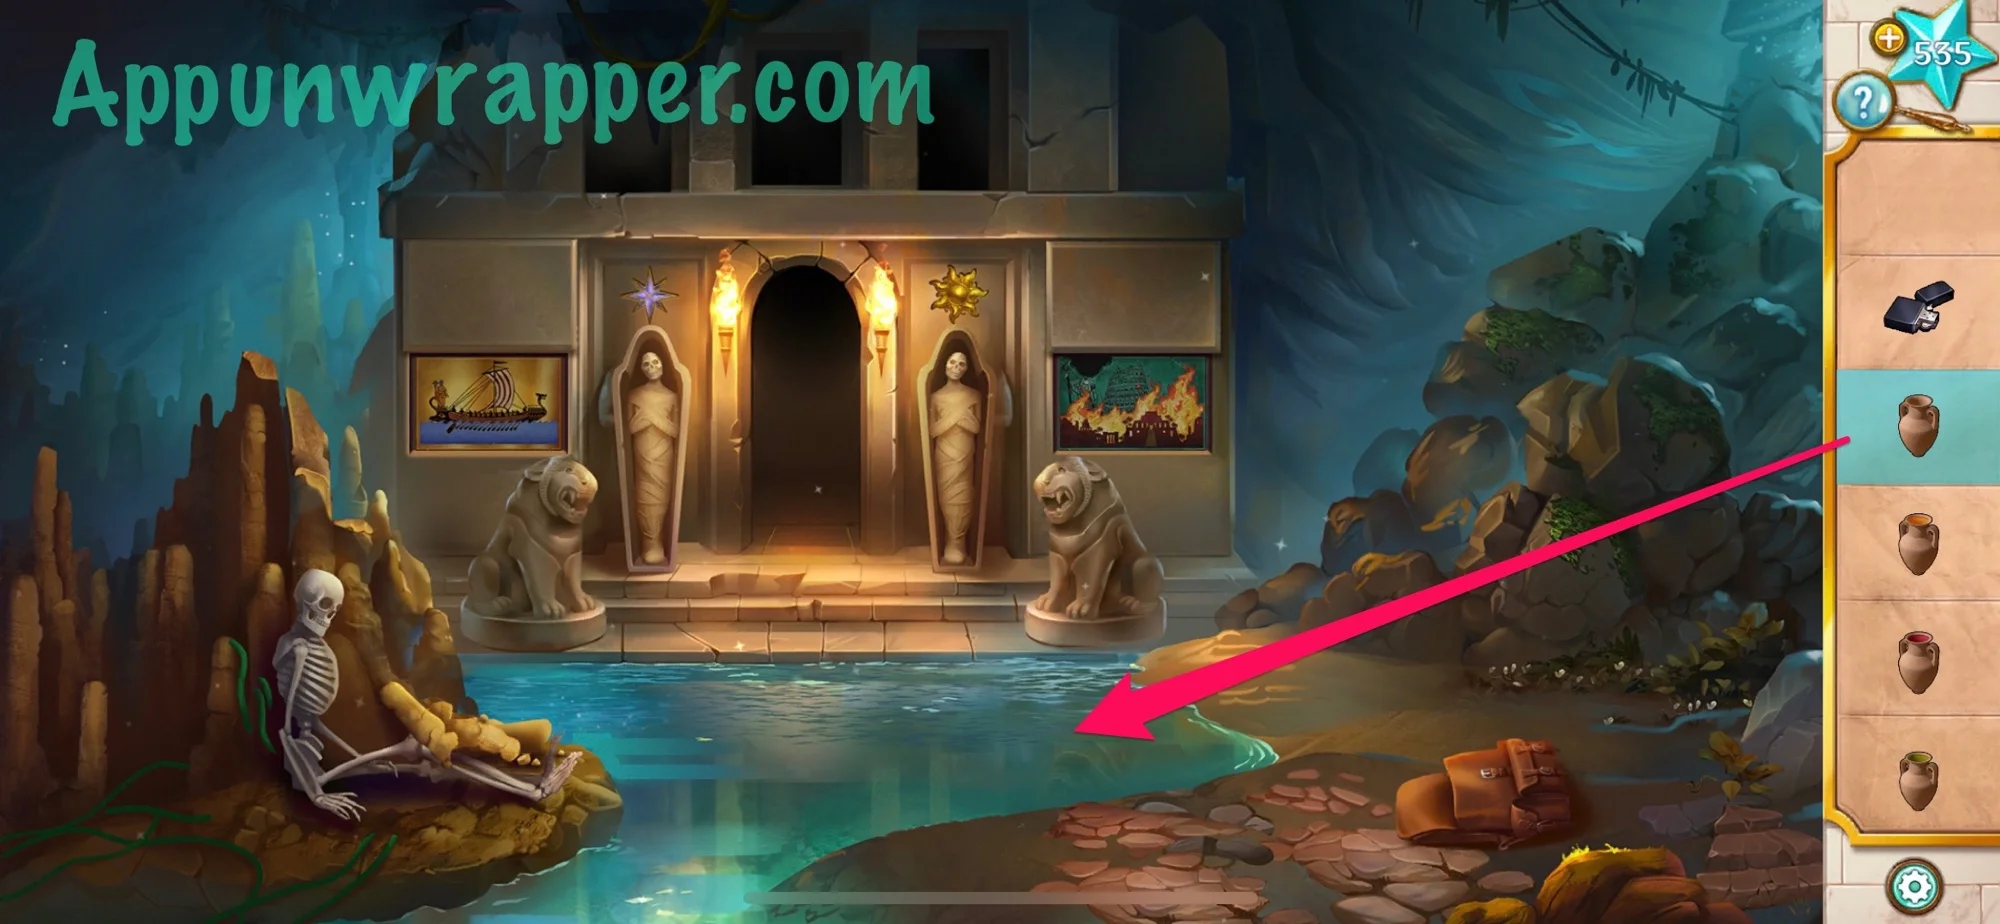
7. Tap the statue a few times until it breaks. Then pick up the heavy statue head. Use the lighter to light the two lamps to reveal a puzzle. Also, grab the lion head and the amphora of oil. Take a look at the murals on the wall.
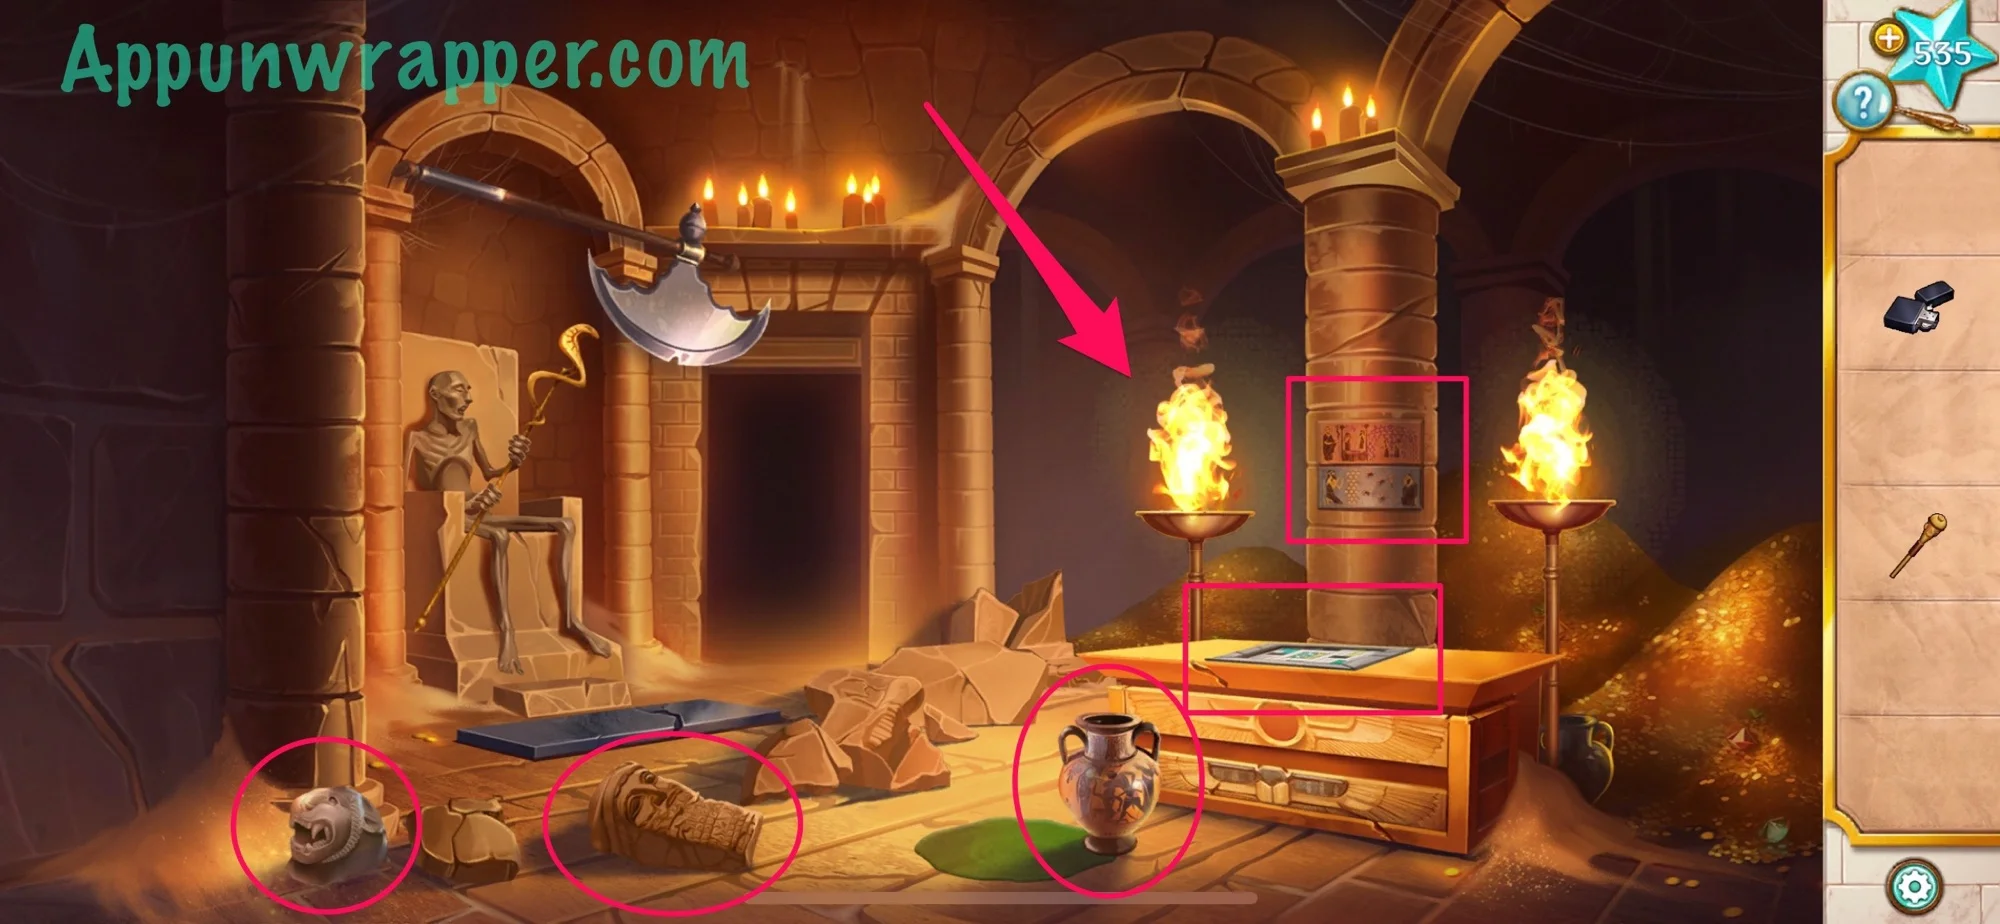
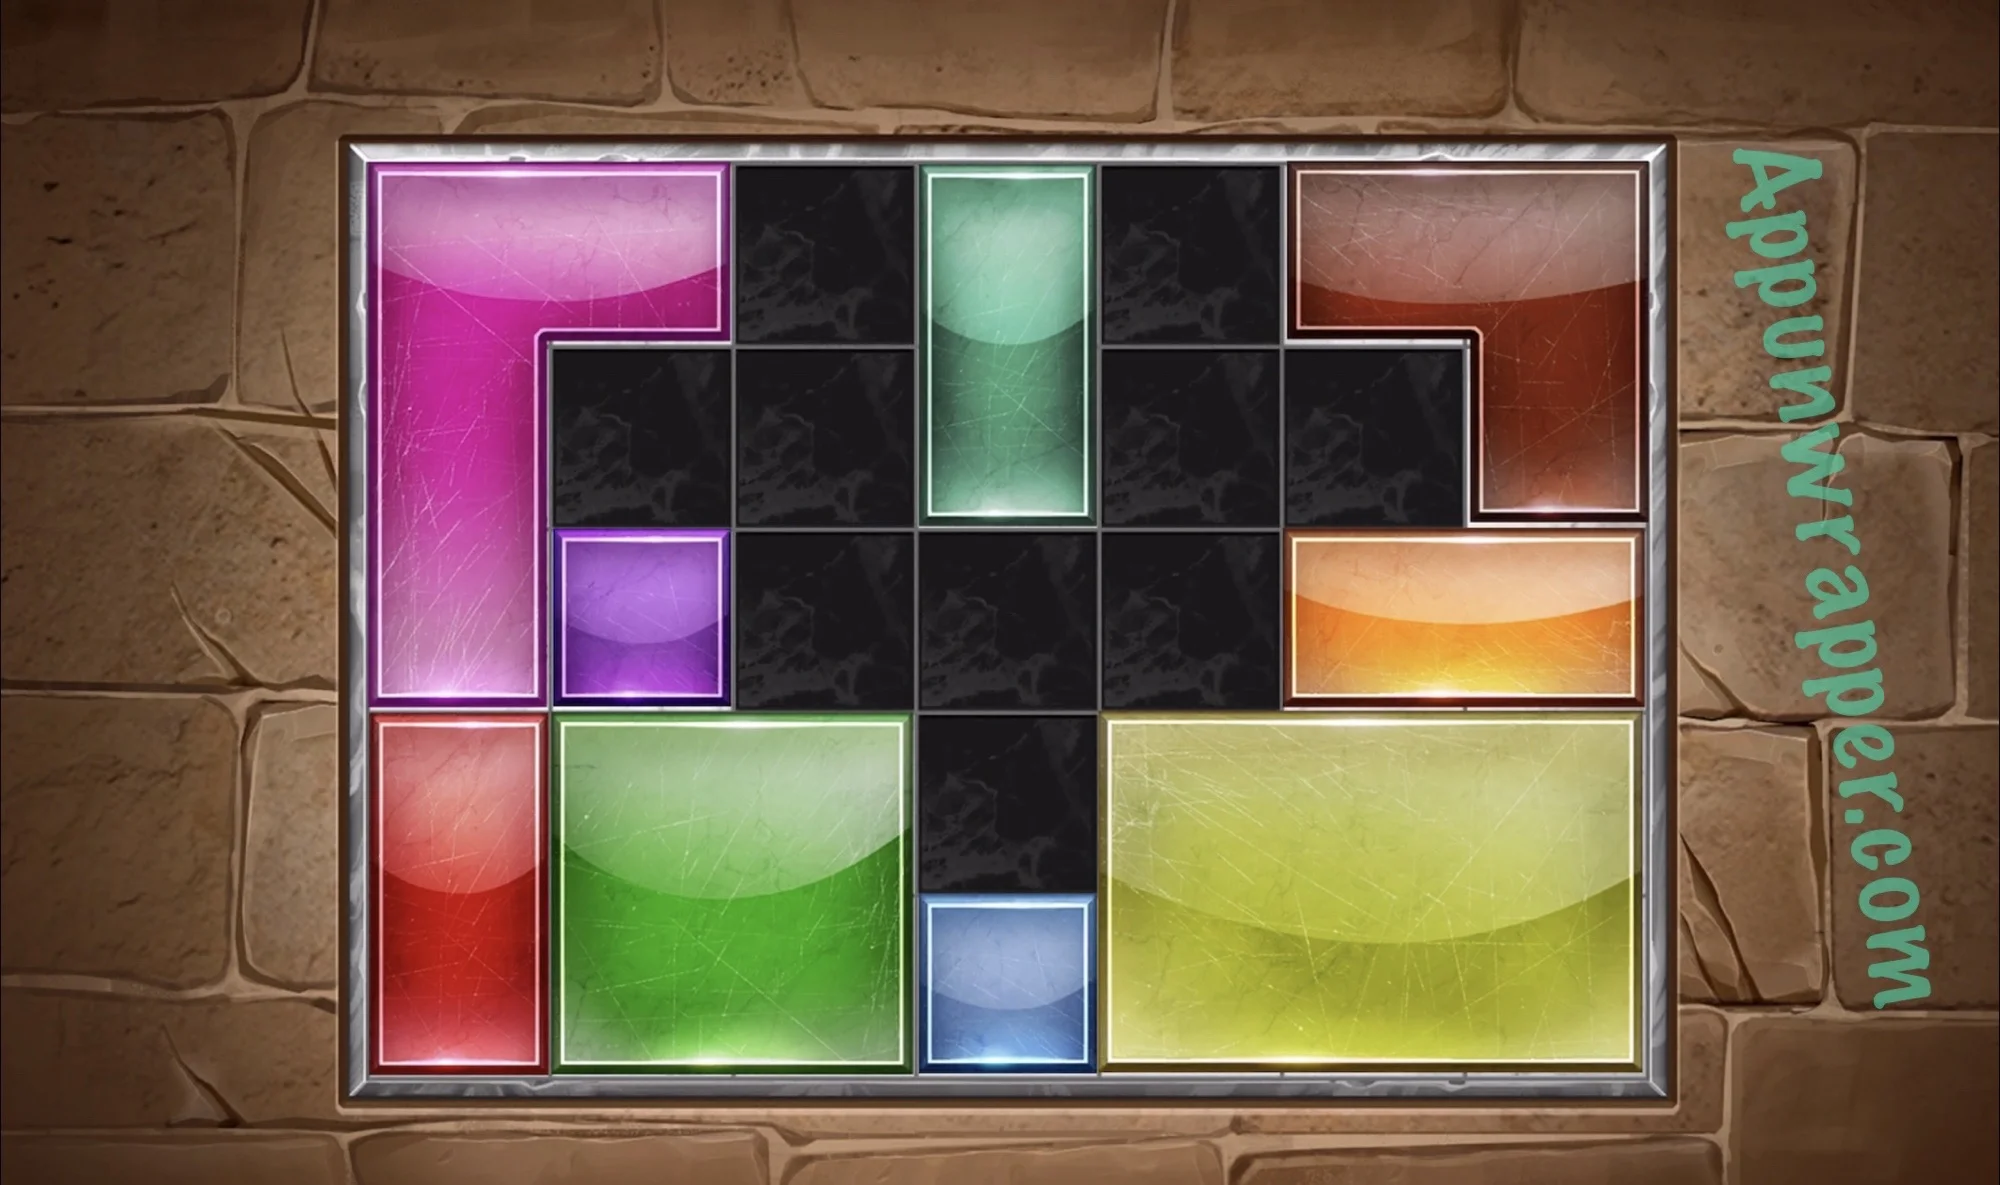
8. Let’s solve the Moving Blocks puzzle. You need to use the arrow buttons to move the colored shapes to their matching colored areas on the grid. All three move together, so it’s a little tricky. You can use my video below if you need help. Then take the Sun of Shamash from inside. Also, place the heavy statue head on the pressure plate on the left to stop the axe from swinging. Grab the Vintner staff.
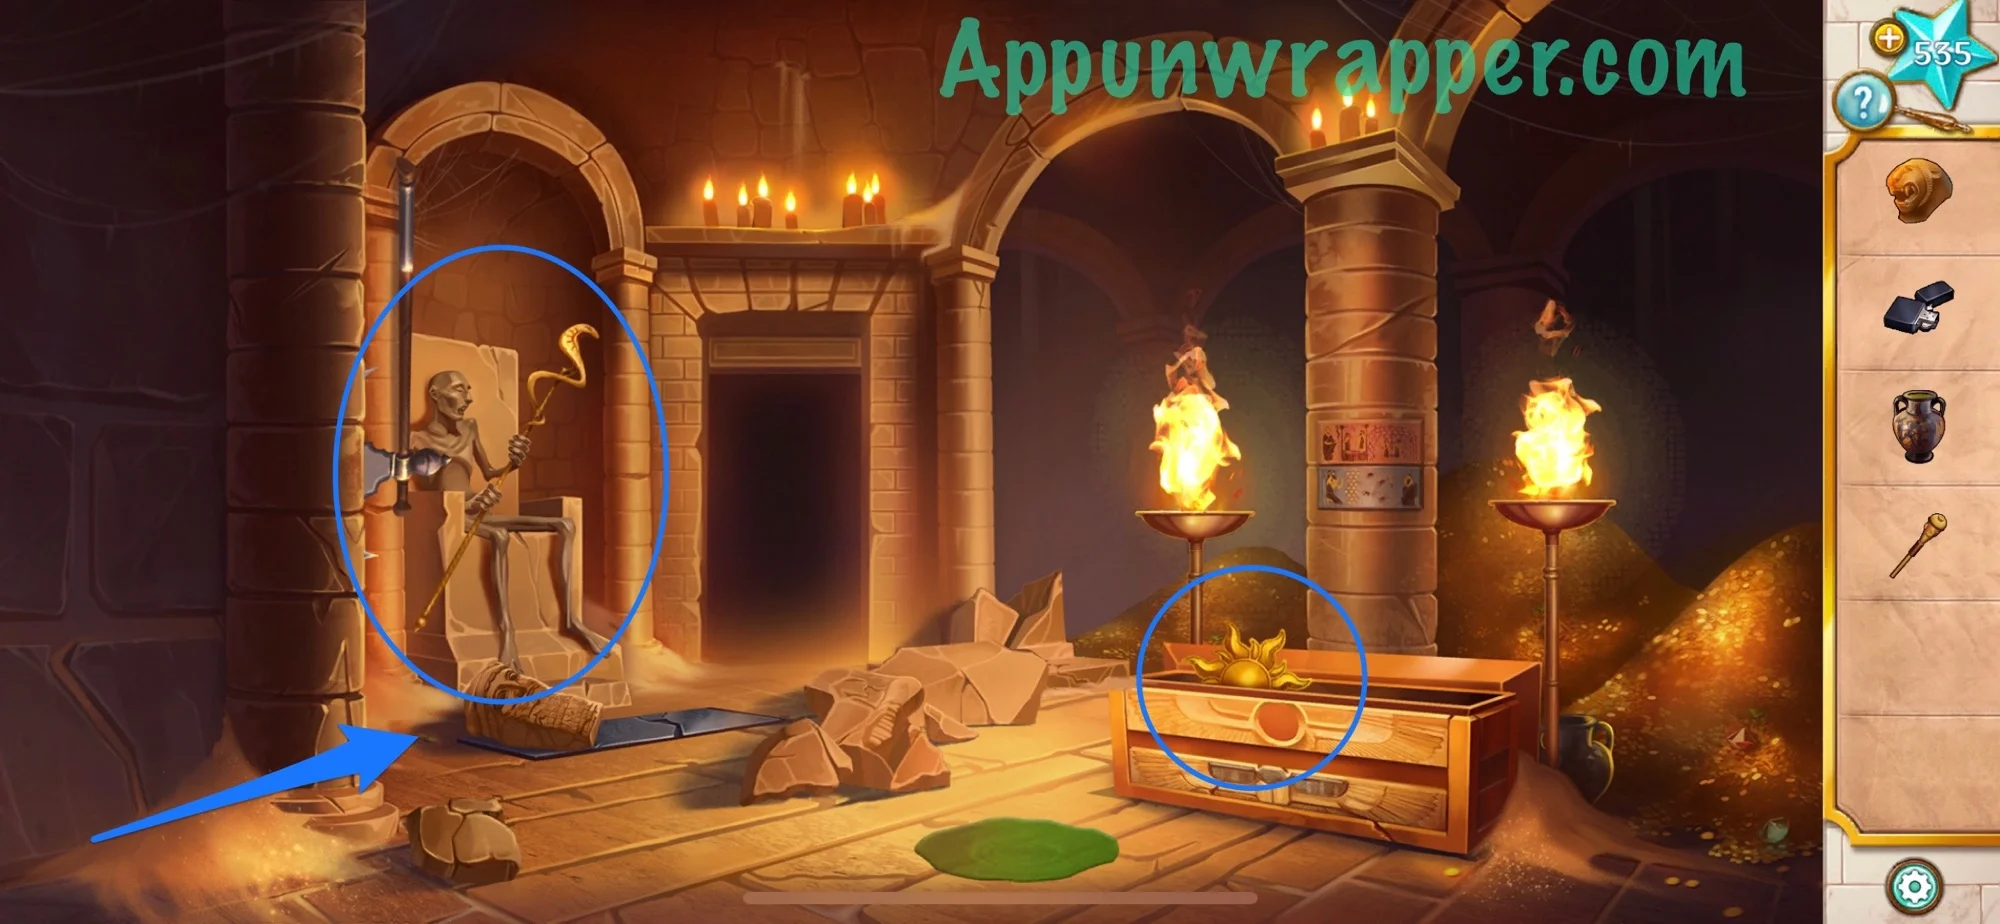
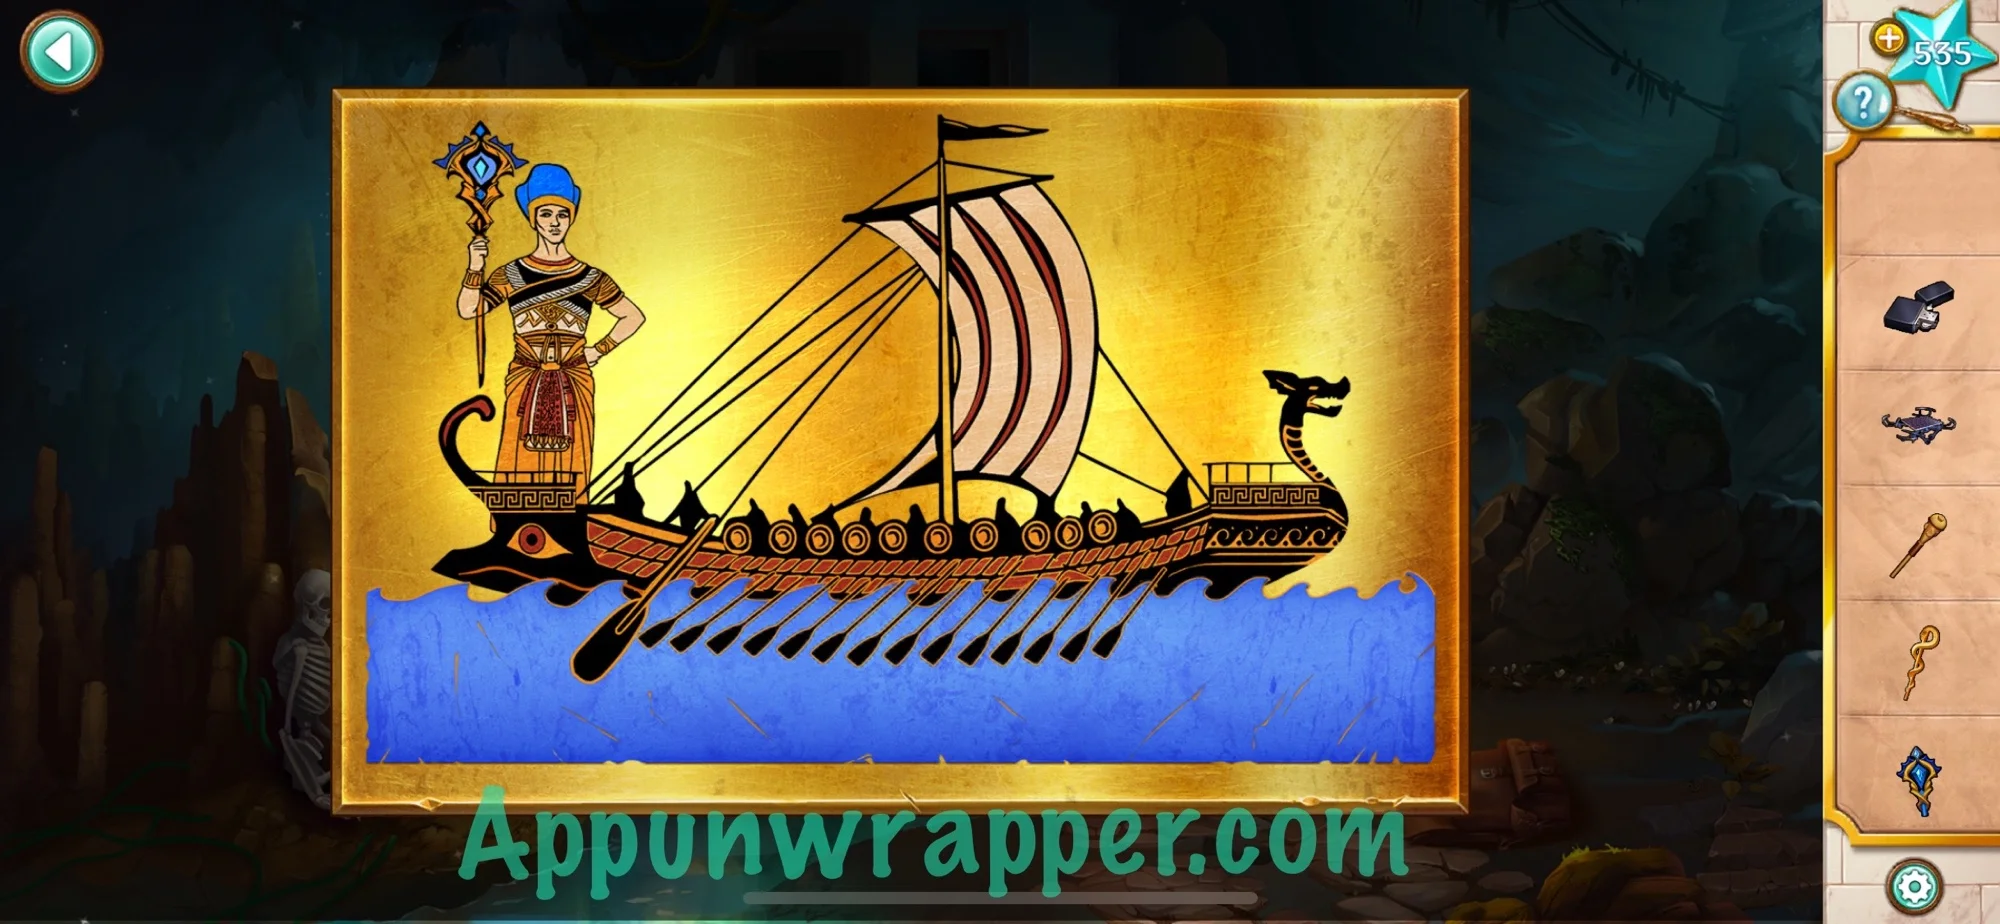
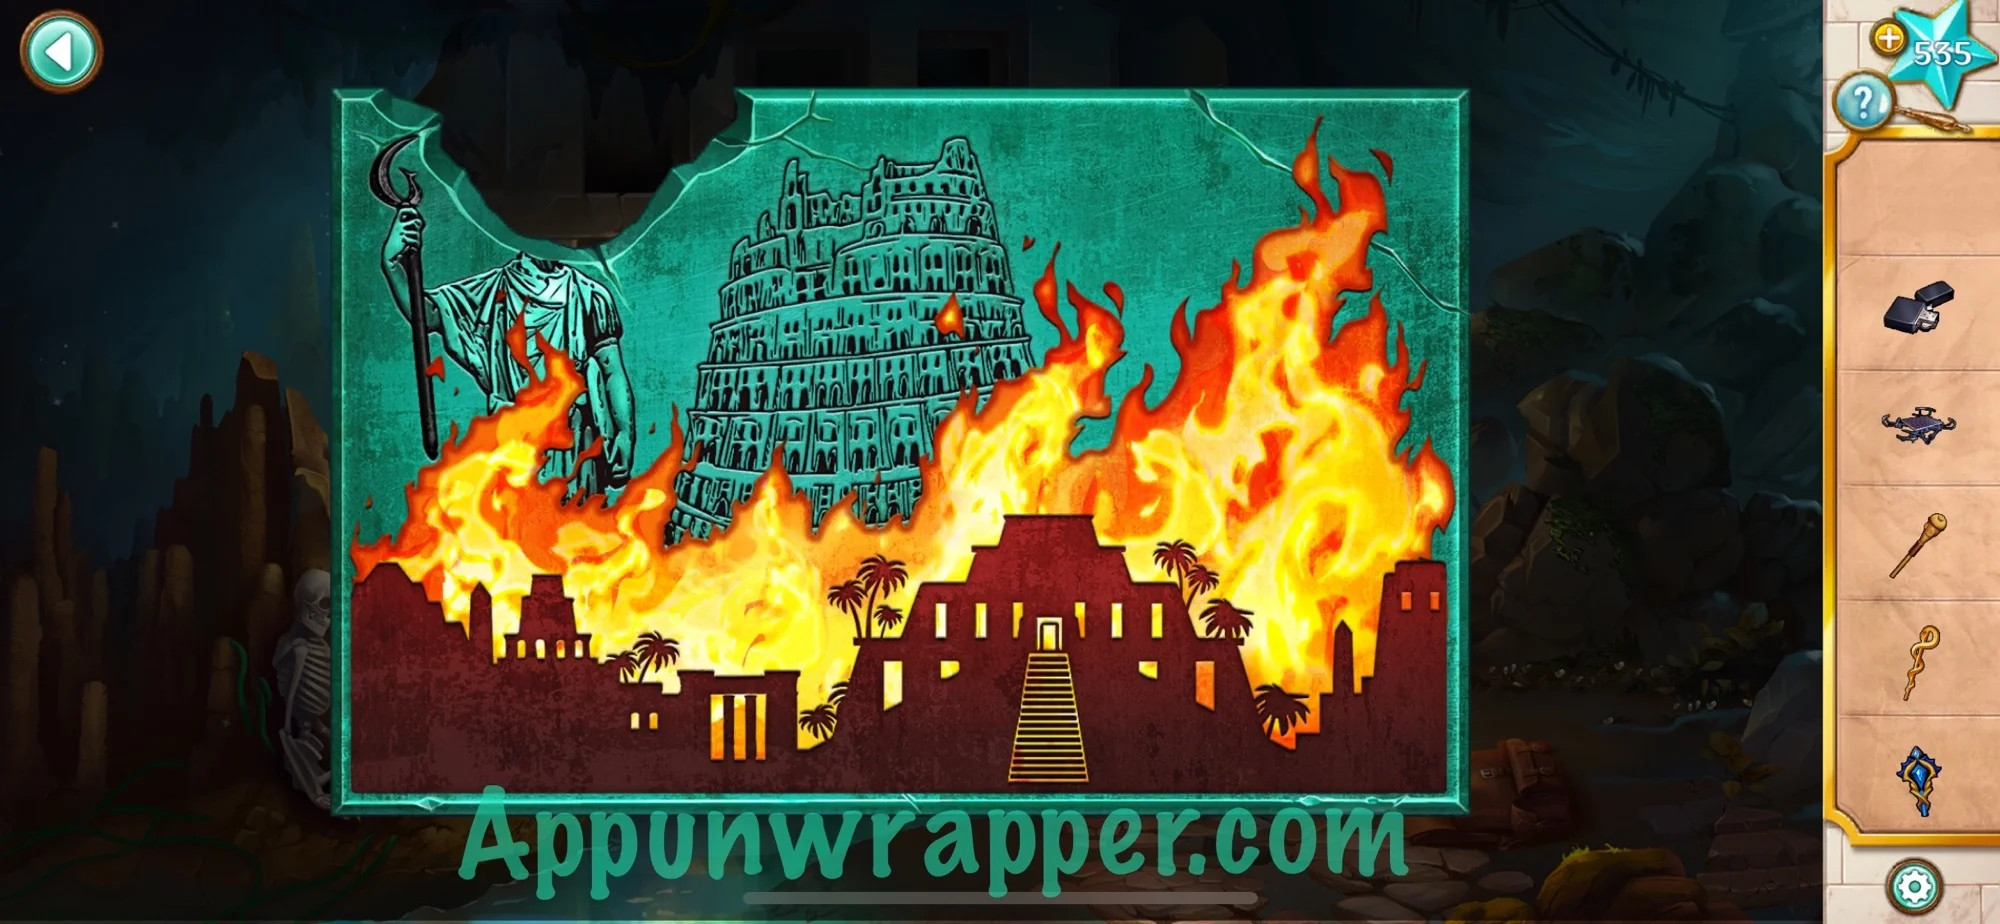
9. Leave the room and go back to the drone. First, place the lion head on the statue to reveal two murals. Look at them. Place the Sun of Shamash over the right sarcophagus and take the high priest staff from inside. And last, pour the oil onto the drone to get it working. Grab the drone.
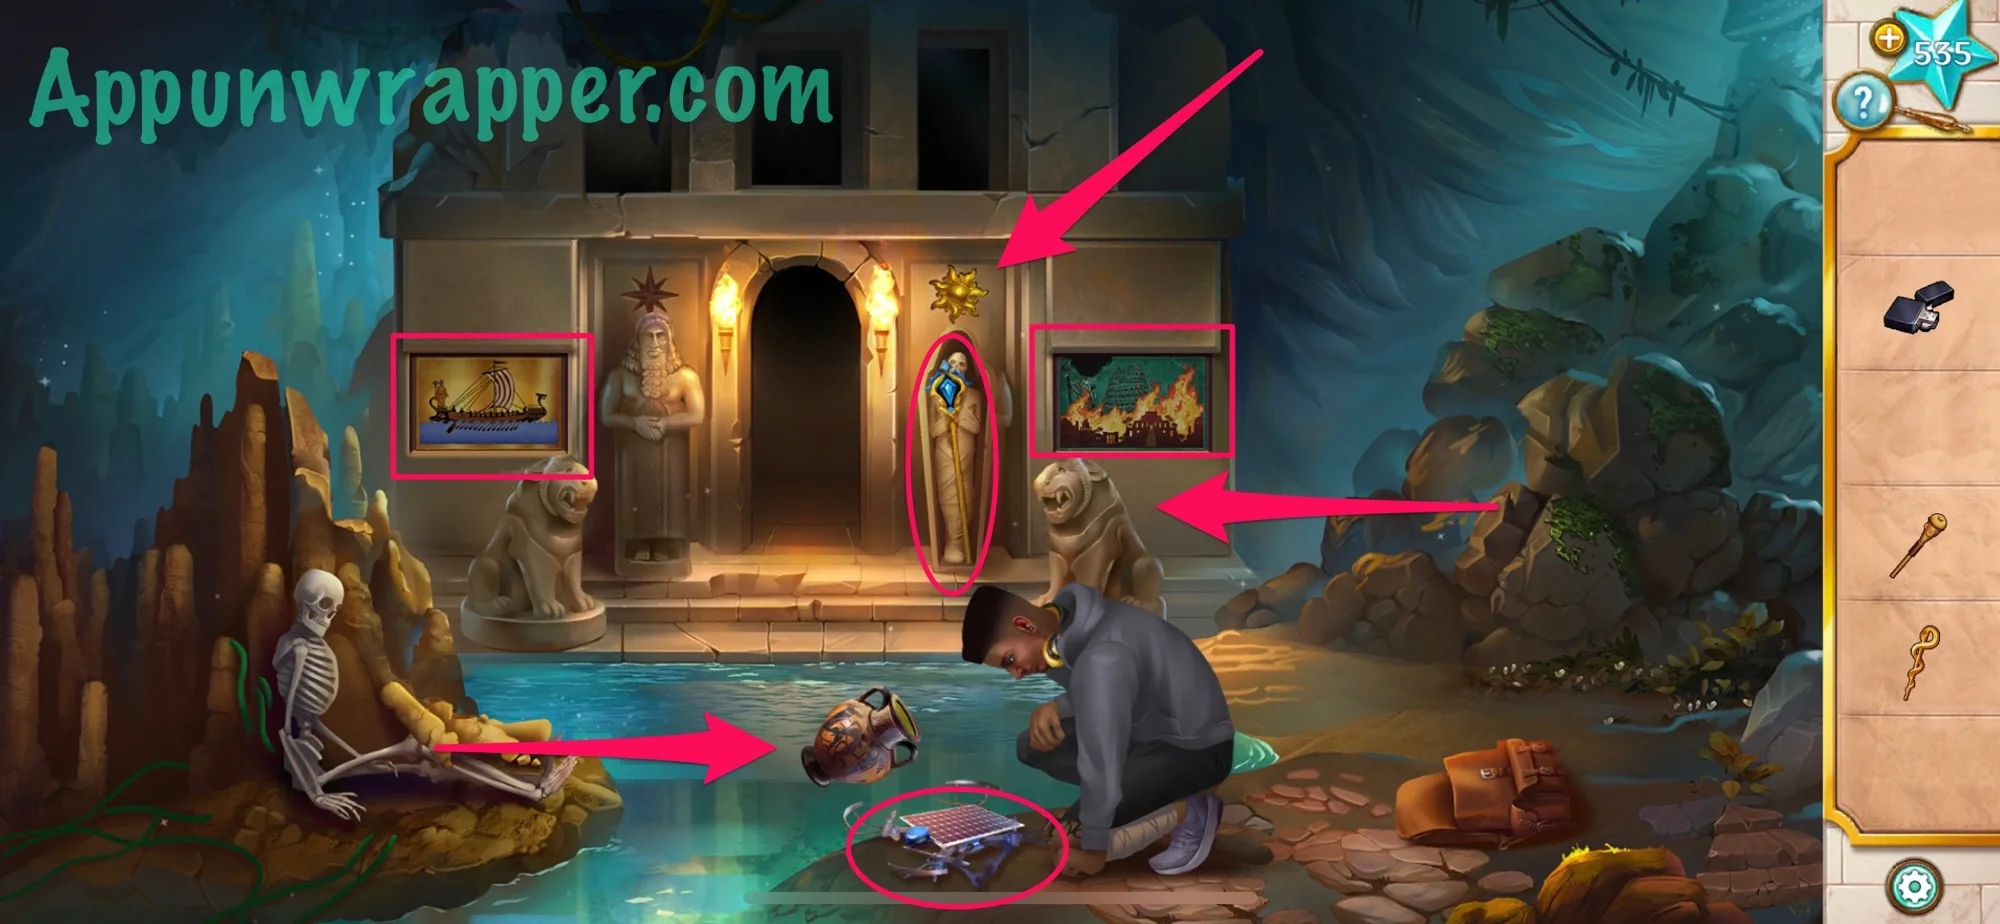
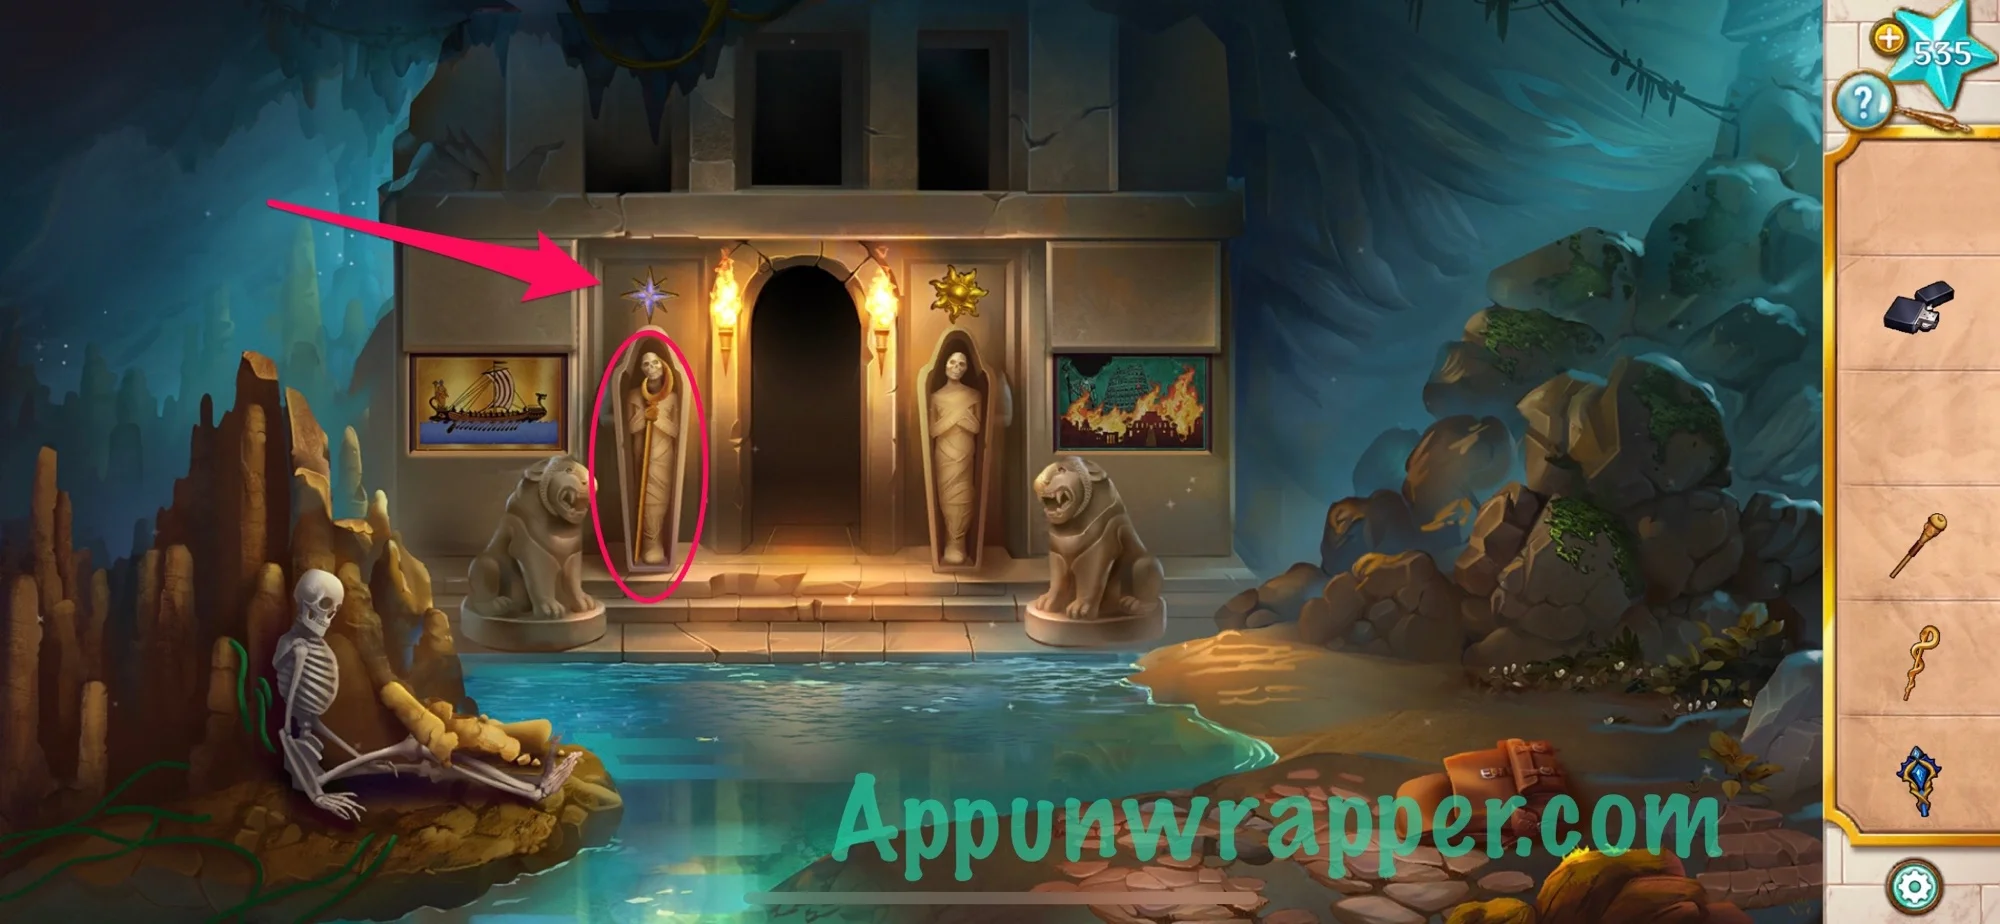
10. Go back inside and use the drone to reach the Star of Ishtar.
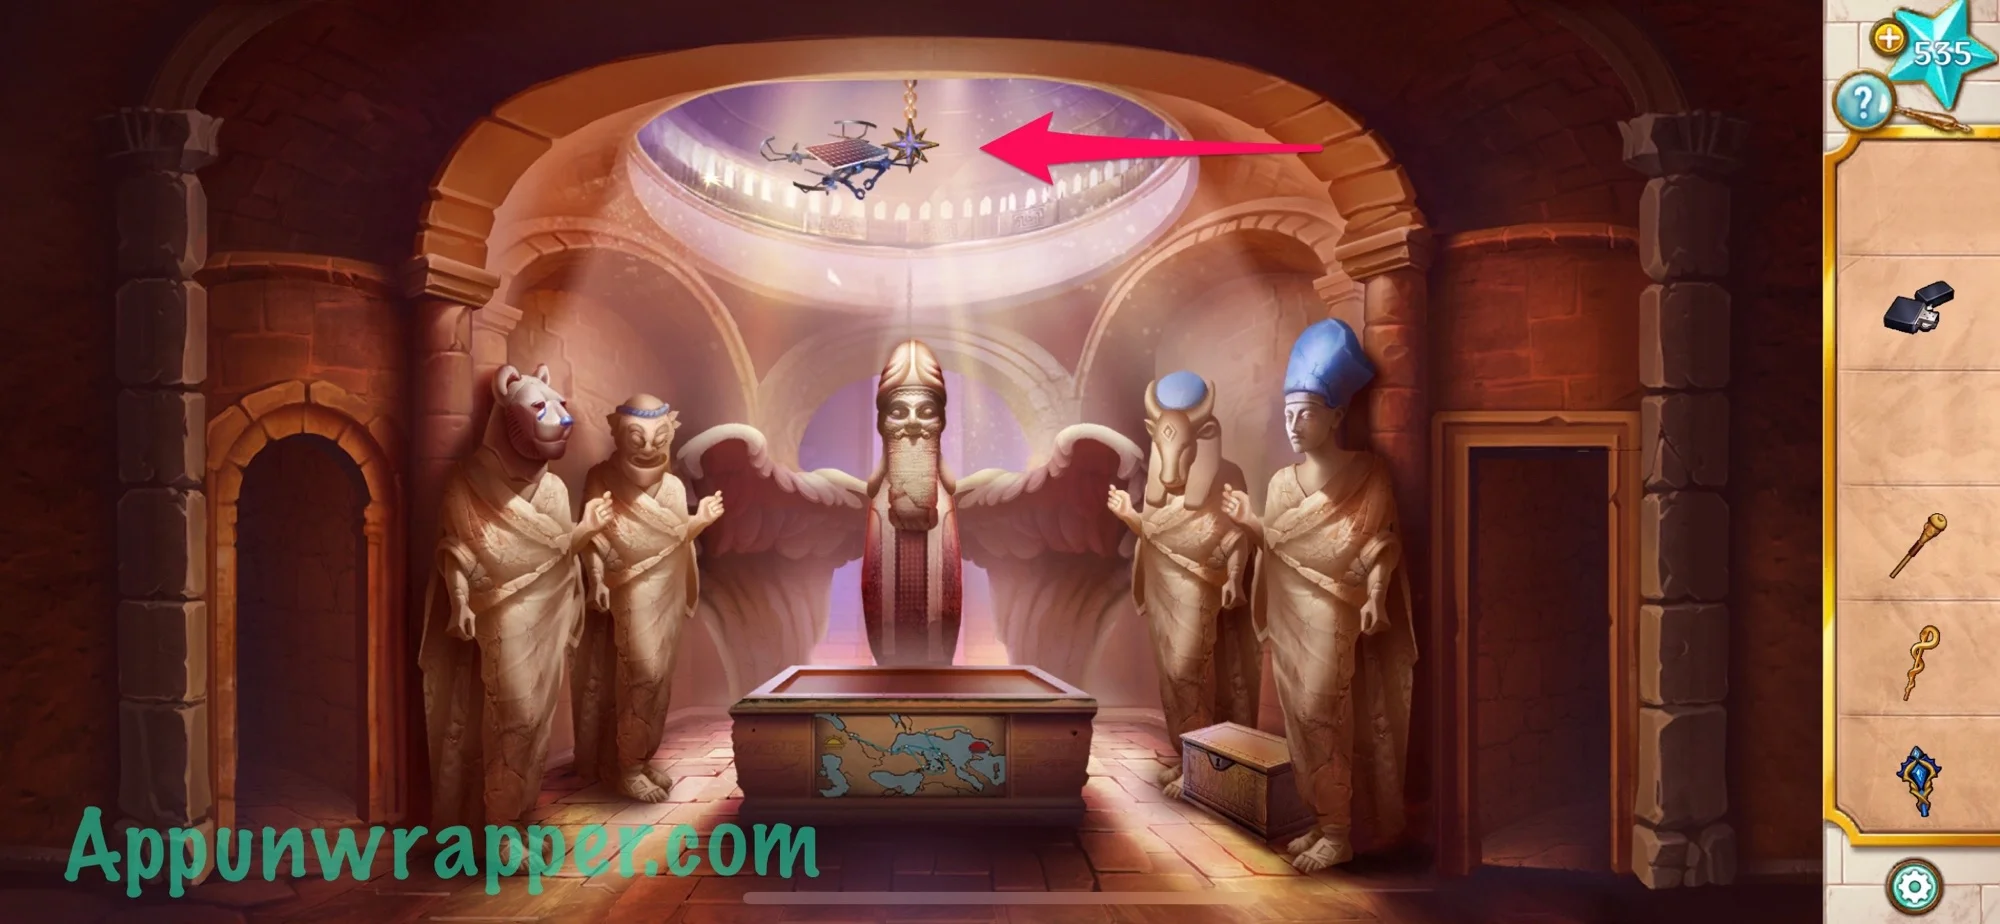
11. Go back outside and place the Star of Ishtar in the slot above the left sarcophagus. Then take the scythe staff from inside.
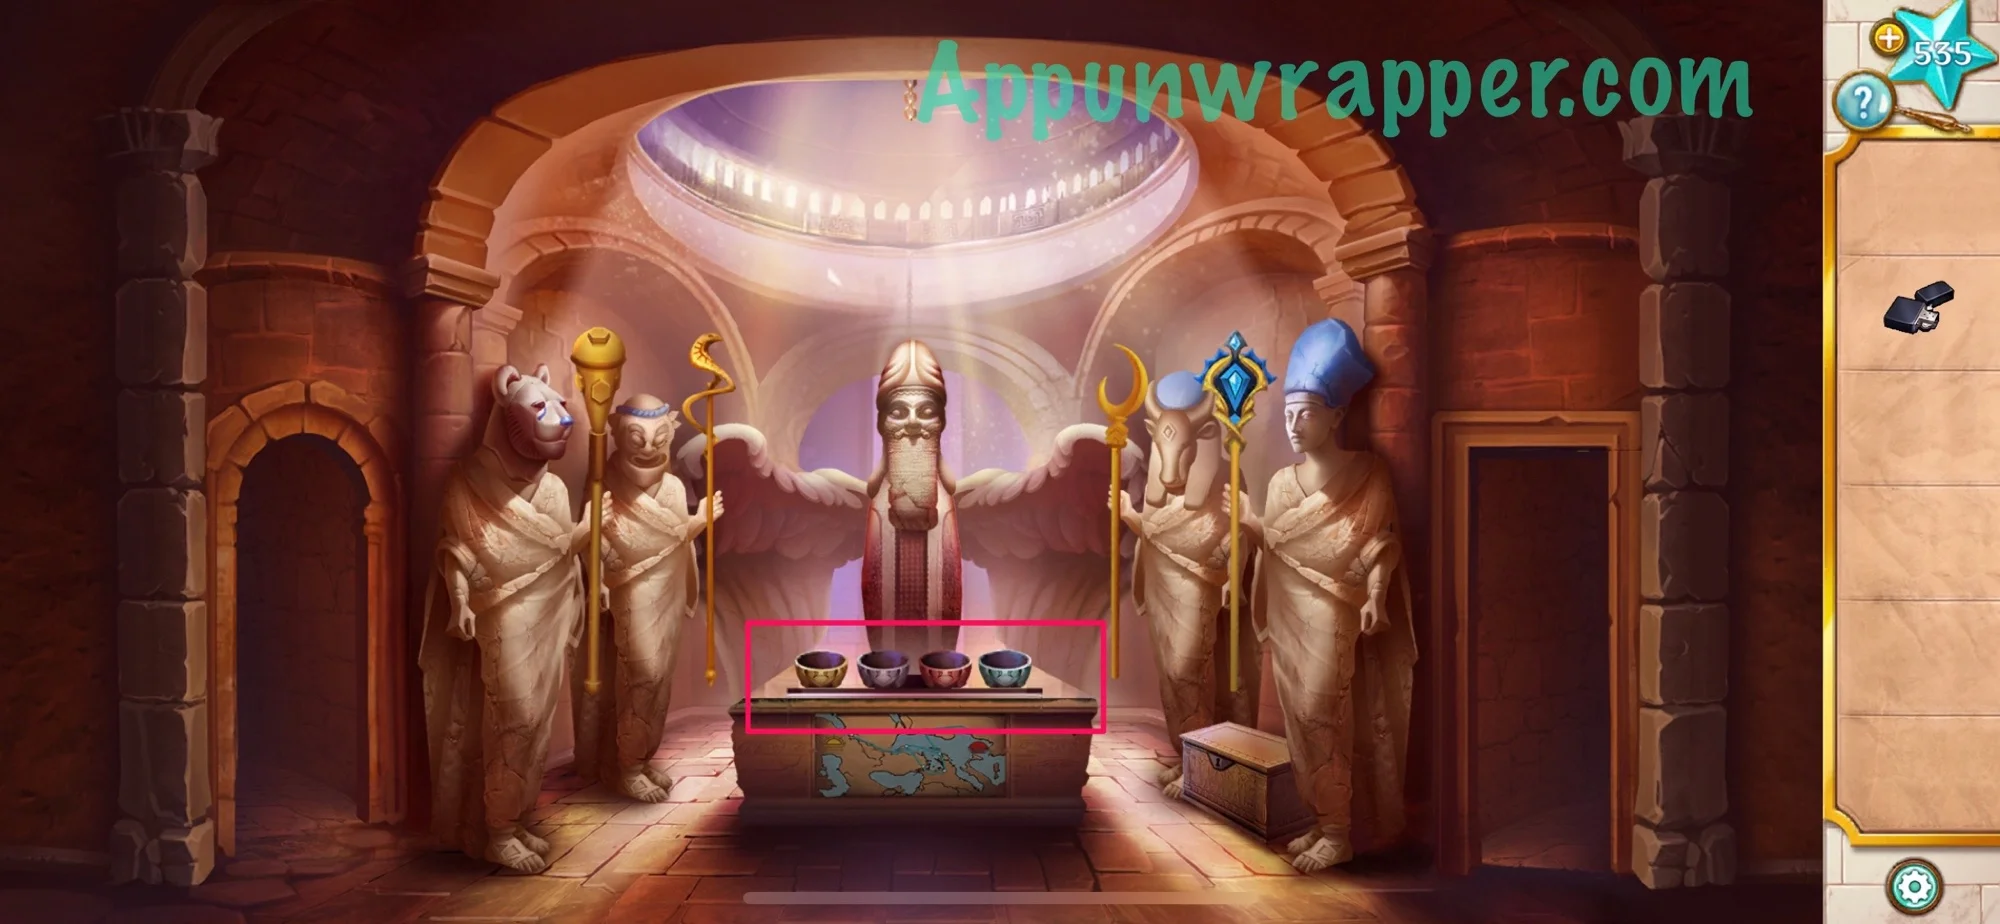
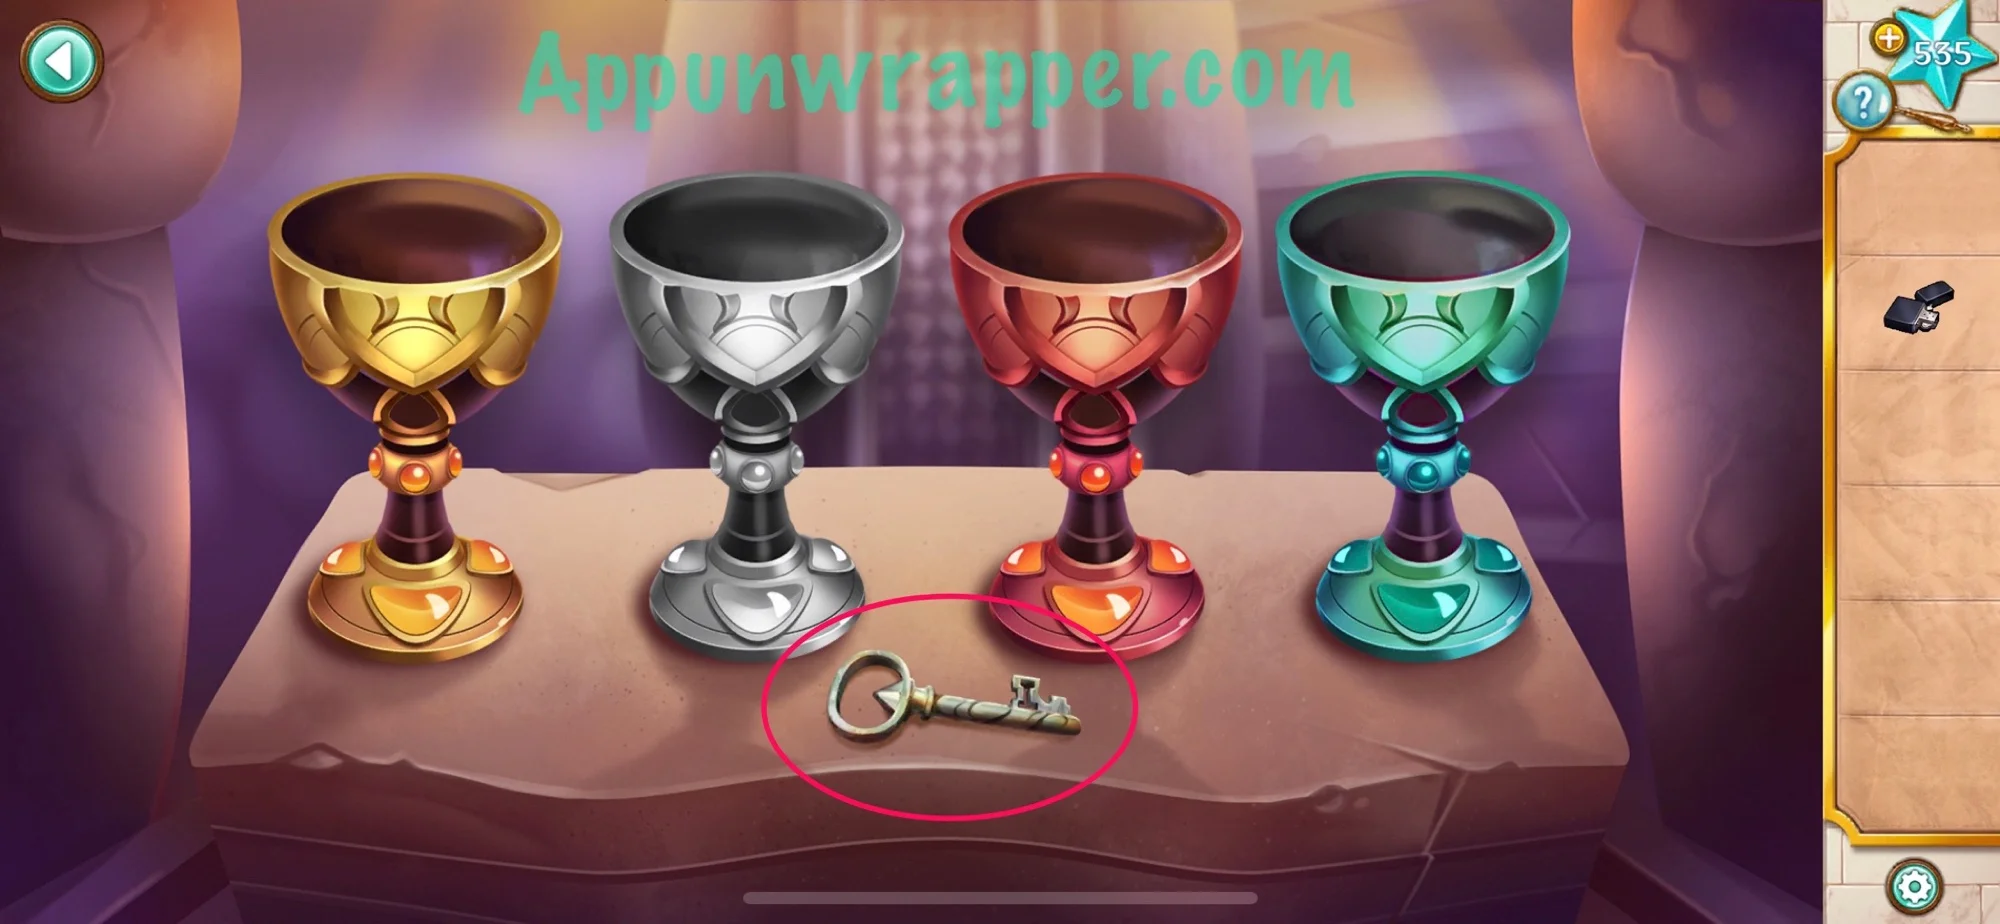
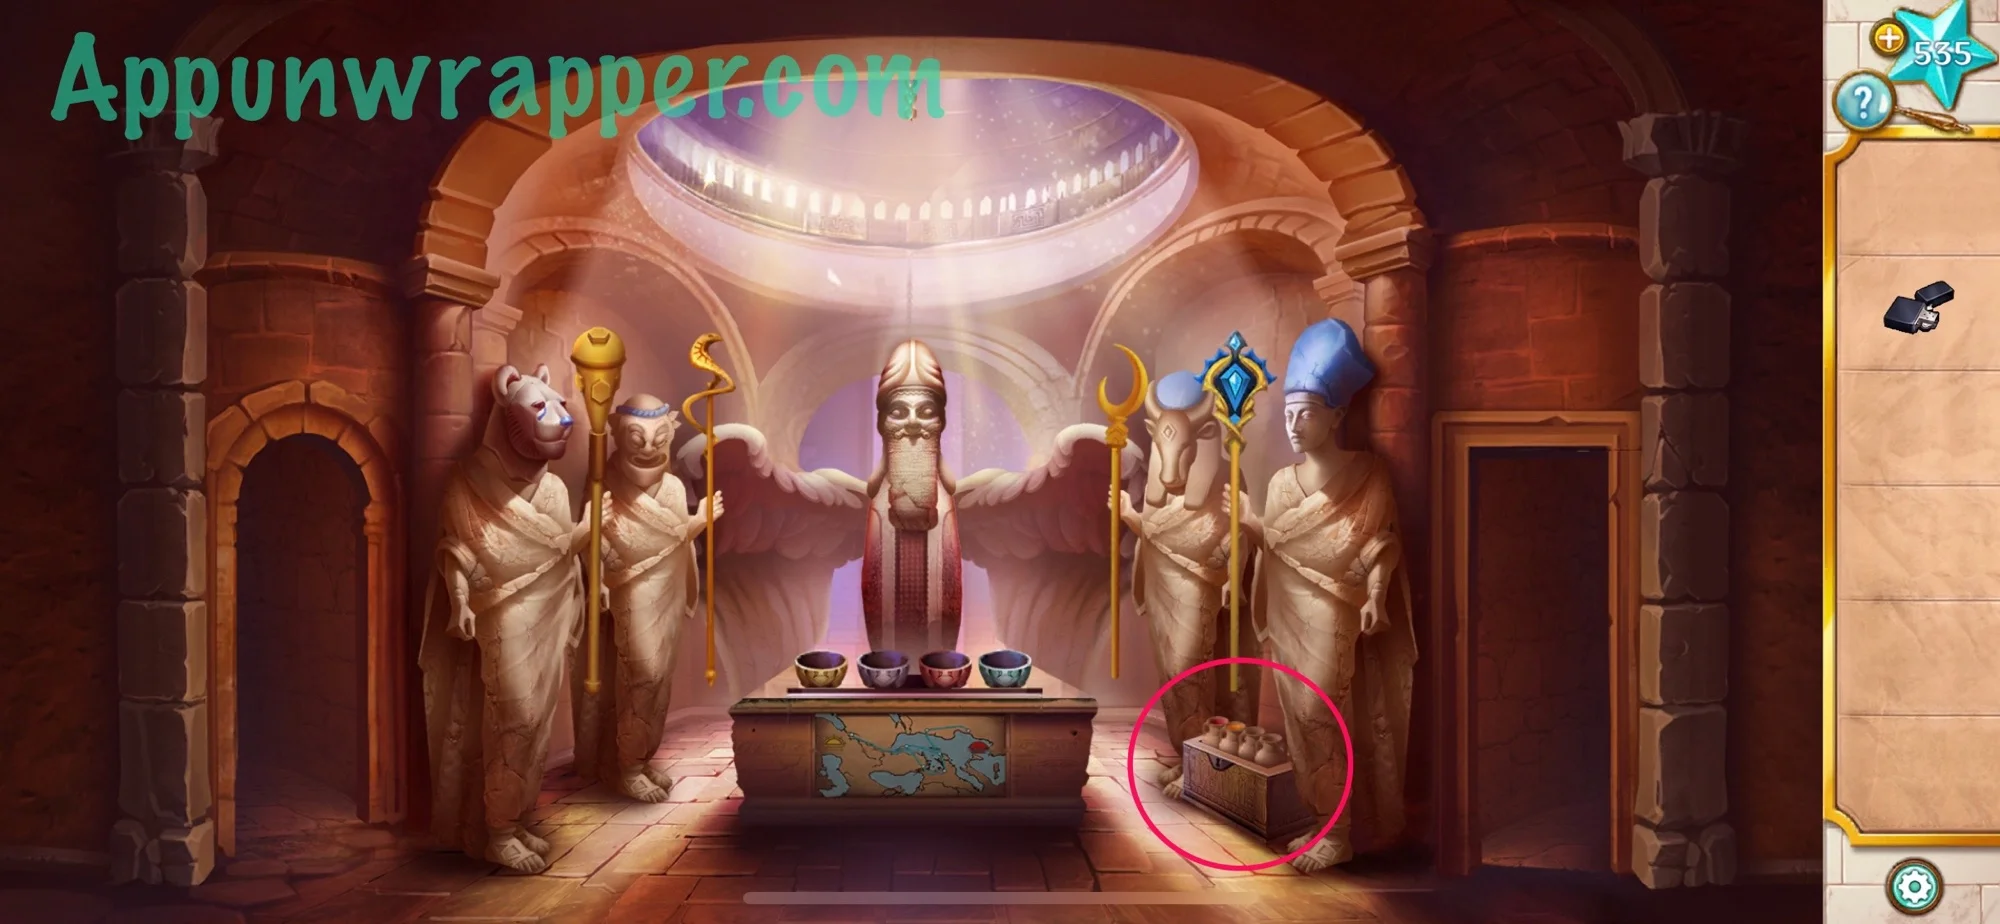
12. Go back inside and place all the staves in the correct statue hands based on all the murals we’ve seen. Then tap on the goblets that appear and take the key.
13. Use the key to unlock the chest and take the jar of wine, jar of honey, and two empty jars.
14. Go through the right doorway and fill one of the empty jars with oil. Then go back outside and fill the other empty jar with water.
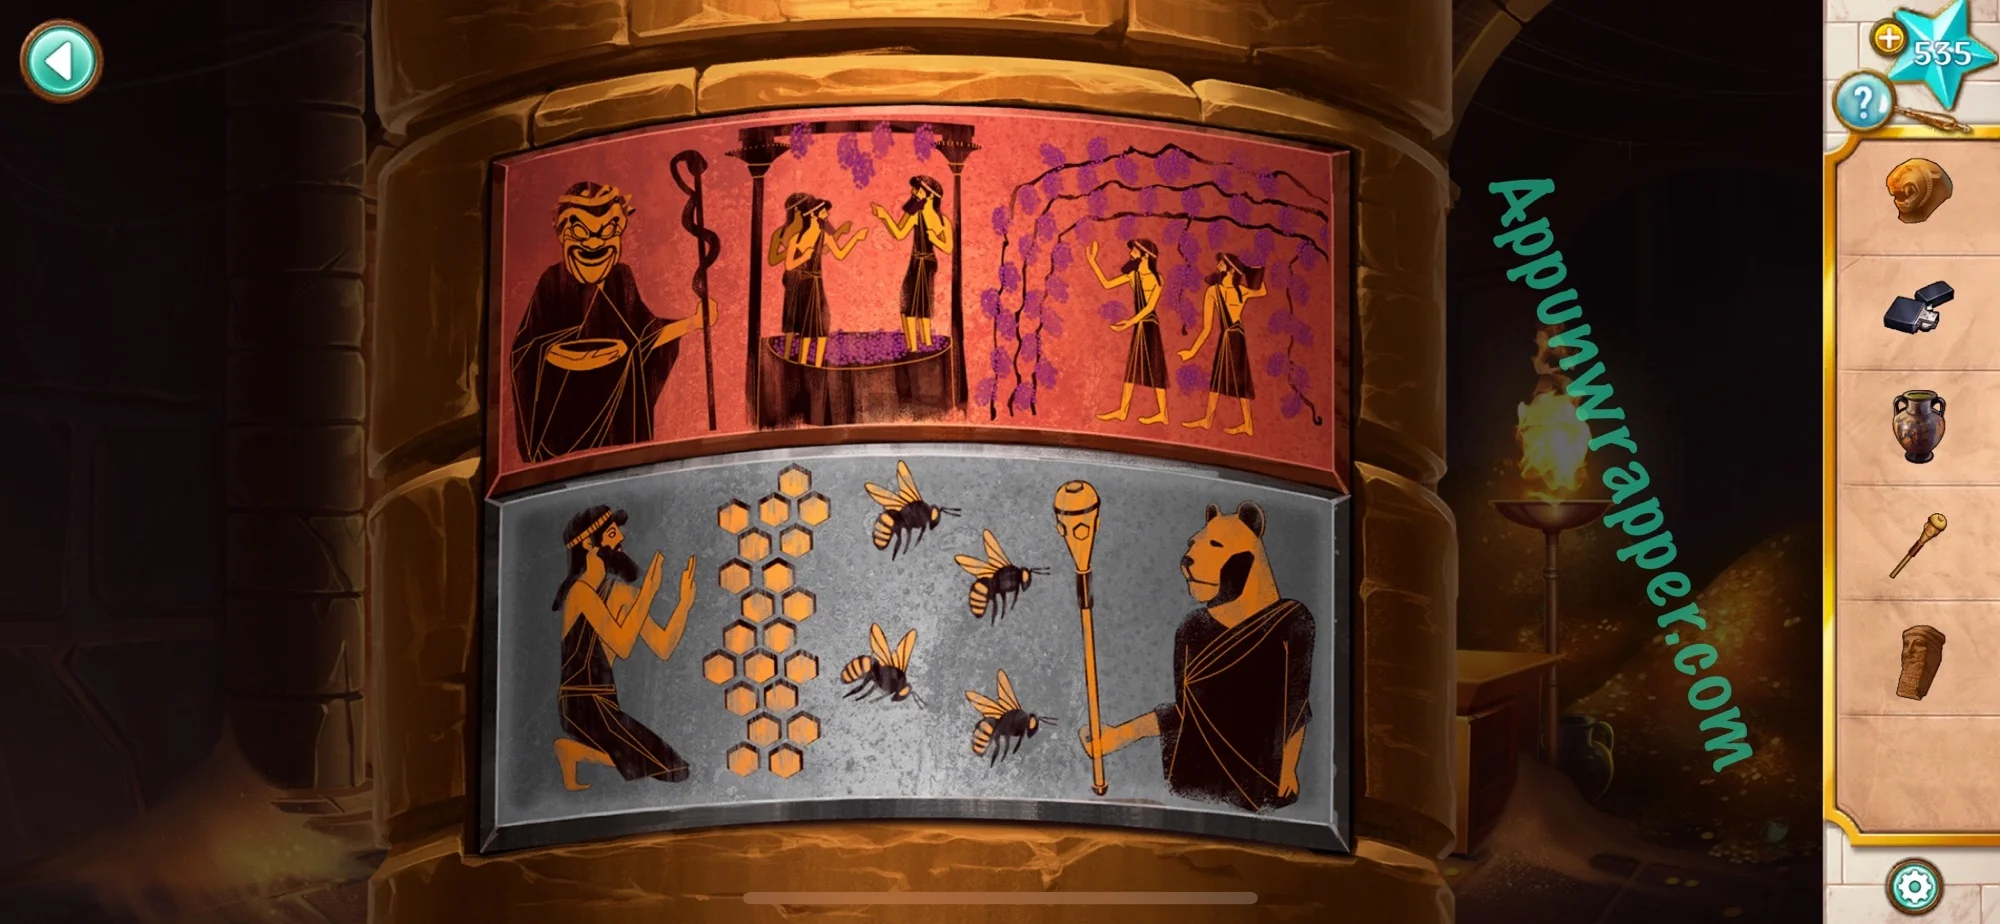
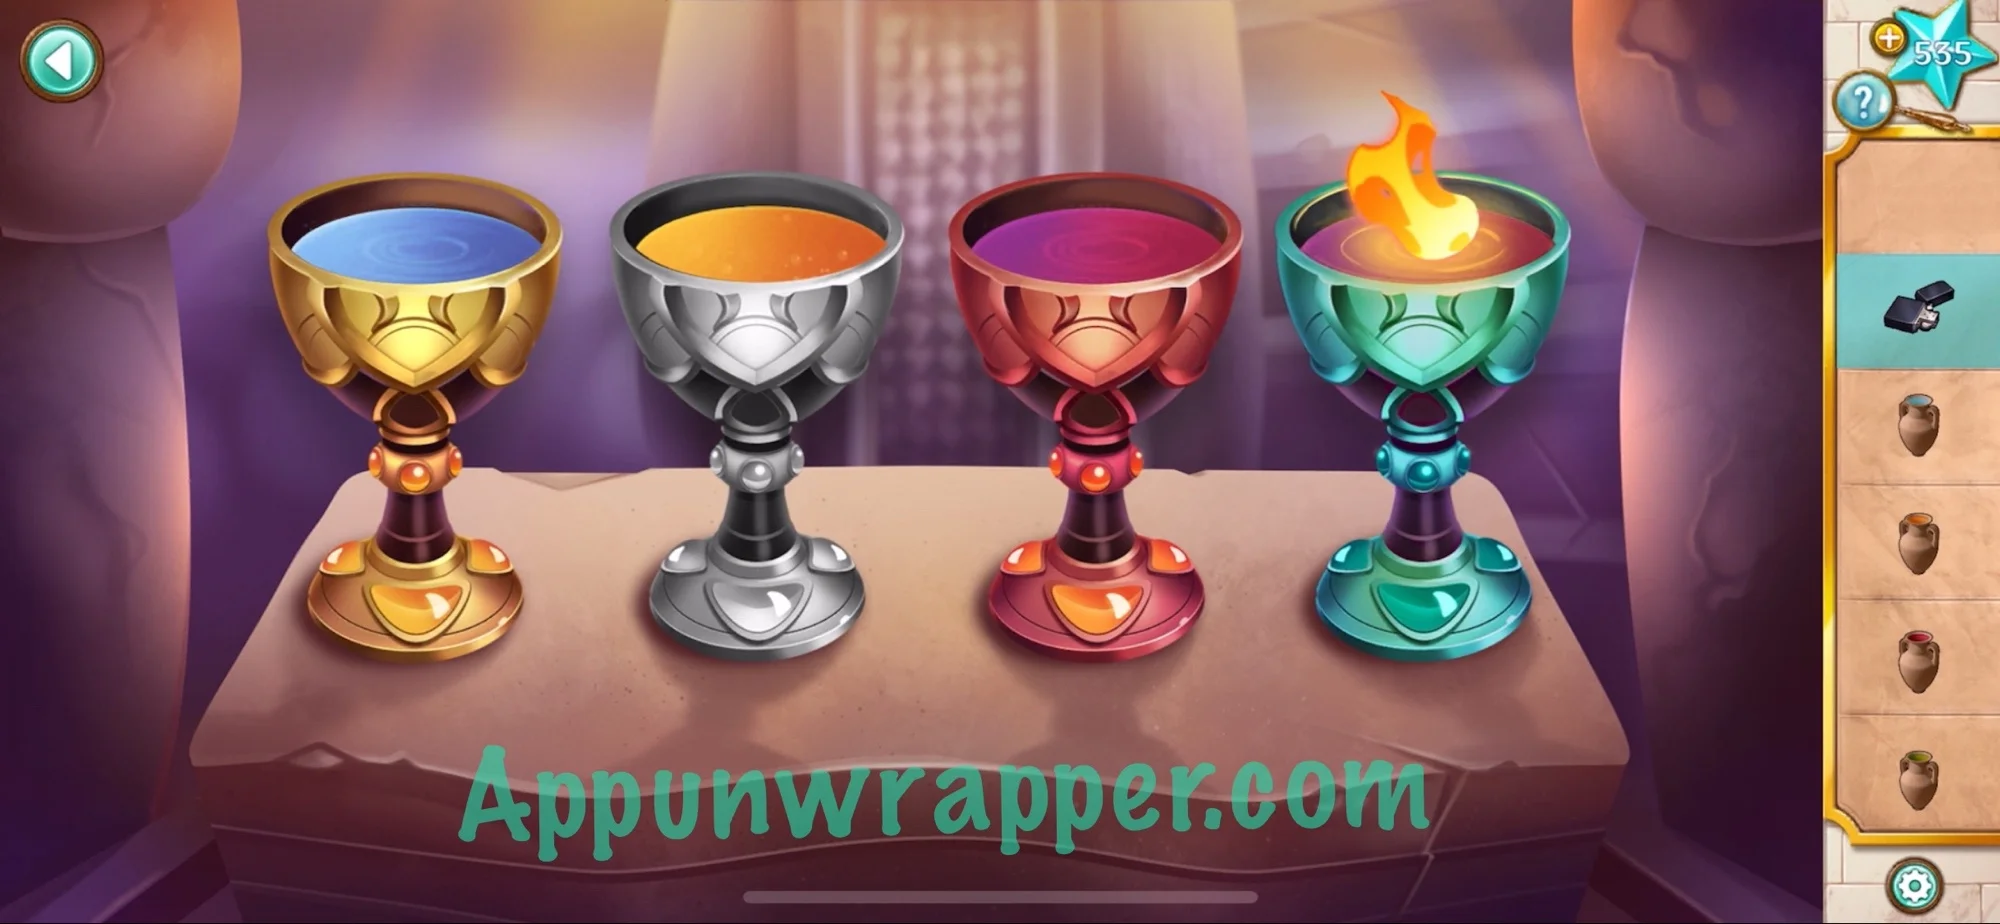
15. Go back to the room with the goblets. Again, use the murals to figure out what to pour into each goblet. The gold goblet is the same color as the gold mural with the priest on it and there’s also water in the mural. So pour water in there. The silver goblet is the same color as the mural with the beekeeper and there’s honeycomb and bees on it, so pour the the honey in there. The third goblet is the same color as the figure with the snake staff and there are grapes in it, so pour the wine in there. And the fourth goblet matches the color of the flaming mural, so pour the oil in there and then use the lighter to light it. It goes Water, Honey, Wine, Oil/Fire.
16. Now we’re back with Professor Burns again and we have to solve the Heart of Zura puzzle. You need to slide the colored pieces around until all the black tiles are uncovered. You can use my video below if you need help. Then watch Professor Burns get possessed.
And that’s the end of Chapter 2! Click here to continue to Chapter 3 or choose a chapter below.
Chapter 1 | Chapter 2 | Chapter 3 | Chapter 4 | Chapter 5 | Chapter 6 | Chapter 7 | Chapter 8
Hi, any updates for this yet ? I need help for chapter 8!!!
Great walkthrough as usual, many thanks already.
@ Katrina: I am in chapter 8, crossed the stream. Do you need Info up to that point?
I honestly laughed a bit when the professor got possessed, I didn’t expect it╬ô├½├¡Γò₧├åΓö£ΓöÉΓö£ΓîÉ Haiku AE’s the best! and thanks for the help as always!
IΓÇÖve put the lion head on the statue without using it for the pressureplate. I canΓÇÖt get i back, how do i continue? IΓÇÖm stuck now
I had the same problem. I think there’s nothing for it but to restart the chapter. Hopefully, they’ll fix this, but I’m not holding my breath.
Edit: It didn’t cost me another key. That’s something, anyway.
I’m such an idiot. The answer was right there in the walkthrough, and I didn’t even see it. Don’t use the LION head, use the STATUE head just to the right of where the axe is. Use the beekeeper staff to break the statue, and enjoy what Peter’s justification is.
You can knock over the statue in the same room as the pressurplate and use it
for the blue green and yellow square puzzle cqn we have written instructions as the video is really hard to follow
There’s no way you rotated the map in the book and not the other one. That’s a part of the real world map and you rotated the normal looking one xD
Moving Blocks puzzle – level 2 (blue, yellow, green blocks puzzel)
WRITTEN INSTRUCTIONS based on video above.
Left – Up – Up – Left
Left – Down – Down – Left
Down – Right – Right – Right
Right – Right – Up – Left
Left – Left – Up – Right
Right – Down – Down