Adventure Escape Mysteries – The Squire’s Tale
By: Haiku Games

Haiku Games is back with a new Adventure Escape game, this time an action-filled adventure in a fantasy world. You play as Martin, a squire who needs to help the knight Cedrick in their quest to find the legendary Sword of Light and put an end to the Monster King once and for all. This walkthrough guide should help you if you get stuck on any of the puzzles in Chapter 4 of The Squire’s Tale. Feel free to ask for extra help in the comments section.
See all my other Adventure Escape guides here.
Walkthrough:
Chapter 1 | Chapter 2 | Chapter 3 | Chapter 4 | Chapter 5 | Chapter 6 | Chapter 7 | Chapter 8
Chapter 4, Morrocas:
You can watch my video for Chapter 4 or continue below for my step-by-step guide:
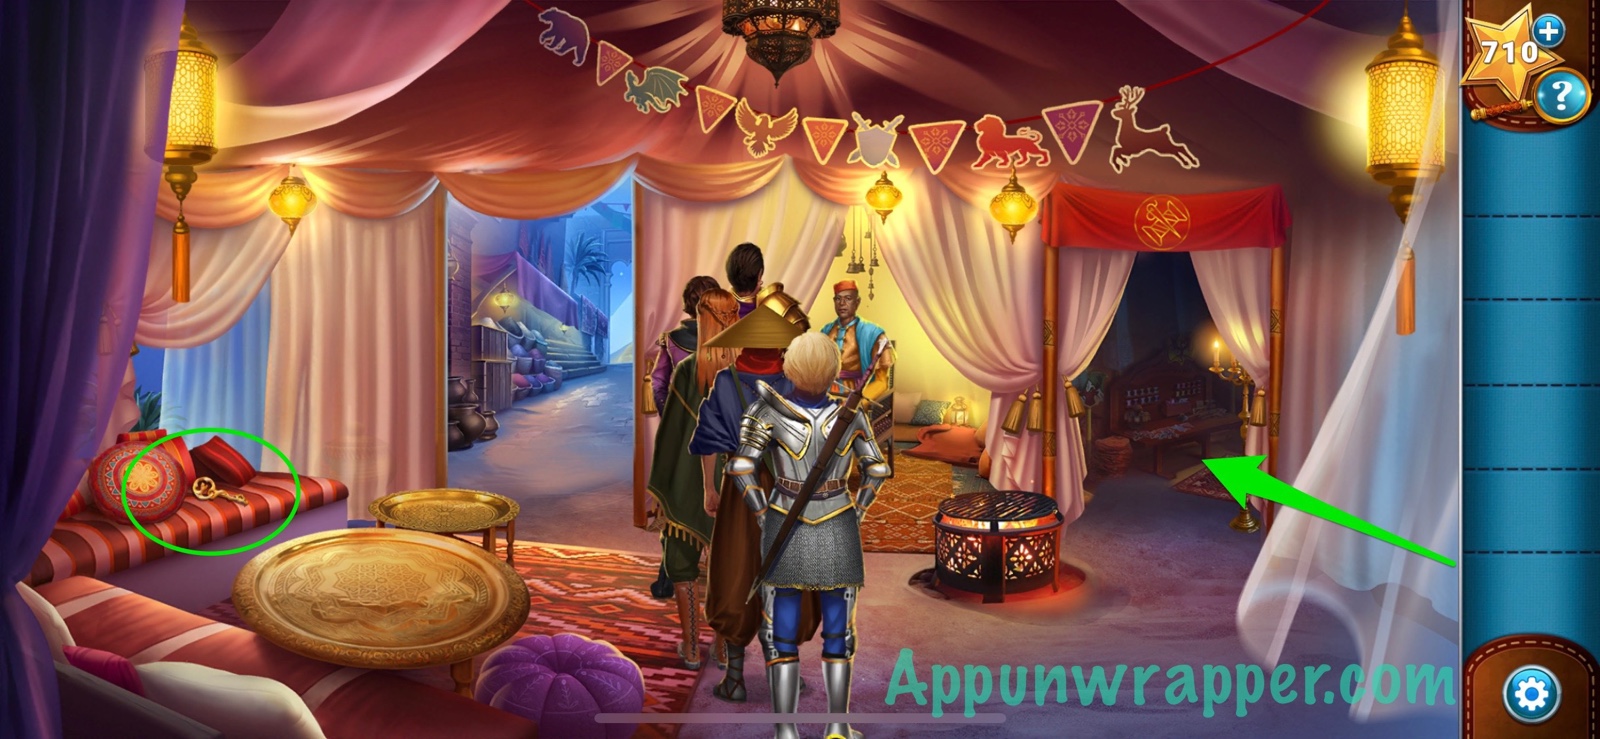
1. Cedrick dragged us to Morrocas to compete in the Tournament of the Mightiest. But it turns out that they’re doing something different this year, called the Tournament of the Mightiest Mind. Looks like it’ll be Martin’s time to shine. First, find the key under the pillow. Then go through the doorway to the other room.
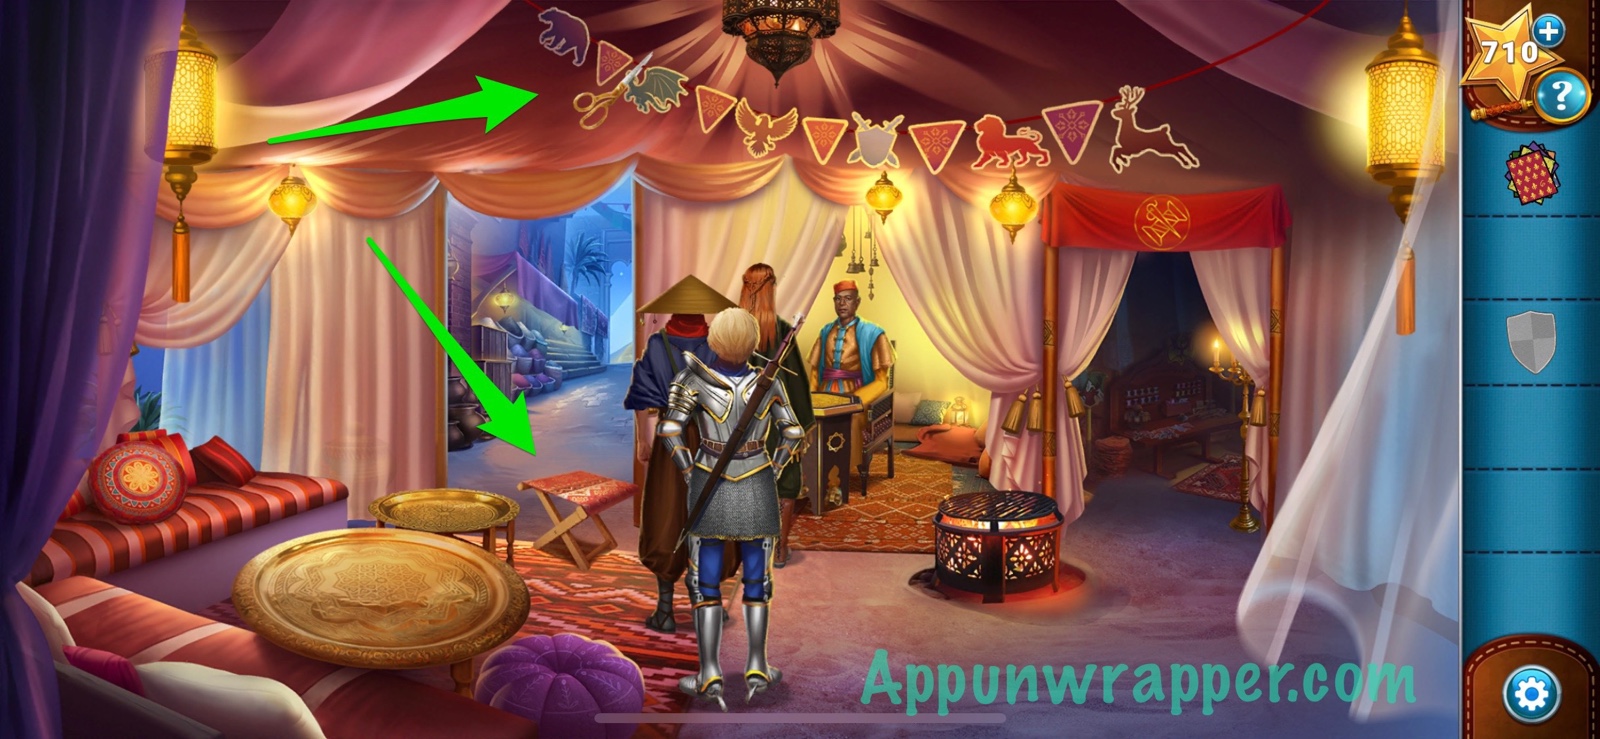
2. Pick up the scissors and look through the book on the table. Also, look at all the different banners.

3. Use the scissors to cut a piece of the gray cloth.
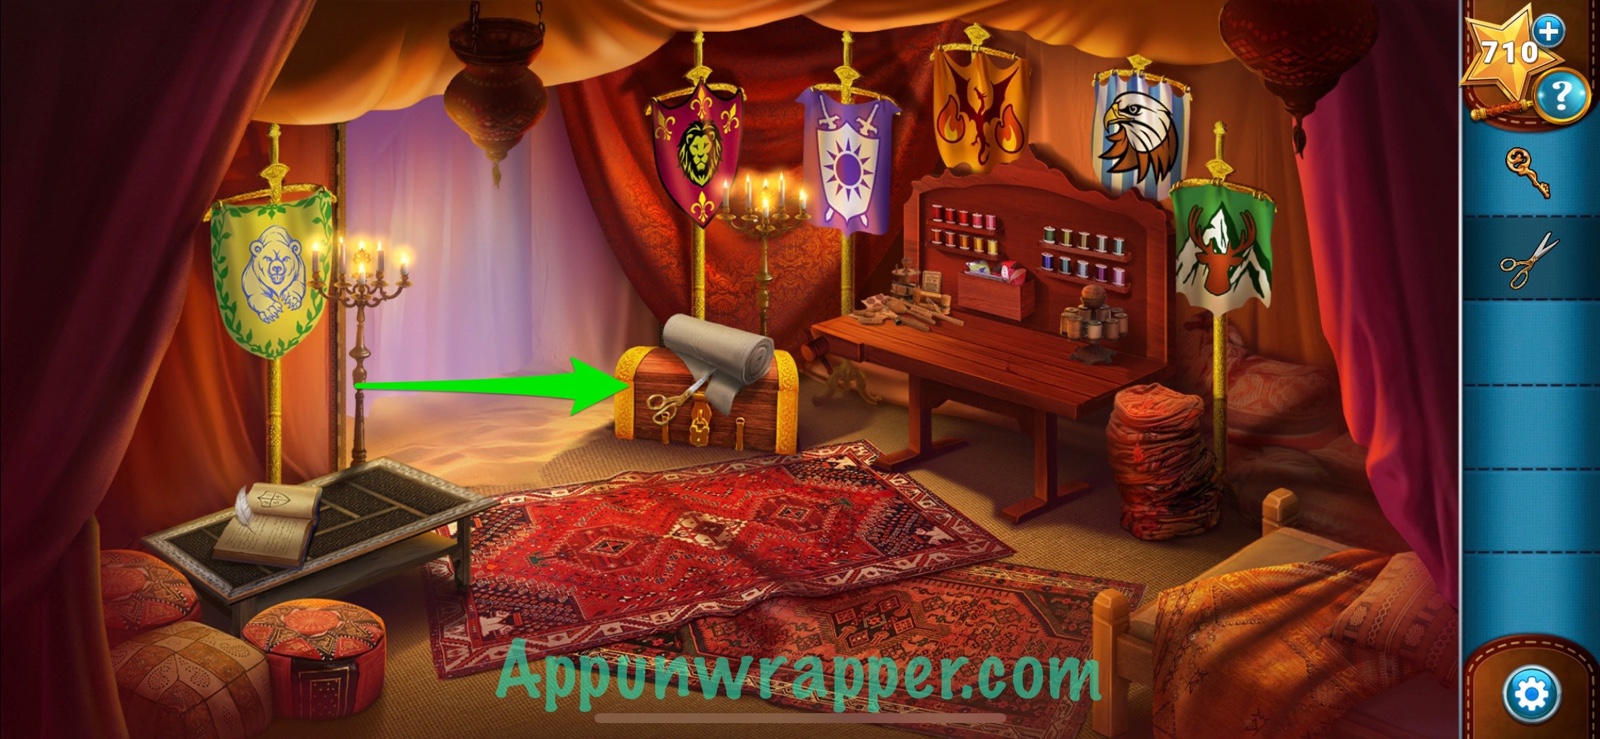
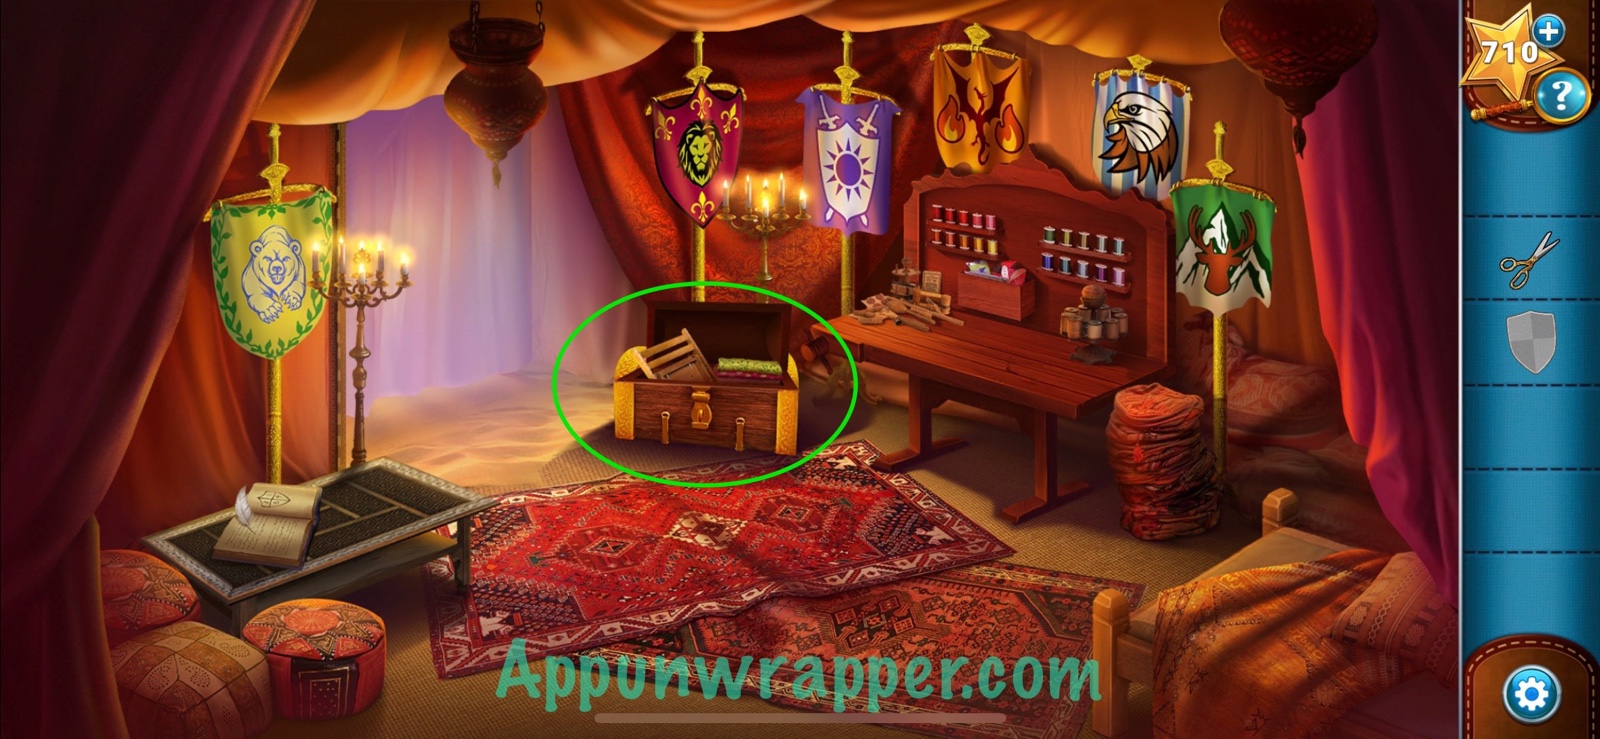
4. Use the key to unlock the chest and take the folding stool and fabric patterns from inside.
5. Leave the room and place the stool down so you can use there scissors to cut down the decorations.
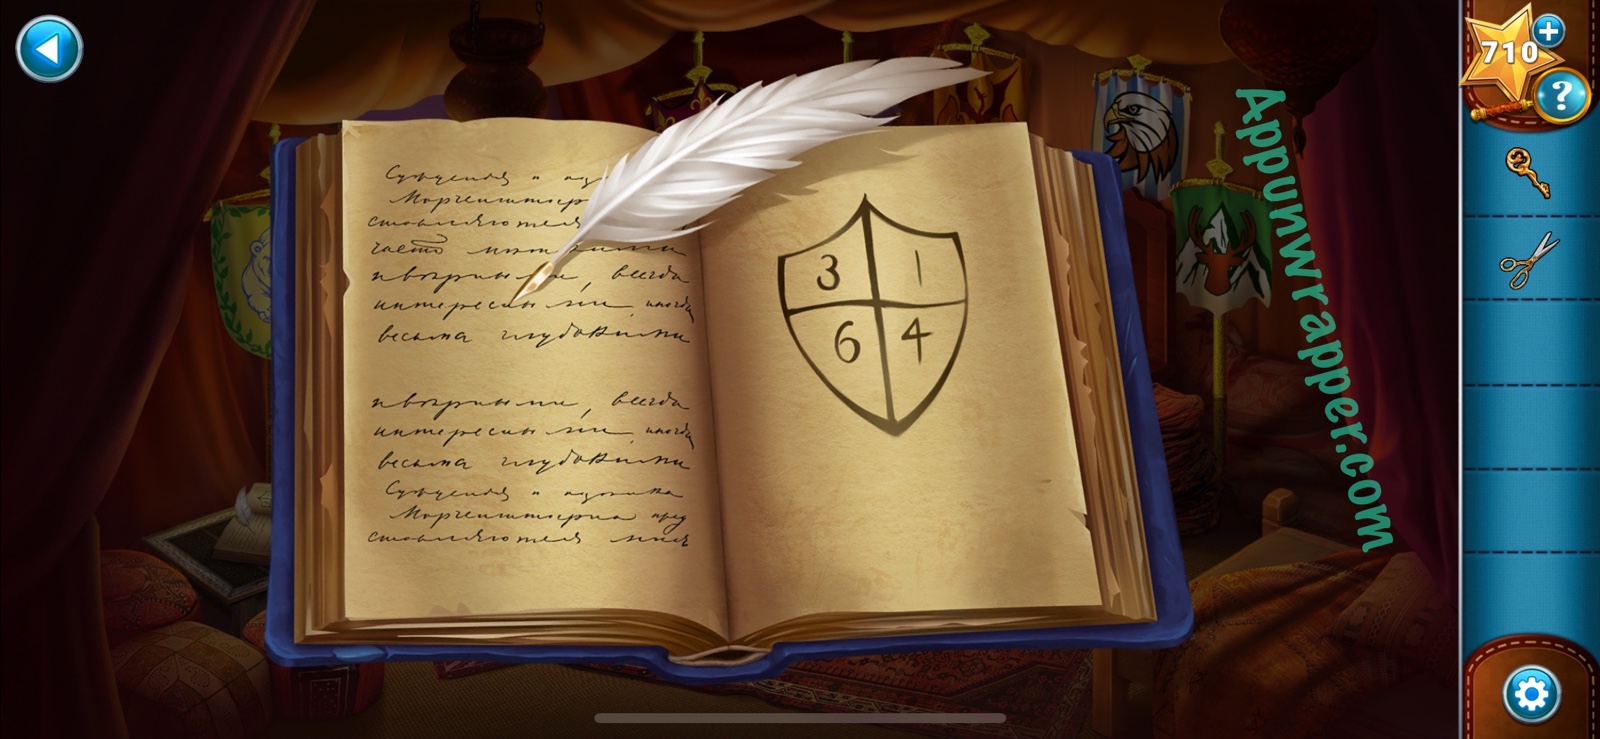
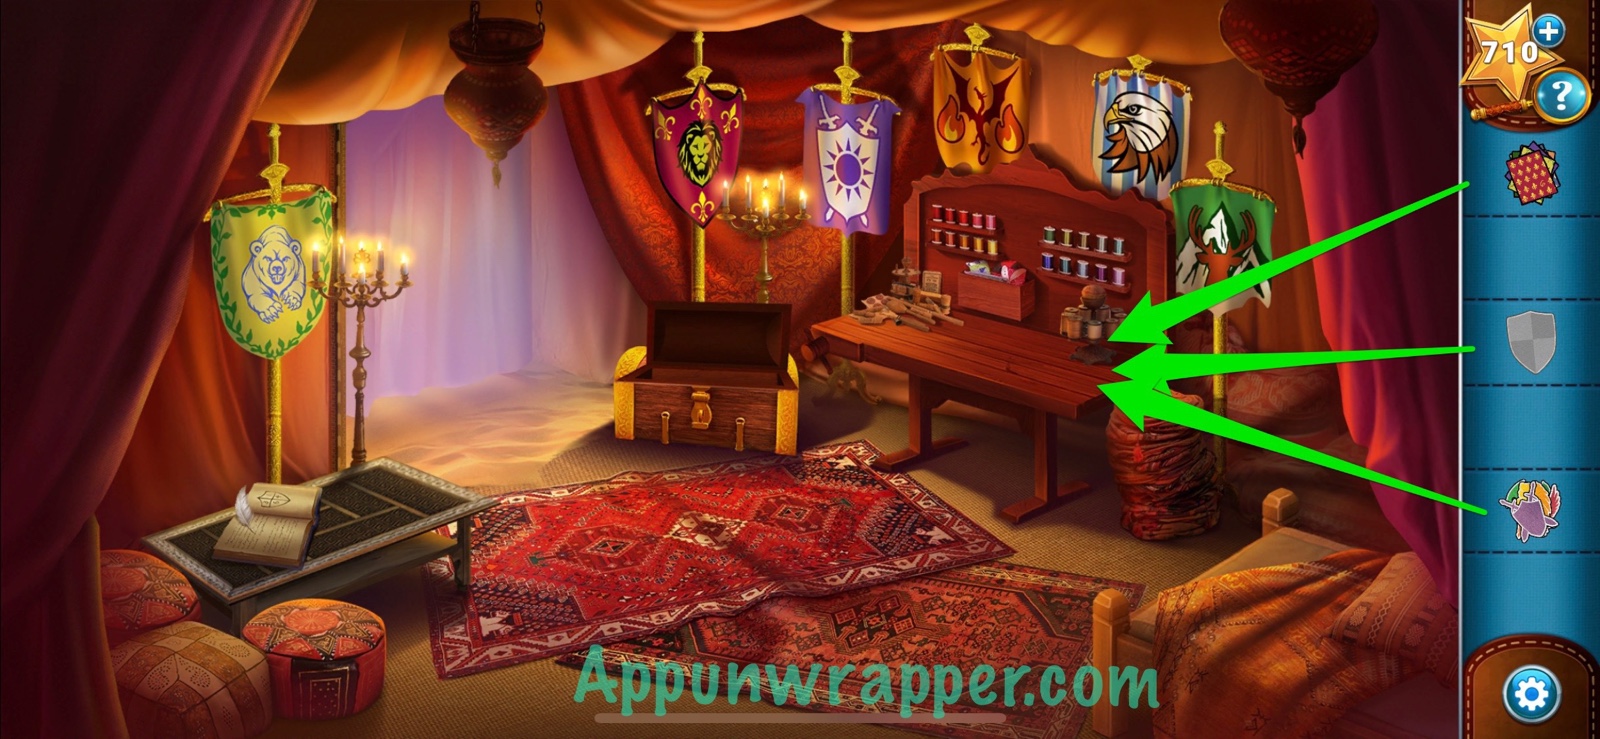
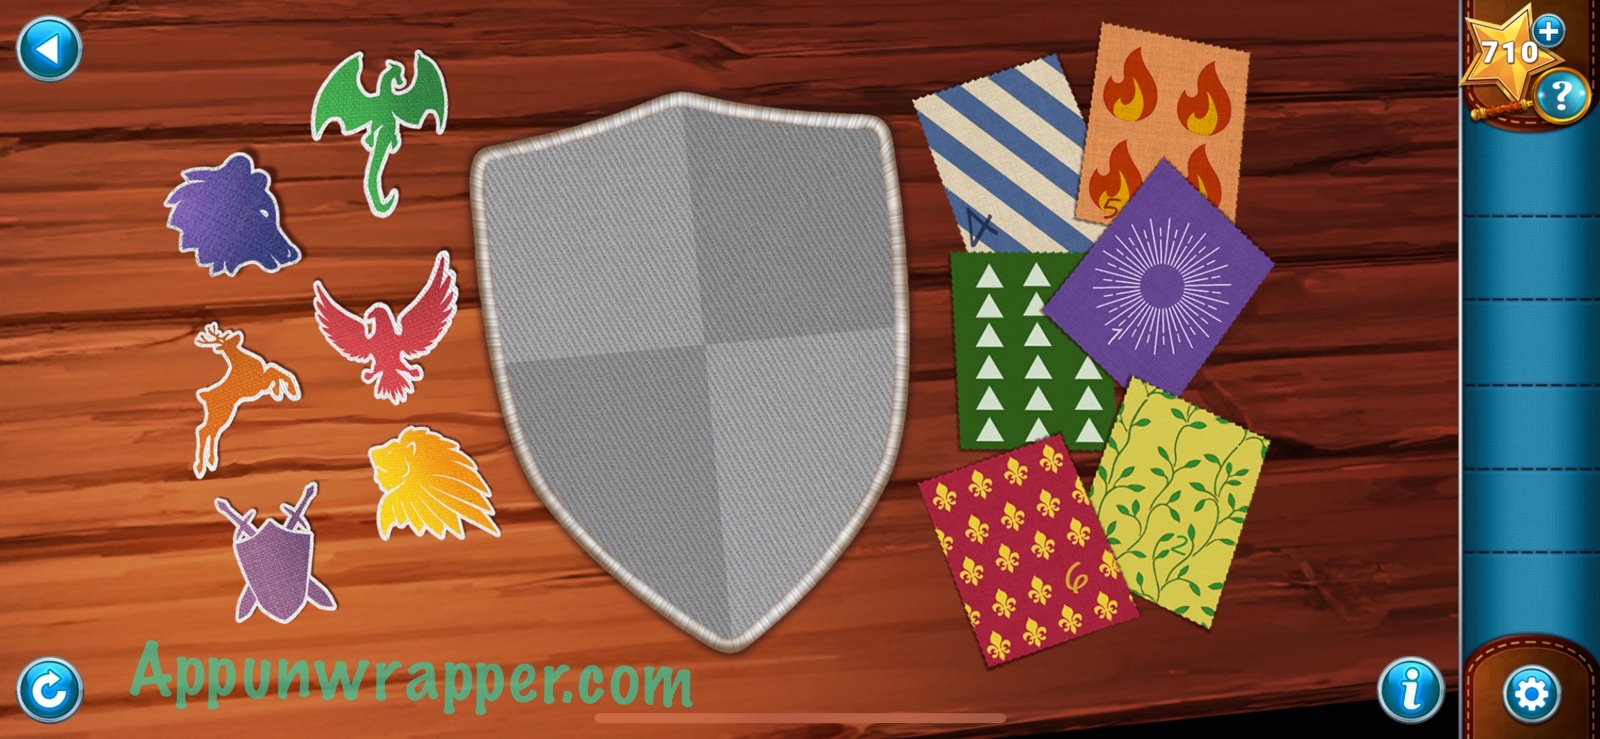
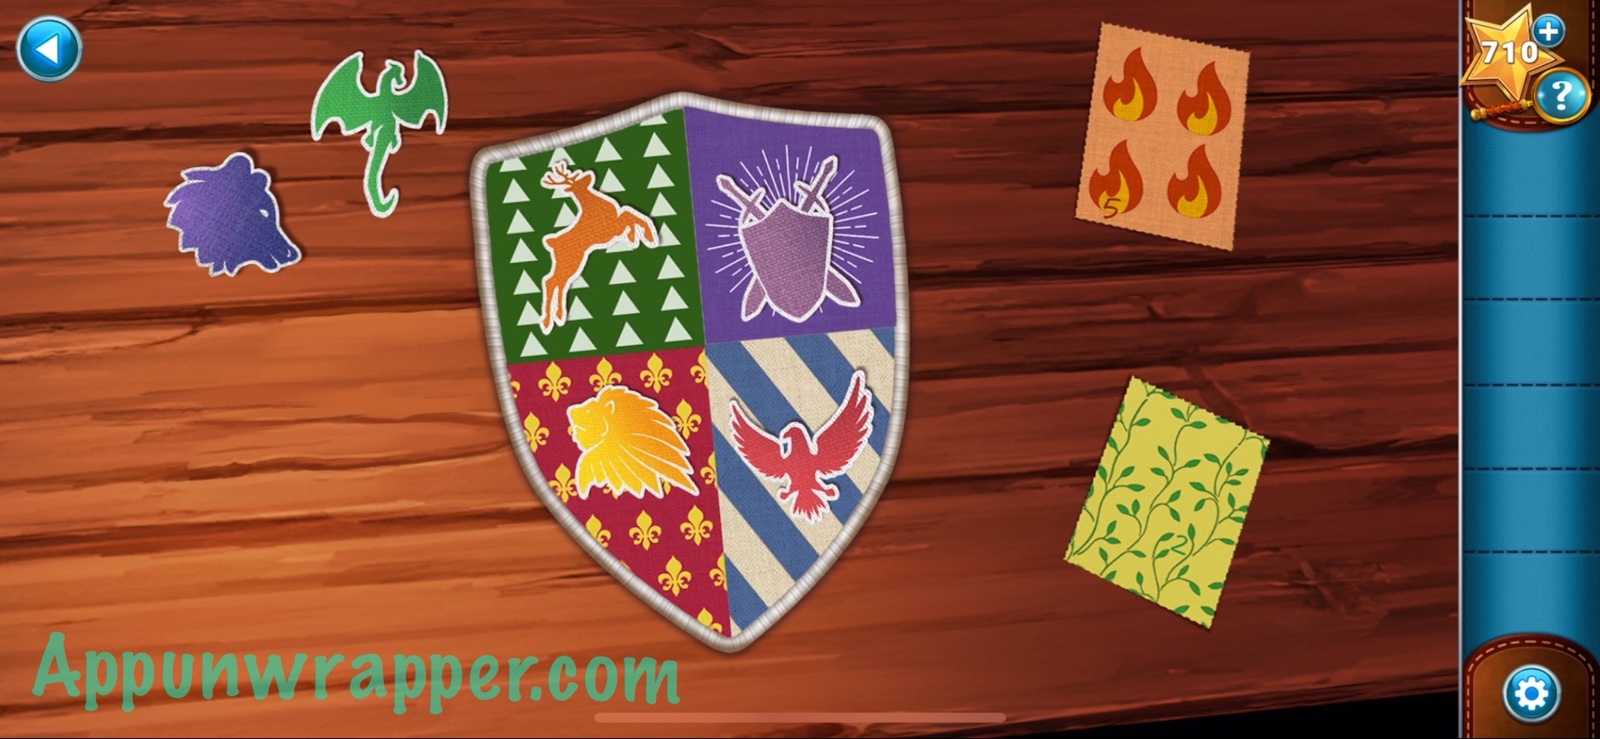
6. Go back to the little room. Place the shield fabric on the tailor’s table. Then add the fabrics and decorations. Now we have to make the invitation. Use the clue from the book. It shows you numbers on each quarter of the shield. Find those numbers on the fabric pieces. And then find those patterns on the banners outside to figure out which decoration to use. So the numbers we need are 3, 1, 6, 4. Place those patterns on the shield. Now we have an invitation!
7. Go back out and give the invitation to Cedrick.
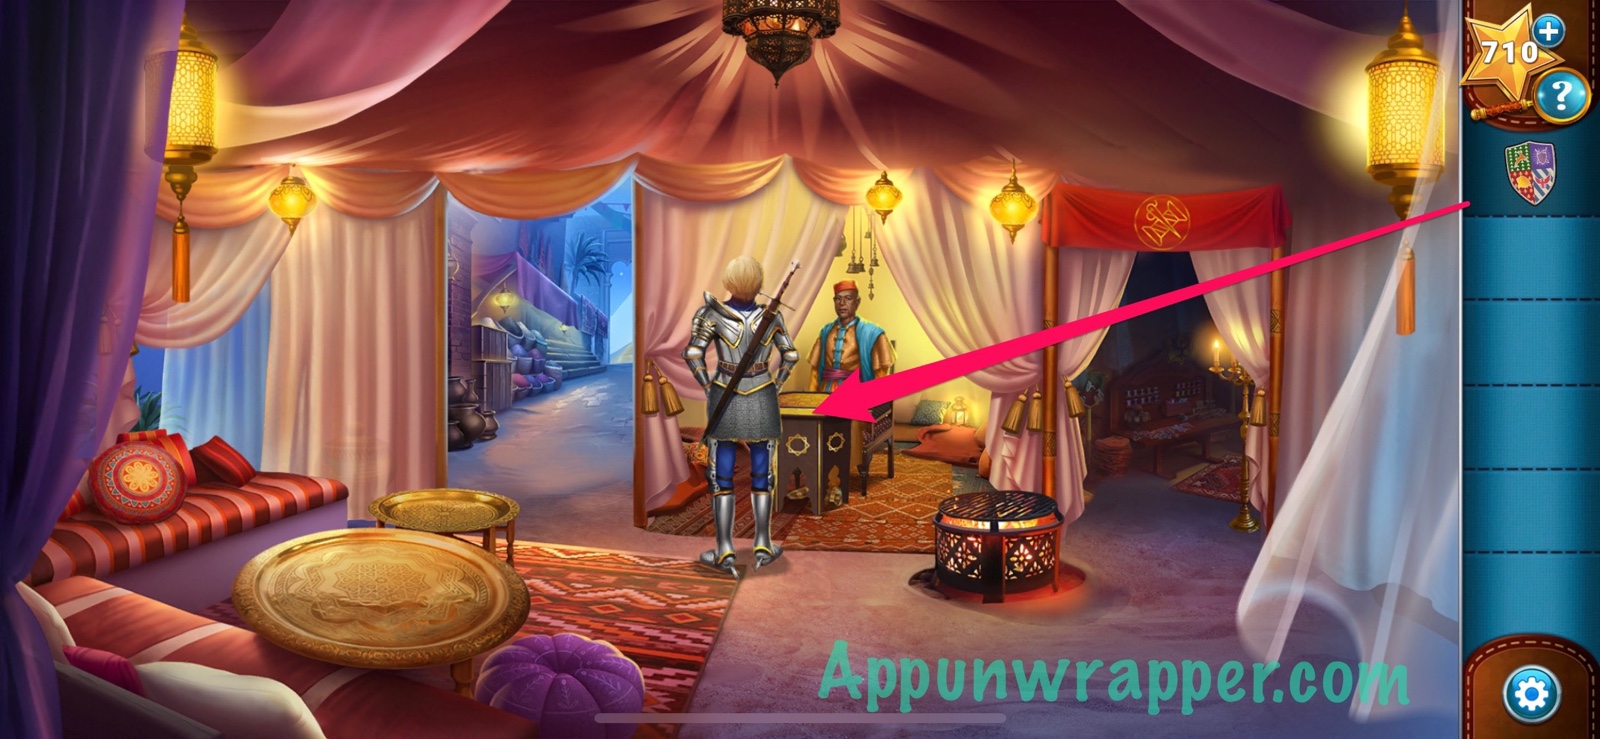
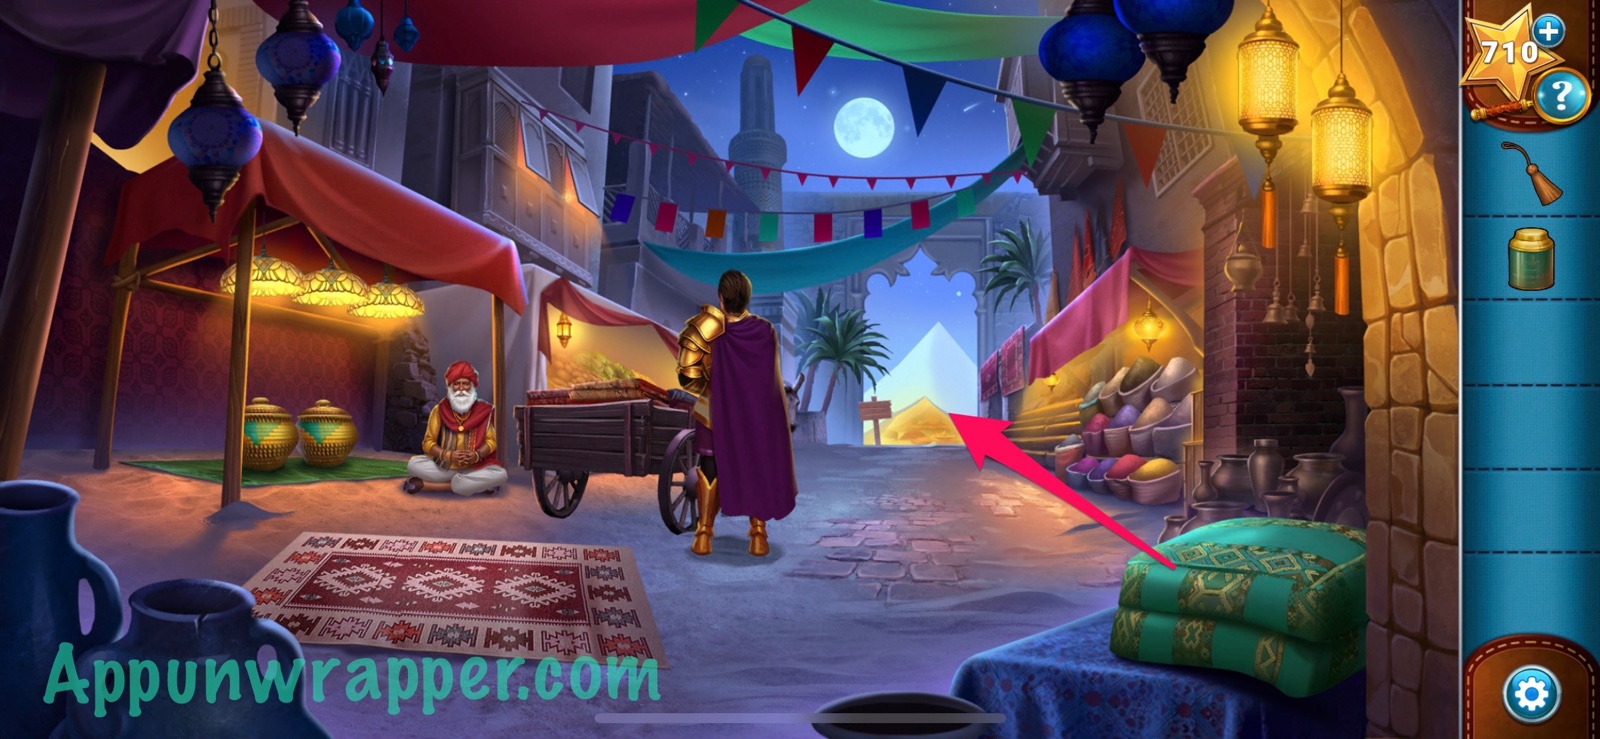
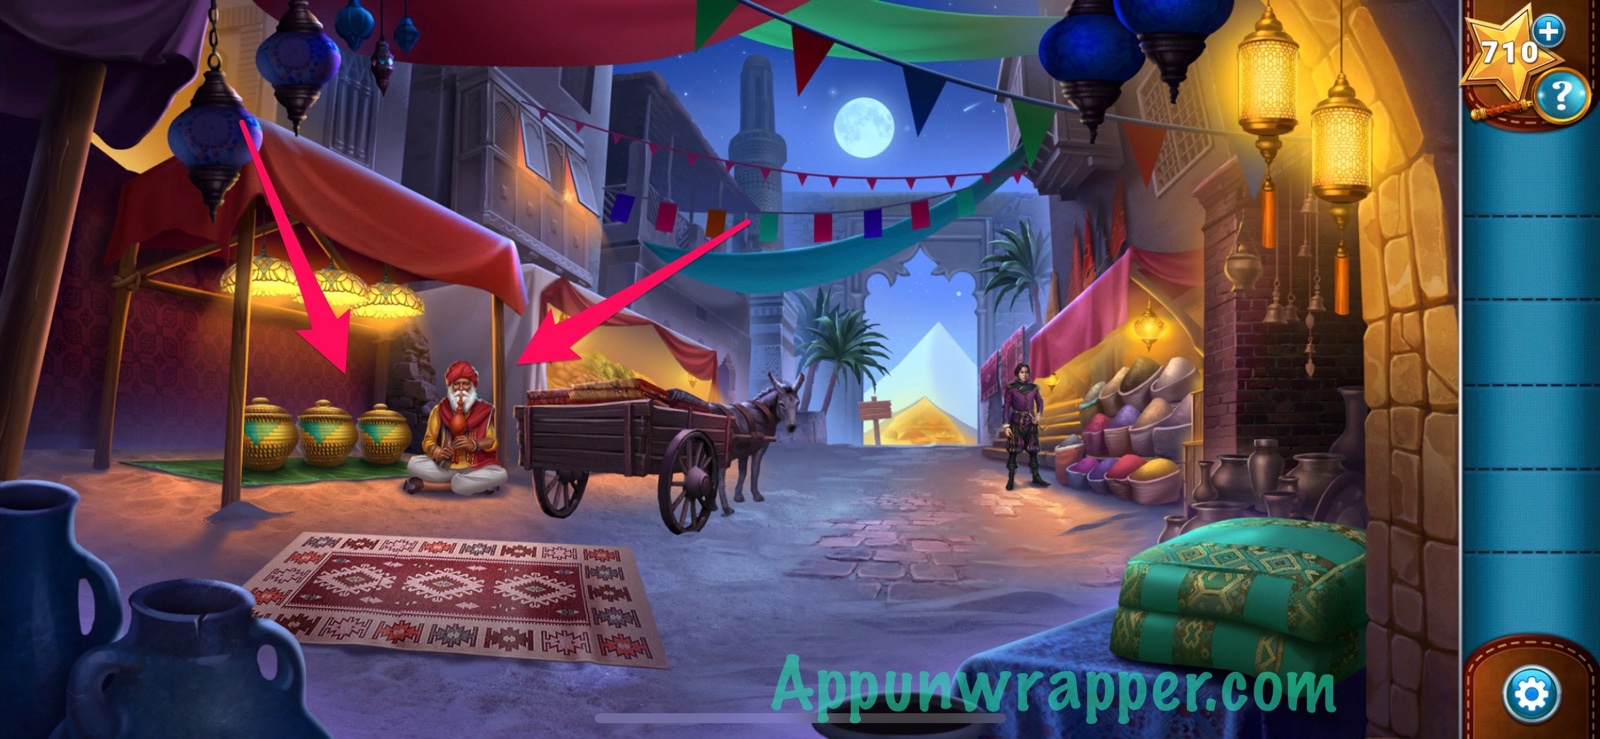
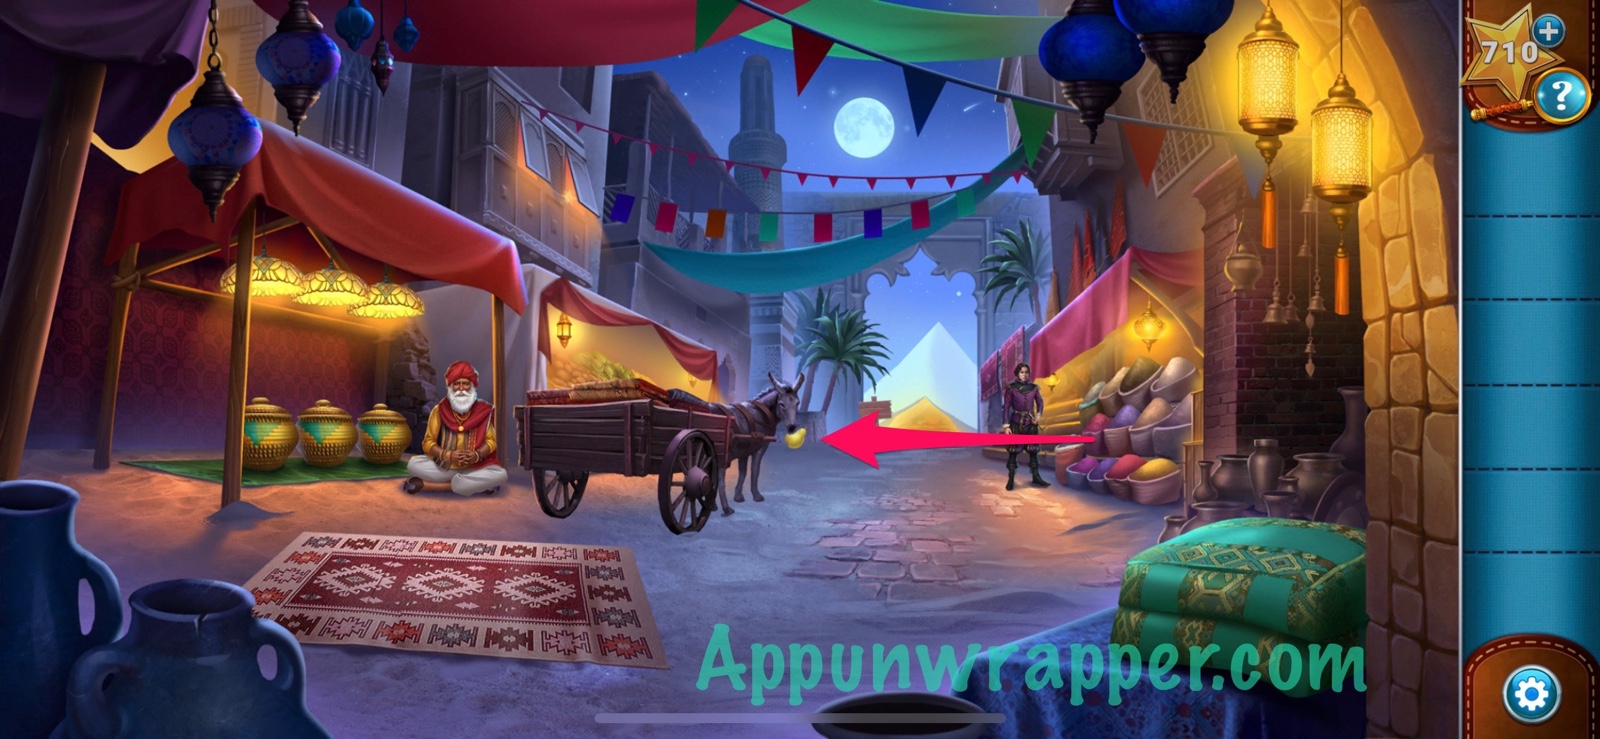
8. You’re given a coin. Head out to the bazaar to see what we can buy with it.

9. Pick up the basket. Throw the coin in the beggar’s cup. He then moves to watch his sister-in-law’s snake stand.
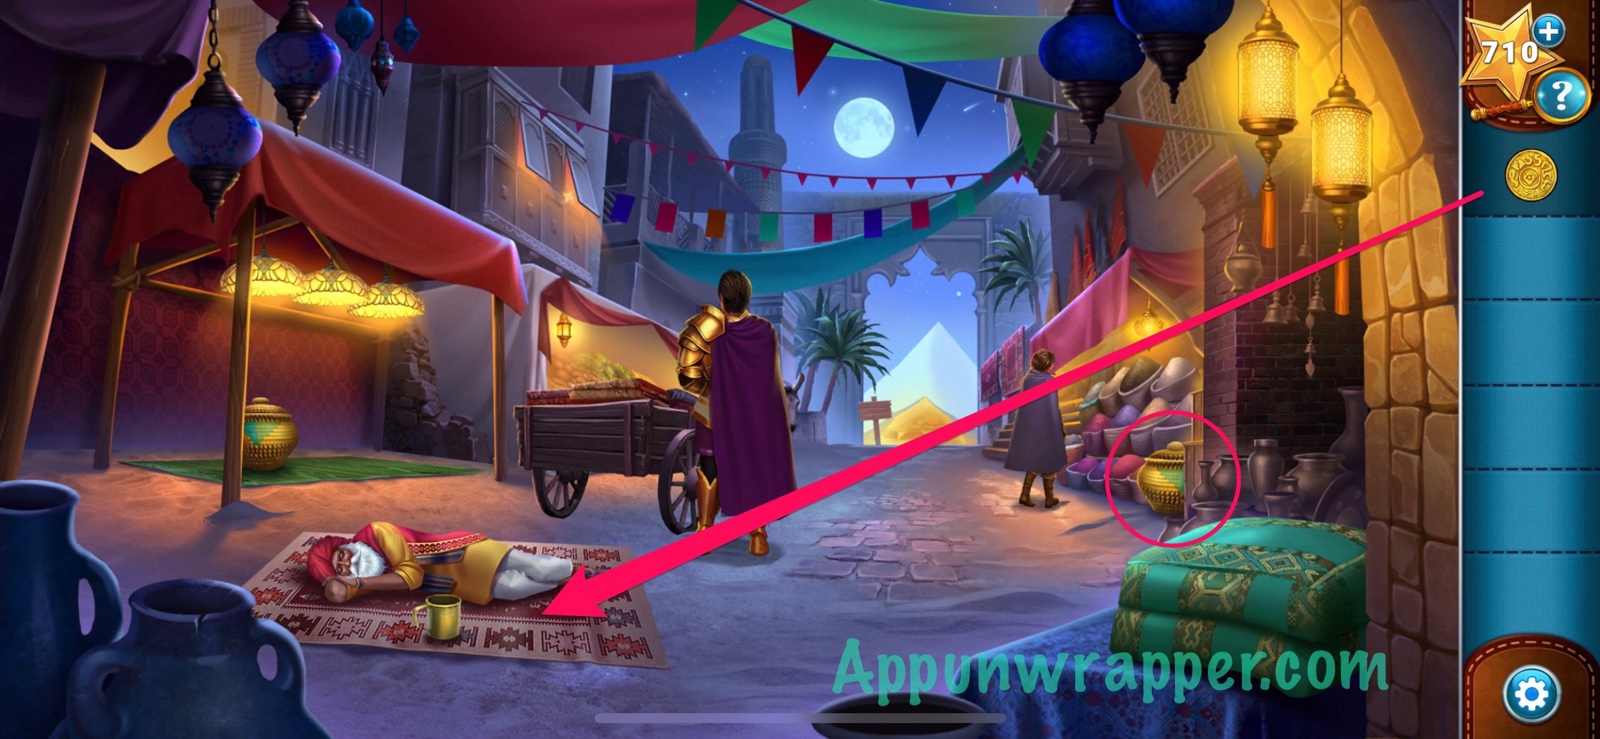
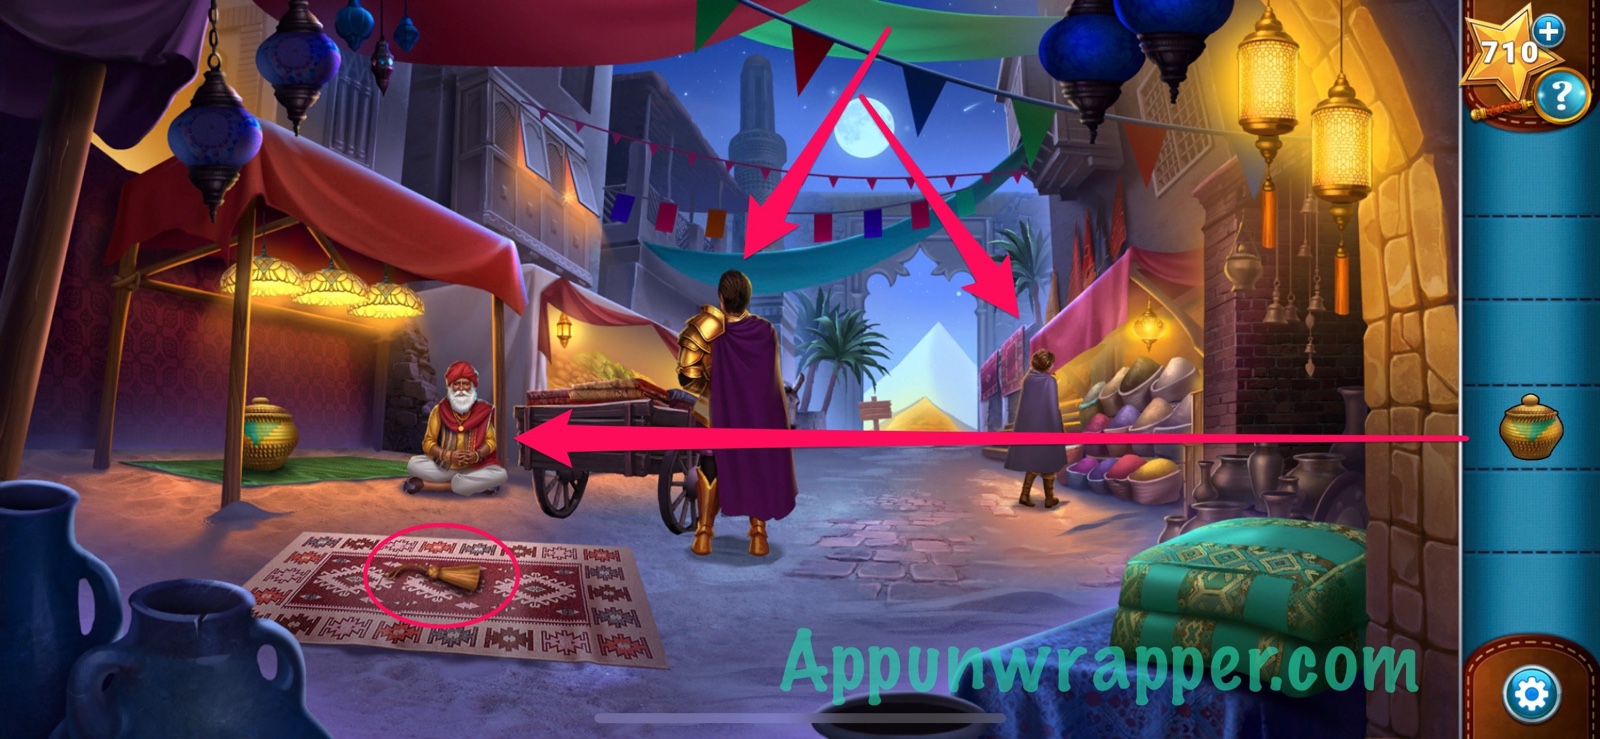
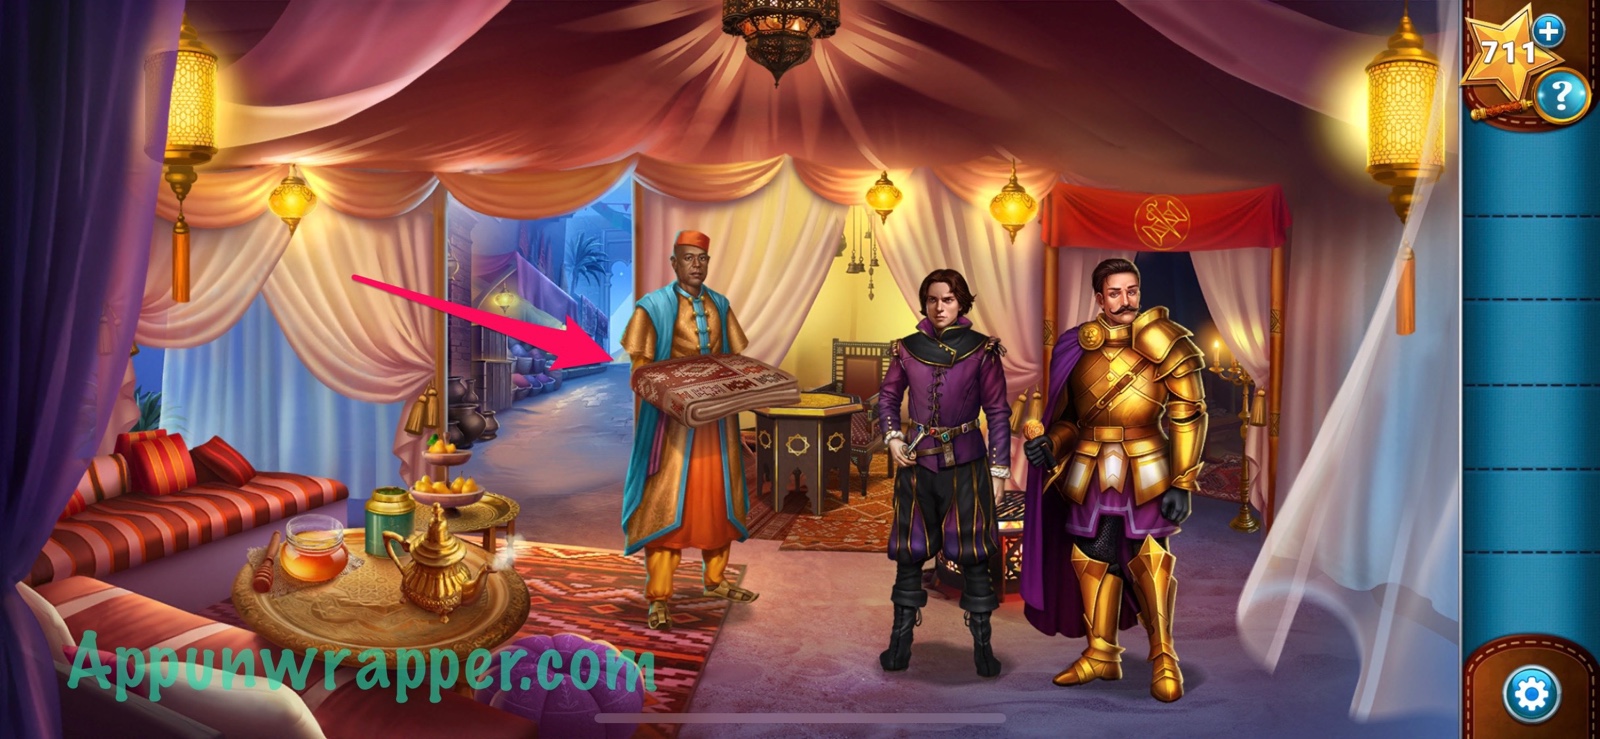
10. Grab the tassel that the beggar leaves behind. Then talk to Sir Cornelius and Nira. Nira offers to give you some tea leaves. Also, talk to the beggar and he asks you to help him find his missing snakes. Give him the basket you found.
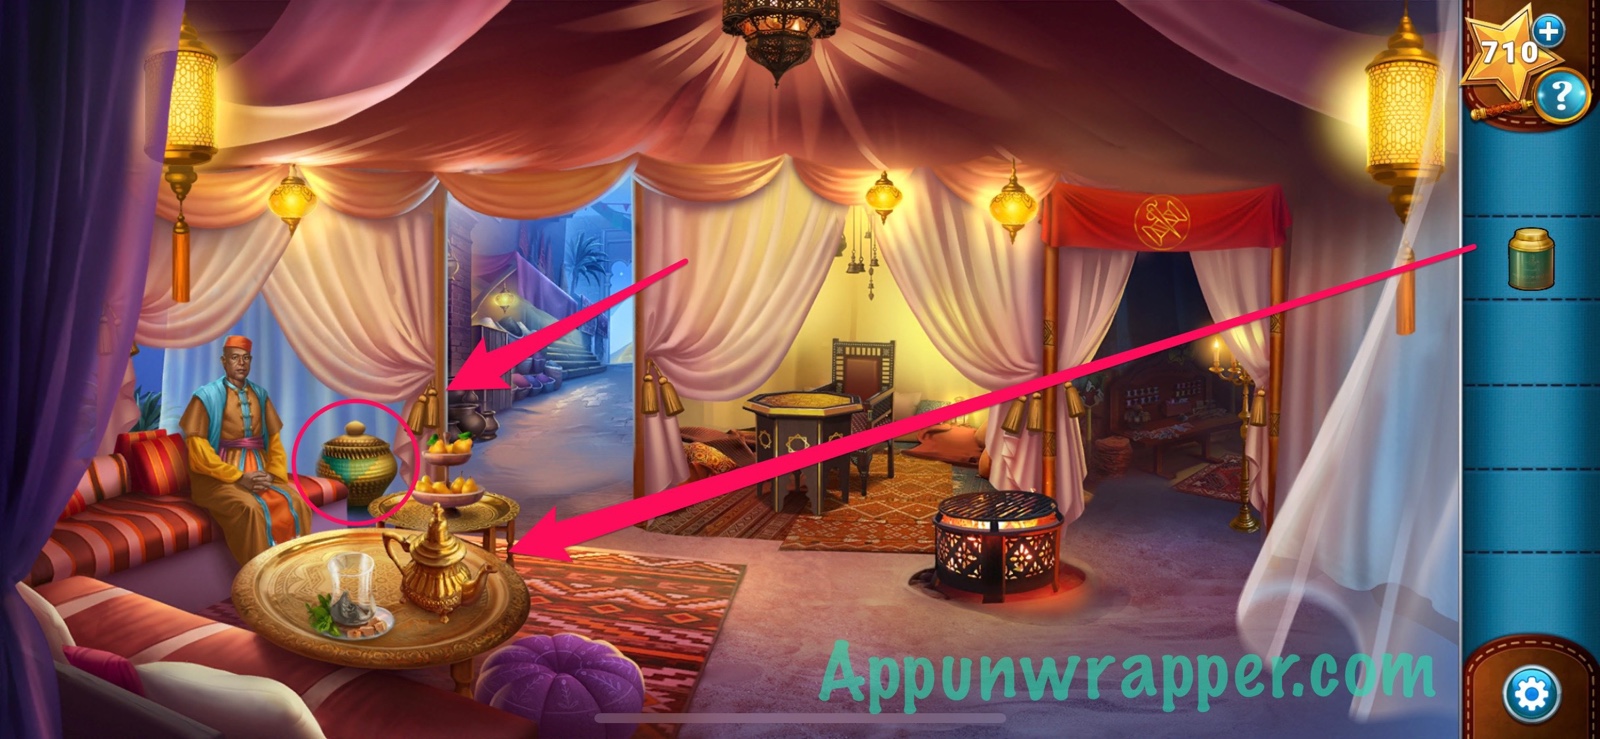
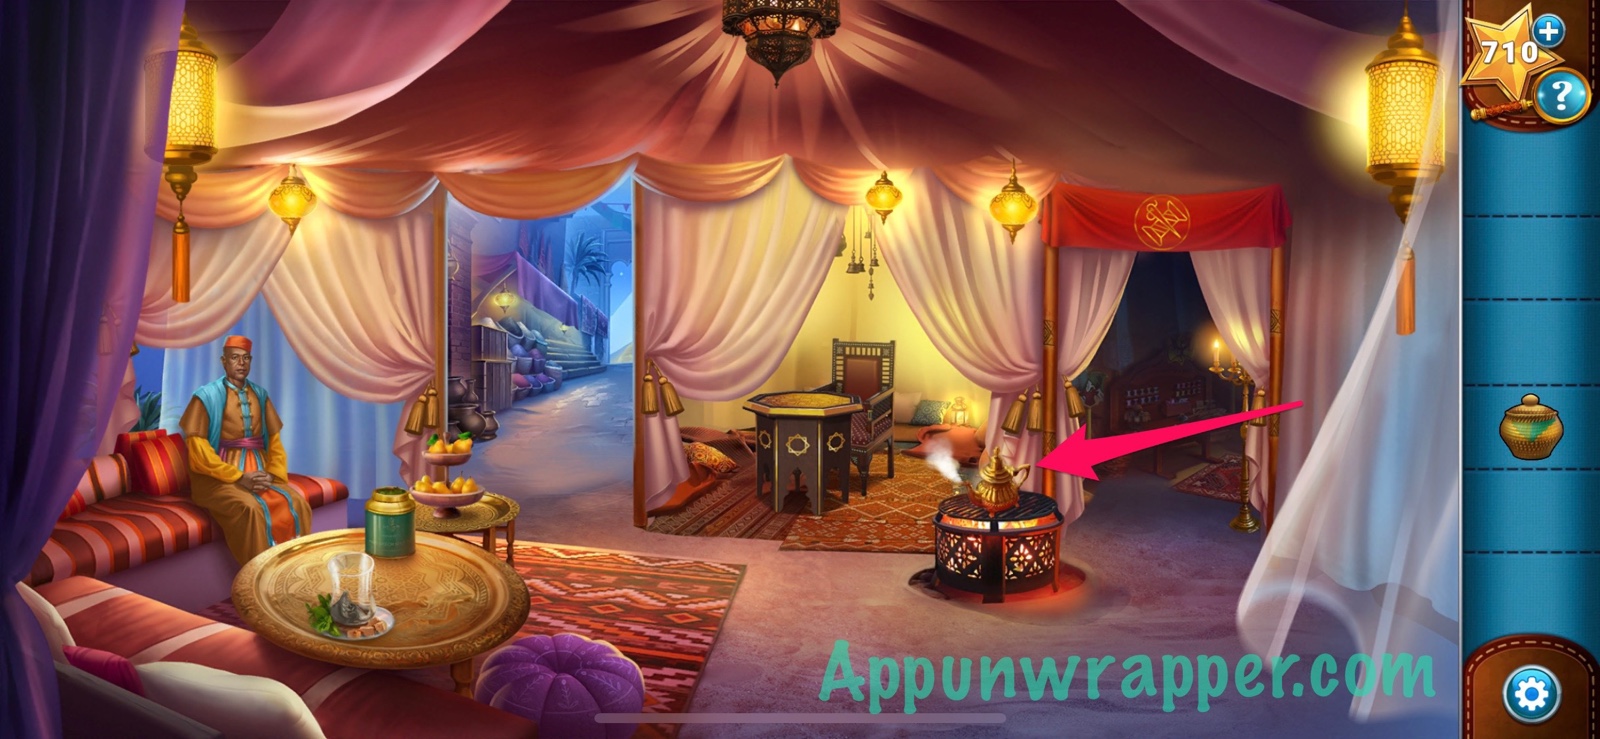
11. Go back inside the tent. Use the tassel to tie up a curtain and take the basket. Also, pour some tea leaves into the teapot. Pick up the teapot, heat it up on the fire, and then pour it into a cup. Ambrose says he wants honey in it!
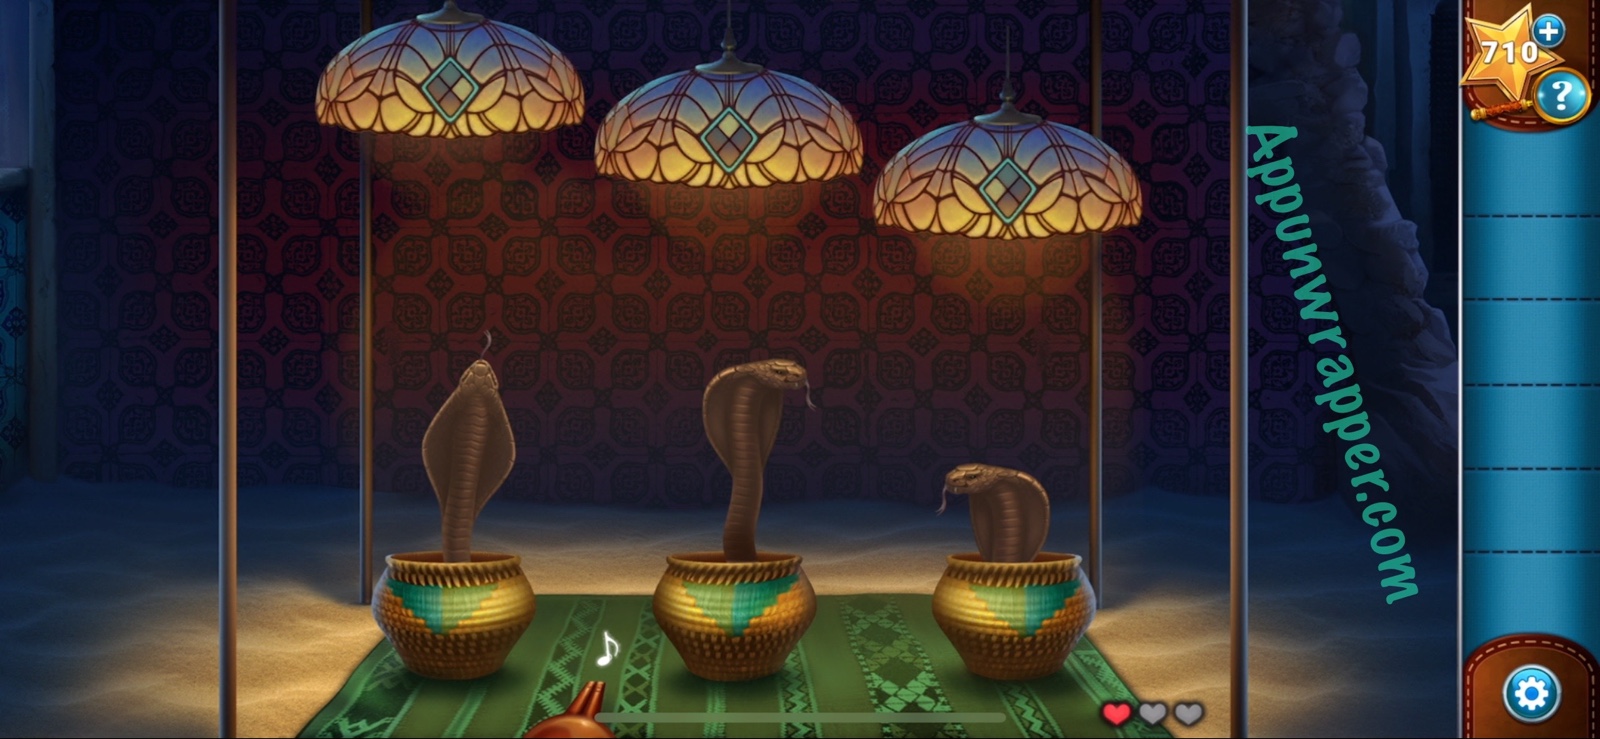
12. Leave the tent and give the basket to the snake charmer. Now he has all three, but they’re upset. He leaves to get them a snack. Pick up the flute.

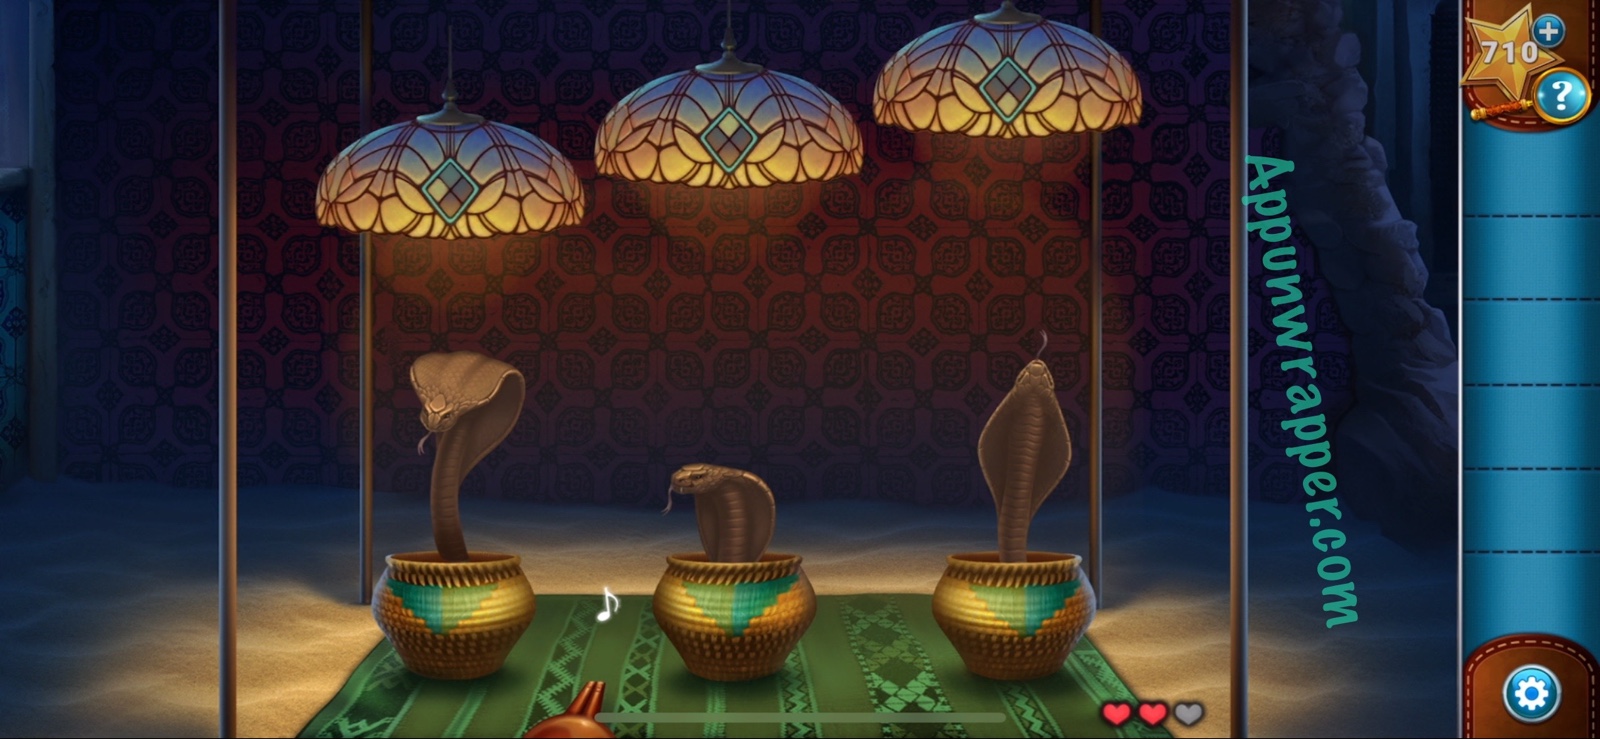
13. Use the flute with the snakes. Now we have to figure out how to charm them! Let’s solve the Snake Puzzle. Pay attention to the little glowing diamond on each lamp. It points either up, down, left or right. You need to make the snakes point in those same directions. But the height of the lamps also matters. They have to match the height of the snakes beneath them. So I’m the first one, all three snakes work with the lamps above them. But after that, you need to figure out which snake should go under each lamp. You can copy all three solutions below if you’re stuck.

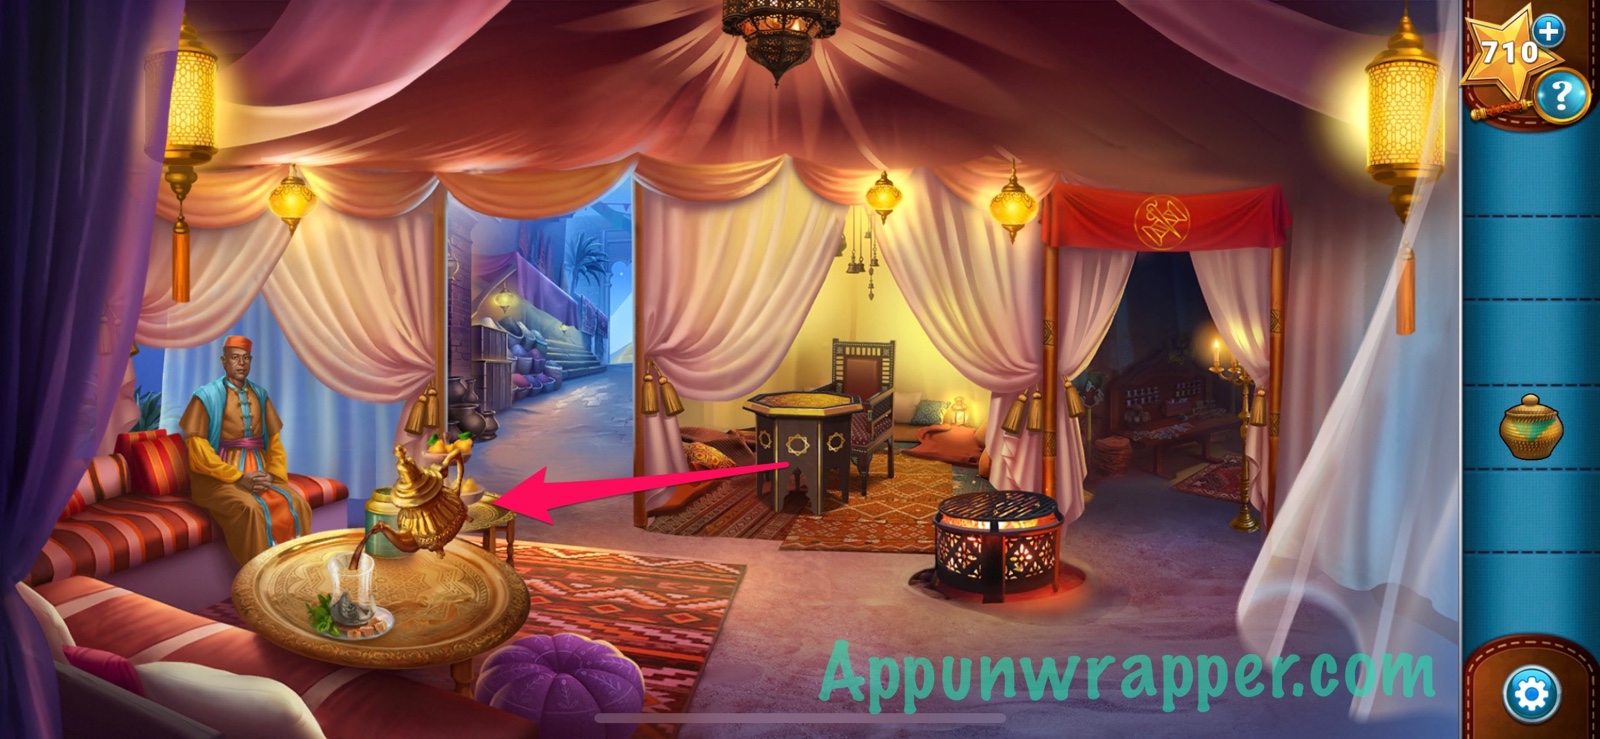
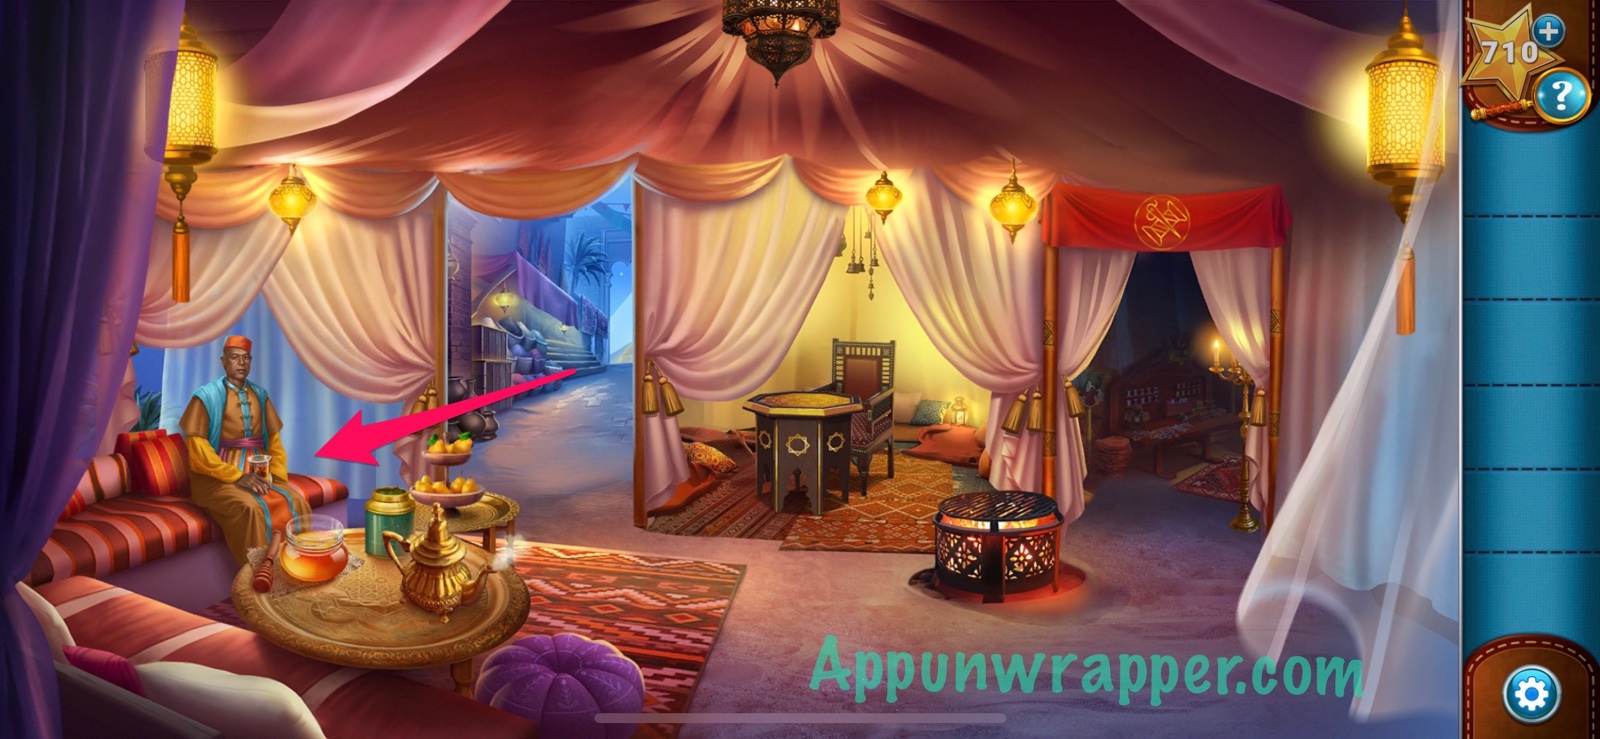
14. The snake charmer returns and gives you some honey. Go back inside the tent and add it to the tea. Then give the tea to Ambrose and he’ll give you a pear in return.

15. Leave the tent and give the pear to the donkey. She’ll kick the cart over and the snake charmer notices.
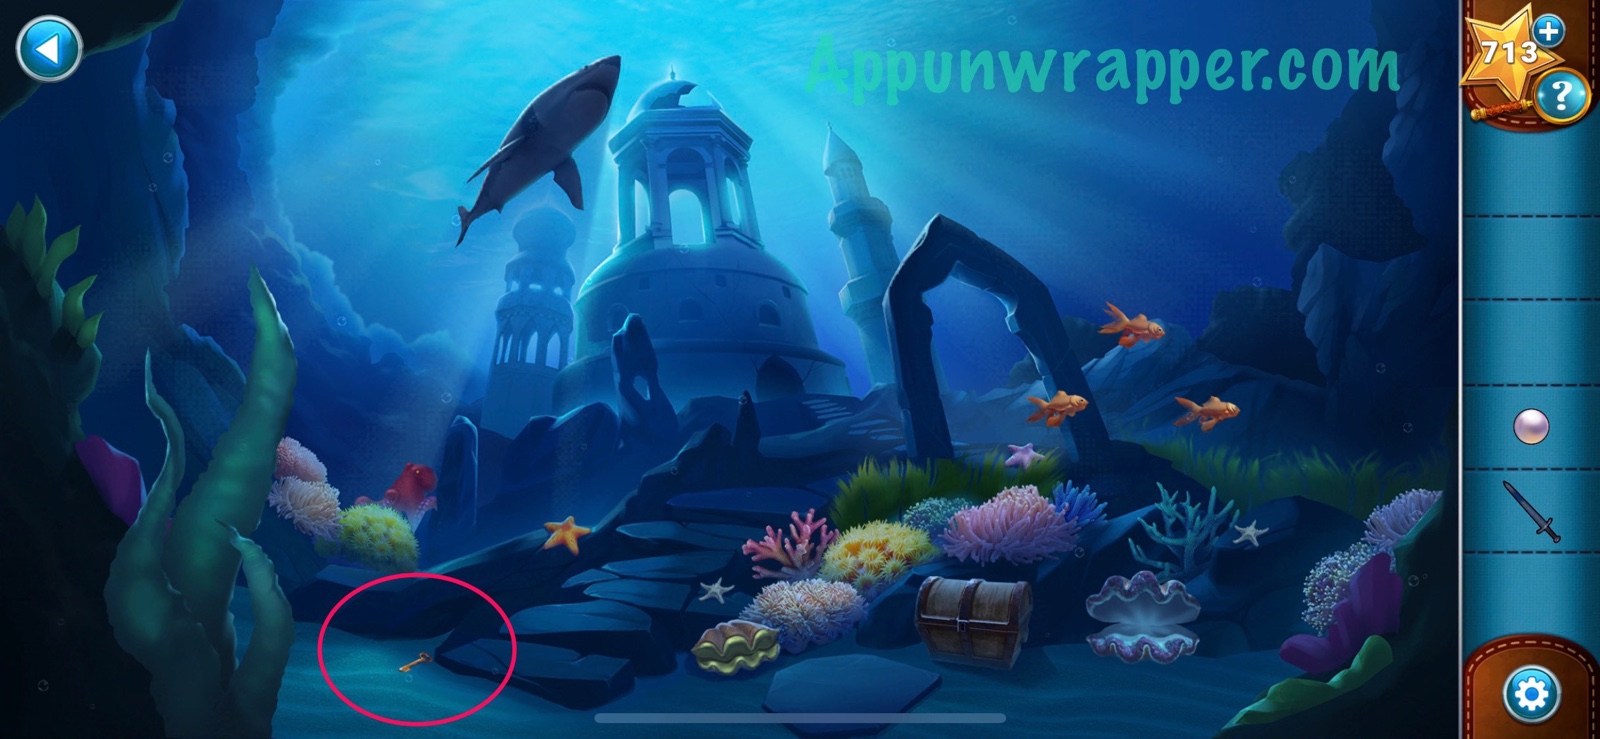
16. Tap on the cart and let’s solve the Rugs Puzzle. You need to slide the rugs around until the edges where they touch have matching patterns. When you finish, he’ll give you a fancy rug as thanks.
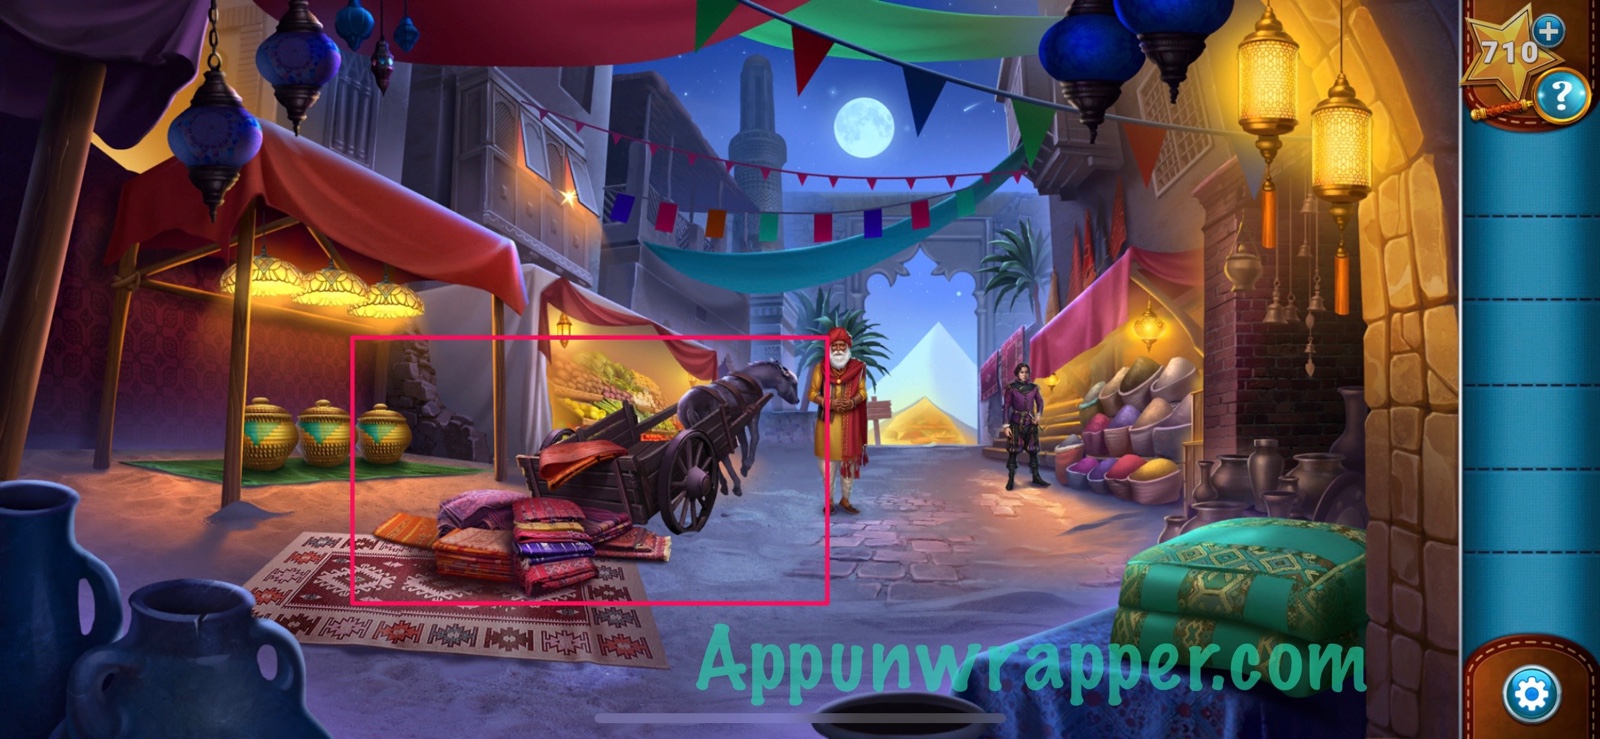
17. Hand the rug to Ambrose and prepare for the next round of the tournament.
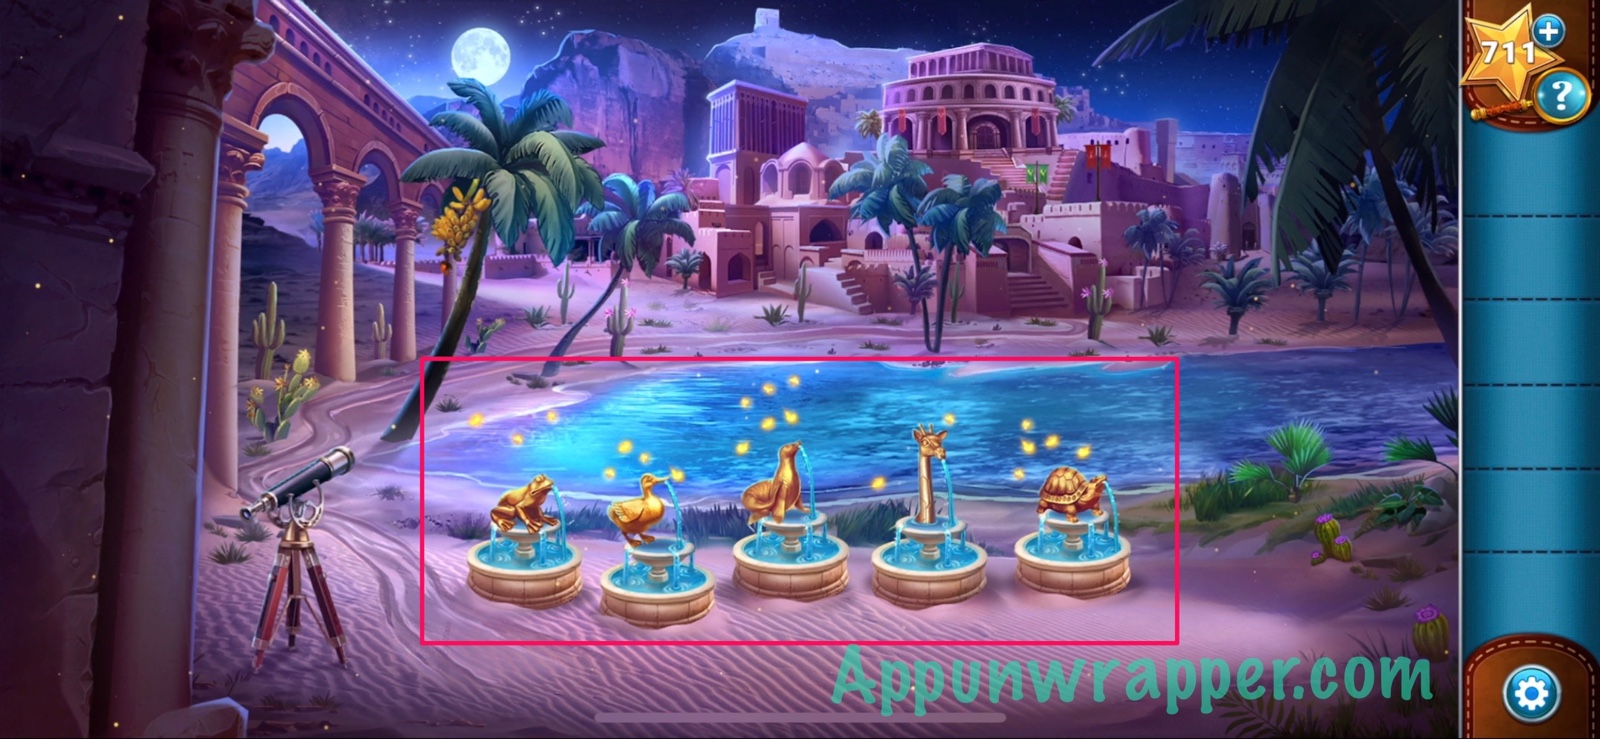
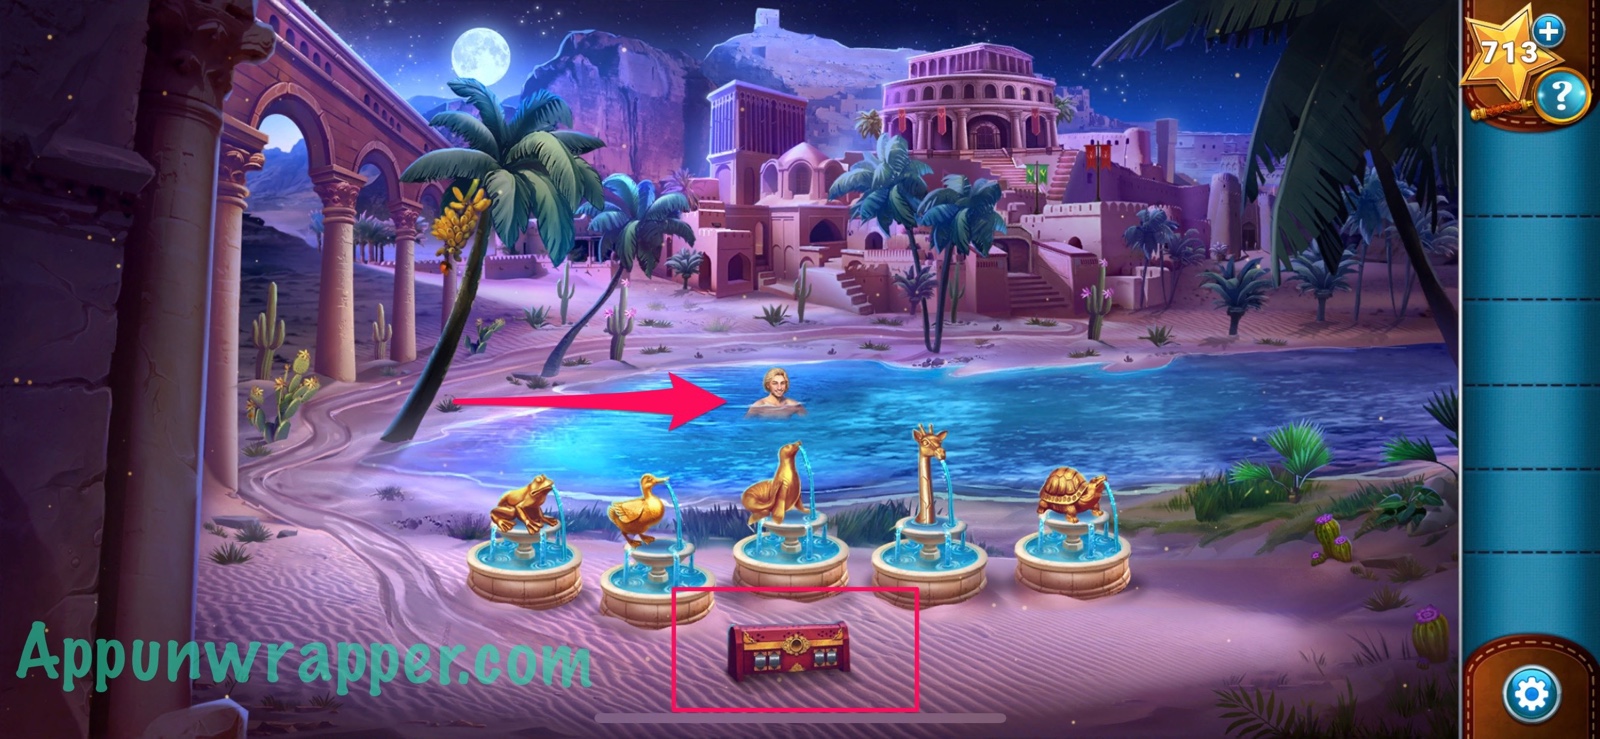
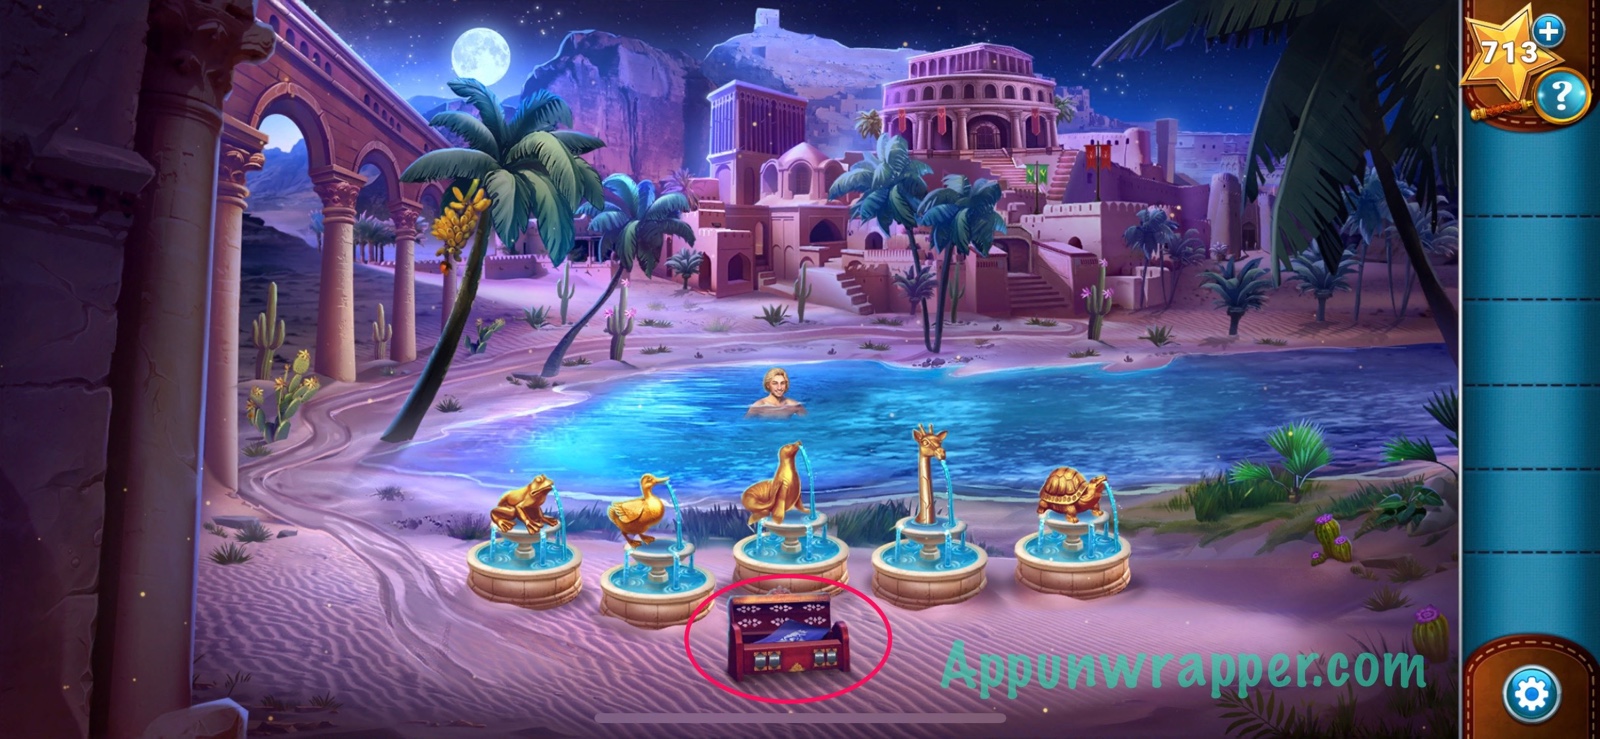
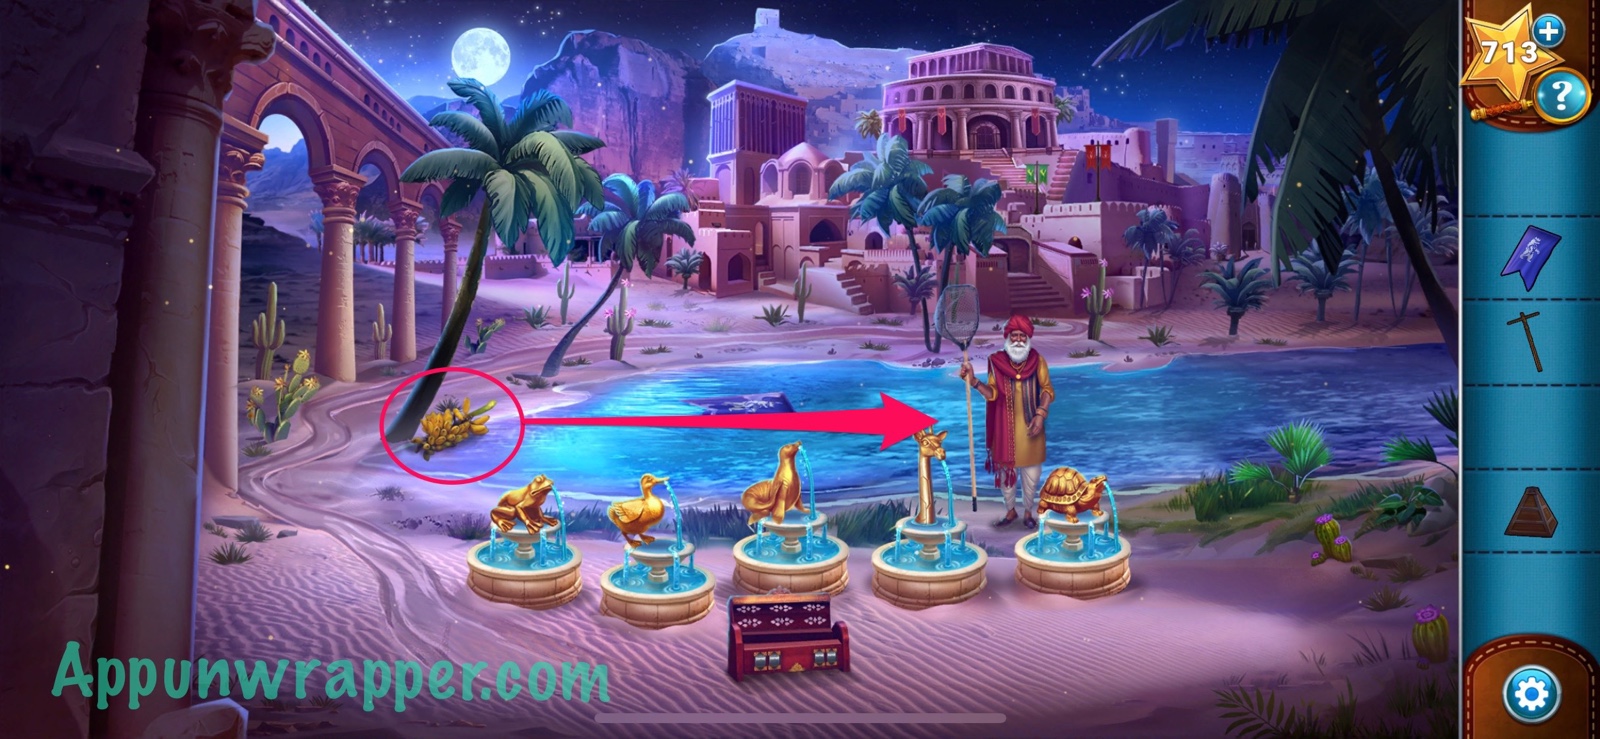
18. For the next challenge, we much retrieve two banners. We need to use the fountains below and the stars above for the first banner. Ambrose will give you a star chart to start you off. Look through the telescope.
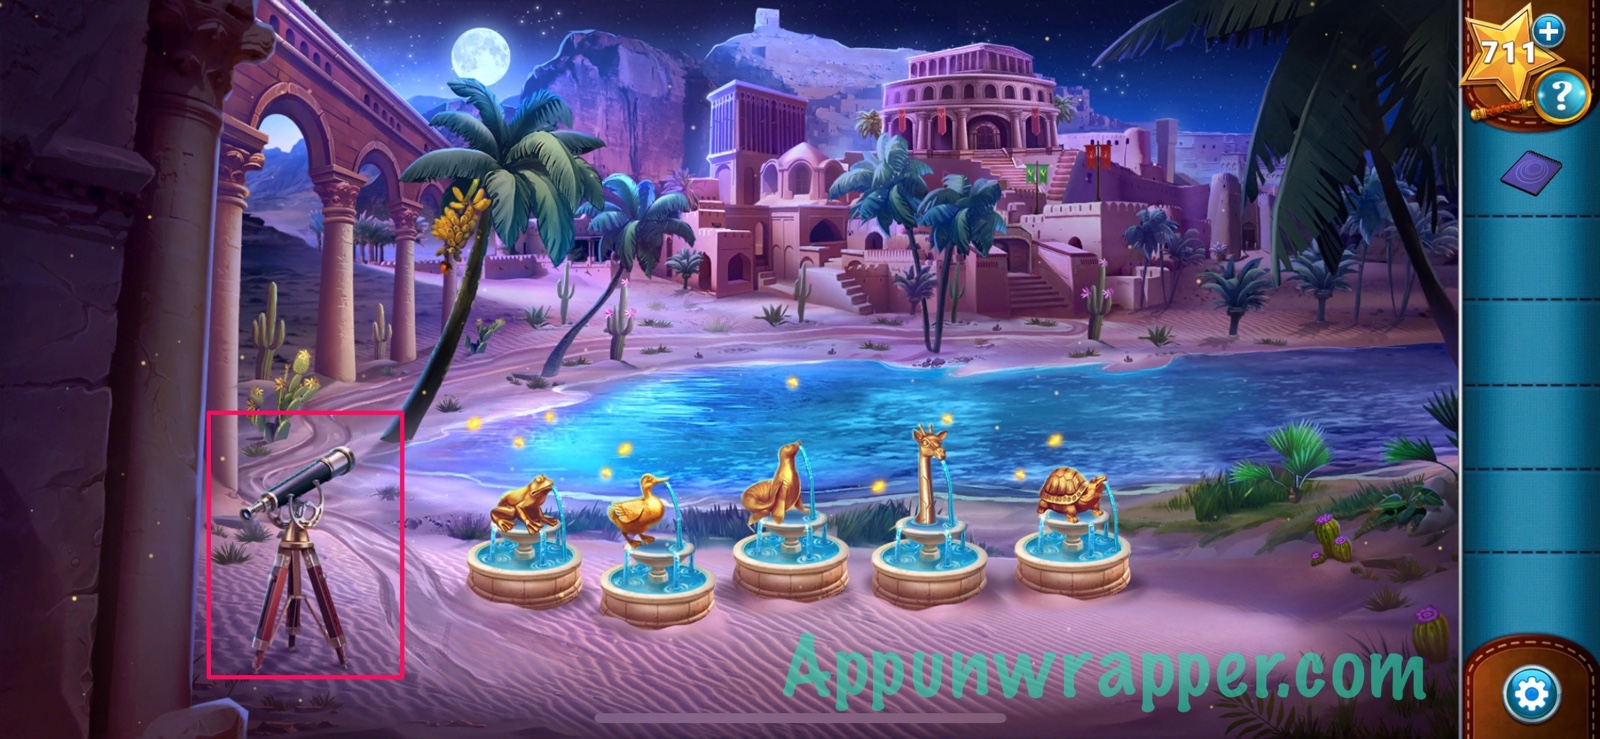
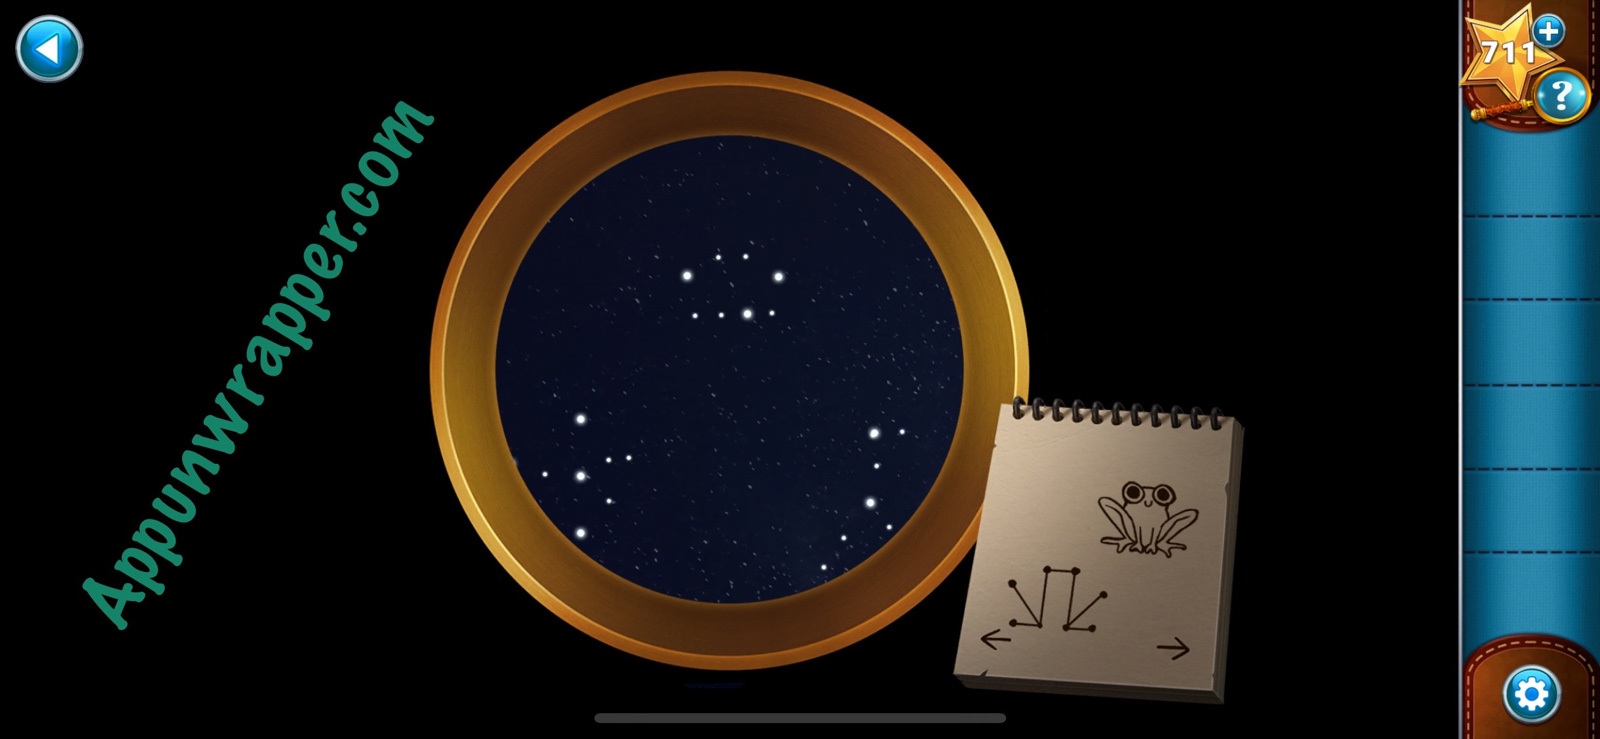
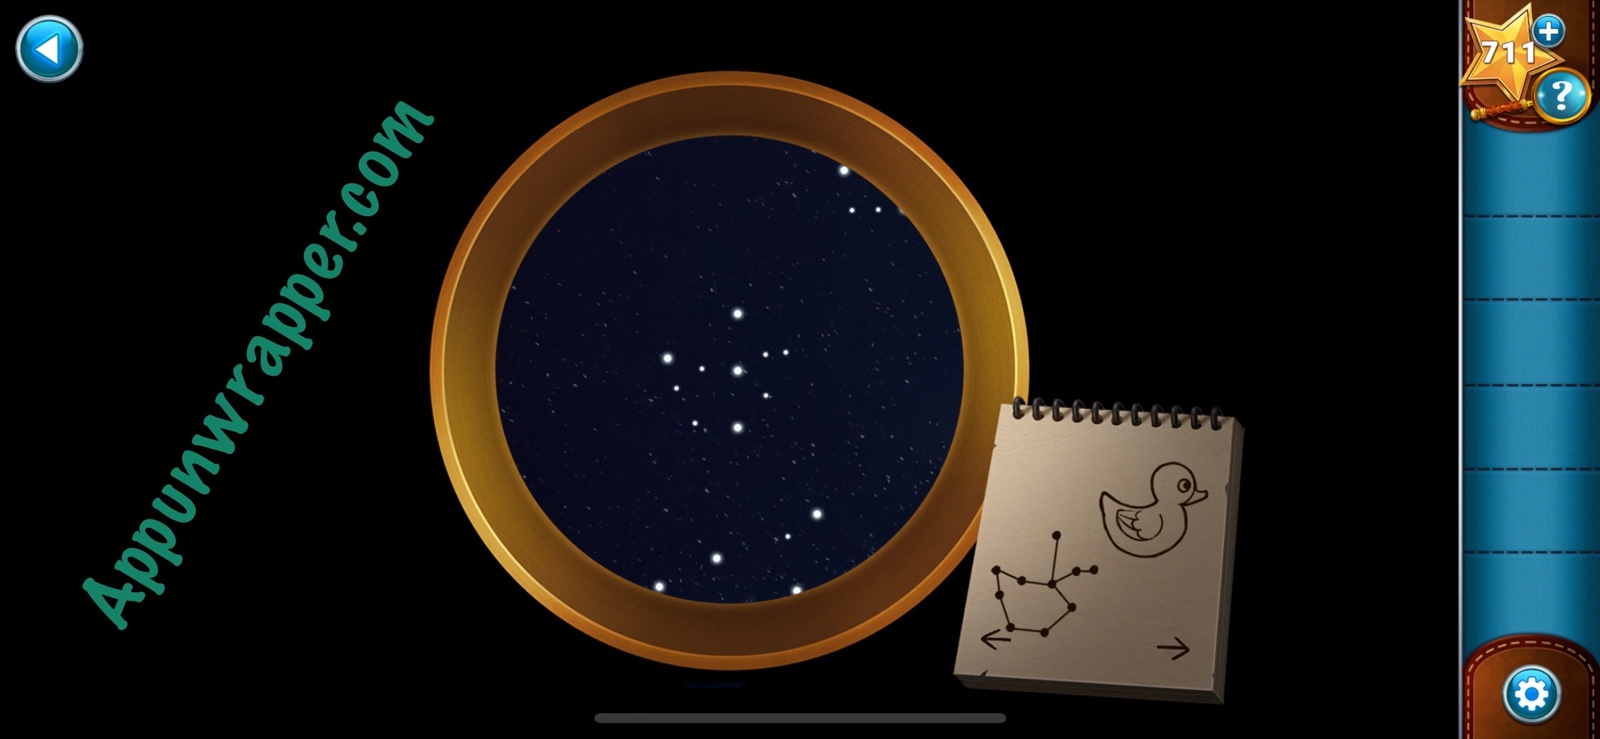
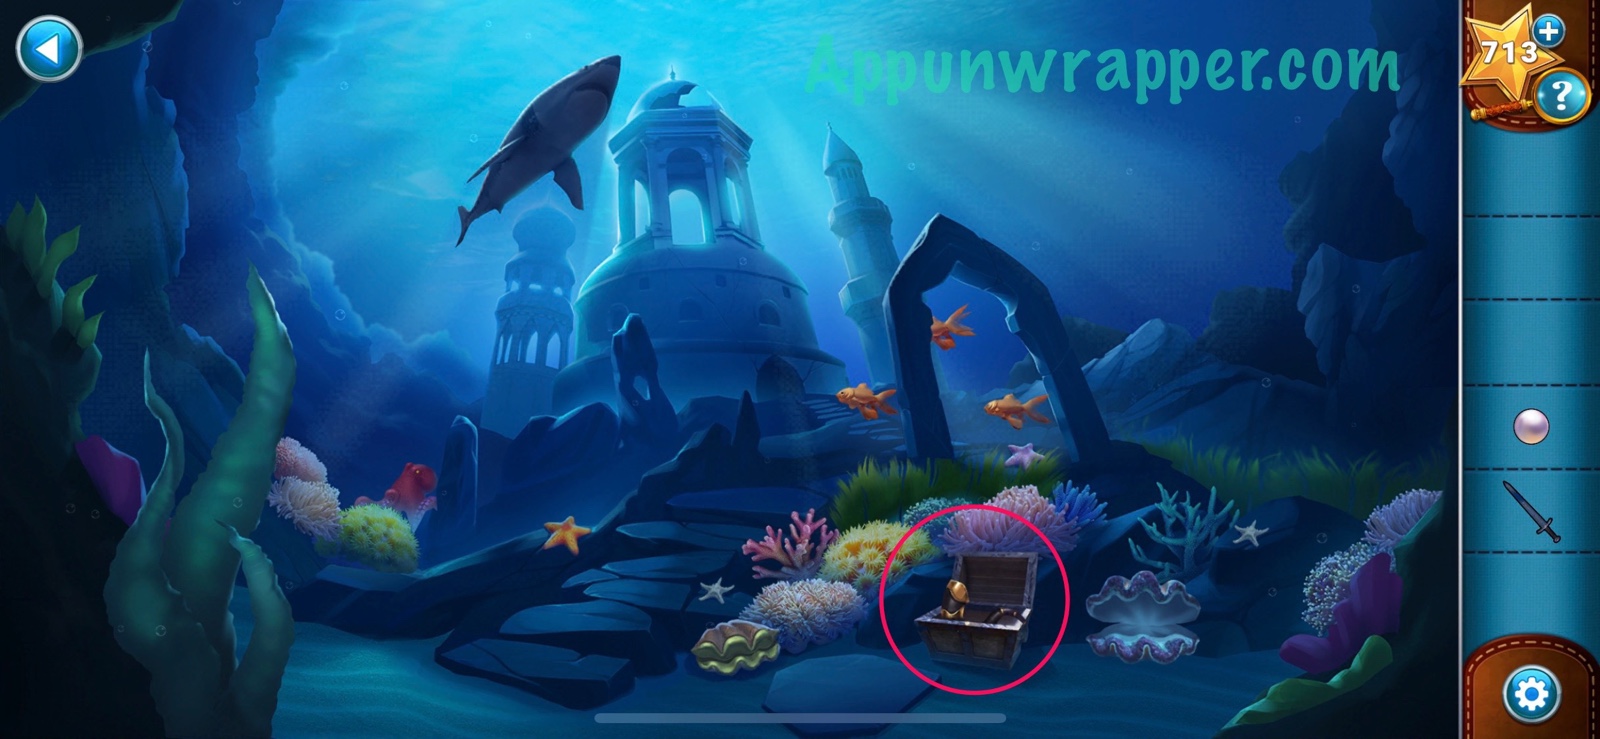
19. Notice the fice fountains. Then take out the star chart. Look at each page and find the matching constellation. Count only the brightest stars. So you get:
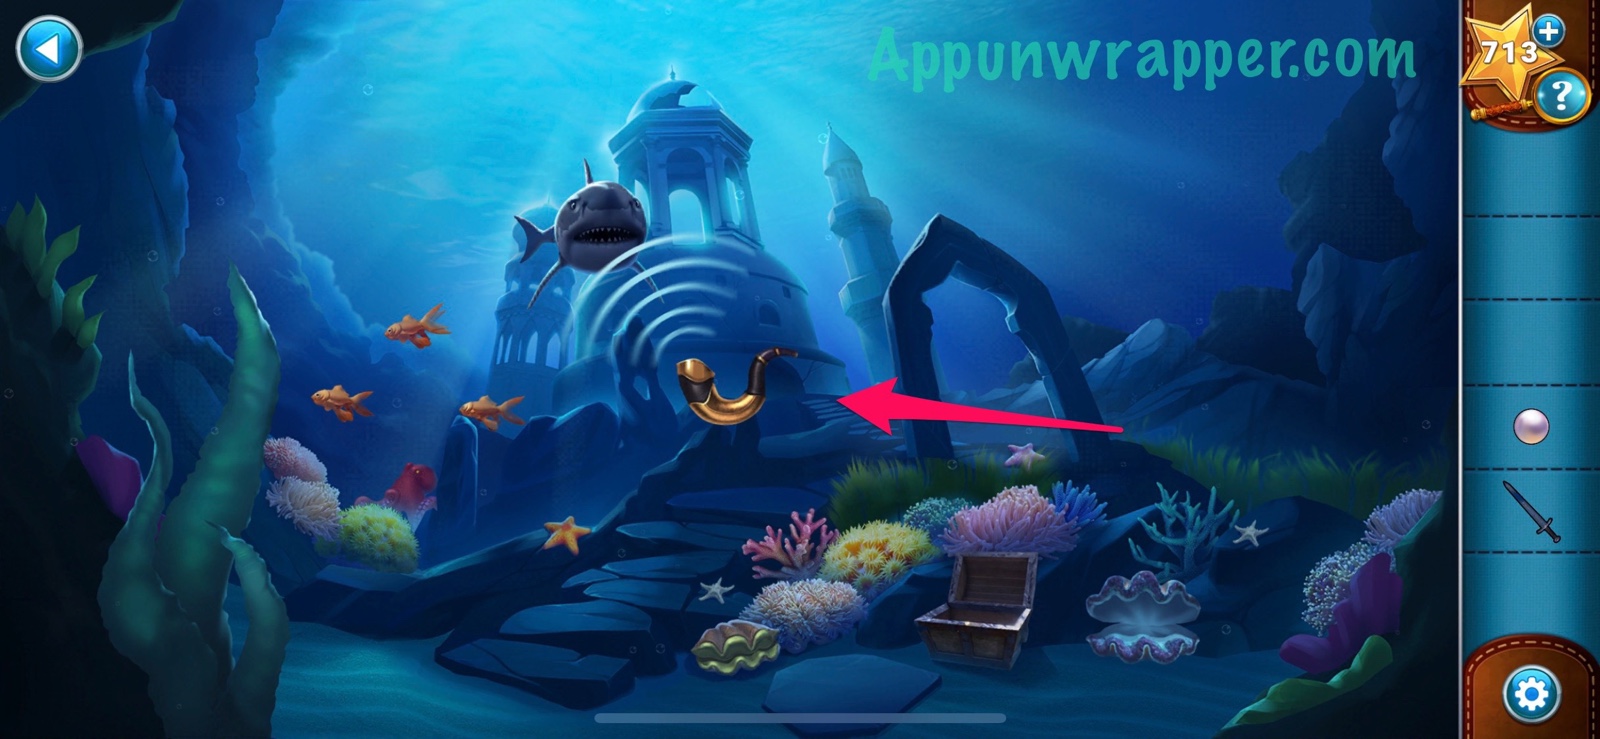
Frog = 3
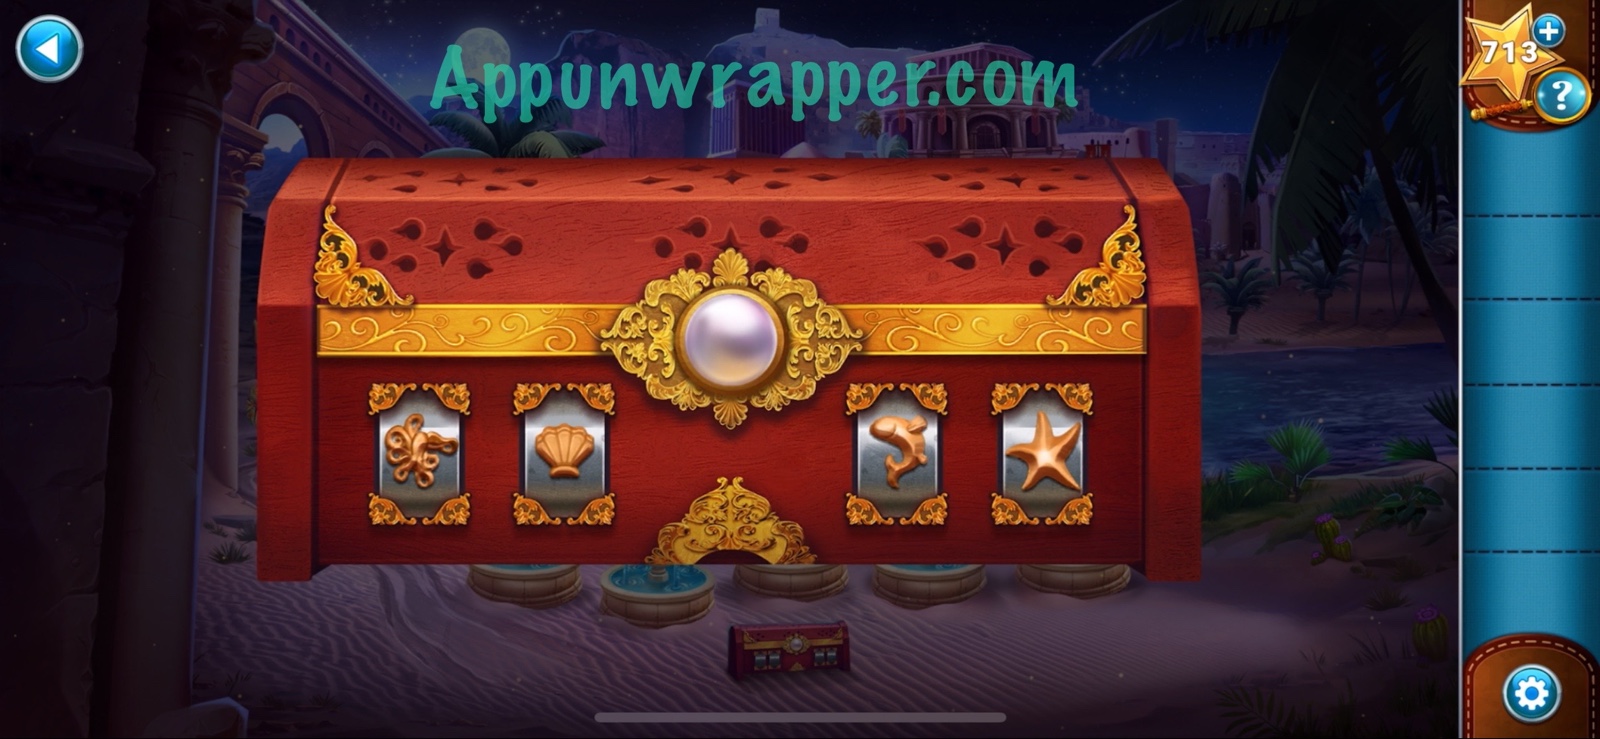
Duck = 4
Seal = 6
Giraffe = 2
Turtle = 5


20. Now tap each fountain until they have the same number of fireflies as bright stars in their constellations. Then you’ll get the first banner.
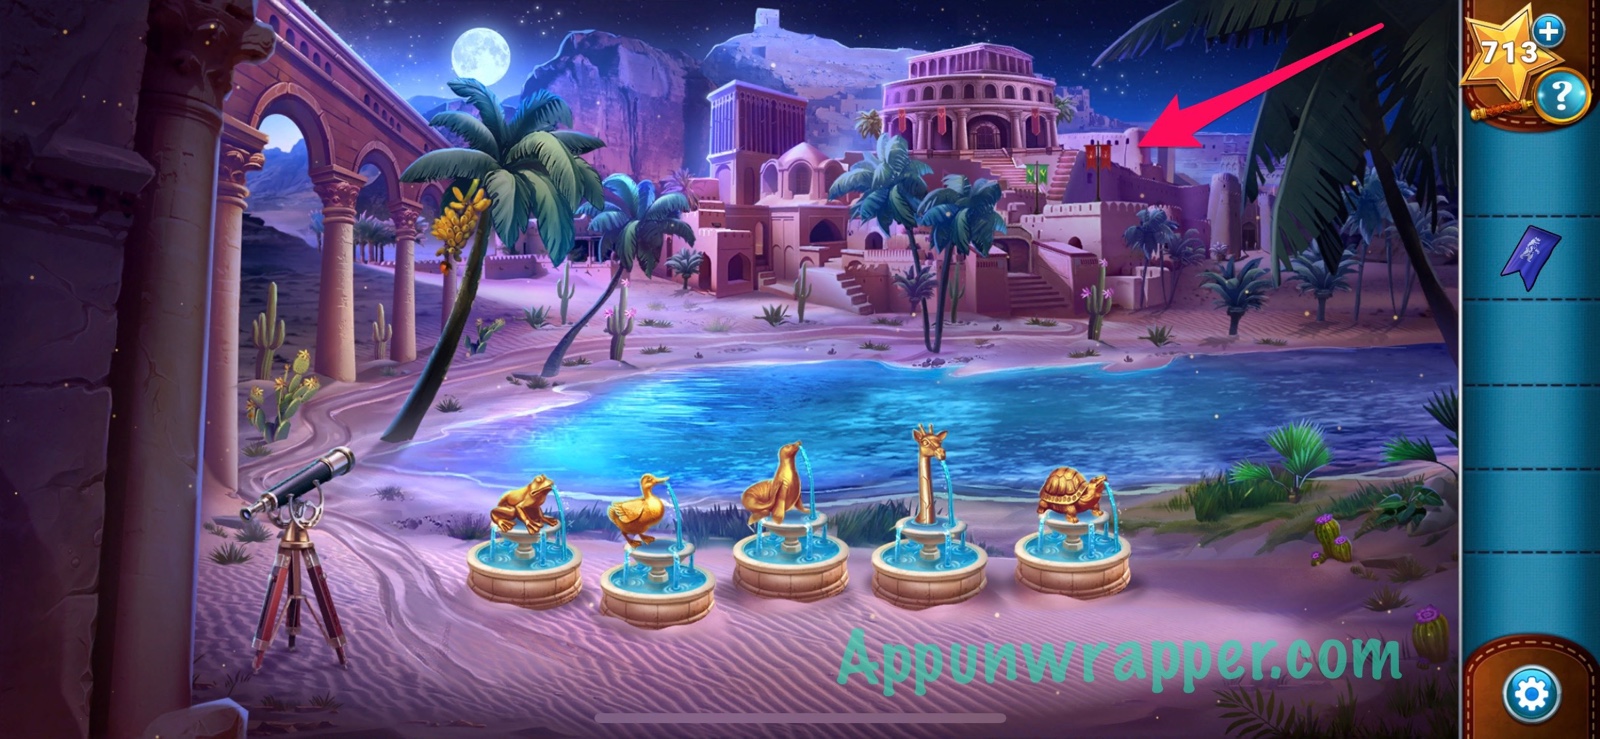
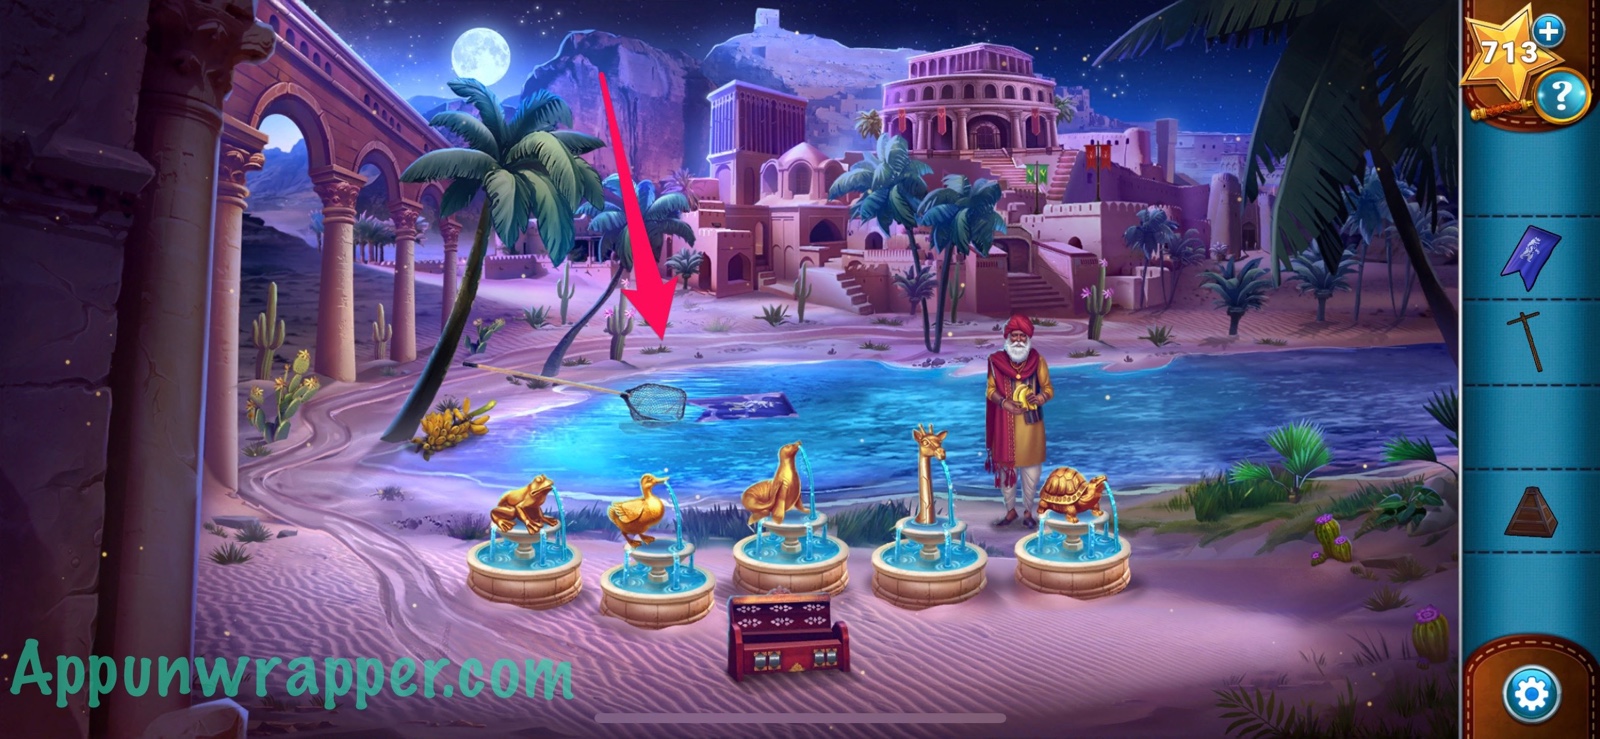
21. Tap on the arena to head over there. Hang the banner and then head back to the oasis.
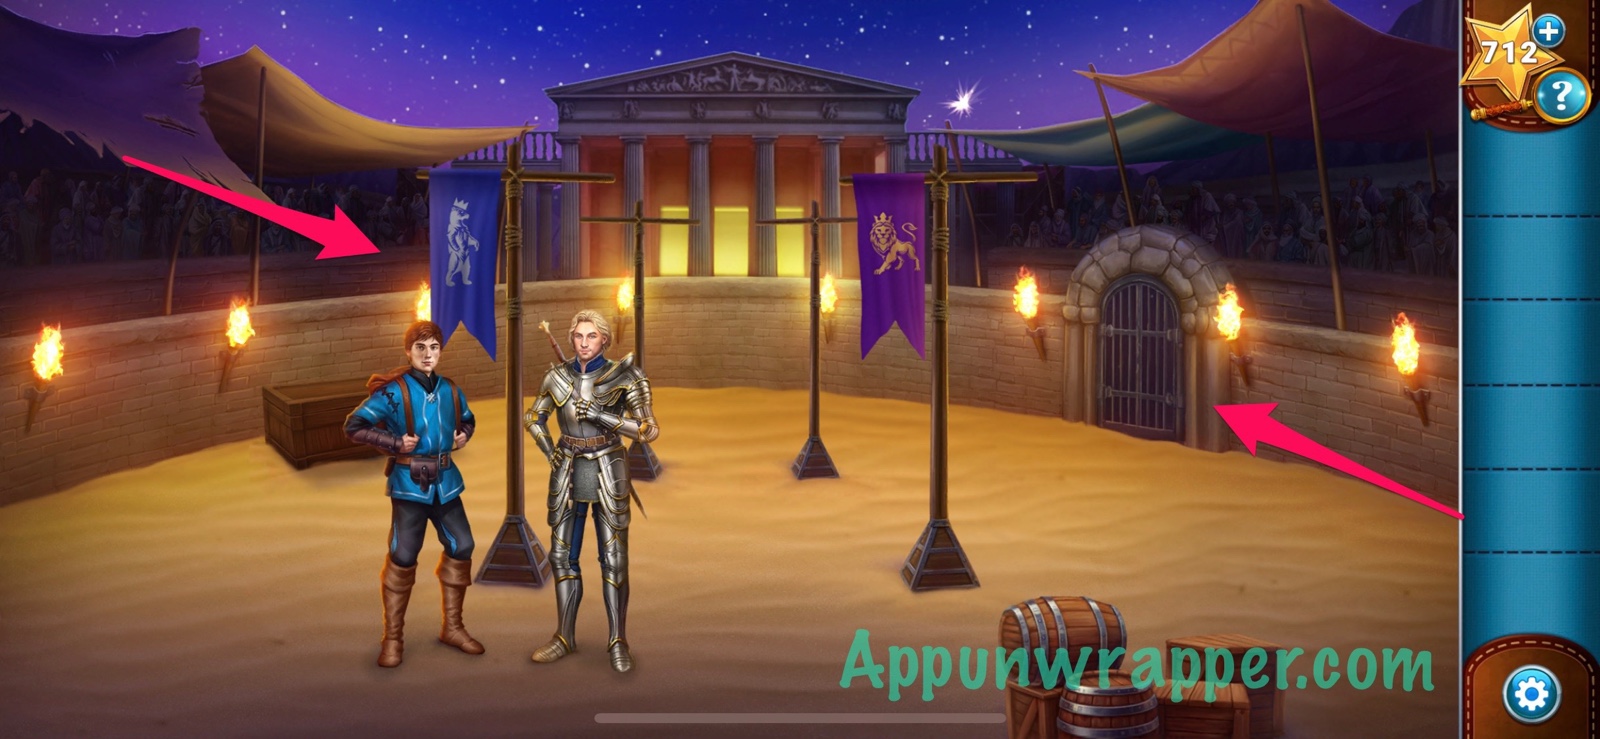
22. Look at the locked box. We need a circular object for it. So tap on Cedrick and have him go look for it.
23. We’re now underwater. Grab the sword and also reveal the clam.
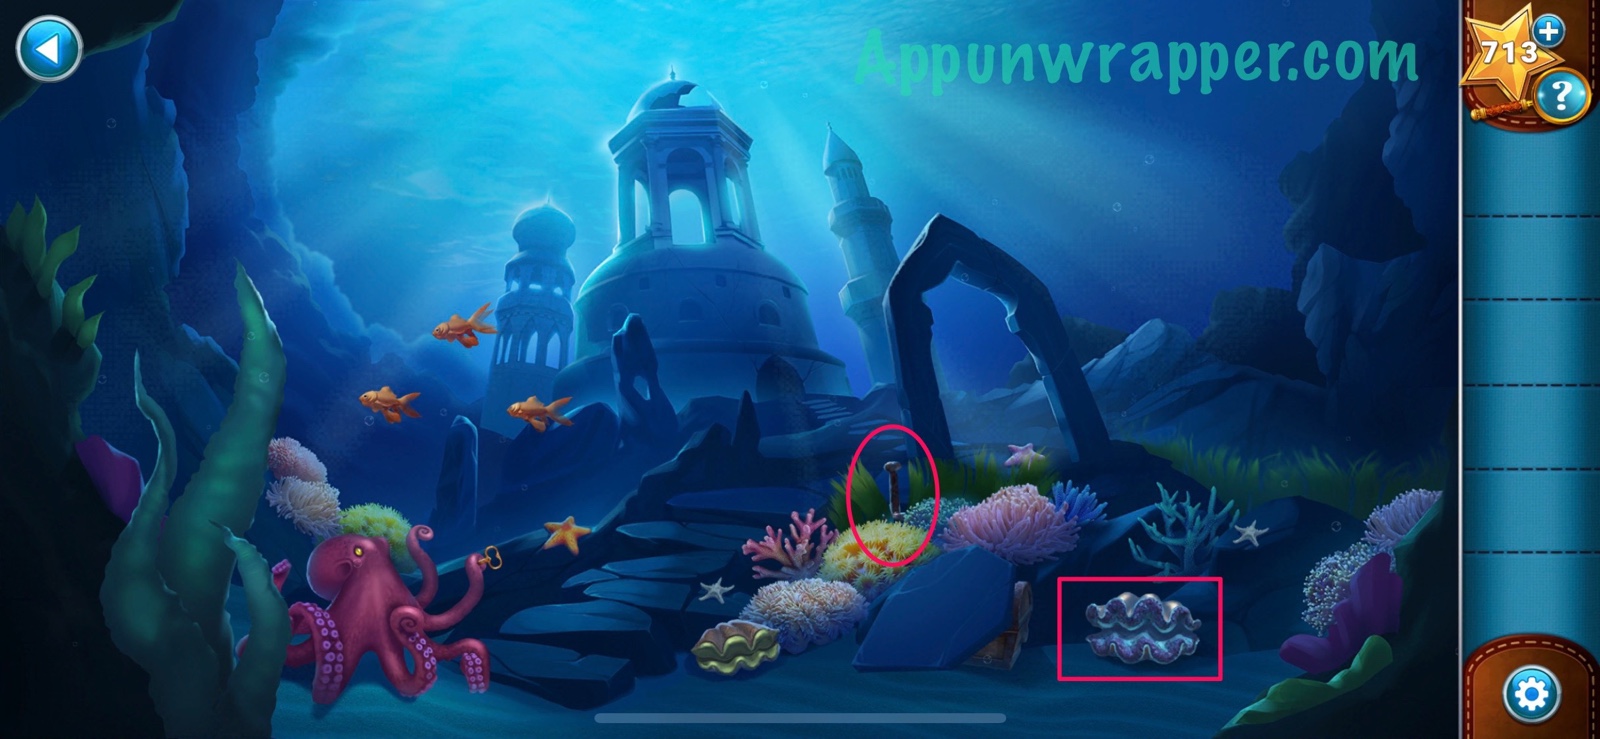
24. Use the sword to open the right clamshell and get a pearl. Use the sword to move the stone slab, revealing a treasure chest. Also, try to use the sword to get the key from the octopus. It will swim away! There’s also a shark blocking our way back.
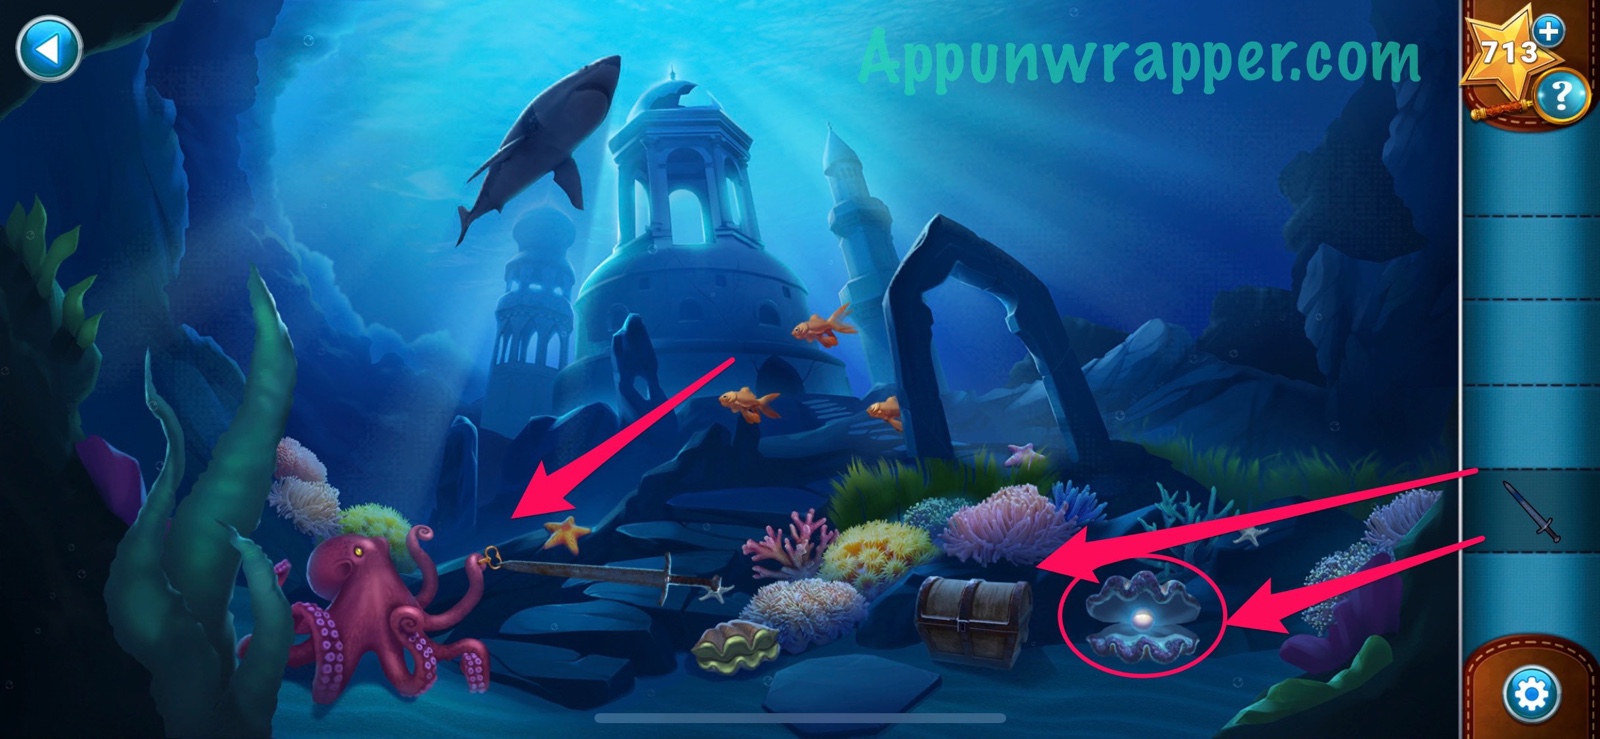
25. The octopus left some ink in its place. Tap it a few times to clean it up and find the underwater key!
26. Use the underwater key to unlock the chest. Take the battle horn from inside.
27. Use the battle horn to scare off the shark and then get back out of the water.
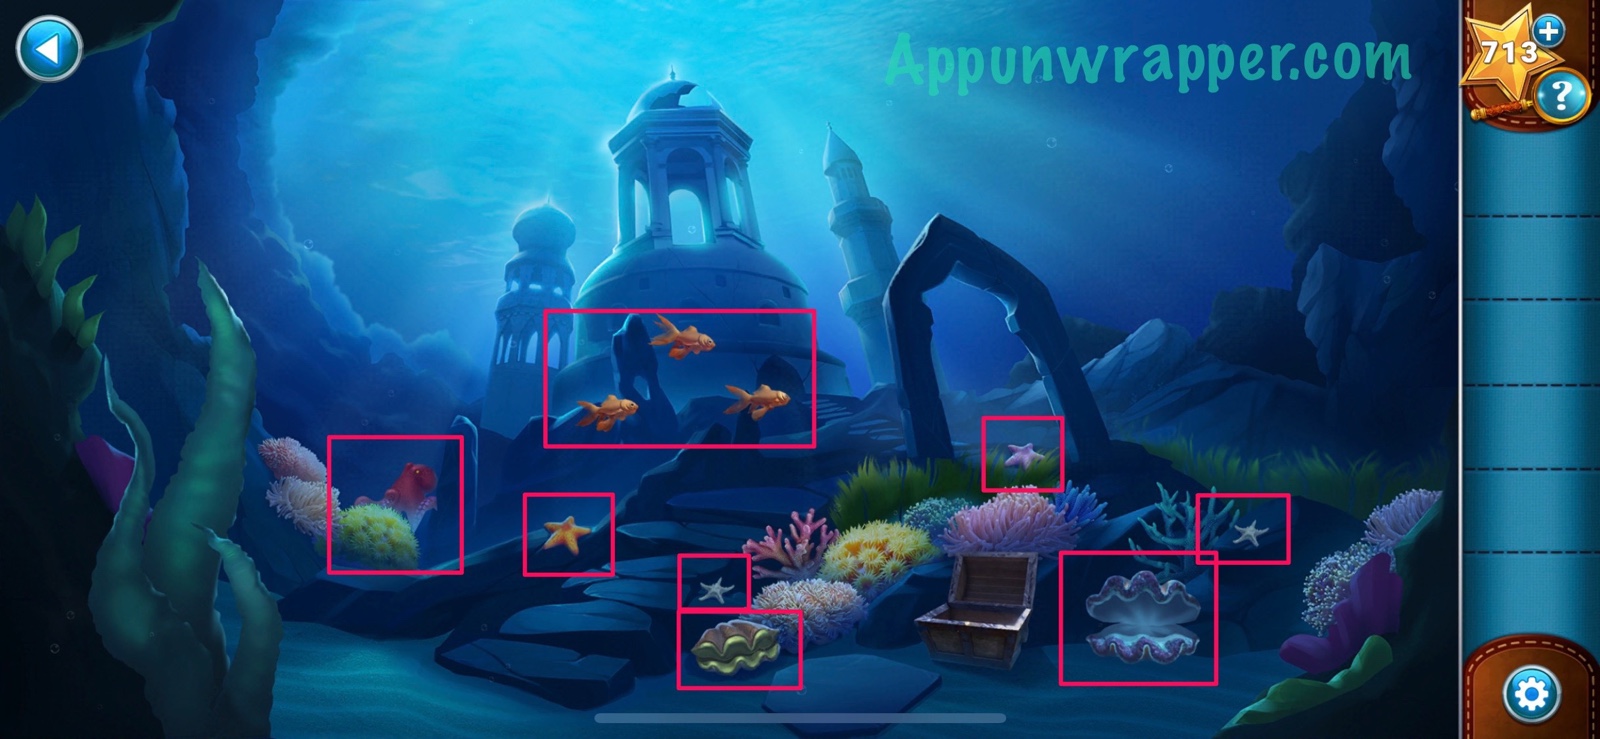
28. Place the pearl in the slot on the locked box. Now we have to figure out the combination for it. Now, this is a pretty odd solution, so I’m not sure if my reasoning is correct. But you need to go back underwater and count objects. Then place them in order of how many you saw. So 1 octopus, 2 clams, 3 fish, 4 starfish. Enter those into the locked box. Then grab the banner from inside.
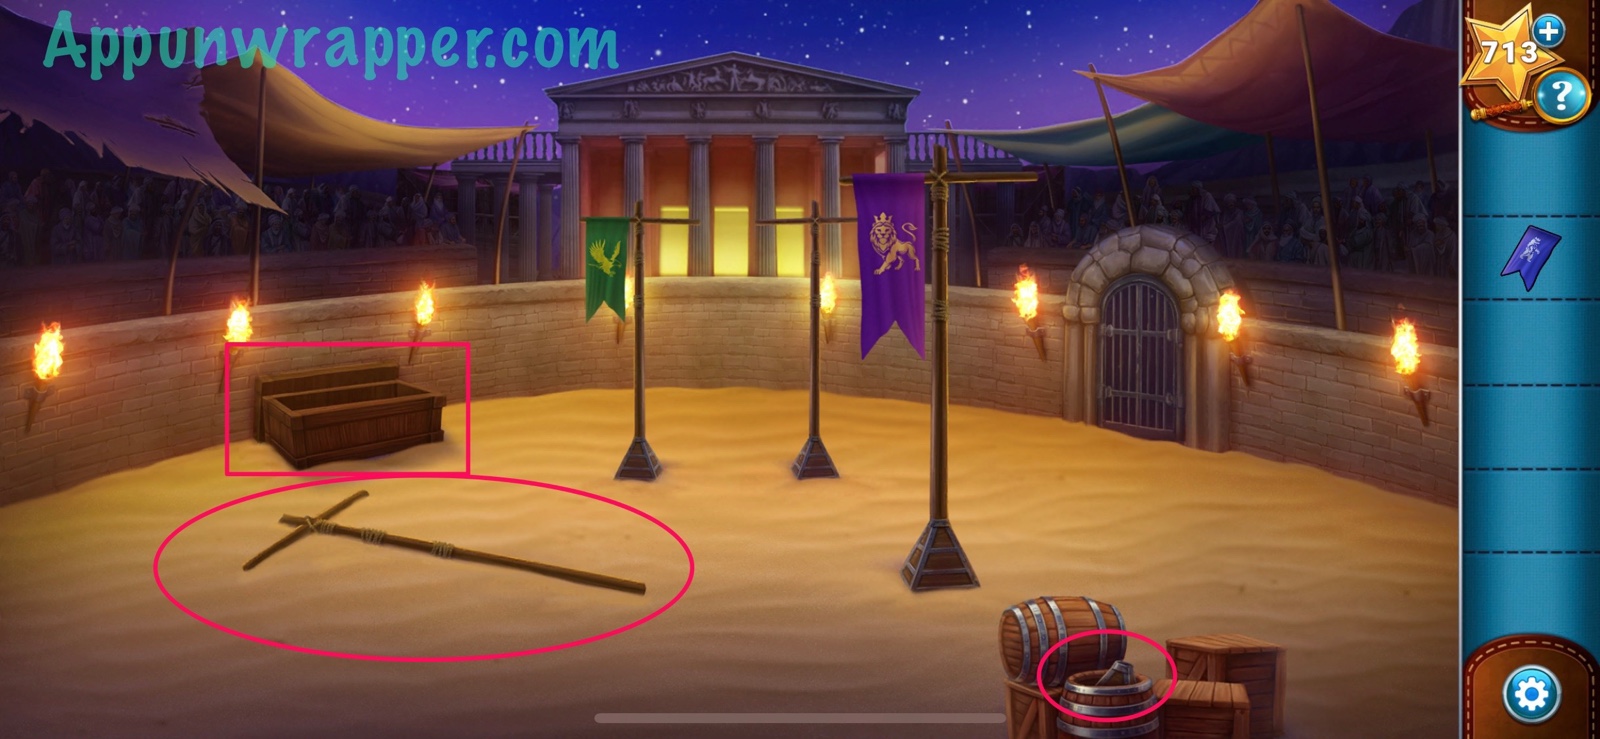
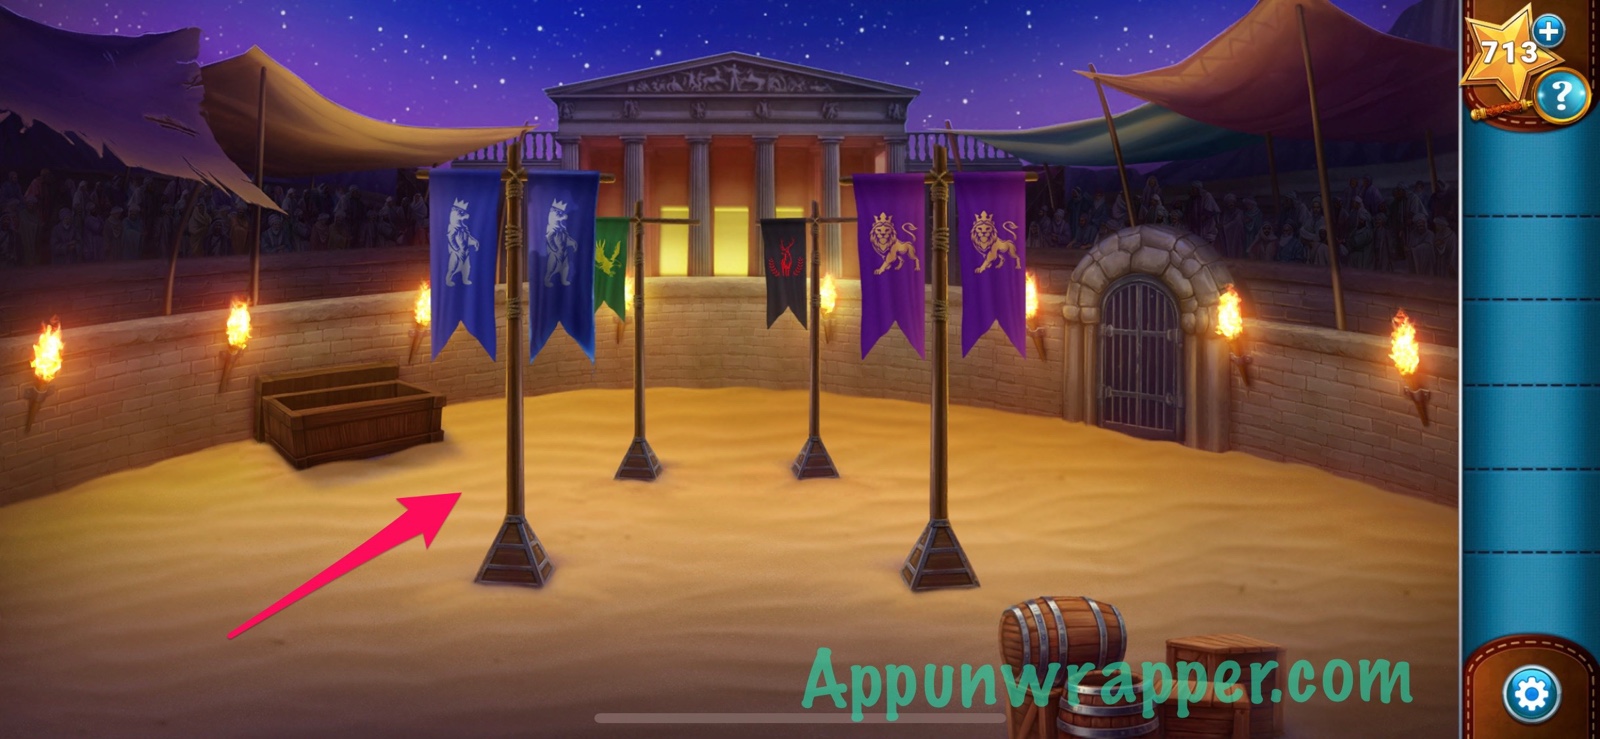
29. Go back to the arena. Our first banner was stolen! Dig up the banner banner pole. Take the banner stand from the barrel and then look in the chest to get a boomerang. Then go back to the oasis.

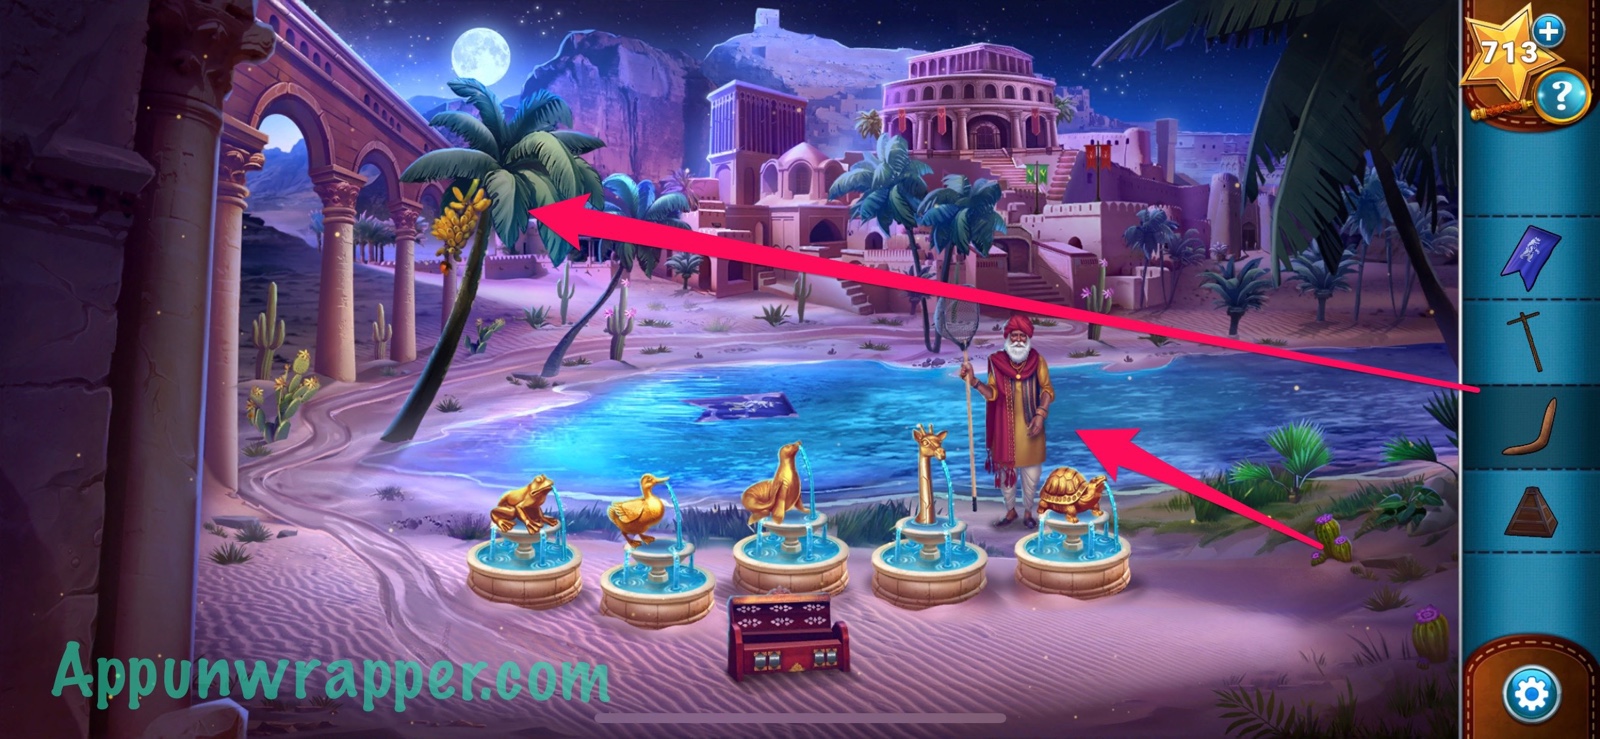
30. Talk to the Manid, the snake charmer. He has a net but will trade it for some bananas. Use the boomerang to knock the bananas out of the tree and take some. Give them to him for the net.
31. Now that we have the net, use it to fish the banner out of the water.
32. Go back to the arena and set up the banner stand and add the banner.
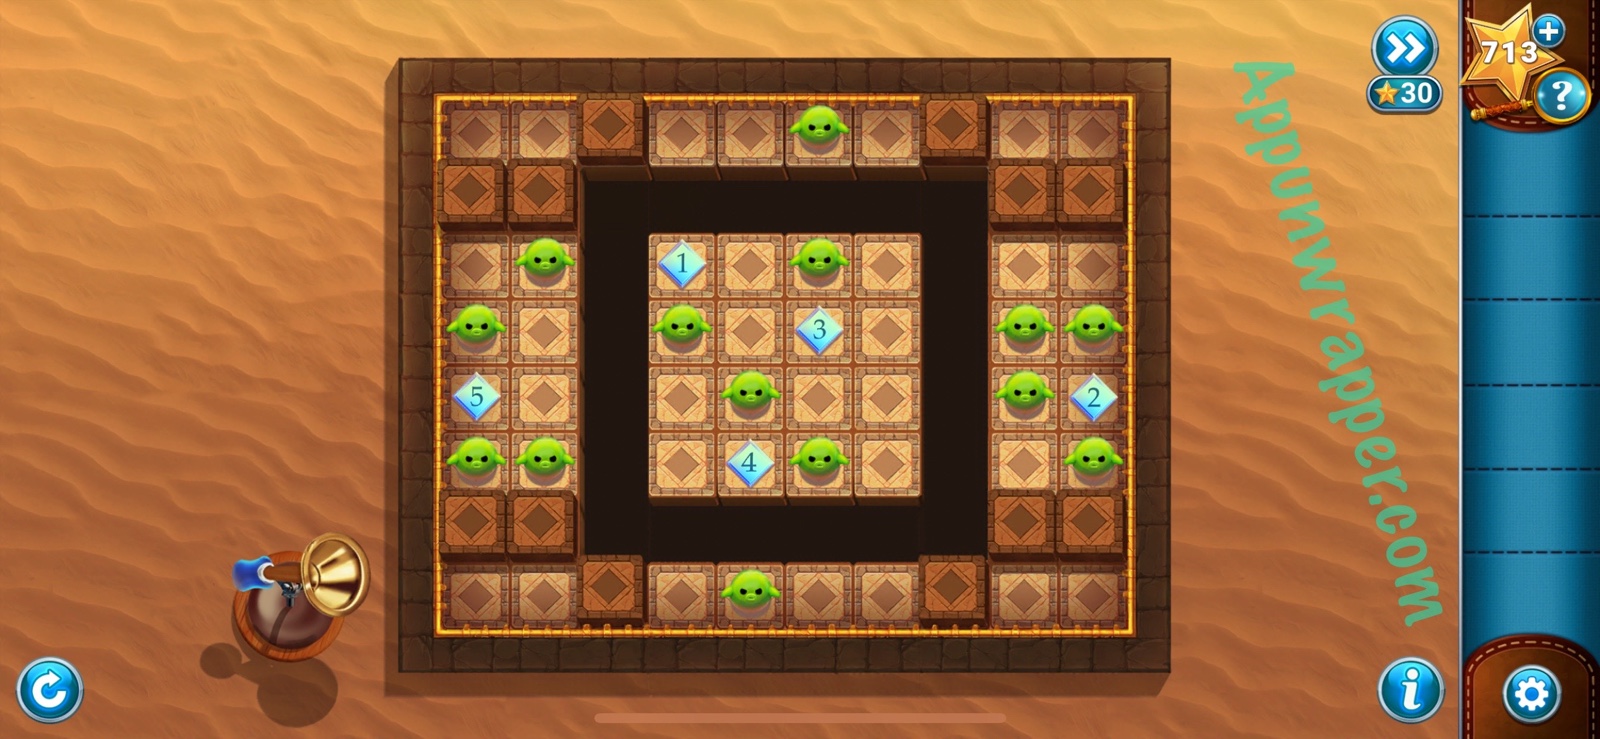
33. Now we have to solve the Final Challenge. Place the gems so that all the monsters are destroyed. Drag the gems onto the board and use the horn to detonate the gems. They’ll explode starting with the first gem. An explosion travels in the same row or column until it hits a block or a monster. You can follow my solution below. Just press the horn after placing the gems. Then watch the ending of Chapter 4.
And that’s the end of Chapter 4! Click here to continue to Chapter 5 or choose a chapter below.
Chapter 1 | Chapter 2 | Chapter 3 | Chapter 4 | Chapter 5 | Chapter 6 | Chapter 7 | Chapter 8

I’m stuck ok making the invitation?! 😫
Use the scissors to get the bunting in the main tent, then look at the patterns and animals on the flags in the upholstery tent, for the patterns look at the numbers on the pieces of material and correspond them to the shield
Stuck on these fxcking rugs givinv me anxiety fr
Has anyone figured out what symbols to press on the cauldron in Chapter 5? It’s have the number and the right-most gauge, but that’s it.
Nm, FINALLY figured it out.
I’m stuck on the left hand code. Any hints?
You willing to share?
You will figure it out, trust me because it’s not as complicated as all other games from them. If not then just wait here for the answers, because here is everything explained the best it just st could be. But till then just try, focus and don’t give up. You’ll be so proud of yourself when you figure it out by yourself and if I managed it I’m sure you will too.
In worse case I used hints for which I had stars which I collected while going through the chapters.
Finiiiiiiiiiiiiished the whole game… This was so far the easiest from all other games here for beginners.
I still really appreciate all the efforts which were put into this game. Cedrick’s character made me laugh many times. This game made me laugh the most from all other EA mysteries games.
I was so annoyed with Cedrick!!! He’s so frustrating and inept 😂😂😂
stuck on frogs in Chapter 6
anybody?
Click them all to get them on their lily pads, then click them in the right order to make them stand up and sing based on the pattern on their lily pads…I think the pattern order to follow are on a tree somewhere but can’t quite remember…
yes, thanx.. managed to complete it 5 minutes after I posted the question 🙂 and the whole game 2 hours later..
How do I move the snakes pots around??
Has anyone figured out the moon puzzle in chapter 8?
The moon puzzle I couldn’t figure out myself so needed to use a hint for it which helped me to realise I have to add up all stars which are shown on the line leading to particular moon phases. So you just add all stars which are leading to every moon phase.
You will figure it out, trust me because it’s not as complicated as all other games from them. If not then just wait here for the answers, because here is everything explained the best it just st could be. But till then just try, focus and don’t give up. You’ll be so proud of yourself when you figure it out by yourself and if I managed it I’m sure you will too.
In worse case I used hints for which I had stars which I collected while going through the chapters.
Thanks so much for this! Sometimes I just need a little hint and dont have the stars so this site rocks!!
I’m stuck at moving the lights to match the snakes’ heights. Just need to know how to move them about. Move the lights or the snakes? What controls the lights/snakes? Thanks.