Adventure Escape Mysteries – The Squire’s Tale
By: Haiku Games

Haiku Games is back with a new Adventure Escape game, this time an action-filled adventure in a fantasy world. You play as Martin, a squire who needs to help the knight Cedrick in their quest to find the legendary Sword of Light and put an end to the Monster King once and for all. This walkthrough guide should help you if you get stuck on any of the puzzles in Chapter 7 of The Squire’s Tale. Feel free to ask for extra help in the comments section.
See all my other Adventure Escape guides here.
Walkthrough:
Chapter 1 | Chapter 2 | Chapter 3 | Chapter 4 | Chapter 5 | Chapter 6 | Chapter 7 | Chapter 8
Chapter 7, The Monster King’s Lair:
You can watch my video for Chapter 7 or continue below for my step-by-step guide:
1. Despite breaking the Sword of Light, our heroes are determined to fight the Monster King. But first we have to get to him. Grab the gloves, old key, rope and shovel.
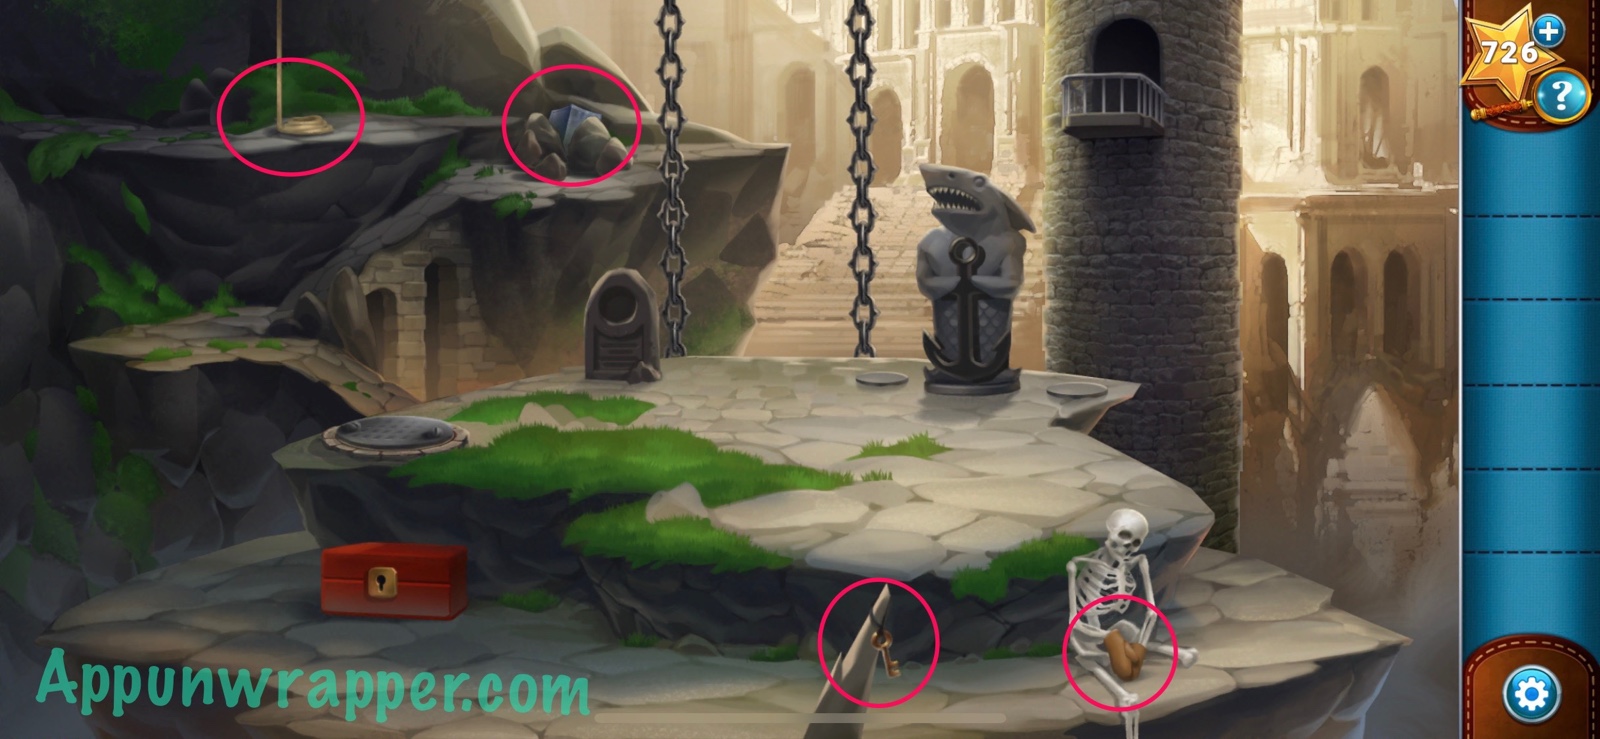
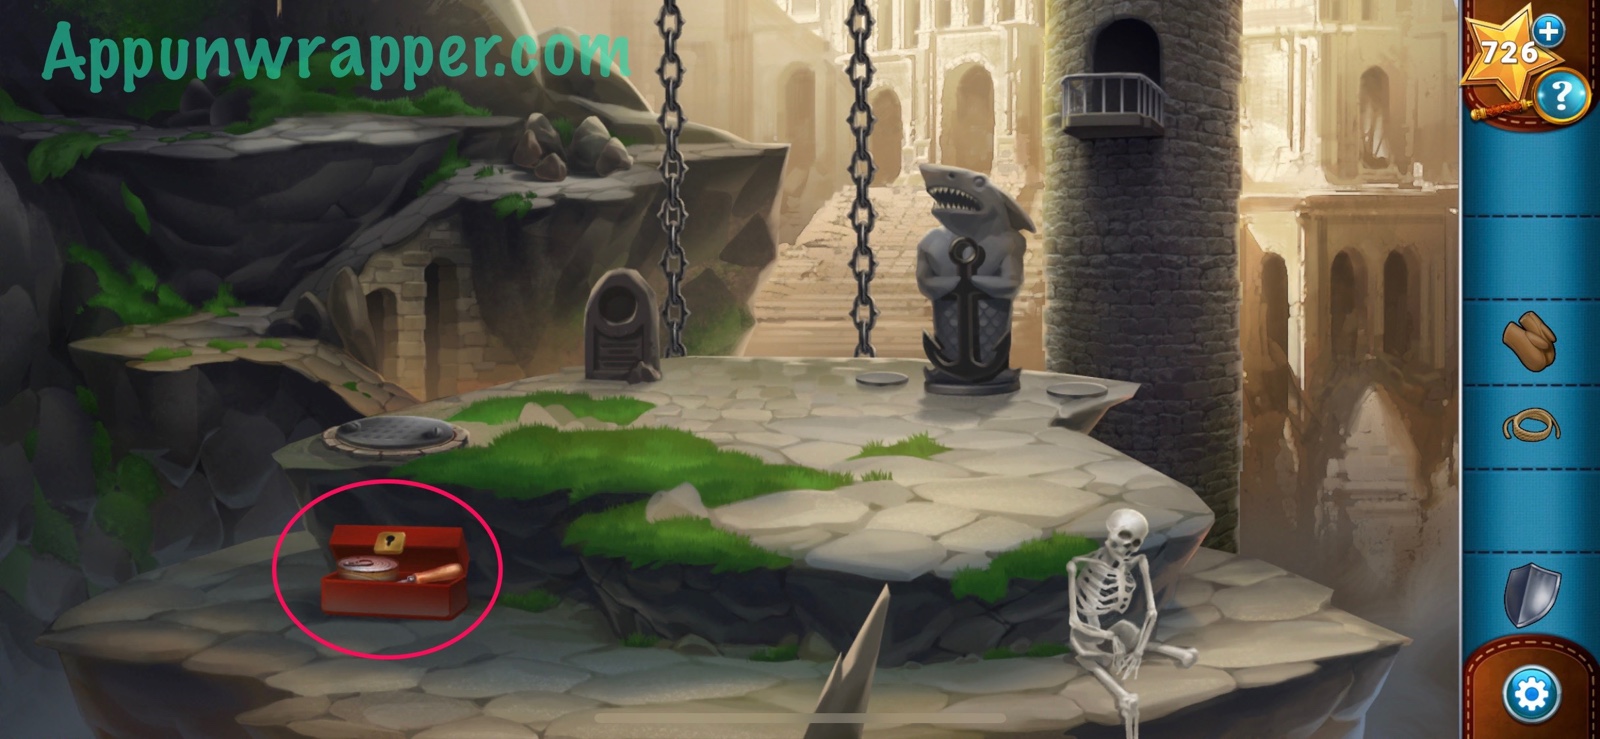
2. Use the key to unlock the toolbox and get the screwdriver and can of tuna.
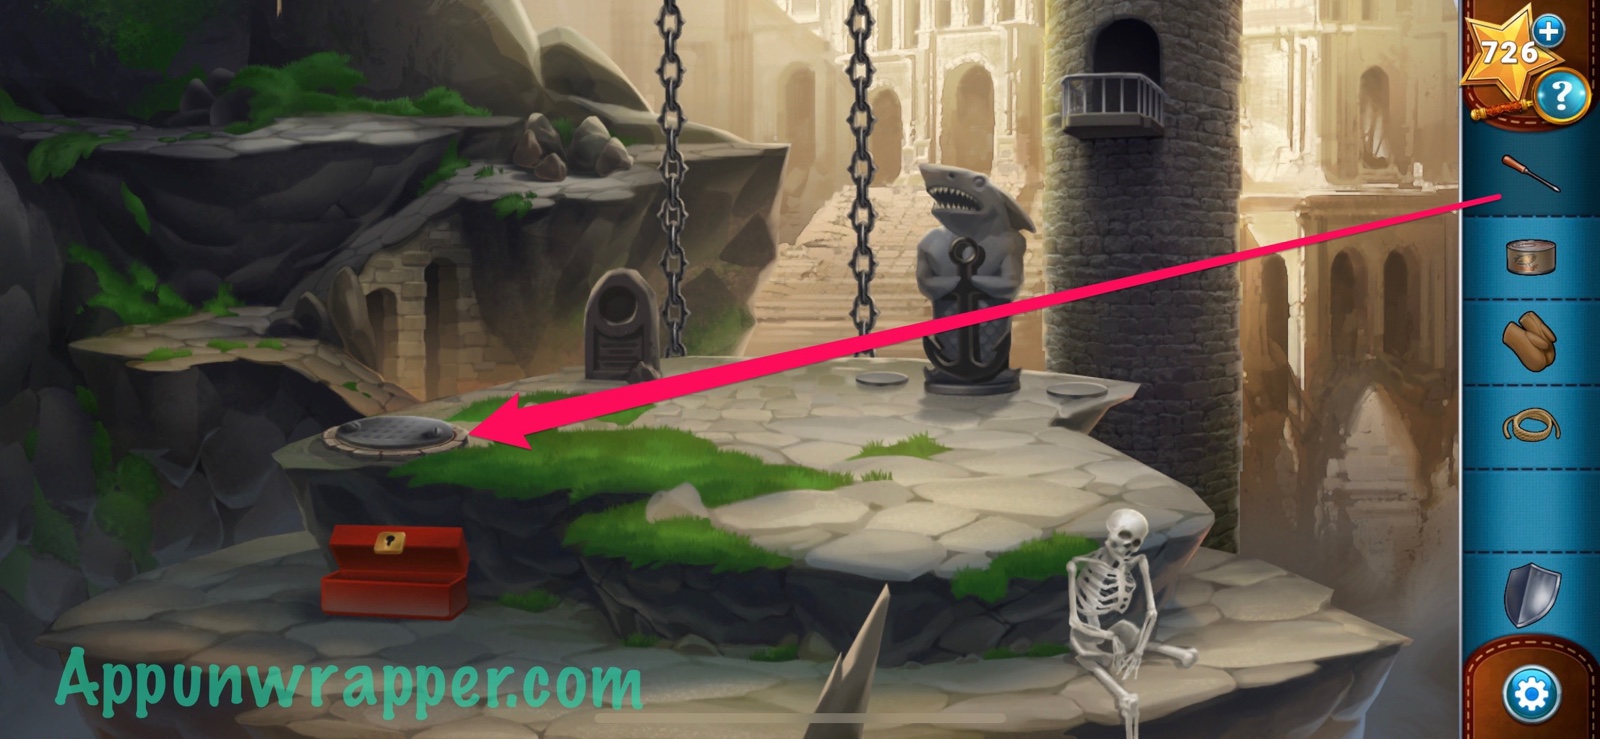
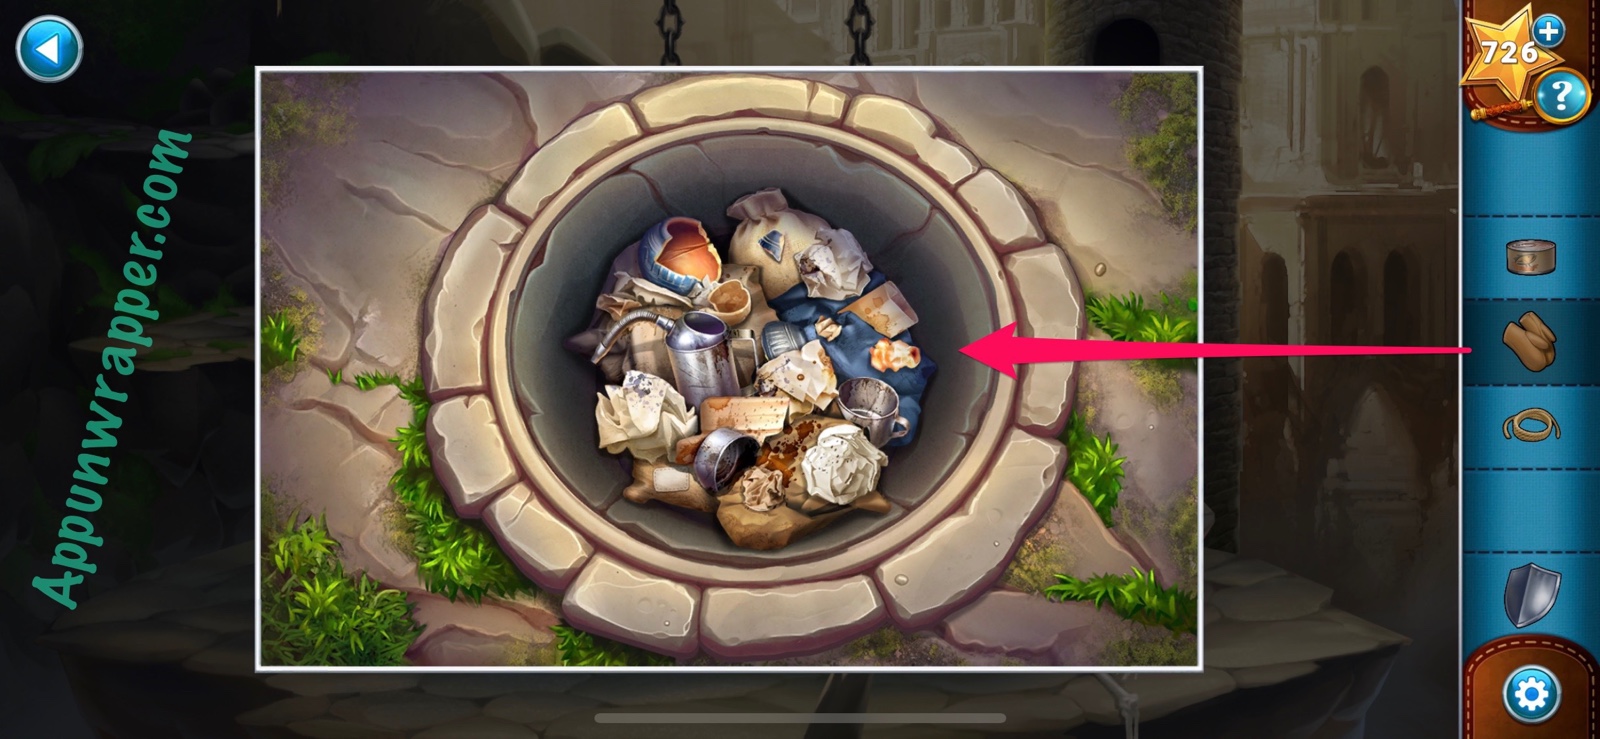
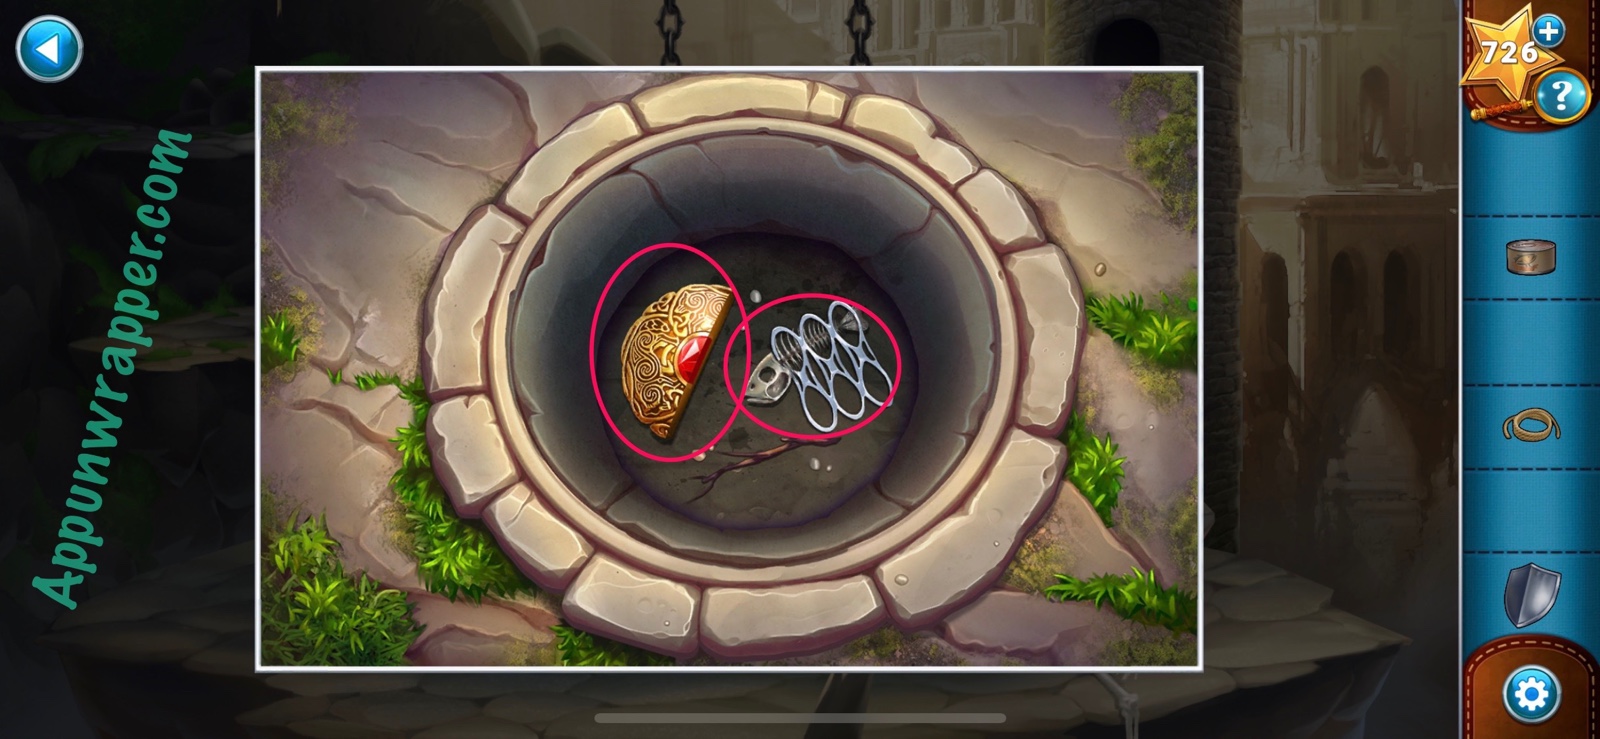
3. Use the screwdriver to remove the manhole cover and look inside. Use the gloves the go through the trash and get the fishbone and medallion half.
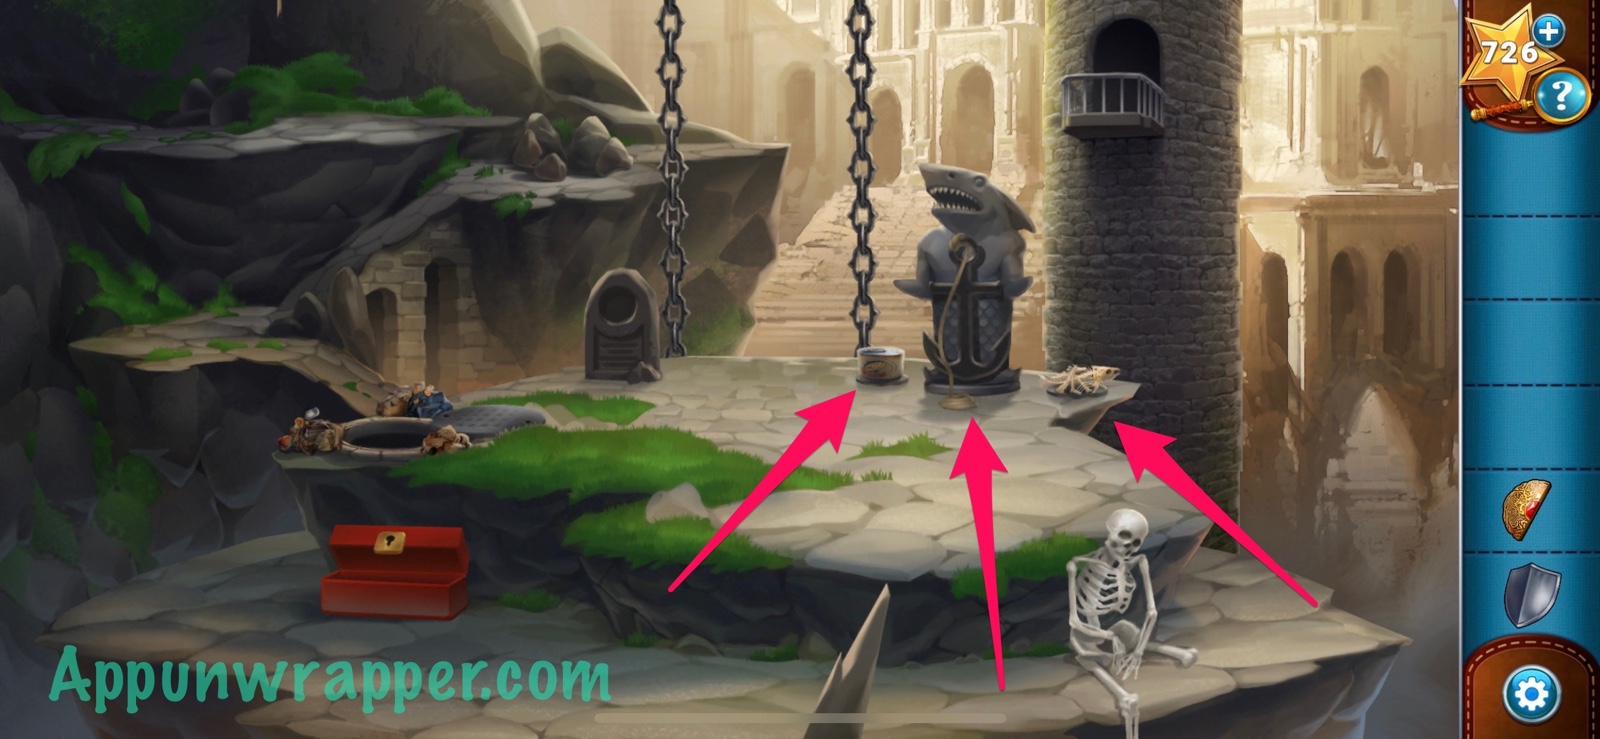
4. Place the fishbone and can of tuna on the plates next to the shark statue as an offering. It will release the anchor. Now you can tie the rope to the anchor and collect it.
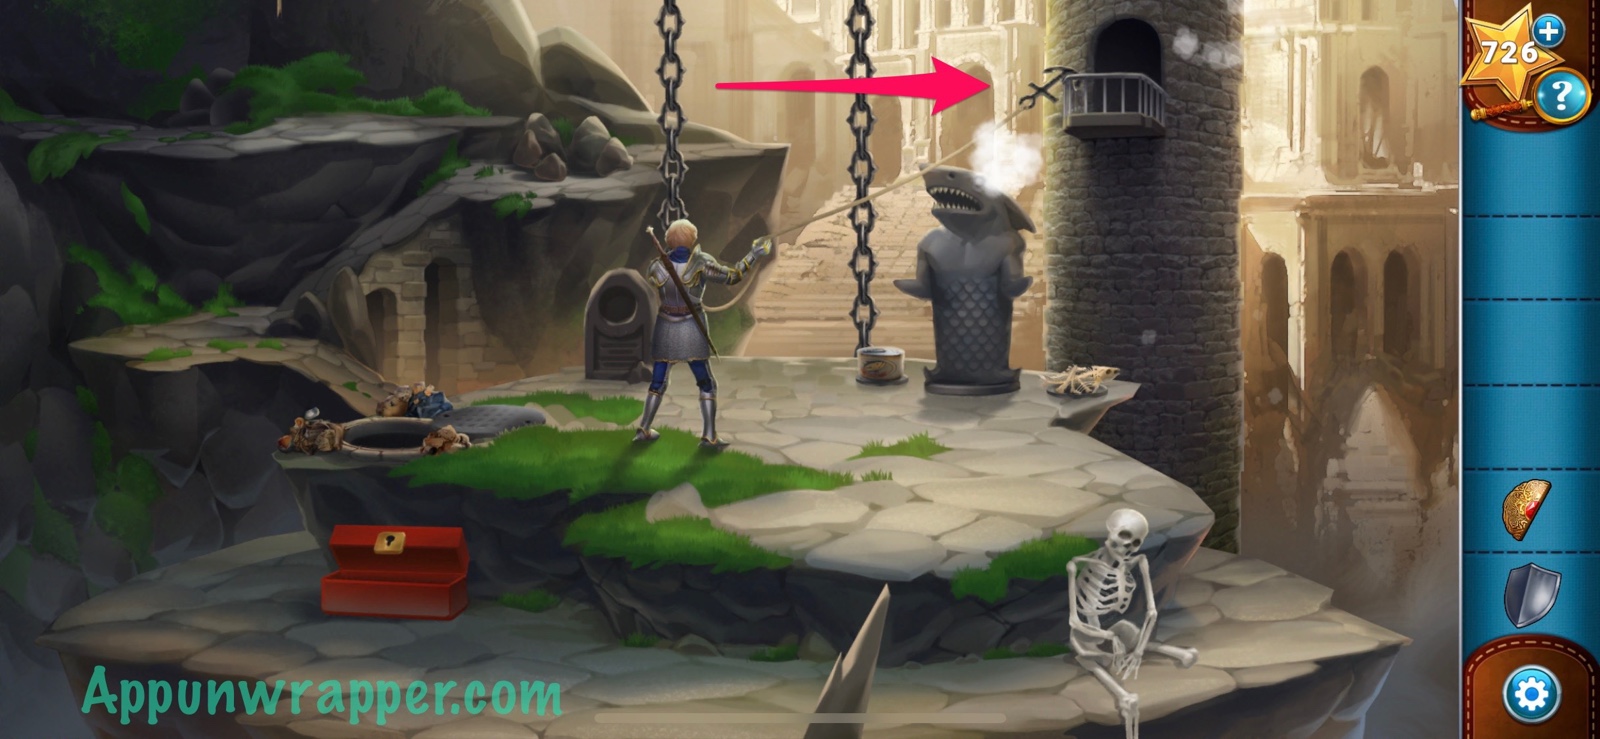
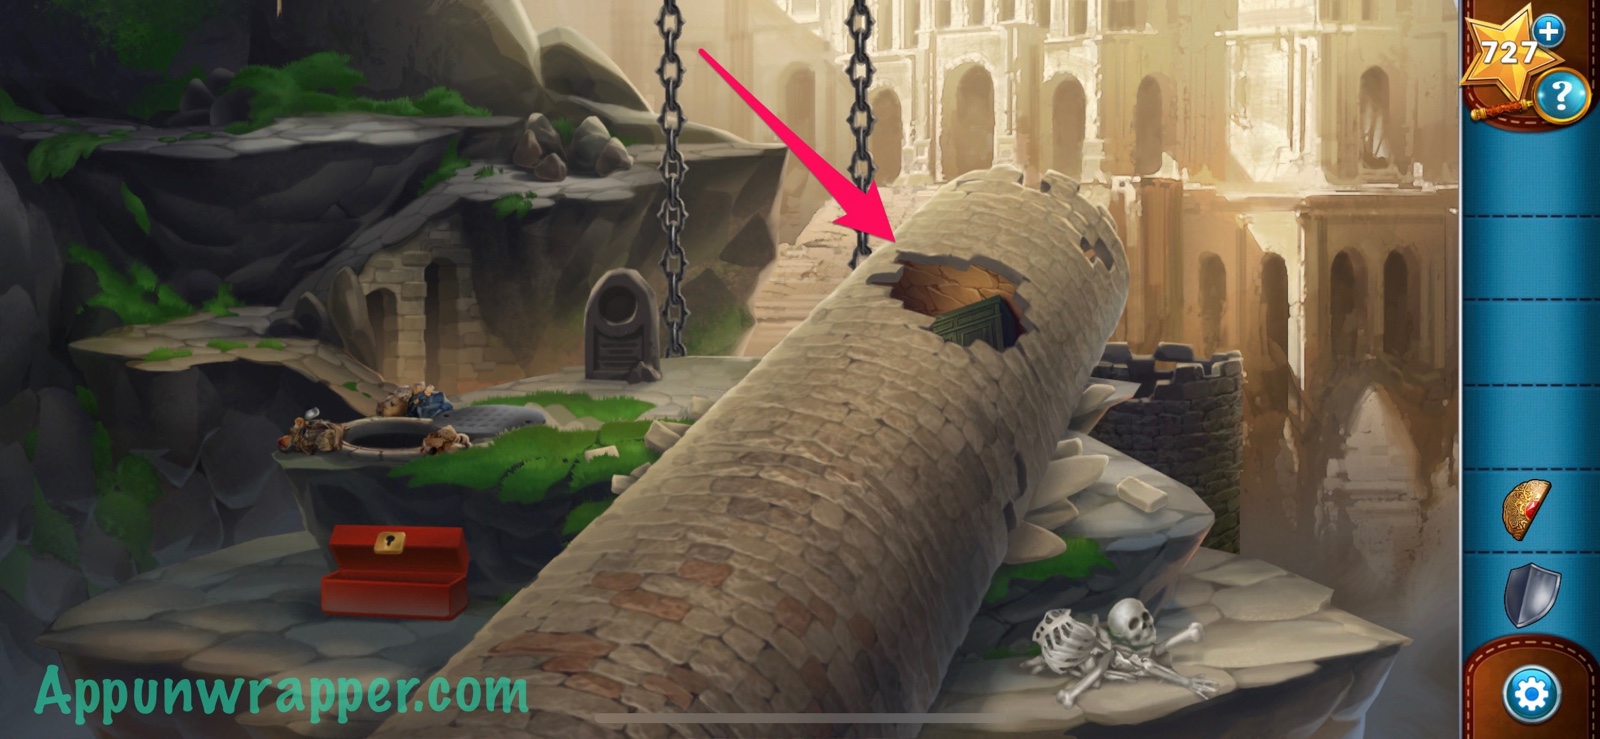
5. Throw the anchor at the balcony so you can climb across. Instead, it brings the whole tower down!
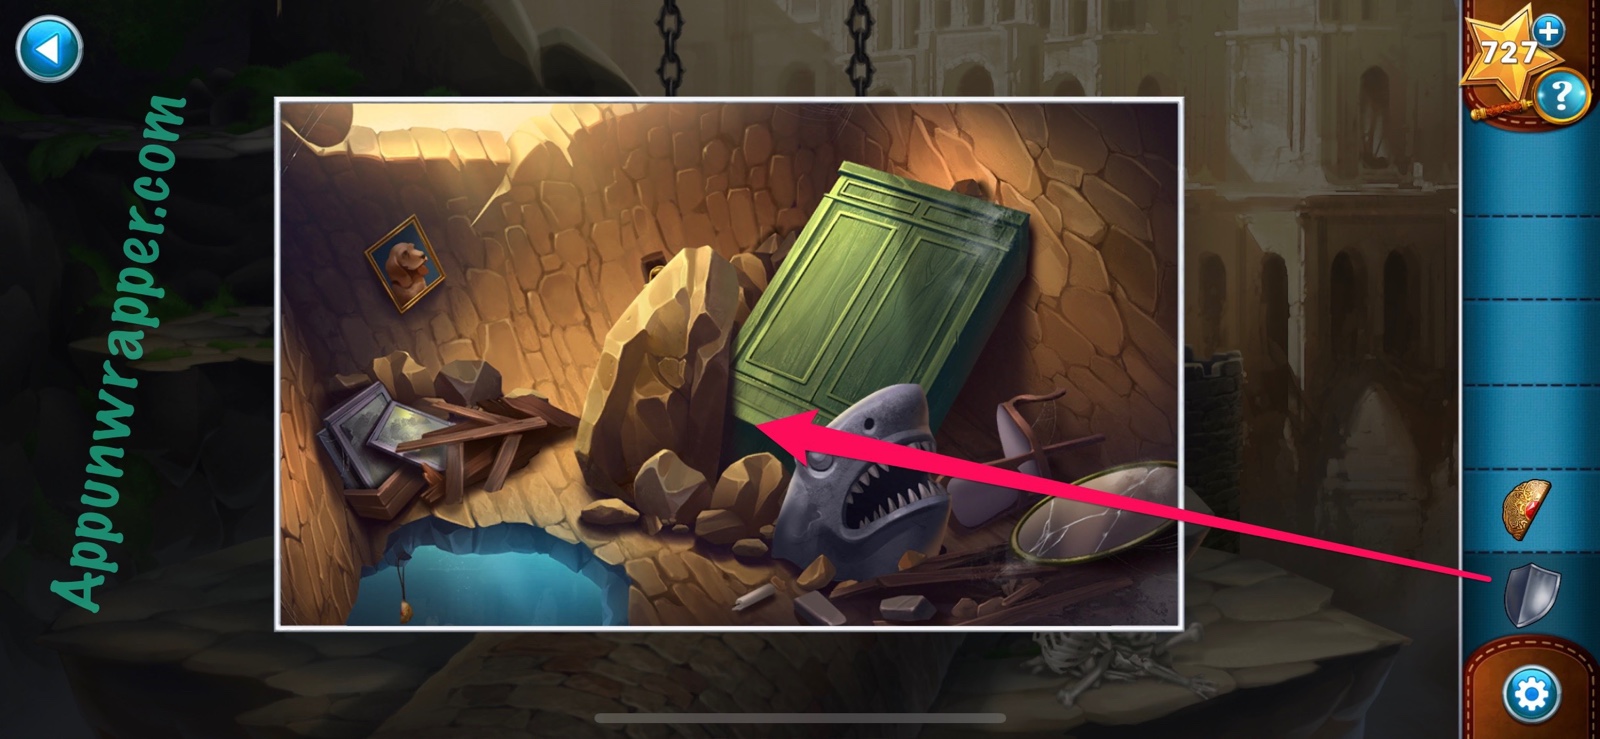
6. Look inside the tower. Use the shield to move the big stone out of the way. Then open the cupboard and take the umbrella.
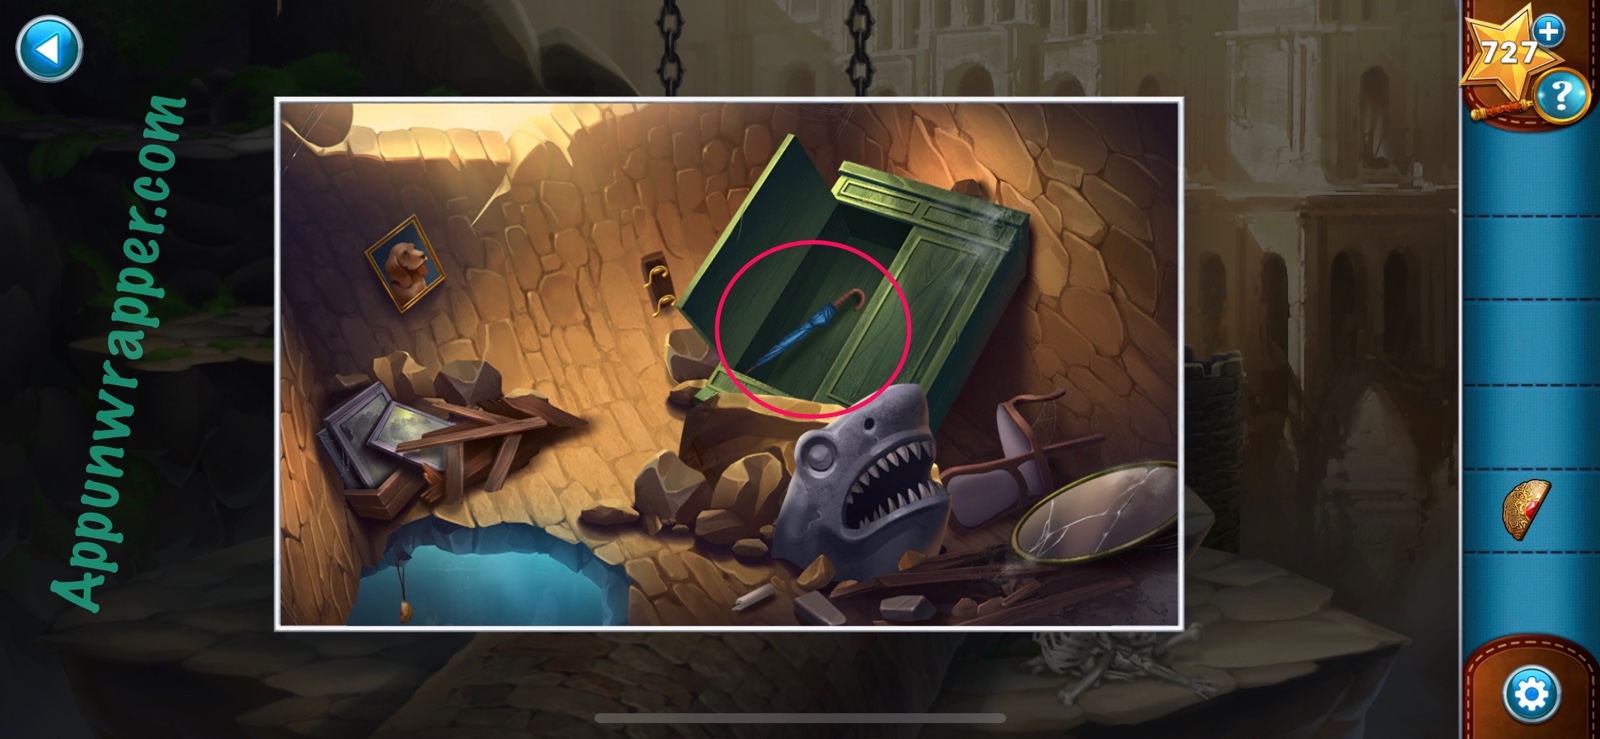
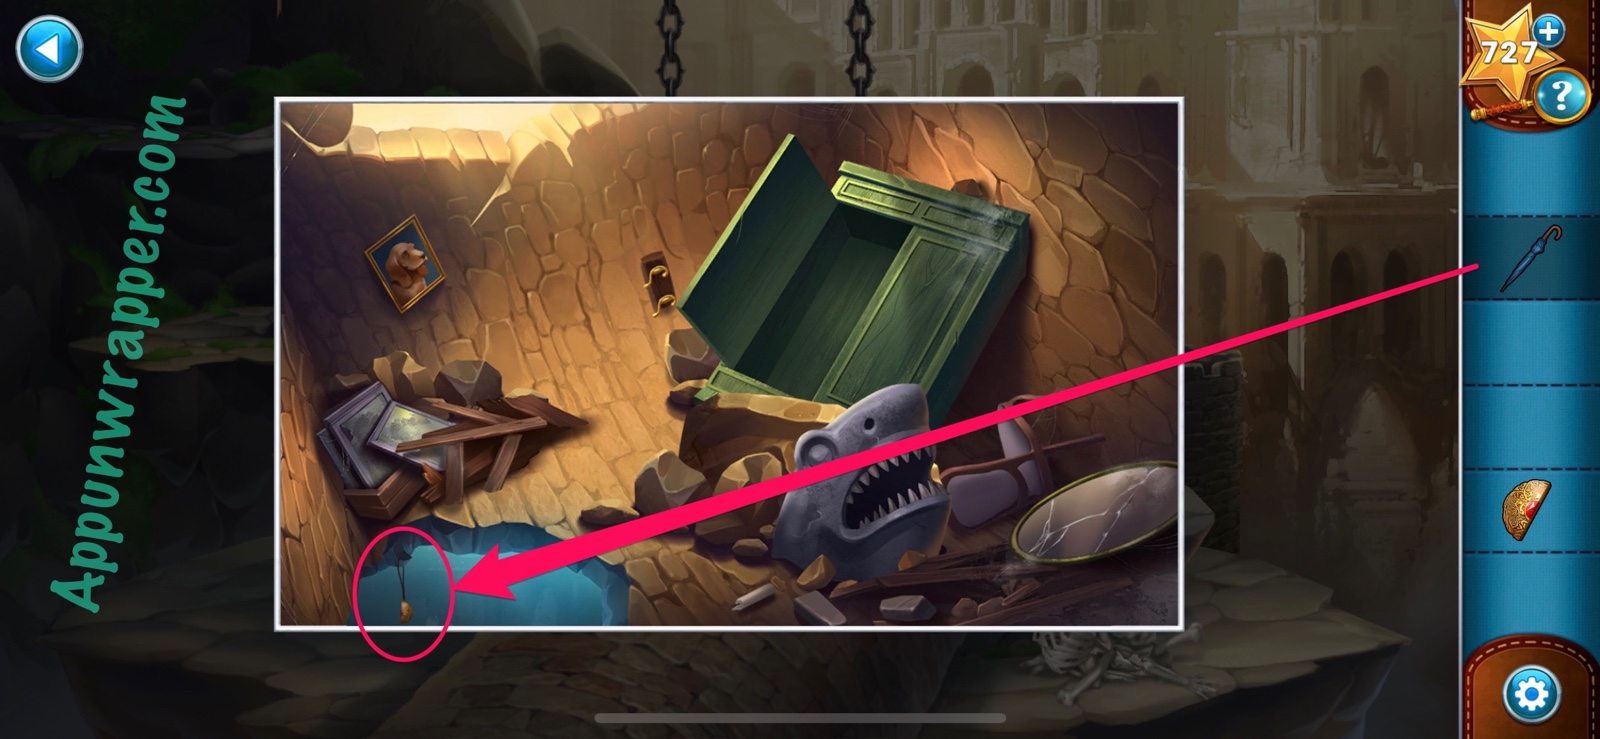
7. Use the umbrella to get the medallion half that’s hanging on a string.
8. Leave the tower. We now have both halves of the medallion. Place them in the round slot to access the elevator. But first, we need to solve a puzzle!
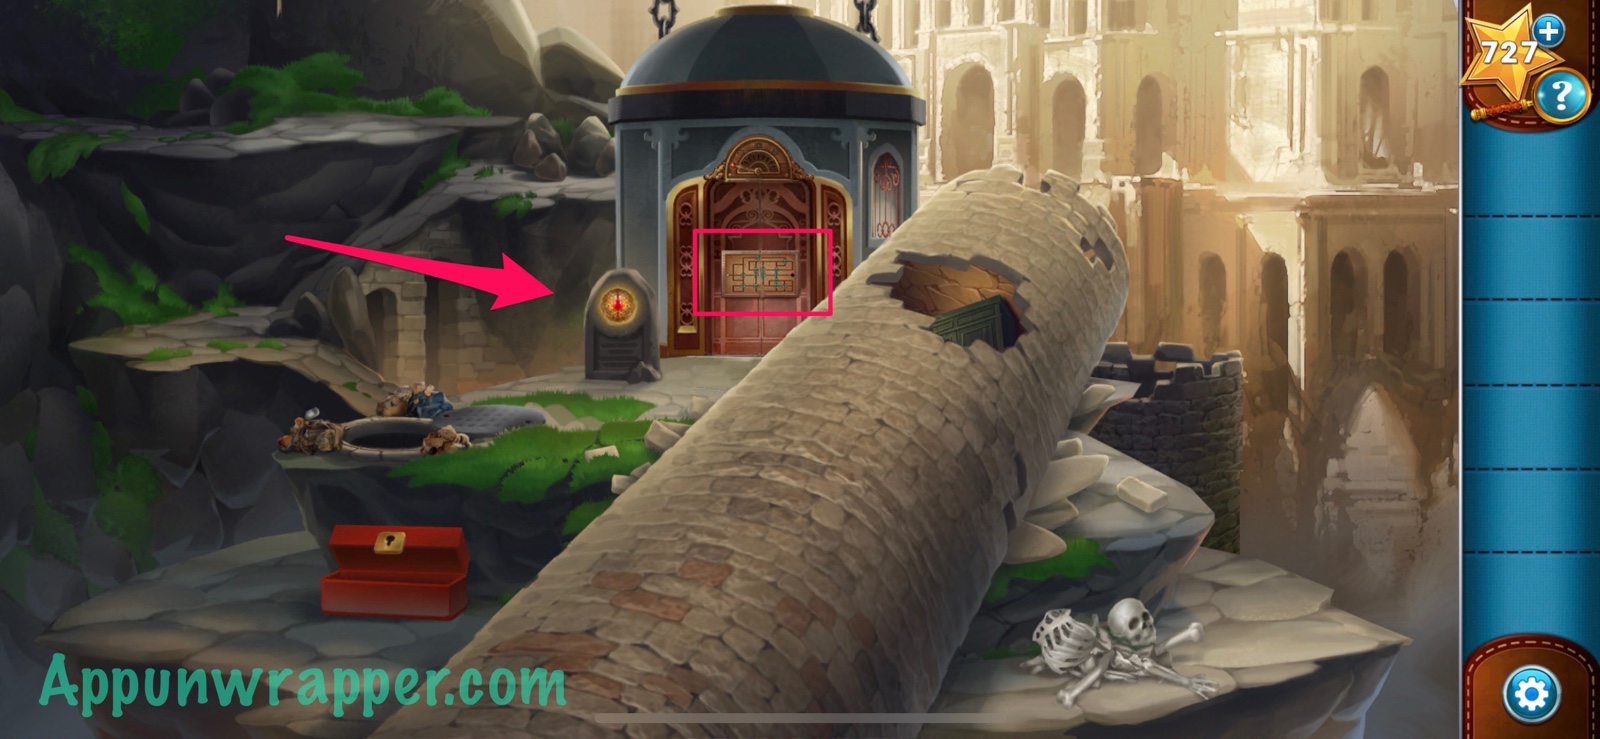
9. Let’s solve the Turners Puzzle. Drag the ball the track to the slot on the right. The blue turners rotate after the ball travels through them, changing the track.
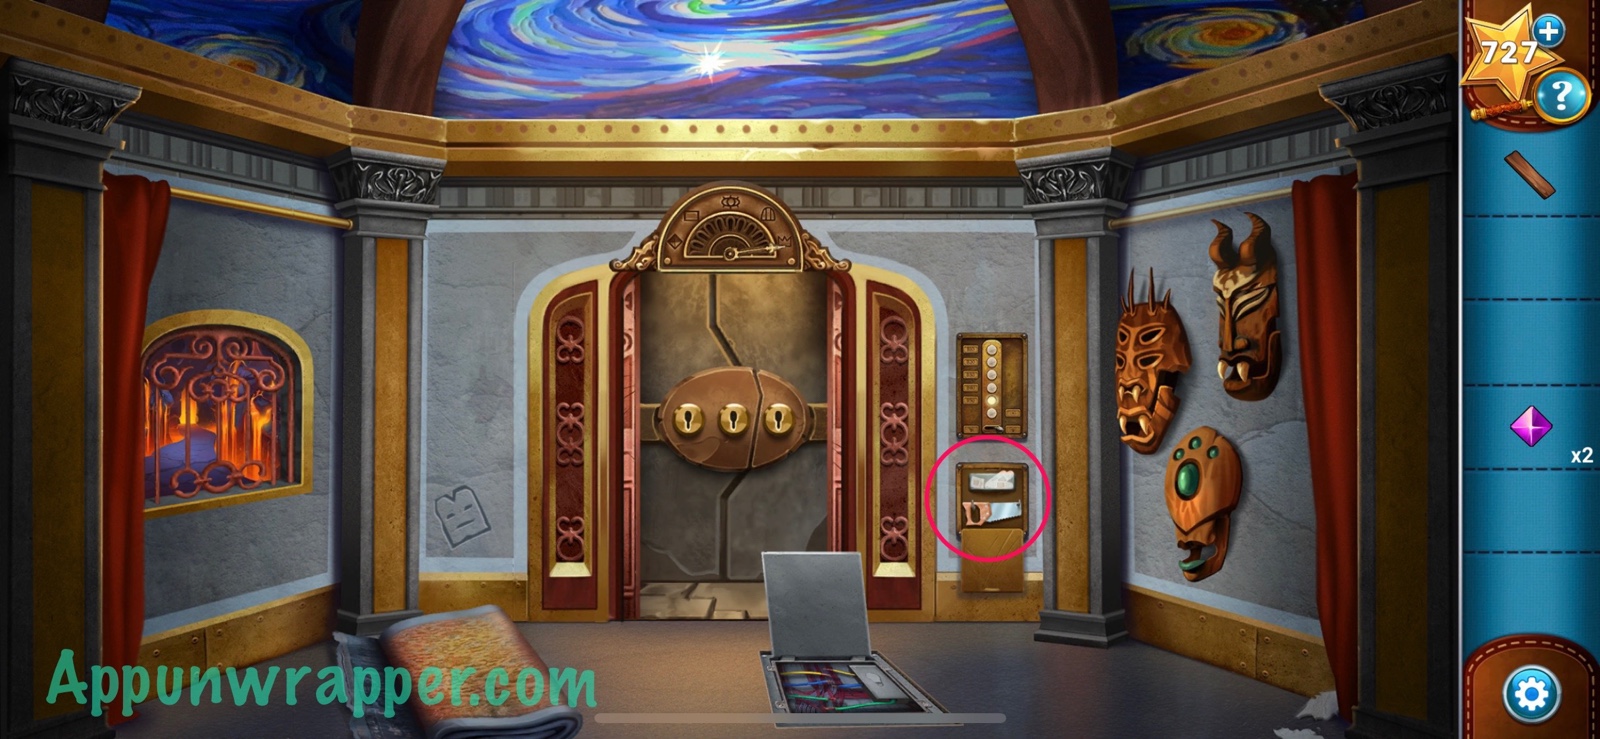
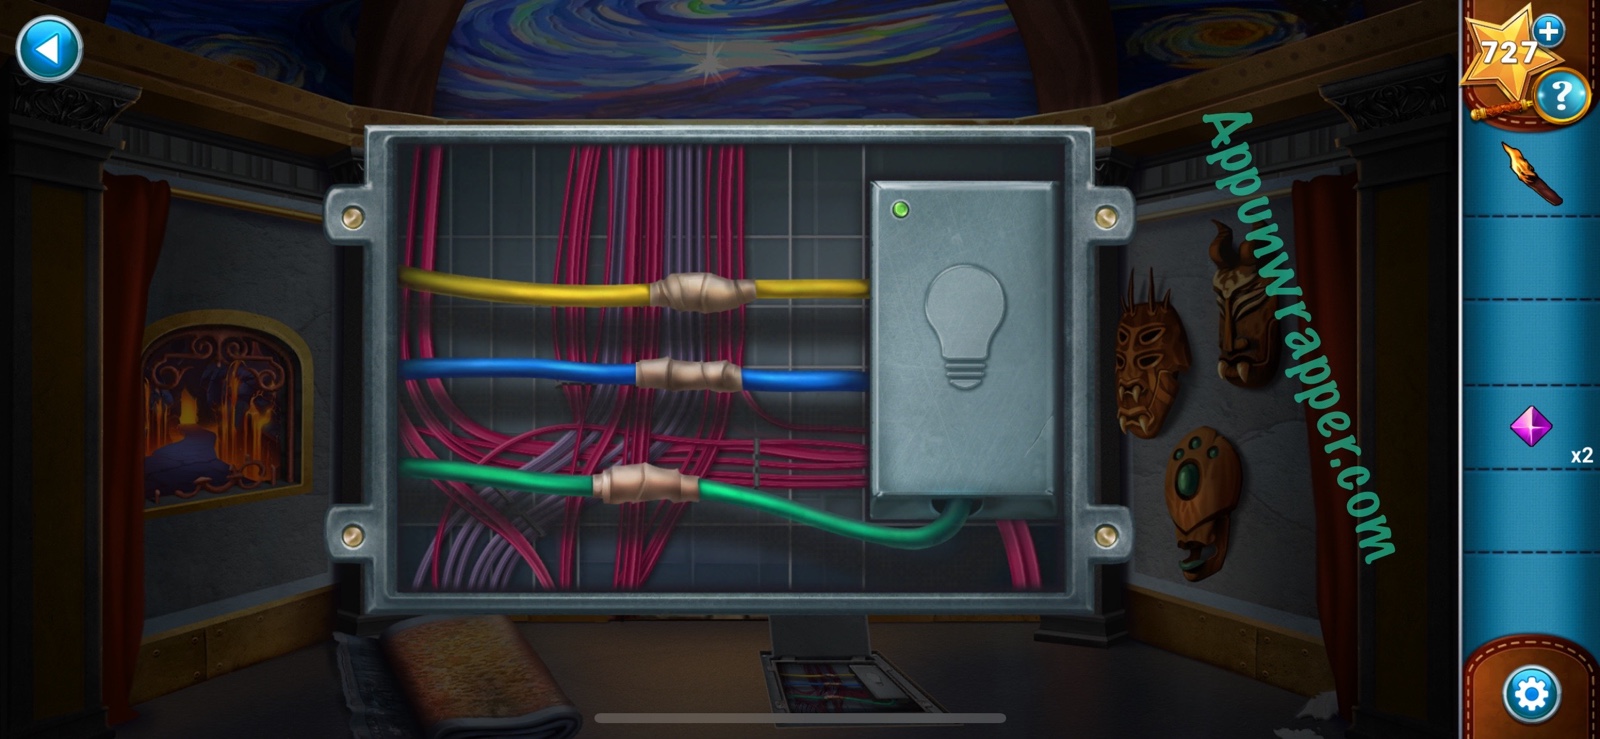
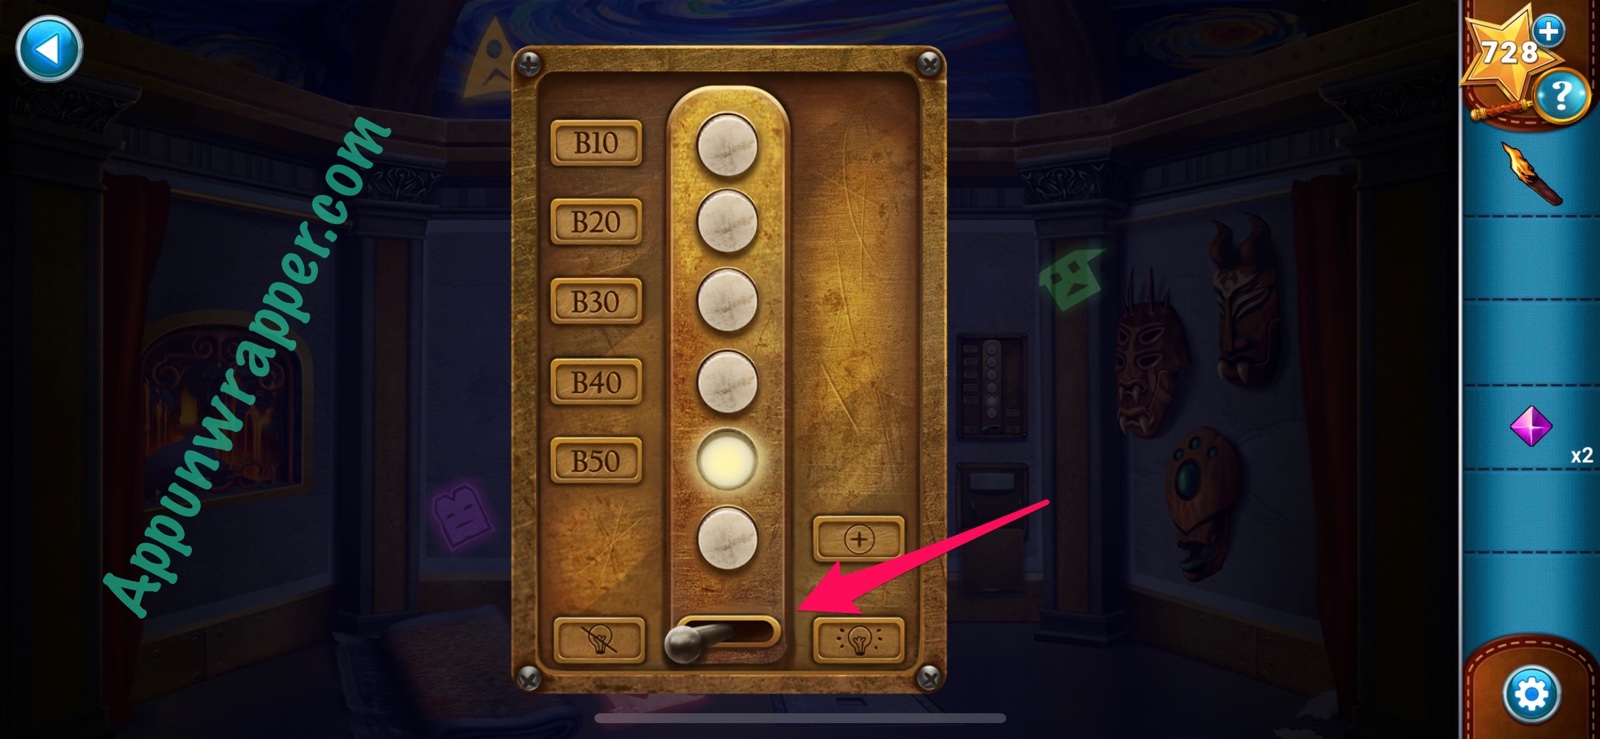
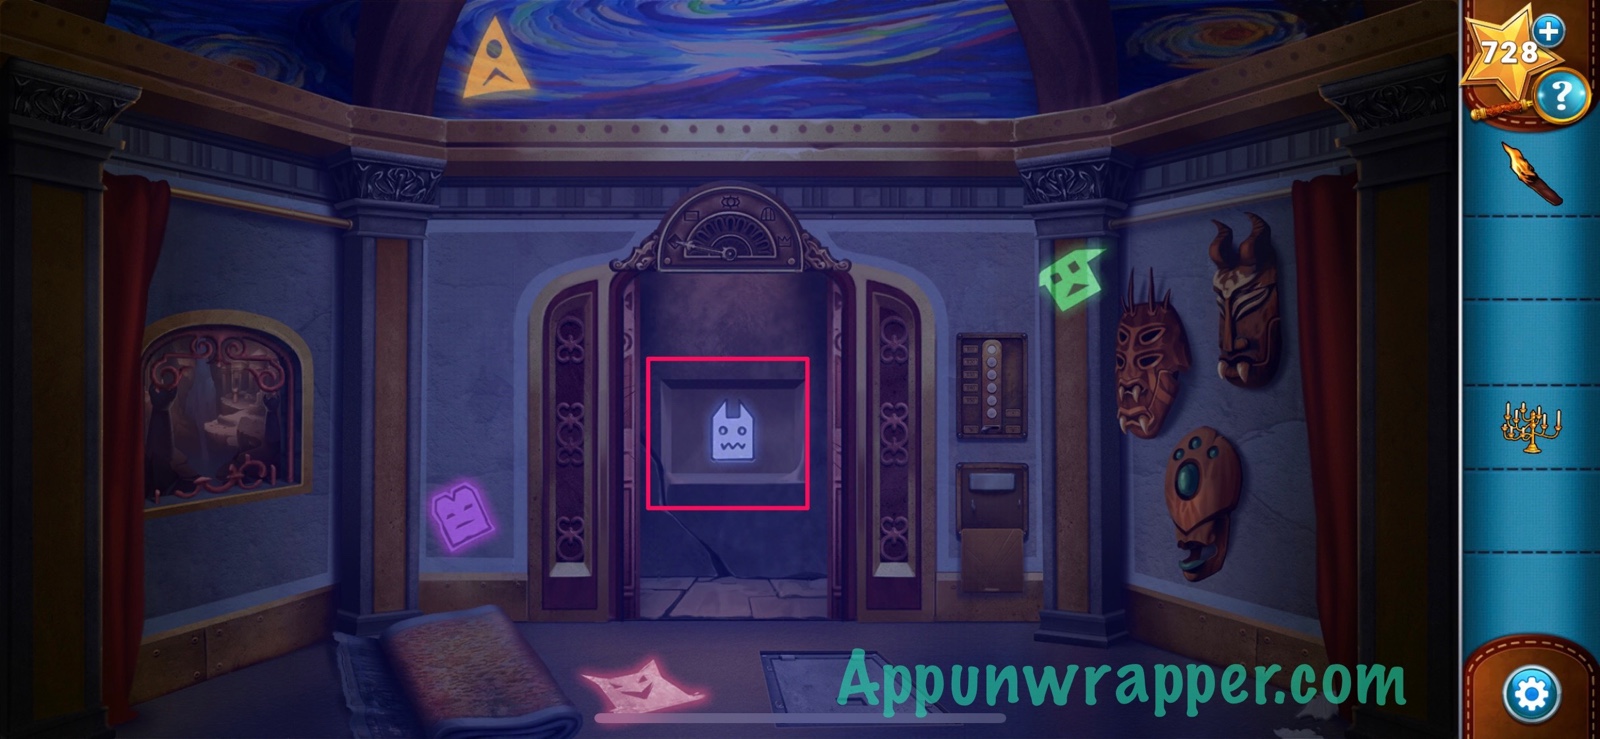
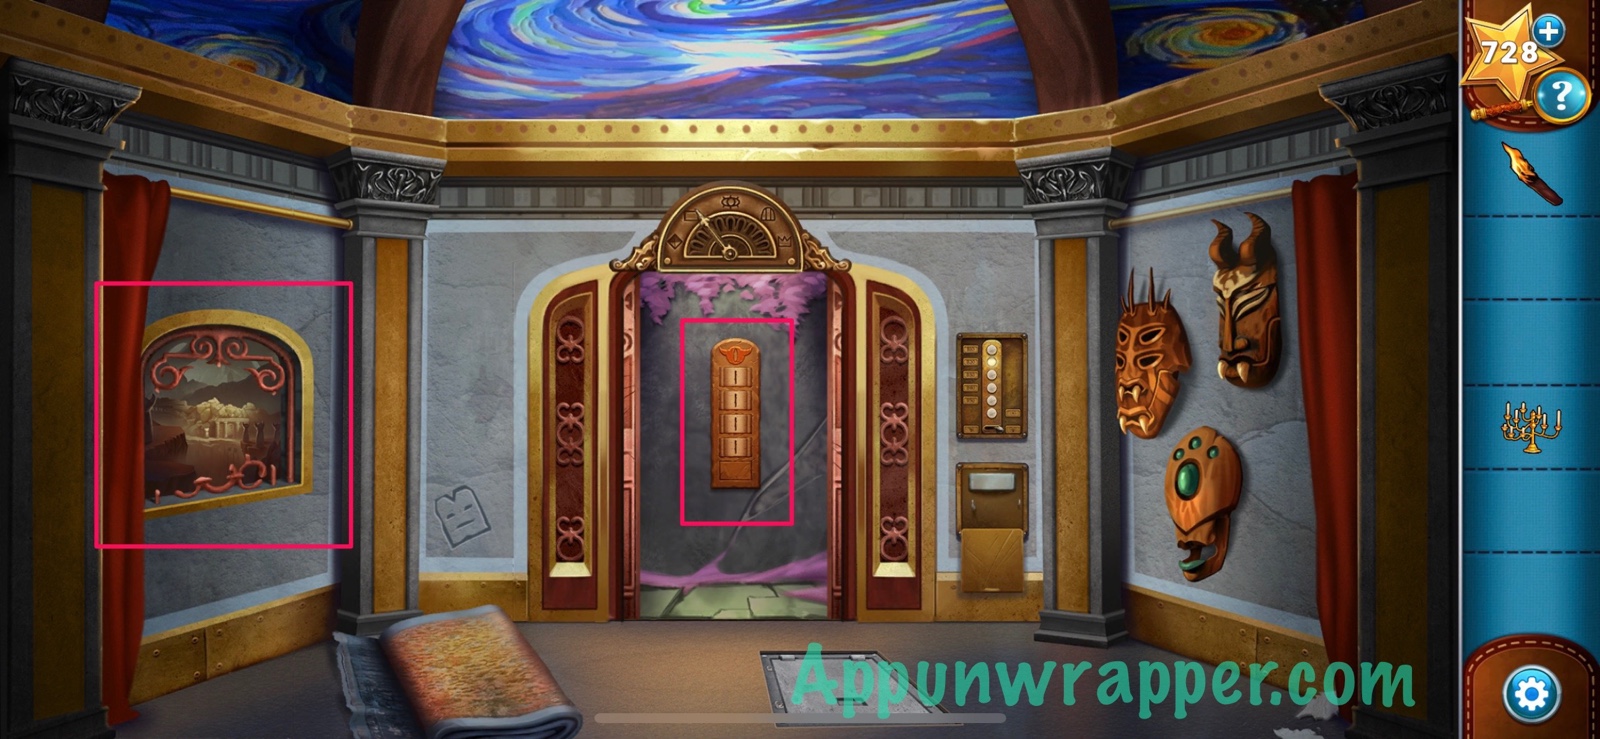
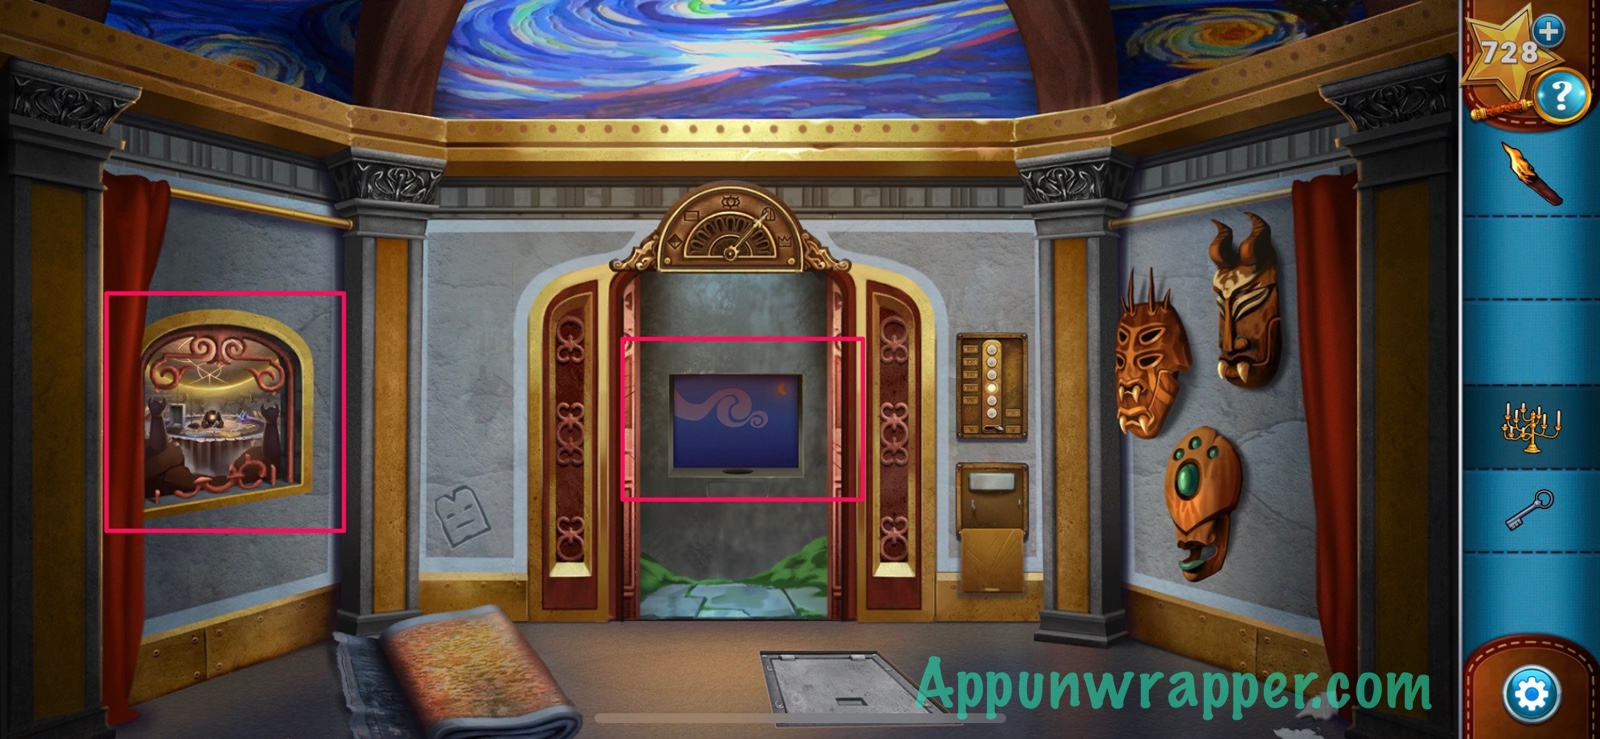
10. Now we’re in the elevator and have to solve a bunch of puzzles. First, move the curtains and rug aside. Then grab the wooden plank. Open the bottom mask mouth to get a gemstone. Grab another gemstone from above the elevator doors. Also, open the panel on the floor to see some broken wires. And look at the ceiling mural and the elevator buttons.
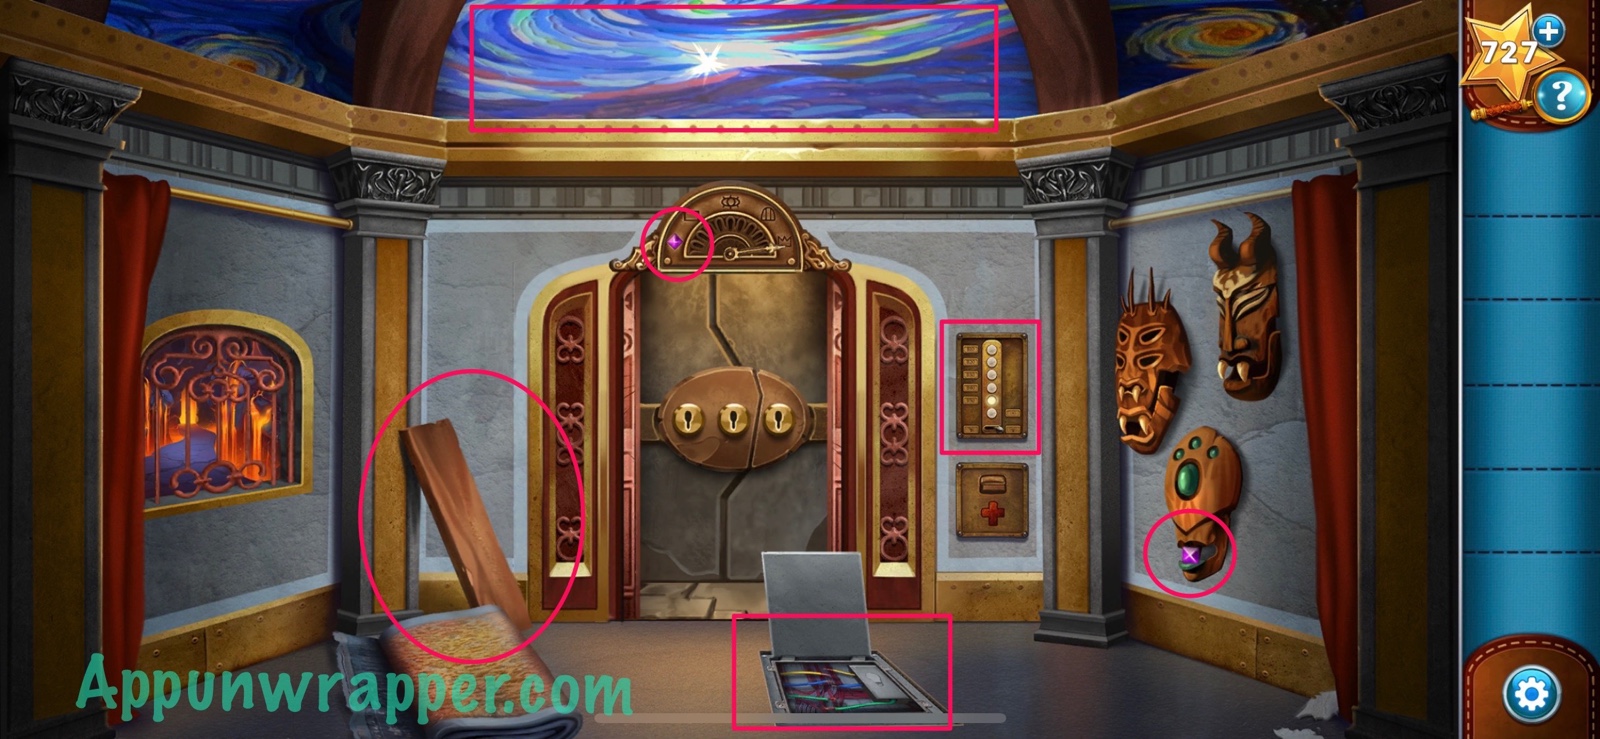
11. On the elevator button panel, press the button with a + on it to open the first aid cabinet.
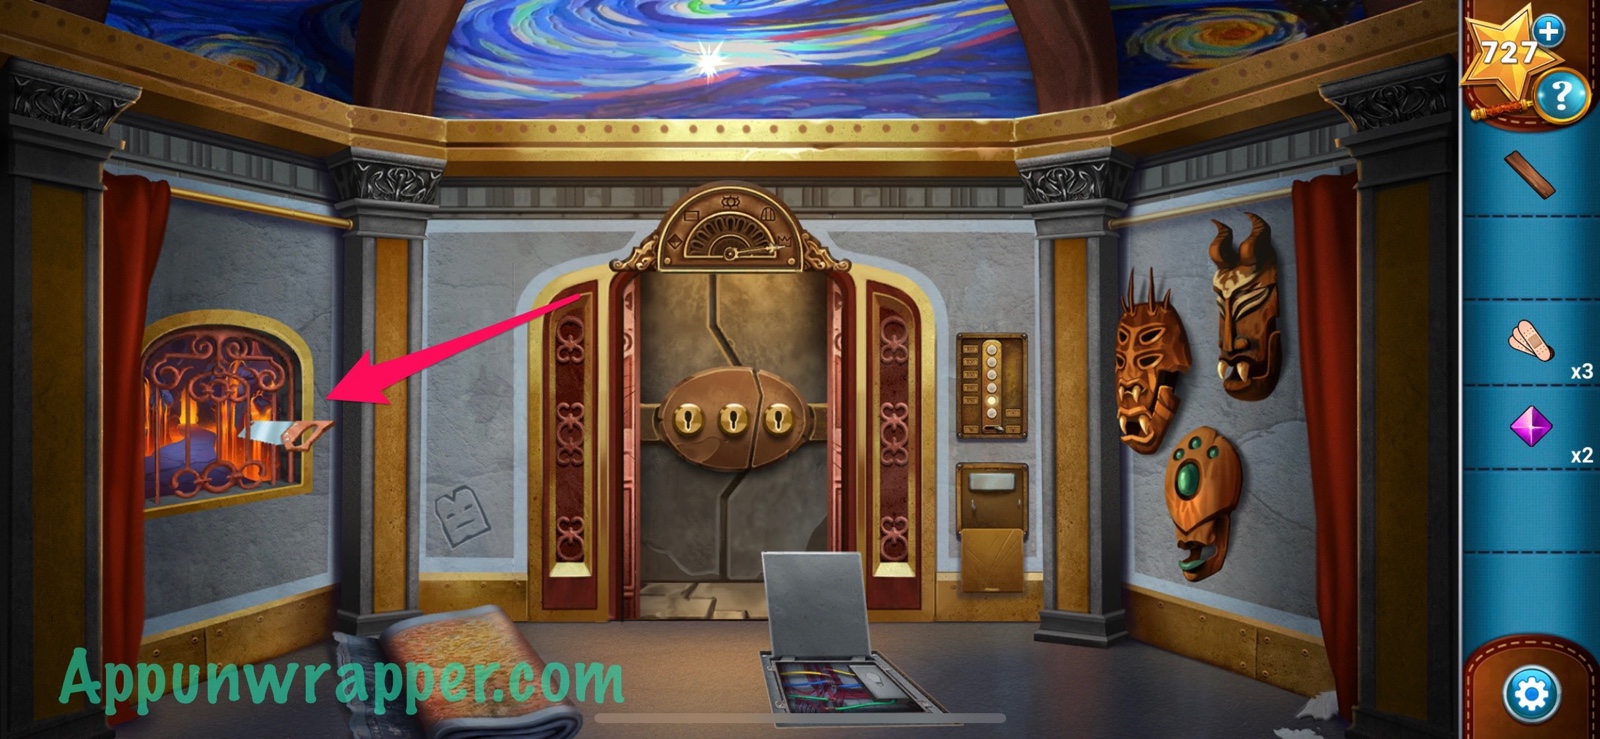
12. Take the bandages and hand saw from the first aid cabinet.
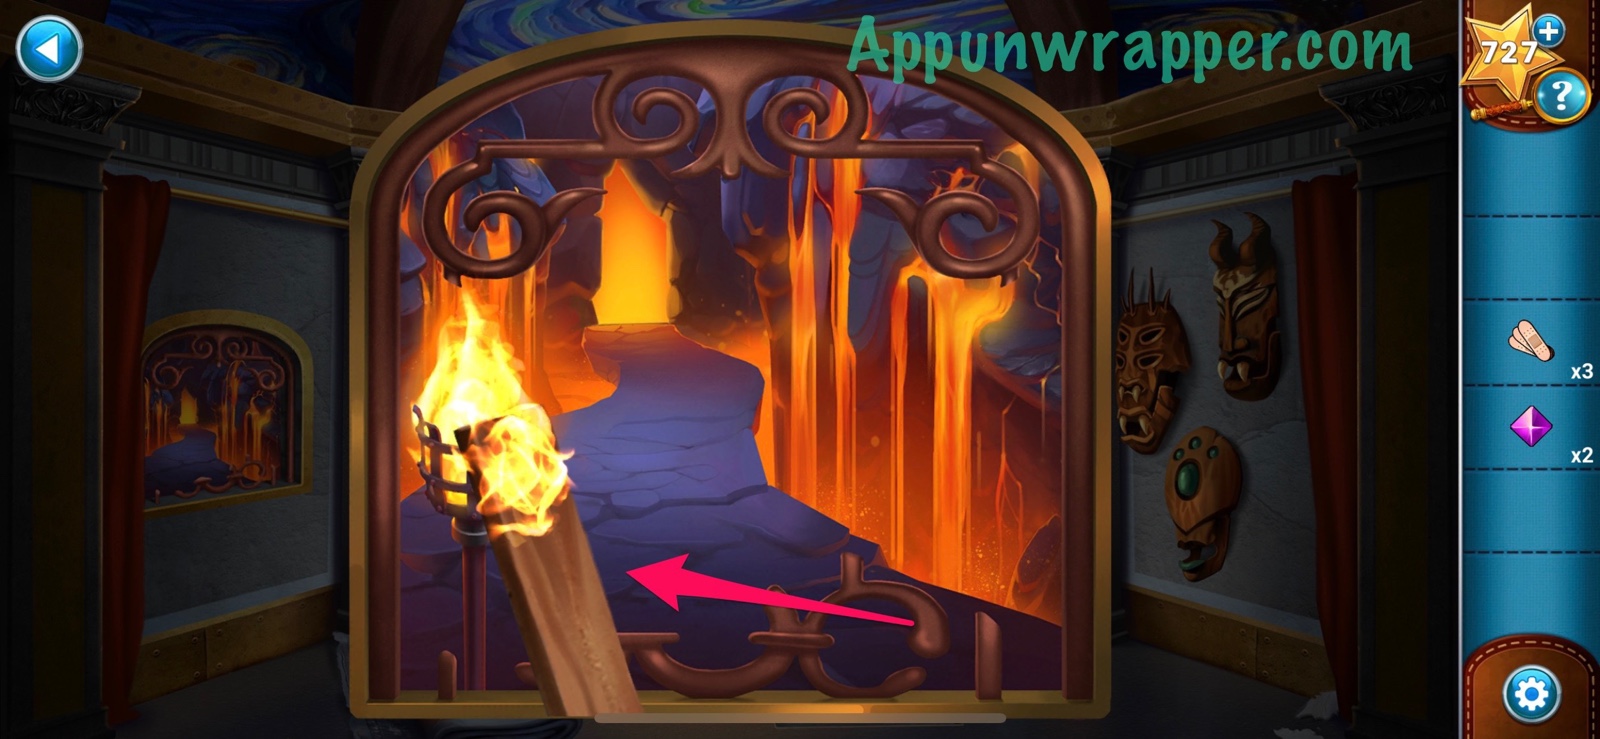
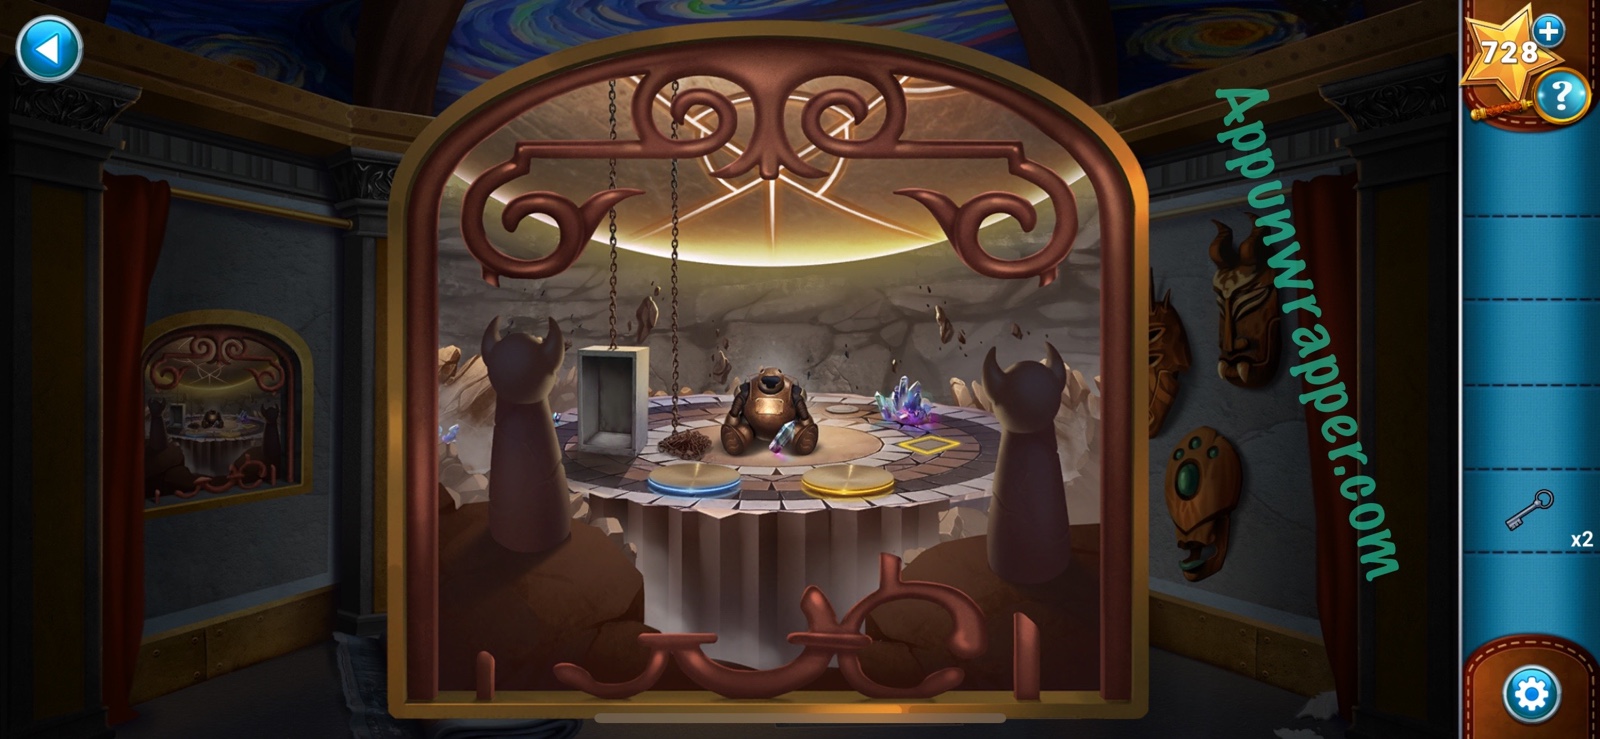
13. Use the hand saw to cut through the bars on the left and then take a look. Use the plank with the torch to get a burning plank.
14. Look at the broken wires again. Use the bandages to patch up the wires. Now the light controls should be fixed.
15. Now we can turn off the lights. Look at the elevator panel again and flip the switch at the bottom to turn off the lights.
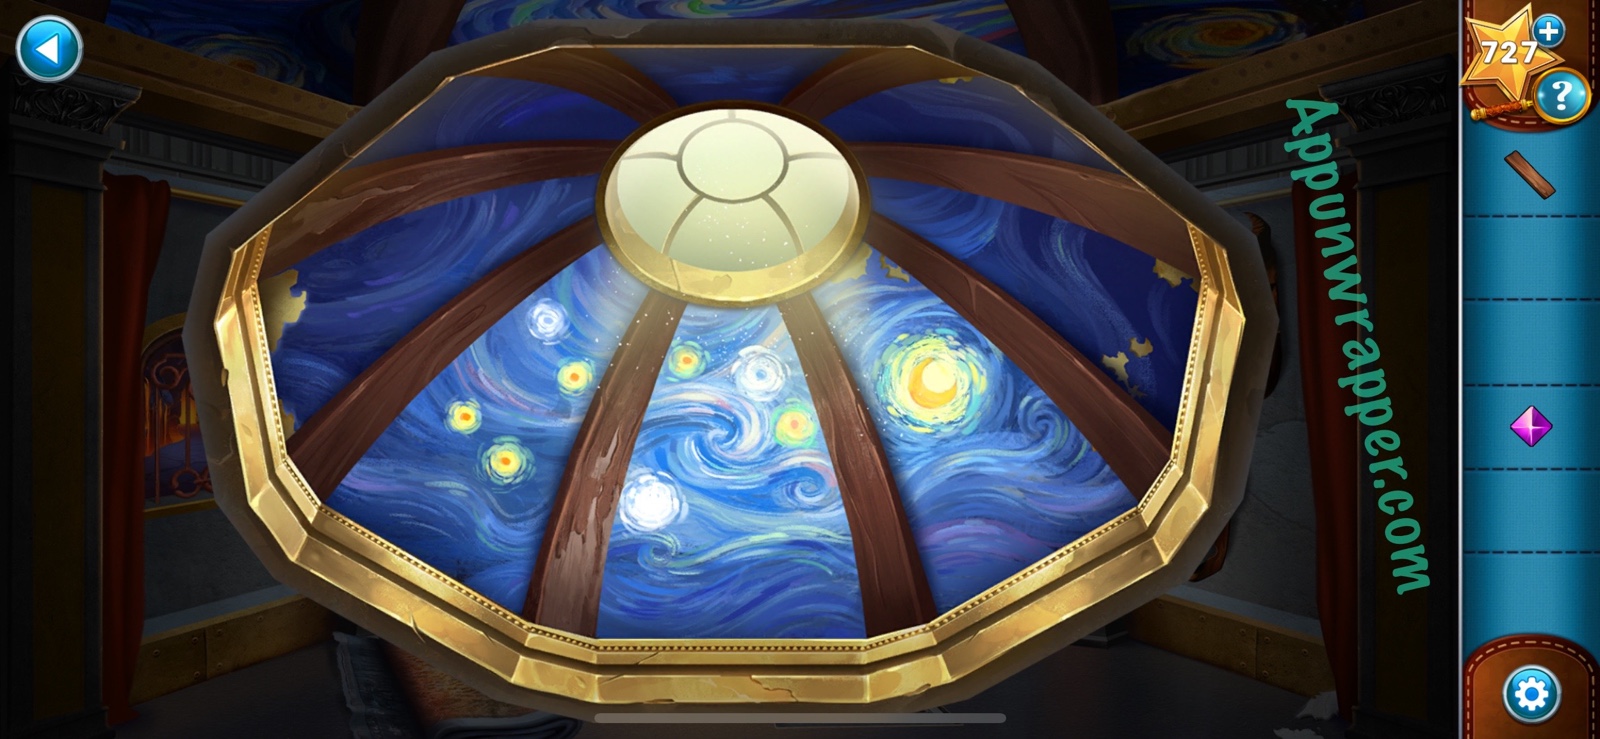
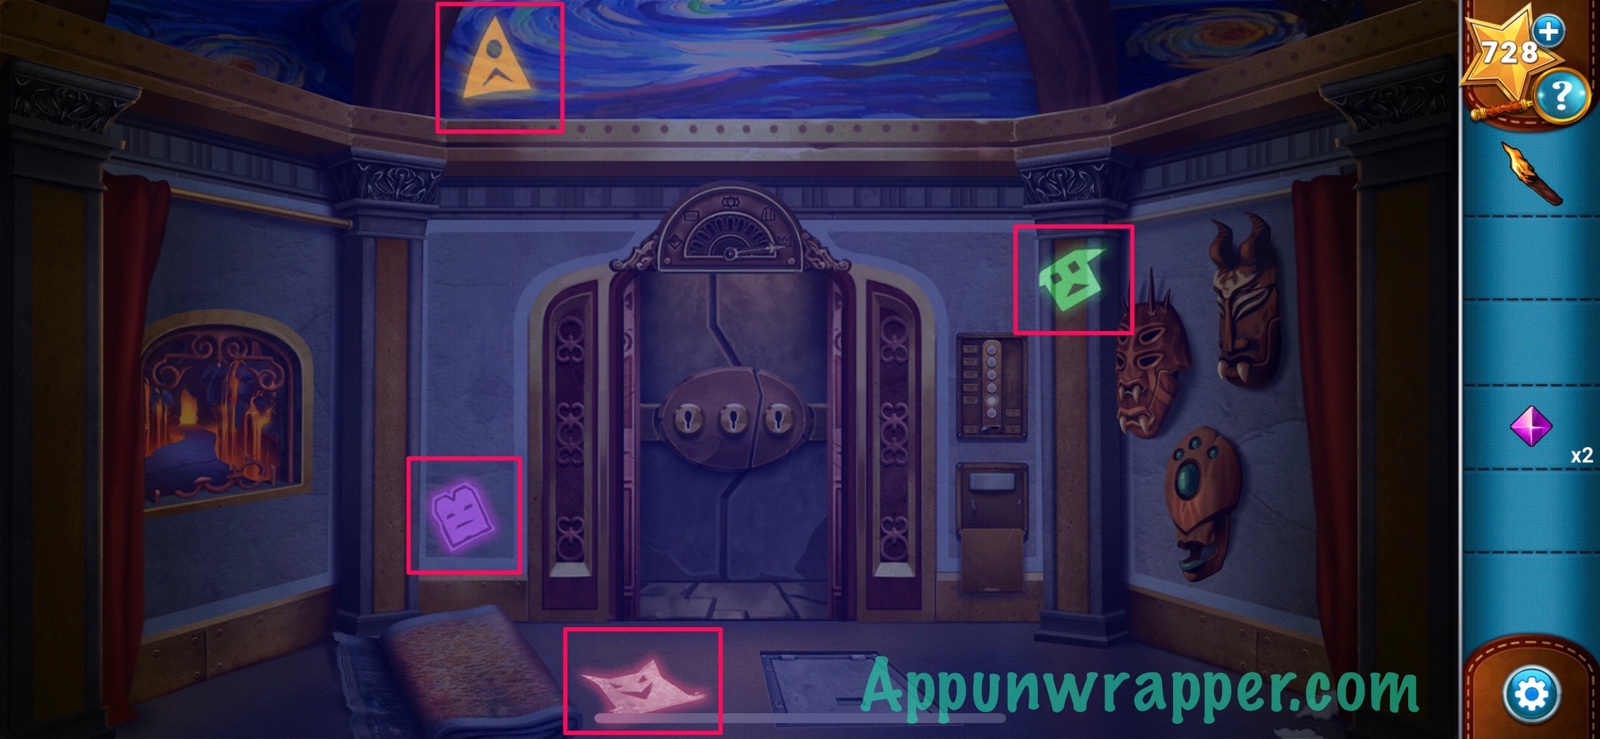
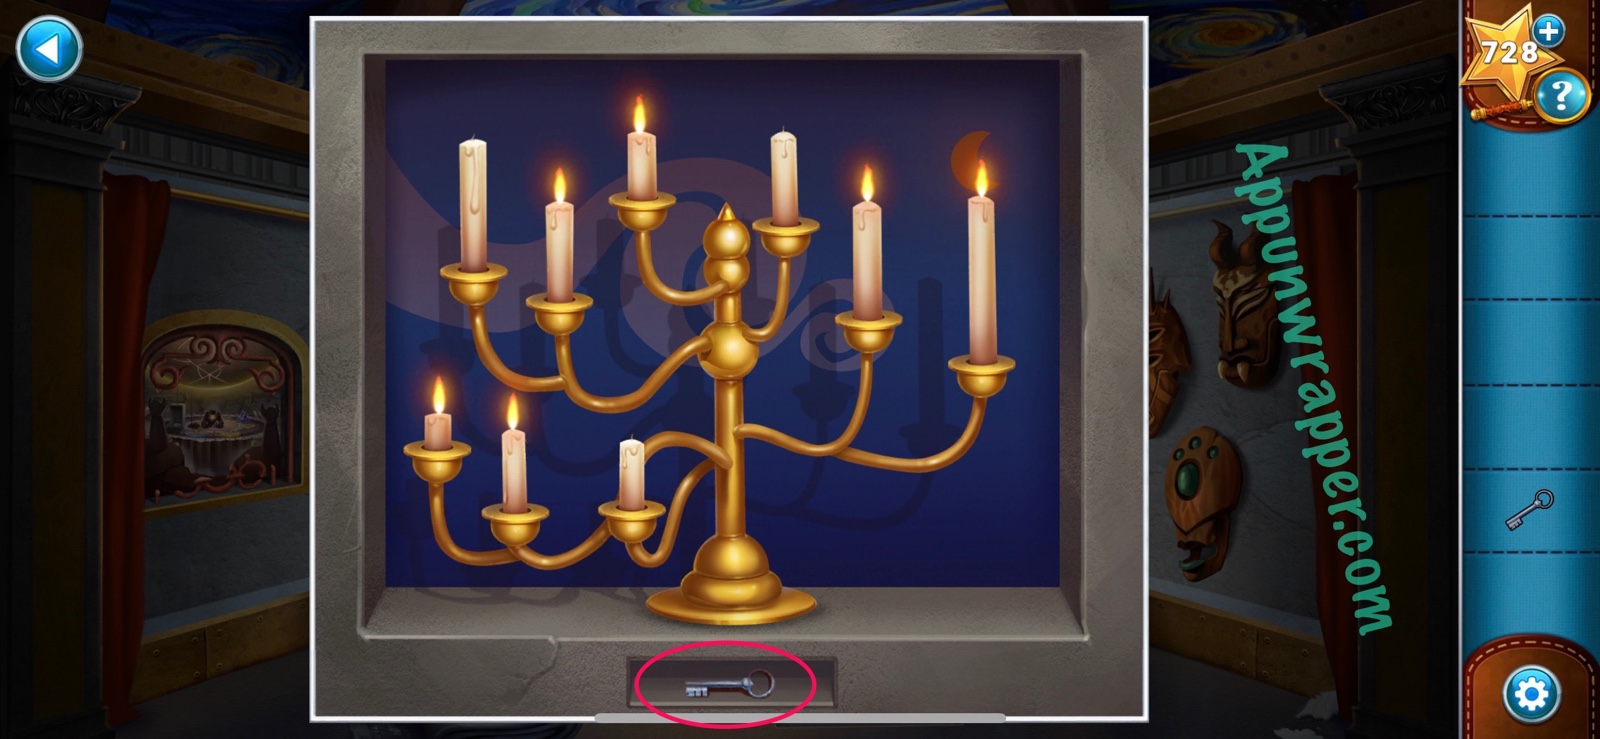
16. Now look around the room and make note of the different glow-in-the-dark faces.
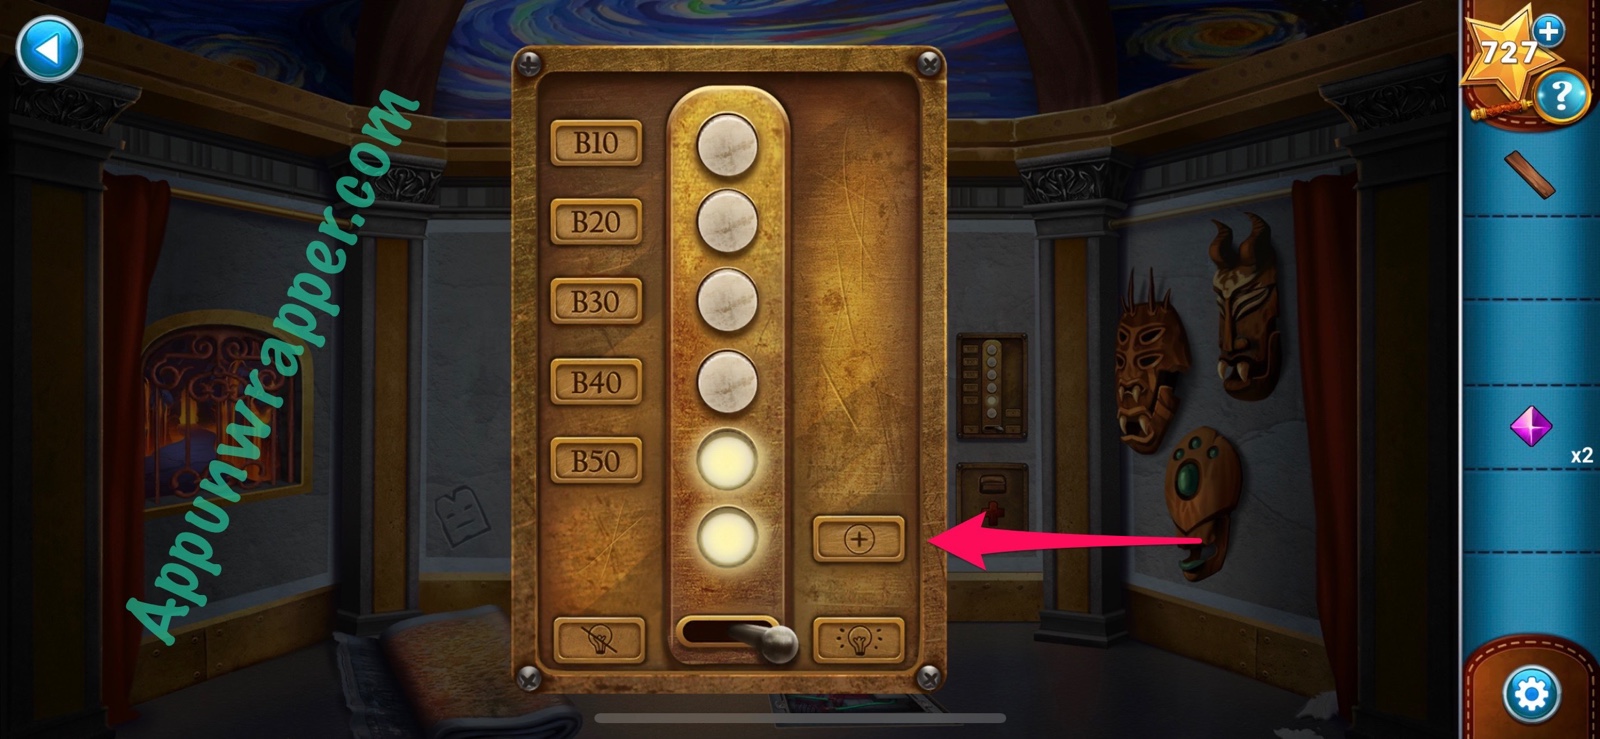
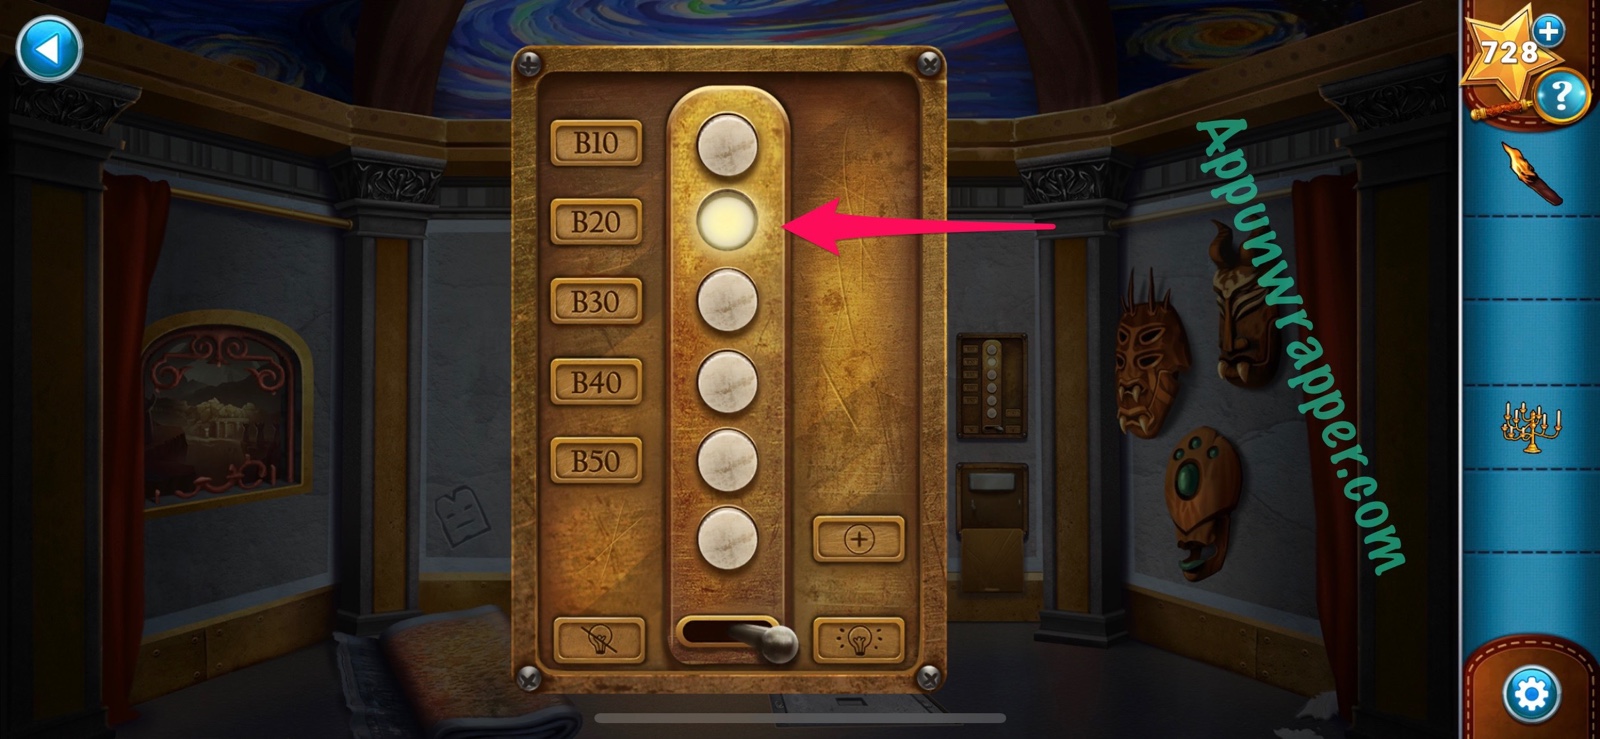
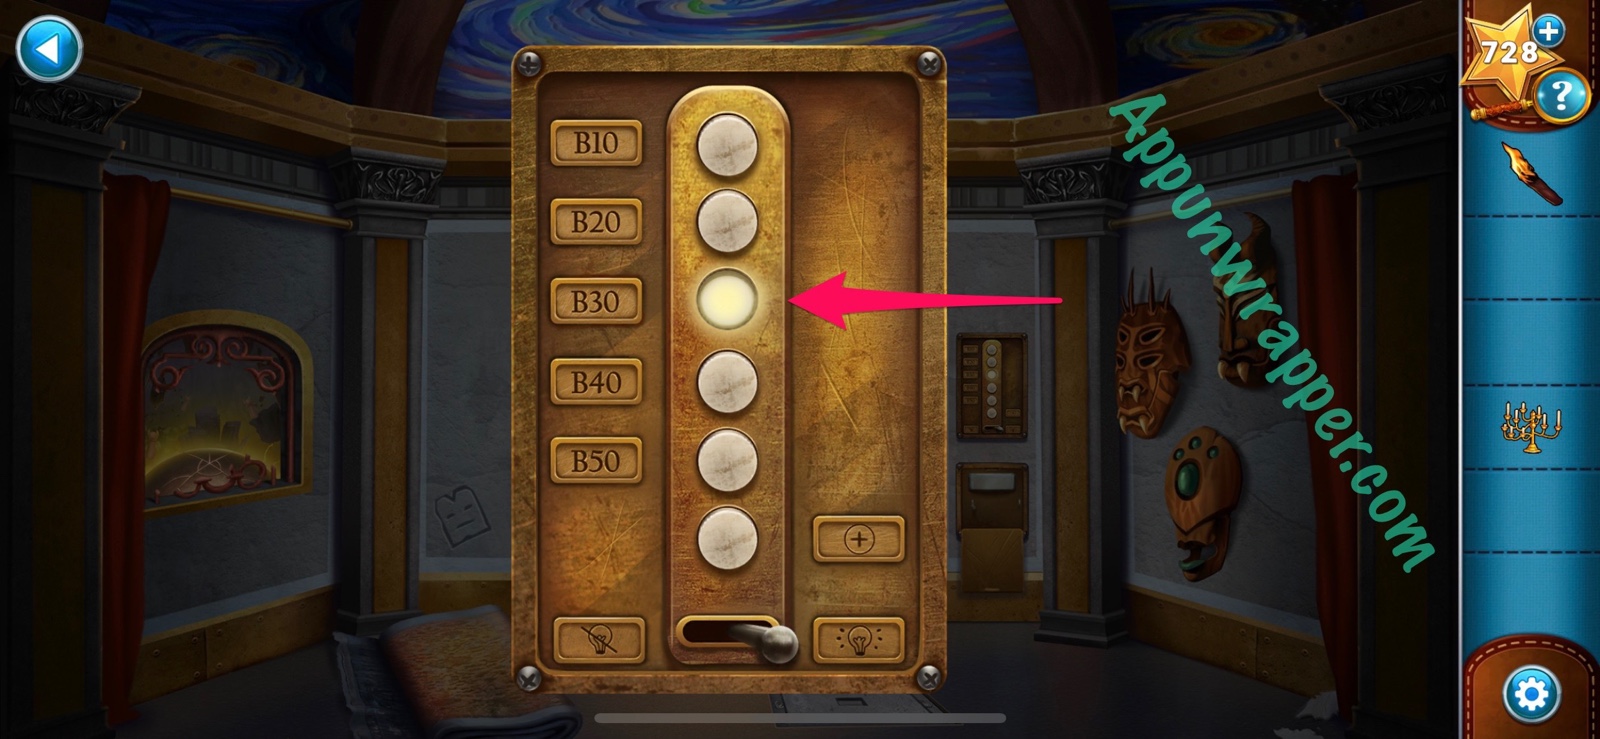
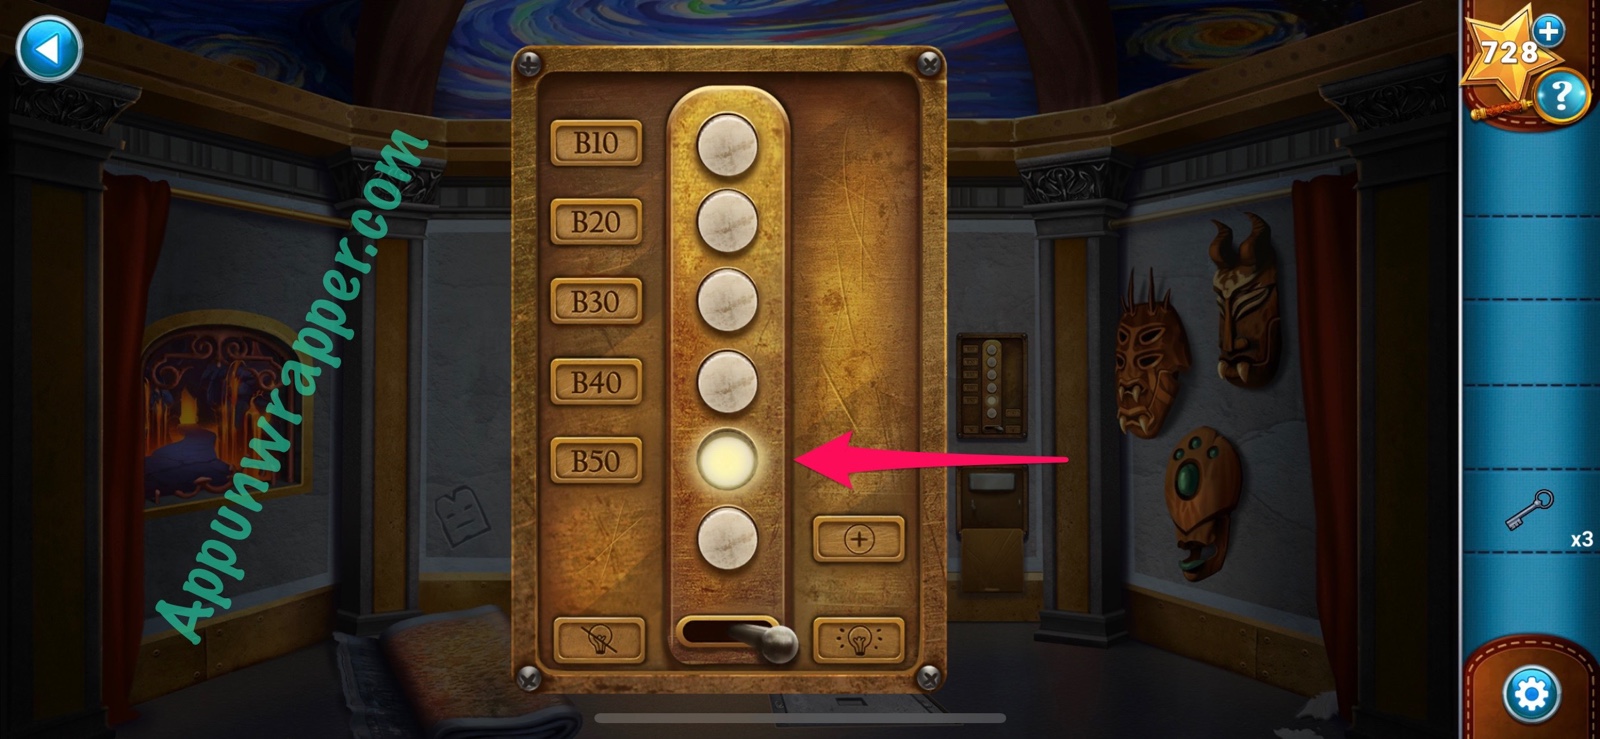
17. Turn the lights back on. Press the elevator button to go to floor B10.

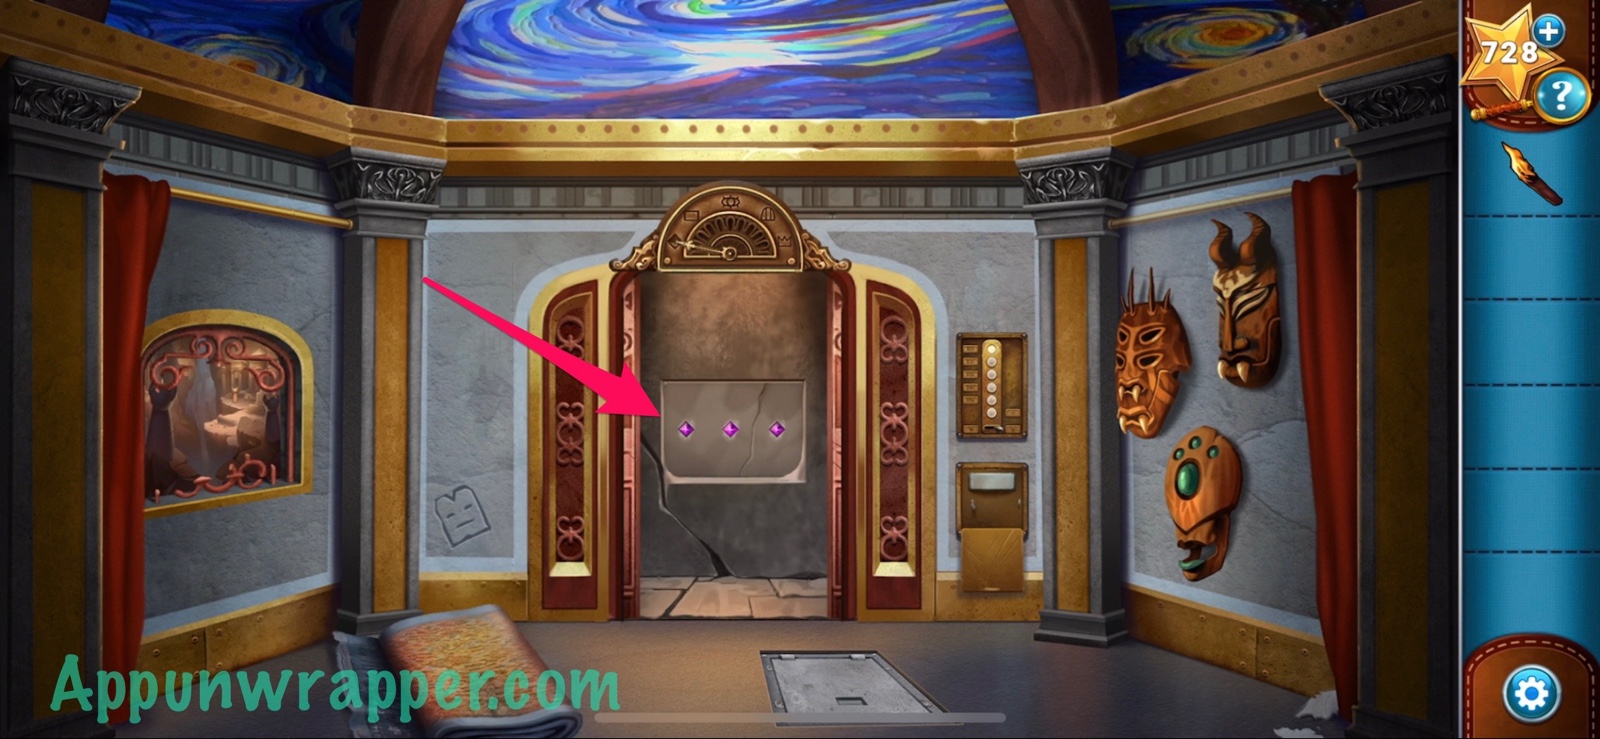
18. Place the other two gemstones in the slots next to the third and then take the candelabra. Also, notice the new face etching. Shut the light to see what color it is.
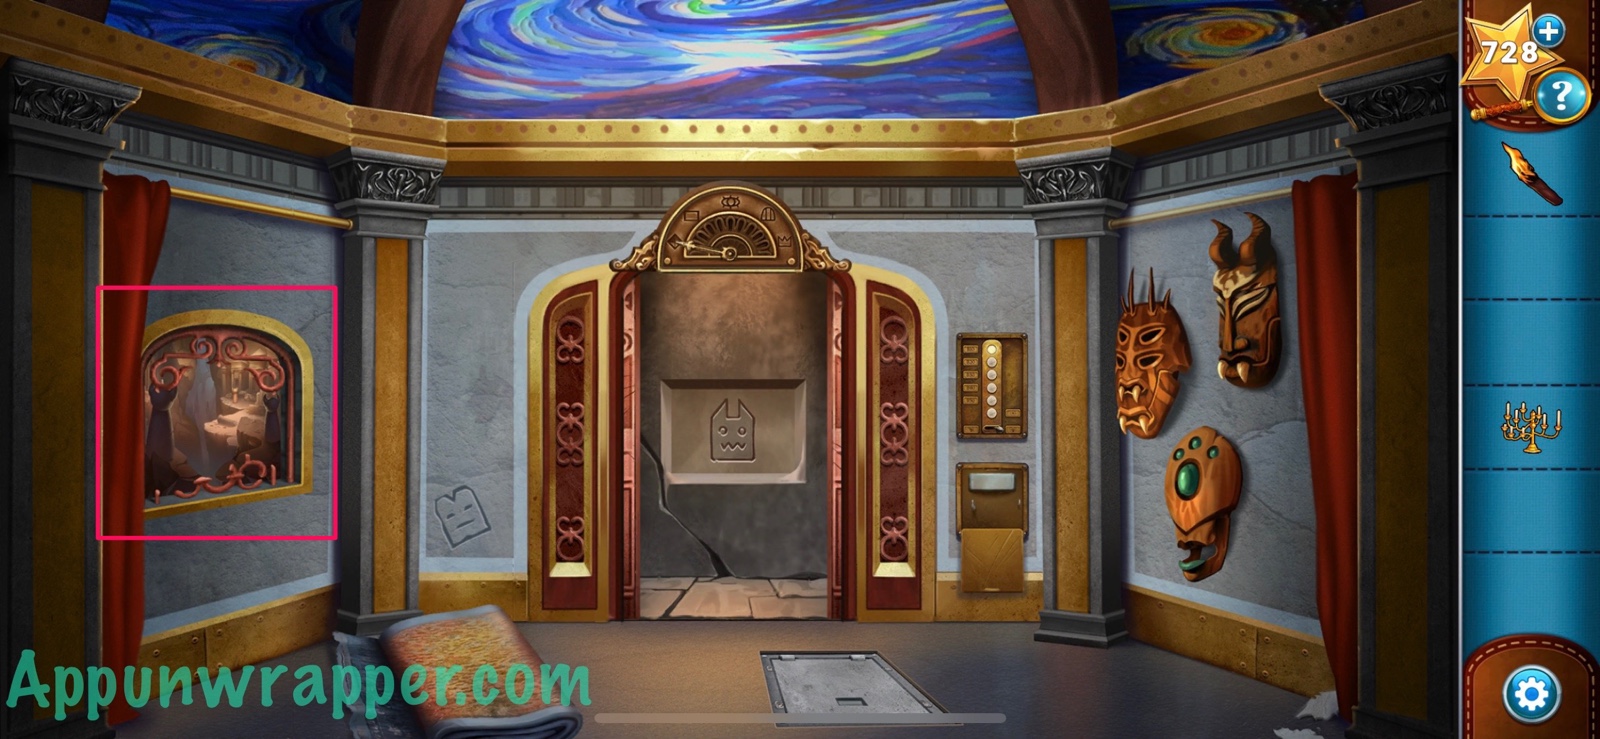
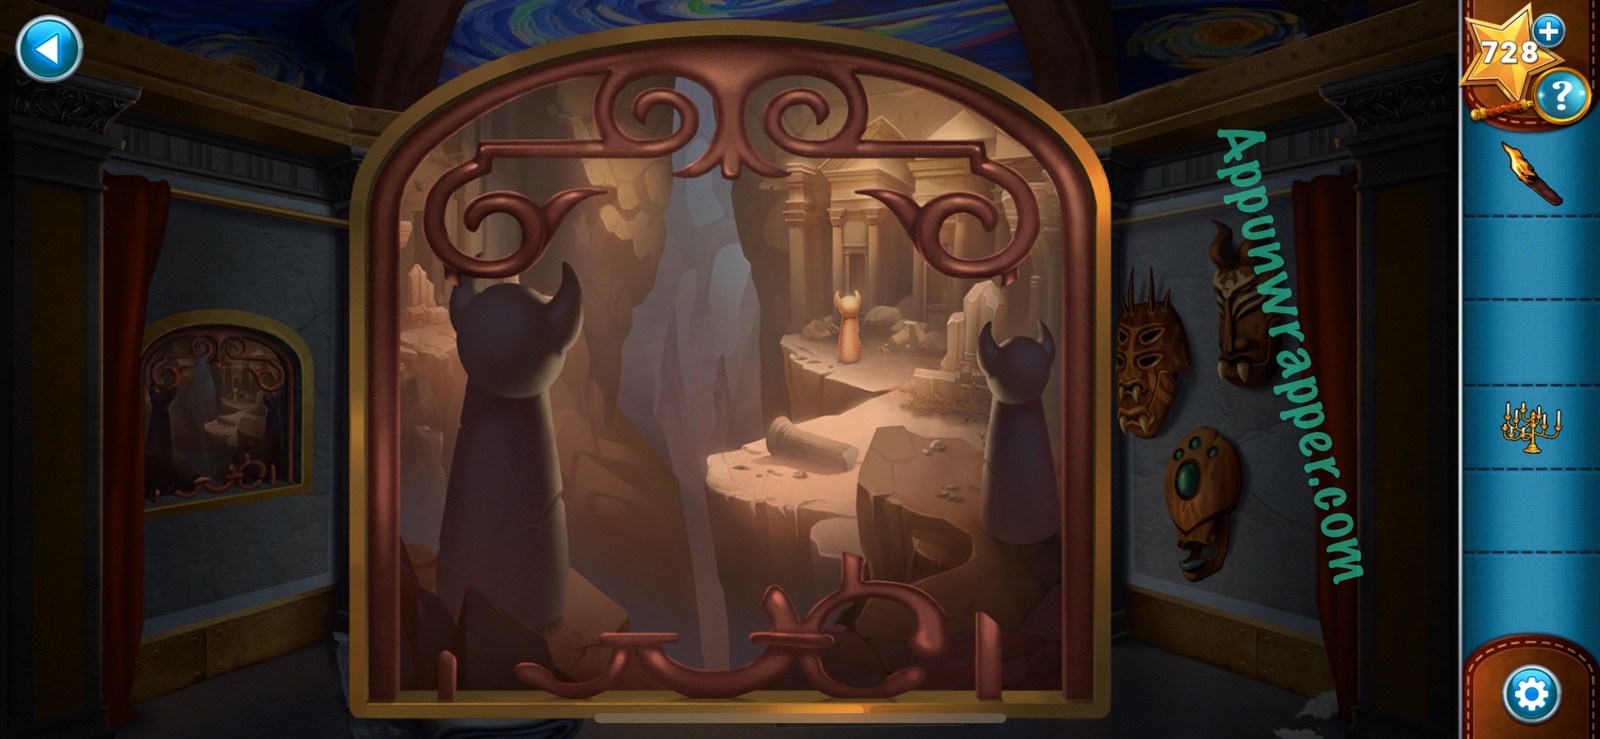
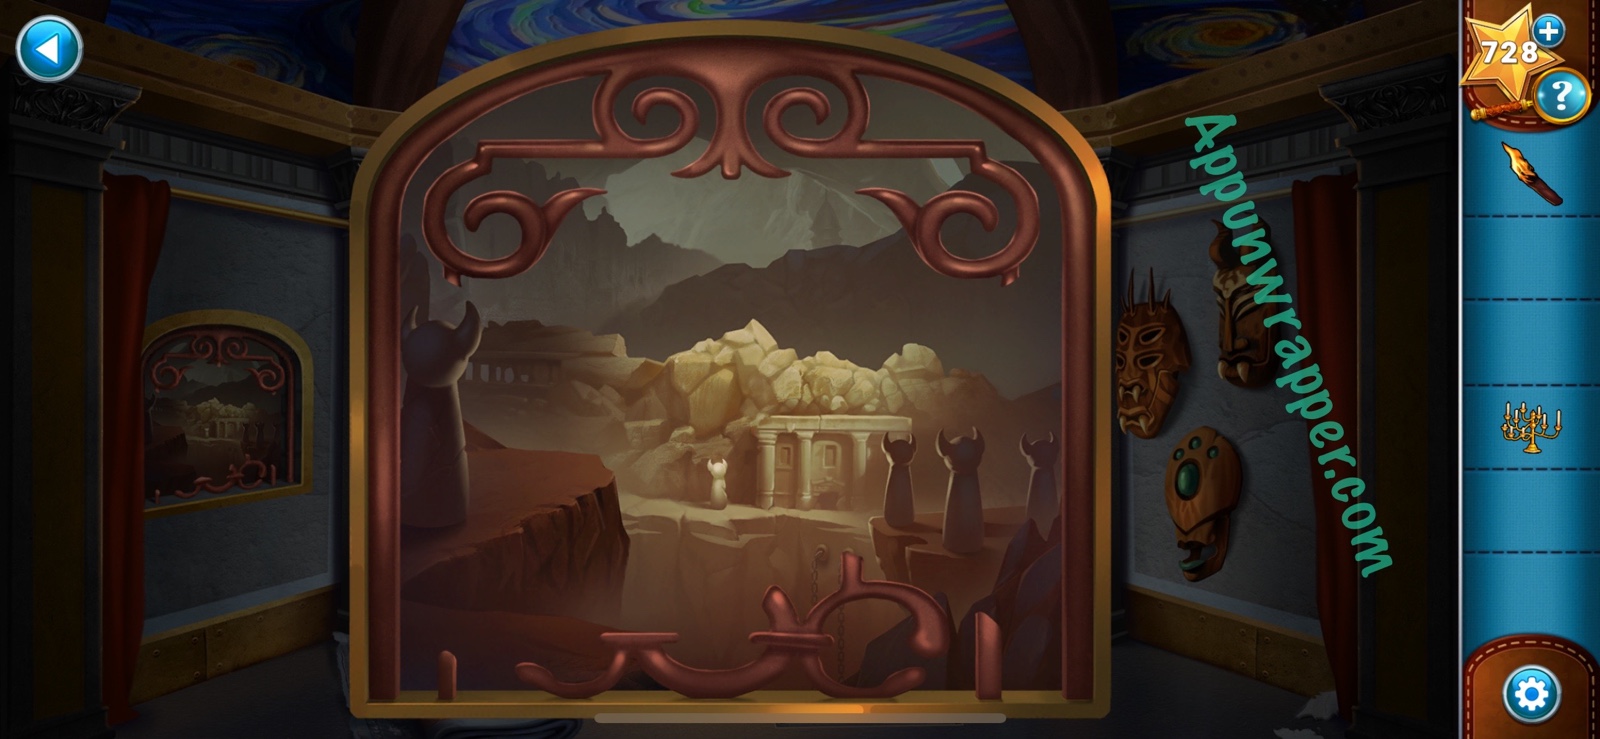
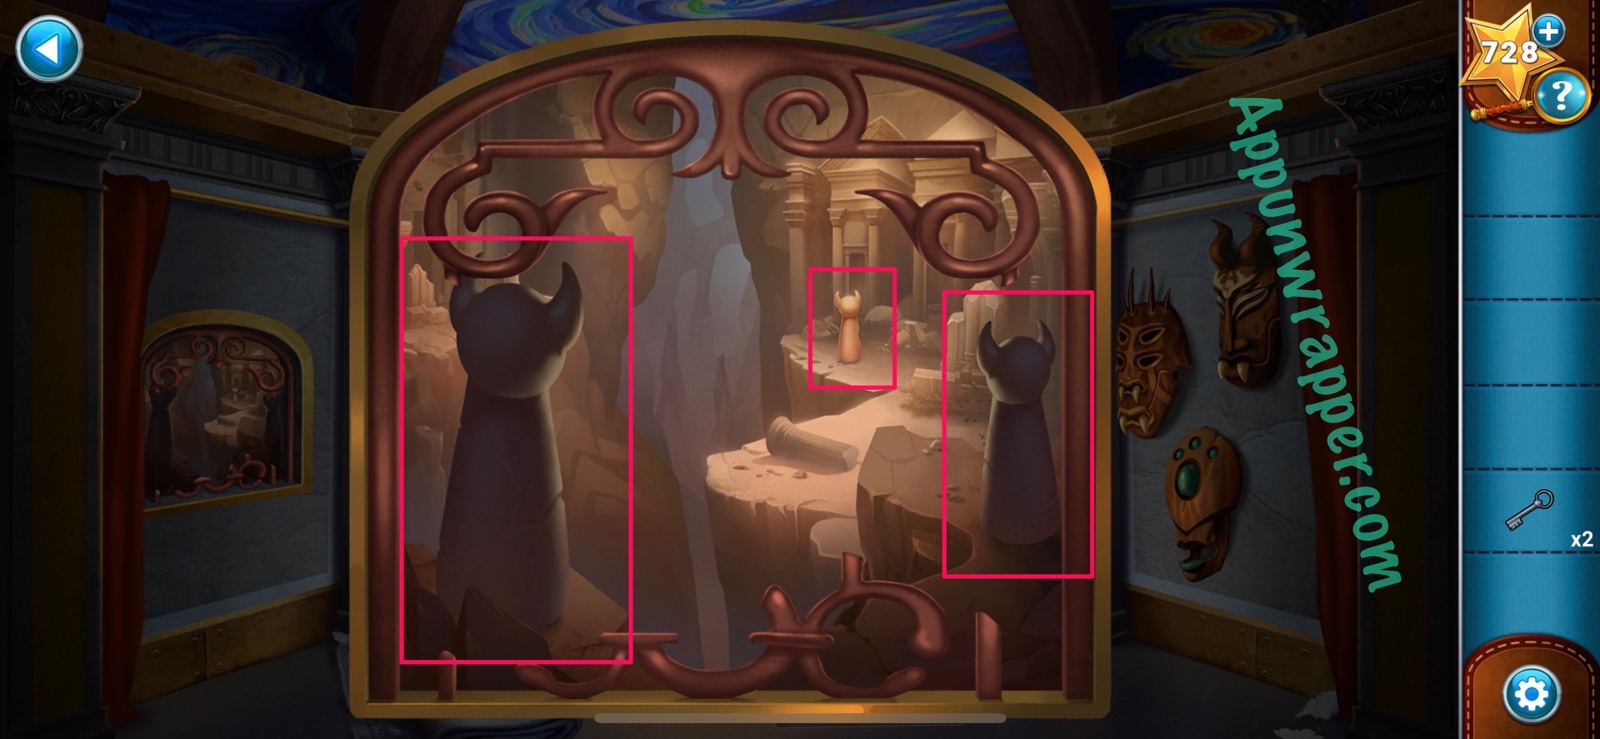
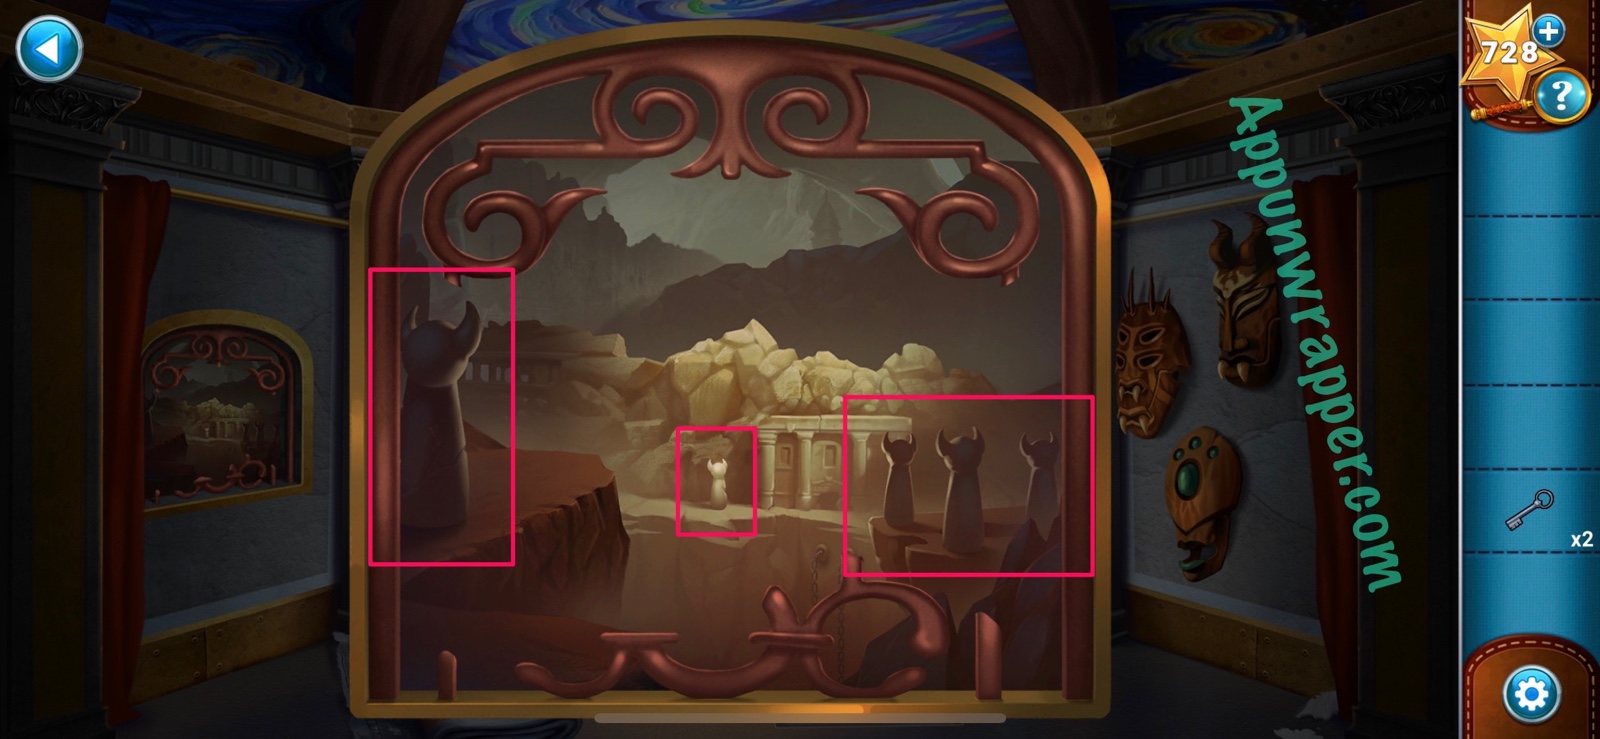
19. Turn the lights back on and look through the window to the left. Make note of it for later. We’ll need to remember the number of statues.
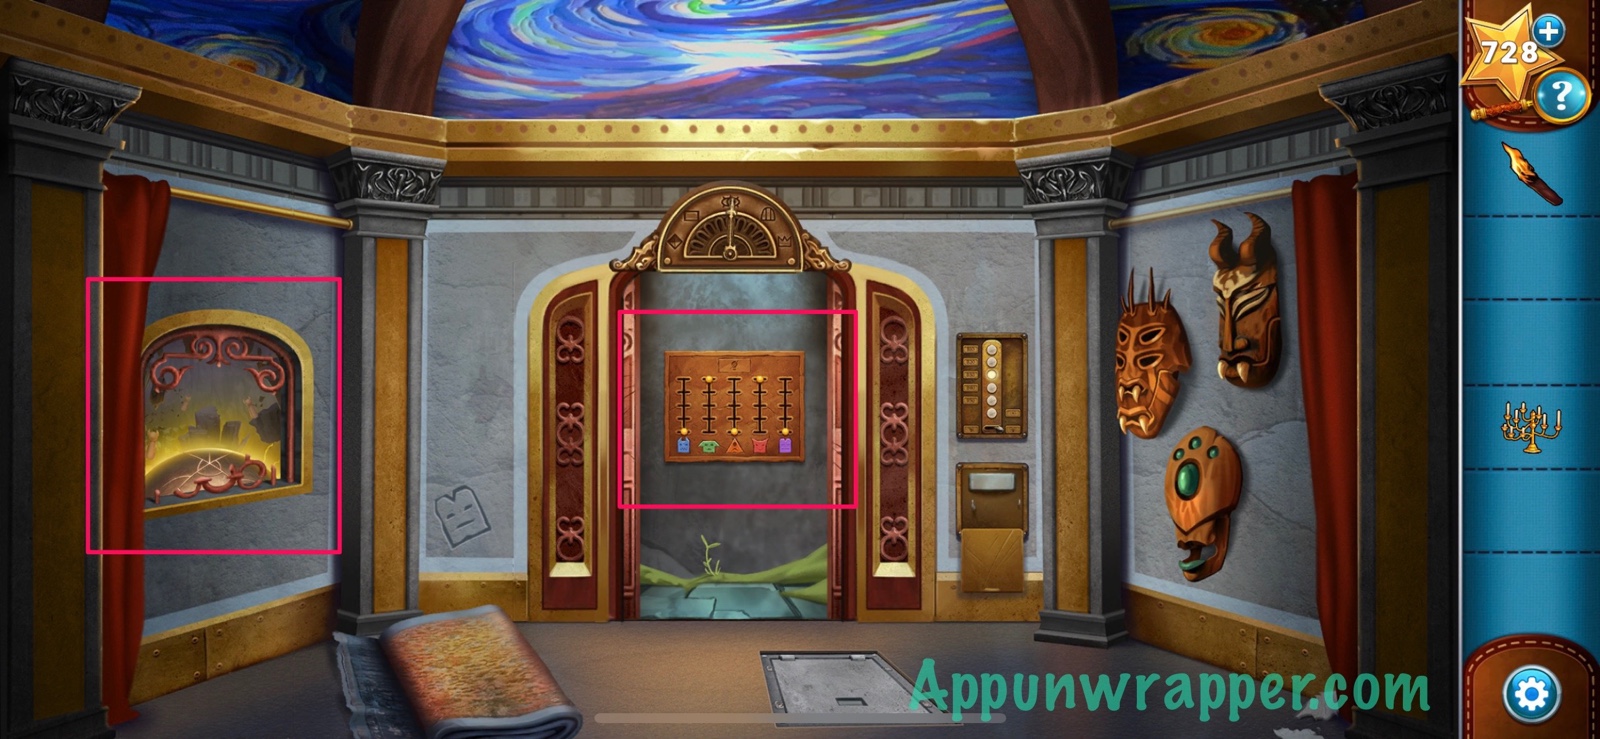
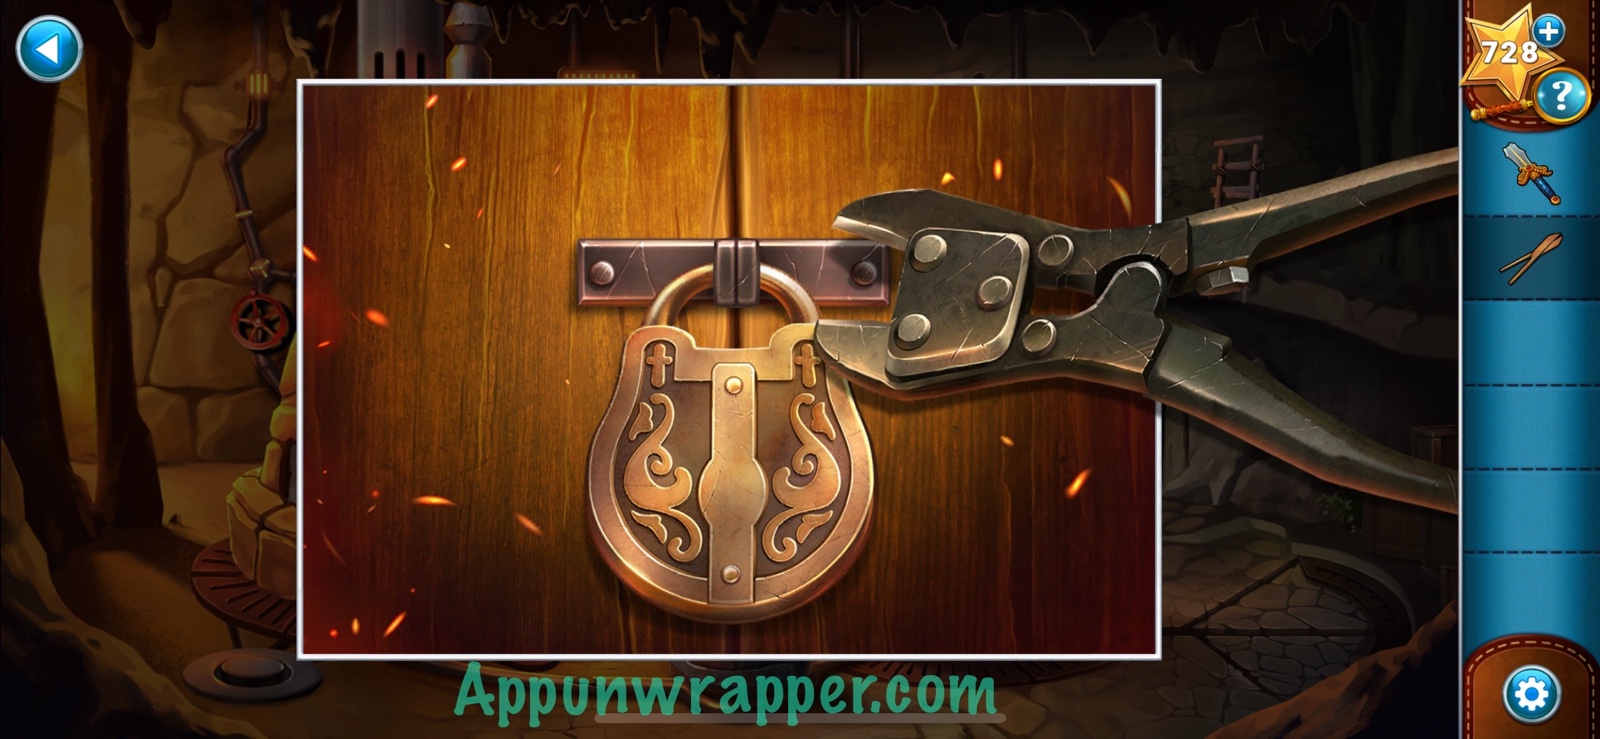
20. Now go to floor B20 and take a look at the puzzle behind the doors. We’ll come back to it. But look out the window to the left and make a note of what you see.
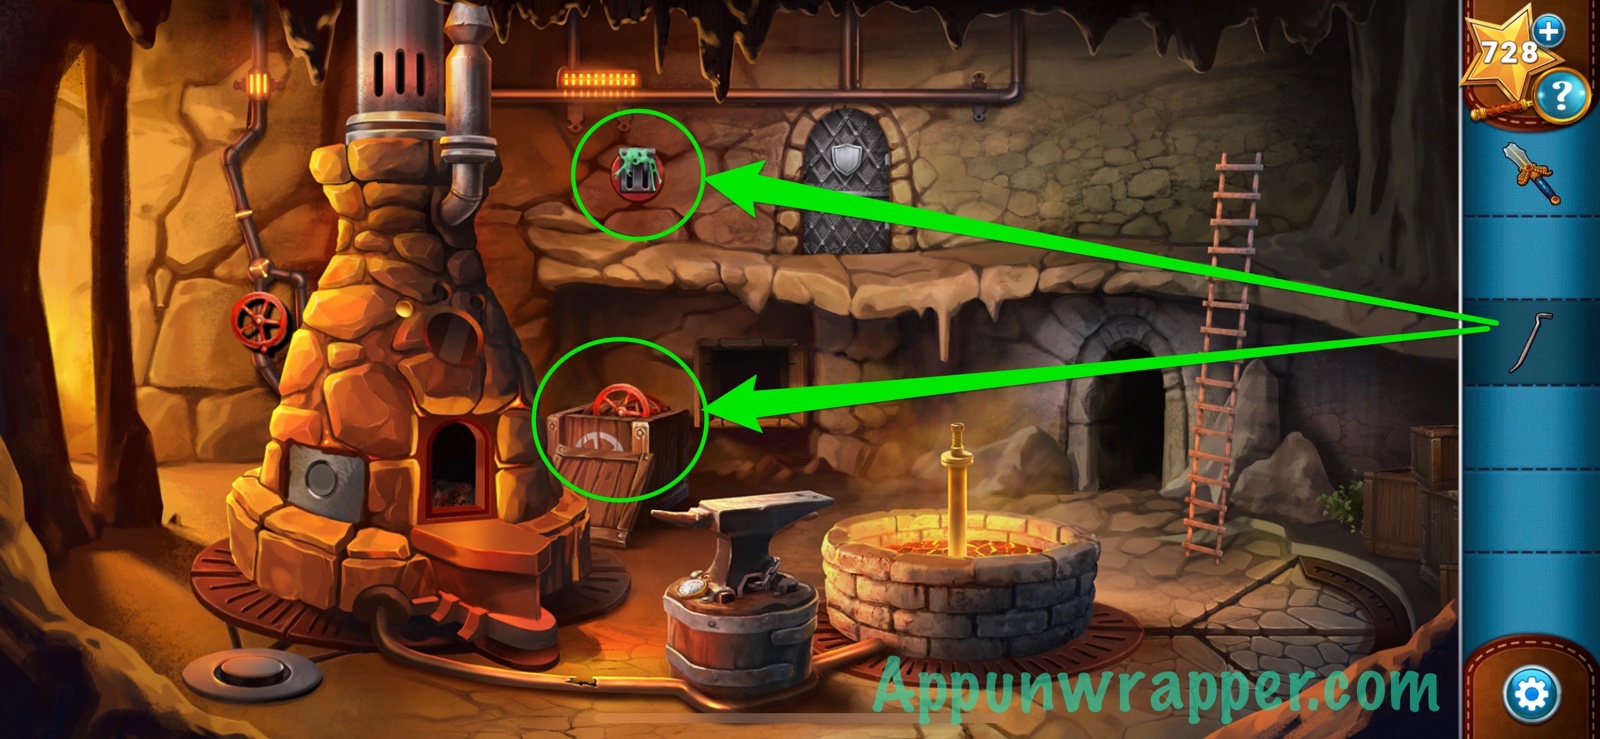
21. Go down to floor B30 and take a look out the window. Also, we can solve the puzzle behind the doors.
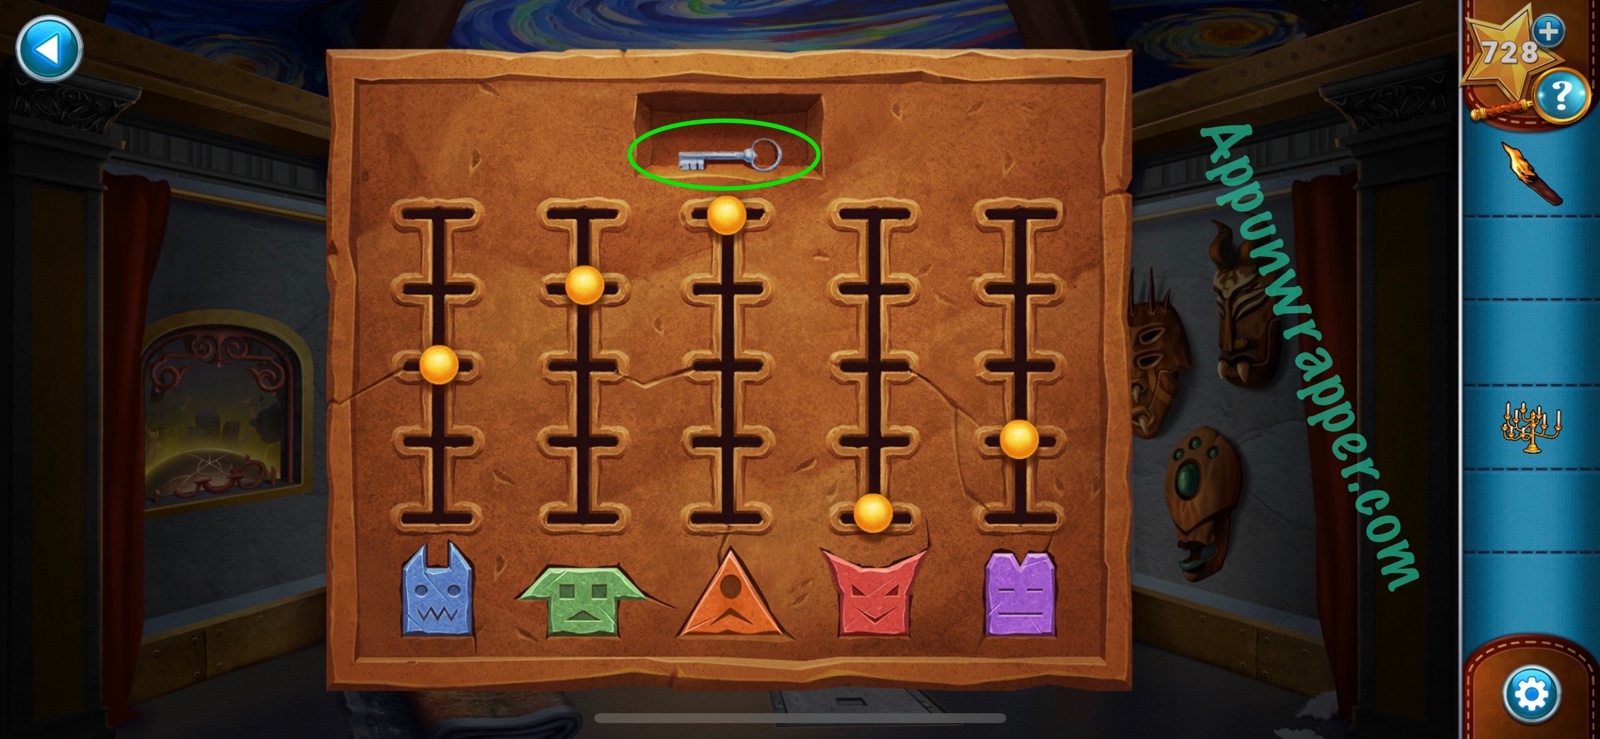
22. Let’s solve the puzzle behind the doors. Take out the photo of the five glowing faces. Move the sliders based on how high up on the wall the faces were. Or just copy my solution. Then take the key.
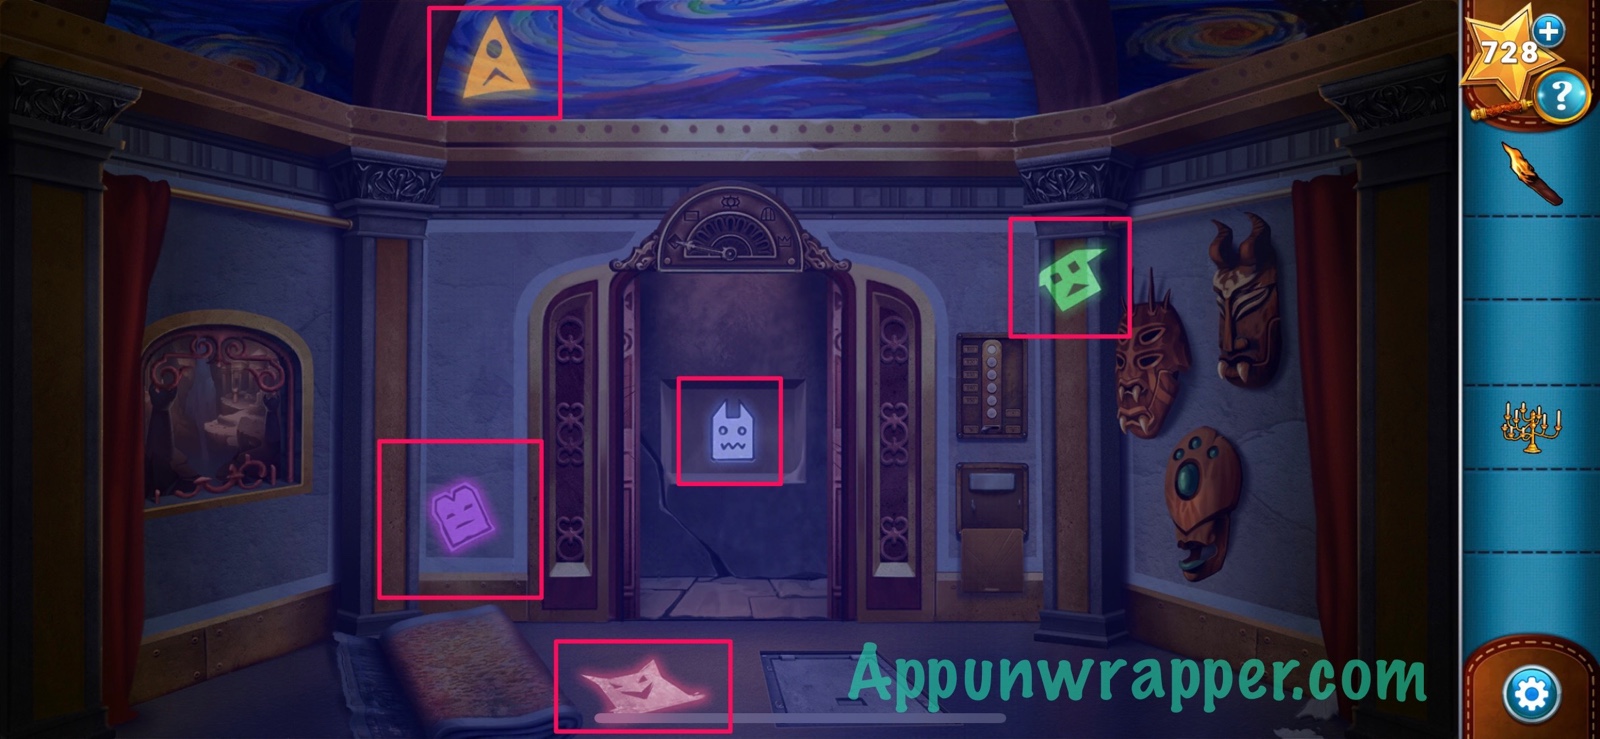
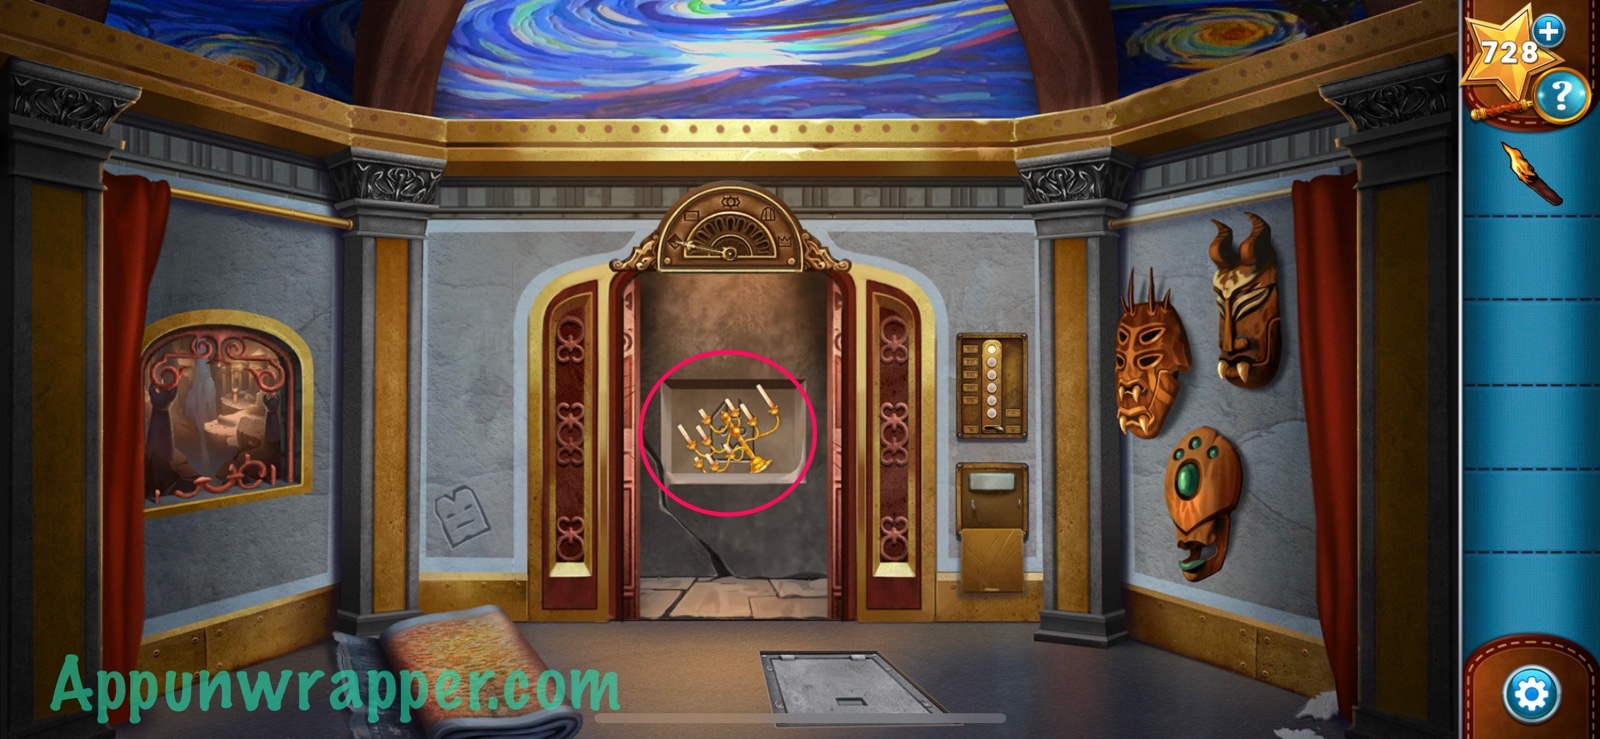
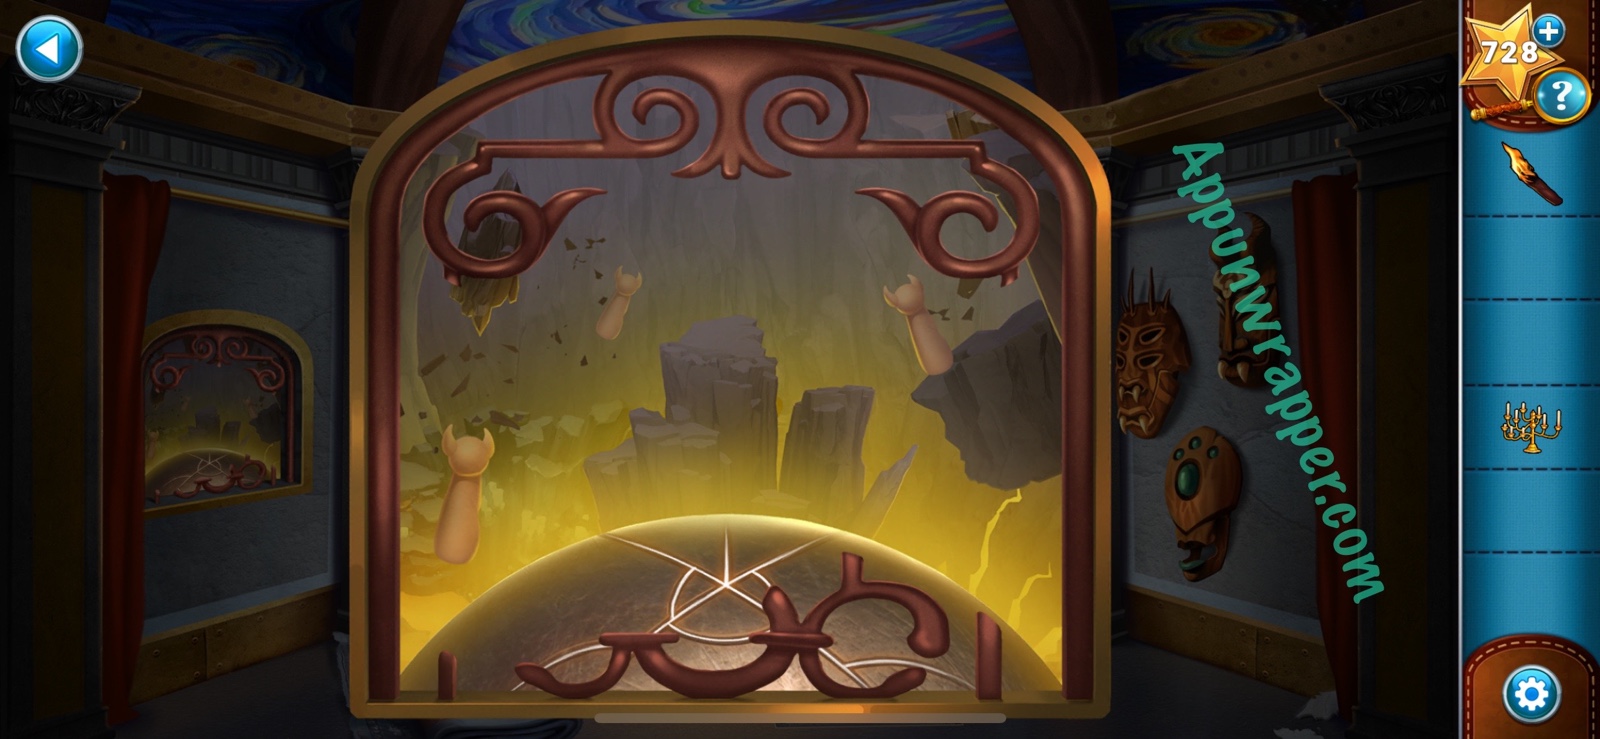
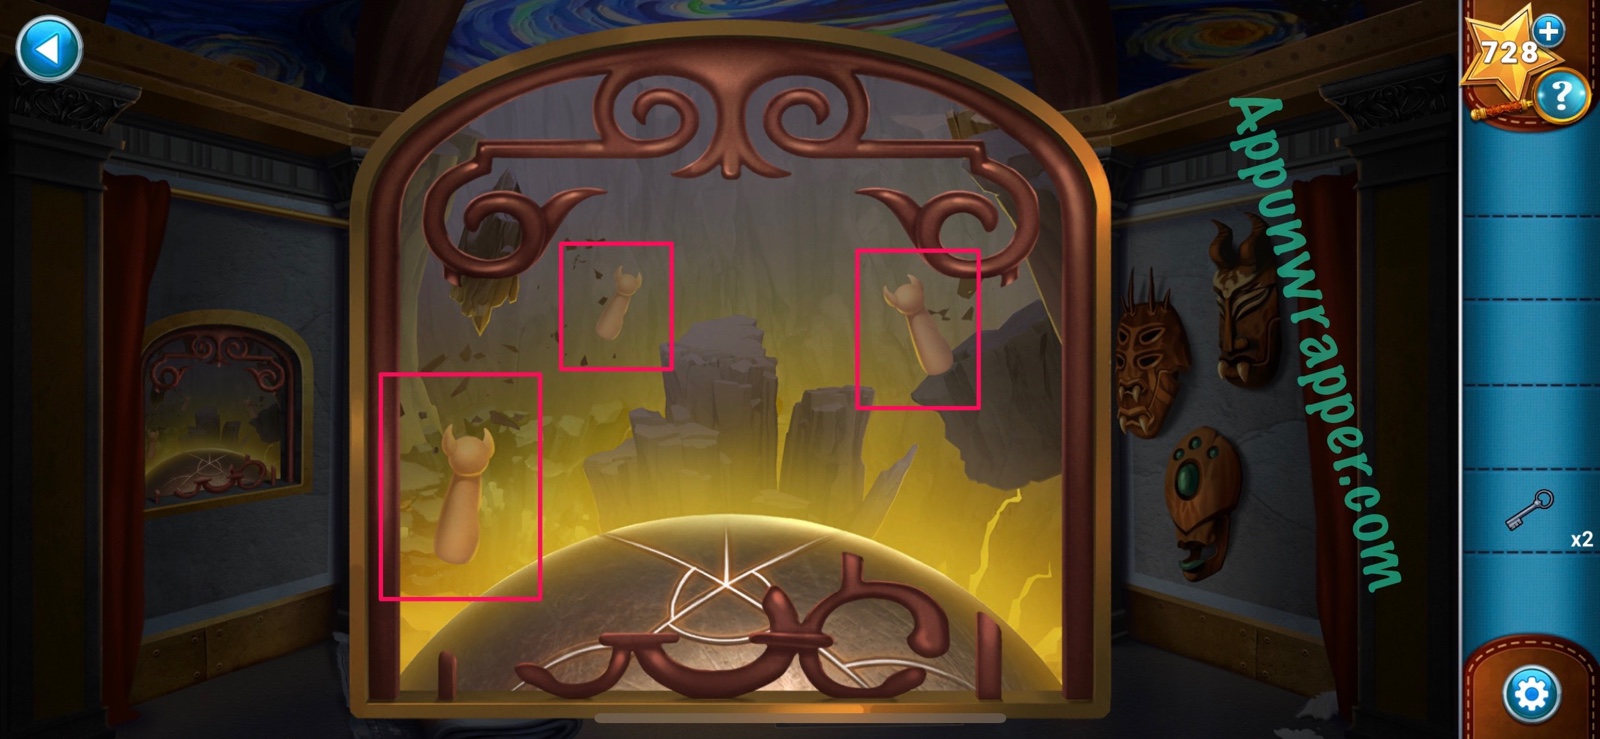
23. Go down to floor B40. Look behind the door to see a slot to place an object. Put the candelabra down and then use the torch to light the candles. Now, look at the starry night mural again and put out any of the candles that aren’t yellow on the mural. It should look like the photo below. Then take the key. Also, look through the window at the left for more statues.
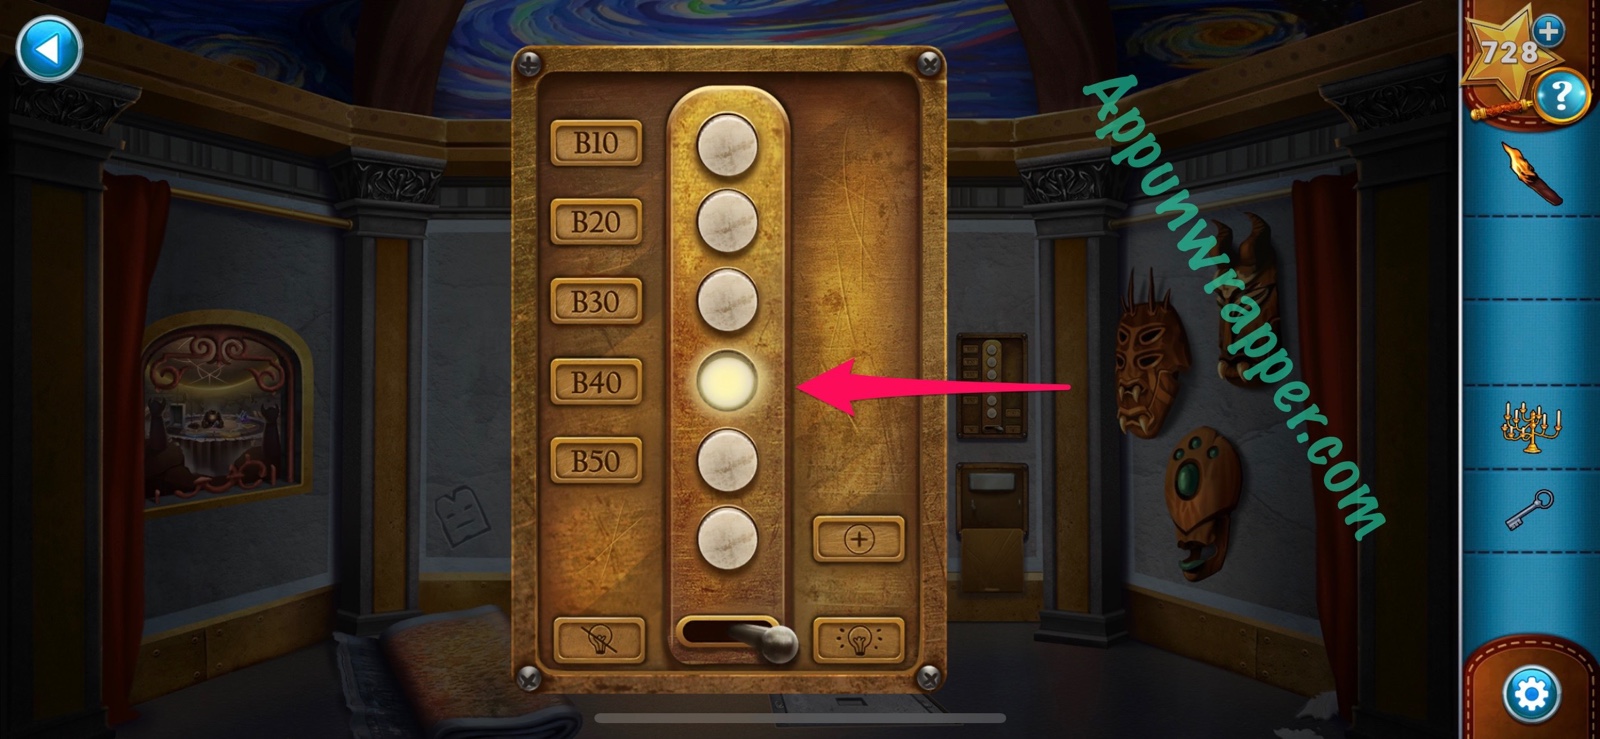

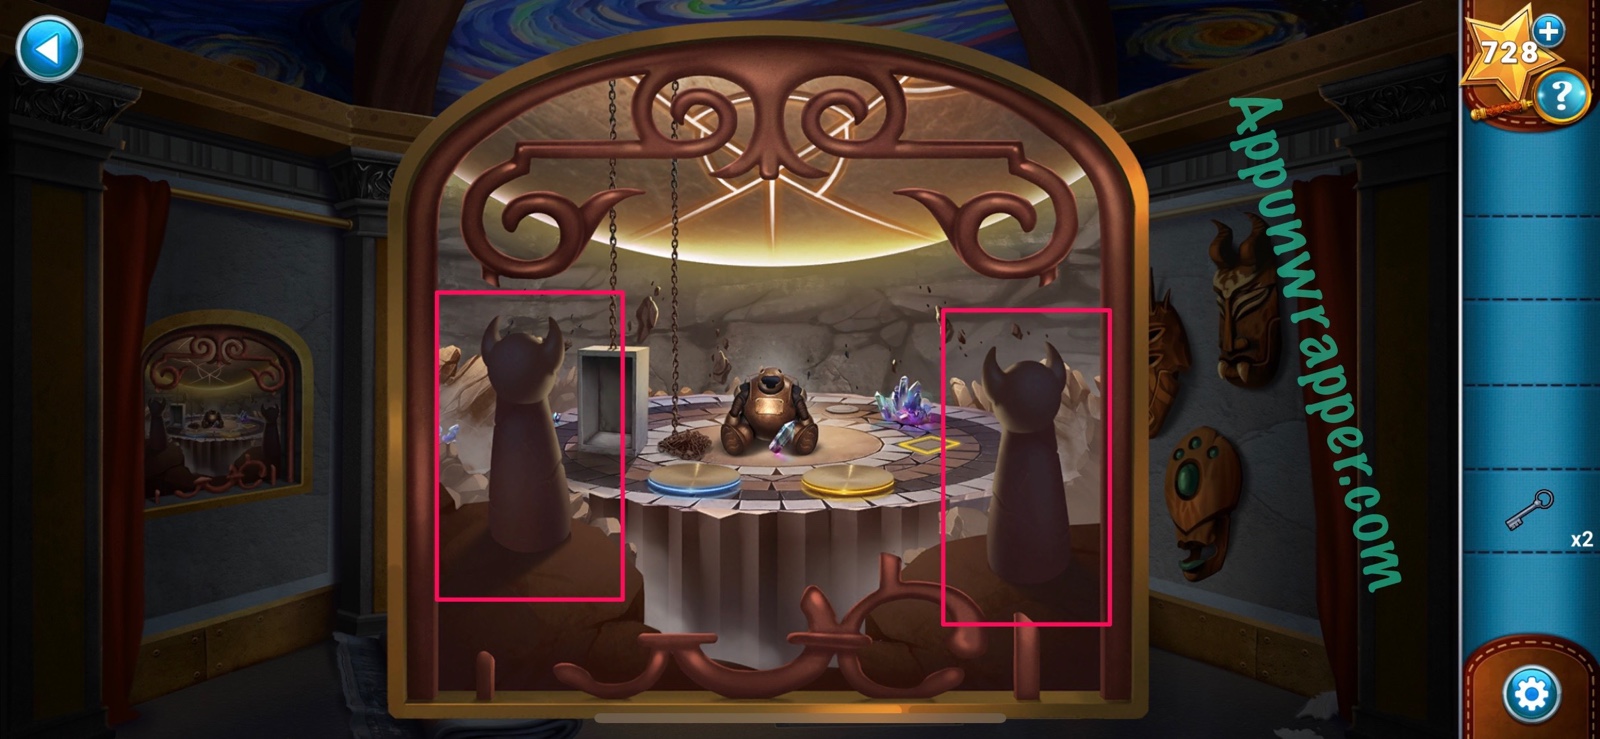
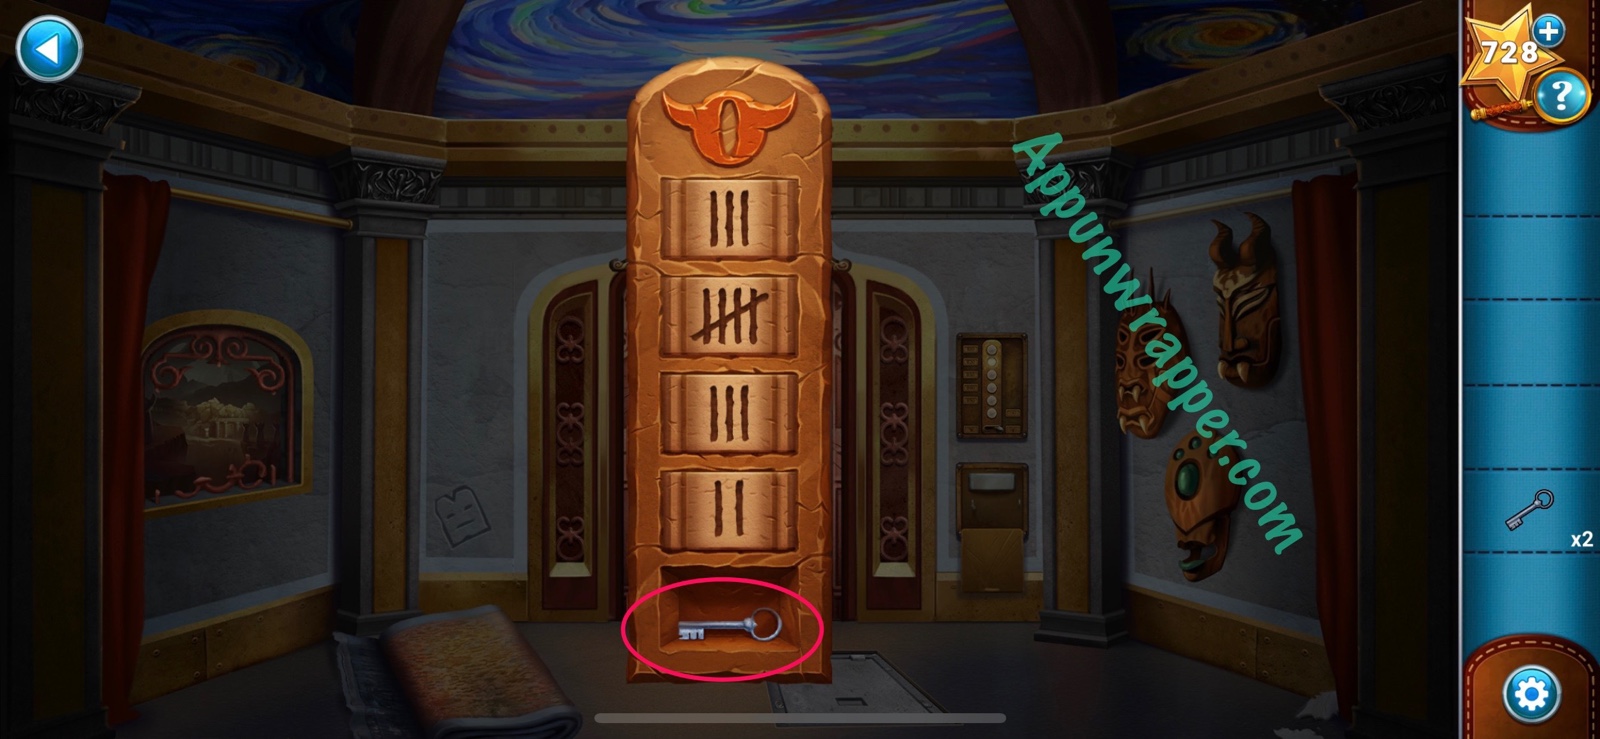
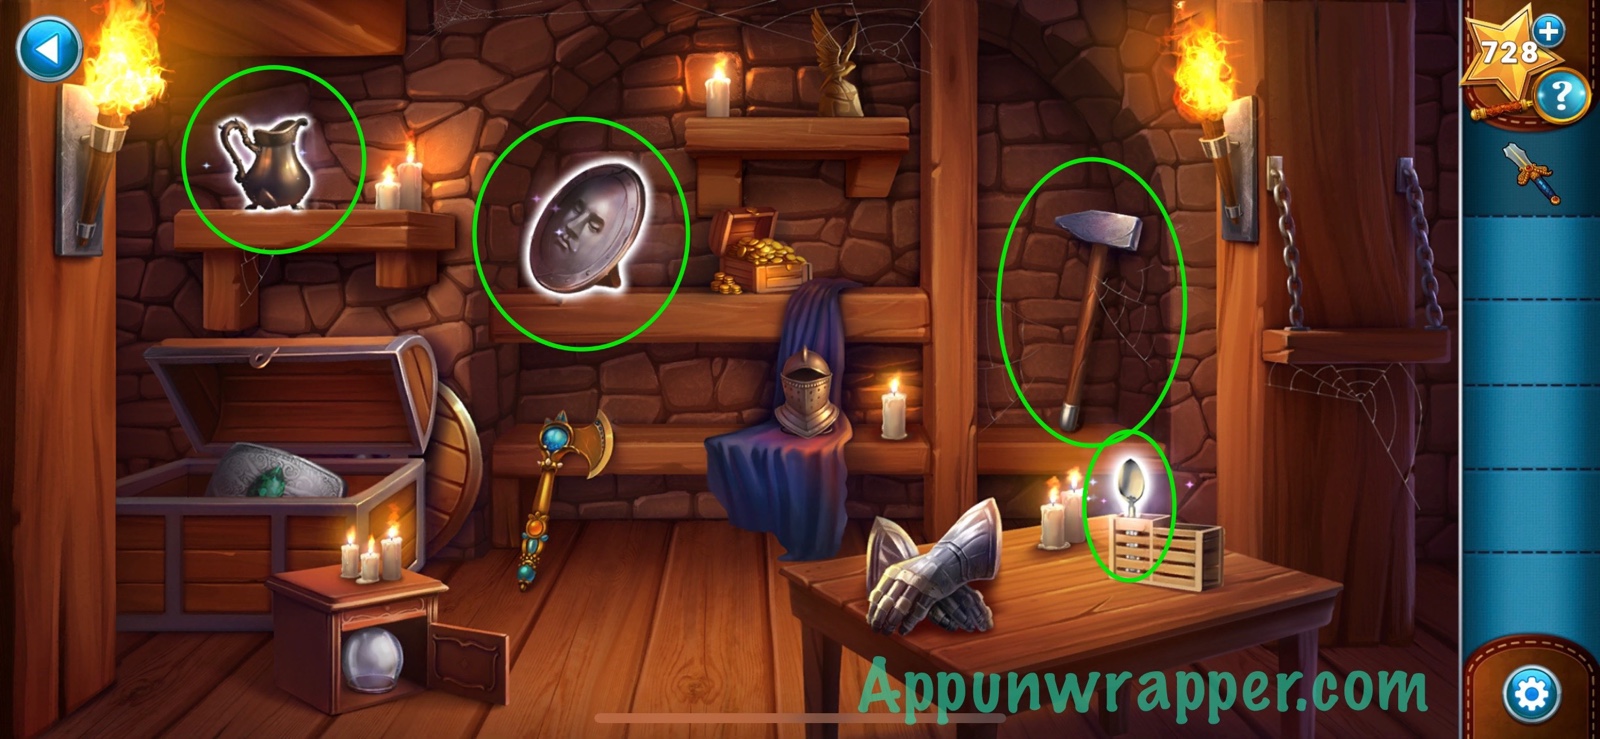
24. Go back to B20. Look at the puzzle behind the doors. What you need to do is count the statues you saw on floors B10, B20, B30 and B40 and enter them on the four tumblers. So it goes: 3532. Or, in Roman numerals: III, V, III, II. Then take the key.
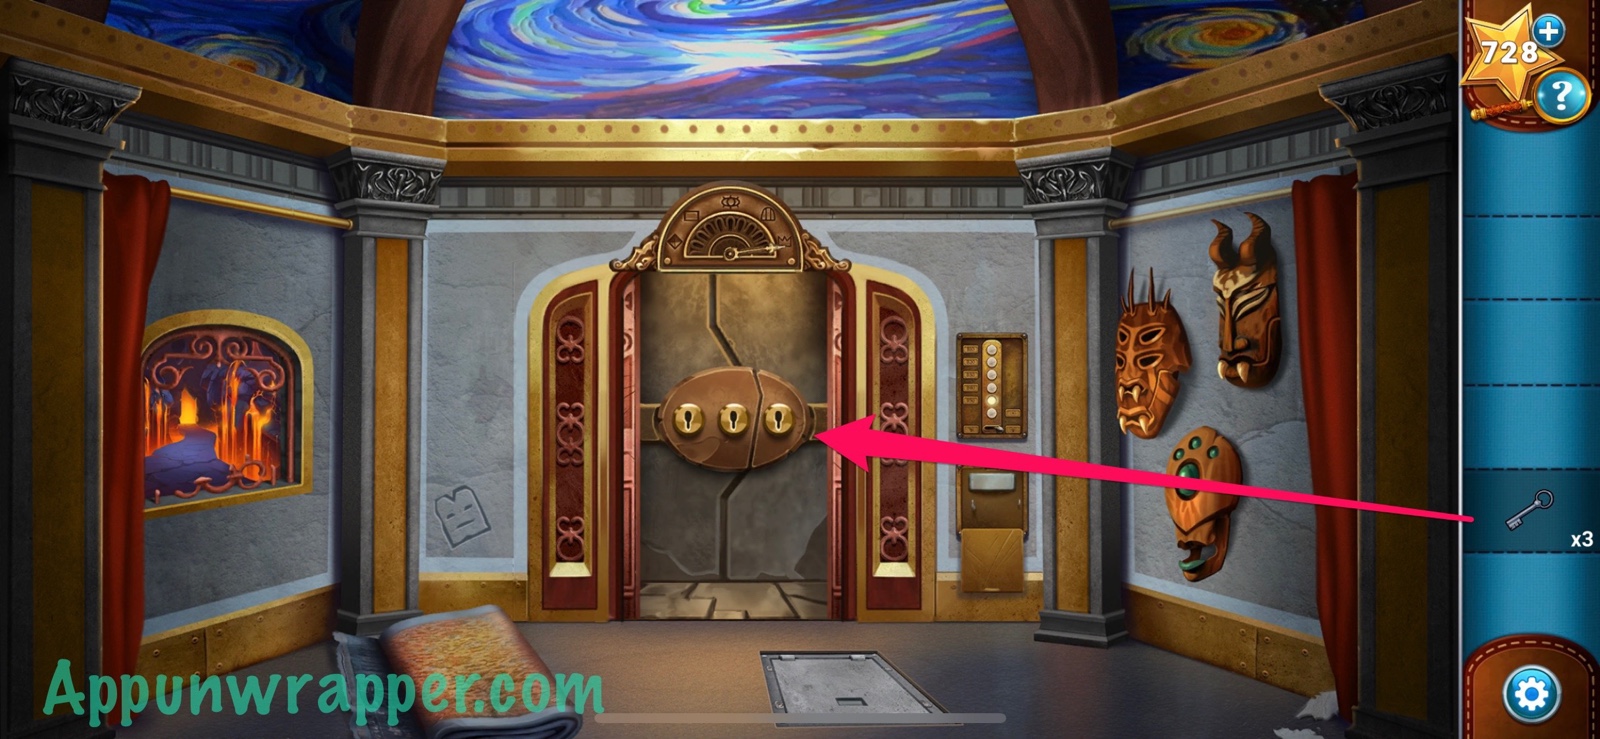
25. Go back to floor B50 and insert all three keys in the locks. Then head through.
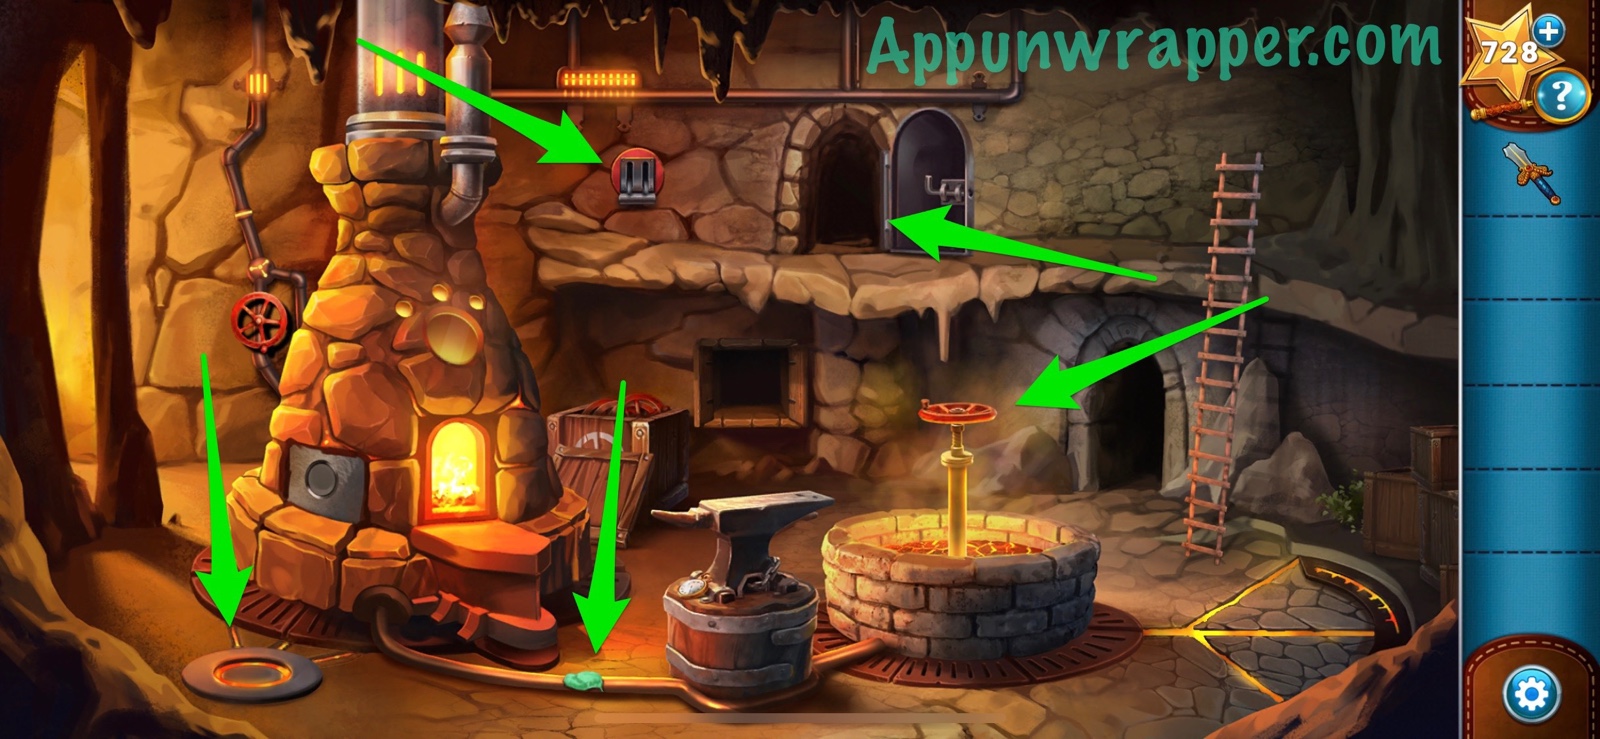
26. Now we’re playing as Nira and need to try and fix the broken Sword of Light. Take the bolt cutters and also activate the valve on the furnace.
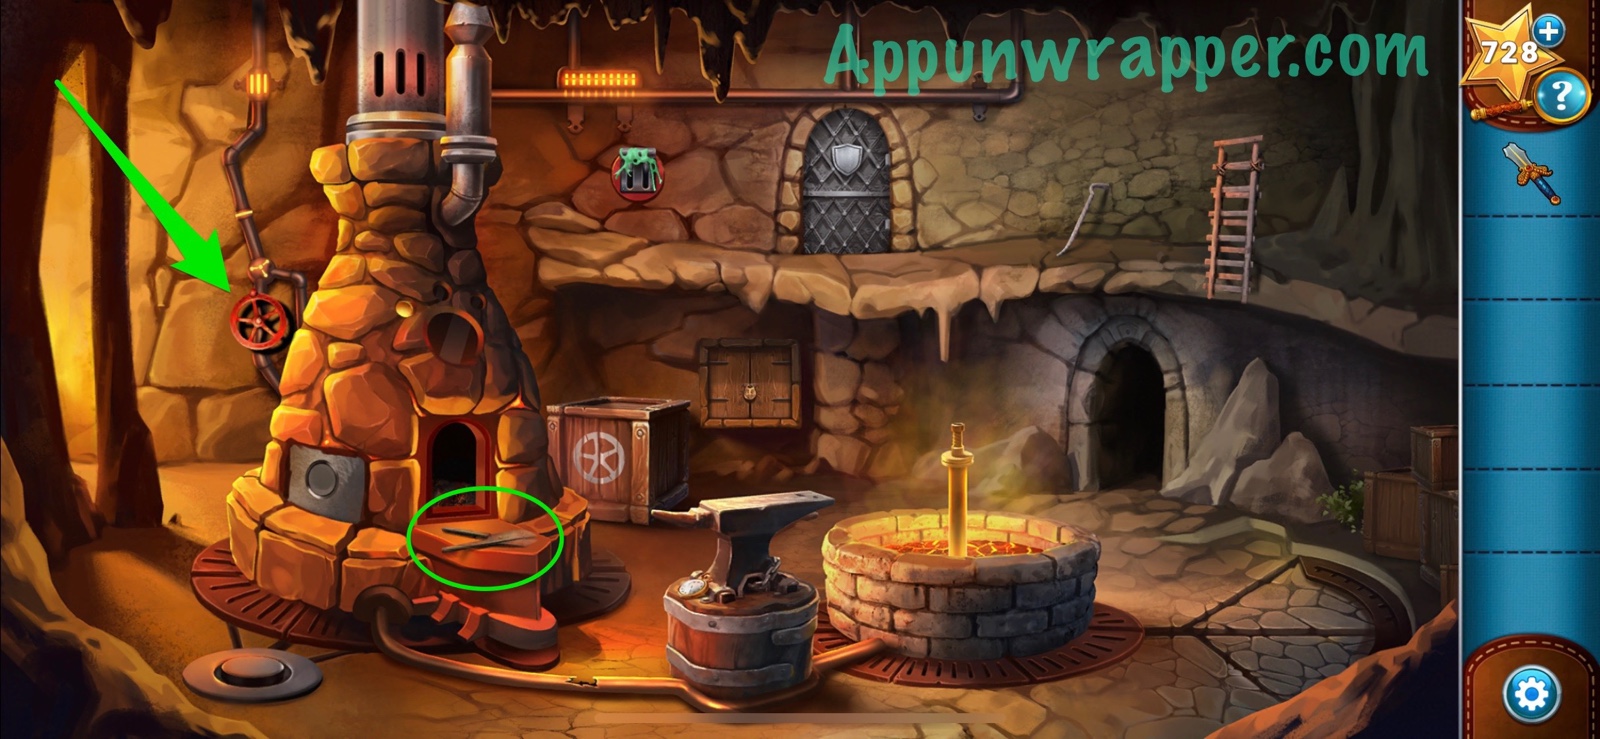
27. Use the bolt cutters to cut the padlock and then take the tongs.
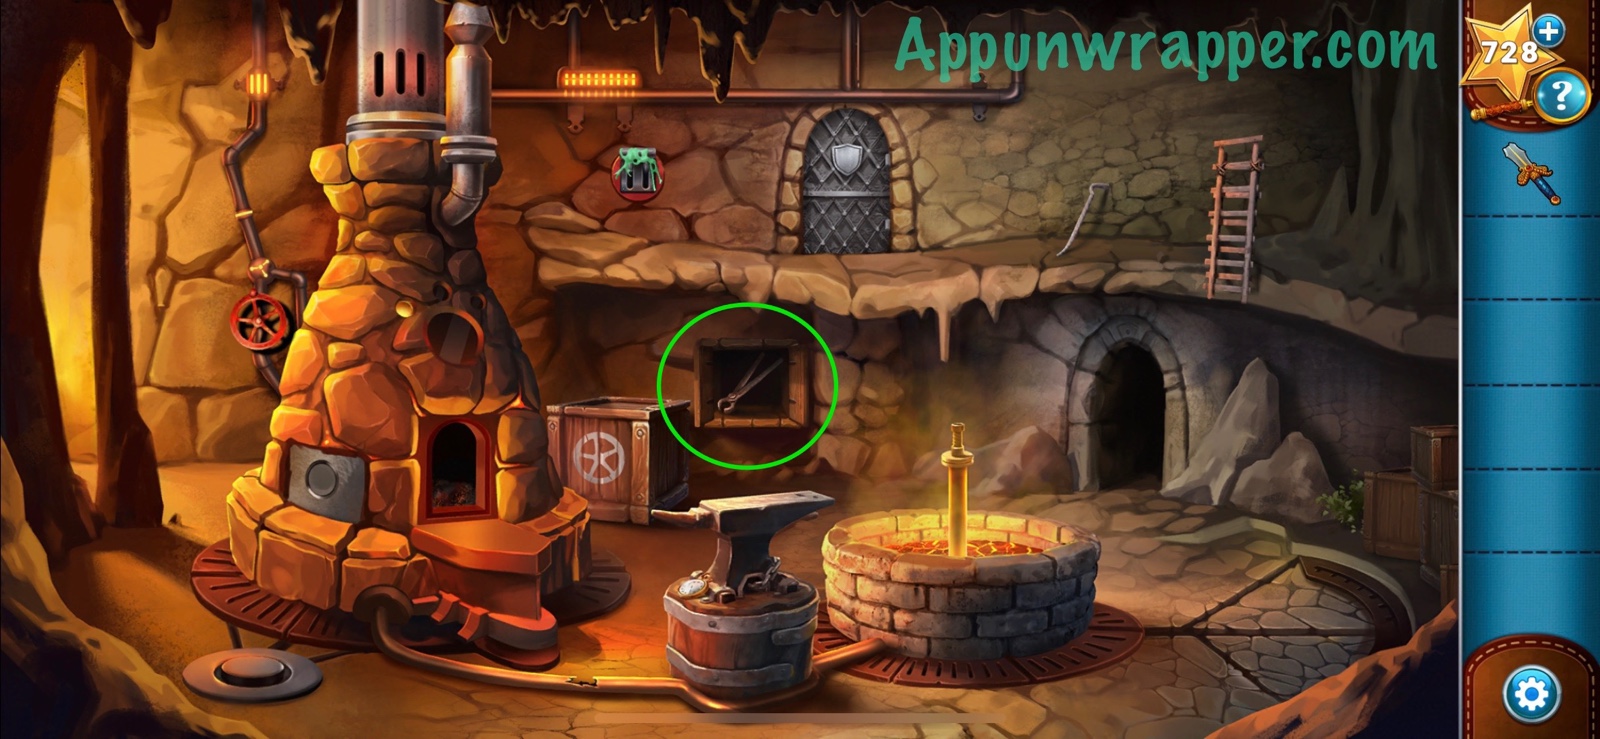
28. Use the tongs to pull down the ladder. Then grab the crowbar.

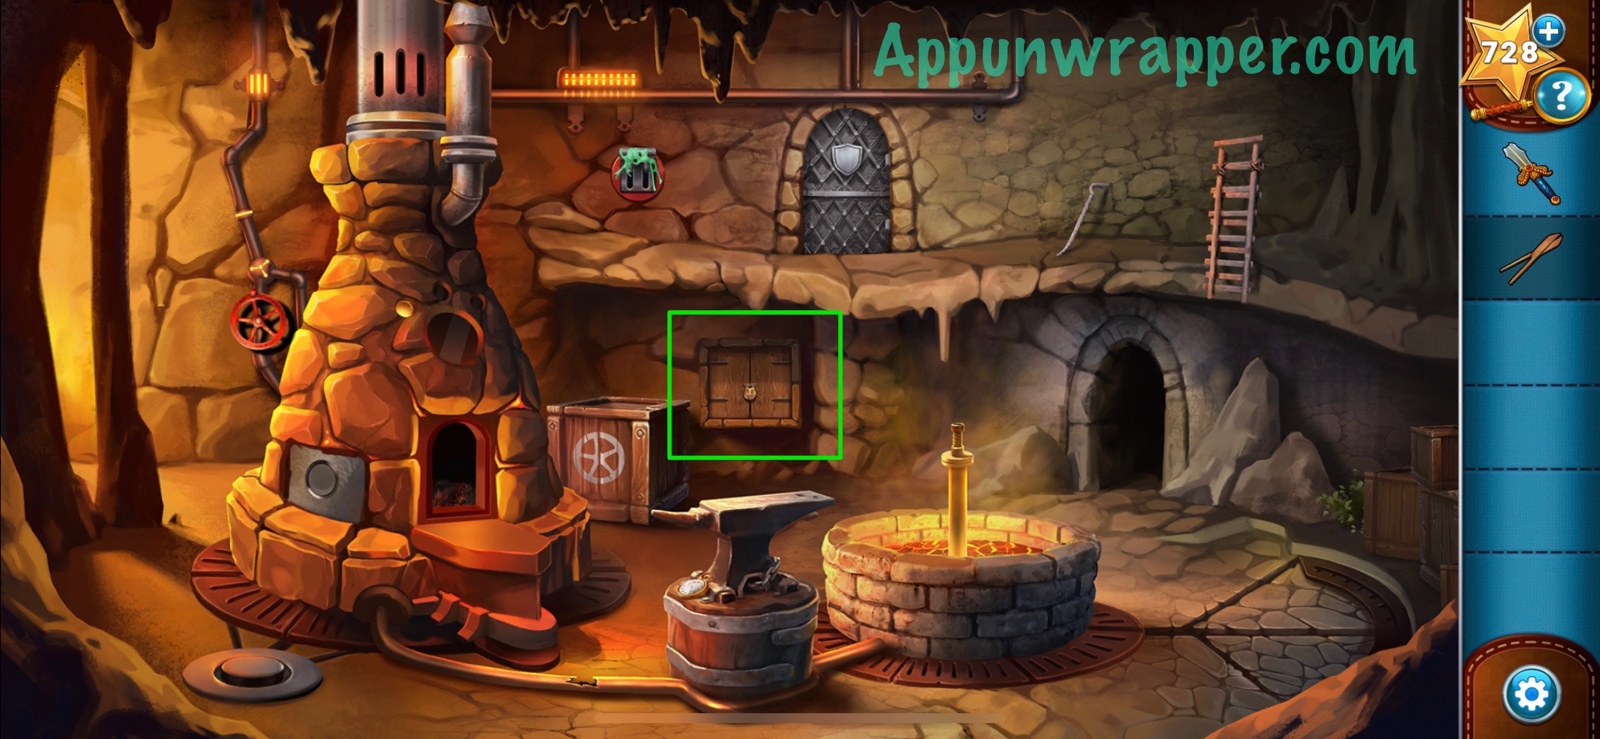
29. Use the crowbar to open the crate and and get another valve. Also use the crowbar to remove the gum from the lever.
30. Place valve on the thing sticking out from the lava. Then patch up the hole in the pipe with the gum. Turn the valve and then pull the lever down to power up the furnace. Then press the button near it to open the upper door and go through.
31. Take the hammer. Then use the Sword of Light on all the objects in the room to see which ones are magical. They’ll glow if they are. Then take the magical spoon, Pitcher of Normalization, and Shield of Screaming.
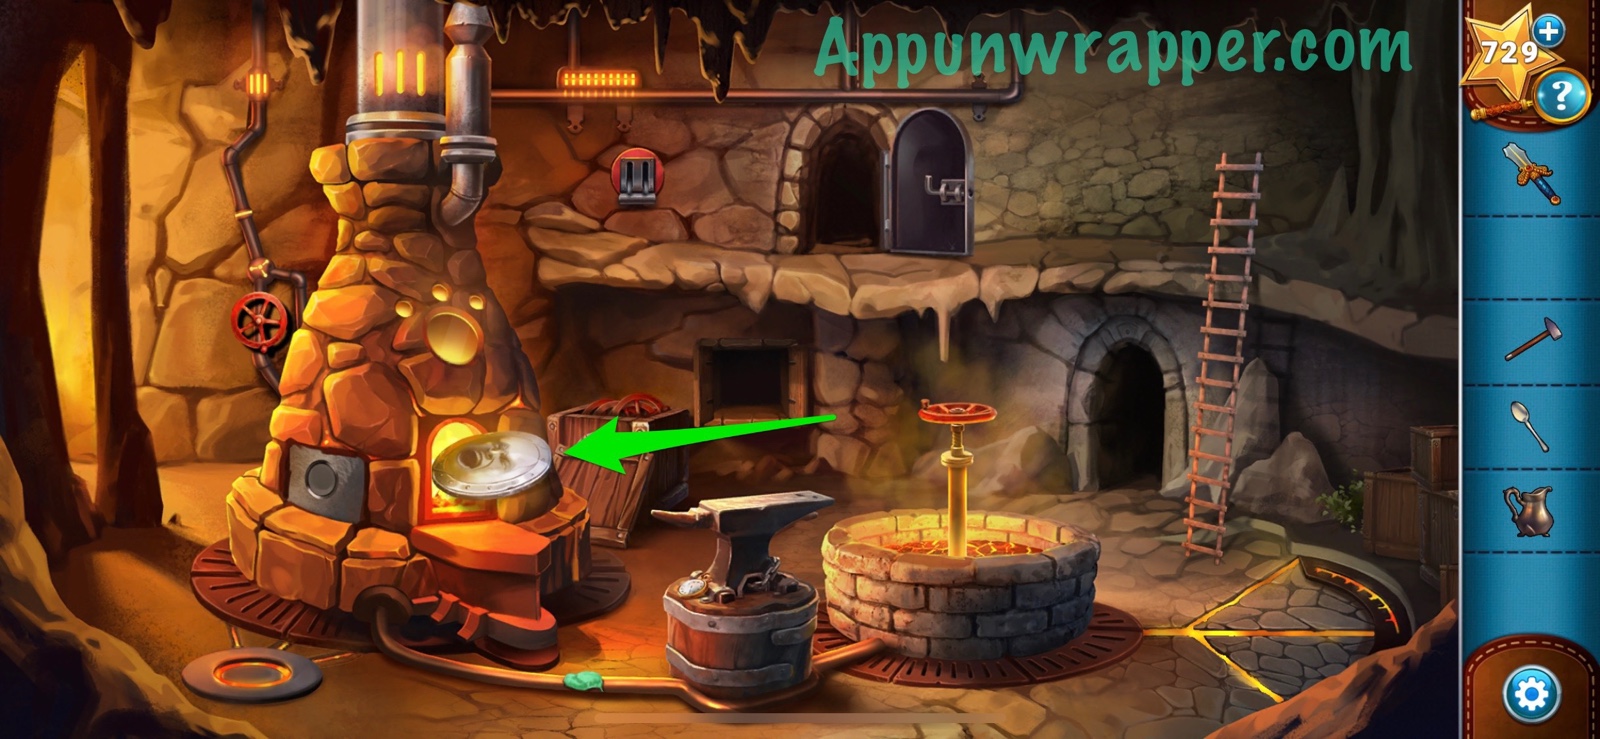
32. Go back to the other room. Place the three magical objects into the furnace.
33. Open the drawer to get the ore.
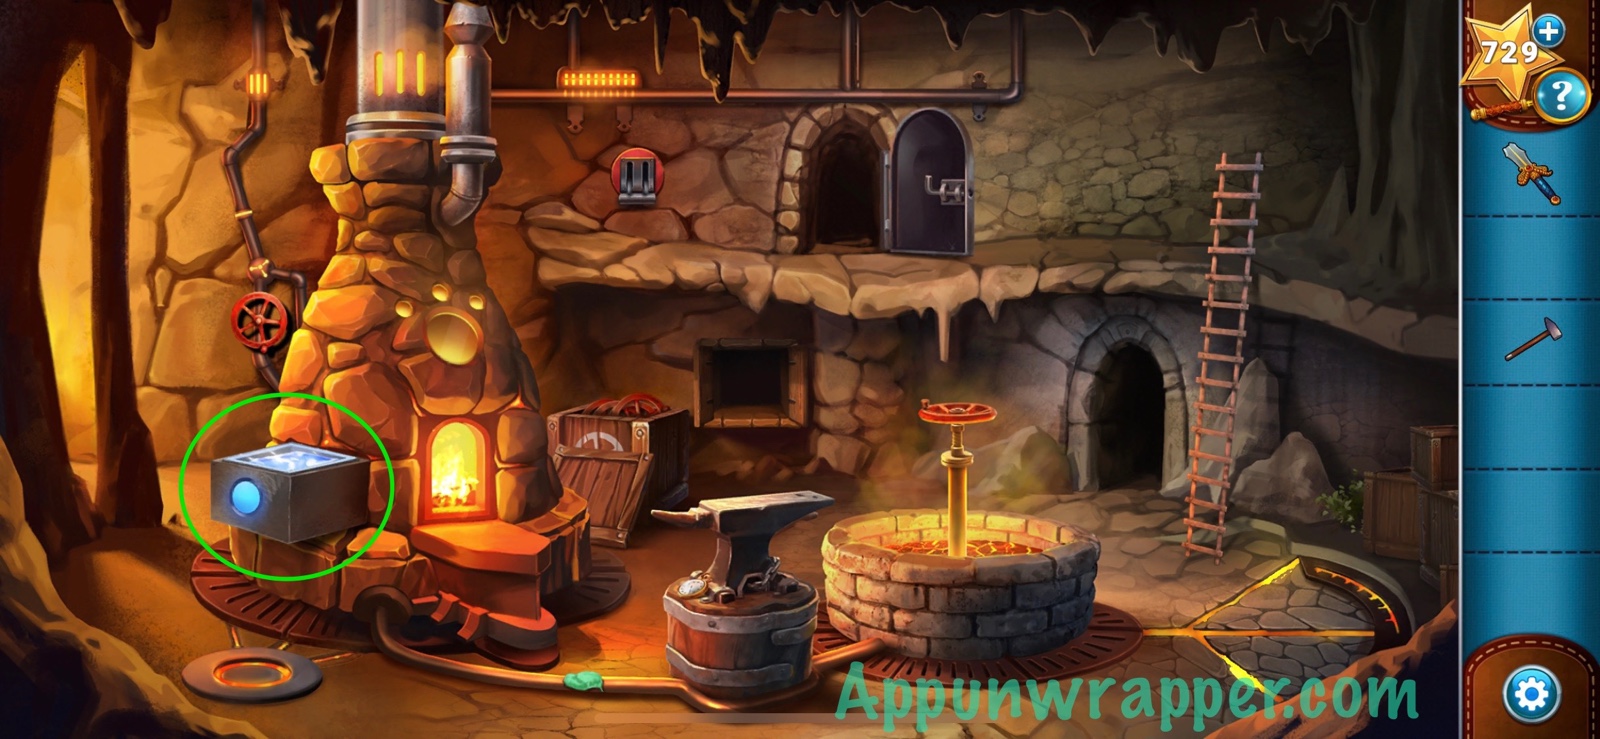
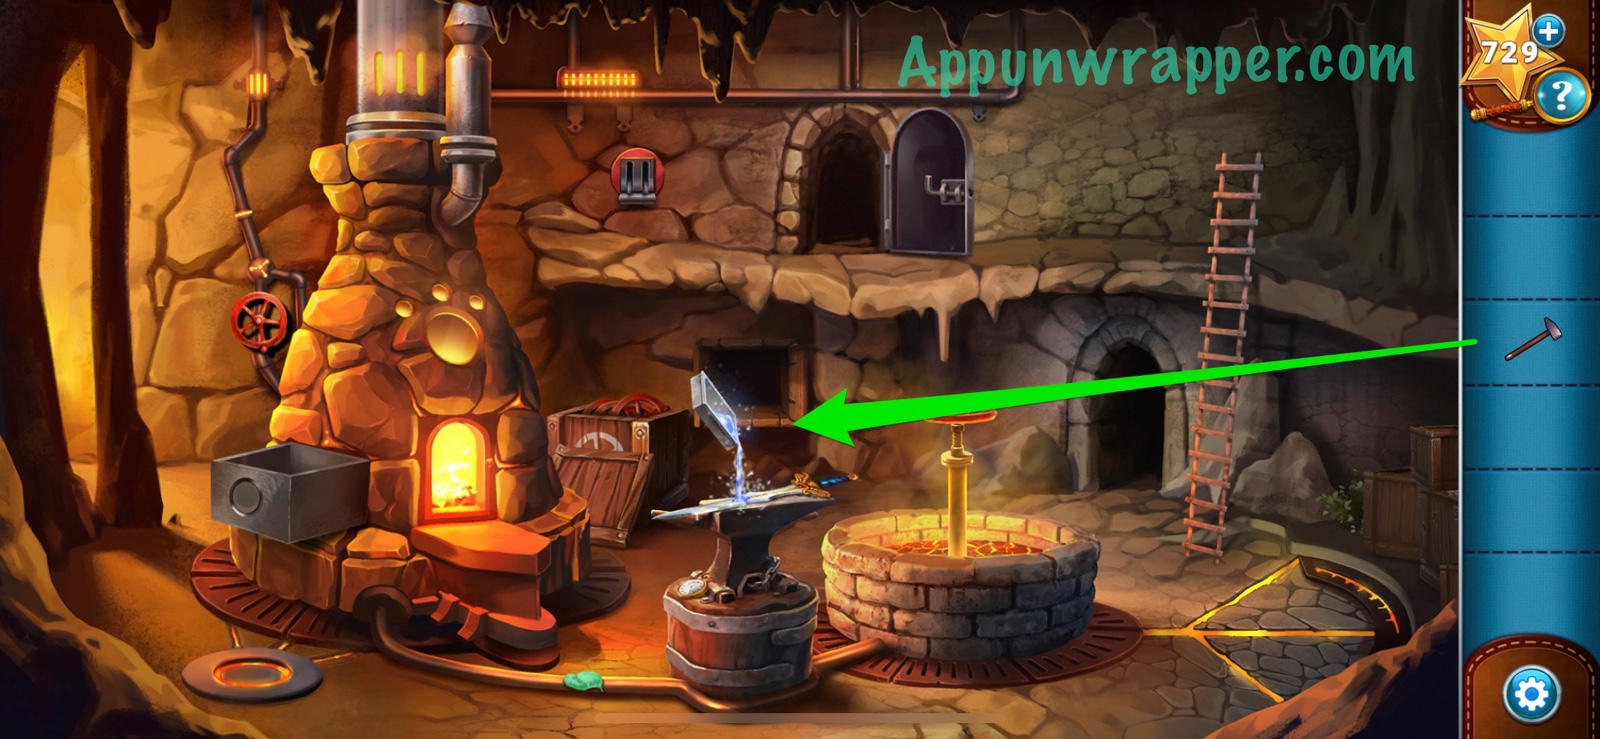
34. Now we can repair the sword. Place the ore on the anvil. It has a lot of impurities, so we have to purify it. Let’s solve the Forging Puzzle. It’s basically a match-3 where you slide the entire board to make tiles of the same color line up and disappear. You need to get rid of all of the tiles to complete the puzzle. Use the stopwatch to undo one move. Swipe in this order to solve it: Right, Up, Right, Down, Left, Up, Right, Up.
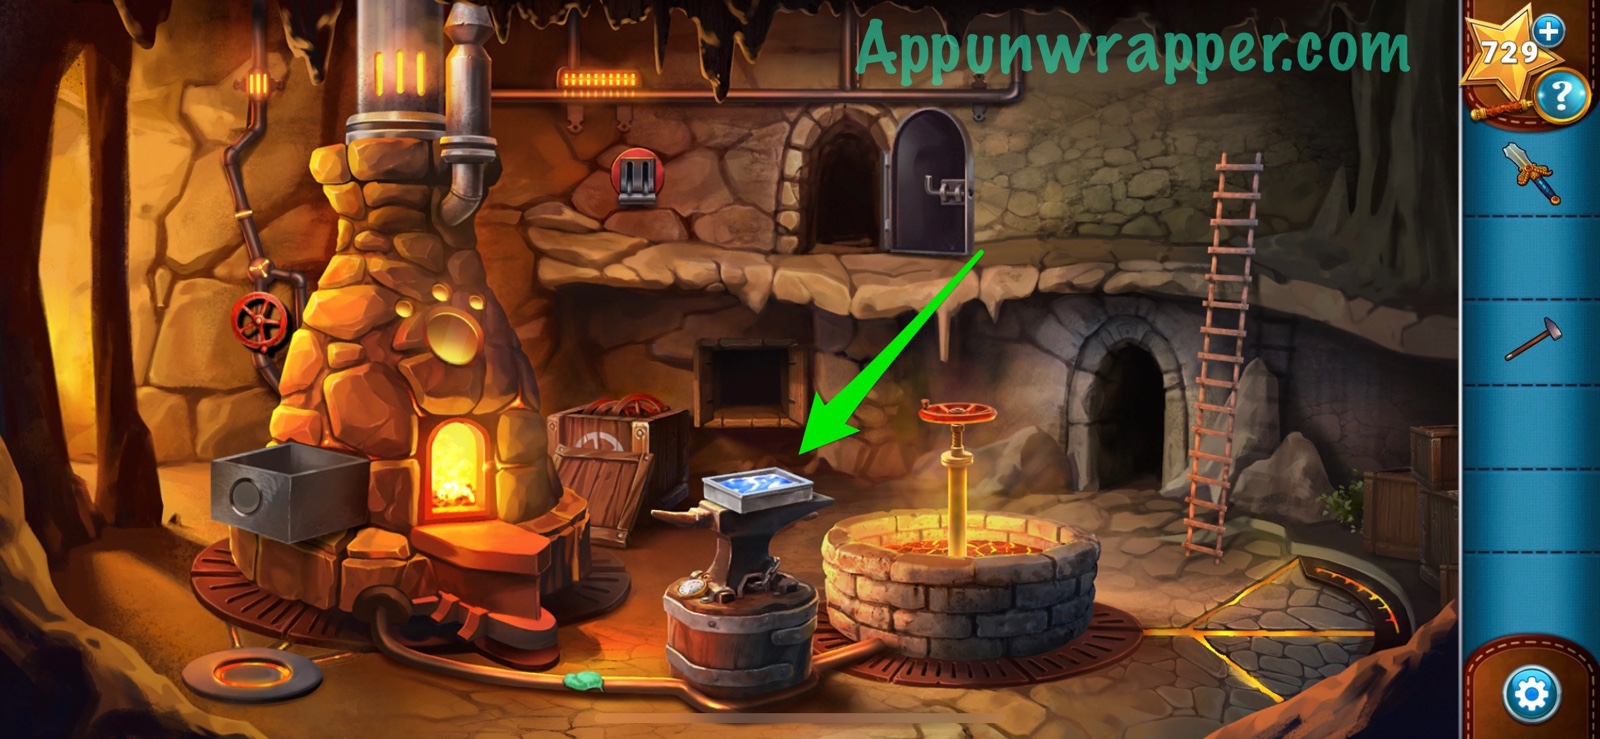
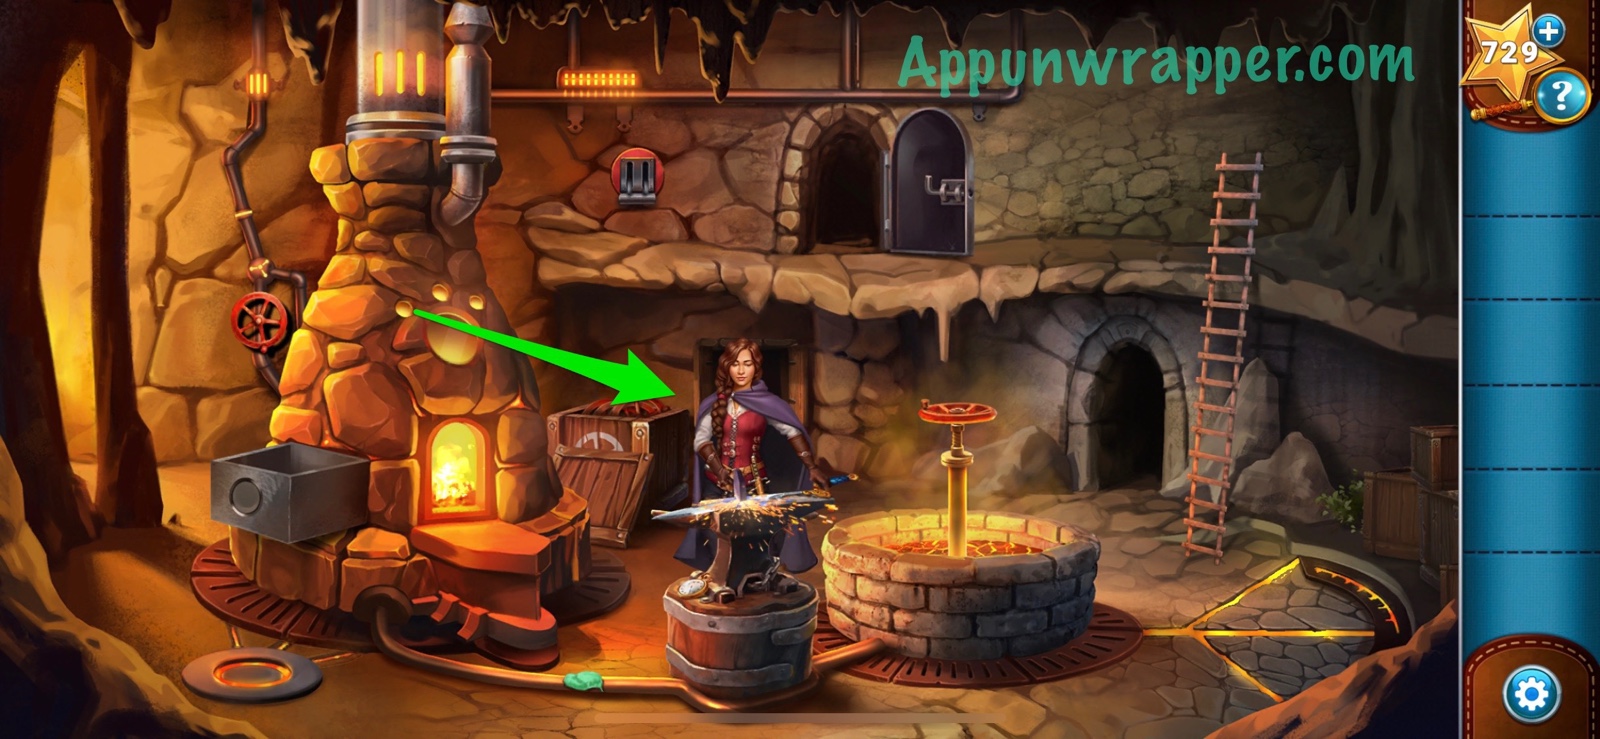
35. And finally, place the broken sword on the anvil, add the purified magical ore, and then use the hammer to fix the sword and then watch the ending of the chapter.
And that’s the end of Chapter 7! Click here to continue to Chapter 8 or choose a chapter below.
Chapter 1 | Chapter 2 | Chapter 3 | Chapter 4 | Chapter 5 | Chapter 6 | Chapter 7 | Chapter 8
Where is the Chapter 8 walkthrough for A Squire’s Tale!
It so close to the end and I’m stuck!
Oh man, I usually only need your walkthroughz occasionally and for a hint in the right direction rather than a full solution, but I definitely needed the solution to that sliding block/matching puzzle!! Thank you for saving me losing half of my stars by skipping it in frustration!! 🙂
I KNEW we couldn’t trust Nira and she’s the bad guy (or girl in this case) in the end.
How do you move the blocks in the matching game. It says to use the arrows, but there are no arrows.
How do you move the blocks?
I need help moving the blocks for the forging puzzle. I have no arrows and no keyboard to use WASD. How do I get past this?