Adventure Escape Mysteries – The Squire’s Tale
By: Haiku Games

Haiku Games is back with a new Adventure Escape game, this time an action-filled adventure in a fantasy world. You play as Martin, a squire who needs to help the knight Cedrick in their quest to find the legendary Sword of Light and put an end to the Monster King once and for all. This walkthrough guide should help you if you get stuck on any of the puzzles in Chapter 3 of The Squire’s Tale. Feel free to ask for extra help in the comments section.
See all my other Adventure Escape guides here.
Walkthrough:
Chapter 1 | Chapter 2 | Chapter 3 | Chapter 4 | Chapter 5 | Chapter 6 | Chapter 7 | Chapter 8
Chapter 3, Ruins of Recursia:
You can watch my video for Chapter 3 or continue below for my step-by-step guide:
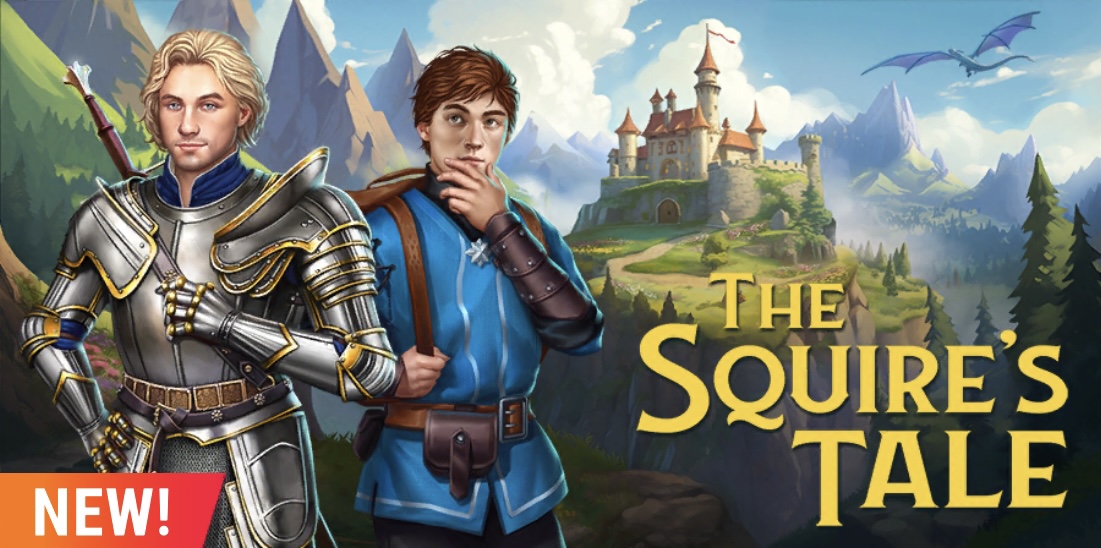
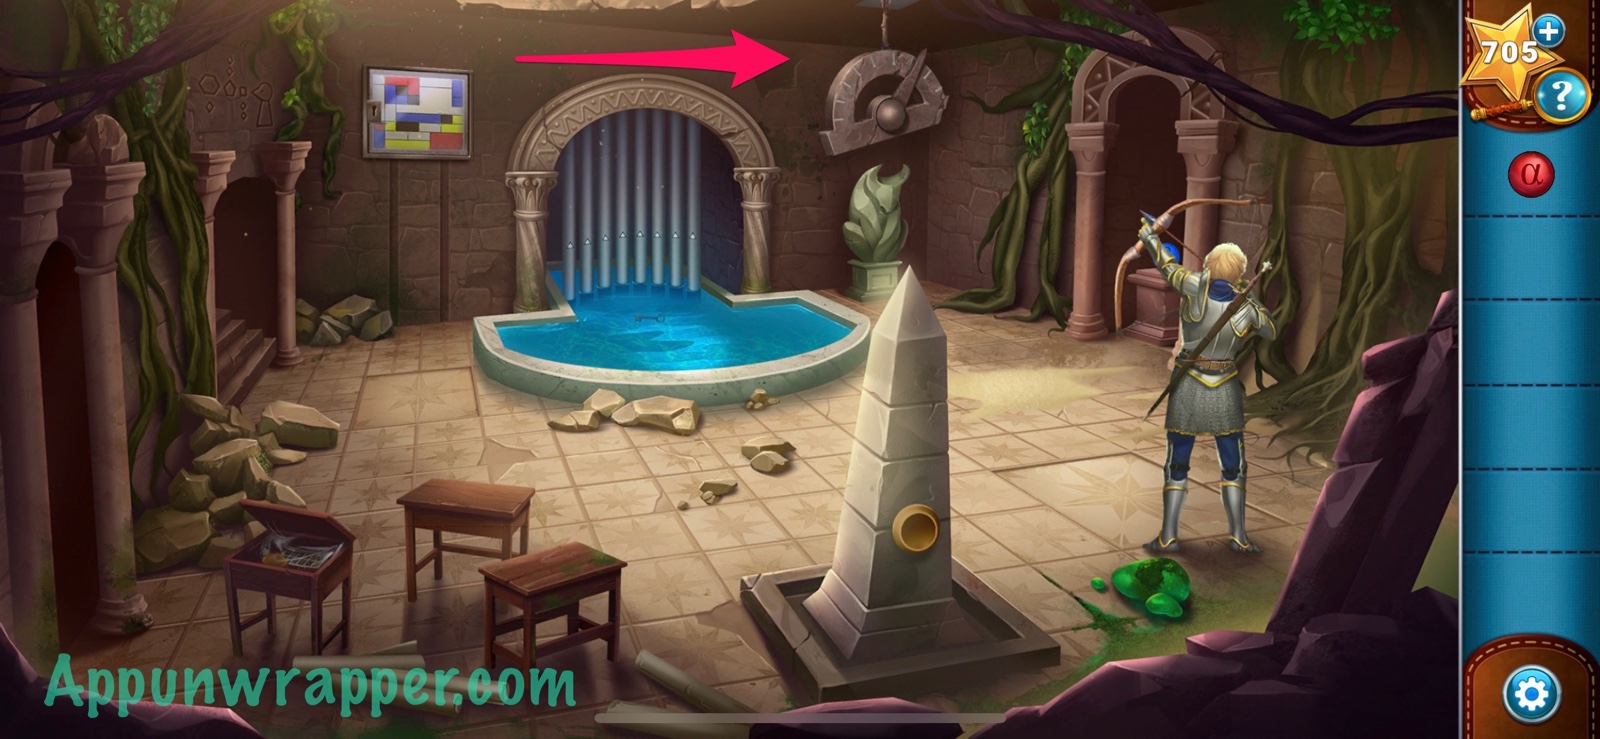
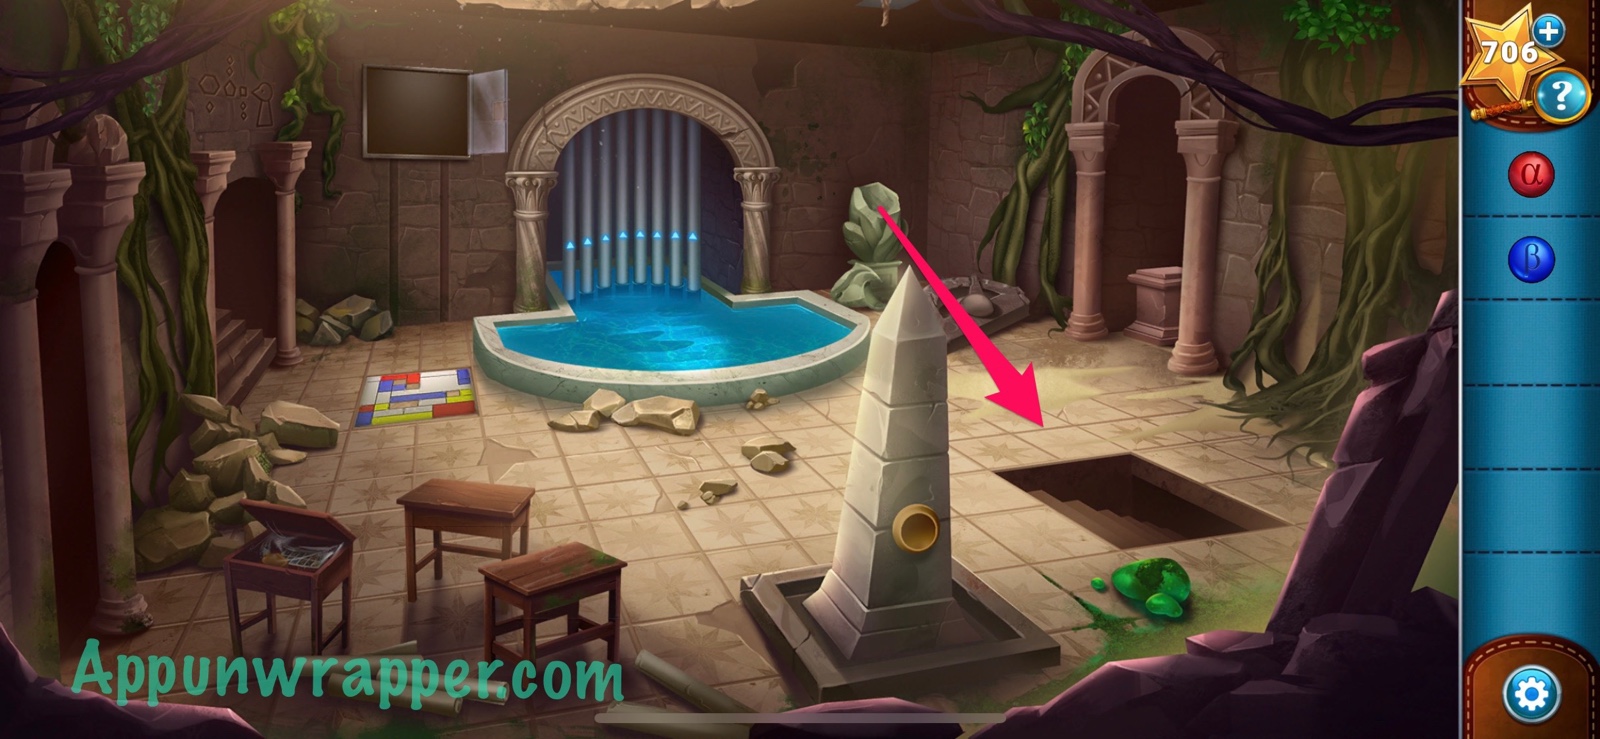
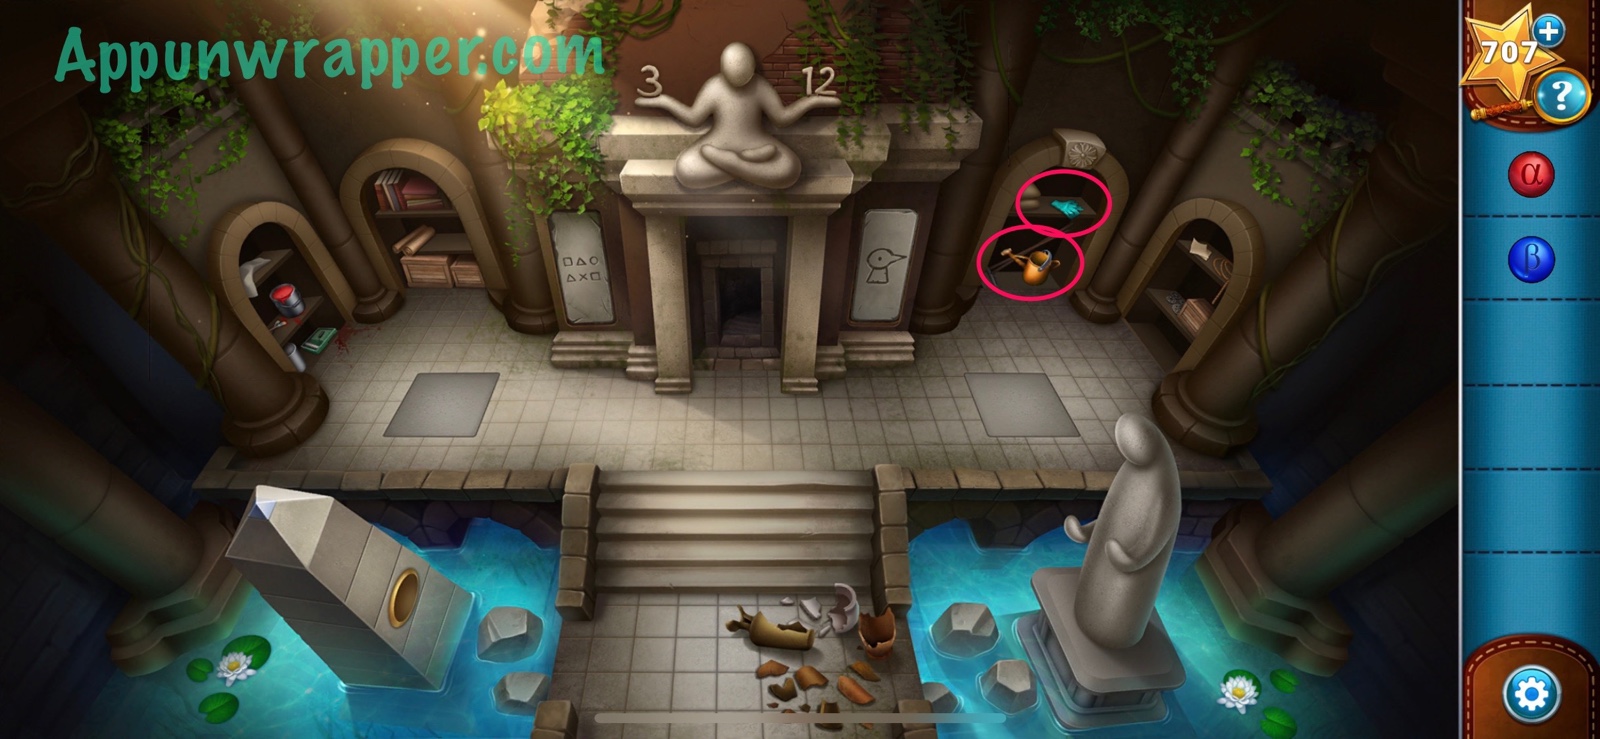
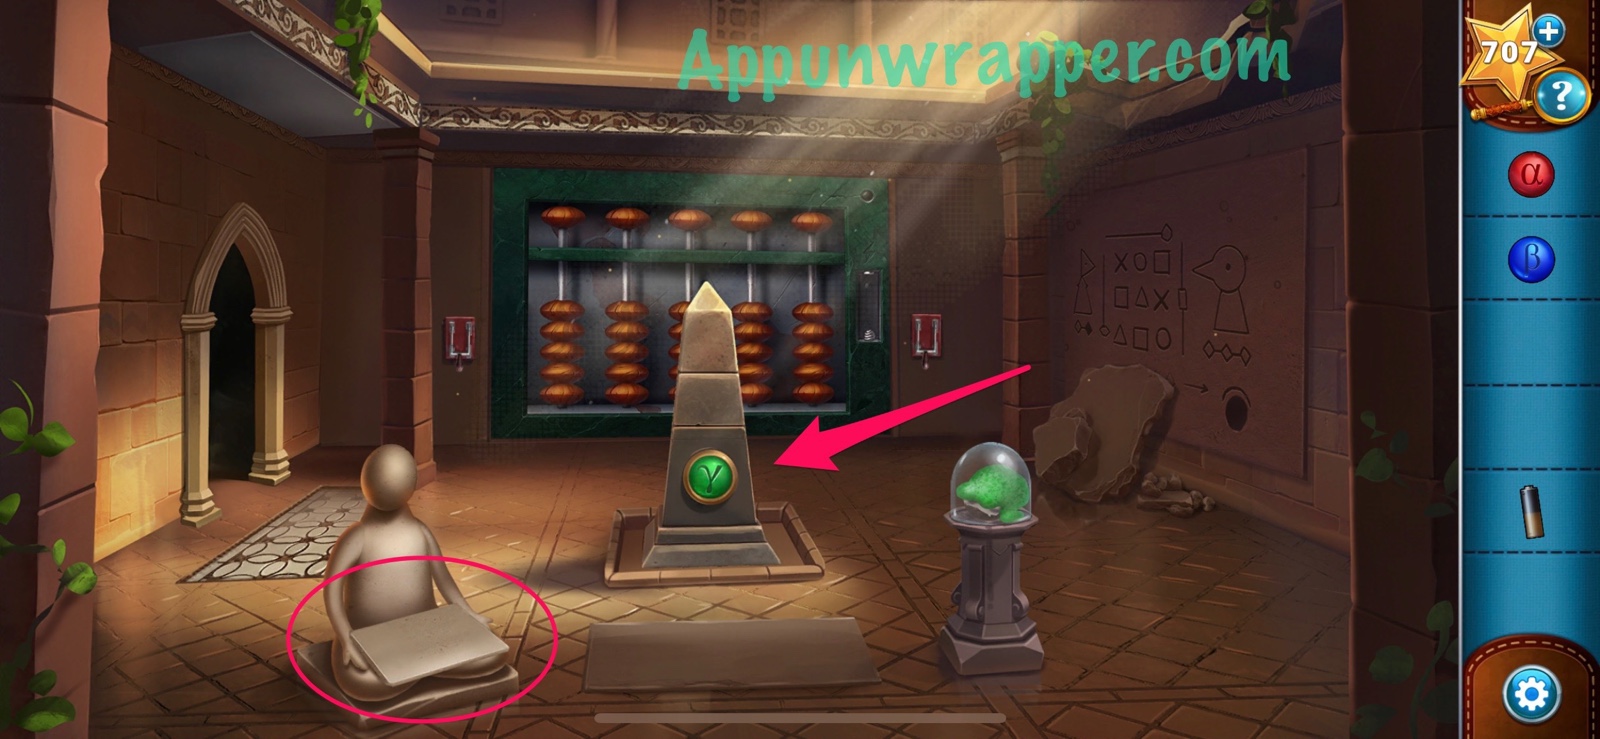
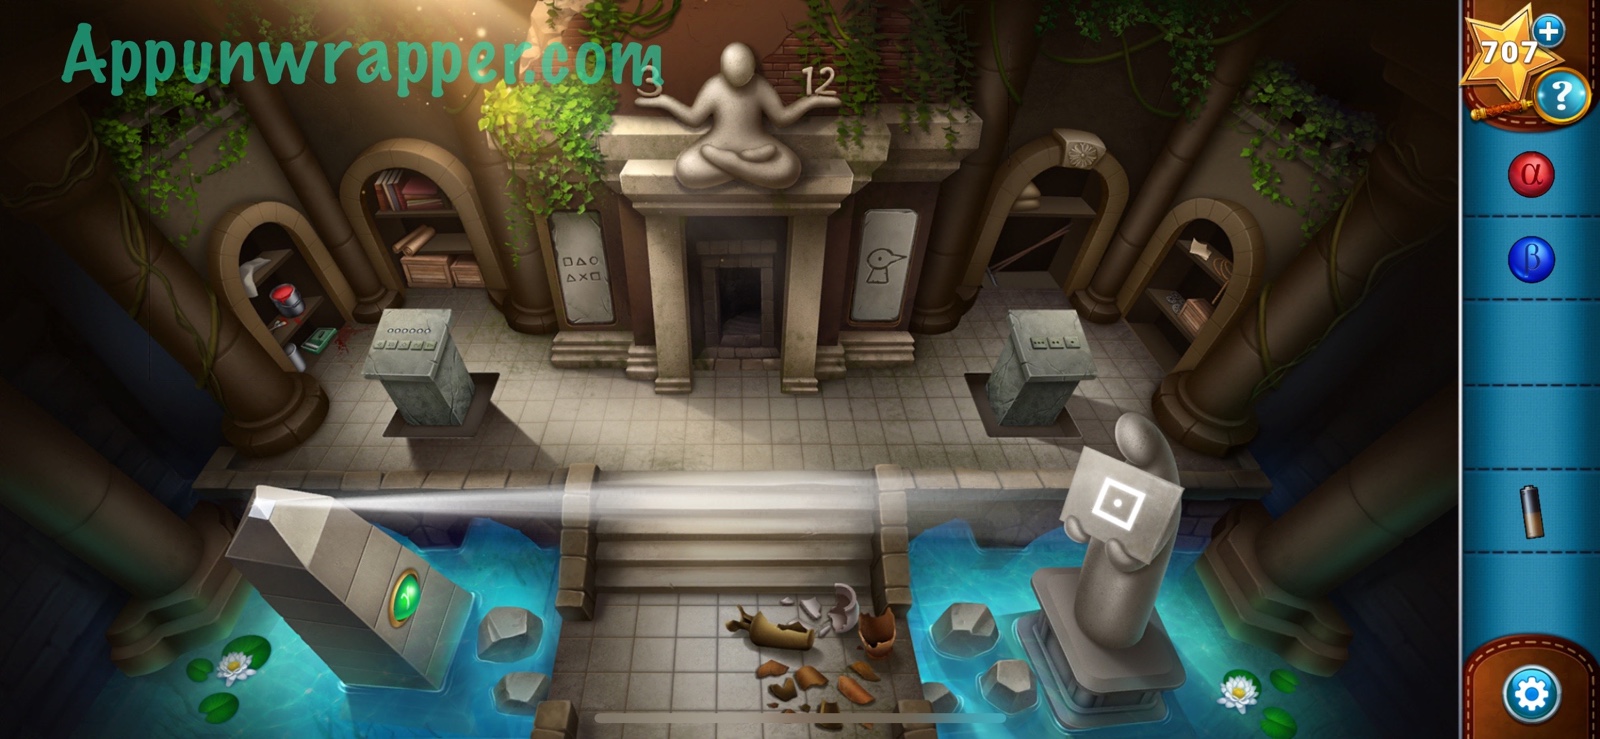
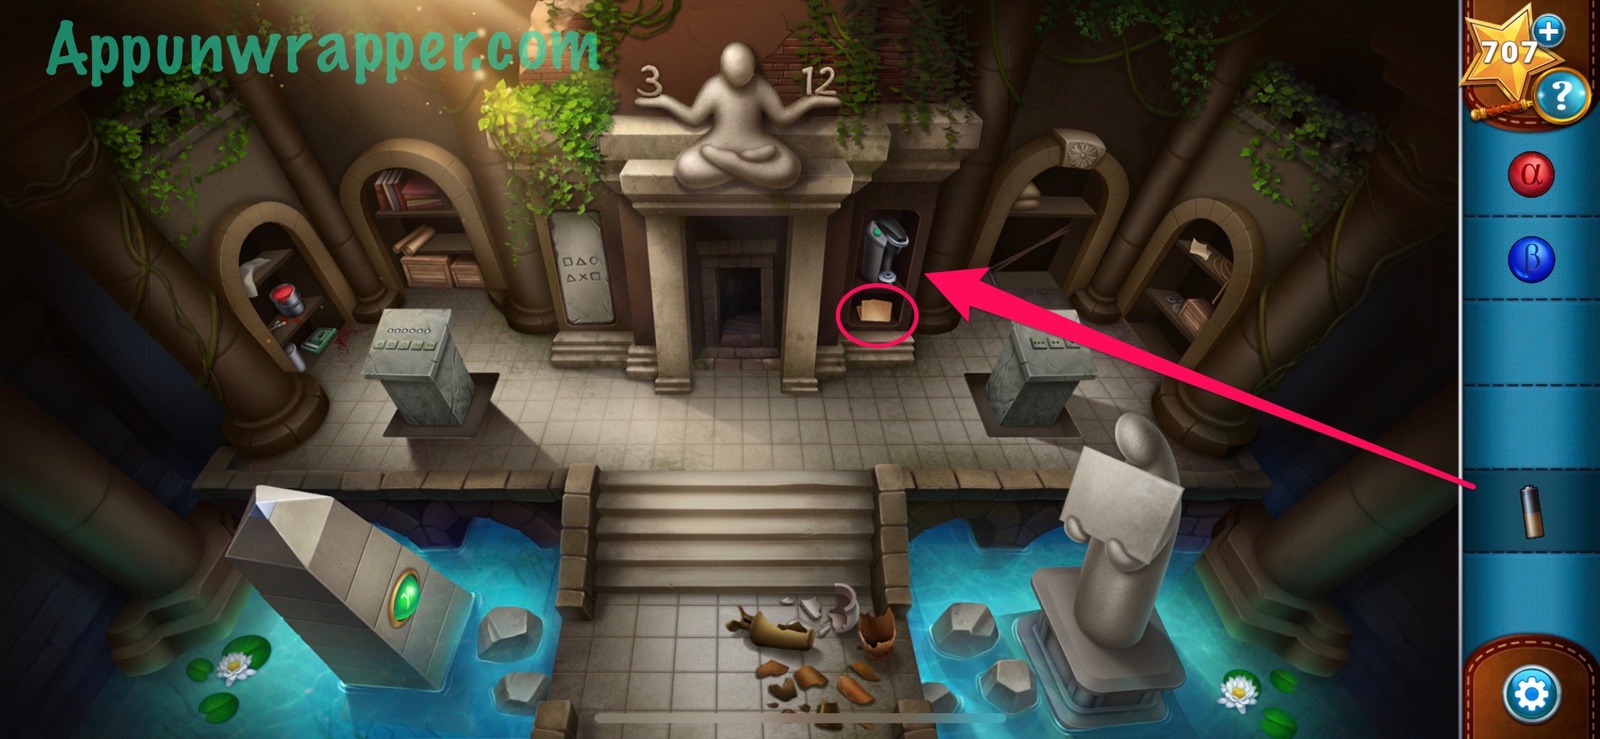
1. We’re now in the Ruins of Recursia. Break the jars to find the key. Also, open the left closet to reveal a bucket of red paint. And last, notice the numbers the statue is holding up and the etchings next to them.
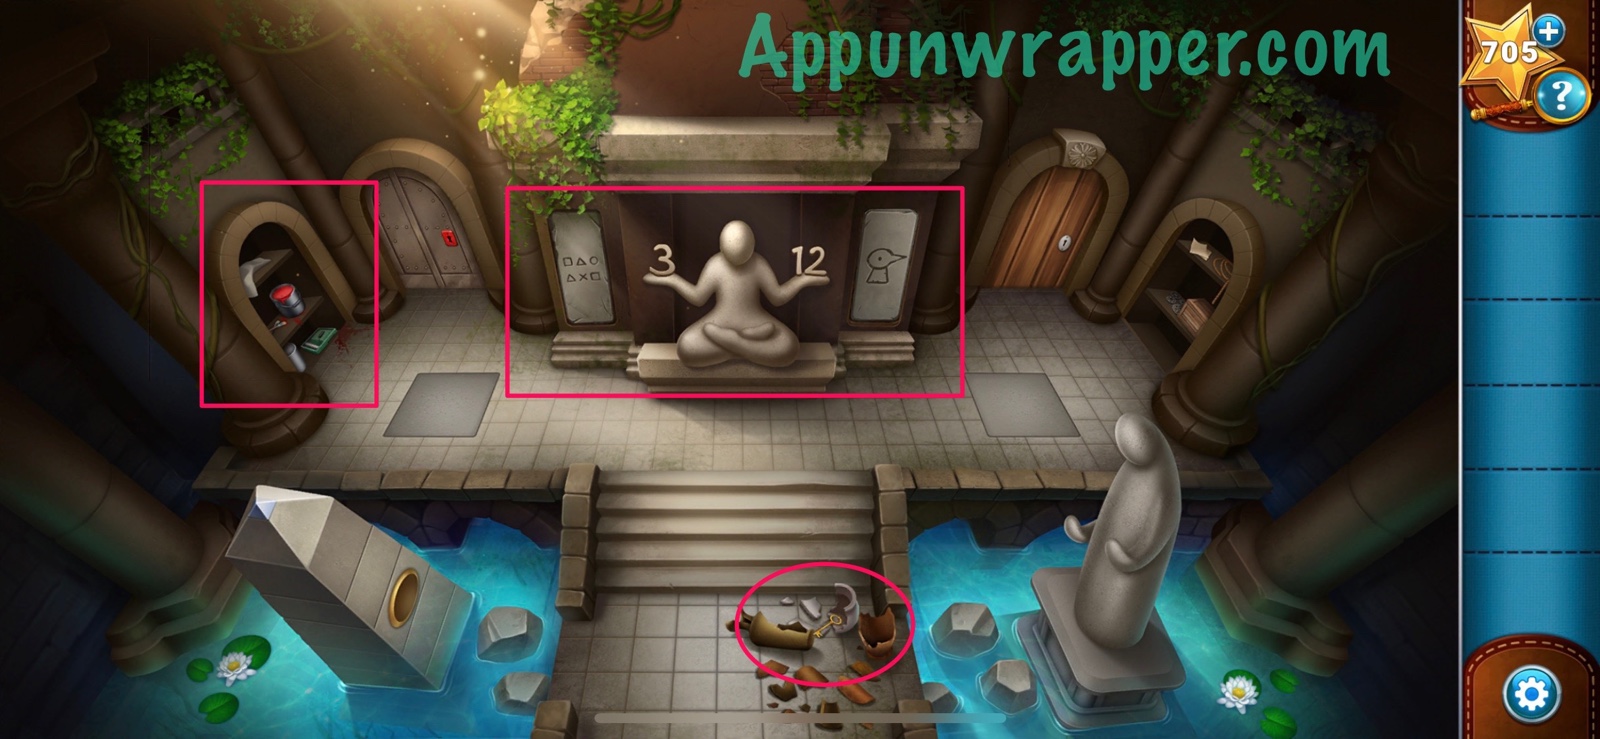
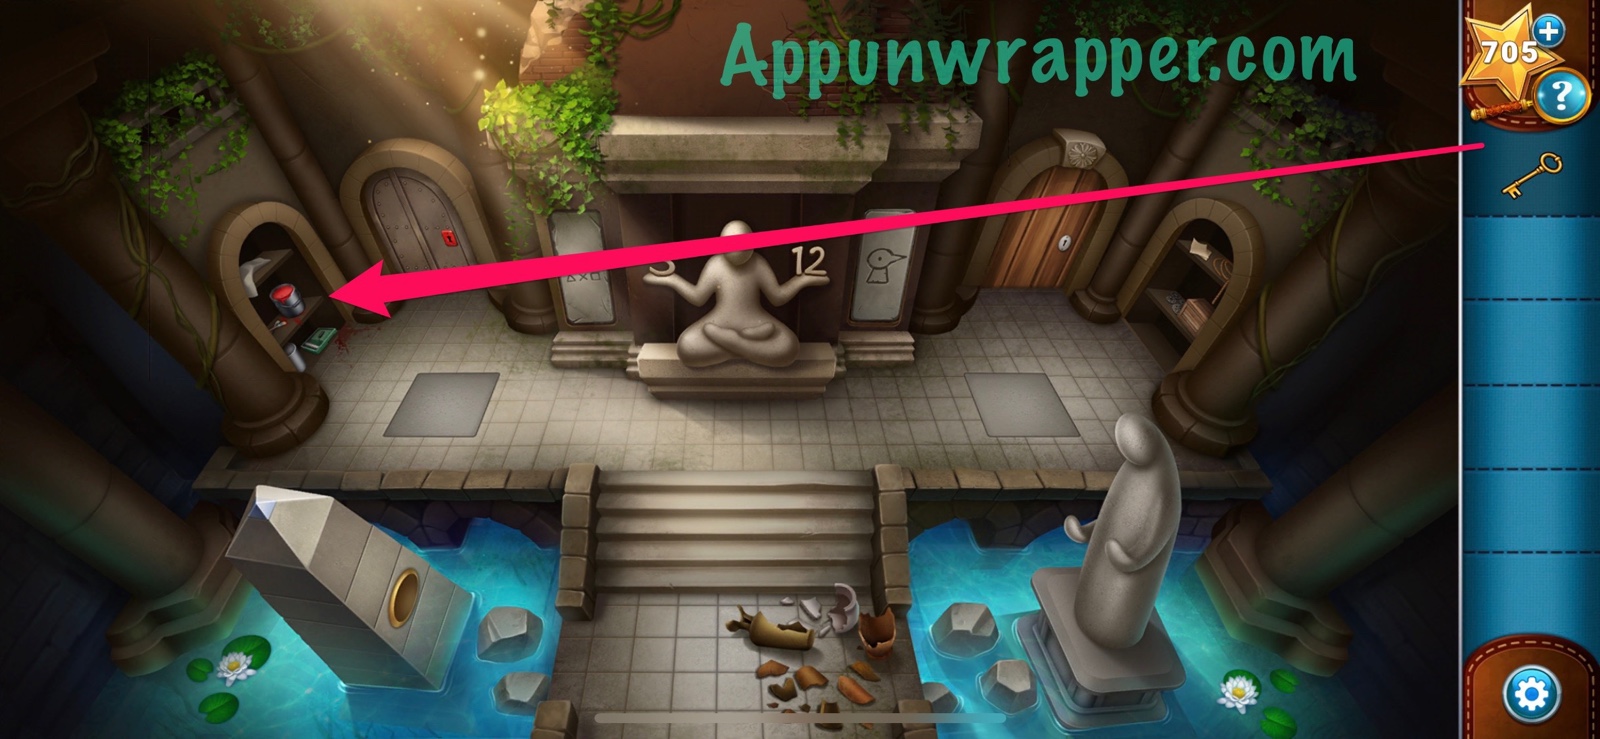
2. Dip the key into the red paint to make it a red key. Then use it to unlock the door with the red lock. Take the alpha orb from inside that closet.

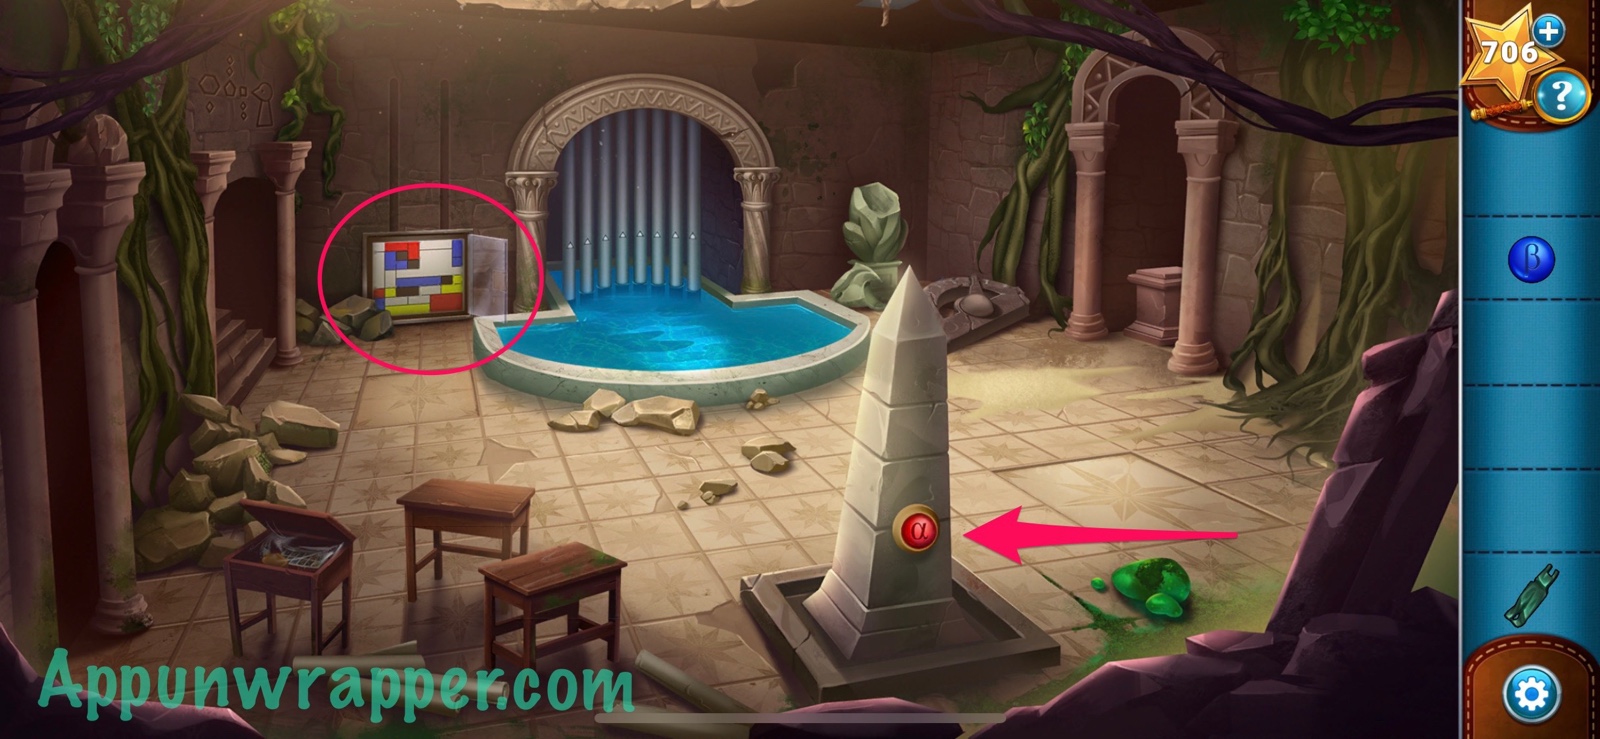
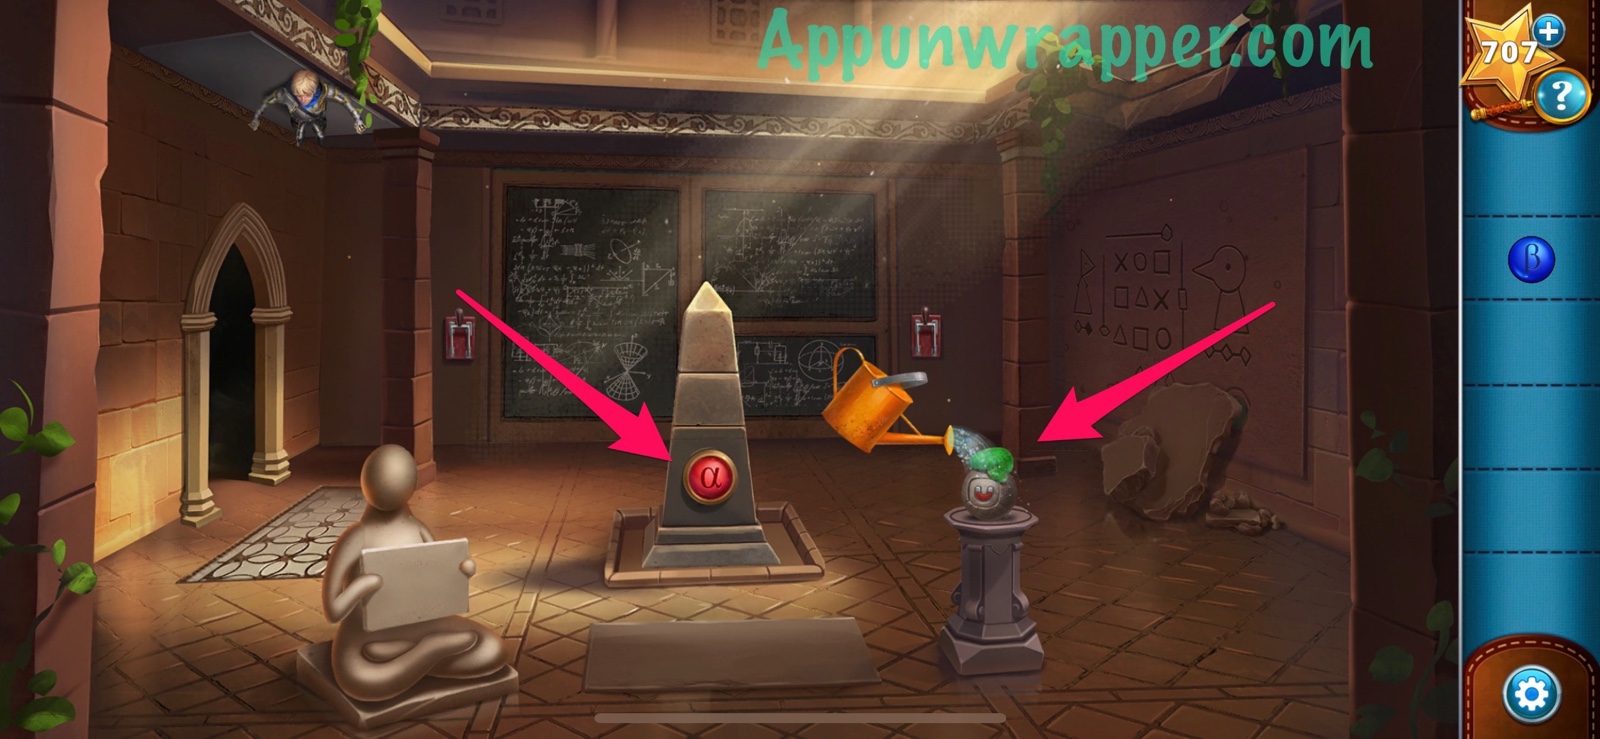
3. Place the orb in the slot on the obelisk and then examine the pedestal that rises up.
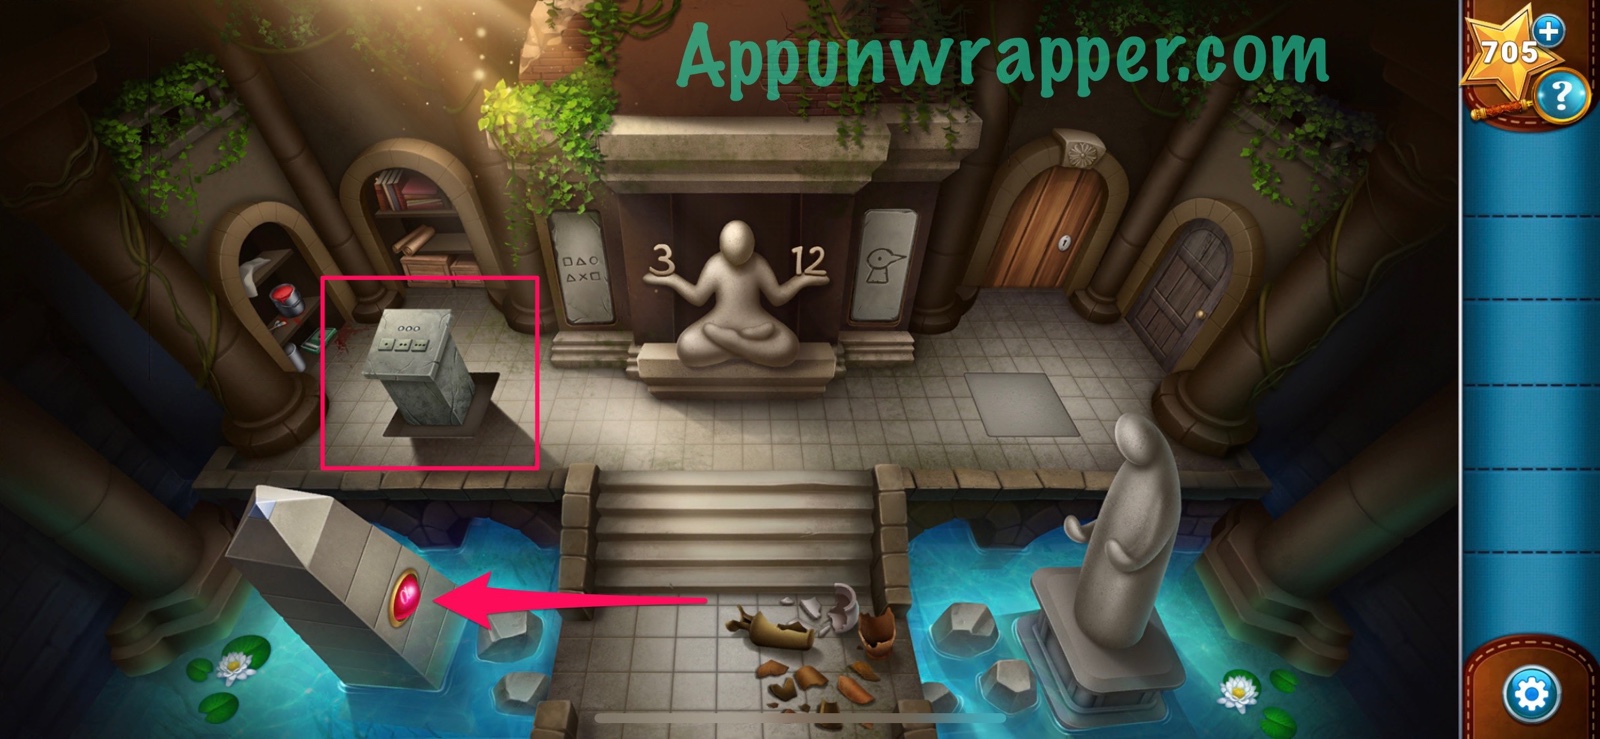
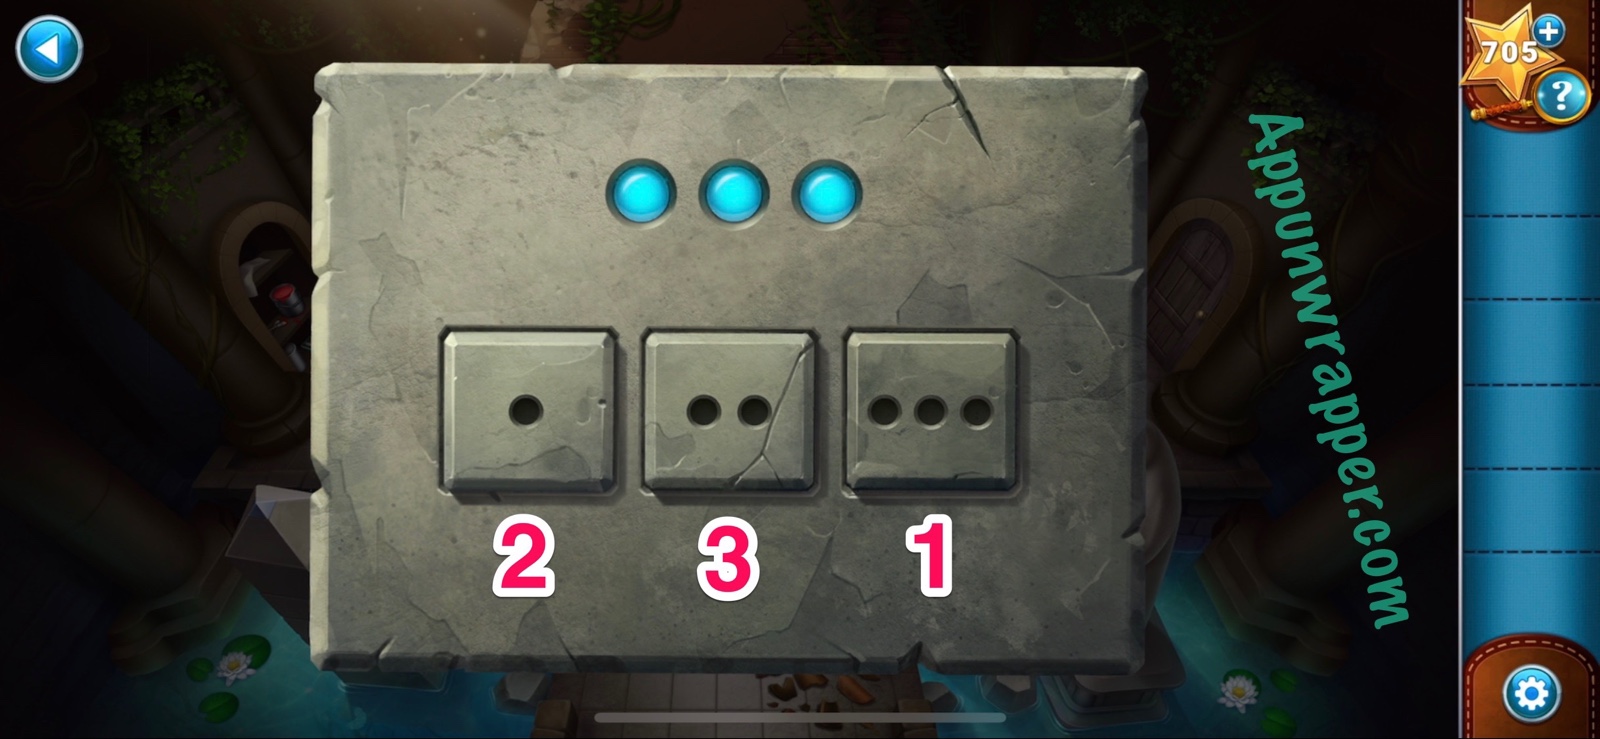
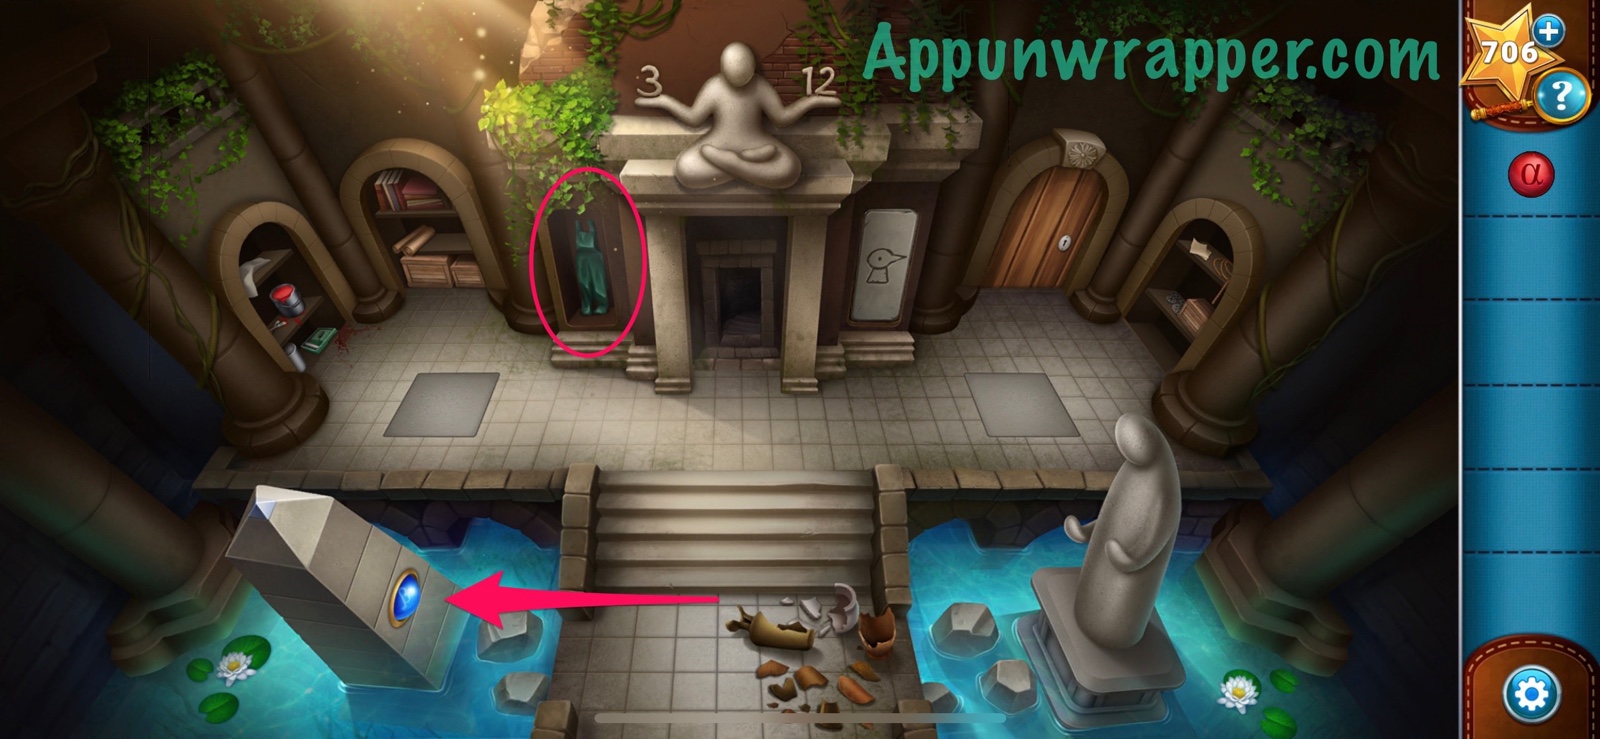
4. We have to solve this puzzle. There’s three buttons and three lights. Look again at the numbers the statue is holding up — I thought they were 3 & 12, but it’s 3, 1, 2. So press the numbers in that order.
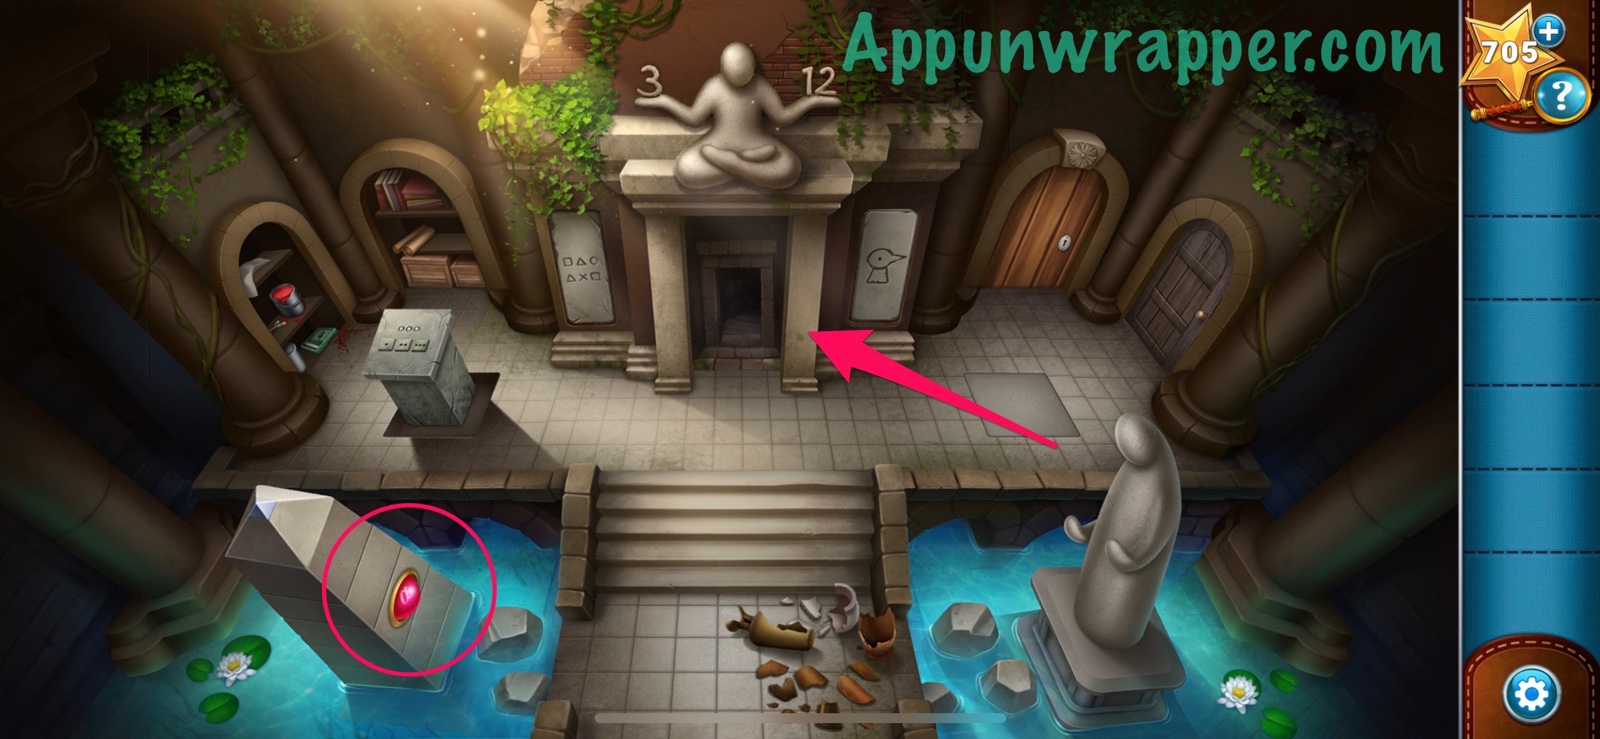
5. Take the alpha orb back and then go through the newly opened door.
6. Find the bow and arrow.
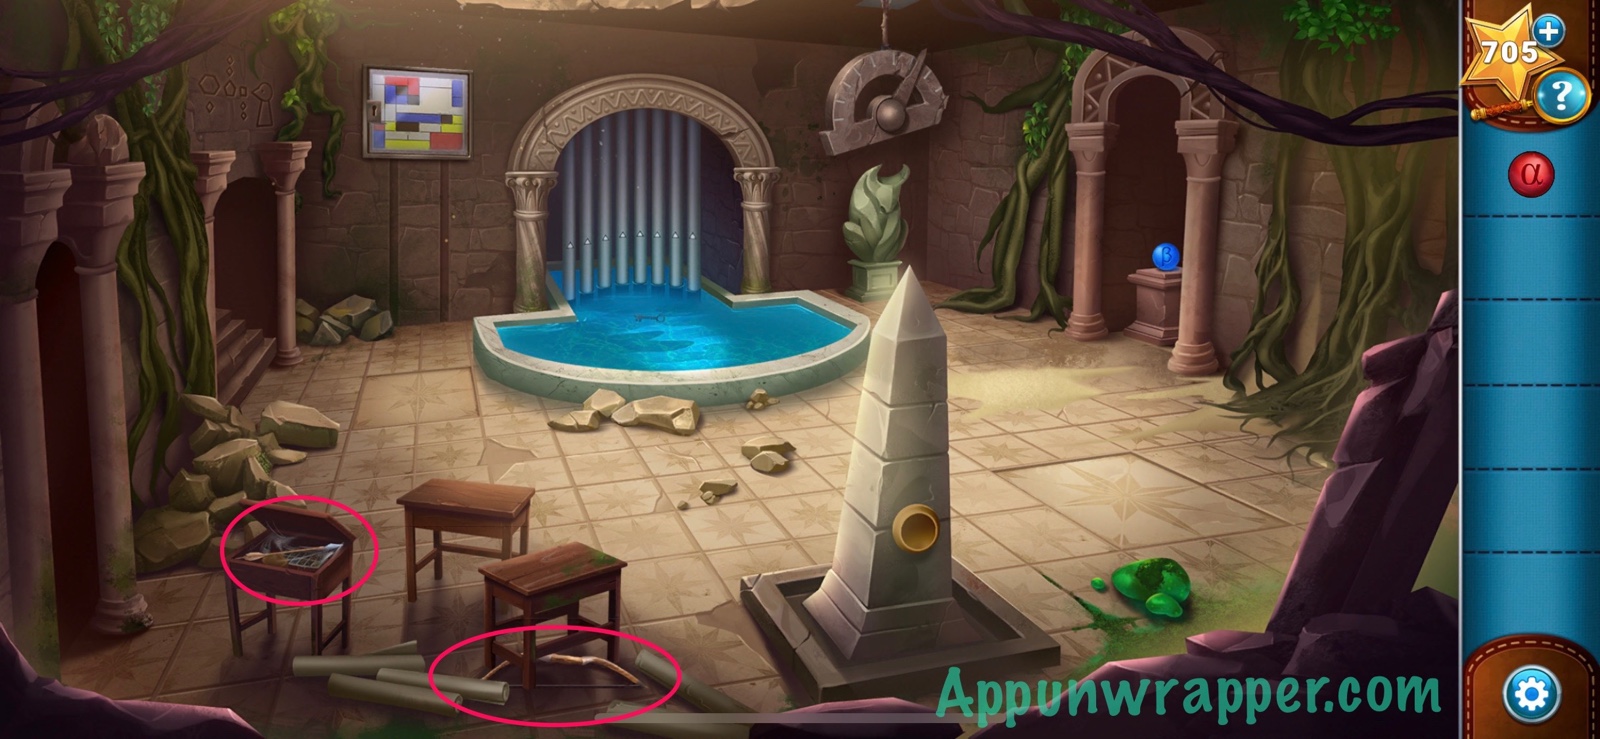
7. Use the bow and arrow to shoot down the hanging statue. Then take the beta orb.
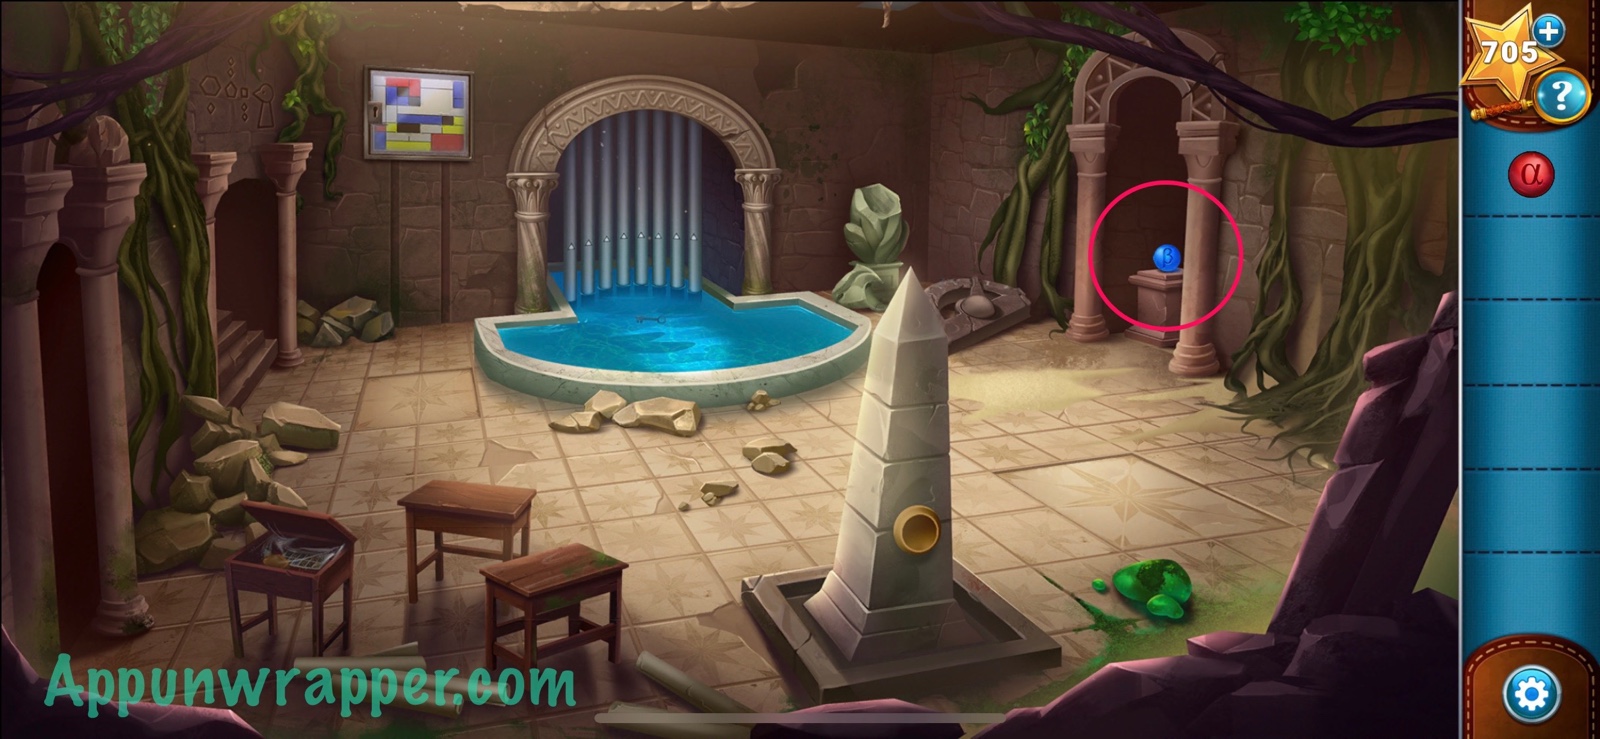
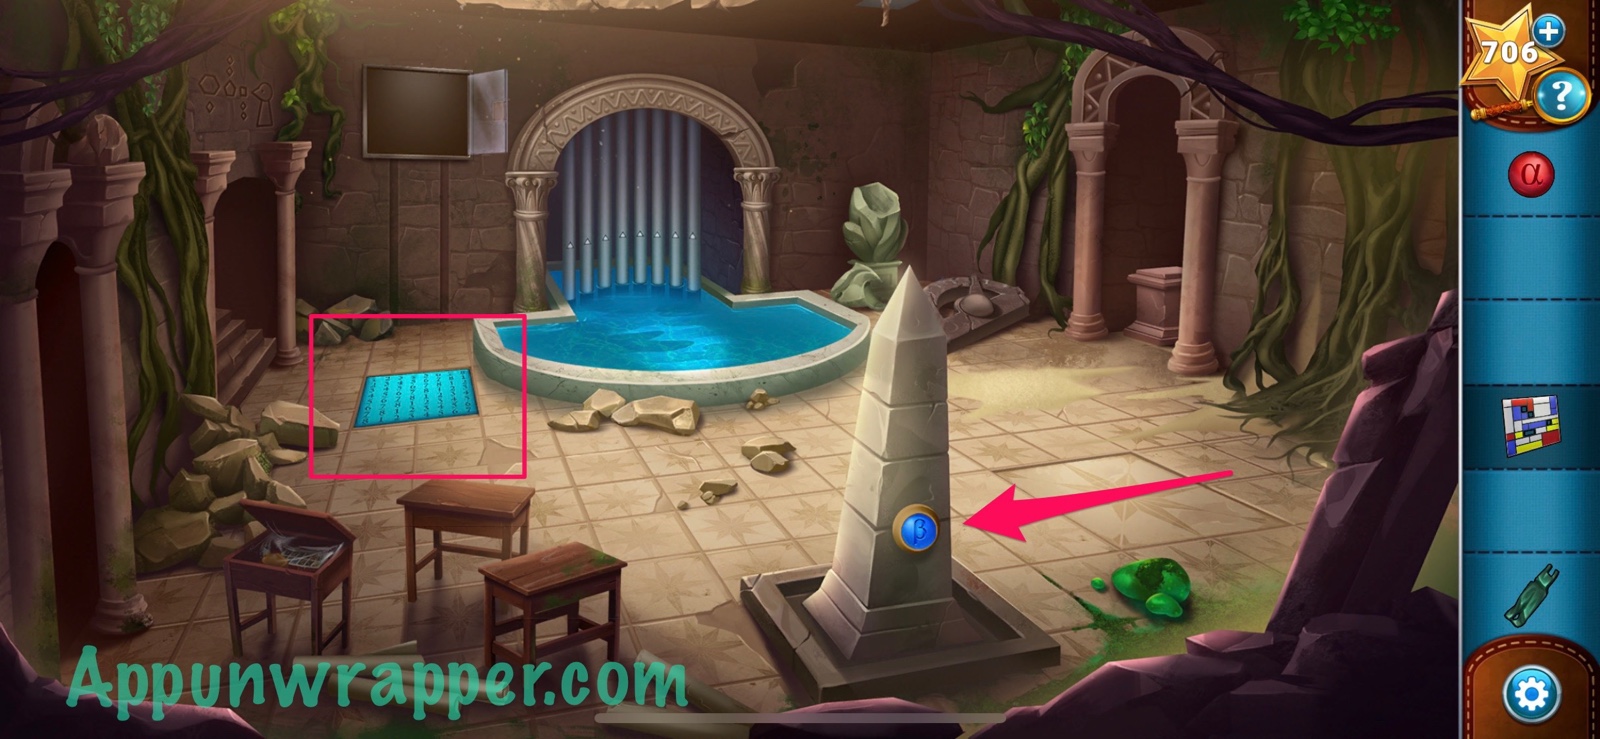
8. Go back upstairs. Place the beta orb in the slot on the obelisk and then take the waders. Take the orb back.
9. Go back down the stairs and use the waders in the pool. Take the painting key.
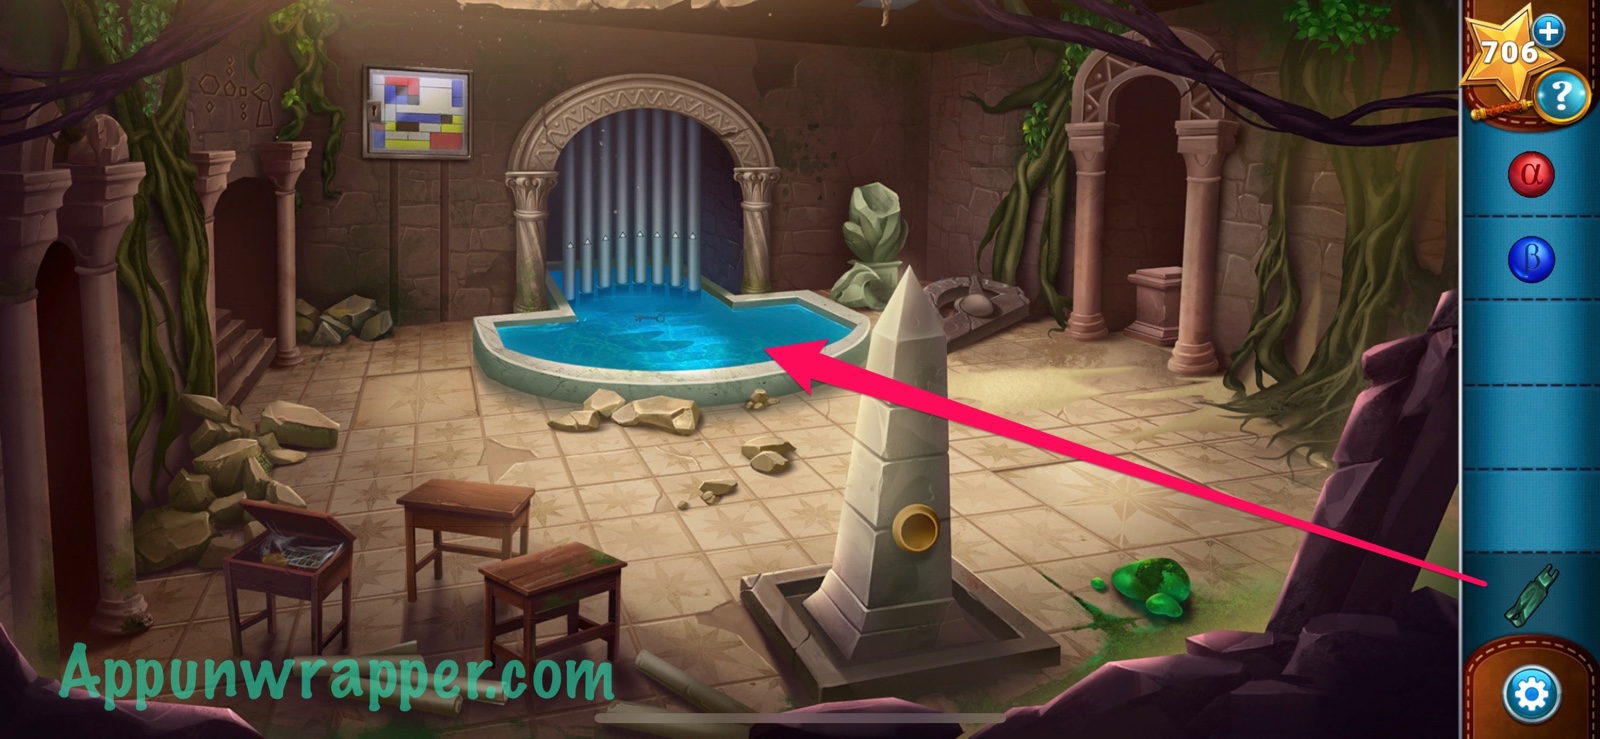

10. Place the alpha orb in the slot on the obelisk. The painting lowers down. Use the painting key to unlock it and grab the painting. Don’t forget to take the alpha orb back.
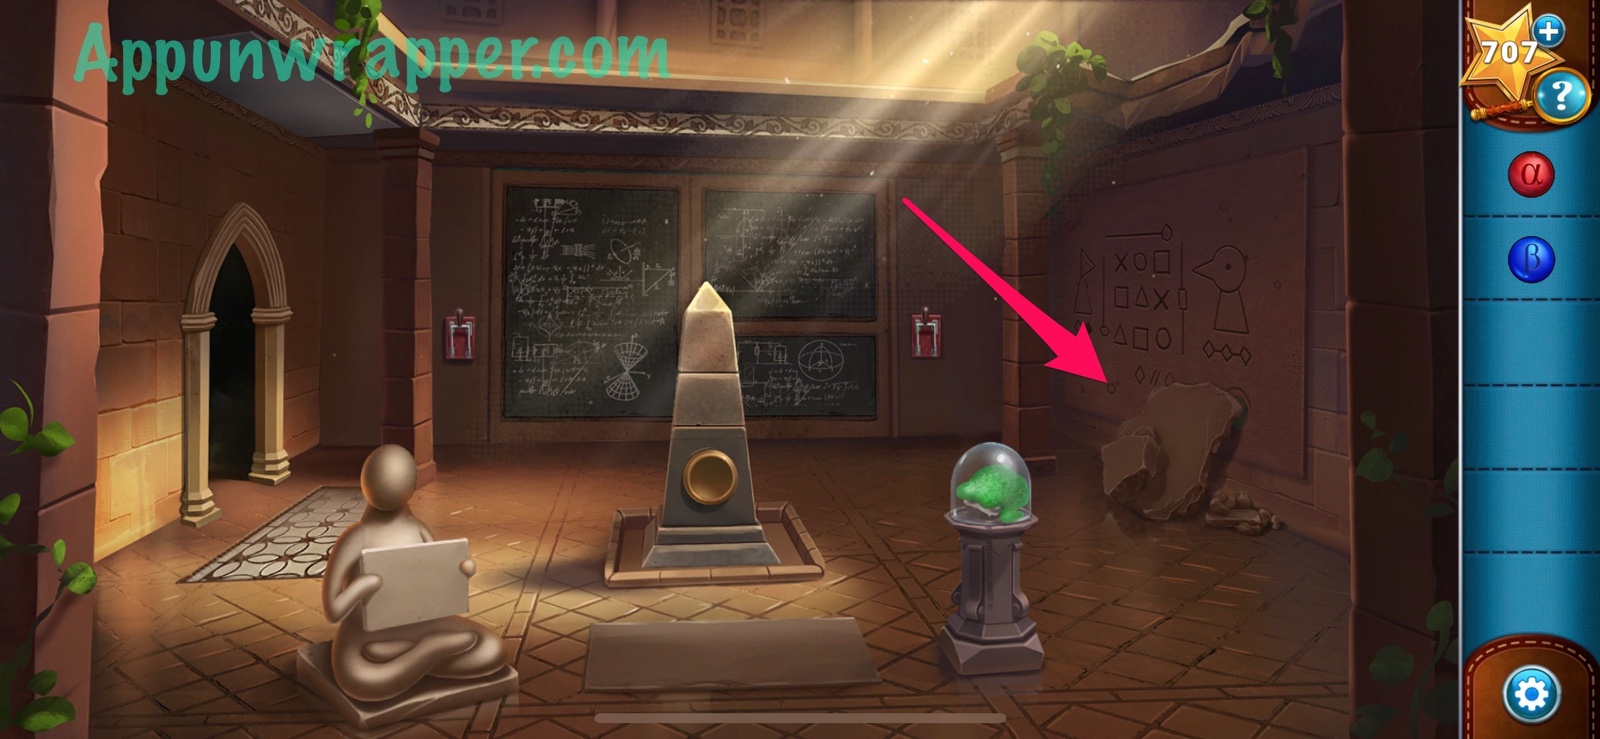
11. Place the beta orb on the obelisk and then place the painting over the numbers on the floor to see just a few of them through the cutout. It’s a clue!
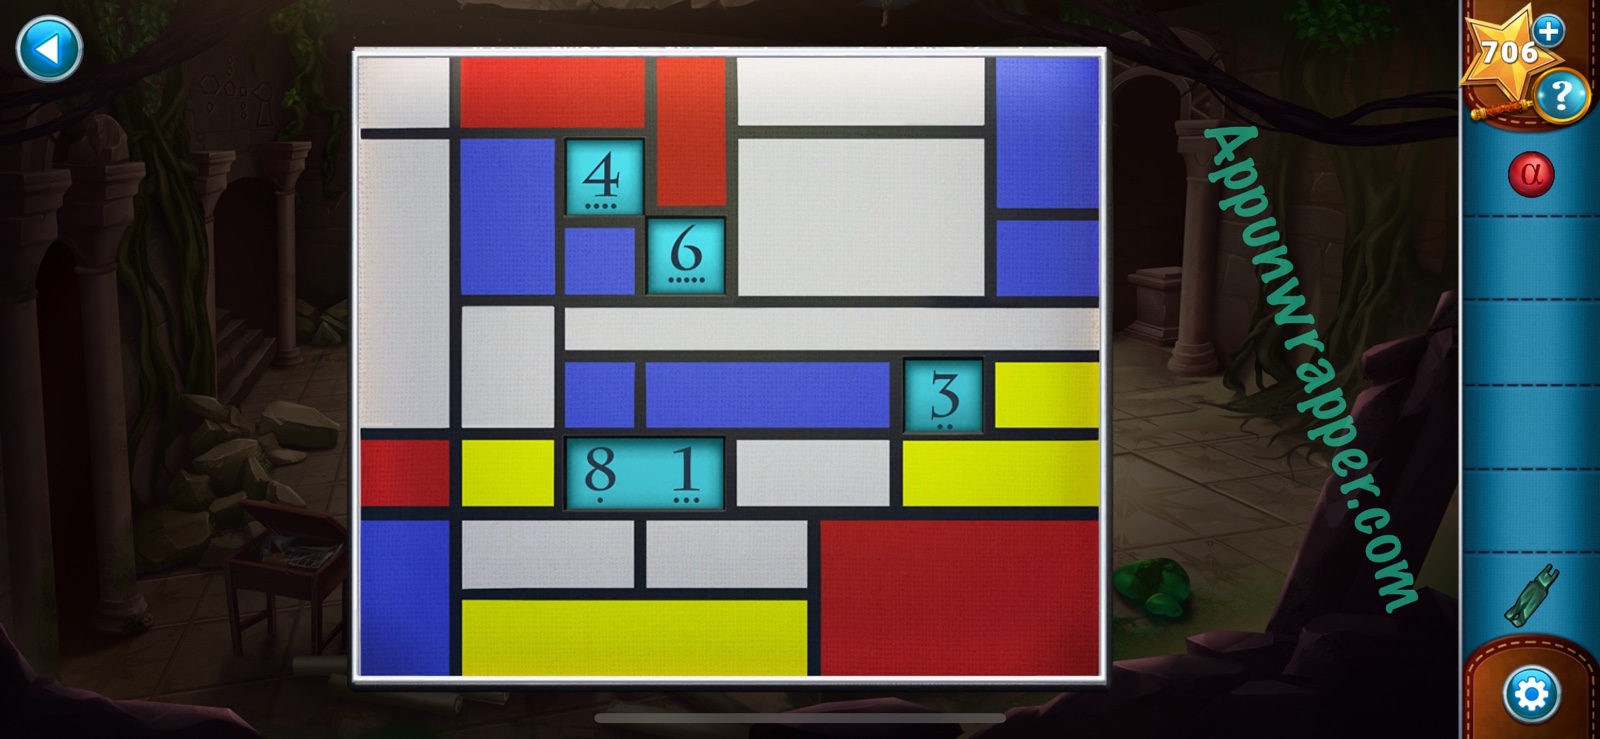
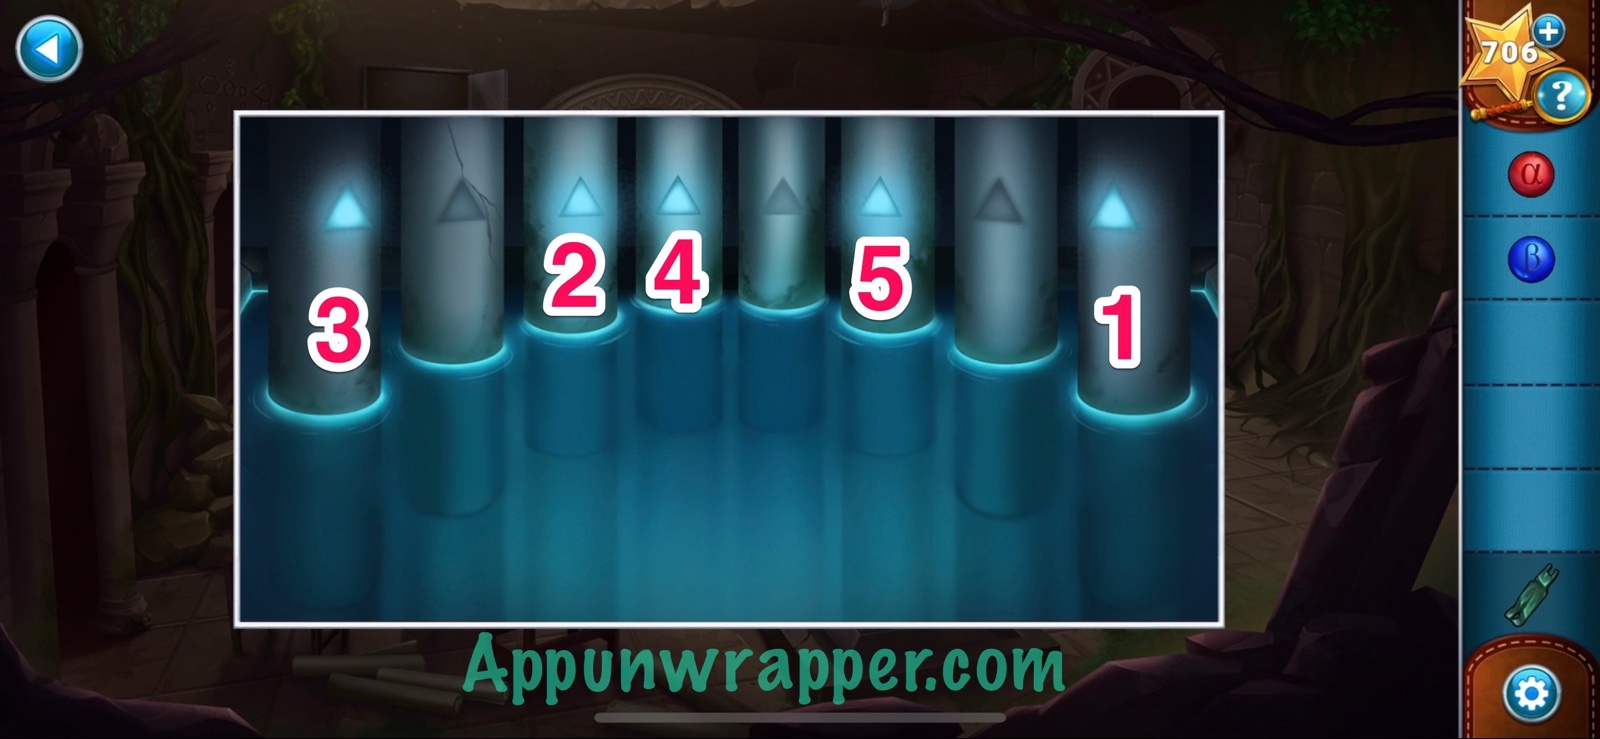
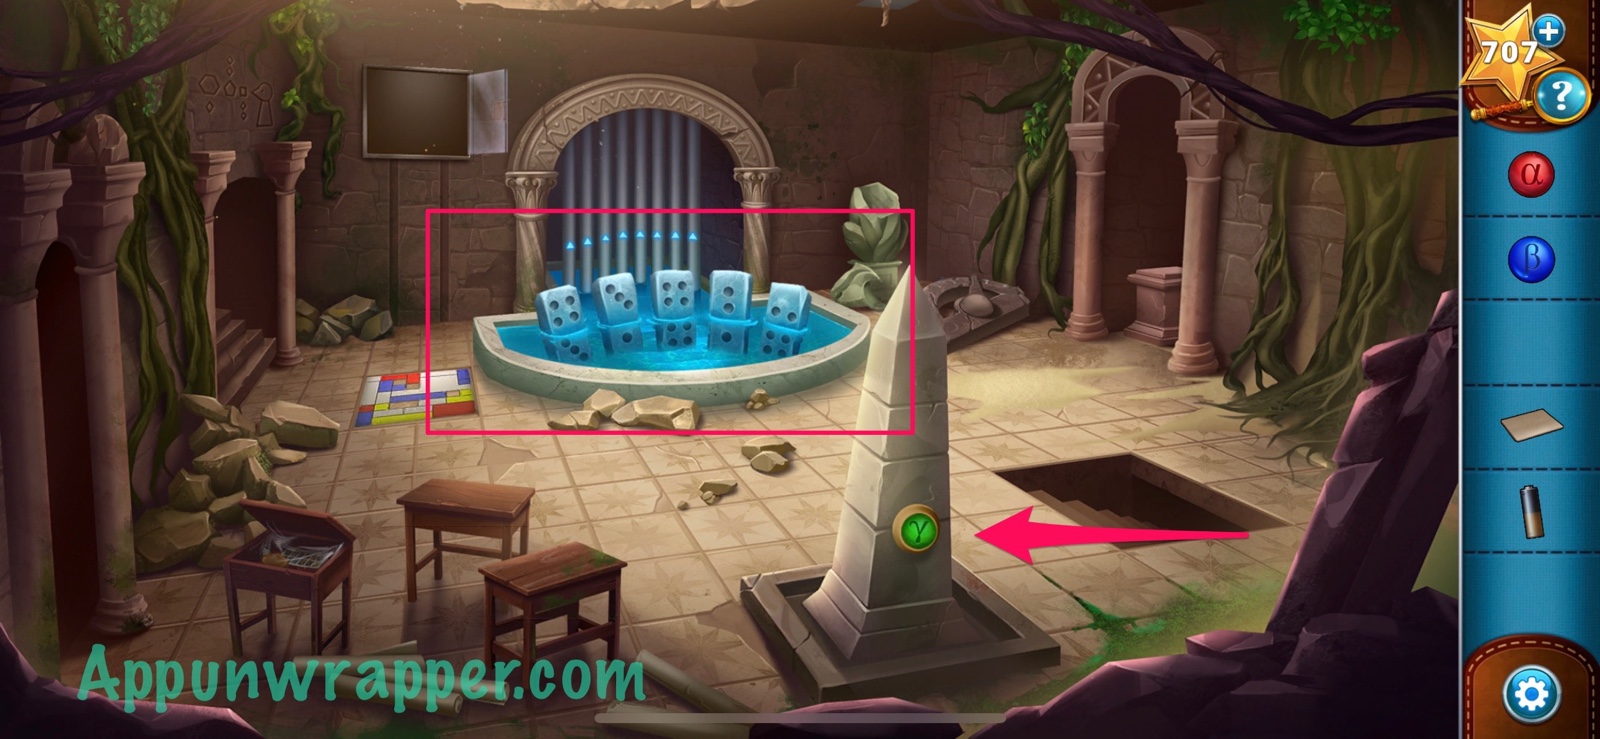
12. Take the orb back and then dive back into the pool. The clue from the painting had dots under each number. If you count the dots, they go from 1 – 5. So they’re telling you the order of the numbers. They go: 8, 3, 1, 4, 6. So now just press the arrows in the pool in that order. Or follow my image below. Then head down the stairs.
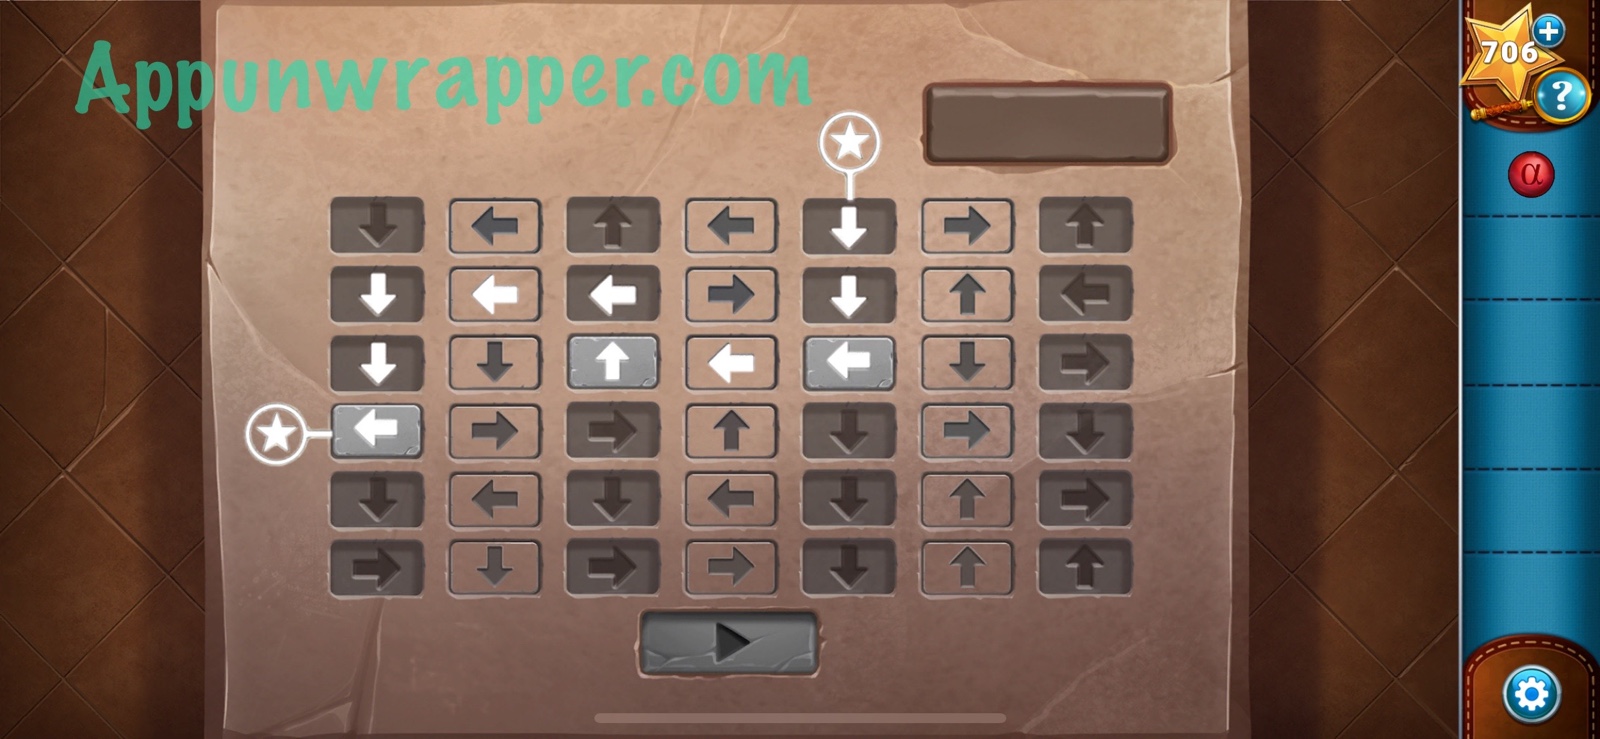
13. Cedrick gets himself stuck to the ceiling, so we have to figure out how to get him down. First, place the beta orb on the obelisk. We now have to solve the Arrow Tiles Puzzle. You need to form a path between the two stars. Drag the stone tiles to the correct slots and then press PLAY.
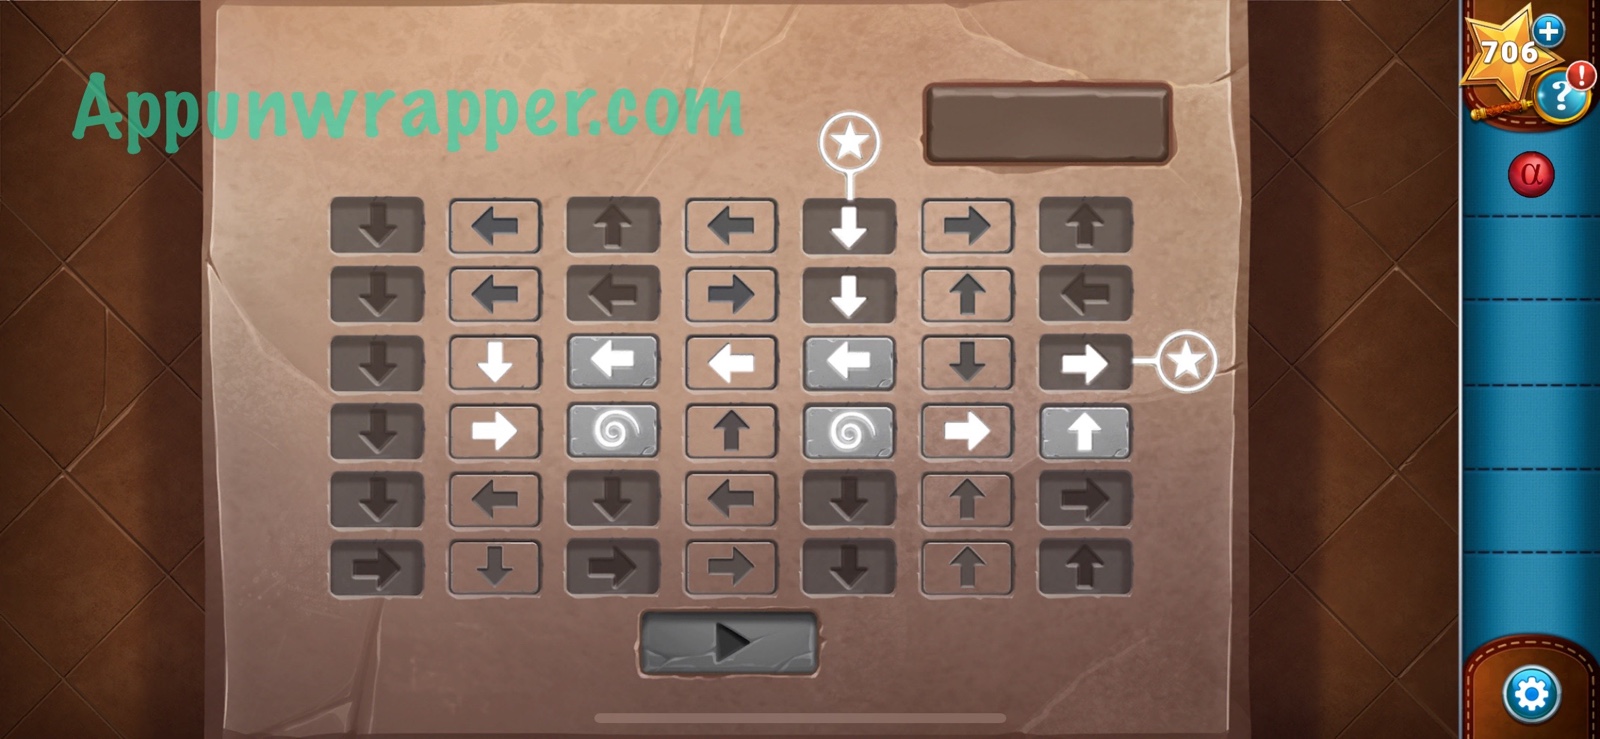
14. Now we have another puzzle, but this time you have teleport tiles to use. When you finish, take the flower key. Don’t forget to take the beta orb back!

15. Go back to the first room and use the flower key to unlock the locked closet. Take the rubber gloves and watering can from inside.
16. Then go downstairs once and use the gloves to pick up the mossbottom ooze. Also, fill the watering can with water.
17. Go downstairs and place the aloha orb on the obelisk. Now you can access the magnet stone. Use the ooze to destroy it. It’s happening very slowly, though, so pour water from the watering can onto it. Then Cedrick will finally drop from the ceiling. Don’t forget to take the orb back.
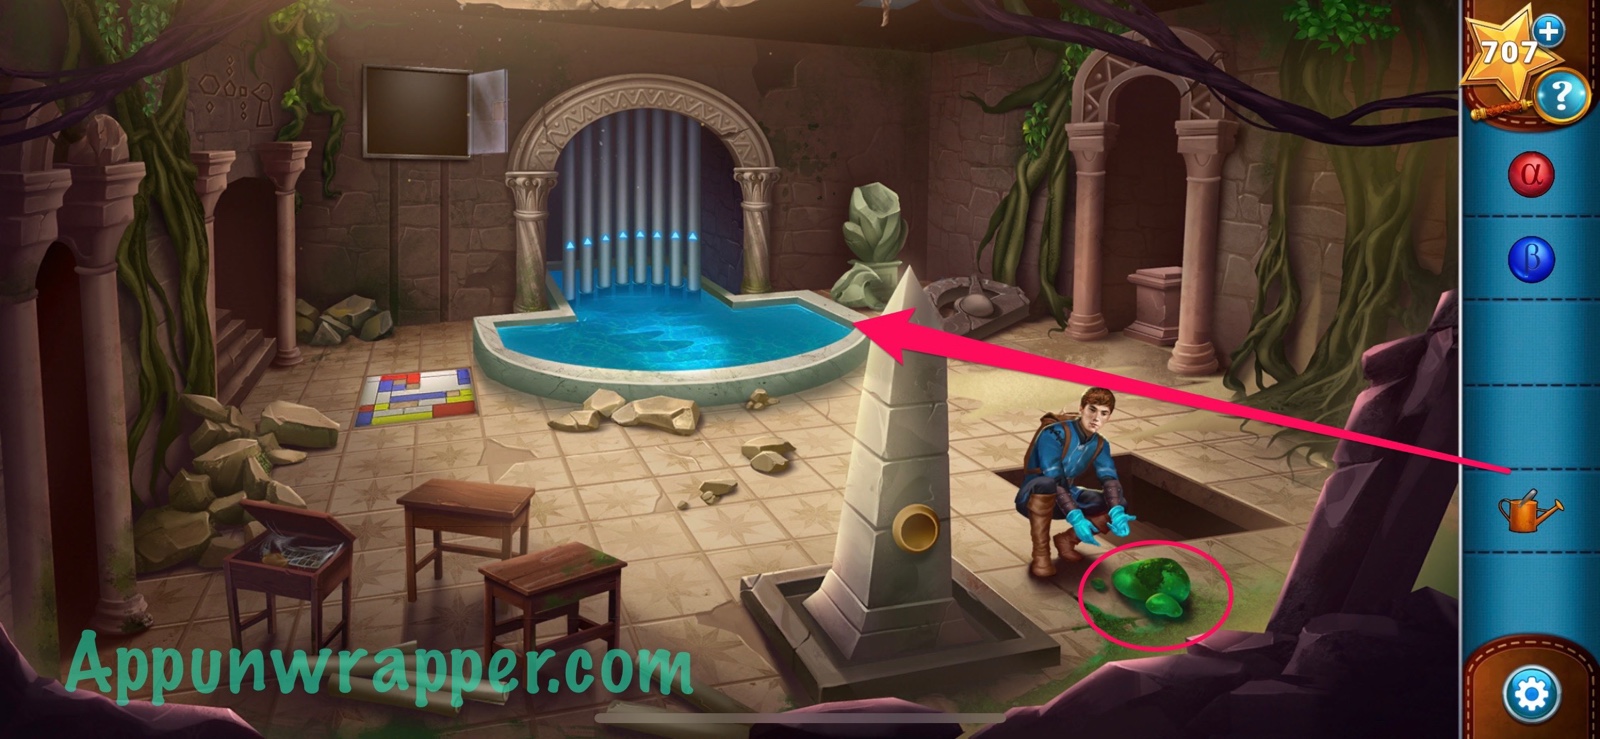
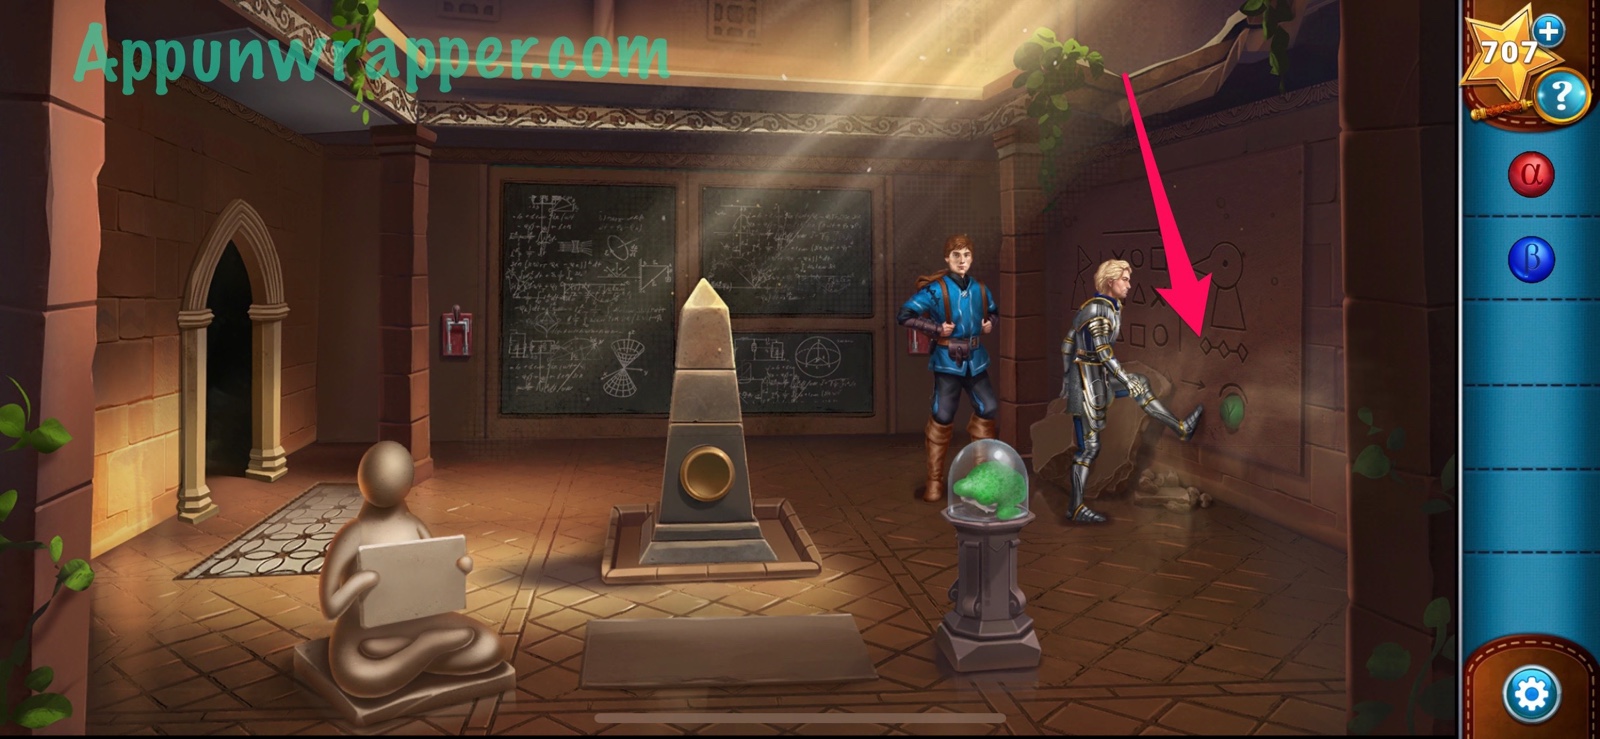
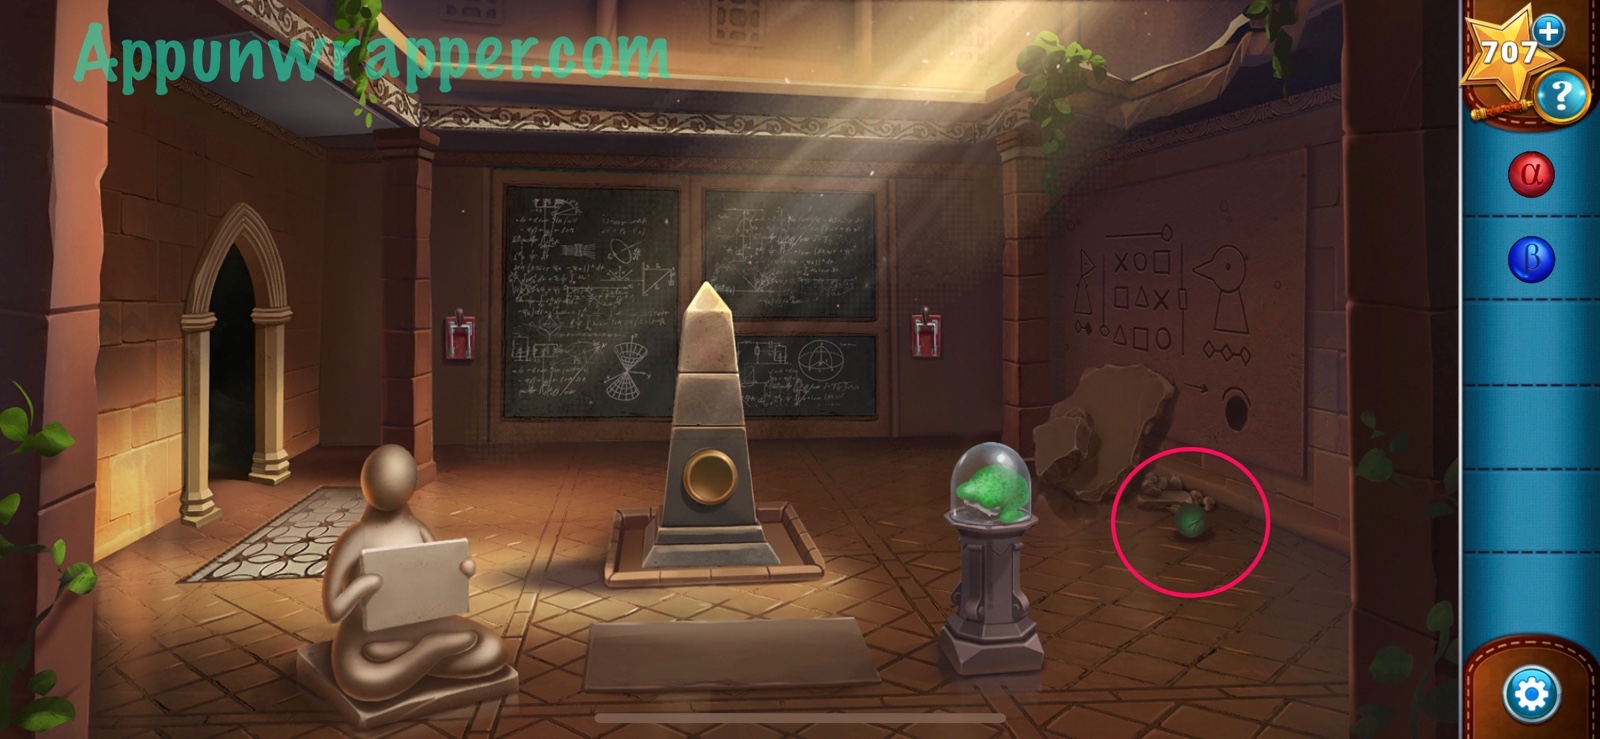
18. Have Cedrick push aside the rubble. Then try to get the green orb. He’ll kick at the wall until it falls out. Pick up the gamma orb.
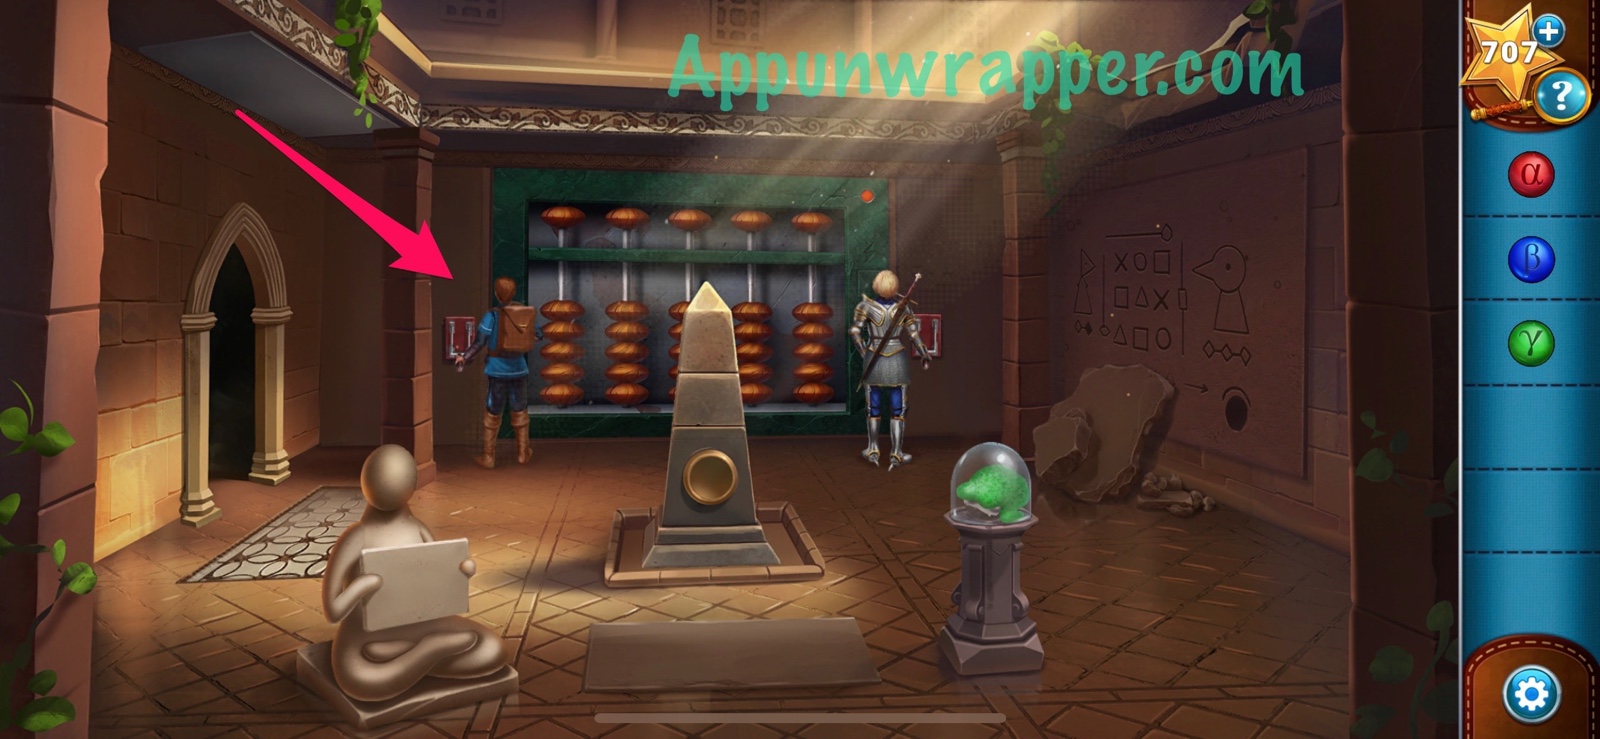
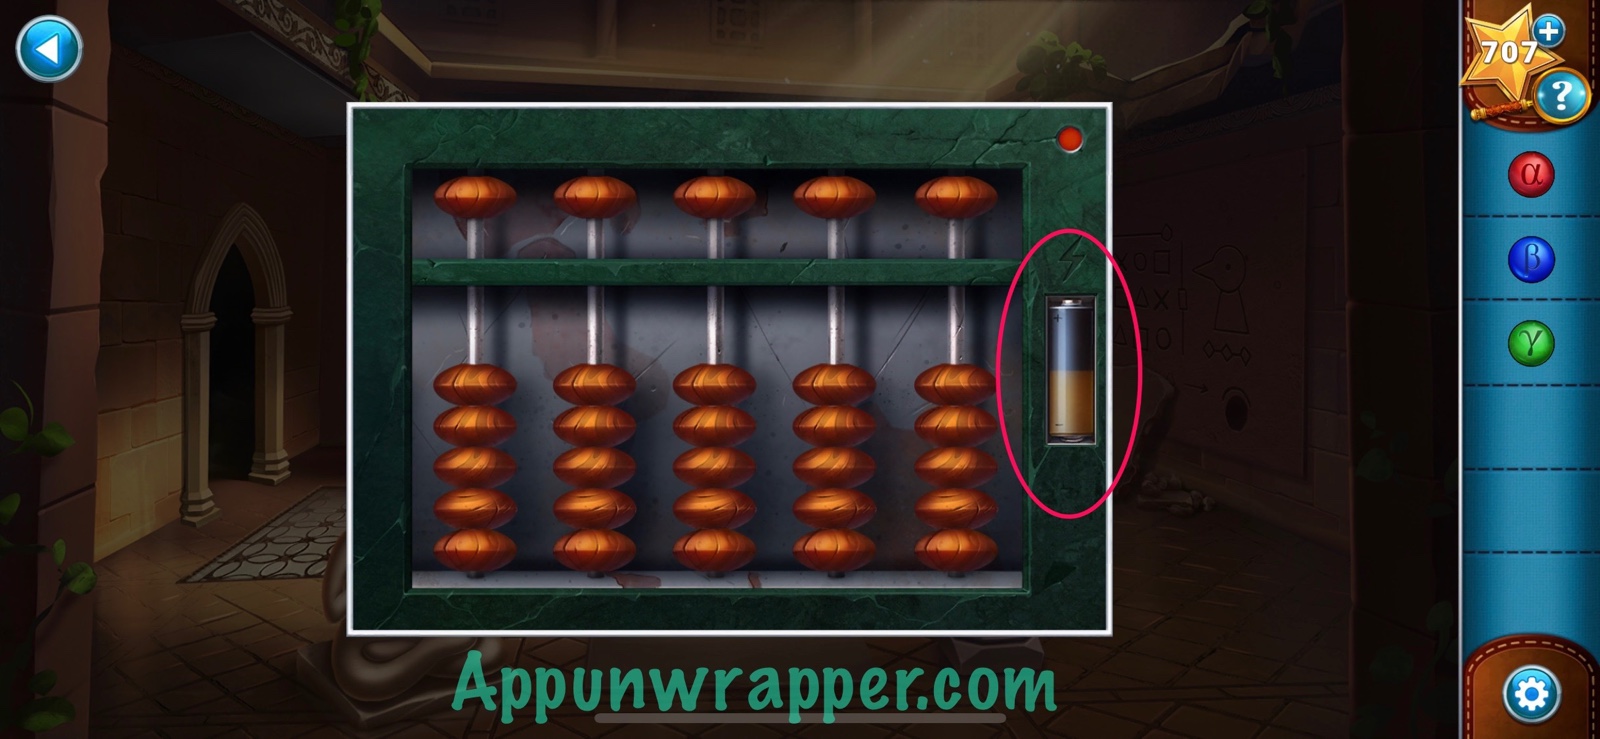
19. Pull one of the levers to see that they don’t stay down. Then, pull one of them again to get Martin and Cedrick to pull them both down at the same time, revealing a giant abacus. Open the battery slot and take the dead battery.
20. Place the gamma orb on the obelisk and take the stone tablet from the stone figure. Make sure to retrieve the gamma orb.
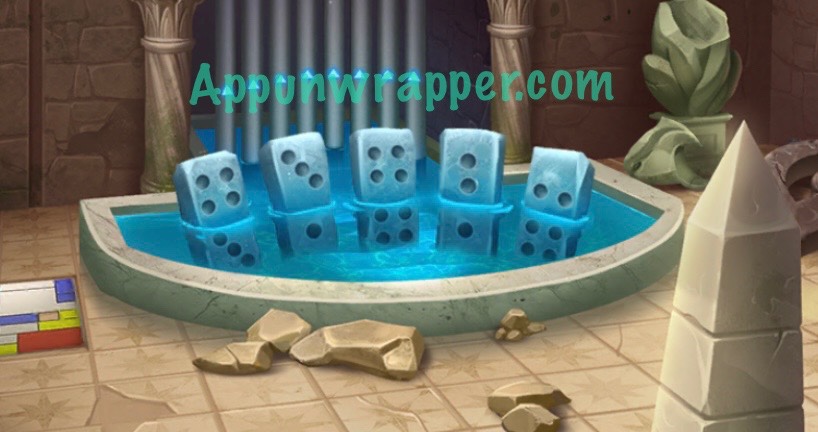
21. Go back up one floor and place the gamma orb on the obelisk. Notice the dominos in the pool. It’s a clue, so make note of it and then retrieve the orb.
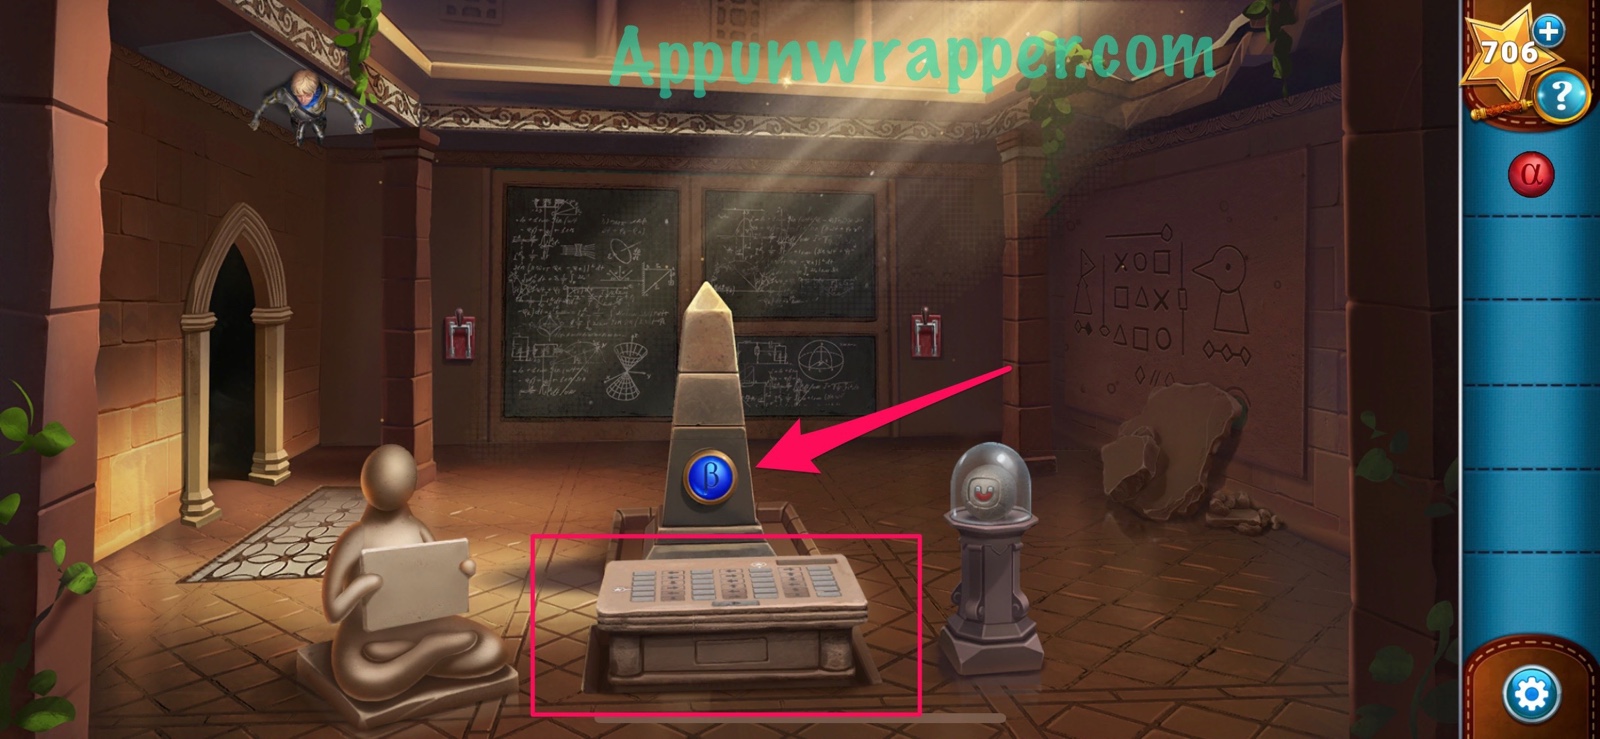
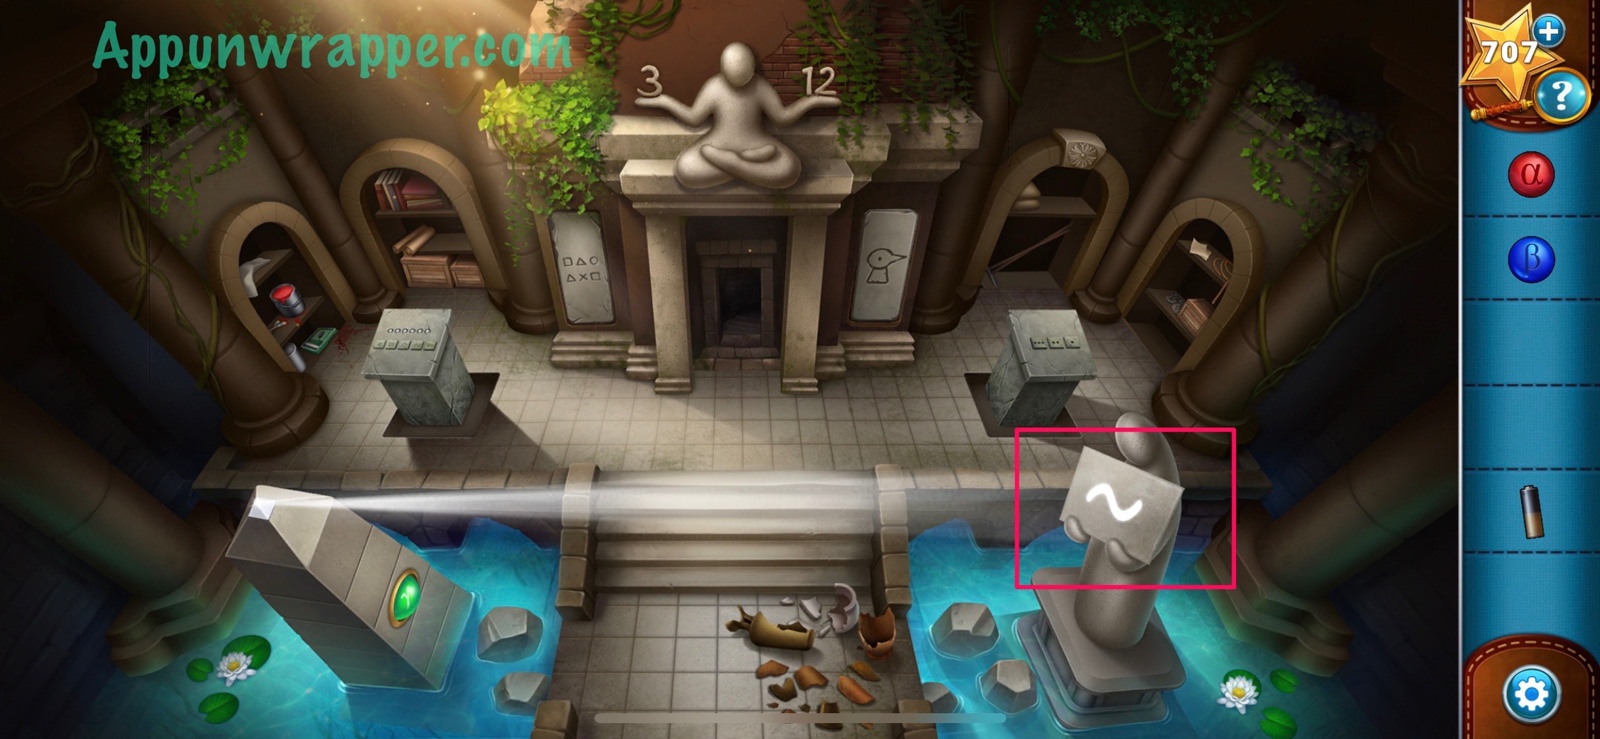
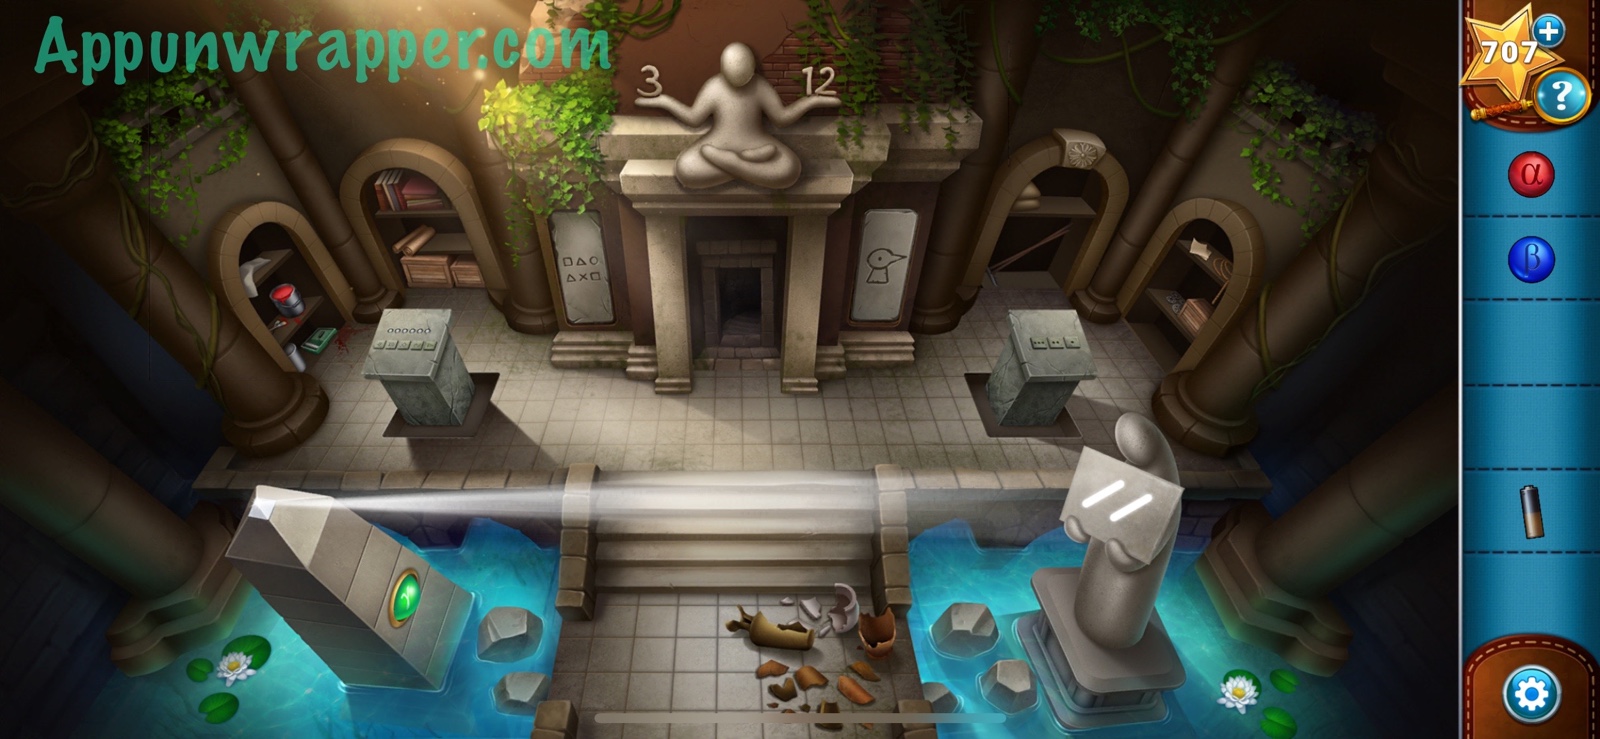
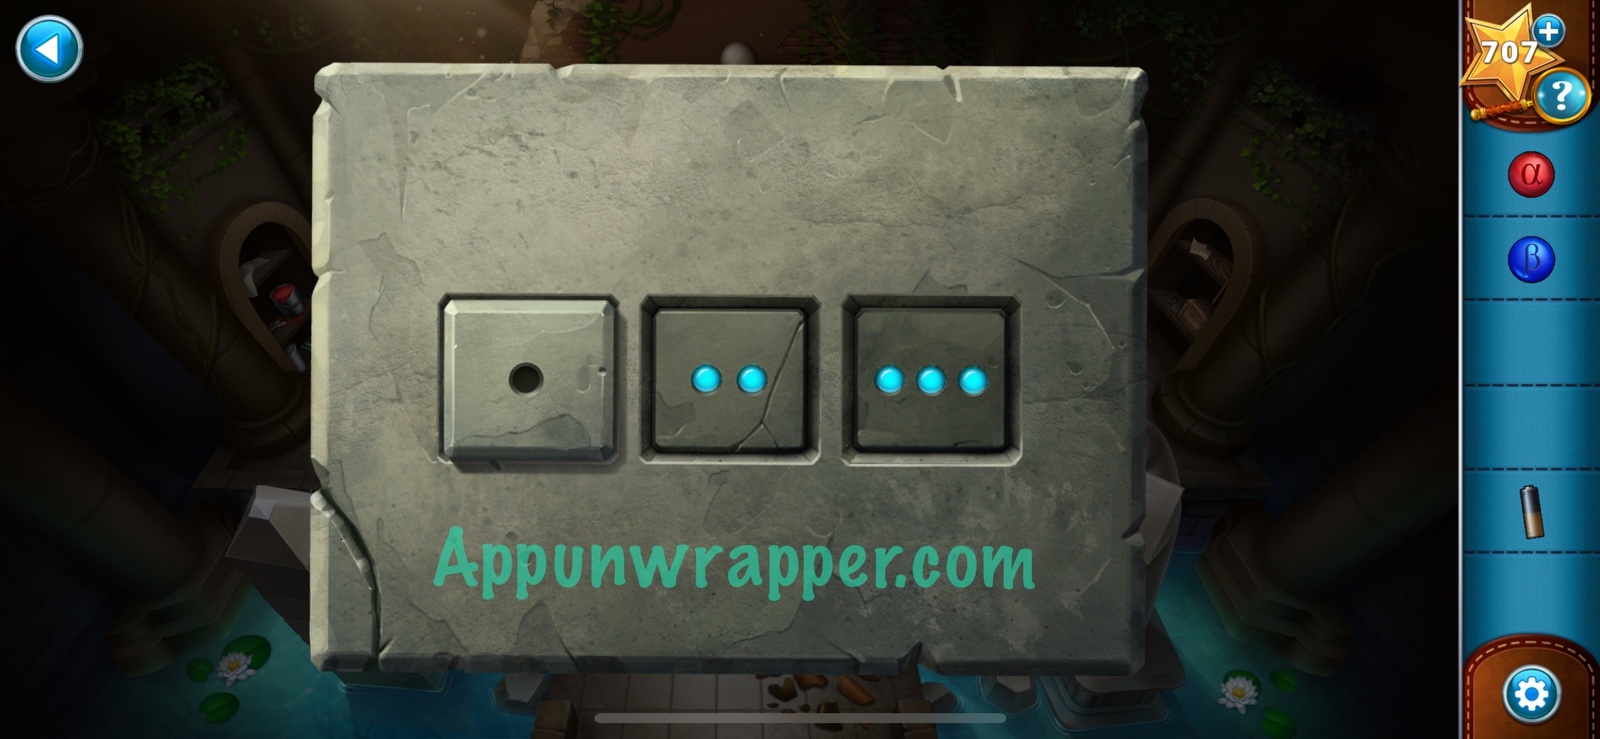
22. Go up another floor. Place the gamma orb on the obelisk and the stone slab in the stone figure’s arms. Two pedestals raise up and an image is being projected onto the stone slab, but we can’t see it.
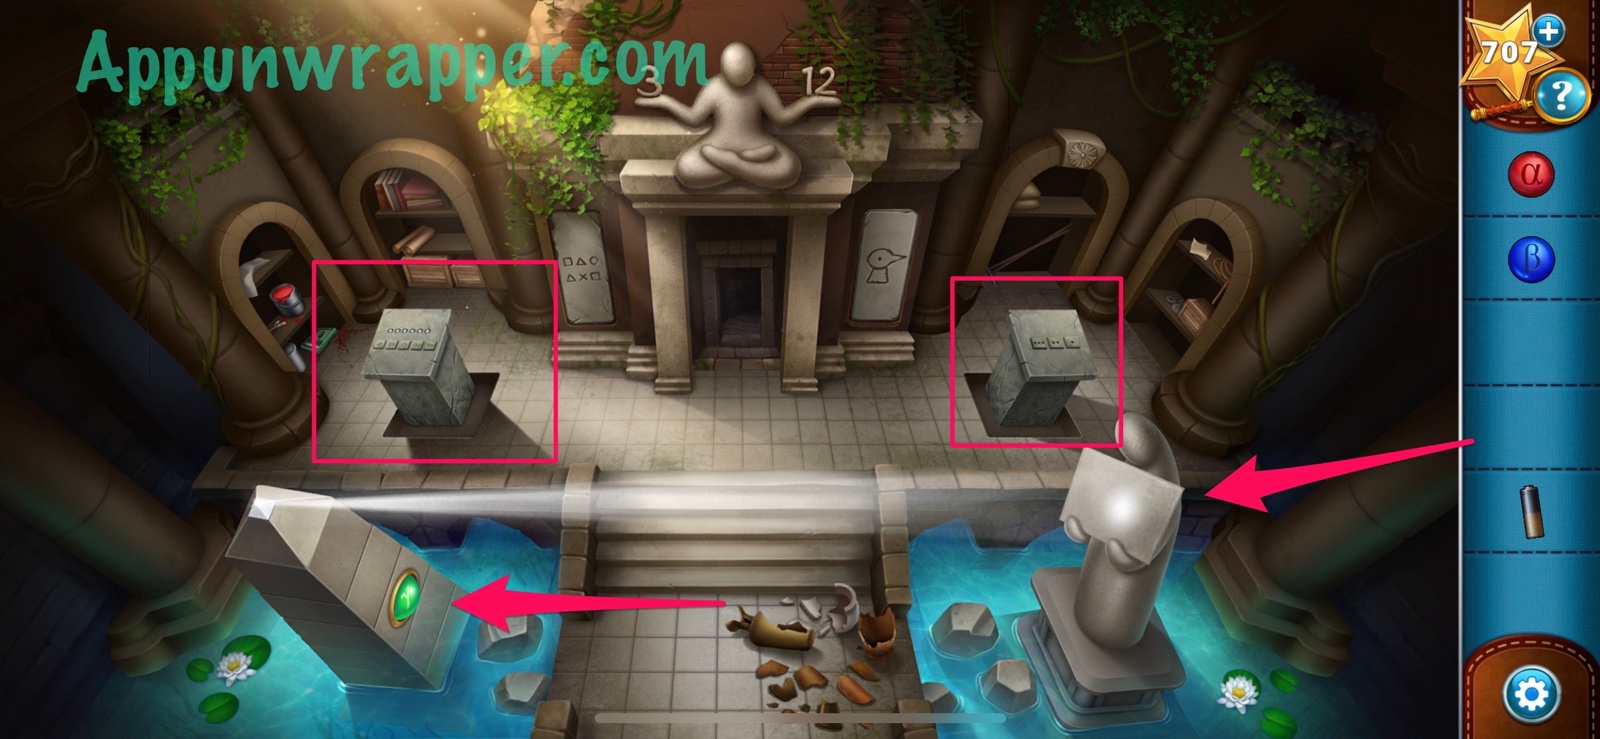
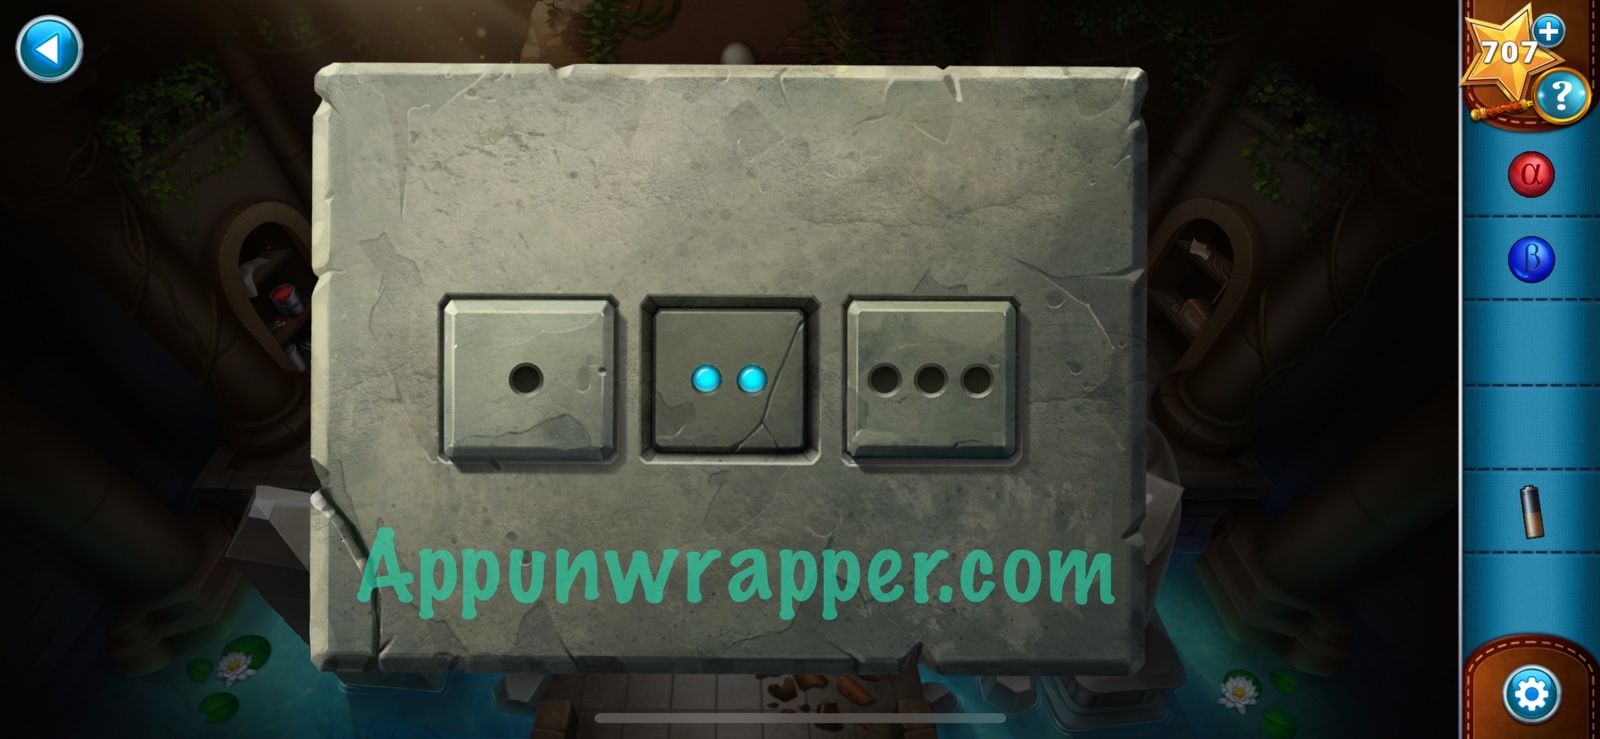
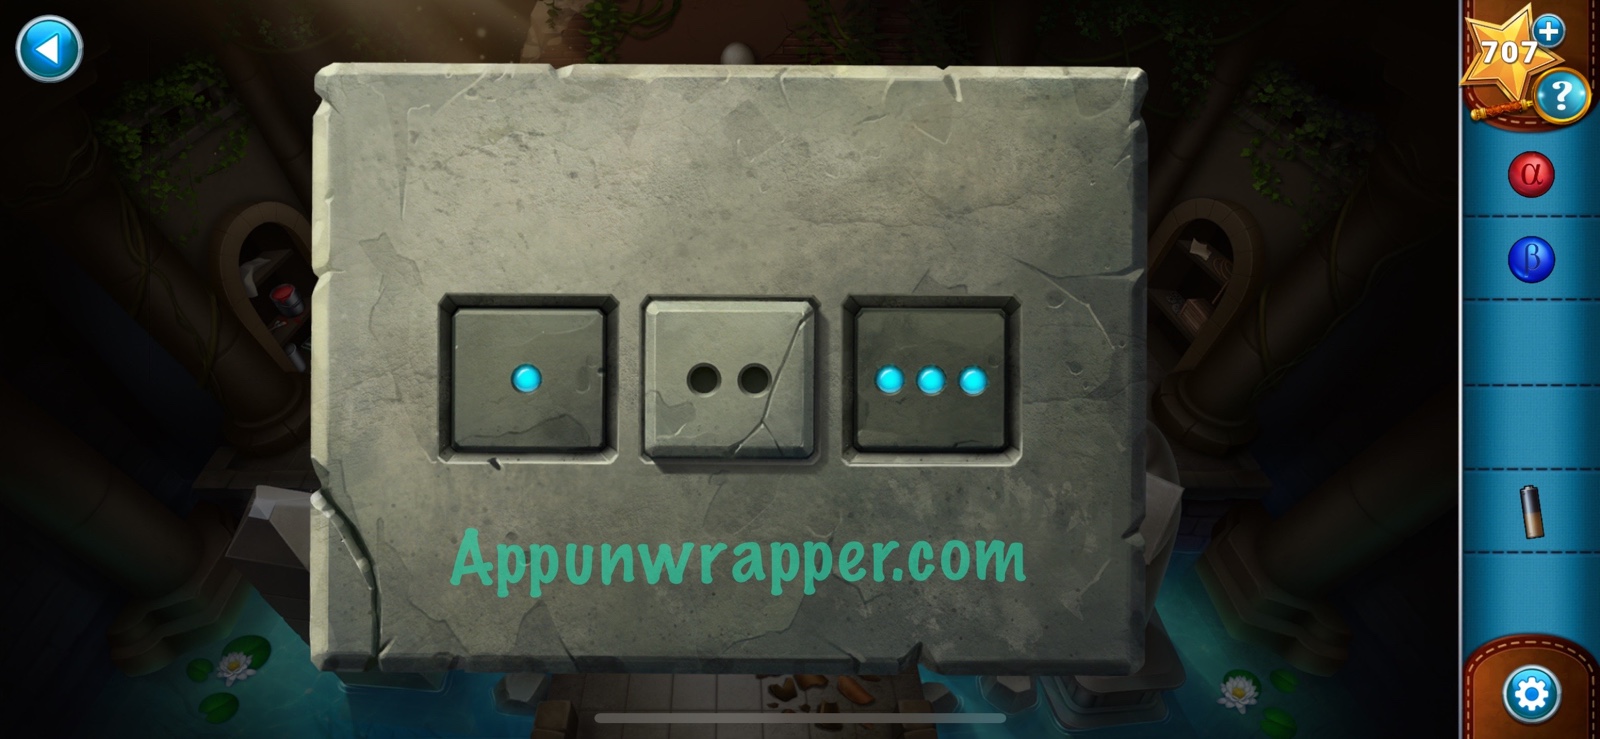
23. Here’s how we solve this puzzle. We need to make six numbers to get six symbols on the stone slab. So tap on the right pedestal and press the button with one dot on it. Then look at the stone slab to see a symbol. Note it down.
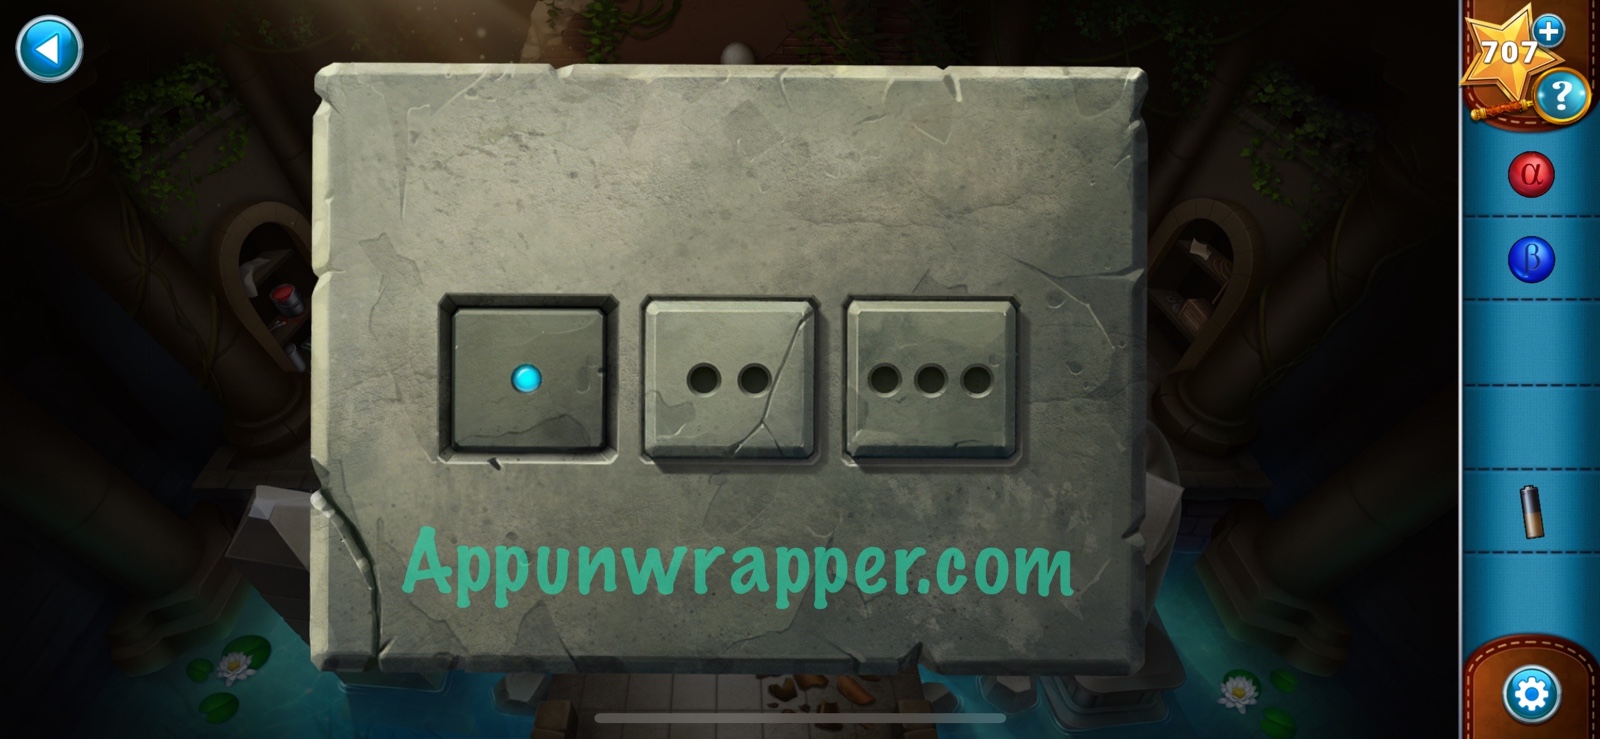
24. Now do the same thing for numbers 2 through 6. I have photos of them below.


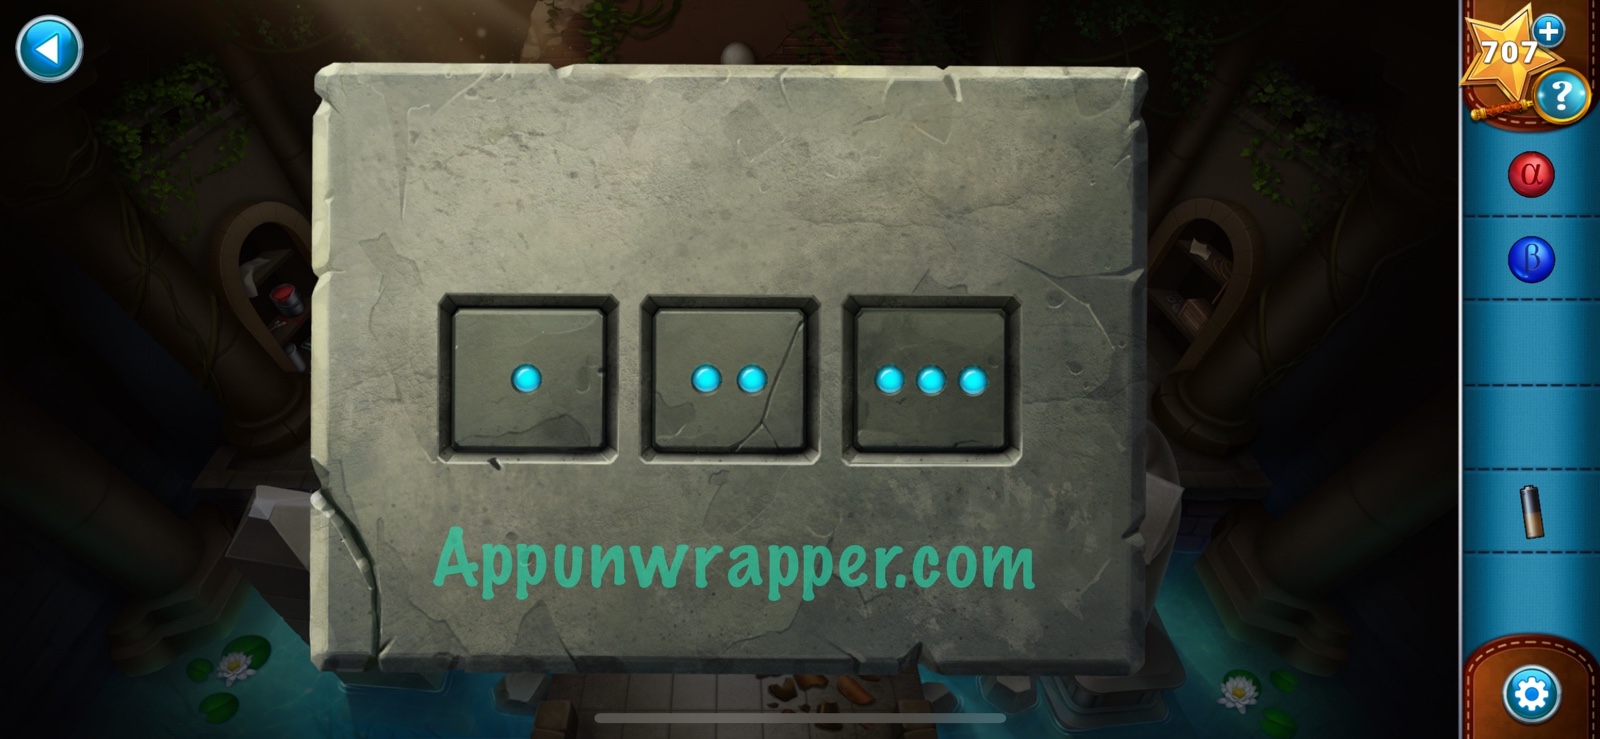

25. Now we have all six symbols. Tap on the left pedestal and enter those symbols in the order you saw them on the tablet.
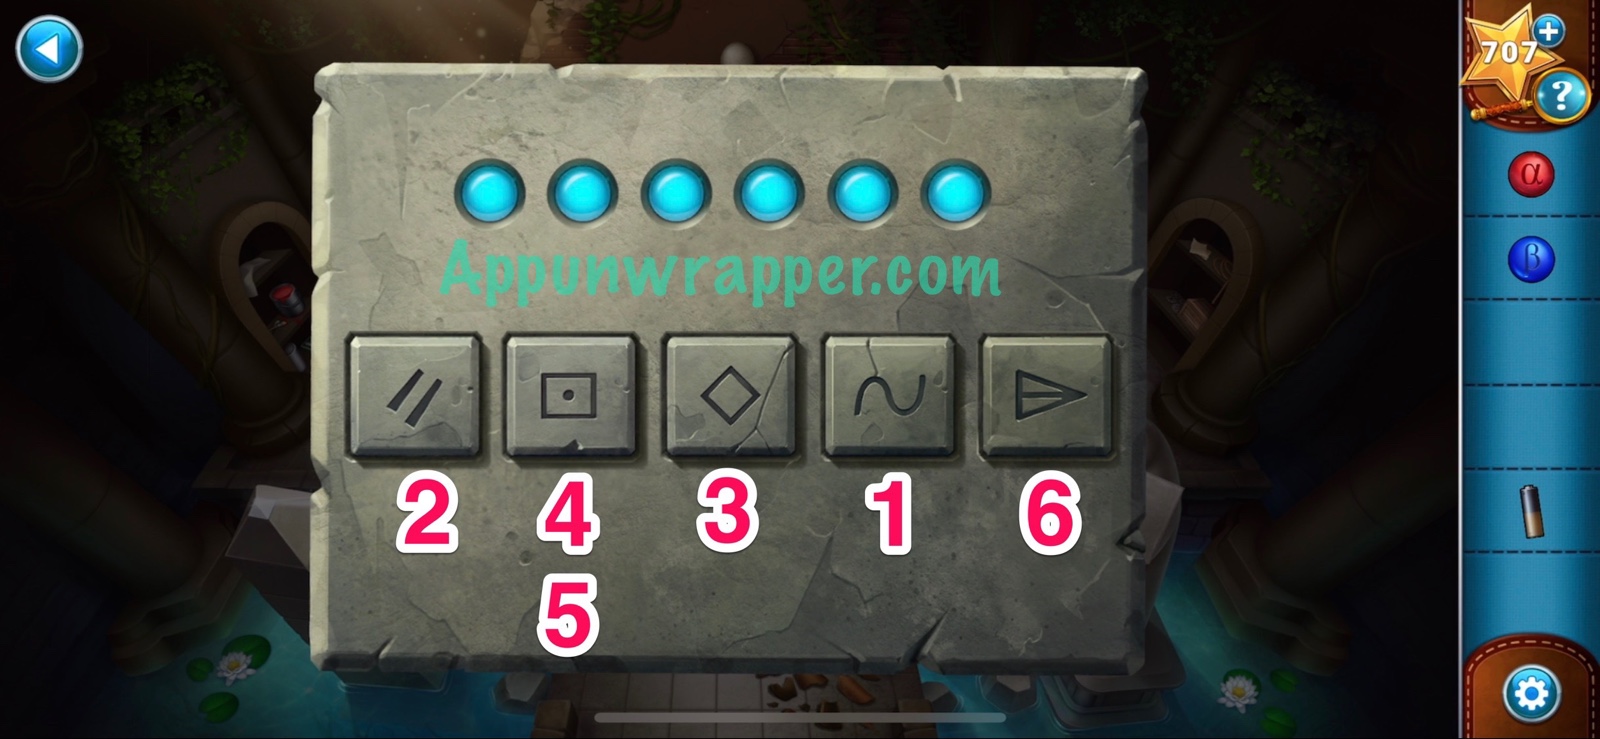
26. Now, take the abacus instructions and insert the battery in the charger to get a recharged battery. Also, look at the abacus instructions. Make sure to retrieve the gamma orb!
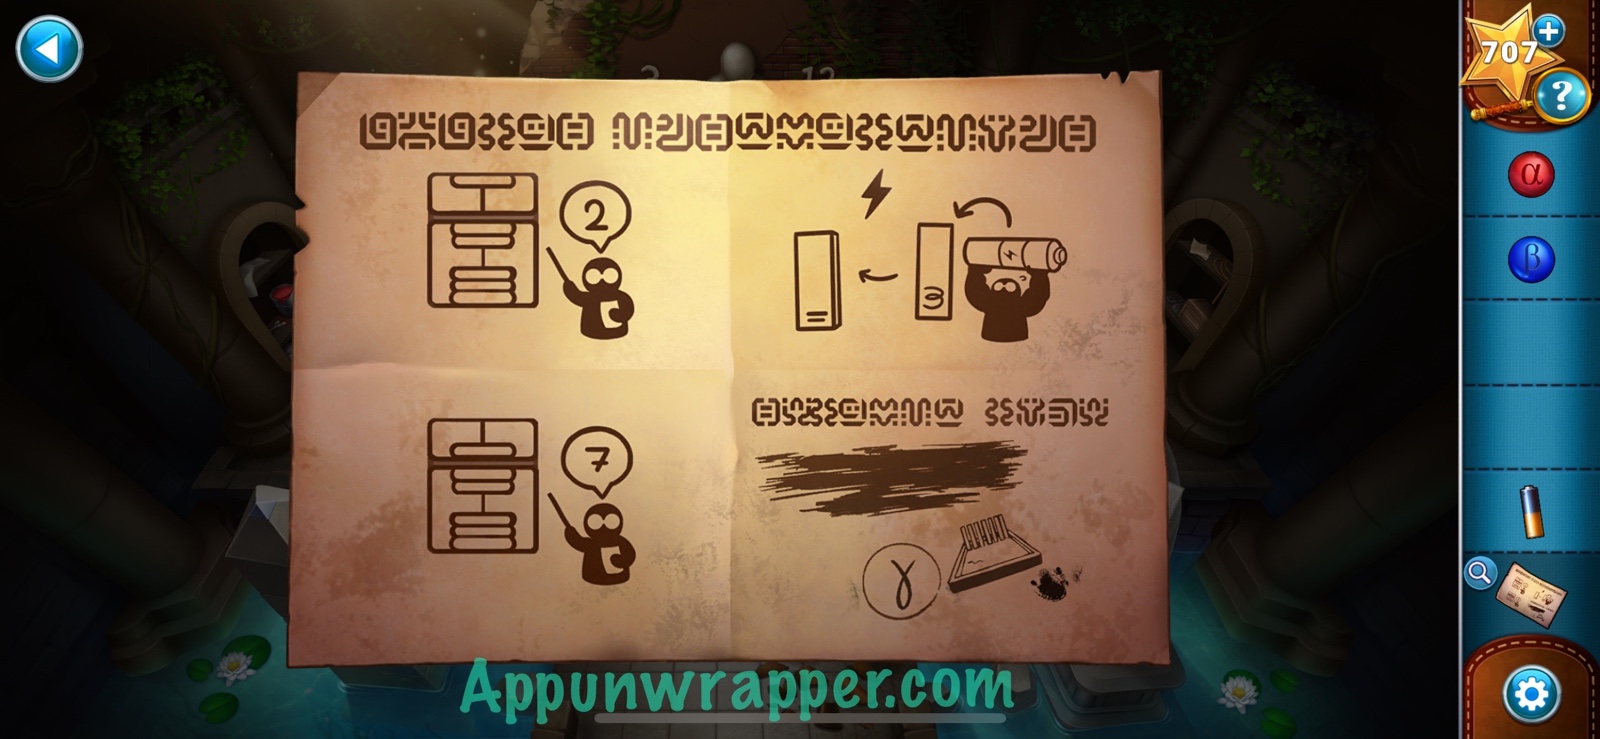
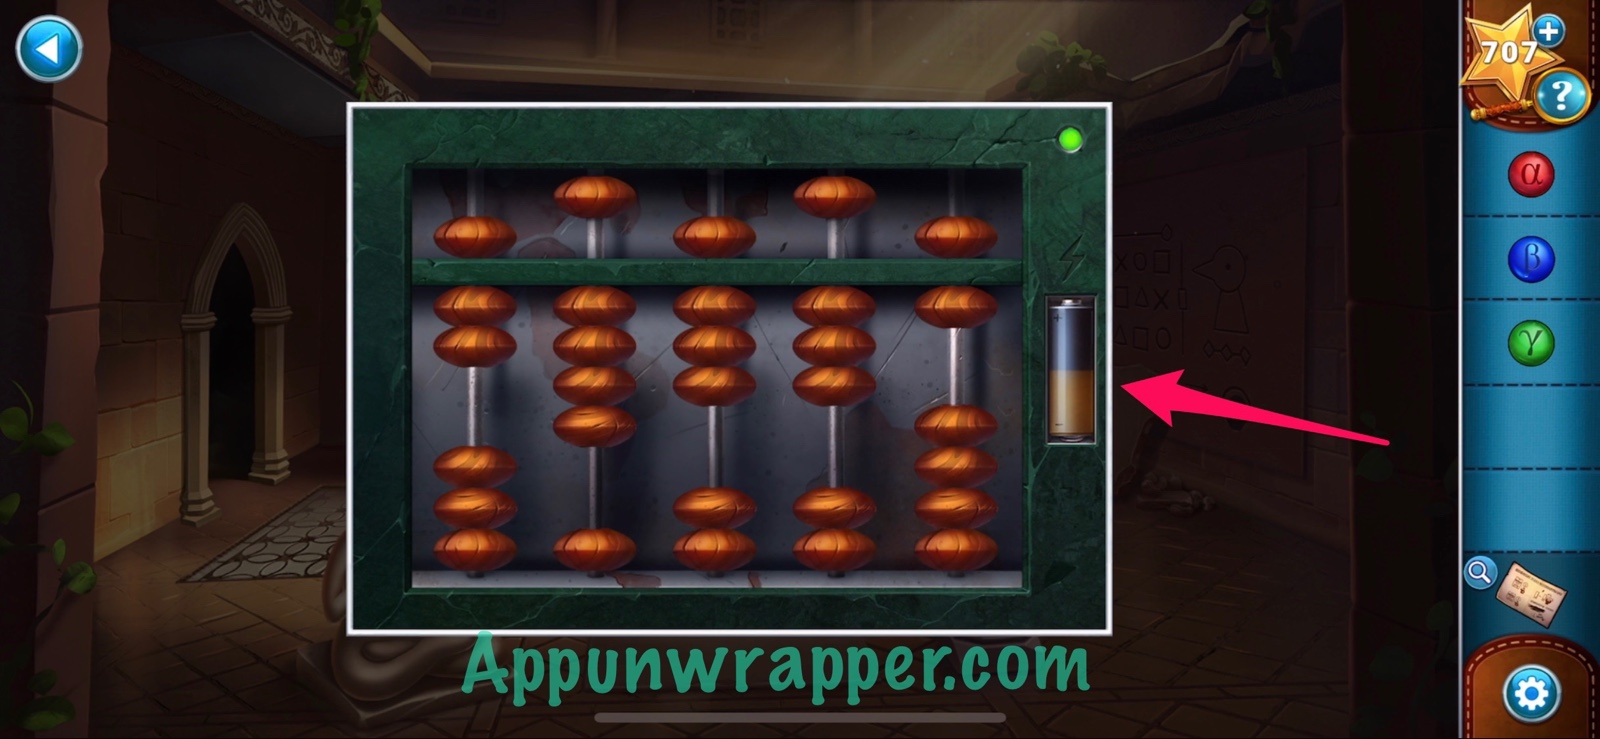
27. Go back to the abacus and insert the recharged battery. Now it should be working! You can see the green light is on now. And now all that’s left is to enter the numbers you saw on the dominos. They went like this: 7, 4, 8, 3, 6. But the instructions are tricky. Let me explain how to do it. The game gives you 2 and 7 in the instructions to help you out. Basically, the top piece counts as 5. If you move it towards the bar, it’s included in the number. If you move it away from the bar, it’s not. Then, the numbers below each count as 1. And the same thing goes for them — towards the bar they’re included, away from the bar they’re not. So with 2, you only have two singles touching the bar. With 7, you have the 5 at the top and two singles. So with that knowledge, fill in the rest. Or follow my solution below. Then head through the new doorway.
28. Now place the orbs in the slots as indicated by their symbols — blue, red, green. A golem appears and wants to test you!
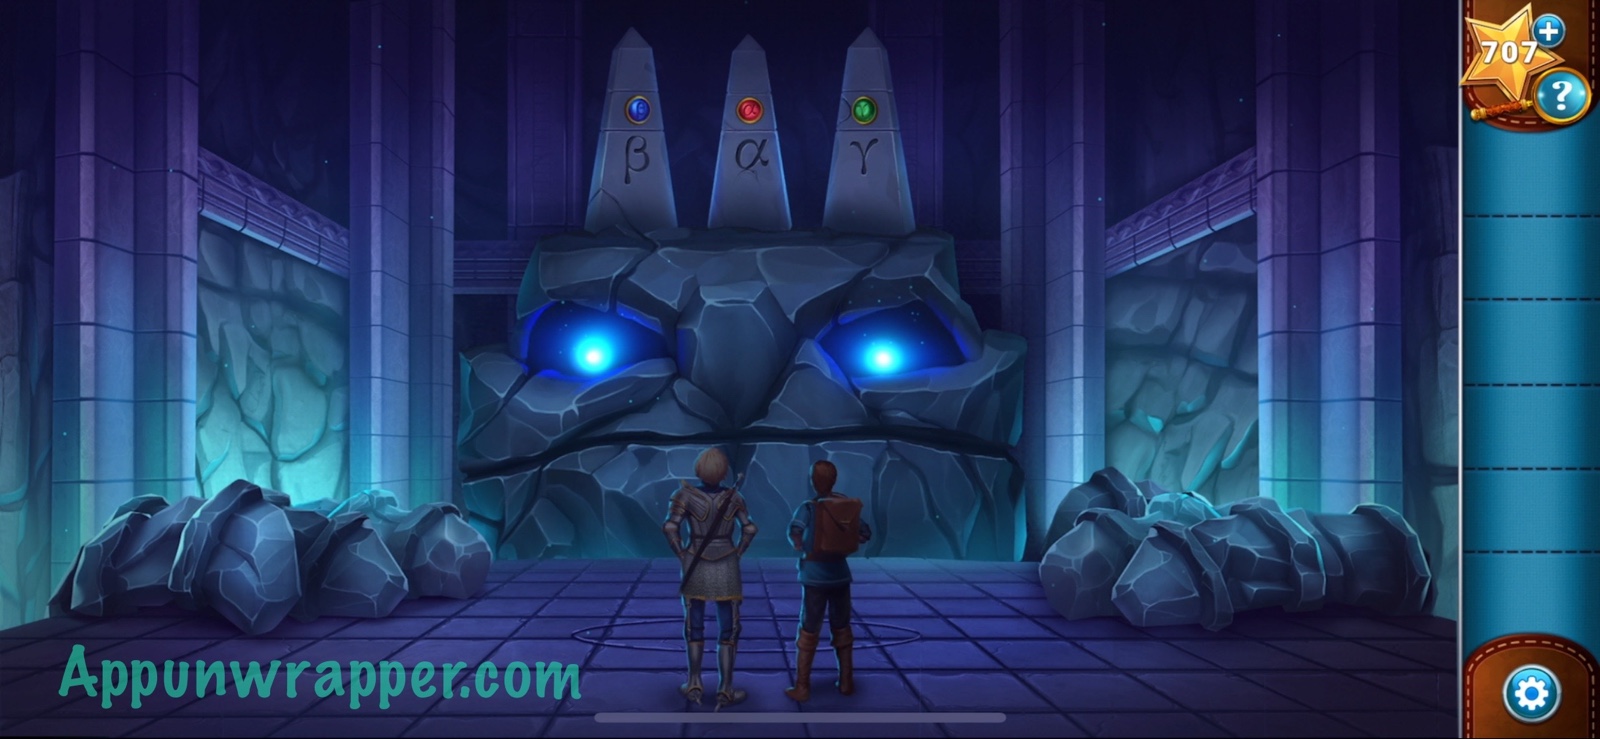
29. Now we have to complete the Golem Challenge. You need to move Cedrick to the top square avoid being in the red area. Here’s the video of the first exam if you need help:
30. And now for the second one. Then watch the ending of Chapter 3!
And that’s the end of Chapter 3! Click here to continue to Chapter 4 or choose a chapter below.
Chapter 1 | Chapter 2 | Chapter 3 | Chapter 4 | Chapter 5 | Chapter 6 | Chapter 7 | Chapter 8
Hi! The numbers worked because it’s the order they are in that the statue is holding.
I’m not explicitly responding to you I just couldn’t figure out how to comment. Why in the world is the alphabet on the piece of parchment the same alphabet as in the legend of Zelda breath of the wild?? I have a dictionary I bought for jokes and it’s very much the same. A bit odd don’tcha think?
For point 4, 3 12 are the numbers held by the statue
I’m on chapter 5 and can’t figure out the security code on the steam pot. Anyone there yet?
No also stuck, i think it was the passcode for his key but i cant remember it
That’s what I thought. Not sure how we are expected to remember something from the beginning of the chapter without taking notes lol
Finally cracked it. For the buttons youve got to use the map in the corner. The map is divided into 9 squares, each square with the trail is the buttons that have to be pressed on the pot. For the temp you have to use the clocks on the shelf. They each have a time and if you look closely each clock has different shapes around the face. Either lines, circles or squares, these will tell you what temp and if you look above the shelves there’s a cloud ornament with 2 drops. These will tell you the humidity to set. Hope this helps!
Ah the map! I was wondering what it was for, just needed those dang squares, thank you!
No problem! Currently stuck on the spider puzzle!
Same here!
Finally got thru the puzzle that was tricky
Just got it
Check the map on the wall, and note which squares the path goes through.
Look at the map with the path between the villages. The code follow the dotted line on this map.
How do you charge the battery chap 3
One of the panels will open when you put the right orb in. Sorry I can’t remember the specific one!
Stuck on Chapter 3..found out you put the green orb into the slot and when you put in 3, 1, 2 a symbol shows up but it seems to be the only symbol shown…
Using the same three buttons, there are 6 symbols on the left pedestal. Use the buttons and add them up. The single dot button is for the first symbol. The two dot button is for the second and so forth.
I figured out the abacus puzzle. Using the dominos in the previous room as a guide, I figured out that the separate bead on the abacus is 5, and the bottom ones are single digit ones. 1=1, 2=2, 3=3 etc. So, write down the numbers for the dominos. The first abacus bead stack is 7, as it says in the instructions paper. From there, it’s a matter of figuring out the combination of beads that let you complete the puzzle. Once through, you’ll be in a chamber with 3 obelisks that have the orb symbols on them. Place the orbs and in the mini game, avoid the red exclamation point. That’s a bad area. After two rounds of the mini game, you get to charge the amulet with the second altar.
Stuck on chapter 8. How do you interpret the lines on the cell wall. I cant seen to get the right sequence to open Cedrics cell
It’s the position of the stars, count the lines in the first row and that is the position of the top star.
Stuck on the locked box with letters by the witch‘s house
Stuck on ch3… the mossbottom ooze just will not go onto the magnet dome anywhere I click, thinking it’s a glitch..?
Same here! The orb is at place, the magnet is off the dome, but I just can’t put the ooze on it…
Same! No matter where I click, it doesn’t work.
I can’t get the mossbottom ooze to go on the magnet. I highlight the ooze then touch the magnet. Yes the orb is in place and the glass is open. Any help.would be great.
Restart level and follow the answers to the puzzles above. I was able to put the mossooze on the stone after that.
I’m on chapter 3 and it won’t let me put the ooze on the magnet stone
Restart level and follow the answers to the puzzles above. I was able to put the mossooze on the stone after that.
Anyone have z solution for the candelabra in chapter 7