The Room Three
By: Fireproof Games
This is a complete step-by-step walkthrough with hints, help, tips, tricks, answers and solutions for The Room Three by Fireproof Games. This section takes you through the entire first chapter, The Lighthouse. Only read this if you don’t mind spoilers. Feel free to ask for extra help in the comments section.
**Note: You can find a complete video walkthrough for each chapter at the beginning of of each chapter. They follow my walkthrough exactly, so it’s easier to find a part that you need. I’ve also added short clips throughout of some individual puzzles. If you’re having trouble with a specific puzzle and want me to add it, just ask.
Chapter 1, The Lighthouse | Chapter 2, The Clock Tower. | Chapter 3, The Forge. | Chapter 4, The Observatory. | Chapter 5, The Projector, Imprisoned Ending.
See all three alternate endings, Release, Escape, Lost.
See my review for The Room Three.
Walkthrough:
Chapter 1, The Lighthouse:
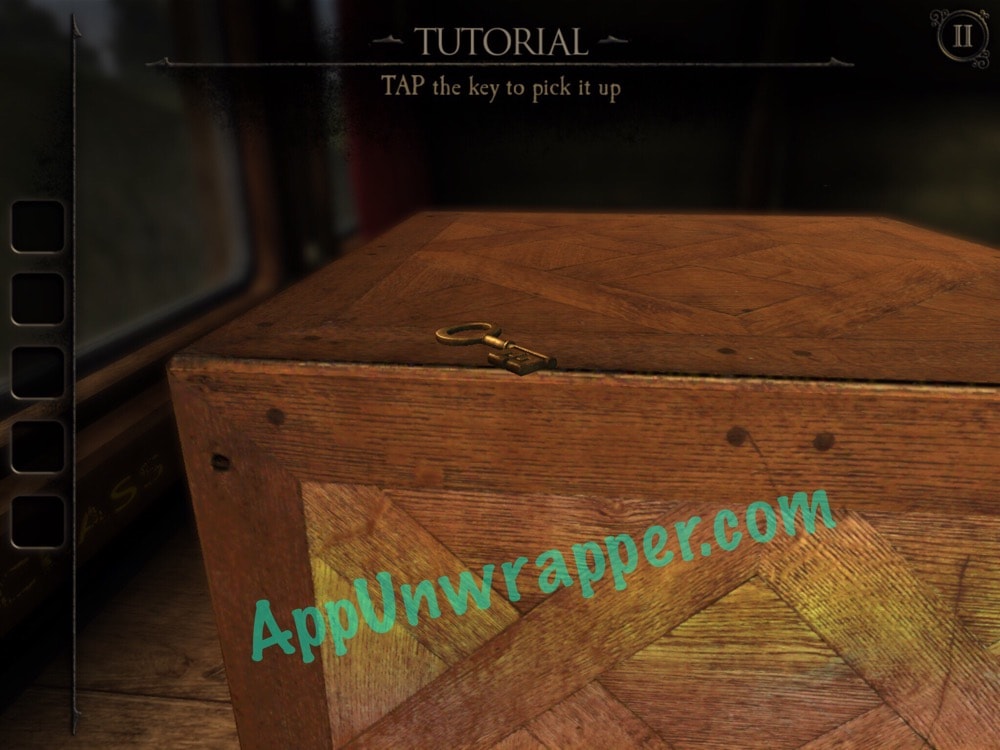
1. Follow the tutorial. Swipe around to find the journal and look rough it a bit. Then, look at the box that appears on the table. Take the key.
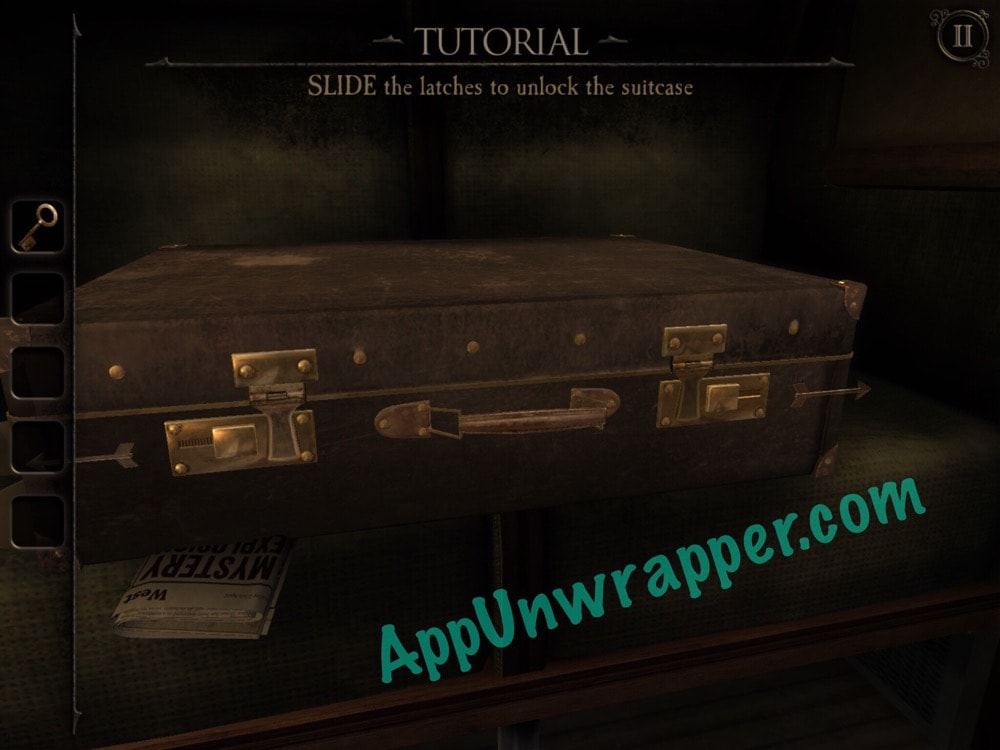
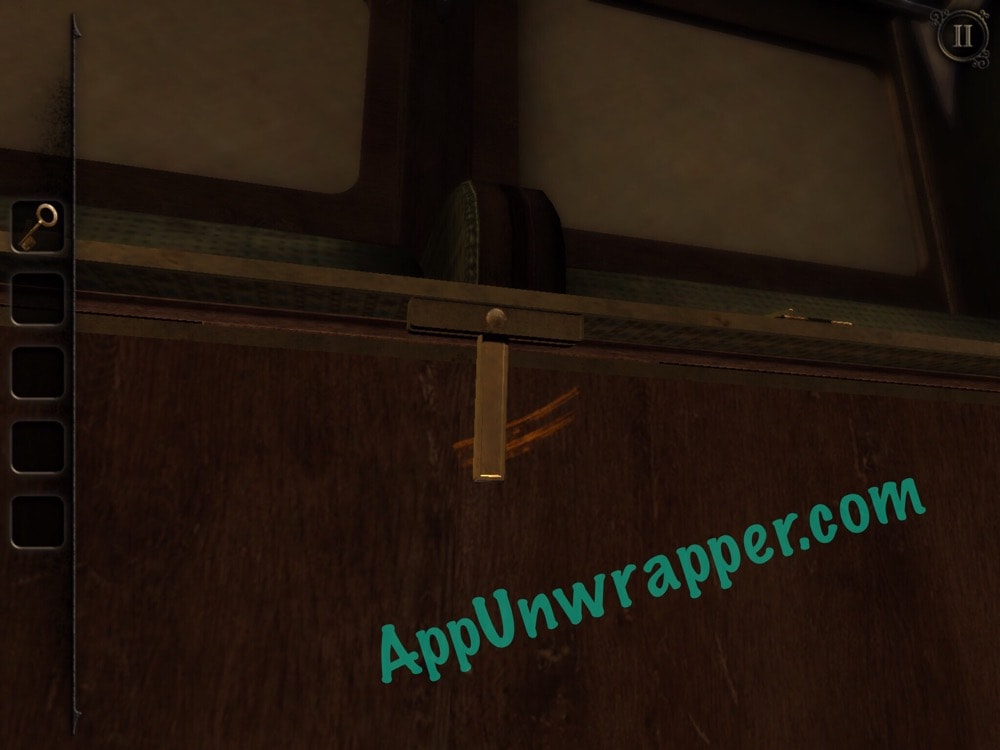
2. There’s no keyhole on the box, so you need to get your eyepiece from the suitcase. Swipe both the right and left locks outward to open the suitcase. Then, zoom in on the little metal strip inside the lid. It’s actually a hidden compartment! Slide it out of the way and then take the eyepiece.
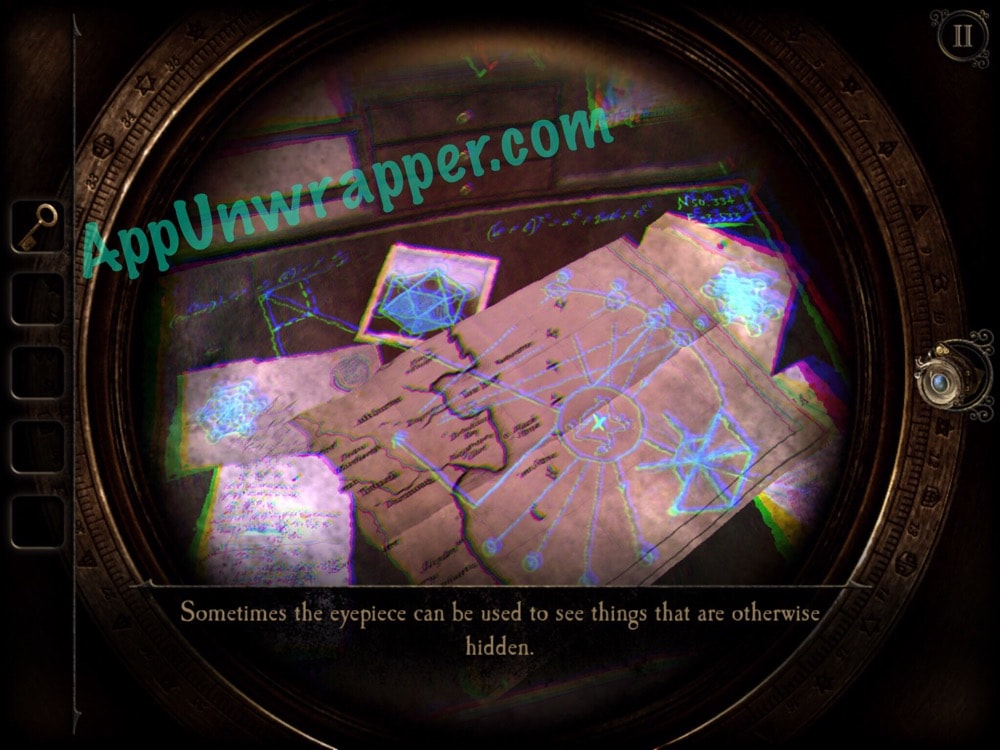
3. You can’t really do anything else right now with the rest of the stuff inside your suitcase. But you can use the eyepiece to see some hidden markings.
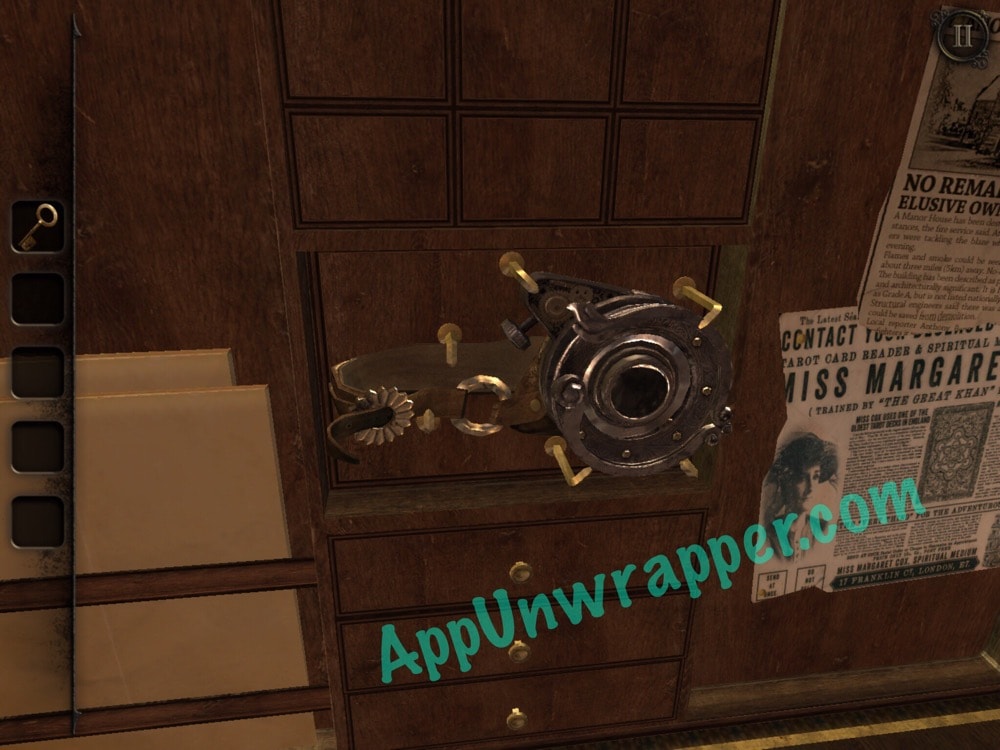
4. Use the eyepiece on the box to see some puzzle pieces. Slide them around to make a square, which will then reveal a keyhole. Use the key in the keyhole and turn it. Then take the engraved pyramid.
You can also watch my video walkthrough for Chapter 1 here:
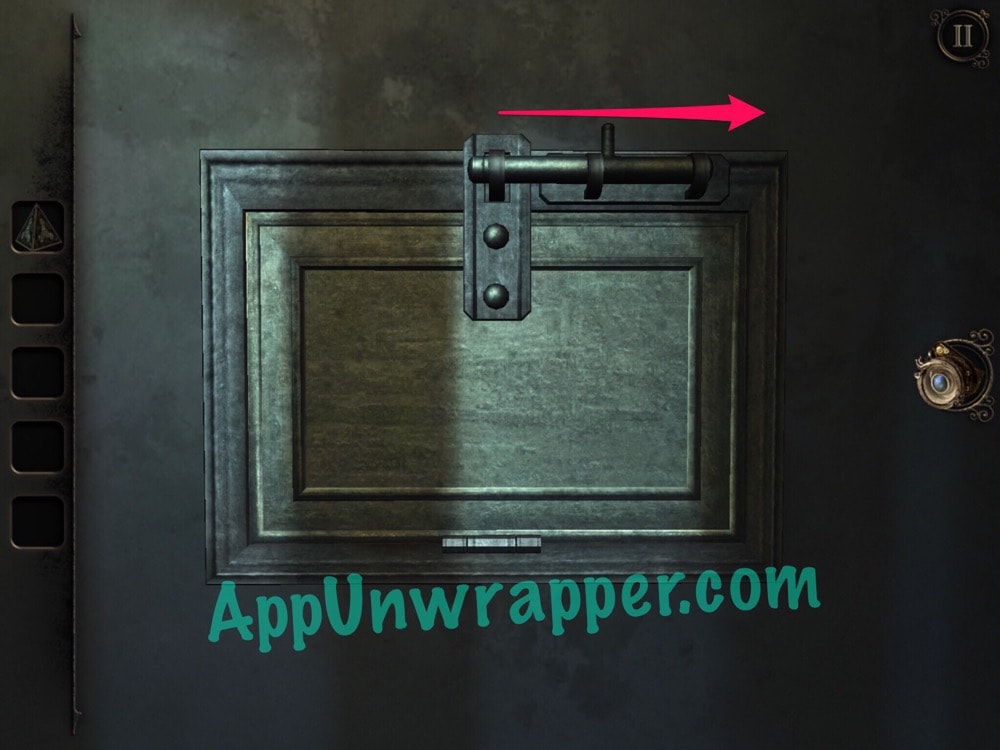
5. You will now be transported to a new room. Slide the lock on the door to the right to see into the next room. Some man walks by the table.
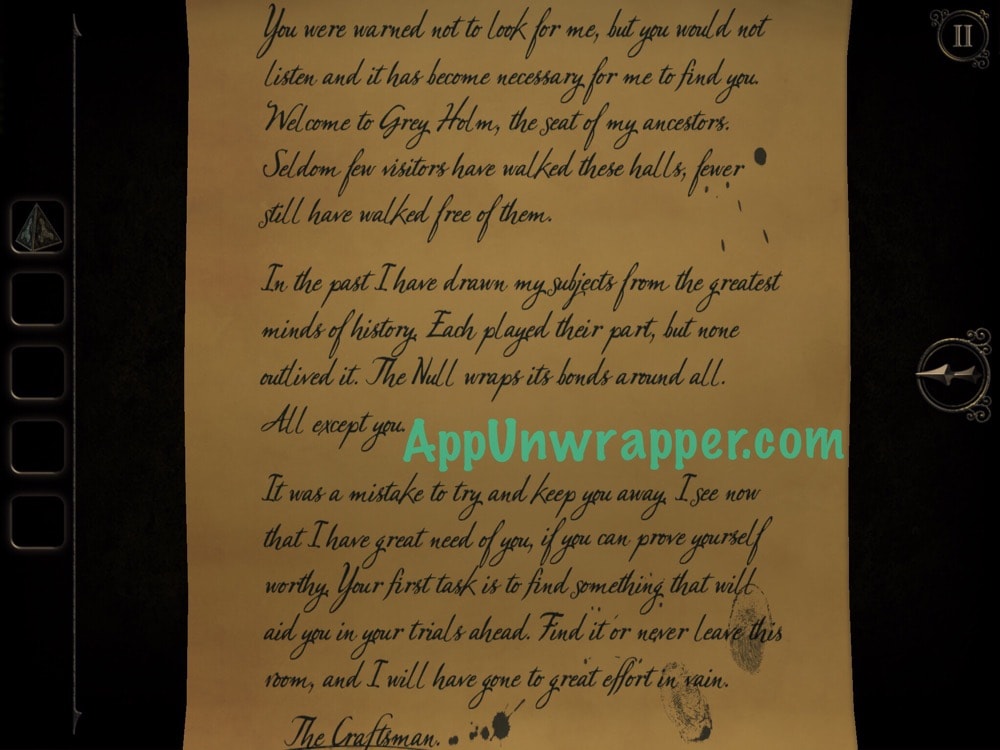
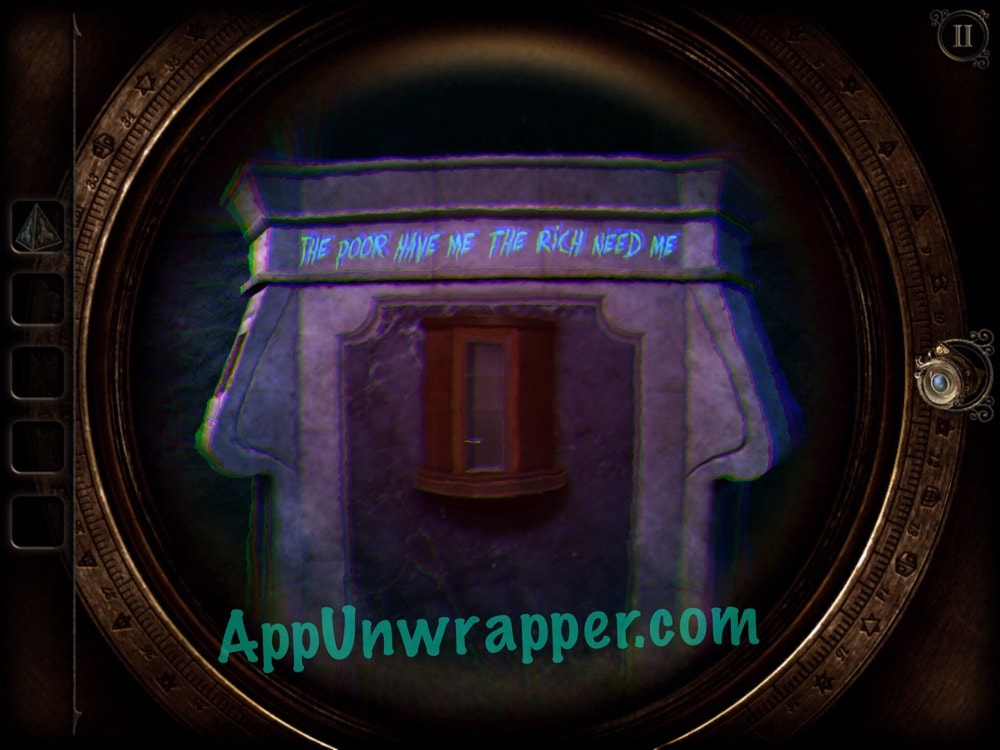
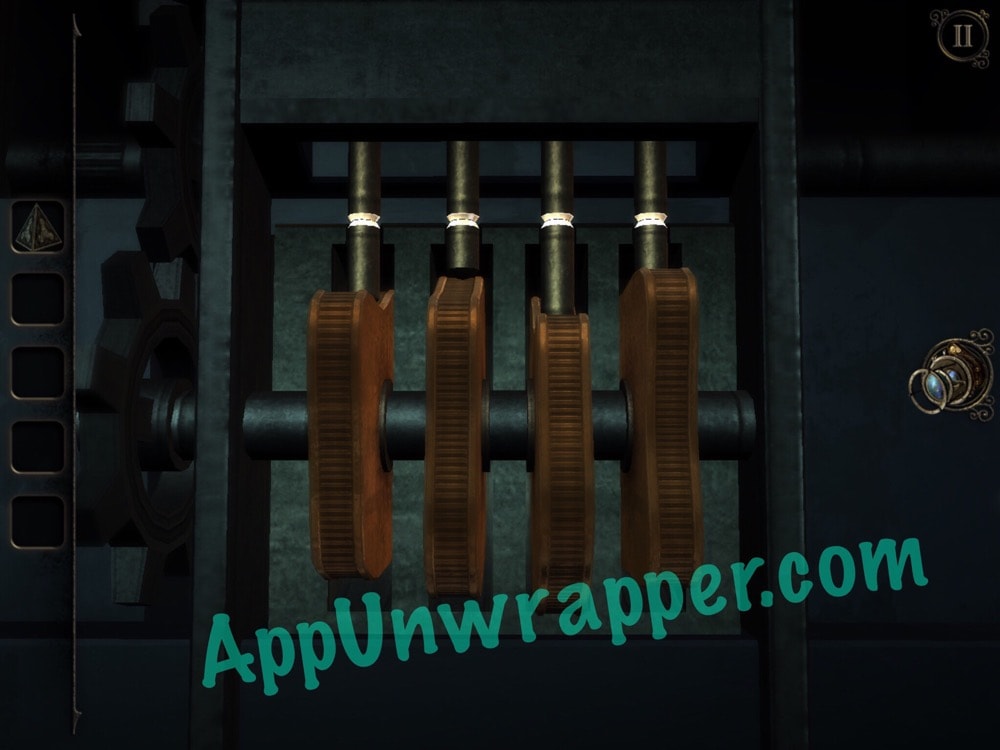
6. Turn around and face the puzzle box in middle of the room. First, read the scroll resting on top. Then, there are three cylinders here filled with objects. You can turn each one using the little dial at the bottom. If you put on your eyepiece, you can see a riddle above each one. The first says “THE POOR HAVE ME THE RICH NEED ME.”
The answer is NOTHING, so set the cylinder to the empty window.
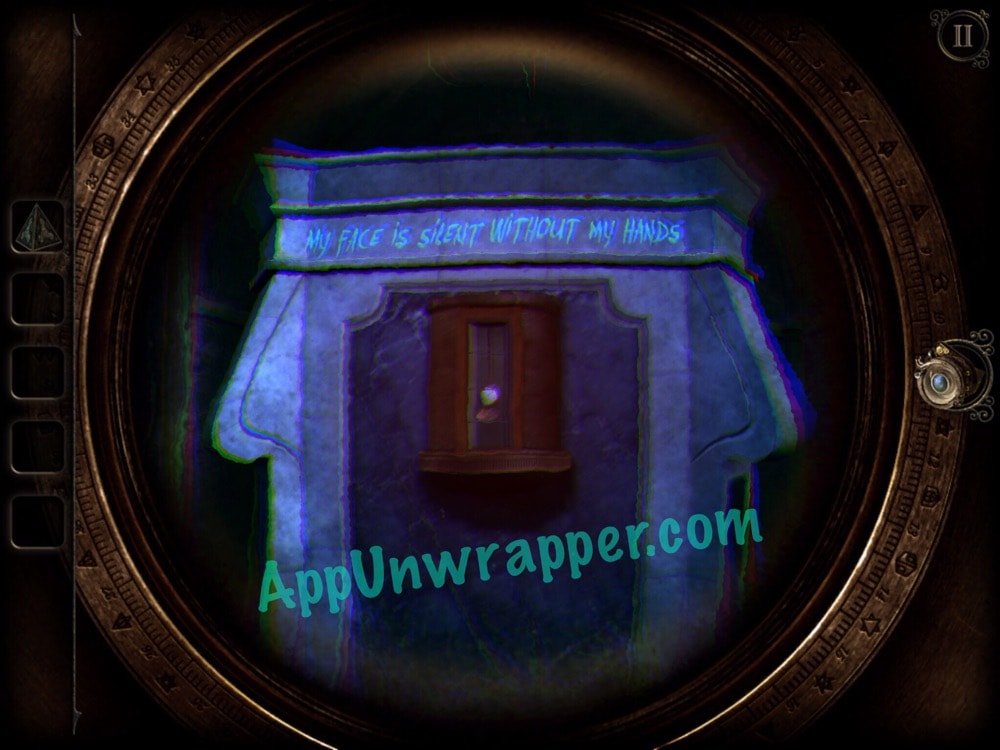
7. The second one says “MY FACE IS SILENT WITHOUT MY HANDS.” The answer is a CLOCK, so find the pocket watch and set it to that.
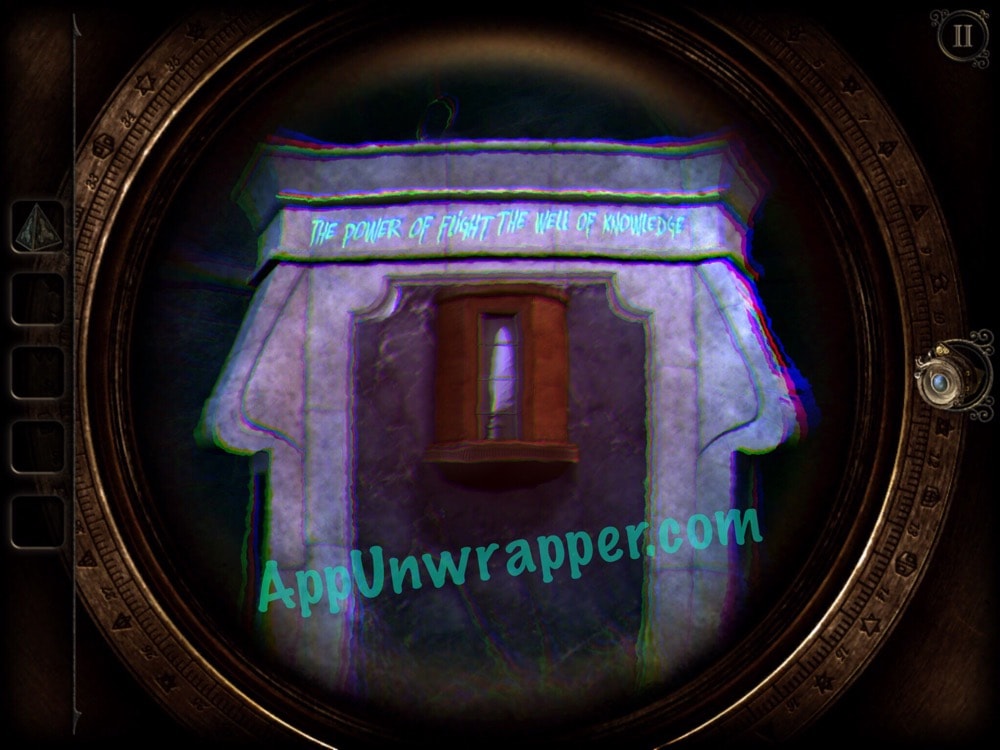
8. The third one says “THE POWER OF FLIGHT THE WELL OF KNOWLEDGE.” This is a quill and ink well. Set it to that.
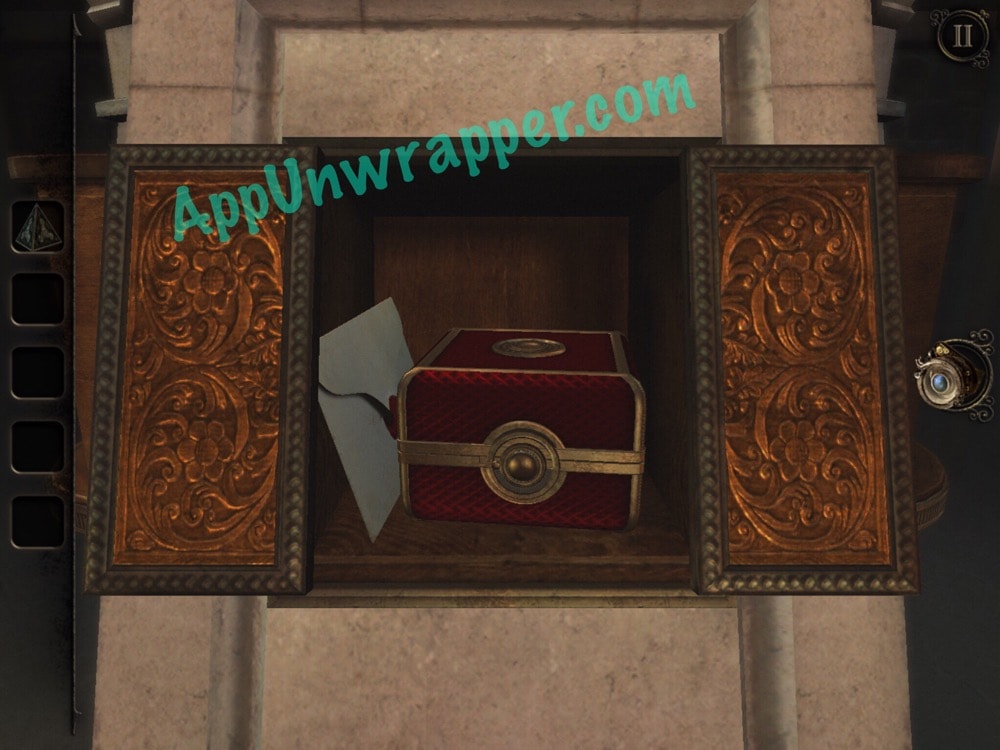
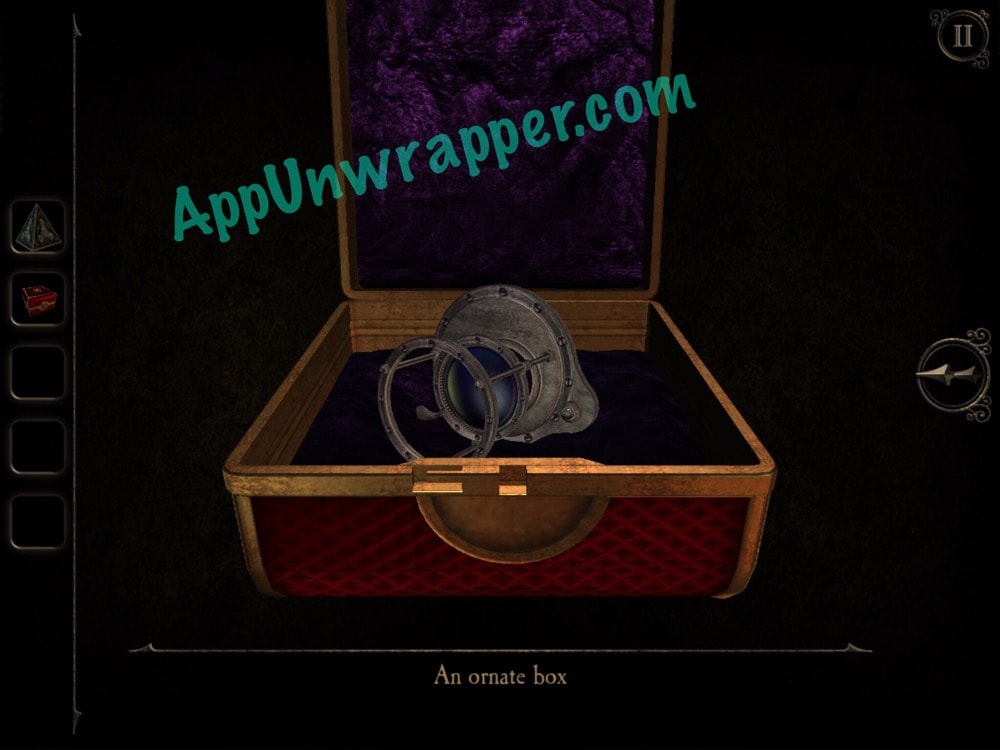
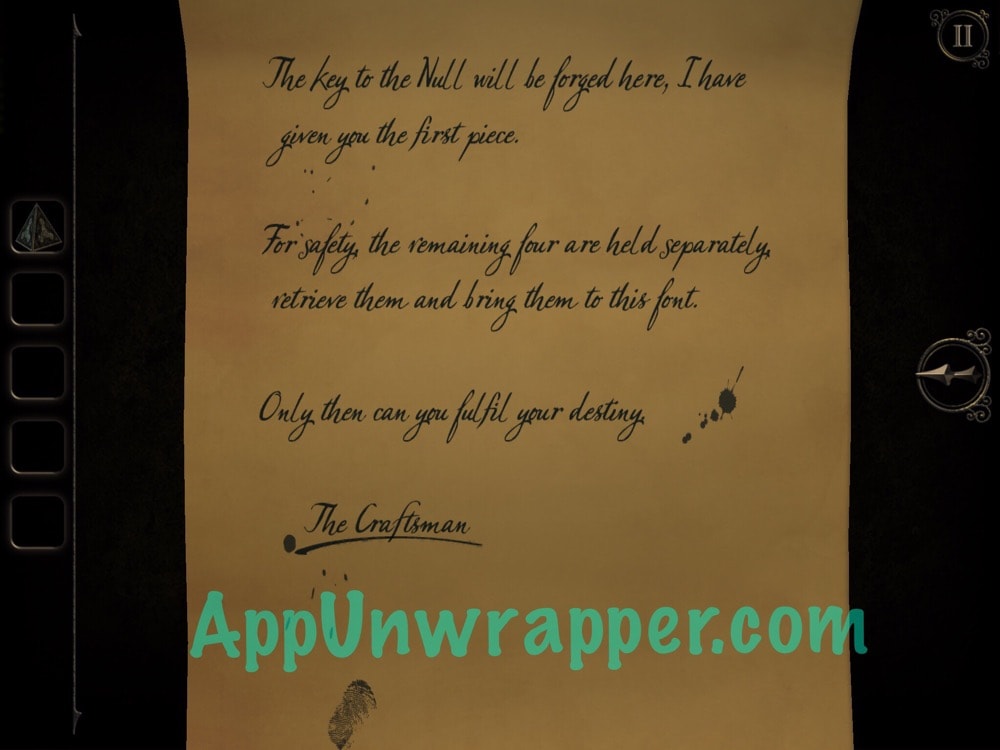
9. A slot in the box will open, revealing a letter from the Craftsman and an ornate box. Take the box and open it. Take the lens. It will automatically be added to your eyepiece.

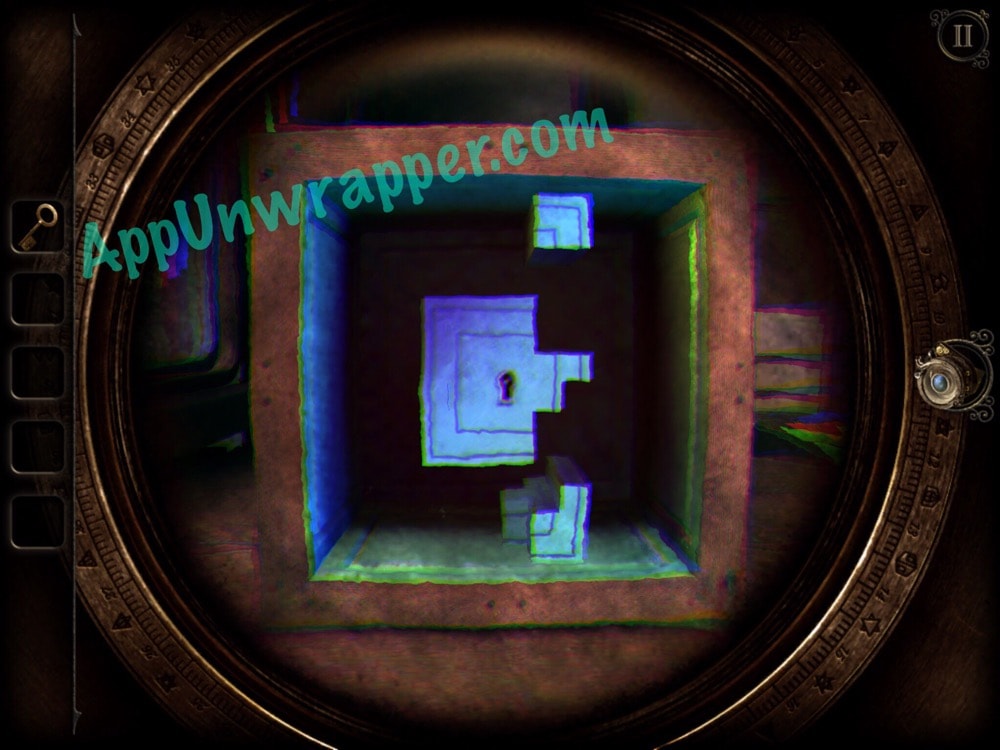
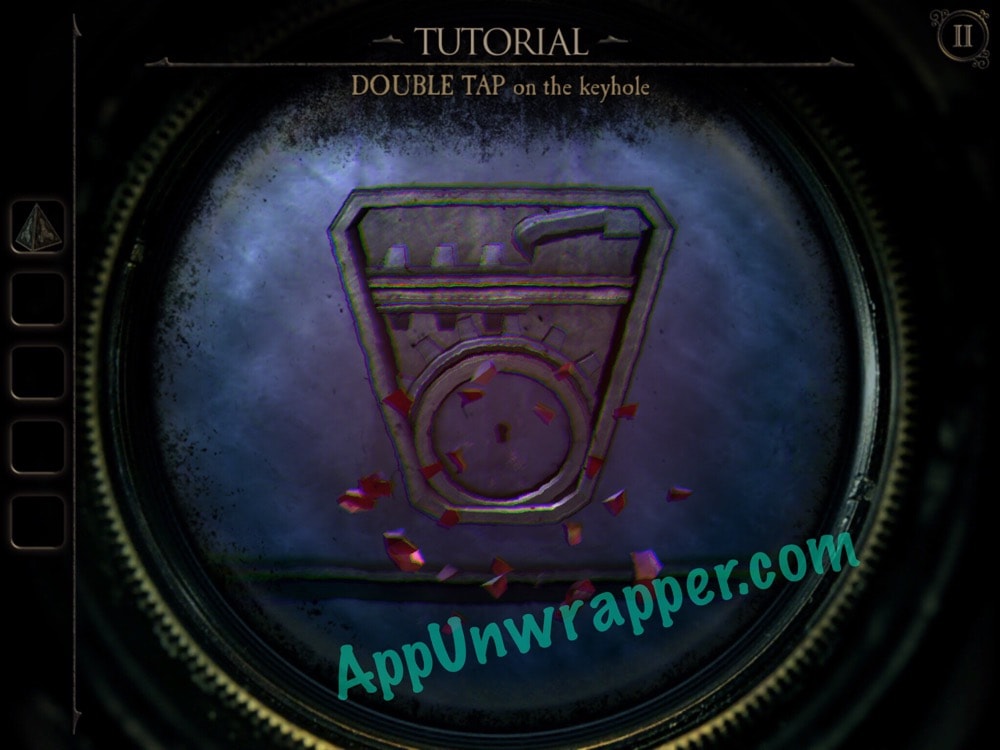
10. Use the eyepiece to see inside the door’s keyhole, then pick the lock. You basically turn two pieces at a time and stop when you see the white glow in the middle. The door will unlock and you can go through to the next room.
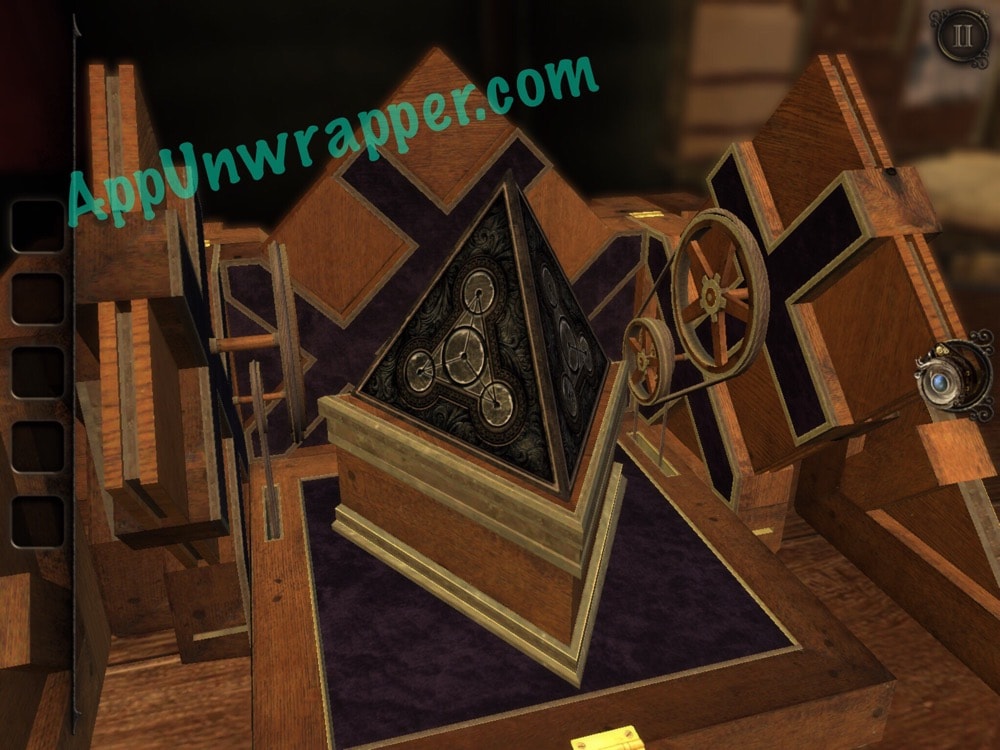
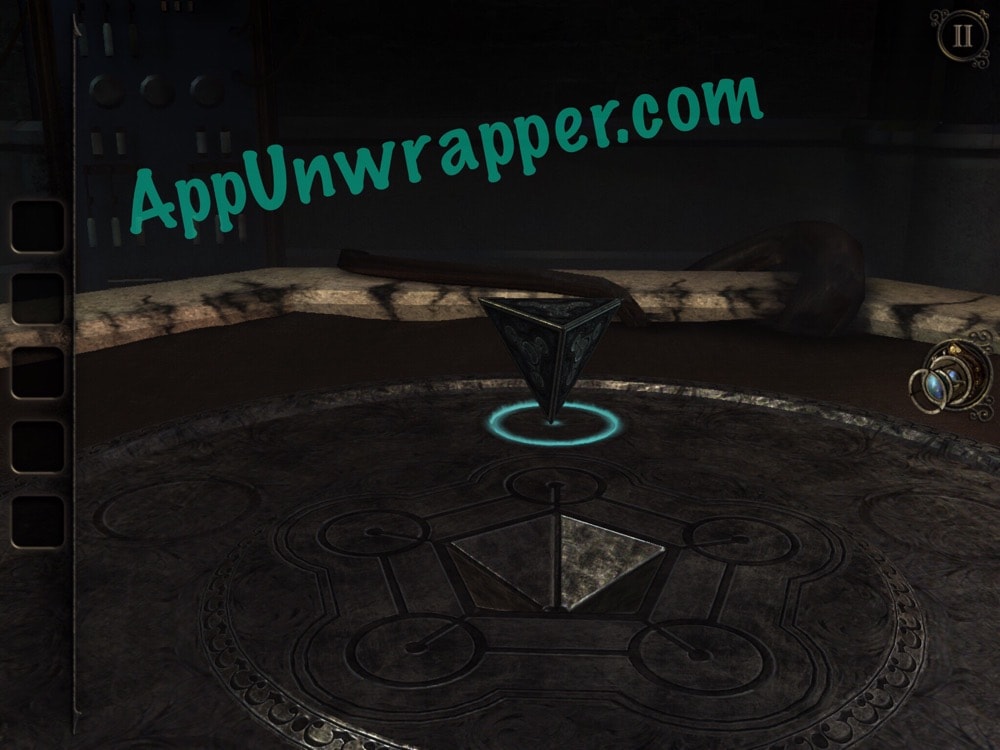
11. There’s a font (or fountain) here. Read the letter resting on it. Then, place the engraved pyramid on the white triangle. It will roll and then spin on a circle. Then an emblem will rise from the fountain. It has a snake and a rat on it. Take it.
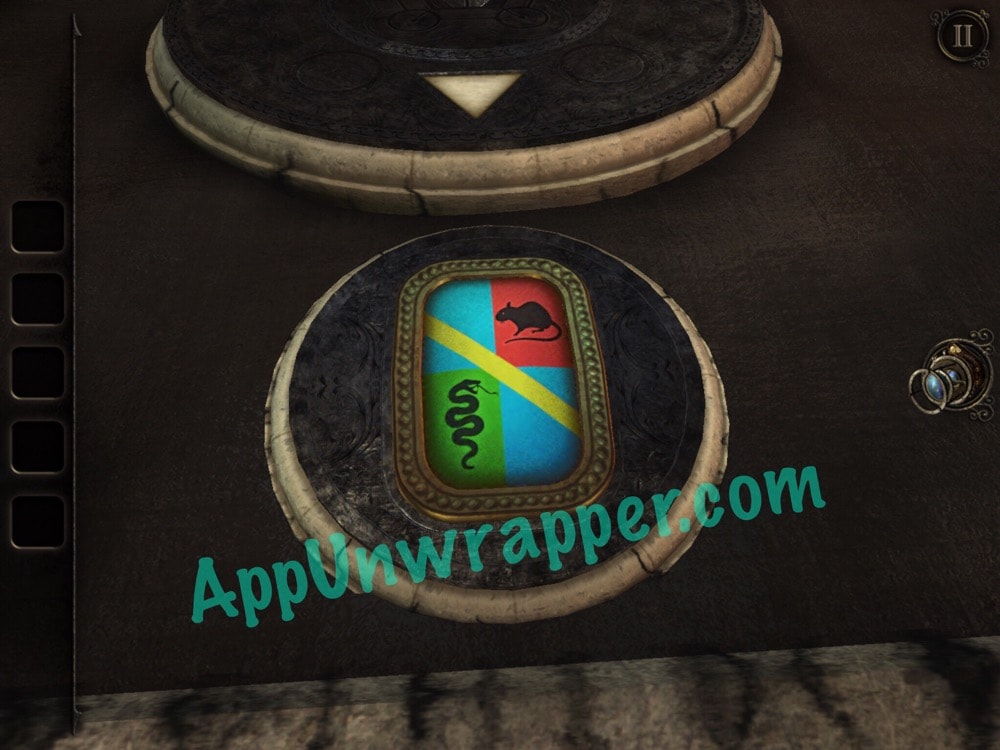
12. Turn around to the painting a family tree with crests on it. Place the emblem you found in the empty slot at the bottom right. Now all the others will reveal themselves.
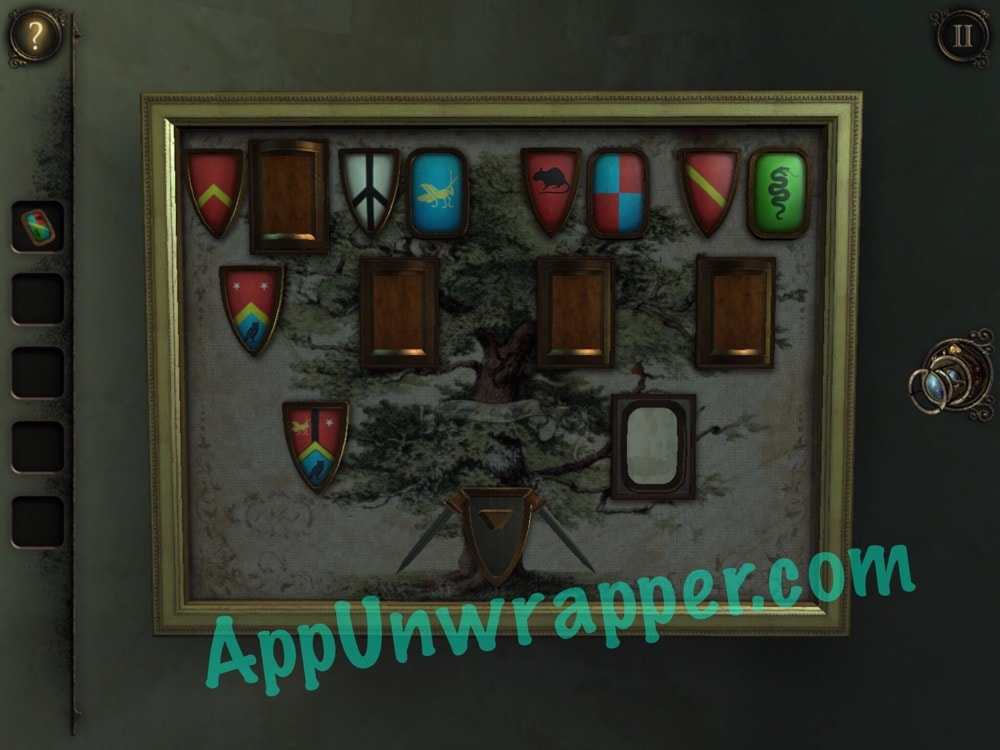
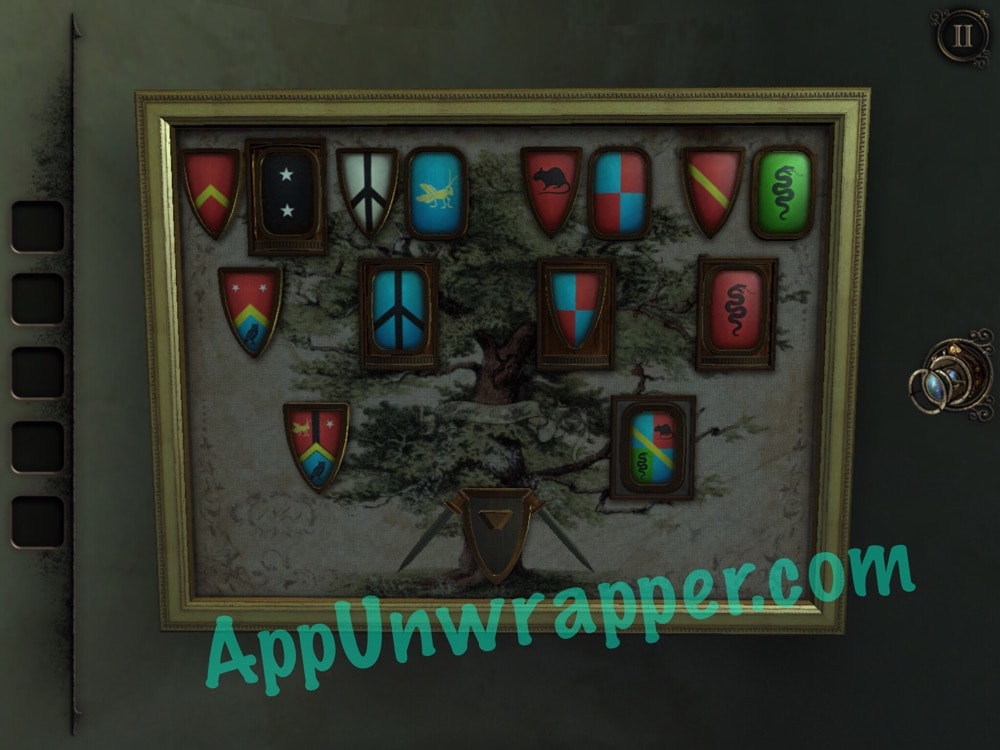
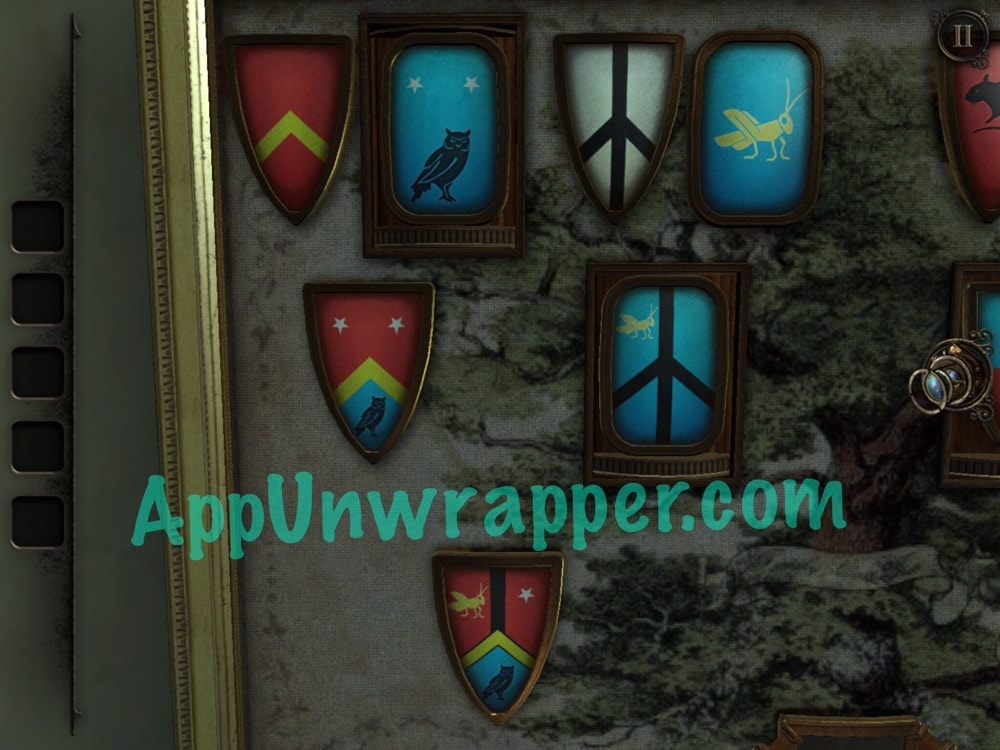
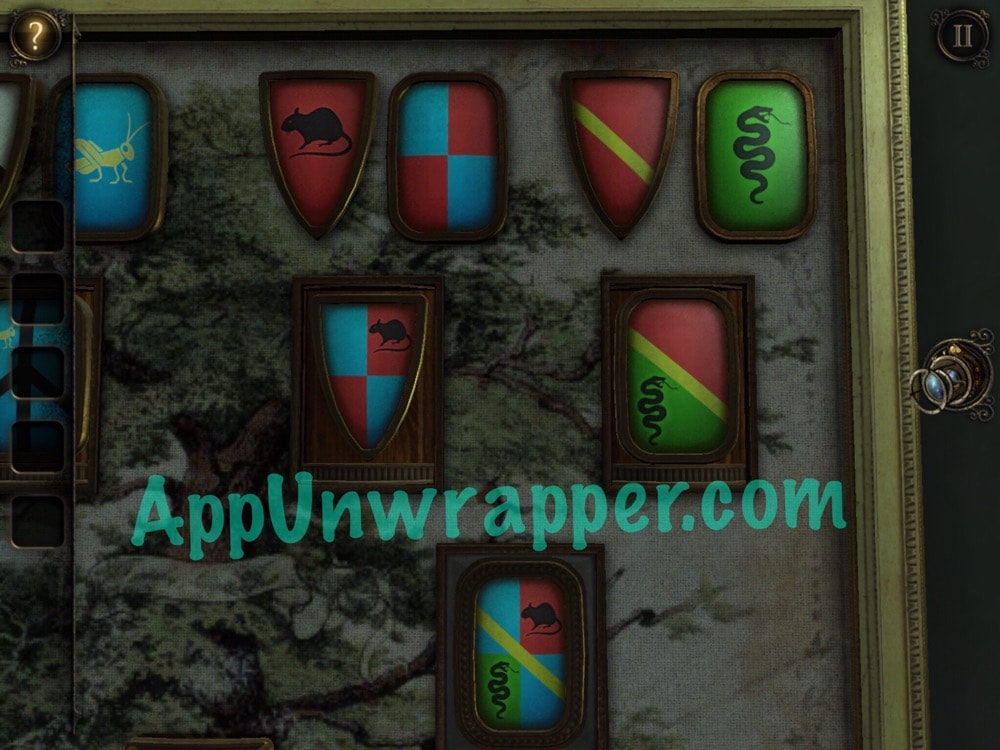
13. What you need to do now is rotate each crest to fill in the blanks. Each crest needs to be a combination of the two above it. For instance, combine the rat and the checkerboard to get a, well, checkerboard with a rat on it. When you’re done, the two swords at the bottom will move and the door will open to another room.
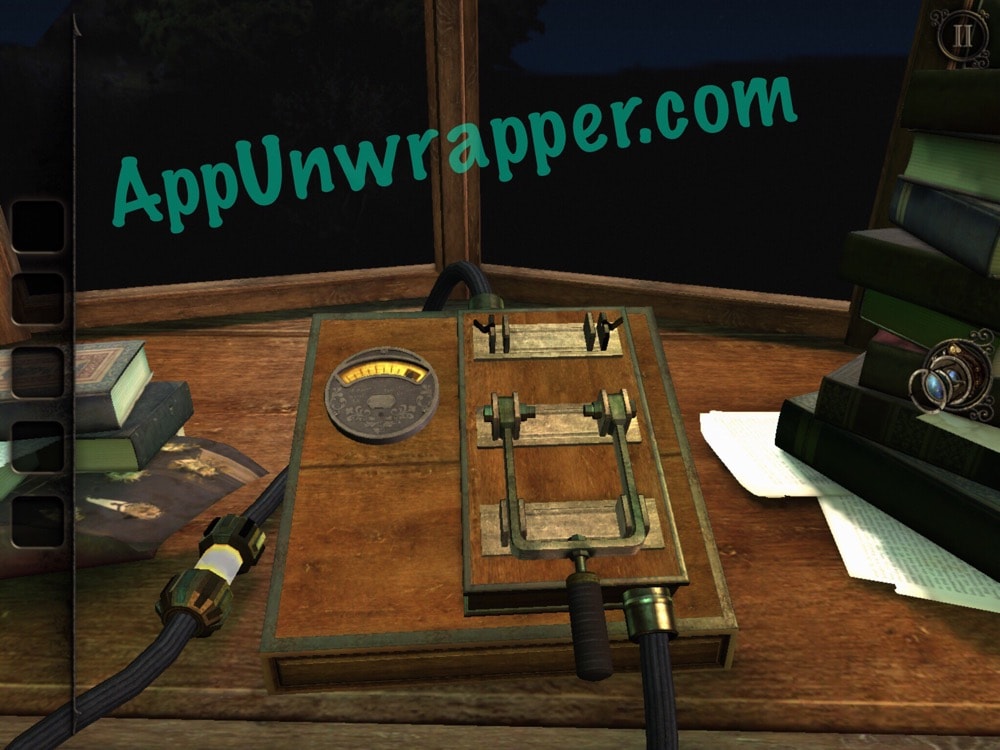
14. In this room, you need to create a chain reaction. The first thing to do is go to is machine to the left and slide the pieces above and below to match pluses and minuses together. It’s seems ok to leave one bulb unlit. It should look like this:

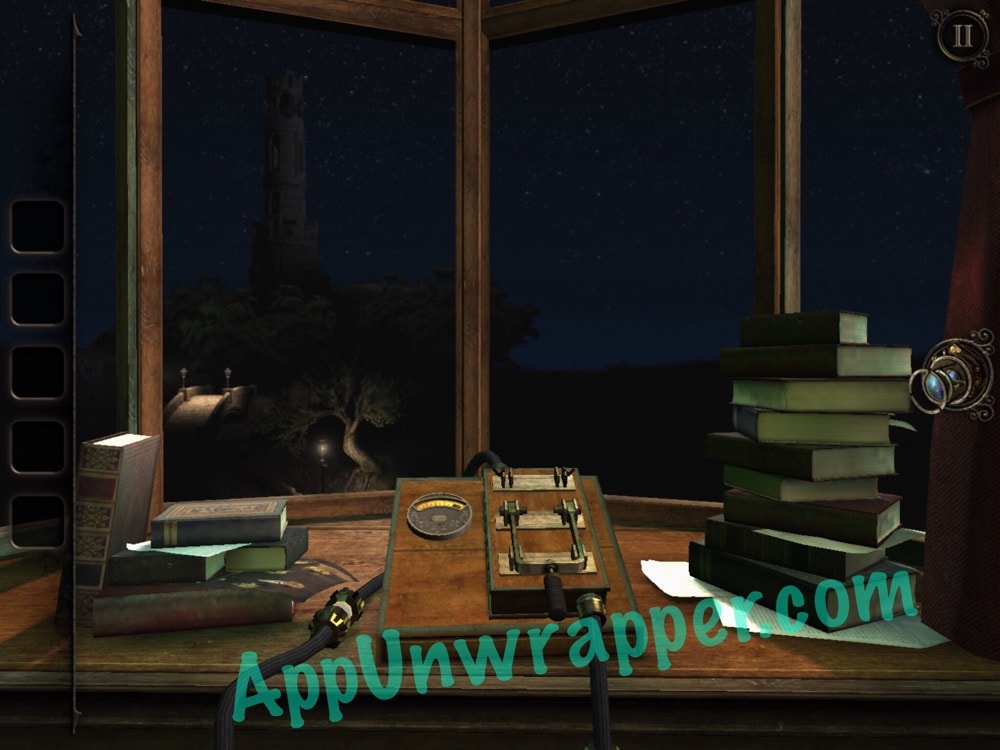
15. Next, flip the switch on the window sill. A bridge and castle in the distance will light up a bit outside.
Click on the little numbers below to continue to the next page of the walkthrough or click here.
What about the cage in the first room? Can you open it?
I cannot figure out how to get the lantern placed!
Okay not bad not bad for