Adventure Escape Mysteries – Cursed Crown
By: Haiku Games

Haiku Games is back with another Adventure Escape game. This time, it’s two games in one. So I’ll be making two separate walkthroughs. This walkthrough guide will help you with hints, tips, tricks, answers and solutions for Chapter 5 of Adventure Escape Mysteries – Cursed Crown. It’s a fantasy game for more advanced players, where you play as Princess Nimue, who needs to save her kingdom using magic. Feel free to ask for extra help in the comments section.
See all my other Adventure Escape walkthroughs.
Walkthrough:
Chapter 1 | Chapter 2 | Chapter 3 | Chapter 4 | Chapter 5 | Chapter 6 | Chapter 7 | Chapter 8 | Chapter 9 | Chapter 10
Chapter 5:
You can watch my video for Chapter 5 here or continue below for my step-by-step guide.
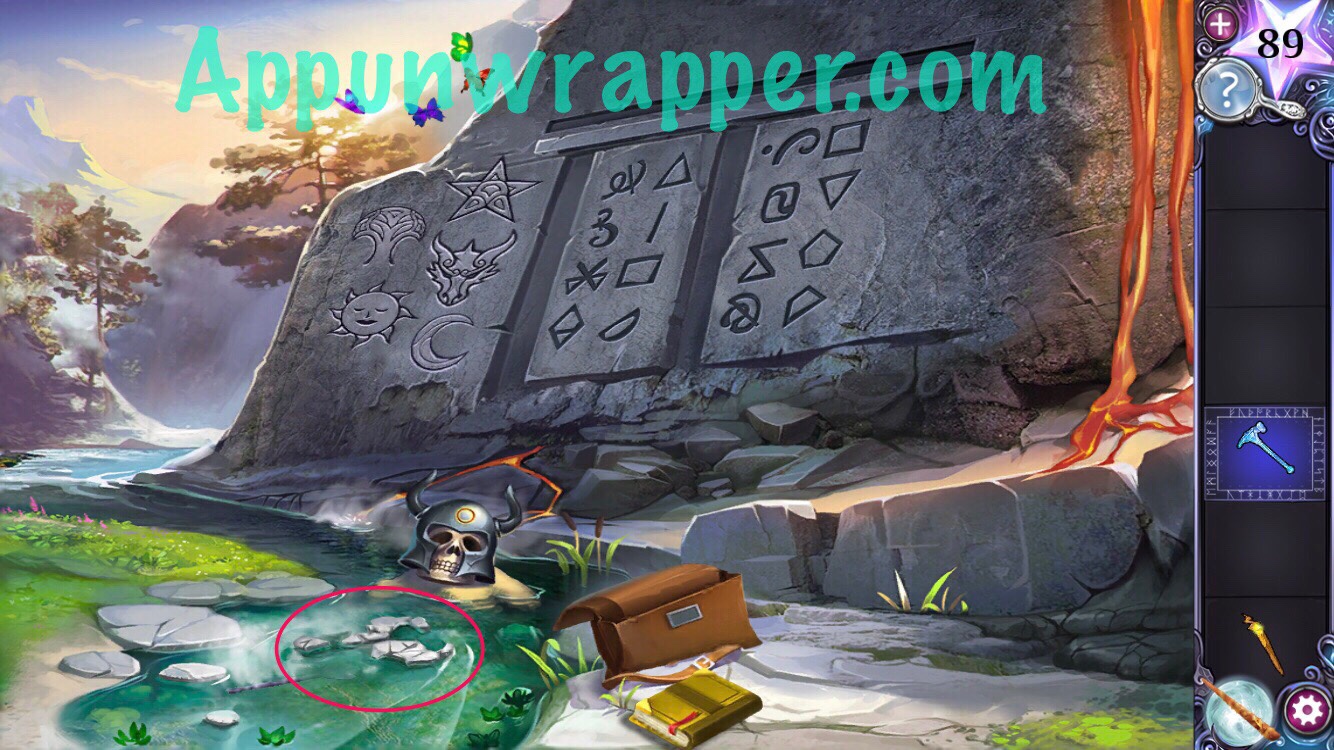
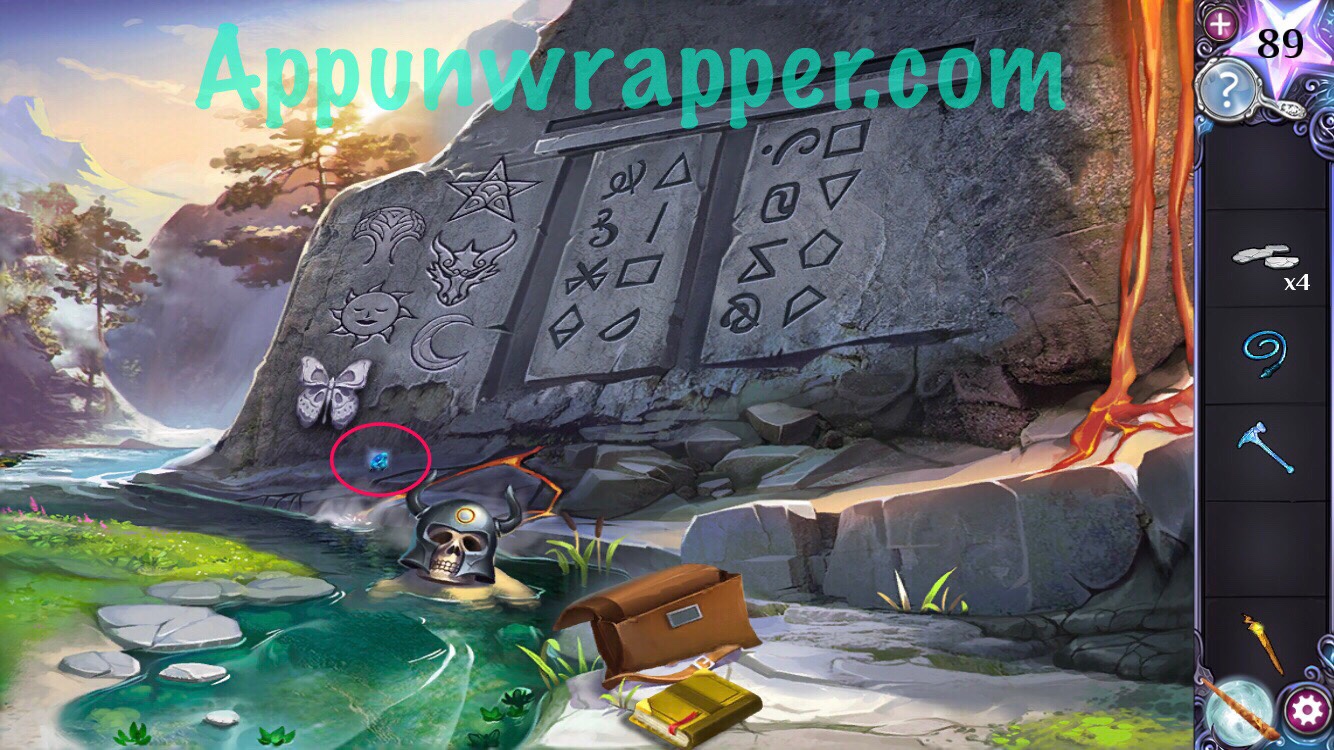
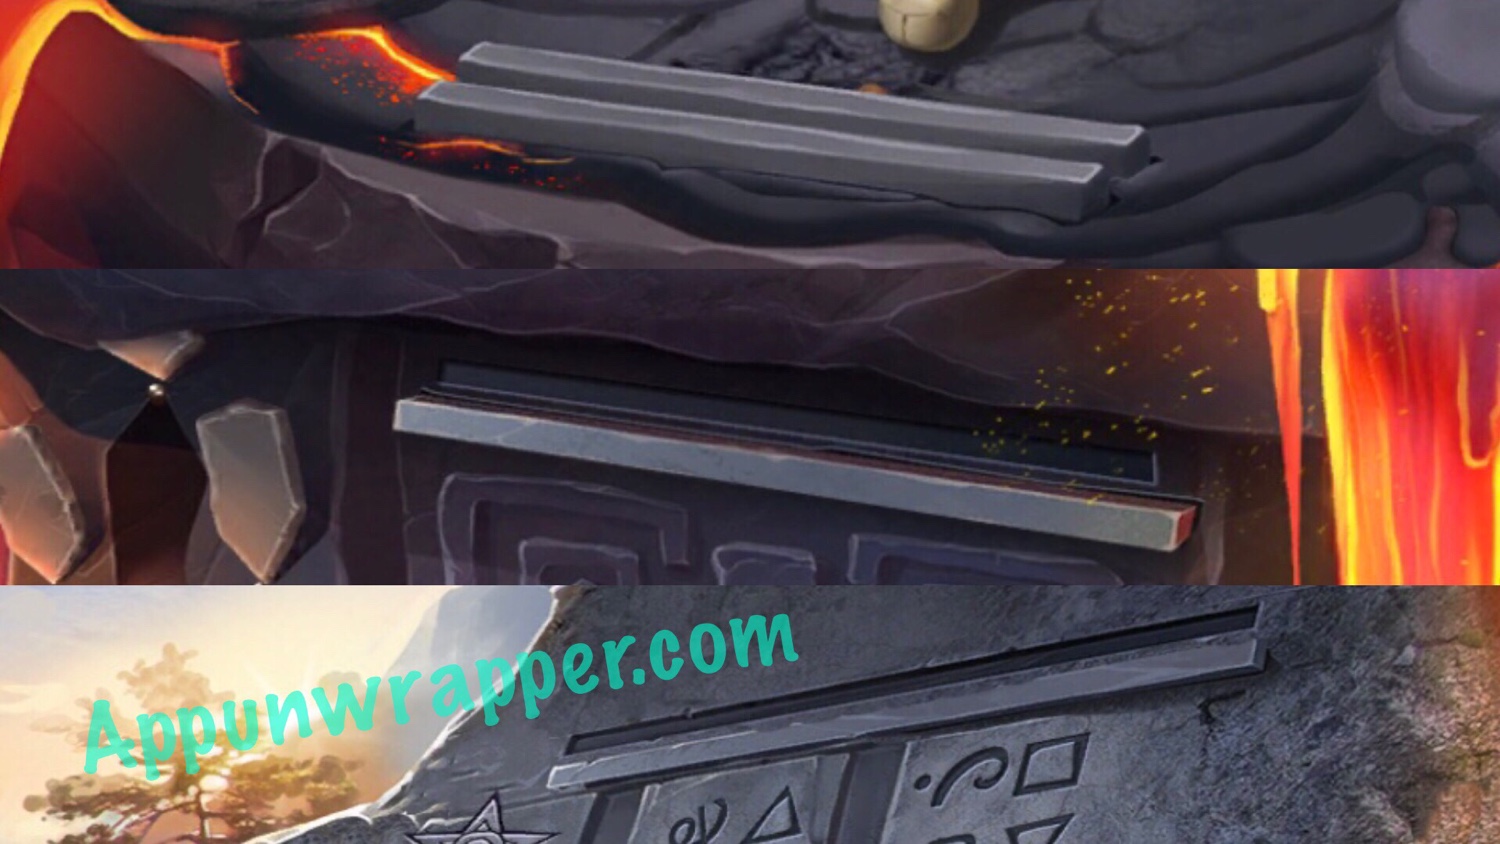
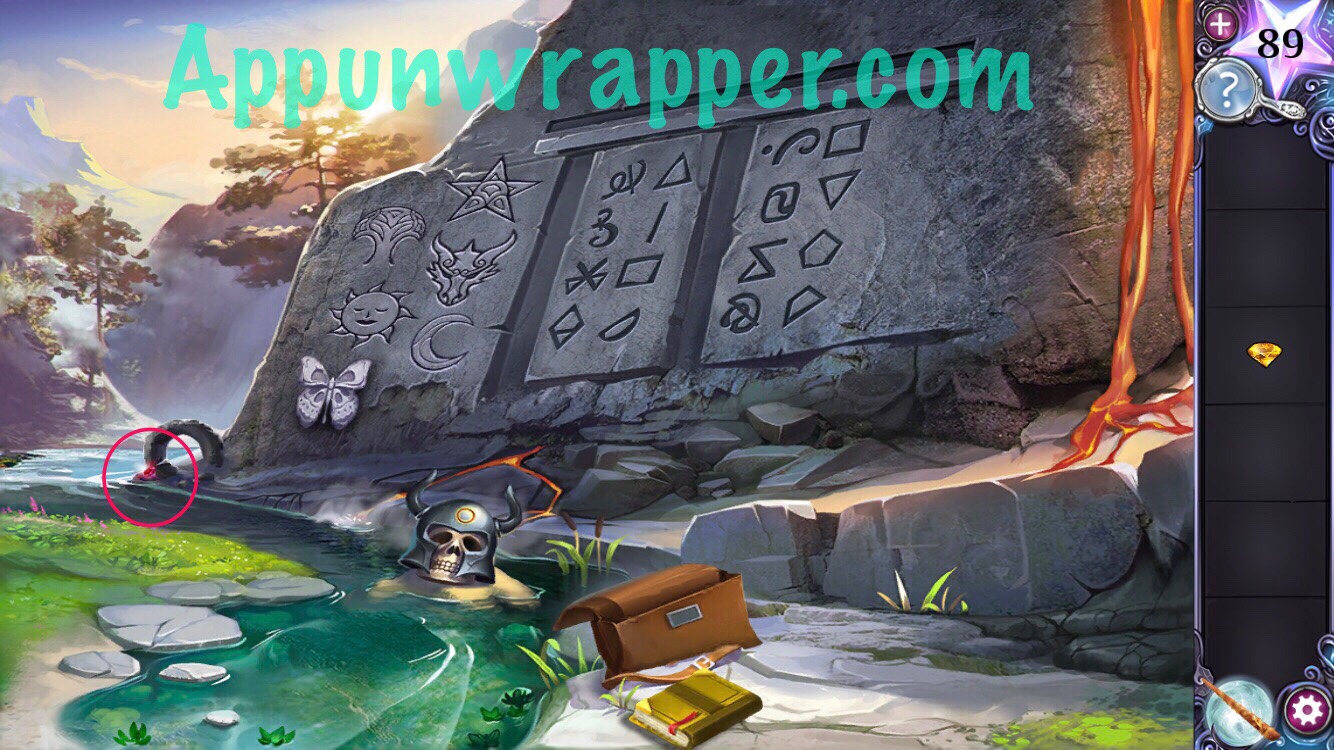
1. Use your Rust Removal spell on the bag’s lock so you can use it. We still need a code for it. While here, also notice the old carving of two bars. It’s a clue for later.
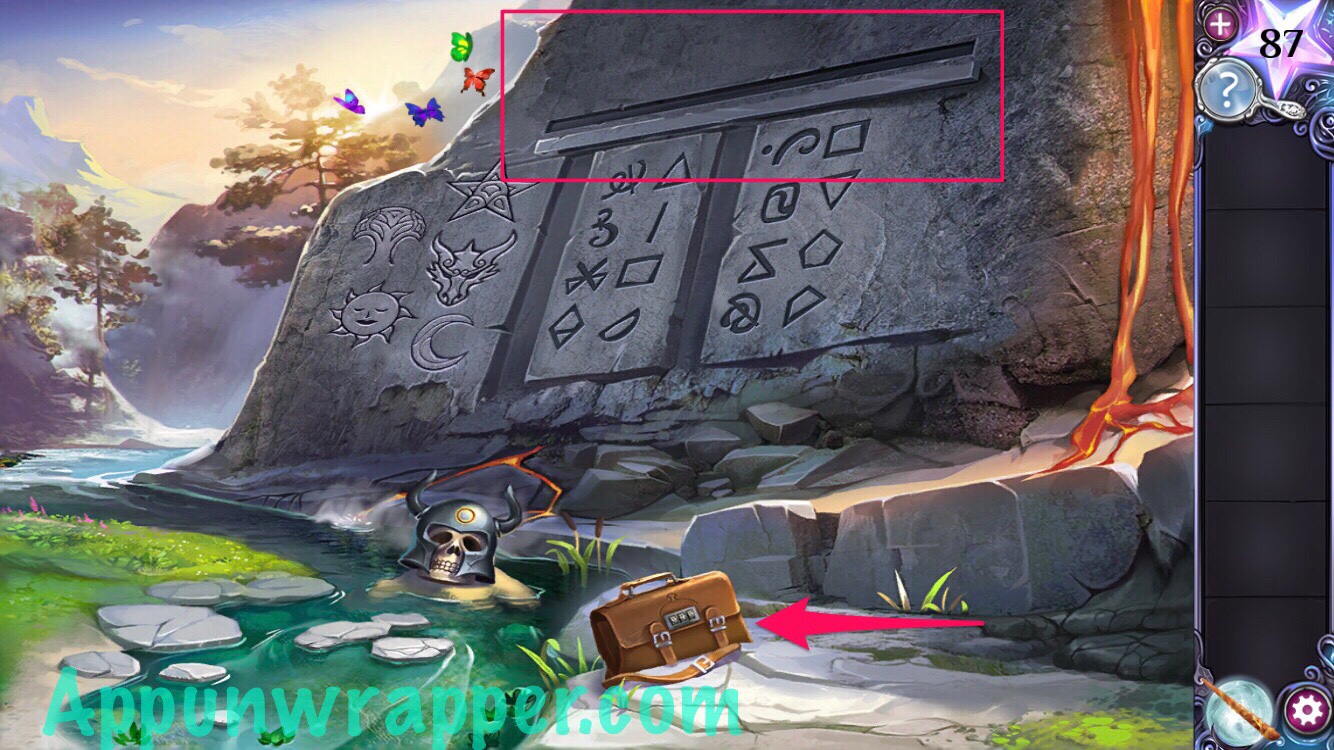
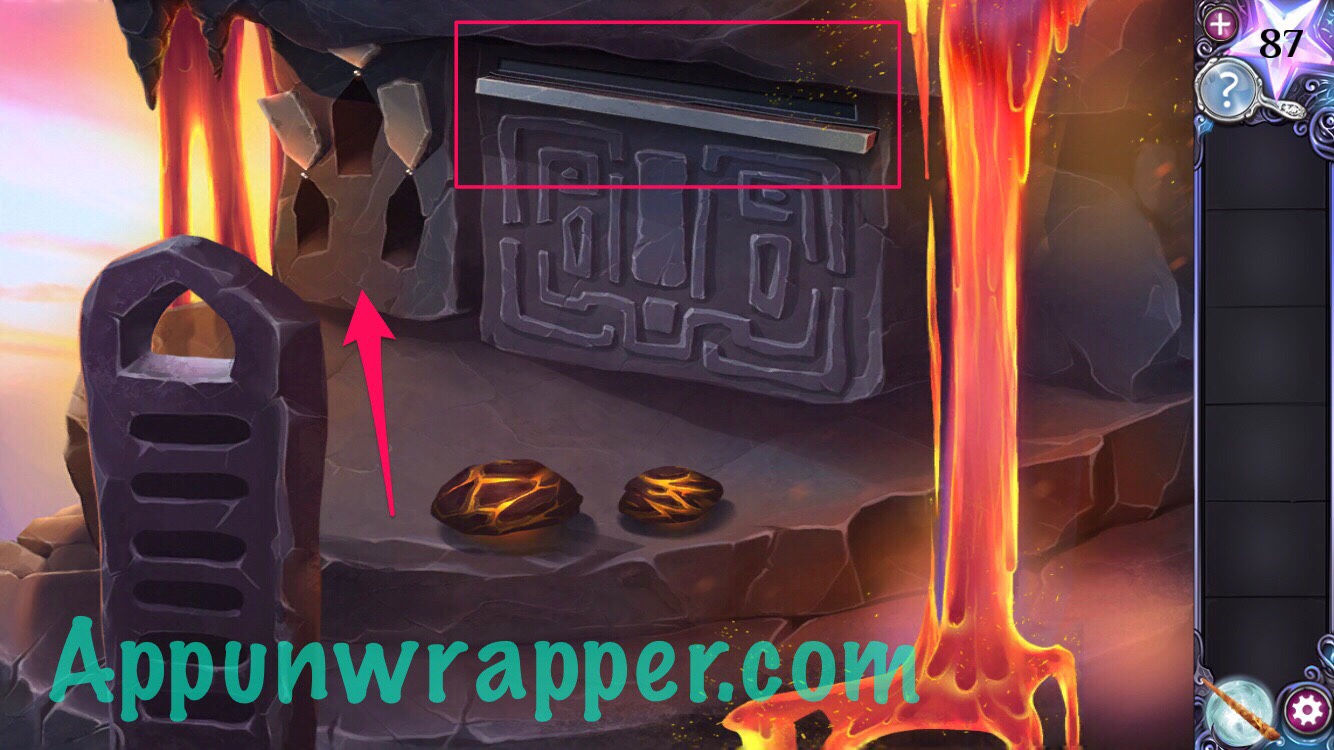
2. Tap on the lava to climb up to the next level of the mountain. Use your Rust Removal spell on the three pointy things to the left. Looks like you need to insert something there. Also, there’s another carving of two bars.
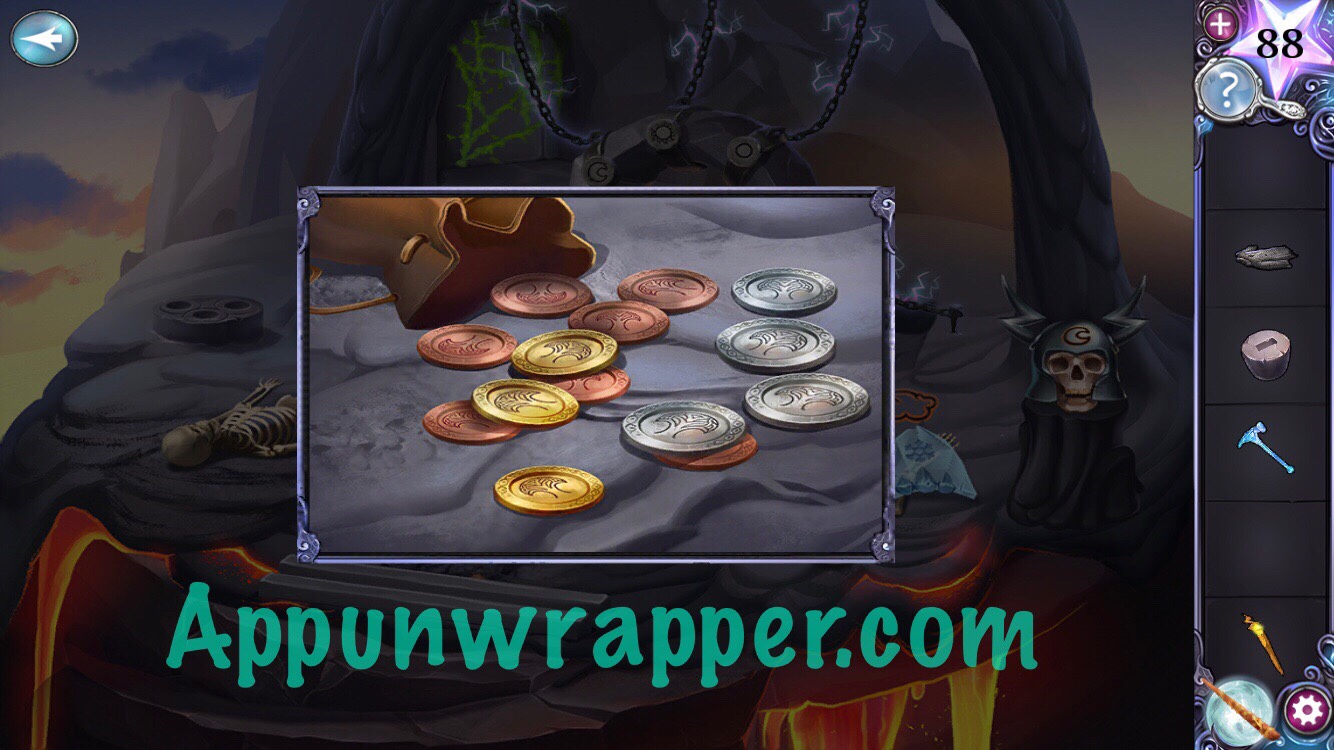
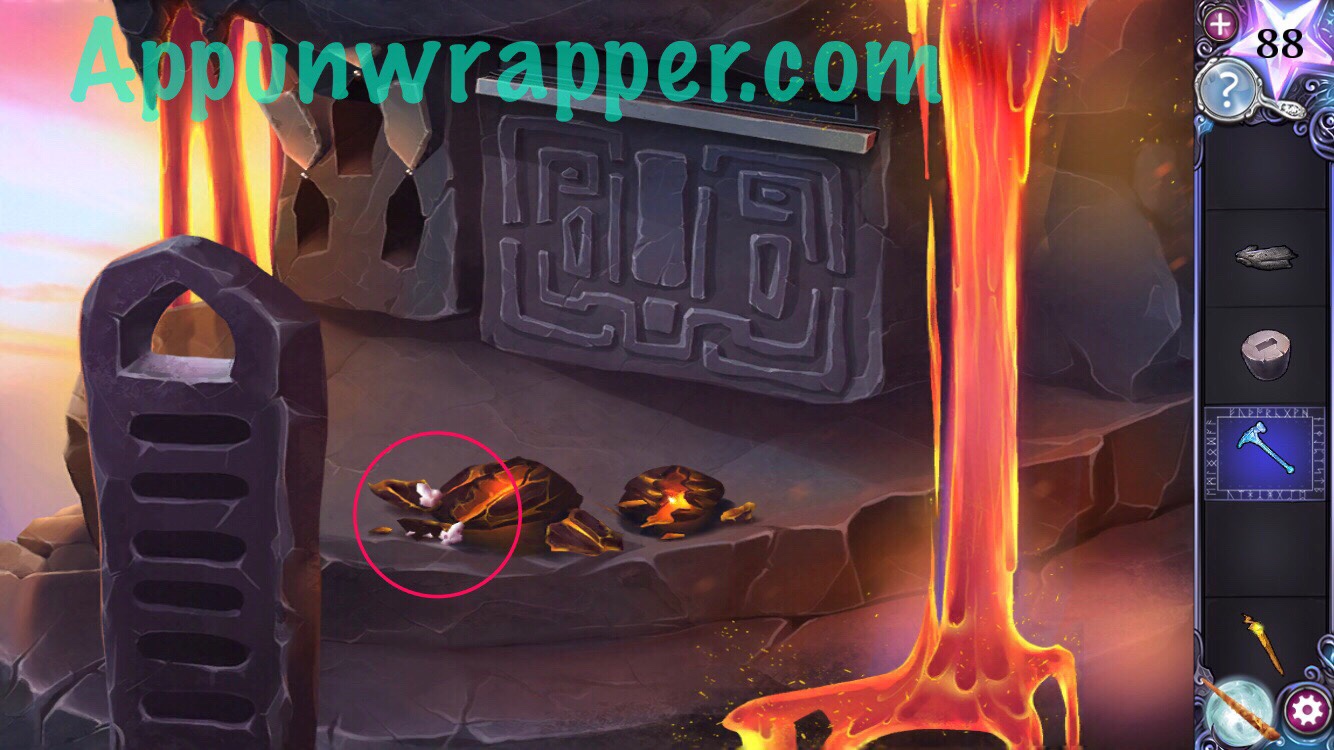
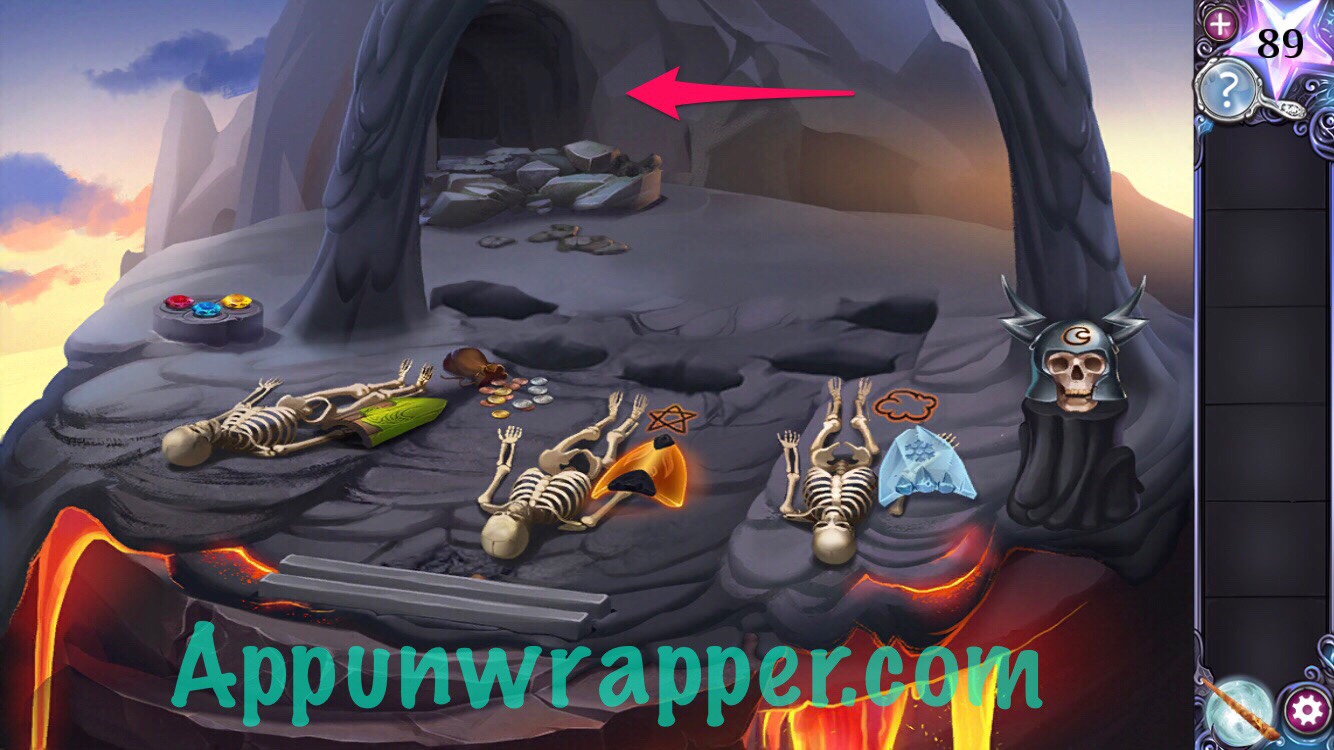
3. Tap to the right of the lava to climb to the top of the mountain. Notice another carving of two bars. Pick up the ice war hammer, lightning staff, chisel mold and chain mail. Also, blow off the dust to reveal a magic power amplifier. Blow away the dust to reveal a burn mark in the shape of a star near the middle skeleton. Move the stone near the right skeleton, revealing a cloud symbol. And last, look closely at the coins. Count the gold, silver and copper coins. You get:
3 gold
4 silver
7 copper

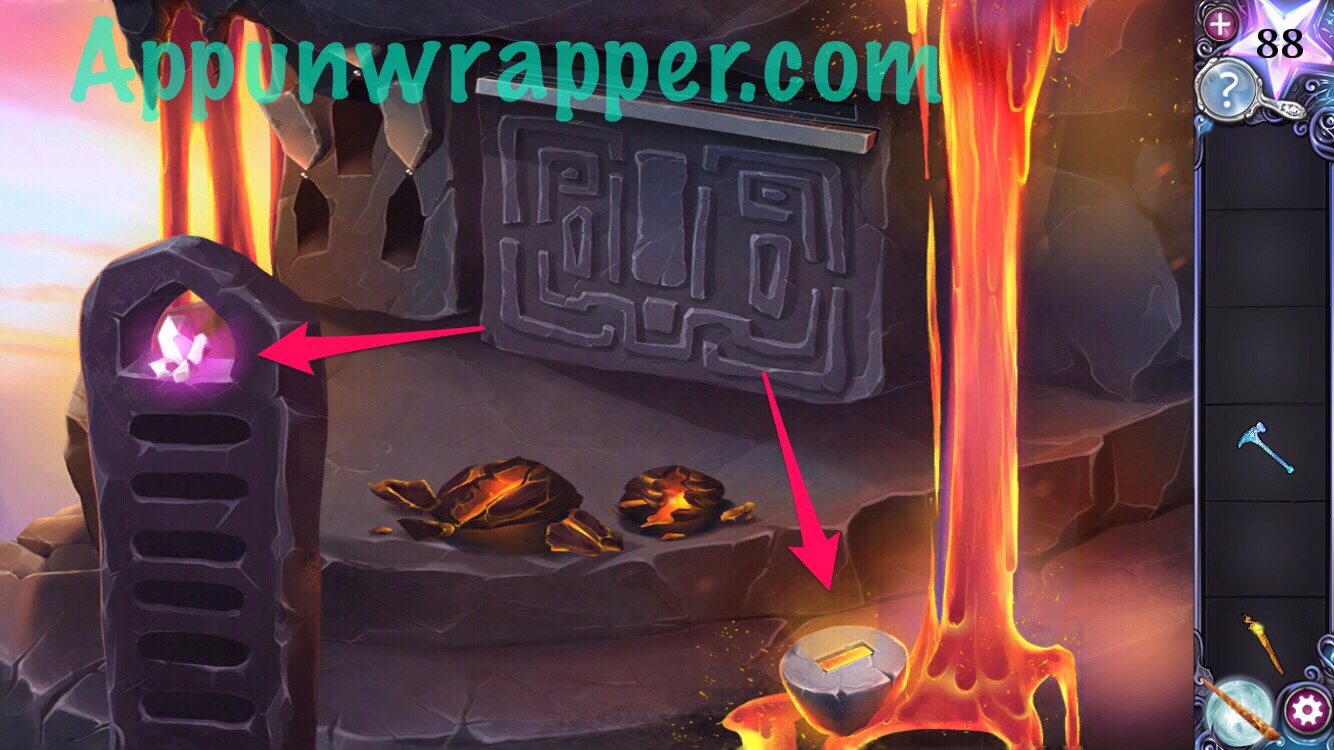
4. Go back to the second level of the mountain and use the hammer to break the two rocks. Take the quartz crystals from inside. Then place the quartz on the stone monolith to the left. Also, place the mold down by the lava and put the chain mail in to melt it. We can’t take it back yet.
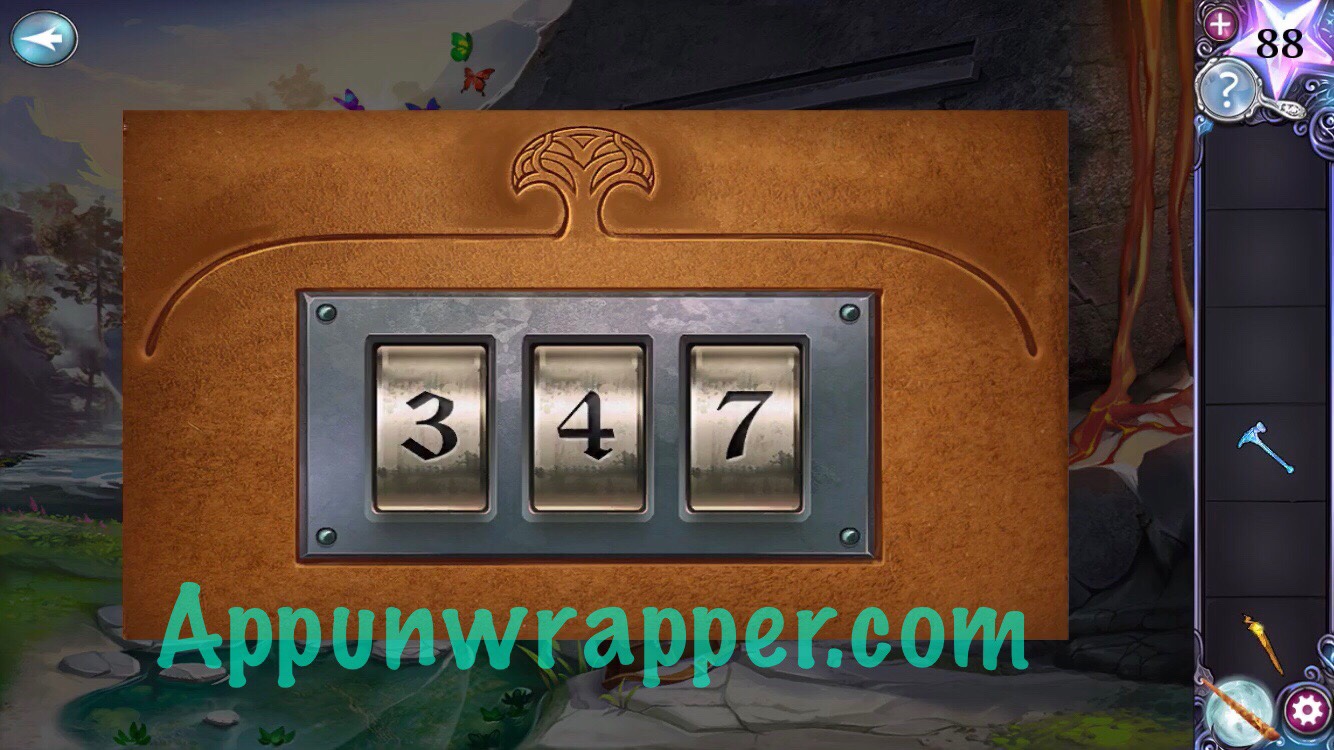
5. Go back to the locked bag and enter 347 to open it. Take the gloves and magic book from inside.
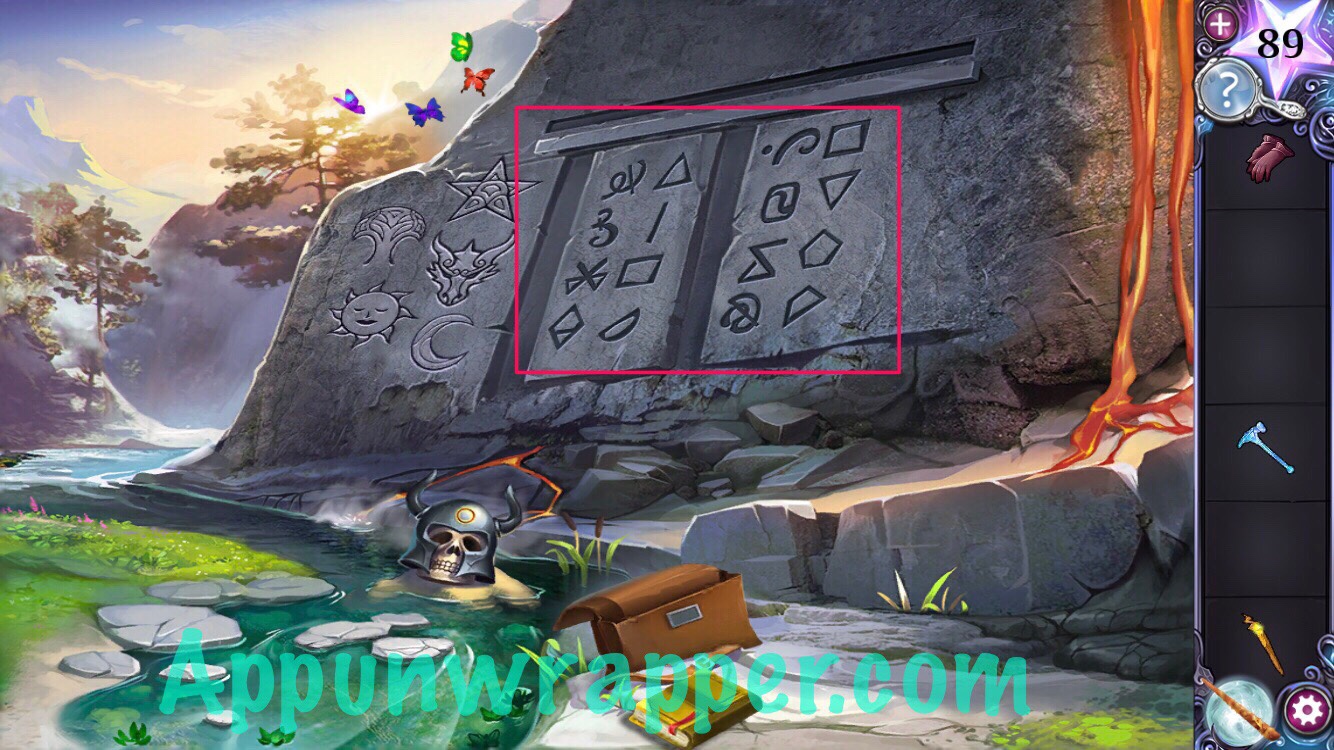
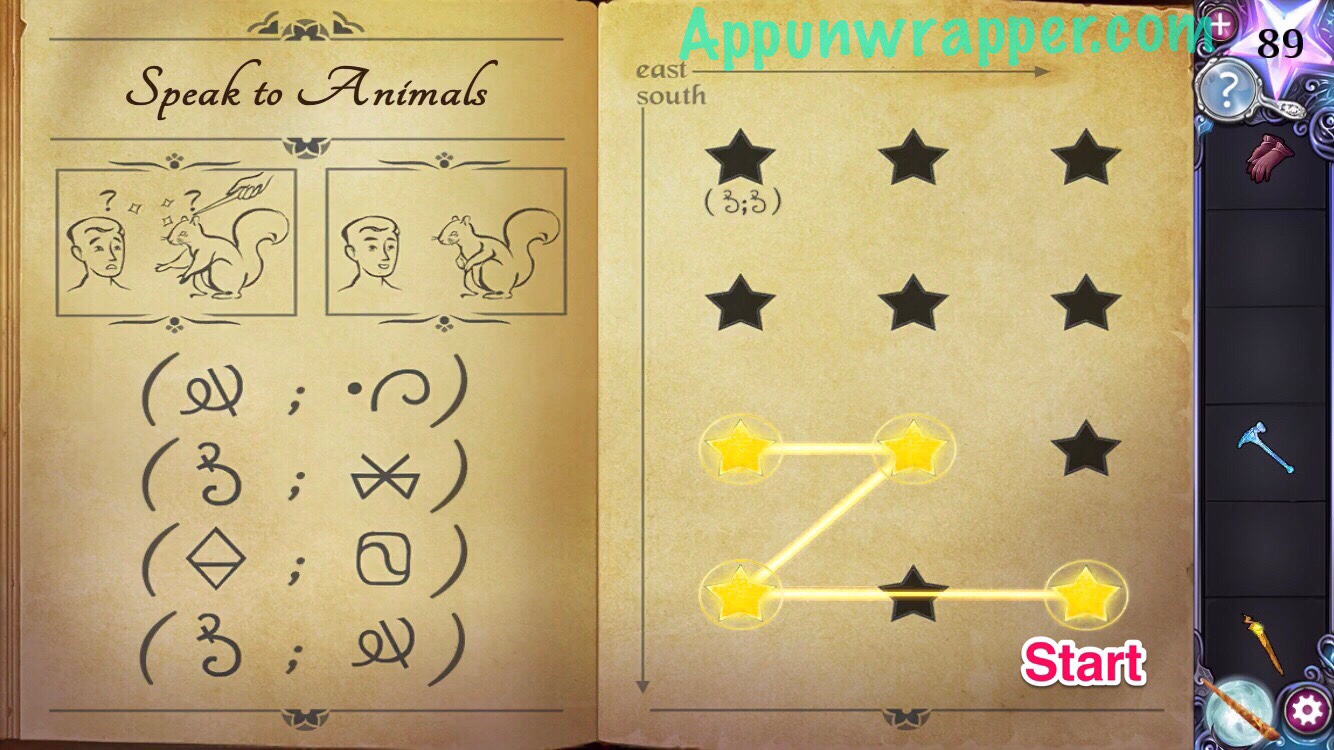
6. Finally, another spell! Use the information to learn the Speak to Animals spell. The symbols on the wall have shapes next to them. The number of lines on each tells you what number that symbol represents. If you look at the book and translate the symbols into numbers, you get:
(3; 4) (1; 4) (2; 3) (1; 3)
So draw from star to star using those coordinates.
7. Now use the Speak with Animals spell to talk to the butterflies. They want you to add butterflies to the mural of creation.
8. Go back to the lava and use the gloves to pick up the full mold.
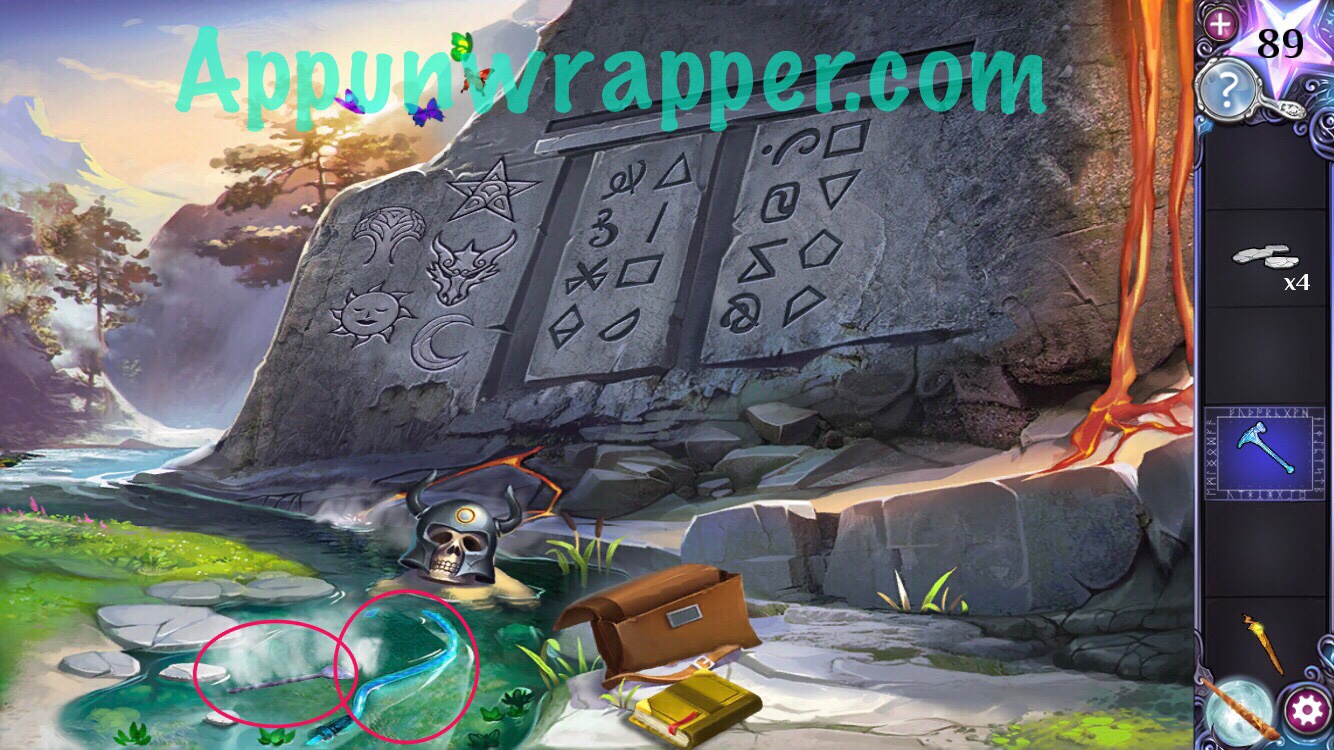
9. Go back down and place the mold in the water to cool it down. Use the hammer to break it and get the chisel. While you’re here, notice that the mold broke some stones in the water. Pick them up, along with the water whip.
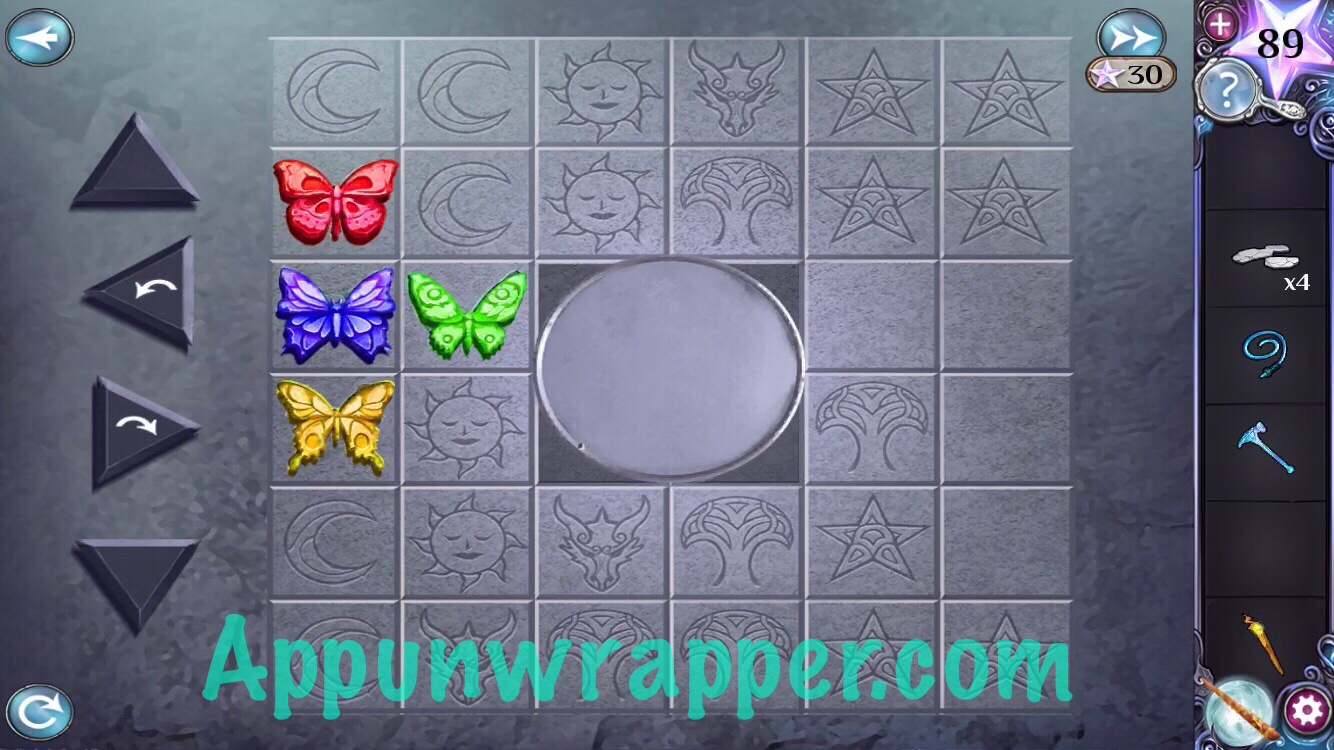
10. Tap on the butterflies and use the chisel to carve butterflies into the puzzle. Now, press the buttons in this order to get the butterflies to the correct locations:
Up, Up, Left, Left, Down, Right, Down, Left, Up, Right, Left, Left, Down, Right, Up, Left, Up, Left, Down, Left
Then take the blue gem.
11. This next part is kind of ridiculous. Go to each level of the mountain and take another look at each of the carvings of two bars. Pay close attention to them.
12. Now go back to the lava and place the flat stones you found into the monolith in that same order. Then take the burning hilt and wind mace. Also, notice the amulet around the skull.
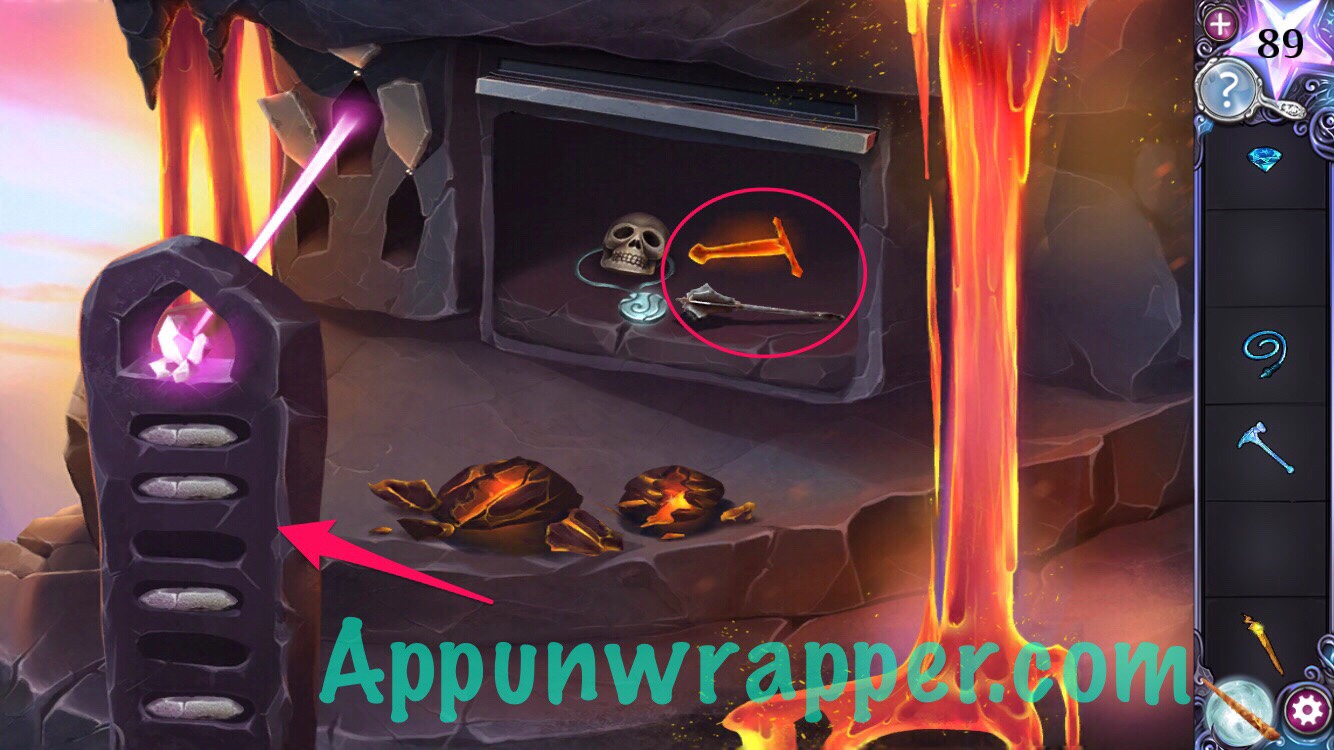
13. Go all the way back up to the top of the mountain and add the gem to the amplifier. Also, add the hilt to the fire sword and take the sword.
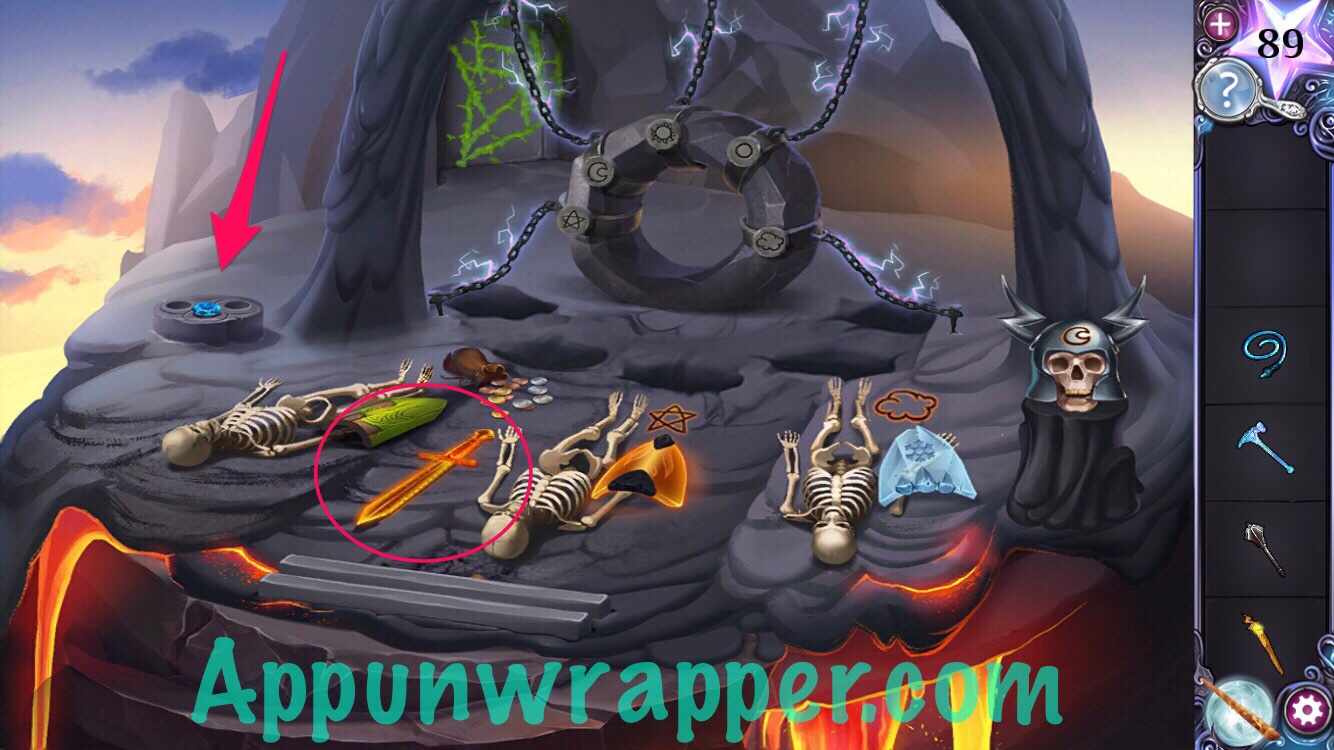
14. You should have everything you need now. Place the five weapons in the holes, matching the elements to the symbols near each of the skeletons around the mountain.
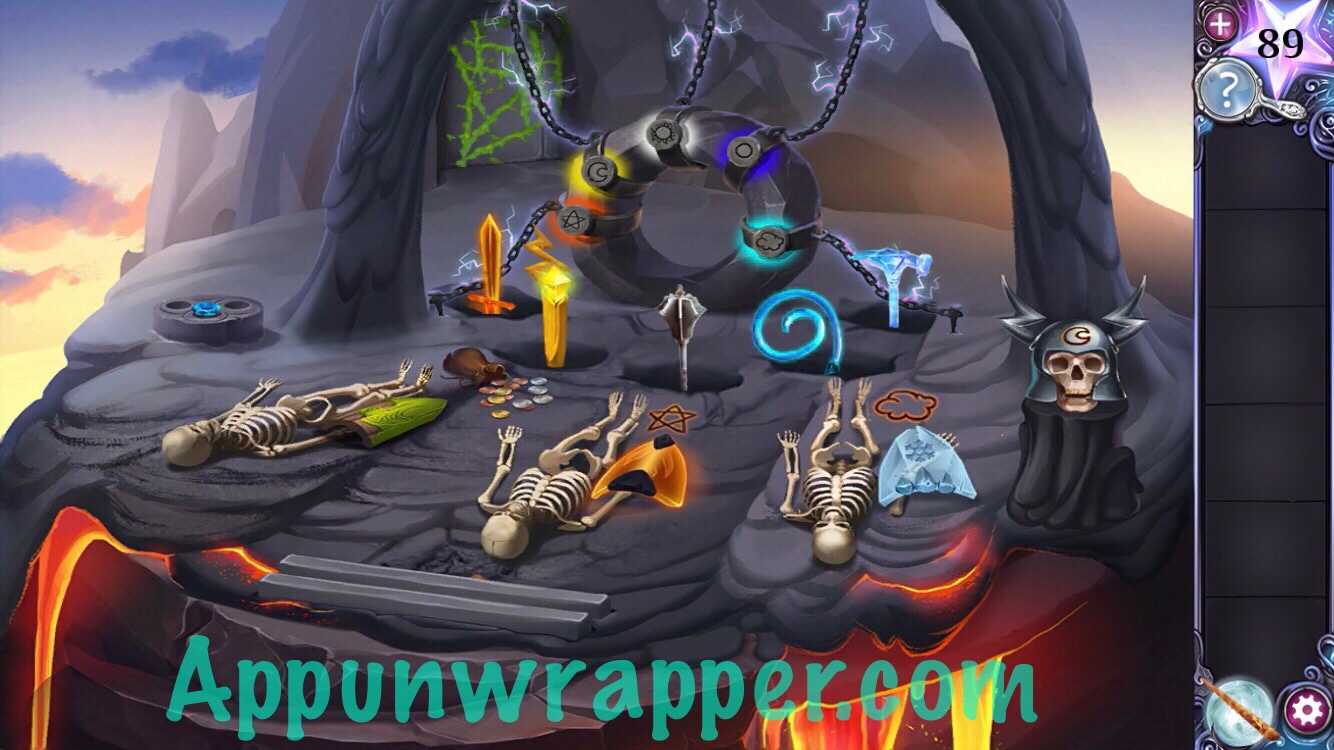
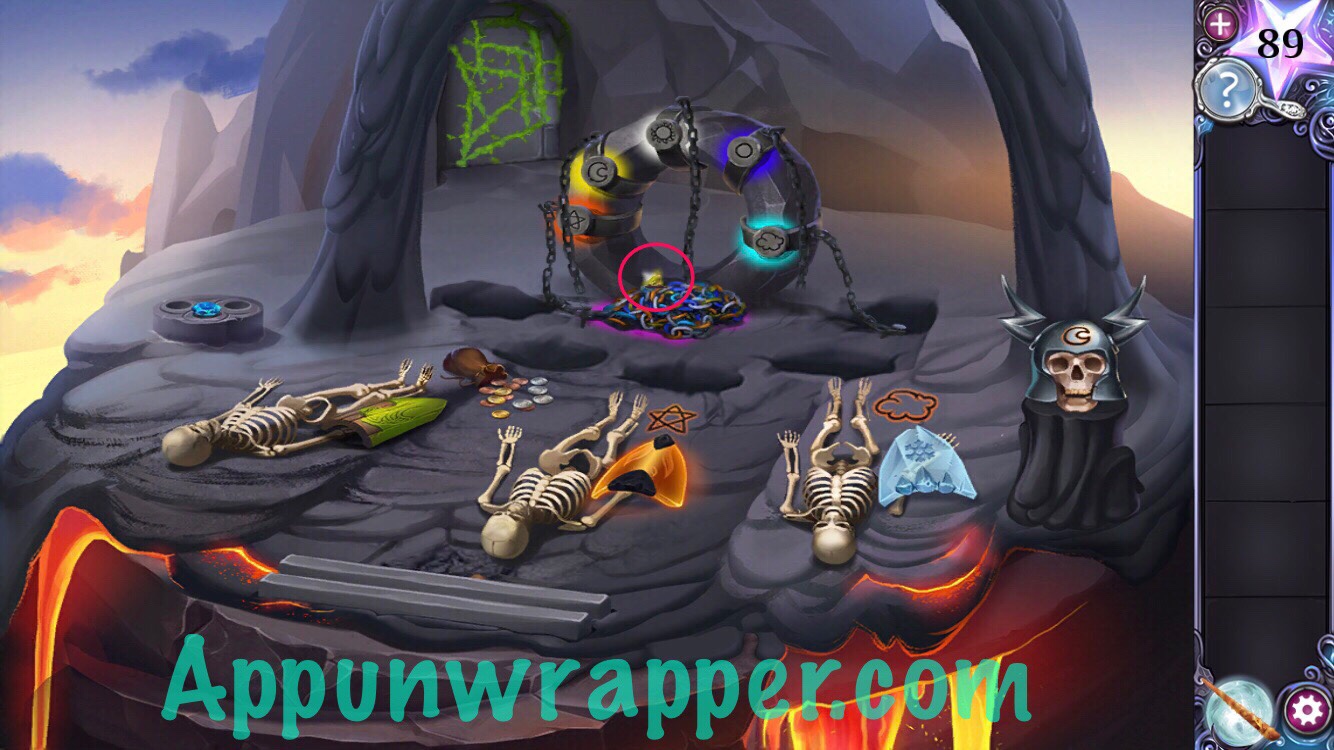
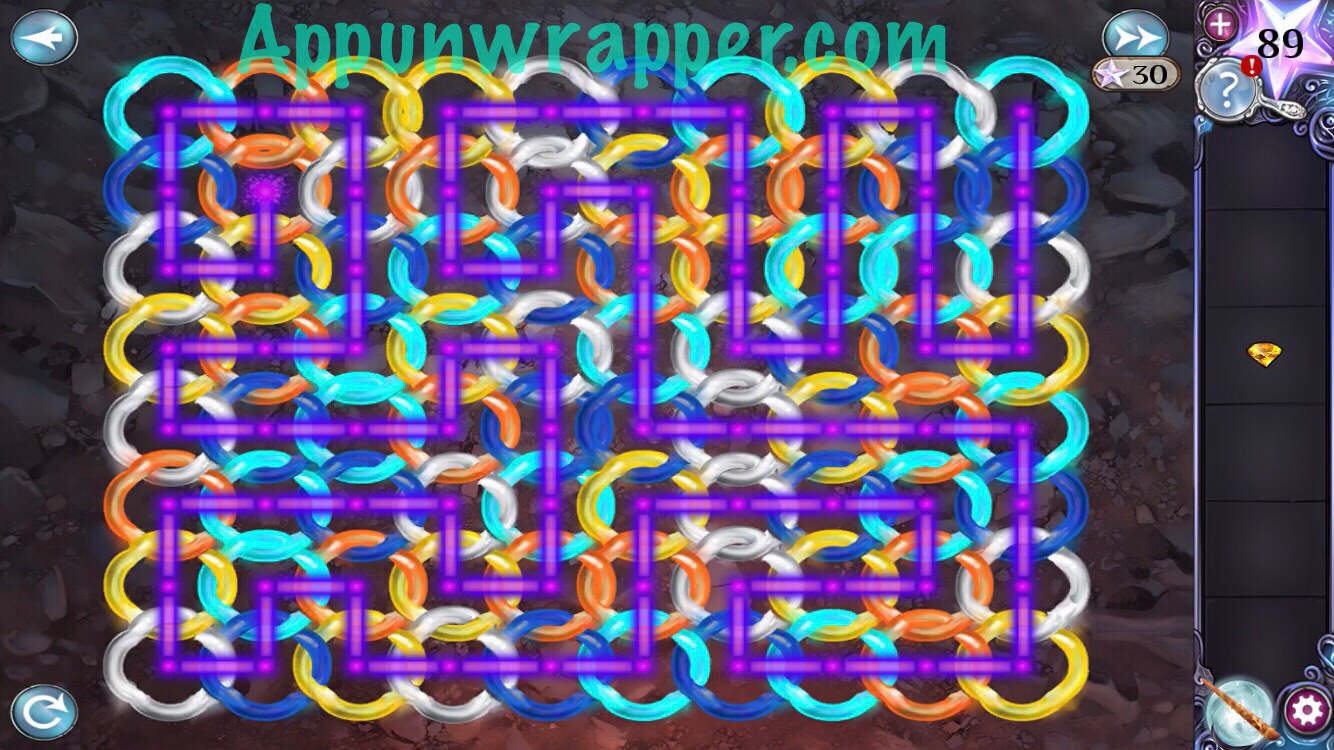
15. Pick up the yellow gem. Now let’s untangle these chains. You need to draw a path through all the links, starting from one next to the purple spark. You need to follow the same color pattern throughout, the same as the five elements on the stone. So it goes: Orange, Yellow, White, Dark Blue, Light Blue.
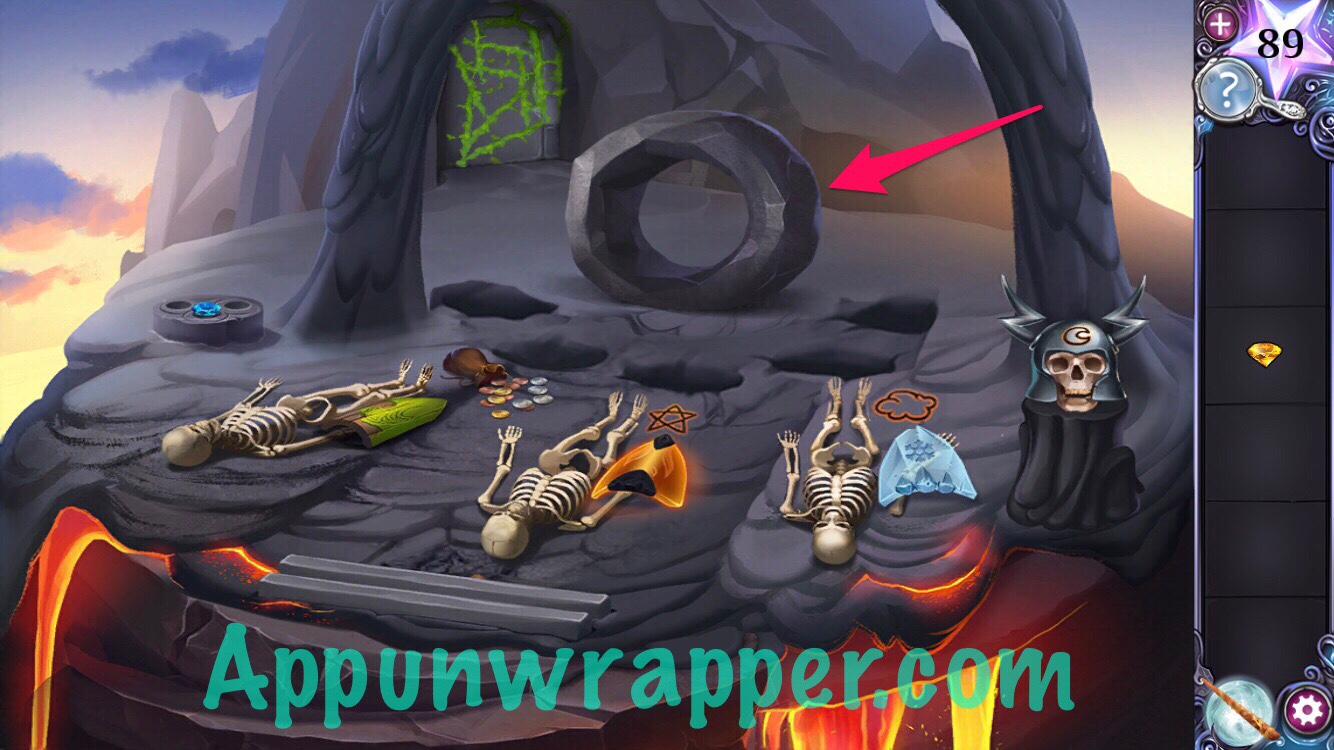
16. Push the big stone wheel off the mountain and it will break. Go down and grab the ruby red gem from the pieces.
17. Go back up and place the three gems in the amplifier.
18. Use the Grow spell on the vines at the back to break down the granite slab. And that’s the end of Chapter 5!
Click on the chapter you need below or click here to continue to Chapter 6.
Chapter 1 | Chapter 2 | Chapter 3 | Chapter 4 | Chapter 5 | Chapter 6 | Chapter 7 | Chapter 8 | Chapter 9 | Chapter 10

Where is the bag??
I found the star puzzle made no sense at all
I think it is number of lines or ends pts and not number of angels and so it should not be 0,4 or 0,3 but 1,4 and 1,3.The first number is representing column no and second represents row forget the start 3,3 and try to trace it is making sense
Yeah I see 0 doesnΓÇÖt make sense as a starting point since thereΓÇÖs only 4 rows. But I still donΓÇÖt see how lines work for ones like the half circle.
I cant get the animal spell. Ive done it like the walkthru says bit don’t work. Can someonetell new how to do it right. TY…
Never mind i got it. Didn’t realize i needed to go around star for 2,4 to get to 1,4…
How do the eight symbols inside the brackets relate to the columns or rows on the stone wall? Also how are the columns and rows numbered, up or down
You have to avoid a star if you want to skip it and go to the one across the place you start
im trying to get thru the part where the quartz stuff is and it says ‘the beam is blocked’ how do I do that part?
The three metal plates are rusty, cast a spell on them
The star puzzle makes no sense
I love how they say that the stone slab one was rediculous when I still can’t figure out the Star puzzle for talking to the butterflies 😂🤦‍♀️.
There are mistakes in number 6. Symbols for the same rows Y should be the same.
the person or persons who designed this level’s spellbook puzzle should be shot out of a cannon into the sun. not only do multiple cipher characters refer to the same number (so you second guess yourself about whether you should be counting linesΓò¼├┤Γö£├ºΓö¼┬¼ “wait, there are *two* triangles”, etc.)Γò¼├┤Γö£├ºΓö¼┬¼ the coordinates they give you don’t even line up with the reference point ((3,3) is marked at the top-left corner of the gridΓò¼├┤Γö£├ºΓö¼┬¼ yet the “correct” first coordinate, “(3,4)” isn’t even in the same column as it).
thank feck for this guide, because I don’t think i could have found the answer otherwise
The star thing makes no sense. CanΓÇÖt go through one without using it.
I was very confused about the spell book as well, but the reference point is not actually (3,3), it’s the symbol that corresponds to 1 on the carving (which looks just like a 3, and it’s so small in the book that it’s hard to see the little line in the middle).
Hinter jedem Zeichen ist eine Form: z. B. Strich = 1, Dreieck = 3, Quadrat = 4. Der eigentliche Sinn eines Koordinatengitters ist hier nicht erfüllt, man muss für jede Koordinate neu gucken und dann ist eine Spalte mit 2 Symbolen belegt. Wenn man diesen Fehler also ignoriert, kommt man zur angegebenen Lösung.