Adventure Escape Mysteries – Cursed Crown
By: Haiku Games

Haiku Games is back with another Adventure Escape game. This time, it’s two games in one. So I’ll be making two separate walkthroughs. This walkthrough guide will help you with hints, tips, tricks, answers and solutions for Chapter 6 of Adventure Escape Mysteries – Cursed Crown. It’s a fantasy game for more advanced players, where you play as Princess Nimue, who needs to save her kingdom using magic. Feel free to ask for extra help in the comments section.
See all my other Adventure Escape walkthroughs.
Walkthrough:
Chapter 1 | Chapter 2 | Chapter 3 | Chapter 4 | Chapter 5 | Chapter 6 | Chapter 7 | Chapter 8 | Chapter 9 | Chapter 10
Chapter 6:
You can watch my video for Chapter 6 here or continue below for my step-by-step guide.
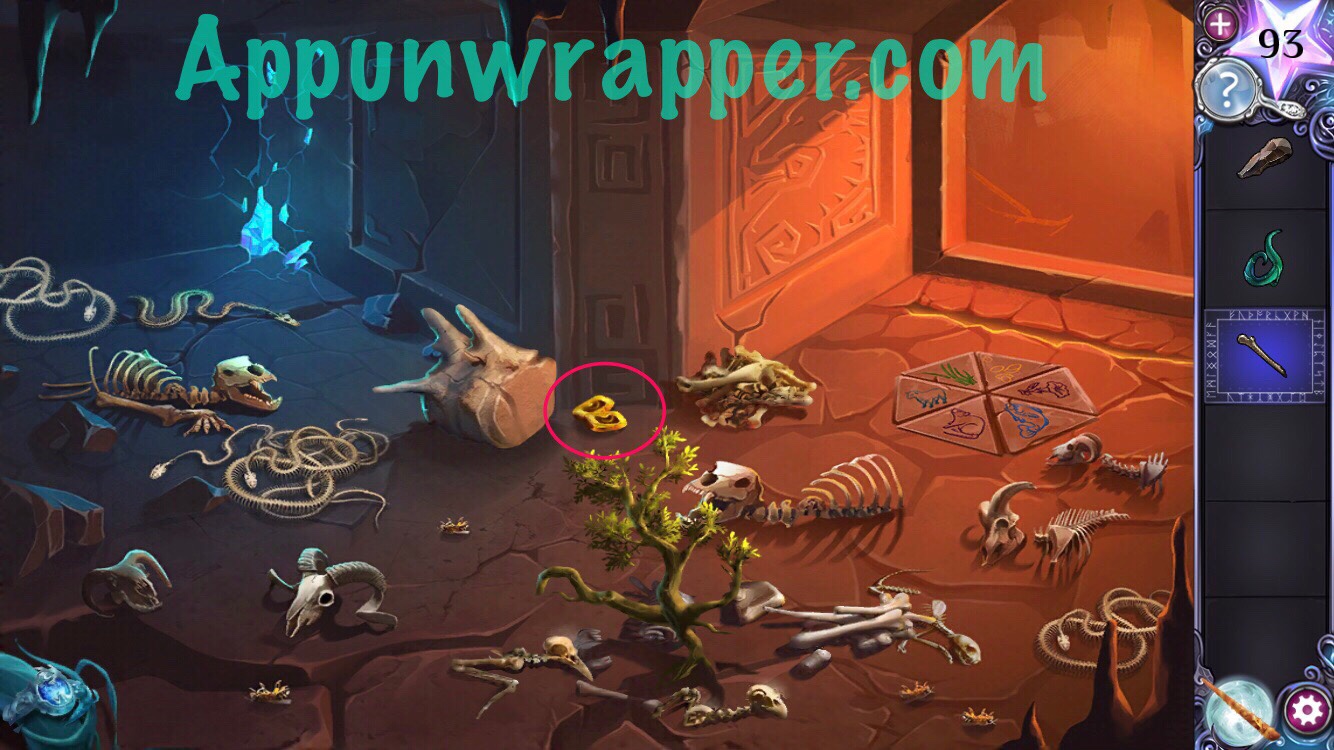
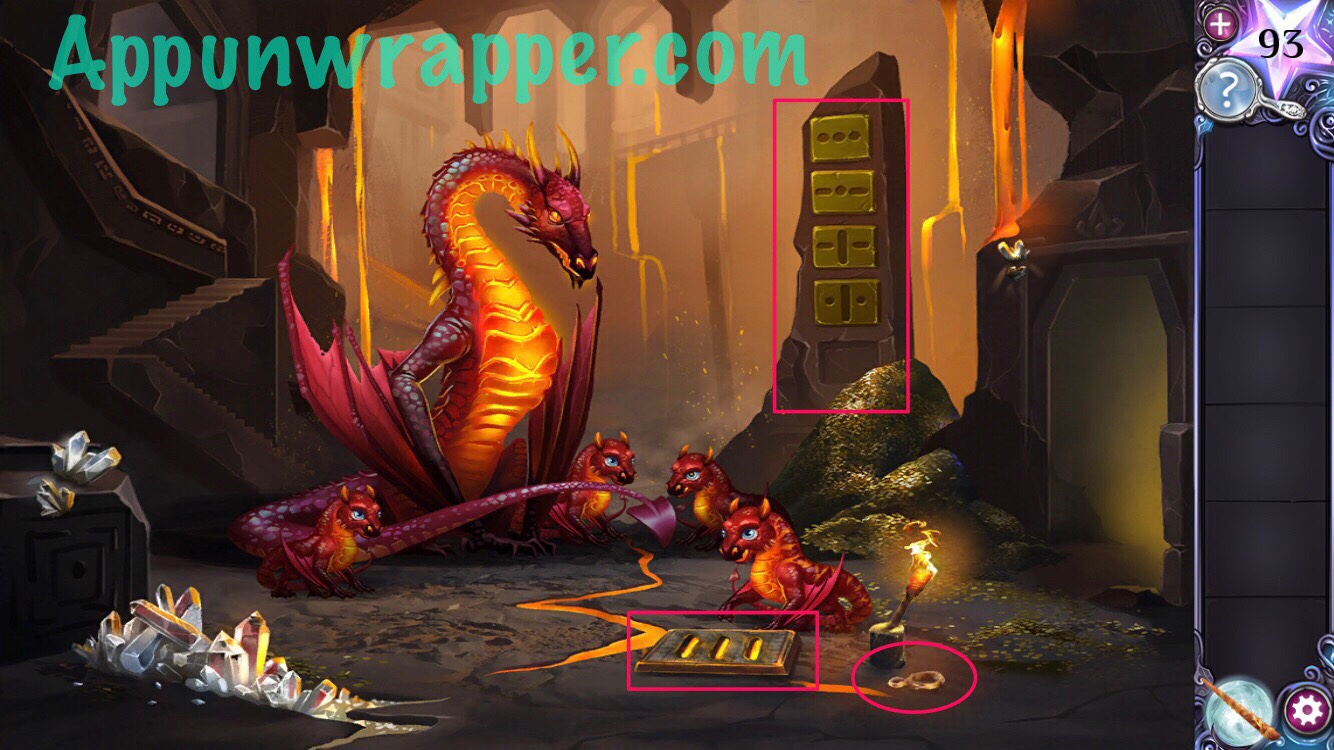
1. Tap on the ring to the left. You can choose to take it or leave it. I chose to leave it. Also, grab the vine near the ring. Pick up the femur from near the pile of bones.
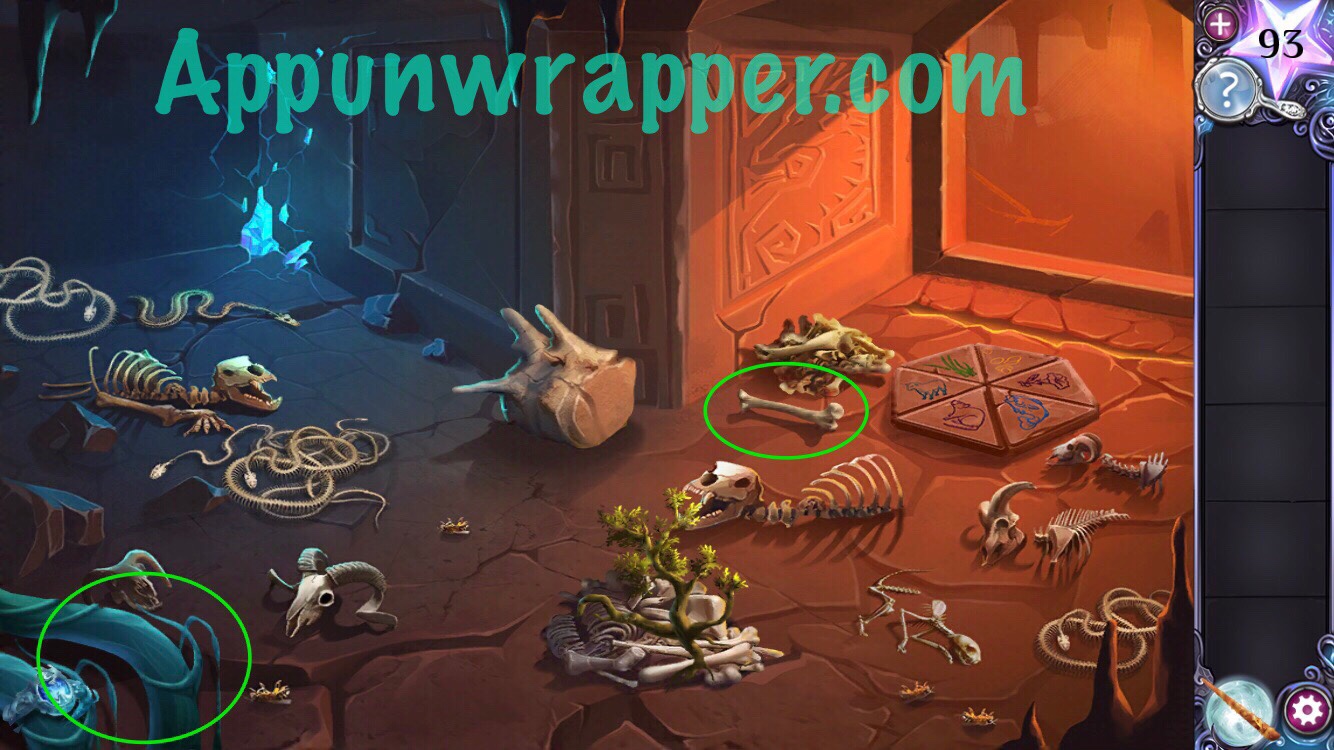
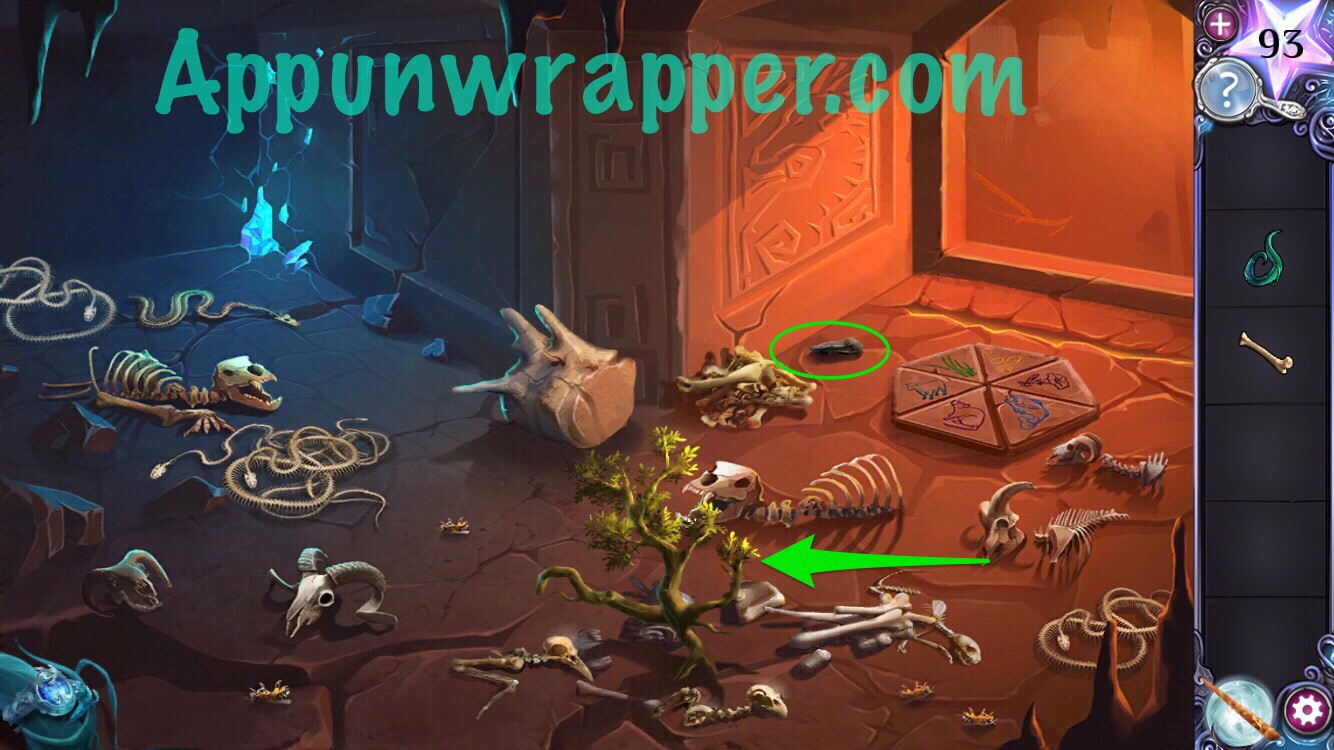
2. Use the Grow spell on the small sapling to make it grow and push all the bones out. Now you can make them all out. Also, move the pile of bones and grab the flint.
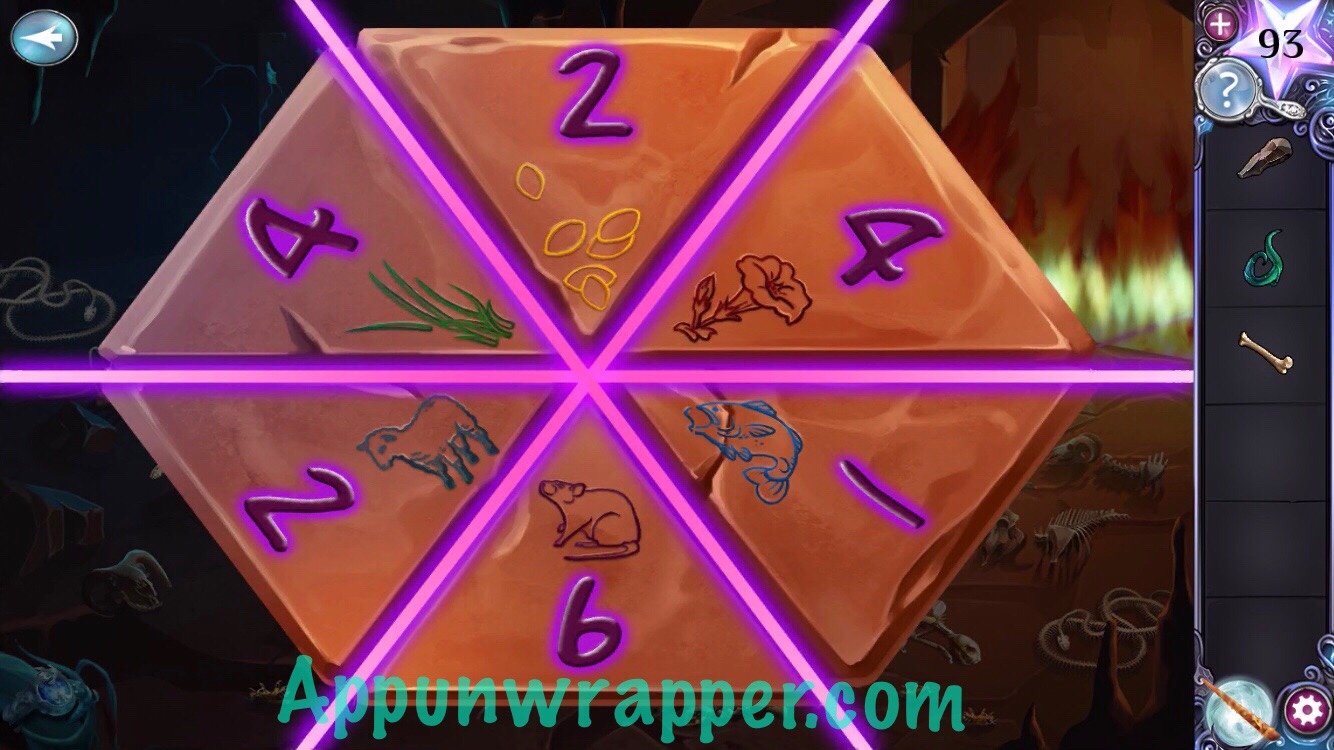
3. Tap on the hexagon on the ground. It’s a trap and it starts a fire! We need to disarm it. Count all the animal remains in the room. You get:
6 Snakes
4 Rams
4 Honeybees
2 Bears
2 Birds
1 Cat
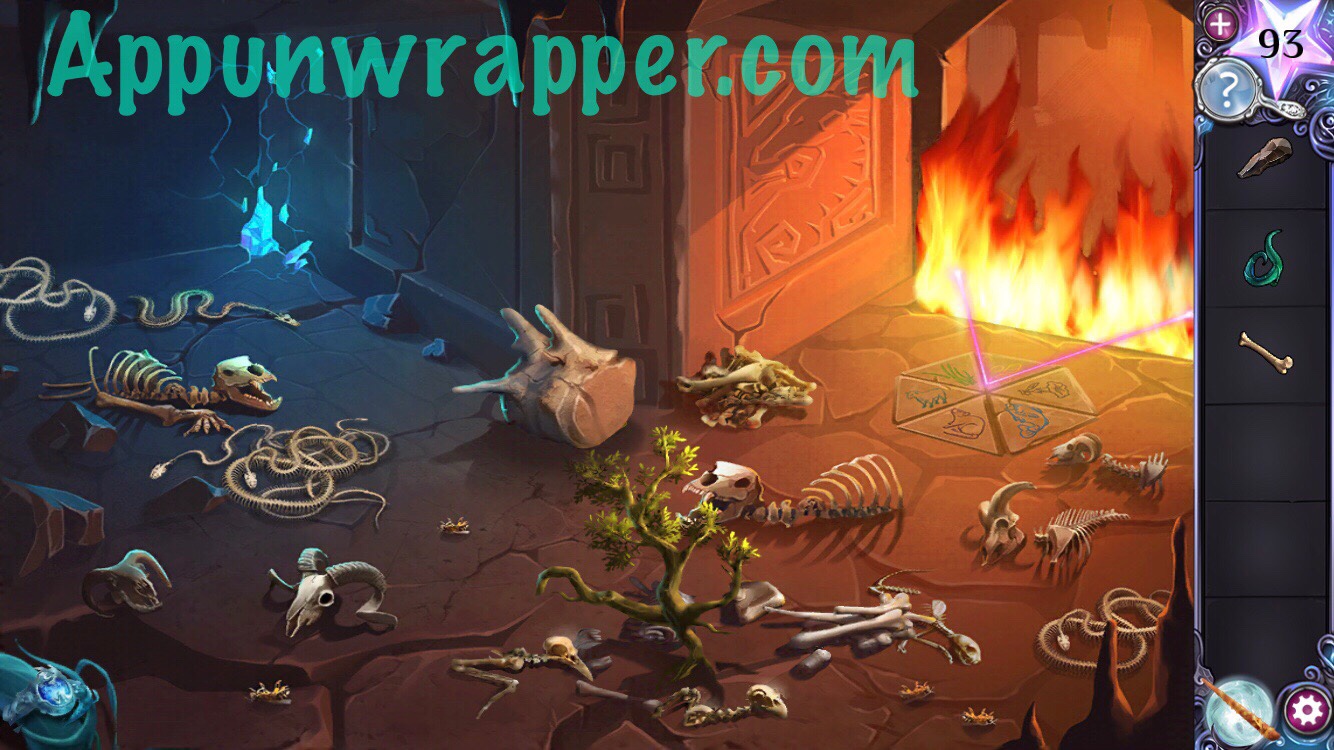
5. Now, what do each of those animals eat? Change the numbers on the pressure plate to clear the flames.
6 Snakes: Rats
4 Rams: Grass
4 Honeybees: Flowers
2 Bears: Sheep
2 Birds: Nuts
1 Cat: Fish
6. Go through to see the dragon. Rub the femur bone against the crystals to get a bone pry bar.
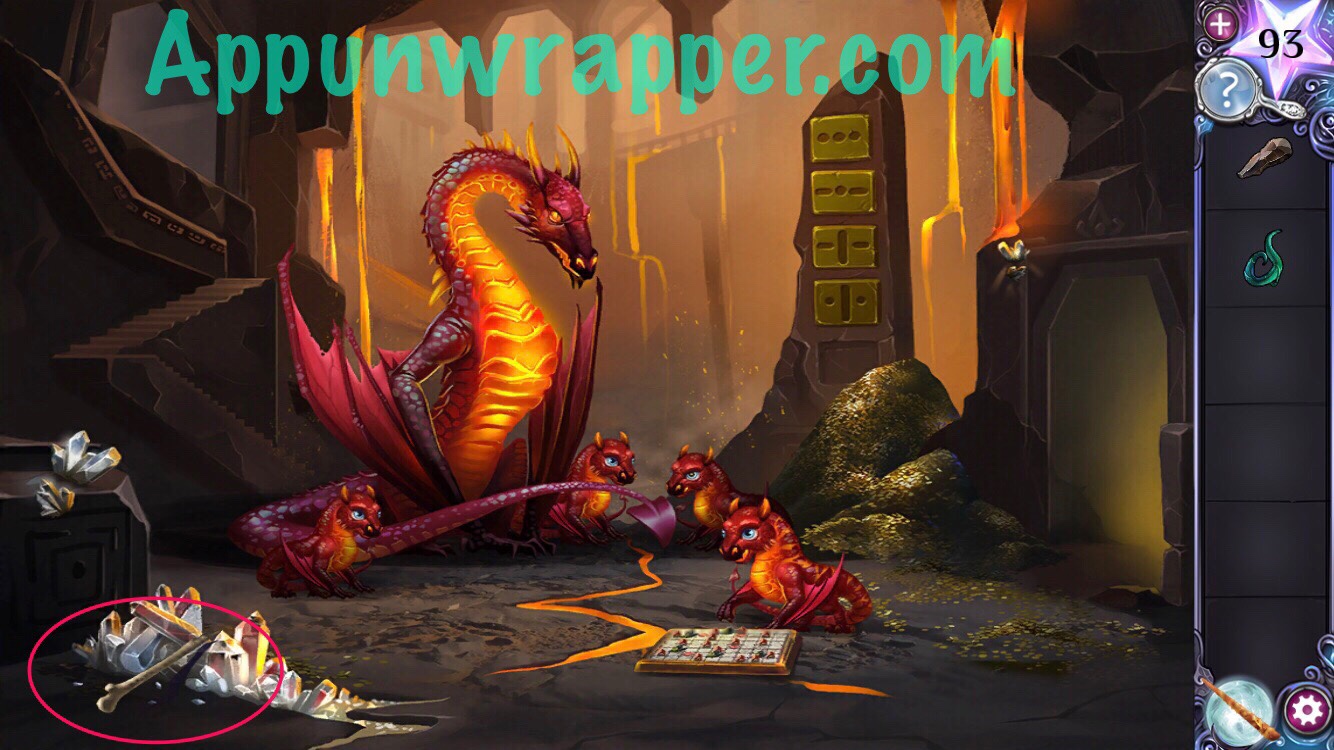
7. Go back up the stairs and use the bone pry bar to move the giant bone aside. Take the gold ears.
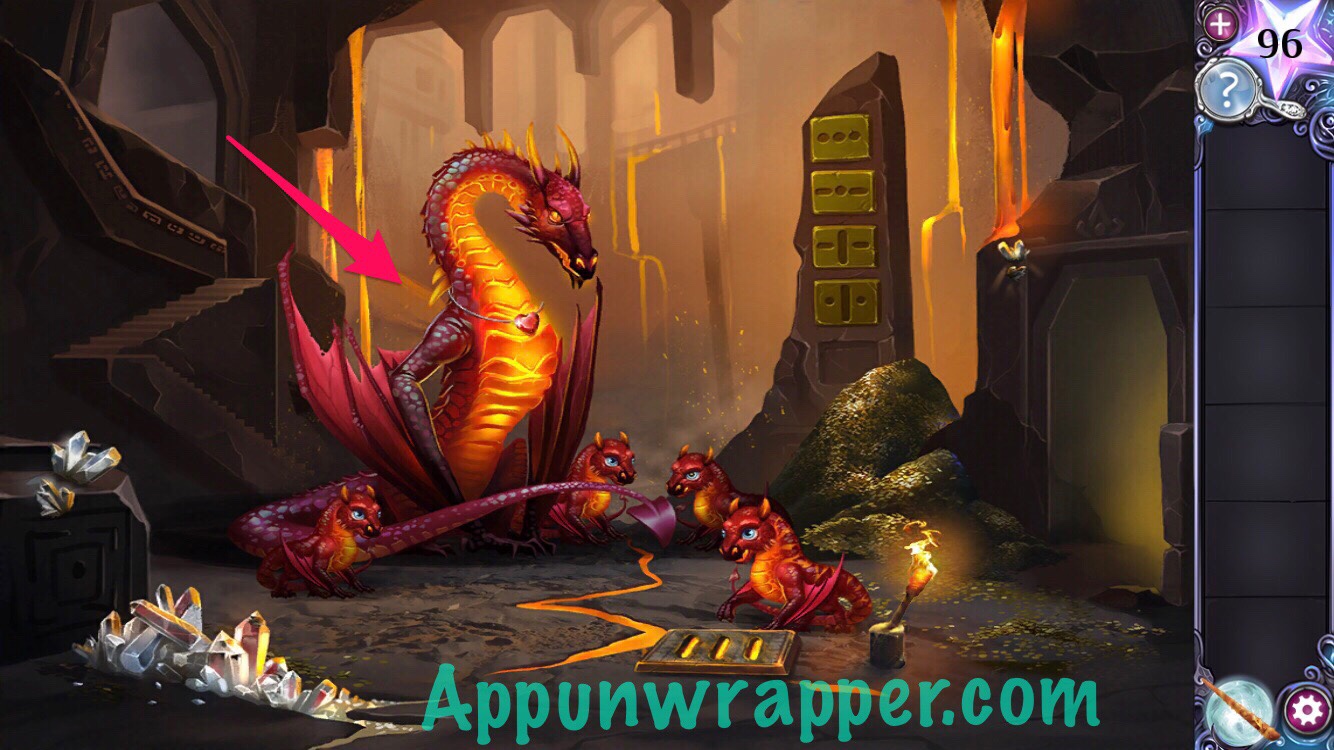
8. Go back down and use the Speak with Animals spell to talk to the mother dragon. Her name is Glaudraxa and she tells you to find her a pendant of the heaviest heart if you want her help.
9. Use the Speak with Animals spell to talk to the hatchling. He wants you to help him with his homework, but first you need to find a fire source. While here, notice the symbols on the giant monolith.
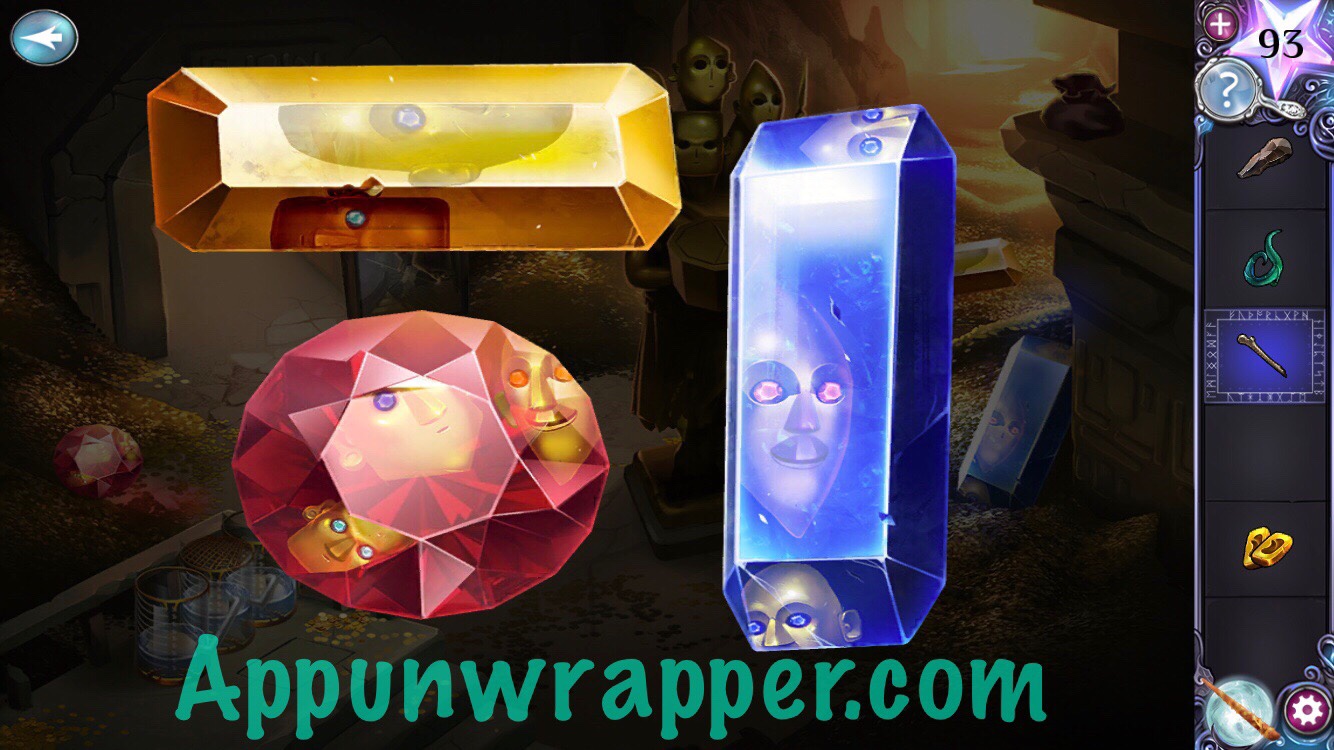
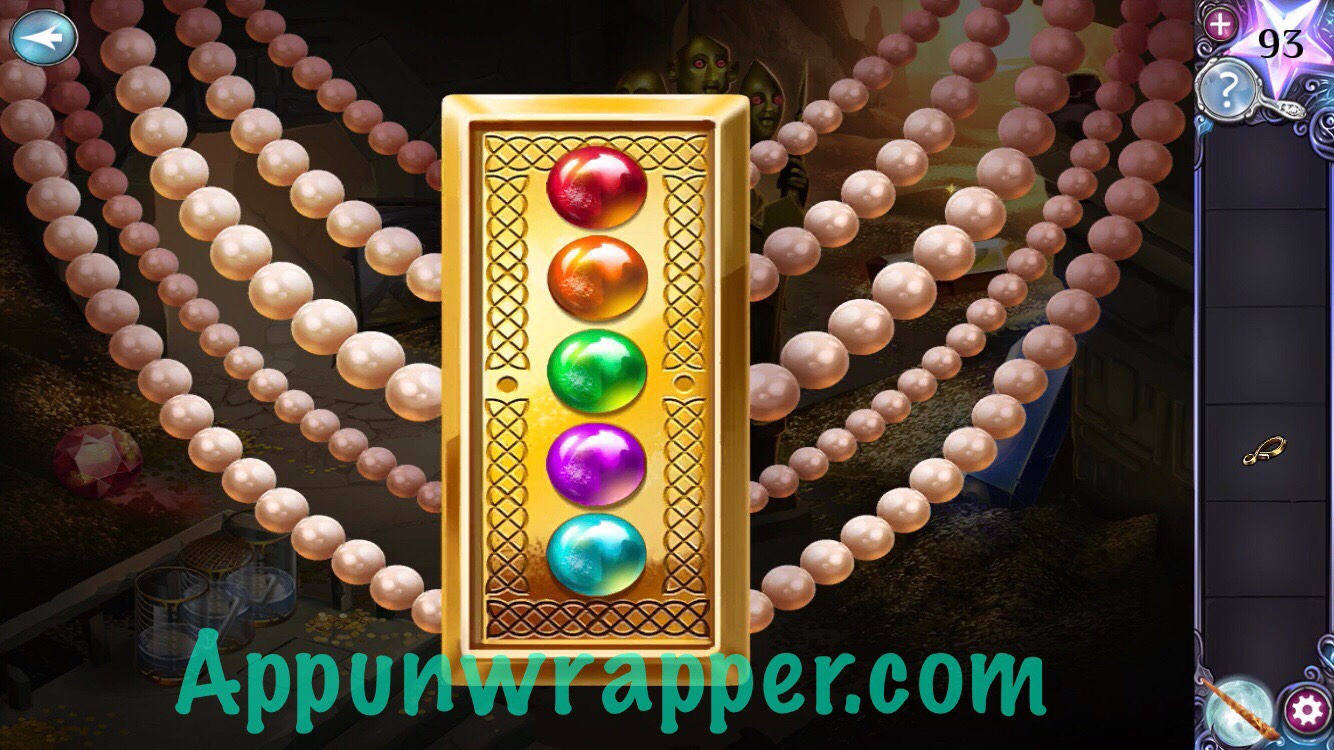
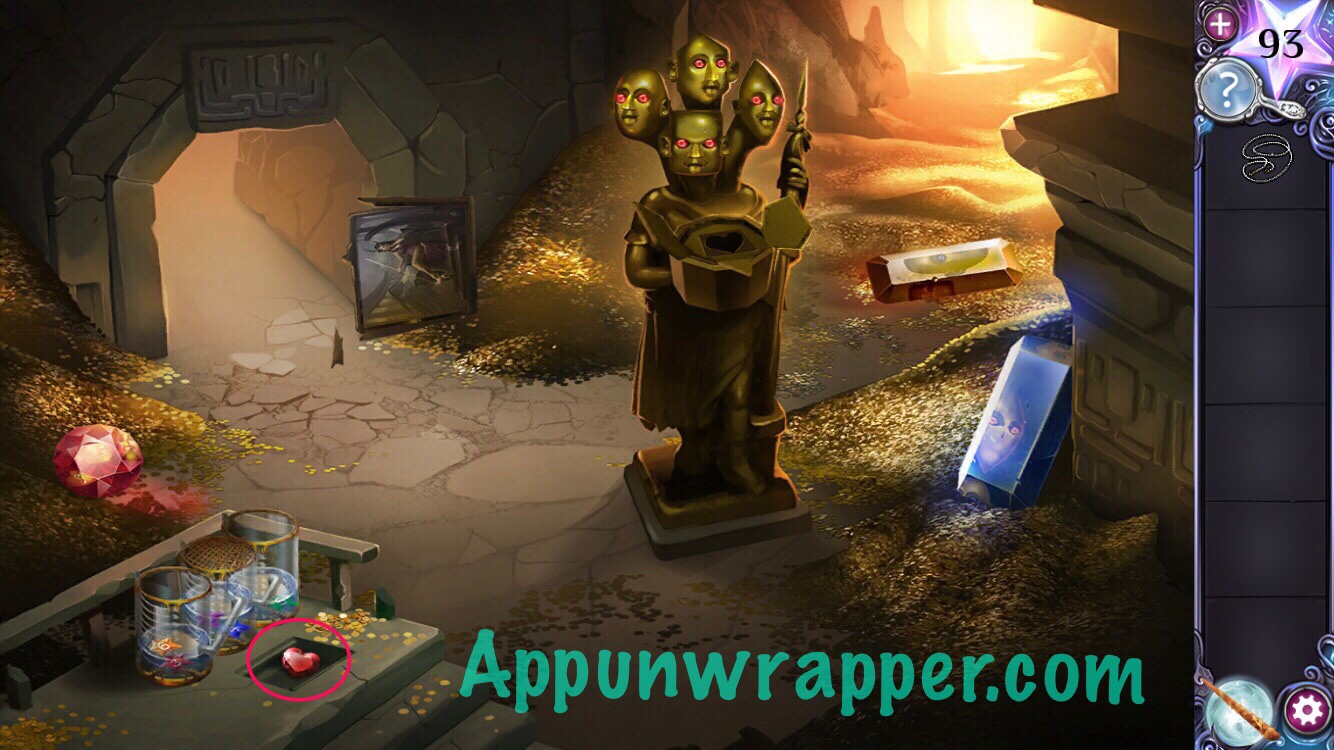
10. Head through the doorway to the right. This next room is full of puzzles. First off, move some gold coins aside to find a necklace. We’ll deal with it later. For now, notice the reflections on the gems.
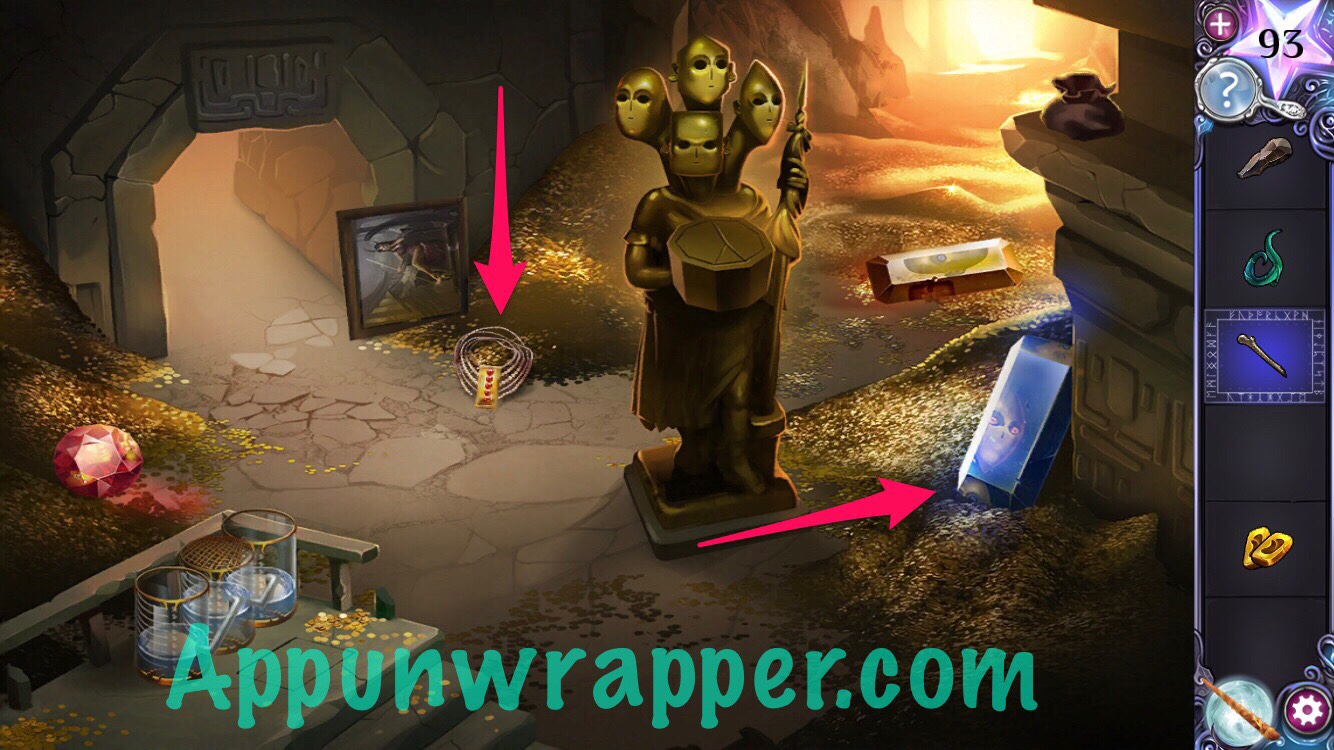
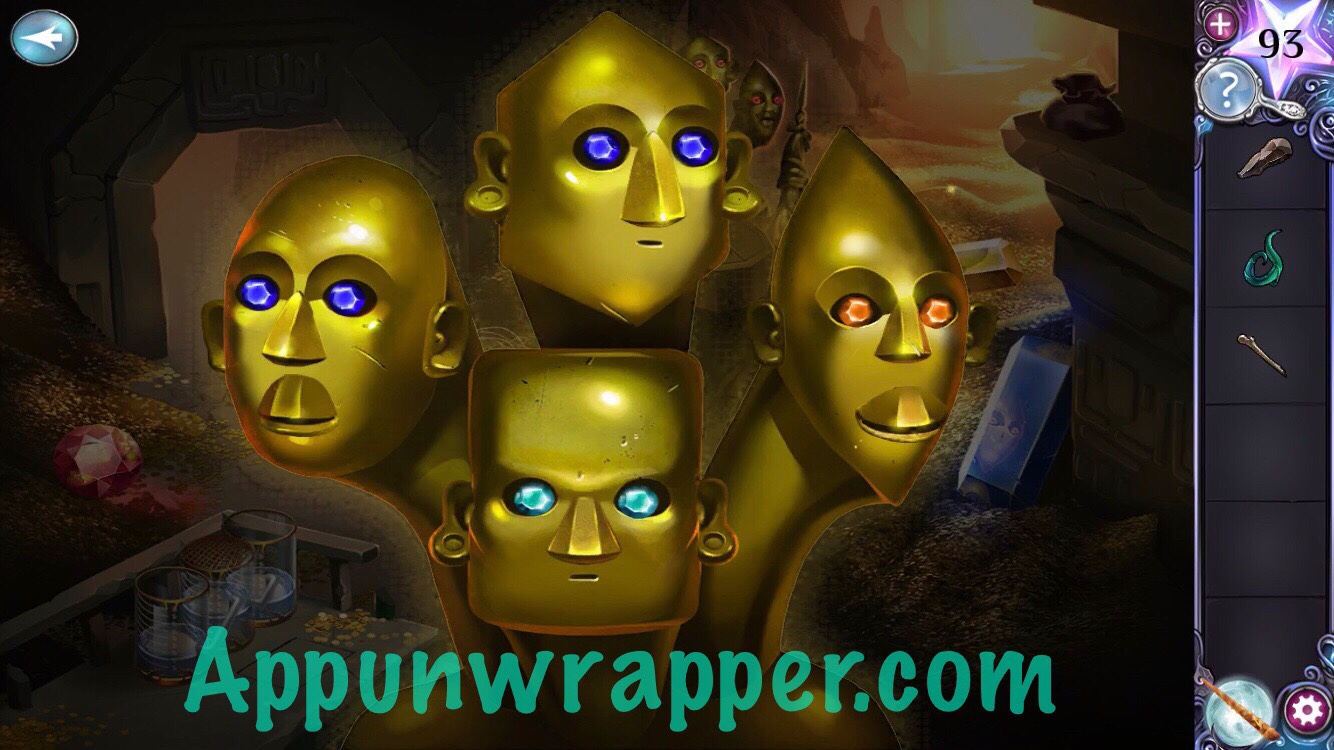
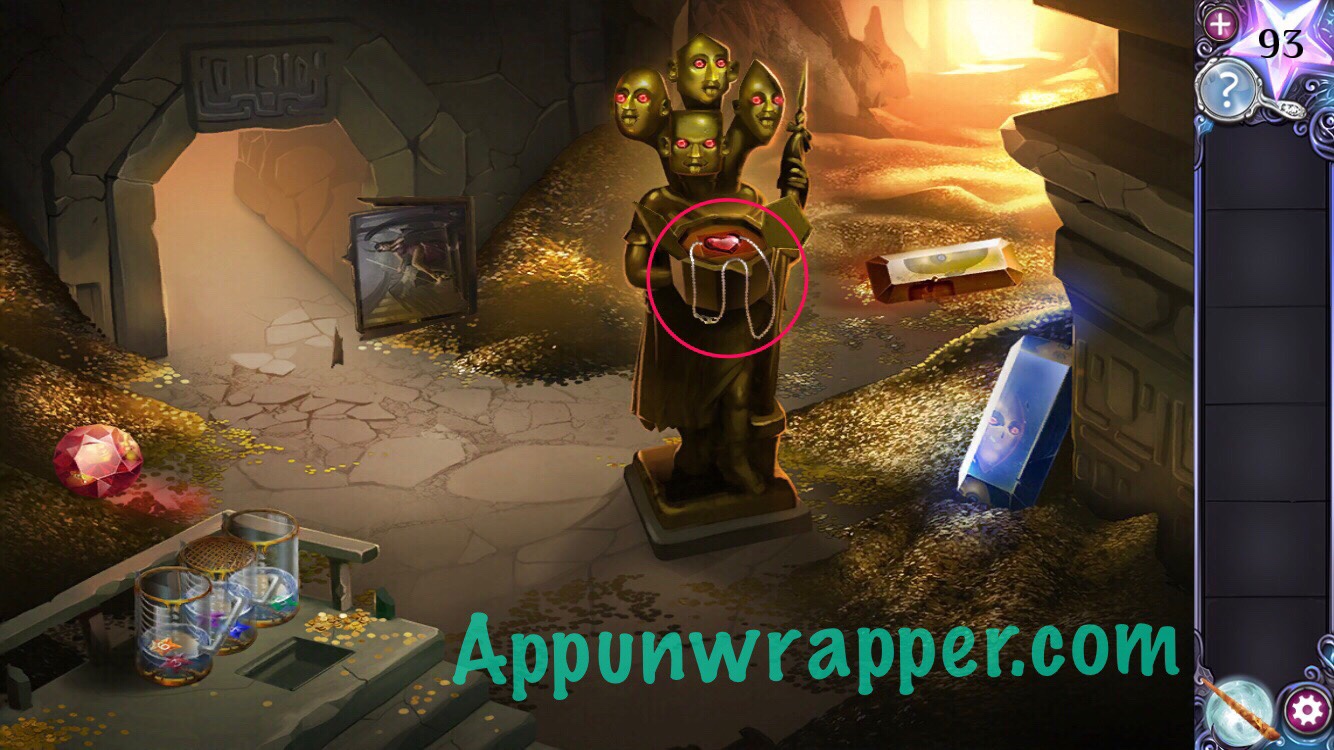
11. Add the gold ears to the four-headed statue and then change the ears, mouths and eye colors based on what you learned from the reflections in the three gems. Now you have access to a heart-shaped necklace setting. We’ll come back to that later.
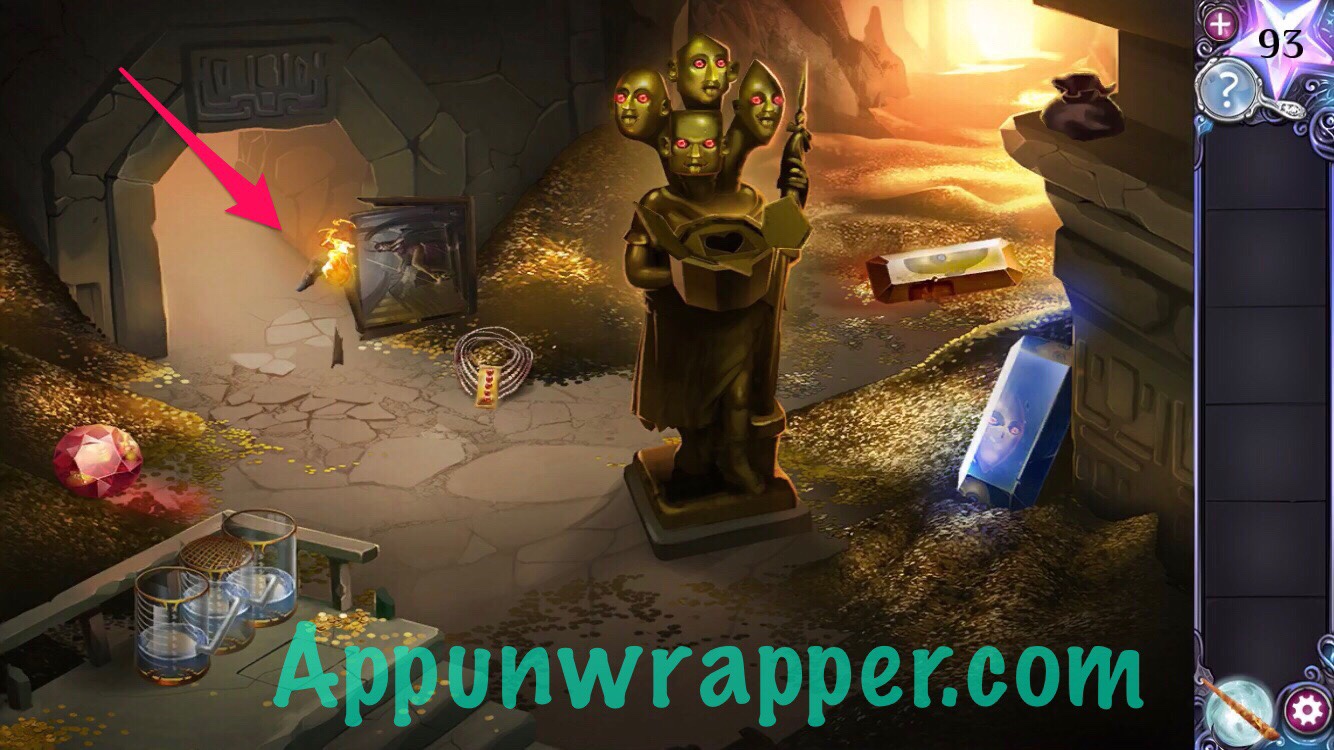
12. Use the bone pry bar on the framed painting to break it into firewood. Place the vine on the wood and then use the flint to light a fire. Now you have a torch!
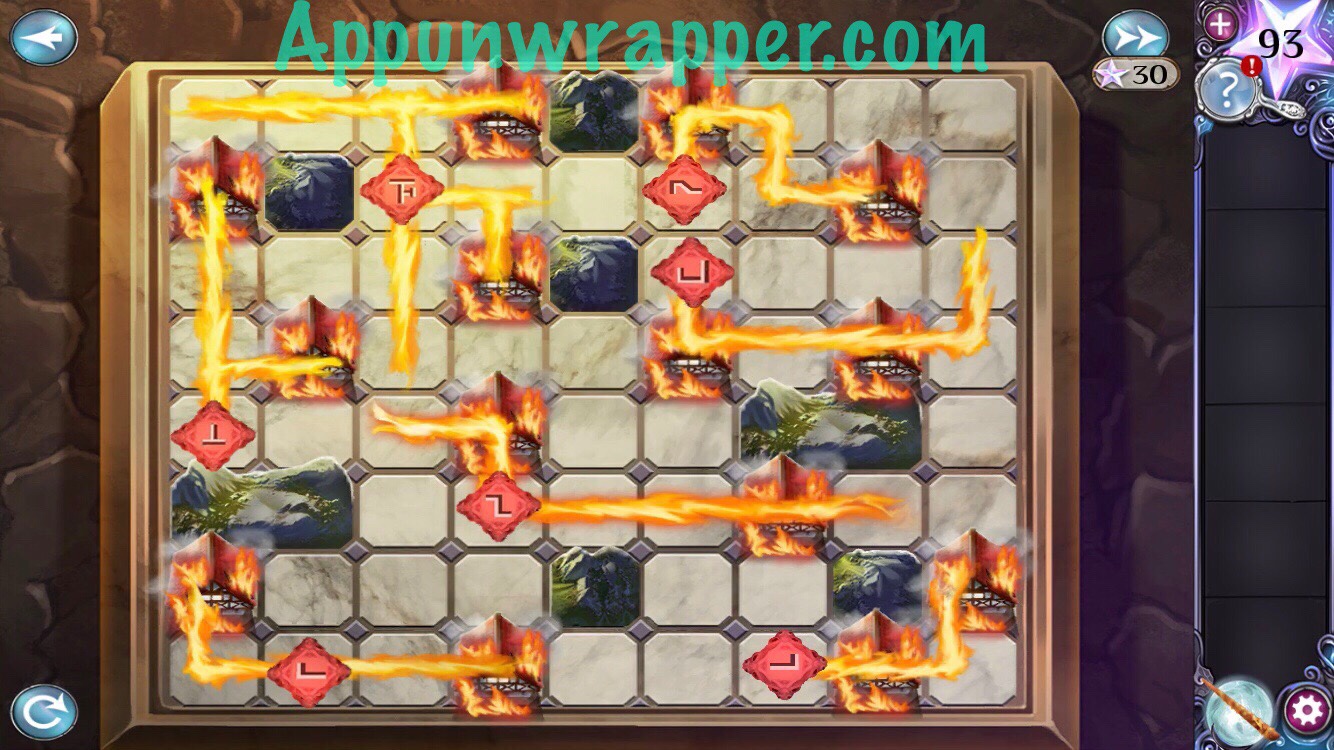
13. Go back to the dragons and use the torch on the hatchling’s homework.
14. Now to solve the hatchling’s homework. You need to burn down all the houses using the shapes given.
15. The hatchling gives you a golden clasp and her dead sister’s name in return for helping. It turns out the plates on the monolith are the hatchlings’ names. Take a look at them.
16. The stones on the necklace in the treausure room also represent the five hatchlings. Let’s figure out what colors they should be. If you look at the three gems in the treasure room, notice the round one is red, the yellow is wide like a horizontal line, and the blue one is tall like a vertical line. Now, if you look at the monolith by the dragons, each plaque is made up of three symbols – a circle, horizontal line, and vertical line. So we can use the gems to determine the colors.
First: Circle + Circle + Circle = Red + Red + Red = Red
Second: Horizontal + Circle + Horizontal = Yellow + Red + Yellow = Orange
Third: Horizontal + Vertical + Horizontal = Yellow + Blue + Yellow = Green
Fourth: Circle + Vertical + Circle = Red + Blue + Red = Purple
Fifth: Vertical + Vertical + Vertical = Blue + Blue + Blue = Blue
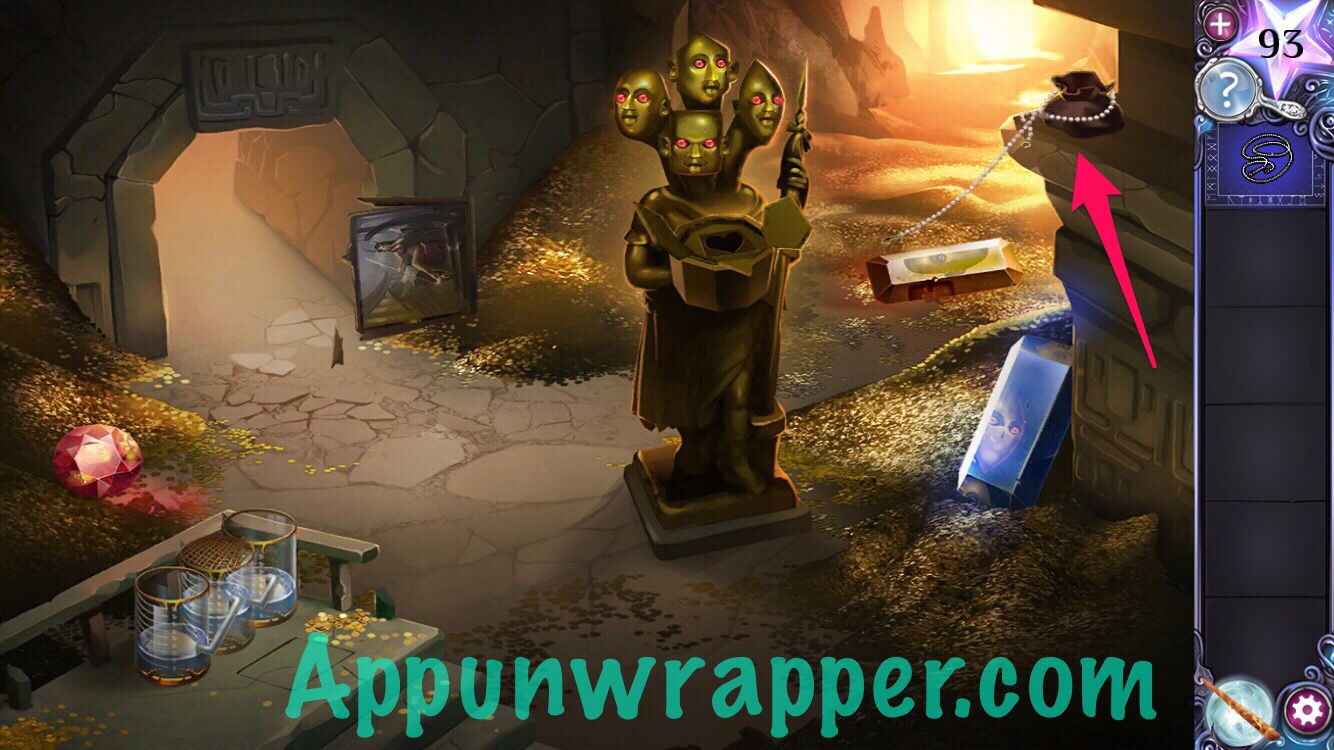
17. Go to the necklace in the treasure room and change the stones to Red, Orange, Green, Purple, Blue. Use the clasp with the pearl necklace chain and then pick it up.
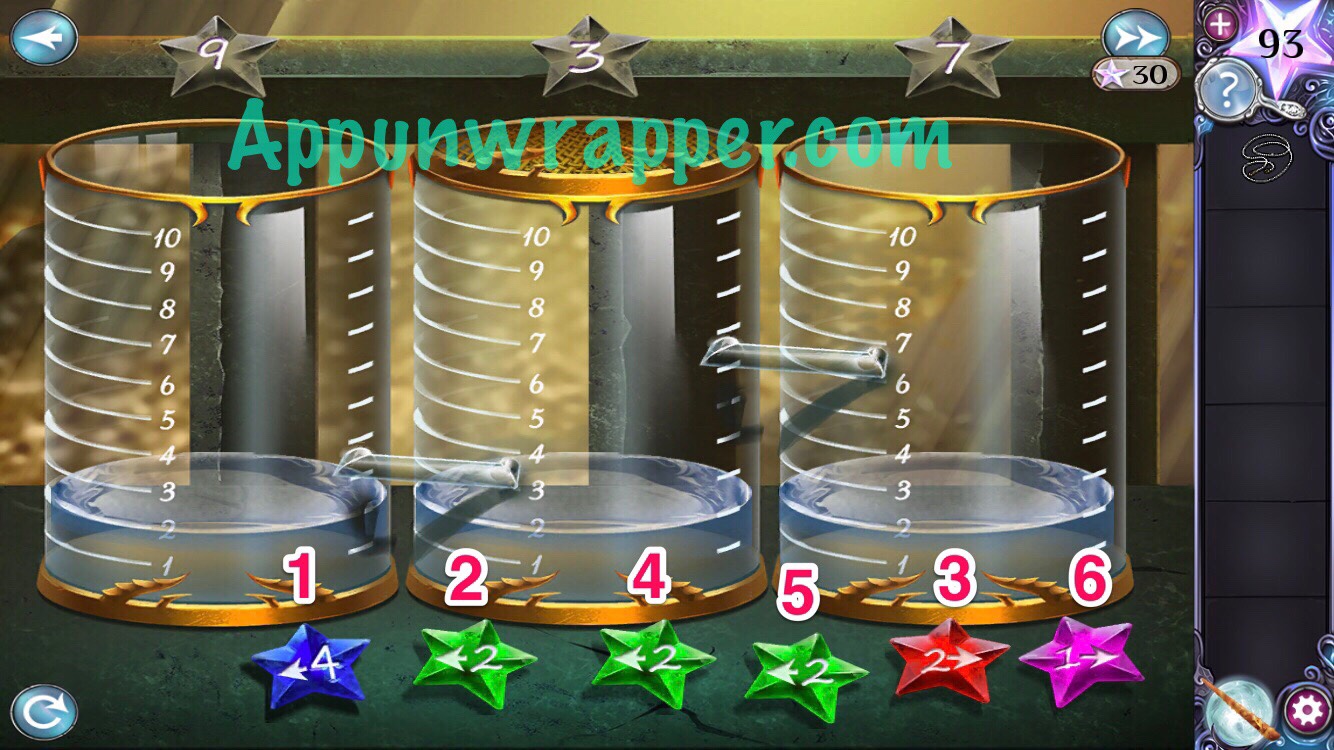
18. Use the pearl necklace chain to grab the bag that’s out of reach. Pick up the star gems.
19. Tap on the measuring cups to the left. Place the star gems down. We need to use them to make the water levels equal 9, 3, and 7. Place them all in the right glass in this order:
4 Left
2 Left
2 Right
2 Left
2 Left
1 Right

20. Take the heart gem. Place the heart gem and the pearl chain in the heart-shaped necklace setting to make the heart necklace.
21. Give the necklace to Glaudraxa and she’ll tell you how to break the curse. That’s the end of Chapter 6!
Click on the chapter you need below or click here to continue to Chapter 7.
Chapter 1 | Chapter 2 | Chapter 3 | Chapter 4 | Chapter 5 | Chapter 6 | Chapter 7 | Chapter 8 | Chapter 9 | Chapter 10
I got stuck in chapter 10… Can someone please help?
How did you solve the necklace in Chapter 6? Which color did you use?
Red, orange, green, purple, blue
If you noticed, the names of the dragons hatchlings are symbols right? Use that with the 3 coloured gems. As an example, if the symbols are -o- that means it is orange (yellow+red+yellow).
Thanks
IΓÇÖm on ch10 now, I canΓÇÖt get passed the chandelier bit, the mirror wonΓÇÖt move, did you manage it?
There’s a lever under the rug and you need to follow the pattern on the windows
Ok but IΓÇÖm still confused. Like whatΓÇÖs the pattern?
Does anyone know what the code is for the cupboard In the room with the books (chapter 8)?
Is it the one with 7 numbers?
Yeah, got it now, now IΓÇÖm stuck on he red and black circle thing
How do you get to know the key to the desk lock in chapter8?
Look at the letter in the mailbox, answer a few lines down
707
9922
On chapter 9… anyone know how to to the X-ray spell thing?
It won’t give me access to the heart shaped setting once I’ve set the statues faces, anyone else having this issue?
I was also stuck on that until I watched a video. You have to change the ears of the top and bottom ones to ears that have circles at the bottom of the ear.
I put the , in the far right, then put the other <2 and <2 in the far left on the water weights, and it also worked.
And if you take the ring?
Their is no twine in my game. Is my game glitching or am I blind?
I cant click on the homework…it just keeps telling me how cute the hatchling is
Sameee I canΓÇÖt move forward because of that if you are able to solve it pls tell me how
You need to do the speaking spell on the little dragons
Unable to select the femur bone so cannot continue
I changed the faces. Buy nothing happens.
Can anybody tell me what’ll happen if you choose to take the ring? I’m curious. (Oreki-san 🙃)
Am I blind? I’m only counting 5 snakes in the dragon’s cave.. where’s number 6?
Same. Haiku team really likes to cheat; I figured out the premise of the puzzle immediately but still had to come here to find out what thing they screwed up. This happens constantly with their games.
This chapter really did it for me and sorry to say I’m quitting this game and will start a different one. Shame as I love some of the other Haiku ones.